Home Blog Page 62

Lemon Garlic Marinade

I love a good marinade. They are pretty close to effortless: Just mix, refrigerate, and let it flavor and tenderize your meat of choice. Olive oil, lemon, and garlic are some of my favorite flavors, and I’m sure I use them in some combination weekly. This Lemon Garlic Marinade recipe was a must-try since I had everything in my pantry and refrigerator.

This post was originally published on July 24, 2017. The text and photos were updated on August 31, 2021. The review and rating have not been changed.

The best marinade ever!!

Recipe Author: Nancy at Foodie Chicks Rule
Get the recipe

The Ingredients

As I mentioned, I had everything on hand except the chicken. I love it when that happens! I mixed the ingredients in a glass bowl, but a plastic bag or container would also work. Just be sure whatever you marinate in isn’t a reactive metal. There’s lemon juice in the marinade, and some metals react with the acid causing a funny taste.
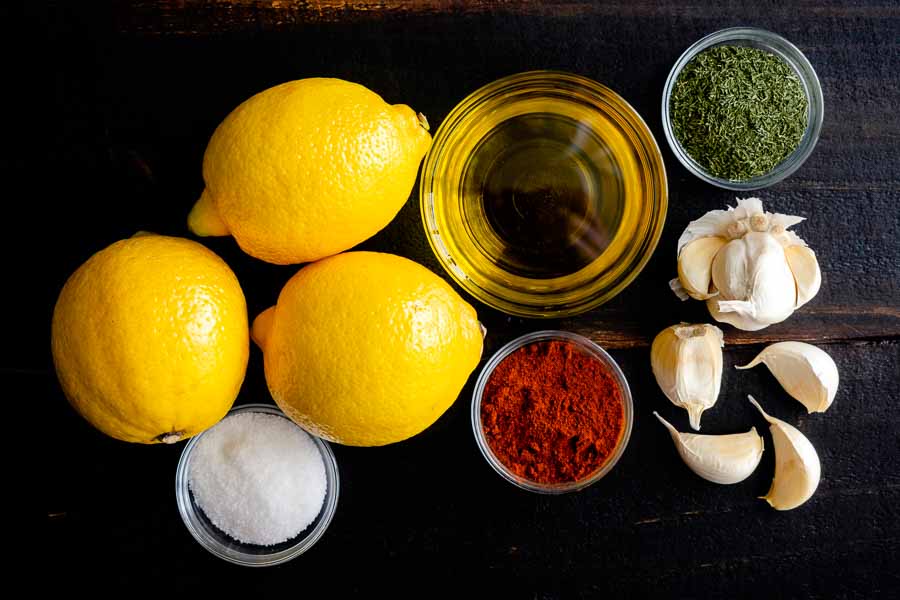
Lemon Garlic Marinade Ingredients
Lemon juice and zest, olive oil, dried dill, garlic, cayenne pepper, and salt

The Process

I do love quick and easy recipes, and this marinade is exactly that. It only took 8 minutes to prep, including pounding the chicken with a meat mallet.

I let the chicken marinate in the refrigerator for 24 hours. Tip: When I was ready to make it, I set it out on the counter to allow it to warm up to room temperature for 30 minutes. This trick helps prevent cold, raw centers and works well with any cut of meat.

I opted to grill the chicken, but that’s just a personal preference. Cooking on the stovetop or in the oven would work just as well. I love using my grill pan when I decide to cook indoors. It really gets close to that outdoor grilling flavor.
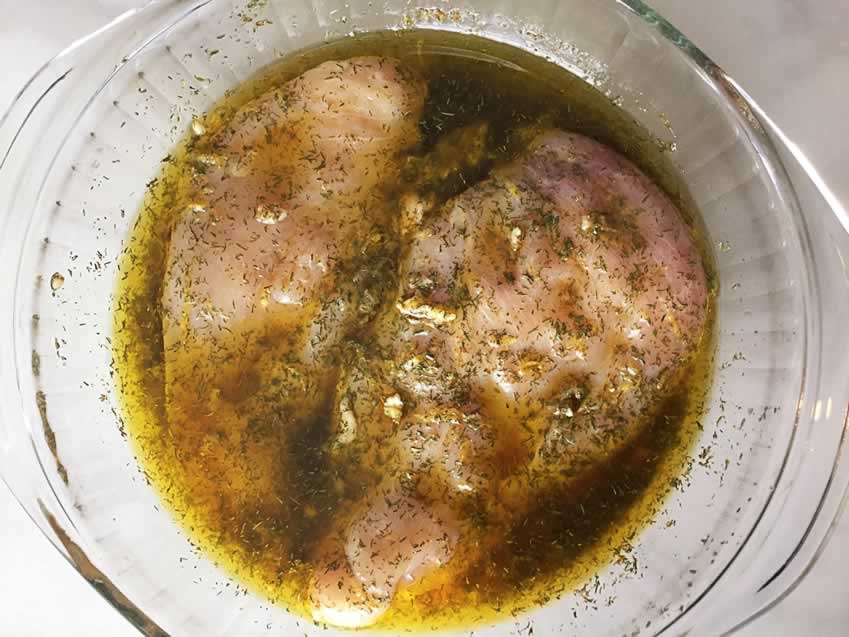
Marinating Chicken Breasts
Marinating chicken breasts in a [eafl id="7849" name="casserole dish" text="casserole dish"]

Charred Lemon, Rosemary and Coriander Gin and Tonics

Here we are, 3 weeks into July, and it’s hotter than ever here in Fort Lauderdale. Bring on the cocktails! I have another gin-based summer cocktail this week: Charred Lemon, Rosemary and Coriander Gin and Tonics. It’s a new take on a classic, and I’m excited to find out if I like a gin and tonic with lemon instead of lime!

This Charred Lemon, Rosemary and Coriander Gin & Tonic is something special! The flavours are so perfectly balanced and it makes a very beautiful start to the evening/afternoon. Well to any occasion!!

Recipe Author: Claire at Sprinkles & Sprouts
Get the recipe

The Ingredients

When I made this recipe for the first time, I was in love with the light taste of the Prairie Organic Gin. I really wanted to try it with tonic water since it has such a strong taste. I was curious to see if it would overpower the gin, and it did not. In fact, it made a very smooth drink. I think I’m turning into a gin person…

Fast forward to 2021, and I’m revisiting my old posts and their, um, not-so-great photography. I decided to remake these Charred Lemon, Rosemary and Coriander Gin and Tonics, but this time I only had a bottle of Hendrick’s on hand. Darn it all! But now I can now tell you without a doubt that Hendrick’s works just as well as Prairie in this cocktail.

Charred Lemon, Rosemary and Coriander Gin and Tonic Ingredients
Gin, tonic water, coriander seeds, rosemary, lemons, and mixed peppercorns

The Process

You’ll want to char the lemons and give them plenty of time to cool before you add them to your cocktail. I didn’t and ended up melting the ice cubes in my first attempt pretty fast.

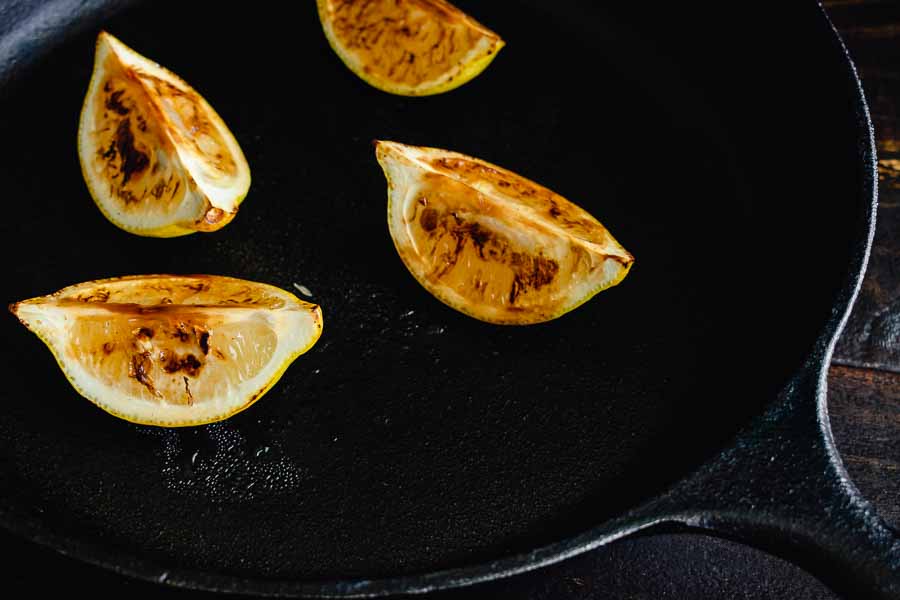
Also, make sure the skillet is very hot before adding the lemons so you get a nice char on them. It really affects the flavor (in a good way), and they smell divine!

Tip: Put peppercorns into a plastic bag before you crush them. I used a zippered sandwich bag to keep things neat and a meat mallet to crush them.

Variation

Slightly crush coriander seeds with the peppercorns and squeeze lemon a little before adding tonic. It increases the taste of both but still lets the gin stand out. I preferred my cocktails this way.

Charred lemon wedges in a cast-iron skillet

Best Buttermilk Lemon Squares

Lemon seems to be a theme with me lately, and dessert is no exception. I adore lemon meringue pie, but I hate making the meringue with a hand mixer. It takes forever!! I just happened to find a lemon dessert that has the crust and filling, but no merengue to mix–these lemon squares. Perfect!

Bright, tangy, and creamy… these lemon squares are foolproof. A buttery crust is topped with a creamy lemon custard, for a light and easy dessert!

Recipe Author: Amanda at The Chunky Chef
Get the recipe

The Ingredients

This is another recipe that I had most of the ingredients on hand for. I only had to buy buttermilk, butter, and lemons. Everything else was already in the pantry. Score!

Speaking of lemons, I bought 2 and almost got enough juice for my lemon bars out of them. Fortunately, I had some lemon juice on hand to top it off to a 1/2 cup. I’d recommend buying at least 3 for the juice and a fourth for the optional garnish just to be on the safe side.

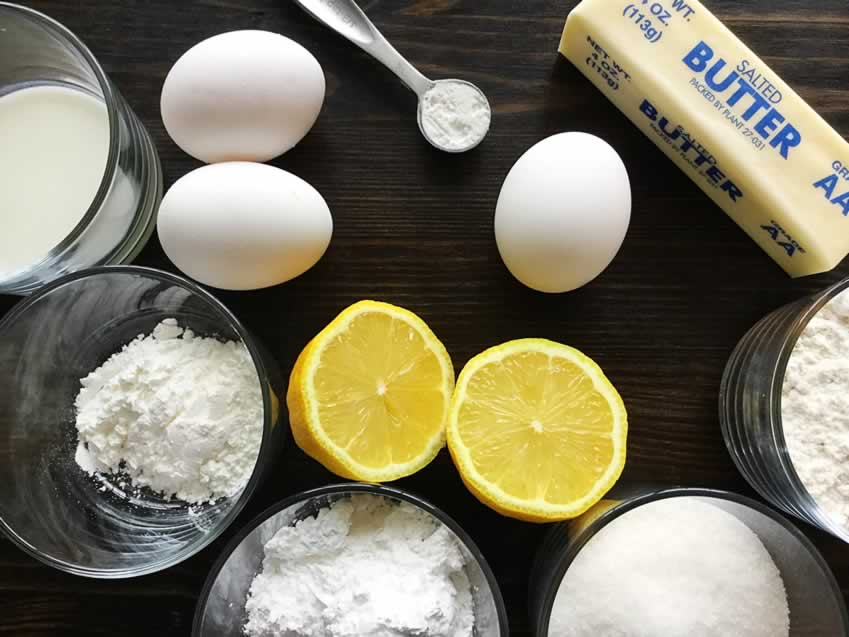
Best Buttermilk Lemon Squares
Buttermilk, eggs, butter, flour, sugar, and lemon

The Process

I ended up baking the lemon bars for 25 minutes, cooling them for an hour, and refrigerating them overnight.

The tip about lining the pan with foil so all the bars could be lifted out at once for cutting worked out beautifully. Unfortunately, the very middle didn’t set as well as the edges, and I lost about 3 bars because they fell apart as soon as I cut them. Also, it helps to spray your knife with Pam or something similar so it slices smoothly.

I used a sifter to dust the lemon bars with powdered sugar. You could also use a mesh colander and lightly tap it while moving it over the bars.

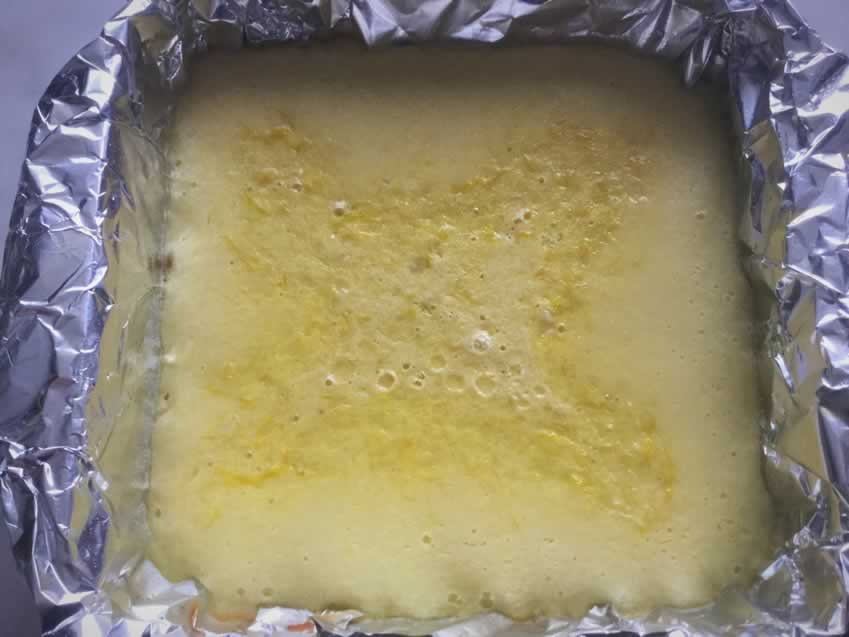
Best Buttermilk Lemon Squares
Step 5: Just out of the oven

Pork Chops with Lemon Thyme Cream Sauce

This is another recipe that lured me in with its title. I don’t make pork chops very often, so they are a real treat when I do make them. Add a creamy lemon sauce? Yes, please! And they were pretty quick to make. Even better!

If you’ve read some of my previous posts, then you know my husband is gracious enough to help me taste-test everything. It works well unless I make something he doesn’t care for. This isn’t too tough–I’ll make them for lunch while he’s at work, but it didn’t quite work out that way with this recipe. He’s very selective when he eats pork, and he doesn’t like pork chops. I found some nice, lean chops, and he agreed to at least try a bite. I’m pretty rough on him 😉

I’m cooking one of my favorite recipes from The Cupboard to Table which is Pork Chops with Lemon Thyme Cream Sauce. If you’re looking for a fast, easy, and delicious dish this is the perfect recipe.

Recipe Author: Judy Hannemann at The Midnight Baker
Recipe Source: Lisa at Creole Contessa
Get the recipe

The Ingredients

The pork chops were just over $3, and the rest of the ingredients were also inexpensive. There aren’t any unusual or difficult to find items, nor is there any special equipment needed. Just a large skillet with a lid, a bowl, an oven-safe plate, and the usual measuring cups and spoons.

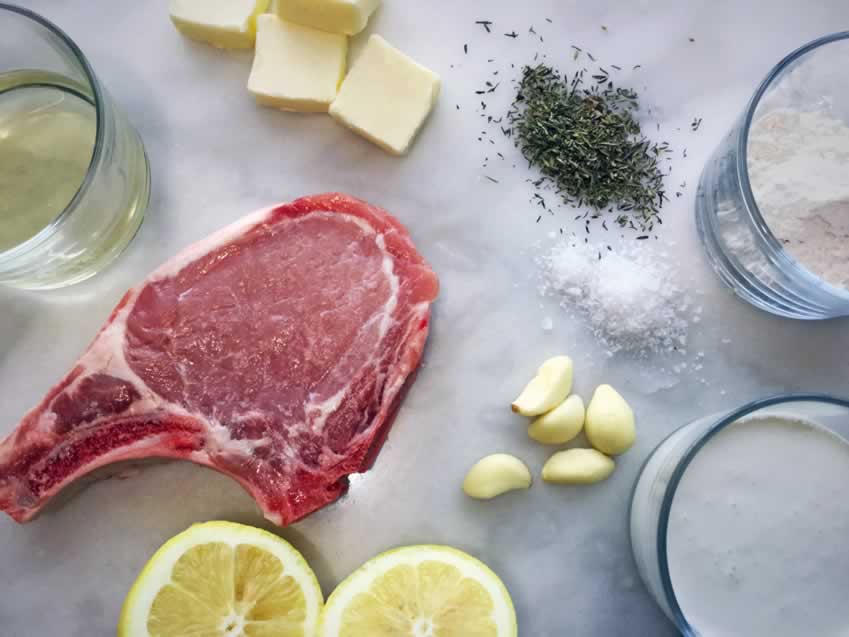
Pork Chops with Lemon Thyme Cream Sauce Ingredients
Pork chops, white wine, butter, lemon, garlic, thyme, salt, flour, and cream

The Process

I’m glad I read through the recipe before I started, or I wouldn’t have had the oven preheated to keep the pork chops warmed. I’d like to see instructions to preheat the oven earlier in the instructions.

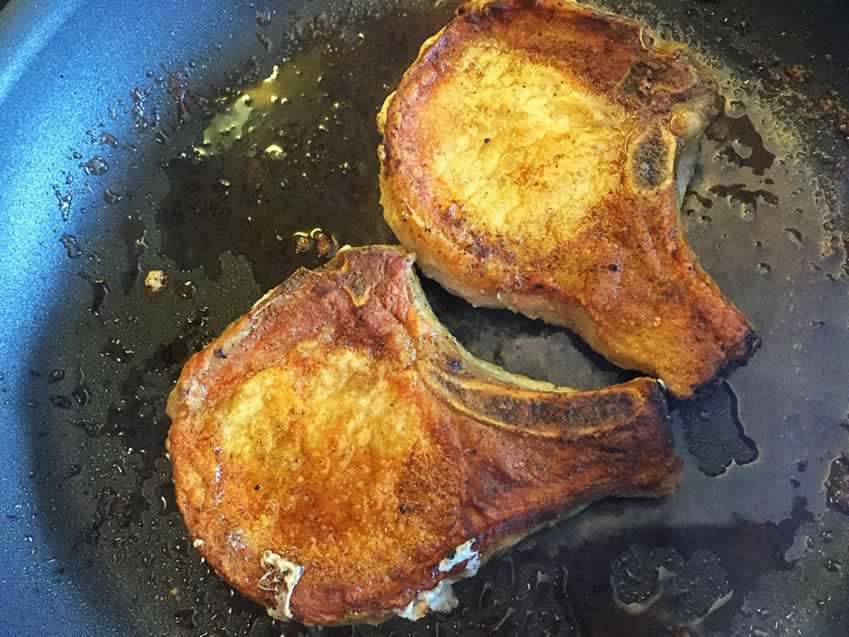
Otherwise, this recipe was straightforward and easy to follow. I used 1/2″ thick chops and browned them for 5 minutes on each side. Then I cooked them for 15 minutes after adding the juice, zest, wine, and seasonings.

Pork Chops with Lemon Thyme Cream Sauce Cooking
Browning the pork chops

Tart & Crisp Cucumber Ginger Gin Fizz

Time for another gin cocktail review. This week is the Tart & Crisp Cucumber Ginger Gin Fizz. There’s a little more prep work to this than I normally do, but it sounded like the payoff would be worth it. Tart and crisp are perfect words for a summer cocktail, after all.

This post was originally published on July 14, 2017. The text and photos were updated on July 18, 2021. The review and rating have not been changed.

I saw this recipe on Pinterest, and as a gin lover (as most Brits are) I had to try it out – plus, how gorgeous is this shade of green? It tastes just as refreshing as it looks.

Recipe Author: Louise Roe at Front Roe
Get the recipe

The Ingredients

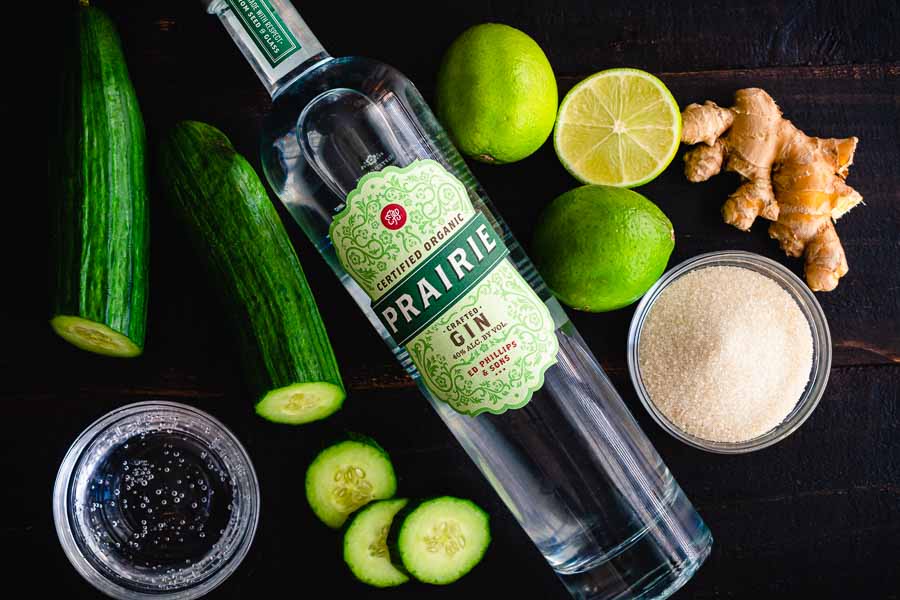
I’m still using a lighter gin, Prairie Organic Gin. It didn’t overpower the last cocktail I made (The Aviation), so why mess with a good thing? The rest of the ingredients were all easy and inexpensive finds at the grocery store.

Tart & Crisp Cucumber Ginger Gin Fizz Ingredients
Gin, lime, ginger, sugar, cucumber, and club soda

The Process

This cucumber ginger gin fizz is a 2-in-1 recipe, meaning you need to make the ginger simple syrup then the cocktail. I always make my own simple syrup since it’s so easy and much cheaper than buying it. It’s literally half sugar and half water and costs a few cents to make rather than $3+ a bottle.

Here’s how I make it:

  • Heat the water to boiling (I use 1 cup)
  • Add the sugar (also 1 cup)
  • Stir until dissolved, remove from heat, and allow to cool
  • Pour into a container and store it in the refrigerator

This recipe had an extra step of adding chopped ginger to the warm mixture and letting it steep for 2 hours. The result reminded me of ginger candy, sweet and a little spicy. I made my syrup the day before so it would be nice and cold for my cocktail.

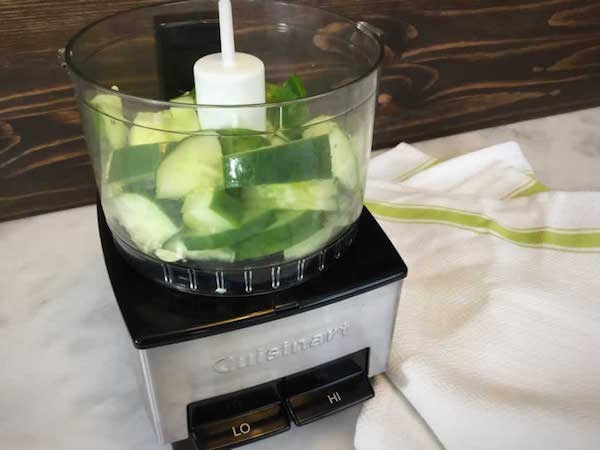
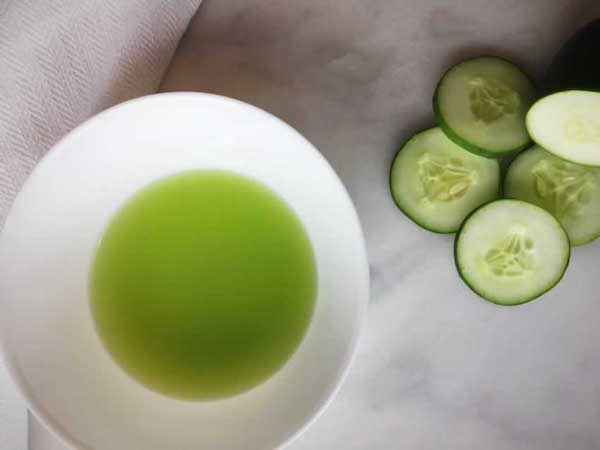
Making the cocktail itself took me 5 minutes, and that included making the cucumber juice. I used about half a cucumber and got 3 ounces of very green juice. I don’t have a Vitamix, so I used my Cuisinart mini-prep:

1.) Roughly chop the cucumber (no need to peel) and place it in the mini-prep. Blend on high for 30-45 seconds.

Cucumber Juice, Step 1

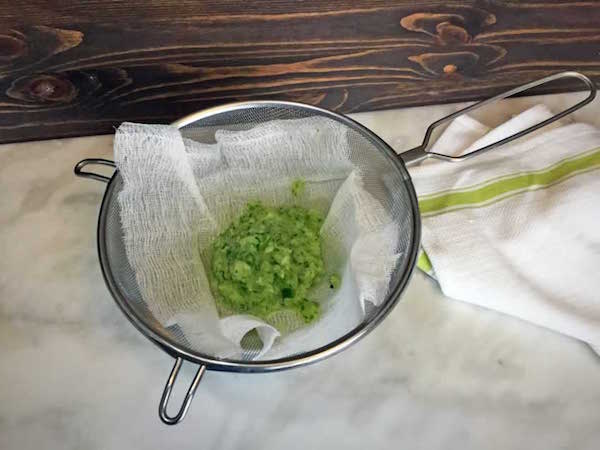
2.) Pour the cucumber pulp into a cheesecloth-lined strainer placed over a bowl.

Cucumber Juice, Step 2

3.) Pick up the corners of the cheesecloth and gather them together to make a pouch. Squeeze the pouch over the strainer to make the cucumber juice.

Cucumber Juice, Step 3

Simple Tuscan Oven Roasted Red Potatoes

I have at least one night a week when I just want an easy-to-prepare meal. Okay, more like 2-3 nights a week, but who’s counting? That usually means my husband and I team up with me prepping and/or making the side and him grilling the meat. These Tuscan Oven Roasted Red Potatoes fit perfectly into our system, so I bought some steak for him to grill and got to work roasting the potatoes.

This post was originally published on July 12, 2017. The text and photos were updated on July 31, 2021. The review and rating have not been changed.

A simple, flavorful and healthy side dish! Tuscan Oven Roasted Red Potatoes are seasoned with herbs you already have in your pantry and will be on the table in under 30 minutes! 

Recipe Author: Megan at With Salt & Wit
Get the recipe

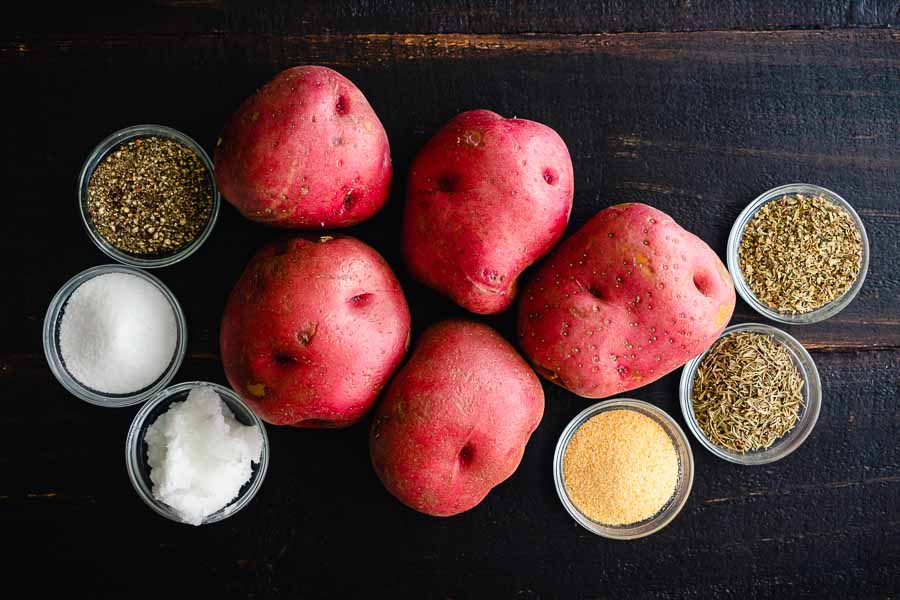
The Ingredients

I had all the seasonings in my pantry and only needed to buy the potatoes, exactly as the author promised. I didn’t have coconut oil, so I used extra virgin olive oil, the suggested alternative. It’s always in my pantry.

Simple Tuscan Oven Roasted Red Potatoes Ingredients
Red potatoes, basil, thyme, garlic powder, coconut oil, salt, and pepper

The Process

We had perfectly seasoned roasted potatoes on our plates in 30 minutes. The prep work was done in 7 minutes, so most of that was inactive time waiting for the potatoes to roast.

The amount of seasonings did have me a little worried as I was measuring them out. I had very well-coated potatoes once I added the olive oil, herbs, and spices and mixed everything together. I’m normally sparing with seasonings, but my worries were totally unfounded.

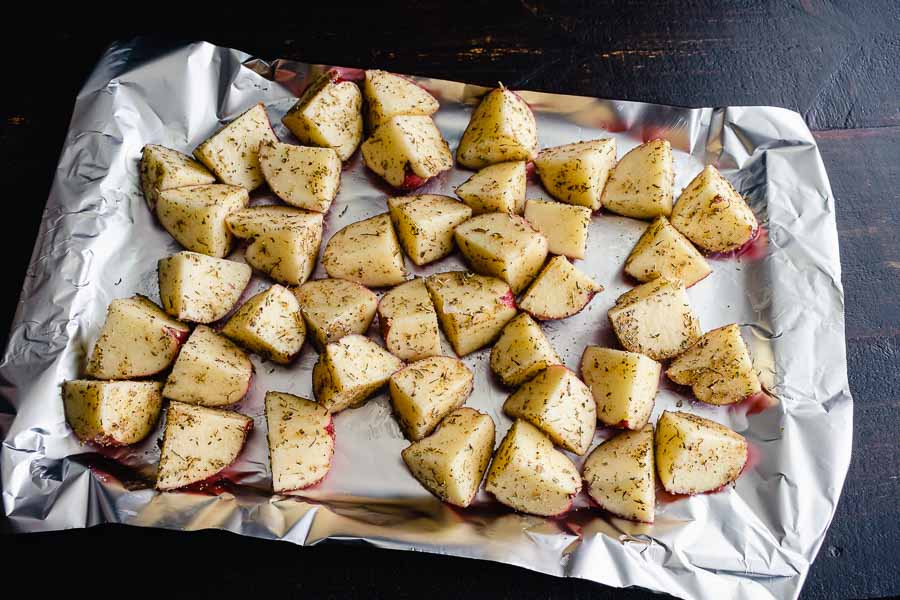
I loved the tip of lining the cookie sheet with foil. It made clean up extremely easy. All I had to do was let the cookie sheet cool while we ate, throw away the foil, and rinse the cookie sheet.

The sliced potatoes tossed in coconut oil and spices

Garlic Panko Salmon

0

Ever have a food you loved that you prepare the same way over and over, even though there is soooooo much more you could do with it? Me too. Salmon is one of my favorite fish, but I almost always poach it. Why? It’s fast, easy, and I don’t need a recipe. I pinned this recipe pretty recently, and I noticed it’s gotten a ton of re-pins. Sounds like a good reason to try it. That and it’s for “garlic” in the name!

This easy and elegant gluten-free, low-carb and paleo Garlic Panko Salmon recipe has a delicious and flavourful crunchy Panko crust with a moist and tender salmon center.

Recipe Author: Olivia at Primavera Kitchen
Get the recipe

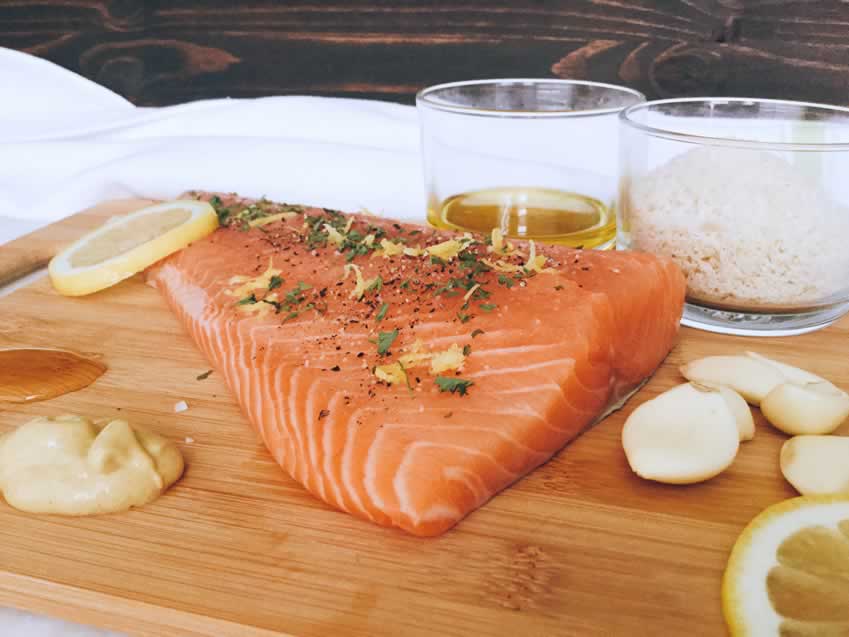
The Ingredients

Garlic might as well be its own food group. I love the stuff, so I had to use the maximum amount (6 cloves). Also, I didn’t have fresh parsley. I meant to, but it somehow ended up being fed to my pet rabbits before I made this dish. No worries, though, since I had dried parsley on hand. I substituted it for fresh but used half the amount called for in this recipe. I was happy, and, even more important, my bunnies were happy.

Garlic Panko Salmon
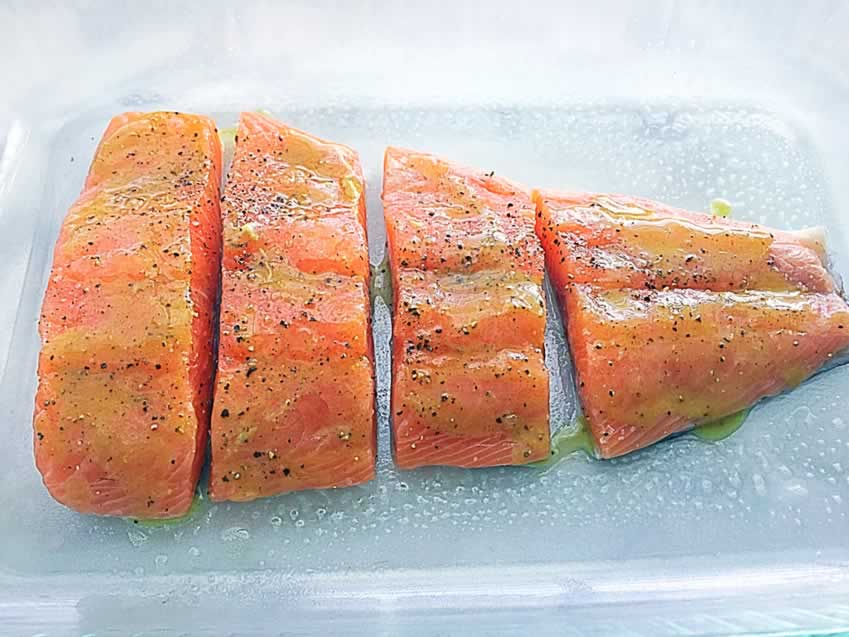
Salmon filet, garlic, lemon, dijon mustard, honey, olive oil, and panko breading

The Process

I did notice a small discrepancy between the ingredients and the directions, so I had to make an assumption at the start. Although salt and pepper are listed in the first group of ingredients (“For the salmon”), I didn’t see instructions on how it was to be used. I decided to simply sprinkle both on the filets before I added the honey/dijon mixture.

I opted to bake the salmon for 15 minutes to make sure it was cooked through. The process started with heating the olive oil for the panko topping about 5 minutes before the timer went off. The panko mixture took about 5 minutes to toast with lots of attention and stirring. Be careful: The bottom layers will toast first, and it’s impossible to tell unless you stir them often.

Garlic Panko Salmon Honey Dijon Glaze
Step 3: Honey/dijon mixture on the salmon filets

Aviation Gin Cocktail

It’s July in South Florida, and it’s HOT! The need for refreshing cool beverages is up there with air conditioning right now, so I thought I’d review some gin cocktails over the next few weeks. My go-to spirit is vodka, but there’s something so crisp and clean about gin that makes it perfect for the summertime. The first gin cocktail I found on my drinks board was the Aviation Gin Cocktail. It’s a classic drink I’ve never gotten around to trying, so I had to fix that.

This post was originally published on July 7, 2017. The text and photos were updated on July 12, 2021. The review and rating have not been changed.

The Aviation Gin Cocktail combines crème de violette, maraschino cherry liqueur and a bit of lemon juice for a perfectly sweet and tart cocktail that’s as pretty as it is delicious.

Recipe Author: Erin at Platings and Pairings
Get the recipe

The Ingredients

I like a more subtle gin than traditional London dry (think Tanqueray or Beefeater), and I wanted to try something new. St. George Botanivore Gin fit the bill. It’s my new favorite dry gin, but I also like Hendrick’s and Prairie Organic Gin.

The liqueurs were new to me and required some research. I discovered there aren’t many choices for maraschino liqueur or crème de violette, but I found highly recommended brands of each:

Luxardo Maraschino Liqueur‘s website lists it as, “Distilled from the leaves, pits, stems, and skins of Luxardo sour marasca cherries, creating a complex liqueur with a persistent cherry aroma. Smooth but sharp, this liqueur has a rounded flavor with notes of cherries and rosewater.”

Rothman & Winter Creme de Violette Produced in Austria from the Queen Charlotte and March Violets found in the Alps. elegant in its simplicity, this authentic crème de violette captures their fragrance, vibrant colors, and taste.

I also had a jar of Tillen Farms Bada Bing Cherries on hand for the garnish. They have to be the best cocktail cherries I’ve ever found!

Aviation Gin Cocktail Ingredients
Gin, lemon juice, creme de violette, cherries, and maraschino liqueur

The Process

Preparation was straightforward and took 5 minutes from the start to garnish. In fact, the garnish was the most “difficult” part, but only because I have never made a lemon twist. A quick google and I found a video showing 3 different ways to make one. It actually wasn’t too hard to do thanks to my channel knife.

I served my cocktails in coupe glasses (a.k.a. champagne saucers, but martini glasses would have worked too. Really, any type of cocktail glass that’s designed for drinks that are served up will work here.

Finally, I did notice that my Aviation Gin Cocktail seemed cloudier than the recipe’s photos. I probably should have used a fine mesh strainer to get out the lemon pulp, but I didn’t think of it. I just used the built-in strainer in my cocktail shaker.

Pumpkin Pie Milkshake

It’s full-on summer here, and anything cold is divine—air conditioner, ice, milkshakes… So I went on the hunt for a cold beverage and found this Pumpkin Pie Milkshake recipe on my beverage board. My love of pumpkin spice anything made this was a must-try recipe.

This post was originally published on July 5, 2017. The text and photos were updated on August 11, 2021. The review and rating have not been changed.

I don’t know about you, but pumpkin pie screams fall to me. I start dreaming about it when people begin talking about pumpkin spice lattes and once Thanksgiving gets nearer… well, it’s all over from there. There is no stopping me from starting with dessert on Thanksgiving day.

Recipe Source: Linda at Craftaholics Anonymous
Recipe Author:  Jenny from Honey and Birch
Get the recipe

The Ingredients

This is a simple recipe with just a few ingredients: vanilla ice cream, milk, pumpkin puree, pumpkin pie spice, graham cracker crumbs, and whipped cream. I think the key here is to buy a really good vanilla ice cream. I went for Blue Bell since it’s super-rich and creamy. Bonus that the 1-pint container was exactly the amount needed to make this recipe (2 cups).

Pumpkin Pie Milkshake Ingredients
Pureed pumpkin, graham crackers, whipped cream, milk, cinnamon, and vanilla ice cream

The Process

How much easier can it get than to throw almost everything into a blender and press a button? I definitely see the reason the graham cracker crumbs need to be stirred in after, though. It keeps them from getting too pulverized and soggy, so you get the sensation of pie crust as you drink.

BTW, I have to share my graham cracker crushing technique. I broke up 2 crackers into quarters and slipped them into a zippered sandwich bag. That made them easy to crush with my hands, kept things from getting too messy, and gave me ready-made storage for the leftovers.

One Pan Shrimp and Pasta in Tomato Cream Sauce

I love to cook, but I hate doing the dishes! That’s why recipes that can be made in one pan appeal to me so much. This One Pan Shrimp and Pasta in Tomato Cream Sauce recipe had a lot of things I like: pasta, seafood, and an Italian feel. I had to give it a try!

This post was originally published on July 3, 2017. The text and photos were updated on July 20, 2021. The review and rating have not been changed.

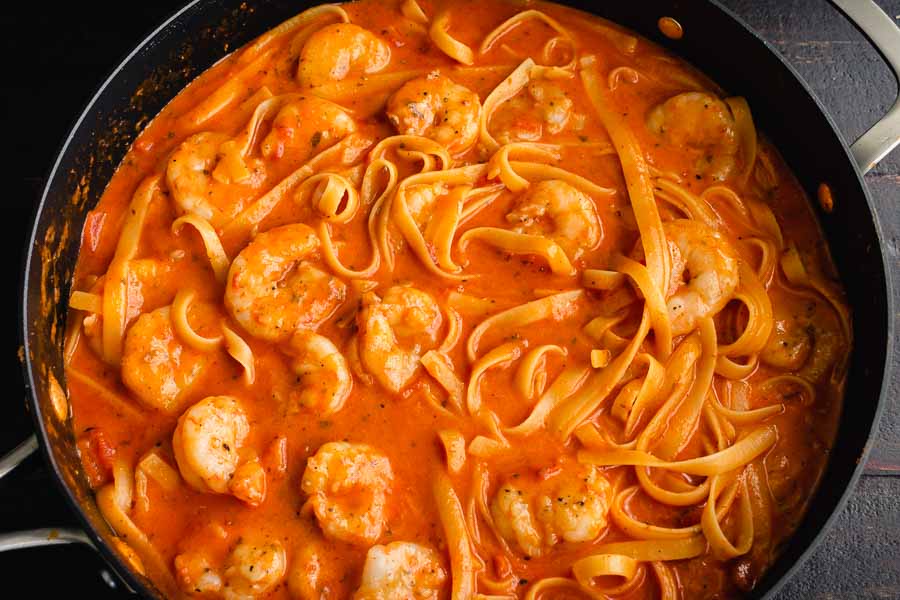
This One Pan Shrimp and Pasta in Tomato Cream Sauce is not only incredibly easy to make, it comes together in just 30 minutes if your shrimp are already peeled!

Recipe Author: Amy at The Blond Cook
Get the recipe

The Ingredients

I have to say I wasn’t looking forward to the prep work on the shrimp. Peeling and deveining an entire pound sounded like it would take a while, but I was willing. I assumed frozen shrimp would be cheaper than fresh. I was wrong.

First, I could only find pre-cooked frozen shrimp that had been peeled and deveined. I wasn’t too into that, so I went by the seafood counter and got a pleasant surprise. Fresh, peeled, and deveined shrimp for about $3 less. Sold!

If there ever was a perfect seasoning, Italian seasoning is it. The stuff is magical! It’s typically a blend of oregano, marjoram, thyme, basil, rosemary, and sage. There’s no guessing which herbs and how much since they have already been blended. I use it every chance I get, like in this White Bean and Ham Soup.

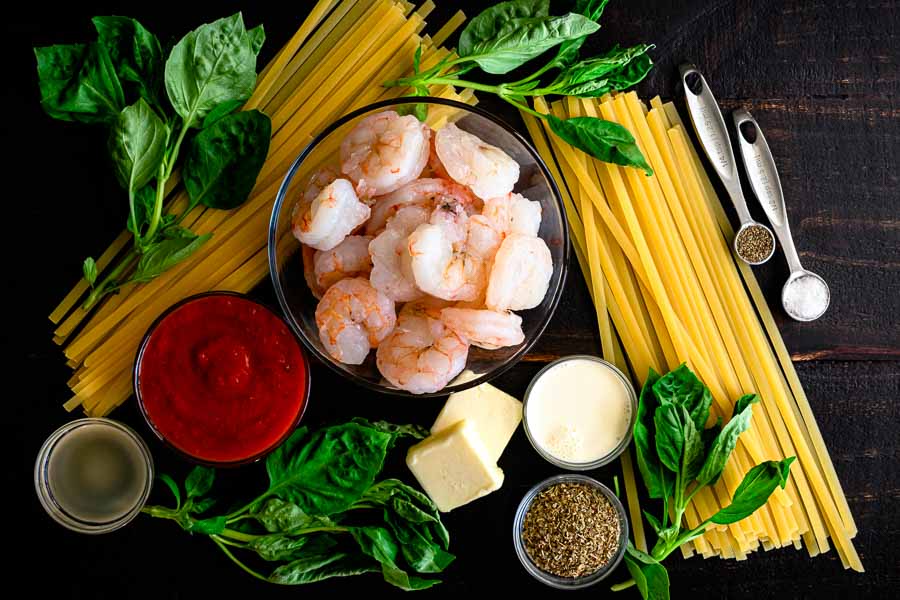
One Pan Shrimp and Pasta in Tomato Cream Sauce Ingredients
Shrimp, bail, fettuccine, pepper, salt, Italian seasoning, heavy cream, butter, marinara sauce, and chicken broth

The Process

Making this dish was pretty easy, especially with the shrimp already peeled and deveined. Can I say how wonderful it was not to have to pre-boil the pasta and lug a heavy pot full of boiling water to the sink to drain it? It’s the little things…

You do need a large saute pan to accommodate the linguine and be able to stir the sauce without making a mess. Also, be sure to stir it a few times while it’s cooking so it doesn’t stick together. I find this is especially important during the first few minutes.

I used a non-stick 5-quart saute pan for this recipe
I used a non-stick 5-quart saute pan for this recipe. It was a perfect size and made clean-up easy.

Red, White and Blue Cheesecake Salad

July 4th is coming up, and Red, White and Blue Cheesecake Salad seemed like the perfect dessert to go with the BBQ ribs I made earlier this week. Cheesecake and fresh fruit are two things I adore, but I’ve never actually tried making a cheesecake. One day, but this seemed far, far easier.

Red, White and Blue Cheesecake Salad comes together so easy with fresh fruit and a rich and creamy cheesecake filling to create the most glorious fruit salad ever! Every bite is absolutely bursting with summer flavor and you are going to go nuts over this recipe!

Recipe Author: Donna at The Slow Roasted Italian
Get the recipe

The Ingredients

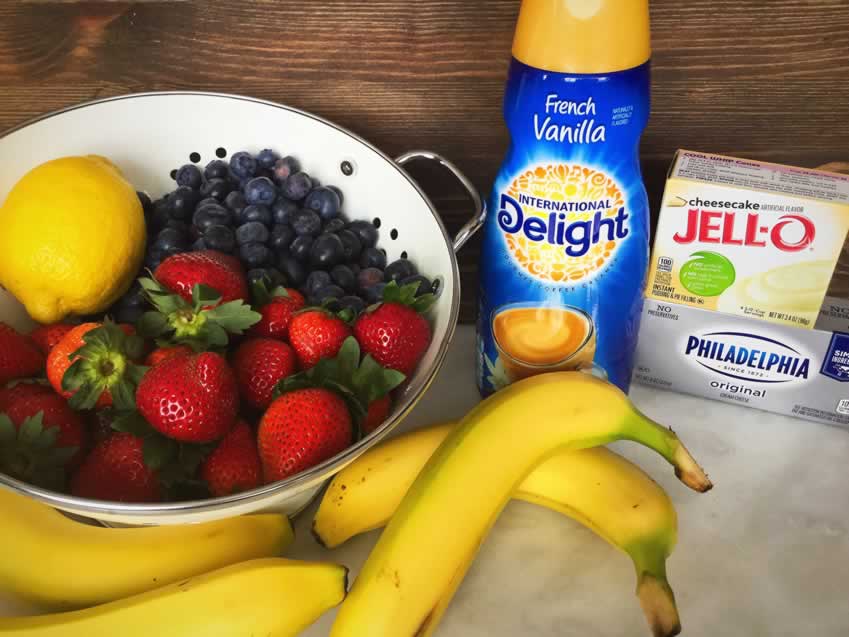
The strawberries smelled so good, it was hard not to eat a few while I took this picture! As you can see, there was nothing hard to find or unusually expensive needed. The French vanilla creamer was the priciest item at $3.67, but I have lots left over for my coffee since I only needed a cup for this recipe.

Red, White and Blue Cheesecake Salad Ingredients
Strawberries, blueberries, bananas, lemon, French vanilla creamer, Jell-O cheesecake pudding mix and cream cheese

The Process

This was pretty quick and easy to put together. It took me about 7 minutes to slice the strawberries and bananas, and another 13 to put everything together. I’m pretty pleased with the results after 20 minutes of work 🙂

Definitely follow Donna’s advice and add the creamer slowly. I spent about 10 minutes alone on the cheesecake mixture, but I ended up with a very smooth mixture. Also, I let the cream cheese sit out a room temperature to soften for about 30 minutes. I think it helped keep the beaters from clogging.

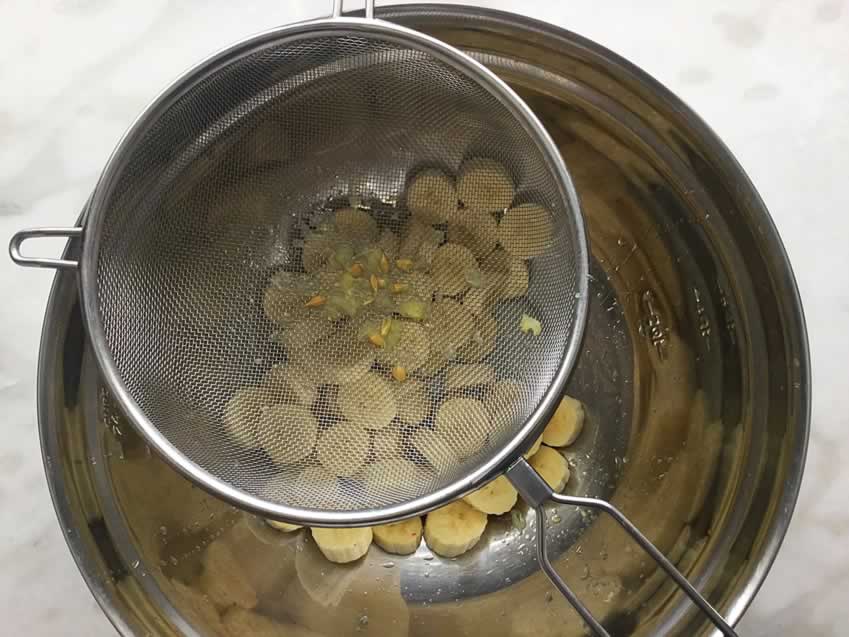
Finally, use a mesh colander over your mixing bowl when you juice the lemon. As you can see, it kept a lot of seeds and pulp out of the bananas.

Red, White and Blue Cheesecake Salad Bananas
A mesh colander to keeps the lemon seeds out of the salad

Perfectly Tender BBQ Ribs Recipe That Will Rock Your World

I grew up with a dad who was a barbecue aficionado. He traveled all over the country for work, and he could tell you the best BBQ joint in almost every city he visited. And he could make some BBQ ribs! He always told me cooking them on the backyard grill wasn’t “real” barbecue. Okay, but those ribs he made were really delicious!

I’ve been thinking about his ribs with July 4th coming up, and I found a recipe that sounded like something I could handle (I’ve never made ribs before). I was skeptical about barbecue in a crockpot and finishing them on a propane grill, but I had to try.

Not only is my recipe for perfectly tender ribs easy, it’s also reliable so you will cook tender, finger-licking ribs every time.

Recipe Author: Amylu at Making Motherhood Matter
Get the recipe

The Ingredients

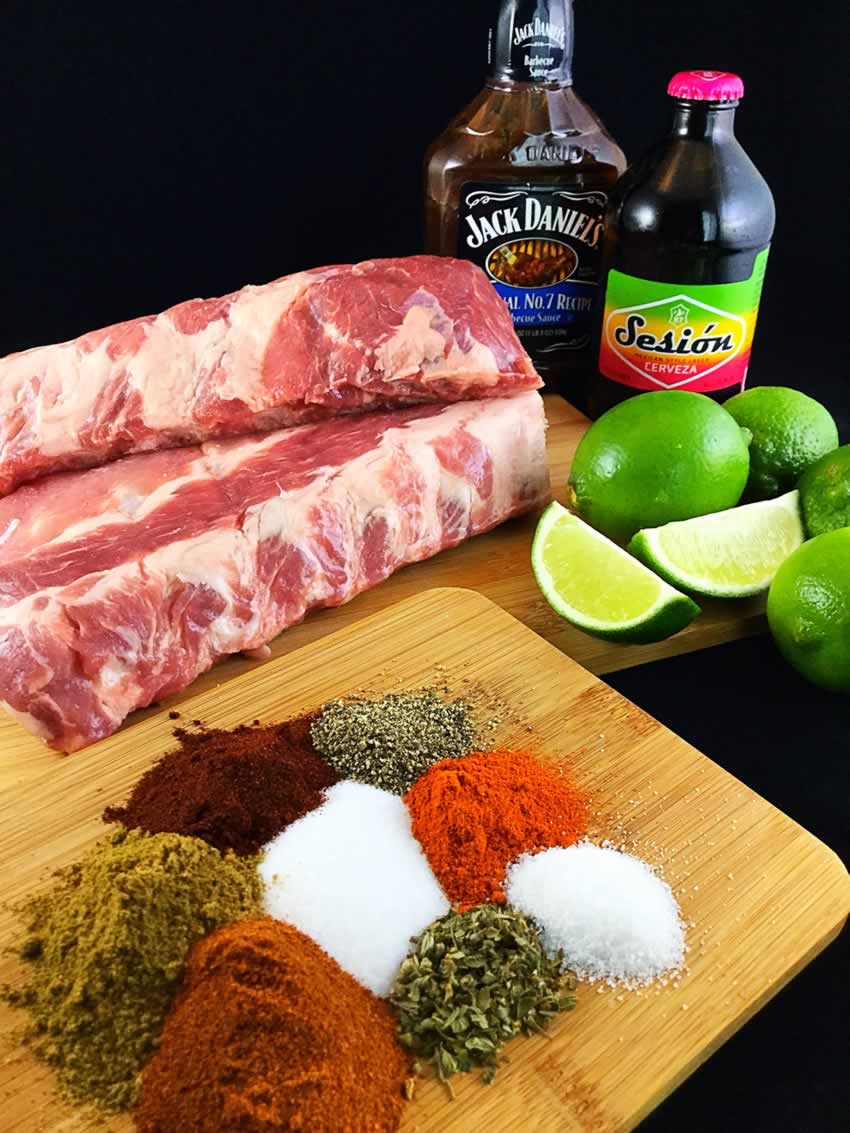
I had everything listed for the rib rub in my pantry, so all I had to pick up was the ribs, limes, and beer. My husband and I aren’t Corona fans, so I made a trip to Total Wine so I could buy a single bottle. Turns out I picked the perfect day since they were having a tasting for a new Mexican style lager called Sesión. It was comparable to Corona but had a lemony finish I thought would go well with pork. I left with a six-pack.

Perfectly Tender Barbecue Ribs Ingredients

The Process

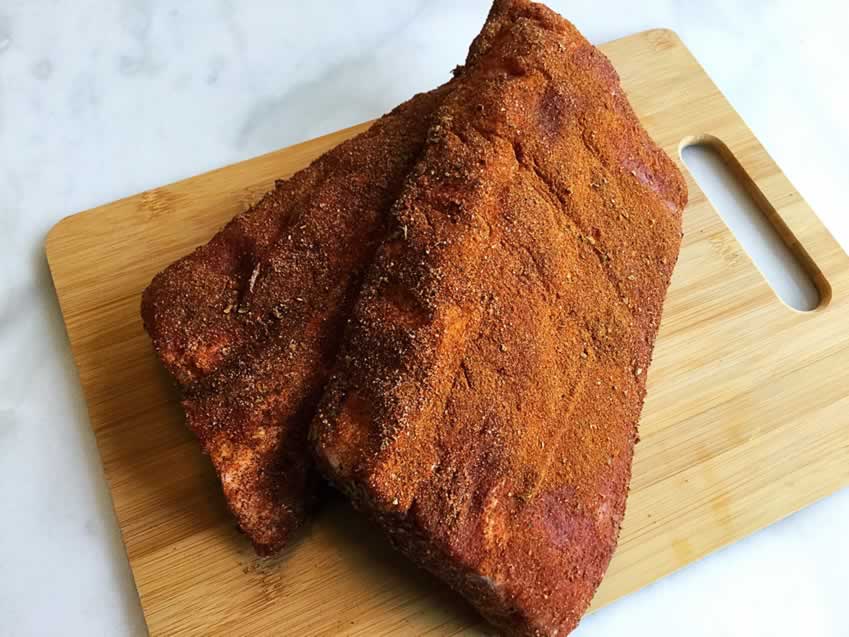
Prepping a rack of ribs turns out to be very easy. All I had to do was cut it in half and sprinkle the mixed spices over it. It got a lot harder after that. Kidding! Next, I just had to throw the ribs into the crockpot with some beer and lime juice, set the timer, and wait. I turned them a few times, and my kitchen soon smelled delicious. Almost torture for 5 hours!

Finishing them on the grill was super easy. I had my husband take care of that part right after I basted the ribs with store-bought sauce. He did say he thought the ribs might fall apart when he turned them, and some bits stuck to the grill. Fortunately, he isn’t too proud to admit he didn’t grease the grate, and that probably would have prevented the minor sticking.

Ribs with Spice Rub
Spice-rubbed ribs

To Serve

Just add a couple of baked potatoes, a salad, and a pitcher of blackberry mojitos to these BBQ ribs for a summer cookout.