Home Blog Page 61

Smoked Rosemary Oil Dirty Martini

0

Vodka martinis used to be my go-to drink, but I haven’t had one in ages. This recipe jumped out at me since I have been cooking with rosemary all week. Then I realized it called for gin. I’m not sure if I have ever had a gin martini. Well, I just happened to have a bottle of gin leftover from my July gin cocktail posts… I took that as a sign that I needed to try it in a martini.

This post was originally published on August 18, 2017. The text and photos were updated on July 14, 2021. The review and rating have not been changed.

My little twist on the classic cocktail is the smoked rosemary olive oil. It may sound peculiar to dash in some oil to a cocktail, but trust me it works here! Oil and water may not mix, but alcohol and oil sure do! It enhances the olive flavor and adds a great texture to the drink.

Recipe Author: Joanna at Jojotastic
Get the recipe

The Ingredients

This is a pretty simple recipe, or should I say pair of recipes since you have to make the smoked rosemary oil and the martini. The first time I made it, I used Prairie Organic Gin. It’s not too dry for me and it’s very smooth. I went with the classic Martini & Rossi extra dry vermouth.

I couldn’t find the Castelvetrano olives, so I used Sable & Rosenfeld Tipsy Olives, along with their brine. They were a little pricey at $6.99 but worth it–they’re nice big olives stuffed with pimento.

When I redid the photos of this recipe, I switched things up to St. George Botanivore Gin, Noily Pratt Vermouth, and the green olives in my refrigerator (I think they were queen olives, but I can’t be sure). You can’t go wrong with either combo.

Smoked Rosemary Oil Dirty Martini Ingredients
Gin, dry vermouth, rosemary, extra virgin olive oil, and green olives

The Process

Getting the rosemary to burn was tricky. I ran a long lighter along the stems several times and was only able to get them to char a little. Then I left them in the olive oil for 3 days so it could absorb the flavor.

The actual martini took 2:30 to make and garnish. I was a bit surprised that the oil didn’t mix into the alcohol. Like not even a little. The blog post and pictures sure made it sound and look like it would.
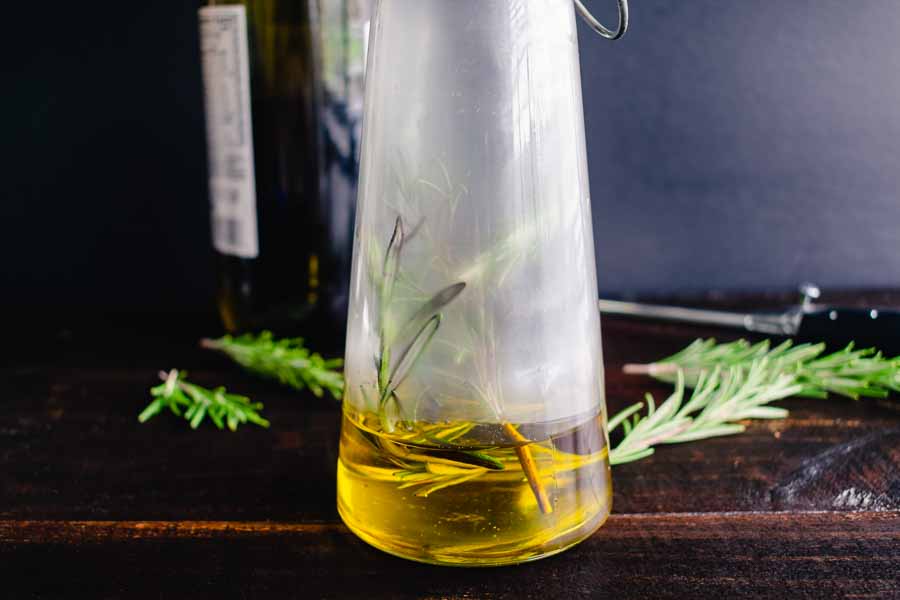
Making the smoked rosemary olive oil

Creamy Mushroom, White Bean and Rosemary Soup

0

One-pot meals are the best. You don’t need any special equipment, and clean-up is fast. I think that’s what really made me want to try this Creamy Mushroom, White Bean and Rosemary Soup. Well, that and the fact that it sounded absolutely delicious and I’m sure my husband will love it. Cooking for two and all…

This post was originally published on August 16, 2017. The text and photos were updated on July 14, 2021. The review and rating have not been changed.

Hearty, filling, and totally comforting.

Recipe Author: Amanda Kerzman at Amanda K. by the Bay
Get the recipe

The Ingredients

The list of ingredients is long-ish, but nothing is on it you can’t easily find in your local grocery store. Nothing is very pricey, either. One thing I would have liked to have seen added to the list is butter or oil. It’s listed in the directions, and you probably have it on hand. But just in case you don’t…

Cooked carrots are one of the few foods I don’t like. I decided to use the minimum of 4. I love cooked celery, so I went in the opposite direction and used the maximum of 4 stalks.

Crimini mushrooms aren’t listed in my grocery store’s app, so I googled them to see if one of the fancy grocery stores in the area carried them. Turns out that my favorite store had them all along, just under another name: baby bella mushrooms.

Crimini is just another name for them, and they are really the same white mushrooms I normally buy. White mushrooms are the youngest, baby bellas are slightly older, and the large portabella mushrooms are fully mature white/button mushrooms.

As for the white beans, I went with great northern beans the first time I made this recipe and navy beans the second time. Cannellini might also work. I chose great northern and navy beans because they are on the small side, and that lets you get the rest of the vegetables and some broth onto a spoon. Cannellini beans are just a little too big for that, IMO.

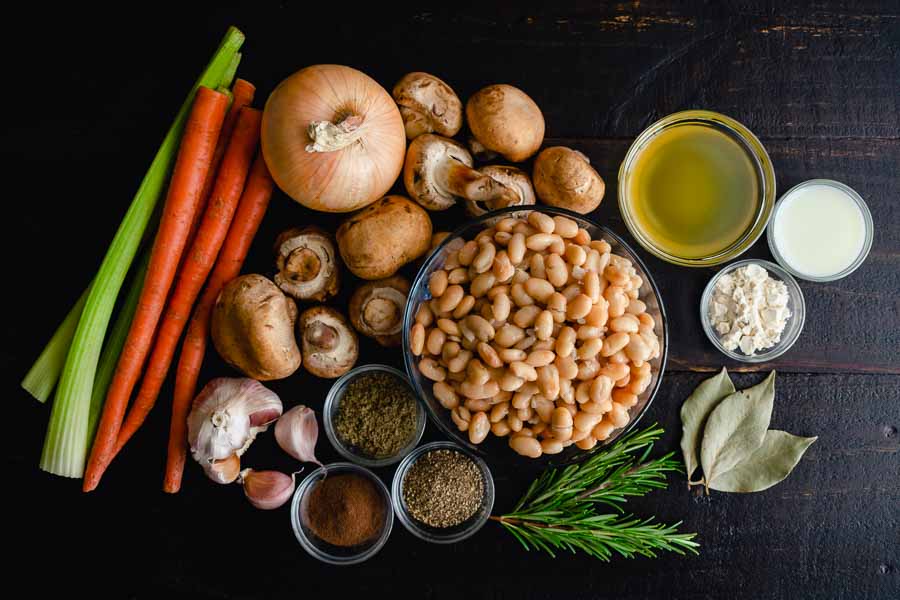
Creamy Mushroom, White Bean and Rosemary Soup Ingredients
White beans (I used navy beans), crimini mushrooms, chicken broth, half and half, flour, bay leaves, rosemary, black pepper, allspice, sage, garlic, carrots, celery, and onion

The Process

Prep work for this Creamy Mushroom, White Bean and Rosemary Soup took 9 minutes, and that included chopping the vegetables, draining and rinsing the beans, and measuring out the flour and spices. The actual cooking time was 37 minutes, with a total time of 46 minutes.

Some amounts of ingredients and times in Step 1 aren’t specified, so this is how I did it:

  • “…a few tablespoons of butter or oil…” = 2 tablespoons of salted butter
  • The onions took 5 minutes to become translucent
  • “…season with salt” = 1/2 teaspoon of coarse sea salt
  • “Add more butter…” = 1 more tablespoon of salted butter
  • And the celery softened after cooking for 10 minutes

I didn’t need to add any additional salt at the end, but I did add some freshly ground black pepper. The number of servings isn’t listed, but I got 6 filling bowls of soup out of this recipe.

One thing I noticed is this soup was good on the first day but great on the second. There’s something about letting soup sit overnight that allows the flavors to meld and the broth to thicken. It’s magical!

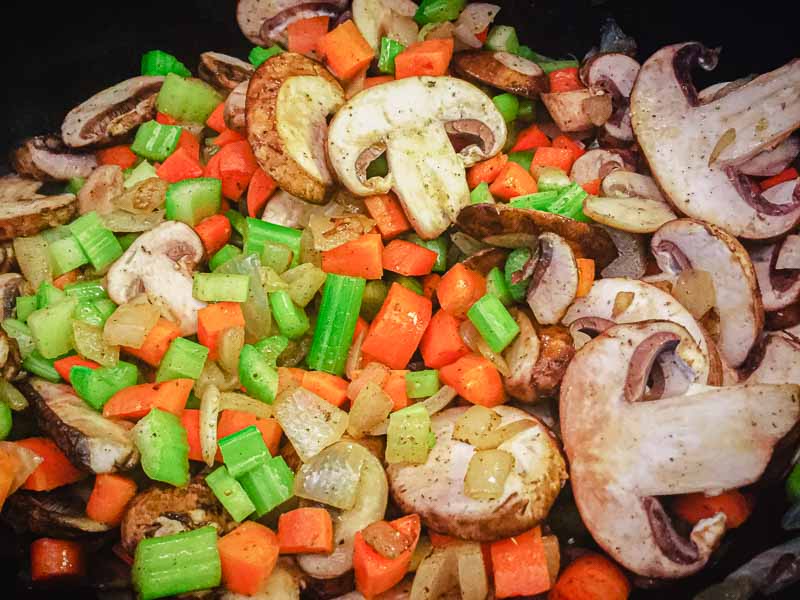
Cooking the vegetables

Pork Loin with Wine and Herb Gravy

I’ve noticed some themes in the recipes I pin, and one of them is wine. I must cook with it more than I drink it, especially white wine. Another theme I already knew about was fresh herbs. Dried sure are convenient, but fresh taste so much better. This pork loin recipe had both wine and herbs in the title, so you know I had to give it a try!

Let’s face it. We all need a break from chicken once in a while. So I think pork. It’s the other white meat. But pork, true … sometimes a little boring. Well not any more! If you’re not one already, this dish will turn you in to a pork lover. I guarantee it.

Recipe Author: Jennifer at Seasons & Suppers
Get the recipe

The Ingredients

My first thought after I read the title of this recipe was ‘pork tenderloin’. Thank goodness the author included some info on the difference between a pork loin roast and a pork tenderloin. Turns out they are totally different cuts. The author does say either can be used with some adjustments to the cooking times, but I opted for the pork loin roast since that is what she used.

Nothing was unusual or difficult to find. I estimate I spent around $15 for this meal. The pork loin was just over $8, the herbs were just over $2 each, and so was the cream. I had the rest in my pantry.

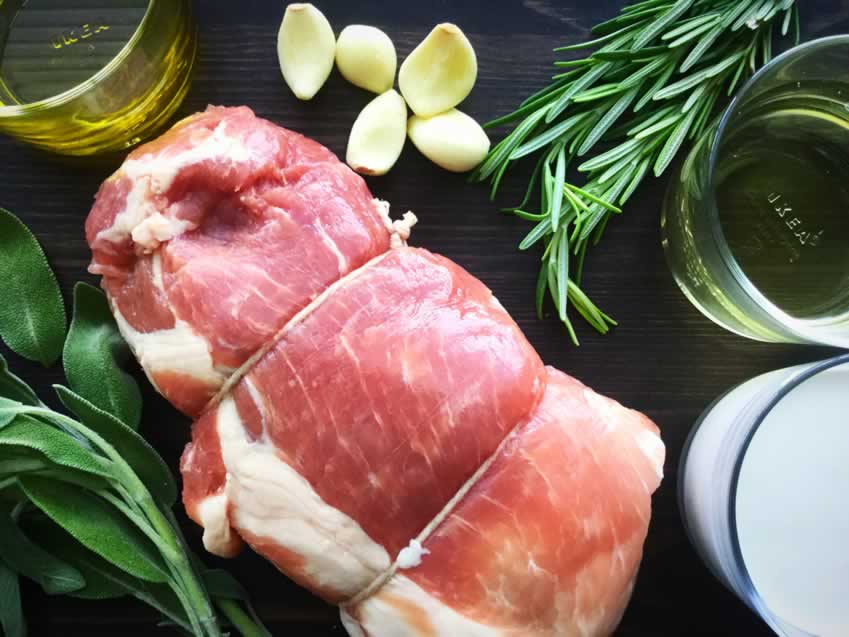
Pork Loin with Wine and Herb Gravy Ingredients
Pork loin, sage, rosemary, garlic, white wine, olive oil, and cream

The Process

This recipe wasn’t difficult, but it did take me 2 hours from prep to finish. Most of the work is at the beginning and end, with the majority of the time spent cooking. The prep work (chopping, measuring, and heating the olive oil) took 11 minutes.

One nice thing about this recipe is the smell of the cooking herbs. It starts almost as soon as you add them to the pan, and it’s divine! I used 8 sprigs of rosemary and 4 sprigs of sage. It seemed like a good amount, but I had leftovers of both.

My pork loin was a little under 2 pounds, so I shortened the cooking time to 1 hour 10 minutes. I did turn it every 20 minutes, but I did not have to add any extra liquid to the pan. I ended up with plenty of liquid for the gravy and had to thicken it with a cornstarch/water mixture as the author suggested.

Serving Suggestion

I served my pork roast with boiled red potatoes topped with some of the gravy. It added a nice flavor to a bland side that was easy to make while the roast was cooking.

Pork Loin with Wine and Herb Gravy
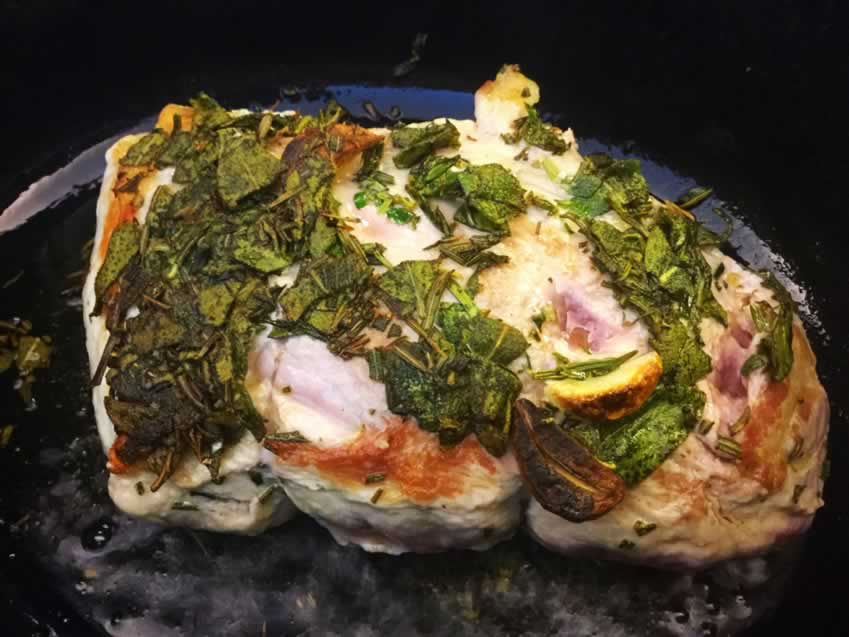
Step 1: Just after sautéing the first side for 5 minutes

Red Wine Champagne Sangria

How else to end a week of Latin and Latin-inspired food but with sangria? I’ve never made it, so you know that means I had to give it a try! Plus it’s probably the easiest fruit cocktail there is to make. I fell in love when I saw “champagne” in the name because it’s my favorite type of wine (and a great excuse to pop a cork!).

This post was originally published on August 11, 2017. The text and photos were updated on August 11, 2021. The review and rating have not been changed.

Red wine champagne sangria is delicious, refreshing, and perfect for the spring and summer months. This sangria includes juicy, fresh fruit.

Recipe Author: Brandi at Stay Snatched
Get the recipe

The Ingredients

I don’t drink wine very often, but I’m a huge fan of champagne. Louis Bouillot is my go-to brand, although it’s technically a sparkling wine since it’s made in the Burgundy region of France. A friend who collects wine introduced me to it several years ago, and it’s all I drink now. I chose the extra dry for this sangria. It’s priced at $20, which is inexpensive for champagnes.

How did I select the red? Well, I did what most people do: I picked the one with a label I liked. I prefer dry reds when I drink non-sparkling wine, but I don’t really know much about them. I thought the name of this was cute (Running with Scissors), and it was priced right at $12.

Red Wine Champagne Sangria Ingredients
Red wine, champagne, sugar, orange, apple, and strawberries

The Process

It doesn’t get much easier than this recipe: Slice and chop fruit, add sugar and wine, chill, top with champagne, and drink. It took 8 minutes to prep plus the 2 hours to chill. Also, I did lightly muddle the fruit with a spoon to release the juices/flavors into the wine.

I chose to top off each glass with a little champagne since I wasn’t going to drink the entire pitcher at once. I worked on it over a couple of nights, making sure the pitcher was covered when I stored it. The taste of the fruit was a little stronger each night, and I was kind of sad to finish it off.

One thing to note: Step 1 starts off, “Add the fresh fruit and sangria…” I assumed that was a typo and should have read, “Add the fresh fruit and sugar…”

Muddling the fruit and sugar with a wooden spoon

One Pan Cilantro Lime Rice (with Black Beans)

Beans and rice are a staple in our house along with cilantro and limes. It’s pretty rare we don’t have them all, so this One Pan Cilantro Lime Rice (with Black Beans) recipe was simply a must-try. And since I love all these things on their own, how great is it to have them together??!!

This post was originally published on August 9, 2017. The text and photos were updated on August 17, 2021. The review and rating have not been changed.

One Pot Cilantro Lime Rice (with Black Beans) simmered with jalapeños, green chilies and red onions spiked with cilantro and lime for the most satisfying Mexican rice you will want to serve with everything. Or with nothing because it’s cravilicious all by itself.

Recipe Author: Jen at Carlsbad Cravings
Get the recipe

The Ingredients

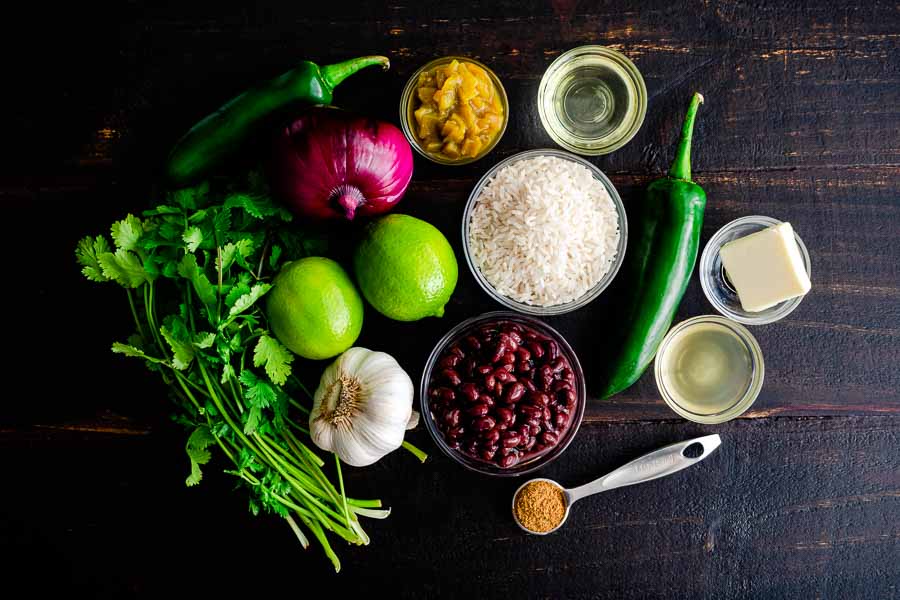
As I mentioned earlier, beans, rice, cilantro, and limes are household staples. I also happened to have the olive oil, cumin, chicken broth, and butter on hand.

I only had to buy a few things to make this dish: red onion, jalapeños, and canned green chiles. None of them were difficult to find or expensive. That’s one of my favorite things about meatless meals!

One Pan Cilantro Lime Rice (With Black Beans) Ingrediets
Cilantro, jalapeno peppers, red onion, canned green chili peppers, olive oil, long grain rice, butter, chicken broth, cumin, canned black beans, garlic, and lime juice

The Process

No special equipment is needed, which is always a good thing in my book. The prep and cook times were both accurate (10 and 20 minutes, respectively), making this dish very quick to make in 30 minutes.

The mix of fresh and canned ingredients helped speed things along—always a plus in my book. I did some measuring and chopping, then I got to cooking.

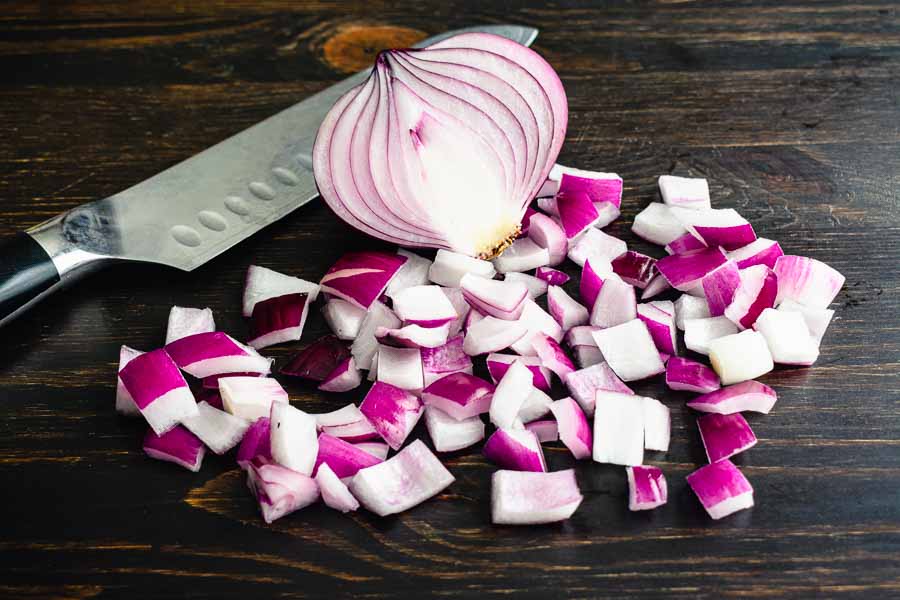
Chopped red onion
Chopped red onion

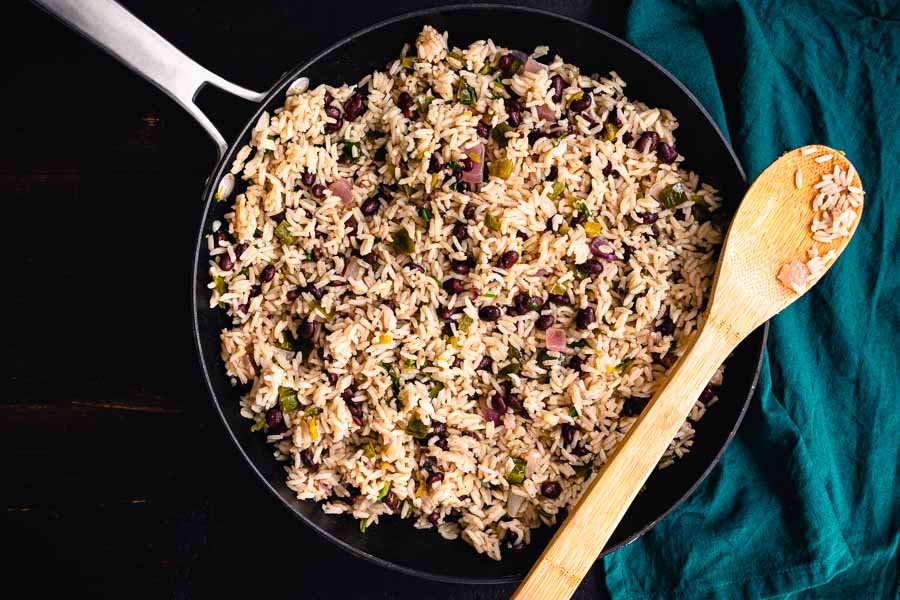
My first instinct was to make this in a large saucepan or a saute pan, but the instructions said to use a large nonstick skillet. It was a perfect size and made the first few steps (sauteeing the vegetables) easy. It also meant I had to carefully everything after the rice was cooked, but things worked out just fine.

I included the optional tablespoon of butter in the ingredients photo, but I ended up not using it. The rice didn’t dry out during cooking, and I didn’t see the point in adding extra fat and calories for very little extra flavor. Trust me, this One Pan Cilantro Lime Rice already has tons of that!

One Pan Cilantro Lime Rice in a large nonstick skillet

Serving Suggestion

The first time I made this recipe, I served it as a side with skirt steak that had been seasoned with Toasted Cumin and Black Pepper Rub (recipe below). Since then, I have made this recipe many times, and it also goes well with chicken.

It’s also very versatile and a great way to use up leftovers. The accompanying post notes that you can add cheese, sour cream, salsa, or sliced avocado to the finished dish. It also mentions cooking it with diced tomatoes, which is something I highly recommend!

One more thing to note is this recipe makes a wonderful meatless meal all on its own. This recipe is also vegan-friendly, just sub in vegetable broth and vegan butter.

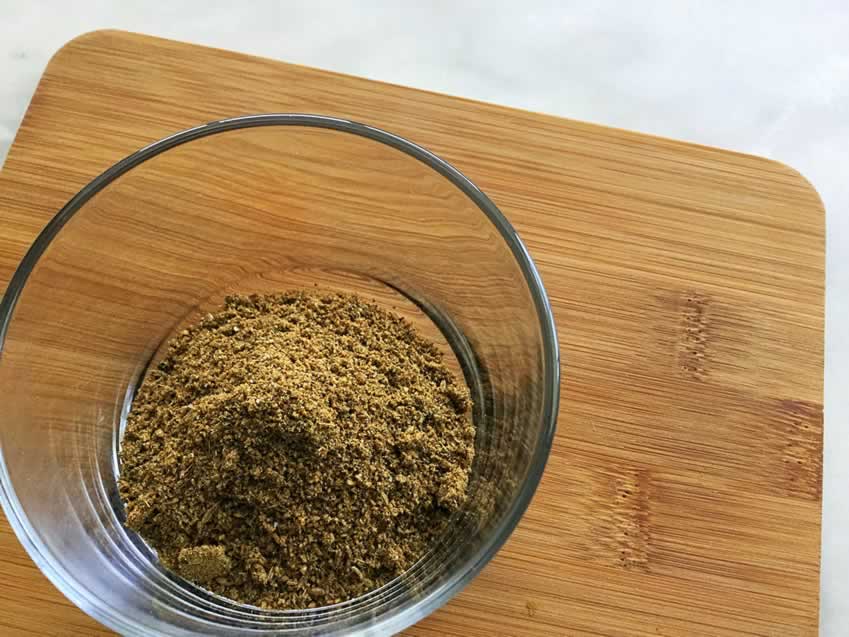
Toasted Cumin and Black Pepper Rub

Toasted Cumin and Black Pepper Rub

The Hungry Pinner
This toasted spice rub is an easy way to add flavor to beef and chicken. Make up a batch, and keep it in a sealed container so it's handy for quick dinners.
Servings 4

Ingredients
  

  • ¼ cup Cumin Seeds
  • 2 tbsp Dried Oregano
  • 1 tbsp Black Peppercorns
  • ¼ tsp salt
  • ½ tsp sugar

Instructions
 

Stove-top Method

  • Add all ingredients to a skillet and toast on medium for about 2 minutes, stirring from time to time so the spices cook evenly. Spices should darken and become aromatic when ready.
  • Allow to cool, then grind in a spice grinder. makes enough rub for 4 chicken breast quarters.

Toaster Oven Method

  • Add all ingredients to a rimmed tray that will fir into the toaster oven. Set dial between 2 and 3, and toast. Spices should darken and become aromatic when ready.
  • Allow to cool, then grind in a spice grinder. makes enough rub for 4 chicken breast quarters.

Notes

Adapted from The National Chicken Council

Matambre: Argentinean Stuffed Flank Steak

I have been wanting to try this recipe for a while. Just reading it made me hungry: steak, hard-boiled eggs, peppers, cilantro, garlic… But I thought it looked complicated, so I kept putting it off. I could kick myself! It turns out that matambre isn’t as difficult as it looks, and it tastes better!

Matambre: An Argentinian Stuffed flank steak with hard-boiled eggs, bell peppers and a mixture of cilantro, garlic, and olive oil. The matambre is then grilled to perfection and cut into thin slices before enjoying.

Recipe Author: Joanna Cismaru at Jo Cooks
Get the recipe

The Ingredients

Most of the ingredients for the matambre were inexpensive and easy to find. Not so much for the steak. A 2-pound piece of flank steak isn’t cheap at just under $18. But it is a lot of meat, and the filling adds to that. I was able to get 6 servings from this dish, so it wasn’t as pricey as I initially thought.

The only piece of special equipment I needed was kitchen string, a.k.a. butcher’s twine. My local grocery store didn’t carry it according to their app, so I had to order some from Amazon. I waited anxiously for it to arrive–I really wanted to get started on my matambre!

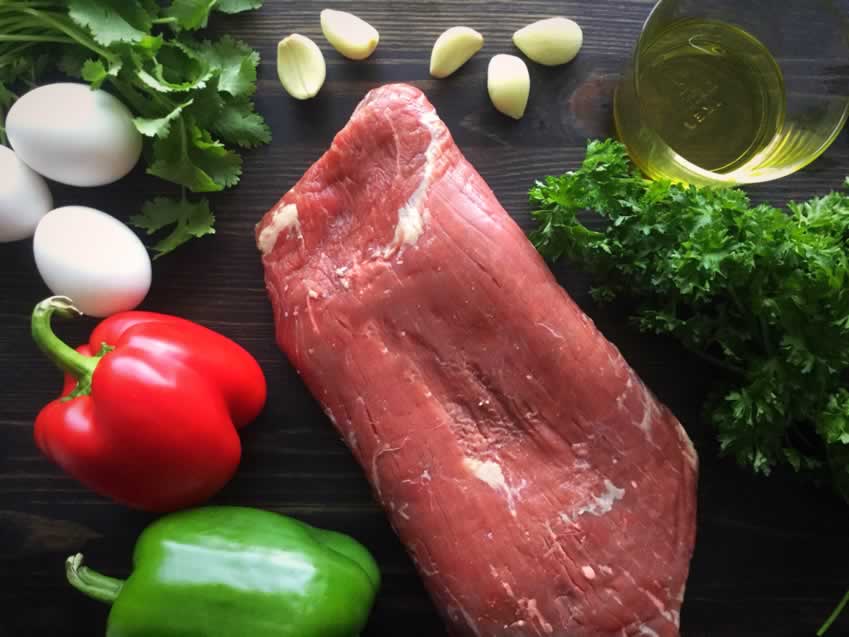
Matambre Ingredients
Flank steak, red and green bell peppers, hard-boiled eggs, cilantro, garlic, olive oil, and parsley

The Process

I have never butterflied a flank steak, so that was my first challenge. I decided to find a video demo because I had no idea what I was doing. It wasn’t as difficult as I thought it would be thanks to this video. The key is to use short, shallow cuts with a very sharp knife and to take your time. I had my steak butterflied and pounded out in 5 minutes. Not perfectly, mind you. I did cut all the way through in one spot, but I put that end in the middle of the roll and had no problem.

Filling

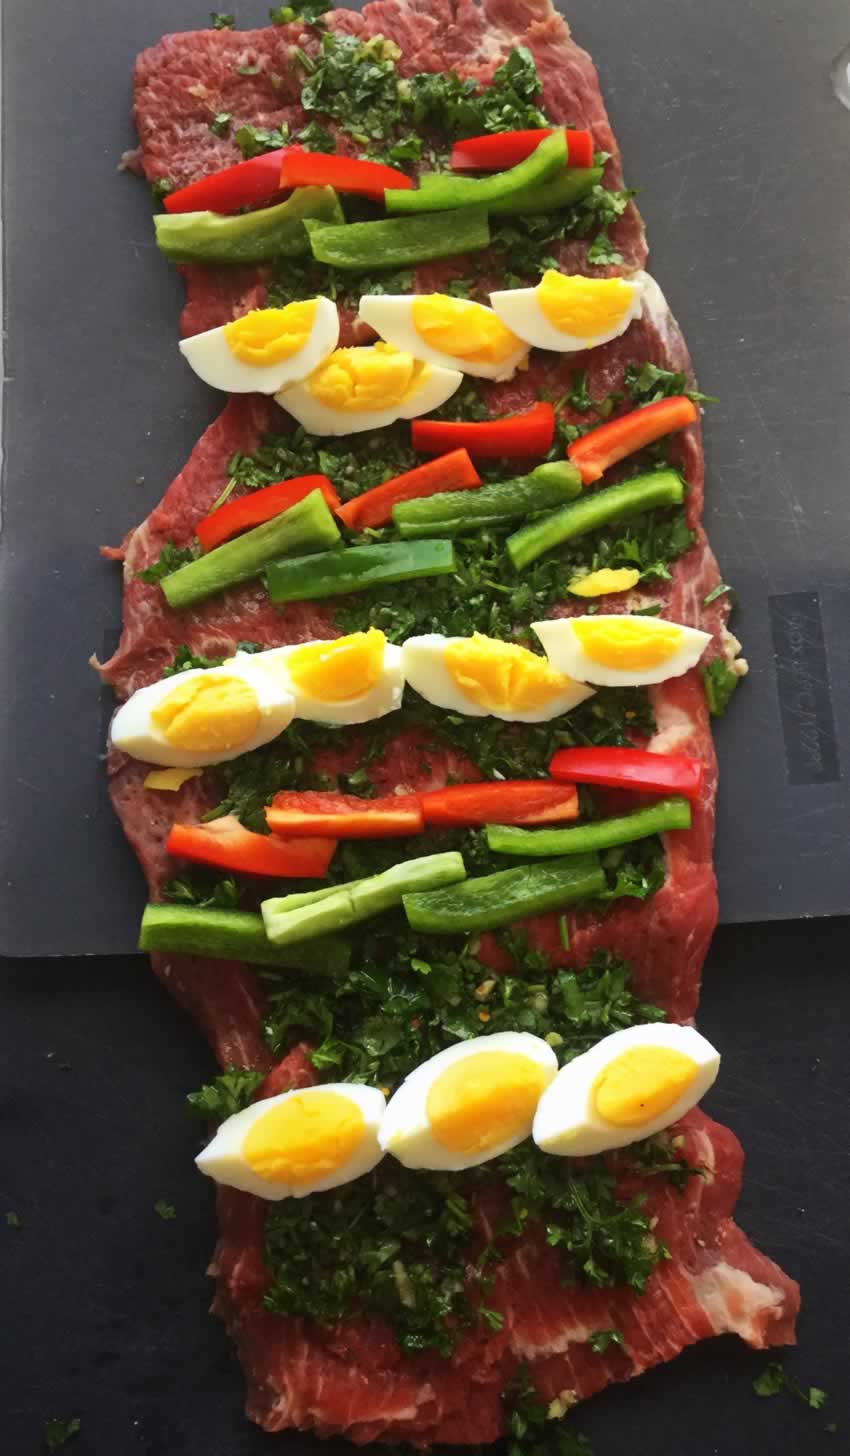
I had a large, thin rectangular piece of meat once that was done. You can see in my photos that I had to double up my cutting boards so it would fit. Now it was time to top with the oil, garlic, and herbs. That was very easy to do using a tablespoon to spread the mixture over the meat. Popping the eggs and peppers on top of that was also easy.

Filled matambre needs to be rolled and tied
Just after filling has been added and just before rolling and tying

Next comes rolling everything up and tying it for cooking. This is another step I assumed would be difficult but really wasn’t. I lost 1 pepper and 1 piece of egg, but the rolling went pretty smoothly otherwise. Next time I won’t put filling quite so close to the edges.

Tying

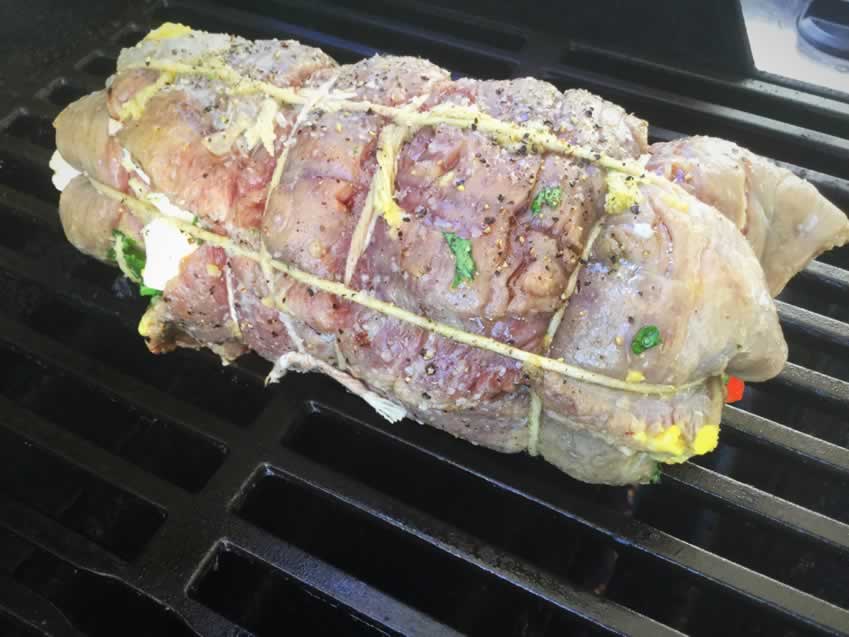
Using kitchen twine was another fast for me, but I don’t think I did too badly. I used 6 pieces of string in total: 4 around the roll to keep it together, and 2 around the length to help keep the filling from escaping the ends. I ended up with a fully prepped matambre in 20 minutes, just slightly longer than listed.

Cooking

The cooking times were spot-on. I had my husband grill the matambre for 20 minutes (5 minutes on each side). Then I immediately put it into a 400-degree oven for 10 more minutes followed by a 15-minute rest before removing the kitchen string and slicing.

Matambre on the grill
Grilling the matambre

Roasted Blueberry Basil Margaritas

I don’t have them often, but margaritas are a must with Mexican food. I love fruity cocktails, and this unusual margarita recipe sounded perfect. I wasn’t sure about the basil-infused syrup, but as always, there’s only one way to find out if it works. Let’s give these Roasted Blueberry Basil Margaritas a try!

This post was originally published on August 4, 2017. The text and photos were updated on July 18, 2021. The review and rating have not been changed.

I don’t know which is weirder. That I had the patience to roast berries before putting them in this beverage or that I put something green, like a vegetable, in my margarita. Basil is a vegetable. Hear me roar.

Recipe Author: Jessica Merchant at How Sweet It Is
Get the recipe

The Ingredients

I’m no tequila expert, so I went with what my husband recommended: Patron. I’m glad I did. Tequila is a prominent taste, so using a good one is important.

I also recommend buying a lot of limes or a good lime juice (not from concentrate). I used 2 1/2 limes to get enough juice for 1 cocktail, and you’ll need some extra for garnish and salting the rim of your glass (I like to use coarse kosher salt for this).

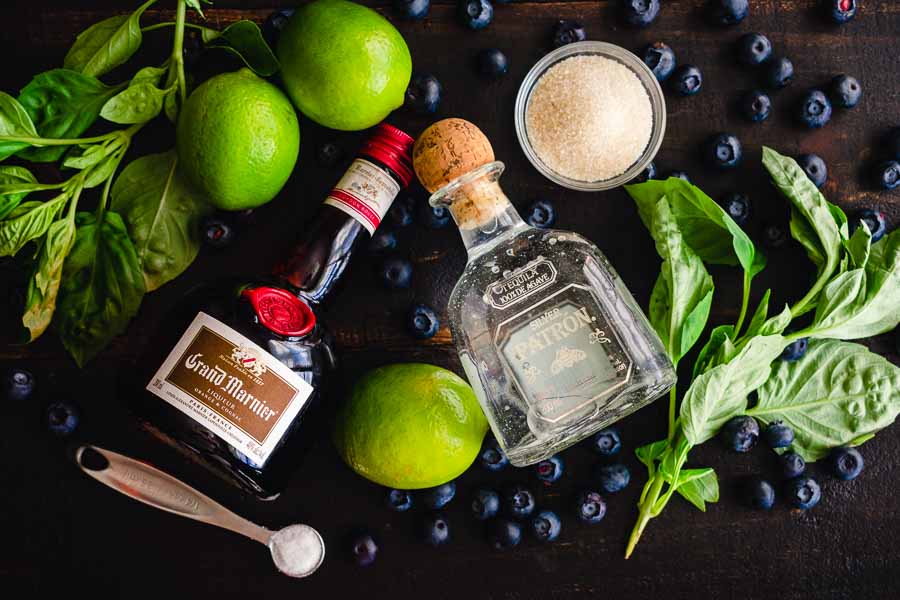
Roasted Blueberry Basil Margaritas Ingredients
Tequila, sugar, basil, blueberries, lime, salt, and Grand Marnier

The Process

The first time I made these Roasted Blueberry Basil Margaritas, I had never made a margarita, and salting my glass was a first. I ran a lime wedge around the rim of glass the glass then dipped it onto a mixture of sugar and salt.

When I decided to update the photos, I had had a lot more practice with salting glasses, so I did it a little differently. This time I dipped the glasses in a little simple syrup instead of using a lime wedge. I let each glass rest for a minute or two to make sure the sugar-salt mixture really stuck.

Making the basil simple syrup and roasting the blueberries was the longest part of the process. It wasn’t difficult, but it took a good half hour to make with time for cooling. The author mentions that it’s not a requirement to roast the blueberries, but I can’t imagine skipping that step. They are so good!

I made my margaritas with strained and unstrained blueberry basil syrup. The blueberry taste was slightly stronger in the unstrained version, and I preferred that. The blueberry bits sank to the bottom of my glass, so I didn’t notice them as I sipped. They did clog the built-in strainer on my cocktail shaker, though, so I had to remove the top and use a separate cocktail strainer.

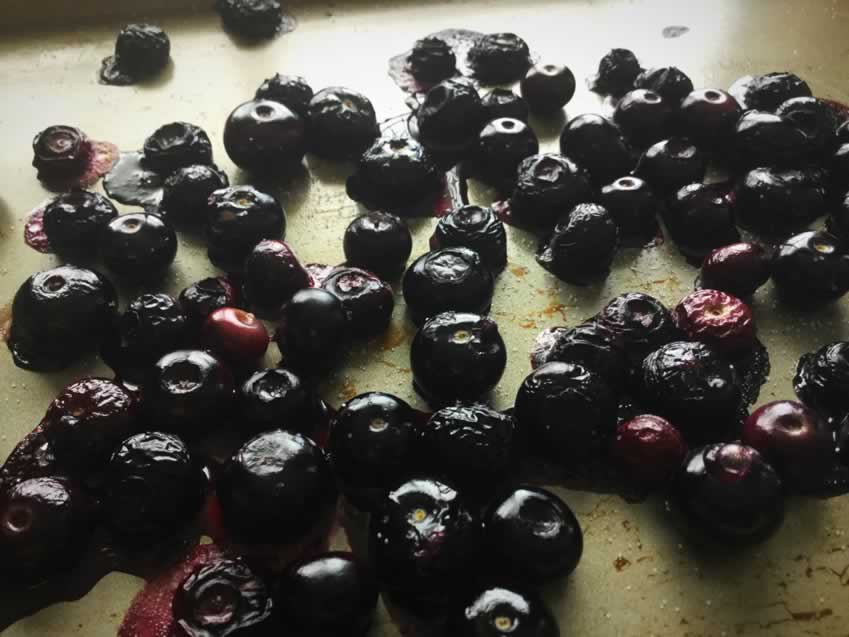
Roasted Blueberries
Roasted Blueberries

Pan Fried Cinnamon Bananas

We have bananas on hand most of the time as treats for our rabbits. They would eat every banana in sight if we let them, but too much sugar isn’t good for them. We usually end up eating or throwing away 1-2 of the bunch, so finding a recipe designed for using up overripe bananas was just made for our household. Let’s give these Pan Fried Cinnamon Bananas a try!
This post was originally published on August 2, 2017. The text and photos were updated on August 8, 2021. The review and rating have not been changed.

Quick and easy recipe for overripe bananas, perfect for a special breakfast or an afternoon snack!

Recipe Author: Kristin at Dizzy Busy and Hungry
Get the recipe

The Ingredients

I didn’t have to shop for any of the ingredients for these Pan Fried Cinnamon Bananas. Can you believe it? I was thrilled!

The only small change I made was using canola oil spray instead of olive oil spray. I already had the canola spray on hand, and I didn’t foresee the change making a difference in the taste. I actually like the idea of canola spray better since it’s a more neutral-tasting oil.

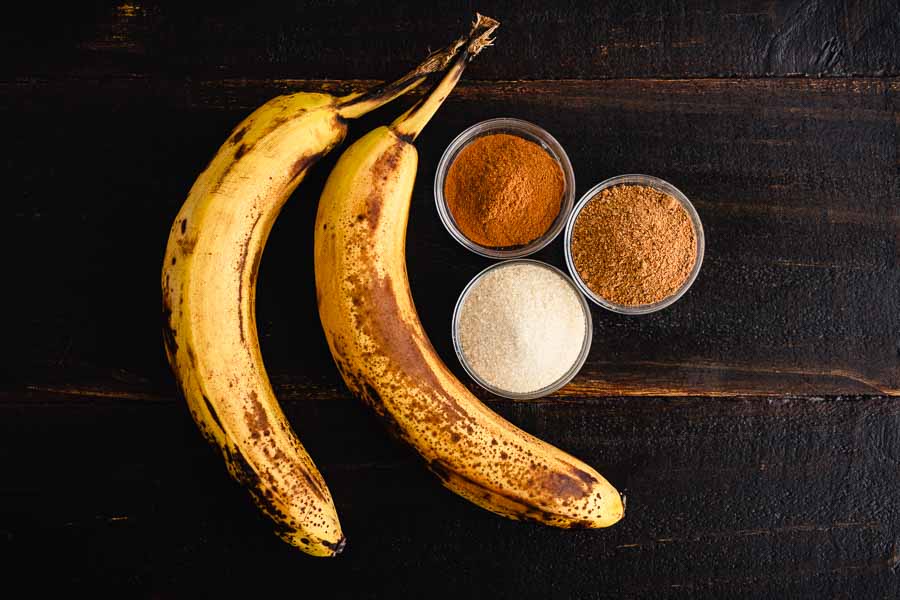
Pan Fried Cinnamon Bananas Ingredients
Bananas, cinnamon, sugar, and nutmeg

The Process

I spent 7 minutes on this recipe from start to finish. It took me 3 minutes to prep and 4 to cook, which was just slightly more than the 5 minutes listed. However, the entire process was extremely easy.

Heating the overripe bananas softened them quickly, and they only needed 2 minutes on each side to warm through. The steam produced mixed with the sugar, cinnamon, and nutmeg and created a delicious syrup.

As a result, my Pan Fried Cinnamon Bananas were a bit wetter looking than the recipe’s photo, but I was okay with that. As I said, the syrup was delicious!

Pan Fried Cinnamon Bananas
Step 4: The bananas have been added to the pan and dusted with the cinnamon/sugar mixture

20 Minute Healthy Chicken Burritos

I am a huge fan of Mexican food, especially since cheese and sour cream are usually involved. Unfortunately, it’s not always the healthiest once you pile on the toppings or if you order a fried dish. I’m always on the lookout for healthier foods, and my husband just happened to mention that I hadn’t made burritos in a while. You know what that means: over to Pinterest to see if I had pinned any burrito recipes. Surprise, surprise, I had!

A quick and easy weeknight dinner recipe that will please the whole family.

Recipe Author: Kelly at Redefined Mom
Get the recipe

The Ingredients

Besides being a healthier version of a classic Mexican dish, I was happy these didn’t have rice in them. Not that I don’t like it, but it does mean extra carbs. The black beans more than make up for not having rice, and they’re tastier in my opinion.

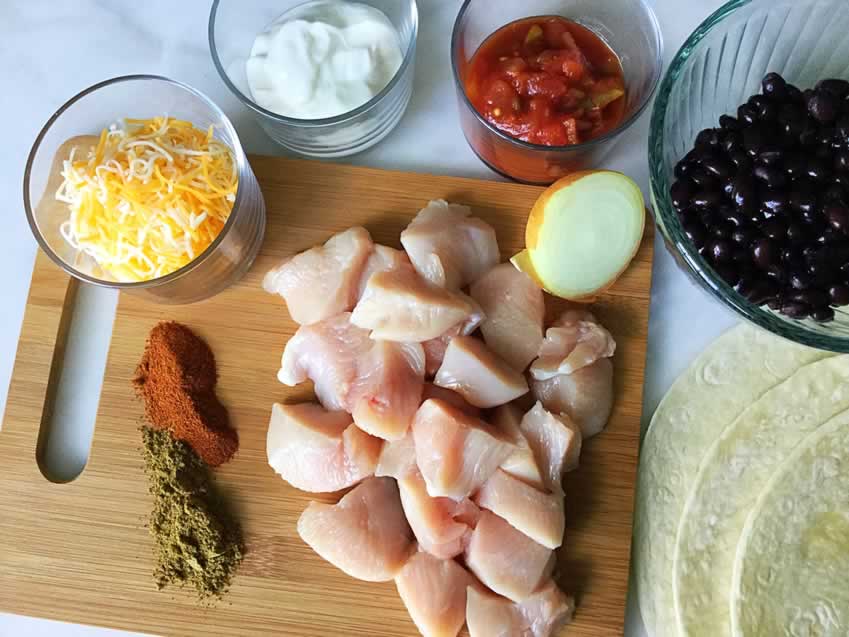
20 Minute Healthy Chicken Burritos Ingredients
Chicken, shredded cheese, sour cream, salsa, onion, black beans, tortillas, and spices

The Process

Prepping this recipe was simple and fast, and the ingredients were all easy to find. The smallest package of chicken I could find was 1 1/2 pounds, so I ended up with 7 burritos using 8″ tortillas. The package was labeled “large”, but they didn’t seem big enough. But I have no problem with more burritos 🙂

Another thing I liked was the inclusion of measured toppings in the burritos. It helps with portion and calorie control. My husband thought it was great that he didn’t need to assemble his own and enjoyed the browned tortillas. I did too, for that matter.

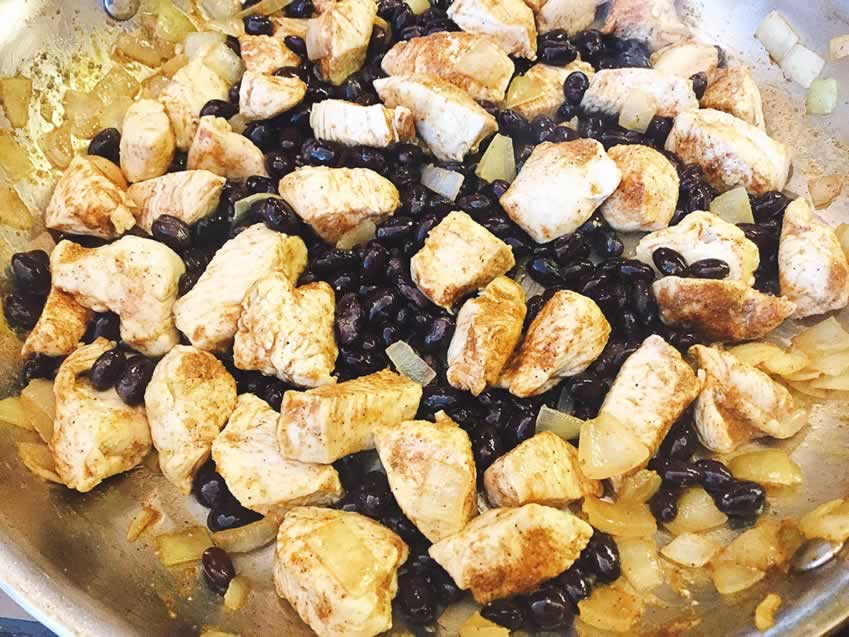
20 Minute Healthy Chicken Burrito Recipe
Cooking chicken, onions and black beans

Serving Suggestion

Top with Fire Roasted Salsa, extra cheese, sour cream, guacamole, etc.

Fire Roasted Salsa

I needed salsa to top the 20 Minute Healthy Burrito Recipe I made earlier this week, so where else would I find a recipe but Pinterest? I was a little skeptical that I could make restaurant-style salsa in 5 minutes and in a blender (no cooking!), but the only way to know for sure is to try…

This post was originally published on July 31, 2017. The text and photos were updated on February 16, 2023. The review and rating have not been changed.

Easy restaurant-style salsa you can whip up in the blender with zesty lime, and spicy roasted tomatoes!

Recipe Author: Tiffany at Creme de la Crumb
Get the recipe

The Ingredients

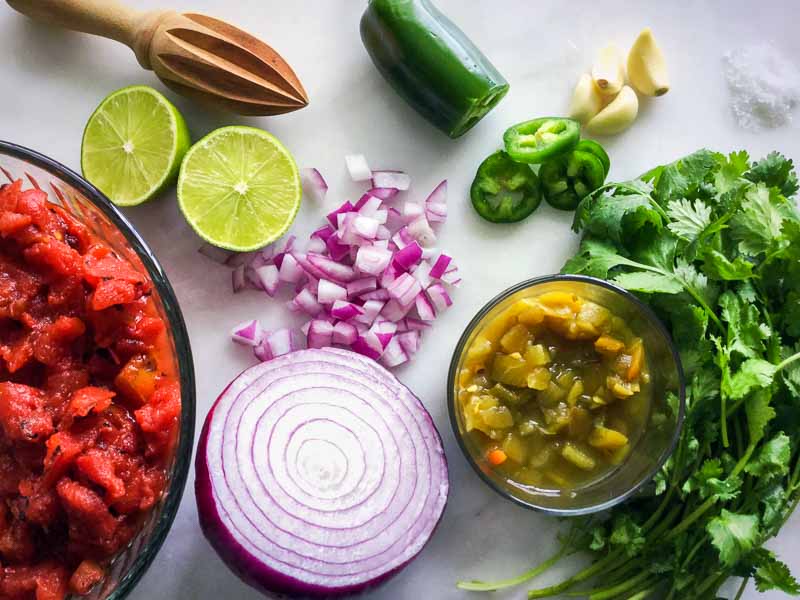
This recipe had everything I love in salsa: fire-roasted tomatoes, onion, 2 kinds of chili peppers, cilantro, lime, and garlic. All are inexpensive and easy-to-find ingredients. Bonus: no cooking is required, and all you need is a blender.

Everything I needed was easy to find and pretty inexpensive at my regular grocery store. No special orders or extra trips required. Just a quick trip down the canned goods aisle, then it was off to the produce department for the rest.

Fire Roasted Salsa Ingredients
Fire-roasted tomatoes, green chiles, cilantro, lime, garlic, salt, and jalepeño

The Process

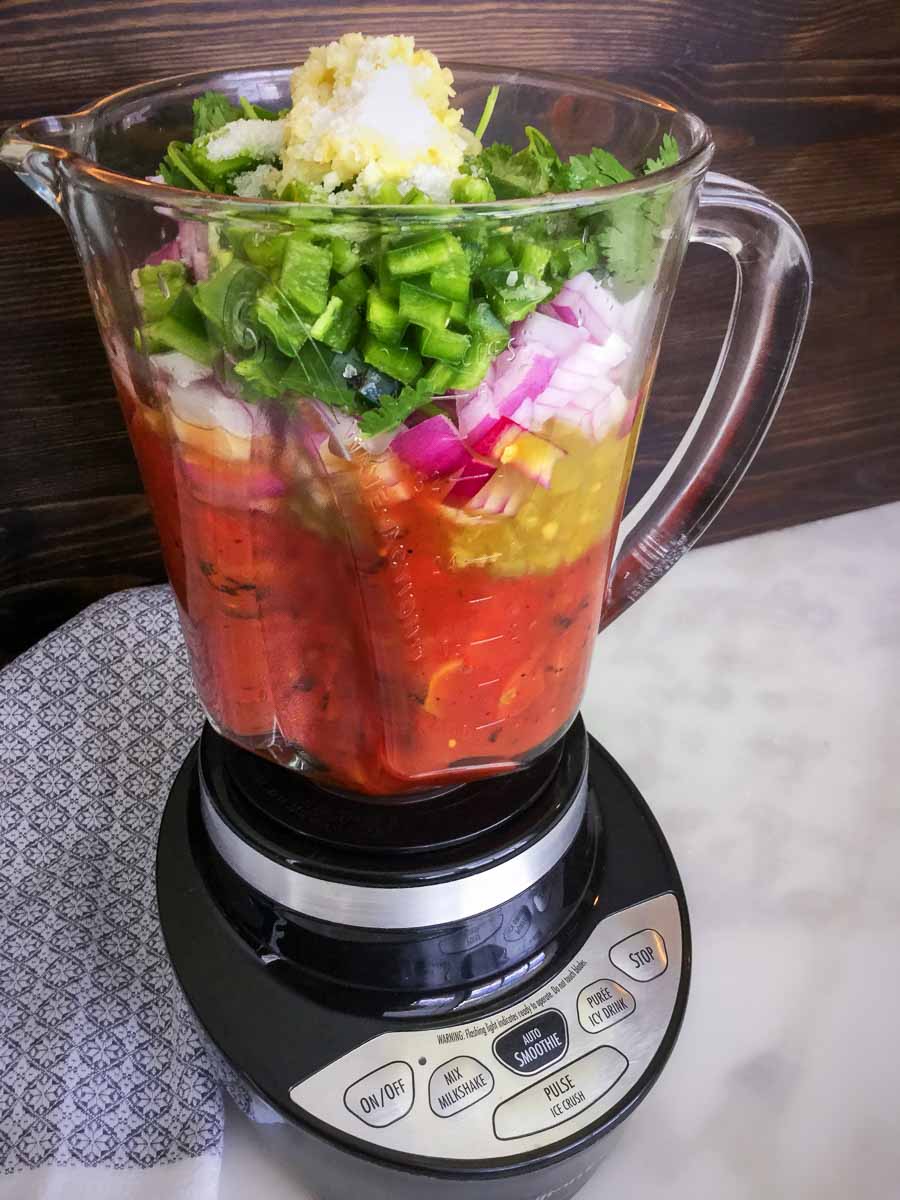
This must be the easiest recipe I’ve ever made! Just a little chopping, open a few cans, juice a lime, toss it all into a blender, and pulse for 30 seconds. It wasn’t specified, so I didn’t drain the canned tomatoes or green chiles. I just opened them and poured the cans into my blender.

Then I popped it into the fridge for a few hours to let the flavors meld. It did take slightly longer than specified, 7 minutes instead of 5, but that’s not a huge deal.

All the salsa ingredients are ready to blend

Serving Suggestion

This Fire Roasted Salsa is terrific with tortilla chips or with these recipes:

White Linen Cocktail

Here we are, the last week of July. Have I mentioned it’s hot down here? And humid. I can’t forget to add humid! Anyway, this is the last of my gin cocktail series. This week’s White Linen Cocktail uses elderflower liqueur. I’ve had a bottle for ages that rarely gets used. I don’t know if it’s an unusual ingredient or if I’m just not looking hard enough for a reason to use it. Reason found!

This post was originally published on July 28, 2017. The text and photos were updated on July 18, 2021. The review and rating have not been changed.

A crisp and refreshing white linen cocktail made with gin, elderflower liquor, cucumber, lime and 7UP is the perfect drink for your summer celebrations!

Recipe Author: Kaleigh McMordie, RD at Lively Table
Get the recipe

The Ingredients

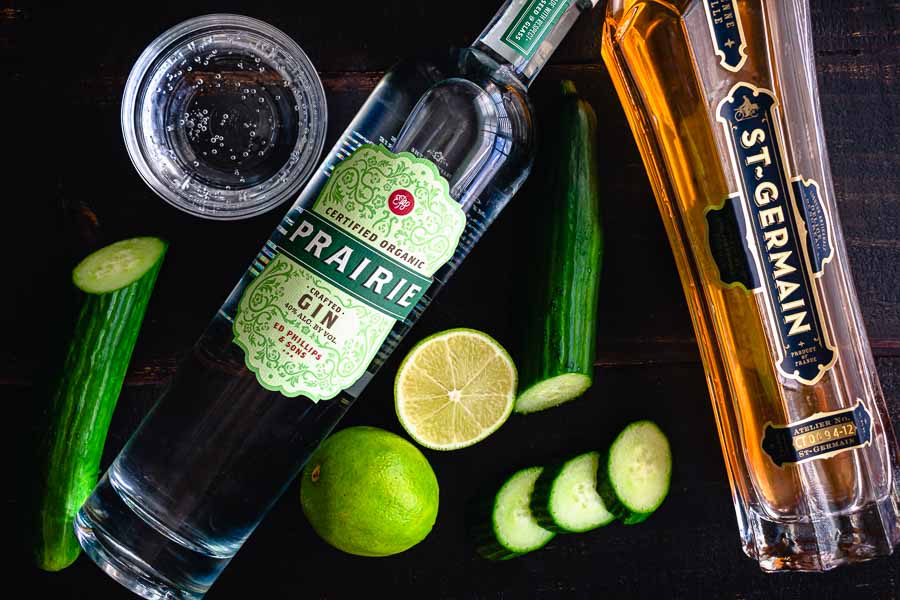
Cucumber, lime, and 7UP really appealed to me. They are all very refreshing, and I was especially looking forward to finding out how muddling the cucumber would affect the taste. I went with my Prairie Organic Gin again because I wanted a light gin to pair with the cucumber.

White Linen Cocktail Ingredients
Gin, elderflower liqueur, 7UP, cucumber, and lime

The Process

Making my White Linen Cocktail was quick and easy (two of my favorite things!). I had a garnished cocktail in my hands in the 5 minute prep time listed.

The prep work was very straightforward. It starts off with muddling some cucumber slices in a cocktail shaker. After that, just add ice, and everything but the 7UP. Give it a good shake, pour into an ice-filled glass, and top with 7UP.

Of course, I had to get fancy for the photos and add a few slices of cucumber and lime for garnish. If you want to do that, make sure you add them before the ice cubes. Otherwise, they will just float on top. Trust me, I have learned this the hard way.

I opted to go with the single cocktail version, but I love that the author included instructions for making a pitcher. That would be so helpful for a summer get-together!

Italian Oven Roasted Vegetables

This Italian Oven Roasted Vegetables recipe caught my eye for a few reasons. I like all the vegetables, it includes lots of garlic and olive oil, and it is quick and easy to make. And who doesn’t like Italian food??!! So I headed ran over to the produce department and got cooking.

This post was originally published on July 26, 2017. The text and photos were updated on August 26, 2021. The review and rating have not been changed.

Simple and delicious Italian Oven Roasted Vegetables! The perfect side dish in minutes!

Recipe Author: Suzy at The Mediterranean Dish
Get the recipe

The Ingredients

The ingredients for this recipe are flexible, and that has come in handy. I usually have the olive oil and spices on hand, and most everything else is easy to find at my usual grocery store.

Zucchini and garlic are easy to find, but sometimes I have to make some substitutions. For example, I almost always have to substitute grape tomatoes for Campari tomatoes. I can find them canned but not fresh.

And I prefer to use small two-bite potatoes, but I have used regular red potatoes in a pinch. I do have to cut them into smaller pieces, though.

The recipe does mention that you can use summer squash instead f zucchini, but I have never had to do that. I’m sure regular white button mushrooms could be subbed for the baby bellas, but again, I have never done it.

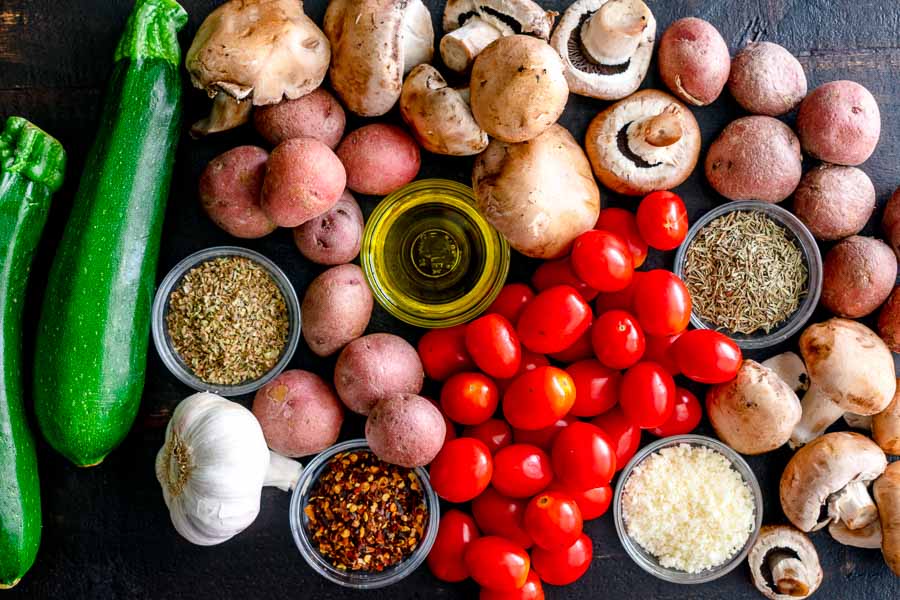
Italian Oven Roasted Vegetables Ingredients
Baby bella mushrooms, baby potatoes, dried thyme, grated parmesan, grape tomatoes, crushed red pepper flakes, extra virgin olive oil, garlic, dried oregano, and zucchini

The Process

This recipe was so simple to make. There’s very little chopping and no peeling if you buy a jar of peeled garlic cloves. Just prep, toss in the spices and olive oil, and roast. Of course, if you prefer to buy a fresh head of garlic, there are plenty of easy ways to peel garlic cloves. I like the cocktail shaker method for this recipe.

This is a recipe I have made many times, and it takes me 25 minutes every time. The vegetables don’t get charred, but they are well done. If you really want a char, you might have to briefly place them under the broiler.

The total time from prep to finish was 32 minutes, which was within the 40 minutes listed on the recipe. Most of that is roasting, which gives me time to make a main. This recipe has become a favorite because it goes with almost anything! My favorites are lemon-garlic chicken, steak (seared in a cast-iron skillet, of course!), and serving the vegetables over pasta (with a touch more olive oil).

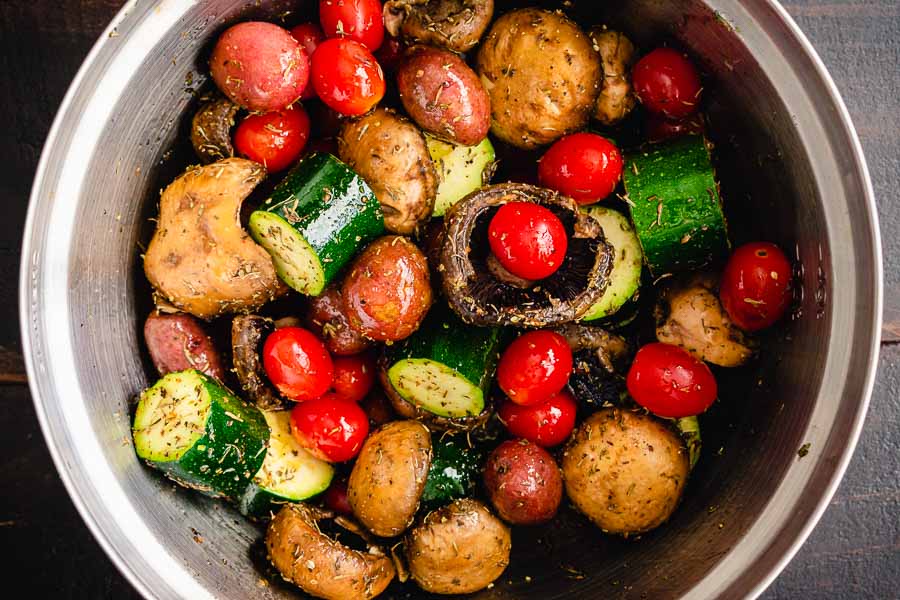
Tossing the vegetables, herbs, and olive oil in a mixing bowl