Home Blog Page 60

Classic Greek Frappe

0

Coffee in the morning is a requirement for me. And although I love the convenience of buying ready-made coffee drinks, I rarely do for a couple of reasons. First, I need coffee immediately. Driving before caffeinating myself is unthinkable. I’m in my PJ’s and grunting replies at that point. I don’t think the baristas at Starbucks would appreciate that. Then there’s the cost—I would spend a small fortune on coffee every week. Classic Greek Frappe recipe to the rescue!

This post was originally published on September 15, 2017. The text and photos were updated on July 14, 2021. The review and rating have not been changed.

This seriously delicious and refreshing iced coffee will make you forget Starbucks this summer. Save big bucks by learning how to make a Greek Frappe at home.

Recipe Author: Jas at All that’s Jas
Get the recipe

The Ingredients

There isn’t much to this drink recipe, but that’s not a bad thing. In fact, it’s really wonderful for the mornings which is exactly when I tested this Classic Greek Frappe recipe.

I was a little hesitant when I saw it called for instant coffee. I’m not a super knowledgeable coffee drinker, but I remember instant coffee as being pretty gross. Thankfully that wasn’t the case here, so don’t let that put you off.
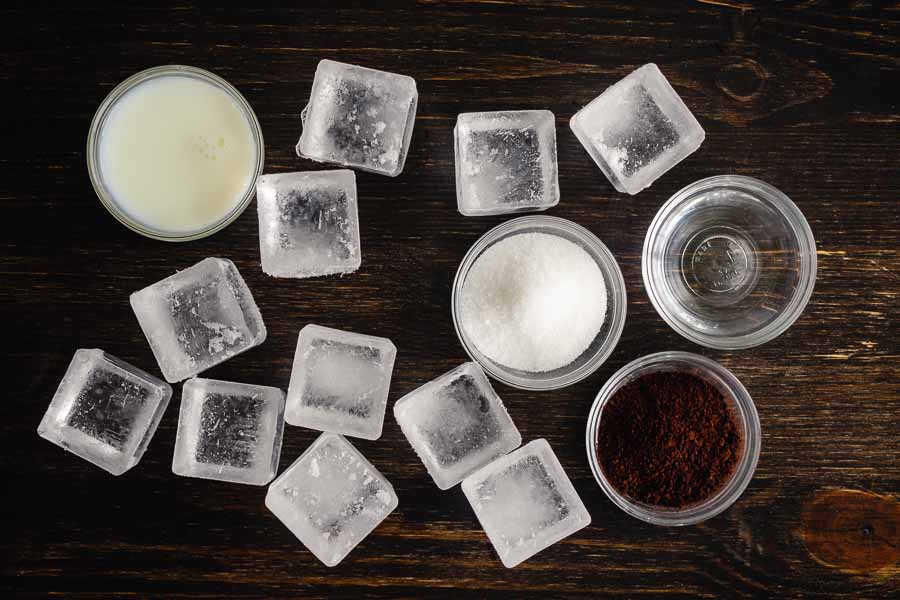
Classic Greek Frappe Ingredients
Instant coffee, ice cubes, milk, sugar, and water

The Process

This frappe recipe doesn’t call for much coffee or water (2 teaspoons and 2 tablespoons, respectively). For perspective, I used the maximum amount of sugar suggested, 4 teaspoons. Twice as much sugar as coffee? I kept re-reading it to make sure I had the correct quantities. I thought I would end up remaking this recipe with more of each. Wrong!

Two minutes of shaking made a lot of thick coffee foam. Seriously, the foam was so thick I had to use a spoon to scrape a lot of it out of the cocktail shaker. The picture below shows how much it filled my glass (with ice). I got really hopeful when I saw that.
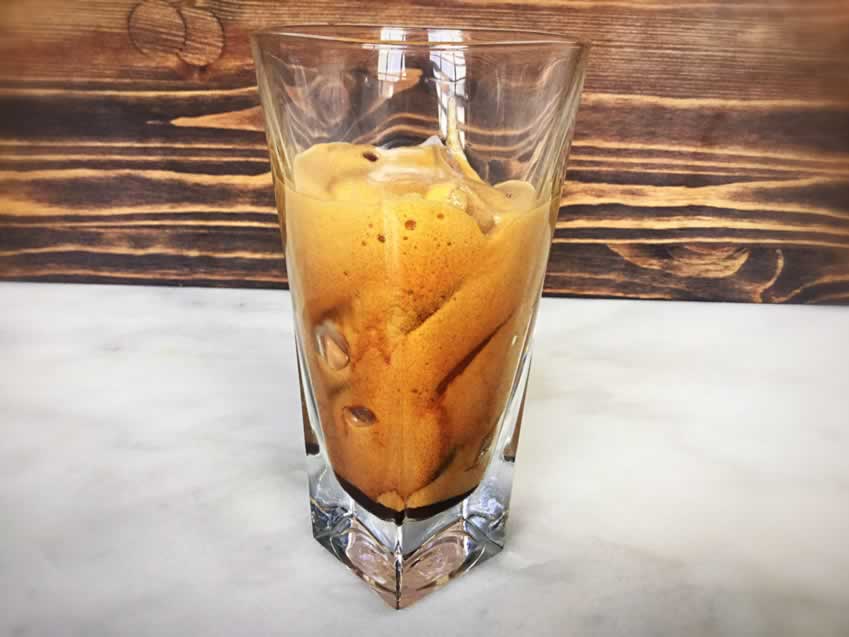
Coffee foam poured over ice

I topped it with whole milk instead of cream to lighten it up a bit. My whole 5 minutes of work paid off with a sweet cold coffee drink that rivaled what I could buy at a coffee shop.

My second frappe (shown in the main photo) was made with the minimum duration of shaking suggested, 1 minute. I still ended up with thick coffee foam, just slightly less than with the 2-minute shake. I’ve continued making them with the 1 minute of shaking since the results were just as good. And that whole non-morning person thing I have going on.

Greek Yogurt Chocolate Fudge Cupcakes

0

Continuing with my Greek-inspired theme this week, I had to give these a try since they feature Greek yogurt. You should know I consider myself baking impaired. Although I make entrees and sides with few failures, baking gives me mixed results, so I rarely bake. That’s something I really want to improve on, so I cleared a day and took my time making some chocolate cupcakes for the first time ever. Boy, was it worth it!

This is a great recipe for when you’re looking for something a little more exciting than your standard chocolate cupcake recipe. Moist, rich, and topped with the most addicting chocolate buttercream ever (trust me; you won’t be able to stop “taste testing”).

Recipe Author: Ashley at Baker by Nature
Get the recipe

The Ingredients

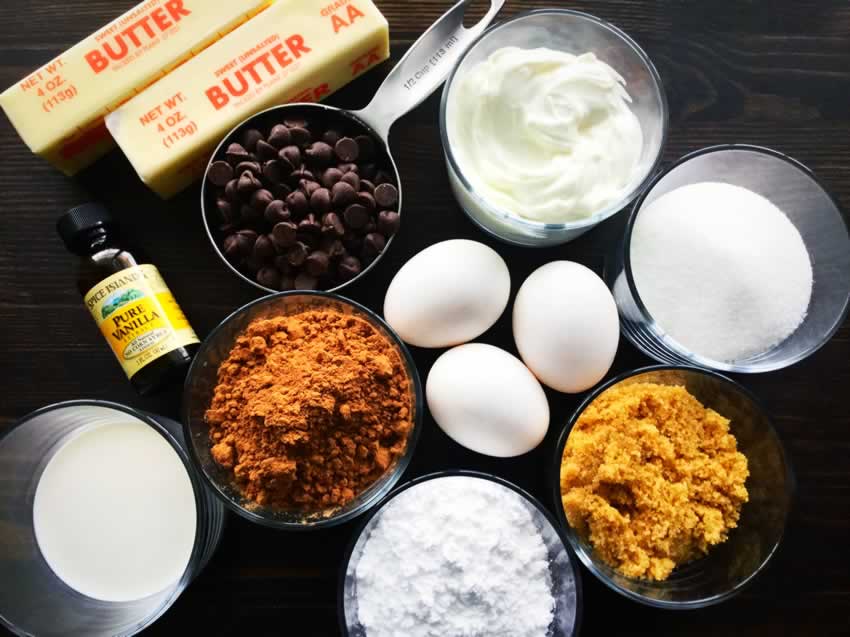
The list of ingredients intimidated me a little because it’s so long. It really surprised me that I had almost all of them on hand. I had to buy eggs, Greek yogurt, and half-and-half. Not bad for a recipe that has 16 ingredients.

Oh, and I used coffee instead of boiling water in the cupcakes since it sounded like the tastier option. How could the combo of chocolate and coffee ever be bad?
Greek Yogurt Chocolate Fudge Cupcakes Ingredients
Butter, chocolate chips, Greek yogurt, sugar, brown sugar, powdered sugar, eggs, cocoa powder and half

The Process

These aren’t quick, but I enjoyed the process since I rarely bake. Here is how the times broke down:

  • Chocolate Cupcakes
    • Prep: 22 Minutes
    • Baking: 28 minutes
  • Fudge Frosting
    • Prep: 13 minutes (made while cupcakes were baking)
    • Application: 10 minutes
  • Total Time: 1 hour, not including cooling

Making everything wasn’t difficult, but I did get a little mixed up at times. I like to have the ingredients listed in the order needed, but the instructions and the list differ in that regard. It was a matter of hunting through the list for the ingredient(s) I needed for some steps so I could find the quantity needed.

The Cupcakes

The recipe makes enough batter for 14 chocolate cupcakes. As a result, I had a little leftover even after filling all 12 in the muffin pan almost all the way full. I’m fine with that since I would rather have a little extra than not enough.

I did the toothpick test after 18 minutes of baking on the middle rack, and it was covered in batter. Way underdone. Adding another 10 minutes solved the problem, and they turned out to be very moist.

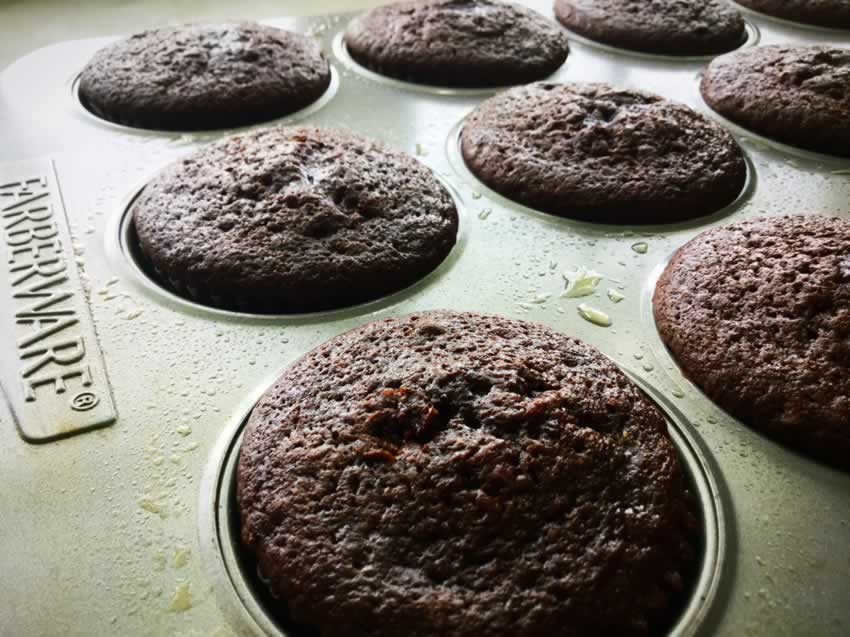
The cupcakes had very round domes when I first took them out of the oven. As you can see from the picture below, they deflated as they cooled. The flatter tops made frosting them easy.
Cooling chocolate cupcakes
Chocolate cupcakes after cooling for 15 minutes

The Frosting

The fudge frosting was easy to make, but things did get a little dusty. My hand mixer really kicked up the cocoa powder and powdered sugar as I was mixing them with the butter, yogurt, and half and half. Luckily I used a very large mixing bowl, or things could have gotten really messy!

Applying the frosting using a pastry bag for the first time was a good learning experience. I found a great tutorial on YouTube that showed me how to assemble, fill, and use the bag (see below). It’s not as difficult as I imagined, and practicing on a cutting board first helped.

Unfortunately, I was a little too generous with the first 6 cupcakes. The next two got a minimal swirl of frosting, and the last two got what was left in the pastry bag. Not so pretty but still tasty!

The Equipment

There’s a lot involved in this recipe, so I thought it would be helpful to list all the kitchen equipment needed.

One Pot Greek Chicken and Lemon Rice

I’m all about easy meals during the week, and one-pan recipes are such a terrific way to make cooking and clean-up easy. I couldn’t pass up this Greek-inspired one-pan recipe with chicken, lemon, rice. And hey, it’s a weeknight. Guess I’m having One Pot Greek Chicken and Lemon Rice tonight ?

This post was originally published on September 11, 2017. The text and photos were updated on August 3, 2021. The review and rating have not been changed.

I want to say the star of this dish is the chicken. But that would be lying to you. Because this, my friends, is all about the RICE! This is a fantastic Greek Chicken recipe for busy weeknights because it’s so fast to prepare and it’s all made in one pot. Seriously!

Recipe Author: Nagi at Recipe Tin Eats
Get the recipe

The Ingredients

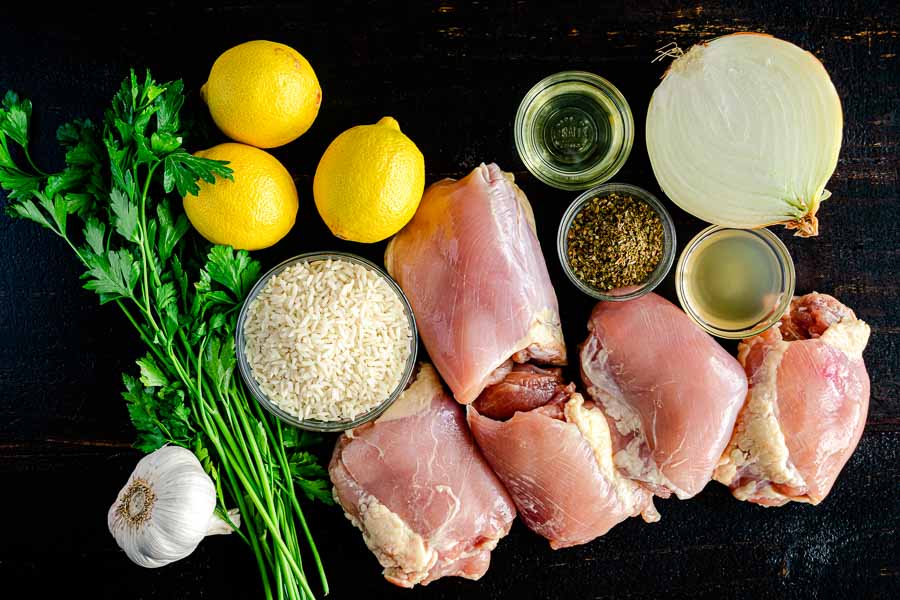
This is another recipe with simple ingredients. The first time I made it, I had most of them on hand, so I just had to buy lemons, chicken, and parsley. Speaking of lemons, I used 3 1/2 for the marinade. Two for the zest, and all for the juice. I also used another lemon for the lemon slices I cooked on top of each piece of chicken and the zest to garnish the dish.

When I decided to update the photos, I changed to boneless, skinless chicken thighs. I’m willing to trade the extra flavor for an easy-to-cut piece of chicken. Fortunately, the recipe notes have instructions just for that change, so it came out perfectly.

One Pot Greek Chicken & Lemon Rice Ingredients
Chicken thighs, olive oil, onion, dried oregano, chicken broth, parsley, garlic, long-grain rice, and lemons

The Process

The marinade took only 9 minutes to make, and I marinated the chicken overnight. The directions say 20 minutes to overnight. I seriously thought about making it after 20 minutes, but I’m so glad I didn’t. The marinade is packed with lemon juice and zest, and the extra time really made the chicken tasty.

Prepping and cooking the dish the next day took an hour, and there wasn’t a whole lot of active time in that. Prep work (measuring and chopping) was a quick 4 minutes. Browning the chicken took about 7 minutes for each side, and the onion became translucent after 2 minutes. The rest of my time was inactive/cooking. The total time on this was 1 hour 9 minutes, just over the 1 hour time listed.

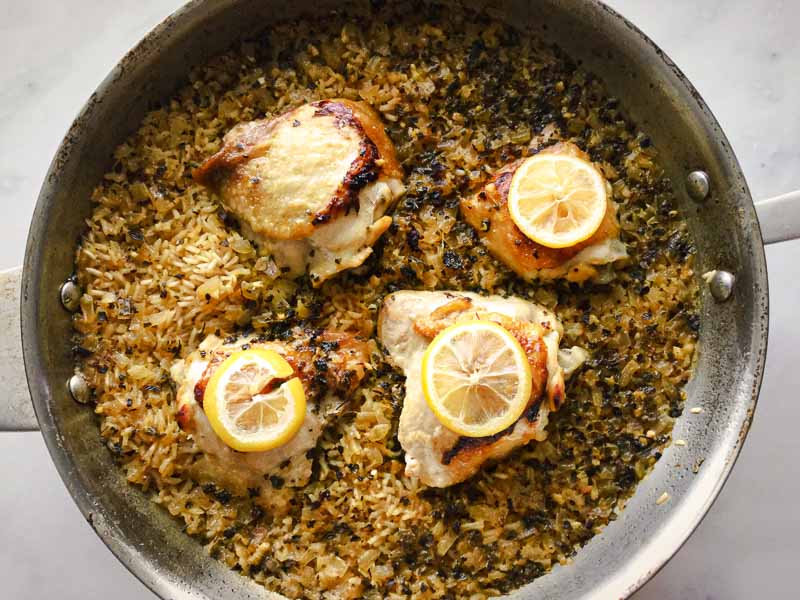
I used a 12-inch stainless skillet the first time I made this recipe, and it worked just fine. It didn’t come with a lid, so I used one from another pan that did. The updated version was done in a 10-inch cast-iron skillet per the recipe notes. I covered it with aluminum foil, and it worked out just as well. Actually, better because the recipe filled the entire skillet so nicely.

One Pot Greek Chicken & Lemon Rice
My first attempt at this recipe using a 12″ stainless skillet

Limonata: Turkish Lemonade

0

My week of Turkish food finishes up with Limonata or Turkish Lemonade. When I was trying to come up with a beverage to go with this theme, my first thought was Turkish coffee. However, I don’t have a Turkish coffee pot or the appropriate coffee cups, so I searched for something that wouldn’t require me to invest in new equipment. Not that I don’t want to, but I do like to keep things as simple and easy as possible.

This post was originally published on September 8, 2017. The text and photos were updated on August 4, 2021. The review and rating have not been changed.

Did you ever hear of lemonade that wasn’t sour? Take a sip of Turkish lemonade and you’ll be surprised at its refreshing lemon taste without the sourness.

Recipe Author: Elizabeth Taviloglu at The Spruce
Get the recipe

The Ingredients

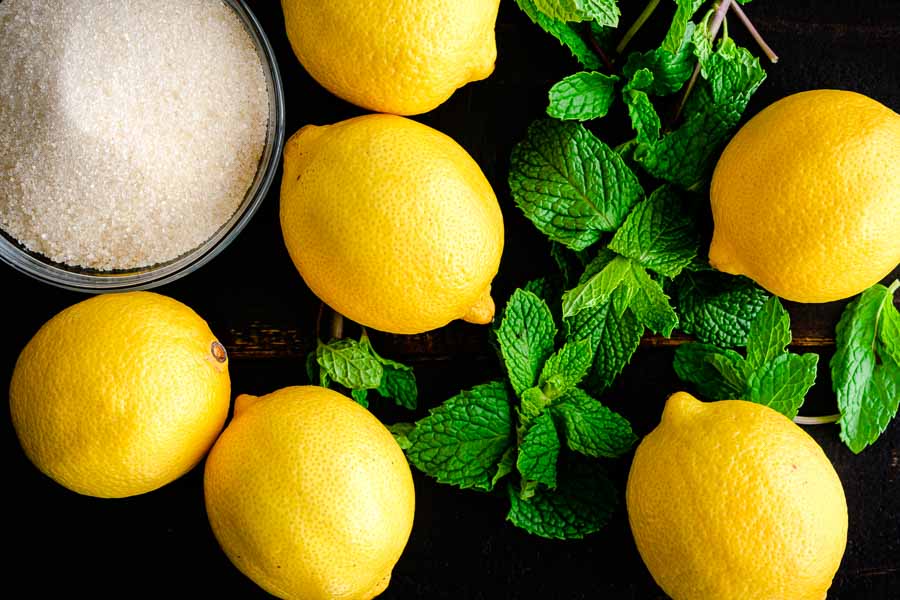
Four ingredients? Sold! Water? Check! Sugar? Got that too. I added a bag of lemons and a package of mint leaves to my already simple grocery list for the week, and I was done.

Limonata: Turkish Lemonade Ingredients
Lemons, mint, and sugar

The Process

The limonata happened in two major steps over 2 days. Peeling the lemons and zesting the rinds took me 18 minutes. That was the first half of step 1, and I was a little nervous as to how long the rest of this process would take. It turned out not to be too bad.

I had completed step 6, refrigerating the lemon, sugar, and mint mixture, in 22 minutes, making the first part of this recipe 40 minutes long (and this is the bulk of the work).

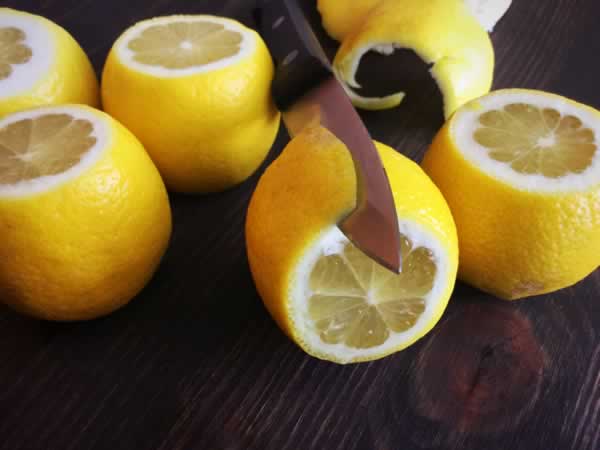
1) Cut off the ends

Cut off both ends of the lemons. Using a paring knife, score the peel vertically. You’re just trying to loosen the peel so you can get your fingers underneath.

Peeling lemons, step 1

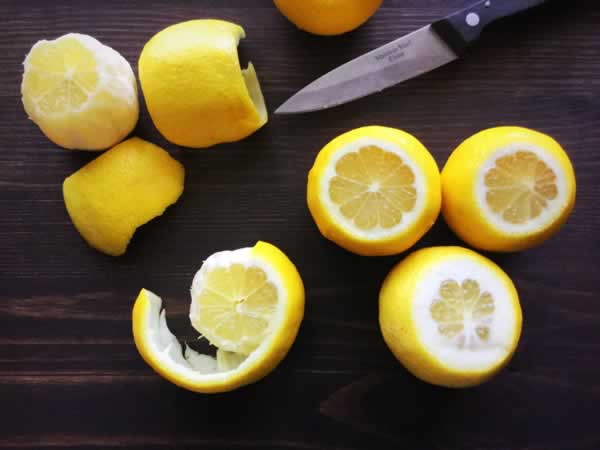
2) Remove the peel

Use your fingers to remove the peel in as few pieces as possible. I was able to remove most in 1-2 pieces.

Peeling lemons, step 2

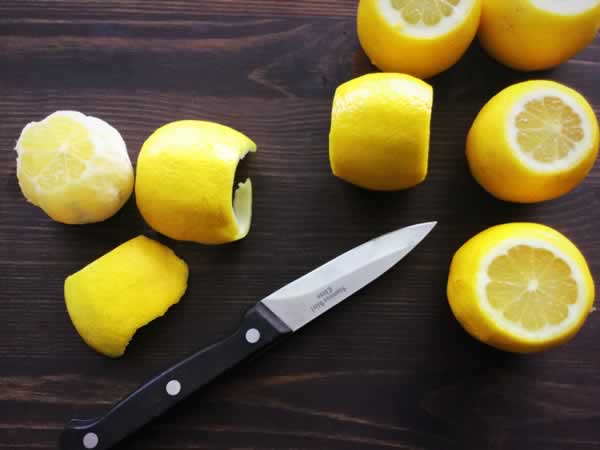
3) Be patient

Take your time peeling the lemons. Remember the goal is to have large pieces to make it easier to grate (zest) them after removal.

Peeling lemons, step 3

Straining the lemonade the next day only took 5 minutes, and I was able to do it by myself. A grand total of 45 minutes to make this lemonade was longer than I normally spent but so worth the effort when I finally got to taste it!

Step 5: All ingredients added to a bowl

Revani: Turkish Semolina Cake in Syrup

4

Since I made Turkish Eggplant Casserole with Tomatoes (Imam Bayildi) earlier this week, I decided I needed a Turkish dessert to top it off. Revani, a Turkish semolina cake in syrup, sounded perfect since I love lemon. And cake, but who doesn’t? I’m not really a baker, but this recipe looked straightforward enough that even I could pull it off.

This cake uses semolina flour, also sold as durum or pasta flour, and is drenched in syrup after baking. The result is half-cake, half-pastry. It is best eaten chilled the day after baking.

Recipe Author: Christine at Honey and Butter

The Ingredients

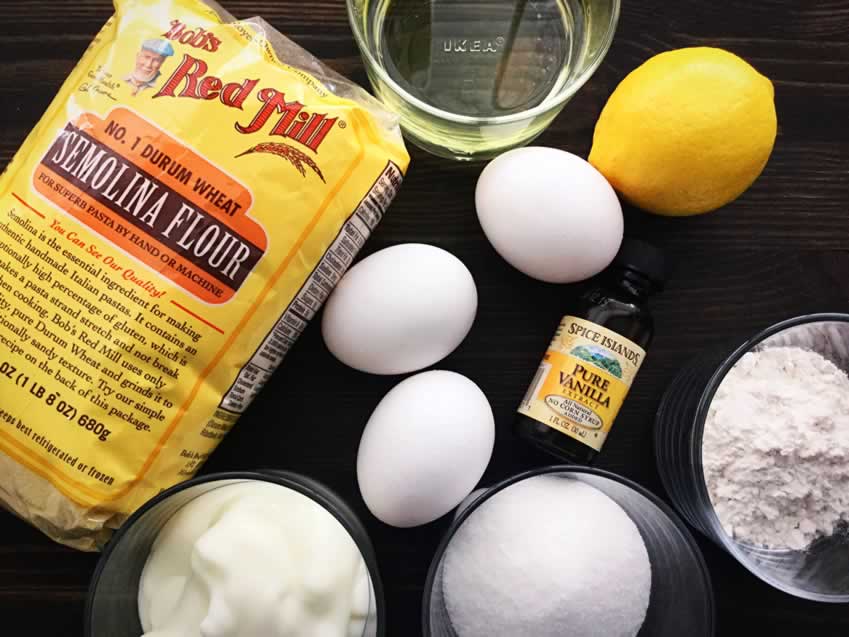
There are a good amount of ingredients in this cake, but they’re not really unusual. I had everything on hand except the yogurt and semolina flour, so this was another short grocery list.

The semolina flour was on the baking aisle with the rest of the flour. I only saw one brand, Bob’s Red Mill, but I’ve used their products before with good results.

Turkish Semolina Cake in Syrup (Revani) Ingredients
Semolina flour, eggs, yogurt, sugar, all-purpose flour, vanilla extract, lemon and vegetable oil

The Process

There are two items to make in order to complete this recipe: the lemon syrup and the cake. The syrup was very easy and only took me 13 minutes to prep and cook. Then I bottled it and let it chill in the refrigerator. The author, Christine, emphasizes it is very important for the lemon syrup to be chilled before pouring it over the cake.

The cake was also easy to prepare, and it only took me 9 minutes. Getting it fully cooked took a little longer than the 25-30 minutes listed. I did the toothpick test and didn’t get it to come out clean until I had increased the baking time to 40 minutes (I started checking after 25 minutes and kept increasing it by 5-minute intervals until I was satisfied it was done).

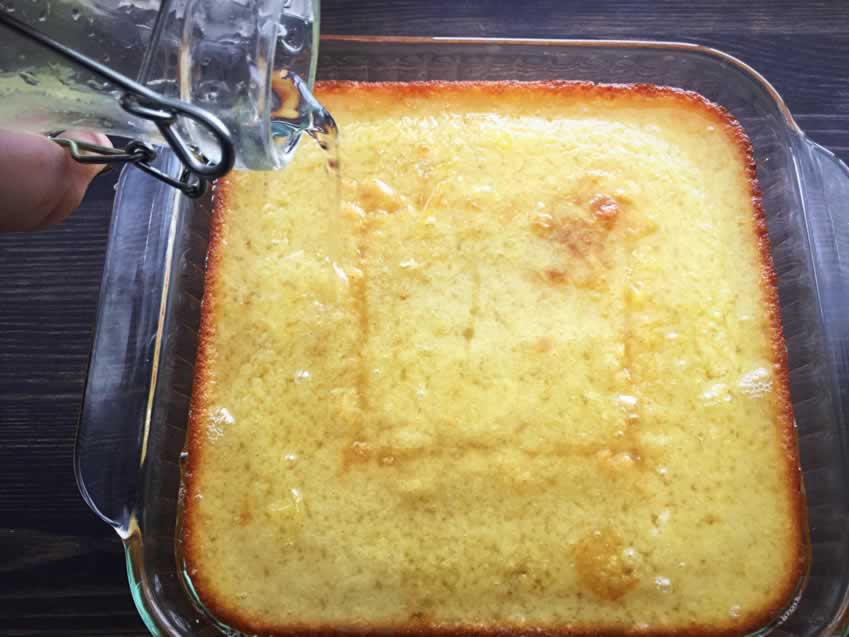
I let the cake cool for an hour, then I added the syrup in 3 stages. Just pour a little, let it soak in a bit, then add more until you’ve used it all. My cake was floating in the syrup when I was done, but it soaked most of it up when I refrigerated it overnight.

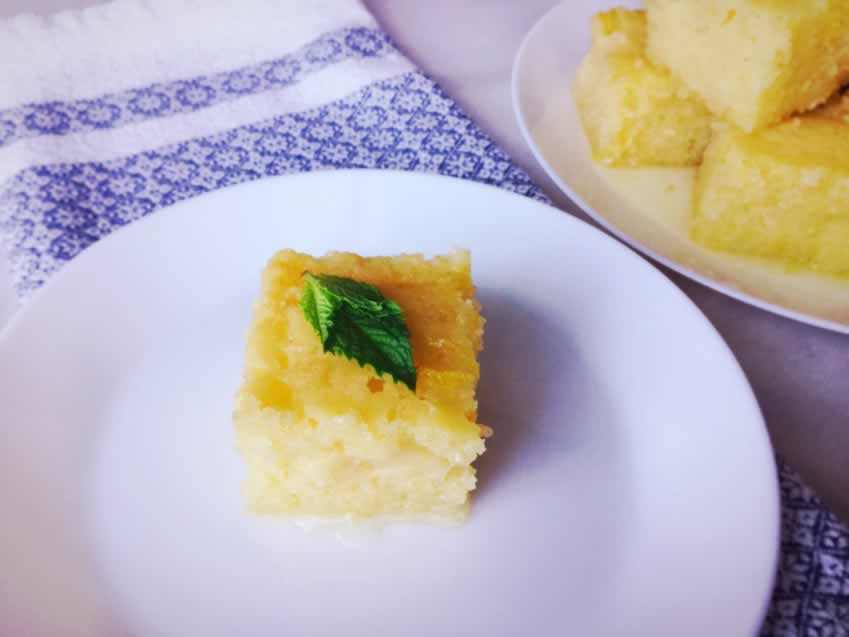
Using an 8″ x 8″ baking dish yielded 16 small pieces of semolina cake. It’s very rich, so small pieces are perfect for this dish. My husband and I had dessert for a week, and we were both happy campers!

Pouring the lemon syrup over the cake

Revani: Turkish Semolina Cake in Syrup Recipe

May 23, 2023: A reader pointed out that this blood doesn’t exist anymore. I hate to see a good recipe disappear, so I have rewritten the recipe below.

Turkish Semolina Cake in Syrup (Revani)

Revani: Turkish Semolina Cake in Syrup

The Hungry Pinner
Revani is a Turkish dessert made with semolina cake soaked in lemon-flavored syrup. It is a light and fluffy dessert that is perfect for a hot day.
Prep Time 15 minutes
Cook Time 50 minutes
Chill & Cool 3 hours
Total Time 4 hours 5 minutes
Course Dessert
Cuisine Turkish
Servings 16 small squares

Equipment

  • medium saucepan
  • zester or fine box grater
  • heat-proof container to store syrup
  • 8"x8" baking dish
  • large mixing bowl
  • wire cooling rack

Ingredients
  

For the Syrup:

  • 1 ½ cups sugar
  • 1 ½ cups water
  • ½ lemon zest and juice

For the cake:

  • 3 eggs
  • ½ cup sugar
  • 1 cup yogurt
  • 1 cup vegetable or corn oil
  • 3 tbsp flour
  • 1 cup semolina
  • 1 tbsp vanilla
  • ½ tsp baking soda
  • 1 tbsp baking powder
  • ½ tsp salt
  • 1 tbsp lemon zest

Instructions
 

To make the syrup:

  • In a medium saucepan, bring water and sugar and bring to a boil. Allow the mixture to boil for 5 minutes. The sugar should be completely dissolved and the mixture will thicken slightly.
    1 1/2 cups sugar, 1 1/2 cups water
  • Add the lemon juice and zest to the pan, stir well, and continue boiling for another 3 minutes.
    1/2 lemon
  • Remove the pan from the heat and carefully transfer the syrup to a heat-proof container. Chill the syrup in the refrigerator until cold.

To make the cake:

  • Preheat the oven to 350℉ with the rack in the middle.
  • Oil an 8"x8" baking pan and set aside.
  • In a large mixing bowl, beat the eggs and sugar well then mix in the yogurt and vegetable oil.
    3 eggs, 1/2 cup sugar, 1 cup yogurt, 1 cup vegetable or corn oil
  • Add the remaining ingredients and mix well.
    3 tbsp flour, 1 cup semolina, 1 tbsp vanilla, 1/2 tsp baking soda, 1 tbsp baking powder, 1/2 tsp salt, 1 tbsp lemon zest
  • Pour the batter into the prepared baking dish. Bake until the top of the cake is golden brown and a toothpick comes out clean, about 30-40 minutes.
  • Remove the pan from the oven, place it onto a wire rack, and allow to cool for at least 1 hour.
  • Once the cake is cooled, slowly add the chilled syrup. You may need to add it a little at a time and allow the cake to absorb it before adding more.
  • Chill the cake in the refrigerator for at least 2 hours (preferably overnight) to allow it to completely absorb the syrup before cutting into squares and serving.

Notes

This is a re-write of a recipe by Christine at Honey and Butter since the recipe is no longer posted at http://www.honeyandbutter.com/desserts/turkish-semolina-cake-in-syrup-revani-2. I have used the same ingredients and quantities and re-written the instructions based on my experience with this recipe. 
Tips:
Refrigerate the simple syrup uncovered so it cools faster. Adding a lid will hold in the heat.
The original recipe called for baking for 25-30 minutes. Mine took 40 minutes, so I am listing a longer time range.
I added the syrup in 3 pours/batches. The cake was literally floating in the pan, but it had fully absorbed the syrup by the next morning. 
Keyword cake, lemon


Imam Bayildi: Turkish Eggplant Casserole with Tomatoes

0

I love eggplant, but the only way I know how to cook it is as eggplant parmesan. Time to expand my horizons, although this recipe isn’t too different from my favorite eggplant parmesan recipe. Both have eggplant, tomatoes, onion, garlic, and parsley. However, they turned out to have very different flavors.

This Turkish eggplant recipe “Imam Bayildi” is a perfect vegetarian weeknight dinner. It’s great for making ahead of time, as the flavors only get better.

Recipe Author: Phoebe at Feed me Phoebe
Get the recipe

The Ingredients

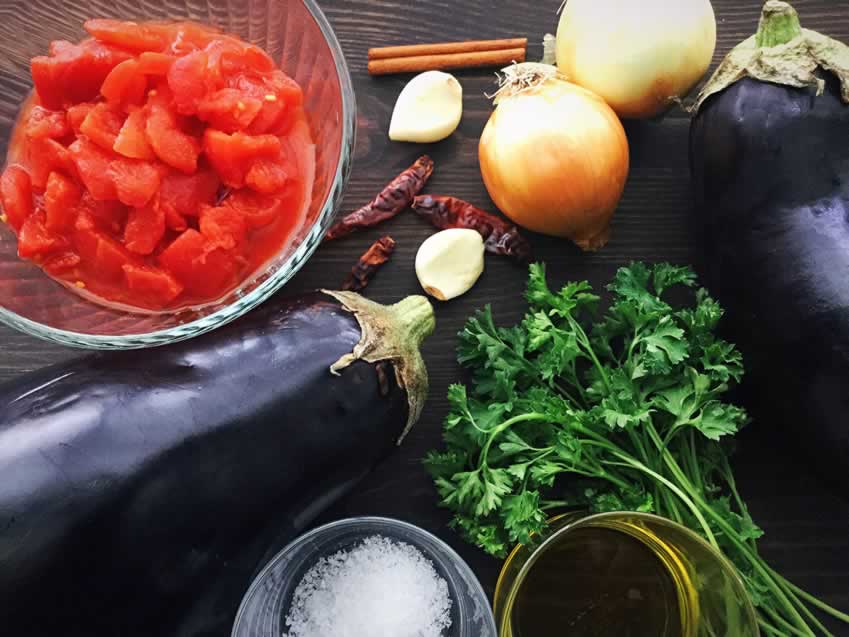
The list of ingredients is short at 9 items, and I had everything on hand except the eggplant and fresh parsley. It made for a very short grocery list, my favorite kind!

Imam Bayildi: Turkish Eggplant Casserole with Tomatoes Ingredients
Eggplant, tomatoes, onions, cinnamon, garlic, chili flakes, parsley, olive oil, and sea salt

The Process

Salting the eggplant and prepping the rest of the ingredients while that stood took 25 minutes. I’ve read articles that are for and against salting eggplant. The anti-salting articles usually say it’s not necessary if you buy young eggplant. The pro-salting articles say it removes the bitterness. I’m in the pro-salting group. I’ve had good results with my previously mentioned eggplant parmesan recipe using table salt, rinsing it after 20-ish minutes, and patting the eggplant dry with paper towels. I didn’t have those results with this recipe, but I think it was because I used coarse sea salt.

The coarser texture didn’t seem to coat the eggplant as well as finer table salt. I don’t think it did as good of a job drawing out the moisture because the finished dish did have a slightly bitter taste. Not enough to make it taste bad, but it was there. I’ll be making this again but using the finer salt for sure.

As for frying, that part was pretty simple. I used the largest skillet I had (13-inch diameter, stainless steel) and it took me 4 batches to get it all fried. The eggplant didn’t seem that big, but I was only able to fit 3 slices at a time into the pan. I’d say I added about a teaspoon of olive oil in between batches and had no issues with it sticking.

TIP: Use the olive oil sparingly. Eggplant behaves like a sponge and will soak it up.

There were a couple of things I needed to look up since they weren’t specified in the ingredients list or the directions. First was the garlic. It seemed odd to add 2 whole garlic cloves. I found a few other recipes online for imam bayildi that specified mincing, so I minced too.

The canned tomatoes were the next mystery: drained or undrained? The recipes I found used fresh tomatoes, and that almost made me drain them until I read the word “sauce” in the directions (step 5). I decided not to drain them, and I think it worked out well that way.

Lastly, the whole dish took 1 hour 55 minutes to complete. That includes the prep work, salting the eggplant, cooking, and 10 minutes standing time after removing the dish from the oven. It was 35 minutes longer than the time listed on the recipe (1 hour 20 minutes).

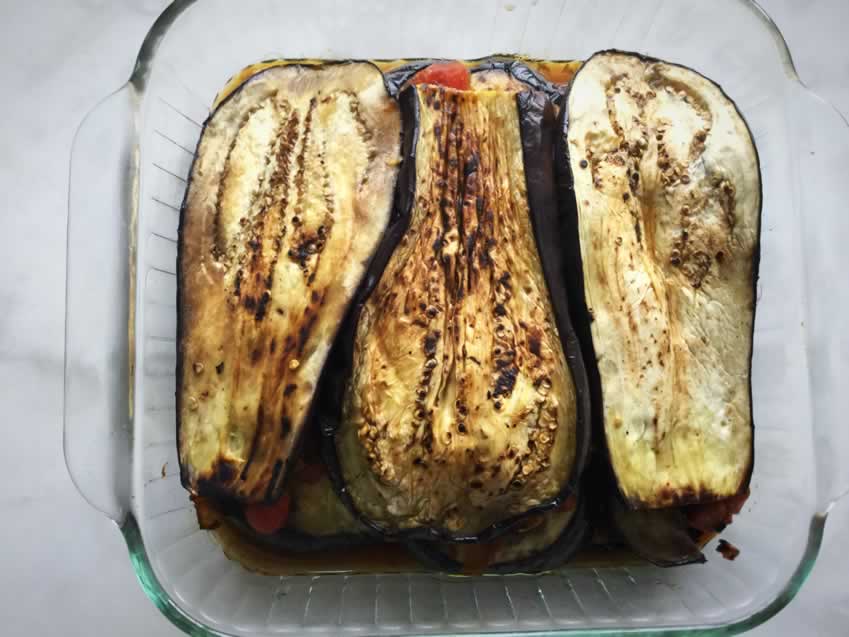
Just after removing from the oven

As you can see, I used an 8″ x 8″ baking dish. It worked okay, but I didn’t have room for more than 3 slices of eggplant per layer. That meant I ended up using all my sauce between layers and I didn’t have enough to cover the top layer. I don’t think it was an issue since the dish was covered with foil for cooking. The top layer didn’t burn or dry out because of that.

Bourbon Chocolate Milkshake

Labor Day is almost here! I’m serving whiskey burgers and seasoned fries, but what beverage would go with that classic American meal? How about a boozy milkshake made with all-American Kentucky bourbon? I thought you’d like that. Thank goodness I had to buy a bottle to make the glaze for the whiskey burgers. That’s one less thing I need to buy to make this Bourbon Chocolate Milkshake.

This post was originally published on September 1, 2017. The text and photos were updated on August 2, 2021. The review and rating have not been changed.

Bourbon, chocolate syrup and vanilla ice cream? Don’t mind if we do. This Bourbon chocolate milkshake is perfect for any occasion.

Recipe Author: Ben Johnson, West Egg Café, Atlanta via Imbibe Magazine
Get the recipe

The Ingredients

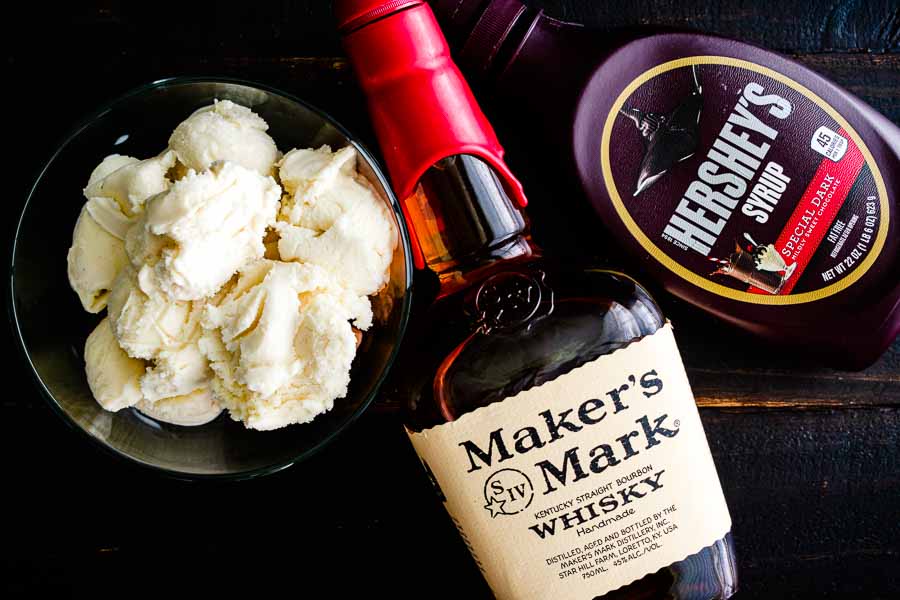
I have a habit of saying how much I like simple recipes, but this has to be the simplest one I’ve ever found. Just 3 ingredients: bourbon, vanilla ice cream, and chocolate syrup. I even had 2 on hand, so all I had to pick up was the ice cream.

By the way, I went with dark chocolate syrup. I love, love, love dark chocolate! The recipe just says “chocolate syrup”, so I took that as any kind of chocolate syrup.

Bourbon Chocolate Milkshake Ingredients
Vanilla ice cream, bourbon, and chocolate syrup

The Process

With only three ingredients and one step in the instructions, this Bourbon Chocolate Milkshake sounded easy. And it was! The most difficult part was spooning the ice cream out of the container because it got pretty hard while it was in the freezer.

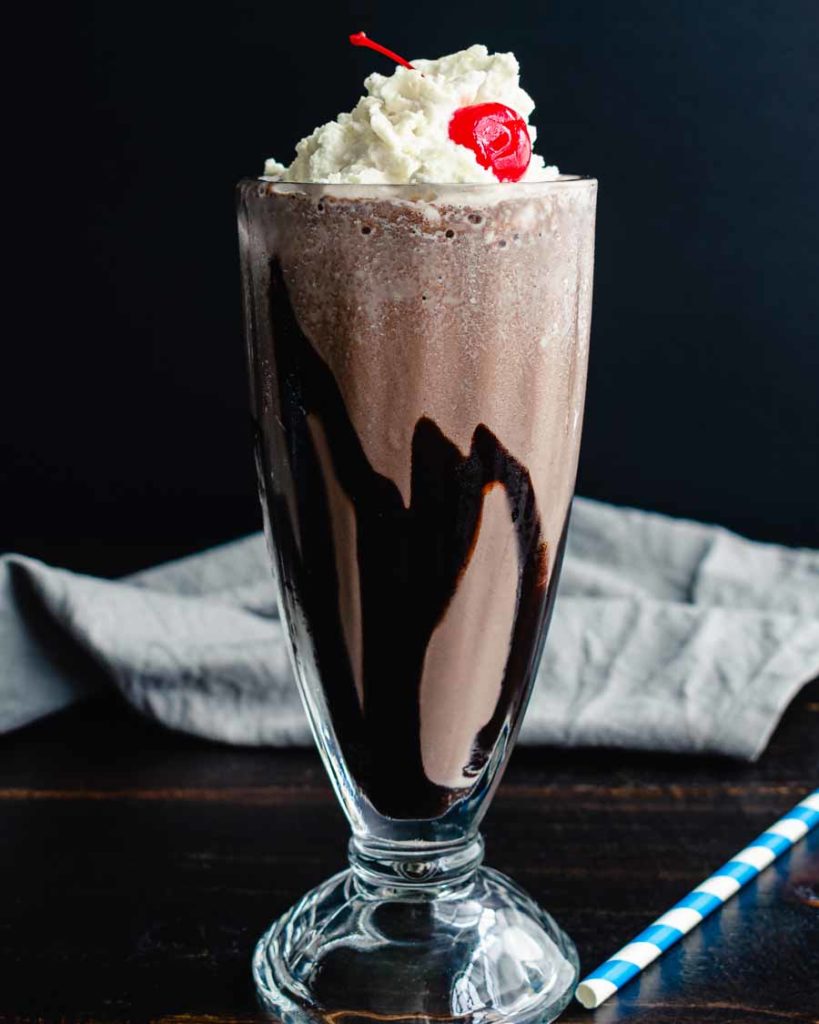
That’s okay, though, because my blender can handle anything. I had my milkshake prepped, blended, and poured in 3 minutes. I topped it with a bit of canned whipped cream for funsies. And who could skip the cherry? It’s practically mandatory in these situations!

Bourbon Chocolate Milkshake

Amazing French Fry Seasoning

What else to serve with Whiskey Burgers than french fries? As usual, Pinterest had my back on this. I was looking for a fry recipe when I stumbled on this seasoning. It sounded terrific and even easier than making fries from scratch. Huge bonus for already having all the ingredients in my pantry.

Plain fries right out of the bag are pretty boring. But this easy seasoning blend gives them just the right amount of zip–yummy for the adults and not too spicy for the kids.

Recipe Author: Pam at Brown Thumb Mama
Get the recipe

The Ingredients

I did have all the ingredients just hanging out in my pantry, but I didn’t have onion salt. no worries, though. A quick google and I found out onion salt is half onion powder and half salt. Both were in my pantry; problem solved. I just had to pick up a back of frozen french fries.

Amazing French Fry Seasoning
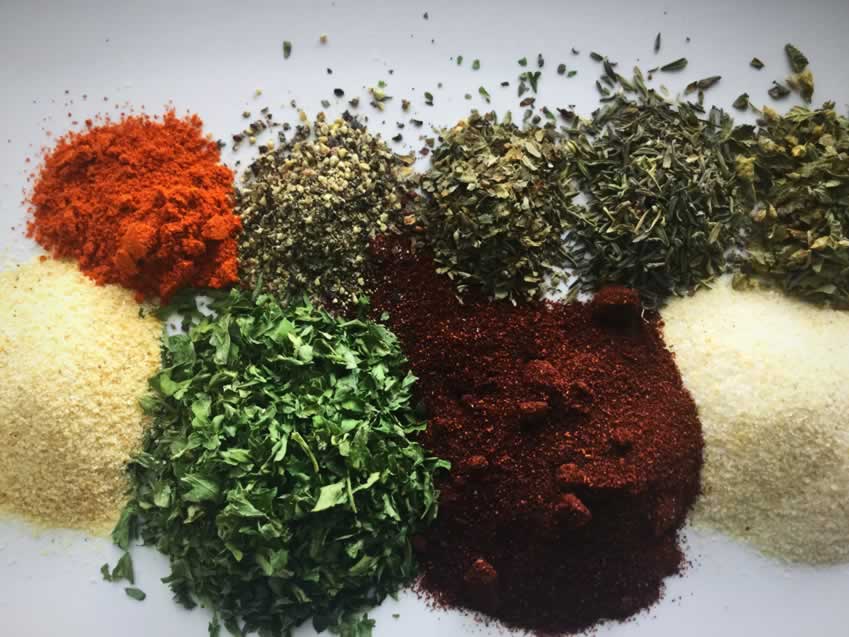
Onion salt, paprika, parsley, garlic powder, oregano, thyme, basil, black pepper and cayenne

The Process

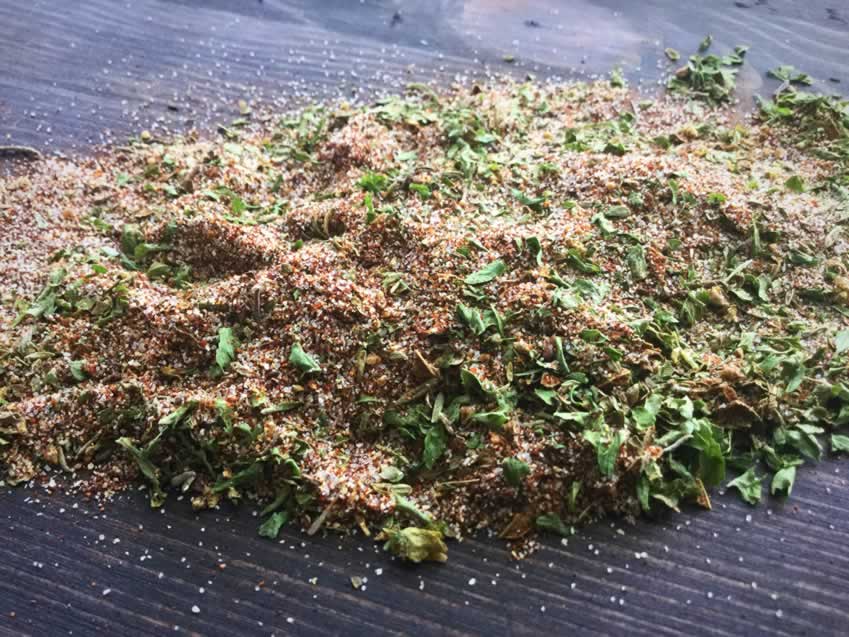
It can’t get any easier than this. Just measure everything into a small bowl and mix. The season your fries with as little or as much as you like. The whole process took me 2 minutes.

I really appreciated the extra tip on using a drizzle of olive oil to get the spice mixture to cling to the fries. It worked like a charm.

Amazing French Fry Seasoning

Whiskey Burgers

Labor Day is almost here! That means a long weekend and cooking out for us, so off I went to Pinterest to find a burger recipe. These Whiskey Burgers jumped out since it also has whiskey, bacon, and mushrooms. Some of my favorite things!

Recipe Author: Lisa at Cooking with Curls
Get the recipe

The Ingredients

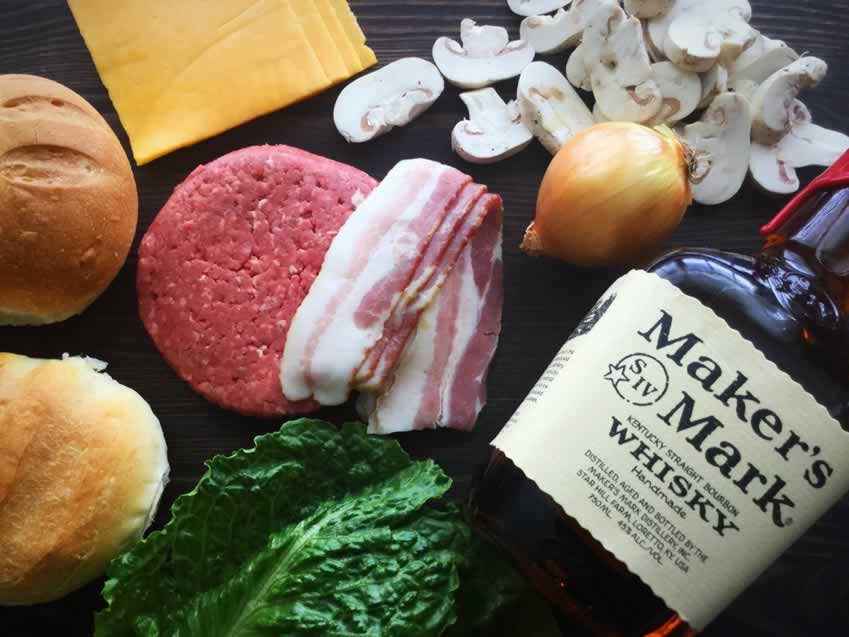
You might need to make a stop at the liquor store to pick up some good quality whiskey to make the whiskey glaze. I went with Maker’s Mark since I had a bottle on hand, but I did have to buy most of the other ingredients since they were fresh. I went with pre-made hamburger patties, sliced mushrooms, and fresh hamburger buns from the bakery department.

My grocery store keeps the uncured bacon in a separate display from the “regular” bacon, so I almost didn’t find it. I had no idea what the difference was and had to look it up when I got home. It turns out that uncured bacon is cured, and the name is a bit of a misnomer. The difference is uncured bacon is cured using natural nitrates, usually from sea salt or celery, whereas cured bacon can be cured using artificial nitrates. The taste difference is slight, but uncured bacon may be saltier since it is left in the brine longer. Read more about the differences.

Whiskey Burgers Ingredients
Whiskey, ground beef, bacon, mushrooms, onion, lettuce, hamburger buns, and cheddar cheese

The Process

I made my whiskey glaze the day before I made the burgers. It was extremely easy and took 30 minutes as specified. It stored it in a glass bottle and noticed it thickened a lot as it cooled.

The burgers went together very quickly once I had the bacon cooked. I used pre-sliced mushrooms and pre-made hamburger patties to save some time on prep work. I also was able to put the husband on grill duty while I did the rest. The directions were sectioned into easy to follow steps, and the whole process took us 25 minutes.

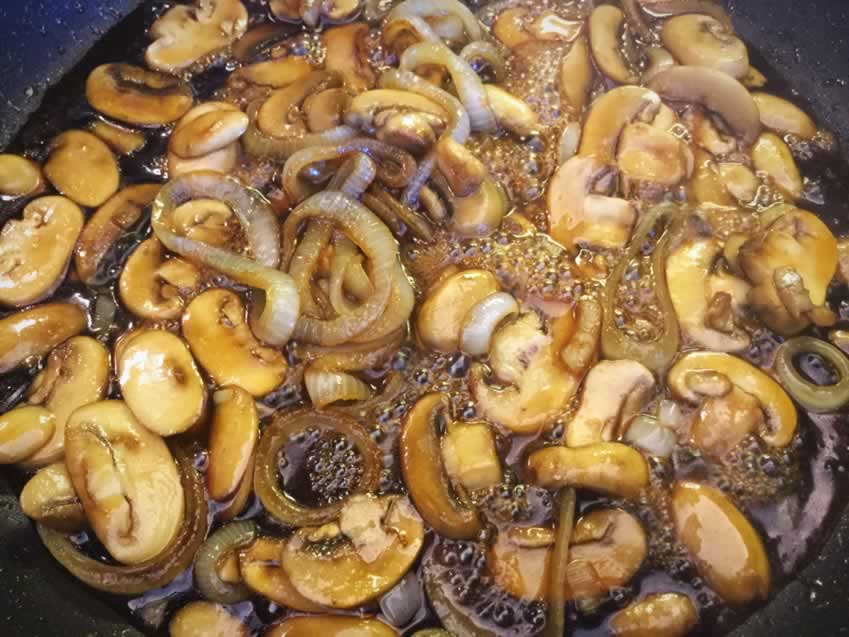
Sautéing the onions and mushrooms in the whiskey glaze

Cinnamon Roll Smoothie

I don’t know about you, but I’m not a morning person. I think my alarm clock is evil, and I’m pretty much a zombie for the first 30 minutes after I get out of bed. I’m also very hungry, but I would be a slow zombie, so catching my food is out of the question. Smoothies to the rescue! They’re faster, tastier, and healthier than leftovers or pre-packaged breakfast foods. Or that giant cinnamon roll this Cinnamon Roll Smoothie recipe made me envision.

This post was originally published on August 25, 2017. The text and photos were updated on July 14, 2021. The review and rating have not been changed.

Basically, just imagine taking all the sweet, sticky, spicy indulgence of a fresh-baked cinnamon roll and cramming it into a glass. The only thing you can leave out is the guilt, because this Cinnamon Roll Smoothie is low-fat and packed with healthy fruit and oatmeal.

Recipe Author: Corey at Family Fresh Meals
Get the recipe

The Ingredients

This cinnamon roll smoothie has just 6 ingredients. That seems pretty average for most smoothie recipes, and I’m not sure my morning brain could handle many more.

I did remember to freeze the banana the day I came home from the grocery store. I’ve gotten into the habit of buying a bunch so I have fresh and frozen on hand. Then I place a few peeled and sliced bananas into sandwich-size ziplock bags right after I put all the groceries away. It’s fast, low effort, and I always have frozen bananas ready to go.

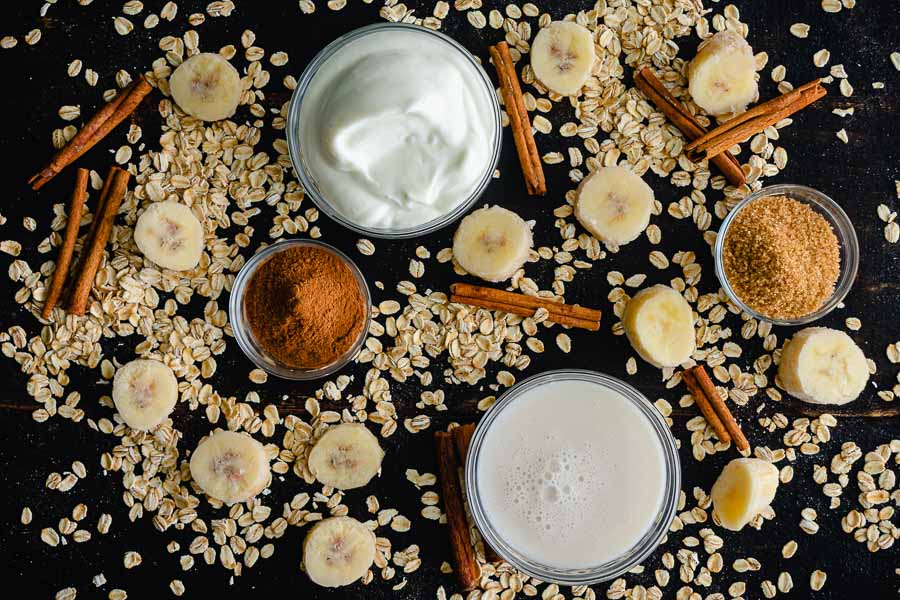
Cinnamon Roll Smoothie Ingredients
Cinnamon, vanilla Greek yogurt, frozen bananas, brown sugar, vanilla almond milk, and old fashioned oats

The Process

It’s a single step: Just put everything into a blender, push a button, and you have a cinnamon roll smoothie. There is no possible way a recipe could be easier to make. Even half asleep I had a smoothie made and poured in 3:30.

Adjustments

I found the banana taste overpowered the cinnamon. I recommend increasing the cinnamon to 3/4 to 1 teaspoon.

Rosemary & Garlic Mashed Cauliflower

0

I’m always looking for new ways to add vegetables to my meals. I also have a bad habit of making potatoes as a side dish. The solution? Mashed cauliflower. I admit it’s not a vegetable I eat very often, but the recipe looked fast and easy. Oh, and garlic! It makes everything better.

This Rosemary Garlic Mashed Cauliflower may be healthier, but tastes just as good as Mashed Potatoes! Perfect for Thanksgiving or any day of the year. Side dishes can be healthy while still being SO delicious!

Recipe Author: Becky Hardin at The Cookie Rookie
Get the recipe

The Ingredients

I always like simple recipes, and this one has only 5 ingredients. It’s also much faster to cut up a cauliflower than it is to peel potatoes. Score! A single head of cauliflower made 4 servings.

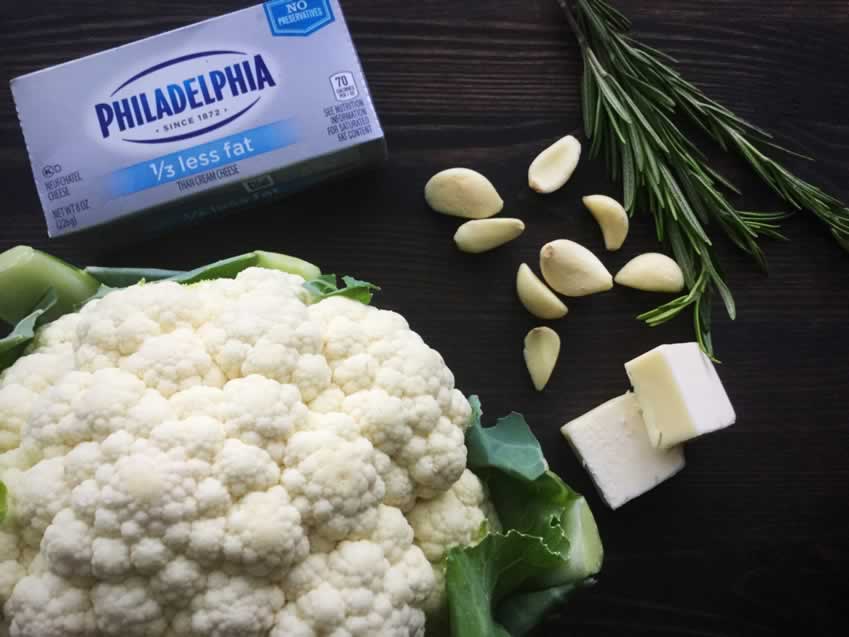
Rosemary & Garlic Mashed Cauliflower Ingredients
Cauliflower, cream cheese, butter, garlic and rosemary

The Process

The recipe lists a blender or food processor, but you could probably also use an electric hand mixer. I grew up using the hand mixer method on mashed potatoes.

I threw everything into my blender and had some difficulty getting it to blend. It was a little tough getting things to blend smoothly at first. I had to pulse and stir the mixture several times before I could let the blender take over, so to speak.

Adding the ingredients in stages would probably make blending easier. I think batches of cauliflower with butter and cream cheese would work best. I’m thinking the butter and cream cheese will melt a little and create a creamy consistency from the beginning.

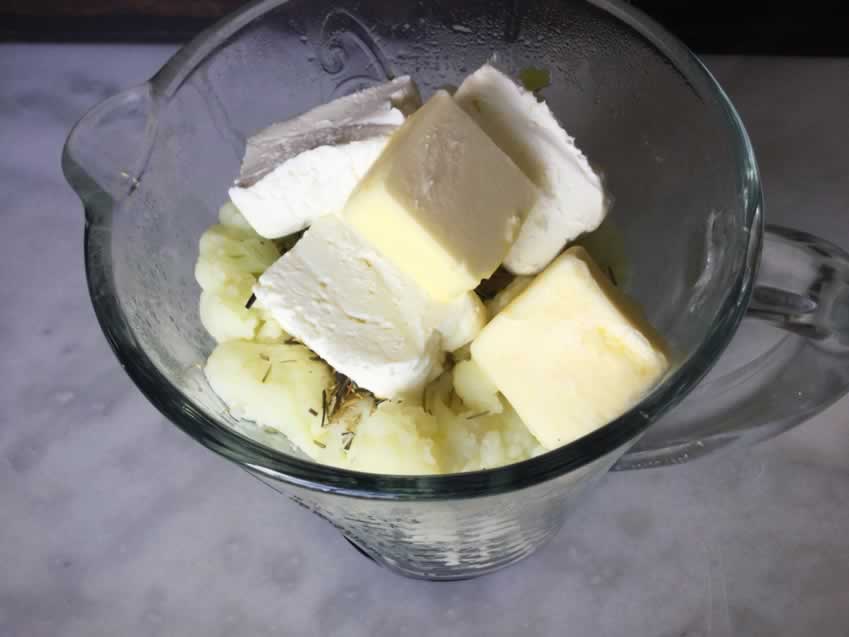
Getting ready to blend ingredients
Step 2: Getting ready to blend the ingredients

Chicken Breasts and Mushrooms in Foil

I like cooking chicken breasts in foil. It’s a great way to portion, easy to clean up, and the chicken turns out juicy every time. Plus I can make the side while the chicken cooks in the oven. Nice and easy, especially for a weeknight meal. That made this recipe one I had to try.

Chicken breasts with mushrooms baked in oven. Very easy and tasty.

Recipe Author: Slava Bond at Magic Skillet
Get the recipe

The Ingredients

The ingredients for this dish were easy to find and not too expensive. Oddly, my local grocery store likes to sell chicken breasts in 3-packs, not 4 as specified. I doubt that made any difference in the final product. Oh, and be sure to pick up some bread so you can use the extra sliced ham for sandwiches.

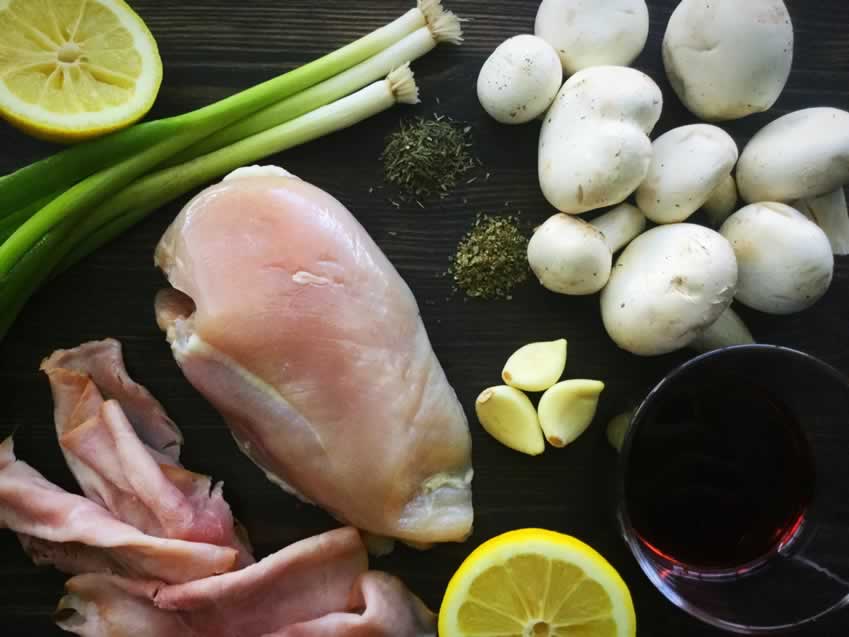
Chicken Breasts and Mushrooms in Foil ingredients
Chicken breasts, ham, lemon, green onion, mushrooms, garlic, red wine, marjoram and thyme

The Process

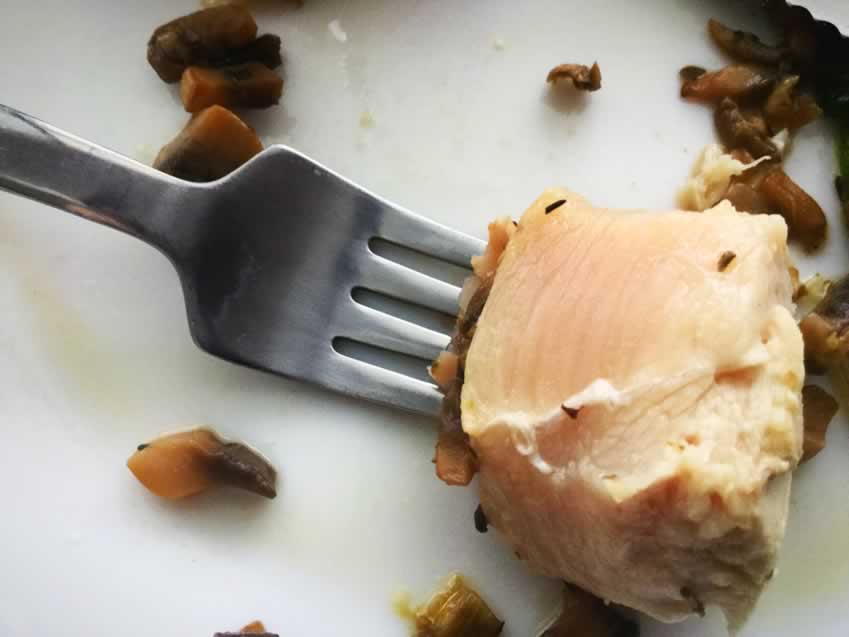
The entire process took 65 minutes from prep to finish. This included 8 minutes for prep work and cooking the chicken breasts for 20 minutes. However, my chicken wasn’t nearly done enough after 20 minutes, and I had to put it back for another 20 minutes to fully cook.

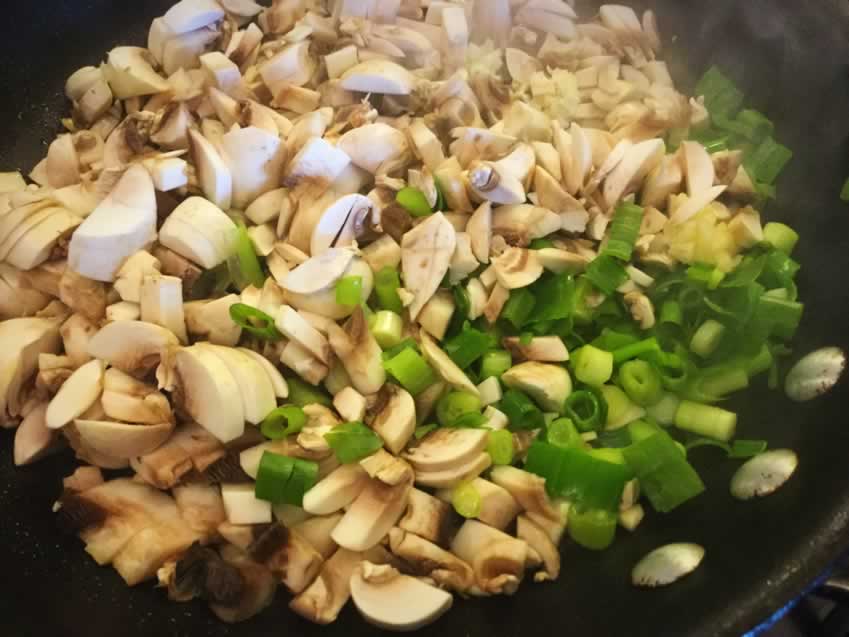
Mushrooms, green onion and garlic
Step 1: Just after adding mushrooms, green onion and garlic to the skillet

I did notice some errors in the recipe. First, thyme is listed twice in the ingredients. This should have been thyme and marjoram. Second, the broth that is listed as an ingredient isn’t mentioned in the instructions. I opted to add it with the wine in step 2. Finally, preheating the oven isn’t listed until the final step. I would have preferred to see it at the beginning so it isn’t accidentally missed.

Chicken after 20 minutes cooking
Chicken after cooking for 20 minutes