Home Blog Page 57

Slow-Cooked Brisket and Onions

The holidays are coming up, and brisket is on my mind. My mother-in-law makes it on special occasions, and I have always wanted to give it a try. This recipe sounded like a great way to start since it’s pretty much impossible to ruin a slow-cooker recipe. That and the slow-cooker is just so damn convenient. So here goes brisket…

If you ask me about comfort food, I will answer promptly: slow-cooked brisket. This old-fashioned pot roast, cooked quietly in the slow cooker all day with just a handful of ingredients and a mess of caramelized onions, makes a rich broth and meat that melts in your mouth. Sunday dinner, weeknight supper — whenever you eat it, this is a classic dish both convenient and comforting.

Recipe Author: Faith Durand at The Kitchn
Get the recipe

The Ingredients

I realized when I was shopping that I have never seen a raw brisket, so I had to hunt for it in the meat counter. Now I know–it’s a giant hunk of meat! This brisket was close to 4 pounds and cost me about $30. I had a little bit of sticker shock, but it turned out to be a good deal. I got 6 generous servings out of this piece.

I thought 1 1/2 pounds of onions sounded like a lot, but I was wrong. I bought 1 red and 1 yellow (Vidalia and Bermuda, respectively), and the Vidalia alone was 1.6 pounds!! I used half of it and the whole red onion and still went a little over the 1 1/2 pounds listed in the recipe.
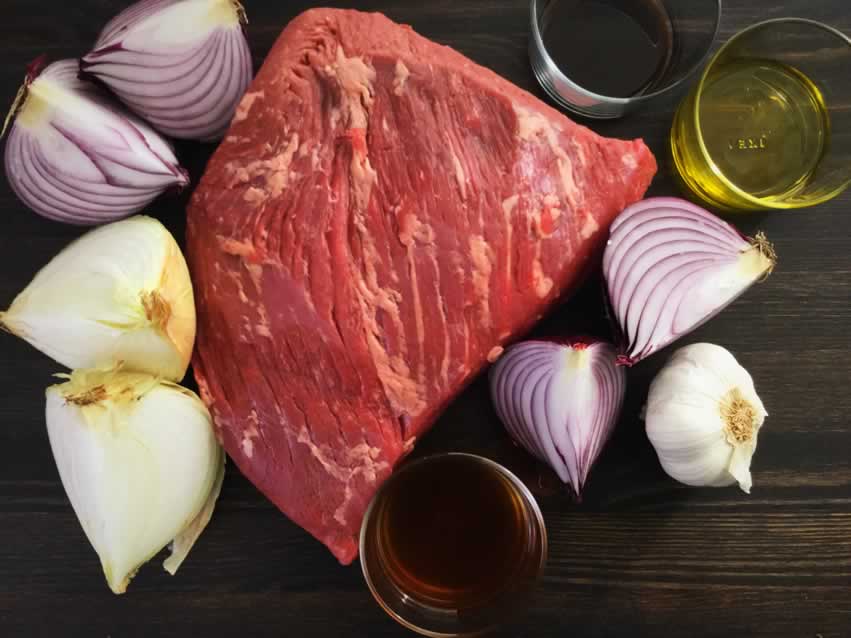
Slow-Cooked Brisket and Onions Ingredients
Beef brisket, onion, Worcestershire sauce, olive oil garlic and beef broth

The Process

The directions for this recipe were clear and easy to follow. That’s always reassuring when I’m making something for the first time! The prep work was really just peeling and slicing the onions, and that took me about 4 minutes.

I put the onions on the stove and stirred them occasionally for 20 minutes. While they were cooking, I prepped the brisket, heated a second skillet, and seared the brisket. I had the brisket, onions, and the rest of the ingredients in the slow cooker in 27 minutes.

I opted to cook it for the full 8 hours. The total time on this recipe was 8 hours 47 minutes. The result was a brisket that literally fell apart and a gravy that was just sumptuous.
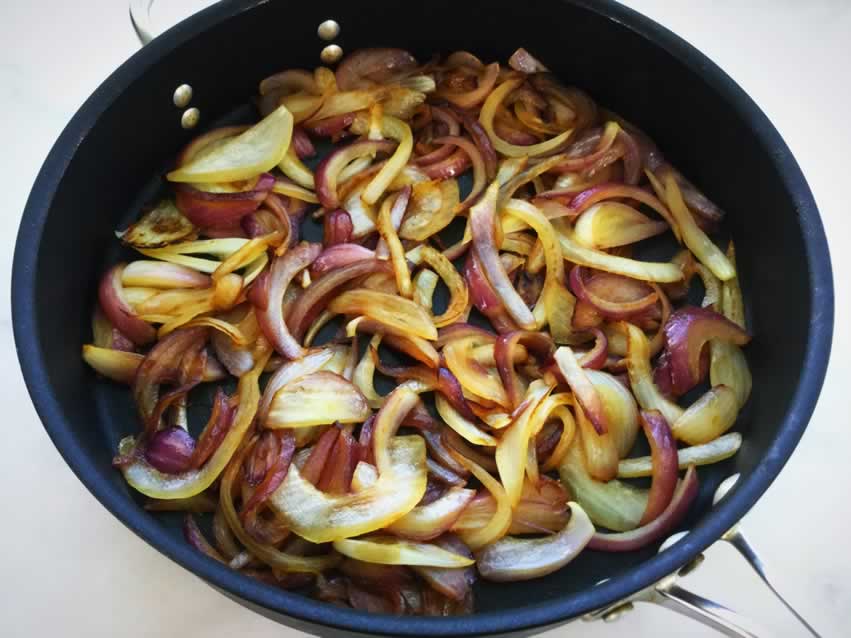
Slow-Cooked Brisket and Onions
The caramelized onions

Fennel, Black Pepper & Grapefruit G&T

0

I always like to end the week with a drink recipe, and (believe it or not) I found a gin and tonic recipe with fennel to fit this week’s theme. I was a little skeptical about the fennel, but the grapefruit sounded like it would work well in a gin and tonic. Plus I already knew the black pepper would work after trying it in Charred Lemon, Rosemary and Coriander Gin and Tonics. So… Fennel in a cocktail. This is something I have to try!

This is the gin & tonic to end all gin & tonics.

Recipe Author: Emily at This Healthy Table
Get the recipe

The Ingredients

There aren’t a ton of ingredients to this cocktail, but that’s not unusual for a beverage. I do recommend buying a good quality gin, though, but you probably know that if you’re a gin drinker. I chose Hendrick’s since I had it on hand and it’s one of my favorites. It’s not too dry, and the rose and cucumber flavors are soooo good! I also opted for red grapefruit. No particular reason other than it’s pretty.

Fennel, Black Pepper & Grapefruit Gin & Tonic Ingredients
Gin, tonic water, fennel and grapefruit

The Process

The “work” for this recipe was slicing 1/4 of a fennel bulb. I use the term “work” loosely. Then it’s a matter of adding the fennel and gin to a glass container and letting it infuse for at least 8 hours. I infused mine for 24, and I was very happy with the result.

I keep a couple of glass bottles like these on hand just for infusing liquors and making simple syrups. The wide necks make it easy to get whatever I use for the infusion in and, most importantly, out of the bottle so it can be reused. I also love the rubber seals that make the bottles airtight so the contents stay fresh.

Fennel, Black Pepper & Grapefruit G&T

Tuscan Braised Fennel

2

This week is all about fennel, so this recipe for braised fennel pretty much jumped off my vegetable recipe board and onto my menu. I discovered fennel when my husband and I were dating. He was at work, I was bored, and I found a recipe online for roast chicken with fennel and decided I wanted to make it for his family while I was visiting. I had never, ever had fennel before, and I thought this was a good idea. Let that sink in! Sometimes…

Fortunately, we all liked the dish, and I have made it many times over the years. But that’s the only way I have ever had fennel. Not that I or my husband are complaining, but you know how I like to expand my horizons. I made another chicken and fennel dish earlier this week. Now comes a dish that’s just fennel.

This is such a pure and simple recipe with complex flavors from the fennel and a decadent touch from the grated cheese! A classic Italian side dish!

Recipe Author: Bill Hovard at Sweet Paul Magazine
Get the recipe

The Ingredients

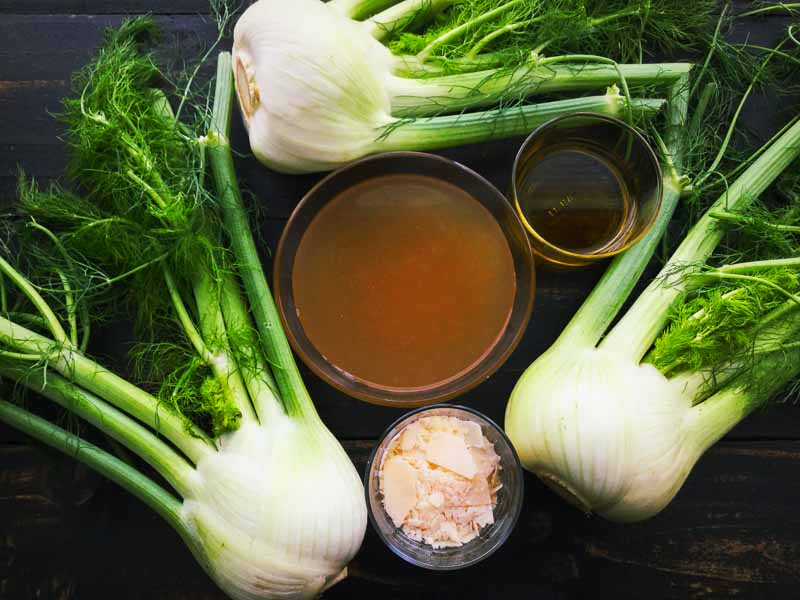
There’s not a whole lot to this recipe—just 6 ingredients and half are pantry staples like salt, pepper, and extra virgin olive oil. Shopping for the remaining fennel, parmesan cheese, and chicken stock was easy and inexpensive.

Tuscan Braised Fennel Ingredients
Fennel, chicken stock, parmesan cheese, and extra virgin olive oil

The Process

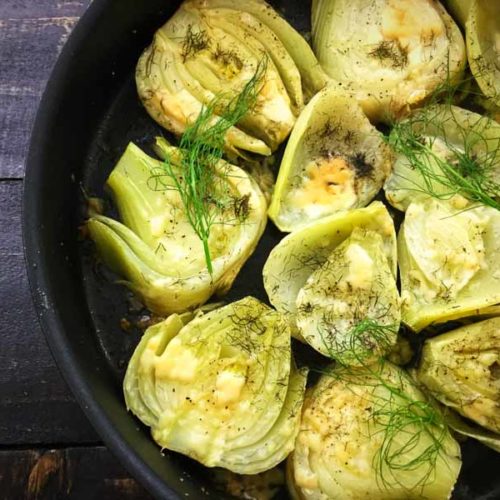
I love quick and easy recipes, and this braised fennel recipe didn’t disappoint. I put the chicken stock on the stove to boil and had everything prepped well before I saw bubbles in the pan. Although no times are listed, I expected this dish to be ready in an hour, and I wasn’t far off. I spent a total of 50 minutes on this dish. That includes prep, 8 minutes to parboil, and 30 minutes in the oven to get it to brown a bit.

The number of servings isn’t listed, but each bulb yielded 4 inch-thick slices, and I had enough for 4 meals.

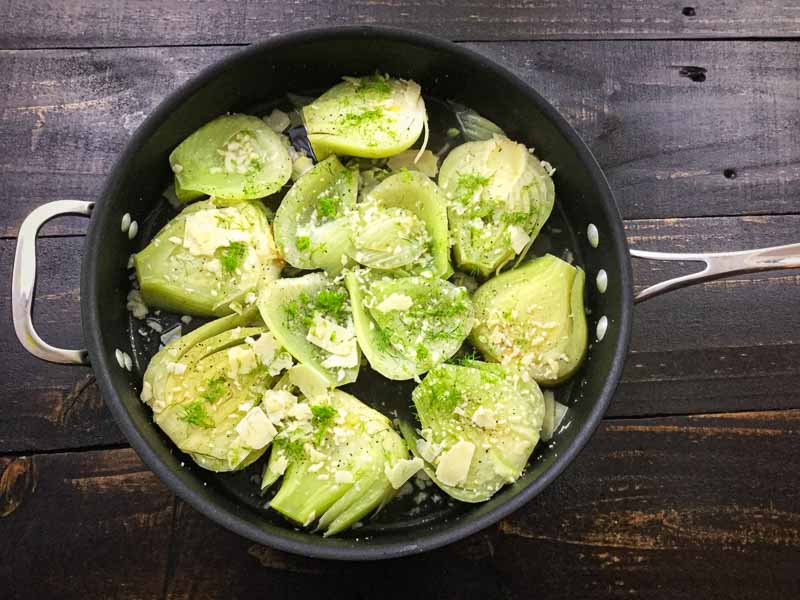
Ready to go into the oven

To Serve

I served this braised fennel dish with a simple lemon chicken. I marinated the chicken breasts overnight using this Lemon Garlic Marinade, then had my husband grill them while the fennel was roasting.

Update

A reader was kind enough to let me know that Sweet Paul Magazine has taken down this recipe. I am posting a re-written version below so it can live on. Enjoy!

Tuscan Braised Fennel

Tuscan Braised Fennel

The Hungry Pinner
This braised fennel is proof that just a few ingredients and a simple recipe can really wow!
Prep Time 12 minutes
Cook Time 38 minutes
Total Time 50 minutes
Course Side Dish
Cuisine Italian
Servings 4

Equipment

  • chef's knife
  • cutting board
  • large pot
  • baking dish or large oven-proof skillet

Ingredients
  

  • extra virgin olive oil
  • 3 fennel bulbs
  • 6 cups chicken stock
  • ¼ cup Parmigiano-Reggiano grated
  • salt and pepper to taste

Instructions
 

  • Preheat oven to 350℉. Lightly coat a baking dish or large oven-proof skillet with olive oil and set aside (cast iron is excellent).
  • Scrub the fennel and trim by removing the stalks and fronds, reserving the fronds for garnish. Remove roots, if present, leaving enough of the stem so the fennel retains its shape. Cut the fennel into 1-inch thick slices.
  • Add the chicken stock to a large pot and bring to a boil. Carefully add the sliced fennel and parboil until slightly tender, 6-8 minutes.
  • Strain the stock, retaining 1/2 cup. Place the parboiled fennel slices into prepared baking dish.
  • Pour retained stock over the fennel and top with salt, pepper, and parmesan cheese. Sprinkle with finely chopped fennel fronds for added flavor.
  • Bake uncovered for 20-30 minutes or until the top is golden brown.
  • Garnish with additional fennel fronds, if desired, and serve warm.

Notes

Based on Tuscan Braised Fennel recipe at Sweet Paul Magazine.

Mediterranean Roast Chicken with Turmeric and Fennel

I’ve been eyeing this recipe for a while. The title alone has several things I like: chicken, turmeric, fennel, and anything Mediterranean. Then I read the list of ingredients. Oh, yum!! The fact that it’s a one-pan dish made it even more appealing. And Pinterest being Pinterest, I keep seeing it pop up in my feed. Tease! So here we are, and I’m about to make and eat the chicken dish I’ve been mentally drooling over since I pinned it. I’m not gonna lie: I’m excited about this!

An easy one-pan roast chicken dinner with a delicious citrus marinade starring turmeric and other Eastern Mediterranean spices! Step-by-step tutorial below.

Recipe Author: Suzy at The Mediterranean Dish
Get the recipe

The Ingredients

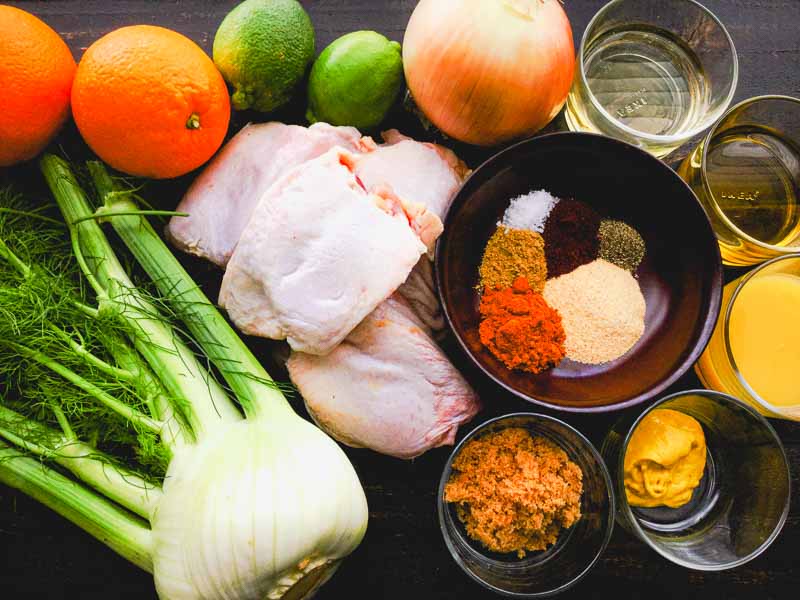
The bad news is the list of ingredients is kind of long for this recipe. The good news is that everything was on hand or easy to find if I had to shop for it. Nothing was unusually expensive. In fact, the chicken was a little cheaper than what I’m used to because it still had the bones and skin. I usually buy boneless and skinless chicken breasts since my husband prefers that, but I’m overruling him for this dish.

Mediterranean Roast Chicken with Turmeric and Fennel Ingredients
Chicken thighs, fennel, oranges, limes, onion, white wine, olive oil, orange juice, mustard, brown sugar, garlic powder, turmeric, coriander, paprika, salt, and pepper

The Process

I have to admit that this dish was pretty easy to prepare, despite the long list of ingredients. Although it’s listed as optional, I did marinate the chicken for 2 hours. I firmly believe marinating makes any type of meat better, and I really liked the combination of a dry seasoning with a liquid marinade. By the way, be careful with the marinade–the turmeric stained my fingernails for a couple of days.

I also love adding spices underneath chicken skin, and this recipe had both. I learned the trick of using my fingers to lift the skin a few years ago. It’s very easy, and it really pays off as far as flavor. Marinade just doesn’t quite penetrate as much as adding seasonings underneath the chicken skin.

The times for this recipe are pretty accurate. In fact, I was done in 52 minutes instead of an hour. Prep took me 12 minutes, and the chicken was ready in 40 minutes. Not too bad.

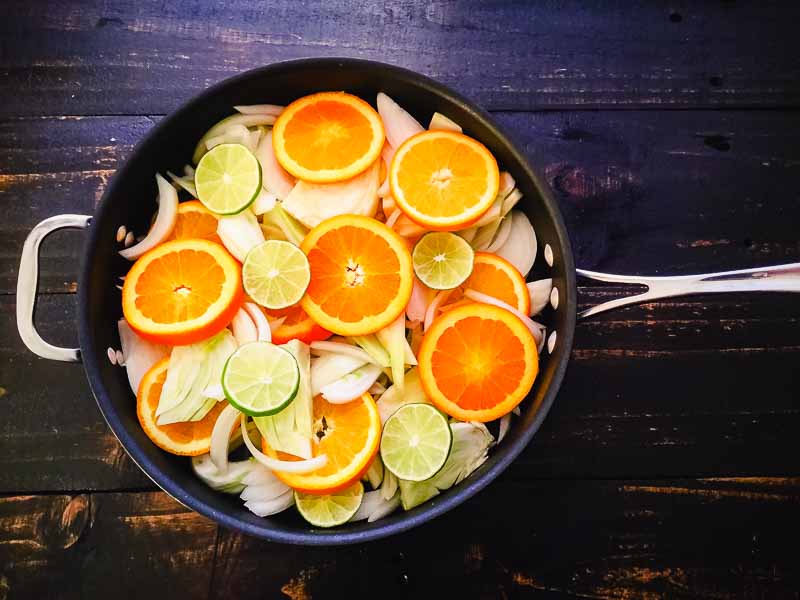
Sliced oranges, lime, fennel, and onion in a saute pan

Rosemary Gin Fizz

0

I decided to give this recipe a try in continuing with my theme of gin and updated classic cocktails like the ginger bramble. A gin fizz is pretty classic. Adding rosemary is definitely a twist, but it sounded like it would be a good pairing with the lemon juice. I had to test my theory with this Rosemary Gin Fizz recipe!

This post was originally published on November 17, 2017. The text and photos were updated on July 14, 2021. The review and rating have not been changed.

I could not help but fall in love with this painting.
It has a certain fuzziness to it that reminds me of one of my favorite Summer drinks, a Rosemary Gin Fizz.

Recipe Author: Patricia van Essche at PVE Design
Get the recipe

The Ingredients

Just a few ingredients to this cocktail, and they’re all easy to find. Sure, it would be easier to find everything if you could buy gin at the grocery store, but now I’m just getting picky LOL! Besides, I didn’t have to shop for any of the ingredients—I had them all on hand.

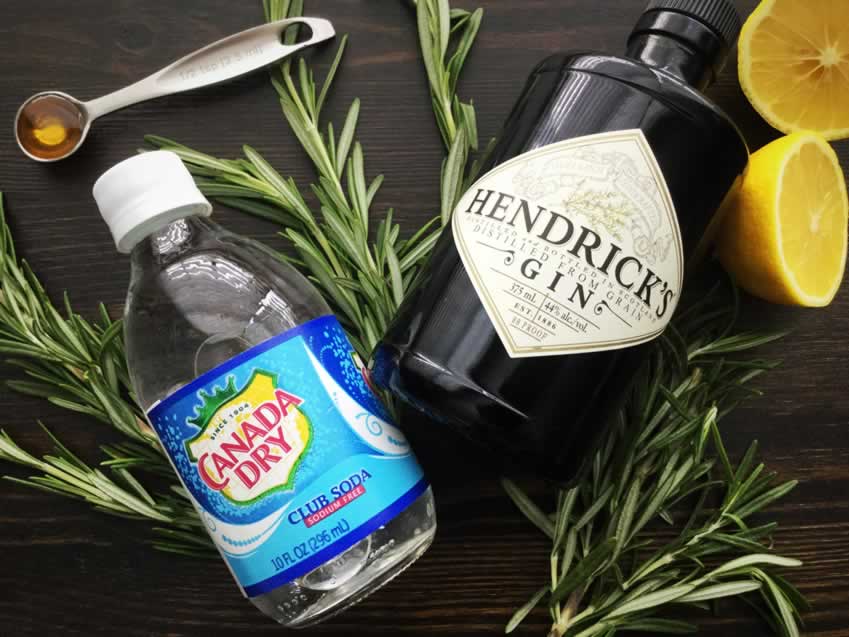
Rosemary Gin Fizz Ingredients
Gin, club soda, rosemary, honey and lemon

The Process

This Rosemary Gin Fizz was very easy to make, and the only special equipment needed is a muddler. You’re just bruising the rosemary leaves to release their flavor, and I imagine you could use a wooden spoon or a meat mallet if you don’t have a muddler.

Everything is assembled in the glass. You don’t even need a cocktail shaker. Like I said, very easy to make. I even took the time to use ice cubes from a tray instead of the refrigerator door, and I had a beautiful cocktail made and garnished in 2 1/2 minutes.

Grand Marnier Berry Salad

0

I love fresh berries! I don’t think there’s a way I’ve tried them that I haven’t liked: pies, tarts, compotes, preserves… the list could go on and on. And I’d be hard-pressed to pick my favorite berry. That’s why this recipe appealed to me: berry salad with strawberries, blueberries, raspberries, and blackberries all in one recipe. Plus it listed the total time to make as 10 minutes. It’s not often I find a recipe that’s so quick to make. I definitely had to give this one a try.

Raspberries, blackberries, blueberries and sliced strawberries come together beautifully with fresh mint and a light, tangy and sweet lime Grand Marnier dressing.

Recipe Author: Allie at Through Her Looking Glass
Get the recipe

The Ingredients

There aren’t many ingredients to this recipe, and they were all easy to find. I don’t use Grand Marnier very often, so a $36+ bottle seemed pricey for one salad. Fortunately, I was able to find a 50ml mini for just over $6. It was more than enough to make this salad and a much less expensive option.

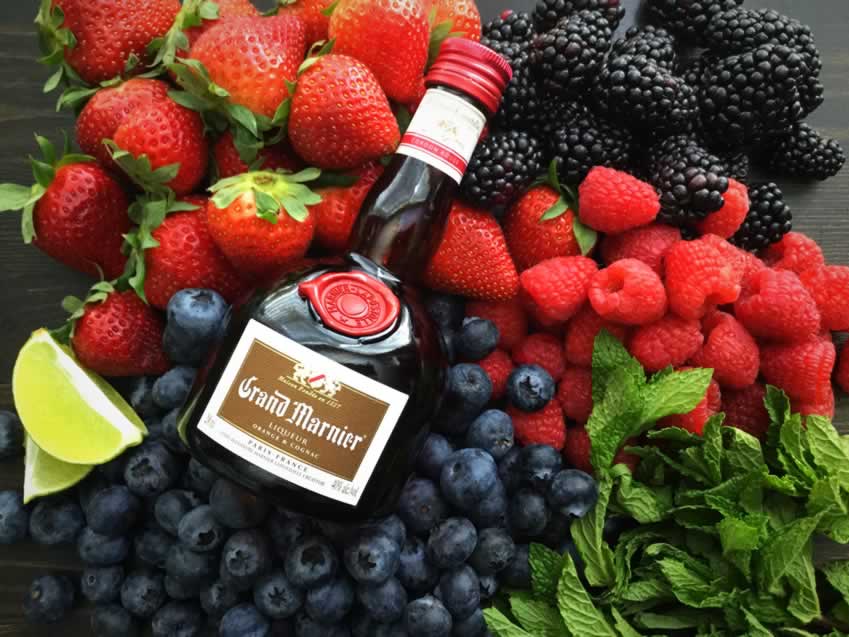
Grand Marnier Berry Salad Ingredients
Strawberries, blackberries, raspberries, mint, blueberries, lime, and Grand Marnier liqueur (I forgot to show the honey, but it’s in the finished salad!)

The Process

This berry salad was incredibly fast and easy to make. I had a beautiful bowl of it made and garnished in just 10 minutes. Seriously, 10 minutes!

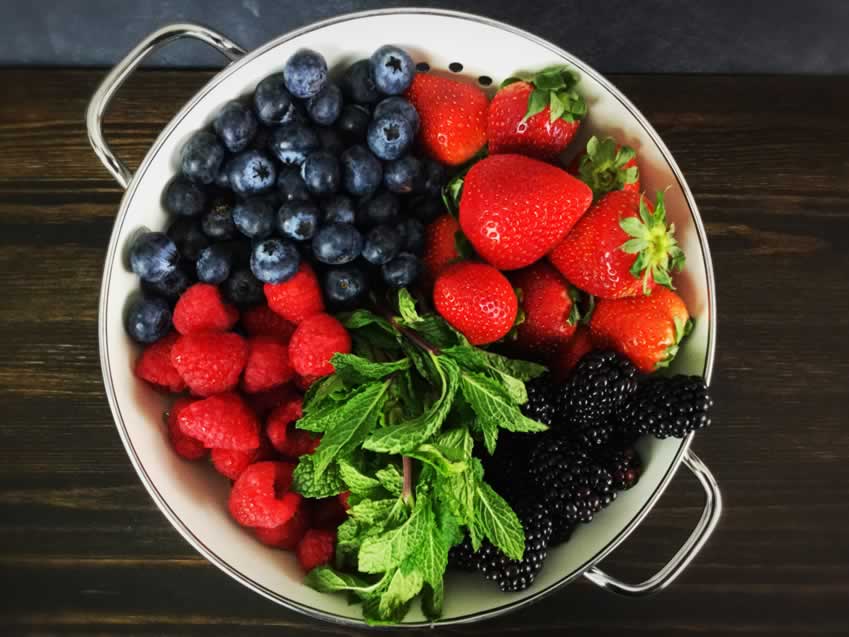
Most of the berries just need to be rinsed and tossed into a serving bowl. The strawberries were the exception, and I decided to cut them into halves or thirds depending on how large they were. I wanted the pieces to be small enough that I could get a mix of berries in each bite.

I used the leaves from 3 mint sprigs in the salad, and I had more than half the package left over. One lime gave me just about enough juice for this recipe, but I did have to top it off with a little bottled lime juice. I’d recommend buying 2 limes to be on the safe side if you don’t normally keep bottled lime juice around (I like to just for these situations).

Grand Marnier Berry Salad
Rinsing the berries and mint leaves

To Serve

Something about this berry salad makes me think of summer and cooking out. This recipe would make a wonderful dessert with BBQ ribs.

Roasted Pork Tenderloin with White Wine, Garlic and Rosemary

I went to a friend’s place for a cookout a few years ago and discovered pork tenderloin. Up until then, I had always had pork as chops or ham. I was amazed at how tender, juicy and tasty this cut was. And it was so easy to cook! The version I had was pre-seasoned, but I’ve found it’s very easy to season myself. It’s also easy to cook, whether it’s grilled, slow cooked or roasted in the oven.

I love garlic, and I cook it in just about everything I make. Here is one of my favorite recipes for Roasted Pork Tenderloin with White Wine, Garlic and Rosemary. This is a simple marinade and tastes great whether it’s marinated for a few hours or overnight!

Recipe Author: Ericka Breedlove at Chef PickyKid and Me
Get the recipe

The Ingredients

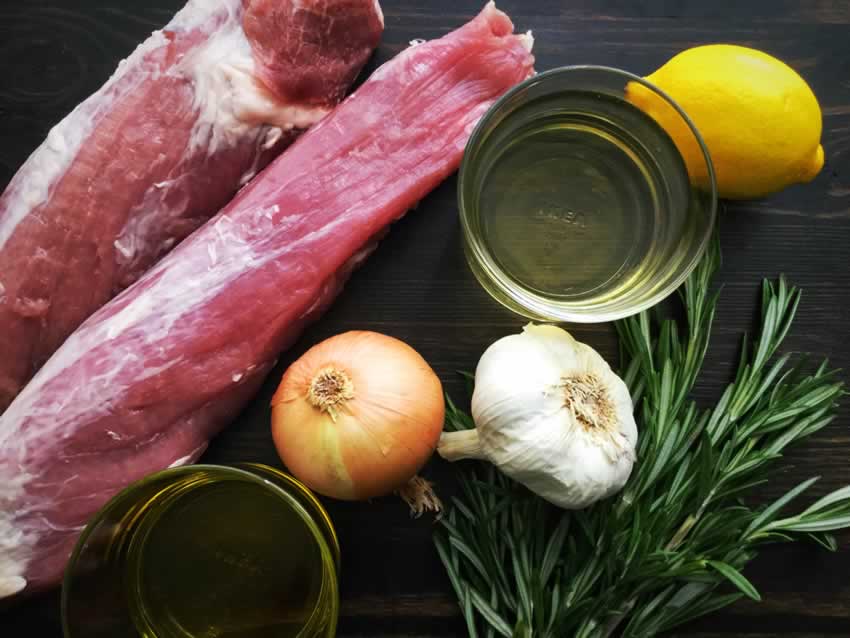
The ingredients list for this recipe is pretty short, and it was all easy to find. I spent a little over $10 on the pork tenderloin. Not bad since I got 4 servings out of it.

Roasted Pork Tenderloin with White Wine, Garlic and Rosemary
Pork tenderloin, white wine, lemon, rosemary, garlic, onion, and olive oil

The Process

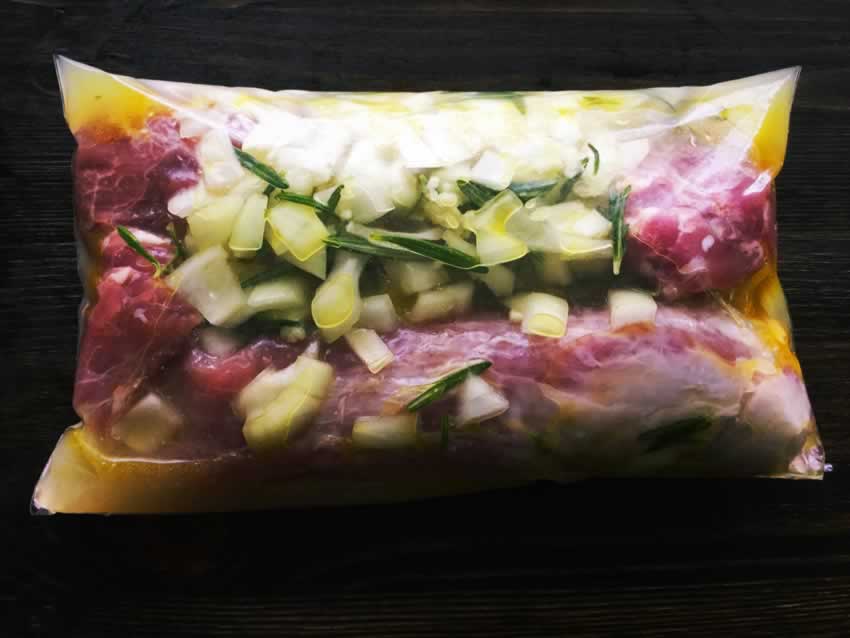
Most of the “work” on this recipe is making the marinade. It took me 5 minutes to get it ready. One thing not mentioned in the recipe is trimming the silverskin. I ended up trimming it after I marinated the meat overnight. I don’t recommend that method! Take a few minutes to trim the silverskin before marinating.

I had my roasted pork tenderloins ready to serve in 45 minutes. They had a great sear in 8 minutes instead of the listed 10. The meat also cooked much faster than the 45 minutes listed. Mine was done to perfection in 20 minutes, and I let it stand for another 10 minutes after that. A foil tent kept it warm while standing.

Marinating the pork tenderloin

Ginger Bramble

0

Gin, ginger and blackberries. How good does that sound? I thought it sounded terrific, so off to the store to buy supplies for my ginger bramble. I know, the author touts this recipe as a New Year’s cocktail and it’s only November, but I’m impatient LOL!

Happy December! The year is gonna be over in just a few more weeks and I’ve got a New Year’s cocktail for you to celebrate in style.

Recipe Author: Nicole at The Spice Train
Get the recipe

The Ingredients

I couldn’t find fresh blackberries, so I had to go with frozen. Surprisingly, that turned out to be a good thing. I was able to skip ice since the frozen blackberries served the same function. No watered-down drink–always a good thing!

The rest of the ingredients were easy to find. As you can see, I went back to my regular brand of gin, Hendrick’s, for this drink. I was out of the Prairie Organic Gin I’ve been using lately, and I decided a little change would be good.

I did opt for regular ice over dry ice. Yes, the dry ice is beautiful, but I wasn’t comfortable with it after reading all the warnings. Besides, you can’t dink it, and I taste everything I blog.

Ginger Bramble Ingredients

The Process

This is a two-part recipe: making the ginger simple syrup and the cocktail. The simple syrup was easy to make. I didn’t even bother peeling the ginger since I had to strain it out of the final product. It took just 5 minutes to make the simple syrup, then I removed the pan from the heat and let it cool with the ginger still in the pan. After it cooled (about 30 minutes) I strained it, poured it into a sealed glass bottle and popped it into the refrigerator.

Making the cocktail was even easier. I wasn’t sure how much a shot was, so I turned to Google and found it’s 1 1/2 ounces. Easy enough, and I had a lovely ginger bramble cocktail mixed up 2 minutes later.

Rosemary Potatoes with Roasted Heads of Garlic

0

I adore garlic and roasting it is my favorite way to make it. Not only does it taste good, but you don’t have to peel the cloves. Add some fresh herbs and white wine, and I’m hooked. There’s no way I could resist trying this recipe for rosemary potatoes.

This wonderful dish is great for a cookout. I’ve even made it while camping, cooked over a charcoal grill. Squeeze the roasted cloves of garlic over your potatoes or on crusty buttered chunks of French bread. A taste sensation!

Recipe Author: Dotty Snyder Grohman at Allrecipes.com
Get the recipe

The Ingredients

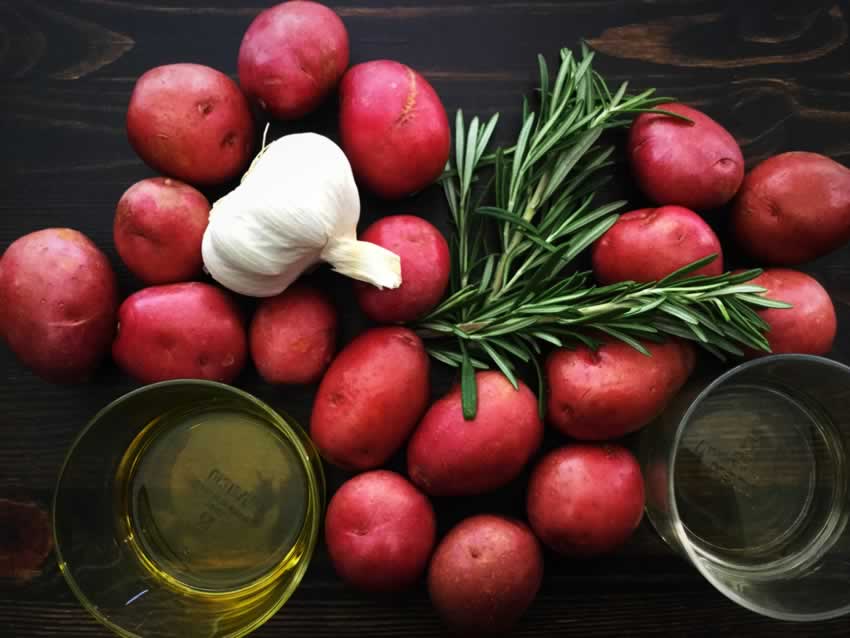
This is another recipe that doesn’t have many ingredients. None of the ingredients were expensive or difficult to find, either. This is never a bad thing! Some of my favorite recipes have very short lists of ingredients and are easy to prepare.

Rosemary Potatoes with Roasted Heads of Garlic Ingredients
New potatoes, garlic, rosemary, white wine and olive oil

The Process

Prepping this dish went fast, and I was ready to get started in 9 minutes instead of the 15 listed. That may be due to the fact that I halved the recipe since it’s just the 2 of us. Even so, we got 4 servings out of this dish.

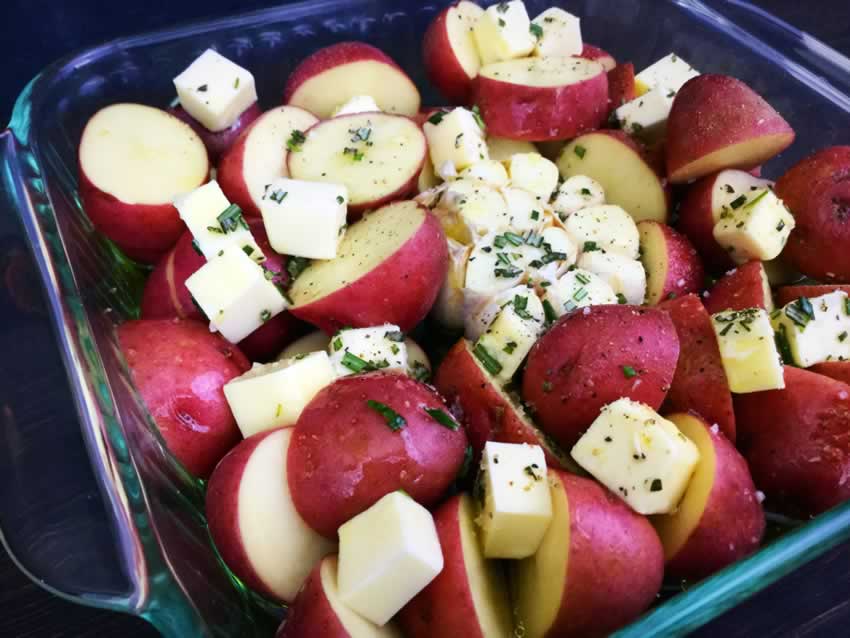
I used an 8-inch pyrex baking dish, and it was a perfect size. (I’m thinking my larger 9' x 13' baking dish would have worked if I hadn’t cut the recipe in half.) Assembly was pretty much just throwing everything into the baking dish and popping that into the oven. You don’t even need to stir anything!

The cooking time was pretty much on the money (45 minutes). I think they could be left in for a little longer if you like your potatoes browned more. Another option would be to place the rack a tad higher in the oven. I used the middle rack since it wasn’t specified.

Just before going into the oven

Chicken and Rice Burritos

Chicken and Rice Burritos is a dish my husband asks for over and over. I love it because it’s easy and we can top it with anything we like. Don’t have salsa, sour cream, or cheese? Have a picky eater who doesn’t like them? No worries! The toppings are delicious, but these burritos are still good without any toppings at all.

I’ve listed my favorite toppings in the recipe, but the options are limitless:

  • Try adding chili peppers, mushrooms, green peppers, black beans, pinto beans, fresh tomatoes, chopped onions, shredded lettuce, guacamole, etc.
  • Omit the chicken and make them meatless
  • Switch the shredded chicken to pork or beef
  • Want cheese on the outside? Top them with queso.
  • Substitute brown, seasoned or yellow rice for the white rice (cooking time may need to be adjusted)

The flexibility of this recipe is a great way to use leftovers and extras from other recipes!

The Ingredients

  • 1 whole chicken breast
  • 3/4 cup long-grain white rice, uncooked
  • 1 3/4 cup water
  • 1 packet low sodium taco seasoning (about 1 1/2 ounces)
  • 8 ounce can of tomato sauce
  • 14 1/2 ounce can of diced tomatoes, drained
  • 2 scallions (green onions) white and green parts, chopped
  • 1 package large flour tortillas
  • Optional Toppings:
  • salsa
  • sour cream
  • shredded cheese
  • chopped cilantro
  • hot sauce
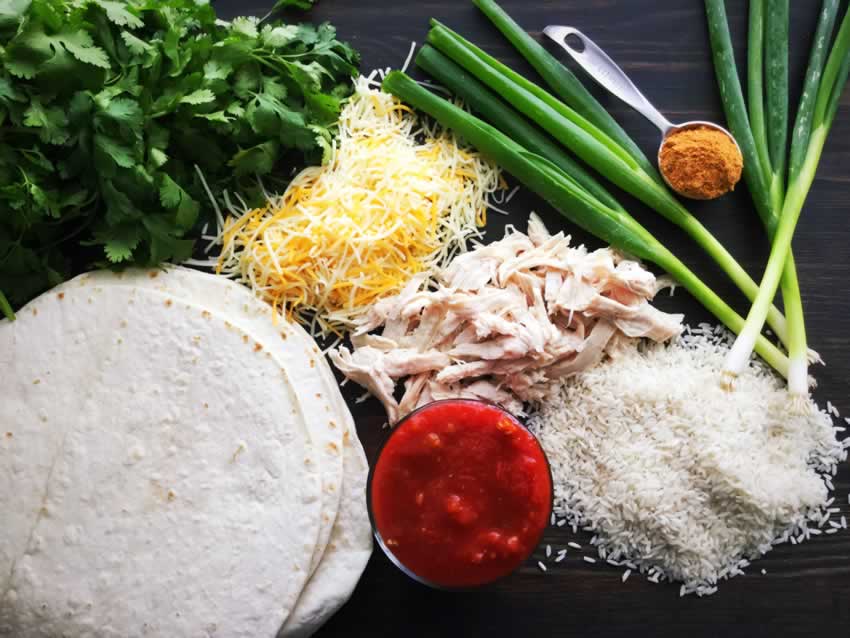
Chicken and Rice Burrito Ingredients
Shredded chicken, rice, scallions, taco seasoning, shredded cheese, cilantro, and flour tortillas

The Process

There are 2 parts to this recipe: cooking the chicken then cooking the rest of the ingredients. I usually make everything at once, but you can cook and shred the chicken a day or two ahead of time. Just be sure to store it in an air-tight container so it doesn’t dry out. I’ll usually cook it on a Sunday if I plan to serve my chicken and rice burritos the following Monday or Tuesday.

  1. Bring a large pot of water to a rolling boil. Add the chicken breast and boil until fully cooked, about 20 minutes. Using 2 forks, shred the cooked chicken and set aside.
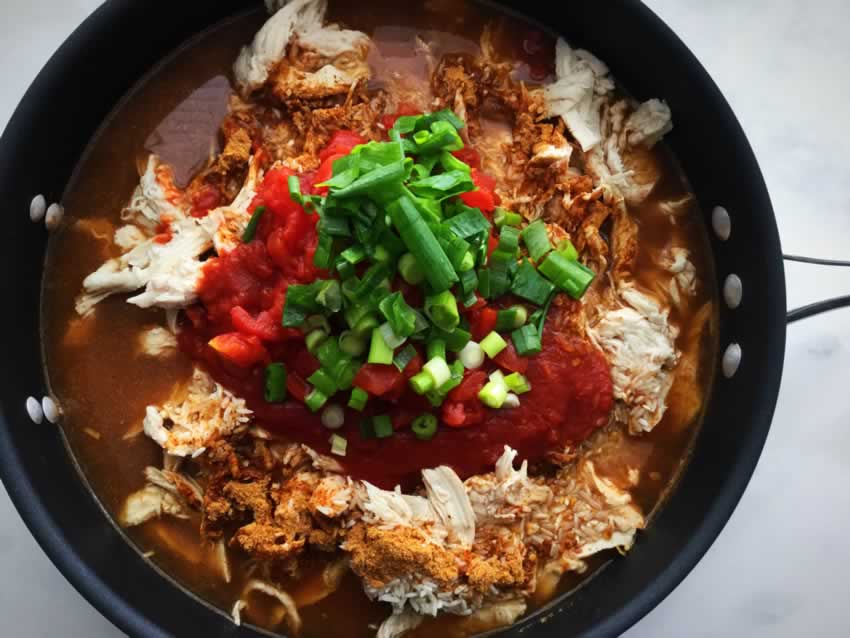
  2. In a large skillet, add the shredded chicken, rice, water, taco seasoning, tomato sauce, diced tomatoes, and scallions*. Stir to combine and bring to a boil. Cover, reduce heat to low and simmer for 20 minutes. Remove from heat and stir again.
  3. Add approximately 1/2 cup filling to each tortilla and toppings you like, then roll burrito style.

* If you prefer a stronger onion taste, add the scallions after the filling is cooked.

Cooking the filling
Cooking the filling
Chicken and Rice Burritos

Chicken and Rice Burritos

The Hungry Pinner
Chicken and rice burritos is a dish my husband asks for over and over. I love it because it's easy and we can top it with anything we like. Don't have salsa, sour cream or cheese? Have a picky eater who doesn't like them? No worries! The toppings are delicious, but these burritos are still good without any toppings at all.
Prep Time 10 minutes
Cook Time 40 minutes
Total Time 50 minutes
Course Main Course
Cuisine Mexican
Servings 4

Ingredients
  

  • 1 whole chicken breast
  • ¾ cup long grain white rice uncooked
  • 1 ¾ cup water
  • 1 packet low sodium taco seasoning (about 1.5 ounces)
  • 8 ounce can of tomato sauce
  • 14 ½ ounce can of diced tomatoes drained
  • 2 scallions (green onions) white and green parts, chopped
  • 1 package large flour tortillas

Optional Toppings:

  • salsa
  • sour cream
  • shredded cheese
  • chopped cilantro
  • hot sauce

Instructions
 

  • Bring a large pot of water to a rolling boil. Add the chicken breast and boil until fully cooked, about 20 minutes. Using 2 forks, shred the cooked chicken and set aside.
  • In a large skillet, add the shredded chicken, rice, water, taco seasoning, tomato sauce, diced tomatoes, and scallions*. Stir to combine and bring to a boil. Cover, reduce heat to low and simmer for 20 minutes. Remove from heat and stir again.
  • Add approximately 1/2 cup filling to each tortilla and toppings you like, then roll burrito style.

Notes

* If you prefer a stronger onion taste, add the scallions after the filling is cooked.
Make-ahead Tip: The chicken breast can be boiled and shredded a day or two in advance. Be sure to store it in an air-tight container so it doesn't dry out.

Grilled Butternut Squash, Zucchini and Steak with Chimichurri Sauce

Recipes that are all-in-one meals are the best! They make meal planning so easy since you don’t have to worry about what sides to pair with your main course. One-pot recipes are my favorite way to do this, but this style is a close second. And really, a couple of extra dishes to wash isn’t that bad. This Grilled Butternut Squash, Zucchini and Steak with Chimichurri Sauce is an all-in-one meal that needs more than one pan, but I’m okay with that.

A simple chimichurri sauce transforms already tasty grilled butternut squash, zucchini and steak into a truly delicious but quick and easy meal.

Recipe Author: Caroline at Caroline’s Cooking
Get the recipe

The Ingredients

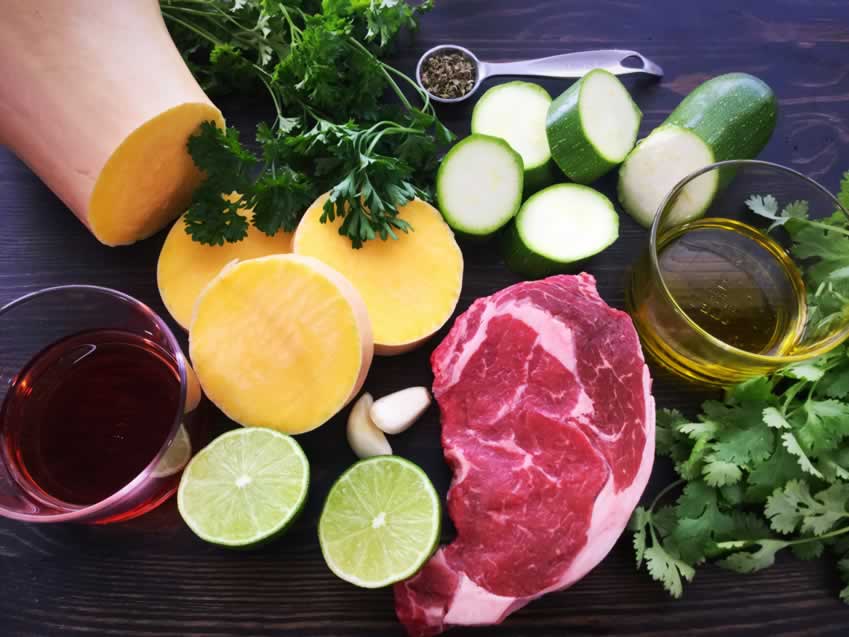
A nice steak, fresh vegetables, and herbs make a pretty picture and a delicious meal! I opted for ribeye steaks instead of strip steaks. The NY strip steaks were much bigger and seemed like they would be too much food for one serving. The ribeye steaks turned out to be a good size, and my husband and I were both full by the end of the meal.

Grilled Butternut Squash, Zucchini and Steak with Chimichurri Sauce Ingredients

The Process

This recipe was very easy to make since I had my husband on hand to grill everything. I had everything prepped in 10 minutes. Cooking took the 15 minutes specified, including pre-cooking the squash in the microwave for 6 minutes. I whipped up the chimichurri sauce while everything was grilling, and we had a gorgeous meal made very quickly!

Did I mention how easy this meal was? It’s so perfect for those nights when you feel too tired to cook but you’re still hungry and tired of takeout.

Two things my husband, the grill master LOL, recommends for grilling vegetables are a grill basket and a set of tongs. The grill pan keeps vegetables from falling through the grating, and the tongs make them easy to turn. I bought the grill pan a few years ago, and we use it a lot more than I initially expected. Just like meat, grilled vegetables are delicious too 🙂

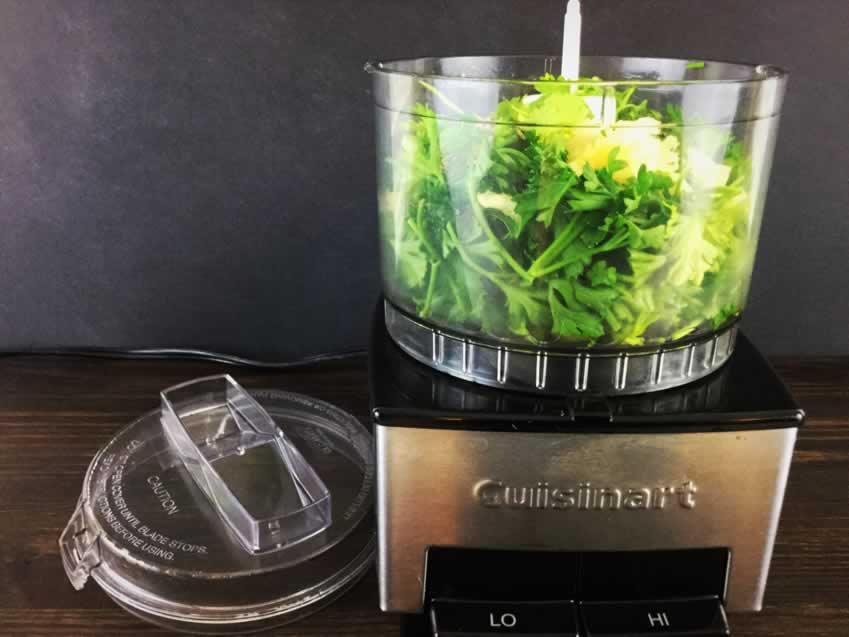
Chimichurri in Mini Prep
Chimichurri in my [eafl id="7831" name="mini-prep" text="mini-prep"]

Tiramisu Martini

I mentioned I don’t have a huge sweet tooth in my last post, and that cheesecake is my favorite dessert. Tiramisu is a close second. Very close! And if both are on the menu? That’s a damn difficult decision to make! Mental note: I need to find a restaurant that has tiramisu cheesecake on the menu. But until then I have this tiramisu martini…

I was looking for something different to make the other night and I came across a recipe for Tiramisu Martinis. Clearly, this would be the one to catch my eye because it is coffee-flavored. So I mixed it up and it came out really tasty!

Recipe Author: Mo at A Cup of Mo
Get the recipe

The Ingredients

Four types of liquor, cream, and ice. Not a ton of ingredients, but kind of a lot for a cocktail. At least for me. Fortunately, I was able to find smaller bottles of the Bailey’s, amaretto and Kahlua. I don’t drink sweet liqueurs that often, so the 375ml size worked out perfectly for me. And I’m sure I can find recipes to use the vanilla vodka. Perhaps another tiramisu martini (darn it all!).

Tiramisu Martini Ingredients

The Process

What can I say? My tiramisu martini was really easy to make. I had my glass garnished and my cocktail shaken and poured in 2 1/2 minutes. And it turned out to be a very pretty drink if I do say so myself.

The chocolate syrup garnish was a first for me. The recipe does say to rim the glass with the syrup, but the author’s photo showed it drizzled in the glass. I decided to go that route since actually rimming the glass seemed like it might drip. This garnish was even easier, too, since all I had to do was squirt the syrup into the glass while I turned the stem.