Home Blog Page 56

Tandoori Salmon

I love Indian food, and tandoori chicken has always been a favorite of mine. I think it’s because it’s one of the first Indian dishes I learned how to cook. I’m always on the lookout for new things to try, and tandoori salmon sounds too good to resist. It will get me out of my rut of poached salmon, and I get to try a new tandoori dish. That’s a win-win!

This salmon is an easy crowd-pleaser and makes a quick week night dinner for the family and guests! I roasted a few potatoes and added the salmon on the same pan when the potatoes were almost done, so it’s an easy clean-up as well. Bonus!

Recipe Author: Priya McHugh at Little Kitchen. Big World!
Get the recipe

The Ingredients

Salmon can be splurgy, but I do try to watch my budget. Although wild is considered the best, I normally buy farmed salmon because it’s half the price. In this case, that’s $11.99 per pound versus $20.99 per pound. Honestly, I don’t think I would be able to tell the difference if I had them side-by-side. My biggest concern is how fresh it is and that there are no bones.

Although the author does link to her tandoori masala recipe, I opted to use my regular brand, Rajah tandoori masala. Her recipe sounds easier than most because it doesn’t require you to roast then grind any of the spices. However, I had ready-made on hand, and it’s just easier. It also adds a bright coloring to the fish because it contains red food color.

One last thing, don’t forget to add cilantro and red onion to your grocery list when you shop for this recipe. They are mentioned as garnishes in the description, but neither appears in the list of ingredients. I was lucky and had cilantro on hand, but no red onion.
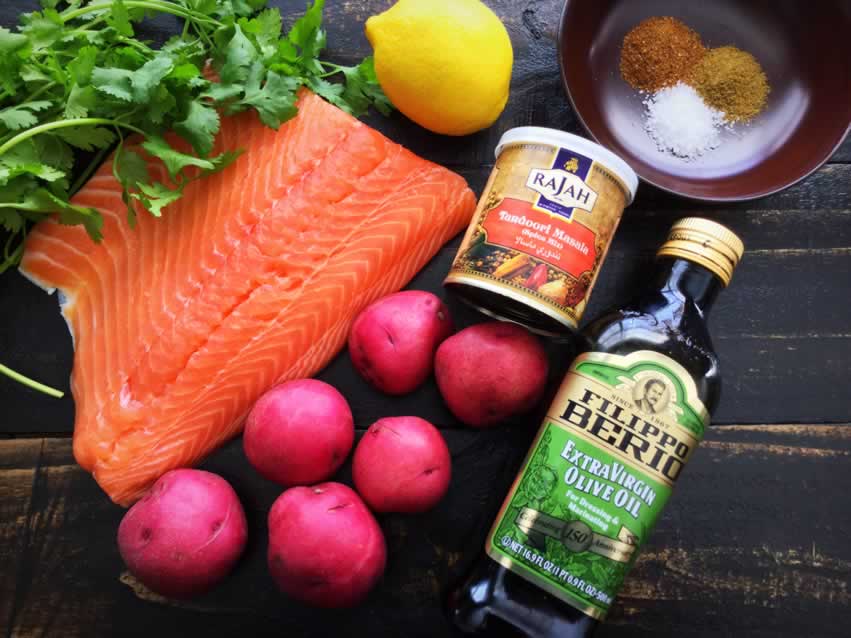
Tandoori Salmon Ingredients
Salmon fillet, cilantro, lemon, tandoori masala, cumin, salt, garam masala, olive oil and potatoes

The Process

The first part of this recipe is marinating the salmon. It’s just a matter of making a very simple paste of tandoori masala, salt, and olive oil, then spreading it over the fish. That took just 3 minutes, quick enough that you could do it in the morning before work. The recipe specifies marinating the salmon for “at least 1 hour,” so I figured the longer the better and marinated my fillet for 4 hours.

The second part is prepping the remaining ingredients and cooking everything. I used quartered new potatoes for my dish. They were very easy to prep and season, and I had them in the oven within a few minutes. I was able to finish the rest of the prep work–chopping the cilantro and slicing the lemon– while they cooked.

The total time to prep and cook my tandoori salmon came in at 44 minutes. Pretty darn close to the time listed. I did notice the lemon slices and potatoes weren’t getting brown, so I decided to put the skillet under the broiler for a few minutes. I think it was the perfect way to crisp the potatoes.

If you decide to do this, set your oven racks up in advance. Trust me, it will make things much easier! Put one rack 1-2 notches below the broiler, and the other just below the middle. It will save you from having to reposition very hot racks and keep the oven temperature from dropping whole you are repositioning them.
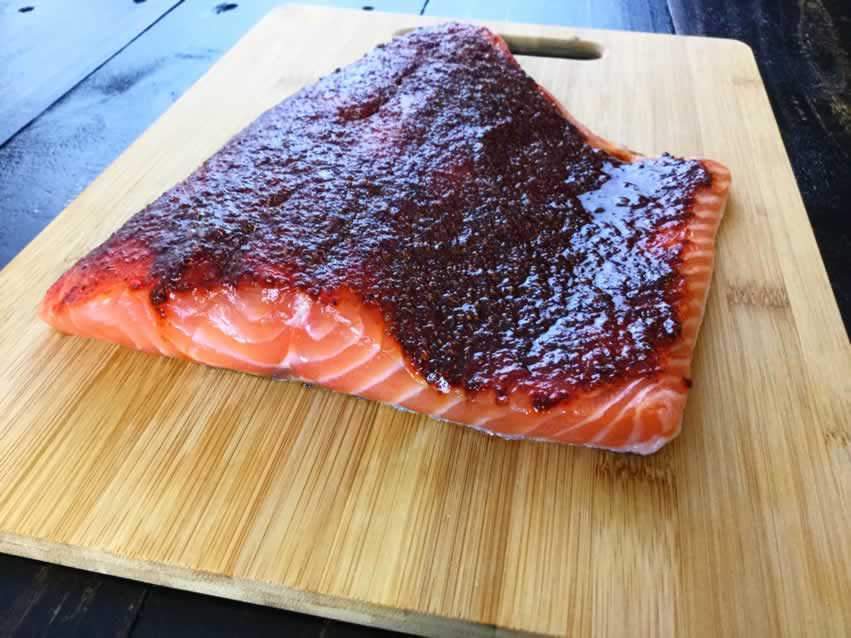
Marinating the salmon
Marinating the salmon in the olive oil/tandoori masala paste

Vanilla Italian Cream Soda

14

This week’s Italian theme must come to an end, and I wanted to go out on a sweet note. Vanilla Italian Cream Soda seems like the perfect way to do that. And it involves cherries and whipped cream. How can anything that has those two ingredients be bad??!!

This post was originally published on December 15, 2017. The text and photos were updated on August 14, 2021. The review and rating have not been changed.

This cross between creamy vanilla ice cream and fizzy soda is the perfect sip when you want a sweet treat.

Recipe Author: Liz Fourez at Love Grows Wild
Get the recipe

The Ingredients

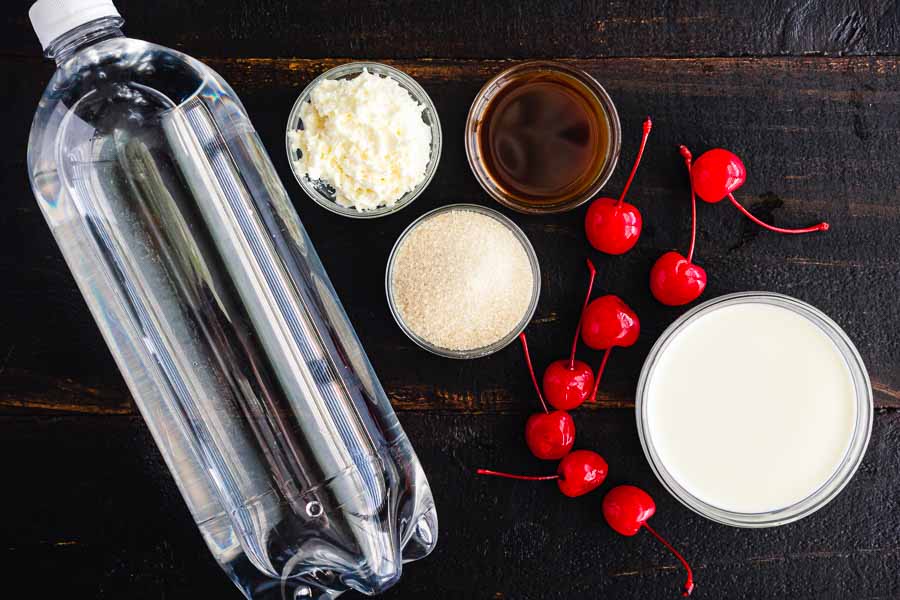
Another recipe with a short list of ingredients—always a plus in my book! I had everything on hand except the half-and-half and whipped cream. Yup, I had maraschino cherries waiting for me to use them in something yummy. Glad I checked before I went shopping!

Vanilla Italian Cream Soda Ingredients
Sparkling water, whipped cream, sugar, vanilla extract, maraschino cherries, and half and half

The Process

My cream soda was mixed, poured, and garnished in 3 minutes. Well, 2 were poured and garnished with cherries. The rest was waiting patiently in the pitcher.

The ingredients include optional whipped cream, and I ended up not using it. The sparkling water and half and half foam up a lot when you first mix them together. The foam lasted through pouring the sodas into the mugs, and it looked like whipped cream.

This recipe has two main parts, making the vanilla simple syrup and making the Italian sodas. It’s still amazingly easy to do, garnish and all. If you want to make it even easier, you can buy plain simple syrup and add vanilla extract. Buying vanilla simple syrup would be even easier, but I’ve never been able to find it.

Want to make an adult version? Easy! Just add a shot of vanilla vodka to each glass, then top with the cream soda and garnish. But I will warn you that it’s not easy to taste the alcohol, so sip slowly.

Chocolate Tiramisu

2

Last month I posted a review for a Tiramisu Martini that was just divine. But I haven’t been able to get the real thing off my mind since. I thought this recipe for chocolate tiramisu would fit in with this week’s somewhat Italian theme. It started off with carbonara with a twist and continues with tiramisu with a chocolate twist.

My friend Kim’s recipe for authentic tiramisu with a chocolate twist. Creamy, chocolaty and delicious!

Recipe Author: Renee at Renee’s Kitchen Adventures
Get the recipe

The Ingredients

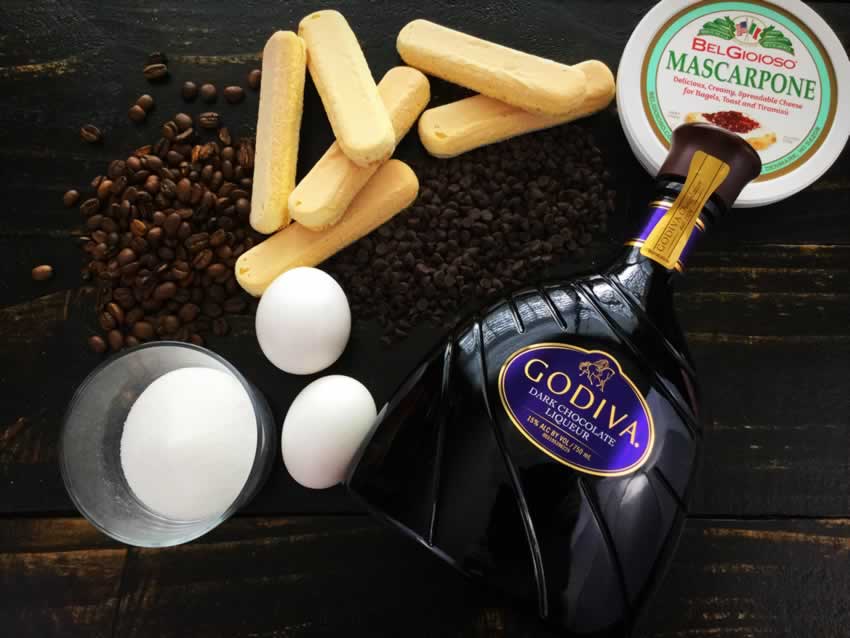
This recipe involved 2 stores: the grocery and liquor store, and it was a little pricey. First stop was the liquor store for the chocolate liqueur. I went to a smaller shop that’s close to home, and they didn’t have a huge selection. In fact, Godiva was the only chocolate liqueur they stocked, and they didn’t have a mini. I had to buy a full-size bottle for just over $30. I wasn’t too disappointed, though, since I have plenty left over to use in other recipes.

The next priciest item was the mascarpone cheese. Two containers were just under $10, and I needed 1 1/2 for my chocolate tiramisu. I have no idea what I’m going to do with the leftovers, but I’m sure I’ll find something. It’s too good to let it go to waste.

Chocolate Tiramisu Ingredients
Coffee, ladyfingers (savoiardi), mascarpone cheese, chocolate liqueur, semi-sweet chocolate chips, eggs and sugar

The Process

Apparently, tiramisu is a no-bake dessert that can be made in 30 minutes. I had no clue, or I would have been making it years ago! The directions for this recipe were very clear and easy to follow. It did take me 10 minutes longer than the time listed to prepare it, but I was being very careful.

The “work” with this dish is brewing coffee and using an electric mixer. You might be able to make it without the mixer, but I wouldn’t recommend it. Beating the egg whites alone (step 2) took 4 minutes.

As far as the coffee goes, I’m glad I brewed a little extra. I ran out halfway through soaking the ladyfingers for the second layer, and I had to add a touch more. It may have been because I dipped each one then flipped it so both sides were wet. My dip-and-flip was very fast, but the cookies sure absorbed the coffee-liqueur mixture quickly.

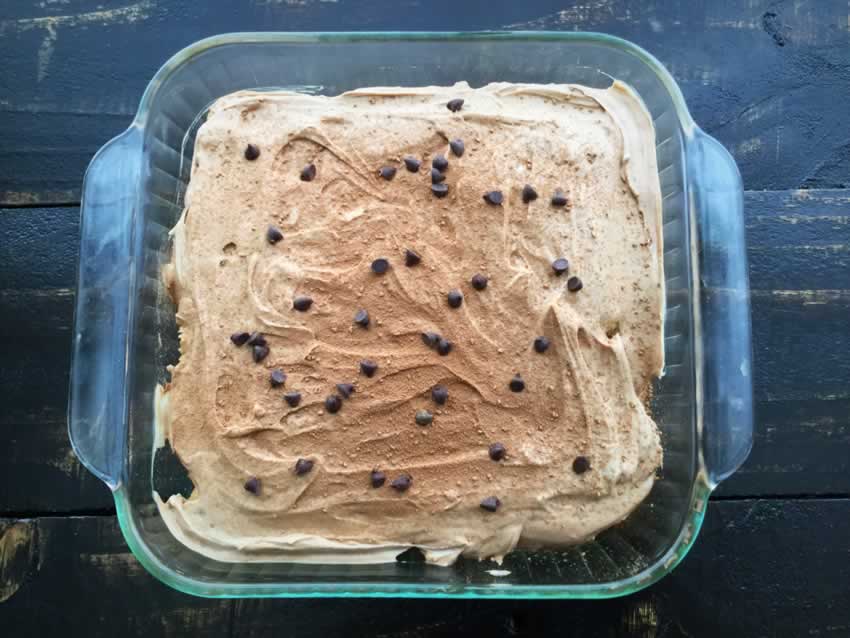
Chocolate Tiramisu

Fancy “Beer Can” Chicken

My father-in-law is an avid hunter and loves the outdoors. He took the family out to dinner at Outdoor World, and we ended up wandering through the store afterward. I couldn’t believe the size of the place or the breadth of their merchandise. Of course, I quickly found the cooking section and spent a good while marveling at all the gear they had for grilling.

That’s how I found the Sittin' Chicken Steamer, and boy do I love it! I had never heard of beer can chicken before that shopping trip, but it sounded like a genius idea. I love cooking with beer, so I picked up a Sittin’ Chicken, and it makes the best chicken!

The Ingredients

There’s not a whole lot to this recipe, and I did that on purpose. It’s also very flexible and allows for some experimentation. You can rub it with another seasoning, switch out the thyme for another herb, change the wine to beer, change the lemon to a lime, etc. This is a good way to use up any extra herbs you have lying around. Here are my favorite seasonings:

  • 6 garlic cloves, lightly crushed
  • 1 lemon, juiced and rinds cut into eighths
  • 1 cup white wine
  • 7-10 sprigs fresh thyme
  • 1 4-5 lb chicken
  • 2 tbsp olive oil
  • 1 tbsp seasoned salt, or to taste
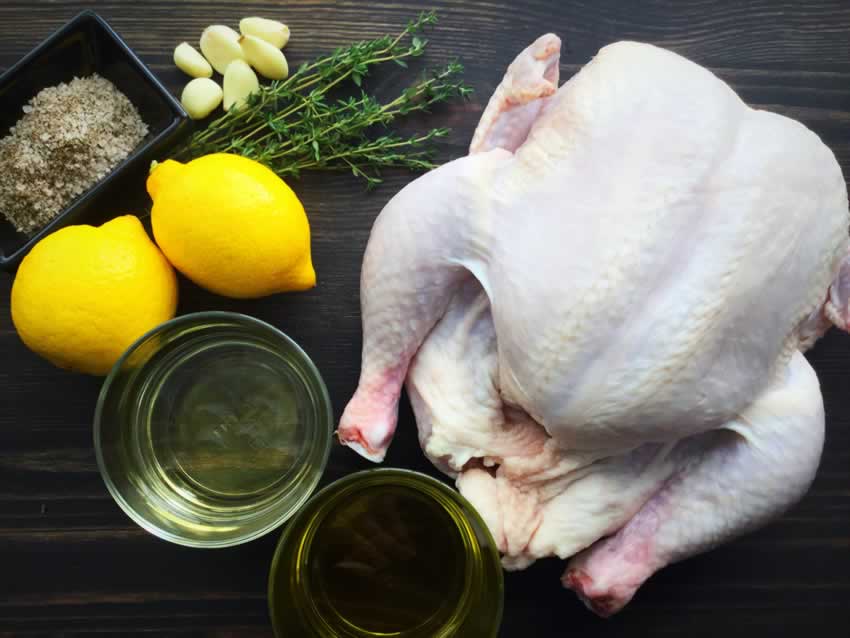
Fancy "Beer Can" Chicken Ingredients
Whole chicken, olive oil, white wine, lemon, seasoned salt, garlic, and thyme

The Process

Prepping this dish is very quick and easy. I love it because the chicken always comes out so juicy it falls off the bone, plus it’s infused with all the delicious flavors of the ingredients in the Sittin’ Chicken Steamer.

  1. Preheat oven or grill to 275℉.
  2. Add garlic, lemon juice, lemon rind pieces, wine, and thyme to Sittin' Chicken. Place Sittin’ Chicken in a shallow baking dish.
  3. Remove giblets and discard, rinse chicken, and pat dry. Rub outside of the chicken and Sittin’ Chicken with olive oil. Sprinkle chicken with seasoned salt, tuck wings, and place on Sittin’ Chicken.
  4. Bake for 30-35 minutes per pound. Remove from oven and allow the chicken to rest for 5-10 minutes before removing from Sittin’ Chicken and carving.

Notes

It’s optional, but you can tie the legs together with some butcher's twine. I find it makes for a neater presentation.

Although I use a Sittin’ Chicken Steamer, it’s not required. You can always use a beer can if you don’t have one. I prefer the Sittin’ Chicken because it has a wide base that makes it stable and less likely to tip over.

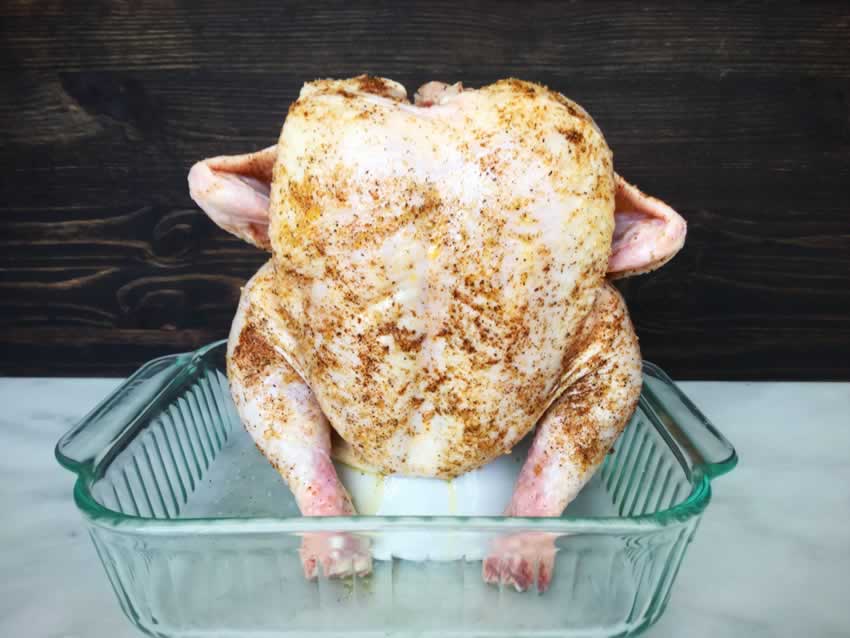
My lovely seasoned chicken atop its Sittin' Chicken Steamer
My lovely seasoned chicken atop its Sittin’ Chicken Steamer
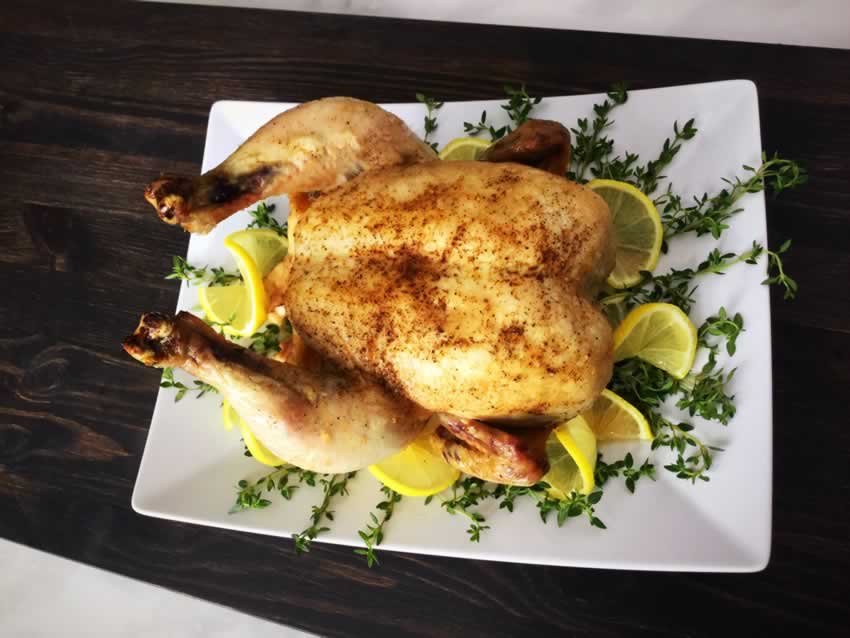
Fancy "Beer Can" Chicken

Fancy "Beer Can" Chicken

The Hungry Pinner
Elevate your beer can chicken using white wine, garlic, and fresh herbs.
Prep Time 10 minutes
Cook Time 3 hours 5 minutes
Total Time 3 hours 15 minutes
Course Main Course
Cuisine American
Servings 4

Ingredients
  

  • 6 garlic cloves lightly crushed
  • 1 lemon juiced and rinds cut into eighths
  • 1 cup white wine
  • 7-10 sprigs fresh thyme
  • 1 whole chicken (4-5 pounds)
  • 2 tbsp olive oil
  • 1 tbsp seasoned salt or to taste

Instructions
 

  • Preheat oven or grill to 275℉.
  • Add garlic, lemon juice, lemon rind pieces, wine and thyme to Sittin' Chicken. Place Sittin' Chicken in a shallow baking dish.
  • Remove giblets and discard, rinse chicken, and pat dry. Rub outside of the chicken and Sittin' Chicken with olive oil. Sprinkle chicken with seasoned salt, tuck wings, and place on Sittin' Chicken.
  • Bake for 30-35 minutes per pound. Remove from oven and allow the chicken to rest for 5-10 minutes before removing from Sittin' Chicken and carving.

Notes

It's optional, but you can tie the legs together with some butcher's twine. I find it makes for a neater presentation.
Although I use a Sittin' Chicken Steamer, it's not required. You can always use a beer can if you don't have one. I prefer the Sittin' Chicken because has a wide base that makes it stable and less likely to tip over.

Garlic and Herb Roasted Cherry Tomato Carbonara with Crispy Prosciutto and Burrata

I love carbonara. Pasta, cheese, and bacon in a creamy sauce. How good does that sound? This recipe caught my eye because the super long title has all kinds of things I love as well as a new one: burrata. I’ve seen burrata cheese all over Pinterest and had no idea what it was. But it looks like a creamy cheese, so odds are it’s delicious. Let’s hope because it’s on the menu this week!

I know that carbonara is typically all about the parmesan, but hey, isn’t two cheeses always better than just one? I think so. And it’s burrata, which you can just never go wrong with because it works with basically every food out there.

Recipe Author: Tieghan at Half Baked Harvest
Get the recipe

The Ingredients

My local Publix had everything I needed for this recipe, but this isn’t a cheap meal. I had the olive oil, salt, and pepper on hand. The remaining ingredients were just over $43. Nope, that’s not a typo. The priciest items were the burrata at $10.99, the tomatoes at $7.98, and the prosciutto at $5.99. Here’s how the costs broke down:

  • Burrata $10.99
  • Dill $2.99
  • Eggs $1.65
  • Garlic $0.63
  • Heavy Cream $2.29
  • Oregano $2.29
  • Parmesan $3.99
  • Parsley $1.29
  • Prosciutto $5.99
  • Tagliatelle Pasta $4.99
  • Tomatoes $7.98

I did get 5 meals out of this recipe, though, at a cost of $8.60 each. Not too bad considering what it would have cost at a restaurant. I also had leftovers of all the ingredients except the prosciutto, tagliatelle, and tomatoes. (The egg, herbs, and burrata sure made a delicious omelet!)

The burrata might just have been my favorite part of this recipe. I was beyond delighted when I read the label and found out exactly what it is. If you don’t know, it’s fresh mozzarella balls that encase a mixture of unpulled (creamy) mozzarella mixed with cream. Trust me, it tastes even better than it sounds. Bonus for the fact that you can tear apart the outer casing after you squeeze out the creamy filling and add both to your meal.

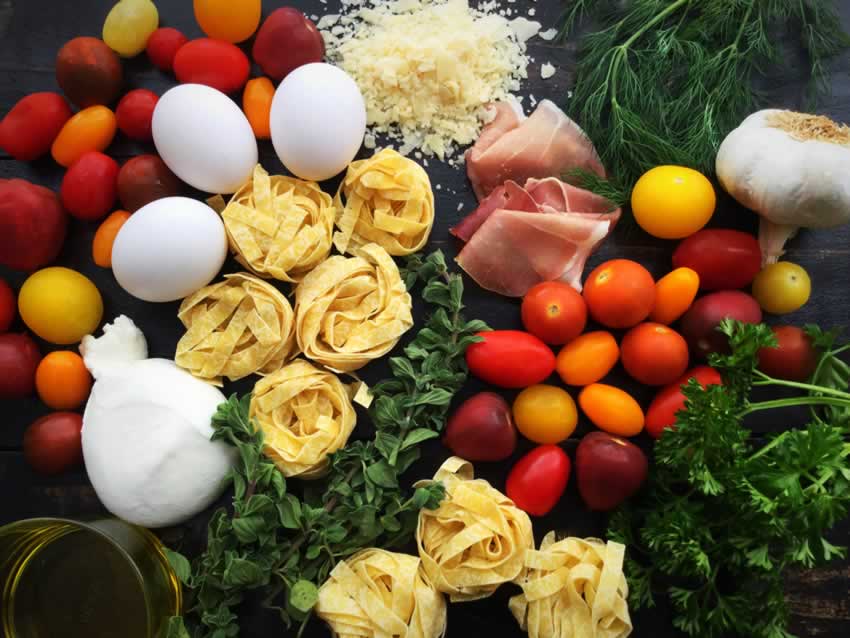
Garlic and Herb Roasted Cherry Tomato Carbonara with Crispy Prosciutto and Burrata Ingredients
Heirloom cherry tomatoes, egg, parmesan cheese, prosciutto, dill, garlic, parsley, tagliatelle pasta, oregano, olive oil, and burrata

The Process

My carbonara took a total of 35 minutes. Prep time was as listed, 10 minutes, but the tomatoes took longer than the 15 minutes listed. I roasted them in a Pyrex baking dish placed on the middle rack of my oven. They had not collapsed after 10 minutes, so I kept adding 5-minute intervals. The skins were splitting, and a few had started to collapse at the 25 minutes mark, and I decided that was done enough.

They didn’t look like the author’s photos, but the pasta and sauce had been ready for a while so I called it. Next time (and there will be a next time for this recipe) I’ll try a metal pan and maybe a lower position for the shelf. I have a feeling the pyrex was really the issue.

Otherwise, the recipe was very easy to follow, and I had no trouble at all making it. The only mystery was what to do with the crushed red pepper flakes. The ingredients list a pinch of them, but the instructions left them out. I ended up skipping them, but I’m going to guess they were to be added as a topping along with the chopped herbs.

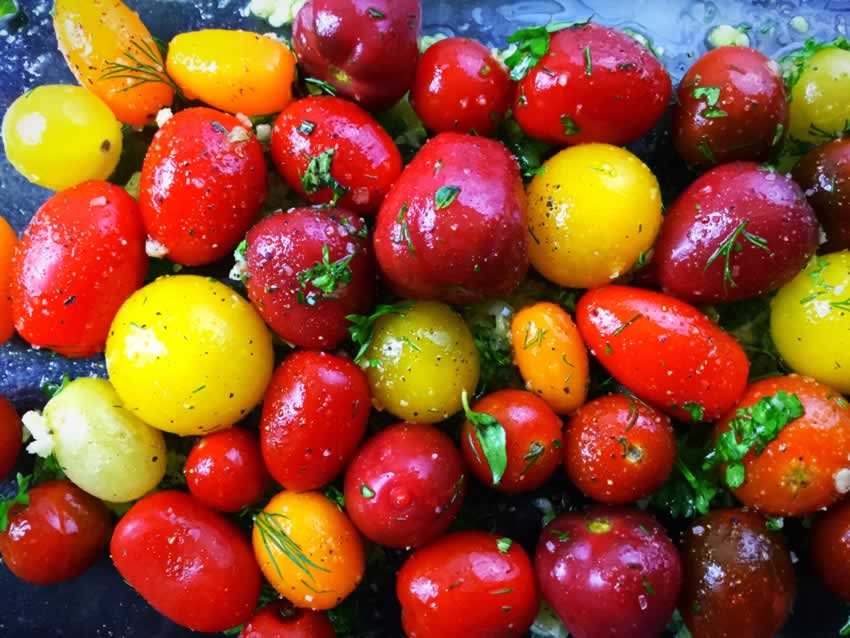
Heirloom tomatoes, garlic and fresh herbs tossed in olive oil
Heirloom tomatoes, garlic, and fresh herbs tossed in olive oil

Amaretto-Cranberry Kiss

0

It’s not a complete menu without a cocktail, and the Amaretto-Cranberry Kiss fits right in with my cranberry theme. Amaretto has such a wonderful taste and scent, and I’m looking forward to trying the cocktail. It looks so festive, and the authors’ description made it sound absolutely yummy!

This post was originally published on December 8, 2017. The text and photos were updated on August 8, 2021. The review and rating have not been changed.

The tang of the cranberry juice is balanced by the smoothness of the amaretto and vodka.

Recipe Author: Meredeth Deeds and Carla Snyder Bon Appétit, December 2007 via Epicurious
Get the recipe

The Ingredients

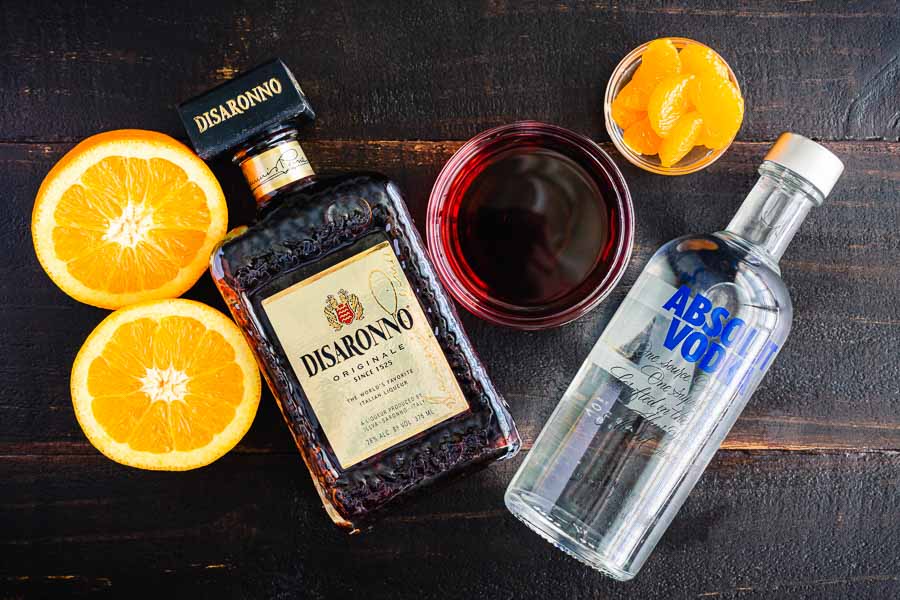
The majority of ingredients for this recipe were easy to find. Amaretto and vodka can be found at most any liquor store. And cranberry juice cocktail is something that every grocery store carries.

The one thing I had trouble with was the clementines for the garnish. However, I was able to find canned mandarin orange segments, so I went with those. They’re pretty much the same thing—clementines are a hybrid between a mandarin orange and a sweet orange. Plus no peeling was required with the canned segments, so I was sold! All I had to do was open the can and drain the juice.

Amaretto-Cranberry Kiss Ingredients
Orange juice, amaretto, cranberry juice cocktail, mandarin orange sections (substituted for clementine segments), and vodka

The Process

This is a quick and easy way to make a lot of cocktails. Just add all the ingredients to a pitcher, give them a quick stir, and use a shaker to make the cocktails two at a time. Love it!

I had a pitcher of 8 cocktails made in 3 minutes. It only took me a minute to shake and garnish 2 cocktails. At that rate, I could have had all 8 Amaretto-Cranberry Kiss cocktails made in less than 10 minutes. Easy peasy, and so perfect for holiday get-togethers.

Amaretto-Cranberry Kiss

Maple Cranberry Pecan Pie

0

Since my Christmas menu is cranberry themed this year, I couldn’t pass up this recipe for Maple Cranberry Pecan Pie. It sounded so good, and it would be another first for me. I’ve made apple pies, but I’ve never made pecan pie before. I’ve been in the room while one was being made (I once had a roommate who was an awesome baker), and I know it can be difficult to get the filling to set. So not only do I get to try something new, but I also have a challenge on my hands. Wish me luck!

We’ve mashed up two of our favorite holiday dishes to come up with this Pecan Cranberry Pie. It’s sweetened mostly with maple syrup for the perfect sweet finish. Wonderful with vanilla bean ice cream!

Recipe Author: The Team at The Adventure Bite
Get the recipe

The Ingredients

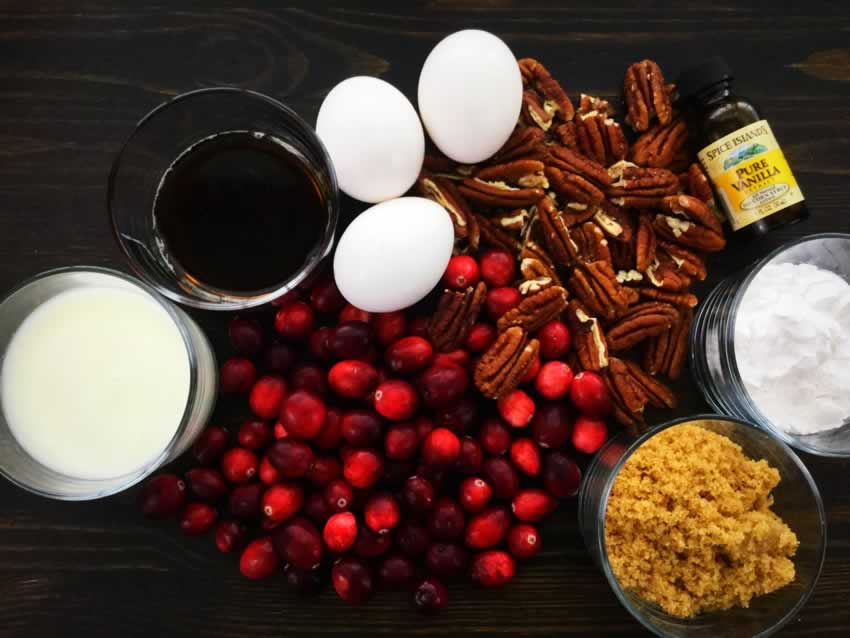
Everything for the crust and filling was pretty standard, and I didn’t have trouble finding anything. Nor were any of the ingredients unusually expensive. It did take me a few minutes to find the tapioca on the shelf, but that’s just one of the perils of grocery shopping.

Maple Cranberry Pecan Pie Ingredients
Cranberries, buttermilk, maple syrup, eggs, pecans, vanilla extract, tapioca, and brown sugar

The Equipment

I’ve noticed desserts seem to need more specialized equipment than I’m used to. Here’s what you’ll need to make the crust and filling for your maple cranberry pecan pie:

The Process

This is really 2 recipes in one: The crust and the filling.

Making the Crust

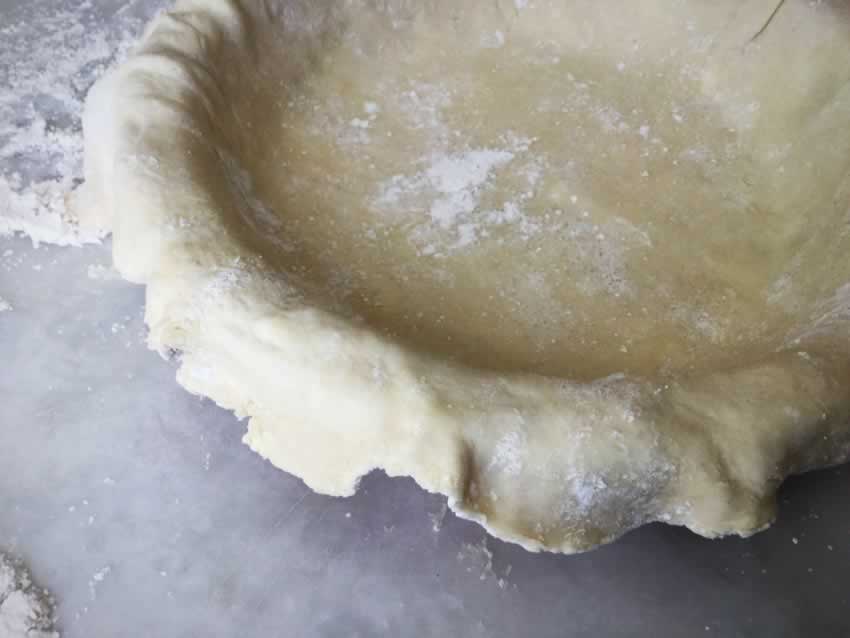
One thing I hate is making pie crust. It takes me at least 2 tries to get it into the pan, and it’s usually not very pretty. However, I have to say this was the easiest pie crust I have ever made. The instructions were so thorough and easy to follow. The crust was very easy to work with, and I had it rolled out and into the pie pan on the first try. I’m pretty sure that’s never happened before.

I was able to follow the instructions up until they said to roll out the dough on a flour sack (Step 7). I have no idea what that is or where to get one. Instead, I added a generous layer of flour to a marble bakers table (a gift from my lovely mother-in-law). Here’s how my time broke down for making the crust:

  • 12 minutes to make the dough
  • 30 minutes to refrigerate the dough
  • 11 minutes to roll out and line the pie pan
  • 15 minutes to refrigerate
  • 68 minutes total (23 active, 45 inactive)

I got started on the filling while the crust was being refrigerated the 2nd time for 15 minutes. Things went very smoothly for the filling until I realized there is no mention of when or how to use the pecan halves. I’ve never made a pecan pie before, so I googled a couple of recipes. Based on what I found and the author’s photo, I decided to add them at the same time as the chopped pecans instead of using them as a topping.

Making the pie crust

Making the Filling

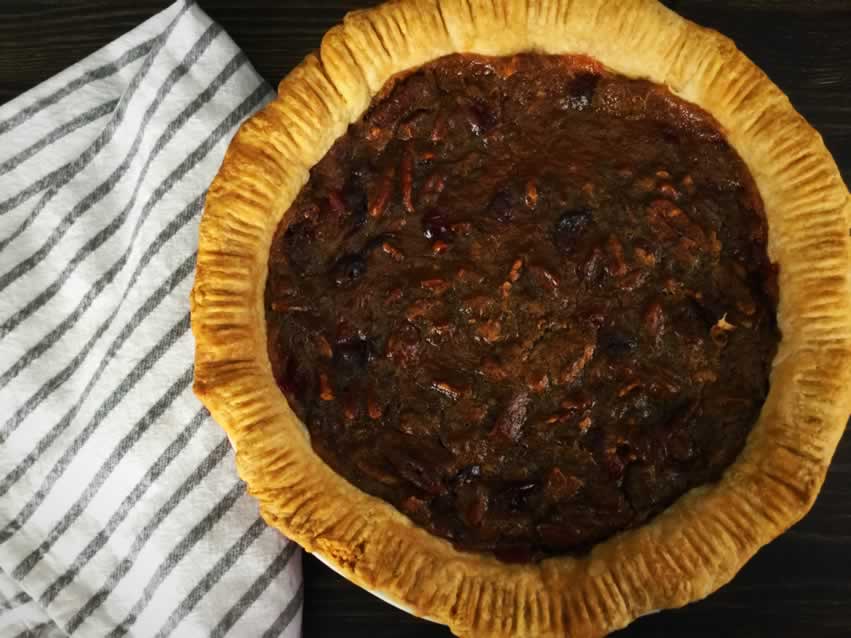
From there all I had to do was bake the pie. I started at 35 minutes, but that wasn’t enough. I added 10 minutes since the center was nowhere near firm and ended up baking it for the full 50 minutes listed. The filling wasn’t totally firm when I took it out and f the oven, but it firmed up nicely while the pie cooled.

Total time on this recipe (or recipes since there are 2) was 1 hour 58 minutes. That includes making the crust, time to refrigerate it, making the filling, and baking the pie. The recipe also called for a minimum of 5 hours to cool. I let the pie cool on the countertop for a good hour, then I covered it with aluminum foil and refrigerated it. I’d recommend making your maple cranberry pecan pie the day before you plan to serve it.

Maple Cranberry Pecan Pie
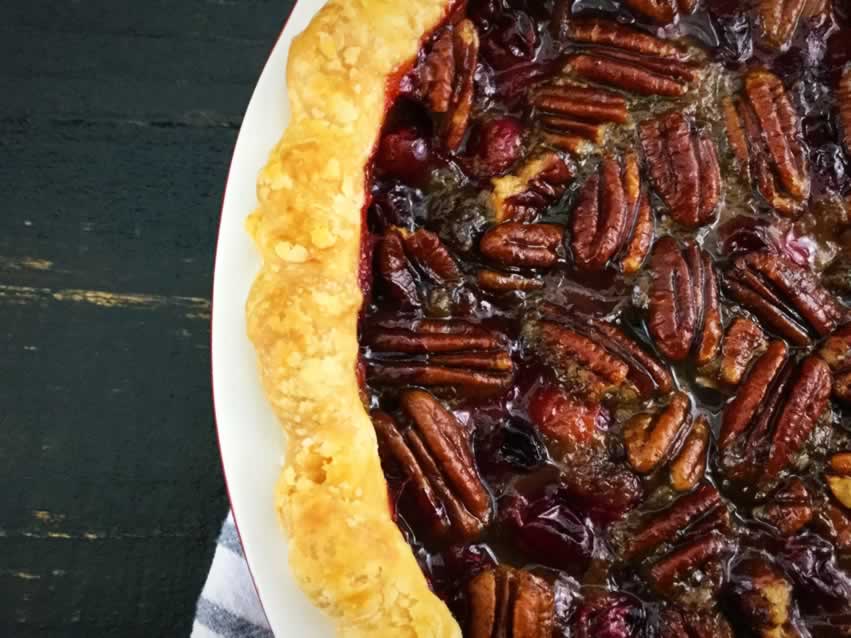
The finished maple cranberry pecan pie as it cools

My Second Try

I really wanted to give this pie another shot since A) I had a second batch of crust in the freezer, B) I wanted mine to look as pretty as the author’s picture, and C) it was just that darn good! This time I didn’t mix the pecan halves into the filling. Instead, I placed them on top of the filling once I had poured it into the crust. Voila! I think my second pie is way closer to the author’s beautiful picture.

Maple Cranberry Pecan Pie
My second pie

Bacon Cranberry Baked Brie

This baked brie recipe caught my eye for a few reasons:

  • I needed an appetizer for my Christmas menu
  • It has cranberries, my menu theme this year
  • It’s fast and easy
  • It has bacon

Not that I don’t like brie cheese or any of the other ingredients, but BACON! I’m a sucker for the stuff. And I really like brie cheese. I know, neither is exactly healthy, but this is a special occasion.

This may be my most favorite baked brie ever. I wanted something sweet and salty and bacon makes everything better, right? Plus, the creamy melted cheese with the crispy bacon and the chewy dried cranberries was everything I look for in a baked brie. I could’ve stood over this, smearing it on top of crackers, until it was gone.

Recipe Author: Amanda at Fake Ginger
Get the recipe

The Ingredients

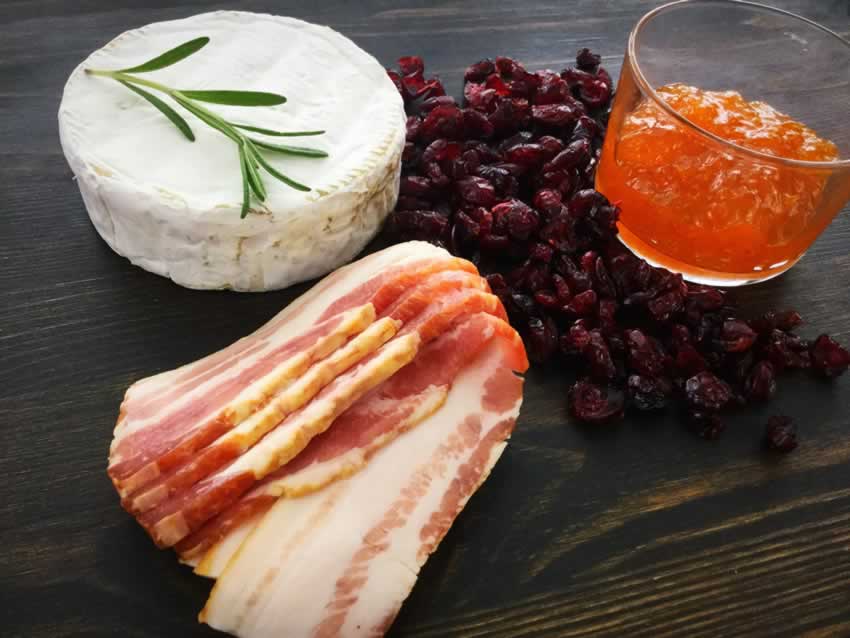
As you can see, there aren’t a ton of ingredients that go into this dish. The post for this recipe was sponsored by Aldi, so the author used their brand in the recipe. Don’t worry if you don’t have a local Aldi, though, because I was able to find everything at my local Publix. I’m sure you will be able to do the same at your local grocery store.

Bacon Cranberry Baked Brie Ingredients
Brie cheese, rosemary, dried cranberries, apricot preserves, and bacon

The Process

This appetizer was super easy to make. I had it prepped in 14 minutes, and it cooked in 10, for a total time of 24 minutes. I bought chopped pecans, so the only “work” was chopping the rosemary. It was pretty fast and only took 2 sprigs. The rest was a little mixing, topping the cheese, and popping it into the oven.

Once you take the baked brie out of the oven, you will need to handle it very carefully. I used a very large spatula coated in cooking spray to lift it off the baking sheet and place it onto the serving platter. It worked like a charm, and I didn’t break the rind on the cheese.

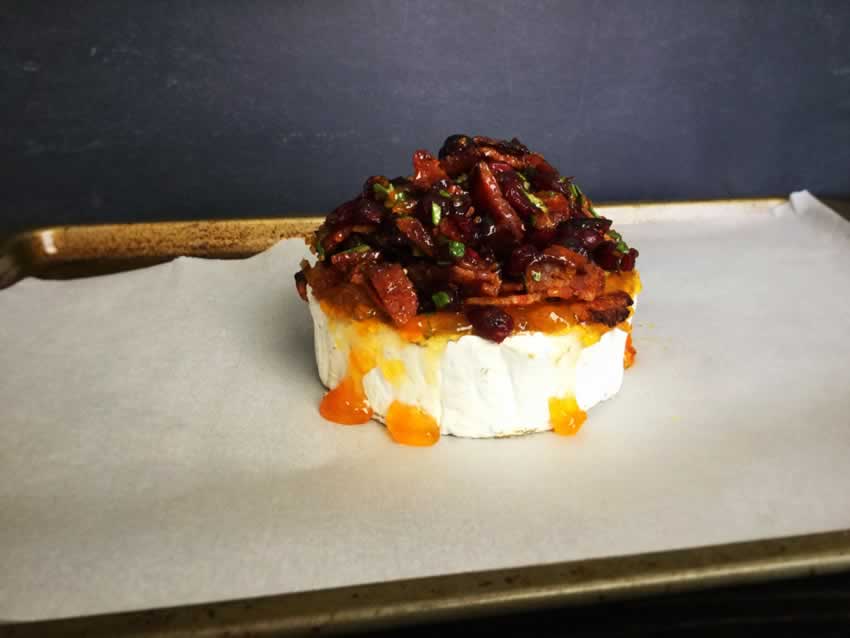
Brie cheese on a baking sheet
Just before baking

To Serve

I served this dish with Triscuit Cracked Pepper & Olive Oil crackers and sliced apples. The crackers brought out the savory flavors of the cheese and bacon. They also added a salty flavor and a touch of heat from the pepper. The apples were the opposite and brought out the sweet flavors of the dried cranberries and apricot preserves. I loved both.

Stuffed Acorn Squash

0

Although the author says she makes this every Thanksgiving, I just had to put it on this year’s Christmas menu. Not only does it keep with my cranberry theme, but it’s another first since I’ve never made or eaten acorn squash before. I do love new things, and I’ve never had a squash dish I didn’t like, so here goes!

This particular acorn squash creation graces our table each Thanksgiving. The filling made of fresh apples, soft pecans, and tart dried cranberries drizzled with sweet maple syrup bake just long enough for the flavors to infuse the squash and produce the most delicious and filling side dish.

Recipe Author: Sammi at Grounded & Surrounded
Get the recipe

The Ingredients

I have to say this was an easy recipe to shop for. Nothing was difficult to find or unusually expensive. I thought about substituting brown sugar for the coconut sugar, but I’m glad I didn’t. Coconut sugar has a richer taste than brown sugar that’s worth trying. It reminds me of toffee and it’s so good in my morning coffee. Horizons have been expanded 🙂

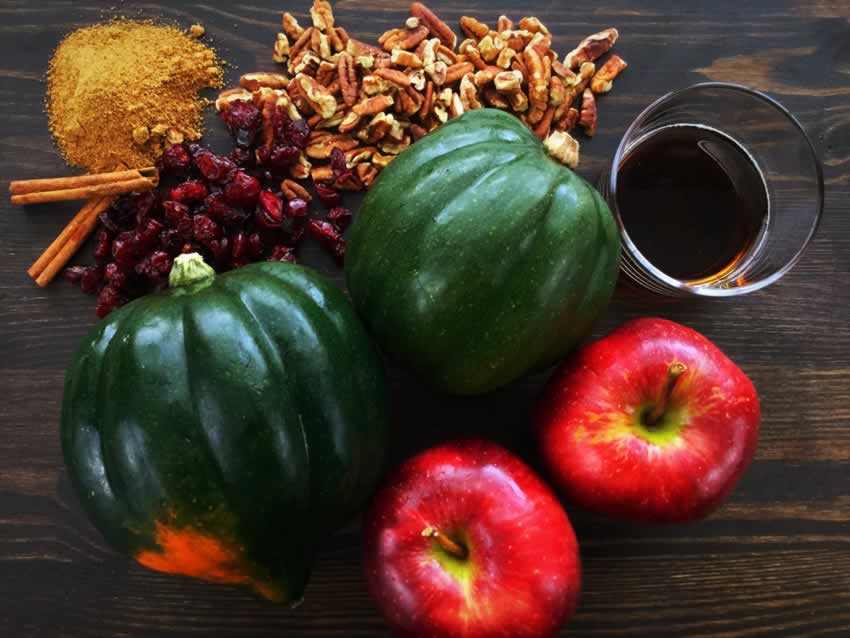
Stuffed Acorn Squash Ingredients
Acorn squash, dried cranberries, cinnamon, coconut sugar, chopped pecans, maple syrup, and apples

The Process

I read through the comments on this post and picked up a great tip to make cutting the acorn squash easier. The author advised microwaving it for 3 minutes to soften it a little. It helped, but be careful when you take them out of the microwave because they get very hot.

While I was microwaving then letting the squash cool, I prepped the filling. It was pretty easy to put together. I thought I had more than I needed, but it just fit into the 4 halves when I packed it a bit. I’m glad I did because the filling settled a little during cooking.

As far as the times go, I had my stuffed acorn squash ready in 1 hour 15 minutes. Prepping it took 15 minutes instead of the 5-7 listed, but I did add the extra step of microwaving the squash. Cooking it only took 1 hour, so I was still within the total time. Works for me!

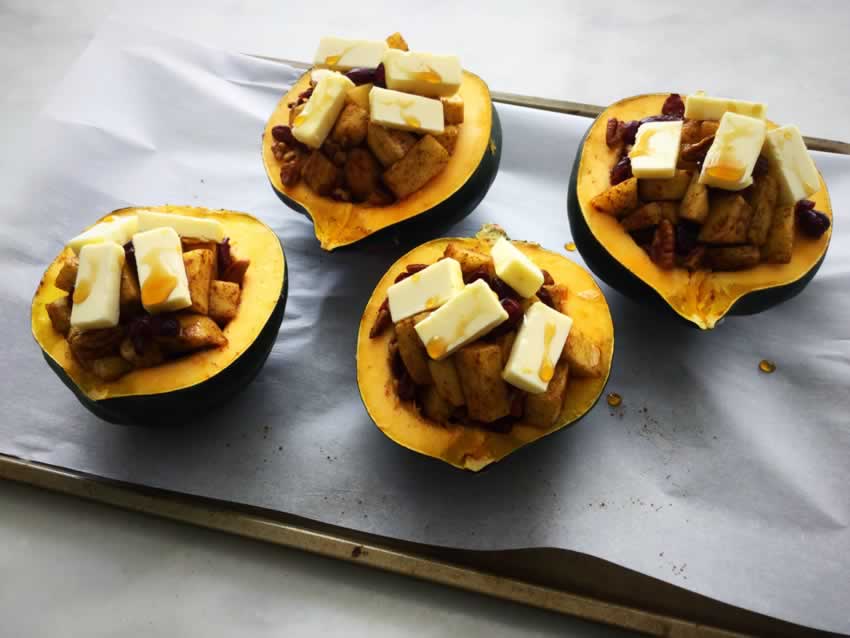
Stuffed acorn squash on a baking sheet
Just before going into the oven

To Serve

I served this dish with Oven-Roasted Cranberry-Dijon Glazed Ham. It was a sweet accompaniment to the savory ham.

Oven-Roasted Cranberry-Dijon Glazed Ham

Some things are a must for the holidays, and ham is definitely on that list. They’re such a great way to feed a big group, they make a beautiful presentation, they’re quicker and easier to make than turkey, and you still get awesome sandwiches from the leftovers. You can’t go wrong with a glazed ham in the center of your Christmas dinner table.

Ain’t nothin better than an oven-roasted glazed ham I say. This recipe uses fresh cranberries, meaning it’s perfect for the holiday season! I love the zing that the dijon mustard adds too. It’s super easy to throw together!

Recipe Author: Karen at The Food Charlatan
Get the recipe

The Ingredients

Although the recipe called for a 5-6 pound ham, the smallest I could find was closer to 8. And by closer, I mean 7.91 pounds close. It rang up to $28.40, but we’re talking about 20 servings. Not too bad when you do that math and realize it’s $1.42 a serving (not including the cost of the glaze ingredients).

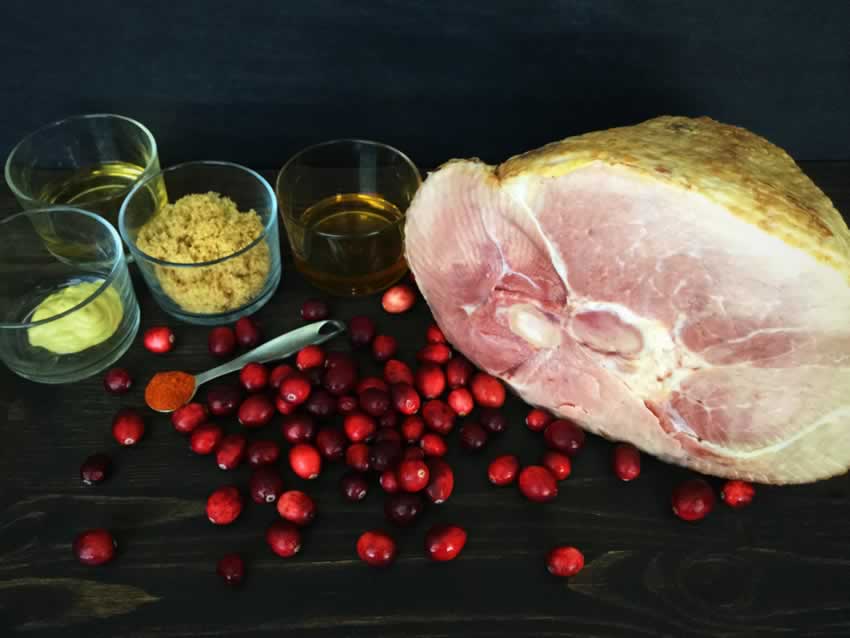
Oven-Roasted Cranberry-Dijon Glazed Ham Ingredients
Spiral sliced ham, cranberries, cayenne pepper, dijon mustard, apple cider vinegar, brown sugar, and honey

The Process

Making the glaze was straightforward, and the sounds of the popping cranberries was fun. (What can I say? I’m easily amused!). I cooked it for a total of 10 minutes then added it to the blender. It took me all of 17 minutes to make the glaze and get it onto the ham (step 8).

I was all set to bake my ham when I read the directions that came with it and had some doubts. The recipe calls for 20-25 minutes per pound at 325°F, but the ham’s directions listed 10-12 minutes per pound at 275℉. BIG difference! I decided to compromise and used the higher temperature and start with the lower time per pound since. Better to add more time than end up with dry ham.

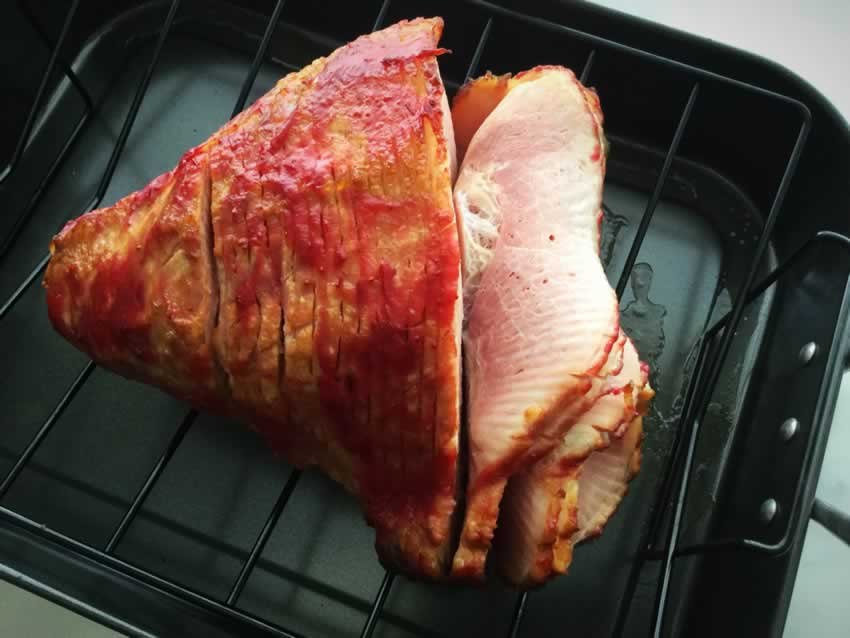
So into the oven went one glazed ham at 325°F for 1 hour 10 minutes. Unfortunately, the ham started falling apart after 20 minutes, as you can see in the picture below. At this point, I decided to take another cue from the directions that came with the ham. I removed the roasting rack and placed the ham flat side down in the roasting pan for the remainder of the cooking time.

I’m not sure if I had the ham positioned correctly to begin with. I assumed it was supposed to be horizontal, but it wasn’t specified in the directions (and no pictures). This was also my first time baking a ham, so it’s entirely possible I was wrong and should have had it vertical from the start. However, I did end up with a beautifully glazed ham that was nice and juicy, and that’s the most important part!

My ham started falling apart after baking for 20 minutes

Slow Cooker Mulled Wine (Holiday Version)

0

With all the cooking that happens from Thanksgiving through Christmas, it’s easy to forget drinks, whether they’re alcoholic or not. Let’s face it, the food is the center of attention for those few months, and with good reason. Gatherings of 8 people or more are pretty standard for my family, so making a drink for each person is a little tough. This mulled wine recipe caught my eye because it sounds like an easy way to please a crowd, and I’m imagining how good the house will smell while it simmers in my crockpot.

Slow Cooker Mulled Wine ~ this warming winter cocktail scents the whole house, and guests can help themselves! Let’s get this party started!

Recipe Author: Sue at The View from Great Island
Get the recipe

The Ingredients

There are two versions of this mulled wine. The author says she serves the main one for harvest festivals, which I took as fall holidays, especially Thanksgiving. She also included a holiday version, which is the one I decided to make. This version omits the clementines and adds cranberries, cranberry juice and rosemary with different garnishes. I had the brandy, vanilla beans, and some of the spices on hand, so the most expensive thing I had to buy for this recipe was a $10 bottle of cabernet sauvignon.

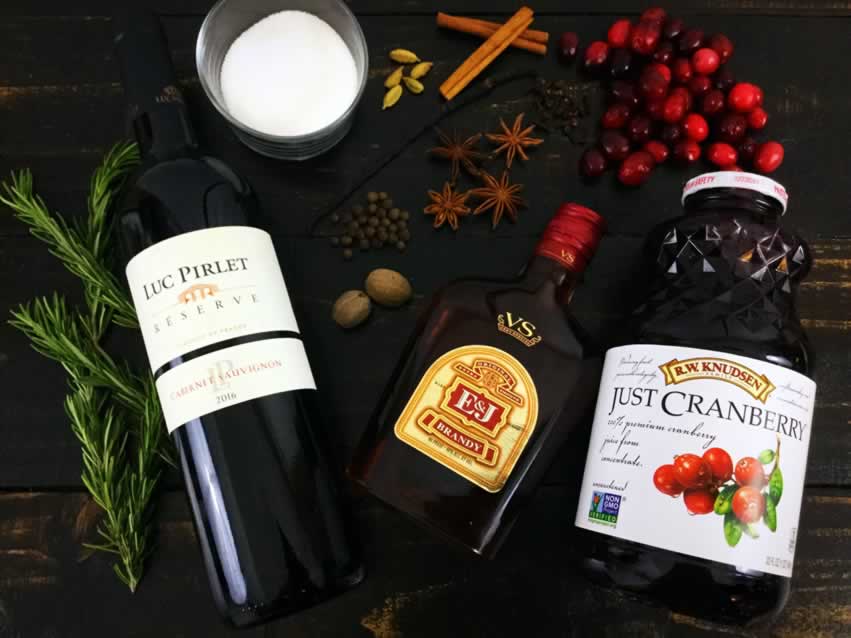
Slow Cooker Mulled Wine Ingredients
Red wine, brandy, cranberry juice, rosemary, sugar, nutmeg, allspice berries, vanilla, star anise, cardamom, cinnamon, cloves, and cranberries

The Process

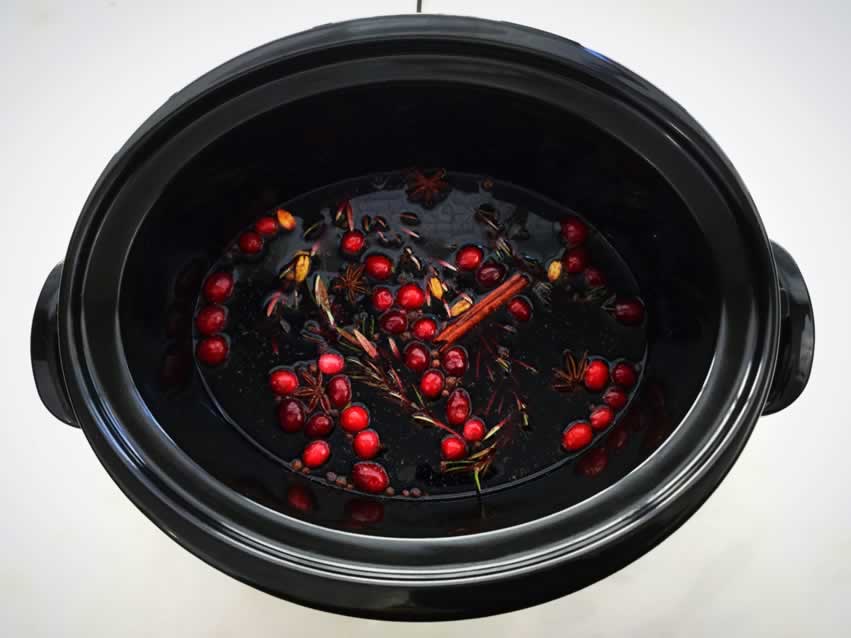
This mulled wine recipe was easy to make. I put the sugar and water into my crockpot then did my prep work. I measured the remaining ingredients and opened the bottle of wine. The sugar was mostly dissolved by then, so I added the other ingredients to the pot and waited for the mixture to start simmering.

I waited for a very long time. Simmering is just before the liquid starts to boil, and there are a few bubbles popping up. I didn’t think it would start bubbling quickly since crockpots are designed to cook at low temperatures, but it took waaaaay longer than I anticipated. The recipe doesn’t specify putting a lid on the pot, but I added it after about 30 minutes because I was getting impatient.

The mulled wine was warm, but I still hadn’t seen a single bubble even after 1 hour. I gave it 15 minutes more, then I gave up on simmering and switched over to warm for another 30 minutes. The mulled wine was nice and warm by that point, so I called it done.

Mulled wine in a crockpot

Crispy-Outside Creamy-Inside Garlic Herb Potatoes

0

What do you make with brisket and onions? My first instinct was latkes, but then I happened upon this yummy-sounding recipe for herb potatoes. It sounded a little healthier, like less work, and the name alone sounded so good. I couldn’t resist!

I know that the name of this side dish is on the brink of ridiculousness, but I could not, for the life of me, think of a way to describe them that gave them justice. They’re so flavorful from the chicken stock, herbs, and garlic, and they have that texture combination that makes you swoon– they’re perfectly crisp on the outside and soft on the inside and… well, they’re Crispy-Outside Creamy-Inside Garlic Herb Potatoes.

Recipe Author: Morgan at Host the Toast
Get the recipe

The Ingredients

I have never heard of baby Yukon gold potatoes, but I know the “adult” version is just delicious after making mashed potatoes with them for this past Thanksgiving. I was prepared to use baby red potatoes when I noticed honey gold potatoes. They are about the same size and looked like baby Yukon gold potatoes. I decided to give them a try, and I wasn’t disappointed.

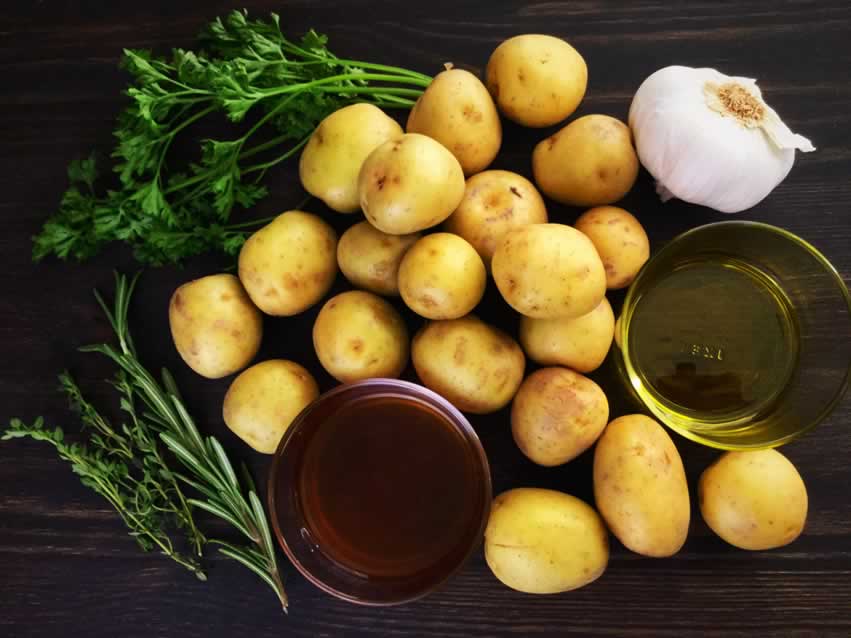
Crispy-Outside Creamy-Inside Garlic Herb Potatoes Recipe Review Ingredients
Honey gold potatoes, thyme, rosemary, parsley, garlic, olive oil and chicken broth

The Process

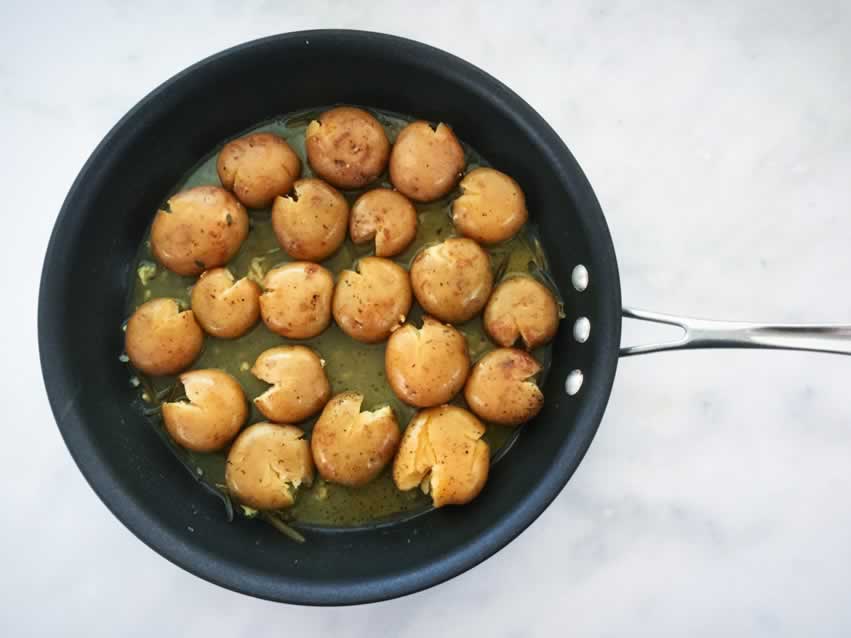
These herb potatoes were pretty easy to make, though I do have some tips. First, be careful if you use a measuring cup to press the potatoes. I used a metal one, and it heated up pretty fast. I switched to a meat mallet after a few potatoes, and it worked much better. Also, press gently. You’ll hear the skin split and feel the mallet sink a little when that happens. You don’t need much pressure.

Next, reduce the heat once the liquid evaporates in step 5. As you can see, I got a nice, crisp crust on mine by doing that. I think they would have been charcoal briquets if I hadn’t turned the heat down a bit.

After cooking for 20 minutes and pressing with a meat mallet
Step 4: After cooking for 20 minutes and pressing with a meat mallet