Home Blog Page 54

Easy Bacon Cheeseburger Soup

Let’s face it, grilled burgers are better than pan-fried, but who wants to grill outside in the cold winter? I know I can make a joke about living in south Florida right now, but that’s just mean. Fortunately, I have found a solution to the problem of craving a burger when you can’t grill: a bacon cheeseburger soup recipe. Sure, you have to skip the bun, onion, and lettuce, but you could always have a salad on the side. Just add croutons if you can’t go without the bread ?

This made about 6 good size bowls of soup! This soup is very filling and I couldn’t even finish a whole bowl.

Recipe Author: Jennifer at iSave A to Z
Get the recipe

The Ingredients

A lot of the ingredients for this soup recipe were either things I always keep on hand or leftovers from other recipes. That explains why I used sliced pickles instead of a whole dill pickle. I mainly use them for sandwiches and burgers, so I always buy pickles that are already sliced. It wasn’t difficult to approximate for this recipe, though. The only items I needed to buy were the ground beef, cream cheese, and heavy cream.

I did have a couple of questions after I read over the list of ingredients. The first was “ground red pepper”. The author, thankfully, had a picture of the ingredients on her blog, and it showed McCormick Red Pepper. A quick Google of that showed me a description of the product, and it’s another name for cayenne pepper, which I always have in my pantry.

The other item I was unsure of was “yellow mustard”. I think of the prepared condiment with burgers, but sometimes it can be powdered. The picture of the ingredients on the author’s blog saved me again–it’s the prepared condiment version for this recipe.
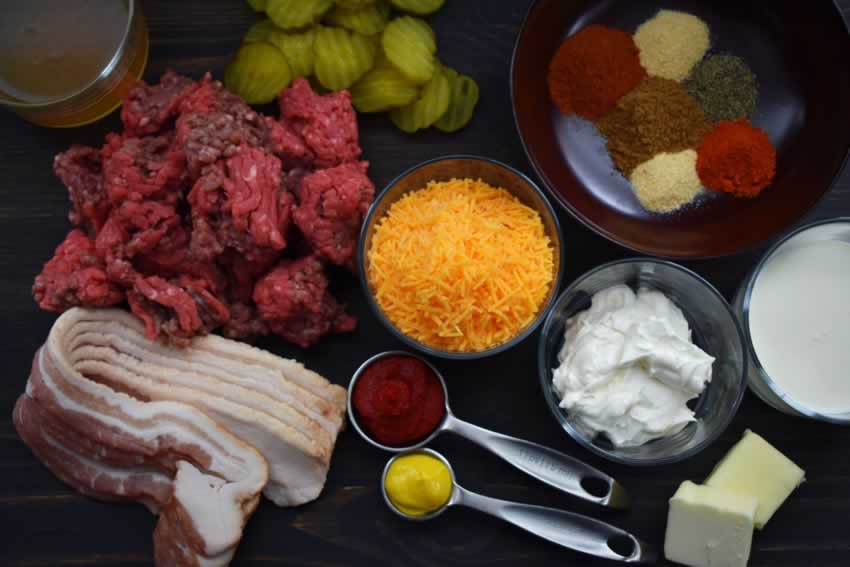
Easy Bacon Cheeseburger Soup Recipe Ingredients
Bacon, ground beef, dill pickles, garlic powder, onion powder, black pepper, red pepper, chili powder, cream cheese, butter, yellow mustard, tomato paste, and shredded cheddar cheese

The Process

This recipe is keto-friendly, but I’m not on the ketogenic diet because it’s high in fat. I still wanted to try this recipe because who doesn’t like bacon, cheeseburgers, and soup? But I did take a few steps to reduce some fat.

Pouring off most of the bacon grease after I fried the bacon was probably the biggest fat reducer. There was a lot since this recipe calls for 5 slices! (The author even suggests using bacon bits to speed things along, but they’re just not the same as real bacon.)

I also used 90/10 ground sirloin instead of the 80/20 that’s called for. I could have gone further with reduced-fat or fat-free cheeses and a lighter cream, but I didn’t want to risk affecting the taste too much on my first try.

The whole process took 20 minutes, just as listed. I put the bacon on to fry and did my prep work while it was cooking. And I have to say this bacon cheeseburger soup recipe is one of the quickest meals I’ve ever made. I was not looking forward to cooking the night I made it, and it was so nice to have a tasty meal that was fast and easy to make.

Browning the ground beef

Blueberry Basil Vodka Gimlet

One of my favorite drinks ever is a vodka gimlet. There are many versions of this cocktail. Some are as simple as vodka and Rose’s lime juice over ice, while others call for fresh lime juice, simple syrup, and even a splash of soda. This Blueberry Basil Vodka Gimlet recipe is pretty different from any version of a vodka gimlet I’ve tried, but I’m intrigued. I loved the Roasted Blueberry Basil Margaritas I made a while back, so I’m thinking there’s an excellent chance I’ll enjoy a similar vodka cocktail. Let’s find out!

This post was originally published on February 9, 2018. The text and photos were updated on July 18, 2021. The review and rating have not been changed.

With all the excess of fruit in the apartment, I’ve been finding non-dessert-like ways of incorporating it into my diet. I absolutely love fruit in salads and sauces (peach salsa!), but of course, I can’t ignore the fact that cocktails make the perfect vessels for truly capturing their essence.

Recipe Author: Linda at The Tart Tart
Get the recipe

The Ingredients

The ingredients for this Blueberry Basil Vodka Gimlet recipe were a little pricey because of the fresh blueberries and basil. However, it did make 2 1/4 cups of blueberry-basil simple syrup, so I feel it was worth it. The rest of the ingredients were pretty basic (sugar, lemons, club soda, and vodka) and not difficult to find.

Blueberry Basil Lemon Gimlet Ingredients
Vodka, basil, sugar, lemon juice, blueberries, and seltzer water

The Process

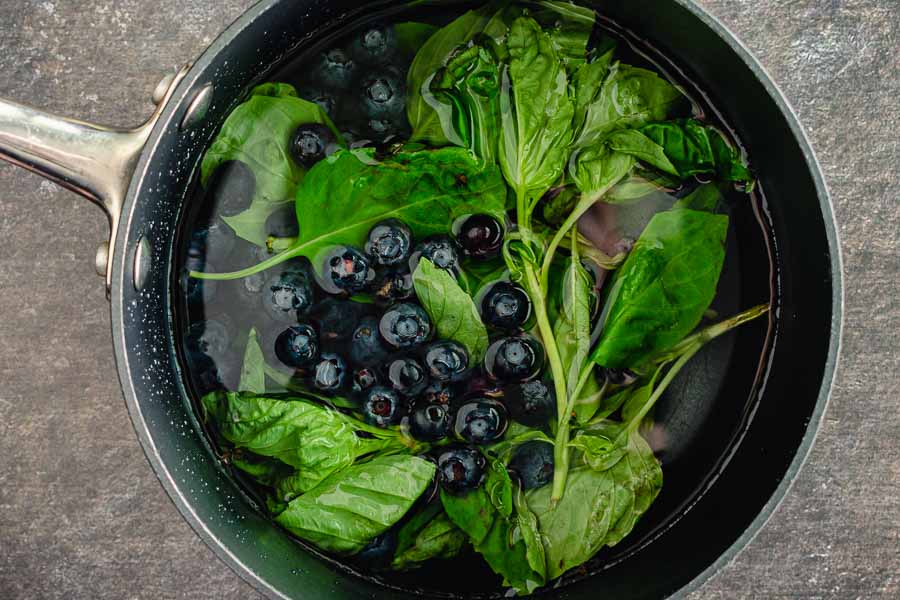
This vodka gimlet recipe is a little more complicated than a traditional gimlet, but the extra work is quick and simple. The first step is making the blueberry-basil infused simple syrup. It’s pretty much just like making plain simple syrup (a mixture of equal parts water and sugar heated until the sugar dissolves) with the addition of fresh blueberries and basil.

The mixture needs to simmer for 15 minutes and then be pressed through a mesh sieve. It only took me 22 minutes to make the syrup, then I popped it into the refrigerator to chill.

This recipe is for a pitcher of drinks, but I made mine one at a time. My husband doesn’t care for fruity drinks, and there’s no way I’m going to try drinking an entire pitcher of anything alcoholic by myself.

The ingredients are listed in parts instead of exact measurements, so scaling it down was easy. I just measured each part with a tablespoon instead of a measuring cup. That part took only 2 minutes, so the total active time on this was 24 minutes.

Just beginning to make the blueberry basil syrup

Best Italian Lemon Olive Oil Cake Recipe with Berries

0

I have wanted to make this olive oil cake ever since I saw it. The author’s pictures are so beautiful! Then I read her blog post and I had to make it. The filling/toppings sounded absolutely decadent. Mascarpone and ricotta cheese, whipped cream, lemon, blackberries, and blueberries. Aaaaahhhhh… However, I’m not the best baker, and I haven’t made a cake in a very long time. Like years. Okay, it’s been more than a decade since my last cake disaster. But those pictures and ingredients… Challenge accepted!

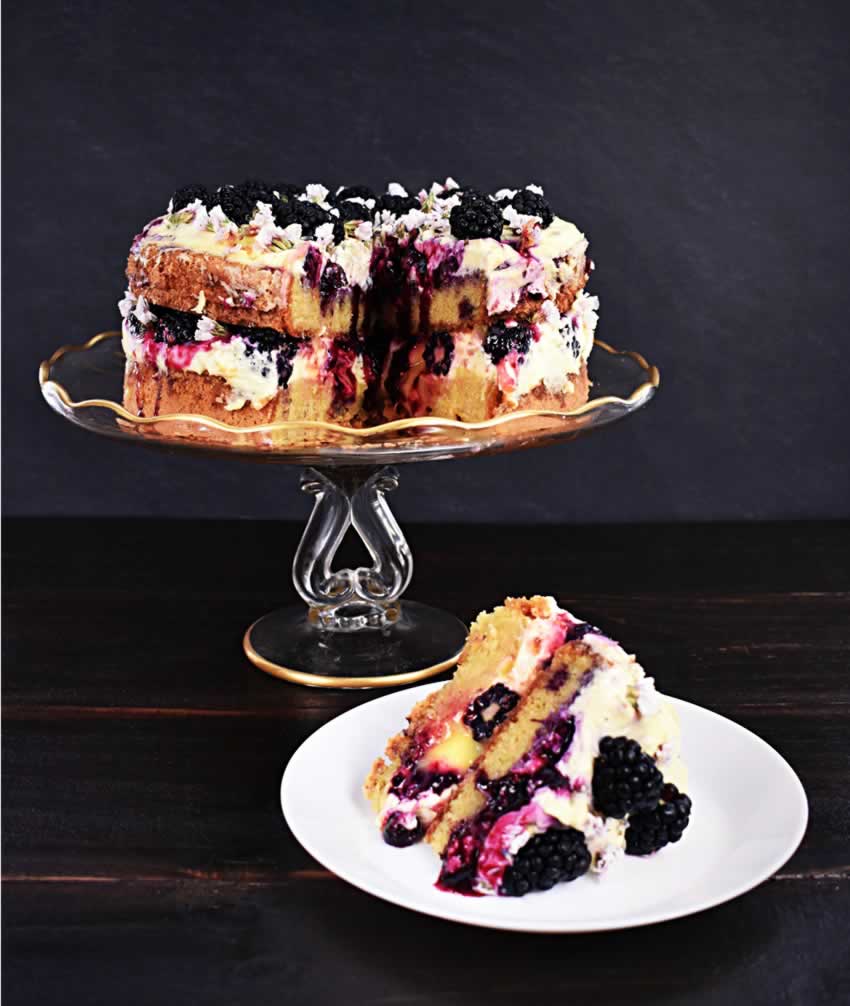
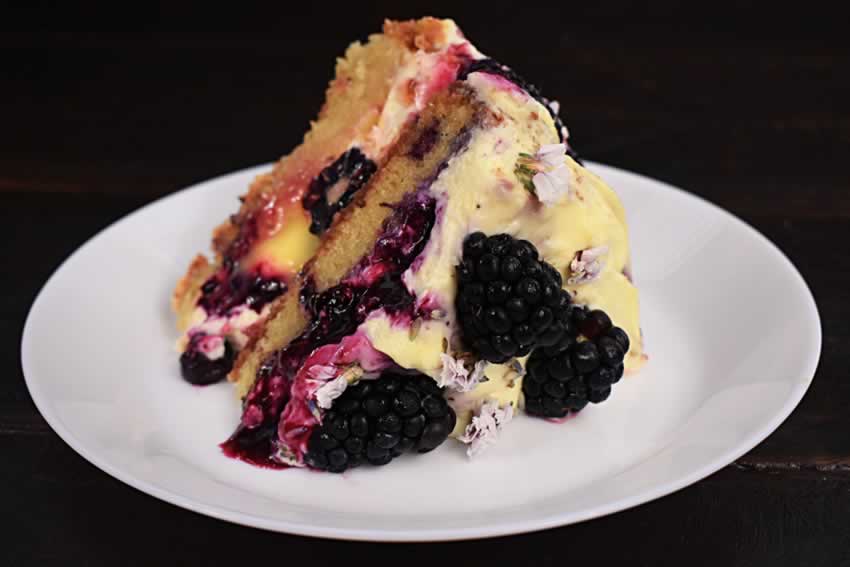
Italian lemon olive oil cake of your dreams, dressed festively with layers of whipped mascarpone cheese, lemon curd, a honey blueberry sauce and finished with fresh blackberries.

Recipe Author: Florentina at Ciao Florentina
Get the recipe

The Ingredients

The list of ingredients for this cake is, unsurprisingly, long. Fortunately, none of the ingredients were difficult to find. I didn’t have to special-order anything or make an extra trip to another store for anything. In fact, I had several of the items on hand, like the sugar, flour, olive oil, vanilla extract, honey, and butter. The fresh berries were a little pricey, but that didn’t surprise me. Frozen blueberries might have worked, but frozen blackberries wouldn’t have been the same. They’re too mushy, and they wouldn’t have made as pretty a topping.

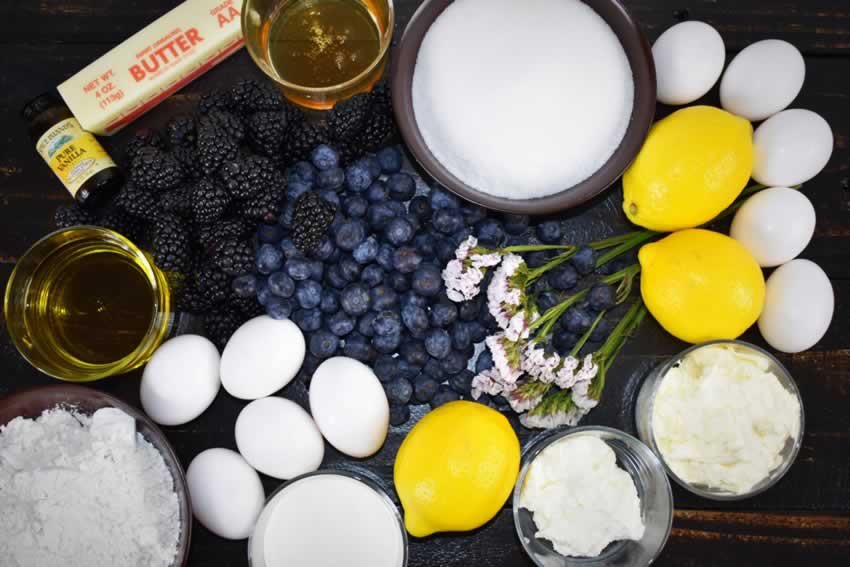
Best Italian Lemon Olive Oil Cake Recipe with Berries Ingredients
Blueberries, Blackberries, extra virgin olive oil, vanilla extract, butter, honey, sugar, eggs, lemons, mascarpone cheese, ricotta cheese, whipping cream, flour and baby’s breath flowers

The Process

If you’ve taken a look at this recipe, you won’t be surprised when I say it’s pretty involved. I spent a total of 4 hours 35 minutes making, assembling and decorating it. That includes 2 hours for the cake and sauces to cool. It’s probably not something you’ll want to make on a weeknight.

Overall, the instructions were pretty easy to follow. I did notice the order of the ingredients was different from the order the components of the cake need to be made in. That caused me a little bit of confusion as I had to hunt through the list to find the amounts I needed as I was making the olive oil cake and sauces.

I followed the instructions pretty closely and made the cake components in the order they were written with one exception: I decided it would be best to zest all the lemons first thing, and I’m glad I did. I think it made the process go more smoothly. Instead of stopping each time lemon zest was needed, I just had to pick up a dish of zest and add it to the bowl/pan.

Making the Cake

Most everything went according to the instructions except for the cake, and that might be my fault. The recipe calls for a 10-inch springform pan, but I only have a 9-inch pan. It was just tall enough to accommodate the cake batter rising in the oven, but I did have to bake it for an extra 10 minutes to get it to firm up (1 hour 10 minutes total). Also, be sure to place your springform pan on a baking sheet. Mine tends to leak a little around the joint, and the baking sheet prevented a mess in my oven.

Another slight departure from the instructions was how I leveled and then halved my cake’s layers. First I leveled the cake since there was a big dip in the center, then I cut it into layers. I pretty much used the method shown in this video with a slight exception. I took a serrated knife and scored the cake all the way around the line created by the toothpicks so the dental floss wouldn’t slip. The knife created a shallow channel for the floss, and I got perfectly even layers of olive oil cake.

Making the Mascarpone Cheese Filling

Another departure from the instructions was how I made my whipped cream. I don’t have a stand mixer, and my hand mixer was being used. Not a problem except for the fact that I I forgot to make the whipped cream before I started the mascarpone cheese filling it goes into. So I measured out the whipping cream, stirred in the sugar, then poured the mixture into a running food processor. I ended up with very thick whipped cream in just a minute or two.

Assembling the Cake

The instructions for assembling the cake were very easy to follow, and I ended up with a beautiful olive oil cake despite my limited baking skills. However, I did have some difficulty with the mascarpone filling. It’s a very thick mixture that’s spread directly over the much thinner lemon curd (bottom layer) and blueberry sauce (top layer). It took some patience, and I found it was easiest to dab spoonfuls of the mascarpone on the outside edges of the cake and spread it inward, especially over the lemon curd. Next time I think I would use less of the lemon curd–there was a lot.

I also found a helpful suggestion from the author in the comments. Another reader had difficulty keeping the layers from sliding around, so the author suggested using the outer ring edge of the springform pan around the cake layers as it was being assembled, then refrigerating it with the ring in place for a while. That’s the method I used, and it worked like a charm.

Italian Lemon Olive Oil Cake Recipe with Berries on Cake Stand

The Equipment

There are quite a few items needed to make this olive oil cake. Most of them are pretty standard, but there are a few specialty items:

Best Italian Lemon Olive Oil Cake Recipe with Berries Slice

To Serve

I let my cake sit in the refrigerator overnight so the layers could soak up the lemon curd and blueberry sauce. I also removed the baby’s breath flowers I used to decorate it (but not the culinary lavender buds). They didn’t have much of a taste, but I didn’t care for the texture. I bought fresh flowers, but they were a little dry and papery.

Creamy Garlic Butter Tuscan Salmon

1

I made a tandoori salmon recipe last month after not having salmon for quite a while. You know what? I’ve missed salmon. My husband likes it better as sushi, so finding salmon recipes he doesn’t find “too fishy” can be a challenge. This recipe for Creamy Garlic Butter Tuscan Salmon caught my eye because of the sauce, mainly the garlic and sun-dried tomatoes. Both have strong flavors and I figured they would help disguise the “fishy taste” he doesn’t care for. I know, it’s fish, and fish is by nature fishy…

This post was originally published on February 5, 2018. The text and photos were updated on August 20, 2021. The review and rating have not been changed.

Creamy Garlic Butter Tuscan Salmon is such an incredible recipe! Restaurant quality salmon in a beautiful creamy Tuscan sauce!

Recipe Author: Karina at Cafe Delites
Get the recipe

The Ingredients

First off, I bought a whole salmon filet with the skin on. Why? The pre-cut salmon fillets were $10 each, so I would have spent $40 on the fish alone. My whole fillet was $18, so I saved $22 just by making 3 slices in the fillet. That’s a significant savings for minimal effort. Totally worth it.

The rest of the ingredients were easy to find except for the sun-dried tomato strips. I can find them dry, but my grocery store didn’t have them in oil. Not really a big deal, though, because cutting them into strips isn’t exactly difficult. I will probably use the dry strips next time only to save on calories. They’re pretty soft when fresh and the texture isn’t very different from the tomatoes in oil.

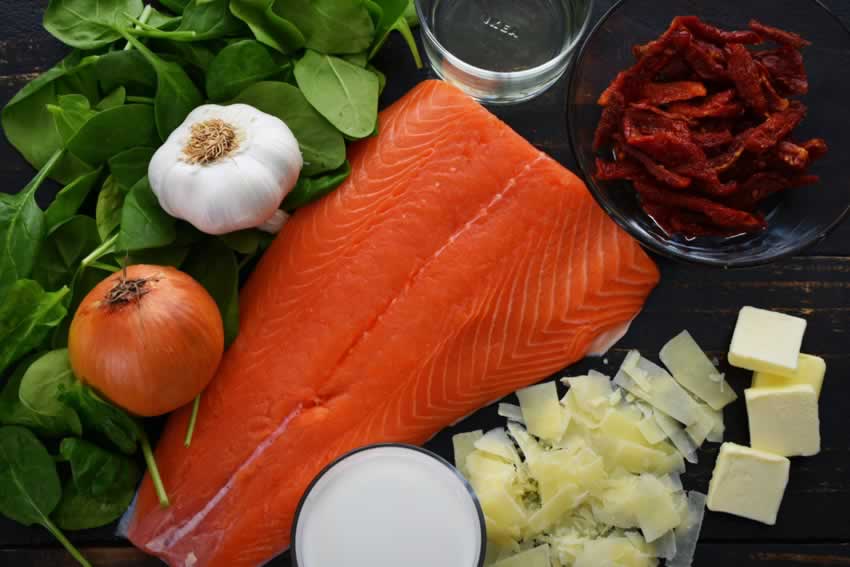
Creamy Garlic Butter Tuscan Salmon Recipe Ingredients
Salmon, spinach, onion, garlic, white wine, sun-dried tomatoes, butter, parmesan cheese, and cream

The Process

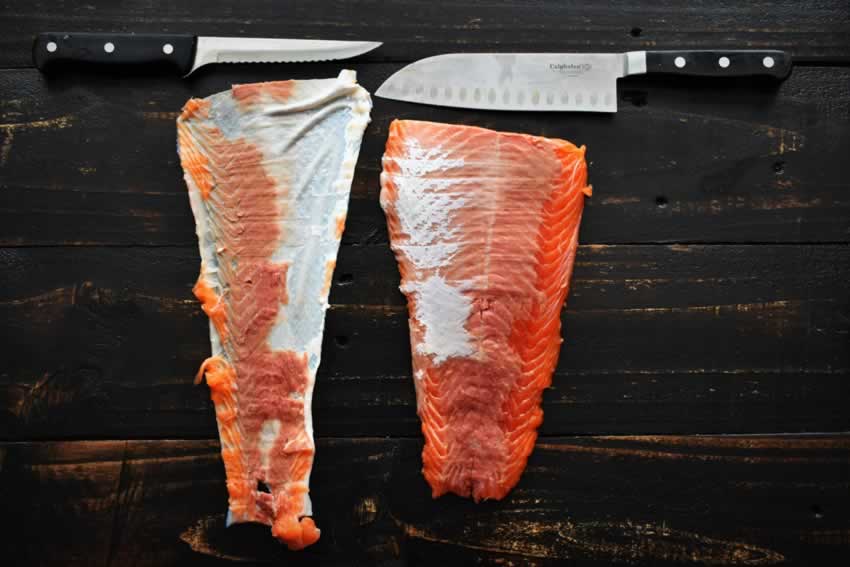
I could have had the fillet skinned at the fish counter, but I wanted to give it a try. I normally remove the skin after cooking because it practically falls off at that point. YouTube to the rescue for this, where you can find instructions on how to do most anything.

I used the technique taught in this short video. I started with a fillet knife (below, left) but had to switch to a longer santoku knife (below, right) as I got to the wider part of the fillet. Otherwise, it went quickly and smoothly, and I had pretty good results.

The directions for this Creamy Garlic Butter Tuscan Salmon recipe were easy to follow (there’s even a video tutorial), and I had it finished in 33 minutes. That’s a little over the 25-minute time listed, but it includes skinning the salmon fillet and cutting up the sun-dried tomatoes. I can’t count that against this recipe since I opted to skin the salmon myself. Otherwise, I think it would have been ready in the time specified.

I do highly recommend a non-stick skillet for this recipe. I love the sear you get with regular pans. However, I can see the salmon sticking and falling apart and the cream sauce burning and sticking too easily with that type of cookware.

Skinned salmon fillet

White Russian Winter Milkshake

What’s better than a white Russian cocktail? A white Russian cocktail with ice cream, whipped cream, chocolate, and a cherry on top! Fortunately, I have found just such a recipe, and I’m happy to share it with you. So plug in your blender, and let’s get our boozy milkshake on!

Enjoy a White Russian Winter Milkshake made with Kahlúa and coffee ice cream.

Recipe Author: DrinkedIn
Get the recipe

The Ingredients

Kahlua and vodka are staples in my bar cabinet, and I usually have some milk around. And ice, of course! That made shopping for this milkshake recipe pretty simple: I just needed coffee ice cream. Good thing that happens to be one of my and my husband’s favorite flavors. I’m sure he will agree that he suffers now that I blog about food LOL!

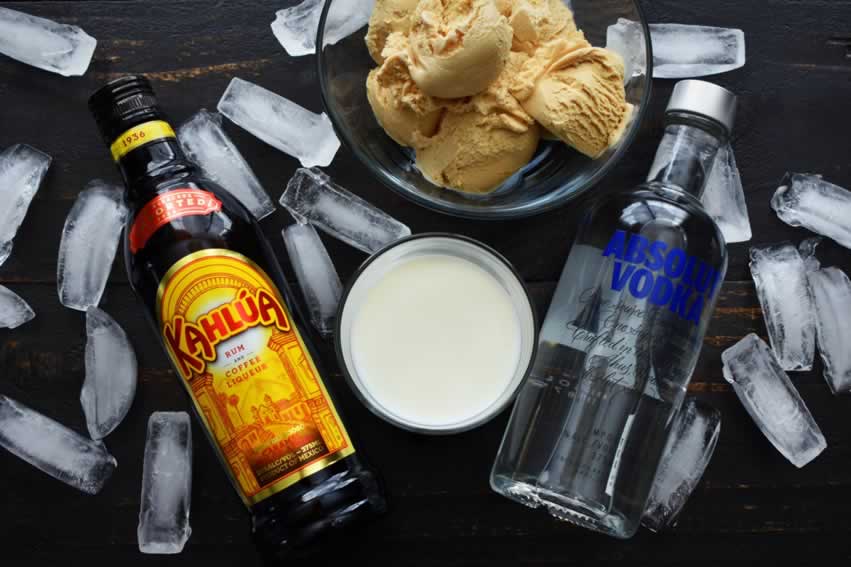
White Russian Winter Milkshake Recipe Ingredients
Kahlua, coffee ice cream, milk, vodka and ice

The Process

Yes, there is a little more work to blending a milkshake than just shaking up a cocktail, but I promise you it’s worth it! I had my frothy, creamy milkshake/cocktail mixed up and garnished in 3 minutes and 30 seconds.

I did change one thing from the picture of the ingredients for this, and that’s using crushed ice instead of cubes. Thank my husband for that idea, because I think the crushed ice blended more thoroughly than the cubes would have. (Definitely something to note when I make my next smoothie.)

Garnishing this lovely drink was even easier. I used canned whipped cream, drizzled it with chocolate syrup, and dropped a cherry onto the creamy goodness. As you can see, things got a little messy, but I purposely did that for my photos. No worries about this happening to you unless you purposely overfill your glass.

White Russian Winter Milkshake

Blackberry Crumb Bars

0

I made lemon dessert bars a while back, and I wanted to try another flavor. Blackberries have always been a favorite, so here we are with Blackberry Crumb Bars. The list of ingredients for these dessert bars was short, there were only 2 steps in the instructions, and the total time listed was under an hour. I’ve been in a sort of lazy mood lately, plus I’ve been craving something sweet. Problem solved!

These cheery, blackberry crumb bars are a summertime favorite and make a perfect afternoon snack or simple dessert.

Recipe Author: Mallory at Chocolate with Grace
Get the recipe

The Ingredients

I know the author says blackberry crumb bars are a summertime favorite, and it’s January. Well, I’m not letting that stop me since fresh blackberries are in stock at my local grocery store. I suppose I could have used frozen as a backup, but I always prefer fresh when possible. Unfortunately, blackberries are sold by weight, so I had no idea how much to buy. I picked up 2 12-ounce packages, and that was just a touch over the 4 cups this recipe called for. they were a little pricey at $4.99 each, but I did get 12 generous servings out of this recipe.

The rest of the ingredients are pantry/refrigerator staples. I had to restock my butter, but I would have done that anyway.

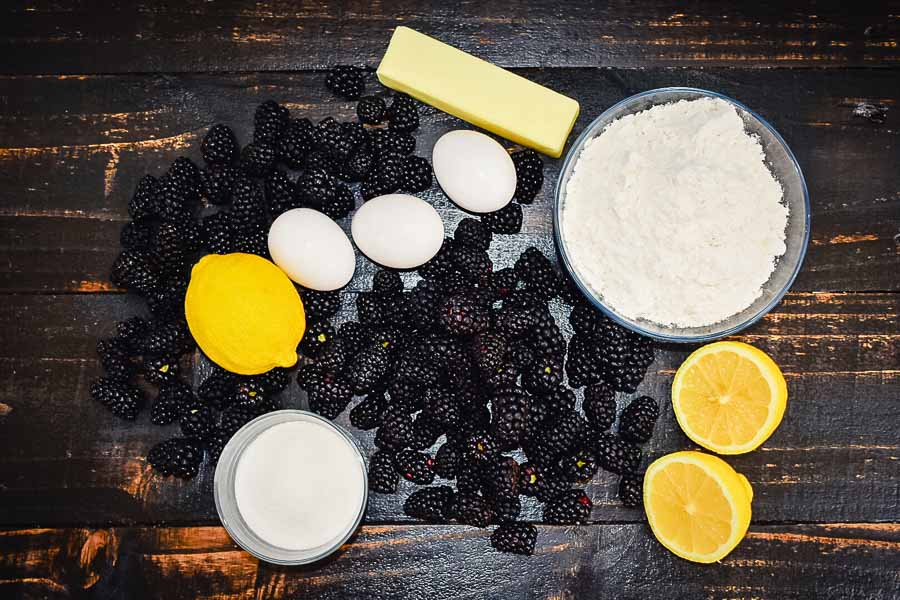
Blackberry Crumb Bars Ingredients
Blackberries, lemon juice, eggs, butter, flour, and sugar

The Process

Blackberry dessert bars are a very easy dessert to make. They are a lot like pie but without the work. The recipe has 2 steps, and they are very easy to follow. I was a little worried about the consistency of the “crust” after I added the eggs. It’s very crumbly and not at all like pie crust dough. Even so, it was easy to divide and press half into the bottom of my baking pan just using my fingers.
Next came the blackberries. Cutting them in half was the most time-consuming part of making these dessert bars, and I’m not sure I’ll bother next time. They pretty much melt while they bake anyway.
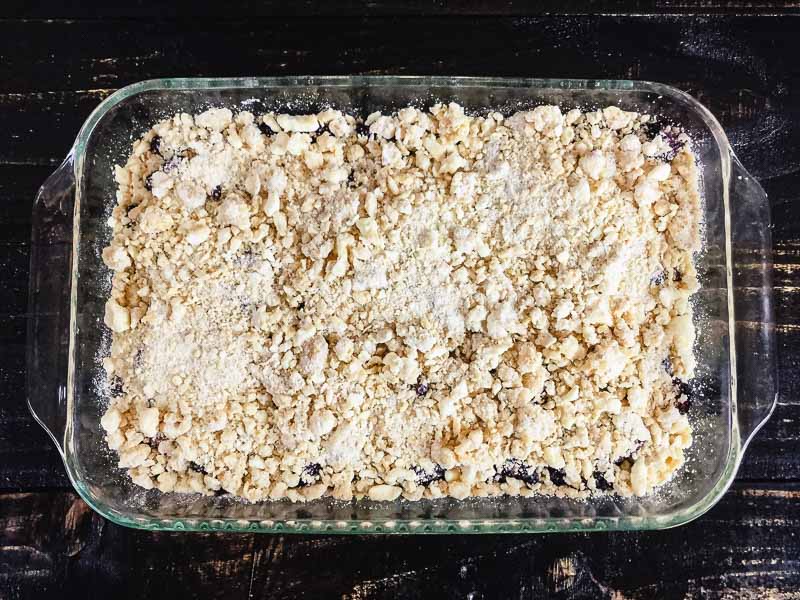
The last step before baking is to sprinkle the rest of the crust over the blackberry mixture. Besides popping the dish into the oven, this was the fastest part of the recipe. Just sprinkle the last half of the crumb mixture sort of evenly over the blackberries, and voila!

The whole process took 50 minutes, just as it was listed in the recipe. I considered the prep work on this recipe to be everything needed to get it ready to go into the oven, and that took 20 minutes (also as listed). Baking for 30 minutes had my house smelling amazingly good, and it was hard to wait for them to cool before giving this recipe a try.

Just about to go into the oven

Ham Bone Soup with Great Northern Beans and Kale

I made my first ham ever this past Thanksgiving, and it was everything! My husband and I ate ham for days—I don’t think I’ve ever seen him happier (mostly kidding)—but all good things must come to an end. I was left with a nice and meaty ham bone and no desire to eat ham again for a loooong time, so I wrapped it up and popped it into the freezer. I just knew I would find a recipe I could use it in. This Ham Bone Soup with Great Northern Beans and Kale recipe is it.

This post was originally published on January 29, 2018. The text and photos were updated on January 14, 2022. The review and rating have not been changed.

Rich in flavor, this hearty Ham Bone Soup with white beans and kale is the perfect comfort food for a chilly or damp and rainy day!

Recipe Author: Michelle at A Dish of Daily Life
Get the recipe

The Ingredients

The first time I made this recipe, the timing was perfect. I had a leftover ham bone in the freezer and leftover kale and carrots from the Curried Cauliflower Rice Kale Soup I made the previous week. Three large kale leaves and three medium carrots worked nicely for this recipe. I only had to buy the canned great northern beans, onions, and some bacon for this soup recipe. By the way, although I thought I would need 2 onions, it turns out one large onion was just the right amount.

When I decided to update this post, I had the ham bone, bacon, carrots, and onions on hand. I couldn’t find curly kale, so I substituted baby kale. It came pre-washed, and I didn’t have to stem it. It was a great timesaver!

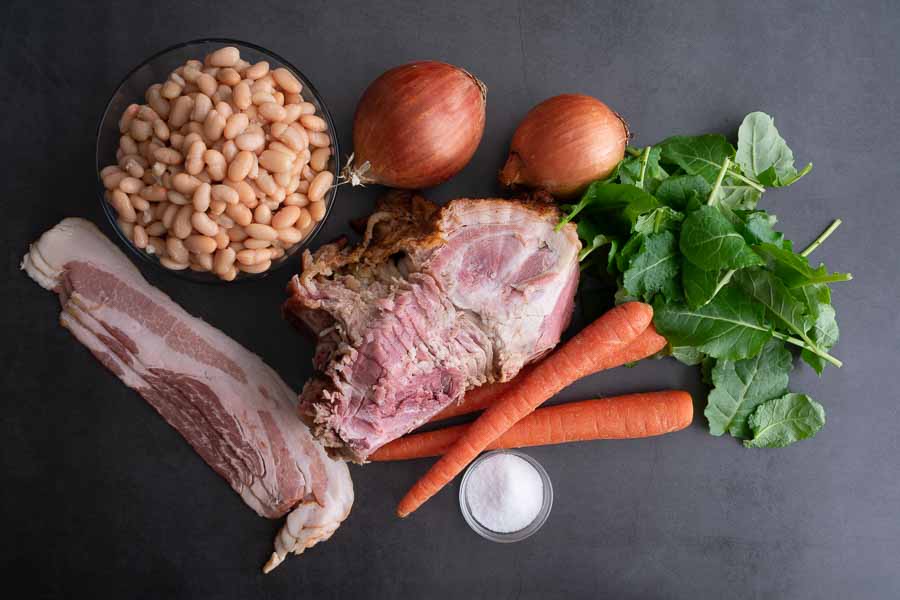
Ham Bone Soup with White Beans and Kale Ingredients
Hambone, onions, baby kale, carrots, salt, bacon, and great northern beans

The Process

This ham bone soup recipe is time-consuming, but most of that is inactive while you wait for things to simmer. I spent just over 2 hours total making it. The directions were clear and easy to follow, and a 5-quart pot was plenty big for this recipe.

You will have to puree the broth and vegetables (step 5). The first time I made this soup, I ladled it out of the cooking pot and into my blender a little at a time. I found out very quickly to do this in small batches and place a folded dish towel over the lid while blending because it’s a hot liquid that splashes.

Fortunately, I have acquired an immersion blender and can now blend the soup in the pot. It’s so much quicker and safer. Plus I don’t have to wash my blender afterward. I’m always for fewer dishes to wash!

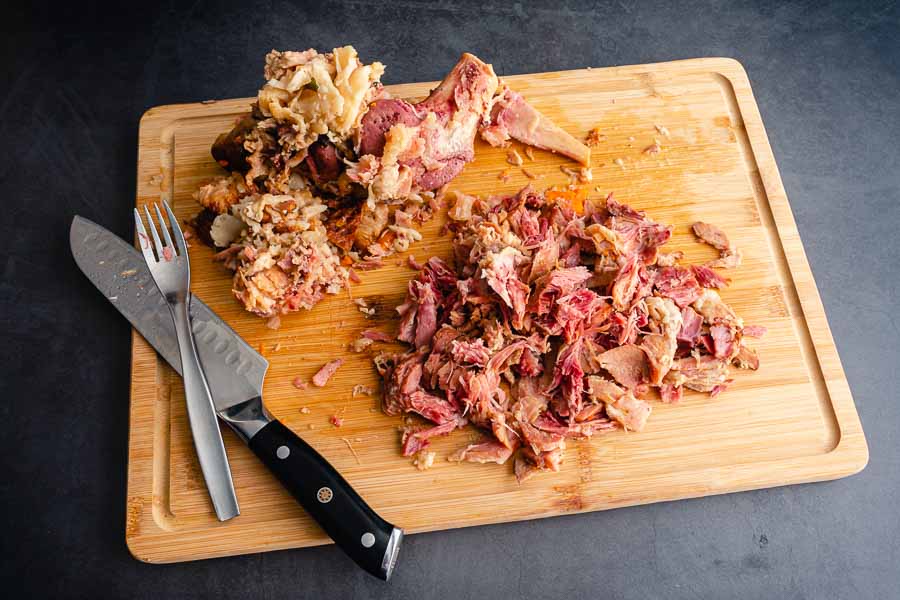
I wasn’t sure of was how easy it would be to remove the ham from the bone. It turns out the ham was incredibly tender after simmering for almost 2 hours. It came right off the bone with almost no effort. I just used a fork to gently pull it away from the bone.

Stripping the ham off the bone after simmering for an hour

Finally, there’s the seasoning. Or, should I say, the almost lack of. The only seasoning in this recipe is salt, and that’s at the bottom of the ingredient list. It’s not even mentioned in the instructions, so I waited until the soup was done cooking before checking to see if it was needed. I figured the bacon and ham would provide some salt, and I was right. The soup was pretty close to perfect, so all I added were 2 teaspoons of coarse sea salt.

Serving the Ham Bone Soup

This soup recipe practically begs to be served with biscuits to dip in the delicious broth. Fortunately, I found an easy and delicious biscuit recipe that used ingredients I had on hand. It only took 20 minutes to make and bake, and I highly recommend it!

Homemade biscuits, the perfect side to a hearty soup or stew

3 Ingredient Mango Coconut Paleo Milkshake

I love mango and easy recipes, so this3 Ingredient Mango Coconut Paleo Milkshake went right to the top of my must-try list. Sweet and tart frozen mango, thick coconut cream, and just a touch of maple syrup for sweetness sounded sooooo good! Okay, I was a little skeptical about the maple syrup, but there was only one way to find out if it worked or not…

This post was originally published on January 26, 2018. The text and photos were updated on July 30, 2021. The review and rating have not been changed.

An easy, 3 ingredient recipe for super thick and frosty mango coconut milkshakes!

Recipe Author: Demeter at Beaming Baker
Get the recipe

The Ingredients

How much can I say about the ingredients since there were only 3? I had maple syrup, so my shopping list for this recipe was super short, just the coconut milk and frozen mango chunks.

As you can see in the main photo, I did decide to add canned whipped cream topping with a chunk of frozen mango as a garnish. I was originally going to skip the whipped cream since I’m not on the keto diet, but I decided to go for it at the last minute.

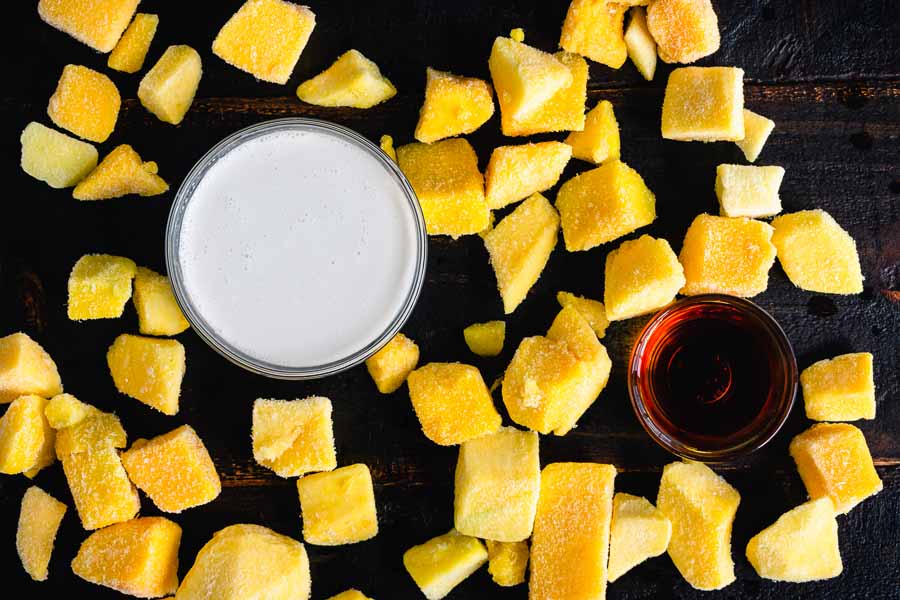
3 Ingredient Mango Coconut Paleo Milkshake Ingredients
Frozen mango, coconut milk, and maple syrup

The Process

When I first made this recipe, blending my mango coconut milkshake wasn’t as quick as I hoped it would be. Although I used a blender designed for smoothies, it had trouble with the frozen mango.

I found that I had to pulse and stir several times before the mixture was liquified enough to just blend. I spent 5 minutes on my milkshakes. It wasn’t a super long time, all things considered, but I think thawing the mango under some running water first might have made things easier.

When I decided to redo the photos for this post, I had upgraded my blender to a Ninja. The central column of blades had no trouble at all with the full recipe. I forgot to time it since I wasn’t planning to update my original review, but I’m sure it was faster than my old blender. And this time I didn’t have to scrape down the sides or do any extra stirring.

3 Ingredient Mango Coconut Paleo Milkshake

Homemade Naan Bread Recipe

One of my favorite things about Indian food is naan is always served. Although it’s considered a flatbread, it is thicker and fluffier than its better know cousin pita. It’s a delicious appetizer and also especially good for sopping up gravies and sauces with the main course (like the broth from the Curried Cauliflower Rice Kale Soup I recently made). Unfortunately, I rarely eat naan anymore because it’s hard to find in my area. Until now. This naan bread recipe came with step-by-step instructions that looked pretty easy to follow. I’ve never made bread before, so here we go!

I really love homemade bread, especially this homemade naan. I put together step by step photos and instructions for you guys, so there is really no messing up this one! There is even a video…..ok, you guys have to try this!! You won’t regret it, promise!

Recipe Author: Tieghan Gerard at Half Baked Harvest
Get the recipe

The Ingredients

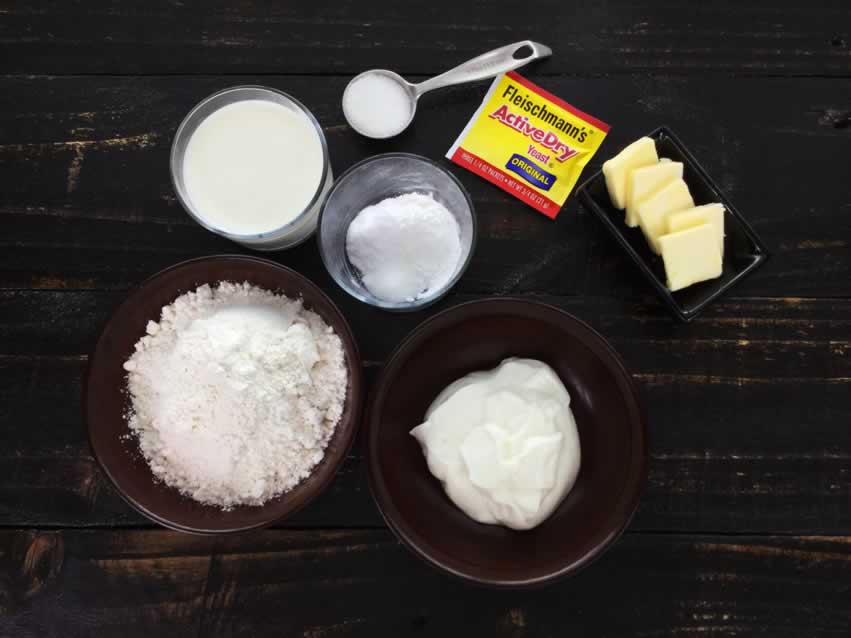
Everything for this naan bread recipe is very basic. Most of the ingredients are things I keep on hand. The only thing I had to shop for was the active dry yeast. I found small jars of yeast in the baking aisle of my local grocery store. Although the jars weren’t very big, they were far more than I needed. I always hate to buy too much of something I’m not sure I’ll use up because I hate to waste food, and my tiny pantry is stuffed full as it is. Fortunately, dry yeast is also sold in small packets. They’re actually strips of 3 packets, and each packet has just over twice the amount needed for this recipe. Perfect!

Homemade Naan Bear Recipe Ingredients
Flour, milk, sugar, yeast, butter, Greek yogurt, salt, baking soda and baking powder

The Process

This naan bread recipe took some time, 1 hour 43 minutes total, but it really wasn’t difficult. The most time-consuming parts of this recipe were inactive: 10 minutes waiting for the yeast to foam and 1 hour for the dough to rise. That leaves 33 minutes of active time for prep and cooking. Not too bad, really.

I did have to mix the yeast, water, and sugar twice to get it to resemble the author’s picture. I used hot tap water as instructed the first time. I don’t think my tap water was hot enough, however, because the sugar didn’t quite dissolve, and the yeast really hadn’t foamed after sitting for 10 minutes. For the second try, I heated the water in the microwave for 15 seconds first, and my results were picture perfect. The sugar dissolved, and the yeast foamed up after 10 minutes.

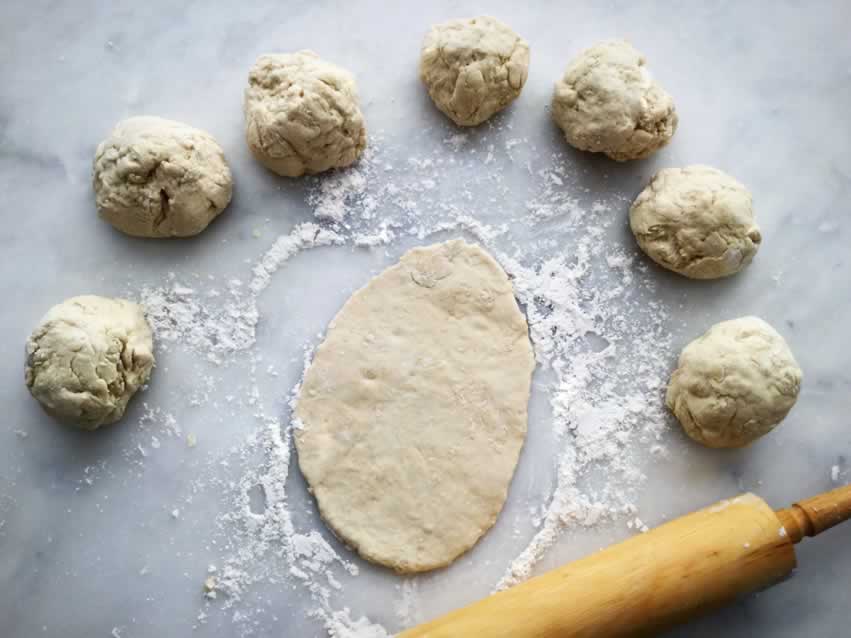
Dividing and rolling out the dough was very easy. The dough wasn’t super sticky, but you will still need a floured work surface. Then it’s just a matter of brushing the rolled out naans with melted butter and cooking them. I used a lot of butter—almost a whole stick. I also found I only needed to cook the naan for 1 minute on each side. The recipe does say 1-2 minutes once you flip it, but mine burned a bit when I went much over a minute.

Naan bread dough and rolling pin
Rolling out the bread dough
Homemade Naan Bread Recipe Review

Curried Cauliflower Rice Kale Soup

0

This Curried Cauliflower Rice Kale Soup is the most re-pinned recipe across all my food and drink boards. I’ve been dying to try it out, and it’s finally time. I love curried anything, but vegetables are always a favorite. It’s not that I especially like them or am good at making them. The opposite is true, and mostly because I’m not very creative with cooking them. This soup is going to be a totally new style for me, and I’m really excited to give it a try!

This post was originally published on January 22, 2018. The text and photos were updated on August 4, 2021. The review and rating have not been changed.

This curried cauliflower rice kale soup is a crowd pleaser for everyone. It’s Paleo, and vegan, and dairy free, and gluten-free, and all those dietary labels. But in all honestly, when it comes down to it, this soup is just a healthy recipe packed with real food. Big bold and hearty flavors and yet still healthy.

Recipe Author: Lindsay Cotter at Cotter Crunch
Get the recipe

The Ingredients

The ingredients list for this recipe is a little long, but don’t let that put you off. About half of the list is dry spices and olive oil. I had all those in my pantry and had to shop for the vegetables, broth (I used chicken), and almond milk.

There are tons of regional variations on curry powder since it’s a blend of several spices. I had Badia Jamaican-style curry powder on hand, so naturally, that’s what I used. The link goes to a very large container of curry powder, but it’s all I could find to show the brand I used. My local grocery store stocks much smaller containers in case you don’t frequently use curry powder.

The ingredients list 5-6 cups of cauliflower florets. That sounded like a lot to me, so I bought 2 heads of cauliflower to be on the safe side. I roasted it all and ended up with 4 cups of riced cauliflower plus enough leftover to use as a side for another meal. I’d say I used 1 1/2 of the 2 heads of cauliflower. When I decided t redo the photos for this post, I used 1 head of cauliflower, and it was plenty.

Lastly, this recipe calls for 2 cups of chopped carrots. I used 7 carrots for my soup, most of a bag of medium to large carrots. I have also used leftover baby carrots, but it takes a lot more chopping that way.

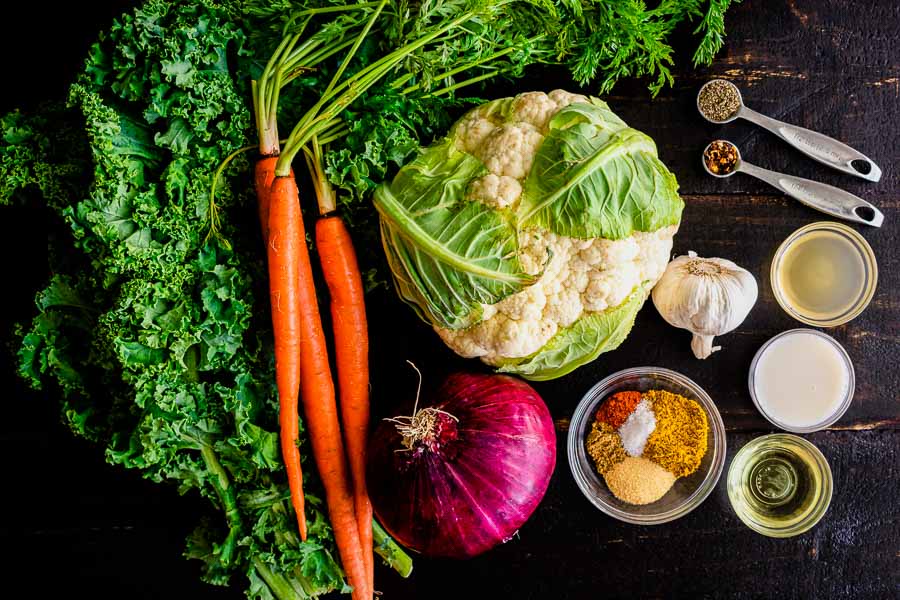
Curried Cauliflower Rice Kale Soup Ingredients
Cauliflower, pepper, red pepper flakes, chicken broth, garlic, almond milk, olive oil, garlic powder, cumin, paprika, sea salt, red onion, carrots, and kale

The Process

I spent 1 hour 6 minutes on my curried cauliflower soup. A lot of what I consider prep work is done while the cauliflower is roasting in the oven and cooling, so I wasn’t really able to separate the times for prep and cooking.

I did spend about 10 minutes cutting up the cauliflower, mixing with the spices, and spreading it onto the sheet pan. The rest of the prep work was done before the cauliflower finished roasting (20 minutes for that).

A few minutes to allow the cauliflower to cool, and it was into my food processor to be riced. This part was crazy easy, and I only had to do a few short pulses.

Another thing I noticed was the broth didn’t cover the chopped kale and carrots when I added them to the pot in Step 9. The kale took up most of the room but wilted the longer it cooked. I made sure to stir several times during cooking to ensure everything cooked evenly.

In the end, this soup had a ton of vegetables, but not a lot of broth. It made for a hearty soup with just enough broth to dip my bread in (and I highly recommend serving this soup with a side of bread!).

Horchata Cold Brew Latte

0

I love iced coffee, and I’ve always wanted to try horchata. I had an idea of what it was, a sweet drink made with rice, but that’s it. Once I read the recipe, I was hooked. Rice, almonds, cinnamon, milk and condensed milk. How could that possibly go wrong? And how good does that sound as an iced latte?

Treat yourself to a glass of Horchata Cold Brew Latte. Make your iced coffee even more special by making it with homemade horchata!

Recipe Author: Liren Baker at Kitchen Confidente
Get the recipe

The Ingredients

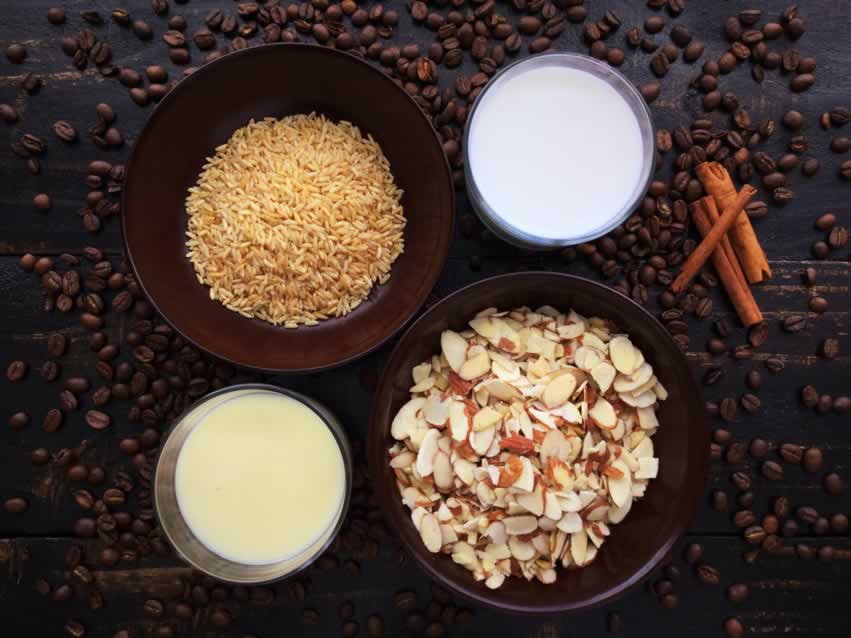
The list of ingredients for this recipe is short and sweet, just the way I like them! I had brown rice, cinnamon sticks, and almonds on hand, so my shopping list was short. And I did decide to buy the cold-brewed coffee rather than make it. I opted for unsweetened since the horchata called for condensed milk, which is very sweet.

Horchata Cold Brew Latte Ingredients
Brown rice, milk, almonds, condensed milk and coffee

The Process

The horchata took all of 10 minutes to make, including the initial prep, blending, and straining after soaking. I let the mixture soak in a covered pitcher overnight on my counter. I added a piece of plastic wrap under the lid in case of ants (they’re everywhere in South Florida).

Removing the cinnamon stick wasn’t specified, so I googled other horchata recipes and found it’s normal to leave it in and blend it with the rest of the ingredients. I wasn’t sure if my blender was big enough to accommodate the rice mixture and all the milks. I ended up blending the rice mixture, straining it through a cheesecloth-lined mesh strainer, then adding the milks and stirring very well.

One more thing: I like my coffee very sweet and creamy, so I used 3/4 cup of the sweetened condensed milk.

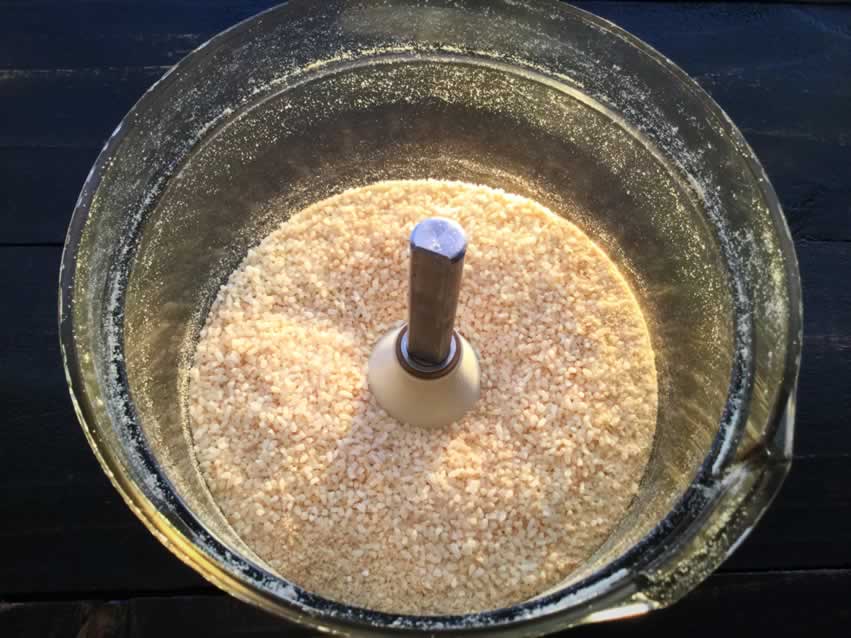
Ground brown rice
Ground brown rice

To Serve

My first attempt at pouring my horchata iced latte didn’t give me that beautiful layered look in the author’s photo. Instead, I ended up with your typical creamy coffee mixture. It tasted wonderful, but I do love a pretty picture, and I had lots more coffee and horchata.

After experimenting a bit, I found got the layered look shown in this post by:

  1. Adding ice to the glass
  2. Filling the glass 1/3-1/2 full with horchata
  3. Slowly pouring the cold brew coffee over the back of a spoon. VERY slowly.

I can’t stress slowly pouring the coffee enough. A faster pour allows it to mix into the horchata and you get a thinner layer of coffee.

Horchata Cold Brew Latte Recipe Review

Mexican Baked Eggs

I’m rarely awake enough in the morning to make breakfast, so I don’t feel the need to limit eggs to a morning meal. They work for lunch and dinner, trust me. I’ve also never baked eggs, so I really wanted to give this recipe a try. It fit right in with this week’s Mexican theme, so it’s eggs for dinner tonight!

This post was originally published on January 17, 2018. The text and photos were updated on July 14, 2021. The review and rating have not been changed.

These Mexican Baked Eggs are delicious and versatile. I have served them for brunch and dinner, and they were a hit at both. It is a hearty meal, and you will definitely be full and wishing you didn’t eat so much after you are finished.

Recipe Author: Allyson at Domestic Superhero
Get the recipe

The Ingredients

This is another recipe with a medium-length ingredients list. Fortunately, everything was easy to find and inexpensive. A few things to note, though:

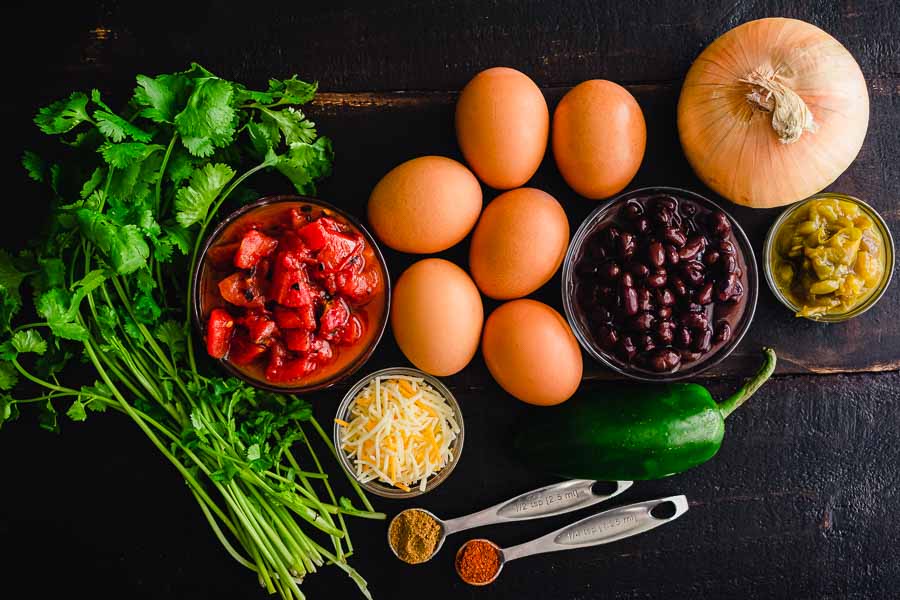
  • 1/4 tsp. chili pepper is actually chili powder
  • It’s not specified, so I didn’t drain the canned green chilis
  • I used 6 eggs (more than enough for 2 servings)
  • And I used medium salsa as a topping

Mexican Baked Eggs Ingredients

The Process

My Mexican baked eggs were ready in 44 minutes. That includes 7 minutes to prep and 37 to cook. I added some cooking time to make sure the egg yolks were set as that’s the way my husband likes them. Specifically:

  • Step 4: I increased the cooking time to 7 minutes
  • Step 6: I broiled the baked eggs for 4 minutes

I ended up with over-hard eggs topped with cheese that was nicely browned.

Tip: Be sure to adjust your oven racks before you preheat your oven. You’ll need one in the middle and one just under the broiler.

Lastly, I have made this recipe in cast-iron and nonstick skillets. Both work equally well, but I prefer the cast-iron skillet for presentation. I think it looks nicer on the table than my nonstick skillet.