Home Blog Page 53

Guinness Irish Soda Bread

St. Patrick’s Day is coming up, and I have 2 bottles of Guinness in my refrigerator. I feel like popping the tops and drinking them would be appropriate but not very original. What to do? Search Pinterest for recipes that use Guinness, of course! I found a couple to help me put those bottles of Guinness to good use, starting with Guinness Irish Soda Bread.

Delicious and easy to make homemade beer bread. Enjoy a deep flavor with without kneading.

Recipe Author: Tiffany at Living Sweet Moments
Get the recipe

The Ingredients

What’s better than a short grocery list of inexpensive and easy to find items? No grocery list. Yup, I didn’t have to buy a single ingredient to make this soda bread recipe. The ingredients are all kitchen staples like flour, salt, baking soda, and butter. How great is that? A few dollars for the Guinness isn’t bad if you already have the rest of the ingredients, and you’ll have 5 bottles left over to enjoy.
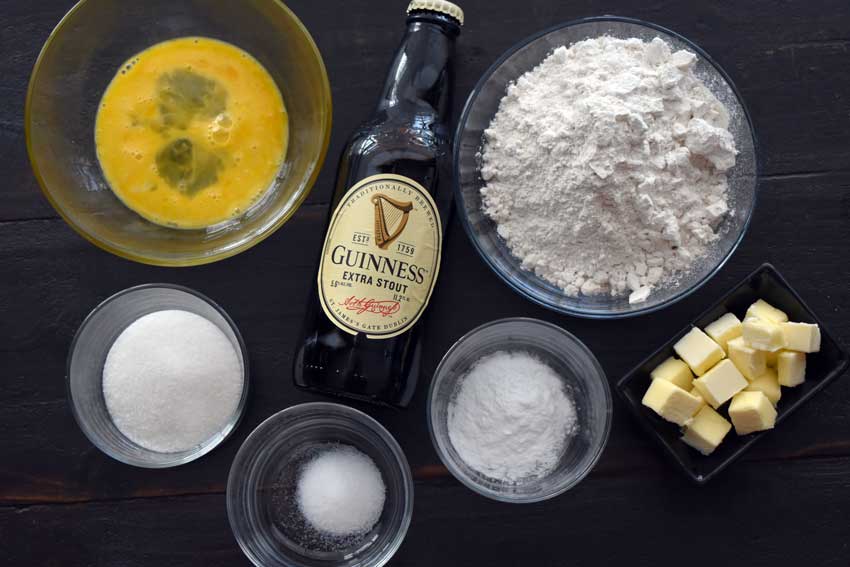
Guinness Irish Soda Bread Ingredients
Guinness beer, egg, flour, butter, baking soda, salt, and sugar

The Process

Making the soda bread was easy, but it took me a lot longer to prep than the 5 minutes listed in the recipe. In fact, it took me 15 minutes to get it ready to go into the oven, and I’m really not sure why.

The directions were clear, and the steps went pretty smoothly. The biggest issue was the dough was very sticky, and that made it difficult to work with at first. Getting onto a floured surface and being able to flour my hands did help a lot, though.

Baking for 25 minutes gave me the hollow sound the author said indicated the bread was done. I let it rest for a few minutes and sliced into it. Unfortunately, I discovered a doughy, underbaked spot in the middle of my bread. I tried baking it for another 5 minutes, but it didn’t seem to help.

Fortunately, the underdone spot was pretty small, and I was able to cut it out of the sliced bread. I would recommend baking for the full 30 minutes and letting the bread sit for a good while to ensure it’s fully cooked.
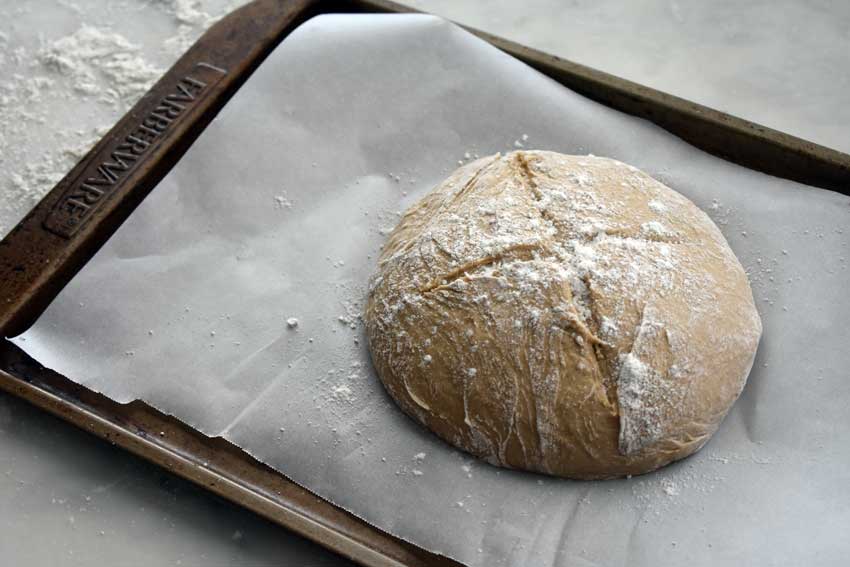
Ready to go into the oven
Soda bread dough ready to bake

Slow Cooker Corned Beef and Cabbage

St. Patrick’s Day is right around the corner, and my Google Calendar let me down. It supposed to show U.S. Holidays, which St. Paddy’s Day sort of is, but it didn’t. I know this doesn’t seem major, after all, it’s not like I missed Christmas or Thanksgiving, but I assure you it is. It’s my wedding anniversary. Doh! And since it is such an important day, I think an Irish-themed week of blog posts is needed, so let’s get started with one of my husband’s favorites: Corned beef and cabbage.

Known as the traditional or classic Irish dish for St. Patrick’s Day, this slow cooker version of corned beef and cabbage is super easy & healthy.

Recipe Author: Shannon at Fit Slow Cooker Queen
Get the recipe

The Ingredients

You know I love short grocery lists, and this recipe doesn’t disappoint. Just a handful of items are needed, and none of them are difficult to find. The corned beef brisket was the priciest item at $22.86 for just over 3 pounds. It’s pricier than most cuts of meat I buy, but it works out to a little under $6 per serving (for 4 servings). That’s on par with what I pay for boneless, skinless chicken breasts, so it really wasn’t as expensive as it first appeared to be.

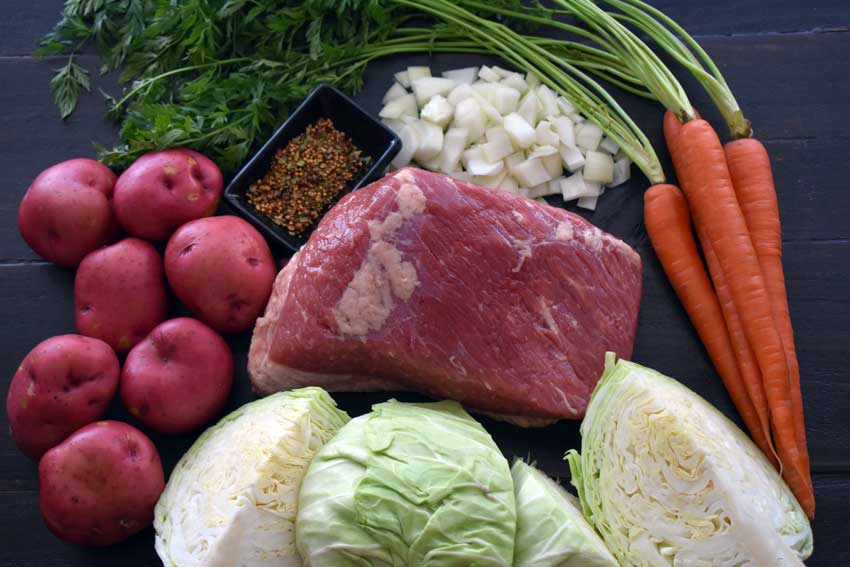
Slow Cooker Corned Beef and Cabbage Ingredients
Corned beef brisket, cabbage, potatoes, onion, carrots, and spices

The Process

This recipe was extremely easy! The prep work (mostly chopping vegetables) took 7 minutes, which was just over the 5 minute time listed. Then it was just a matter of turning on the slow cooker and waiting until it was time to add the cabbage.

Speaking of which, I was only able to add about 3/4 of the head of cabbage. My slow cooker is 6 quarts, and it was stuffed full. The broth/cooking juices were almost to the rim once I added the cabbage! The rest of it will have to go to my rabbits as a treat, along with the leftover carrots.

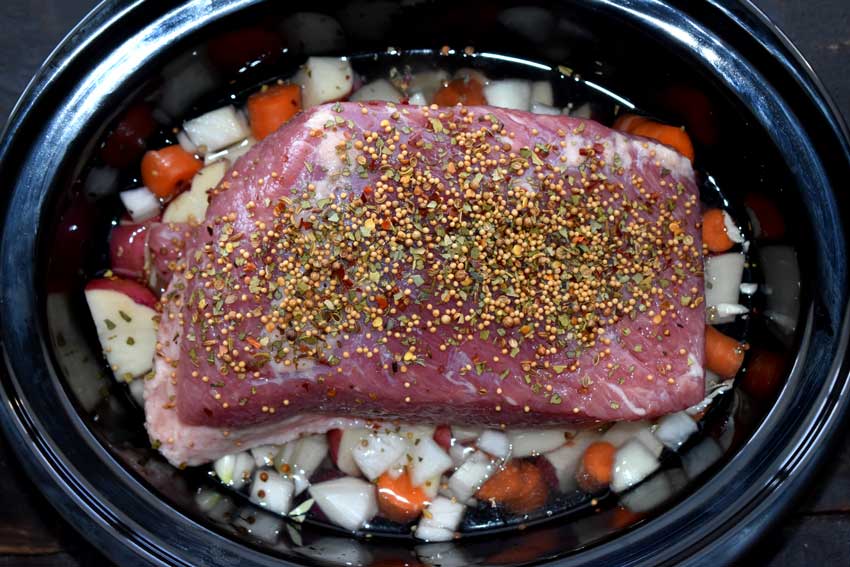
Corned beef, potatoes, onion, and carrots just added to the crockpot
Corned beef, potatoes, onion, and carrots just added to the slow cooker

Grilled Parmesan Garlic Bread

I needed a side dish for the Caprese Stuffed Chicken Breast recipe I made earlier this week. My first idea was to find a vegetable, but then I came across this garlic bread recipe. I suddenly had to add a vegetable to my check AND garlic bread dinner.

Buttery, thick Italian spiced Grilled Parmesan Garlic Bread is the perfect summer side to almost any meal and so incredibly easy and budget friendly!

Recipe Author: Jen at Carlsbad Cravings via Real Housemoms
Get the recipe

The Ingredients

There aren’t many ingredients for this recipe (yay!) and none of them were expensive. In fact, I had most of them on hand. The only ingredients I needed to buy were the bread (fresh French bread from my local grocery store’s bakery section was a must) and parsley. Although the recipe calls for freshly grated Parmesan, I cheated a little and used leftover pre-shredded cheese I already had in the refrigerator. My husband prefers it anyway, and I am cooking for him too.

It’s not specified in the recipe, but I used unsalted butter. The recipe calls for salt, so unsalted butter worked perfectly. I’m sure you could use salted butter if you omit the 1/4 teaspoon of salt from the recipe. Unless you like very salty food. It’s up to you 🙂

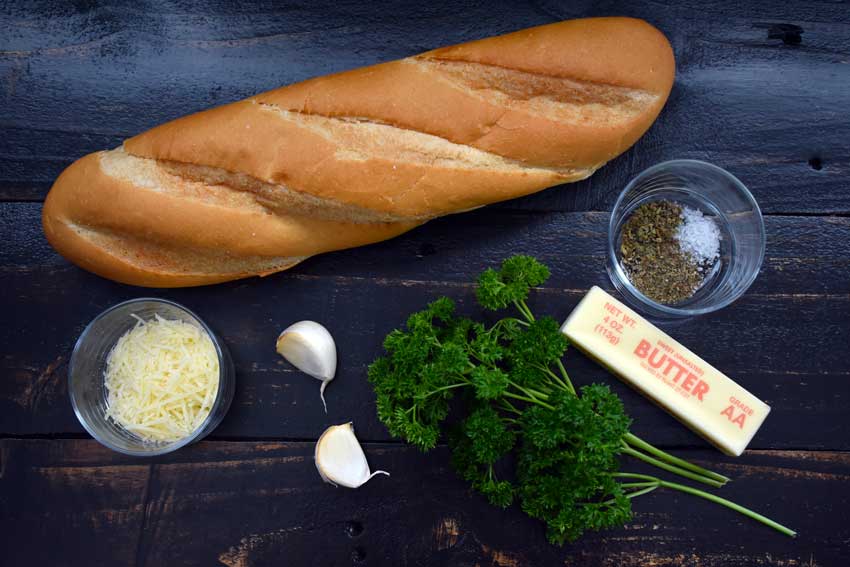
Grilled Parmesan Garlic Bread Ingredients
French bread, oregano, basil, salt, butter, parsley, garlic, and parmesan cheese

The Process

Freshly toasted garlic bread is very quick and easy to make. The total time spent on this recipe was 22 minutes. That broke down as follows:

  • 15 minutes prep (includes pre-heating the grill)
  • 7 minutes to cook (it took an extra minute to melt the cheese)

Things went pretty smoothly except I ran out of the butter/herb mixture after dipping about half my bread slices, despite using a light touch. I had to make a second batch to finish the rest of the slices, and that added a few minutes to the prep time. Next time I will try only dipping one side into the butter mixture.

The rest of the process went very smoothly. I brought the bread, garlic, parsley, and Parmesan out to the grill and cooked al fresco. Running in and out of the house between steps would have been impossible since each step just takes a few minutes.

I did find that rubbing the garlic onto the bread requires a very light touch. The bread is quite soft, and I smooshed the first couple of pieces a bit. I really wanted to make sure I got garlic on them, and I was a little too enthusiastic (I really, really love garlic). So the lesson here is to be gentle with the garlic LOL.

Toasting garlic bread on the grill
Grilling the garlic bread

Caprese Stuffed Chicken Breast

I tried Tuscan-Style Grilled Ribeye Steak a while back, and I just loved the flavor of the balsamic vinegar marinade. This Caprese chicken recipe immediately brought that to mind when I saw the chicken breasts were brushed with a balsamic vinegar and Dijon mustard mixture, and I started wondering if chicken would be as good as the steak. And, darn it all, there’s only one way to find out. Guess I have to make this recipe!

An all-in-one power packed flavor meal, this Caprese Stuffed Chicken Breast takes it’s inspiration from the classic Italian salad and is made in 25 minutes.

Recipe Author: Kevin at Kevin is Cooking
Get the recipe

The Ingredients

A quick scan of this recipe’s list of ingredients, and it’s no surprise that none were difficult to find or unusually expensive. But there was one ingredient I was particularly happy to see: fresh mozzarella. Now I love mozzarella in any form, whether it’s fresh, sliced, or shredded, but fresh has always been my favorite. It’s a combination of the moist, soft texture, that it’s not as salty as sliced, and that it gets nice and gooey when it’s melted. And this recipe will definitely melt it.

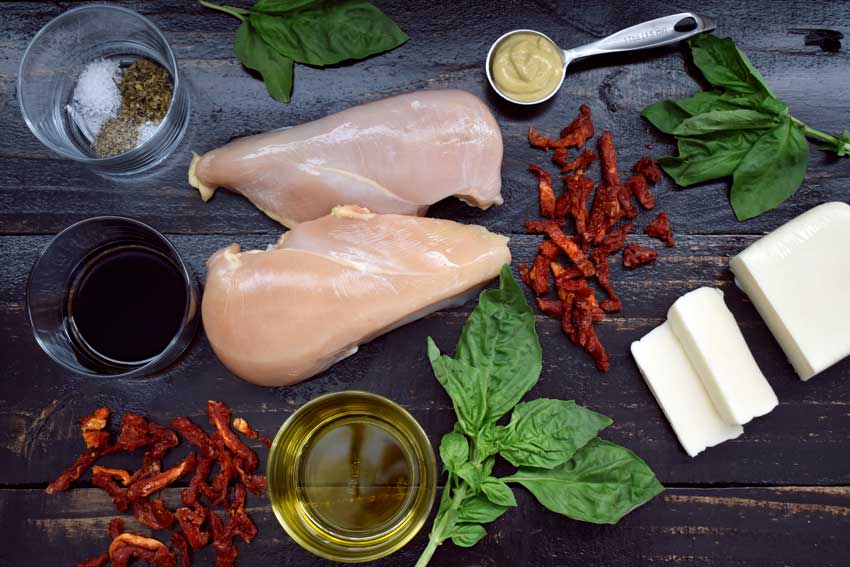
Caprese Stuffed Chicken Breast Ingredients
Chicken breast, balsamic vinegar, salt, pepper, oregano, basil, dijon mustard, sun-dried tomatoes, mozzarella cheese, and olive oil

The Process

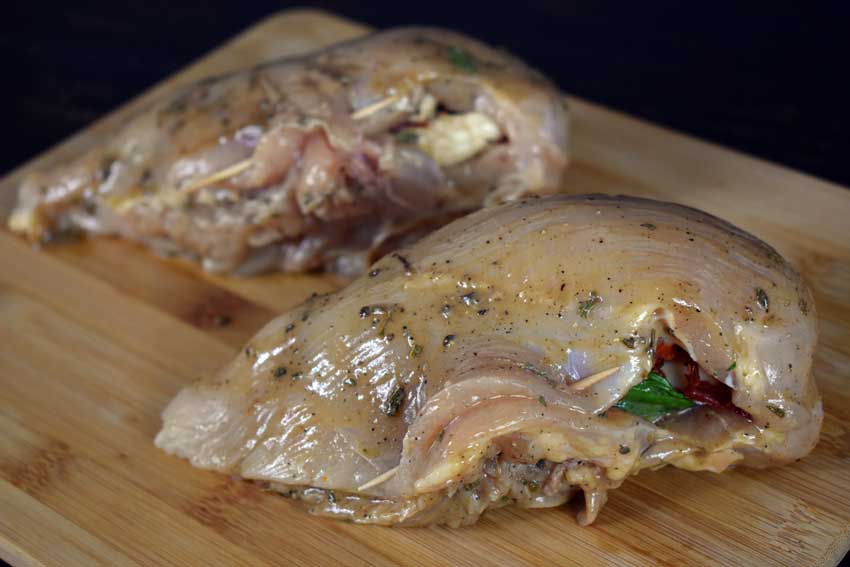
Think stuffed chicken breasts sound difficult and time-consuming? Nope! This recipe went together fast, although it did take a bit longer than the 25 minutes listed–mine took 28 minutes. I had the chicken breasts stuffed and ready to go into the oven in 10 minutes. The recipe listed a 5-minute prep, but I’m not that fast! Next was searing them in a skillet for 3 minutes total (2 minutes on the first side and 1 minute on the second side). Last was baking in the oven for 15 minutes, after which I had 2 perfectly done stuffed Caprese chicken breasts.

Cutting the pockets into the chicken breasts is the hardest part, and I use that term loosely. I’ve had plenty of mishaps doing this, and there have been more than a few times I have cut through the bottom of the piece of chicken on accident. Then I ended up with cheese and filling leaking out and making a big mess.

But there’s a secret to making perfect pockets, and that is turning the chicken breasts smooth side down. You’ll notice there is an indentation/dip in the middle of the chicken breast, and it’s easy to accidentally cut through it. This way you can see the dip and make sure your knife stays safely away from it. Start on the thicker side and use a paring knife to carefully cut the pocket about halfway up. Go slowly so you don’t slice all the way through to the other side, and keep the pocket in the thickest part of the chicken breast—there’s no need to take it all the way into the thinner, pointy part. That’s all there is to it.

I opted to brush the inside of the chicken pieces with the vinegar-mustard mix and reserve the rest for the outside. This kept things a little neater while I was stuffing it with the basil, cheese, and sun-dried tomatoes. It was also easier to close the chicken breasts with toothpicks without the sauce making them slippery.

Stuffed chicken breasts
Stuffed chicken breasts brushed with balsamic dressing

Coconut Mint Margarita

My coconut-themed week is coming to an end, but not without a Coconut Mint Margarita cocktail recipe to finish things off on a happy note! If you’ve followed my blog for a while, you’ll know I rarely drink tequila. In fact, I haven’t made a tequila recipe since August 2017 when I tried a recipe for Roasted Blueberry Basil Margaritas, but this recipe sounded way too good not to try. So it’s off to the liquor store to pick up a bottle of tequila, along with a trip to the grocery store for the rest of the ingredients. Let’s hope I still have those margarita glasses in the cabinet above the refrigerator! You know the one we all have but only go into once a year or less.

This post was originally published on March 2, 2018. The text and photos were updated on July 14, 2021. The review and rating have not been changed.

Recipe Author: Rayan at The Design Confidential
Get the recipe

The Ingredients

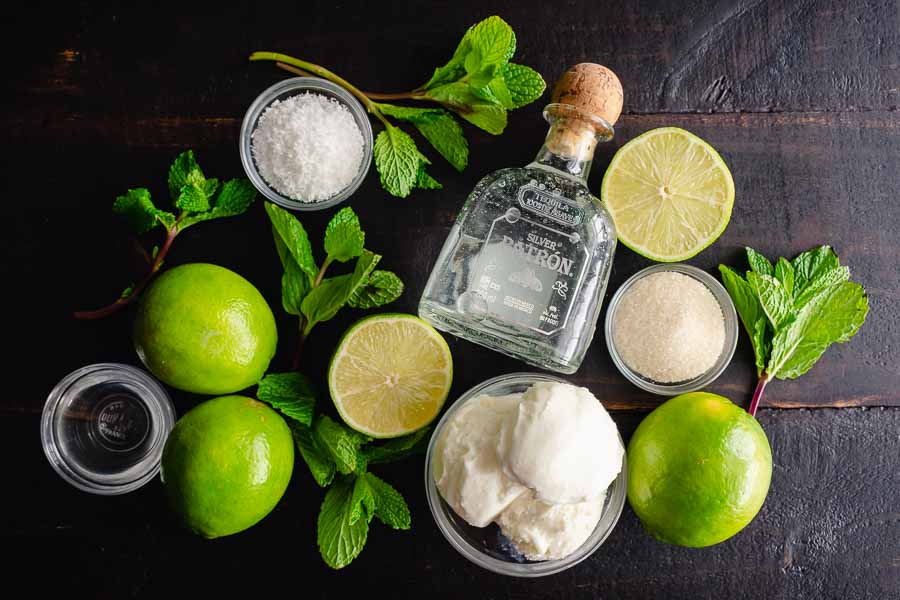
Everything I needed for this Coconut Mint Margarita cocktail was easy to find. Yes, the tequila was about $40, but it’s the good stuff. And it’s not like this recipe uses anywhere near the whole bottle, so I have plenty leftover.

I couldn’t find coconut sorbet, but I was able to find coconut gelato. And the container was 16 ounces, exactly the amount this recipe calls for. Not that I would have been in any way upset or inconvenienced if I had some leftover! But not needing to measure made things faster.

Coconut Mint Margarita Ingredients
Tequila, lime juice, sugar, coconut gelato, mint leaves, simple syrup, and coconut flakes

The Process

Now this recipe did take me a little longer than the average cocktail, but there is a little more to it than just measuring the ingredients. The recipe is divided into 3 sections that are easy to follow, and I had my margarita mixed and garnished in 8 minutes. I used a generously sized margarita glass to serve, and I got just over 2 servings from this recipe.

Rimming the glass with coconut and sugar is just delicious, but I found it difficult to get the coconut to stick when I used a juiced lime to rim the glass. When I revisited this recipe, I used simple syrup (recipe below) and had much better results. The thicker syrup really made the sugar and coconut stick to the rim.

Finally, I used my mini-prep to mix my Coconut Mint Margarita instead of a full-sized blender, although either would work fine. I find the smaller appliance more convenient, but that’s just a personal preference.

Simple Syrup

Simple Syrup

The Hungry Pinner
A quick and easy-to-make staple of any well-stocked bar. This recipe yields approximately 12 ounces of simple syrup.
Prep Time 5 minutes
Cook Time 5 minutes
Cool 1 hour
Total Time 1 hour 10 minutes
Course Drinks
Servings 12 1-ounce servings
Calories 63 kcal

Ingredients
  

  • 1 cup water
  • 1 cup sugar of your choice (I use organic sugar, which gives the syrup an amber tinge)

Instructions
 

  • In a small saucepan, bring the water to a boil.
  • Reduce heat to medium and add the sugar. Stir until dissolved (the mixture will become clear when the sugar is dissolved).
  • Remove from heat and allow to cool. The simple syrup can be refrigerated in a bottle or other airtight container for up to 4 weeks.
Keyword bartending, mixology, simple syrup, sugar

Coconut Cheesecake Bars

0

Since I started the week with a coconut milk based seafood chowder, I thought I would continue the theme with a dessert. No, not a seafood dessert! Coconut has always been a favorite, and adding it to cheesecake is irresistible for me. But the only thing I don’t like about cheesecake is the work involved. Coconut Cheesecake Bars to the rescue. This recipe promised to give me the coconut cheesecake I love with far less work. Let’s see if it delivers.

Coconut Cheesecake Bars recipe – the best coconut cheesecake bars I have ever had! They are sweet, creamy, coconut-y. The no graham cracker crust is a must try.

Recipe Author: Anna at Crunchy Creamy Sweet
Get the recipe

The Ingredients

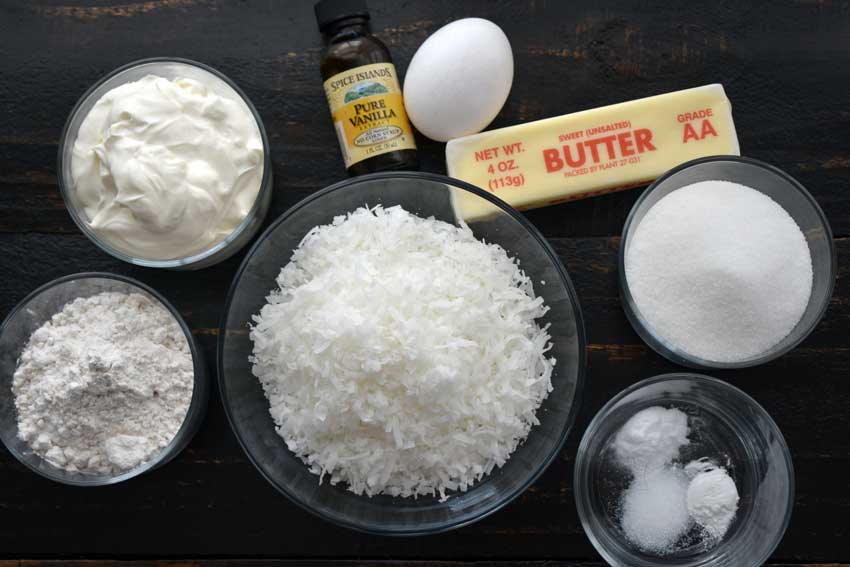
There are a few ingredients for this recipe, but the majority are pantry/kitchen staples. In fact, all I needed to purchase was the shredded coconut and the cream cheese. Two items! I had leftover coconut, but the package of cream cheese was exactly the amount need for this recipe.

Coconut Cheesecake Bars Ingredients
Shredded coconut, flour, cream cheese, vanilla extract, egg, butter, sugar, baking powder, baking soda, and salt

The Process

This recipe took slightly longer than the 45 minutes listed. The slowdown was with the prep work, though I’m not sure why. Here’s how the time broke down:

  • Prep: 15 minutes (this was everything up to Step 7)
  • Cook: 36 minutes
  • Total: 51 minutes (not including time to cool)

The prep work for this recipe involves some advance planning. The butter needs to be melted then cooled, and the cream cheese needs to be softened. Fortunately, I found ways around that…

If you’re like me, you melt butter in the microwave. The secret here is to use the shortest amount of time possible. I used half a stick of butter cut into small cubes and microwaved it for 15 seconds. Then I stirred it well, microwaved it for another 15 seconds, and stirred it again. The butter was warm with small solid pieces floating in it, so I set it aside so it could finish melting while I did the rest of my prep work. The butter was cool by the time I was ready to make the crust (more on that later).

Did you know you can buy softened cream cheese? My husband made this discovery a short time ago when he came home with a container of cream cheese spread. It’s not as light as whipped cream cheese since whipping adds air, but it’s much creamier than the old-fashioned block of cream cheese. I was able to use the spread right out of the refrigerator without waiting for it to soften.

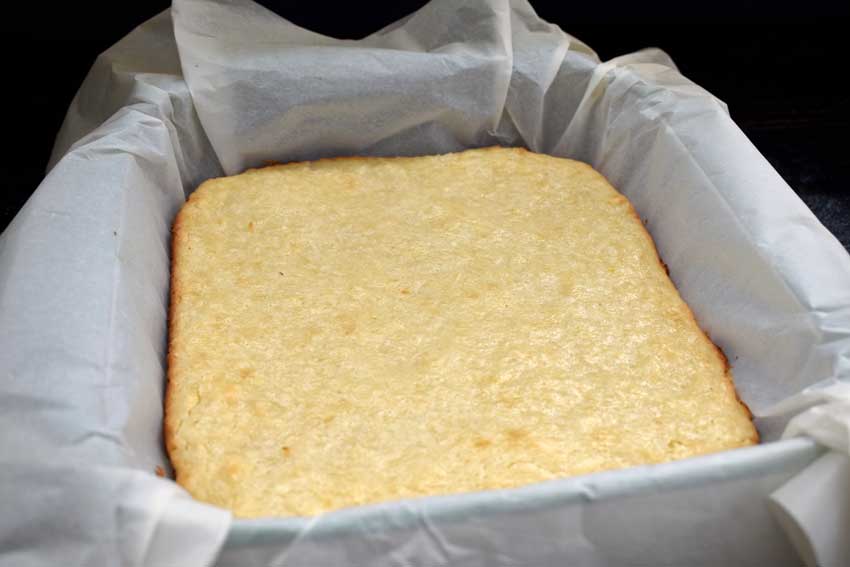
I recommend lining the baking pan with parchment instead of aluminum foil. Why? In my experience, foil is more likely to tear when you remove it from the pan. Yes, foil is easier to line the pan with since it holds its shape right away. Parchment isn’t quite as easy at first, but it holds its shape nearly as well once you press the crust into the pan.

I also prefer parchment because it’s so easy to lift the dessert bars out of the pan once they have cooled. Then it’s just a matter of placing the whole thing on a cutting board and cutting it into 9 pieces. I was even able to lift the parchment and cut bars and place them back into the baking pan for storage (my pan has a lid just for that).

Baked and cooled coconut cheesecake bars

Coconut Lime Shrimp and Cod Chowder

0

I’ve had this Coconut Lime Shrimp and Cod Chowder recipe on my mind for a while now. The ingredients (shrimp, lime, and coconut milk) reminded me of Thai tom yum soup that I absolutely love. I knew the ingredients would be a little more costly than my normal meals, but we all need a treat once in a while. Plus I needed a break from the usual beef and chicken. So after a little careful budgeting, I finally get to make my first seafood chowder. Whoohoo!

I’m not usually all that big on soup. Most soups, I find, are way too light to be eaten as a meal and tend to leave you starving just a few hours after you’ve had your last bite, if not down right immediately after. But this Coconut Lime Shrimp and Cod Chowder, despite being a seemingly light meal, is so chock full of fish and seafood, it won’t let you down quite so quickly…

Recipe Author: Sonia at The Healthy Foodie
Get the recipe

The Ingredients

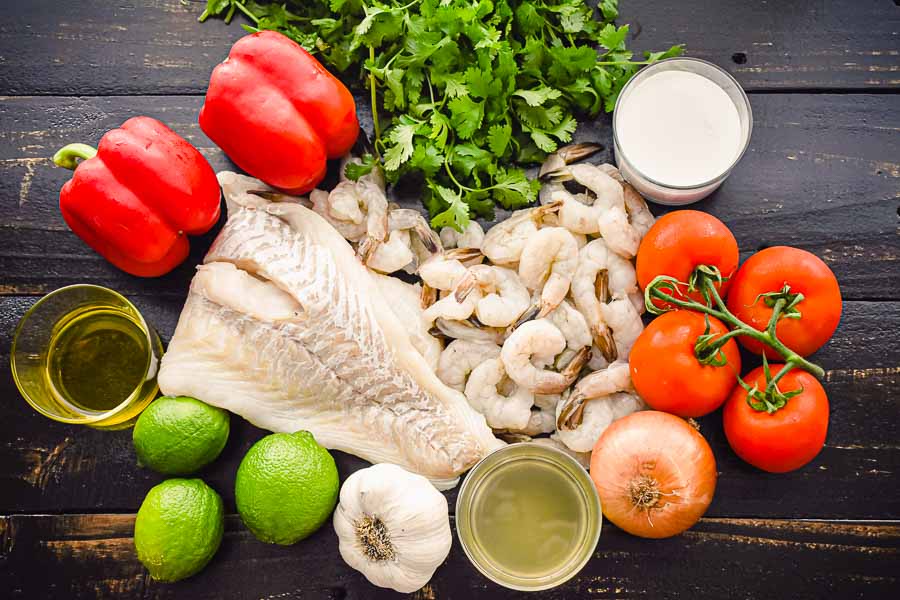
The seafood for this recipe was pretty splurgy for me. I spent $18.34 on the cod and $25.98 for the shrimp (peeled and deveined, but still had the tails on), for a total of $44.32. That’s not counting the rest of the ingredients, but what I needed to buy wasn’t expensive, especially compared to the seafood. Yes, it was for 6 servings worth of seafood chowder, but still… Next time I will scale it down to 2-3 servings since it’s just the 2 of us, this soup is very filling, and reheating seafood doesn’t usually have the greatest results.

One last note about the tomatoes: I used 4 small instead of 2 large. My local grocery store doesn’t sell large tomatoes on the vine, and I find they taste so much better than the larger tomatoes they carry.

Coconut Lime Shrimp and Cod Chowder Ingredients
Cod, shrimp, cilantro, coconut milk, tomatoes, onion, fish stock, garlic, lime juice, olive oil, and red bell peppers

The Process

This recipe took a total of 35 minutes from start to finish, just a touch over the 35 minutes listed. The prep work was what took me a little longer (13 minutes instead of the 10 listed). I think that was likely because I had to remove the tails from the shrimp.

Buying peeled and deveined shrimp is such a timesaver that I’m always willing to pay a little more for. They still had the tails on, though, but they’re quick and easy to remove. Just pinch the portion of the shell that’s still attached to the shrimp and lightly tug. The shell and tail should come right off, and you won’t lose any of the meat like you would if you cut off that portion.

One thing I would change is how long I cooked the chowder at Step 3. I (foolishly) decided to cook it for the maximum time listed of 10 minutes. I really should have tested things at the 8-minute minimum, but I thought everything looked underdone. Silly me. I think the shrimp was a tad overdone after 10 minutes. It wasn’t terrible or the author’s fault, so live and learn.

Otherwise, I found this seafood chowder recipe very easy to follow. The author breaks the ingredients list up especially well, and each step is grouped/listed as it’s called for in the directions. Just be careful when you stir the soup once you’ve added the cod because it flakes apart very easily.

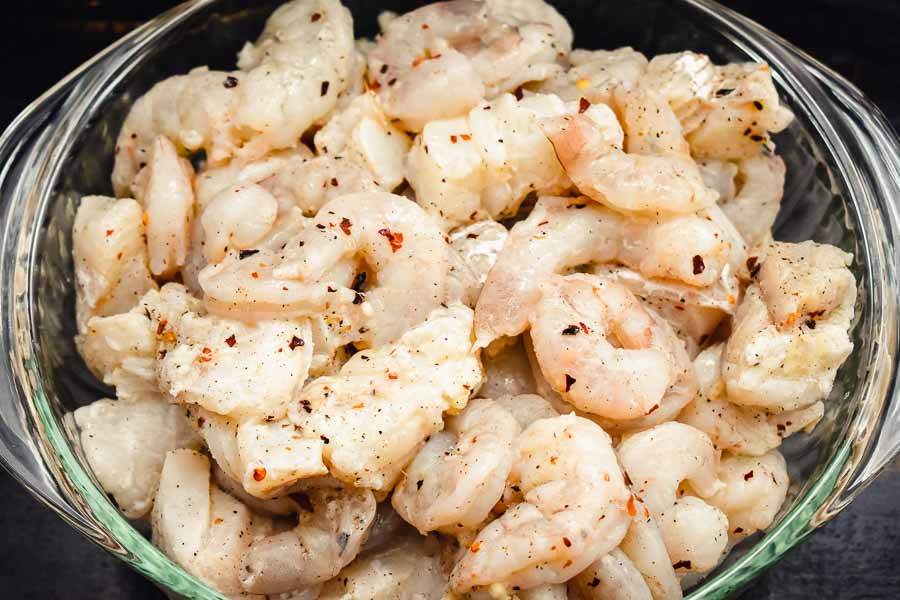
Shrimp and cod marinating in a casserole dish

Strawberry Mojito

0

My Cuban-themed week is at an end, and I’m a little sad. I’m going to miss the mojo pork and Cuban rice I feasted on this week. But I do have one more delicious recipe to try, the classic mojito cocktail with a fruity twist. I’m not a regular rum drinker, but I seriously love mojitos. The classic version is my go-to, but I do love trying different versions, even when they’re made with vodka ?.  I’m very excited to try this strawberry mojito recipe!

Recipe Author: in the Mix Magazine
Get the recipe

The Ingredients

The list of course ingredients for this recipe was filled with easy-to-find ingredients that were reasonably priced. I always keep a bottle of homemade simple syrup (recipe below) around, so I didn’t have to buy that particular ingredient. It’s equal parts hot water and sugar, stir until the sugar is dissolved, then chill. It takes less than 5 minutes to make, and it’s far cheaper than purchasing it ready-made.

My only issue with the list of ingredients was it omitted the club soda. That ingredient isn’t mentioned until the end of the instructions. Fortunately, club soda is a staple for me, and I always have some around.

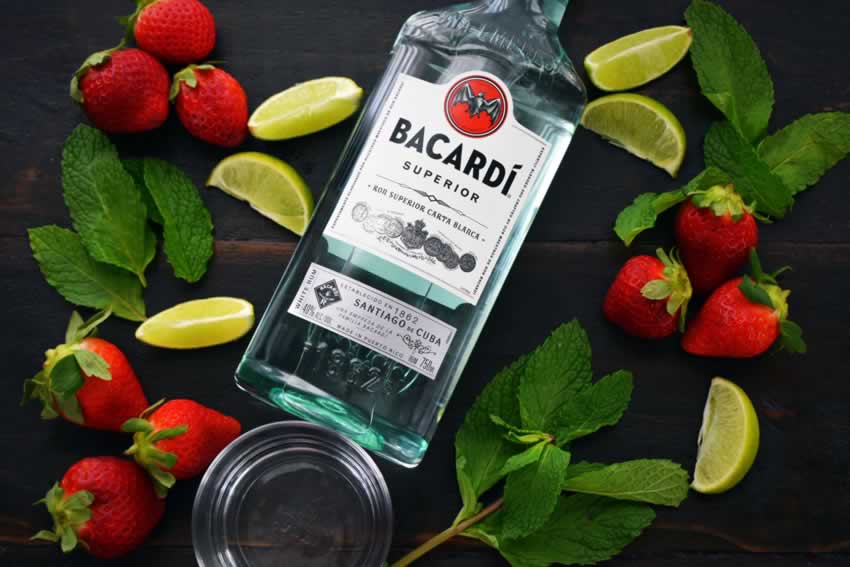
Strawberry Mojito Ingredients
Bacardi Superior Rum, mint leaves, lime, strawberries, and simple syrup (club soda not shown)

The Process

This strawberry mojito recipe was very easy to make, and I had a garnished cocktail in 4 minutes. Muddling the limes was the toughest part. Squeezing them a bit first helps soften them up. Of course the strawberries and mint muddled very easily. The rest is just a matter of adding rum, crushed ice, and club soda. And crushed ice is important—it keeps the muddled fruit from floating to the top of your drink.

Simple Syrup

Simple Syrup

The Hungry Pinner
A quick and easy-to-make staple of any well-stocked bar. This recipe yields approximately 12 ounces of simple syrup.
Prep Time 5 minutes
Cook Time 5 minutes
Cool 1 hour
Total Time 1 hour 10 minutes
Course Drinks
Servings 12 1-ounce servings
Calories 63 kcal

Ingredients
  

  • 1 cup water
  • 1 cup sugar of your choice (I use organic sugar, which gives the syrup an amber tinge)

Instructions
 

  • In a small saucepan, bring the water to a boil.
  • Reduce heat to medium and add the sugar. Stir until dissolved (the mixture will become clear when the sugar is dissolved).
  • Remove from heat and allow to cool. The simple syrup can be refrigerated in a bottle or other airtight container for up to 4 weeks.
Keyword bartending, mixology, simple syrup, sugar

One Pot Cuban Yellow Rice (with Chicken and Sausage)

Since this week is all about Cuban food, I simply had to include a Cuban rice recipe. It’s a versatile staple dish that can be prepared many different ways. I like it with green pepper and sausage, and this recipe has both. However, it’s made with turkey sausage, which is something I find unusual. I like that it’s a little healthier than pork sausage, so I figured I’d see if it tastes as good.

A flavorful one skillet rice dish, packed with chicken and sausage and other amazing ingredients. The perfect dish your family would love.

Recipe Author: Renz at Home Made Zagat
Get the recipe

The Ingredients

The list of ingredients for this Cuban rice recipe is medium length, but nothing was expensive or difficult to find. The author recommends using precooked Jennie-O Hot Italian Turkey Sausage but also says uncooked will work. That’s really fortunate because my local grocery store only stocks it uncooked. It worked out fine, but make sure you use a very sharp knife when you cut it because the uncooked sausage is very soft. Also, the casing will fall off most of the pieces. I peeled it off the rest.

The ingredients list also calls for 3 chicken breasts. That’s really a lot of meat, so I used 3 chicken breast halves. That quantity seemed more reasonable since a half chicken breast is usually a whole serving.

This recipe also lists several options for extra vegetables. I opted for red bell pepper since the flavor is pretty mild. One was just enough to make the 1 cup the recipe called for, and it added some color.

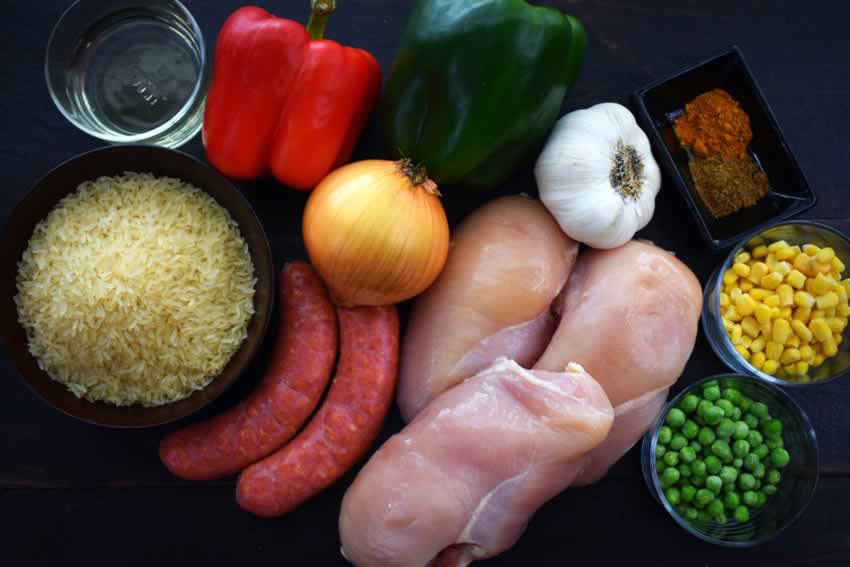
One Pot Cuban Yellow Rice (with Chicken and Sausage) Ingredients
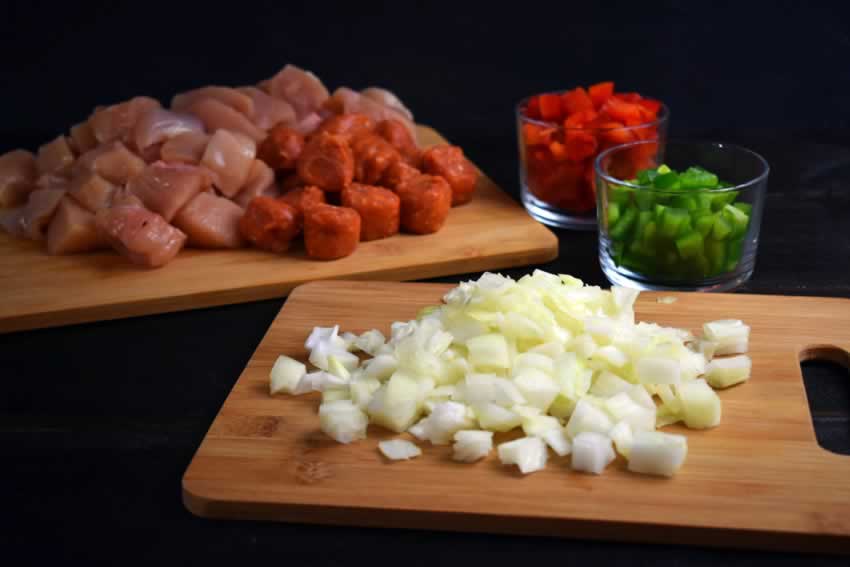
Rice, white wine, red bell pepper, onion, green bell pepper, garlic, turmeric, cumin, frozen corn, frozen peas, chicken breast, and turkey sausage

The Process

Most of the prep work for this recipe is chopping the meats and vegetables. I used my veggie chopper to speed things along. My post for vegan fajitas includes a quick technique to core bell peppers to get them ready for the chopper (steps 1-4). It should help speed things along if you need to chop the peppers the old fashioned way too.

I noticed there was a lot of liquid in the pot after cooking the meats, onion, and green pepper. I think that extra liquid was why my Cuban rice took a little longer to cook. Next time I think adding less of the chicken stock will take care of that issue. It could be poured off, too, but I don’t like that option because that liquid had the meat and vegetable drippings as well as the spices.

The directions were pretty clear and easy to follow, but I did have a couple of questions. the first was how to prep the garlic. It’s not specified, so I minced it. The second question was whether to cook the rice with or without a lid. Some recipes call for the pot to be covered, while others say uncovered. This recipe doesn’t specify covered or uncovered until the very last step. I went with uncovered since there was so much liquid.

Overall, I spent 1 hour and 8 minutes on this recipe. The prep time was 10 minutes (as listed), and the rest was time spent cooking.

Chopped chicken, sausage, red and green bell pepper, and onion

Cuban Mojo Marinated Pork (Lechon Asado)

One of the things I love about living in South Florida is how easy it is to find good Cuban food. I don’t think I’ve ever tried a dish I didn’t like, but I can’t say I’ve ever made Cuban food at home. That must change! Mojo pork sounded like a good place to start, but I was a little unsure of this marinade recipe because it doesn’t call for sour oranges. However, I was reassured after reading the author’s post and seeing that she tried to recreate the taste using a combination of oranges and lime. Now I was curious. Would it really work? I had to know.

A traditional Cuban roasted pork recipe that is very simple, yet packed with tons of flavor! There is nothing to this pork except an amazing marinade, but it is honestly some of the best meat I’ve ever put in my mouth.

Recipe Author: Karen at The Food Charlatan
Get the recipe

The Ingredients

There are a fair amount of ingredients in this mojo pork, but none were unusually expensive or difficult to find. The pork shoulder was the most expensive item at $11.60 for 3.88 pounds. Not bad for 6 servings. And although the label said boneless, there was a bone in it. I’m not sure if that’s the norm for this particular cut or if it was a packaging error. Luckily it was fairly easy to cut around when I carved the cooked roast.

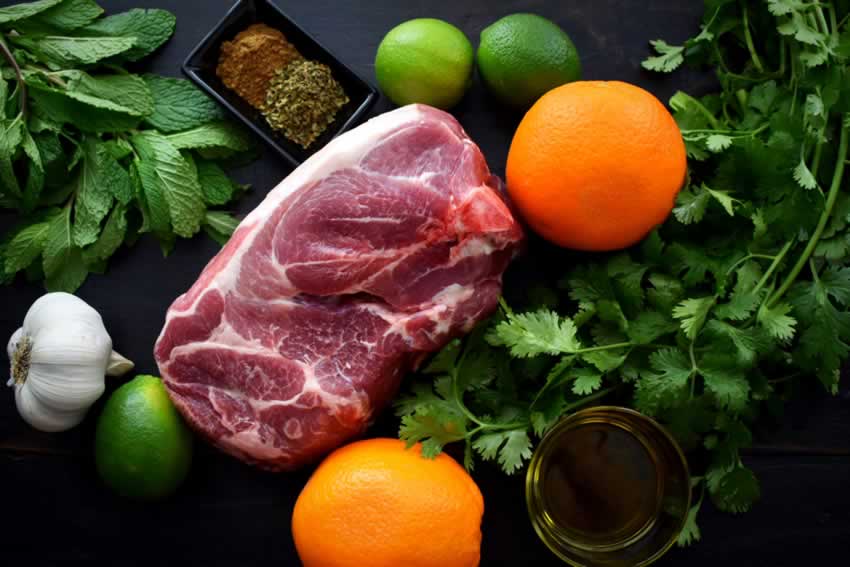
Quantities of the oranges and limes aren’t given, just for the amount of juice and zest you will need. I used 1 orange for the zest and 1 1/2 oranges for enough juice. Two limes were enough for the lime juice. I’m glad I bought 3, though, because you never know it limes will be juicy or dry.

Cuban Mojo Marinated Pork (Lechon Asado) Ingredients
Pork shoulder, lime, garlic, mint, cumin, oregano, orange, cilantro, and olive oil

The Process

Most of the work for this recipe is making the marinade. There are two methods listed, with or without a food processor. I pulled out my mini-prep, thinking it could handle the job. However, a quick read through the ingredients made me rethink that, and I’m really glad I did. This is a job for a full-sized food processor. I had my pork shoulder marinating in just 10 minutes, and I left it in the refrigerator overnight to make sure the roast soaked up the flavors.

The next night it was just a matter of preheating the oven and cooking the roast. I used a roasting pan with a wire rack, but no worries if you don’t have one. The author includes an ingenious alternative of placing a wire cooling rack on a baking sheet that would have been just as effective. No matter which method you use, be sure to line the pan with foil for easy cleanup. I didn’t, and the marinade that dripped while cooking burned onto the pan. It took multiple scrubbings to remove it.

The total time spent on this roast was 2 hours 40 minutes, plus marinating overnight. Here’s how the times broke down:

  • 10 minutes to prep the marinade
  • 24 hours to marinate
  • 10 minutes to preheat the oven
  • 2 hours to roast
  • 20 minutes to stand after roasting
Cuban Mojo Marinated Pork (Lechon Asado)
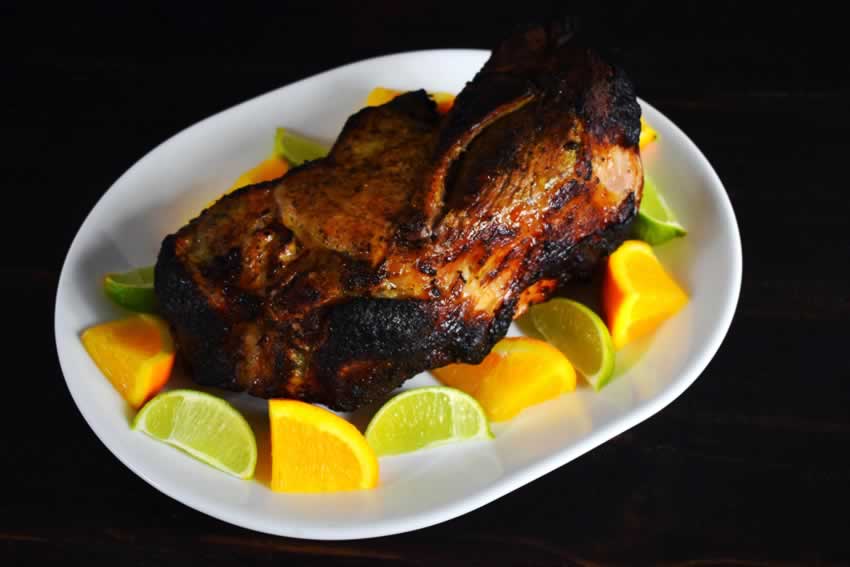
My mojo pork roast before slicing

Bourbon Strawberry Milkshake

Since I started the week off with a cheeseburger soup recipe, it seems kind of natural to end the week with a milkshake. But not just any milkshake! You know I like my milkshakes a little boozy. I haven’t posted a bourbon recipe in a while, so this bourbon strawberry milkshake recipe popped up at just the right time. My husband thinks it’s an odd combination; I think it will totally work. Time to find out who’s right LOL!

This strawberry milkshake is creamy, cool and full of bourbon! This is a sweet adult, boozy, sippable treat!

Recipe Author: Tanya at Lemons for Lulu
Get the recipe

The Ingredients

The list of ingredients for this bourbon strawberry milkshake is short and sweet. Unsurprisingly, the bourbon is the most expensive item, but you don’t need to use much. You could always buy a small bottle if you don’t drink bourbon regularly or just want to save a little.

Also, I bought strawberry ice cream that’s had chunks of strawberries mixed in. I highly recommend you do the same—they put this recipe over the top.

Bourbon Strawberry Milkshake Ingredients
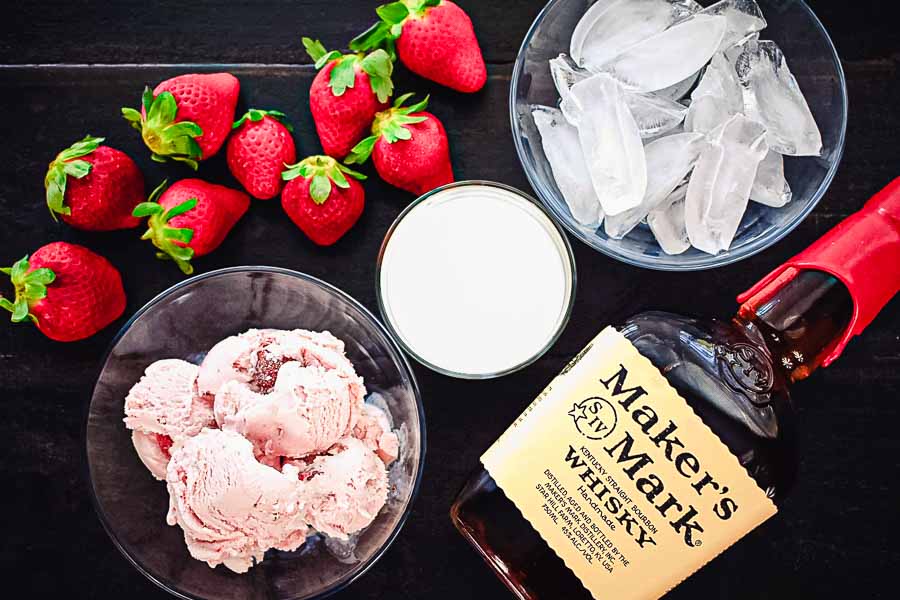
Strawberry ice cream, milk, ice, and bourbon

The Process

This bourbon strawberry milkshake recipe couldn’t have been easier to make. The ratio of ice cream to liquid was perfect and didn’t give my blender any problems. All I had to do was add the ingredients, hit the milkshake button, and blend for a minute or so. The consistency of the finished product was a little thin, but that made it easy to drink with a straw. No waiting for a too-thick milkshake to thaw.

The total time on this recipe was 7 minutes, just under the 10 minutes listed. That includes making the milkshake and garnishing. The recipe does say it makes 2 servings, but I ended up with 3 full pint glasses. Not that I’m complaining, but you can’t really store the extra shake and drink it later. Good thing my husband was on hand to help with the extra!

Bourbon Strawberry Milkshakes

Spinach and Bacon Salad

0

I’m not a salad person, but I do enjoy spinach salad. Top that with bacon and you have my attention. Not to mention that the list of ingredients s short, full of basics, and the total time listed to make this recipe is just 10 minutes. I do enjoy a challenge, but I also appreciate quick and easy recipes, especially on weeknights. So let’s see if this salad is as good as it sounds!

This delicious Spinach and Bacon Salad is a breeze to prepare! The sweet dressing with the salty bacon keeps you wanting more!

Recipe Author: Aimee at Shugary Sweet
Get the recipe

The Ingredients

The list of ingredients for this spinach salad is pretty short. In fact, I had all of the dressing ingredients on hand, so I only had to buy the spinach and croutons. I had 3 slices of bacon leftover from another recipe, and this salad sounded like the perfect way to use it up.

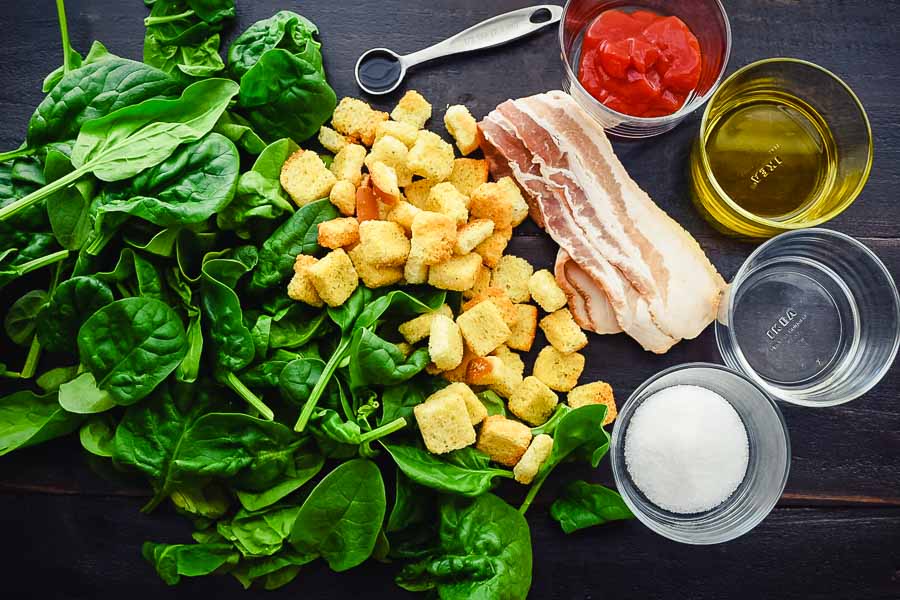
Spinach and Bacon Salad Ingredients
Spinach, croutons, Worcestershire sauce, ketchup, olive oil, vinegar, sugar, and bacon

The Process

This spinach salad is one of the easiest recipes I have ever made. It only took a couple of minutes to mix up the dressing. I put all the ingredients into a small plastic container with a secure lid, gave it a really good shake, and popped it into the refrigerator overnight.

When I was ready to make the salad, I stemmed the spinach while the bacon was frying. It took me about 5 minutes to finish the spinach, and a few more for the bacon to get nice and crispy. Then it was just a matter of adding the spinach to a couple of bowls, topping it with the bacon, drizzling with the salad dressing, and tossing on a few croutons. The entire process took just 15 minutes.