Home Blog Page 52

Asparagus and Artichoke Breakfast Casserole

If you’ve read some of my past posts, then you know I’m not a morning person. Not. At. All. And although my coffee consumption has gone down, I just can’t give up breakfast. Even though I’m a morning zombie, I am always hungry at that time of day. The result is normally finding the fastest and easiest thing I can to make or, more often, reheat. Until today. I love trying new things, and a breakfast dish that requires a recipe is unheard of in this house. I’m very excited to try out this breakfast casserole, albeit it will be served late morning. Closer to lunch, but we can always say brunch-ish.

A light, healthy and tasty summer breakfast casserole with asparagus, artichokes and plenty of cheese!

Recipe Author: Kevin at Closet Cooking
Get the recipe

The Ingredients

Eggs for breakfast are pretty standard if I decide to actually cook in the morning. Even adding cheese to them isn’t unusual. What makes this recipe so different for me is adding multiple kinds of cheese and vegetables. I absolutely love both, and I’m always down for learning how to work vegetables into a meal.

Fortunately, the list of ingredients for this recipe isn’t long, full expensive items, or anything that was hard to find. The most expensive item was the shredded parmesan cheese at $4.19. Everything else was around $1-$2.
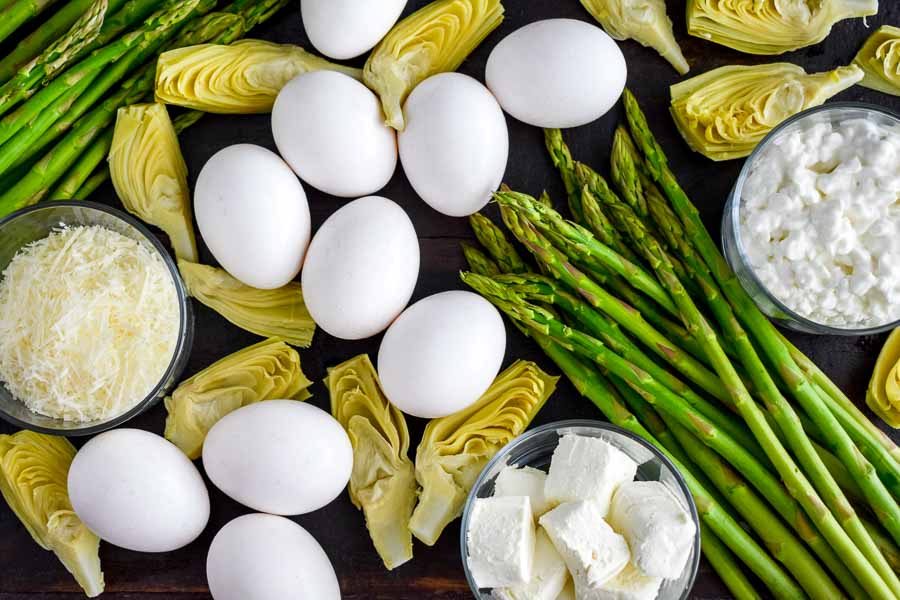
Asparagus and Artichoke Breakfast Casserole ingredients
Asparagus, artichoke hearts, eggs, parmesan cheese, cottage cheese, and cream cheese

The Process

There really wasn’t a whole lot of work to make my breakfast casserole, and it was ready to bake with just 8 minutes of prep work. I bought shredded parmesan cheese, so no work there besides measuring it. Then it was a matter of shopping a few things like the asparagus, artichoke hearts, and cream cheese. From there all I had to do was mix it all up, pour it into a baking dish, and pop it into the oven.

First, I have to tell you that I used an 8″ x 8″ baking dish instead of the 9″ x 9″ the author listed. I think this caused me some issues with the baking time. I started out timing my casserole for the lowest time, 20 minutes. The recipe says to bake until the “eggs have set and the top is a light golden brown”. None of that happened, so I added 5 minutes as listed. No joy. The top was definitely not browned, and the center still seemed like liquid.

I wasn’t going to take the chance of undercooking my breakfast casserole, so I moved the oven rack up one level from the middle where it was initially placed. Then I added 10 minutes, checked the casserole, and add 10 more minutes. The total cooking time more or less doubled from 20-25 minutes to 45 minutes, but I ended up with a golden brown breakfast casserole that was pretty well set in the middle.

Note: I added pepper but no salt to my egg mixture. The marinated artichoke hearts and cheeses were all salty, so I didn’t want to overdo it. I’m glad I waited because I found the casserole to be perfectly seasoned without the extra salt. That’s saying a lot since I usually add salt to everything!
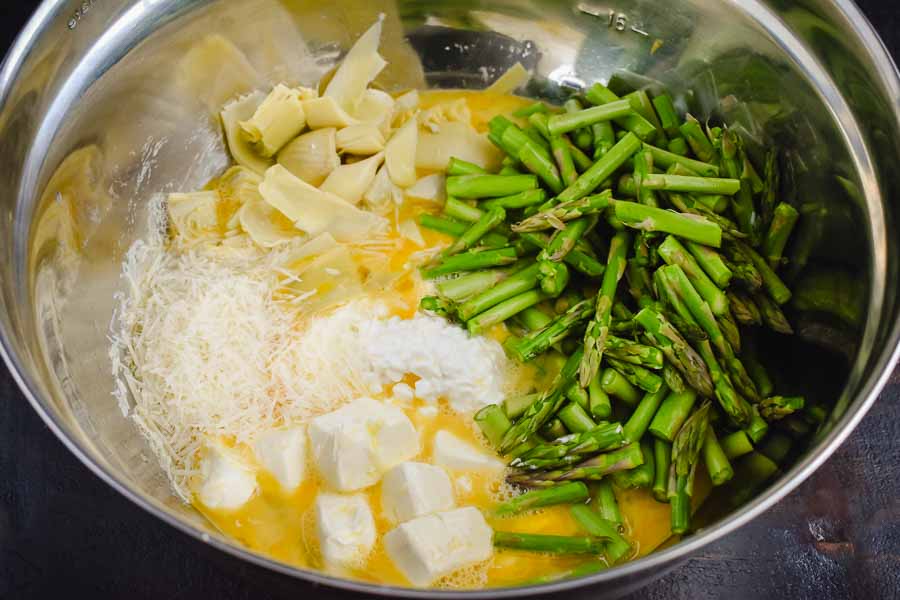
Mixing the ingredients
Everything is chopped, measured, and ready to mix

Chocolate Martini

I have to admit I had trouble finding a beverage recipe this week. I try to have a theme for all my recipes each week, like a particular cuisine or an ingredient. This week just didn’t work out that way, so I used the German Chocolate Brownie Pie I just made as a jumping-off point for this week’s drink recipe. After all, who doesn’t like chocolate? I love the stuff, so I went with this Chocolate Martini recipe. Let’s see how it goes.

This Chocolate Martini recipe is one of our favorite ways to celebrate special occasions. Just measure, shake and pour!

Recipe Author: Lisa and Anna at Garnish with Lemon
Get the recipe

The Ingredients

I had a bottle of Godiva dark chocolate liqueur left over from making Chocolate Tiramisu, and I keep creme de cocoa and chocolate syrup on hand. All I had to shop for to make this chocolate martini recipe was the milk and vanilla vodka. If you need to purchase all of the ingredients, here is an idea of the cost:

  • $29.99 Godiva chocolate liqueur
  • $14.99 Creme de cocoa
  • $13.99 Vanilla vodka
  • $ 1.79 Milk
  • $60.76 Total (plus tax)
Chocolate Martini Ingredients
Chocolate liqueur, creme de cocoa, vanilla vodka, milk, and chocolate syrup

The Process

Making this chocolate martini recipe was ridiculously quick and easy, and I had my garnished cocktail ready in 2 1/2 minutes. It really was just as easy as the author said it would be. I love it when that happens!

The only thing I had a question about was the creme de cocoa. It’s available in dark and white, but the variety wasn’t specified. Fortunately, the author included a short video showing the ingredients she used, and I noticed she used dark creme de cocoa.

I didn’t have a mini squeeze bottle for the chocolate syrup garnish, so I had to improvise to get the thin lines. Instead, I snipped off a tiny corner of a plastic bag, added some chocolate syrup, and used it as a piping bag. I have to say it worked pretty well. The alternative would be to just use the chocolate syrup bottle, but the opening on that is very wide and would have made a thick, drippy line. It’s just a matter of which you prefer.

German Chocolate Brownie Pie

0

I do like German chocolate cake, but German chocolate brownie? This could be an improvement on something I thought was already pretty perfect. Changing the chocolate cake to a brownie sounds even richer and more chocolatey than the classic version. Topping that with pecans and gooey coconut frosting makes it sound even better. It isn’t the classic version I’m used to, but I have high hopes for this version.

An easy, from scratch, fudgy brownie is baked into a tart pan and topped with a classic coconut-pecan German frosting for a decadent dessert you won’t be able to resist!

Recipe Author: Heidi at Foodie Crush
Get the recipe

The Ingredients

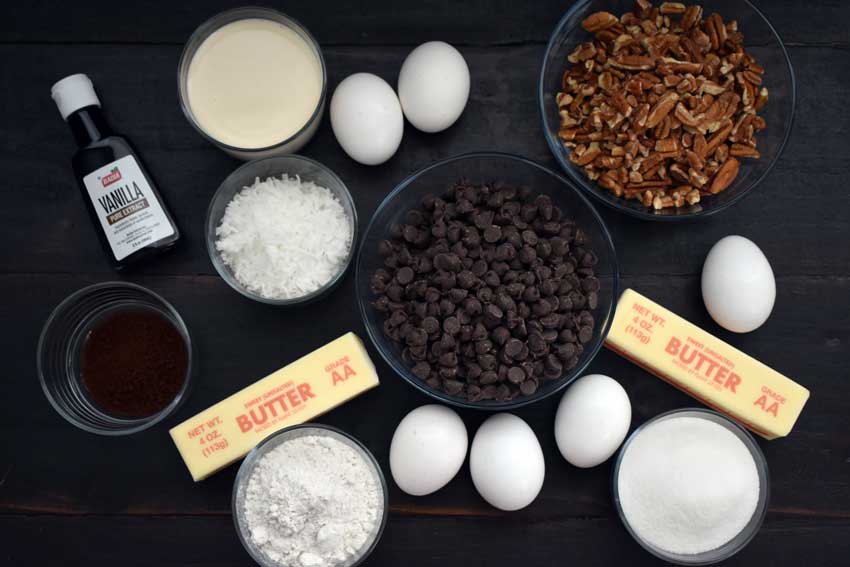
As usual, I had a few of the ingredients on hand, like flour, sugar, butter, instant espresso, and even leftover shredded coconut from the Coconut Cheesecake Bars I made a couple of weeks ago. What I did have to buy was easy to find and mostly inexpensive. The priciest item by far was the chopped pecans at $10.99 for a 2-cup package.

German Chocolate Brownie Pie Ingredients
Semi-sweet chocolate chips, shredded coconut, instant espresso powder, vanilla extract, evaporated milk, eggs, chopped pecans, butter, sugar, and flour

The Process

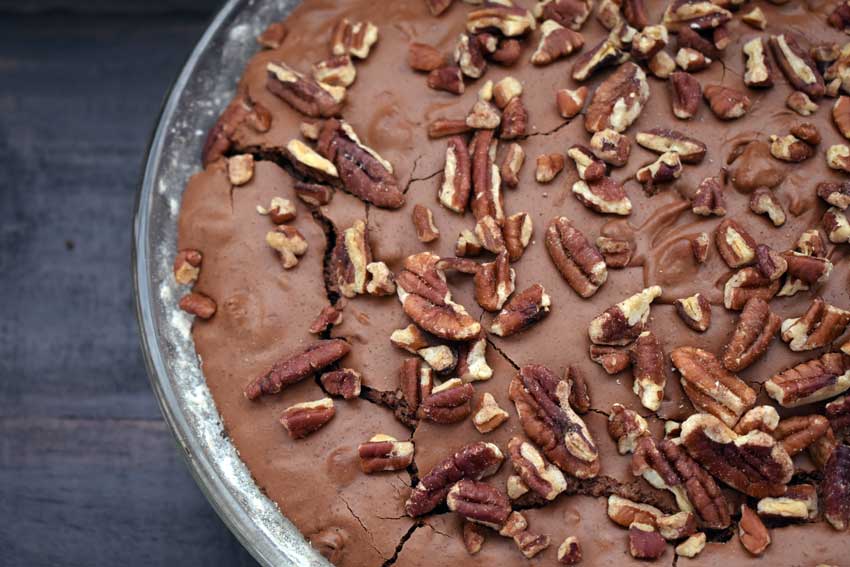
This recipe is divided into 2 sections, 1 for the brownie pie and 1 for the frosting. I made it over 2 days for a total time of 1 hour 25 minutes. Day 1 was the brownie pie. It took me 15 minutes to get it ready to go into the oven and 45 minutes to bake. As you can see below, the top cracked just like the author described in Step 5.

Day 2 was making the frosting. That took 20 minutes to cook on the stove. Unfortunately, I forgot to keep track of how long it took to cool, but I would say at least an hour. Actually frosting the pie took only 5 minutes. That includes sprinkling the frosted pie with some extra chopped pecans.

Although the frosting was cool, it was still very soft. Since it is layered so thickly, it collapsed when I made the first slice into the pie. I covered it with plastic wrap and refrigerated it overnight to fix that. The frosting held its shape nicely for the next slice.

Another departure from the recipe was the pan I used. I don’t own a tart pan with a removable bottom, so I used my Pyrex pie plate with a circular piece of parchment paper in the bottom. The pie came right out after I ran a knife around the edge of the pan. A removable bottom would have been more convenient, but this was still easy.

Brownie pie fresh out of the oven

Slow Cooker Creole Cornish Hens

I love one-pot meals, but this Slow Cooker Creole Cornish Hens recipe takes it to another level. Not only is it made in one pot, but it’s also a well-rounded and healthy meal. I also love the fact that it is made in a slow cooker, so I can set it and forget it. Bonus: My husband has never tried Cornish hen, and I know he’ll like it. If you’ve never had it, the best way I can describe the taste is somewhere between chicken and turkey.

Creole seasoning is used on Cornish hens in this simple slow cooker meal for two. This one-pot meal recipe is healthy (whole30/paleo) and flavorful too.

Recipe Author: Shannon at Fit Slow Cooker Queen
Get the recipe

The Ingredients

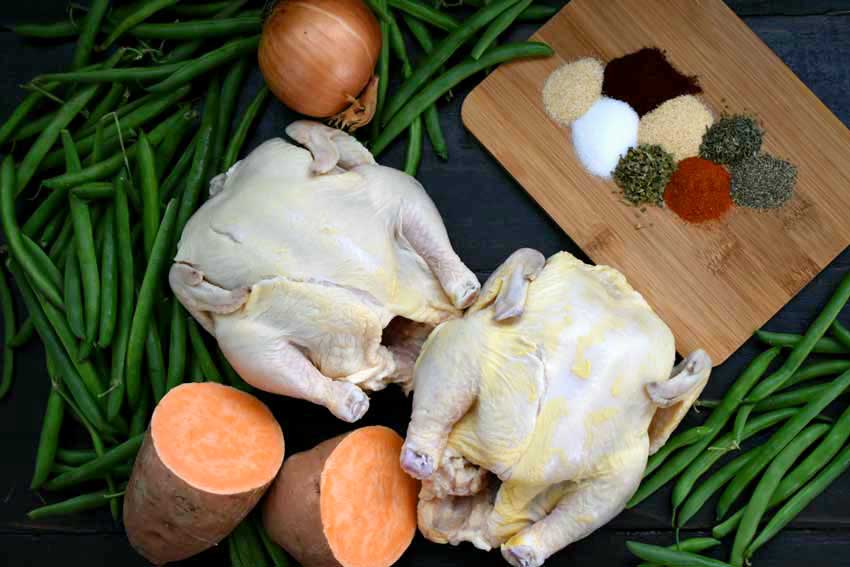
Everything was easy to find and reasonably priced. The Cornish hens were the most expensive item at $11.22, but that’s in line with a package of boneless, skinless chicken breasts. I was worried I would have to buy them from the frozen section, but my grocery store had fresh Cornish hens stocked in a convenient 2-pack. It’s like they knew!

Slow Cooker Creole Cornish Hens Ingredients
Cornish hens, sweet potato, green beans, onion, garlic powder, paprika, salt, onion powder, oregano, thyme, cayenne, and pepper

The Process

The bad news is it took me 10 minutes to prep this recipe instead of the 5 minutes that was listed. And I’m not mad about it. Seriously, 10 minutes to get an entire meal ready to cook is still pretty good as far as I’m concerned. That time includes:

  • Mixing the spice blend
  • Snapping the stems of the green beans
  • Peeling and dicing the sweet potato
  • Peeling and slicing the onion
  • Putting it all together in the slow cooker

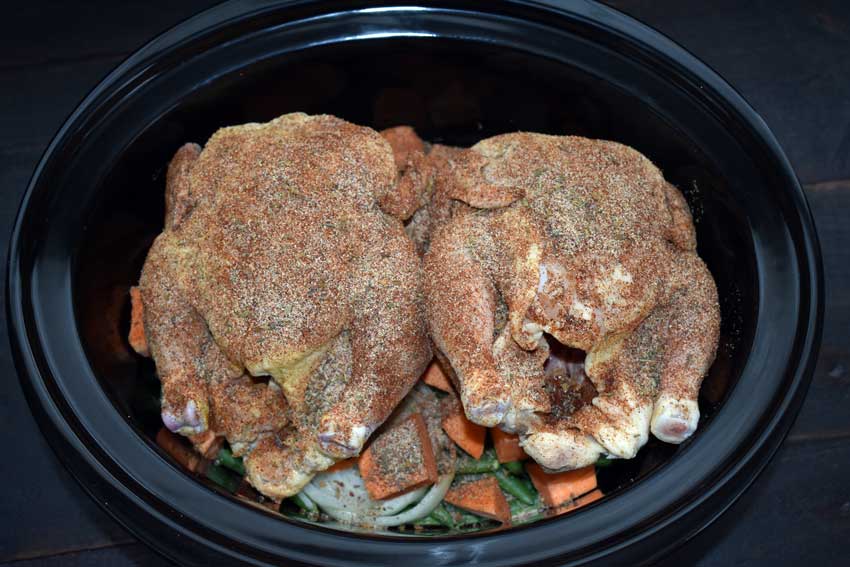
After that, I set my slow cooker to 5 hours on low and walked away. I came back to a meal that was ready to serve. The Cornish hens were juicy, the onion and sweet potato were tender, and the green beans were still crisp. All I had to do was serve. And my husband loved it!

Everything is ready for the slow cooker

Easy Mango Lassi

Since I started this week by making Slow Cooker Indian Butter Chicken I thought I would continue the Indian food theme with another classic recipe, a mango lassi. Lassi’s are similar to fruit smoothies and come in sweet and salty flavors. I’ve never tried salty, so I’m sticking with the sweet version for this post. And this will be my first time making a mango lassi at home. I can’t wait to try it!

Nicely frothed with fresh dollops of yogurt, ripe mango, sugar, cardamom powder and heaps of ice cubes, Easy Mango Lassi Recipe is a soothing delight.

Recipe Author: Neha Mathur at Whisk Affair
Get the recipe

The Ingredients

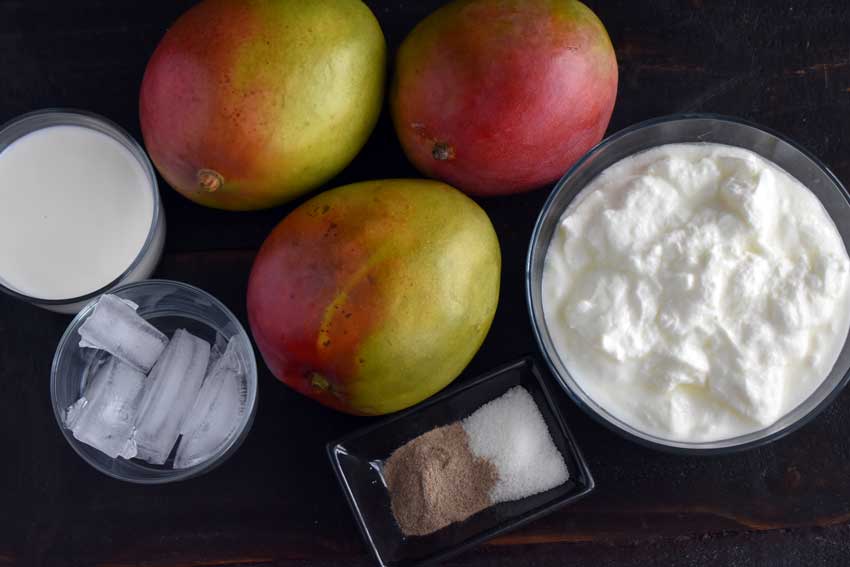
Recipes with “easy” in the title usually have a short list of ingredients, and that’s the case with this one. Just 6 items on the ingredients list without the garnishes (9 items with garnishes). Thankfully several are staple items, like sugar, cardamom powder, milk, and, of course, ice. Yogurt isn’t something I normally keep on hand, but it may very well be a staple item for you. Either way, you’ll have a short grocery list of easy to find and inexpensive items for this recipe.

Easy Mango Lassi Ingredients
Mango, plain yogurt, sugar, cardamom powder, and ice

The Process

If you guessed the first step to this recipe is cutting up the mangoes, you guessed correctly. But don’t worry, it’s not as difficult as you might think. If you don’t have a mango corer, this video shows you how to cut up a mango with just a kitchen knife. I eat mangoes regularly enough that I invested in a mango corer. It makes it even easier to remove the pit without sacrificing any of the fruit. By the way, I got 2 cups of mango chunks out of 2 mangoes with a little left over.

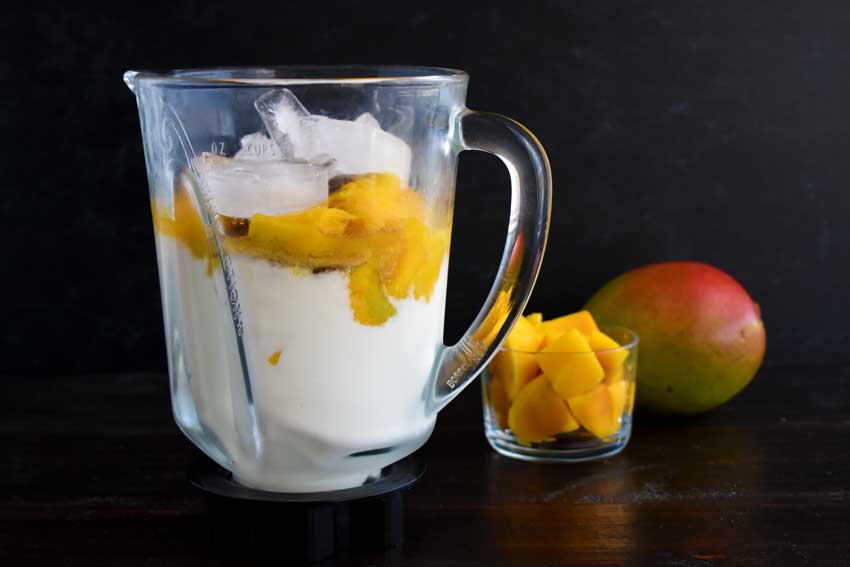
Just like a typical smoothie, the next step is throwing everything into a blender and pushing a button. My blender has a smoothie setting, so I just push that button and wait for it to finish blending. Then it was just a matter of pouring my lassi into a glass and garnishing it with crushed pistachios and saffron strands. The entire process took 10 minutes, just as listed in the recipe.

Getting ready to blend my mango lassi

Slow Cooker Indian Butter Chicken

Butter chicken is one of my favorite dishes and a wonderful introduction to Indian food. It’s full of flavorful spices but it’s not hot/peppery. Traditional butter chicken is made with leftover tandoori chicken. Of course leftover tandoori chicken is best as the spices have more time to absorb, although I’ve never managed to actually have leftover tandoori chicken. It’s just too delicious! Fortunately, I found this butter chicken recipe, and it solves that problem. So not only do I get to skip making tandoori chicken and the temptation that comes with it, I get to throw everything into my slow cooker and go about my day while my dinner makes itself. Love it!

Slow Cooker Indian Butter Chicken made with spices you already have in your cabinet with all the creamy deep flavors you’d expect from a restaurant.

Recipe Author: Sabrina at Dinner Then Dessert
Get the recipe

The Ingredients

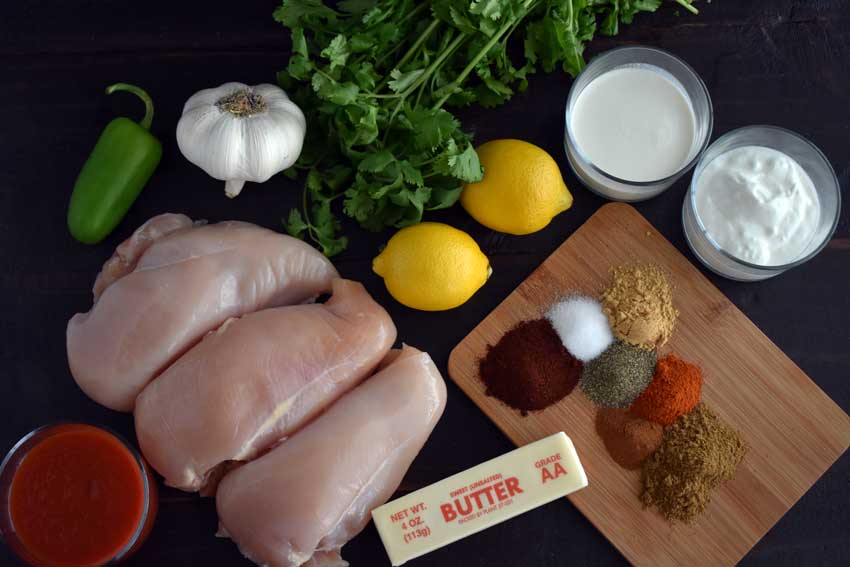
I did have to pick up several items for this recipe, but nothing was hard to find. No special trips to another grocery store or ordering an unusual ingredient online. The chicken was the most expensive item at just over $12 for 3 chicken breast halves, but I expected that. That would easily be enough for 3 meals by itself, but I’m planning to serve my butter chicken with basmati rice, so I’m sure that will stretch the number of meals I get out of this recipe. That’s never a bad thing!

Slow Cooker Indian Butter Chicken Ingredients
Chicken breasts, tomato sauce, jalapeño pepper, garlic, cilantro, lemon, cream, yogurt, cumin, cayenne, pepper, ginger, salt, and paprika

The Process

Putting this recipe together was super easy since the bulk of the total time was inactive (cooking). I had the chicken marinating in only 4 minutes, and mixing the marinade in the ziplock bag meant I didn’t have an extra bowl and spoon to wash. The next day, I had everything chopped, minced, and cooking in my slow cooker in 6 minutes. And 5 hours and 23 minutes later I had my butter chicken. Here’s the whole breakdown of the times for this recipe:

  • 4 minutes to prep the marinade (active)
  • 24 hours to marinate (inactive)
  • 6 minutes to prep for slow cooking (active)
  • 5 hours 20 minutes to cook (inactive)
  • 3 minutes to mix in the cornstarch (active)
  • 29 hours 33 minutes total (13 minutes active, 29 hours 20 minutes inactive)

Lavender Lemonade Mojitos

My week of lavender recipes is coming to an end. I’m a little bummed about that since the recipes I’ve made so far have been so good. And since both were also paired with citrus, I decided to end the week with a cocktail that does the same: Lavender Lemonade Mojitos. This recipe fits my theme so well!

Made with a lavender simple syrup and homemade lemonade muddled with mint, these Lavender Lemonade Mojitos are the prettiest color and make for the perfect summer cocktail.

Recipe Author: Sues at We Are Not Martha
Get the recipe

The Ingredients

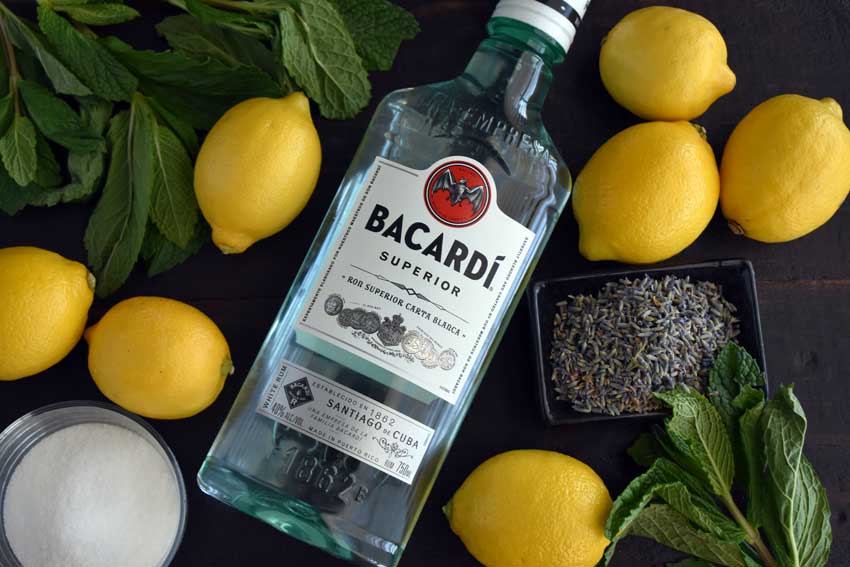
My grocery list for this cocktail was super short since I had most of the ingredients already on hand to make a lavender lamb dish and lemon lavender cupcakes. I even had rum leftover from the strawberry mojitos I recently made. All I had to do was buy the fresh mint.

Lavender Lemonade Mojitos Ingredients
Rum, lemon juice, mint, lavender, and sugar

The Process

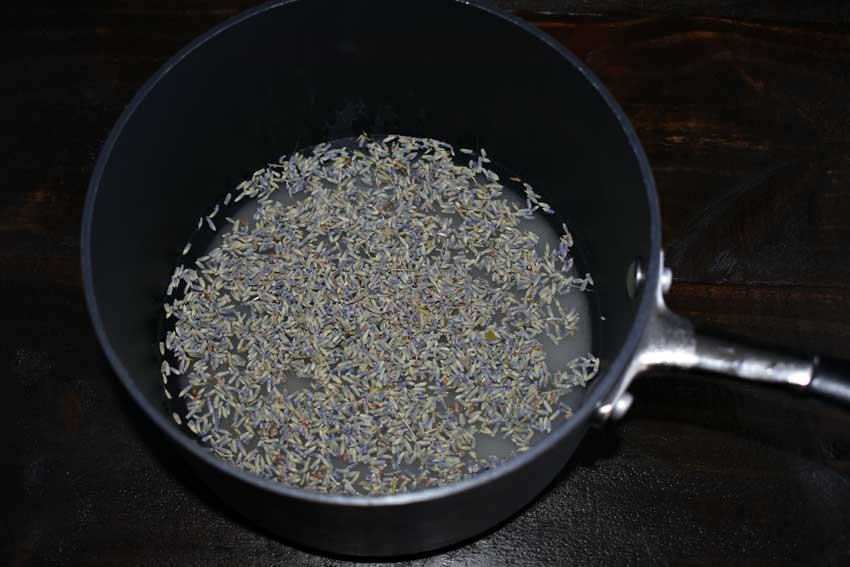
This Lavender Lemonade Mojito cocktail recipe was made in 2 parts, for a total time of 1 hour and 22 minutes. The first part was making the lavender simple syrup. It took me 1 hour and 15 minutes to make, and the 1 hour was inactive time letting the lavender steep in the syrup while it cooled. I have to say it smelled incredibly good while it was simmering! I could have skipped the sugar and just simmered the lavender to scent my house.

The second part was mixing up a pitcher of cocktails. That took a total of 7 minutes, mainly because I had to juice 8 lemons to get 1cup of lemon juice. This was 1 time I was very glad to have an electric juicer. I normally use a wooden citrus reamer for easy cleanup, but it would have taken forever. My electric juicer also strained the seeds and pulp to save even more time.

Making the lavender simple syrup

Lemon Lavender Cupcakes

0

Now that I’ve had my Spring lamb dinner, I need dessert. Well, I don’t need it, but that bag of culinary lavender in my pantry says otherwise. It’s been a while since I made cupcakes, so this recipe for Lemon Lavender Cupcakes needed to be made. I get to use my lavender again and satisfy my sweet tooth at the same time. How perfect?!

I can guarantee that if you made these Lemon Lavender Cupcakes for any spring event or party that they’s be a guaranteed hit!

Recipe Author: Shay at The Brooklyn Cook
Get the recipe

The Ingredients

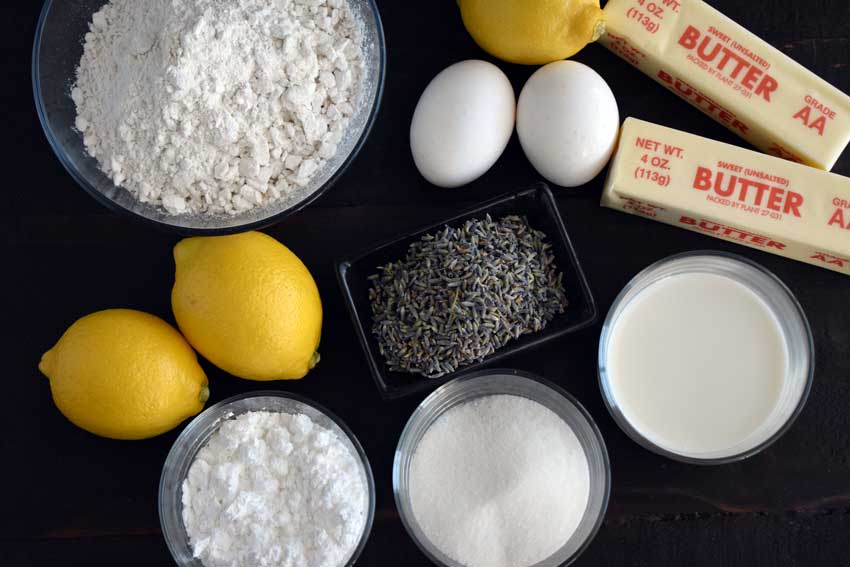
Since I already had culinary lavender on hand, shopping for the rest of the ingredients for this recipe was easy. I really had to stock up on 3 things: lemons, butter, and powdered sugar. I ended up using 7 lemons, 4 sticks of butter (with some leftover), and 6 cups of powdered sugar because I doubled the quantities for the frosting*.

Lemon Lavender Cupcakes Ingredients
Flour, lemon zest, eggs, butter, milk, sugar, powdered sugar, and dried lavender

The Process

The total time spent on this recipe was 52 minutes. The recipe lists 35 minutes, but that only covers the time to prep and bake the cupcakes. Neither time includes time for the cupcakes to cool, so you will need to allow an hour or more for that.

The cupcakes were very easy to whip up. I had them baking in the oven after 15 minutes of prep work, and they were ready in 20 minutes just as the recipe specified. The frosting took 10 minutes to prep/mix and 7 minutes to apply, but it wasn’t quite as easy as the cupcakes.

The first step for the frosting was creaming the powdered sugar and butter. Despite using a large bowl and a low speed on my hand mixer, the powdered sugar went everywhere. My counter was covered in powdered sugar dust, and no amount of mixing produced a creamy texture. I had globs of powdered sugar and butter, and I was beginning to doubt this frosting recipe would work.

Adding the milk changed the crumbly texture to smooth. Whew, was I relieved! I also added 1 drop each of red and blue food coloring to give the frosting a lavender tint (it’s white without it). It took a good amount of mixing, but I ended up with very thick frosting. So thick it was difficult to squeeze it out of the piping bag, but I managed. Next time I will add a little extra milk to thin it a bit, give it a creamier texture, and make it easier to work with.

*Note:

I doubled the recipe for the frosting. I tend to be generous with it, and it’s faster to double it from the beginning rather than make 2 separate batches. If you double the recipe and want the same lavender tint, you will need to add 2 drops of each of red and blue food coloring.

Unbaked cupcakes
Ready to put the cupcakes in the oven

Lavender Lamb Loin Chops with Grilled Blood Oranges

Easter is coming up, Spring is in the air, and I have a nice lamb dinner on my mind. Unfortunately, my husband doesn’t like lamb. What to do? I made a leg of lamb a while back, but it’s was a lot of red meat for just me. Lamb chops were the perfect solution, and this recipe for loin chops let me get outside to grill and enjoy the nice weather as an added bonus. And I get to try cooking with 2 new ingredients: lavender and blood oranges. This is going to be fun!

I’m here to share an absolutely delicious and easy to make recipe for lamb chops that looks like you’ve slaved for hours when really it only takes about 20 minutes of cooking and rest time.

Recipe Author: Joshua Weissman for Civilized Caveman Cooking Creations
Get the recipe

The Ingredients

This recipe required some planning because my usual grocery store doesn’t carry fresh lavender or blood oranges. I’m fact, I couldn’t find fresh lavender locally and had to order dried. Amazon came to my rescue with a bag of culinary lavender, and I had a bag on my doorstep in a couple of days. Note: The taste of dried flowers is stronger than fresh, so used 1/3 the quantity of fresh lavender listed in the recipe (1 teaspoon dried instead of 1 tablespoon fresh).

Whole Foods had fresh blood oranges, so I made a special trip just for them. The rest came from my local Publix and was easy to find. The lamb chops were a little pricey for me at just over $13 for 5, but this is a special dinner for me.

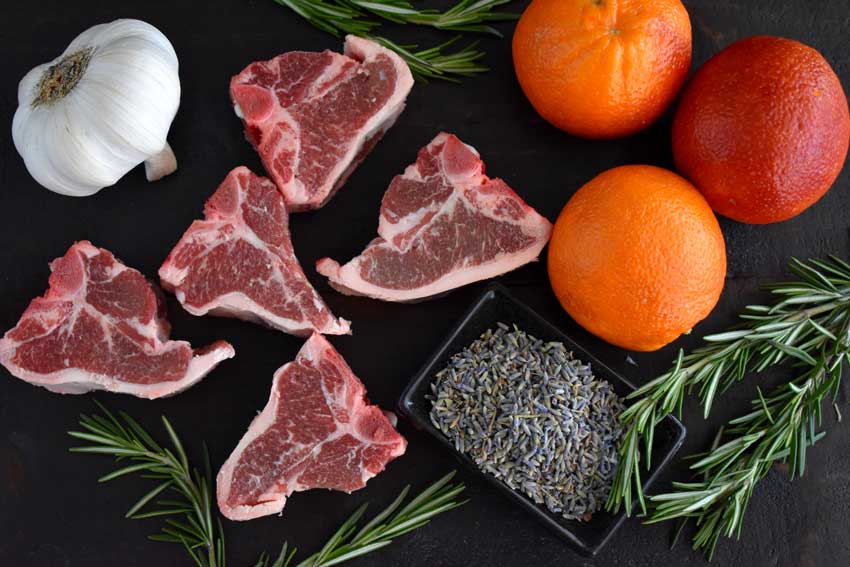
Lavender Lamb Loin Chops with Grilled Blood Oranges Ingredients
Lamb loin chops, garlic, rosemary, blood oranges, and lavender

The Process

In addition to planning for the special ingredients for this recipe, I also had to plan to marinate the lamb chops. The recipe does say it’s not required, but when does marinating meat not make it better? A quick 7 minutes to measure, chop, and peel, and I had my lamb safely marinating in my refrigerator in a sealed container.

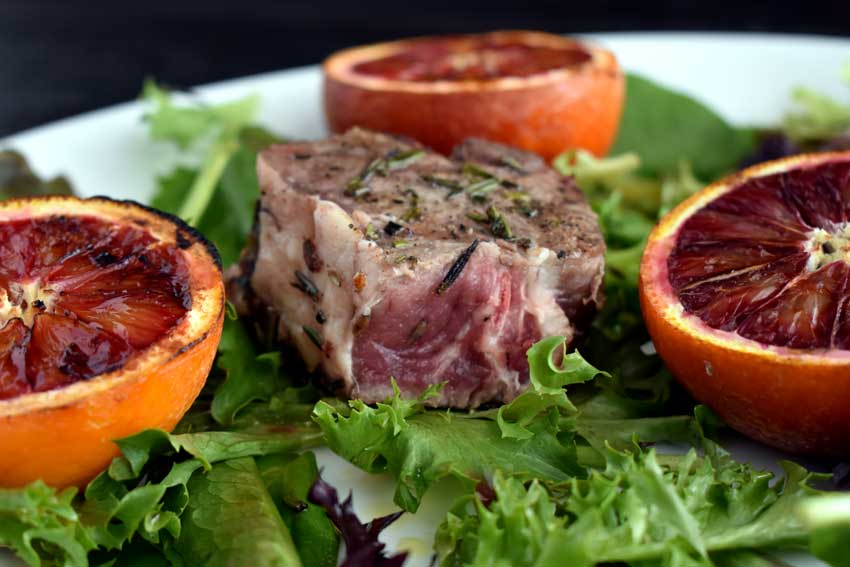
The next day I let it warm to room temperature while I preheated the grill and cut the oranges in half. Then I took everything out to the patio and grilled it up. I didn’t manage to get the grill marks on the lamb, but it and the oranges grilled just beautifully.

Once I was back in my kitchen, I added some spring mix greens to a platter, placed with lamb and oranges on top, and drizzled with olive oil. The presentation was just gorgeous, and the process was so quick and easy!

Here’s the full breakdown of how long each step took:

  • 7 minutes to prepare the marinade
  • 24 hours to marinate
  • 15 minutes to preheat the grill, warm lamb, and cut oranges
  • 10 minutes to grill the lamb
  • 10 minutes for the lamb to rest and grill the oranges
  • 24 hours and 42 minutes total time
Rare lamb chops
Rare lamb chops

Spiced Vietnamese Coffee with Sweet Vanilla Cream

Many years ago I worked at a place that was in a small strip mall in downtown Orlando. Not only was it one of my favorite jobs ever, but it was also a few doors down from a Vietnamese restaurant. One day one of my coworkers bought me an iced coffee, and I’ve been hooked ever since! Vietnamese coffee is this magical mix of strong coffee with sweetened condensed milk. It’s the perfect caffeine boost for warm climates like Orlando. Or any climate—the stuff is addictive! I was thrilled to find this recipe for Vietnamese coffee spiced with cardamom because I love trying twists on the classics.

Hello, Vietnamese coffee. We’ve elevated the traditional recipe a bit by brewing the coffee with spices and adding some vanilla to the cream, which we cut with ½ & ½ to avoid major sugar overload. And man, it’s good. Really good.

Recipe Author: Holly at The Modern Proper
Get the recipe

The Ingredients

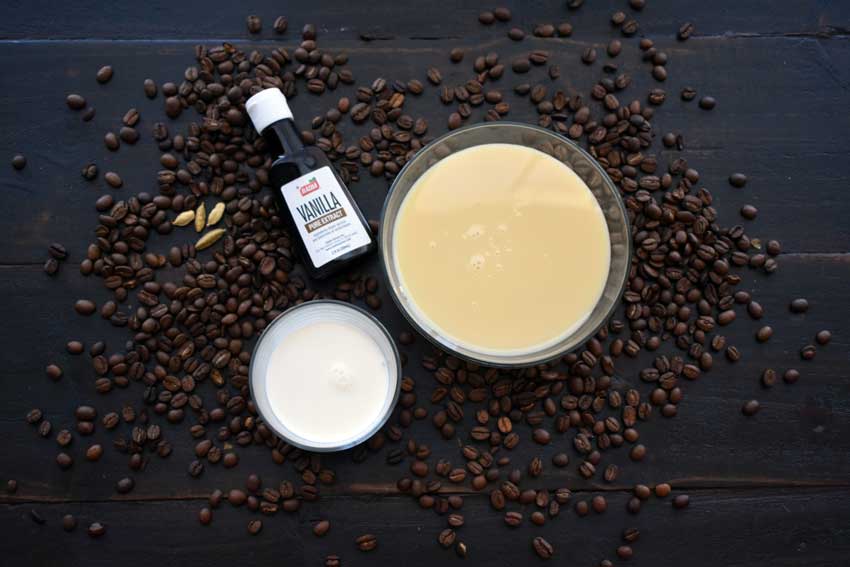
Since there are only 5 ingredients to this recipe, my shopping list was nice and short. I had coffee beans, cardamom pods, and vanilla extract in my pantry. All I had to buy was the sweetened condensed milk and the half-and-half.

Spiced Vietnamese Coffee with Sweet Vanilla Cream Ingredients
Coffee, cardamom, vanilla extract, condensed milk, and half-and-half

The Process

The directions for this recipe were clear and easy to follow. The author doesn’t list the total time to prepare it, but these were my results:

  • 5 minutes to prep the cardamom-infused coffee
  • 24 hours for the coffee to steep
  • 20 minutes to filter the coffee (more on that later)
  • 2 minutes to mix the creamer and make 1 coffee drink with it
  • 24 hours 27 minutes total

The Coffee

The first thing I did was make the coffee since it had to steep for 24 hours. That part was quick and easy. I just ground the coffee, lightly crushed 4 cardamom pods, and added them to a pitcher with the water.

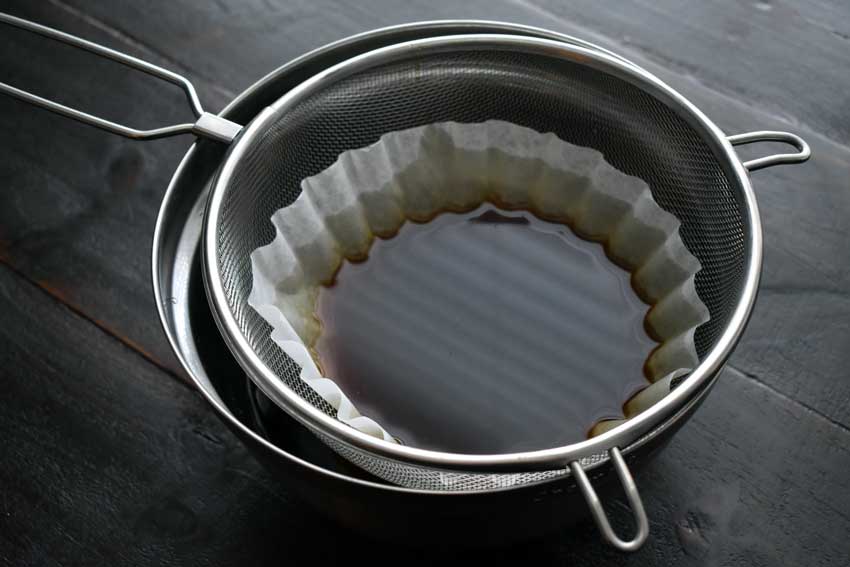
This recipe calls for coarsely ground coffee, and it means it! I don’t drink coffee too often, so I grind my own beans. This time I ground them too fine, and I didn’t realize the consequences until I began to filter the coffee. I used a coffee filter in a mesh sieve placed over a small mixing bowl. Things went fine at first, then I noticed the rate the coffee was going through the filter slowed from a stream to a drip to almost nothing. What?!

It turns out that the filter was getting clogged with extremely fine coffee grounds. I had to wait (and wait and wait) for the coffee to drain through the filter and replace it. This time I poured less coffee because I knew the filter would clog again. So after 20 minutes of boredom watching coffee drip, I finally had all the coffee filtered and poured it into a pitcher. I’m going to buy coarsely ground coffee next time. Learn from my mistake, it will save you time and maybe your sanity.

The Rest

Thank goodness mixing the creamer and mixing it with the coffee was as easy as I thought it would be. I didn’t have a mason jar, so I used a plastic Snapware® container instead. The top was very secure, so I knew it wouldn’t leak when shaken (trust me on this, I’ve dropped full Snapware® containers and never had a leak). Two minutes later, I had a delicious spiced Vietnamese coffee mixed up and ready to drink.

Filtering the coffee
Filtering the spiced coffee

Vietnamese Chicken Curry (Cà Ri Gà)

I love Vietnamese food! But whether I’m ordering it at a restaurant or cooking it at home, I either have pork or seafood. I’m not sure I’ve ever ordered or made a chicken dish. That needs to change, and I’ve found the perfect recipe to do that. I’m also excited that get to try deep frying the vegetables. It’s something I never do, and I always love trying new things. Let’s give this chicken curry recipe a whirl!

This post was originally published on March 20, 2018. The text and photos were updated on August 11, 2021. The review and rating have not been changed.

Although there is some waiting involved with the marinade and extra care taken with the root vegetables, this curry recipe is fairly easy to make. This is, yet another recipe, that I have been lucky enough to grow up eating as a child.

Recipe Author: Huy at Hungry Huy
Get the recipe

The Ingredients

The most exotic item needed for this chicken curry recipe was lemongrass, and my usual grocery store doesn’t carry it. That meant a special trip to Whole Foods, so I decided to buy everything I needed there. It was pricier than Publix for sure, but sometimes convenience is worth a little extra.

I’m glad this recipe is flexible as to what cut of chicken can be used. I wanted to try chicken breasts with the bone and skin, but I don’t own a meat cleaver. There’s no way I could have cut chicken with bones into small pieces for this curry.

The first time I made this recipe, I opted to use boneless, skinless chicken breasts instead since that is my husband’s favorite cut. When I decided to update this post, I used boneless, skinless chicken thighs. Turns out we both liked the thighs better as they were more flavorful and juicy.

I also made a change to the curry powder I used when I updated this post. On my first try, I used a bottle of generic curry powder. This time, I wanted to stay as true to the recipe as possible and get the recommended brand.

However, in the recipe posts’ comments, I found out the brand of curry powder the author recommends, D&D Gold, has changed their recipe. There were a lot of complaints about it. I did some research, though, and found a brand that is comparable (at least based on the comments I read). It is Quoc Viet Foods Curry Soup Base, and it made a huge difference in the flavor!

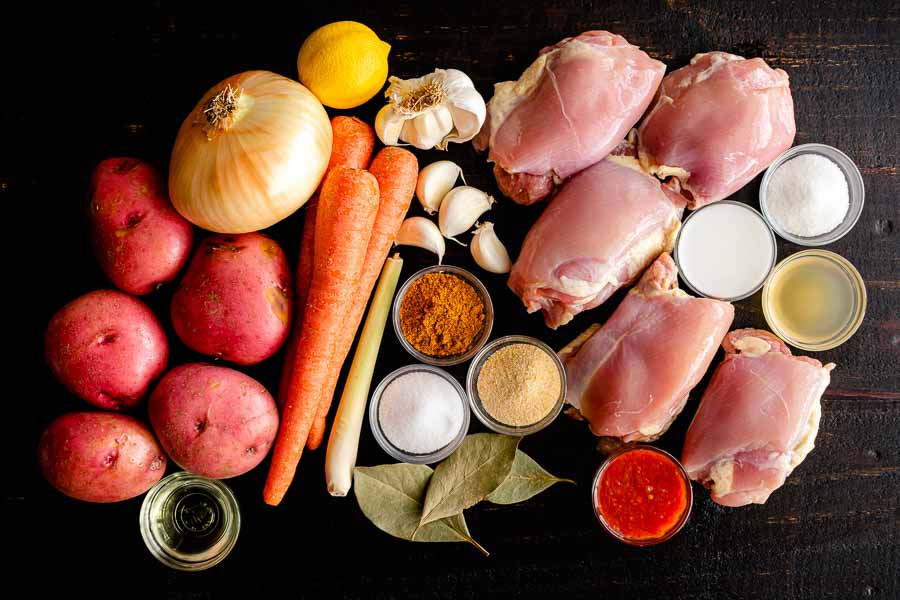
Vietnamese Chicken Curry (Cà Ri Gà) Ingredients
Chicken thighs, coconut milk, sugar, chicken broth, sambal paste, bay leaves, onion powder, Vietnamese curry powder, salt, lemongrass, carrots, vegetable oil, red potatoes, yellow onion, lemon juice, and garlic

The Process

This chicken curry recipe took a while to prepare, but the effort was very much worth it. Here’s how the times broke down:

  • 5 minutes to make the marinade and cut up the chicken
  • 4 hours to marinate the chicken (The second time I made this recipe, I marinated the chicken for 2 hours, and it was just as good.)
  • 10 minutes to prep the vegetables
  • 52 minutes to cook
  • 5 hours 7 minutes total

The Prep Work

The first part of this recipe was very easy. I had the chicken cut up and marinating in the spice mixture within 5 minutes. I took it out of the refrigerator just before the 4 hours was up so it could come up to room temperature. That’s when I prepped the vegetables, and I let the oil for deep frying them heat up at the same time.

Peeled and cut up potatoes and carrots

Frying the Vegetables & Chicken

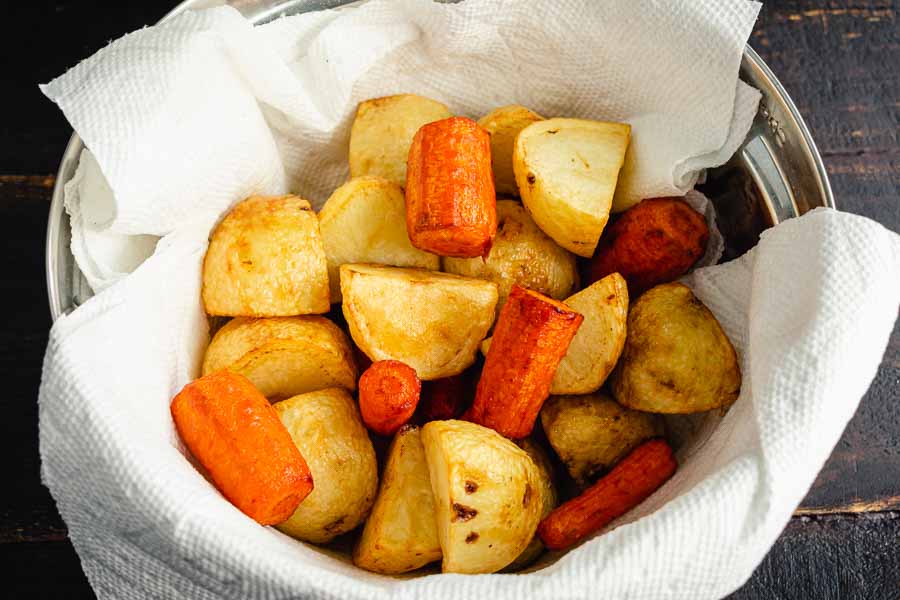
Let’s talk deep frying. I don’t have a fryer, so I used a 32-ounce bottle of canola oil in a small saucepan with the heat set on 8 (out of 10). As a result, I had to fry the vegetables in 3-4 batches for 5-10 minutes before they just started to turn golden. I was surprised at how not greasy they were when they were done, but I still drained them in a mixing bowl lined with paper towels.

One more thing about frying the vegetables: Step 3 says to fry the onions and carrots, but that should be potatoes and carrots. The author specifies that in his post, so ‘onions’ is a typo. Update: The author has corrected the recipe.

Fried potatoes and carrots draining in a paper towel-lined mixing bowl

I browned the chicken in a large pot while the vegetables were frying. It sounds like a lot going on at once, but it really wasn’t. It was pretty easy to do with the long breaks between the batches of vegetables, and I had both ready at the same time.

Browned chunks of marinated chicken

Assembling the Curry

Then it was time to put it all together. I used a 5.3-quart pot, and it was barely big enough to hold everything. And I did have to use the full 3 cups each of chicken broth and water to cover all the meat and vegetables. Next time I’ll use a larger pot—at least 6 quarts.

My chicken curry turned out to be very yellow, whereas the author’s pictures show a redder color. I’m guessing the yellow was from the curry powder I used. You might have different results.

Guinness Black Magic Cocktail

I had 2 bottles of Guinness stout in my refrigerator at the start of this week. Making Guinness Irish Soda Bread used 1 of those bottles, but what to do with the last 1? I like to finish out the week with a beverage review, so it was off to Pinterest to find an Irish-themed drink recipe.

Irish Coffee was out because it doesn’t use Guinness (I was a little sad about that). A Guinness chocolate milkshake sounded good since I know Guinness pairs well with chocolate (this brownie recipe is proof!). Then I found the Guinness Black Magic Cocktail recipe, and I was hooked. I loved the idea of blending the quintessential Irish beer with American bourbon, and the addition of blackberries sealed the deal. Let’s see how this Guinness cocktail turned out.

A gorgeous cocktail to toast with on Halloween or St Patrick’s Day – Guinness, bourbon, blackberries and lime.

Recipe Author: Lucy at Supergolden Bakes
Get the recipe

The Ingredients

This is yet another recipe that doesn’t have a long or complex list of ingredients. A quick trip to the liquor store for the bourbon and grenadine, followed by a stop at the grocery store for the limes and blackberries didn’t take too long. Then I was ready to get mixing my first ever Guinness cocktail.

Guinness Black Magic Cocktail Ingredients
Guinness stout, bourbon, grenadine, blackberries, and lime juice

The Process

This recipe was pretty quick and easy to make. I had my cocktail mixed, poured, and garnished in 5 minutes, just as the recipe stated. The directions were very straightforward and easy to follow. You’ll need a few pieces of equipment besides the obvious ice and a glass, but nothing unusual:

* The citrus reamer isn’t a requirement, but it makes juicing the lime quicker and more thorough. A juicer would also work.

Guinness Black Magic Cocktail