Home Blog Page 51

Filet Mignon with Porcini Compound Butter

I was lucky enough to have a couple of filet mignon steaks in my freezer, so I had to find a really good recipe to use them in. Hello, Filet Mignon with Porcini Compound Butter! I already knew I loved steak and mushrooms, but I don’t think I’ve ever tried porcini mushrooms. Even better since I love to try new things. So it’s off to the grocery store to hunt down some dried porcini mushrooms. And a few other ingredients.

Butter is the secret to this tender and flavorful combo. You could flavor your butter with herbs, onions or garlic, but our favorite is mushrooms. Because steak and mushrooms means true love. And when the butter melds with the pan-grilled meat, suddenly you have a succulent sauce all of its own, and for very minimal cooking effort.

Recipe Author: Heidi at Foodie Crush
Get the recipe

The Ingredients

The filets I had in my freezer were 6 ounces each but 1/2″ thick. The recipe calls for 1 1/2″ thick steaks, so I knew I would have to adjust the cooking times. Other than that, I only had to pick up a few things: dried porcini mushrooms, fresh thyme, and salted butter. The thyme and mushrooms were a bit pricey at about $5 each. I also had to make a special trip for the mushrooms since my local Publix didn’t have them (Fresh Market did).
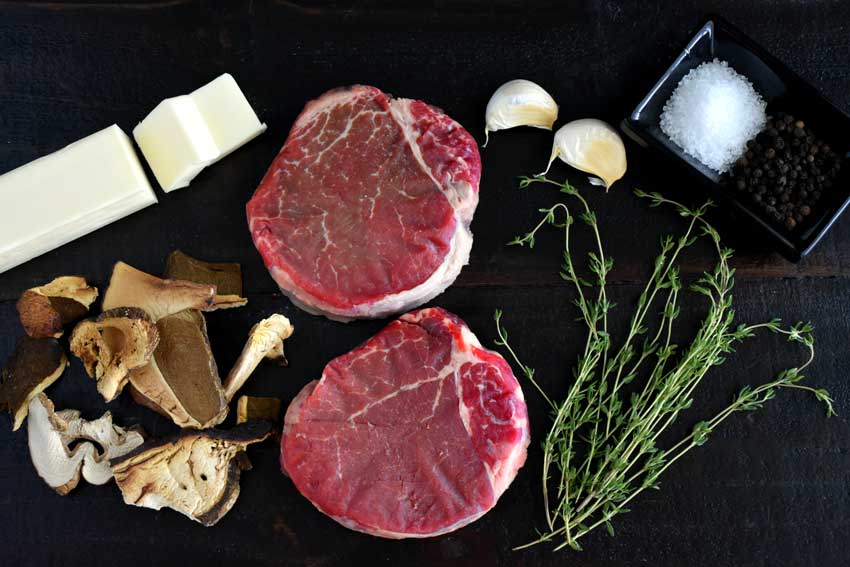
Filet Mignon with Porcini Compound Butter Ingredients
Filet mignon steaks, dried porcini mushrooms, butter, garlic, thyme, salt, and pepper

The Process

This recipe is made in 2 parts, the compound butter then the filet. Both are easy, but there was some guesswork involved in the compound butter. The recipe calls for whole dried porcini mushrooms, but I was only able to find them sliced.

Since Step 1 calls for 10 whole mushrooms, I decided to start with Step 2 and grind 2 tablespoons worth of mushrooms first. Then I rehydrated the leftover sliced mushrooms per Step 1. That worked out really well, and I had my compound butter blended and in the refrigerator in 15 minutes.

I cooked the filets later that evening, and they were even quicker at 10 minutes total. Of course, I adjusted the cooking times for the thinner steaks to 2 minutes on the first side, 1 minute on the second, then 2 minutes in the oven. They didn’t get as brown as the recipe’s pictures, but I didn’t want to overcook them since they were so much thinner.

I also added the pat of porcini butter before I put the steaks in the oven to make sure it would fully melt. I don’t think they really needed to be finished in the oven because they were so thin, but it is a good idea for thicker cuts.
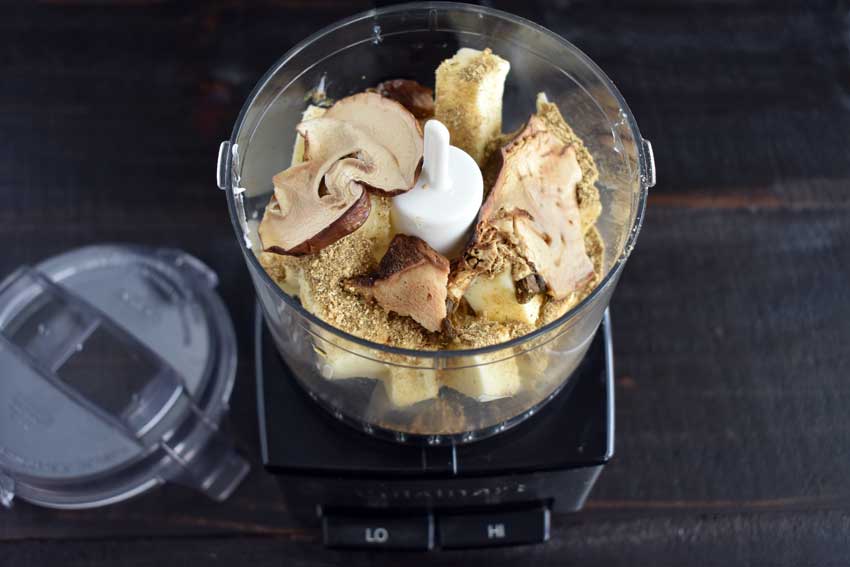
Getting ready to blend the butter, mushroom powder, and mushrooms

Moroccan Harcha

Since my menu theme for this week is Moroccan, I wanted to make either a side dish or a beverage to go along with the chicken stew I had already decided on. My first impulse was coffee, but I did make a coffee cocktail recently, so I wanted to mix things up a little. Then I came across this recipe for harcha bread, and that was that. I had used semolina to make a Turkish cake recipe a while back and absolutely loved it. This would be a totally different taste using semolina, so I had to give it a try.

Harcha is a Moroccan bread that takes the shape of a galette and is prepared with semolina and butter or olive oil.

Recipe Author: Vera Abitbol at 196 Flavors
Get the recipe

The Ingredients

After the long list of ingredients for the Moroccan Slow Cooker Chicken Stew with Chickpeas recipe I made earlier this week, I was kind of relieved to find this harcha recipe has only 6 ingredients. A truly short (and sweet) list. A lot of it is staple items, but I did have to stock up on butter and semolina since it calls for a lot of both. My local grocery store carries both, so no special trips or Amazon orders were needed.

Moroccan Harcha Ingredients
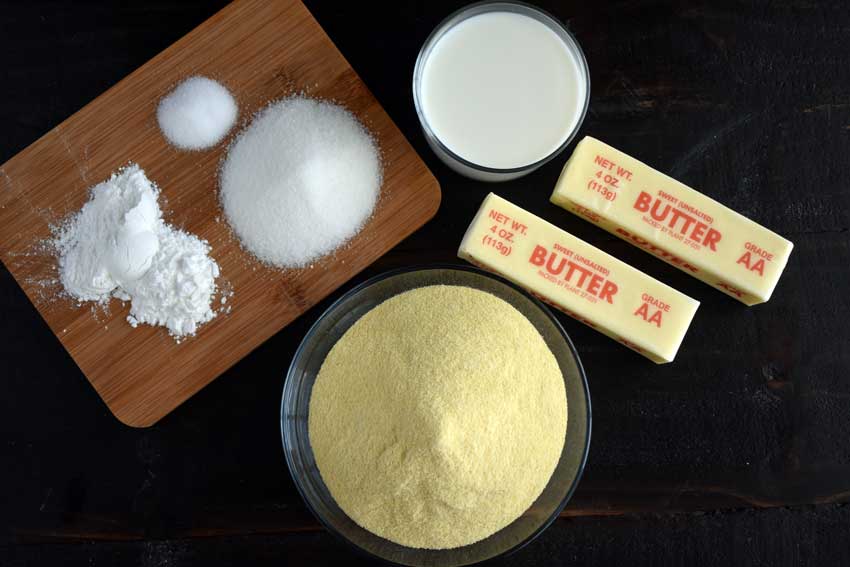
Semolina, baking powder, salt, sugar, milk, and butter

The Process

I made my harcha while my Moroccan Slow Cooker Chicken Stew with Chickpeas was cooking in my crockpot. I expected both to take around 3 hours, but I had my harcha ready in under an hour. Here’s how the time broke down:

  • 7 minutes to prep
  • 15 minutes for the dough to rest
  • 34 minutes to cook
  • 56 minutes total

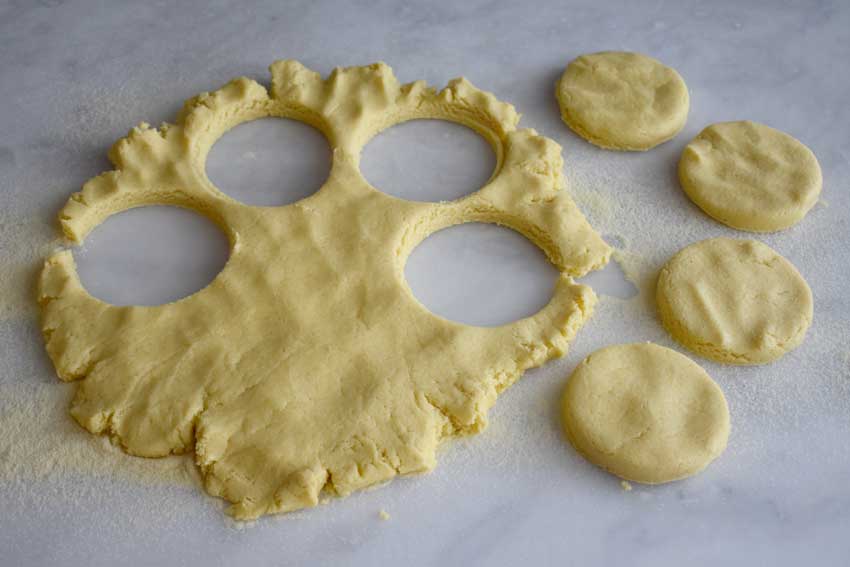
The instructions were very clear and easy to follow, but I had to guess at how thick the pressed out dough needed to be. I’d say it was about 1/4-inch thick. I used the largest glass I have to cut out my harcha loaves and got 12 instead of the 8 listed in the recipe. I was wondering if my glass wasn’t large enough or I pressed the dough too thin. Either way, it worked out well because the harcha was very dense and filling. I think small loaves are the way to go with this recipe.

I don’t happen to have a stand mixer, so I used my trusty hand mixer and hand no issues. Mixing the dough doesn’t take long at all, so no worries if you don’t have a stand mixer either.

I noticed the recipe calls for cooking the harcha in a nonstick skillet, which I did. I also noticed it didn’t call for any extra butter or oil. That, I assumed, was because there are nearly 2 sticks of melted butter in the batter. I was able to cook my harcha just as instructed with no extra oil in the pan and absolutely no sticking.

Cutting out the harcha

Moroccan Slow Cooker Chicken Stew with Chickpeas

Last week I used my crockpot for the first time in a while, and I feel the need to continue that this week. I love the thing! It makes meals so easy to prepare, and I’ve never managed to mess up anything I’ve made in it. So instead of a beef and pasta dish like last week, I decided to go with a chicken and vegetable dish this week: Moroccan chicken stew. Slow-cooked chicken with tomatoes, chickpeas, onions, olives, and lots of spices. How yummy does that sound?

Moroccan slow cooker chicken thighs with chickpeas, olives and herb couscous that is easy to put together yet full of flavor and spice.

Recipe Author: Imma at Immaculate Bites
Get the recipe

The Ingredients

I know the list of ingredients for this dish is pretty long, but don’t let that intimidate you! A quick look through my refrigerator and pantry and I discovered I had most everything on hand. My shopping list for this recipe was far shorter than I thought it would be. All I had to pick up was the chicken, ginger, and some parsley.

Right before I made my Moroccan chicken stew, the folks at SeasonalitySpices were nice enough to send me a couple of free samples of their spices to use in a post. One of the samples was pimentón, a Spanish smoked paprika. How perfect!

This recipe calls for smoked paprika, so I was very excited to give this new brand a try. This is not the name-brand variety I’ve always used, and the difference in the smell and flavor was incredible. When I compared them, the fake smoke smell and taste of the name-brand paprika was very obvious. I hate to waste anything, but it promptly went into the trash. That’s how big of a difference there was.

Moroccan Slow Cooker Chicken Stew with Chickpeas Ingredients
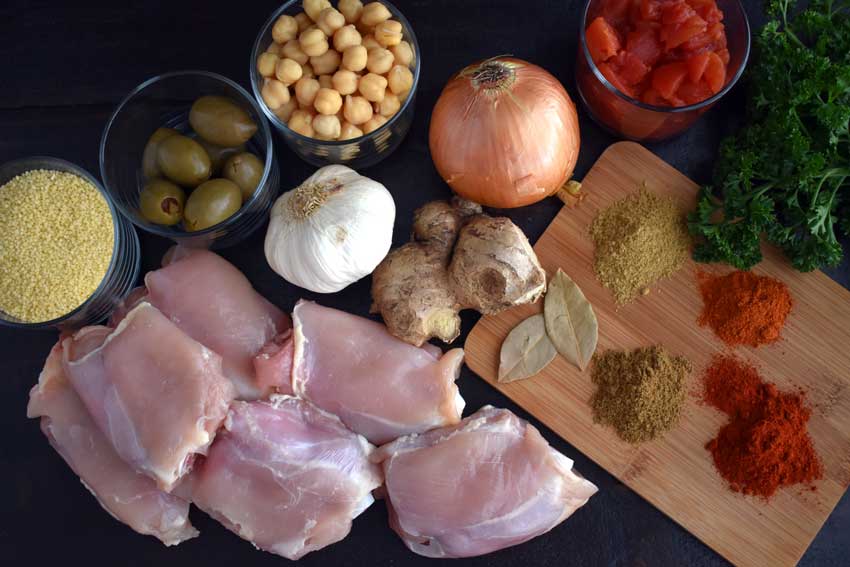
Chicken thighs, couscous, olives, garlic, chickpeas, onion, ginger, diced tomatoes, parsley, cayenne, smoked paprika, cumin, bay leaves, and cardamom

The Process

So, guys, this recipe made the most incredible Moroccan chicken stew, but I had some difficulties. It was so good that I hate to ding it in any way, but I have to be honest and let you know the directions caused me some confusion.

First, the times. The total time listed in the recipe is 3 hours 15 minutes, but Step 7 does list the cooking time at 3-4 hours. I chose the shorter time because of the high heat setting. Here’s how everything broke down:

  • 16 minutes to prep (most of that was skinning and trimming the chicken)
  • 30 minutes to marinate the chicken and finish prep work
  • 9 minutes to sear the chicken and deglaze the skillet
  • 3 hours in the slow cooker
  • 8 minutes to make the couscous
  • 4 hours 3 minutes total

The things that confused me about making this stew were the ingredients listed not appearing in the instructions and vice versa.

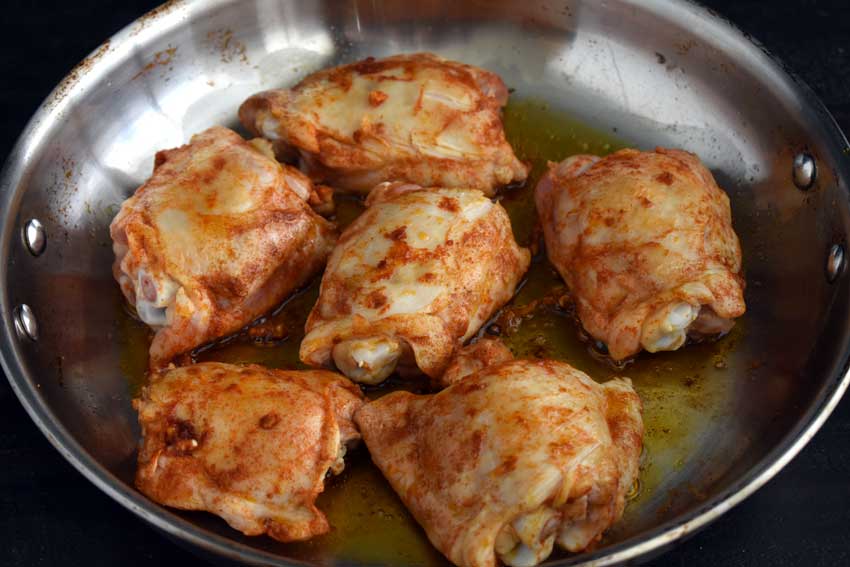
Browning the chicken in a skillet

The Stew

Step 1: Bay leaves aren’t listed as an ingredient for the marinade, but adding them is included in the instruction. However, they are listed in the second grouping of ingredients that go into the slow cooker, and that’s how I used them.

Step 5: Ginger isn’t listed, but it’s part of the ingredients. I added the teaspoon of minced ginger listed with the ingredients. The step also says to add salt that isn’t listed in the ingredients. I skipped it knowing I could add more once the stew was finished cooking.

Also, neither the ingredients nor the instructions say whether to drain the canned tomatoes, so I didn’t.

The Couscous

Step 1 mentions adding onions that are not part of the listed ingredients. I skipped them because I didn’t know how much to add. It also mentions adding salt that isn’t listed. however, the instructions for the brand of couscous I use said to add a 1/2 teaspoon, which I did.

Dirty Chai White Russian

I decided to finish up my sort of Russian-inspired week with a twist on the classic White Russian cocktail. Just like Russian dressing, a white Russian isn’t Russian. Surprised? Me neither. This version is made with a spiced coffee syrup that sounds amazing (I love flavored coffee). Let’s find out if this recipe lives up to my expectations.

Dirty Chai White Russian is a soul-warming holiday drink everyone will love. Classic White Russian spiced up with homemade coffee and chai syrup.

Recipe Author: Rachel at Modern Farmhouse Eats
Get the recipe

The Ingredients

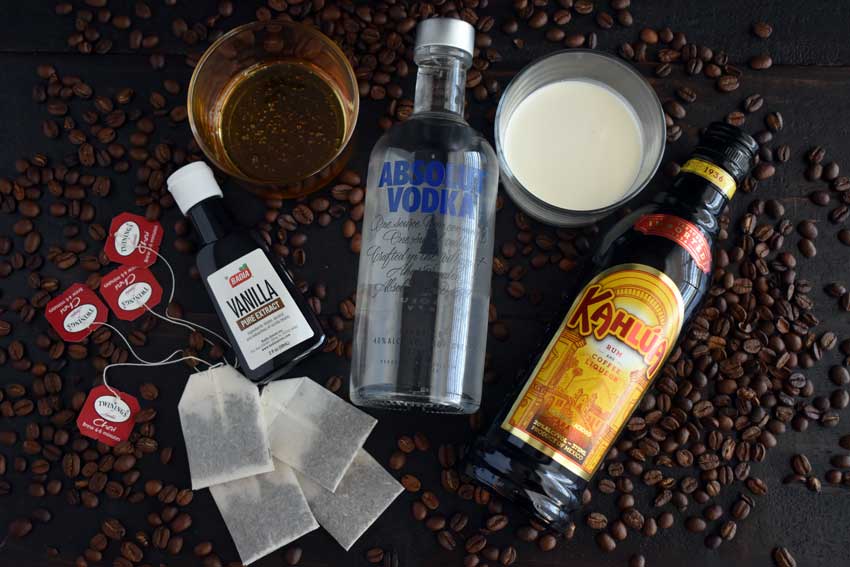
Most of the ingredients for this cocktail recipe are pantry staples or easy to find at your local grocery store. I had everything except the heavy cream on hand, even the chai tea. I’m sure it’s not a revelation that the vodka and Kahlua were the most expensive items on the list. But fear not–there are still ways to save a few bucks on this cocktail. I tend to buy 375ml bottles, which are half the size of regular bottles. Additionally, good vodka is available at many price points, so don’t feel like you have to buy the most expensive brand out there. Buy the best you can afford.

Dirty Chai White Russian Ingredients
Vodka, Kahlua, chai tea, coffee, vanilla extract, honey, and heavy cream

The Process

This White Russian recipe is made in 2 parts. First, the dirty chai syrup is made by steeping chai teabags in strong, hot coffee. It’s then sweetened with honey or maple syrup (I used honey) and flavored with vanilla extract. The smell is incredible! Once the syrup is cool, it’s time to mix up your cocktail. This part was even easier than the last, and the cream looks beautiful as you swirl it into the rest of the ingredients.

Most of the instructions are very straightforward, but there aren’t any quantities for the coffee grounds. I used 6 tablespoons of ground coffee in 2 1/2 cups of water and let it brew in my French press for 4 minutes. I got just over 2 cups of very strong coffee out of that. While the tea was steeping, I kept the coffee warm on the stove using a very low setting to keep it from burning.

The time listed for this recipe is 15 minutes, but mine took a bit longer to make. The chai syrup alone took 22 minutes, though the cocktail only took 2 minutes. Slightly longer than stated, but worth it.

Swirling the cream into the cocktail

Homemade Russian Dressing

Since the beef stroganoff I made earlier this week was a Russian-inspired recipe, I decided to use that as the theme for this week’s recipe. Hence today’s Homemade Russian Dressing recipe, even though Russian dressing is an American invention. I do love the stuff on a good old-fashioned Rueben sandwich, but I’m not sure I’ve ever actually had it on a salad. The husband and I are trying very hard to incorporate more fruits and vegetables into our diet, and salad dressing is a great excuse for that.

This Homemade Russian Dressing is the best I have ever had. It is creamy, tangy, and way better than anything you can find in a store!

Recipe Author: The Team at Family Favorite Recipes
Get the recipe

The Ingredients

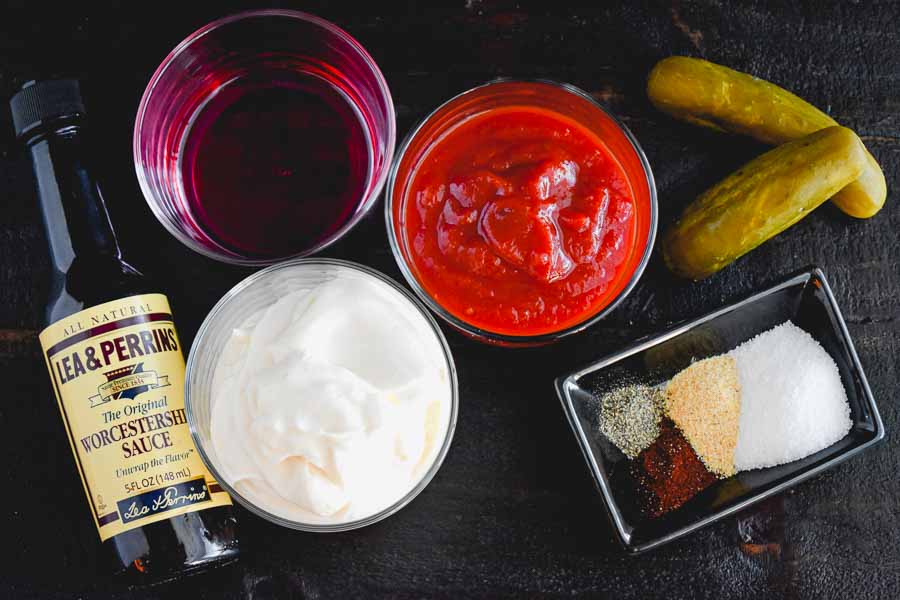
There aren’t a ton of ingredients for this dressing recipe, and nothing was hard to find or particularly expensive. In fact, all I had to pick up was the chili sauce. (I love it when my grocery lists are super short!) And no worries about it being too hot, even though it has ‘chili’ in the name. It’s very mild and not at all like hot sauce, which is what came to mind when I read the name.

Homemade Russian Dressing Ingredients
Mayonnaise, Worcestershire sauce, red wine vinegar, chili sauce, dill pickles, sugar, garlic powder, paprika, and black pepper

The Process

There is absolutely no cooking involved in this recipe, and I had it ready in only 6 minutes. It was just a matter of blending most of the ingredients, adding the chopped pickles, and letting it sit in your refrigerator for a few hours. I used my mini-prep to blend the dressing, and it was just the right size. It’s a great convenience if you have one, but a regular blender would be just fine if you don’t.

Crockpot Beef Stroganoff

It’s been a while since I’ve made a beef recipe, and I was really having a craving. Although I loved that this beef stroganoff recipe includes pasta and is made in the crockpot, I was still hesitant to make it. Why? It uses canned, condensed soup, which doesn’t have the healthiest reputation. Even still I kept coming back to this recipe, and I was finally convinced to give it a try when I read the accompanying post. The author isn’t a condensed soup fan, either. This is something I can relate to, so it went straight on my menu.

I grew up on the beef stroganoff that many others did: ground beef and a can of cream of mushroom soup with sour cream over egg noodles. I recently found a new spin on that childhood classic, and I’m never looking back! Though I’m not a huge fan of using condensed soups in many recipes, there are a few where they work well, and this is one of them. And to make things even better, it’s made in the crockpot.

Recipe Author: Heather at Heather’s Bytes
Get the recipe

The Ingredients

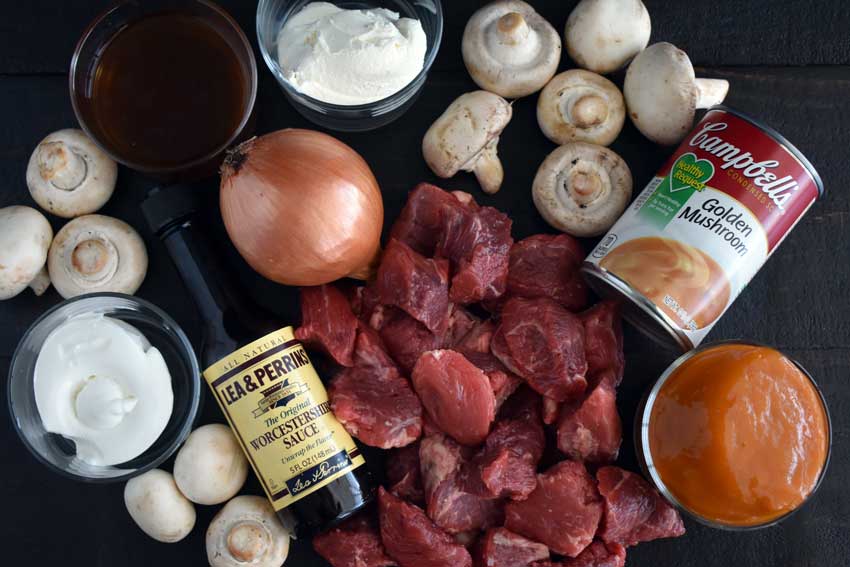
The ingredients list for this beef stroganoff recipe is short and sweet. Nothing was difficult to find or unusually expensive. The toughest thing about it is deciding how much beef to use since it calls for a range of 1-2 pounds. I split the difference and bought 1 1/2 pounds of pre-cut beef stew meat. I wanted to save a little and cut up a roast myself, but the pre-cut was all that was in stock. No biggie, though, since the package was the exact weight I needed and it did save me a little work.

As far as the soup goes, I was pleasantly surprised to find Campbell’s Golden Mushroom is a part of their Healthy Request® range. This line is designed to be heart-healthy and has fewer calories, fat, and sodium than the regular version. It’s not much lower, but every little bit helps.

Crockpot Beef Stroganoff Ingredients
Beef stew meat, Worcestershire sauce, mushrooms, sour cream, beef broth, cream cheese, and golden mushroom soup

The Process

I spent a whopping 8 minutes prepping this recipe. Chopping the mushrooms and onion were the bulk of that work, and that was really nothing. The rest was opening cans, measuring a few things, and giving it all a good stir once I had added it to my crockpot. Then it was a set it for 5 hours on low and forget it deal. Well not quite forget since it started smelling good a couple of hours in, but I found that reassuring.

Once the 5 hours was up, I added the sour cream and cream cheese while the egg noodles cooked (I used a whole bag). The cream cheese did take a good amount of stirring, but it’s not like stirring is a difficult task.

The sauce seemed a bit thin to me even after it was completely blended, so I’m really glad I planned to follow the author’s tip about adding the cooked noodles to the crockpot for half an hour before serving. They helped to thicken up the sauce, and I was really pleased with the consistency when I served it.

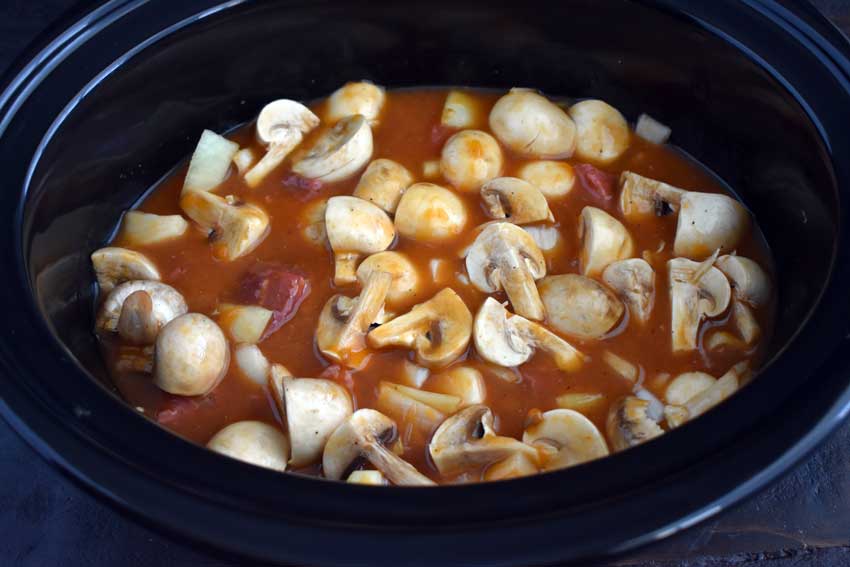
Step 1, just added the beef, condensed soup, onion, Worcestershire sauce, broth, mushrooms, salt, and pepper to my crockpot

Ginger and Lemongrass Iced Tea – Sierra Leone Flavors

It’s only May, but it’s already hot here in sunny South Florida. Iced tea is the defacto summer drink in my house, but plain iced tea can get boring. I’m always on the lookout for ways to mix it up, and this Ginger and Lemongrass Iced Tea recipe does that in every way. Not only is it infused with ginger and lemongrass, but it also uses rooibos tea, something I’ve never tried. Until now, that is.

A refreshing ginger and lemongrass iced tea recipe.

Recipe Author: Bintu at Recipes From A Pantry
Get the recipe

The Ingredients

I wasn’t worried about the cost or difficulty finding most of the ingredients for this iced tea recipe, except for the lemongrass stalk and the tea. Not that the lemongrass was difficult to find, but I did have to make a special trip to Whole Foods to get it. Actually, I tried Fresh Market first since it’s closer, but they don’t carry it. Grrr. So it was off to Whole Foods and dealing with the crazy traffic around that store to get it. The tea was my biggest worry, but good old Publix had it in stock. No worry was needed.

The author does mention that this recipe can be adjusted to taste. For my first batch, I used a 6-inch stalk of lemongrass, 3 tablespoons of sliced ginger, and 3 tablespoons of honey. My husband thought it was a bit strong, so I halved the ginger and lemongrass for the second batch. It’s a tough call to choose a favorite, but I think I have to go with the first version.

Ginger and Lemongrass Iced Tea Inredients
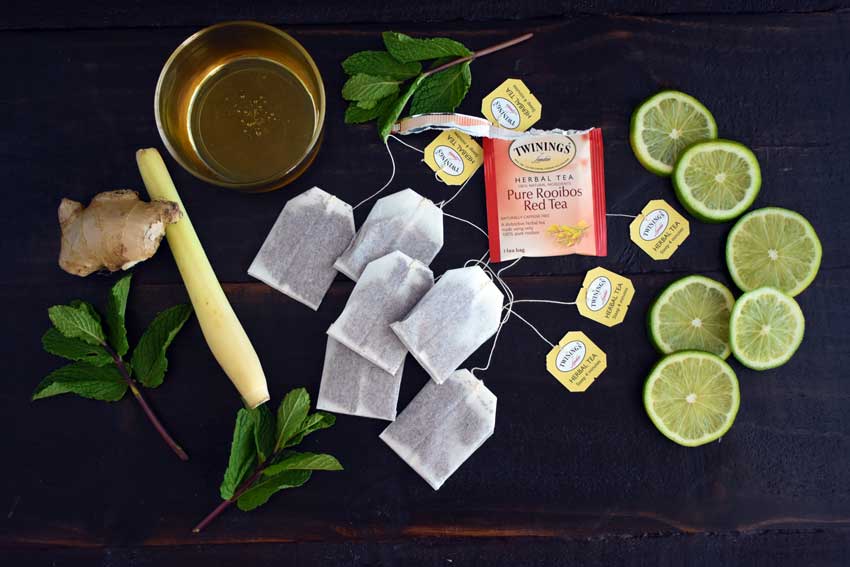
Rooibos tea bags, mint, lemongrass, ginger, honey, and lime

The Process

Making this iced tea was simple and straightforward and there wasn’t much extra work involved. The recipe lists the total time at 5 minutes, but the instructions include more details on the times. Here’s how my time broke down:

  • 5 minutes to prep
  • 12 minutes to boil and steep
  • 2 hours to cool
  • 1 minute to strain
  • 2 hours 18 minutes total

Looking back, I think the prep work could have been cut down by a minute or two if I had skipped peeling the ginger. It’s strained away anyway, so there really wasn’t a need to peel it. I suppose it’s just a habit for me.

The only thing that confused me was that lime slices are listed in the ingredients but never mentioned in the instructions. I threw them in as a garnish without squeezing them. I think they could be skipped entirely unless you want a garnish. The same goes for the mint, but it is pretty.

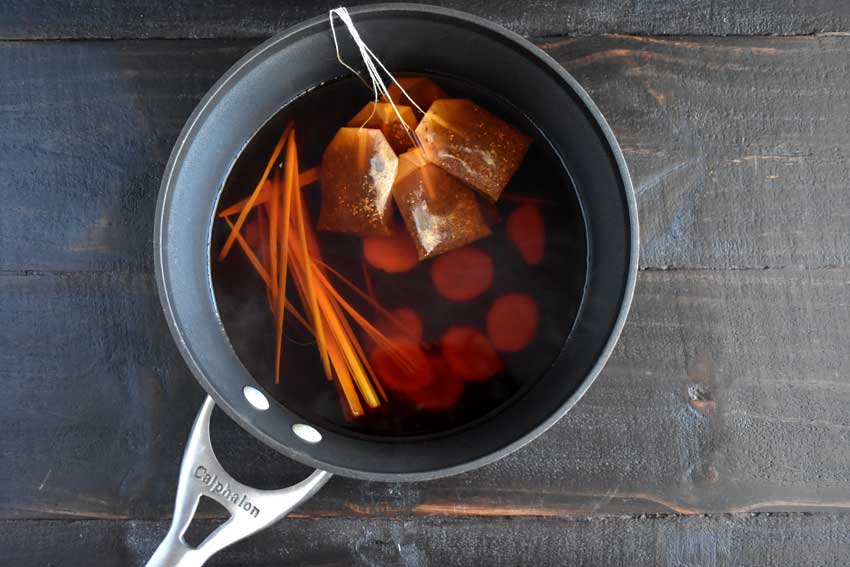
Steeping the tea, ginger, and lemongrass

Tanzanian Style Mussel Curry

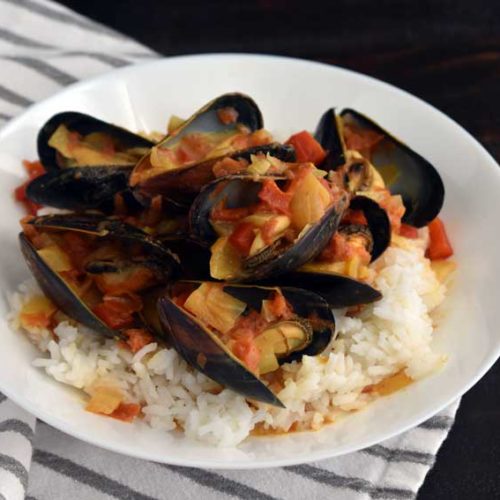
I’ve never met a curry I didn’t like, and curried mussels have always been a favorite in this house. The beautiful thing about curry is there are a million types, so finding a new taste using a favorite ingredient (or two) is easy. This recipe appealed to me because it uses a couple of ingredients I love, mussels and coconut milk, just like my favorite mussel curry recipe, but pretty much everything else is different. Reading the list of ingredients has made me hungry, so let’s get going and find out if this recipe is a Pinterest success.

In this Tanzanian seafood curry, mussels are cooked in a sauce spiced with cloves, cardamom and ginger and enriched with creamy coconut milk.

Recipe Author: Bintu at Recipes From A Pantry
Get the recipe

The Ingredients

Fresh seafood can be expensive, so it’s not a frequent menu item for us (I wish it was). I haven’t bought mussels in ages, and I was pleasantly surprised at the price of $4.99 a pound. Since it’s just the two of us, I bought 1 1/4 pounds and got 46 mussels with only 1 DOA. Not bad for just over $6. the rest of the ingredients were inexpensive and easy to find, but I was a little worried about the tomatoes.

I have never encountered a recipe that calls for canned finely chopped tomatoes, so I did some research online before my shopping trip. Initially, I thought there might be a difference in terminology since the author is in the UK, but I wasn’t able to find a familiar equivalent. I was hoping crushed tomatoes would work, but I was able to find Pomi finely chopped tomatoes at my local grocery store. The consistency looks chunkier than crushed tomatoes, so I’m glad I was able to find them.

Tanzanian Style Mussel Curry Ingredients
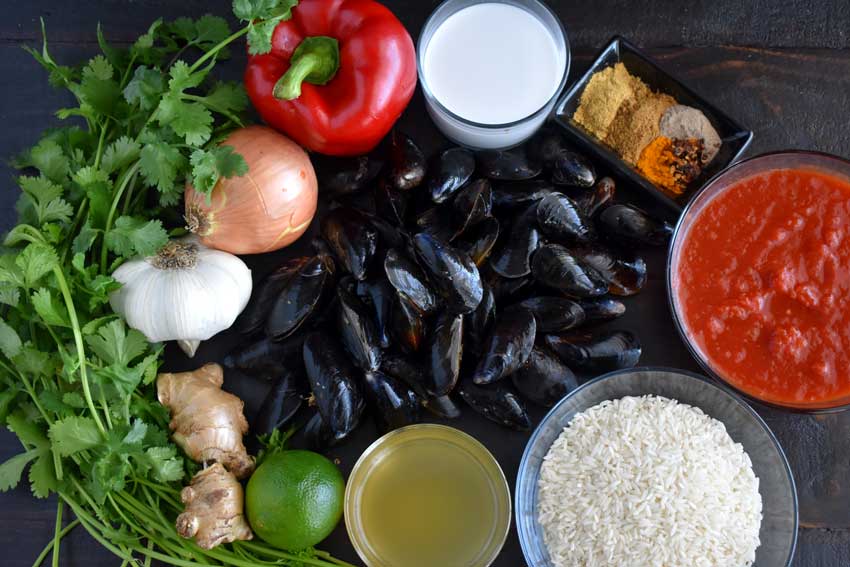
Mussels, garlic, onion, red bell pepper, coconut milk, coriander, cumin, cardamom, turmeric, red chili flakes, finely chopped tomatoes, rice, chicken broth, lime, ginger, and cilantro

The Process

Making this recipe wasn’t difficult, and I had it prepped in 10 minutes as listed. The entire meal was ready in 42 minutes, just 2 minutes over the time listed, so this recipe would work well for a weeknight. I served my mussel curry over long-grain white rice. It was easy to cook at the same time as the mussels since rice doesn’t require much work.

One thing I missed was the difference between cloves and garlic cloves. Cloves are mentioned in the description and Step 1, but they aren’t listed as an ingredient. As a result, I added the garlic to the pan too early (in Step 1 instead of Step 2). Fortunately, it didn’t burn, and I don’t think adding the garlic early affected the taste too much. However, the lack of cloves must have, but I had no way of knowing how much to add.

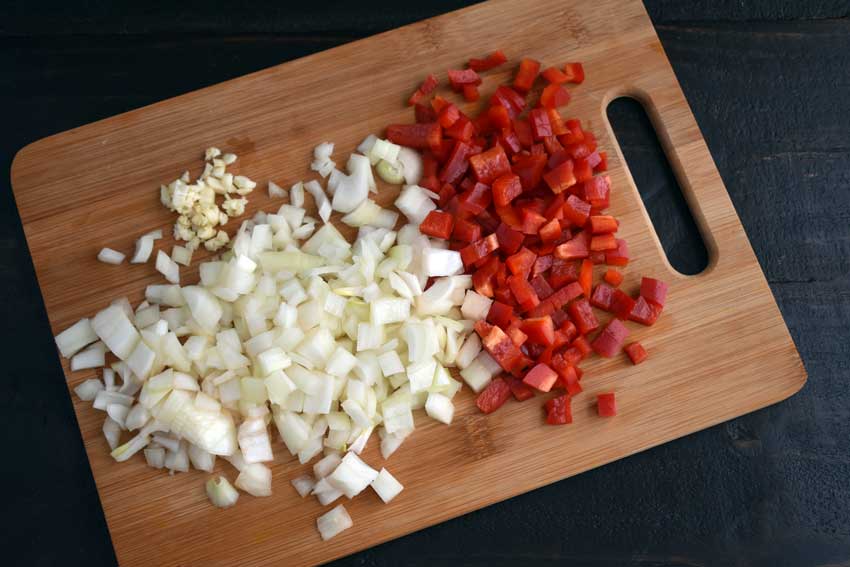
Chopped onion, red pepper, and garlic

Update (12/26/2020)

A reader recently informed me that this recipe is no longer posted. I see the original blog post, but the actual recipe is nowhere to be found. Fortunately, I save all the recipes I make here, and my version is posted below. Enjoy!

Tanzanian Style Mussel Curry

Tanzanian Style Mussel Curry

This is a re-written version of a recipe I found at Recipes From a Pantry. I prefer to link back to the original recipe rather than rewrite them here, but the original recipe no longer appears on the blog.
Prep Time 10 minutes
Cook Time 30 minutes
Total Time 40 minutes
Course Main Course
Cuisine African
Servings 4
Calories 450 kcal

Ingredients
  

  • 2 tbsp vegetable oil
  • 1 large onion chopped
  • 1 red bell pepper finely chopped
  • 2 tsp ginger minced
  • 2 garlic cloves minced
  • 1 ½ tsp ground coriander
  • 1 ½ tsp ground cumin
  • ¾ tsp ground cardamom
  • ¼ tsp ground turmeric
  • ¼ tsp red chili flakes
  • 14 ½ ounces canned petite diced tomatoes undrained
  • 14 ½ ounces chicken stock hot
  • 13 ½ ounces coconut milk
  • 1 ¼ pound mussels cleaned
  • tamarind or lime juice to taste

To serve:

  • freshly chopped coriander (cilantro)
  • rice

Instructions
 

  • Heat the vegetable oil in a large saucepan. Add the onion and bell pepper, and saute for 8 minutes or until soft.
  • Add the ginger, garlic, and spices, and fry for an addtional 30 seconds.
  • Add the diced tomatoes and chicken stock. Bring to a boil then reduce heat and simmer for 15 minutes, stirring occasionally.
  • Add the coconut milk and bring to a boil. Reduce the heat to a simmer, add the mussels, and simmer for approximately 6 minutes or until the mussels open. Discard any that do not open.
  • Remove from heat and add the tamarind or lime juice to taste. Serve over rice and garnish with chopped coriander (cilantro).

Notes

This recipe was originally posted at Recipes from a Pantry.

Tiramisu Tippers

I’ve had my eye on this Tiramisu Tippers recipe for a while because I just love tiramisu. Read through the ingredients, and you’ll probably be just as eager to try it. Coffee ice cream, chocolate-covered espresso beans, creme de cocoa, Kahlua–Yum!! I also liked that this drink is served in tiny espresso cups. Not just because they’re cute (and they are), but because I usually like really sweet cocktails in small quantities. With that said, let’s dive in and see what this tiramisu coffee cocktail recipe is like.

Recipe Author: Beter Homes & Gardens
Get the recipe

The Ingredients

As you can see, there aren’t a ton of ingredients for this recipe, and I’m totally okay with that. I was very pleased that I had all of the liquors on hand and only had to shop for the ice cream and espresso beans. You know I love short grocery lists. The only “problem” with this recipe is you will have a lot of leftover chocolate covered espresso beans, but I’m sure the leftovers won’t go to waste. I know mine won’t!

Amaretto was surprisingly not on the list of ingredients. I mean, tiramisu needs amaretto, so shouldn’t tiramisu coffee? But I didn’t worry about it too much. That mystery would quickly be solved when I made my Tiramisu Tippers.

Tiramisu Tippers Ingredients
Vodka, coffee liqueur, creme de cocoa, coffee ice cream, ic, and chocolate-covered espresso beans

The Process

The instructions for this recipe are short and clear. Just place everything but the chocolate covered espresso beans into a blender and let the blender do its thing.

Then roughly chop a few of those yummy espresso beans, pour the drinks, and gently place the chopped beans on top. And I do mean gently–I had a few beans sink to the bottom because I wasn’t careful enough. I have to say the extra care was worth it, though, because the garnish gives a pretty plain looking drink something extra.

My Tiramisu Tippers were made, poured, and garnished in 4 minutes, making this even quicker to prepare than after-dinner coffee or espresso.

I only got 4 servings out of this recipe instead of 8, but my espresso cups are 3.8 ounces while the serving size listed was 1 ounce. I’m sure I would have had more than 8 servings with smaller cups.

Tiramisu Tippers

No-Bake Amaretto Truffles

I just usually steer clear of no-bake desserts, but my sweet tooth demanded I make these amaretto truffles after I read the ingredient list. It’s full of deliciousness like coconut, honey, and, of course, amaretto just to name a few. The smell of amaretto alone makes me smile like a fool, close my eyes, and go ‘aaaaahhhhh’. And then I realized the boozy goodness wouldn’t be cooked away since there is no baking involved. Sold!

These moist and delicious No-Bake Amaretto Truffles are easy to make and a great dessert to serve with an affogato after a classic Italian dinner party. Mangia! ?

Recipe Author: Martha and Jack at A Family Feast
Get the recipe

The Ingredients

This recipe required a little more shopping than most. I found the majority of the ingredients at my local grocery store with the exception of the amaretto and the amaretti cookies. The former was easily found at the liquor store, but I had to do some searching for the latter. Fortunately, there is an incredible market up the street that carried them, Doris Italian Market. It’s a local chain that reminds me of a smaller Italian-themed Fresh Market. I highly recommend a visit if you’re in South Florida! But don’t despair if you’re not because they also have an online store.

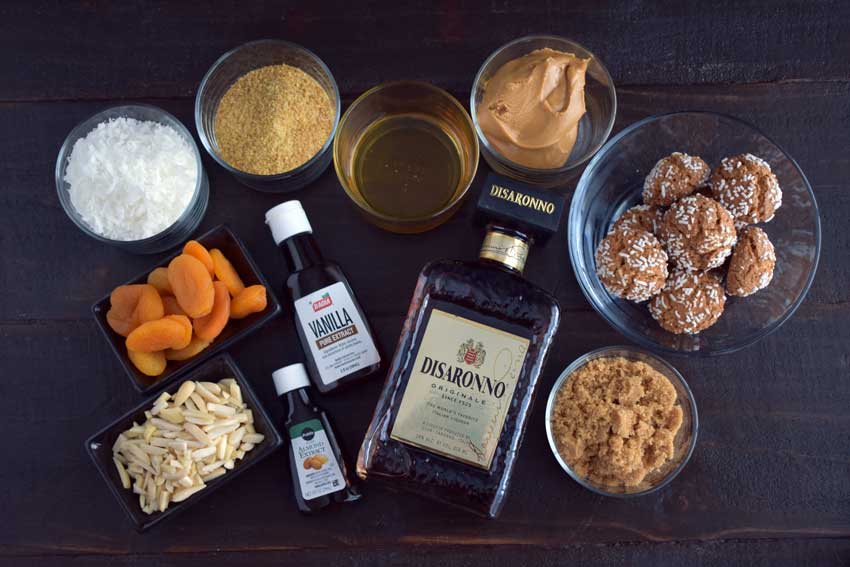
No-Bake Amaretto Truffles Ingredients
Amaretto, vanilla extract, almond extract, almonds, dried apricots, shredded coconut, golden flaxseed meal, honey, almond butter, amaretti cookies, and brown sugar

The Process

The directions make preparing these amaretto truffles sounded pretty simple, and they were. I had 24 truffles made in 30 minutes just as promised. However, there are a few things I will do differently next time I make this recipe.

I had trouble getting the dough to hold together unless I squeezed each truffle pretty hard. The dough had a texture that was more crumbly than I expected, and I suspect that was because I didn’t chop the apricots finely enough or crush the cookies enough (I put them into a ziplock bag and crushed them with a meat mallet). Neither could be fixed once I had mixed everything, but next time I will take some extra time with the apricots and put the cookies into my food processor so I get a finer dough.

I also had trouble getting the chopped almonds to stick to the outside. I chopped slivered almonds myself since I couldn’t find chopped almonds at the grocery store. I did notice the finer bits stuck better larger ones, so I stopped and ran the almonds through my mini-prep. That completely changed things, and it was easy to get the almonds to adhere to the truffles after that.

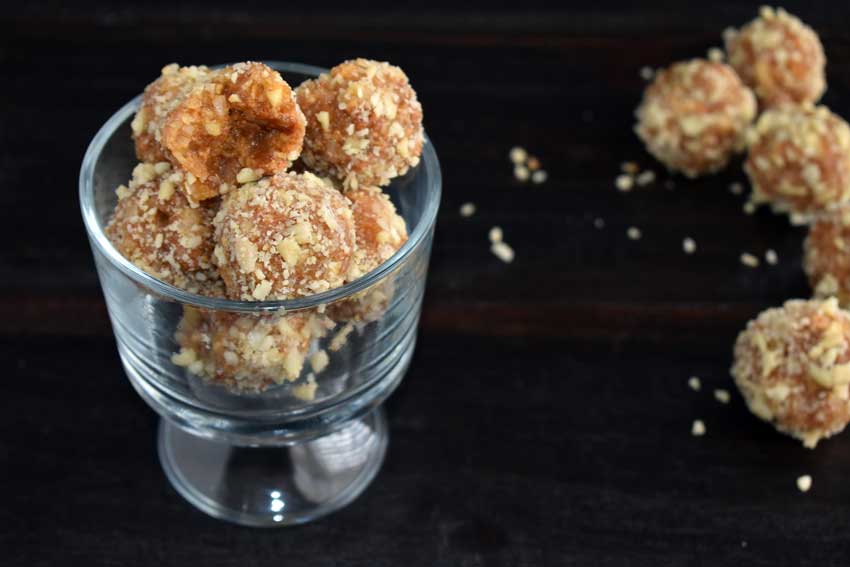
No-Bake Amaretto Truffles
I couldn’t help myself–these truffles smelled so good I had to take a bite!

Sun-Dried Tomato and Mushroom Pasta In a Garlic and Basil Sauce

I don’t know about you, but I love carbs, and pasta is probably my favorite variety. It’s tasty, versatile, and budget-friendly, which are all reasons this recipe appealed to me. That and my husband and I are making an effort to eat less meat. And fettuccine pasta loaded with mushrooms and sun-dried tomatoes in a creamy basil sauce just sounds sooooo good! Let’s give this Sun-Dried Tomato and Mushroom Pasta In a Garlic and Basil Sauce a try.

If you’re looking for a delicious and easy-to-make pasta recipe to add to your weekly/monthly recipe rotation, try this sun-dried tomato and mushroom pasta in a garlic and basil creamy sauce. The combination of flavors in this dish is SO GOOD, it’s a pure comfort food that you will be tempted to eat right out of the pan.

Recipe Author: Julia at Julia’s Album
Get the recipe

The Ingredients

I did have to shop for most of the ingredients for this recipe, but nothing was expensive or difficult to find. I bought the mushrooms already sliced to make my life a little easier. Also, I bought julienned sun-dried tomatoes because they would be easier to chop. Finally, I opted for dried basil. I had it on hand, and I didn’t want leftover fresh basil to go to waste.

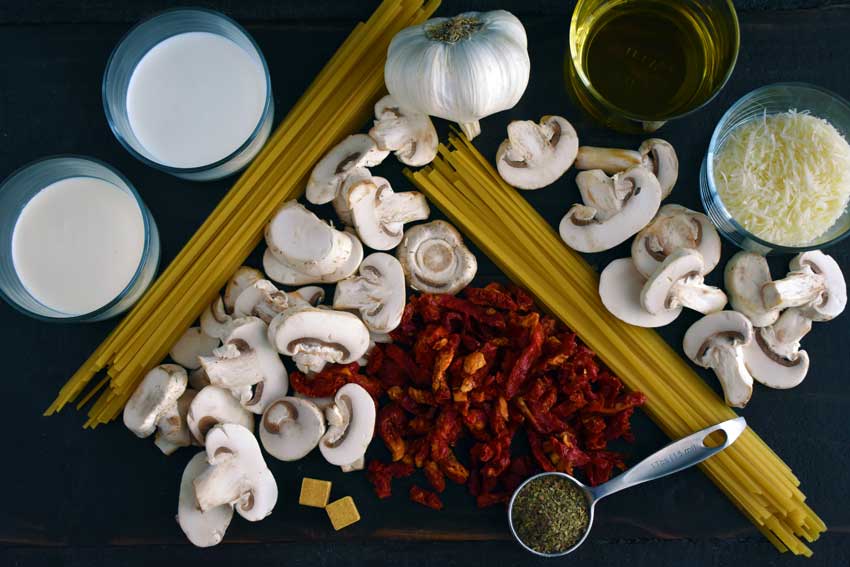
Sun Dried Tomato and Mushroom Pasta In a Garlic and Basil Sauce Ingredients
Fettuccine, mushrooms, sun-dried tomatoes, basil, bullion cubes, cream, half-and-half, garlic, olive oil, and parmesan cheese

The Process

This really was an easy recipe, and I had it ready to serve in 30 minutes, just as the recipe listed. I didn’t do all the prep work before I started cooking. Instead, I prepped as I went straight nice there was plenty of time between steps. I also started boiling the water to cook the fettuccine at the same time I began the sauce.

I thought my sauce would turn out too thin, but I ended up closer to the opposite. Watch the sauce carefully once you add the fettuccine. The pasta absorbs the liquid, and the heat from the stove evaporates it as well. I recommend removing the pan from the heat when the sauce still looks a little thin so you end up with a creamy but not too thick consistency.

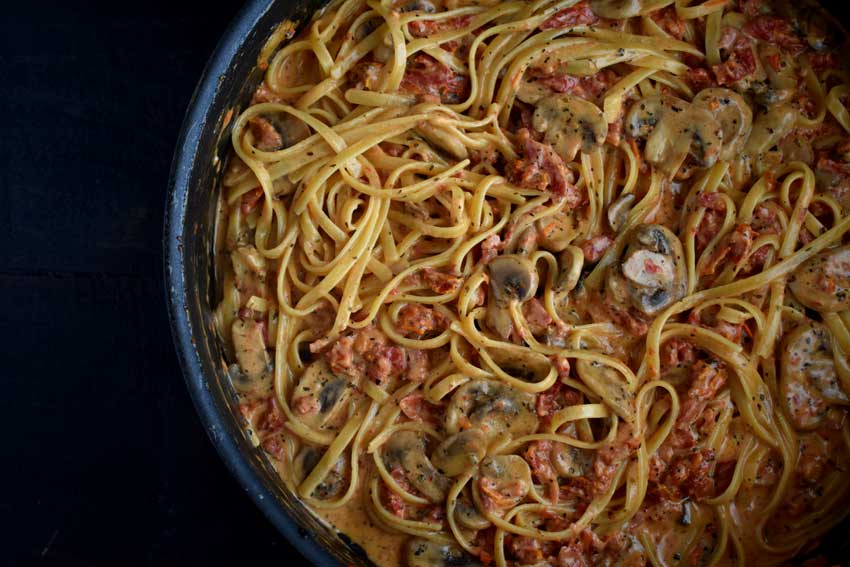
A pan of Sun Dried Tomato and Mushroom Pasta In a Garlic and Basil Sauce
A pan of Sun-Dried Tomato and Mushroom Pasta In a Garlic and Basil Sauce

Cream Cheese Banana Bread

The week I have breakfast on my mind, and the breakfast casserole I made earlier this week was a touch more work than I normally put into my morning meal. My go-to breakfast foods require minimal work like removing from the refrigerator, microwaving, etc. This banana bread recipe will be perfect for me since I can make it ahead of time and grab slices as needed, whether for breakfast, a snack, or dessert.

This post was originally published on April 29, 2018. The text and photos were updated on February 12, 2023. The review and rating have not been changed.

Cream Cheese Banana Bread – one of the best breads you will ever make! Perfect for breakfast, snack and dessert!

Recipe Author: Lidia at Yummiest Recipes
Get the recipe

The Ingredients

I really liked the fact that this recipe uses a lot of pantry staples. I had many of the ingredients on hand like flour, vegetable oil, vanilla extract, sugars, baking powder and soda, and salt. That left me with a short grocery list of dairy products (cream cheese, sour cream, and eggs) and bananas. And when is a short grocery list ever a bad thing?

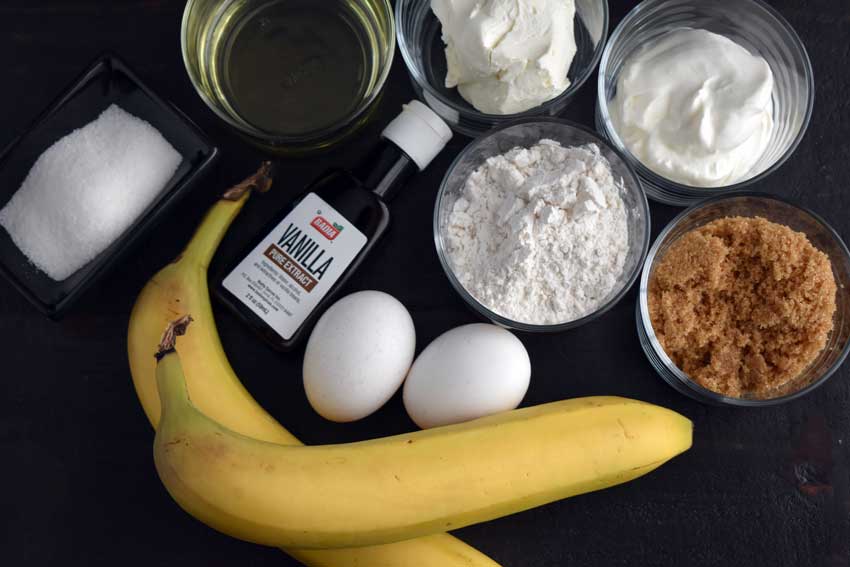
Cream Cheese Banana Bread Ingredients
Bananas, egg, vanilla extract, sugar, vegetable oil, cream cheese, sour cream, brown sugar, and flour

The Process

The directions for this recipe were clear and easy to follow. The prep work did take me a little longer than the time given (15 minutes instead of 10). Banana bread is a new thing for me, so that may have been the cause.

I’ll save you some guesswork and let you know that this recipe makes about 2 cups of batter for the bread. So for Step 4, you will need to add 1 cup of batter to your loaf pan. The consistency wasn’t too thick, and I didn’t need to smooth it with a spatula. It leveled out on its own as did the cream cheese filling and the second layer of bread batter.

My banana bread seemed to be done after 40 minutes of baking, as promised, but it turns out that wasn’t exactly the case. After cooling, the first 2 slices looked fine, but I noticed the bread got mushy as I moved toward the center of the loaf. The bananas I used were pretty large, so I’m thinking I ended up using too much.

I tested the theory by re-making this recipe using 1 banana from the same bunch, and it turned out beautifully. So either use 1 large or 2 small bananas unless you prefer mushy banana bread.

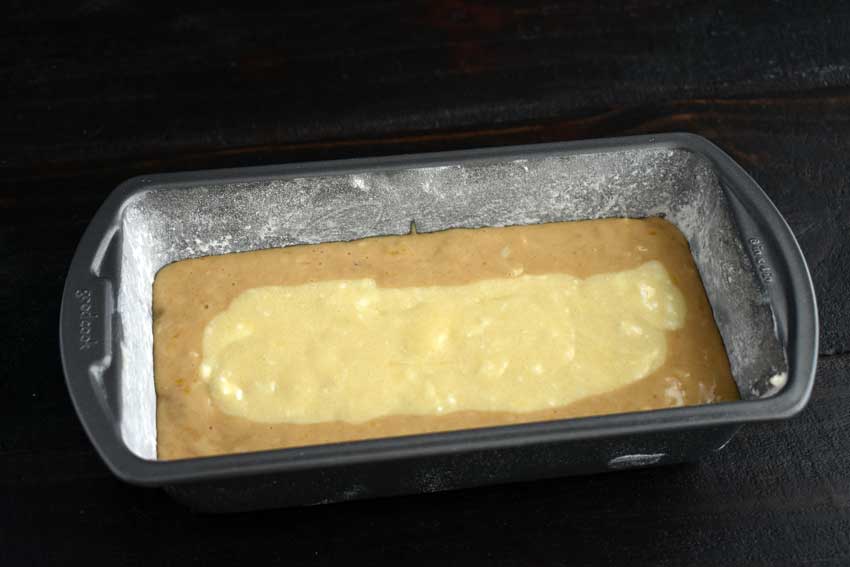
Adding the cream cheese filling
Just after adding the cream cheese filling to the banana bread batter