Home Blog Page 5

Hot Cocoa Cupcakes

0

Christmas is right around the corner, and I’m really looking forward to it. It’s still warm down here in South Florida, but it’s winter, damn it! And what’s more wintertime-like than a cup of hot cocoa? It’s not something I have any other time of year, so it really gets me into that Christmas mood. That’s why I was so psyched when I found this recipe for Hot Cocoa Cupcakes. Chocolate cupcakes filled with chocolate ganache and topped with frosting made with Swiss Miss hot chocolate mix plus a marshmallow garnish? Oh yeah! I grew up on Swiss Miss hot chocolate, so there’s some nostalgia there for me. I can’t wait to try this recipe!

Dark chocolate cupcakes with thick chocolate ganache filling and fluffy hot cocoa frosting.

Recipe Author: Ginny Dyer at In Bloom Bakery
Get the recipe

The Ingredients

This recipe for Hot Cocoa Cupcakes has quite a few ingredients, but I’m happy to say they were all easy to find at my usual grocery store. My pre-shopping pantry check showed me that I had a lot of ingredients on hand. My pantry was stocked with all-purpose flour, baking powder, baking soda, salt, espresso powder, and granulated sugar.

I usually have vanilla extract and Dutch process cocoa powder, but I didn’t quite have enough of either for this recipe. I had to buy those plus the perishable ingredients. Unsalted butter, whole milk, heavy whipping cream, sour cream, and eggs were all easy to find in the dairy case.
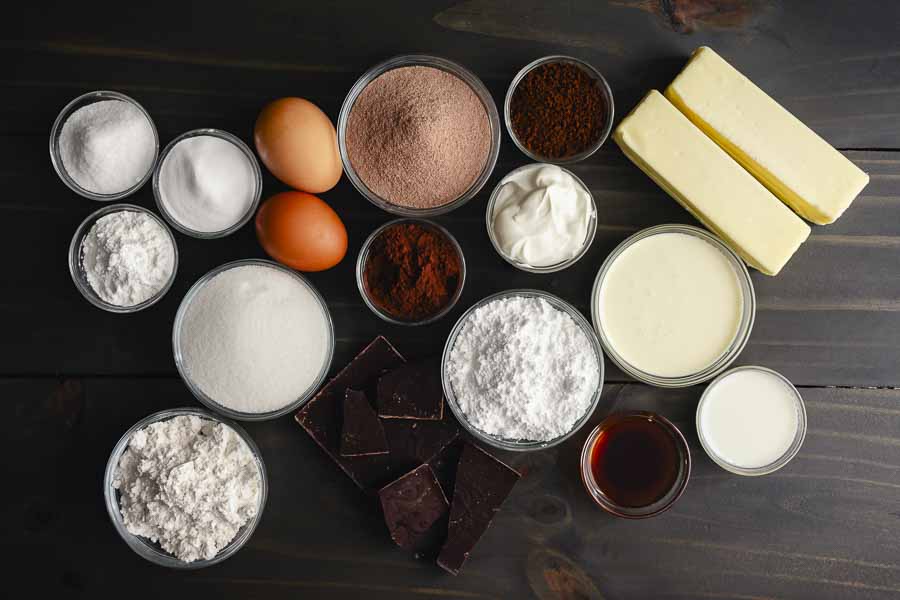
Hot Cocoa Cupcakes Ingredients
Swiss Miss milk chocolate hot cocoa mix, espresso powder, sour cream, unsalted butter, heavy whipping cream, whole milk, vanilla extract, powdered sugar, Dutch process cocoa powder, semi-sweet chocolate, all-purpose flour, granulated sugar, eggs, baking powder, baking soda, and salt

The baking aisle had semi-sweet baking chocolate, Dutch process cocoa powder, and vanilla extract. The Swiss Miss cocoa mix was with the coffee and tea, and I chose a canister instead of the individual serving envelopes. I just wasn’t sure the envelopes would have enough of the cocoa mix.

Lastly, I had to find marshmallows. I was thinking they would be on the candy aisle, but I couldn’t find them. Instead, they were on the aisle with the juice, dried fruit, and stationery. I never would have found them if I hadn’t asked!

The Process

This recipe is broken down into four sections: cupcakes, chocolate ganache, frosting, and assembly. The recipe walked me through everything pretty clearly.

Making the Chocolate Cupcakes

This was the first step, and it went smoothly for the most part. I used my stand mixer with a flex-edge paddle beater to mix the batter. It was perfect!
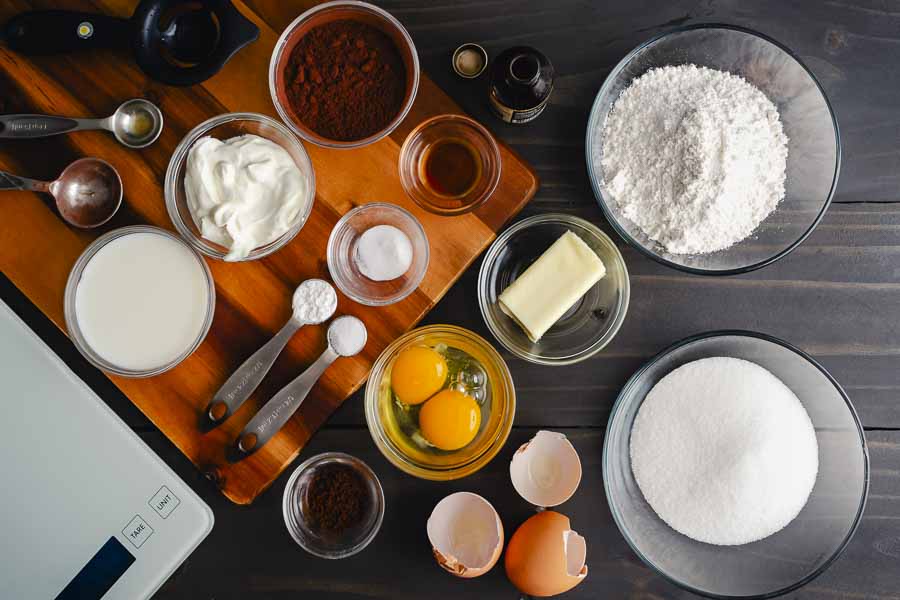
Weighed and measured cupcake ingredients

The only thing that confused me was step 7, adding the dissolved espresso powder. Dissolved in what? I went back to the blog post to see if I could figure it out. It turns out the recipe displayed in the post had been corrected to add the espresso powder to step 2. The espresso powder should have been sifted into the dry ingredients.

It looks like the printed version that I used had not been updated, but everything was fine. I had not added all of the dry ingredients yet. I was able to sift in the espresso powder to what I had left, and I didn’t have any problems with the batter.

The batter was supposed to fill the cups about 3/4 full, but mine only made it to halfway. I shrugged it off, wiped up my mess, and popped the muffin pan into the oven to bake. The cupcakes passed the toothpick test at 17 minutes, so I let them cool in the pan and then on a rack.
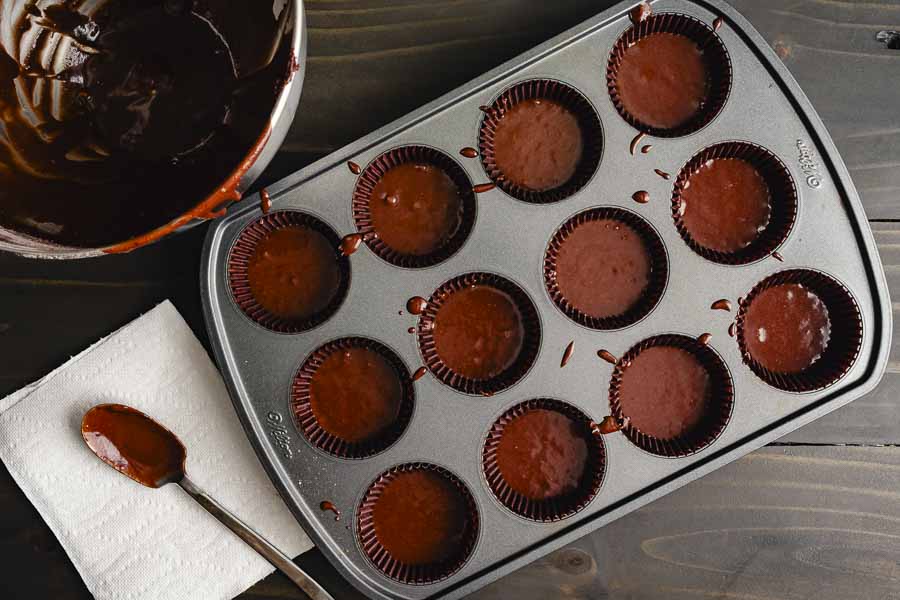
Lined cupcake pan filled with chocolate batter
The cups filled about halfway up instead of 3/4 per the recipe

Making the Chocolate Ganache Filling

The ganache was definitely the easiest part of this recipe. All I had to do was heat the heavy whipping cream until it just began to boil. I chopped up the chocolate while it warmed, and paced it into a heat-proof mixing bowl.

Once the whipping cream had warmed up, I poured it over the chopped chocolate and left it to melt for a minute. Then I used a spoon to mix slowly until the white color of the whipping cream had disappeared. I ended up with what looked like thick chocolate syrup. The mixture needed to cool before I could use it, so I set it aside and began the frosting.
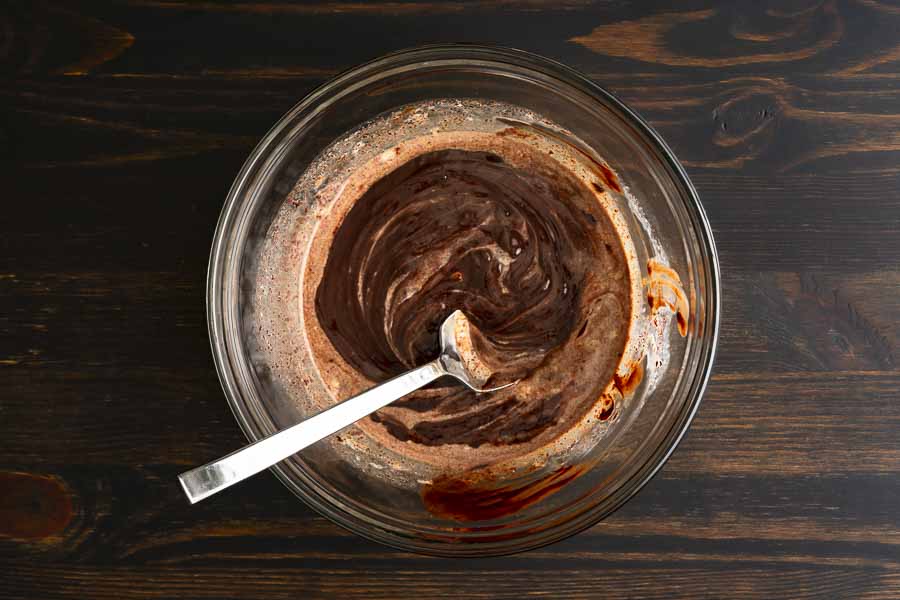
Making chocolate ganache
Mixing boiling heavy whipping cream with chopped bittersweet chocolate to make ganache

Making the Hot Cocoa Frosting

I’m not the greatest baker, and it showed in the frosting. It was easy to make, and there were tons of air bubbles in the frosting. I was so excited about using my new Russian ball piping tips that I didn’t notice until I looked at the photos. What did I do wrong? I used the whisk attachment to mix the frosting and I mixed it at too high of a speed.

Tip: The whisk attachment I chose adds air to whatever you’re mixing, so the paddle attachment I used to mix the batter with would have been a better choice (and vice versa). I also should have left the mixer on a low speed. I found a wonderful article on how to get bubbles out of buttercream frosting (and how to make it smooth in the first place).

I’m going to make sure I follow those tips in the future, and that means the very near future. These Hot Cocoa Cupcakes were so delicious that I decided to bake a few batches for Christmas gifts. I’ll be sure to update this post when I do and let you know if I was able to make smooth buttercream.
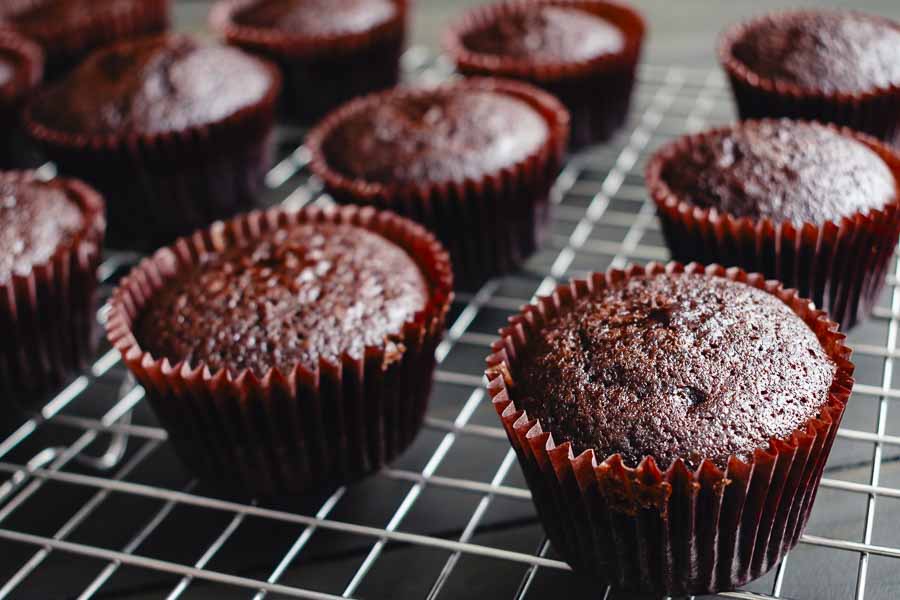
Baked cupcakes on a wire cooling rack
The cupcakes baked up nice and level

Assembling My Hot Cocoa Cupcakes

Assembling these cupcakes was very much like these Vanilla Maple Whiskey Cupcakes. I used a 1-inch biscuit cutter to core the cooled cupcakes. The ganache had cooled, and there was just enough to fill the newly-cored cupcakes.

Tip: The ganache is thin enough to flow/pour easily. I used a disposable piping bag without adding a piping tip to fill the cupcakes, but I had to work fast because. I cut the hole too large, and the ganache poured out fast without any pressure. Next time I will cut a smaller hole and enlarge it if needed.

Next, I loaded another piping bag with the hot cocoa frosting and began piping it on. I used a Russian ball piping tip to make a ruffle-like design before topping it with a large marshmallow. This tip was so much easier than my usual cupcake piping tips!

Tip: Here’s a link to an easy-to-follow Russian ball piping tip tutorial. The technique for the ruffles starts about one minute in. I used 2 to 3 back and forth twists without lifting the piping tip to create my ruffles. Leaving the piping tip on the surface of the cupcake instead of lifting it left a void for the marshmallow.
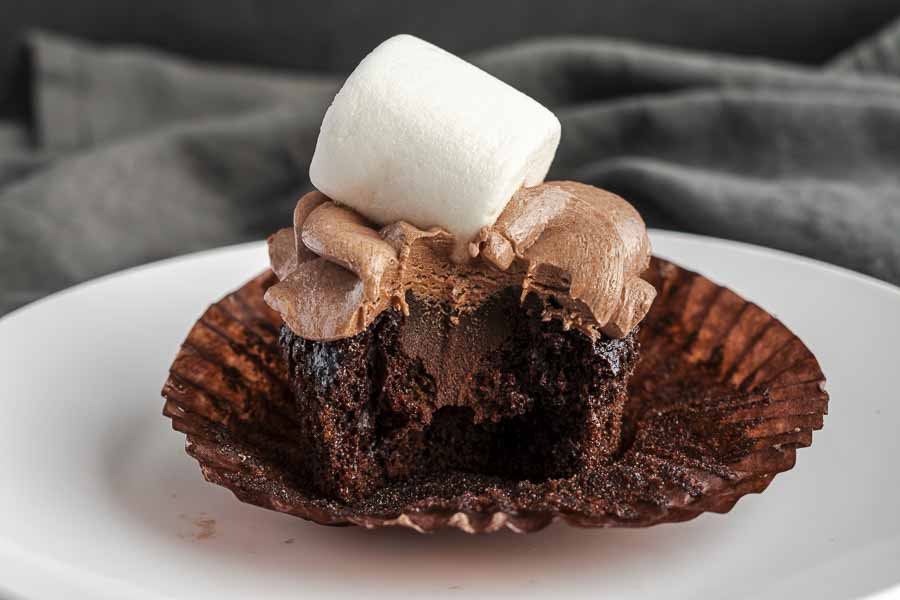
Taste-tested Hot Cocoa Cupcake

Timing

This recipe lists 30 minutes to prep and 18 minutes to cook, but no total time. The prep and cooking times add up 48 minutes, so that’s what I’m basing my rating on. Here’s how my time was spent:

  • 18 minutes to prep the cupcakes (9 minutes to measure + 9 minutes to mix & pour batter)
  • 17 minutes to bake the cupcakes
    • 8 minutes to make the ganache (while the cupcakes baked)
    • 8 minutes to start the frosting
  • 12 minutes to finish the frosting
    • 5 minutes to cool the cupcakes in the pan
    • 7 minutes to cool the cupcakes on a rack
  • 8 minutes to fill the cupcakes
  • 12 minutes to frost and garnish with marshmallows
  • 1 hour 7 minutes total

The cooking time listed lines up with mine, but the prep time goes way over even though I did some things concurrently, like making the ganache and starting on the frosting while the cupcakes baked. But I’m not mad about it because these cupcakes were so damn good!

Baked Apple Cider Donuts

You might think I’m not into the holiday season since I’m not doing a Thanksgiving menu this year. Nope, totally not the case! In fact, I think I’m more into it since I don’t have the pressure of creating, making, photographing, and writing up a menu. Not that I’m a complete spectator this year. I’m just getting into the season by making non-Thanksgiving dinner dishes like this Baked Apple Cider Donuts recipe. Apple cider practically screams Fall, and I’m intrigued by the idea of putting them into donuts. This baked donuts recipe also includes a few changes to make them a bit healthier, and who doesn’t need that during a season that’s all about eating? Ammiright?

The perfect fall treat, these baked apple cider donuts are made a healthier with whole wheat pastry flour, coconut sugar, Greek yogurt and coconut oil.

Recipe Author: Brittany Mullins at Eating Bird Food
Get the recipe

The Ingredients

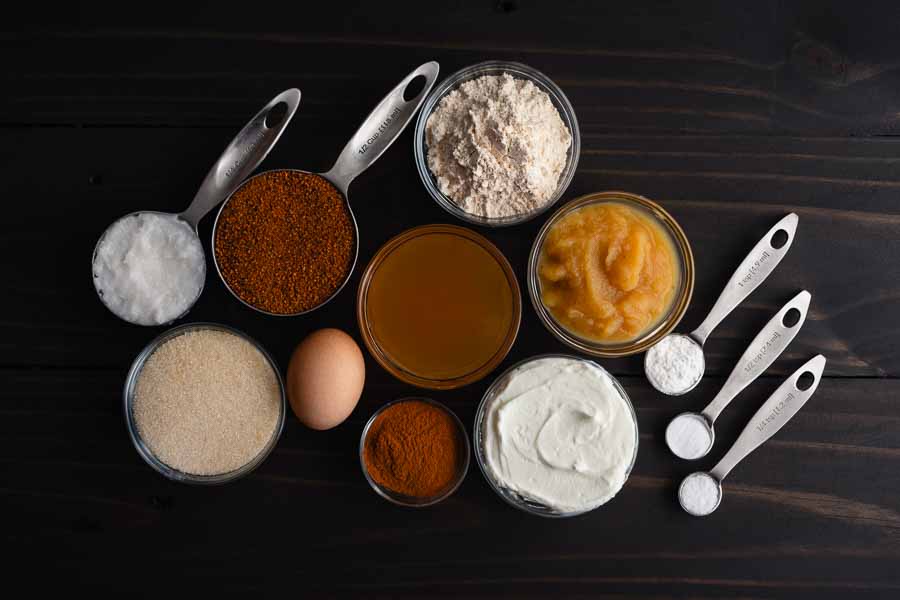
Although apple features heavily in these donuts, there’s no coring, peeling, or chopping involved. In fact, there are no fresh apples to be found on the ingredient list. Instead, it has seasonal favorite apple cider plus unsweetened applesauce.

I had to buy both items along with some plain Greek yogurt and eggs. I had everything else on hand, even an unopened bag of whole-wheat pastry flour, coconut oil, and coconut sugar.

Baked Apple Cider Donuts Ingredients
Apple cider, whole wheat pastry flour, unsweetened apple sauce, baking powder, baking soda, sea salt, plain Greek yogurt, ground cinnamon, egg, organic cane sugar, coconut oil, and coconut palm sugar

Tip: Coconut sugar and coconut palm sugar are the same thing. The bag I bought was labeled “coconut palm sugar”, but it’s the same thing as coconut sugar. And what is coconut sugar? It’s made from the sap of the coconut palm trees only, and not from any other species of palm tree.

There is also such a thing as palm sugar, but it’s made from the sap of other types of palm trees including palmyra, date, nipa, and sugar palm trees.

The Process

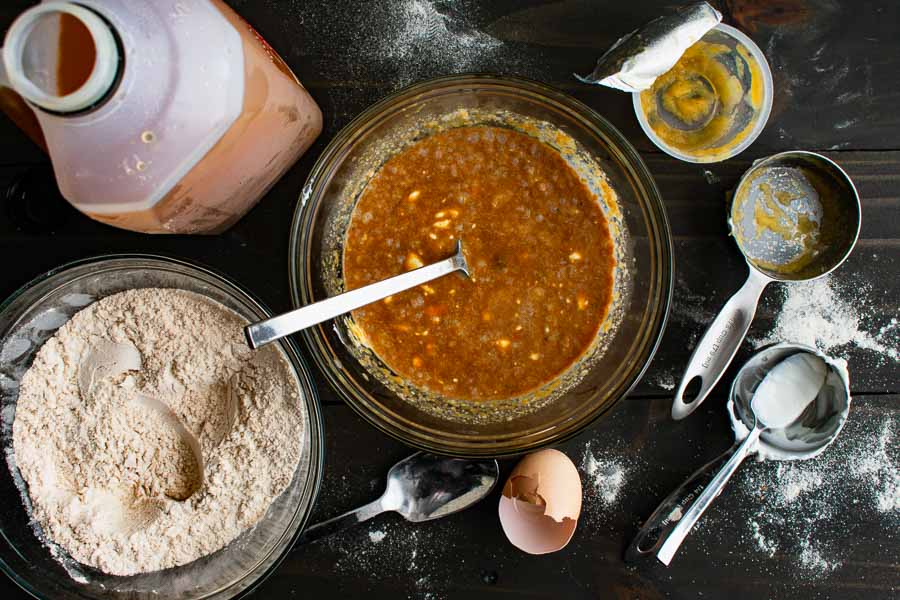
This recipe began much like many recipes I’ve made for baked goods. Preheat the oven, spray the pan(s) with oil, mix the wet and dry ingredients separately, then mix them together to create the batter.

That all went smoothly, although the wet ingredients were a bit lumpy. I don’t think it mattered once I mixed in the dry ingredients. However, if it bothers you like it bothered me I have a fix. Tip: Mix the yogurt and applesauce together first. Add in the rest of the wet ingredients afterward, and the mixture will be nice and smooth.

Step 3: mixing the wet ingredients
The Greek yogurt didn’t dissolve in the liquid. To prevent that, mix the yogurt and applesauce until smooth before adding the other ingredients.

This recipe needs donut molds, but I already bought a pair when I tried making Raspberry Baked Donuts with Raspberry Glaze in November of 2021. Tip: Silicone donut molds are very soft and flexible, so they need to be placed on a sheet pan. I suggest doing this before adding the batter to them.

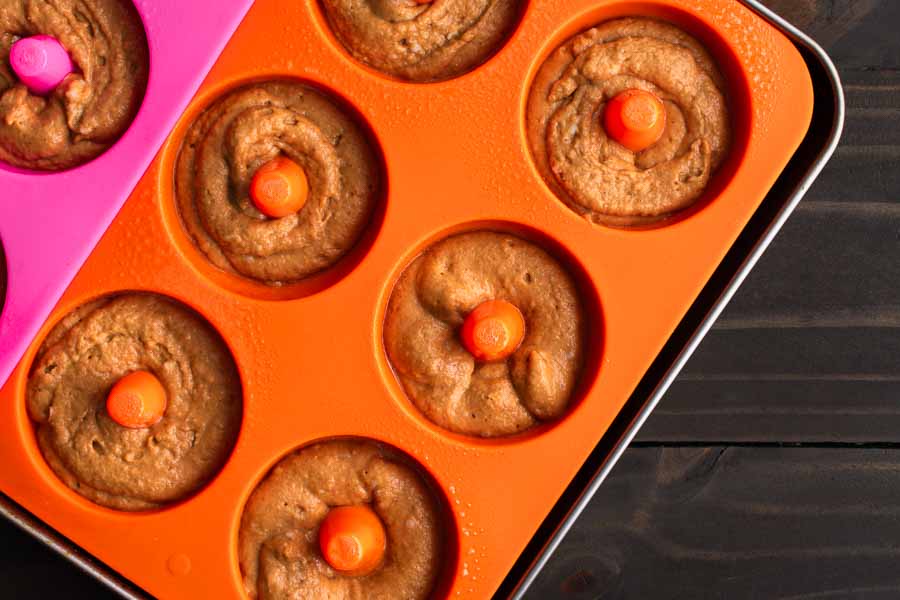
The batter was quite thick and definitely not pourable. The recipe gives the option to spoon or pipe in the batter. Spooning would have taken longer, so I used a piping bag to add the batter to my donut molds. No piping bag? Tip: You can add the batter to a plastic bag, snip off a corner, and use that the same way as a piping bag.

I used a piping bag to fill the donut molds

Baking the Donuts

Once the batter was in the pans, I slid them into the preheated oven on the middle rack and set a timer for 6 minutes. They were most definitely not done after that, so I added 2 more minutes. Again, they were not done, so I added another 2 minutes for a total of 10 minutes.

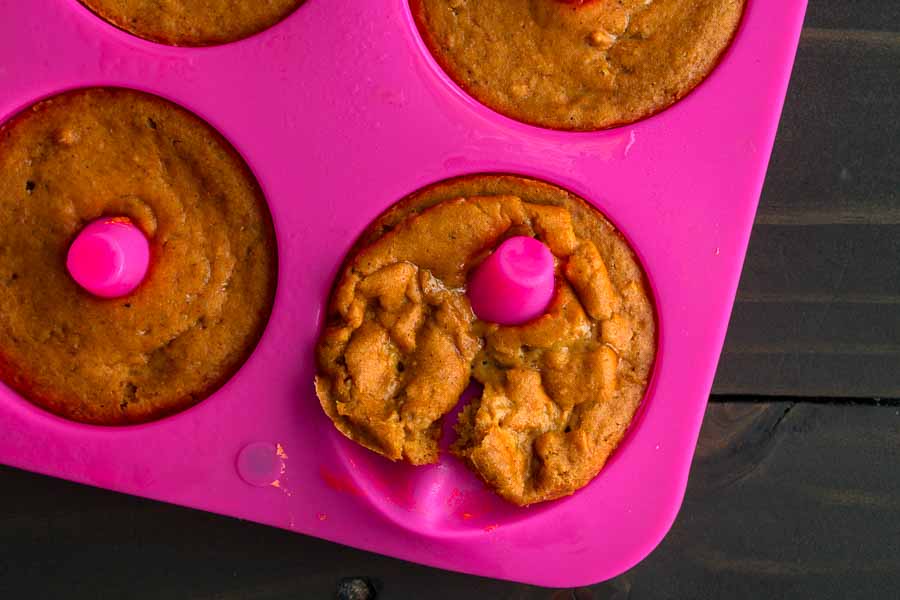
The donuts passed the doneness test in Step 6 and were pulling away from the sides of the pan. I took them out and allowed them to cool in the pans for 5 minutes. Alas, the first donut I tried to remove from the pan was beyond squishy. The outside looked done, but the inside was still batter.

After 10 minutes baking, the donuts looked done but were not
After 10 minutes of baking, the donuts looked done but were not

I consulted that raspberry donut recipe I mentioned for help. It said to bake for 15 minutes at 350°F. Based on that, I turned my oven back on, added another 4 minutes to the cooking time, and then used the toothpick test.

Adding the Cinnamon-Sugar Coating

They passed the test, so it was on to cooling while I mixed up the cinnamon sugar in a shallow bowl and melted some coconut oil. The donuts were cool enough to touch after cooling for 5 minutes in the pan and another 10 minutes on a wire rack.

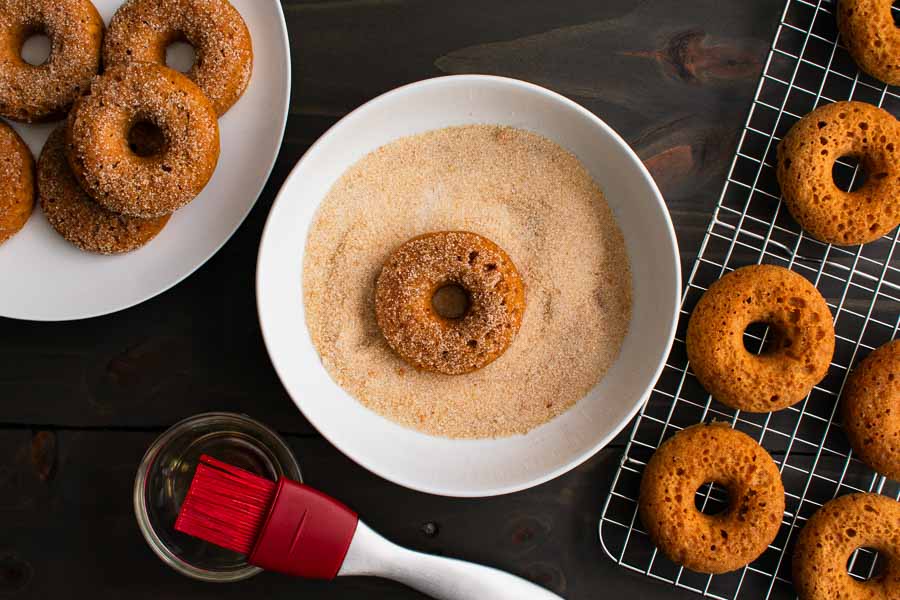
Coating them with the sugar mixture was simple. I created a station so I could zip right through them. Using a pastry brush, I lightly coated both sides of a single donut then dipped it into the sugar mixture, coating both sides. Tip: Work 1 at a time to coat the donuts in the cinnamon-sugar mixture to keep the coconut oil from soaking into the donut and losing its effectiveness.

Brushing the donuts with melted coconut oil and sipping them in cinnamon-sugar

Unfortunately, my first bite of my completed Baked Apple Cider Donuts was still a bit underdone and doughy. I was afraid the sugar would caramelize if I put the donuts back into the oven. I ended up microwaving them for 2 minutes at 70% power to fully bake them.

Baked Apple Cider Donuts, Take 2

I re-made this recipe a day or two later so I could troubleshoot it. This time I lowered the oven rack one notch and baked the donuts for 15 minutes at 350°F. I used the classic toothpick test to make sure they were done instead of the method in the recipe (Step 6).

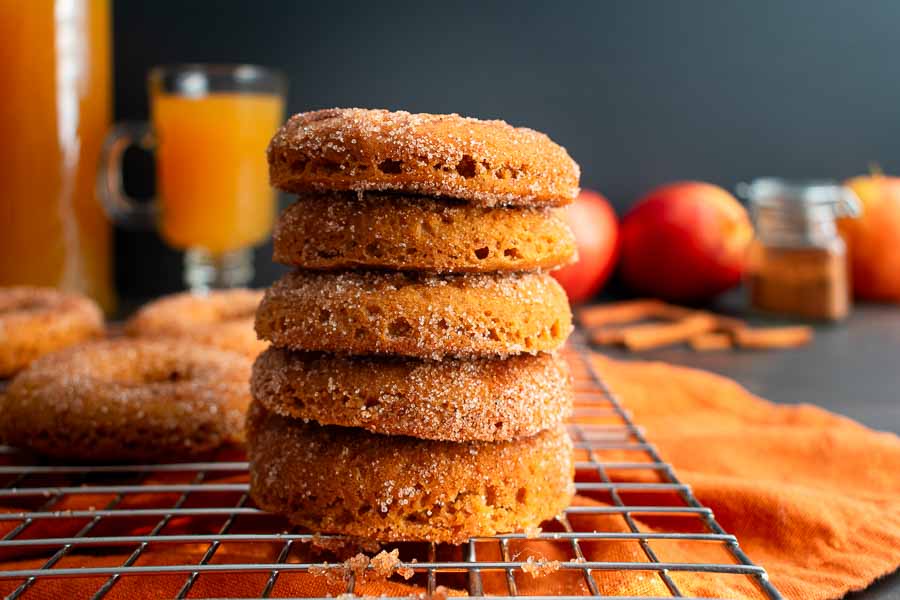
This batch was a huge improvement over the first one! I think not taking the pan in and out of the oven was key. No dips in the temperature made a big difference, and this batch was done all the way through. I ended up with very cake-like and had lots of holes. All the better to soak up that tasty cinnamon-sugar coating!

Stacked Baked Apple Cider Donuts
The tops of the donuts (relative to the pan) were flat, and the bottom had a curve thanks to the pan

Tip: The sugar will melt into the donuts if you store them overnight. I didn’t mind and could still taste it, but I have an idea to keep that from happening: use turbinado sugar. It’s coarser than organic cane sugar and adds a bit of crunch without melting. You can add it per the recipe’s instructions or bake it in. To bake it into the donuts just sprinkle it into the pan before adding the batter, then sprinkle more onto the top of the batter before baking.

Timing

This recipe lists 10 minutes to prep, 8 minutes to cook, and a total time of 18 minutes. Here’s how my time was spent:

  • 13 minutes to prep
  • 16 minutes to cook (15 minutes worked on my 2nd try)
  • 15 minutes to cool
    • 2 minutes to make cinnamon sugar (made during cooling)
  • 6 minutes to add cinnamon-sugar coating
  • 50 minutes total

I wasn’t surprised that I went over the times listed on the recipe since I had to increase the cooking time, but I was surprised at how much over. I went over the prep time making the batter, and adding the cinnamon-sugar coating took me way over.

The order of the ingredients in the instructions was different from the list at the top. I had to hunt for the ingredients and amounts, which always slows me down.

It doesn’t seem like the cooling time was included in the listed times. If I deduct that I end up with a total of 35 minutes. That’s still way over the time listed. But was it worth all that extra time? It sure was!

Pumpkin Pie Smoothie Bowl

0

I’ve been seeing pins with photos of beautiful smoothie bowls all over Pinterest. They seem to come in a huge variety of flavors and colors, not to mention there seem to be zillions of toppings. I do love a good smoothie, but I haven’t made one in a long time, and I’m not sure why. Maybe I got tired of them? Perhaps a smoothie in a bowl will get me back into smoothies. This Pumpkin Pie Smoothie Bowl sounds delicious and perfect for the Fall season. Let’s give it a try and see if it tastes as good as it looks!

This pumpkin pie smoothie bowl is a healthy and easy fall breakfast recipe! It’s a vegan and dairy-free smoothie made with pumpkin puree, dates, almond butter, banana, and plant-based milk. You’ll love this creamy fall dessert smoothie!

Recipe Author: Kaylie Grace at Purely Kaylie
Get the recipe

The Ingredients

My pre-shopping ingredient check was pretty unsurprising, and I had the spices, vanilla, and pumpkin seeds in my pantry. I had to shop for the rest and found everything at my usual grocery store. I did have to search for the Medjool dates, but I found them conveniently placed (hidden) underneath the banana display in the produce department.

Toppings sound optional and flexible, but I stuck with what the recipe suggested since I like them all. I used my pumpkin seeds and bought pecans and granola. I chose Cascadian Farms French Vanilla Almond Granola, and it was delicious on its own.

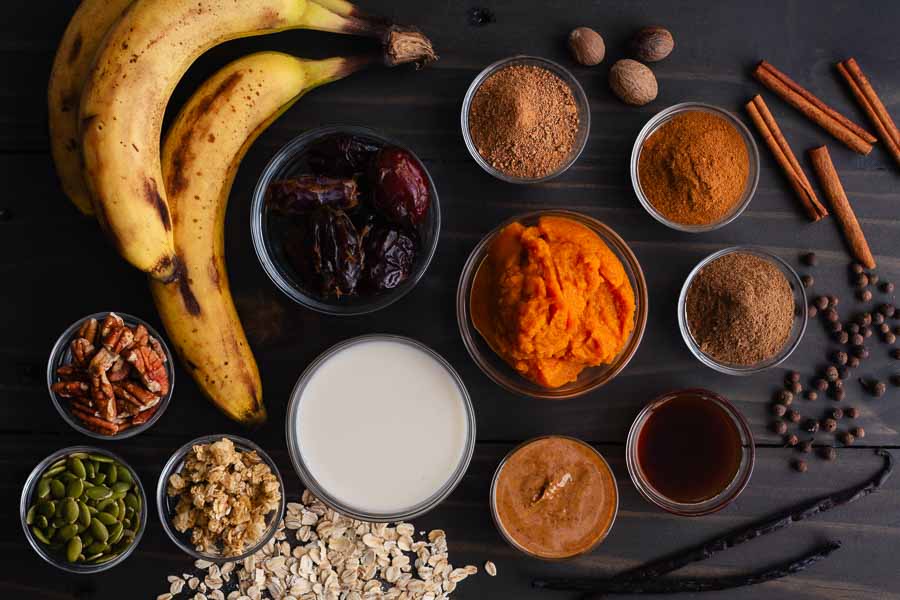
Pumpkin Pie Smoothie Bowl Ingredients
Pumpkin puree, nutmeg, cinnamon, allspice, vanilla extract, almond butter, oat milk, granola, pumpkin seeds, pecans, bananas, and Medjool dates

The Process

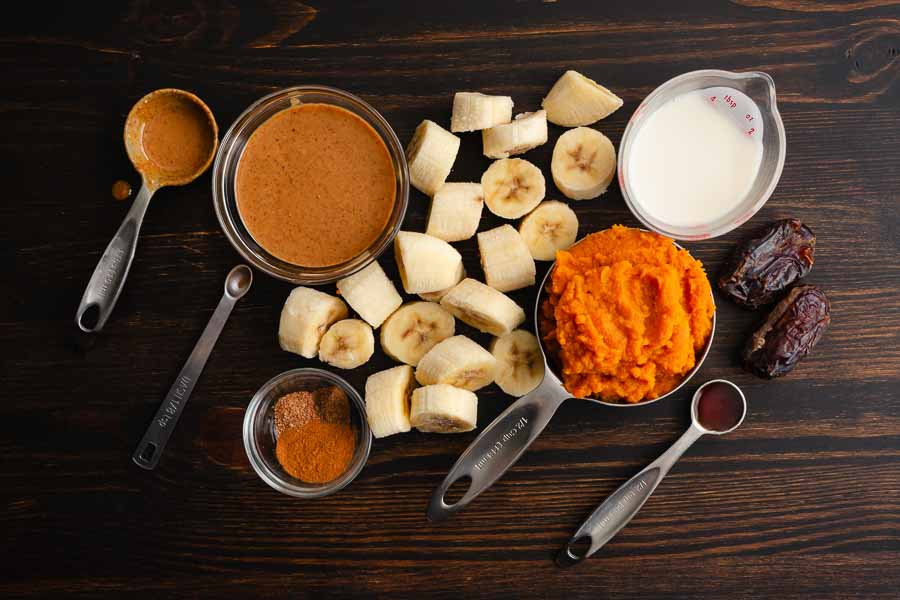
I technically started this recipe the night before I planned to actually make it. The bananas needed to be frozen, so I peeled two, cut them into small pieces, and popped them into the freezer. I appreciated the author’s tip to peel them before freezing. I learned the hard way that frozen bananas are impossible to peel.

When I was ready to actually make my smoothie bowl, I gathered the ingredients and took the bananas out of the freezer. I found they had frozen together into a big chunk of cold bananas, so I broke them apart before I added them to the blender.

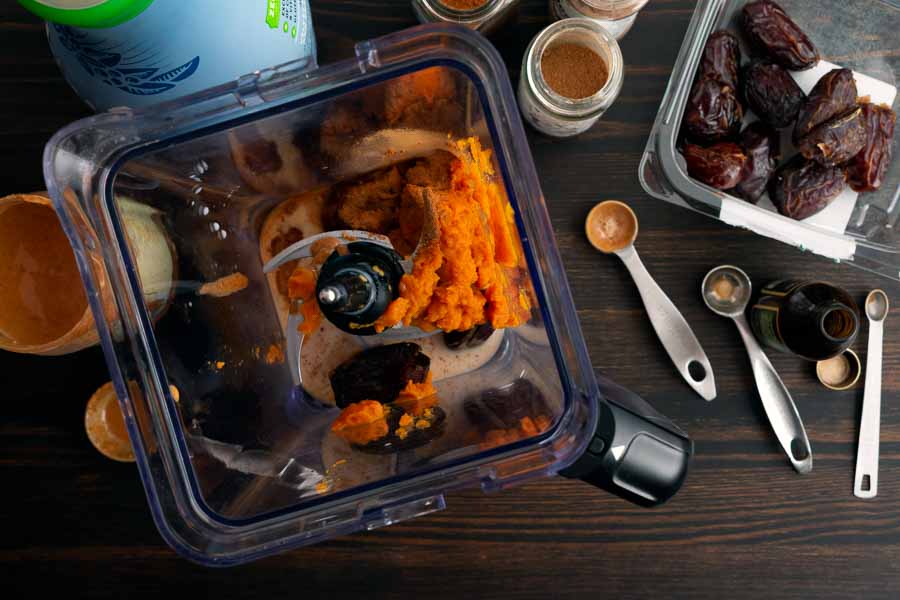
Measured Pumpkin Pie Smoothie Bowl ingredients

Once I had the bananas separated and everything else measured out, it was time to get “cooking”. This recipe doesn’t need any actual cooking, so all I had to do was toss everything but the toppings into the blender and push a button.

Tip: You can substitute 3/4 teaspoon of ready-made pumpkin spice for the cinnamon, nutmeg, and allspice to speed up making this smoothie bowl. I could very faintly taste cloves when I did that, but it was still a geat smoothie bowl.

I have a powerful blender, so it handled the frozen bananas pretty well. However, I did find I had to stop and scrape down the sides a few times with a spatula. This usually happens when I blend a small amount of something quite thick, but I think the problem was that I added the frozen bananas last.

Adding the Pumpkin Pie Smoothie Bowl ingredients to my blender

My next step was to pour the pumpkin pie smoothie mixture into a bowl. Well, not pour. More like I removed the blades and used a spatula to scrape the mixture into the bowl. It was so thick that pouring would have taken forever. The mixture was thick, but a few swipes of my spatula smoothed it right down.

I chose one of my pasta bowls because they are big and shallow. It gave me lots of room to add the toppings. I added granola, pumpkin seeds, and pecans to one side of the bowl and banana slices to the other (1 whole banana). It works in smaller bowls, but the same amount of toppings completely covers the smoothie base.

Timing

This recipe lists a total time of 5 minutes. My Pumpkin Pie Smoothie Bowl took a bit longer since I had to stop the blender to scrape down the sides a few times. Here’s how it went:

  • 7 minutes to measure the ingredients and blend
  • 5 minutes to our into the bowl and add toppings
  • 12 minutes total

I have tried this recipe a few more times, and sometimes it mixes up faster than others. Putting the oat milk in right after adding the bananas and dates seems to help. That gets the total time down to 8-9 minutes for me.

Thanksgiving Recipe Roundup

This year is going to be the first in a long time that I’m not able to blog about a Thanksgiving dinner or put together a menu. Instead, I thought I’d put together a collection of my favorite Thanksgiving recipes. Ideas for main courses, side dishes, desserts, cocktails, and even leftovers are all listed.

  1. Main Courses
  2. Side Dishes
  3. Desserts
  4. Drinks
  5. Leftovers

Some of these reviews date back to 2017 when I was a brand new blogger with no photography experience and taking bad photos with an iPhone SE. While the pics might not be the best (read: terrible), I promise you the recipes were delicious!

Of course, I couldn’t list every recipe that I’ve blogged that would work for a Thanksgiving menu. Here’s a list of links to recipes I’ve reviewed that feature ingredients I associate with the Fall season:

So grab a glass of iced tea (or whatever you like to sip), get comfy, and peruse my favorite recipes for some inspiration for your Thanksgiving recipes.

Main Courses

While turkey is the most popular main course for Thanksgiving dinner, not everyone goes that route. Naturally, I’m including some of my favorite recipes for whole turkeys and turkey breasts. I’m also adding a few beef and pork recipes that were originally made for other holidays or special occasions as well as a vegan option that can be used as a main or a side.

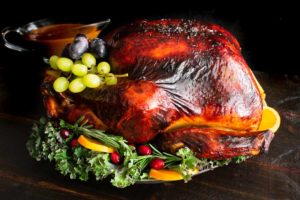
1.) Maple Cider Bourbon Brined Turkey with Bourbon Gravy

This was my first ever brined turkey. I never got why people went to the trouble to brine their turkeys until I made this recipe. It only added about 30 minutes of extra work plus an overnight brine. But brining eliminated basting while still producing a beautifully browned skin, juicy meat, and to-die-for bourbon gravy.

Maple Cider Bourbon Brined Turkey with Bourbon Gravy
This Maple Cider Bourbon Brined Turkey with Bourbon Gravy was a stunning Thanksgiving centerpiece and tasted as good as it looked!
See Review & Get Recipe
Maple Cider Bourbon Brined Turkey with Bourbon Gravy

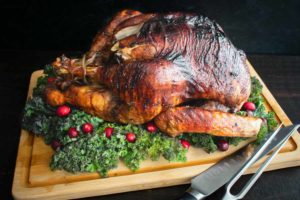
2.) Mulled Wine Turkey

This was originally part of a Christmas dinner menu, but I had to include it here. It was a phenomenal turkey recipe! It doesn’t include gravy, but the meat was so juicy that it wasn’t needed.

Mulled Wine Turkey
Basting a whole turkey in mulled wine produced a beautiful bird that was the juiciest, most flavorful turkey I think I've ever had!
See Review & Get Recipe
Mulled Wine Turkey

3.) Thanksgiving Stuffed Porchetta-Style Turkey Breast

This was my first time making a turkey roll, and it was a wonderful main course for a smaller gathering. Instead of a whole turkey, it’s a butterflied turkey breast filled with stuffing, rolled up, and covered with bacon to keep the meat nice and juicy. It was a little bit of a challenge to get it rolled up and tied, but it was worth it.

Thanksgiving Stuffed Porchetta-Style Turkey Breast
This Thanksgiving Stuffed Porchetta-Style Turkey Breast was incredible and might have been my best Thanksgiving dinner yet!
See Review & Get Recipe
Thanksgiving Stuffed Porchetta-Style Turkey Breast

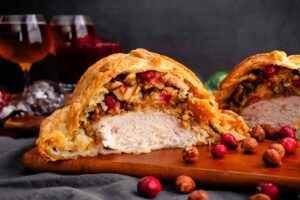
4.) Cranberry Hazelnut Turkey Wellington

This was my first ever Thanksgiving turkey recipe for this blog, way back in 2017 and I just updated it with some extra tips. I chose this recipe because I wanted to try something a little different. This recipe delivered on that with the turkey and stuffing in one delicious pastry crust.

Cranberry Hazelnut Turkey Wellington
Turkey Wellington tastes as impressive as it looks, and it's the perfect all-in-one Thanksgiving or Christmas dish for a small family.
See Review & Get Recipe
Cranberry Hazelnut Turkey Wellington

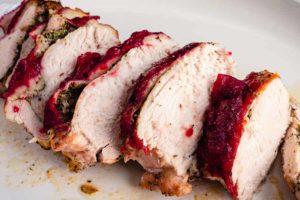
5.) Cranberry Glazed Turkey Breast

This Cranberry Glazed Turkey Breast is another Thanksgiving recipe that’s perfect for smaller gatherings. The meat was so juicy! If you don’t care for turkey skin, I would make sure to remove it, glaze the turkey breast, and then place the skin back on during cooking. The extra fat helps keep the meat moist.

Cranberry Glazed Turkey Breast
This Cranberry Glazed Turkey Breast was the perfect centerpiece for my Christmas dinner this year, and it was so easy to make!
See Review & Get Recipe
Cranberry Glazed Turkey Breast

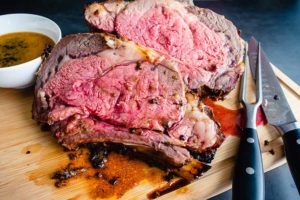
6.) Standing Prime Rib Roast

This roast was part of a Christmas menu, but it would work for any special occasion. It was my first time making prime rib, and the recipe was remarkably simple. I managed to make some amazing prime rib, if I do say so myself.

Standing Prime Rib Roast
This herb-crusted Standing Prime Rib Roast was a spectacular centerpiece to my Christmas dinner! Don't tell anyone how easy it was!!
See Review & Get Recipe
Standing Prime Rib Roast

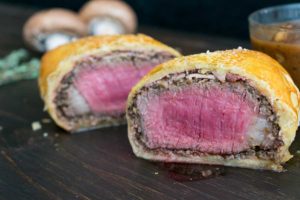
7.) Individual Beef Wellington with Mushroom Sauce

These little Beef Wellingtons were a smash hit! I had made turkey Wellington once before, but actual beef Wellington was a first. I’m so pleased to say they came out beautifully and were easier than I thought they would be.

Individual Beef Wellington with Mushroom Sauce
Individual Beef Wellington makes savory, juicy filet mignons wrapped in a flaky crust with a mushroom and thyme filling. A memorable main for a special occasion.
See review & Get Recipe
Individual Beef Wellington with Mushroom Sauce

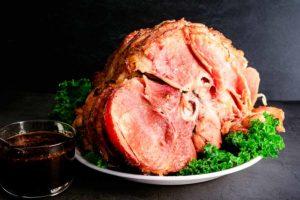
8.) Honey Baked Ham (Copycat)

I do love a nice ham, and this is one of my favorites. The glaze is on point, and the ham makes a beautiful centerpiece for any special dinner.

Honey Baked Ham (Copycat)
This Copycat Honey Baked Ham was hands down the best ham recipe I have ever made! It was the perfect balance of sweet and salty–just like the real thing.
See Review & Get Recipe
Honey Baked Ham (Copycat)

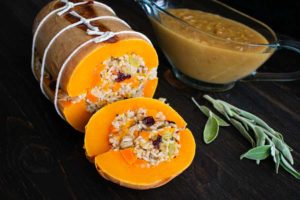
9.) Stuffed Roasted Butternut Squash

I loved this recipe because it was so unique! The rice stuffing was just phenomenal, as was the onion gravy. It’s a great make-ahead recipe too. The stuffed squash can be made up to three days ahead and heated up in about half an hour the day you want to serve it.

Stuffed Roasted Butternut Squash
This Stuffed Roasted Butternut Squash is a beautiful and delicious vegan Thanksgiving centerpiece or side if you are like me and need a turkey on the table.
See Review & Get Recipe
Stuffed Roasted Butternut Squash

Side Dishes

The turkey might be the most important part of the meal, but the sides can make or break the dinner. I love to add mashed potatoes, stuffing, and at least one other vegetable side dish (usually something green). Cranberry sauce is an absolute must too, now that I know how to make it.

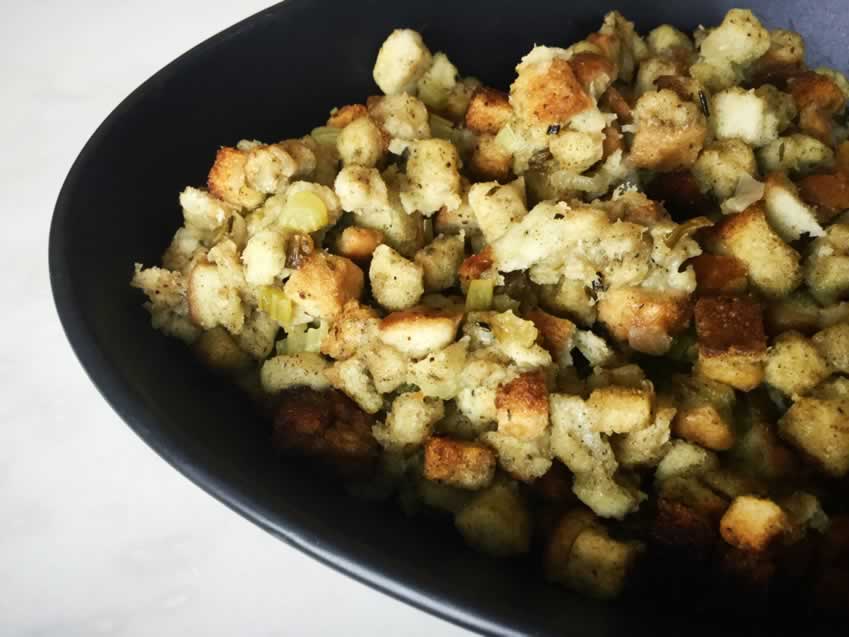
1.) Slow Cooker Thanksgiving Stuffing

This has become a staple for my holiday dinners because it’s so good! Literally just like Mom’s. Plus being able to cook it in my slow cooker is a huge plus since my oven gets a workout when I’m cooing holiday dinners.
Slow Cooker Thanksgiving Stuffing
This stuffing recipe is a must to make your Thanksgiving dinner easier. It’s delicious, has a perfect texture, and you can make it in your slow cooker.
See Review & Get Recipe
Slow Cooker Thanksgiving Stuffing

2.) Old-Fashioned Chestnut Stuffing or Dressing

This recipe is a great choice if you want to go the traditional route. I originally made it with Mulled Wine Turkey (recipe above) for a Christmas dinner, but it would work just as well on Thanksgiving.

Old-Fashioned Chestnut Stuffing or Dressing
This classic chestnut stuffing did not disappoint! The seasoning was on point, and it paired nicely with the turkey and other fixings.
See Review & Get Recipe
Old-Fashioned Chestnut Stuffing or Dressing

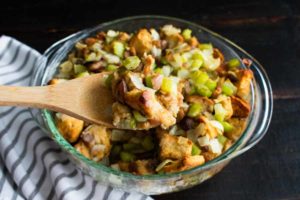
3.) Bacon Wrapped Sausage Stuffing

This stuffing recipe is a bit different from my usual fare, but it was a huge hit. It’s mostly sausage with some stuffing and the whole thing is wrapped in tons of bacon.

Bacon Wrapped Sausage Stuffing
This Bacon Wrapped Sausage Stuffing was a savory, salty, smokey carnivore's delight! It was the most commented-on part of my Thanksgiving table.
See Review & Get Recipe
Bacon Wrapped Sausage Stuffing

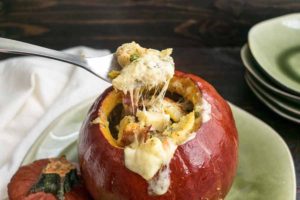
4.) Pumpkin Stuffed with Everything Good

This French recipe was never part of my Thanksgiving menus, but I have to admit it would have been a stunning way to present the stuffing. The recipe is flexible, and you can also scoop out the baked pumpkin with the stuffing if you like.

Pumpkin Stuffed with Everything Good
Pumpkin stuffed with garlic, thyme, bacon, cheese, and bread, then baked until the mixture is melted to gooey perfection.
See Review & Get Recipe
Pumpkin Stuffed with Everything Good

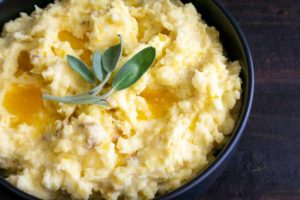
5.) Make Ahead Mashed Potatoes

My disabilities make cooking a whole Thanksgiving dinner in one day too hard on my body these days. That’s why this recipe for Make Ahead Mashed Potatoes caught my eye. The potatoes can be made up to two days before the dinner, and they can be reheated in the oven or microwave.

Make Ahead Mashed Potatoes
These Make Ahead Mashed Potatoes were creamy and buttery as promised, and I was able to make them two days before Thanksgiving dinner.
See Review & Get Recipe
Make Ahead Mashed Potatoes

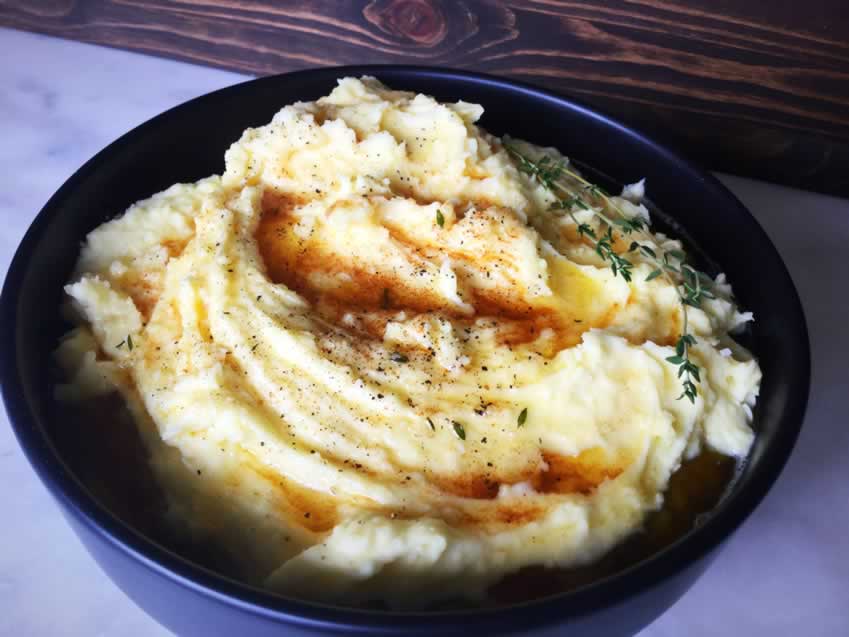
6.) Mashed Potatoes with Thyme Infused Brown Butter

Thyme-infused brown butter adds a gourmet touch to simple mashed potatoes! This Thanksgiving recipe is also quick at just 30 minutes.

Mashed Potatoes with Thyme Infused Brown Butter
These mashed potatoes are the best carbs ever! Topping them with browned butter infused with fresh thyme really takes mashed potatoes from plain to wow!
See Review & Get Recipe
Mashed Potatoes with Thyme Infused Brown Butter

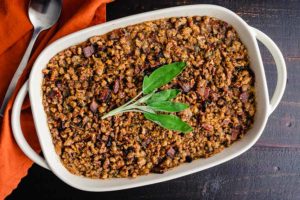
7.) Bourbon Sweet Potato Casserole with Sweet ‘n’ Savory Bacon Pecans

If you like your mashed potatoes sweet, this recipe is the one for you! The sweet and savory pecan-bacon topping really compliments the mashed sweet potatoes and adds some crunch.

Bourbon Sweet Potato Casserole with Sweet ‘n’ Savory Bacon Pecans
Bourbon Sweet Potato Casserole with Sweet ‘n’ Savory Bacon Pecans — It's a long name for a sweet and crunchy side dish you'll love!
See Review & Get Recipe
Bourbon Sweet Potato Casserole with Sweet ‘n’ Savory Bacon Pecans

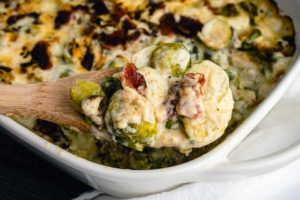
8.) Brussels Sprouts Gratin

So much cheese, so much bacon! Oh, and there’s Brussels sprouts LOL! This is a rich side, but it’s pretty darn incredible. I have to admit I was surprised Brussels sprouts could be so good.

Brussels Sprouts Gratin
This Brussels Sprouts Gratin With Bacon was pure, savory goodness in a hearty cheese sauce. With bacon! And bacon makes everything better!!
See Review & Get Recipe
Brussels Sprouts Gratin (With Bacon)

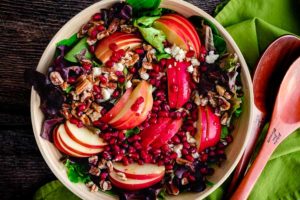
9.) Apple Pomegranate Salad

This Apple Pomegranate Salad has never been part of my holiday menus, but it could be. I tend to forget healthy sides like salads for Thanksgiving dinner, but if I ever remember to add on, it will be this recipe.

Apple Pomegranate Salad
This Apple Pomegranate Salad is a new quick and easy favorite! The mix of sweet, salty, tangy, and savory flavors was perfectly balanced.
See Review & Get Recipe
Apple Pomegranate Salad

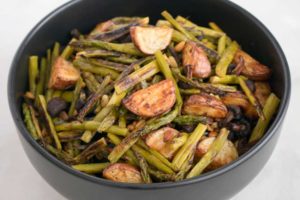
10.) Roast Asparagus with Red Potatoes and Mushrooms

First, I apologize for the lousy pic and overcooking this recipe. This simple recipe was so much better than I made it look! It was an easy side to make, and I liked that it included some greens with the potatoes.

Roast Asparagus with Red Potatoes and Mushrooms
Roasted asparagus, potatoes, and mushrooms get an extra pop of flavor with a little lemon juice and toasted pine nuts. Easy, delicious, and healthy!
See Review & Get Recipe
Roast Asparagus with Red Potatoes and Mushrooms

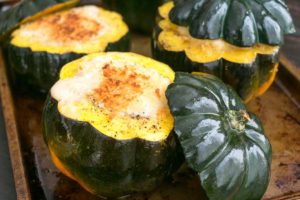
11.) White Cheddar Mac ‘n Cheese Stuffed Squash

If mashed potatoes aren’t enough carbs for you, I recommend adding this White Cheddar Mac ‘n Cheese Stuffed Squash recipe. The mac ‘n cheese is delicious, and stuffing it into acorn squash makes a stunning presentation.

White Cheddar Mac n’ Cheese Stuffed Squash
This Mac n’ Cheese Stuffed Squash is an impressive looking side dish that combines a classic Fall vegetable with old-fashioned comfort food. Mmm!
See Review & Get Recipe
White Cheddar Mac n’ Cheese Stuffed Squash

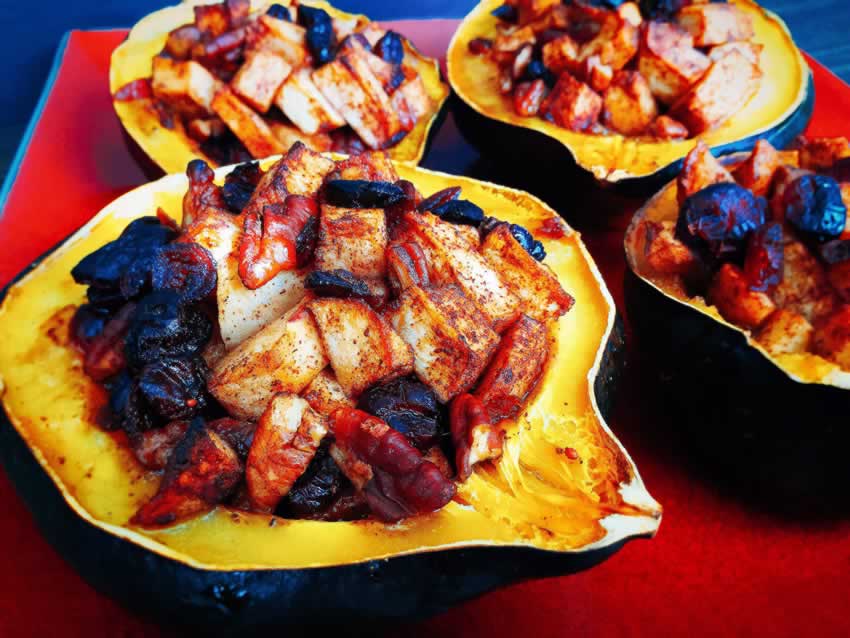
12.) Stuffed Acorn Squash

This was my first ever acorn squash recipe, and it’s a keeper. The filling is on the sweeter side, but it compliments the acorn squash nicely. I strongly advise making a few extras because they’re that good!
Stuffed Acorn Squash
Acorn squash stuffed with pecans, apples, & dried cranberry seasoned with cinnamon & topped with maple syrup & butter. It's a drool-worthy & healthy side!
See Review & Get Recipe
Stuffed Acorn Squash

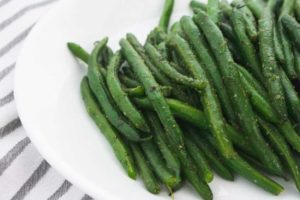
13.) Green Beans with Tarragon

This quick and easy green bean recipe is one of my all-time favorites! It’s easy to scale up or down and best of all it’s ready in just 15 minutes. To make things easier you can opt for pre-washed and trimmed green beans.

Green Beans with Tarragon
Tarragon and garlic take humble green beans from an okay side to a side you’ll be craving! This simple recipe has only a few ingredients and is ready in just 15 minutes.
See Review & Get Recipe
Green Beans with Tarragon

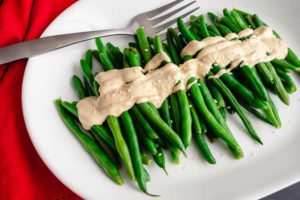
14.) Dijon Tahini Green Beans

This is another quick and easy green bean recipe with a little extra zing thanks to the dijon-tahini sauce. It looks elegant when drizzled over the green beans, but you can also serve it on the side if you are unsure of your guests’ tastes.

Dijon Tahini Green Beans
These Dijon Tahini Green Beans are an easy, zingy side dish that works for special occasions and weeknight dinners.
See Review & Get Recipe
Dijon Tahini Green Beans

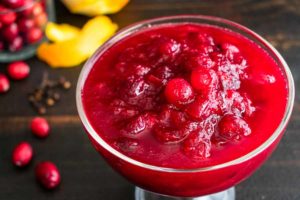
15.) Grand Marnier Cranberry Sauce

This Grand Marnier Cranberry Sauce has been on almost every Thanksgiving menu since I first tried it. I love the extra flavor the Grand Marnier orange liqueur adds to fresh cranberry sauce!

If liqueur isn’t your thing, I’ve got another recipe for you that was on my Thanksgiving menu last year (2022). It’s Apple Cranberry Sauce with Cider & Cinnamon by Karen at Kitchen Treaty. It had some stiff competition with the Grand Marnier Cranberry Sauce, and I would say it’s at least a close second if not a tie as far as taste and ease of preparation.

Grand Marnier Cranberry Sauce
This Grand Marnier Cranberry Sauce takes a Thanksgiving staple from meh to must have seconds! Ditch the canned stuff for this easy recipe.
See Review & Get Recipe
Grand Marnier Cranberry Sauce

Desserts

Thanksgiving dessert is a must, even after a huge meal. We spend the day with family, and the meal takes a few hours thanks to all the talking and catching up we do. Almost everyone asks for a small piece of whatever we’re serving, but we all have dessert.

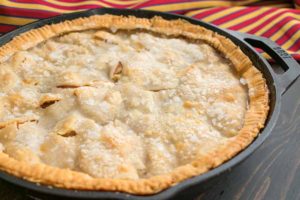
1.) Cast Iron Pan Apple Pie

I’m not the greatest baker, so I welcome any help I can get. This Cast Iron Pan Apple Pie recipe uses frozen pastry for the crust, but you would never know it. It gives that classic cinnamon-apple and buttery crust taste with much less work!

Cast Iron Pan Apple Pie
This Cast Iron Pan Apple Pie recipe is layers of frozen pastry and apples mixed with cinnamon & sugar. It's not totally from scratch, but it tastes like it!
See Review & Get Recipe
Cast Iron Pan Apple Pie

2.) Salted Caramel Apple Galette

This Salted Caramel Apple Galette is another easier option than apple pie. Like the recipe above, the look is rustic and the taste is amazing. The dough and salted caramel sauce can be made ahead too.

Salted Caramel Apple Galette
This Salted Caramel Apple Galette has all of the apple pie flavors you want without as much work making it a perfect Thanksgiving dessert!
See Review & Get Recipe
Salted Caramel Apple Galette

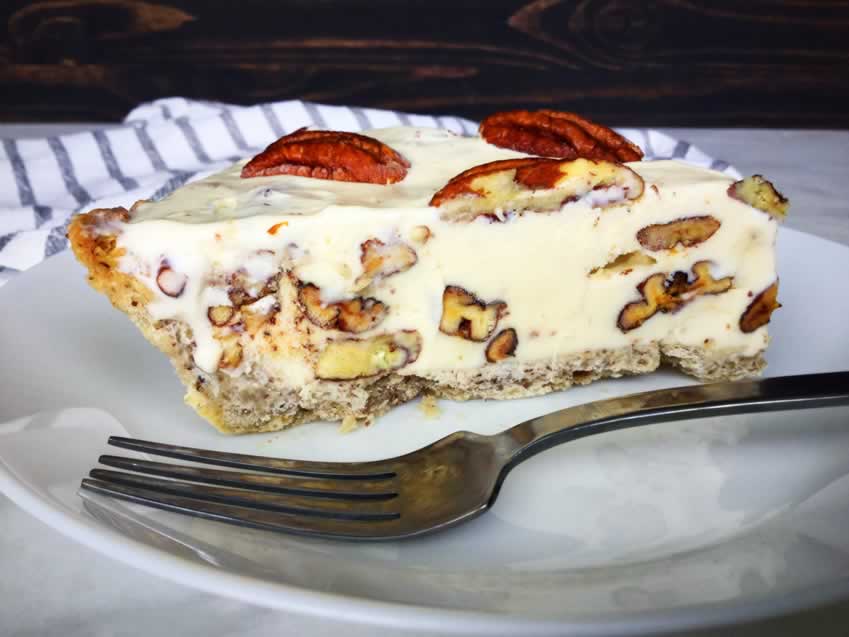
3.) Pecan Pie Ice Cream Pie

This Pecan Pie Ice Cream Pie is another make-ahead Thanksgiving dessert recipe. This one is perfect for anyone who likes pecans but thinks pecan pie is too sweet (like my hubby). The recipe includes a homemade pie crust, but you could use a frozen crust to make it even easier.

Pecan Pie Ice Cream Pie
A pecan shortbread crust filled with vanilla ice cream and candied pecans makes a great alternative to a traditional pecan pie.
See Review & Get Recipe
Pecan Pie Ice Cream Pie

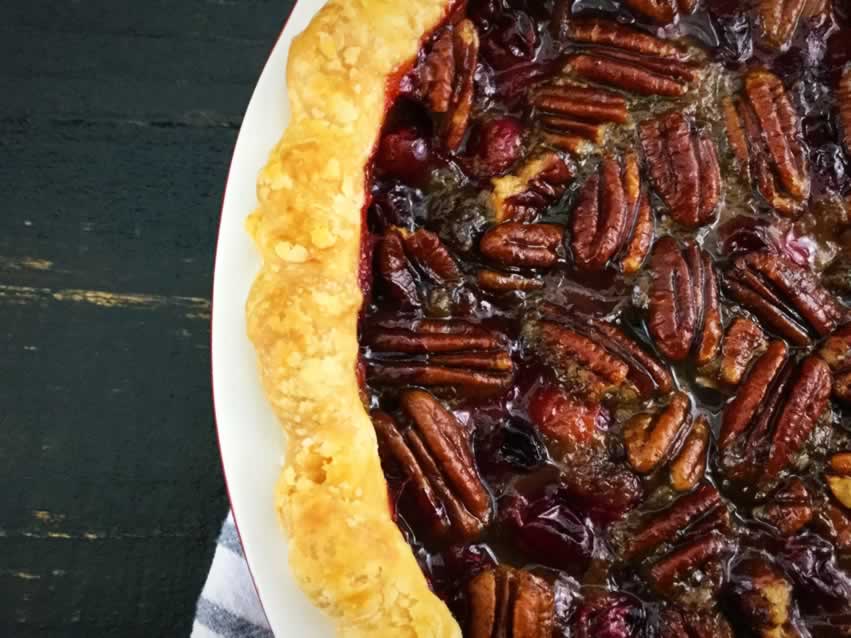
4.) Maple Cranberry Pecan Pie

Mmm… This is another of my early posts that tasted so good but has a lousy photo. It was part of my first Christmas menu, but I think it would work just as well for Thanksgiving. It’s a less sweet pecan pie that I loved!

Maple Cranberry Pecan Pie
Maple cranberry pecan pie isn't the ultra-sweet dessert you know. But sweet maple syrup, crunchy pecans, and tart cranberries go oh so well together!
See Review & Get Recipe
Maple Cranberry Pecan Pie

5.) Pecan Pie Bites

These individual desserts are a new take on a Thanksgiving classic. They give you pecan pie flavor in buttery crust cups. Even my hubby liked this one, and he thinks pecan pies are too sweet.

Pecan Pie Bites
These Pecan Pie Bites really are a Thanksgiving miracle! Buttery crust and sweet pecan filling–just like pecan pie with far less work!
See Review & Get Recipe
Pecan Pie Bites

6.) Pumpkin Pie Cupcakes

These Pumpkin Pie Cupcakes are another new take on a classic Thanksgiving dessert. The pumpkin cupcakes are just a bit firmer than the pumpkin pie filling. What I loved was not having to make buttercream icing—just spoon on some whipped cream and you’re done!

Pumpkin Pie Cupcakes
Pumpkin pie cupcakes? Yes, indeed! These cupcakes have everything but the crust, and you won't miss it. Just top them with a bit of whipped cream and yum!
See Review & Get Recipe
Pumpkin Pie Cupcakes

7.) Pumpkin Cupcakes with Brown Butter Frosting

If you want some pumpkin pie flavor and you want to make buttercream icing, this is the recipe for you! These cute little cupcakes are an indulgent individual dessert with all the Thanksgiving flavors you love.

Pumpkin Cupcakes with Brown Butter Frosting
These pumpkin cupcakes are full of classic Fall flavors, plus they're topped with a sweet brown butter frosting, caramel sauce, and pecans. Yum!
See Review & Get Recipe
Pumpkin Cupcakes with Brown Butter Frosting

Drinks

1.) Fall Sangria (Boozy Apple Cider Punch)

If you’re serving a crowd, this is the recipe you need. It’s filled with Autumn flavors like apples and cinnamon, and you can make it by the pitcher.

Fall Sangria (Boozy Apple Cider Punch)
This Fall Sangria lived up to its name. It was sweet and fruity with just enough cinnamon and bourbon making it perfect for this season!
See Review & Get Recipe

2.) Apple Cider Bourbon Cocktail

Like the Fall Sangria, this Apple Cider Bourbon Cocktail is made for this season. The recipe says it makes two servings, but they are generous servings.

Apple Cider Bourbon Cocktail
This apple cider bourbon cocktail all about Fall flavors of apple, cinnamon, and nutmeg. It's a little sweet, a little spicy, and a little tart. Yum!
See Review & Get Recipe
Apple Cider Bourbon Cocktail

3.) Maple Manhattan

If you’re looking for individual cocktails, this Maple Manhattan is a good option. It’s simple and easy to make. It has four ingredients, and the addition of maple syrup gives it some autumn vibes.

Maple Manhattan
With just a touch of maple syrup, the Maple Manhattan cocktail stays true to its namesake while paying homage to the fall season.
See Review & Get Recipe
Maple Manhattan

4.) Hot Apple Pie Bourbon Cocktail

This Hot Apple Pie Bourbon Cocktail is exactly what the name says. It takes a few minutes to make, though, and I would recommend designating a guest as the bartender to make it if you’re also cooking dinner. It can also be served after dinner as an alternative to dessert.

Hot Apple Pie Bourbon Cocktail
This cocktail is Autumn in a glass–it's like drinking apple pie with a hint of bourbon. It really lives up to the name Hot Apple Pie Bourbon Cocktail.
See Review & Get Recipe
Hot Apple Pie Bourbon Cocktail

5.) Baileys Pumpkin Spice Espresso Martini

This sweet cocktail uses a seasonal version of Baileys Irish Cream and espresso to make a wow-worthy martini. I recommend making and chilling the espresso ahead of time.

Baileys Pumpkin Spice Espresso Martini
This year you can have your dessert in a glass. This pumpkin spice cocktail is just what you need after a big Thanksgiving meal. Or before–I won't judge.
See Review & Get Recipe
Baileys Pumpkin Spice Espresso Martini

Leftovers

Thanksgiving dinner always has leftovers, and sometimes they are the best part. You can always use them to create a huge sandwich or add them to an after-Thanksgiving recipe made just for those leftovers.

I’ve found a few great ones over the years, and now I make sure to add them to my Thanksgiving dinner menu. I make sure the ingredients are included in my pre-holiday shop so everything is ready to go the next day.

1.) Thanksgiving Leftovers Galette

I love a good post-Thanksgiving turkey sandwich, but this pot pie-like galette has that beat! I made the dough as part of my Thanksgiving dinner prep and refrigerated it until I needed it. Honestly, making this galette wasn’t much more difficult than making a couple of sandwiches.

Thanksgiving Leftovers Galette
Until I tried this Thanksgiving Leftovers Galette, I never imagined Thanksgiving leftovers could get any better, but they sure can!
See Review & Get Recipe
Thanksgiving Leftovers Galette

2.) Turkey Stock

I make this tock every time I make a turkey. It’s so much better than canned stock! Plus I usually have leftover celery, carrots, and herbs from the sides I make with the turkey dinner. After I strain it, I freeze it in 2-cup potions in ziplock bags and thaw it when needed. And a few cups immediately go into the turkey soup recipe that’s next on this list.

Turkey Stock
This simple turkey stock recipe is easy to make and gives you a huge batch of flavorful stock that can be used right away or frozen for later.
See Review & Get Recipe
Turkey Stock

3.) Turkey Soup

This Turkey Soup is such comfort food! I always add a bag of egg noodles to my list when I make a turkey so I can make this soup right after. It’s an excellent way to use up the last bits of leftover turkey and vegetables from the dinner.
Turkey Soup
This warm and comforting turkey soup recipe is an easy way to use quickly up those Thanksgiving leftovers.
See Review & Get Recipe
Turkey Soup

4.) Healthy Chicken and Wild Rice Soup

This hearty soup is on my menu frequently, especially in the colder months. It’s not technically a Thanksgiving recipe, but just swap the chicken for turkey to use up your leftovers.

Healthy Chicken and Wild Rice Soup
This Healthy Chicken and Wild Rice Soup was everything it promised to be: hearty comfort food without the extra fat and calories. Loved it!
See Review & Get Recipe
Healthy Chicken and Wild Rice Soup

German Potato Soup (Kartoffelsuppe)

0

I had several German recipes to choose from for my second post this week. I’m not gonna lie, German cheesecake sounded amazing! But I wanted to go for something lighter since it feels like rich foods have been on my menu lately. Instead, I went in the complete opposite direction when I found this vegan German Potato Soup (Kartoffelsuppe) recipe. I love potato soup but I hate the fat and calories some of them have (cheese, bacon, sour cream, sausage, etc.). This might just be a satisfying stand-in potato soup that I won’t feel so guilty about. Let’s give it a try!

This homemade German potato soup (Kartoffelsuppe) is a warm, creamy, and simple vegan stew. Combining potatoes with carrots, celery, onion, and a selection of additional herbs, spices, and dairy-free cream leads to a more-ish comforting dish perfect for the colder months.

Recipe Author: Michaela Vais at Elevegan
Get the recipe

The Ingredients

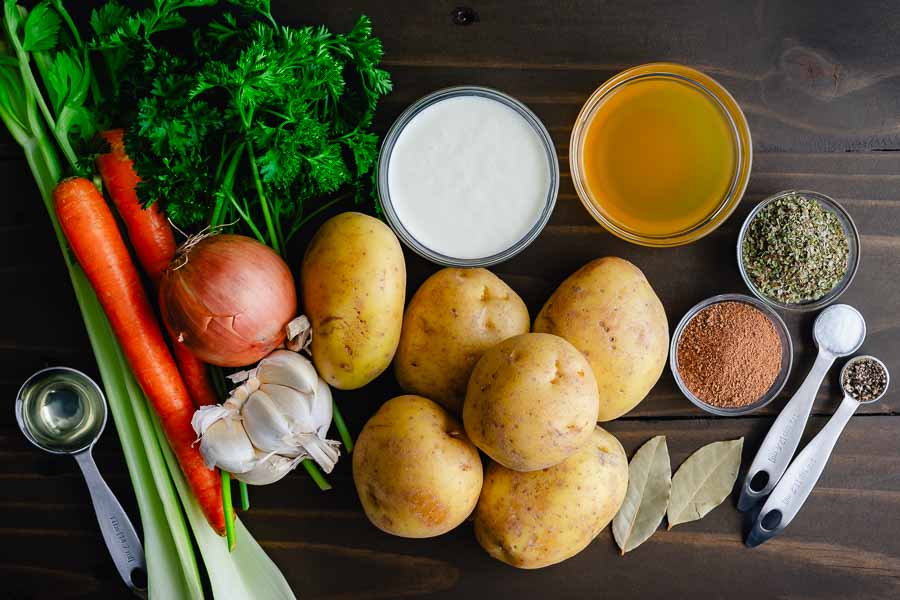
The usual pre-shopping kitchen check only found a few ingredients. I had marjoram, nutmeg, bay leaves, salt, pepper, and vegetable oil. It wasn’t much. The good news is the rest of the German Potato Soup ingredients were mostly easy to find. They were mostly produce items along with vegetable broth and dairy-free cream.

I didn’t find Yukon Gold potatoes, so I chose yellow potatoes. They are about the size of red potatoes, and 6 of them weighed 2 pounds.

German Potato Soup (Kartoffelsuppe) Ingredients
Yellow potatoes, dairy-free cream, vegetable broth, dried marjoram, salt, pepper, nutmeg, bay leaves, garlic, carrots, celery, vegetable oil, yellow onion, and parsley

The only item I couldn’t find was vegan sausage. Or I should say I couldn’t find the right flavor for this recipe. They had several flavors like hot Italian and spicy Mexican chipotle. They sounded good but I don’t think they would work in a German recipe.

And I want to mention the notes of this recipe have some great tips and alternate ingredients. I really appreciated that this was included in the recipe! I usually have to read through the posts and add them myself, and, unfortunately, it’s not unusual for me to miss some.

The Process

I have to say this recipe was nice and easy to follow. The prep work took just 14 minutes and was full of basic cooking techniques. Things like peeling potatoes, dicing onions and carrots, and measuring spices. It was easy to do, and putting on some good music while you work makes it go by fast.

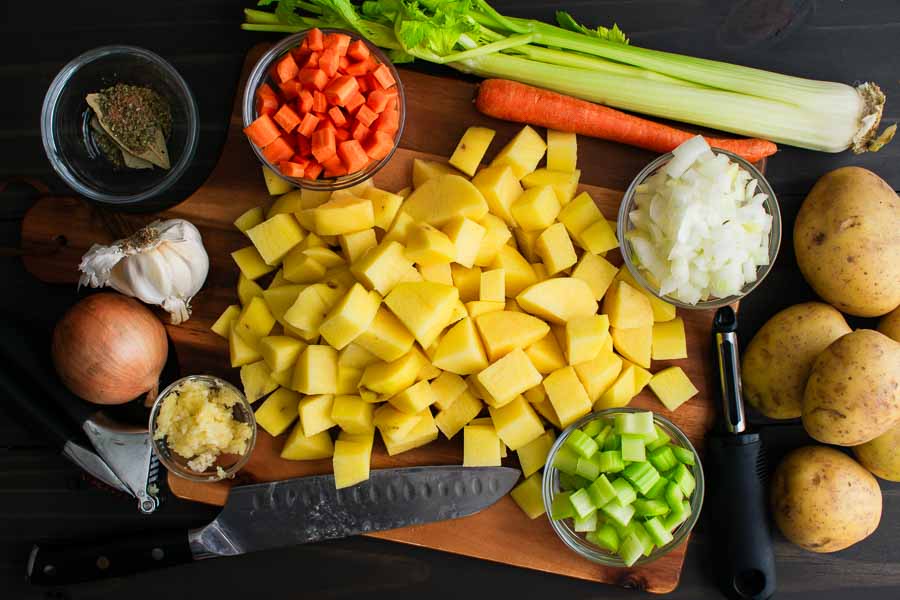
Prepped vegetables and measured spices

I had pre-heated my 5.5-quart Dutch oven with 1 tablespoon of vegetable oil toward the end of the prep work. The cooking part of this recipe was also full of basic techniques, so making this German Potato Soup recipe was so easy.

I simply sauteed the vegetables and spices then added the vegetable broth and bay leaves. Next, I turned up the heat until the mixture was boiling. That seemed to take a while, but once it reached a nice boil I turned the heat to low, put the lid on the pot, and let everything simmer for 20 minutes.

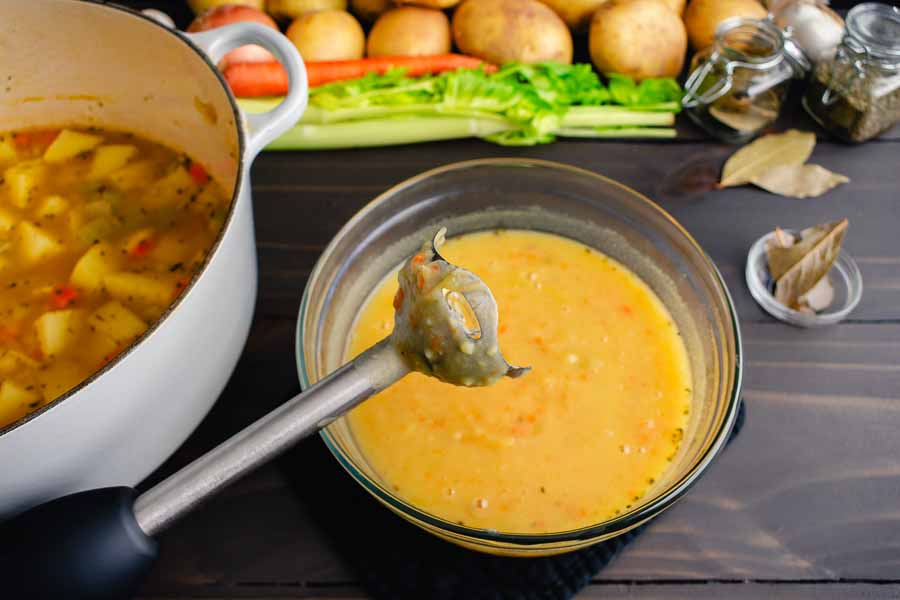
The vegetables were nice and soft when the timer went off, so I moved on to Step 4, blending half the soup. I used a heavy cast-iron Dutch oven, so picking it up and pouring out half the soup was a no-go. Instead, I ladled half into a heat-proof 1.5-quart mixing bowl.

I love my immersion blender for small jobs like this! It does a great job, and cleaning is minimal. It worked really well with this soup, and there was no splashing or spilling over the edge of the bowl (thank goodness). All I had to do to finish was stir in the vegan cream and serve.

Blended German Potato Soup (Kartoffelsuppe) Process
Blending half the soup with my immersion blender gave it a creamier texture

Timing

This German Potato Soup recipe lists 15 minutes to pre, 25 minutes to cook, and a total time of 40 minutes. Not bad at all. Here’s how my time was spent:

  • 14 minutes to prep
  • 30 minutes to cook
  • 6 minutes to blend
  • 50 minutes total

The prep time was accurate, but there was a slowdown in the cooking process. I think it was in a couple of places.

First, it took a while for my soup to come to a boil in Step 2 (old stove). The other place was blending in Step 4. My soup pot was too heavy to pick up and pour, so I ladled the soup into a heat-proof mixing bowl instead.

In other words, I don’t think the slowdown was the recipe’s fault. It seems more like just my old stove and my being extra careful with hot soup.

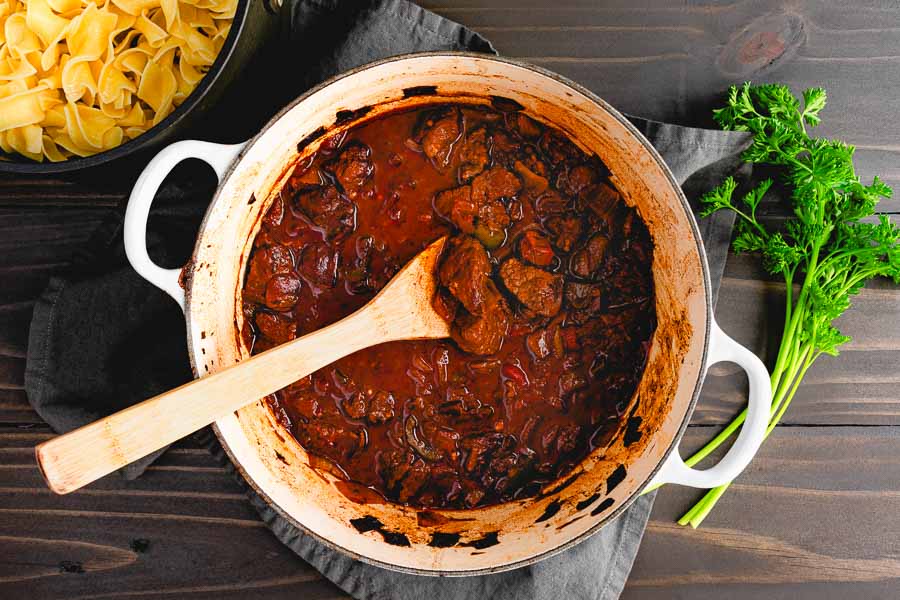
Classic German Goulash

When I was looking for recipes to try, I stumbled upon a German pork roast and immediately knew what this week’s theme would be: German food. My husband loves it, but I haven’t given it a try. There was no particular reason I hadn’t other than I never got around to it. Well, that is about to change! I passed on that pork roast recipe because it included beets. Hubby and I are both meh on them. Instead, I found this Classic German Goulash, and we were both totally into it. I’ve made Hungarian Beef Goulash, so what’s the German version like? Let’s find out!

This savory braised beef stew is made with lots of onions, caraway seed, paprika and beef stock. It only takes 30 minutes of hands on prep and a few hours of braising. Serve this hearty, rich German Goulash over egg noodles, mashed or steamed potatoes for a delicious family dinner.

Recipe Author: Lisa Lotts at Garlic & Zest
Get the recipe

The Ingredients

This Classic German Goulash recipe has 16 ingredients. Well, 17 if you include egg noodles, which I simply had to do. I can never pass up egg noodles—they’re such a childhood comfort food for me 🥰 A quick check of my kitchen I found several ingredients: kosher salt, black pepper, dried marjoram, olive oil, beef broth, and tomato paste.

That left me with 11 ingredients to buy, and I found almost everything else at my usual grocery store. The recipe gives the option of using a chuck roast or beef stew meat. I chose the stew meat since it was already cut up and a few dollars less than the chuck roast.

Classic German Goulash Ingredients
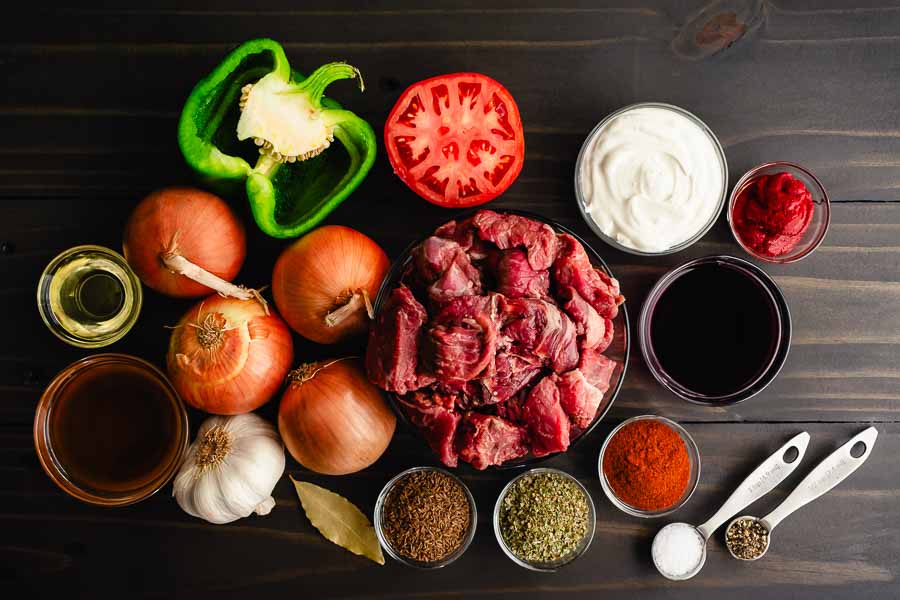
Stew beef, sour cream, tomato paste, dry red wine, sweet Hungarian paprika, black pepper, kosher salt, dried marjoram, caraway seeds, bay leaf, garlic, beef broth, olive oil, yellow onions, green pepper, and tomato

They did have caraway seeds, but I almost missed them. It took me a while to look through a huge selection of bottled spices to find the tiny little bottle. I’ve never used them before, and I instantly loved the rye bread-like smell when I opened the bottle. For reference, a 0.9-ounce bottle of McCormick Caraway Seeds was $3.99.

In case you can’t find caraway seeds, you can substitute fennel, cumin, dill, anise, or nigella seeds. Fennel seeds seem to be the top choice, but they aren’t quite the same flavor as caraway seeds. The caraway flavor was prominent in this goulash, so I’m sure anything else will change the flavor a bit.

I also needed paprika, but I don’t buy that in the grocery store. Ever since my aunt brought me back paprika from her trip to Hungary, I have bought the same Chili-Trade sweet paprika brand online. It’s amazing!

The Process

I always love a one-pot recipe, and my 5.5-quart cast-iron Dutch oven was perfect for this one. Things started off with preheating the olive oil while I chopped the onions, a quick 3-minute task. Then I added them to the pot with some kosher salt and let them cook for 15 minutes.

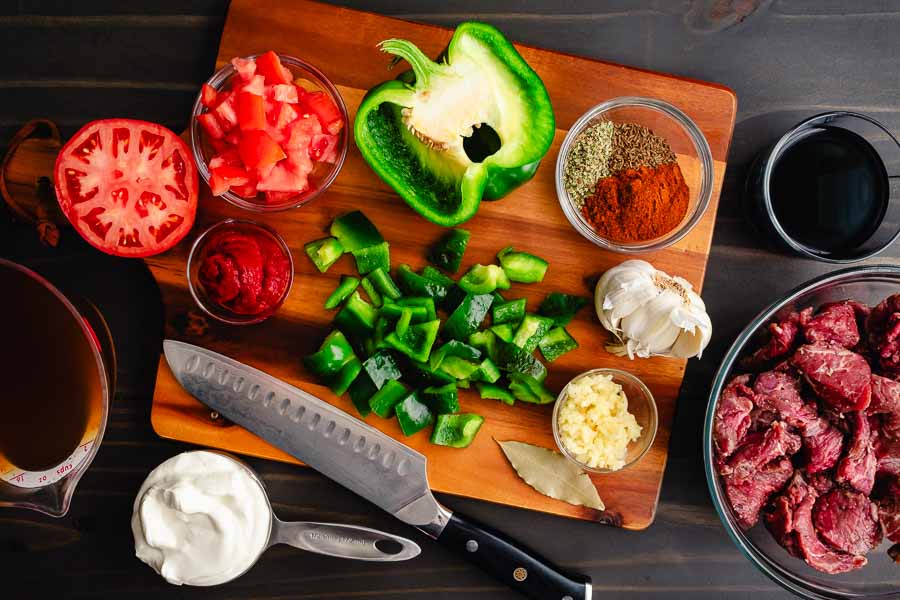
Prepped Classic German Goulash ingredients
Chopped vegetables with measured spices, sour cream, beef broth, and dry red wine

While the onions cooked, I prepped the other ingredients. Just a little more chopping and measuring the rest of the ingredients while occasionally stirring the onions.

Once the onions were done, I removed them from the pan and added the stew meat. I turned up the heat and let it brown for 5 minutes. The beef released a lot of liquid, but it didn’t really sear. I think the pan was too crowded and I probably should have browned the beef in two batches.

I left the beef and liquid in the pot and added the remaining ingredients except for the sour cream. Once the mixture came to a boil I turned the heat down to low and let it simmer for 90 minutes.

The meat soaked up all those flavors while it tenderized, and it was practically falling apart when the timer dinged. All that was left to do was stir in the sour cream, and my Classic German Goulash was done.

Classic German Goulash before adding sour cream
After stewing for 90 minutes, before adding the sour cream

I did serve it over wide egg noodles, and I’d love to say I timed things perfectly, and they were done with the goulash. That didn’t quite happen. I ended up cooking a bag of egg noodles immediately after the goulash finished, and it only took a few minutes.

I did add some butter after I drained them to keep them from sticking together. It worked nicely, although next time I might stick with olive oil to avoid the extra saturated fat.

Timing

My first try at this Classic German goulash recipe went so smoothly! The recipe lists 30 minutes to prep, 2 hours to cook, and a total of 2 hours 30 minutes. I came in a little under that because I chose the quickest cooking time, and this is how my time was spent:

  • 3 minutes to prep the onions (steps 1-2)
  • 15 minutes to cook onions and finish prep (steps 2-3)
  • 14 minutes to brown beef and add remaining ingredients (steps 4-5)
  • 1 hour 30 minutes to cook (step 6)
  • 3 minutes to add sour cream and chop parsley to garnish (step 7)
  • 2 hours 5 minutes total

Monster Truffles

0

I came across these Monster Truffles when I was searching for a Halloween-themed recipe. They were so stinking cute that I couldn’t pass them up! It’s been a while since I have tried a recipe for truffles, and these are different than any of the recipes I have tried. Plus I love the color purple, so that was another point in their favor. The recipe sounded simple enough, so I went ahead and ordered the ingredients so they would be here in plenty of time. I didn’t want to miss out on the Halloween fun!

Monsters, Inc. is one of my all-time favorite movies and these little guys definitely remind me of a monster you’d see from that movie! One big eye and some sprinkles on top — these couldn’t be easier to make!

Recipe Author: Chelsea at Chelsea’s Messy Apron
Get the recipe

The Ingredients

There were only a few ingredients in this recipe, but I had to buy them all. The cream cheered and sandwich cookies were easily found at the grocery store. I did look for Oreos, but they only had the double stuff and flavored versions. To stay as true to the recipe as possible, I ended up buying a 15.5-ounce package of generic sandwich cookies.

I had to order the lavender candy melts, lavender sprinkles, and large candy eyeballs. What I didn’t realize is the grocery store isn’t the only place to find them. Local craft stores carry baking supplies, and I found lavender candy melts at JoAnn Fabrics for much less. Their prices on candy eyeballs and sprinkles were lower too, but they were out of both.

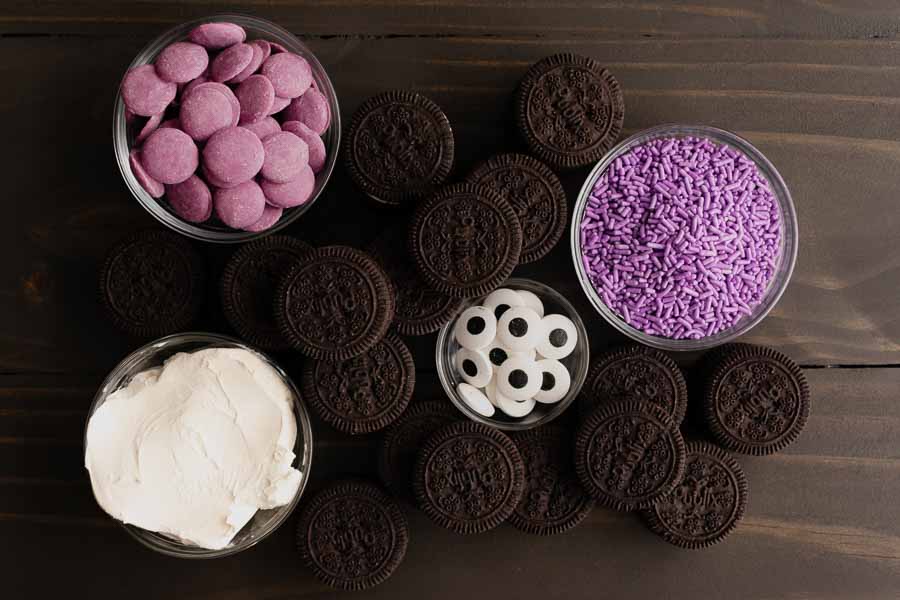
Monster Truffle Ingredients
Sandwich cookies, candy eyeballs, lavender sprinkles, cream cheese, and lavender candy melts

The Process

I have to be honest and tell you I went into this recipe thinking it wouldn’t be a challenge. I have made truffles in the past, and while I’m not the greatest at it I didn’t do too badly. This was a simple recipe with just a few ingredients and steps, but there were some challenges for me.

My First Try at Monster Truffles

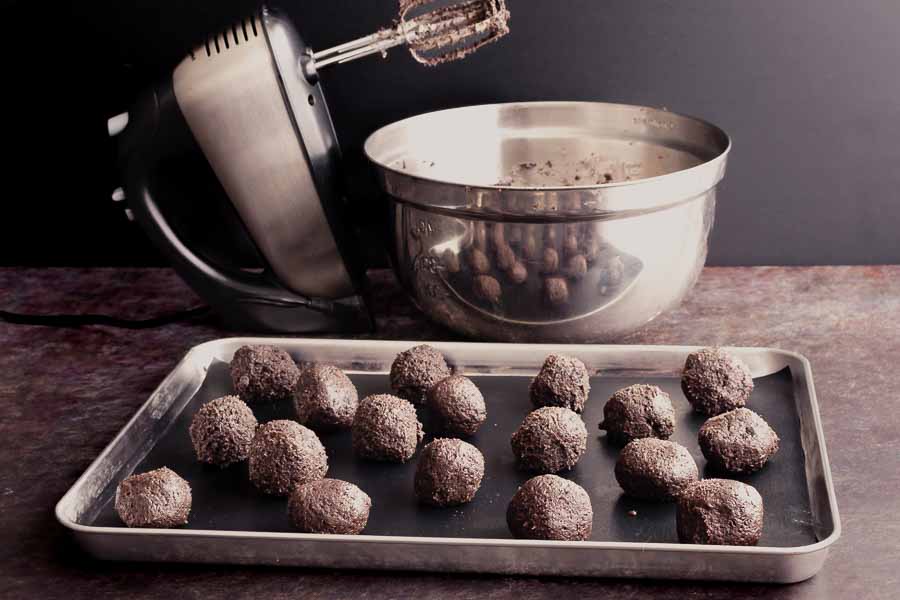
Making the truffles was very easy! I dumped the package of Oreos into my food processor and pulsed to grind them up. There were still some larger chunks, so I put it on for about 1 minute to really grind them up. The result had the texture of potting soil which was perfect.

18 Monster Truffles on a lined sheet pan
I eyeballed the amount for each truffle and got 18

Next, I added them to a large mixing bowl along with the cream cheese. It only took a few moments to blend them together with a hand mixer. I ended up with 18 truffles after I rolled the mixture into roughly 1 to 2 bite balls.

After an hour in the refrigerator, I was ready to dip and decorate my truffles. I began by melting 12 ounces of lavender candy melts in a double boiler. The melted candy was very thick, so I added vegetable oil 1 teaspoon at a time to thin it. By the time I thought it was thin enough, I had added 8 teaspoons of oil. If I had read the instructions on the bag, I would have seen the maximum was 2 teaspoons of oil. Eek!

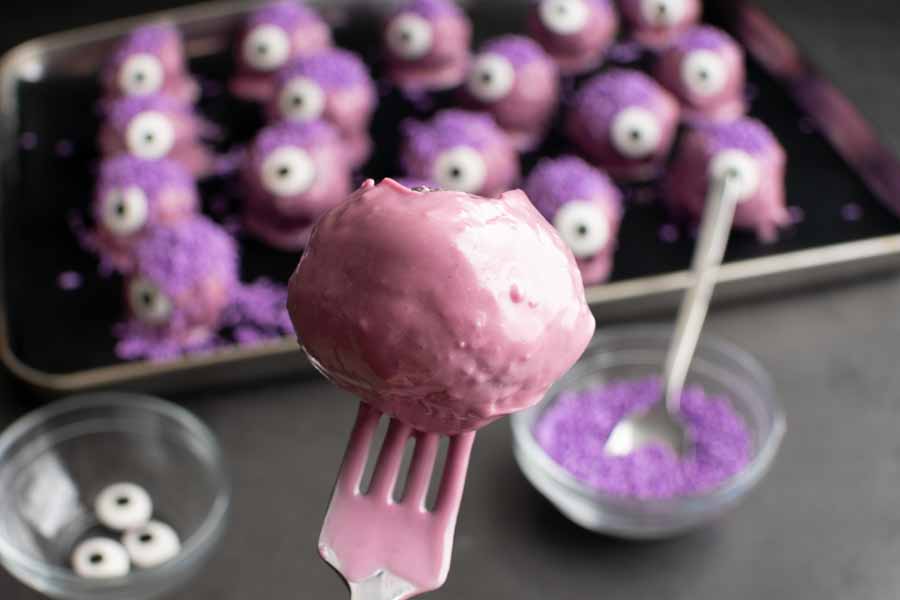
The instructions say to pick up each truffle with a fork, dip it into the candy, tap off the excess, and place it onto parchment paper to dry. Sounds simple, but my truffles kept falling off the fork no matter how hard I speared them. I had to drop each truffle into the melted candy, roll it around to coat it, then scoop it up and place it onto the baking mat I used instead of parchment.

Freshly dipped Monster Truffle on a fork
I think I thinned the candy melts a little too much because all the lumps and bumps were visible

That created some pooling under the truffles because I couldn’t tap off the excess candy. I also think I thinned the candy melts too much and that contributed to the pooling too. It also didn’t do much to disguise every lump, bump, and imperfection in the underlying truffle that a thicker coating would have.

I made sure to decorate each truffle as soon as I dipped it. It turns out that it was super easy to get bits of melted lavender candy onto the whites, and the black part ran if any moisture touched it. I also could have been more careful with the sprinkles. They got everywhere!

So while my Monster Truffles weren’t perfect, the drips and imperfections kind of worked. I think my monsters were more like The Blob than Monsters, Inc., but they were still cute and tasted amazing!

My Second Batch of Monster Truffles

We loved the taste of these truffles and the pictures were cute, but I was bothered by my mistakes. Could I make better-looking Monster Truffles now that I realized where I went wrong? I had to find out, so I bought more ingredients and gave it a go.

I managed to find lavender candy melts locally this time, but they were out of candy eyeballs. Instead, I ordered some colorful Halloween sprinkles with eyeballs in them. They were smaller than the first ones, but the sprinkles were so cute!

I made candy eyeballs!

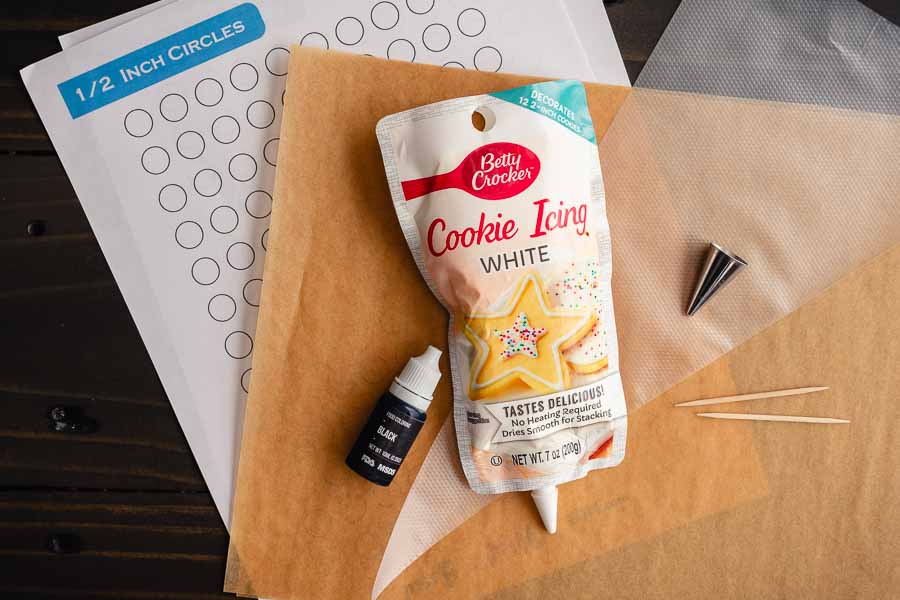
When the sprinkles arrived I realized the eyeballs in them were a little small for this. As usual, I asked the Google if there was a recipe for candy eyeballs, and it delivered. There were several recipes to choose from, but I settled on the easiest. I had some white royal icing left over from another project, along with all the other ingredients and equipment, so I tried my hand at making Candy Eyeballs.

My piping skills are almost non-existent, so they didn’t turn out great. I put printouts of small circles underneath the parchment paper, and I got pretty good circles after a few practice eyeballs.

I used royal icing and black food coloring to make candy eyeballs for my second batch of Monster Truffles

Unfortunately, the black pupils sunk into the whites as they dried overnight. I probably should have let the whites dry more before adding the pupils. But it was a learning experience, and there were enough good ones for this batch of truffles.

Then I made more Monster Truffles

And, if I’m being honest, this batch (of 22 truffles) didn’t turn out better than the first. I followed the instructions on the bag and melted this batch of candy melts in the microwave. I even used 2 bags so the melted candy was deep enough to submerge the truffles.

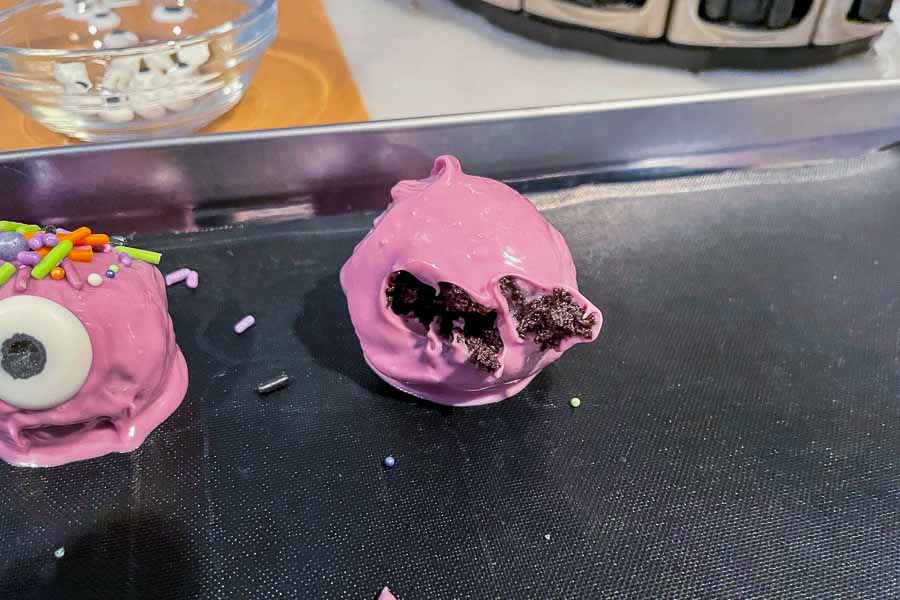
But alas, no matter how hard or what technique I tried, I couldn’t get a smooth finish. The candy was way too thick and left swirl marks. And most of the truffles fell off the fork when I tried tapping off the excess candy.

I couldn't get the truffles off the fork without messing up the candy coating
I couldn’t get the truffles off the fork without messing up the candy coating

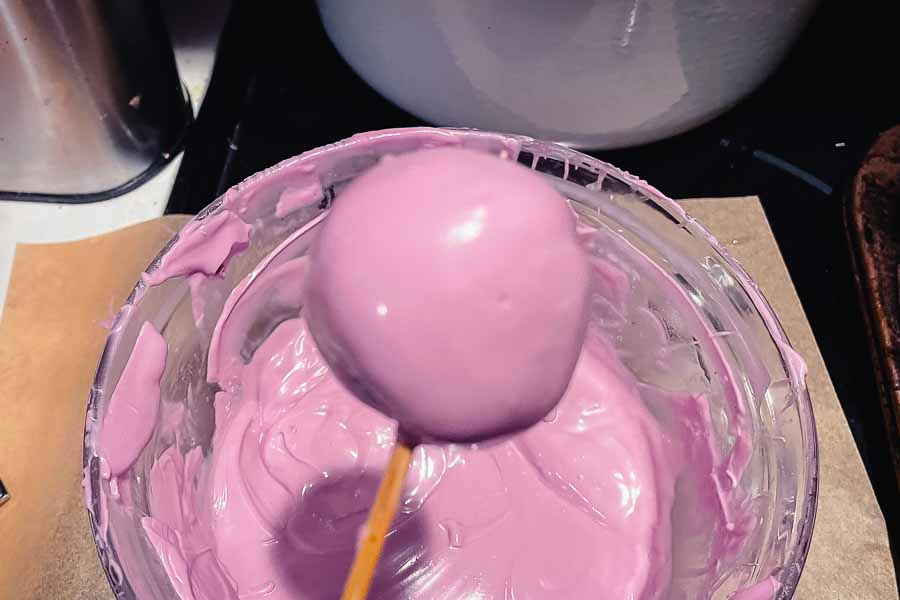
I didn’t think I would need to, but I thinned the candy with vegetable oil. Once it was thin enough, I kind of got a smooth finish by swirling the speared truffle through the candy in a circle. Unfortunately, I messed up the finish as I tried to get the truffle off the fork. I was able to paint over the dent with my pastry brush, but it wasn’t perfect.

Monster Truffle on a bamboo skewer
I tried using a bamboo skewer instead of a fork, and I managed to get a smooth-ish finish on one side of the last few truffles.

So the final result is I am not good at making truffles. At least not candy-coated truffles. But I think the imperfections in these worked since they are monsters. Plus blobby monsters taste just as good as not blobby monsters, and hubby and I had no problem with an extra batch of these cute, tasty Halloween truffles.

My 2nd attempt at Monster Truffles

Timing

This recipe lists 20 minutes of prep time, 1 hour to chill, and 1 hour 20 minutes total. I went a little over that, but I’m not surprised. Here’s how my time was spent:

  • 7 minutes to prep and make truffles
  • 1 hour to chill
  • 26 minutes to decorate
    • 12 minutes to melt and thin candy
    • 14 minutes to dip and decorate
  • 1 hour 33 minutes total

I worked on the truffles very carefully once I realized how touchy the cady eyeballs were. It was easy to get melted candy on the whites, and the black pupils ran if any moisture came near them. The extra time to thin the candy melts with vegetable oil, adding 1 teaspoon at a time, is included.

I spent 1 hour 35 minutes just decorating the Monster Truffles on my second try. I really took my time trying to get a smooth finish. That includes multiple times heating the candy in the microwave, thinning it with vegetable oil, and adding the sprinkle and eyeballs.

Twelve Yolk Pound Cake

0

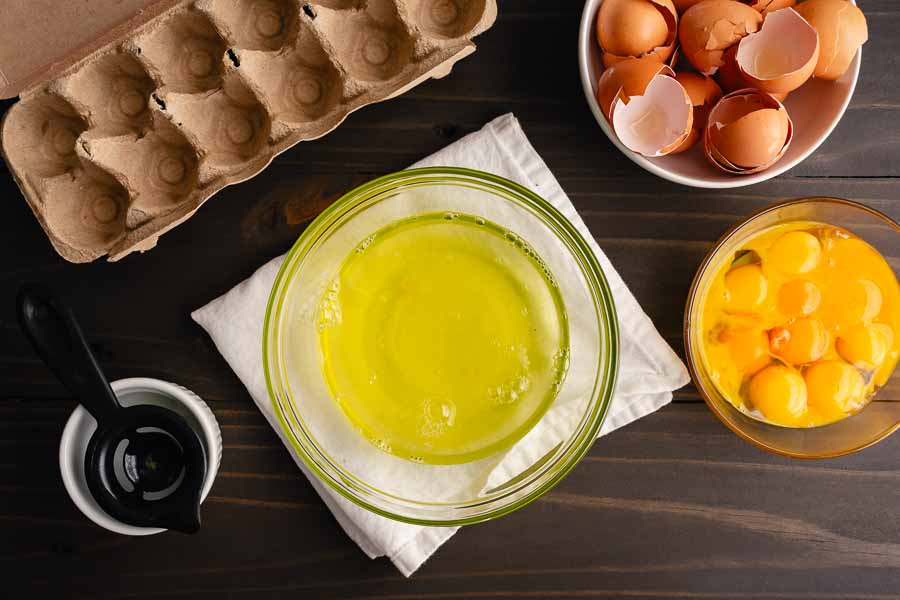
When I made my first Angel Food Cake earlier this month, I had to use a dozen egg whites. That meant I had a dozen egg yolks left over, and I hated just pouring them down the drain. I googled “what can I make with a dozen egg yolks” on a whim and the first result was this Twelve Yolk Pound Cake recipe. It was perfect! I already had the egg yolks, and there were only a few other ingredients needed to bring this recipe to life. I had to make it!

Versatile and delicious, Twelve Yolk Pound Cake has it all. This cake is also a great way to use leftover egg yolks. A great basic cake that’s not overly sweet. Serve this with a good vanilla ice cream and rich caramel sauce.

Recipe Author: Paula at Call Me PC
Get the recipe

The Ingredients

I think this is the perfect place to mention that this is not your traditional pound cake recipe—it’s much lighter. Pound cake is heavy and dense because it’s made with 1 pound each of four main ingredients: flour, butter, sugar, and eggs.

This recipe skips the butter and has less of the other three. I got curious to see what the weights would be for this recipe and looked them up. It gets close to one pound of flour and sugar, but the eggs are pretty much halved:

  • 3 cups all-purpose flour = 0.8 pounds
  • 12 large egg yolks = 0.49 pound
  • 2 cups granulated sugar = 0.89 pounds

All tolled, this cake recipe has 8 ingredients. That’s not bad at all, especially since one of them is cold water, and I already had the egg yolks. If you’ve ever done any baking, I imagine you will have most of the rest in your pantry like I did.

I went through my pantry for the other ingredients, and I almost had them all. I was so close, but no lemon extract. A quick text to hubby, and I had a bottle in my hand that evening so I could bake the next day.

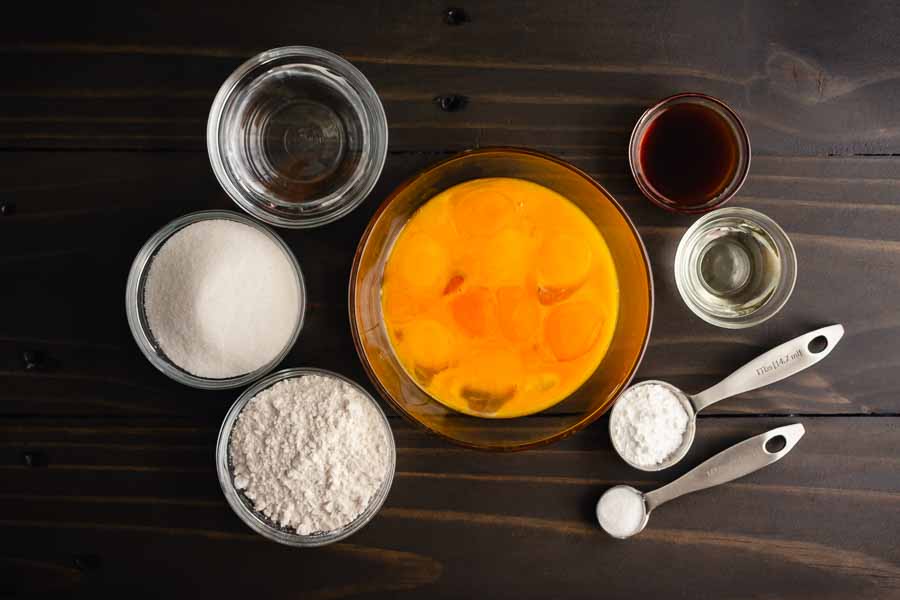
Twelve Yolk Pound Cake Ingredients
Egg yolks, vanilla extract, lemon extract, baking powder, salt, all-purpose flour, granulated sugar, and cold water

The Process

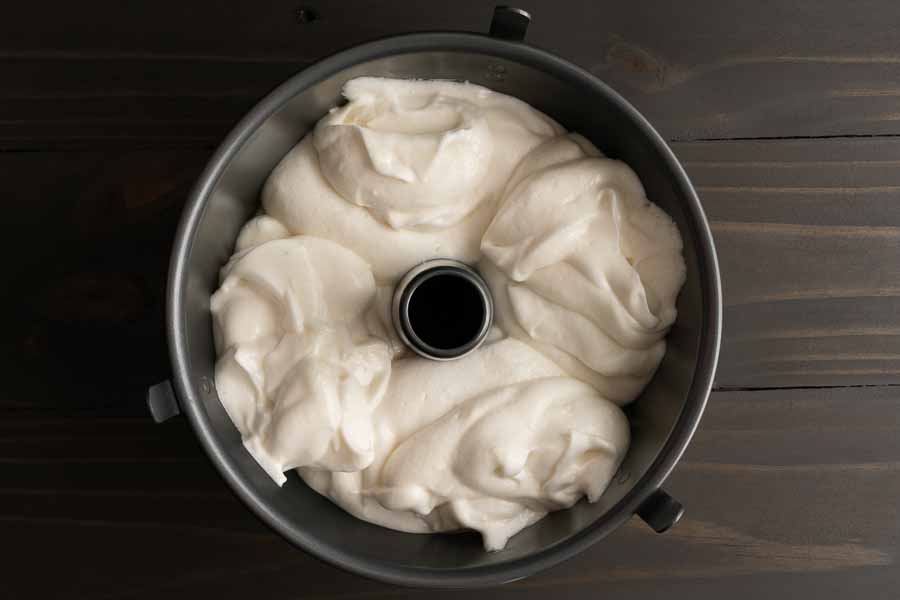
This recipe calls for a tube pan or a bundt pan, so I decided to use the angel food cake pan I just purchased. It’s not fancy, but it was the right size, and I didn’t want to order another pan that I would have to find room to store. I don’t have room!

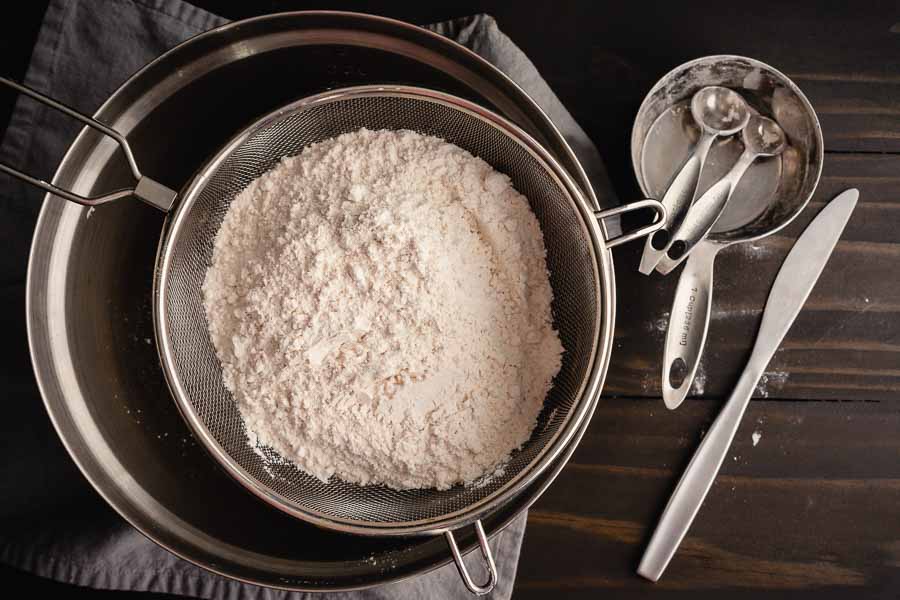
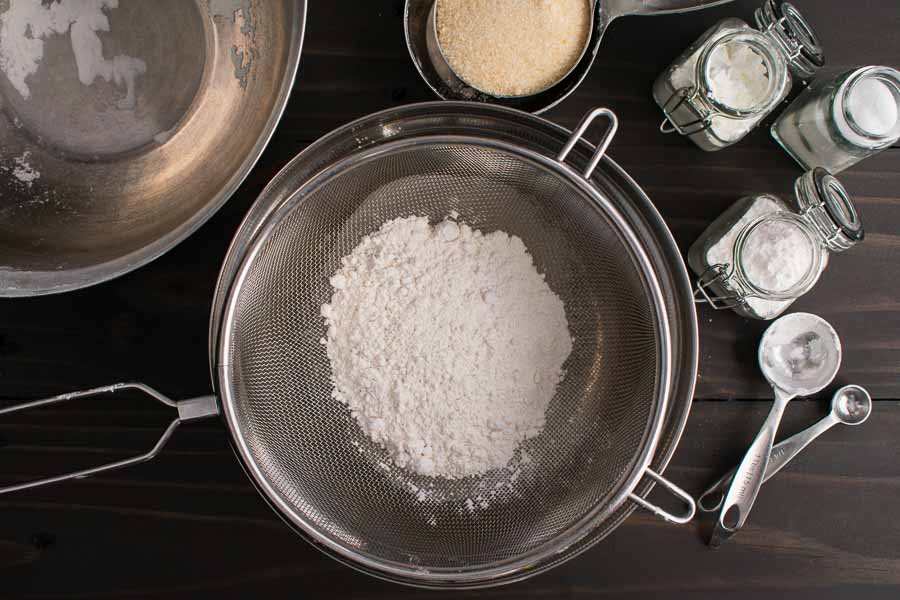
This recipe’s instructions were as simple as the list of ingredients. I began with sifting together the flour, salt, and baking soda. Next, I added all those egg yolks to my stand mixer, put on the wire whisk, and beat them until they were nice and fluffy.

The recipe doesn’t specify what tool to use for this, but I can’t imagine it not being electric. I opted for my stand mixer, but a hand mixer would have worked too. An old-fashioned balloon whisk could do it if you really, really need a good arm workout!

Sifting flour, baking soda, and salt together

Once that was done, I added the sugar, then the extracts and cold water. Finally, I mixed in the sifted flour and the batter was ready to pour into the pan.

I baked my Twelve Yolk Pound Cake for 50 minutes. The top had cracked nicely, and it passed the toothpick test, so no more baking was needed. Cooling took some patience (it always does!), but I found the cake was super easy to remove once it was done.

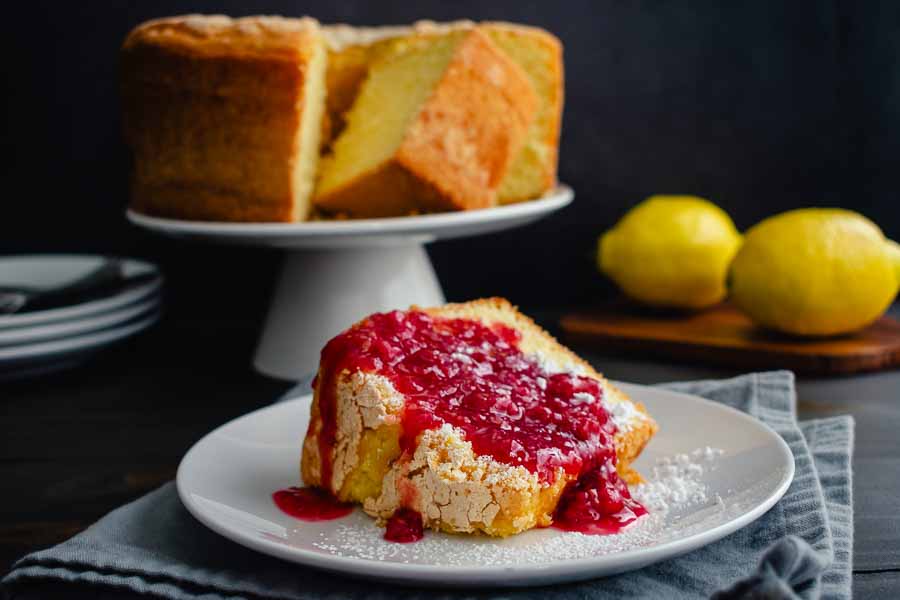
While the cake fully cooled, I had plenty of time to make raspberry sauce for it. I found the recipe on the same author’s website, and I had frozen raspberries waiting in the freezer. It only had 4 ingredients, and it took me 10 minutes to make. A little slower than the time listed, but I didn’t thaw the raspberries first.

I topped my Twelve Yolk Pound Cake with raspberry sauce and powdered sugar

Timing

This recipe lists 10 minutes to prep, 50 minutes to bake, and 1 hour total. Here’s how my time was spent:

  • 17 minutes to prep
  • 50 minutes to bake
  • 2 minutes to remove from the pan
  • 1 hour 9 minutes total

My prep took me longer than listed, but the baking time was spot-on. Also, neither includes 15 minutes to cool in the pan or time to cool completely on a wire rack.

Bourbon Bacon Cinnamon Rolls

Sometimes I find a recipe that I want to make but can’t fit into my schedule. This recipe for Bourbon Bacon Cinnamon Rolls was one of those recipes. It sounded so decadent, but I never seemed to find the time to give it a try. Well, the time has come, and I’m so excited! Anything with bacon is drool-inducing, and this adds cinnamon, brown sugar, buttermilk, and more. Absolutely drool-worthy! Plus I have never made cinnamon rolls, and I always love a new challenge. The closest I have come was Ube Cake Roll, so I’m pretty sure I will be able to pull this one off. Let’s find out!

Bourbon and bacon in cinnamon rolls? Yes please, makes for a fabulous breakfast or brunch.

Recipe Author: The Noms at Gastronom Blog
Get the recipe

The Ingredients

My pantry was surprisingly full of ingredients for these Bourbon Bacon Cinnamon Rolls. I had the sugars, spices, baking powder, baking soda, and salt. There was even a bottle of Jim Beam Bourbon in my bar, so I didn’t have to make an extra trip to the liquor store.

The rest of the ingredients were easy to find at my usual grocery store. All I needed was butter, cream cheese, buttermilk, and bacon. I chose thick-cut bacon for this recipe, and I used 6 slices to make 1/3 cup of crumbled bacon.

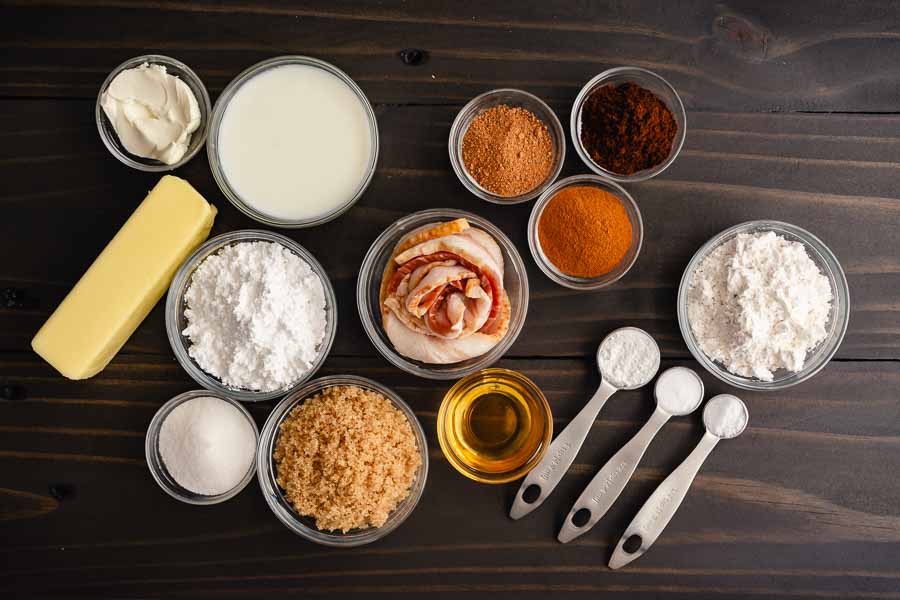
Bourbon Bacon Cinnamon Roll Ingredients
Bacon, ground nutmeg, ground cloves, ground cinnamon, all-purpose flour, salt, baking soda, baking powder, bourbon, brown sugar, granulated sugar, powdered sugar, unsalted butter, cream cheese, and buttermilk

The Process

First off, we needed bacon. I fried up 6 strips of thick-cut bacon while I did the other prep work. I kept the temperature at a medium setting and checked it as I worked so it didn’t burn. It fried up nice and crispy—perfect for crumbling.

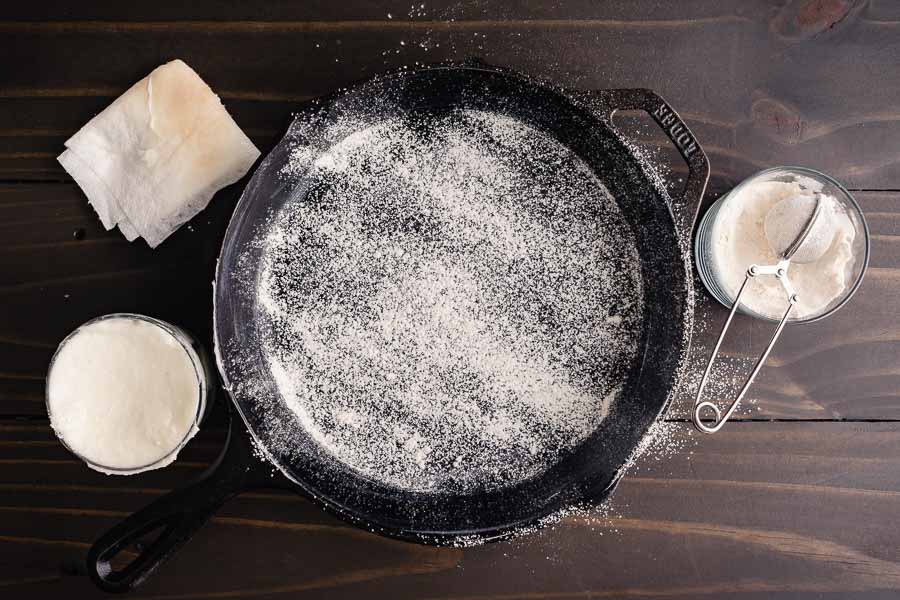
This recipe can be made in a cast-iron skillet or a pie plate. I chose the former and used my 10-inch cast-iron skillet. To prepare it, I rubbed it generously with vegetable shortening to prevent sticking then dusted it with all-purpose four. I re-purposed my sugar duster for flour, and it kept the flour from clumping.

Floured cast-iron skillet
Cast-iron skillet coated with vegetable shortening and flour

Making the Rolls

I have made bread dough before, and the cinnamon roll dough was a similar process. No waiting for it to rise, though, and I wasn’t mad about it. A quick mix and some kneading and it was ready.

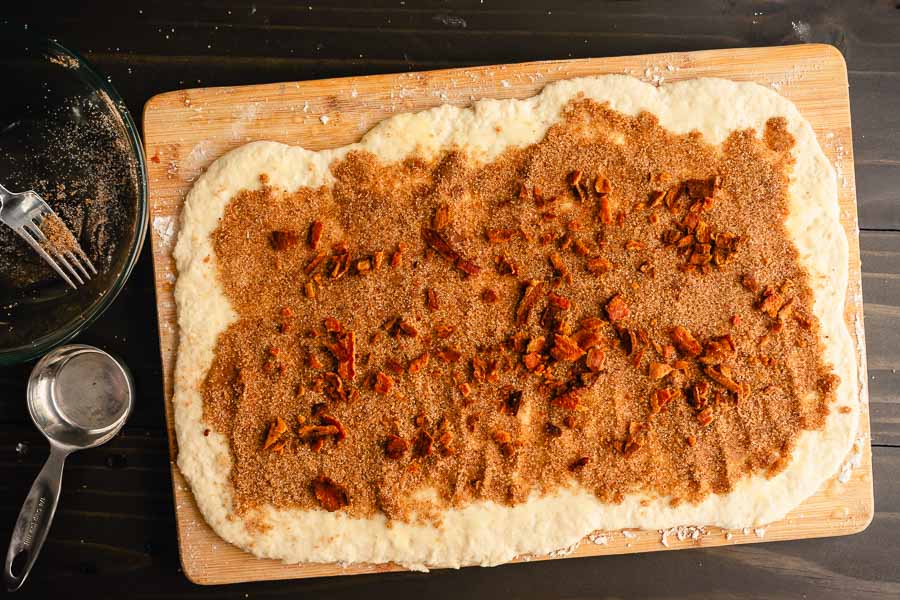
Initially, I used my hands to flatten the dough. It was very stretchy, and I had to finish flattening it by lightly rolling it out with a rolling pin. It was ready to be rolled up once I topped it with melted butter, brown sugar, spices, and most of the bacon bits.

Rolled out dough topped with brown sugar, spices, and crumbled bacon
Rolled-out dough topped with brown sugar, spices, and crumbled bacon

I was a little nervous about this part, but it went pretty smoothly. Using my largest cutting board created the perfect workspace since it was 17″ x 12″. The dough needs to be rolled out to 18″ x 12″, so I got it close without measuring.

The only problem I had was a break in the dough, and it happened to end up on the outside of the roll. No worries, though! I pinched off some dough from the end, wet it, and used it to patch the hole.

My serrated bread knife made cutting the rolled-up dough easy without smooching it too much. I got 9 cinnamon rolls out of it, and most of them were the same size. One of the ends was noticeably smaller than the rest. I’m guessing I didn’t spread the toppings enough on that end.

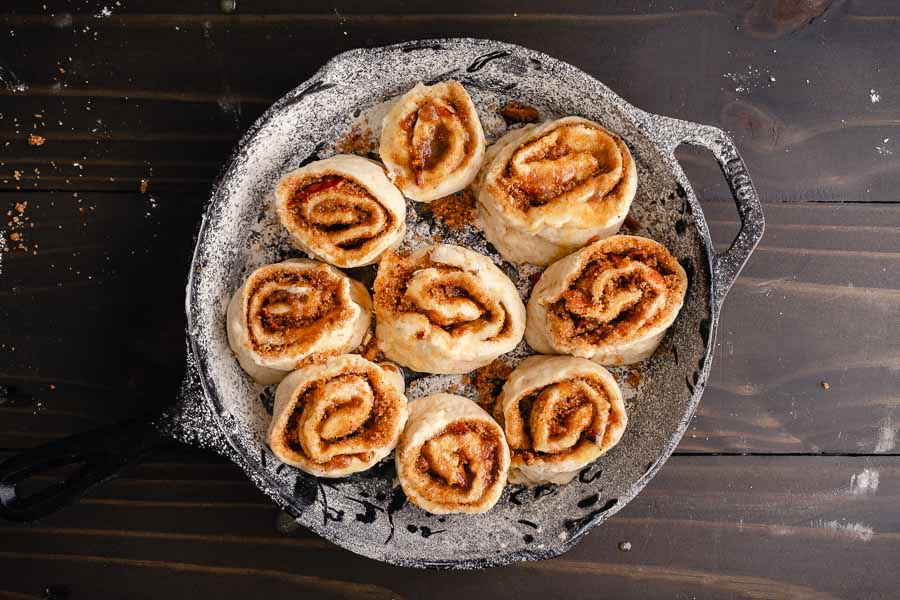
I noticed there was lots of room in the pan once I added all the cinnamon rolls. Did they need to be smooshed down to fill the space? I wasn’t sure, but I ended up not smooshing them because it wasn’t mentioned in the instructions. They did expand to fill the skillet as they baked, so leaving some room was the right thing to do.

Unbaked Bourbon Bacon Cinnamon Rolls in a floured cast-iron skillet
There was space in the pan for the rolls to expand while they baked

Making the Glaze

I had plenty of time to mix up the glaze as the cinnamon rolls baked. The glaze was tasty but very thin, even watery. I envisioned a thick glaze that would sit on top of the pastries instead of soaking in. Hmmm…

The recipe does say to add extra powdered sugar to thicken it if you want, and I did just that. I added 1-2 tablespoons at a time, mixed with my immersion blender (it’s great for small jobs like this), and tested the thickness. In the end, I added 8 tablespoons (1/2 cup) of extra powdered sugar to get the thickness I wanted. I’m not mad about that, either!

I was practically biting my nails once the rolls came out of the oven! They made the house smell like a bakery, and my husband and I must have been drooling. Waiting for them to cool down enough to glaze was torture!

After about 30 minutes, it was time to glaze. I had set things up for photos as they cooled, so I was ready to go! I drizzled them with the glaze, sprinkled on the rest of the bacon, and got to snapping those pics. They were still warm by the time I was done, and let me tell you that first bite was divine!

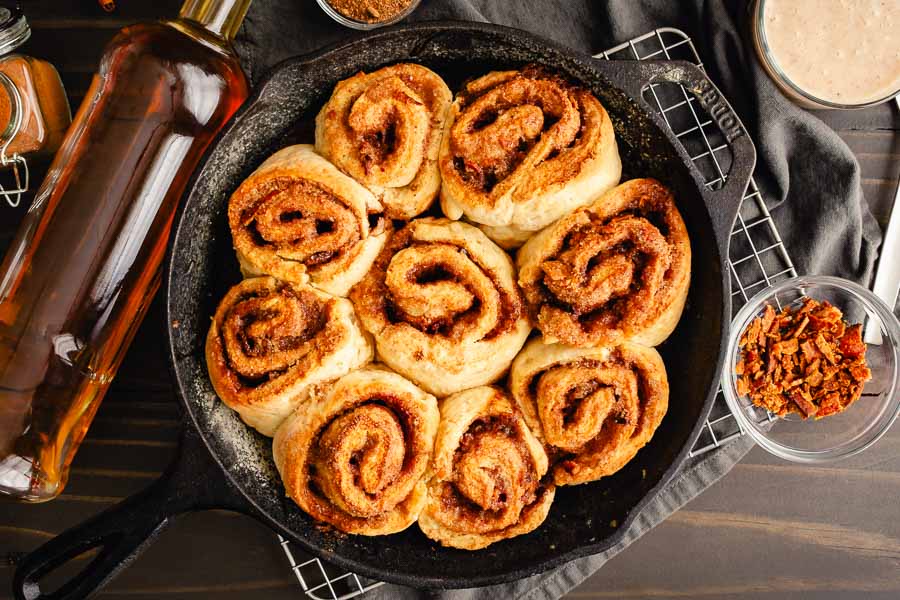
Unglazed Bourbon Bacon Cinnamon Rolls in a cast-iron skillet
The unglazed Bourbon Bacon Cinnamon Rolls looked good right out of the oven, but they needed some glaze and crumbled bacon on top

Timing

This recipe lists 20 minutes to prep, 25 minutes to cook, and 45 minutes total. Cooling time* isn’t included there, but it is mentioned in the instructions. However, a specific time isn’t listed so I’m not counting it in my time rating. Here’s how my time was spent:

  • 22 minutes to prep
    • Includes 15 minutes to fry the bacon
  • 25 minutes to bake
    • Includes 5 minutes to make the glaze while the rolls baked
  • 47 minutes total

*I allowed an extra 30 minutes to cool the rolls. It would have been less if I had used a pie pan, but the cast-iron skillet really held the heat. It kept the rolls nice and warm and would have been great for serving directly out of on the table with the extra glaze on the side.

The slow-down in the prep work was due to the order of ingredients in the ingredients list being different from the order in the instructions. I had to do some hunting for the ingredients and their amounts because of that. Also, the icing instructions mention nutmeg, but their ingredients have cinnamon. I put in both since I couldn’t decide which I liked better 🙂

Prosciutto Pasta

I think it was way back in April that I went on a few runs to Home Goods and discovered their gourmet food section. I grabbed a bunch of pasta I couldn’t find in my usual grocery store without a plan for any of it, but I couldn’t pass them up! One of those bags of pasta was long, wide pappardelle noodles. They are becoming a favorite of mine, and this particular bag is becoming Prosciutto Pasta today. A short, simple name for a dish with big noodles. I like the sound of it!

This prosciutto pasta recipe has a silky cream sauce with fresh tomato, peas, and cooked prosciutto. It’s fast and simple to make!

Recipe Author: Natasha Bull at Salt & Lavender
Get the recipe

The Ingredients

So, big ole noodles? Check! The bag of pappardelle I bought was just over a pound, so I weighed out half of it. That’s right, I have enough left to make this again. Insert happy dance!

A quick pass through my kitchen showed me that I had to buy almost everything else. I had salt, pepper, butter, and olive oil plus some homemade Italian seasoning mix. None of the ingredients I needed looked like they would be difficult to find, and I was right.

The olive oil I had was a new product for me, and I liked it so much I wanted to tell you about it (not sponsored!). I always have olive oil around—both extra virgin and regular (a.k.a. light or mild) olive oil. EVOO is so tasty and works well for finishing drizzles, salad dressing, etc. It doesn’t stand up to heat, though, and loses its flavor to boot.

But I happened to come across an olive oil BOGO recently, and I bought some extra virgin olive oil that would stand up to the heat. It was Pompeian Smooth Extra Virgin Olive Oil for Sautéing and Stir-Frying, and I gotta say I was pleased with it. It stood up to the heat of frying without smoking or the flavor going off.

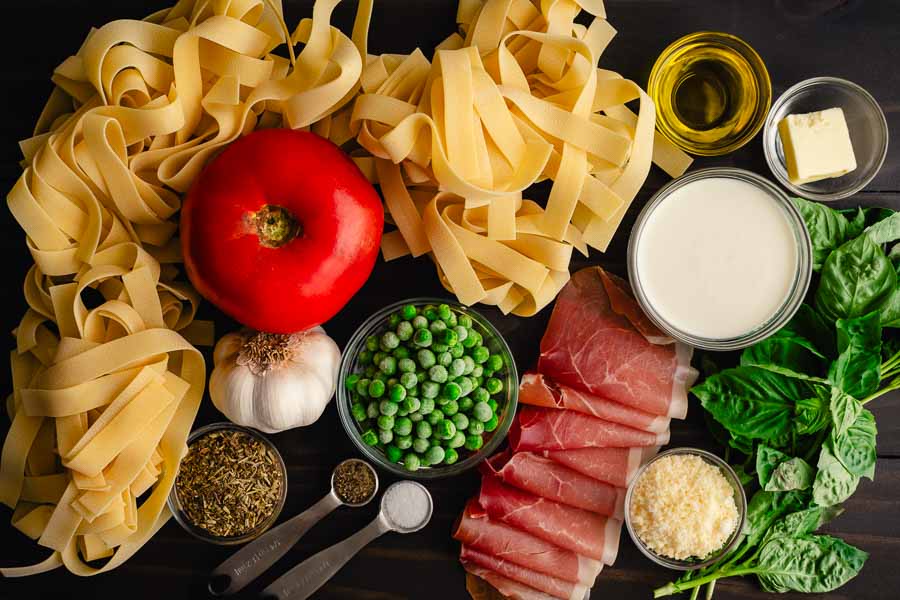
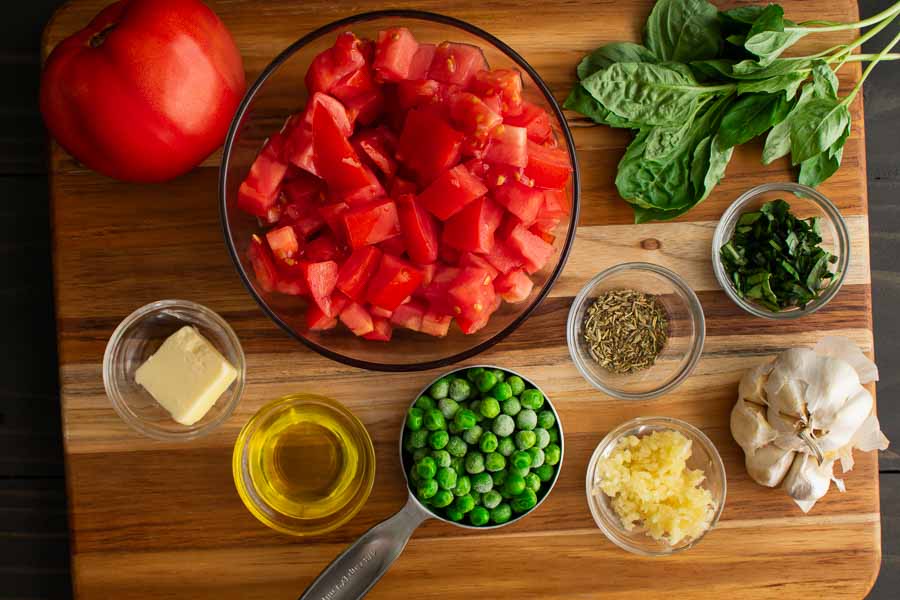
Prosciutto Pasta Ingredients
Pappardelle pasta, olive oil, butter, heavy cream, basil, grated parmesan cheese, prosciutto, frozen peas, salt, pepper, Italian seasoning, garlic, and tomato

The Process

This Prosciutto Pasta recipe moves fast, so I took the time to do the prep work before I began cooking. The “work” was chopping a tomato, slicing some basil, and micing a couple of cloves of garlic. I also took the time to measure out anything that didn’t need chopping. It took me 7 minutes to do, so just under the 10 minutes listed.

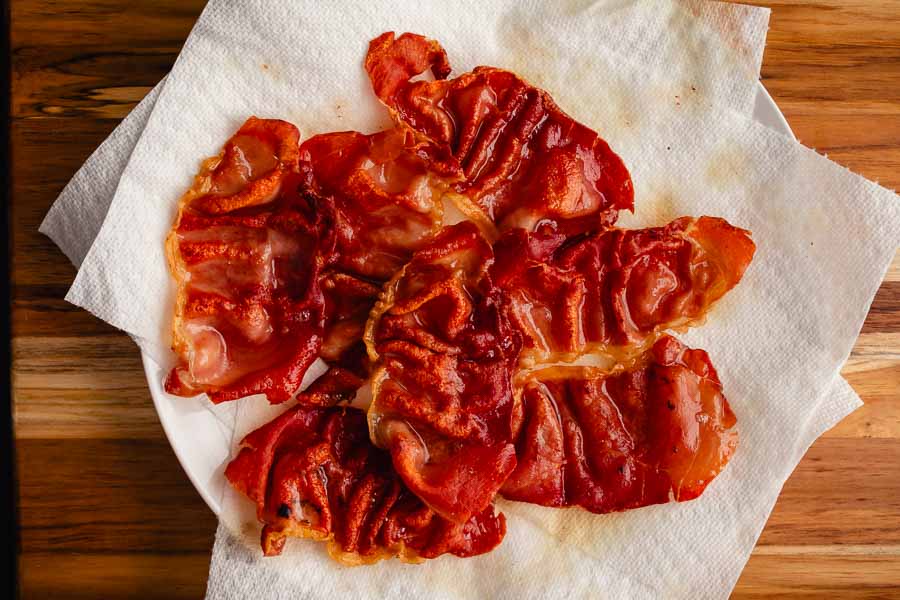
I fried the prosciutto in two batches until it was very crispy

Next, I let a 12-inch skillet preheat with the oil and butter while I put on a salted pot of water for the pappardelle noodles. I took the recipe’s advice and fried the prosciutto in 2 batches so it had plenty of room in the pan. It got nice and crispy, but I was careful not to let it get burnt the way I like my bacon. Prosciutto is too nice for that!

Prepped and measured Prosciutto Pasta ingredients

Once the prosciutto was done and draining on paper towels, I moved on to the tomato-cream sauce. It was so easy! A little bit of sauteeing and stirring was all it needed to come together. A quick 5-minute boil to thicken and I finished the sauce by crumbling in some prosciutto and adding the sliced basil.

I had the drained pappardelle waiting in a colander when the sauce was ready. A quick toss in the sauce with a pair of tongs, and I was ready to serve up a couple of big bowls of this luscious Prosciutto Pasta. Topped with grated parmesan plus more prosciutto and basil, of course!

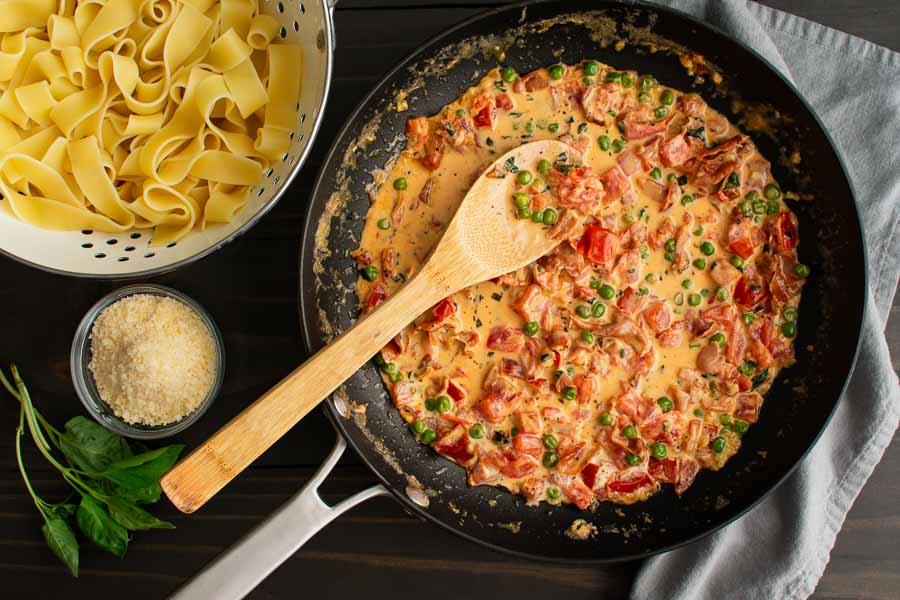
Prosciutto Pasta sauce before adding the pasta
A 12-inch skillet left plenty of room to mix in the cooked pappardelle noodles

Timing

This recipe lists 10 minutes to prep, 20 minutes to cook, and a total time of 30 minutes. I came in seconds over that! Here’s how it went:

  • 7 minutes to prep
  • 22 minutes to cook (including pasta)
  • 2 minutes to mix
  • 31 minutes total

Ramos Gin Fizz

0

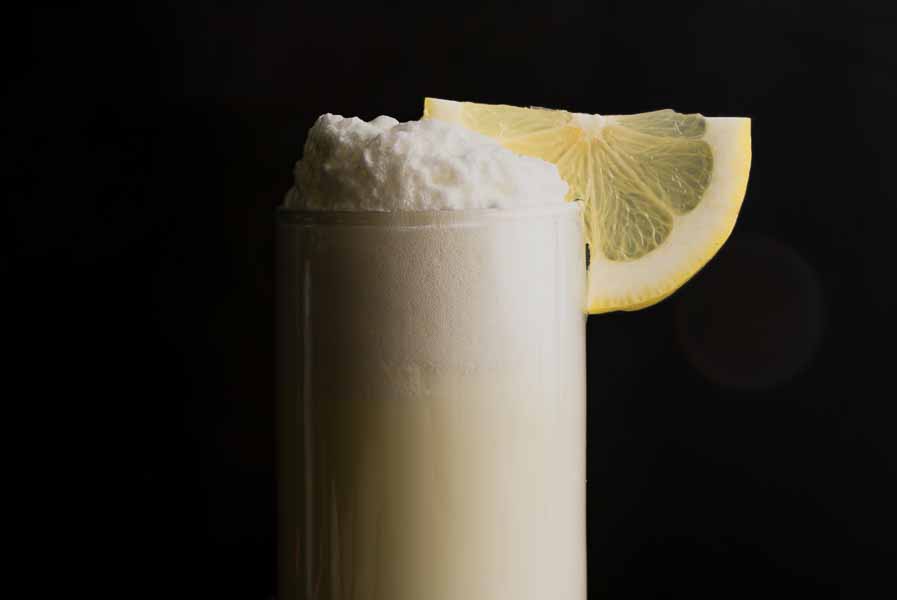
Hmmm… What to make after a fluffy white cake? How about a fluffy white cocktail? That’s exactly what I found in this historic cocktail. The Ramos Gin Fizz was created in 1888 by Henry Charles Ramos and was originally known as the New Orleans Fizz. It became a sensation in New Orleans, and people flocked to his bar, the Imperial Cabaret Saloon, to give it a try. The only problem? The gin-based cocktail gets its fluffy texture from being shaken for 12 minutes. In fact, Henry had to hire 20 “shaker boys” to be on duty at all times to make this cocktail relay-style. Whew!

I have to say I would have passed this cocktail recipe up if I had to do that. I had enough trouble with 2 minutes of shaking to make a Classic Greek Frappe. It’s tougher than it sounds! But it stayed on my mind, and I even thought about enlisting hubby to help with the shaking. Three minutes per arm might be doable. Maybe. But this version of the Ramos Gin Fizz gives the option of using my stand mixer to do the work. I’ve never used a stand mixer for bartending, but I’m about to!

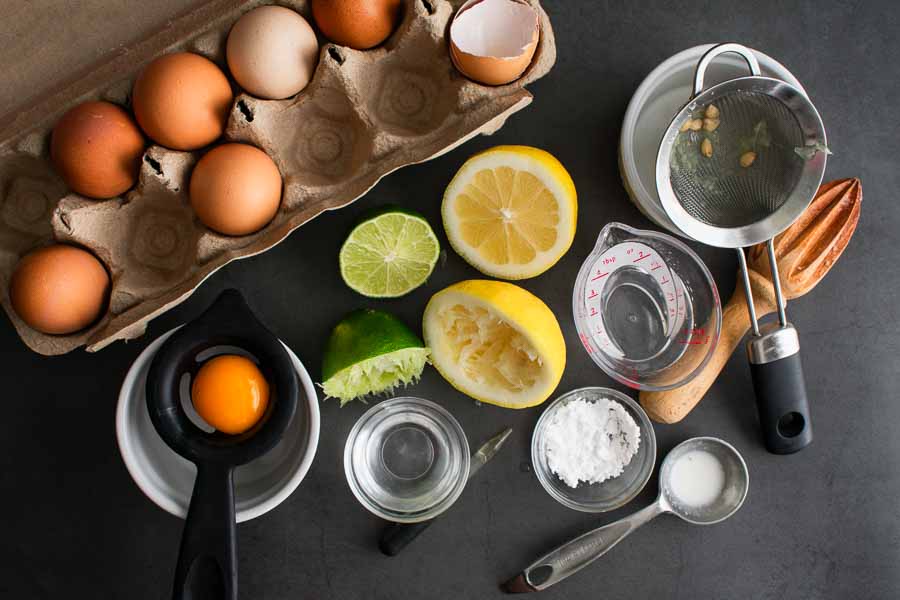
The Ramos Gin Fizz is made with gin, lemon, lime, egg, cream, and seltzer water. Here’s how to make one.

Recipe Author: Rebecca Swanner at Darcy Magazine
Get the recipe

The Ingredients

As usual, my pre-shopping rummaging through my kitchen found a few ingredients for this recipe. I had powdered sugar, seltzer, crushed ice, and orange flower water. I knew I could find the rest at my regular grocery store, and I was hoping the gin would be easy to find too.

The Ramos Gin Fizz requires a specific type of gin called Old Tom gin. Like the cocktail, the recipe dates back a ways. This type of gin was popular in 18th-century England and is just a bit sweeter than London Dry gin.

Today, there are several companies making this recipe. This Ramoz Gin Fizz recipe recommends Hayman’s Old Tom Gin, and I was able to find it at my local ABC. A 750ml bottle was $31.99, so on par with classics like Tanqueray, Hendrick’s, and Bombay Sapphire.

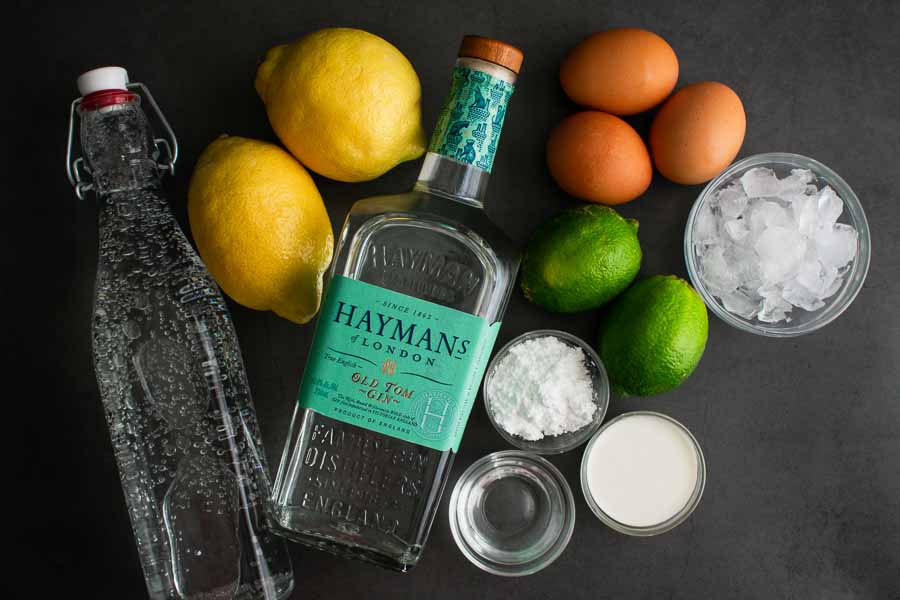
Ramos Gin Fizz Ingredients
Old Tom Gin, egg whites, crushed ice, lime juice, powdered sugar, cream, orange flower water, seltzer water, and lemon juice

The Process

I tried making this cocktail three different ways. Not because I wanted to, but because I assumed I remembered the recipe. I always give them a few read-throughs. Once to decide if I can make it, when I add it to my recipe software, when I make a shopping list, and usually right before I make it.

Well, this time I didn’t do that final read-through, and I just went for it. Apparently, my memory and reading comprehension are slipping. And I swear I did not have any cocktails before I started working on this one!

And before I get into it, I want to mention one tool this recipe needs: an eyedropper to add the orange flower water. I keep a few around the house, and they come in handy more than I thought they ever would. I bought mine ages ago, and my eyedroppers came with a cleaning tool. The tiny droppers can be difficult to clean, and this cleans the glass and the rubber bulb (especially great with oily ingredients).

Prepping my Ramos Gin Fizz

My First Ramos Gin Fizz

My first try was an adventure. My reading comprehension went out the door y’all! I missed the part about chilling the stand mixer’s bowl and not adding crushed ice. I put in the ice, and the chips of ice flew everywhere as soon as I turned on the mixer, of course, I forgot to put on the pouring shield that also acts as a splash guard.

I immediately turned off the mixer and added the pouring shield. Ice still flew everywhere, but a little less. After turning the mixer off again, I covered the mixer with a couple of tea towels and dared to turn the mixer back on.

This time worked out. The ice was either flung out or eventually melted, and I ended up with a frothy mixture after 12 minutes. It wasn’t very cold, but it fizzed up nicely when I added the seltzer water to the glass. This version is the one in my photos, by the way, and it was a good cocktail

My Second Attempt

Okay, reading comprehension was still lacking on this one. Buuuuut… this time I left out the ice when I mixed the cocktail. There was a little splashing, but nothing the pouring shield couldn’t handle.

I let the stand mixer do its thing for 10 minutes. Then I poured the mixture into a cocktail shaker with crushed ice and shook it manually for 2 minutes.

While this version was nice and cold, it didn’t have a firm foam head when I added the seltzer. It was a soft foam that just overflowed the glass. I think the shaking just knocked out the air that was added by whisking in the stand mixer.

After mixing for 12 minutes

Take Three, Success!

The next day I finally got it right! I read and understood the simple instructions and had an all-out attack of embarrassment. How did I not see it?!

Well, the recipe didn’t include instructions for this method. While the blog post mentions using a stand mixer twice, the instructions for that method aren’t part of the printable recipe, which is what I use when I cook recipes for my posts.

Instead, it says to add everything except the seltzer to a chilled stand mixer bowl and whisk on medium-high until soft peaks form. So more like my first try. I knew I wasn’t imagining it, but I swore I did for days until I reread the whole post and saved my sanity!

The post doesn’t give a time for the stand mixer method, so I used 12 minutes on medium-high for all three tries and never got soft peaks. I did get a lot of foam, and adding seltzer made even more.

For my third and most successful try, I put the stand mixer’s bowl into the freezer for about an hour. Once the bowl was nice and frosty, I added all the ingredients except the ice and seltzer. Twelve minutes later I had a cold Ramos Gin Fizz with the firm foamy head after adding seltzer. It looked just like the first one I made, but it was nice and cold. It made a big difference!

Ramos Gin Fizz Close-up

Timing

This recipe lists prep/total time of 15 minutes. I came in at 17 minutes with 3 minutes to prep & pour plus 12 minutes to mix. I made the garnish in a few seconds while the stand mixer did its thing.

Angel Food Cake

0

It’s National Angel Food Cake Day, and I realized two things. One: I haven’t had angel food cake in ages. It used to be a regular on Mom’s dessert menu, although she always bought it rather than making it. And two: I have never made an angel food cake. I need to change both of those things, so I had to try making this Angel Food Cake recipe. I have ordered my angel food cake pan (yes, it has its own pan), and I’m ready to get baking!

100% homemade angel food cake! This is the recipe that everyone will ask you for! This recipe shows you how to use all purpose flour instead of cake flour to make angel food cake, plus we’ve tested it multiple times and works GREAT with gluten free flour!

Recipe Author: Beth at The First Year
Get the recipe

The Ingredients

As usual, I did a pre-shopping kitchen run-thorough to see what ingredients I had for this recipe. It turns out that I had a lot of them. So it was a big check for almond and vanilla extracts, granulated sugar, flour, cornstarch, salt, and cream or tartar.

That left me with a grand total of one item for my shopping list: a dozen eggs. Since this recipe requires all of them to be separated I was glad I already had some eggs in my refrigerator. If not, I would have bought another half dozen as a backup. It’s so easy to break a yolk, and they can’t be separated out to the whites if that happens.

What about buying a carton of egg whites? That isn’t mentioned in the recipe or accompanying blog post. I did see the questions asked in the comments, and the author replied that she had never tried it.

However, another reader did chime in and said she has done it that way successfully many times. It sounds like an easier option, but you won’t have leftover egg yolks to make a Twelve Egg Pound Cake. Not so subtle hint that that recipe is coming soon—I couldn’t bring myself to waste all those egg yolks!

Oh, I made sure to pick up fresh strawberries and whipped cream to top my angel food cake. Fresh berries and whipped cream are my favorite toppings, though this cake is good enough to eat on its own too.

Angel Food Cake Ingredients
Egg whites, all-purpose flour, cream of tartar, salt, cornstarch, granulated sugar, almond extract, and vanilla extract

The Process

This Angel Food Cake recipe is all about two things: flour and egg whites, and they both need a lot of work. Thank goodness for modern appliances! It also requires an angel food cake pan or a bundt pan (a.k.a. tube cake pan).

The Angel Food Cake Pan

Angel food cake pans are similar to bundt pans. They have a tube in the center but additionally have short legs on the top edge and removable bottoms. These pans can also be used as bundt pans, just ignore the legs. I tested this myself, and the pan did not leak despite the removable bottom (yay!).

The legs allow air to circulate when the cake is inverted for cooling. Yes, it’s cooled upside down. Not greasing the pan lets the cake stick and not fall out while it cools this way. The removable bottom makes getting the cake out of that ungreased pan intact much easier. With a little help from a spatula.

I bought a non-stick angel food cake pan for some extra help with removal. While the capabilities of different materials vary, nonstick generally means you need much less oil, and clean-up is easier. I have seen ads for nonstick pans that claim not to need any oil, but I have never used one, and that has not been, my experience with the pans I own.

FYI, The recipe does not mention what size pan is needed, but it does have a link to a 10-inch pan that is no longer available. The pan I bought was 9.5 inches in diameter, 4 inches tall, and holds approximately 16 cups. It was a great size for this recipe and that Twelve Yolk Pound Cake I mentioned above.

What if you don’t have an angel food cake pan and just don’t want to buy another single-use pan? The author does mention using a bundt pan in the recipe post. She said she balances the center of the pan on an inverted coffee mug to allow air to circulate during cooling. The only downside is removal is probably not as easy without a removable bottom.

Sifting the Flour

Things begin with sifting the flour. I have a one-hand press or squeeze sifter. It’s fine for small amounts of sifting, but it gets tedious and downright painful for my joints for lots of sifting.

You might have a hand-cranked sifter, and I have a feeling that style is much easier to use. I might have to pick one up since they aren’t too pricey. A quick glance at Amazon shows $10 to $15 for most, with some going up to $20.

Either style does the same job, and they’re great because most have a double layer of mesh for a finer sift. But I had to work with what I had. The flour needed to be sifted 7 times, so I used another tool to save my poor hands.

I sifted the flour and other dry ingredients with a mesh strainer

Tip: To sift the flour, I simply placed a mesh strainer (colander) over a mixing bowl and lightly shook it. It can also be stirred with a spoon if that motion isn’t comfortable for you. Either way, the sifting is much faster and easier than my old squeeze sifter.

I sifted the flour into one mixing bowl, then poured the sifted flour back into the sieve after placing it over a second mixing bowl. The sifting went back and forth between the bowls, adding other ingredients as instructed.

Finishing the Batter

Next up were the egg whites. I don’t know how I did it, but I managed to separate 12 eggs without breaking a yolk into them. Some of the yolks did break as I put them into another bowl, but I wasn’t worried about that at all.

The leftover egg yolks can be used to make Twelve Yolk Pound Cake

Next, the recipe said to combine the egg whites, cream of tartar, and extracts and mix for 7 to 10 minutes. This is when I really appreciated my stand mixer (and its whisk attachment). You can use a hand mixer, but you lose some mobility while you’re mixing.

I used my stand mixer's whisk attachment to whip the egg whites, cream of tartar, almond extract, and vanilla extract for 10 minutes
I used my stand mixer’s whisk attachment to whip the egg whites, cream of tartar, almond extract, and vanilla extract for 10 minutes

The egg whites had stiff peaks after 10 minutes, so I began folding in the sifted flour. I was so careful not to knock the air out of the egg whites that I didn’t mix it thoroughly enough.

I realized that when I found pockets of flour as I poured the batter into the pan. It wasn’t a problem to stop, return the bit of batter poured to the mixing bowl, and mix a little more to make sure there were no more pockets of unmixed flour.

The batter kept its shape when I poured it into the pan so it needed to be smoothed out before baking

When I poured all the batter into the angel food cake pan, I noticed it held its shape. I had to use a silicone spatula to smooth it out. That wasn’t in the instructions, but I didn’t know if the batter would settle while it baked. A lumpy angel food cake was not my goal here!

I smoothed the batter with a silicone spatula before baking

Baking and Removal from the Pan

My angel food cake passed the toothpick test after 40 minutes in the oven. This is when not creating the pan came in handy. Let me explain.

The angel food cake pan I bought had three legs to stand on when inverted and a removable bottom. I did some practice pan flips with an empty pan, and the bottom fell. However, the baked cake stuck to the ungreased sides of the pan and held the bottom in place.

Flipping it was easy! I placed it on a wooden cutting board and left it to cool for an hour and a half. The cake didn’t move an inch.

Removing the cake from the pan was pretty easy too. First, I slid an offset spatula around the outer edges until the cake and center portion could be removed. Then I slid the same spatula around the center and bottom of the pan.

Another flip or two was needed to get things right. First, I put a plate on top of the cake while it still rested on the center part of the pan. Then I flipped it all and gently pulled the center of the pan loose.

Now the cake was completely out of the pan but it was upside down so one more flip was needed. I did it the same way: I put a plate on the upside-down cake and flipped it one last time. Now I had an angel food cake that was right-side up.

I was able to remove my angel food cake from the pan in one piece

Timing

This recipe lists 15 minutes to prep, 40 minutes to cook, 1 hour additional time (cooling time), and 1 hour 55 minutes total. Here’s how my time was spent:

  • 24 minutes to prep
  • 40 minutes to cook/bake
  • 1 hour 30 minutes to cool
  • 3 minutes to remove from the pan
  • 2 hours 37 minutes total

At first glance, it looks like I went way over the time listed. I did almost double the prep time, but I think there is more to it. That 1 hour of additional time seems like a typo because the instructions list 1.5 to 2.5 hours to cool.

If I adjust the additional time to the minimum cooling time of 1.5 hours, I get a total time of 2 hours 25 minutes. That is more in line with my results.