Home Blog Page 48

Chickpeas in Turmeric Peanut Butter Curry

0

The cucumber-peanut salad I made earlier this week gave me my theme ingredients for this week: peanuts. So to continue that, I just had to make this Chickpeas in Turmeric Peanut Butter Curry recipe. I know peanut butter curry might sound a little strange, but this recipe sounds like it will be more savory than sweet, and I love savory! And it’s vegan, so it fits right in with my effort to eat more plant-based meals.

Easy Peanut or Almond Butter Curry with Summer veggies and Chickpeas. Serve over rice or cooked grains. Vegan Gluten-free Soy-free Recipe.

Recipe Author: Richa at Vegan Richa
Get the recipe

The Ingredients

Since this is a vegan recipe, most of the ingredients were found in the produce department. I loved picking out all the colorful vegetables. Spices are also heavily featured, but I had most of those on hand as well as the peanut butter. Lastly, I needed non-dairy milk, so I chose coconut milk. A single can was just enough to make this recipe and the turmeric milk for Cardamom Cinnamon Turmeric Tea, so nothing went to waste.
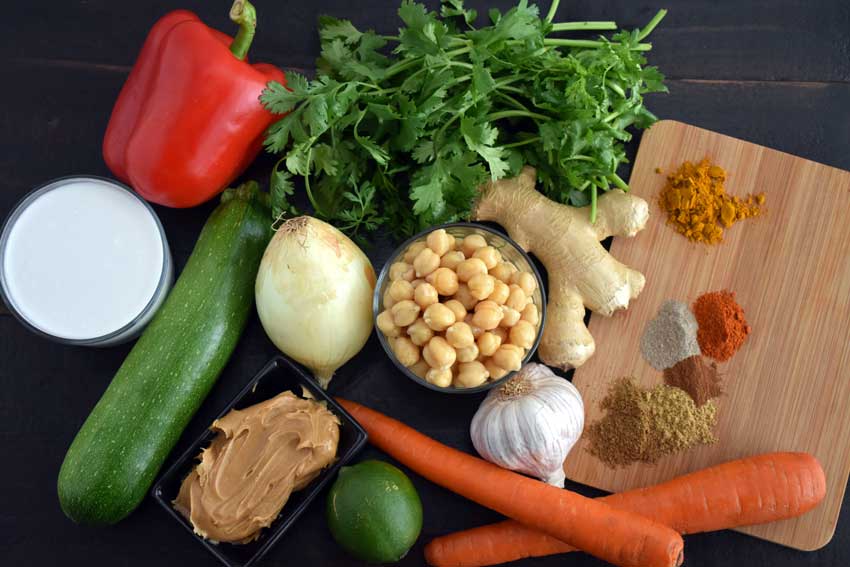
Chickpeas in Turmeric Peanut Butter Curry Ingredients
Chickpeas, onion, zucchini, coconut milk, red bell pepper, cilantro, ginger, turmeric, cayenne, cardamom, cinnamon, coriander, cumin, garlic, carrots, lime juice, and peanut butter

The Process

The instructions for this recipe were well-written and easy to follow, and the total time of 40 minutes was spot on. The prep work took 10 minutes, and my mandoline came in very handy to slice the vegetables evenly.

The author mentioned using a NutriBullet in step 1, but I don’t have one. Instead, I used my mini-prep, but a food processor or blender would probably work too. If not, you always have the option of simply mincing the onion, ginger, and garlic.

One last note is to use a saute pan or a deep skillet. You need to stir this curry really well when you add the peanut butter, and a shallow skillet pretty much guarantees spills to clean up.
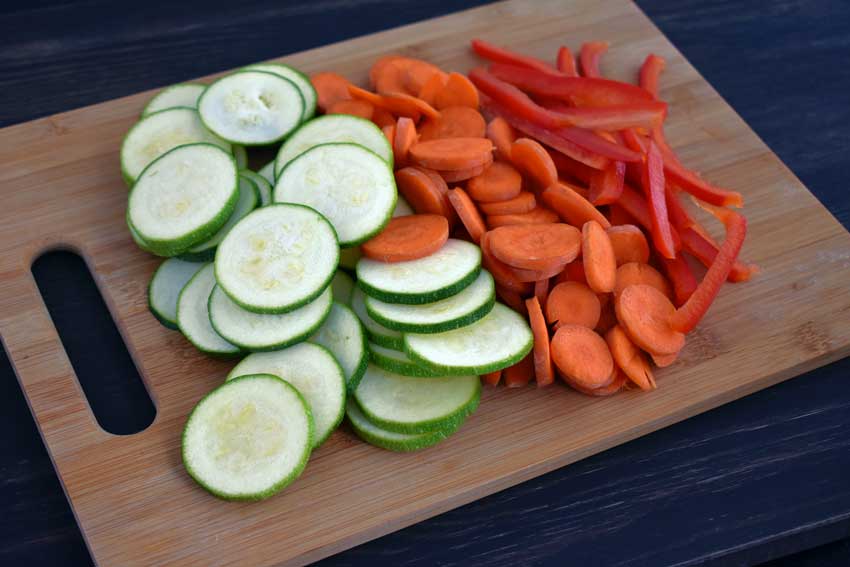
Sliced vegetables
Sliced zucchini, carrots, and red bell pepper

Tuna Steaks with Cucumber-Peanut Salad

Although we live in Florida, we don’t eat a lot of fish. I love it, but my husband is pretty picky when it comes to fish. Tuna is the exception—he loves it. I decided to take advantage of that and give us a little change with this recipe for Tuna Steaks with Cucumber-Peanut Salad. It sounded like something we would both appreciate, and he was all for it when I shared the idea with him. Plus I love the convenience of recipes that include a main and side.

This post was originally published on August 27, 2018. The text and photos were updated on August 1, 2021. The review and rating have not been changed.

Peanuts give the cucumber salad a crunchy contrast, and the fish sauce and lime juice in the dressing complement the tuna.

Recipe Author: Cook’s Country, June/July 2017
Get the recipe

The Ingredients

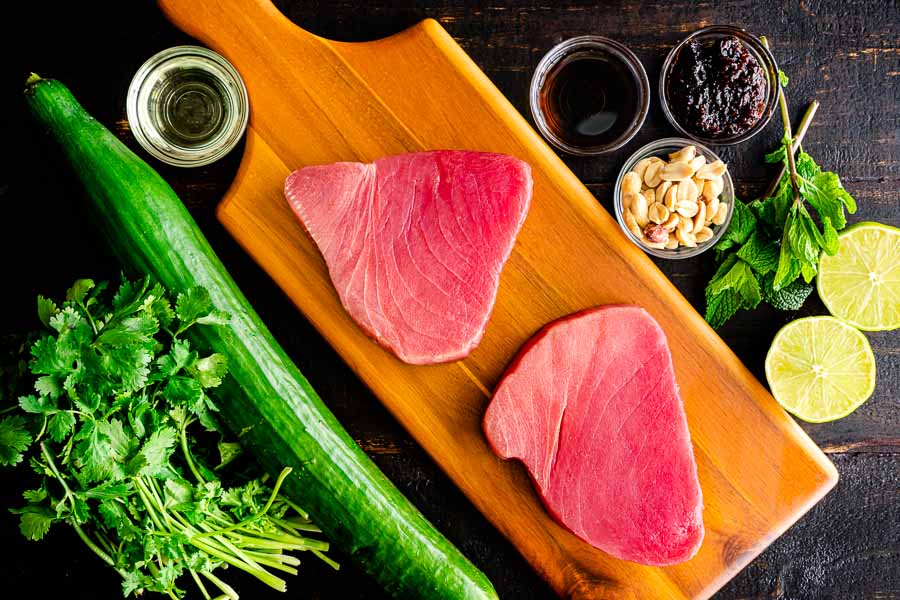
This recipe really didn’t have a huge list of ingredients—just 10 items. I’m sure no one will be surprised that the tuna steaks were the most expensive items at $15.98 for 2. Yes, they were a little splurgy but worth it.

Why 2 when the recipe calls for 4 tuna steaks? We’re a family of 2, and tuna is not something that can be successfully reheated. It overcooks and dries out way too easily for that.

The rest of the ingredients were pretty basic. The only exceptions might be the Asian chili-garlic sauce and the fish sauce. A grocery store with a decent international foods section should have both of those items. Mine did, but I also had both in my pantry.

Tuna Steaks with Cucumber-Peanut Salad Ingredients
Tuna steaks, fish sauce, garlic-chili sauce, roasted peanuts, mint, lime juice, English cucumber, cilantro, and vegetable oil

The Process

I can’t believe how fast and easy this recipe was to make! Most of the work was in prepping the cucumber salad, and that only took 11 minutes. My mandoline came in handy for thinly slicing the cucumber in a blink. I love that thing!

Next was crushing the peanuts. I hate chopping small, hard items like nuts, so I used a different method. I added the measured amount of peanuts to a ziplock bag and crushed them with my meat mallet. It was fast, more thorough, and a lot less messy than chopping.

Once the salad was mixed up, all I had to do was sear the tuna in a nonstick skillet. At 2 minutes per side, I had beautifully done tuna steaks. They were done just the way my husband and I like: seared outside, rare inside, and perfectly juicy.

The total time for this recipe was a mere 15 minutes. That’s for the salad and tuna!

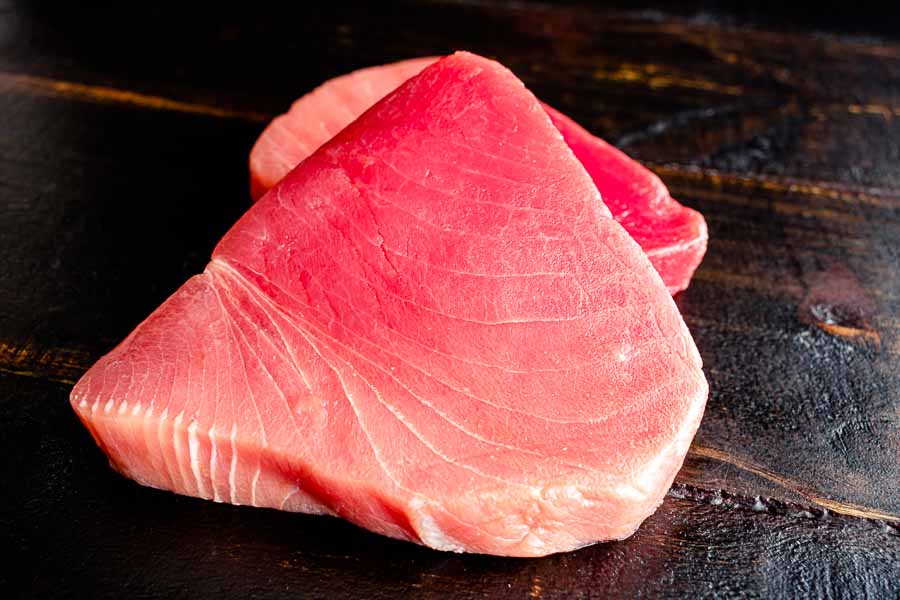
Raw tuna steaks
Raw tuna steaks

Smashed Blackberry & Goat Cheese Toasts

The Eggplant and Goat-Cheese Sandwiches with Tomato Tarragon Sauce recipe I recently made reminded me how much I love goat cheese, so I found this Smashed Blackberry and Goat Cheese Toasts recipe impossible to pass up. I’m pretty much obsessed with blackberries, I’ve never had them with goat cheese and carbs. Bread, I mean bread! So now that my mouth is watering and my tummy is starting to rumble, it’s full to the grocery store. It’s the best time to shop—not!
In many ways toast is the perfect food. Quite literally a blank canvas, there’s no limit to the number of fantastical concoctions you can create. And while the internet is bursting with all sorts of toast ideas, there isn’t one like this. Because these smashed blackberry & goat cheese toasts could be served as a meal, a snack, OR an app! It’s quite possibly the most versatile toast ever, and it’s ready in just 20 minutes.

Recipe Author: Christine at Wry Toast
Get the recipe

The Ingredients

Lots of fresh berries from the produce department, goat cheese from the deli, and fresh bread from the bakery we’re on my shopping list this week. Yum! I had the basics like vanilla, sugar, and cornstarch on hand, but here’s what I paid for the items I had to buy:

  • $ 3.49 blackberries
  • $ 3.49 blueberries
  • $ 2.29 mint
  • $ 2.99 bread
  • $ 3.29 goat cheese
  • $15.55 Total

I got 7 blackberry and goat cheese toasts out of this, which that came to $2.22 each, not counting the items I already had. It seems a little pricey, but I did have leftover blackberries, blueberries, mint, and bread. Not so bad as long as I can find a way to use the leftovers.

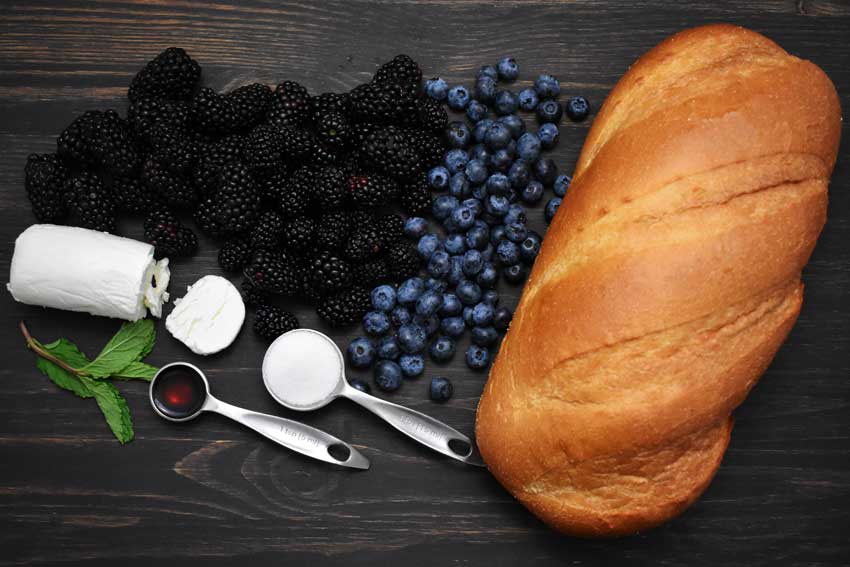
Smashed Blackberry & Goat Cheese Toasts Ingredients
Blackberries, blueberries, bread, sugar, vanilla extract, and goat cheese

The Process

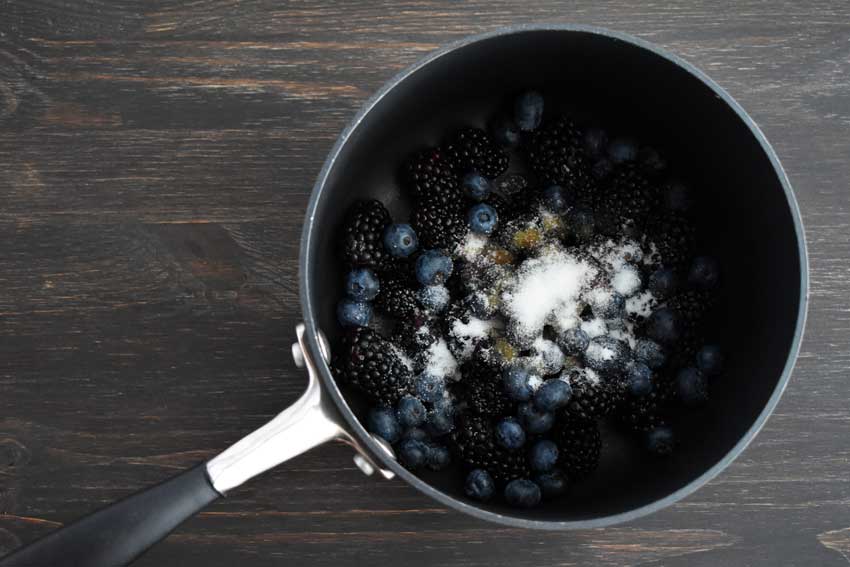
These blackberry and goat cheese toasts were very simple and quick. Like 14 minutes quick. While I let the berries, sugar, and vanilla warm in a saucepan, I sliced and toasted the bread. And not thin slices. Nope, nice inch thick slices.

It was time to assemble my toasts before I knew it. The goat cheese was a little problematic because although it’s soft, it doesn’t spread well. Think butter that’s too cold—you smash the bread trying to spread it evenly. To make it spreadable, I put a few slices on a cutting board and used a butter knife to mix it to a smooth and creamy texture. Spreading it onto the toast was much neater and easier after that.

Then I topped my goat cheese toasts with the thick blackberry mixture (courtesy of 2 teaspoons of cornstarch), sprinkled on some tiny mint leaves, and voila! Lovely blackberry goat cheese toasts for lunch with some leftover for breakfast the next morning. And dessert. This recipe is versatile like that!

Berry compote ingredients
Getting ready to simmer the fresh berries, sugar, and vanilla

Steak and Veggies Sheet Pan Dinner

Every once in a while I have a craving for a steak, and this week was one of those occasions. Steak usually means grilling, but it’s just been either too hot or rainy. Neither are great for being outside. Oh, and my grill is still broken. Steak and Veggies Sheet Pan Dinner to the rescue! One pan, no outdoor grilling, sides are included, and it’s ready in about 30 minutes.

Perfectly seasoned sirloin steak, tender asparagus, and cherry tomatoes prepared together on just one sheet pan. SO easy and SO darn delicious!

Recipe Author: Katerina Petrovska at Diethood
Get the recipe

The Ingredients

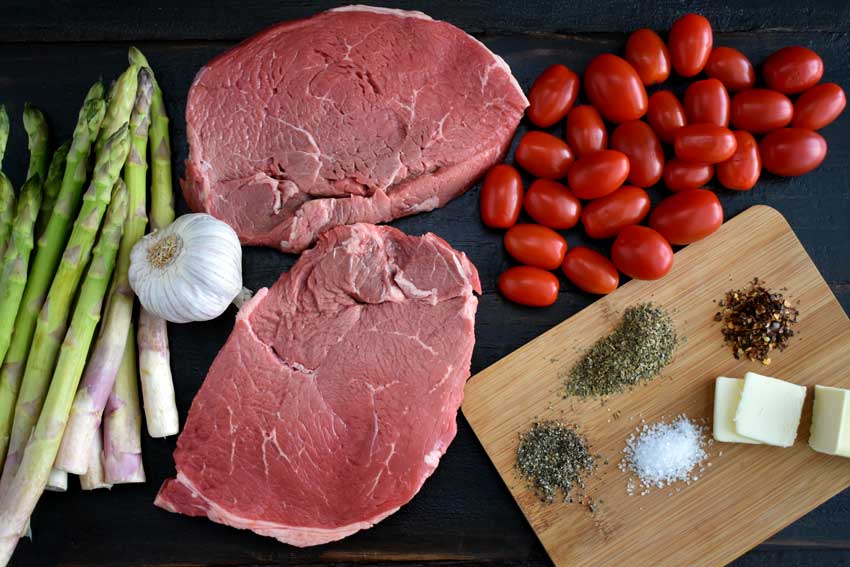
This is a simple sheet pan dinner recipe, and the list of ingredients reflects that. I had most of the ingredients on hand (basil, red pepper flakes, salt, pepper, butter, and garlic), so I only had to pick up the meat and vegetables. Unsurprisingly, the steaks were the most expensive part of the meal at +/-$7 each. The items I had to buy came out to $21.95 or just under $5.50 per serving. Not bad at all for a steak dinner!

Steak and Veggies Sheet Pan Dinner Ingredients
Steak, garlic, asparagus, cherry tomatoes, basil, red pepper flakes, salt, and pepper

The Process

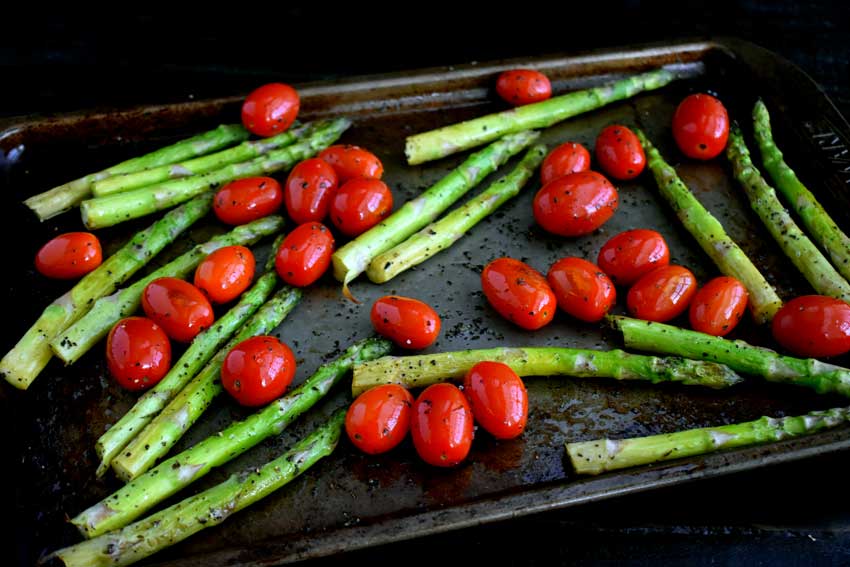
This might be the easiest steak dinner I’ve ever made. Total time was 30 minutes, and 9 minutes of that was prep work and waiting for the oven to preheat. I had the vegetables and steaks seasoned and the basil garlic butter blended by the time my oven reached 400 degrees.

One thing I found helpful that wasn’t listed in the instructions was my olive oil sprayer. I tried drizzling the olive oil over the vegetables then mixing them on the sheet pan, but I didn’t think they were coated thoroughly enough. A quick spray of olive oil took care of that, and my vegetables didn’t dry out.

I also skipped garnishing the cooked meal with extra basil and red pepper flakes. I felt the amount of basil the recipe called for would be plenty since dry herbs are more potent than fresh. And I also used the full 1/2 teaspoon of red pepper flakes on the steaks (1/4 teaspoon per side).

Otherwise, I followed the instructions for this sheet pan dinner as listed. I don’t think my vegetables charred as much as the ones in the original post, but they were still cooked through.

Par-roasted asparagus and cherry tomatoes

Mint Limeade Fizz

Growing up in Florida has its benefits, and one of my favorites was summer vacations to The Colony in Sarasota. It was a lovely resort on the Gulf of Mexico I visited with family many summers. Sadly, The Colony has been closed for several years, but I still have many fond memories. One of those was the fizzy limeade served by the pool. It was magical to me because it was so sweet and refreshing, and I’ve never had anything like it since. Plus I totally felt like a grown-up ordering it from the poolside bar. It immediately came to mind when I happened upon this Mint Limeade Fizz recipe. Summer is in full swing here, and nothing could be better than a fizzy limeade!

This mint limeade fizz is refreshing, citrusy, bubbly, and most definitely the drink of the summer!

Recipe Author: Bita at Honest & Tasty
Get the recipe

The Ingredients

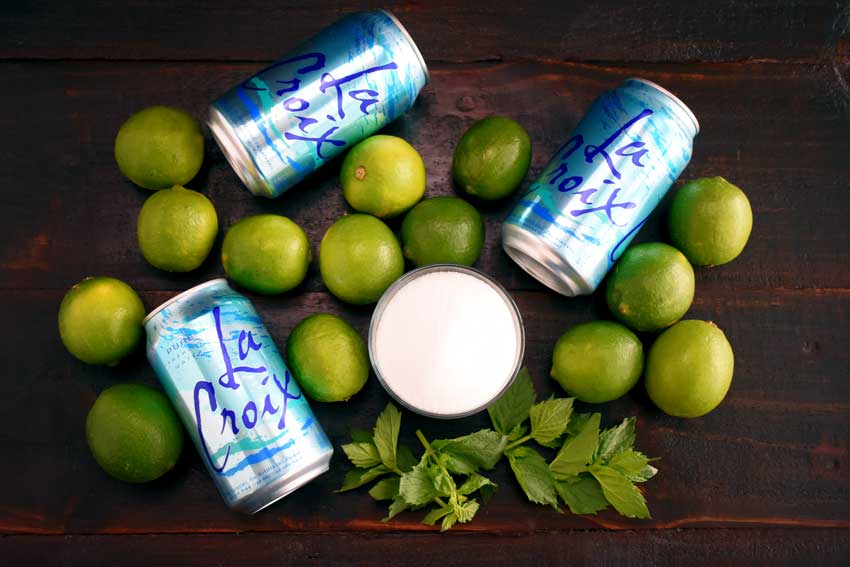
There are no surprises here, and nothing outrageously pricey or hard to find. The short list of ingredients is exactly what you think it should be: carbonated water, limes, mint, and sugar.

Most of the equipment is very basic, but one thing you’ll definitely want is an electric juicer. The recipe says juicing 5-9 limes will give you the necessary 1 cup of lime juice, but I needed 12. Juicing that many limes by hand? No thanks!

Mint Limeade Fizz Ingredients
Limes, carbonated water, mint, and sugar

The Process

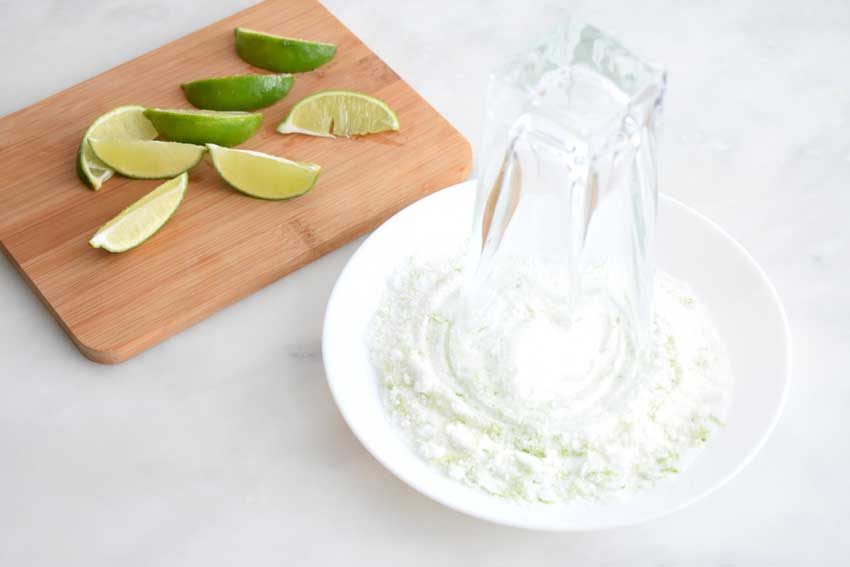
The instructions for this recipe are clear and easy to follow, from making the syrup to rimming the glass and mixing up the limeade. It did take me slightly longer than the 15 minutes listed (18 minutes), but I still consider this a quick recipe.

This recipe made me experiment to find the flavor I liked best. I ended up making it twice, and here is how it went both times.

My First Try

I made the recipe almost exactly as instructed and started off with 1/4 cup of the rich simple syrup. The limeade was very tart, and upping the simple syrup to a 1/2 cup tasted much better to me.

The only way I deviated from the instructions was by not muddling the mint. It was already sliced and there was no need to muddle it since slicing already released the oils/flavor. However, I didn’t taste the mint at all in my drink. I wanted to fix that, so I gave it another try a few days later.

My Second Try

This time I wanted to taste the mint, so I got crafty. I added the sliced mint leaves to the lime juice and let it steep for 2 hours to infuse it with the mint flavor. Then I strained out the mint leaves and made the limeade per the directions. That did the trick and gave me limeade with a subtle mint flavor. It might sound like an odd pairing, but I preferred the minty version.

Rimming the glass with a mixture of sugar and lime zest

Grilled Eggplant and Spinach Salad

0

As I mentioned in my last post, I let my husband choose this week’s recipes, and he wanted vegetables. The Easy Tuscan Bean Soup I just made was a terrific start, and now we have his second choice: Grilled Eggplant and Spinach Salad. I’m not really a salad person, but I love spinach and eggplant. The fresh herbs and tahini-based dressing all sound good too, so I’m excited about a salad. There’s a first time for everything LOL!

This grilled eggplant and spinach salad makes a wonderfully fresh, healthy, and filling warm weather meal. The eggplant is smoky and delicious, and the smoked paprika in the lemony dressing enhances its flavor even more.

Recipe Author: Natasha at Salt & Lavender
Get the recipe

The Ingredients

I’d say I had to buy a little over half of the ingredients for this recipe. Most of that was the produce and fresh herbs, none of which were overly expensive or hard to find. My local grocery store even stocks tahini, and that was the priciest ingredient at around $8. But I now have a good sized jar of tahini left over to use in future recipes. I’m more than okay with that.

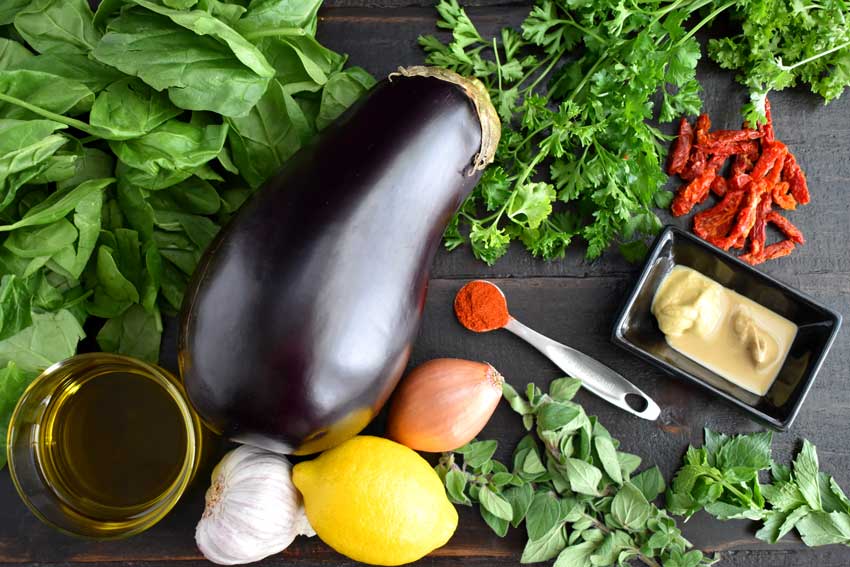
Grilled Eggplant and Spinach Salad Ingredients
Spinach, eggplant, parsley, sun0dried tomatoes, dijon mustard, tahini, mint, oregano, smoked paprika, shallot, lemon, garlic, and olive oil

The Process

My Grilled Eggplant and Spinach Salad wasn’t difficult to make, but I did hit a snag with my grill. I could hear and smell propane leaking when I opened the tank’s valve. It was turned off quick–I was not about to hit the ignition button. We’ll need to get that fixed ASAP. In the meantime, it’s a good thing I have a grill pan for my stove!

So back inside I went and began heating my grill pan while I did the prep work. I had to fry the eggplant in 2 batches, and each batch took 5-7 minutes per side. The eggplant did char nicely on the outside, but I smoked up the whole downstairs. Ah, the wonders of an open floor plan… And my mistake for using olive oil. I should have stuck with plain old vegetable oil.

Besides the issues with my grill and the indoor smoke, the rest of this recipe went very smoothly. I will warn you that the cooked eggplant is fragile, especially when it’s hot, so be sure to let it cool before you cut it into quarters.

It wasn’t listed as a requirement in the recipe, but I used my mini-prep to blend the dressing. I’ve found it to be the best way to thoroughly blend salad dressing. It breaks up the minced garlic a little more and keeps the oil from separating as fast as whisking.

Even with having to fry my eggplant on the stove in 2 batches, my Grilled Eggplant and Spinach Salad was ready in 35 minutes. It only took 5 minutes more than listed on the recipe. I think that was because I was able to prep the rest of the ingredients while the eggplant cooked. I would not have been able to do that if I had to grill the eggplant outside.

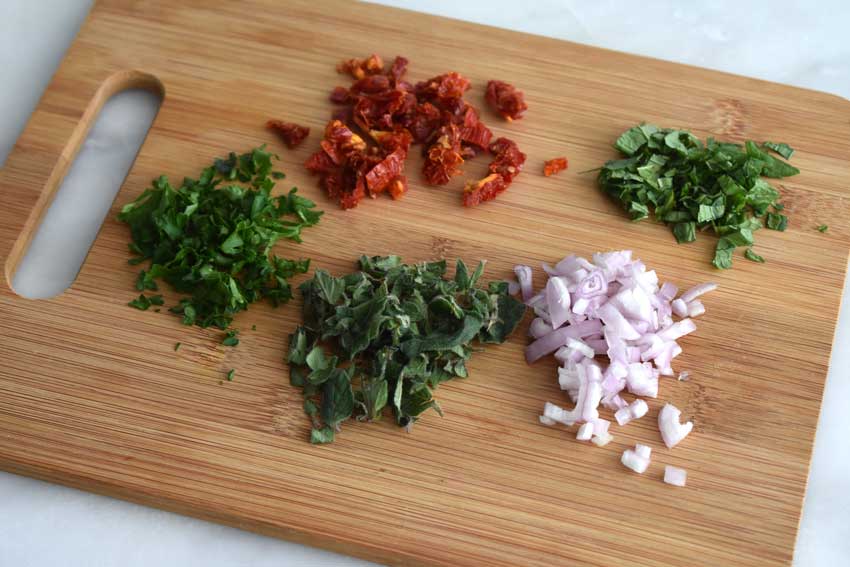
Chopped herbs
Chopped parsley, sun-dried tomatoes, mint, shallot, and oregano

Easy Tuscan Bean Soup

0

This week I decided to try something different by letting my husband pick my theme and recipes. I wanted a different perspective so I don’t keep making the same thing over and over, and I sure got it. This week will be chock full vegetables with a side of fruit without any meat or seafood in sight. But don’t despair–he chose recipes that sound like they will be filling and full of deliciousness! First up is a hearty Tuscan bean soup that is ready in about 30 minutes. Mmmmm!

This easy Tuscan bean soup is the perfect meal for stormy weather and busy weeknights!

Recipe Author: Anetta at Wanderlust Kitchen
Get the recipe

The Ingredients

The list of ingredients for Tuscan bean soup was long, but don’t let that intimidate you. I had a few things like the spices, sugar, and vinegar in my pantry, and that shortened my grocery list a bit. I mainly had to shop for the vegetables with a few items from the canned foods aisle.

A nice surprise was how inexpensive all the fresh food was. Most items were around a dollar. In fact, the Parmesan cheese was the most expensive item at $3.50, and it was just a garnish. It’s not even on the list of ingredients, and I only knew to add it after reading the author’s blog post.

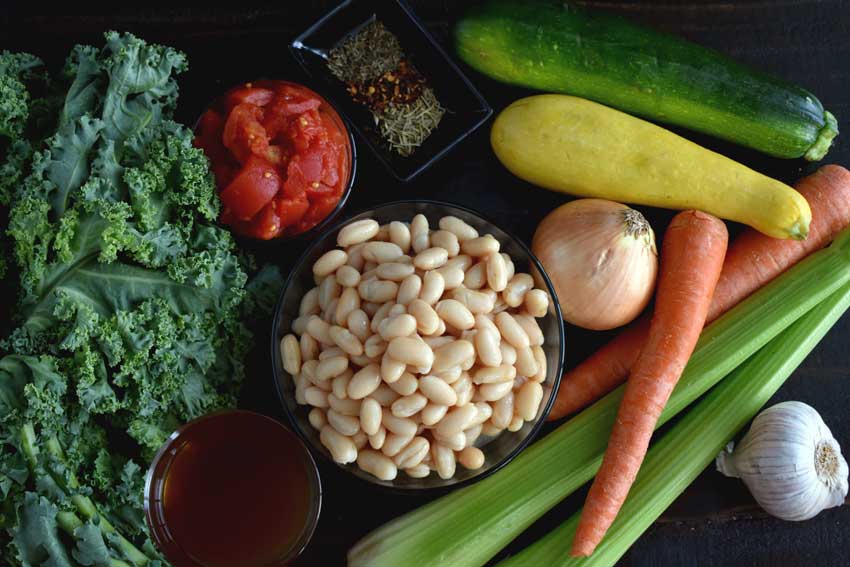
Easy Tuscan Bean Soup Ingredients
Cannellini beans, vegetable broth, kale, chopped tomatoes, thyme, red pepper flakes, rosemary, zucchini, summer squash, yellow onion, carrots, celery, and garlic

The Process

My Tuscan bean soup was pretty easy to make, but it did take slightly longer than the 30 minutes listed on the recipe. Mine took 37 minutes, and the extra time went into the prep work, but I expected that. The author explains in her blog post that she used an attachment for her stand mixer to quickly chop the vegetables. I don’t have a stand mixer, so I used my trusty vegetable chopper instead.

The cooking part went very smoothly, and I was pretty effortless up to the part where I had to blend the soup. It wasn’t difficult, but I had to be very careful while ladling the hot soup into my blender. There were spills, but it wasn’t too messy. An immersion blender would have made things quicker and easier for sure.

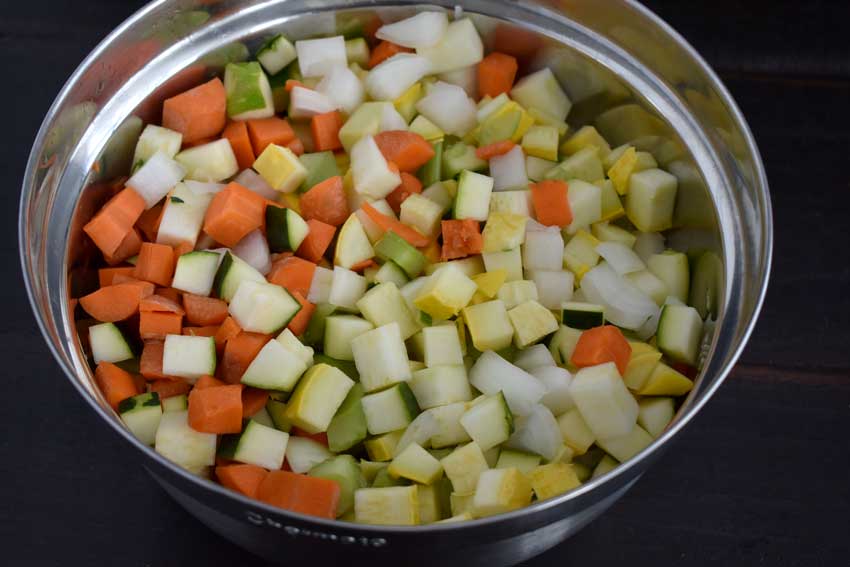
Chopped vegetables
Chopped onion, carrots, celery, zucchini, and squash

Fresh & Light Authentic Lebanese Tabbouleh

Since I had some bulgur wheat leftover from the Lebanese Bulgur with Chicken, Tomatoes and Chickpeas recipe I made earlier this week, I decided to make a classic bulgur recipe: tabbouleh. I use to make it once in a while, but I’ve gotten lazy and buy it premade when I crave it. But fresh is always better, at least in my book, so I printed this recipe, hit up the produce department, and got cooking. Or mixing since there’s no actual cooking involved. You get the idea!

This post was originally published on August 9, 2018. The photos were updated on December 5, 2021. The review and rating have not been changed.

Fresh & Light Authentic Lebanese Tabbouleh is a lemony, fresh herb salad with juicy tomatoes and nutritious bulgar (fine cracked wheat).

Recipe Author: Christine at Colorful Recipes
Get the recipe

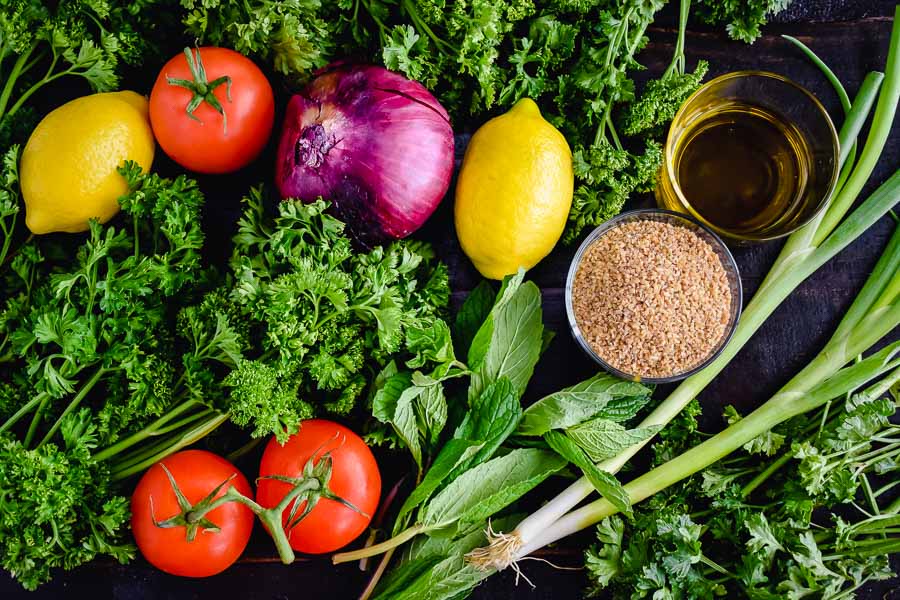
The Ingredients

The majority of the ingredients for tabbouleh are fresh vegetables, so I had to buy almost everything for this recipe. Most everything was inexpensive and easy to find except the bulgur wheat. I had to hunt around the grocery store and finally found it with the breadcrumbs. Not sure of the reasoning there, but the important part was I found it!

Fresh & Light Authentic Lebanese Tabbouleh Ingredients
Parsley, olive oil, bulgar wheat, scallions, mint, tomatoes, lemons, and red onion

The Process

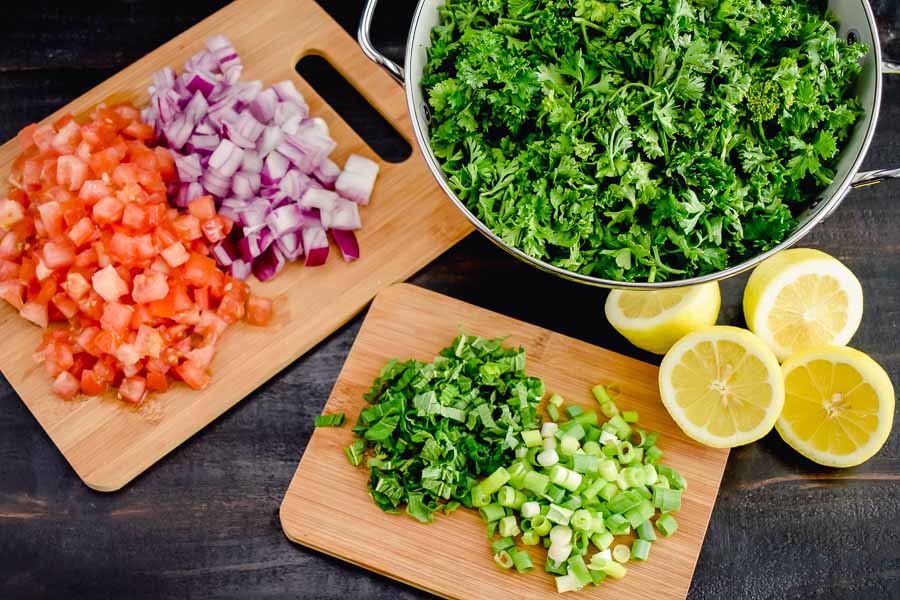
This was a two-part recipe and needed a little planning. The first part was prepping the parsley by removing most of the stems, washing it, and laying it out to dry overnight. I dried my parsley on wire baking racks instead of leaving it on damp paper towels so there would be more air circulation.

The next day was a lot of chopping and assembling my tabbouleh salad. For the most part,  adding everything to a giant bowl and mixing it thoroughly. I spent 30 minutes on this recipe, just as it stated, and that broke down to 15 minutes each day. It really was quick!

One thing to note about the salt was I used coarse sea salt instead of table salt. I know it may sound odd, but it’s not as salty as the finer table salt. You might want to start with half the amount of salt if you use regular table salt. You can always add more if you like.

Chopped parsley, scallions, mint leaves, tomatoes, red onion, and sliced lemons

Lebanese Bulgur with Chicken, Tomatoes and Chickpeas

I’m pretty sure the only way I have ever had bulgur wheat is in tabbouleh. Not that I’m complaining, but it’s always nice to try new things. That’s why I decided to try this bulgur chicken recipe this week. Lebanese Bulgur with Chicken, Tomatoes, and Chickpeas sounds easy, healthy, and filling, all things I love to find in a recipe. Let’s give it a try!

This One Pot Lebanese Bulgur with Chicken, Tomatoes and Chickpeas is the ultimate healthy dish. At only 185 calories and 15 grams of protein per serving, you won’t feel guilty for eating two helpings!

Recipe Author: Hanady Awada at Recipe Nomad
Get the recipe

The Ingredients

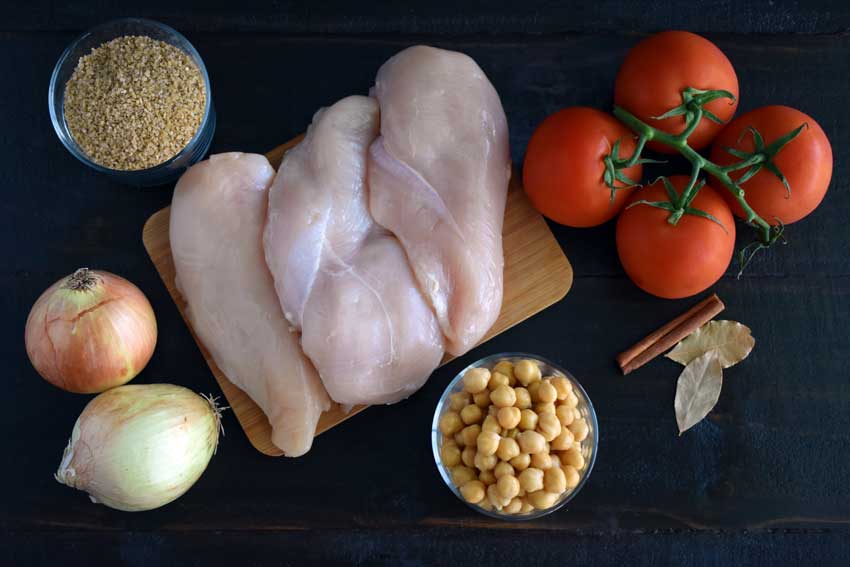
The list of ingredients for this bulgur chicken dish was fairly short, and everything was easy to find. Well, pretty easy. I did have to hunt for the bulgur, but I found it eventually.

As you can see in the picture below, I chose to use chicken breasts instead of drumsticks. This was because my husband prefers them and I thought shredding them would be easier than drumsticks. I’m sure boneless, skinless chicken thighs would work too.

Lebanese Bulgur with Chicken, Tomatoes and Chickpeas Ingredients
Chicken breasts, bulgar wheat, tomatoes, cinnamon stick, bay leaves, chickpeas, and onions

The Process

Making this bulgur chicken dish wasn’t difficult, but it did take a little over an hour (1 hour 8 minutes). That’s because I followed the steps exactly and used one pot to make everything. The author does mention using two pots in her blog post to save time, and I’ll give that a try next time. It should cut the time down by 20 minutes.

I used a 4 1/2 -quart pot to make this dish, and it was just big enough to hold all the ingredients. It was also small enough that the chicken breasts were covered by all the water when I boiled them, but just barely. Next time I think a slightly smaller pot would work better for boiling the chicken. A slightly larger pot would also work for the caramelizing the onions and mixing everything together in the final step (steps 3-5).

Everything went very smoothly, but I wasn’t sure if the stock was supposed to boil away completely after the final 25 minutes of cooking. There was some liquid left in the pot, but the bulgur had absorbed a lot. I spooned the first couple of servings off the top to avoid that extra liquid. The bulgur chicken mixture was moist but not soggy, and the leftovers absorbed the remaining liquid by the next day.

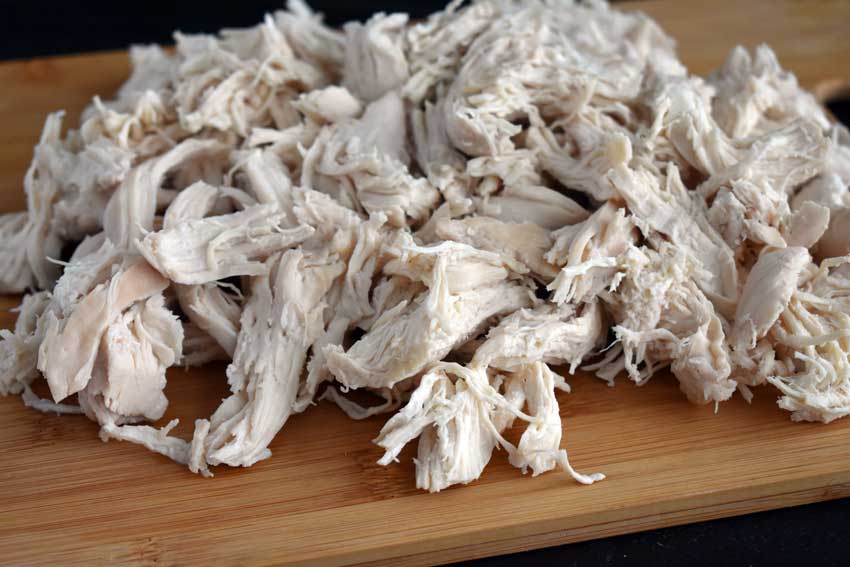
Shredded chicken breasts for bulgur chicken recipe
Shredded chicken breasts

Pakistani Coffee with Cinnamon & Cardamom

I’ve tried iced coffee with cardamom, now it’s time to try it hot as Pakistani Coffee with Cinnamon & Cardamom. I can’t wait! This recipe sounds like it will become my perfect coffee recipe. It’s spiced, creamy, and sweet, which is just the way I like my coffee. Now to set my alarm for an early wake up so I can properly test this recipe’s tasty caffeine powers!

Pakistanis prepare this fragrant coffee in large pots, constantly stirring and pouring from up high to create a frothy mixture. It’s a sociable activity – one that can be found throughout the local shops – and one that clicks through the rhythms of the day.

Recipe Author: Sasha Martin at Global Table Adventure
Get the recipe

The Ingredients

This recipe’s list of ingredients was short and full of things I had in my pantry. All I needed to buy was a quart of milk. I decided to go with regular, full-fat milk since coffee has become a rare treat for me. And dairy milk, for that matter. Sometimes I need to splurge!

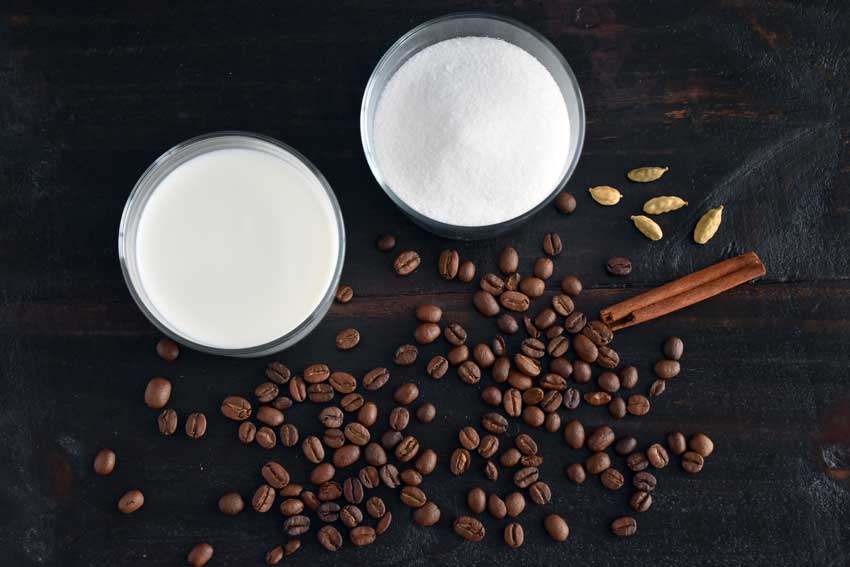
Pakistani Coffee with Cinnamon & Cardamom Ingredients
Coffee, milk, sugar, cardamom pods, and a cinnamon stick

The Process

This Pakistani coffee recipe was very easy to make, and it took exactly 20 minutes as specified. I love it when that happens!

Brewing the Coffee

I made sure to use a nonstick saucepan and stir often because the milk had to be heated with the coffee. I still had some milk residue that stuck to the pan, but it washed away easily because of the nonstick coating.

The amount of sugar wasn’t specified, so I played it by ear. I like my coffee very sweet, and the recipe said it could serve up to 6 people. I added 6 tablespoons of sugar to the pan, and it turned out to be the perfect amount for me.

Ladling the mixture to aerate the coffee was a new technique for me. Making coffee is normally a hands-off type of thing for me as I just add water and wait for it to steep. However, I found that ladling the coffee was oddly soothing, so I went well over the 20 times specified in the recipe.

Filtering the Coffee

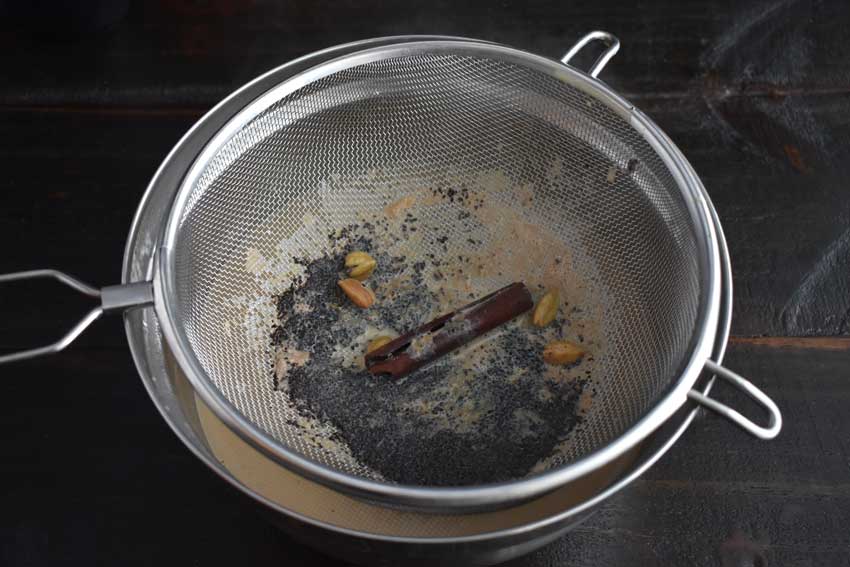
The final step was straining the coffee and did this twice to make sure all the coffee grounds were removed. The first time I used a regular mesh strainer over a small mixing bowl. That removed the large spices and most of the coffee grounds.

Next, I waited a minute or two for the remaining coffee grounds to settle to the bottom of the bowl, then I slowly poured most of the coffee back into the pan until I had about half a cup remaining. Then I added a disposable coffee filter to my mesh strainer to filter out the remaining fine coffee grounds. It worked a treat! No coffee filters? I’m sure lining a strainer with a piece of cheesecloth or even a paper towel would work too.

Straining out the coffee grounds, cinnamon stick, and cardamom pods

Egg and Potato Curry (Anday Aloo Ka Salan)

After starting the week with a Pakistani-inspired recipe, I thought I’d continue the theme with something authentic. This recipe for Egg and Potato Curry (Anday Aloo Ka Salan) sounded so good I couldn’t pass it up. It’s full of vegetables and spices and bound to be a filling, satisfying vegetarian meal. Plus I’ve never tried Pakistani food, and I love trying new things!

A typical Pakistani recipe … Delicious Egg and Potato Curry cooked with onions and tomatoes.

Recipe Author: Ambreen at Simply Sweet ‘n Savory
Get the recipe

The Ingredients

I was thrilled to see all the vegetables that went into this recipe. It’s full of potatoes, tomatoes, and onion, and they’re all easy to find. Most of the spices are too, except the black cardamom pods. I couldn’t find them at a local grocery store so I ordered some from Amazon.

I’ve never cooked with black cardamom, and I found it’s very different from the green cardamom pods I’m used to. Not only do they look different, but they have a more pungent smell. I actually didn’t care for the smell, and I was glad it didn’t carry over into the curry.

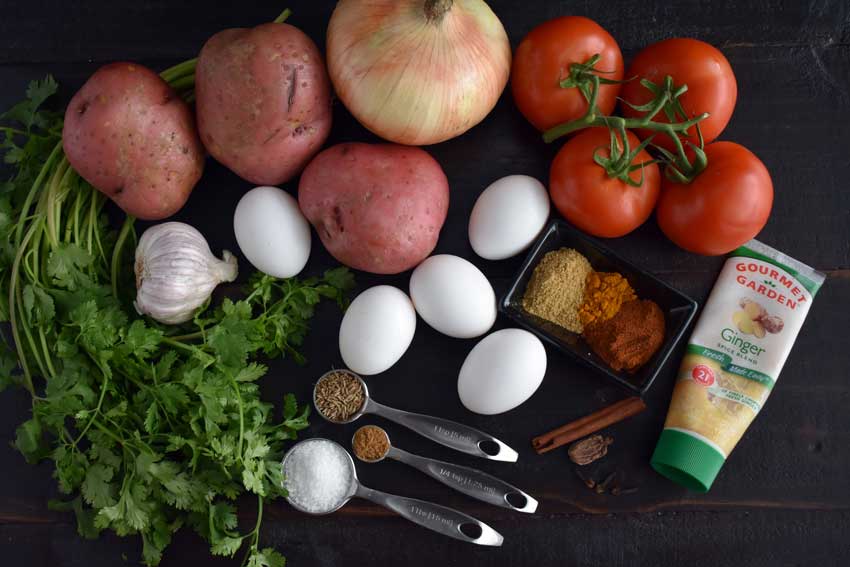
Egg & Potato Curry (Anday Aloo Ka Salan) Ingredients
Eggs, potatoes, onion, tomatoes, ginger paste, coriander, chili powder, turmeric, cinnamon stick, black cardamom pod, cloves, cumin seeds, garam masala, salt, cilantro, and garlic

The Process

This is not a quick recipe, but I thought t was very much worth the time I put into it. I spent 20 minutes doing prep work (mostly slicing, chopping, and peeling vegetables) and 1 hour 5 minutes cooking, for a total of 1 hour 25 minutes. That does not include 20 minutes to hard-boil the eggs plus time for them to cool.

Most of the instructions are very clear, but there was a step that just said to add water without a measurement. I think the amount will depend on the pan you use. I used a 13” skillet and added 1 cup of water.

Speaking of my skillet, the type of pan was never specified. I really guessed here, and the large skillet worked out nicely. The only difficulty I had with it was frying the hard-boiled eggs. I had to roll them around a lot to try and fry them evenly. I didn’t totally succeed and had white, unfried ends, but most of the outsides fried to a golden brown.

Oh, I also made an equipment change. Instead of a blender, I used my food processor. It had a larger capacity than my blender and it’s more powerful. It puréed the vegetables and spices for the sauce in seconds without my needing to stop to stir or scrape down the sides.

Fried hard boiled eggs
Fried hard-boiled eggs

Karachi Masala Lamb Chops

The folks at SeasonalitySpices were nice enough to send me a Sampler of the Month that included their Karachi Masala (Pakistani curry). This stuff smelled so good when I opened it that I just had to find a way to use it immediately! The description in their online shop mentions a couple of ways to use this spice blend, including in a marinade for lamb chops. That was it–I can’t pass up a lamb chop, especially a spicy one. I practically ran to the grocery store to pick up what I needed to create this recipe.

Karachi masala, the typical fiery aromatic escapade from the Sindh region of Pakistan, can boast multiple uses as curry base and a marinade. This vibrant red curry blend is a perfect go-in for Pakistani-style lamb chops. Karachi curry, balancing mustard seed and fenugreek leaves, lives up the full-blown flavor of grounded Kashmiri red chillies.

The Ingredients

The Seasonality Spices Karachi Masala listing mentioned using yogurt and lemon juice as the marinade base, so I started with that in mind. Then I did a little research on spices and flavors that are commonly used in Pakistani food and decided to add some garlic and ginger. Like I said, I love spicy!

Greek yogurt has gotten popular in the past few years, and its what I use when I make marinades. Why? Because the lemon juice thins out the yogurt. Even when it’s thinned out a bit, the thicker Greek yogurt sticks to the lamb chops better than regular yogurt. Could you use plain yogurt if you can’t find Greek yogurt? Absolutely. I can’t detect a difference in the taste, just the texture.

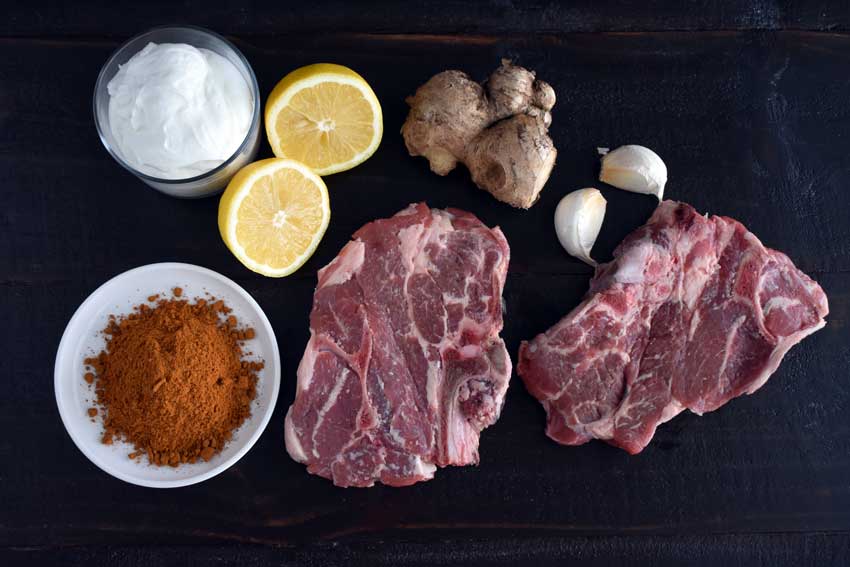
Karachi Masala Lamb Chops Ingredients
lamb chops, Karachi masala, Greek yogurt, lemon juice, ginger, and garlic

The Process

I wanted to make this recipe simple, so I kept the ingredients to a minimum. Just mix up the ingredients, marinate for 8-24 hours, and grill or broil your lamb chops.

The prep work is pretty basic. There are some peeling and mincing involved with the garlic and ginger as well as juicing a lemon, but I promise it’s quick. Not quick enough? You could substitute lemon juice that’s not from concentrate and garlic and ginger paste to make the prep work even quicker (my local grocery store stocks tubes of both in the produce section).

As far as the marinating time goes, my position is the longer the better. If you can make the marinade the night before, then go for 24 hours. If not, make it in the morning and marinate for 8 hours. You’ll still have flavorful lamb chops and an easy meal that evening. Just add a salad to balance the spiciness of the lamb.

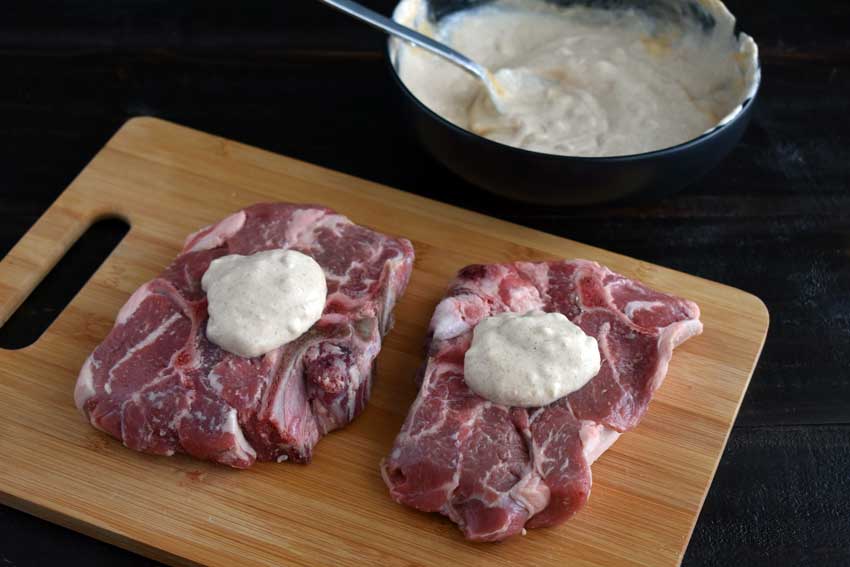
The Karachi masala marinade

The Recipe

Karachi Masala Lamb Chops

Karachi Masala Lamb Chops

These lamb chops are marinated in a spicy Pakistani curry mix that is a treat for the senses. Pair them with a cool side salad to balance the complex and spicy flavors.
Prep Time 8 minutes
Cook Time 11 minutes
Marinate 8 hours
Total Time 8 hours 19 minutes
Course Main Course
Cuisine Pakistani
Servings 2

Ingredients
  

  • 2 lamb shoulder blade chops

Marinade

  • 1 cup Greek yogurt
  • 1 lemon juiced
  • 2 garlic cloves minced
  • 1 tablespoon minced ginger
  • 1-2 teaspoons Karachi masala (Pakistani curry powder) * see notes

Instructions
 

  • In a small bowl, mix together all the marinade ingredients.
  • Add marinade and lamb chops to a ziplock bag or other airtight container. Marinate in the refrigerator for 8-24 hours.
  • Remove lamb chops from the refrigerator and let stand at room temperature for 30 minutes. Discard excess marinade.

To Grill

  • Preheat grill to medium. 
  • Grill lamb chops for 4 minutes per side for medium-rare, keeping the lid closed. Remove from grill and let the chops rest for 3-5 minutes before serving.

To Broil

  • Place oven rack 6 inches from heating element and preheat broiler to high (400℉).
  • Place lamb chops on an oiled broiler pan. Broil chops until each side is nicely browned, 3-5 minutes per side. Remove from the oven and let stand for 3-5 minutes before serving.

Notes

* Karachi masala is a spicy Pakistani curry spice blend available from SeasonalitySpices.
You can use other types of lamb chops, but you may need to adjust the cooking time depending on the thickness.