Home Blog Page 47

Spiced Moroccan Chicken Wrap

This recipe for Spiced Moroccan Chicken Wraps is one that I pinned a long time ago, really wanted to try, but, for some inexplicable reason, haven’t. It sounds ridiculously good and it’s full of things I love. Lots of spices, eggplant, hummus, and flatbread. If I’m totally honest, I think I’m a little intimidated. These spiced chicken wraps look kind of complicated and have a lot of ingredients. But I’m here to try new things and challenge myself, so no more excuses!

For me, the more spices the better, especially when it comes to a simple meal such as a grilled chicken sandwich wrap; and because there are typically only a handful of ingredients in a “portable pal” of this sort, it creates the perfect vessel for those magical powders to heat things up and warm the soul, not to mention the taste buds.

Recipe Author: Ingrid Beer at The Cozy Apron
Get the recipe

The Ingredients

There are quite a few ingredients in this recipe, but most are produce and spices. I had the spices on hand, so shopping wasn’t too bad. The only things I couldn’t find were Japanese eggplant and Roma tomatoes. Instead, I substituted a regular “globe” eggplant and my favorite tomatoes on the vine.

I also decided to buy naan bread instead of pita. I had a feeling these spiced chicken wraps would need larger pieces of bread, and I was right. The pita available would have been way too small to wrap around the filling.
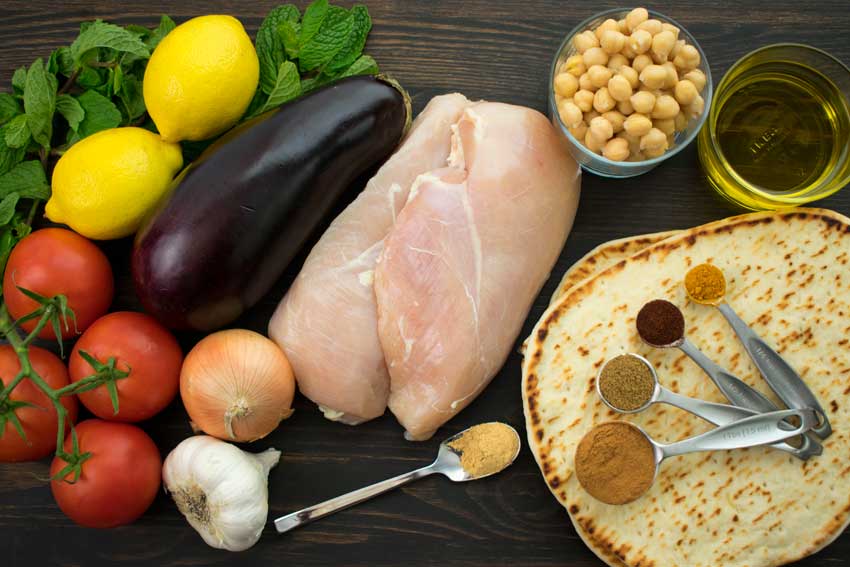
Spiced Moroccan Chicken Wrap Ingredients
Mint, lemon, eggplant, chicken breasts, chickpeas, olive oil, flatbread, turmeric, paprika, cumin, cinnamon, ginger, garlic, onion, and tomatoes

The Process

To get myself past being intimidated by all the steps in this recipe, I decided to break it into pieces. I know it was all in my head, but that really made it seem manageable. Here’s how I broke it down:

  1. Marinating the chicken (8 minutes + overnight)
  2. Blending the hummus (6 minutes)
  3. Grilling the chicken (16 minutes)
  4. Making the chutney (29 minutes)
  5. Assembly (5 minutes)

Day 1

First up was making the marinade. I did this the same way I did the pork souvlaki I made last week. I added all the ingredients to an airtight container, gave it a good shake, then popped it into the refrigerator overnight.

I also made the hummus ahead of time to give the flavors time to meld. It was so easy! All I had to do was put all the ingredients into a food processor, blend, add some olive oil, and blend until smooth. I considered using my mini-prep but I think it would have been too small. Using the food processor was the safer bet.

Day 2

I let the chicken and hummus sit on the countertop and warm up to room temperature while I made the chutney. This was the longest step or all, but it was just half an hour.

I skewered the chicken toward the end of the chutney cooking. Then all I had to do was pop the skewers into the grill pan and rotate them every 2-3 minutes. Finally, it was all ready to assemble, and that was the fastest and easiest part. When it was all said and done, I felt a little silly for letting a long recipe intimidate me. It really wasn’t difficult!
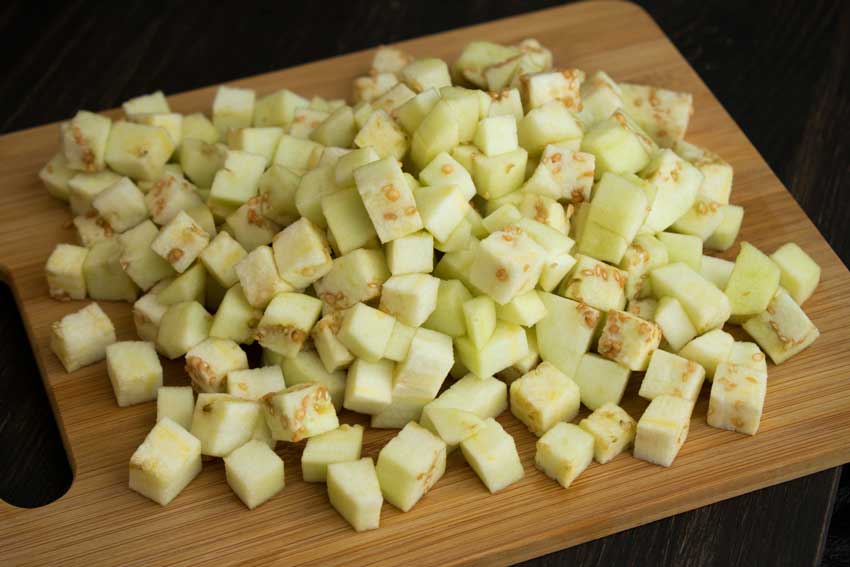
Diced eggplant for the Eggplant, Tomato & Onion Chutney

Rosemary Lemonade

0

My week of Greek-themed food is coming to an end. I loved the pork souvlaki and kale salad, but there was one thing missing from both recipes that I always associate with Greek food: rosemary. Thank goodness I found this Rosemary Lemonade recipe. It’s not exactly Greek, but it does fill that void. And it’s still hot as blazes here, so a nice cold glass of lemonade is always a good thing.

Rosemary lemonade is a refreshing drink with the light and sweet addition of fresh rosemary!

Recipe Author: Aimee at Like Mother Like Daughter
Get the recipe

The Ingredients

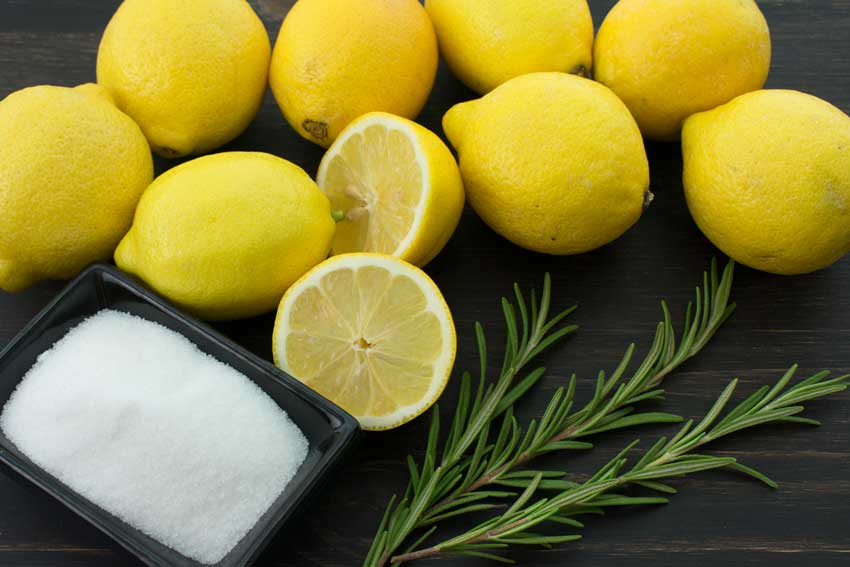
Ready for a short shopping list? This recipe has four ingredients: lemon juice, rosemary, sugar, and water. I had the sugar and water, so all I needed was a bag of lemons and a package of rosemary. Easy peasy!

Rosemary Lemonade Ingredients
Lemons, rosemary, and sugar

The Process

If you can boil water, you can make this rosemary lemonade recipe. The instructions were easy to follow, and all I needed were basic cooking tools and skills. My electric juicer came in handy, but you can definitely go without if you don’t own one.

My rosemary lemonade was made a little quicker than the 40 minutes listed with this recipe. Here’s how long it took:

  • 5 minutes for Steps 1-3 (dissolving the sugar)
  • 30 minutes for Step 4 (steeping the rosemary)
  • 1 minute for Steps 5-7 (making the lemonade)
  • 36 minutes total

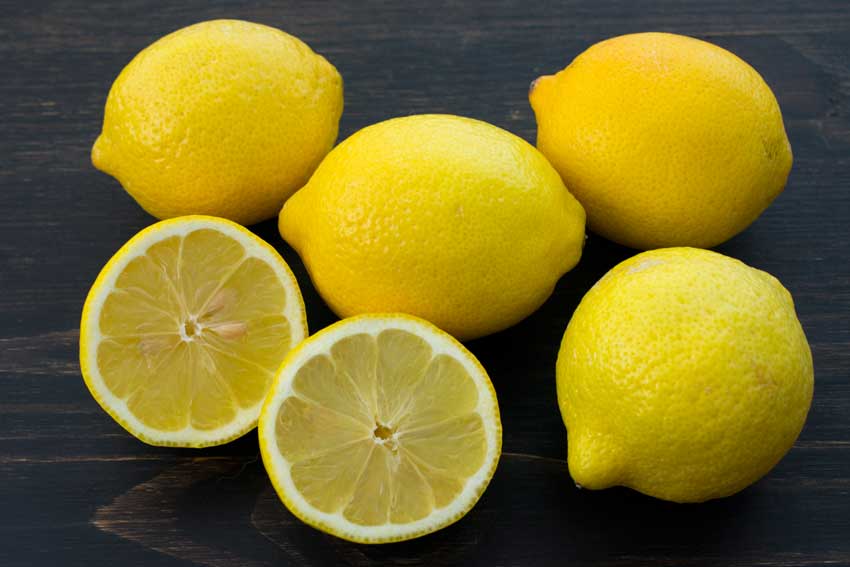
Lemons

Greek Kale Salad with Creamy Tahini Dressing

0

I don’t know about you but I don’t think of kale when I think of Greek salad. But that made this kale salad recipe all the more intriguing! Just the reading the name pretty much convinced me to try this recipe, but then I read the ingredients and had to make it. It’s chock full of tasty things like black olives, sun dried tomatoes, and chickpeas. Is it authentic Greek? Probably not, but I’m still willing to give it a try.

This healthy Greek kale salad recipe is full of bold Mediterranean flavors.

Recipe Author: Kate at Cookie and Kate
Get the recipe

The Ingredients

Most f the ingredients for my kale salad were easy to find. It’s lots of produce, of course, and a few other canned and jarred items. The only thing that might be hard to find is the tahini. Last time I needed tahini, I had to order a jar from Amazon.

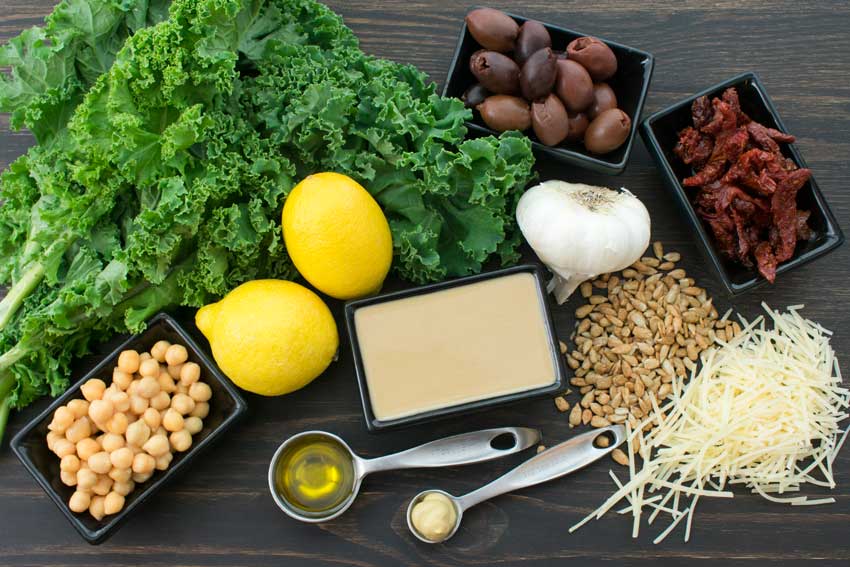
Greek Kale Salad with Creamy Tahini Dressing Ingredients
Kale, Kalamata olives, garlic, sun-dried tomatoes, parmesan cheese, sunflower seeds, tahini, olive oil, dijon mustard, lemons, and chickpeas

The Process

I don’t think I’ve ever had a kale salad, and I was a little worried it would be very bitter. Because of that, I made sure to chop the leaves into small pieces and massage them thoroughly as instructed. It really did make a difference in their flavor.

The rest of the process went smoothly and just as the instructions said it would. The only thing I did differently was to blend the tahini dressing in my mini-prep. Over the years I’ve found it to be the easiest way to blend salad dressing with oil, and it doesn’t separate nearly as fast as it does when I just stir it. No mini-prep? Shaking the dressing in a cocktail shaker or other sealed container would also work.

My times for this recipe matched up perfectly with the times listed:

  • 20 minutes prep
  • 5 minutes to cook (roast the sunflower seeds)
  • 25 minutes total

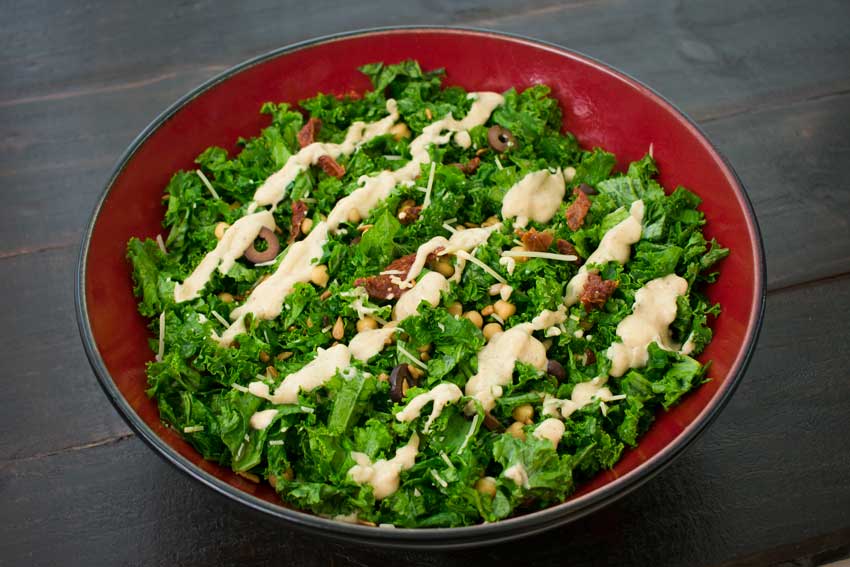
Greek Kale Salad with Creamy Tahini Dressing

Pork Souvlaki With Lemon Rice

Greek food never gets old for me, so it was an easy choice when I decided I wanted to make a pork dish this week. This pork souvlaki recipe sounded easy and delicious, two things I love. And it includes a lemon rice side dish, so meal planning was extra simple.

A simple marinade with the classic Greek flavors of fruity olive oil, lemon and oregano give a tangy, fresh and distinctly Greek taste to grilled pork skewers.

Recipe Author: Heidi at Foodie Crush
Get the recipe

The Ingredients

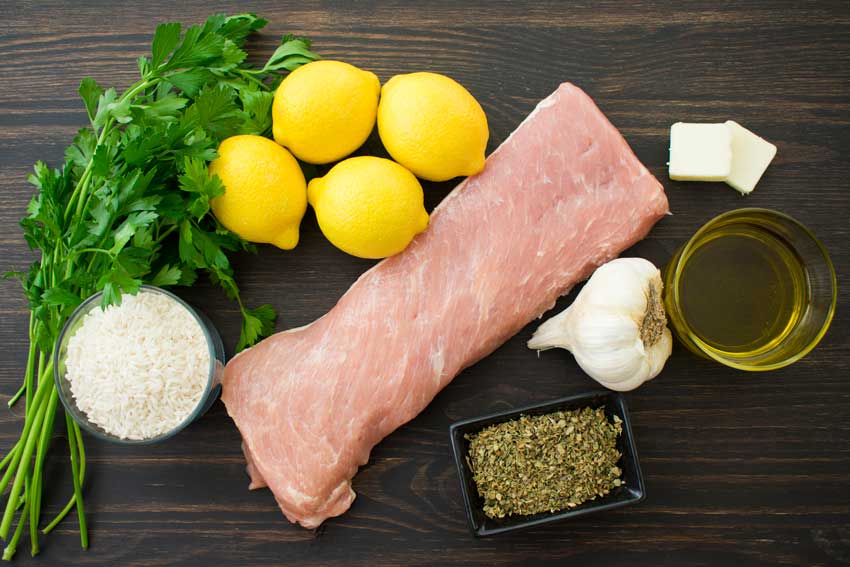
This recipe was full of pretty basic ingredients, so there were no special trips required to find all the ingredients. The most expensive item, unsurprisingly, was the pork tenderloin.

I was looking forward to trying Meyer lemons because I’ve never tried them. Unfortunately, they weren’t available, so I ended up using regular lemons. maybe next time…

Pork Souvlaki with Lemon Rice Ingredients
Pork tenderloin, rice, Italian parsley, lemons, butter, olive oil, garlic, and oregano

The Process

I made this recipe in three parts: marinating the pork, cooking the rice, and cooking the pork. Here’s how long everything took:

  • 20 minutes to make marinade and cube pork
  • 37 minutes to cook pork and rice
  • 57 minutes total (not including time to marinate)

Pork tenderloin is great for kebabs because it’s easy to cube. Just cut it into long strips then into bite-sized pieces. I put the cubed pork into an airtight container with the marinade ingredients, added the lid, and shook the container to mix everything. Super easy, right?

I planned to marinate overnight but ended up marinating for two nights because life has a habit of not going as planned. Fortunately, the recipe author did mention the pork could be marinated for a few days, so no worries there.

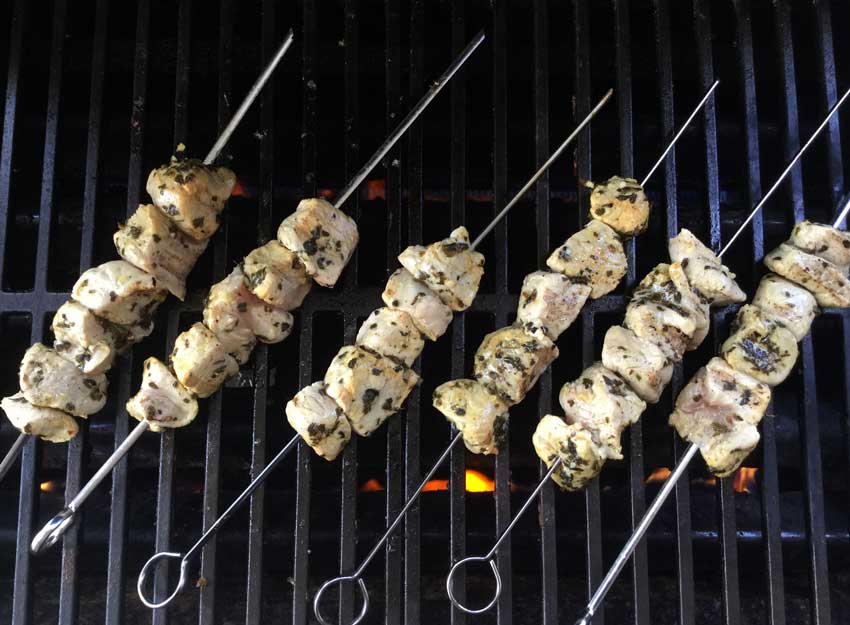
When I was finally able to make my pork souvlaki, I got the rice going first. While it was cooking, I threaded the pork onto skewers and took it outside to grill. The timing was perfect, and the skewers were done just before the rice.

Grilling the pork souvlaki kebabs

Chocolate Stout Blackberry Brownies

0

The end of summer is approaching fast, but there’s still time to enjoy one of my summer favorites: berries. Specifically, blackberries. It’s become clear that I’m obsessed with them, but chocolate and beer are way up there on my list of likes. And what a coincidence that I found a recipe that combines all three in these Chocolate Stout Blackberry Brownies! Pinterest has already shown me that beer and chocolate make good brownies with the Five Ingredient Guinness Brownies recipe I tried a while back. Let’s find out if adding blackberries makes the combination even better!

With ooey, gooey chocolate & ribbons of sweet blackberries, these decadent & rich Chocolate Stout Blackberry Brownies are a chocolate lover’s dream…

Recipe Author: Carrie at Frugal Foodie Mama
Get the recipe

The Ingredients

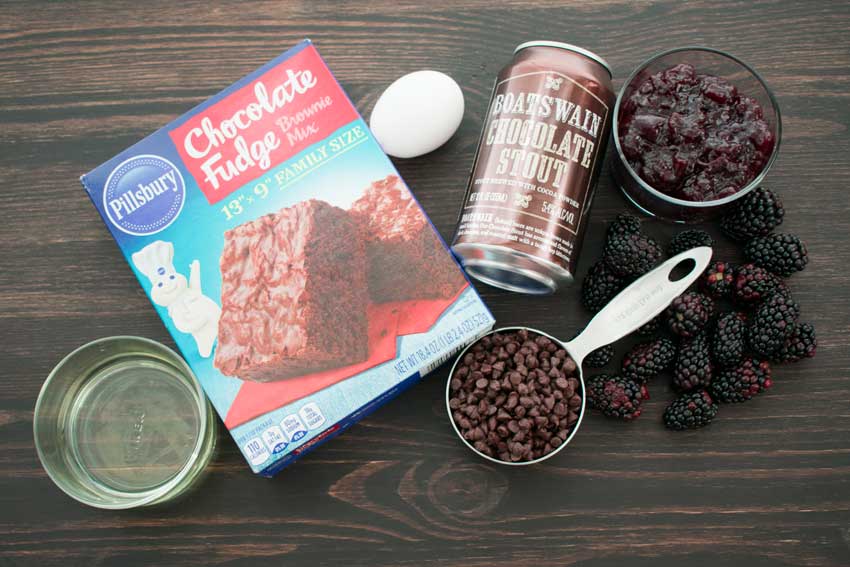
I did have to make a special trip for my blackberry brownies to get the chocolate stout. I don’t get to Trader Joe’s too often, so I made an extra effort for this recipe. The author was right–they have a wonderfully chocolatey chocolate stout.

As you can see, the rest of the ingredients are pretty ordinary items that most grocery stores should have stocked.

Chocolate Stout Blackberry Brownies Ingredients
Brownie mix, vegetable oil, egg, chocolate stout beer, blackberry jam, fresh blackberries, and chocolate chips

The Process

I usually make brownies from scratch, so I randomly grabbed a box of mix off the shelf. Then I noticed it was labeled ’13″x9″ family size’ and the recipe calls for a 9″x9″ pan. I thought I’d have to reduce the amount of brownie mix until a quick google showed me the box was pretty much average size. Oh, and I could have turned it over and seen the adjustments for a smaller pan… Live and learn.

So now that my brownie mix dilemma was solved, it was time to do some baking. The list of ingredients was short, and the directions were clear. Everything went together without a hitch. I took the author’s tip and mashed my blackberries with a bit of the chocolate stout using a potato masher. Unfortunately, I didn’t strain them, and the seeds were kind of irritating (those suckers really get stuck in your teeth!).

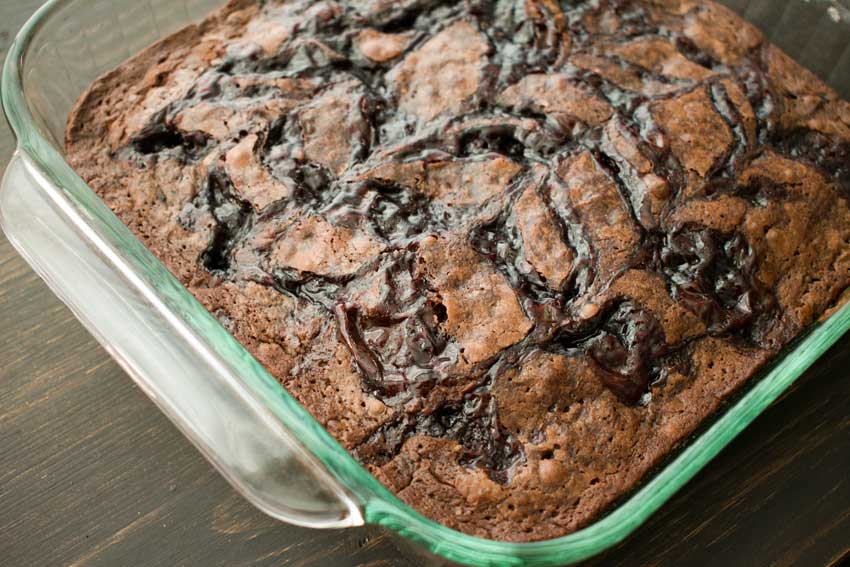
I was especially proud of the nice marbling effect I was able to get. How, you might ask? Here’s how I did it:

  • Heat the blackberry jam in a small measuring cup with a pour spout until it turns to liquid (20 seconds worked for me)
  • Starting at one side of the pan, slowly pour the jam in a zigzagging pattern. Work the zigzag back and forth until you get to the other side of the pan. It doesn’t have to be neat.
  • Also starting at one side of the pan, take a butter knife and drag the tip across (perpendicular) the blackberry jam from left to right. Reverse the direction to right to left for the next row. Keep alternating directions until you get to the other side if the pan.
  • Baking will warp the pattern a little, so don’t worry too much about it being perfectly neat.

Finally, it was time to bake my blackberry brownies. I did deviate from the recipe for this step and followed the instructions on the brownie mix. Specifically, I baked my brownies for 50 minutes at 350 degrees. They came out perfect with a crisp top and gooey center.

Chocolate Stout Blackberry Brownies

Steak Fajita Bowls with Garlic Lime Rice

I always love finding recipes for a whole meal in one and these Steak Fajita Bowls with Garlic Lime Rice sounded too good to resist. Savory skirt steak, tart lime rice, and an array of vegetables and toppings seemed like a complete and delicious meal to me. Plus I liked the idea that everyone could pick and choose what they wanted to add.

Homemade steak fajita bowls with garlic lime rice. These fajita bowls taste even better than the ones at Chipotle! The secret is the homemade marinade for the steak… it is to DIE for!

Recipe Author: Marzia at Little Spice Jar
Get the recipe

The Ingredients

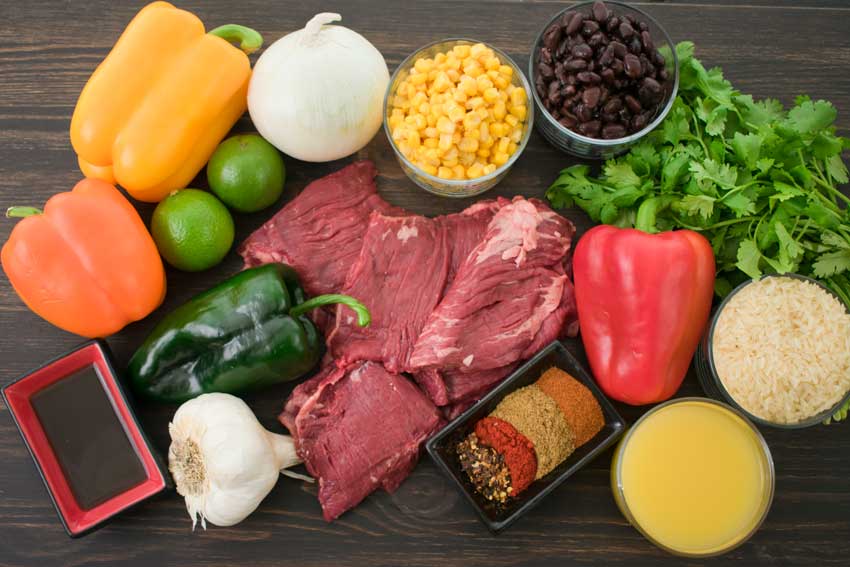
There were a lot of ingredients for this steak fajita bowl recipe, but I didn’t mind. About half of them were for the marinade, and the list didn’t seem so bad once I used those up.

Not surprisingly, the meat was the priciest item on the list. A 1.28-pound package of skirt steak was $20.47. I got 5 servings out of it, though, so it came out to $4.09 per serving.

The rest of the ingredients were inexpensive items like fresh produce, canned goods, rice, spices, and other condiments. I chose things like corn, black beans, salsa, salsa verde, and sour cream.

Steak Fajita Bowls with Garlic Lime Rice Ingredients
Skirt steak, garlic, poblano pepper, Worcestershire sauce, orange bell pepper, yellow bell pepper, limes, white onion, corn, black beans, cilantro, red bell pepper, parboiled rice, and pineapple juice

The Process

This recipe is actually a combination of two recipes: One for steak fajitas, and one for the rice. I wanted to give the steak the maximum amount of time to marinate, so I did that step the day before I planned to serve my steak fajita bowls. Here’s how the time broke down:

  • 8 minutes to prep the marinade (then marinate 2-4 hours or overnight)
  • 17 minutes to prep the rice and vegetables
  • 20 minutes to cook and assemble
  • 45 minutes total (not including time to marinate)

Day 1: The Marinade

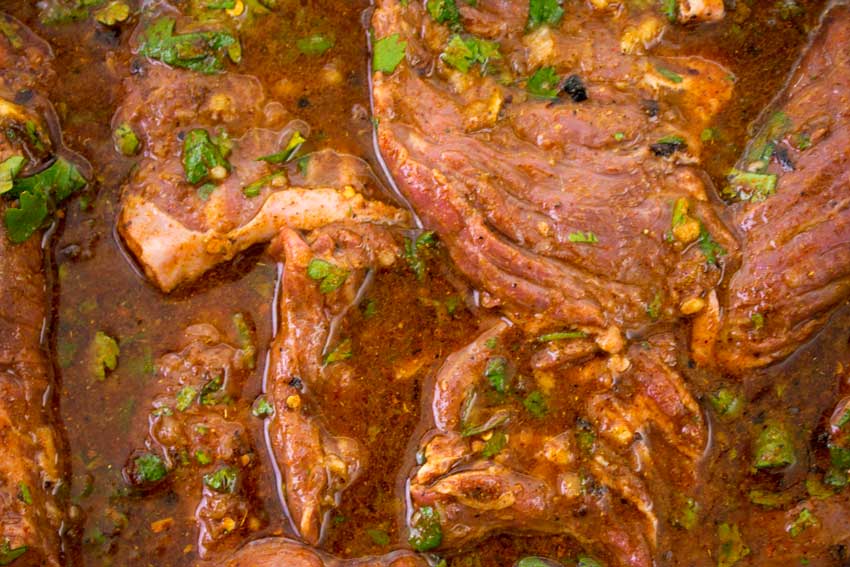
This step was quick and easy. I combined all the marinade ingredients in an airtight plastic container and shook them to blend. Then I added the skirt steak, flipping each piece to make sure it was well coated and popped the container into the refrigerator.

Day 2: Cooking and Assembly

The next day was all about prepping the vegetables and cooking everything. I brought the steak out to warm up to room temperature, rinsed the rice, and left it to drain while I cut up the vegetables and did the rest of the prep work.

Then I got the rice started and moved onto the steak and vegetables while it cooked. I cooked the steak up in my grill pan then moved it to a plate covered in foil so it could rest while the vegetables cooked. Everything went according to the directions except the vegetables. I prefer them to be on the softer side, so I cooked them for 5 minutes instead of 2-3.

After that, it was just a matter of assembling the bowls to everyone’s liking. That part was easy since it’s just the two of us, but I can see this being great for families or groups with picky eaters. There’s literally no wrong way to assemble your bowl!

Marinating skirt steak
Marinating the skirt steak

Tropical Painkiller

0

My week of Caribbean food is ending, and I think the perfect way to finish it is with a rum cocktail. This recipe for a Tropical Painkiller looked and sounded perfect. Garnishing it sounded like an opportunity to get creative, which I couldn’t pass up. Plus the list of ingredients sounded deliciously tropical: coconut milk, pineapple juice, orange juice, and dark rum. Can’t you just imagine sipping it on a tropical beach or poolside? I sure can!

Fill cocktail shaker about half full with ice cubes. Add all ingredients, seal and shake….. Pour into a small cocktail glass filled with ice and serve….. Now kick back, relax, and most importantly, forget that today ever happened!!

Recipe Author: Lisa at Cooking with Curls
Get the recipe

The Ingredients

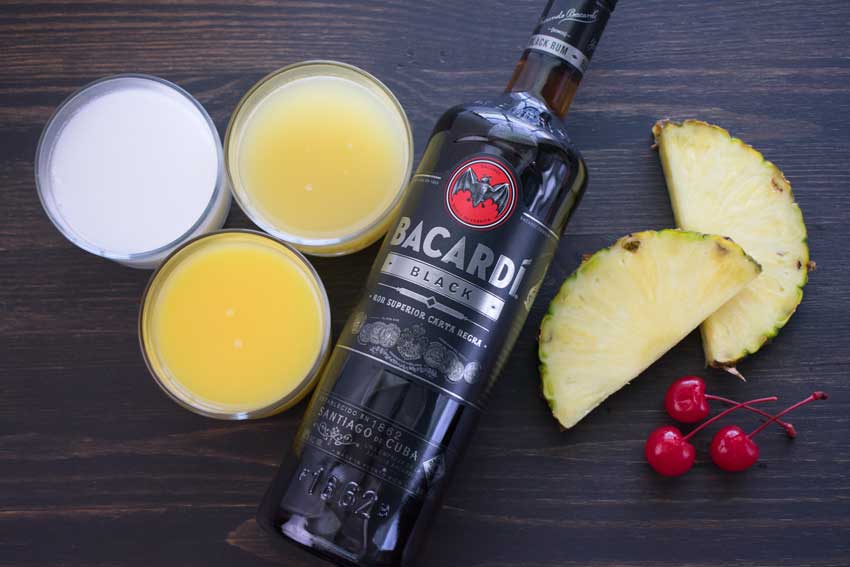
The ingredients for this recipe were pretty basic, but the author was very specific about the type of coconut milk to use. She recommended using boxed rather than canned, and I can understand why. Canned coconut milk separates quickly, leaving the fatty coconut cream floating on top of the coconut water.

I’ve never used unsweetened boxed coconut milk, but I assumed it would not separate, and I was right. Unfortunately, it was very watery and didn’t have much of a coconut taste once mixed into my cocktail. I decided to try Coco Lopez Cream of Coconut, the gold standard of cream of coconut, for my second try. It’s richer, sweetened, and it made a huge difference in taste.

Tropical Painkiller Ingredients
Dark rum, orange juice, coconut milk, and pineapple juice

The Process

Mixing up my tropical painkiller was a straightforward process, and the only special equipment needed was a cocktail shaker. I had my drink made and garnished in 4 minutes, and a good portion of that was making the garnish. It was totally optional but really, really pretty.

Caribbean Rice and Beans

0

My week of Caribbean food continues with a new version (for me) on a food I will always adore: Rice and beans. I’ve had versions from various regions of the Caribbean and Southern U.S., but I don’t think I’ve ever tried it with coconut milk. Of course, it’s possible I have and didn’t know it, but I highly doubt it. Reading this Caribbean Rice and Beans recipe was a Doh! moment because coconut makes everything better in my book, so why not beans and rice? You know I had to give this one a try!

Seasoned with garlic, onions and creole spice. Infused with bay leaves, thyme, Scotch bonnet and coconut milk.

Recipe Author: Imma at African Bites
Get the recipe

The Ingredients

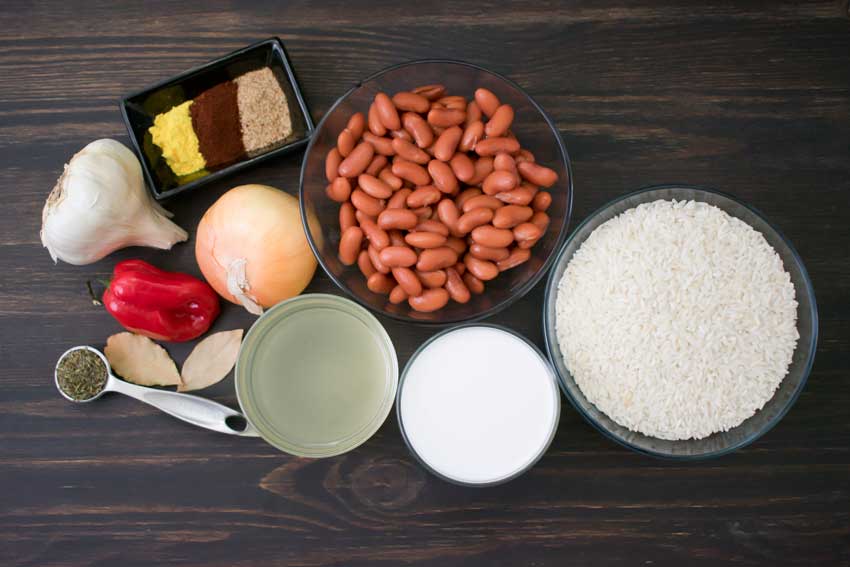
The list of ingredients for this Caribbean rice and beans recipe wasn’t too long, and I had several items on hand. There were a few choices to be made, and here’s what I decided:

  • Canola oil instead of vegetable oil (because I had it on hand)
  • 3 garlic cloves instead of 2 (because I love garlic)
  • Prepared creole seasoning instead of homemade (because I had it on hand)
  • Dried thyme instead of fresh (because I had it on hand)
  • Chicken broth instead of water (for more flavor)
  • And I added the optional chicken bullion and paprika (for more flavor)

I had to buy a few items (onion, coconut milk, kidney beans, chicken broth, and the scotch bonnet pepper), but they were all easy to find and inexpensive staple items.

Caribbean Rice and Beans Ingredients
Kidney beans, rice, coconut milk, chicken broth, bay leaves, dried thyme, scotch bonnet pepper, onion, garlic, chicken bouillon powder, paprika, and creole seasoning

The Process

I have to say this recipe was pretty easy to make. It took exactly 35 minutes, just as listed on the recipe. The directions were easy to follow, but there were a couple of things that almost tripped me up.

First, the recipe gives you the option of using water or chicken broth as the liquid. Step 2 specifies water, so be aware of that if you are using broth. I added 1 cup of water before I realized that and then used chicken broth for the remaining 2 cups.

Second, the recipe notes give you the option of using more water/broth to get a creamier consistency. The quantity listed with the ingredients is 2 1/4 cups, which is for the less creamy version. However, the quantity in Step 2 is 3 cups, which is for the creamier version. I intended to cook the less creamy version and ended up with the creamy one (the creamy version was incredible, BTW).

Other than that, things went very smoothly. I did watch and stir my Caribbean rice and beans throughout cooking instead of just setting it on simmer and waiting for the timer to go off. I suppose that makes it more work than regular rice, but it was worth it and then some.

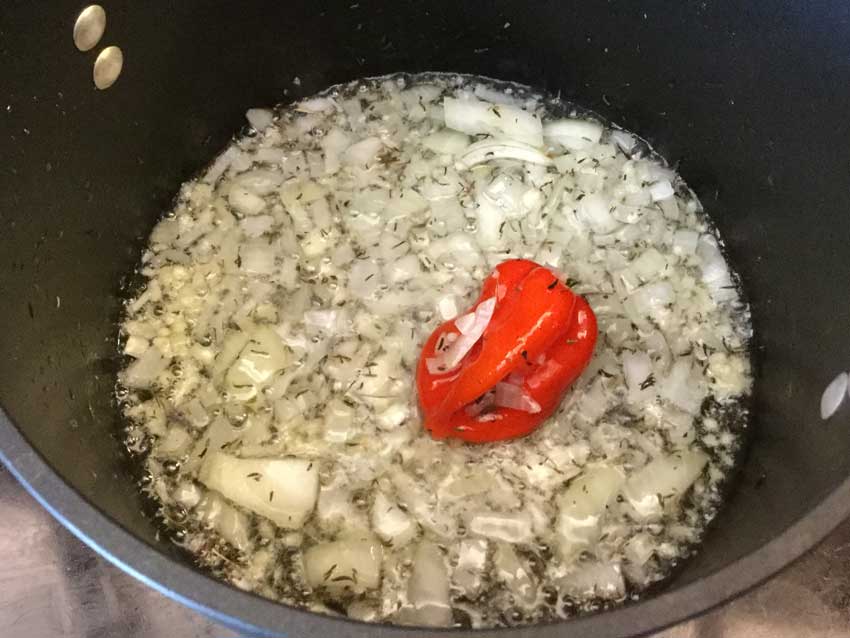
Sautéing the onions, garlic, thyme, and hot pepper

Caribbean Chicken

0

This week is all about Caribbean food, something I have a deep love for. My dad was from Nassau, and I grew up cooking and eating Bahamian recipes. As I grew older, I’ve found Caribbean food, in general, is always delicious. Seriously, I’ve never tried a dish I didn’t like! So after searching through my Pinterest boards, I found my first dish: Caribbean Chicken. From the comments on the original post, this is a Western Caribbean dish called stew chicken and most famously from Trinidad, although a few other islands were mentioned.

This is another one of my favorite chicken recipes, Caribbean Chicken. It is super tasty and always a hit with everyone.

Recipe Author: Miryam at Eat Good 4 Life
Get the recipe

The Ingredients

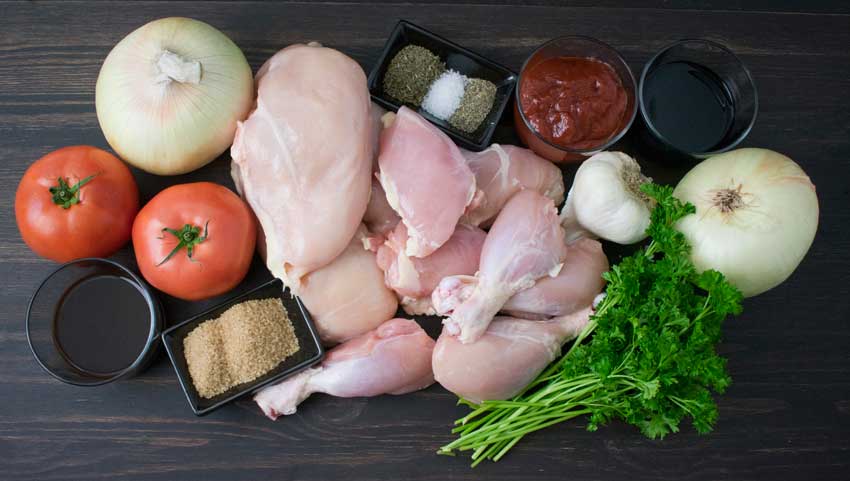
The shopping list for this recipe is a little long, but don’t let that scare you away. Most of the ingredients are for the marinade and, of course, the chicken you use it on. Speaking of chicken, you’re going to need a lot. this recipe gave me the option of using a whole chicken cut into pieces or 3 pounds of chicken breasts cut into large chunks. I opted for a mix of chicken breasts, thighs (both boneless), and drumsticks, as you can see, and also went with skinless since the recipe didn’t specify. I figured it would allow the marinade to soak in more easily.

Caribbean Chicken Ingredients
Chicken (breasts, thighs, and drumsticks), brown sugar, Worcestershire sauce, tomato, onion, thyme, salt, pepper, ketchup, balsamic vinegar, garlic, and parsley

The Process

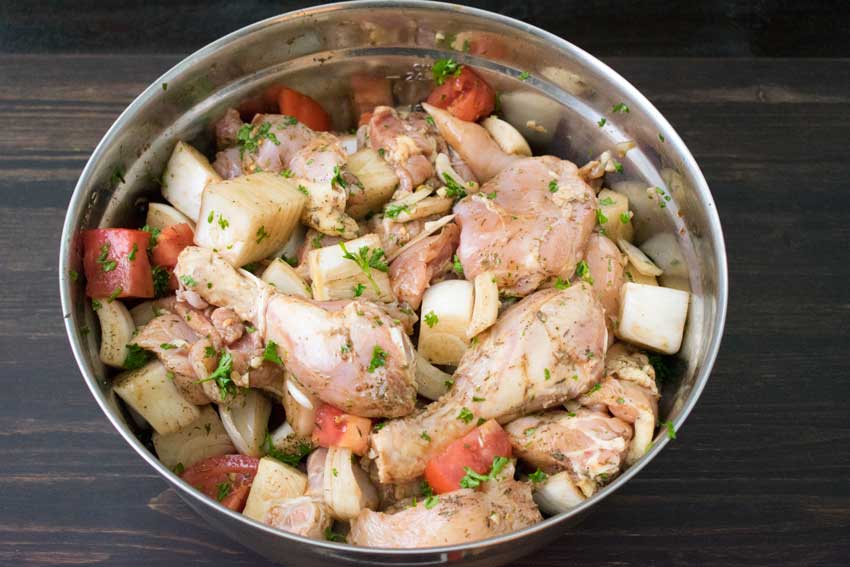
First off is marinating the chicken and vegetables. You’re going to need a big bowl. You know the one you have all your other mixing bowls sitting in that’s so big it won’t fit into the dishwasher and you barely ever use it? That’s the one you’ll need. Mine is 24 cups, and it was just big enough to hold everything, although I did have some veggies ‘escape’ the bowl when I mixed everything.

Once everything was marinated, I got out the biggest Dutch oven I have–it’s just over 7 quarts and made of enameled cast iron (and weighs a TON). I found it had more than enough room for this recipe, so a slightly smaller pot would probably work too.

The first cooking step was getting the chicken pieces browned in a mixture of olive oil and brown sugar. I use an electric stove and kept the dial around 5 for this step. It kept the sugar from burning and still gave the chicken a decent browning at 1-2 minutes per side and in 4 batches.

Now that the ‘hard’ parts were done, all I had to do was throw everything back into the pot, add a cup of water and the ketchup, and let my Caribbean chicken stew for an hour. I followed the author’s suggestion and removed the lid around 45 minutes and increased the heat to give me a thicker gravy. I can’t say I ended up with a thick gravy, so you might want to add less water or remove the lid earlier.

Finally, here’s how the time broke down for all the steps:

  • 12 minutes to make the marinade (step 1)
  • 1 hour to marinate
  • 20 minutes to brown the chicken and add everything to the pot (steps 2-3)
  • 1 hour to cook
  • 2 hours 35 minutes total
Marinating the chicken

Portuguese Tomato Rice (Arroz de Tomate)

The Portuguese Squid Stew I made earlier this week was both a nice introduction to Portuguese food and an excellent comfort food. This recipe for Portuguese Tomato Rice (Arroz de Tomate) sounded like it would be a great way to continue on both themes. I served my tomato rice with grilled chicken breasts, but I imagine it would pair well with almost anything.

It’s a dish that is super easy to prepare – and also very delicious! Diced onions and garlic are sautéed in bacon fat and the tomatoes are then added and allowed to simmer so they too pick up the wonderful, smoky bacon flavor! Finally rice and broth are added – and it all cooks together until the rice is tender.

Recipe Author: Martha at A Family Feast
Get the recipe

The Ingredients

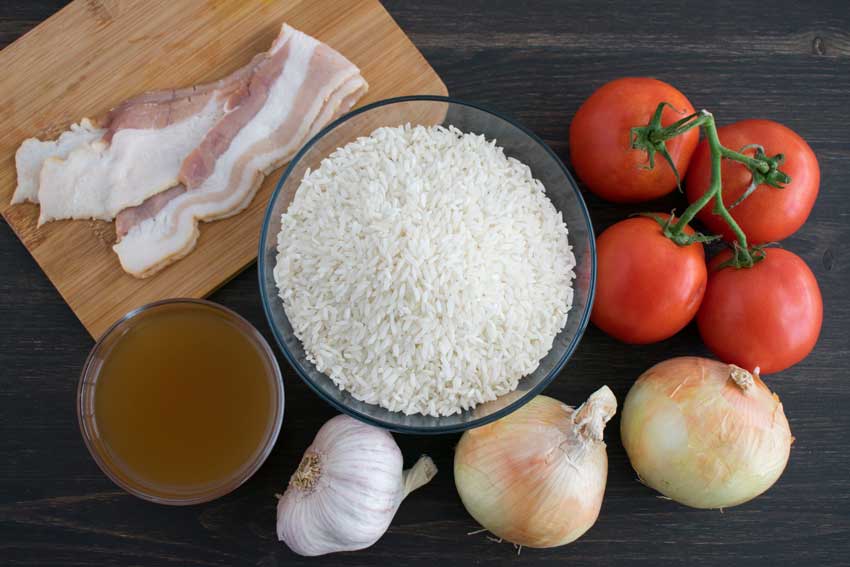
This recipe is another example of a short and sweet list of ingredients. It’s also full of pantry staples, so your shopping list is likely to be very short and inexpensive. I had most of the ingredients on hand, so all I needed to buy was the tomatoes, onion, and vegetable broth.

Portuguese Tomato Rice (Arroz de Tomate) Ingredients
Rice, tomatoes, onions, garlic, vegetable broth, and bacon

The Process

With only 6 steps to make, this recipe was easy to make. It took me a total of 59 minutes with 9 minutes of that for prep work. The time listed on the recipe was 50 minutes, so my tomato rice took just a touch longer than expected.

I didn’t have bacon fat or lard, so I fried 2 strips of bacon while I was chopping the vegetables. That gave me exactly 1 tablespoon of bacon fat with not a drop to spare. I recommend frying 3-4 pieces just to be on the safe side.

Everything else went just as the directions stated until the final step. My rice was a little soggy, so I let it sit for about 5 minutes to absorb the extra water. Then I fluffed it with a fork, adjusted the seasonings, and it was perfect.

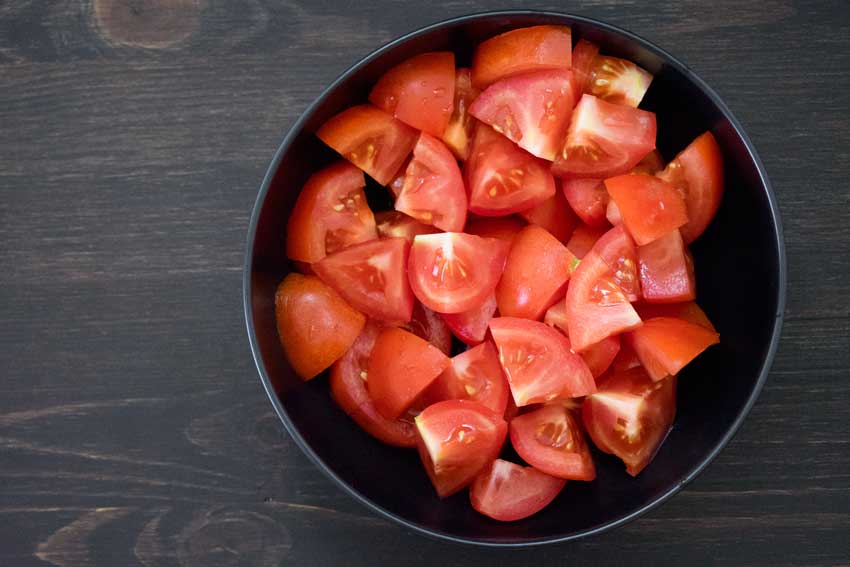
Chopped tomatoes
Chopped tomatoes

Portuguese Squid Stew (Caldeirada de Lulas)

I’ve been noticing Portuguese recipes in my Pinterest feed, and I finally had to give them a try. First up is this recipe for Squid Stew or Caldeirada de Lulas. Reading through this recipe made me think “comfort food” especially with the tomato broth and potatoes. I know it’s still summer, but a stew made with squid should be light enough for the season. Plus I’m just in the mood for a nice seafood stew, hot weather or not.

Portuguese Squid Stew, known as Caldeirada de Lulas, is one of the best and most popular Portuguese seafood dishes, and for good reason. It is a traditional and hearty dish which provides many of the best flavors in Portuguese cooking. The combination of the fresh squid along with a rich tomato sauce makes for a wonderful seafood dish that is perfect for any occasion.

Recipe Author: Tiago Moniz and Pedro Bicudo at Easy Portuguese Recipes
Get the recipe

The Ingredients

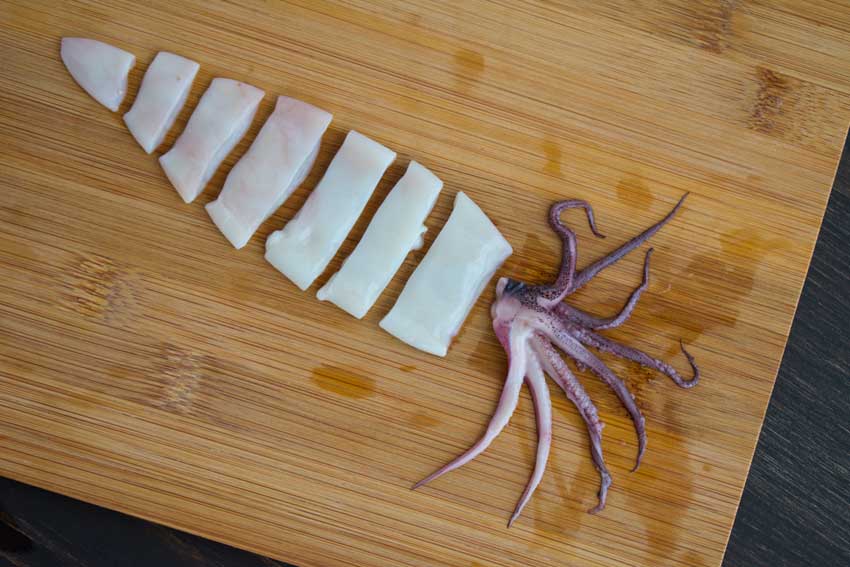
The squid for this recipe meant a special trip to Whole Foods since my regular grocery store doesn’t carry it. They didn’t have whole squid like this recipe calls for, but they did have cleaned squid tubes and tentacles. A quick google told me I would only need about 2/3 the amount of cleaned squid versus whole, so I settled on 2.3 pounds instead of 4. The rest of the ingredients were basics, so they were inexpensive and easy to find.

Portuguese Squid Stew (Caldeirada de Lulas) Ingredients
Squid, potatoes, tomatoes, olive oil, white wine, parsley, garlic, onion, and paprika

The Process

Making this squid stew was easy as it required only basic cooking skills. The prep work did take a little while because of all the peeling, chopping, and slicing involved, though. At least half of that was slicing the squid tubes into rings, so you could save time by buying it pre-sliced. The tentacles were small enough that they didn’t need to be cut apart.

The only confusion in the directions was when to add the paprika. It’s listed in the ingredients but not in the instructions. I decided to add it to Step 4.

Lastly, a note about the potatoes. I peeled and chopped them with the rest of the prep work so they would be ready to go when they were called for in Step 5. I also cut them into bite-sized pieces instead of halves so they would cook faster and be easier to eat. As a result, they cooked in just 15 minutes.

Cleaned and sliced squid

Peanut Butter Cheesecake Truffles

0

After the cucumber-peanut salad and the peanut butter curry I made earlier this week, there was only one more way I needed to use peanuts: in a dessert recipe. Peanut Butter Cheesecake Truffles sounded like a decadent way to do that. Dark chocolate drizzled over a peanut butter cheesecake filling that also has chunks of chocolate throughout. Yes, please!

Peanut Butter Cheesecake Truffles are delicious bites of smooth peanut butter cheesecake loaded with chocolate chips, covered with crunchy chocolate shell.

Recipe Author: Vera at Oh My Goodness Chocolate Desserts
Get the recipe

The Ingredients

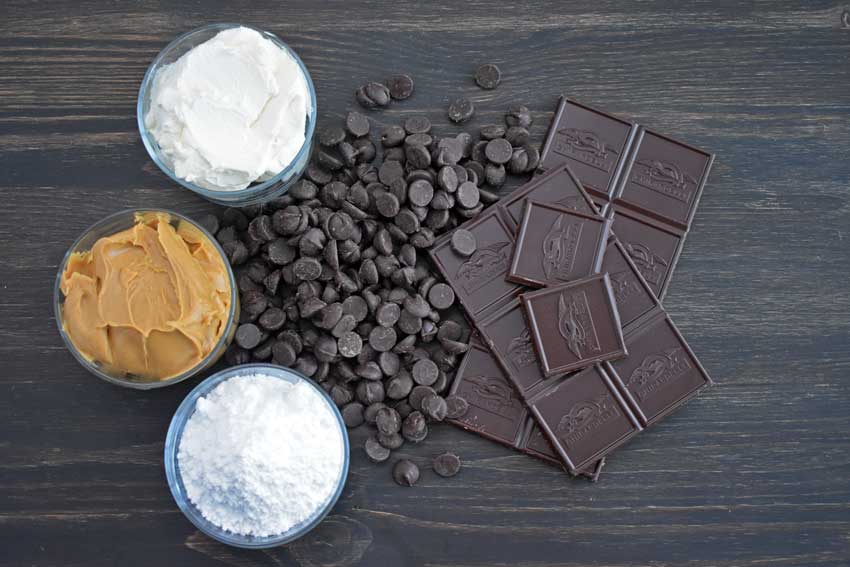
I’ve never made truffles before, so I had no idea what to expect. One thing I can tell you I did not imagine was a list of ingredients only five items long. Yes, you read that correctly. And as you can see from the picture below, two of the five ingredients were chocolate.

Peanut Butter Cheesecake Truffles Ingredients
Cream cheese, chocolate chips, baking chocolate, powdered sugar, and peanut butter

The Process

This recipe wasn’t super difficult, but it probably does take more practice than I have to make beautiful truffles. I think mine turned out okay for a first try.

There weren’t a ton of steps in this recipe, but a few of them took several minutes or more. Here’s how the times broke down for me:

  • Step 1: 8 minutes
  • Step 2: 2 hours
  • Steps 3-4: 36 minutes
  • Step 5: 10 minutes
  • Step 6: 7 minutes
  • Step 7: 65 minutes (includes 1 hour for chocolate to harden)
  • Total Time: 4 hours 6 minutes

Steps 1-4

Chopping the chocolate chips evenly was a little bit of a pain. No matter how careful I was, I had chunks of chocolate flying around. Next time I will use mini chocolate chips so I don’t have to chop them and make a mess.

Making the cheesecake balls was pretty simple. I didn’t have a small ice cream scoop, so I used a tablespoon (the measuring kind, not flatware). Each ball was a generous tablespoonful. A spray of canola oil between scoops kept the filling from sticking to the spoon.

Step 5

Melting the chocolate was almost a disaster. I put it into a glass bowl and microwaved it in 30-second bursts. I’m not sure why, but it ended up with grainy bits in it when I gave it a stir. I thought I was going to have to dump it and make another trip to the grocery store for more until I googled for a solution.

The graininess is called seized chocolate, and there was an easy solution to the problem. This article described how to add boiling water to the seized chocolate to bring it back to a smooth texture. It worked perfectly and didn’t have to waste chocolate. I’m thinking a double boiler might work out better for next time.

Step 6

Dipping the truffles wasn’t exactly difficult, but I did have some problems getting a smooth finish. I used a fork to dip them into the chocolate, but they kind of rolled off the fork when I tried to add them to the cookie sheet. I had to dribble extra chocolate to cover the dents and dings, so the coating was far from perfect. A second fork to gently ease the truffles onto the cookie sheet really helped with that.

Step 7

Finally, I added the leftover chocolate to a ziplock bag with a few extra chocolate chips. then I put the bag into a bowl of boiling water for a few minutes to remelt the chocolate, snipped off a tiny corner of the bag, and used that to decorate my truffles. It didn’t take much chocolate to do this, but I definitely did it too quickly and got sloppy.

Just dipped truffles waiting for the chocolate coating to harden