Home Blog Page 46

Herb Roasted Turkey with Gravy

Thanksgiving is right around the corner, and I can’t wait! Last year I wanted to try something different and made a Cranberry Hazelnut Turkey Wellington. It wasn’t the most beautiful turkey dish, but it sure tasted good. This year, I went for something more traditional with this Herb Roasted Turkey with Gravy recipe. I’m the type of person who either skips the gravy or buys it, so making my own will be a bit of an adventure. Let’s see if I’m up to the task!

Gourmet doesn’t necessarily mean complicated. And in this case, it really couldn’t be simpler. This turkey only takes a few minutes to prepare.

Recipe Author: Jessie at A Hint of Honey
Get the recipe

The Ingredients

The list of ingredients for this recipe wasn’t too long, and I loved the fact that it called for plenty of fresh herbs. I went with the author’s suggestions and used parsley, rosemary, thyme, and sage. After the turkey (about $15 for 9.5 pounds), the fresh herbs were the most expensive item at just over $8 for all four.

The only item I couldn’t find was the turkey stock, so I went with the closest thing I could find: chicken stock. I sure hope there isn’t a huge difference in the taste.
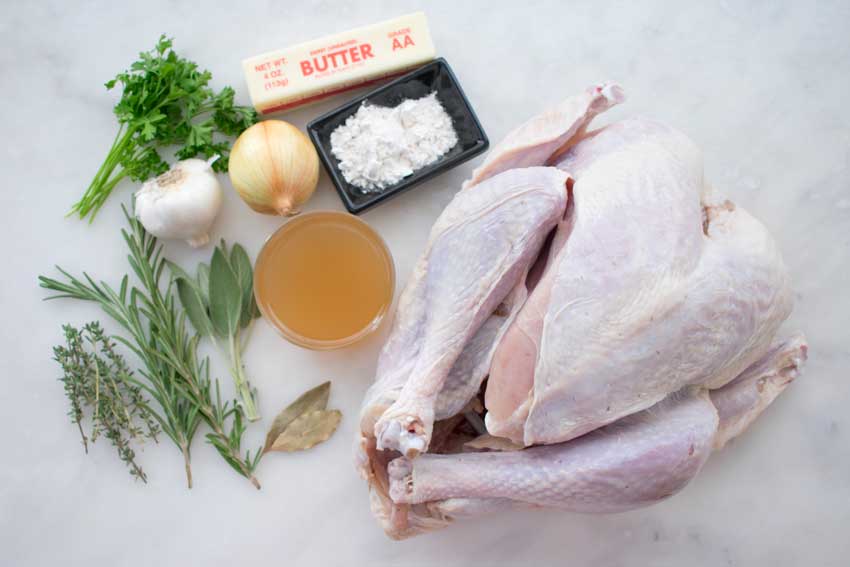
Herb Roasted Turkey with Gravy ingredients
Turkey, bay leaves, rosemary, thyme, sage, parsley, garlic, onion, butter, flour, and chicken stock

The Process

I have to say this roasted turkey and gravy recipe was pretty easy to make. The instructions were clear and I didn’t have any trouble following along. Here’s how it went:

  • 17 minutes to prep
  • 2 hours 45 minutes to cook the turkey
  • 12 minutes to make the gravy
  • 3 hours 14 minutes total

I went by the directions for the turkey until the part where the temperature was raised to 425 degrees. My oven’s heating elements are on the bottom, and the drippings started burning away and smoking a lot. I raised the rack a couple of notches to fix that issue. I also re-tented the turkey with foil to keep it from browning too fast.

Once the turkey was done, I had 1/2 cup of dippings for the gravy. I added 1 1/2 cups of the chicken stock to that because I like my gravy on the thick side. The gravy was still on the thin side after simmering for 10 minutes, but it did thicken up some as it cooled.
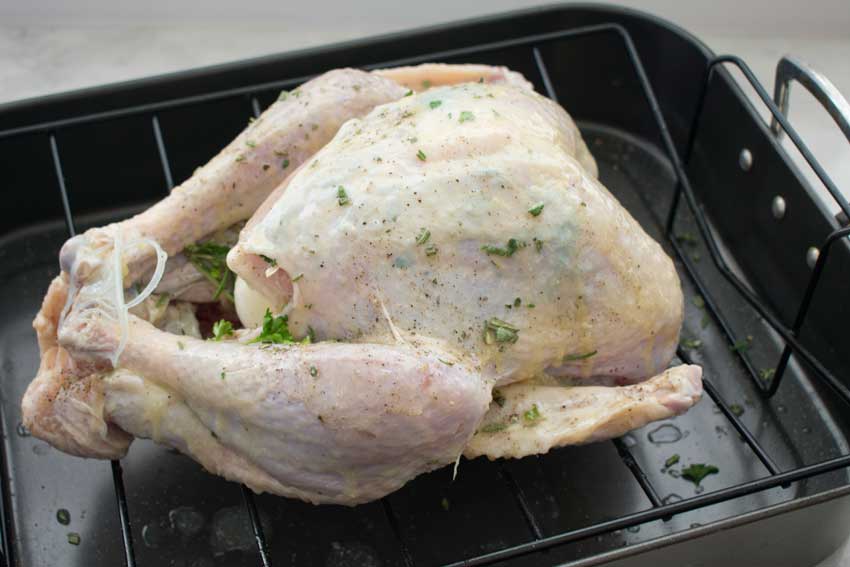
The turkey is ready to roast

The Equipment

The Recipe

Unfortunately, this recipe was removed from the author’s site. I have re-written and posted it here so this amazing recipe will live on.
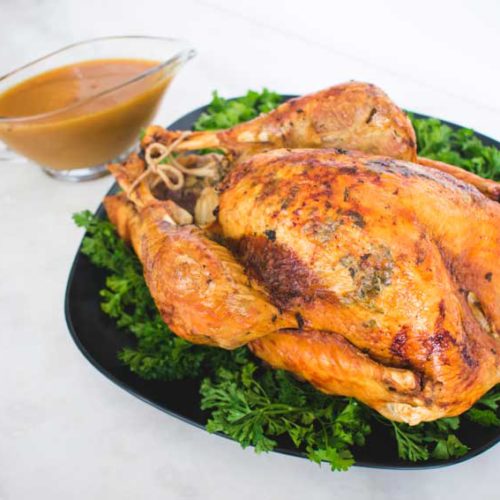
Herb Roasted Turkey with Gravy

Herb Roasted Turkey with Gravy Recipe

A mixture of fresh herbs, garlic, and onion infuses this roasted turkey with a subtle, earthy flavor. The accompanying gravy tastes phenomenal and is quick and easy to make.
Prep Time 20 minutes
Cook Time 3 hours
Rest 10 minutes
Total Time 3 hours 30 minutes
Course Main Course
Cuisine American
Servings 4

Equipment

  • roasting pan with rack
  • cooking oil spray
  • cutting board
  • sharp knife
  • measuring spoons
  • kitchen string
  • basting brush
  • aluminum foil
  • medium saucepan
  • Measuring cup
  • whisk

Ingredients
  

Turkey:

  • 1 10 lb. turkey
  • kosher salt and freshly ground black pepper
  • 1 medium onion quartered
  • 1 head garlic halved
  • several sprigs of fresh herbs I used parsley, rosemary, thyme, and sage
  • 2 bay leaves
  • ½ cup butter melted
  • 1 Tbsp. parsley chopped
  • 1 Tbsp. rosemary chopped
  • 1 Tbsp. thyme chopped
  • 1 Tbsp. sage chopped

Gravy:

  • turkey drippings from above 10 lb. roasted turkey
  • 2 Tbsp. butter
  • 2 Tbsp. all-purpose flour
  • 2-3 cups turkey stock or broth
  • salt and pepper to taste

Instructions
 

To make the turkey:

  • Place oven rack in the lowest position and preheat oven to 325℉. Spray the rack of your roasting pan with vegetable oil.
  • Remove neck and giblets from turkey (if included) and pat dry with a paper towel. Place onion, garlic, herb sprigs, and bay leaves into the turkey cavity and set aside.
  • Mix the chopped herbs in a small bowl. Use your fingers to gently lift the turkey skin at the breast and thighs. Add some of the herb mixture under the skin and rub the outside of the skin with the rest.
  • Place the turkey breast side up on the prepared roasting rack. Tie the legs closed and tuck the wings underneath to keep the tips from burning.
  • Brush the outside of the turkey with half of the melted butter then season with salt and pepper.
  • Loosely tent the turkey with aluminum foil and roast for 2 hours.
  • Remove the foil and baste the turkey with the remaining butter. Increase the oven temperature to 425℉.
  • Return the turkey to the oven and cook until a meat thermometer placed in the inner thigh (not touching the bone) reaches 165℉ (approximately 45 to 65 minutes). Loosely tent with foil if the skin browns too fast.
  • When the turkey is done remove it from the oven and allow it to stand for 15 minutes before carving.

To make the gravy:

  • In a medium saucepan, melt the buter over medium heat. Add flour while whisking constantly to form a roux, approximately 1 minute.
  • Once the roux is formed, mix in the drippings from the turkey with the turkey stock. Bring to a boil, reduce heat, and simmer for 5 to 10 minutes, stirring occasionally until the mixture thickens.
  • Season with salt and pepper to taste and adjust the consistency if desired. Add more stock if the gravy is too thick, or simmer for a few additional minutes if it’s too thin.

Notes

This is a re-written version of a recipe that was posted by A Hint of Honey http://www.ahintofhoney.com/2010/01/herb-roasted-turkey-with-gravy/ and has since been removed. 
Keyword gravy, Thanksgiving, turkey

Pumpkin Cupcakes with Brown Butter Frosting

0

With fall on my mind, I just had to make something with pumpkin. Pumpkin Cupcakes with Brown Butter Frosting? Yes, please! They sound like a great way for me to practice my baking skills and satisfy my sweet tooth. Oh, and Thanksgiving is coming up, and these cupcakes sound like they’ll be a good but different seasonal dessert. Let’s find out!

These Pumpkin Cupcakes are the perfect fall dessert! Perfectly spiced pumpkin cupcakes topped with an easy brown butter frosting and drizzled with salted caramel sauce. A must-bake this fall!

Recipe Author: Julia at Plated Cravings
Get the recipe

The Ingredients

Okay, the list of ingredients for this recipe is pretty long. The good news is it’s full of pantry staples like sugar, flour, vegetable oil, and spices. I had most of the ingredients on hand and needed to buy very little. The rest is pretty ordinary, so everything I needed to buy was easy to find and inexpensive.

I opted to buy the caramel sauce instead of making it myself. It wasn’t actually part of the recipe and saved me a bit of time. I love cooking, but I have limits!

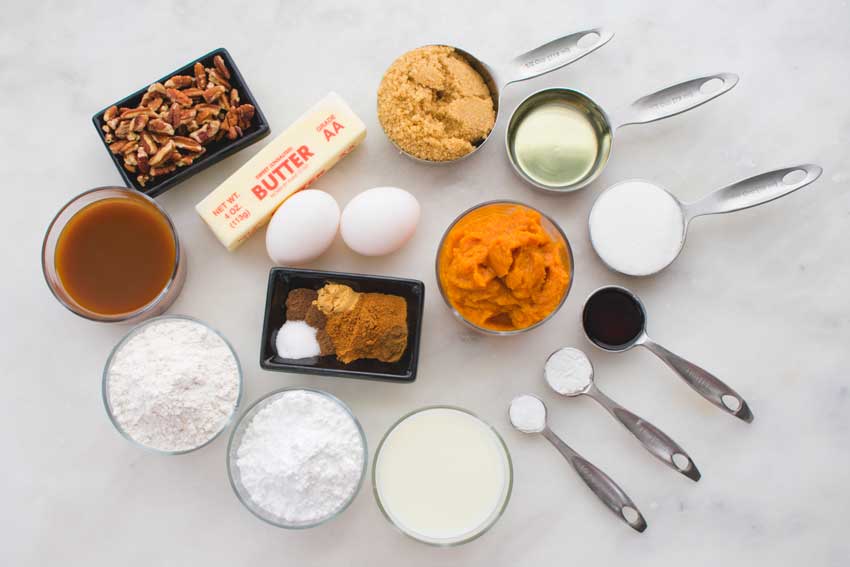
Pumpkin Cupcakes with Brown Butter Frosting Ingredients
Brown sugar, vegetable oil, sugar, vanilla extract, baking powder, baking soda, milk, powdered sugar, flour, caramel sauce, chopped pecans, butter, eggs, nutmeg, ground ginger, cinnamon, ground cloves, allspice, and salt

The Process

These cupcakes went together surprisingly fast, and I finished them in far less time than I expected. Instead of the 1 hour 25 minutes listed, I had my cupcakes ready in just 48 minutes, not including time to cool. Here’s how the time broke down:

  • 13 minutes to prep and make browned butter
  • 25 minutes to cook and make the frosting
  • 10 minutes to frost and add caramel sauce and pecans
  • 48 minutes total

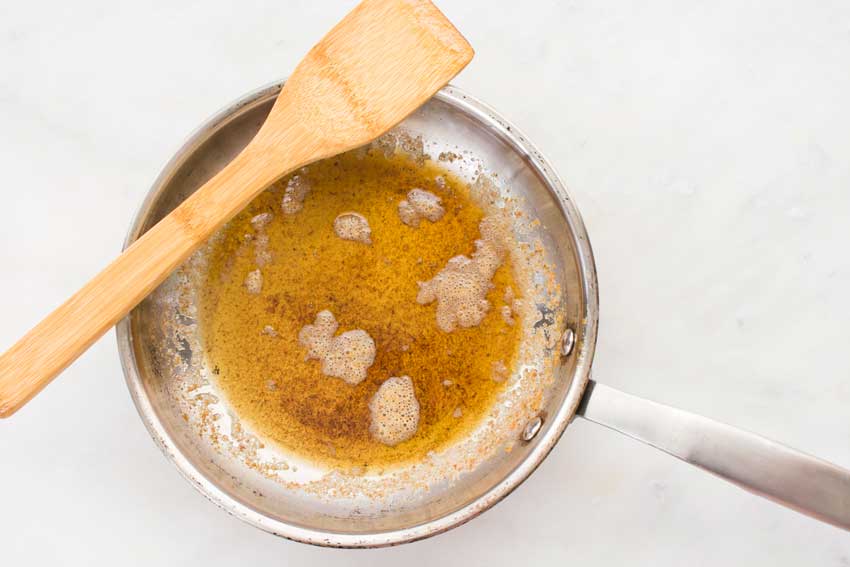
Since I planned to frost them the same day I baked them, I made the browned butter right after I prepped the muffin pan. I let it cool in the skillet while I made the cupcake batter. After putting the cupcakes into the oven to bake, I poured the warm browned butter into a ramekin and put it into the refrigerator to finish cooling.

I washed the dishes I had used so far then got started on the frosting. The browned butter was cool by the time I needed it, and my frosting was finished before the cupcakes were baked.

I let the cupcakes cool before I frosted them. That gave me a chance to check out a video on how to use my round piping tip since this would be the first time. It was easier than I thought it would be, but I did double the recipe to make sure I didn’t run out. It was a smart move, and I had just a little leftover when I was done.

Once I had the frosting done, I heated a few tablespoons of caramel sauce in my microwave for 15 seconds. Then I drizzled it onto each cupcake. I did it in an ‘X’ pattern, but I didn’t try to be too neat. The beauty of drizzled toppings is in their messiness.

Finally, I put about 1/4 cup of chopped pecans into a ziplock bag and crushed them with a meat mallet. The chopped pieces were just too big for my liking. Then all I had to do was sprinkle them over the cupcakes, and I was done.

Decorating with the caramel sauce and chopped pecans was messy. I put my cupcakes on a baking sheet for those steps to contain the mess. Otherwise, I would have had caramel sauce and pecans all over the place!

Browned butter
Browned butter

Beef and Butternut Squash Stew

Even though it’s fall, it still feels like summer here in south Florida. The days are hot and humid, but the nights have cooled down. Maybe that’s why I’m in the mood for a meal that feels like autumn. I happily stumbled across this recipe for Beef and Butternut Squash Stew and instantly knew I had found what I was craving. I always associate butternut squash with the fall, and any type of stew works for this season.

Delicious Healthy Beef and Butternut Squash Stew! It’s Paleo, Whole30, Gluten Free, Low Carb. Can be made in a slow cooker or crockpot.

Recipe Author: Sheena at Noshtastic
Get the recipe

The Ingredients

Talk about a short list of ingredients! I had to buy most everything for my beef and butternut squash stew, but I was okay with that. My first official fall meal seemed like a bit of a special occasion.

The meat was the most expensive item at $13.04 for 2 pounds. I chose to buy a whole chuck roast because it was a little cheaper than pre-cut stew meat and I would be able to cut it into bite-sized pieces. For some reason, the ready cut stew meat always comes in huge chunks. I have to cut most chunks in half anyway, so why pay extra?

I timed my shopping trip just right and snagged the last butternut squash on display. Unfortunately, it was massive and weighed in at 4 pounds, double what I needed. But the good news is squash freezes well, so the extra didn’t go to waste. I peeled it, cut it into chunks, and froze it for another meal.

Lastly, I opted for fresh herbs. It was the pricier option compared with using dried, but I wasn’t sure how much of the dried herbs to use. No measuring was required with the fresh rosemary and thyme, but I’ll have to find a way to use the extra (and there was plenty of extra). If you grow your own herbs, which I really need to do, then you can easily cut the sprigs you need and have no waste.

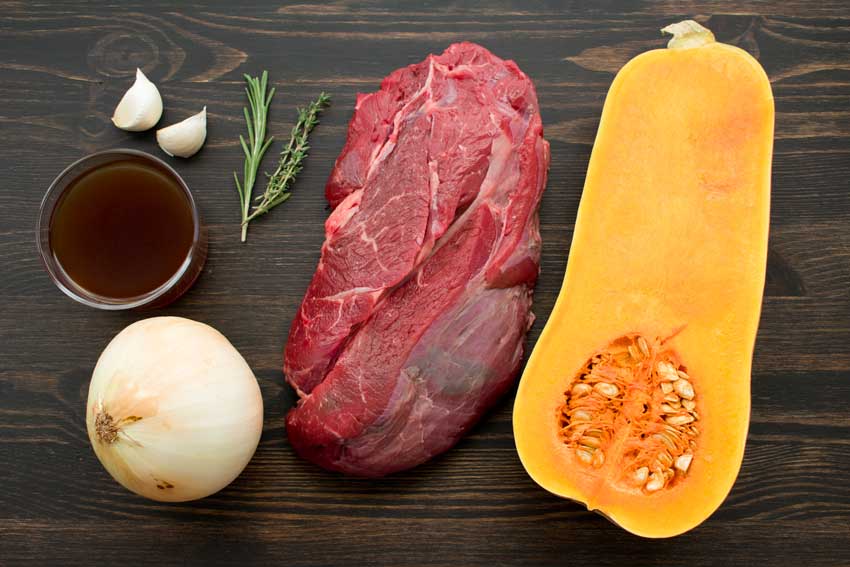
Beef and Butternut Squash Stew Ingredients
Butternut squash, beef chuck roast, thyme, rosemary, garlic, beef stock, and onion

The Process

This beef and butternut squash stew recipe has options for cooking on the stovetop and in the slow cooker. I do love my slow cooker, but I decided to try the stovetop method. It’s quicker, but it’s a little more work than tossing everything into the crockpot.

Based on prior experiences making stew on the stove, I expected this recipe to be a lot more work than it was. Once everything is peeled and chopped, all I had to do was sauté the onions and beef. After that, I threw everything but the butternut squash into the pot and left it to simmer for an hour.

The final step was adding the squash and letting it simmer for another 30 minutes. That was it! I found I didn’t need to adjust the seasonings when the stew was done. I had a perfectly done stew with tender meat and squash with a broth that was delicious enough to eat on its own. My only regret was not buying a loaf of crusty bread to soak up every last drop!

A 5-quart cast-iron Dutch oven was the perfect size for this recipe, and it went together pretty quickly. The time listed on the recipe looks like it’s for the slow cooker method, which is much longer than the stovetop version I used. Here is how the time broke down for me:

  • 14 minutes for prep work
  • 1 hour 38 minutes to cook
  • 1 hour 52 minutes total
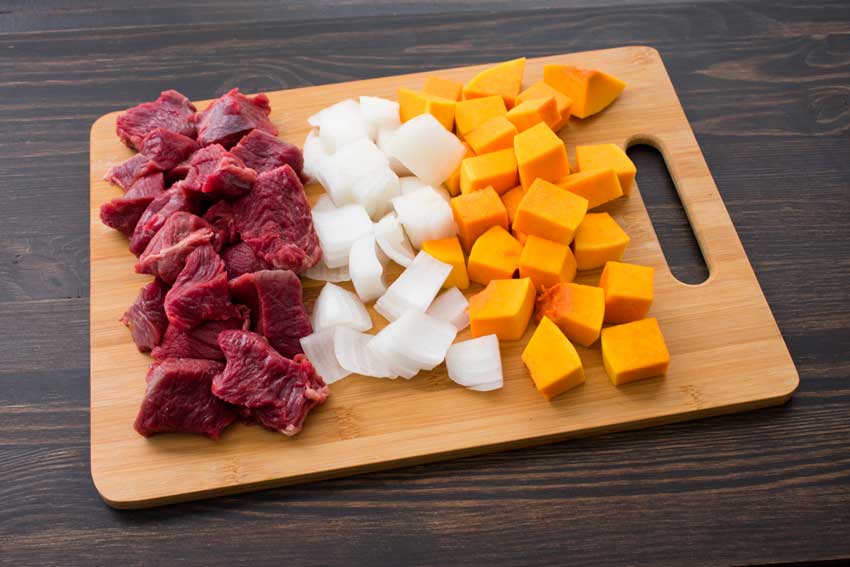
Chopped beef, onion, and butternut squash

Hibiscus Vanilla Thai-Styled Ice Tea

0

This week’s Thai-inspired menu is coming to an end, and what better way to finish it off than with Hibiscus Vanilla Thai-Styled Ice Tea. Thai iced tea is always a treat for me. Black tea with sweetener and creamy coconut milk served over ice is so refreshing and a little decadent. This version keeps the coconut milk but uses herbal tea and spices to add what sounds like a flavorful twist. Let’s find out if it’s a Pinterest success or a Pinterest fail!

…sometime last week, that memory made it’s way back into my head. The taste, the look, the shooting stars, and I decided that I needed to make my own version. A version that I can drink and not feel terrible because of the dairy and amount of sugar. I did some research and it turns out that coconut milk is a more than acceptable milk to sub for the half and half, and in fact, I think it adds a little something to the flavor and texture.

Recipe Author: Jodi at What’s Cooking Good Looking
Get the recipe

The Ingredients

Everything I needed to make this tea was easy to find. I had a few things like the spices and the coconut palm sugar on hand. That left me with needing to buy the hibiscus tea, vanilla bean, and coconut milk. The latter was inexpensive, and the tea and vanilla bean were around $6 each. The tea wasn’t bad price-wise considering I only used a few of the tea bags, making the vanilla bean the priciest item since it was a single use.

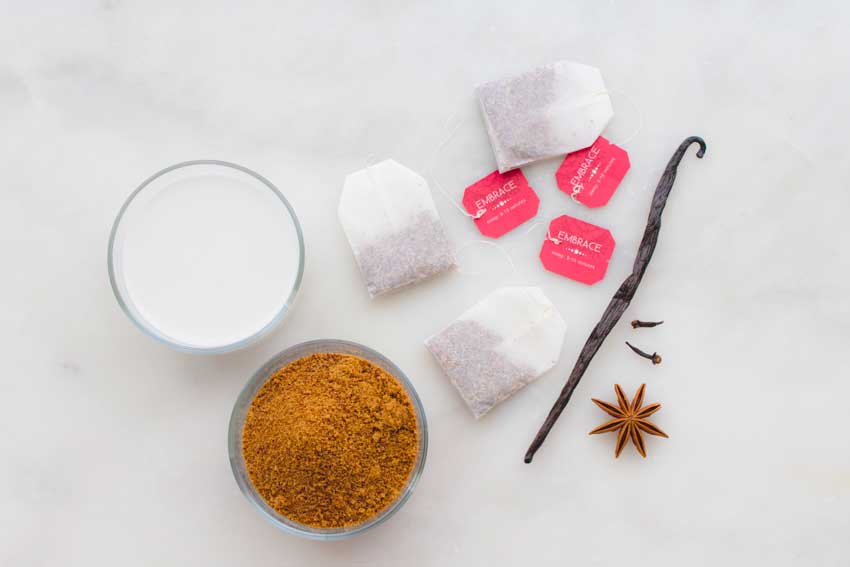
Hibiscus Vanilla Thai-styled Ice Tea Ingredients
Hibiscus tea, coconut palm sugar, coconut milk, vanilla bean, cloves, and star anise

The Process

The instructions were so easy to follow, and no special equipment was needed. Just a few basics like a saucepan, sieve, and a paring knife to scrape the vanilla bean. If you’ve never done it, here’s a quick video tutorial on how to scrape a vanilla bean.

Cooling the spiced tea was the longest step. Fortunately, an hour in the refrigerator is completely inactive, so I was free to go about my day while I waited.

Putting the tea together was the easiest step. Just add ice to a tall glass, pour in the tea, then add coconut milk. I used light coconut milk that was shaken well, and I sure didn’t miss the extra fat. My tea was just as rich as traditional Thai iced tea with the twist of herbal tea and spices to add flavor.

The total time wasn’t listed on this recipe, but here is how it broke down for me:

  • 7 minutes prep work
  • 15 minutes to cook
  • 1 hour to cool
  • 1 minute to put it together
  • 1 hour 23 minutes total
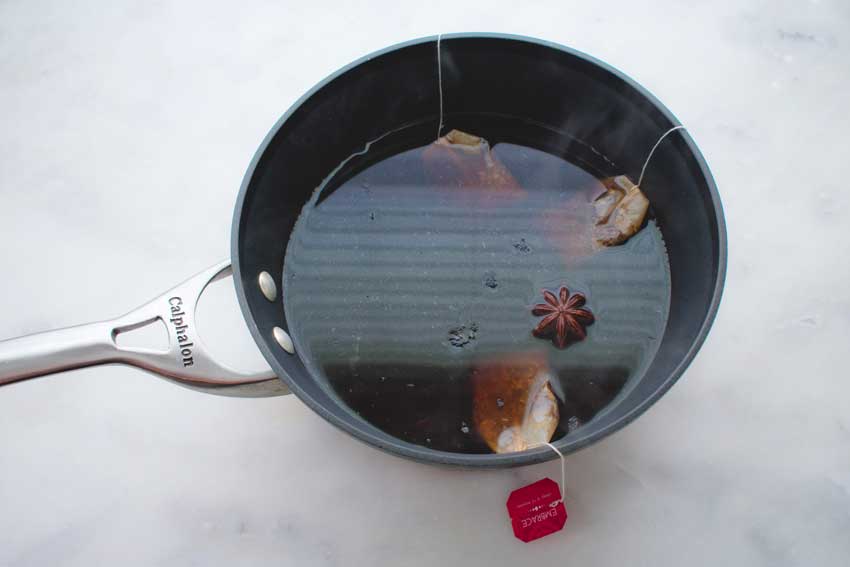
Brewing the tea with the spices
Brewing the tea with the star anise, cloves, and vanilla bean and seeds

One Pot Spicy Thai Noodles

Since I started this week with a Thai-style curried clam recipe, I thought I would continue that theme with One Pot Spicy Thai Noodles. Not only does it sound delicious, but it’s also quick, vegetarian, and healthy. It can also be served warm or cold, making it a great make-ahead option for weekday lunches or busy weeknight dinners.

One Pot Spicy Thai Noodles are SO good and easy to cook up. This is a vegetarian recipe, but there are options for added protein too!

Recipe Author: Allyson at Domestic Superhero
Get the recipe

The Ingredients

The list of ingredients for this rOne Pot Spicy Thai Noodles recipe was pretty short. Best of all, it was filled with basics like pasta (I used linguine), eggs, and vegetables that were inexpensive and easy to find. Sriracha sauce was the only specialty ingredient, but I think most grocery stores will stock it. If not, you could use a mild hot sauce or extra red pepper flakes.

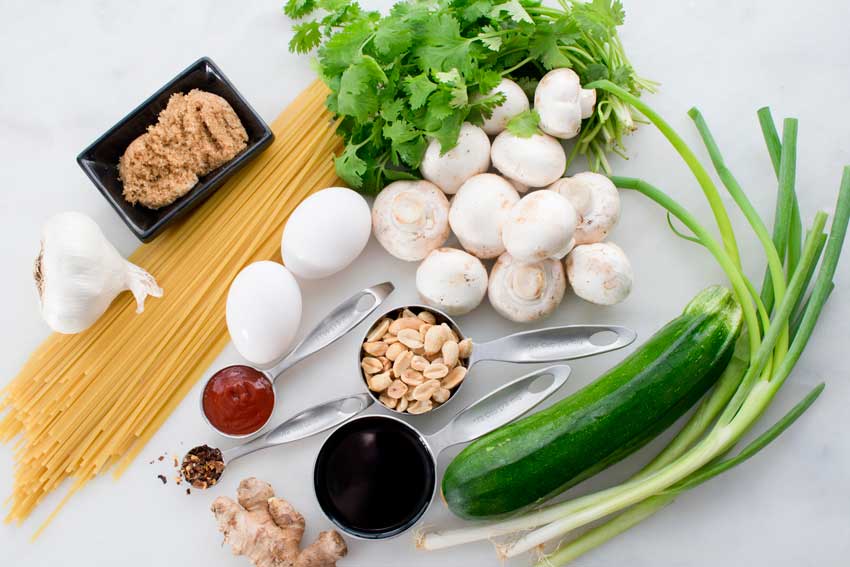
One Pot Spicy Thai Noodles Ingredients
Linguine, garlic, brown sugar, cilantro, eggs, mushrooms, green onions, zucchini, soy sauce, peanuts, Sriracha sauce, red pepper flakes, and ginger

The Process

The blog post with this recipe mentions using two pots to speed things up. That way you could cook the eggs and vegetables while the noodles boil. I decided to do things with one pot to find out how the longer method would take and cut down on the dishes.

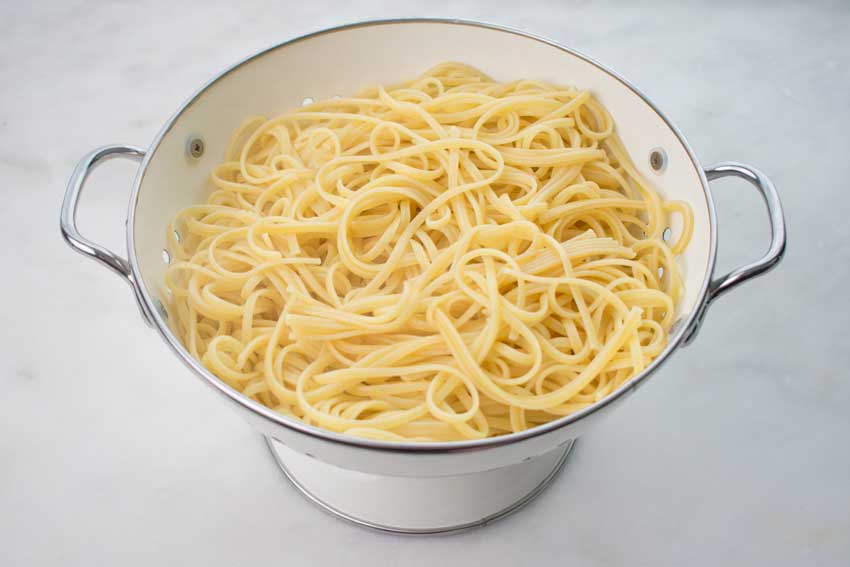
The “long” way took 30 minutes from start to finish. The instructions were very clear and easy to follow. No special equipment was needed, just a large pot (mine was 5 quarts) and a colander. I did have a slight issue with the linguine sticking together while it rested in the colander, but a drizzle of olive oil would fix that. Otherwise, this meal was quick and easy to prepare.

Cooked linguine
Cooked linguine

Red Curry, Coconut, and Ginger Infused Steamed Clams

0

I’ve been in the mood for some seafood lately but wanted to try something new. Clams and curries aren’t new foods for me, but I’ve never actually cooked clams at home. I’ve made mussels, so I’m expecting steamed clams to be a similar process. Curry is a pretty regular menu item at my house, but it’s also a hugely diverse category. Curried clams are definitely new, so I’m excited to give this Asian-inspired recipe a try.

An Asian style steamed clam recipe featuring red curry, coconut milk, garlic, and ginger. Very flavorful and the right amount of spice.

Recipe Author: Alice Currah at Savory Sweet Life
Get the recipe

The Ingredients

All of the ingredients of this steamed clams recipe were easy to find. The clams, of course, were the most expensive item at $14.21 for 2 pounds. That was for 29 littleneck clams at $0.49 each. They were not sold by the pound, but the guy at the seafood counter was nice enough to weigh them for me.

The fish sauce and red curry paste might be tough to find if your local grocery store doesn’t have a well-stocked international foods aisle. I like Thai Kitchen brand (I’ve used it for years), and you can order their red curry paste and fish sauce on Amazon. I bought both locally because it was more convenient and a little cheaper than ordering it.

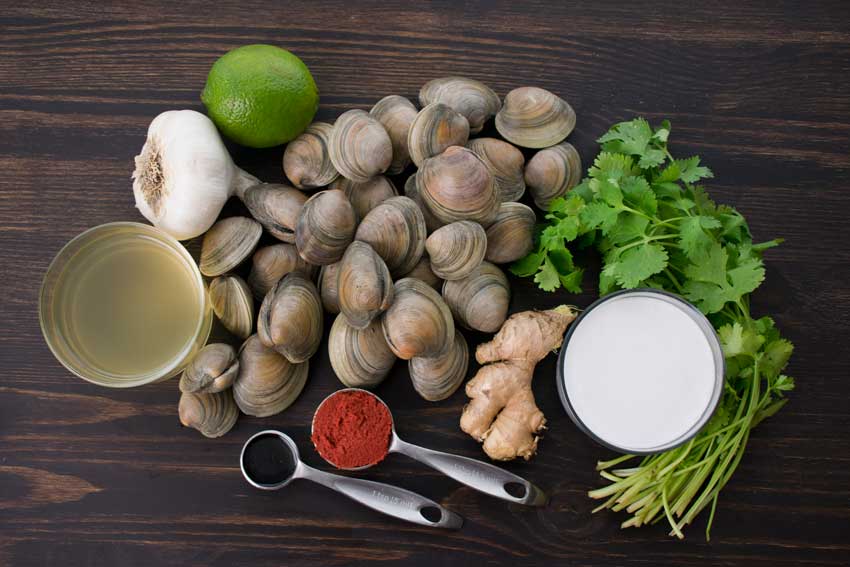
Red Curry, Coconut, and Ginger Infused Steamed Clams Ingredients
Littleneck clams, red curry paste, fish sauce, chicken broth, garlic, lime, cilantro, coconut milk, and ginger

The Process

I didn’t have any trouble following the instructions for this recipe, but it did take me nearly twice as long as the 10-minute total time listed. Instead, it took me 6 minutes to prep and 12 minutes to cook, for a total time of 18 minutes. It looks like the discrepancy is with the cook time listed (5 minutes) versus what is called for in the directions (7-10 minutes). Still, 18 minutes to make a meal isn’t bad.

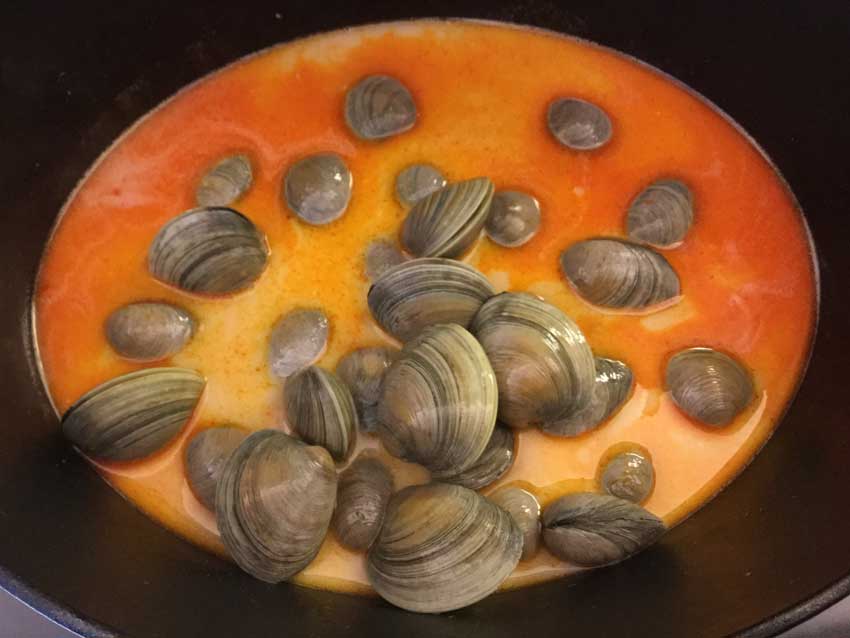
One question I had was what type of pot to use for this recipe. I didn’t want anything too deep so the clams would steam. I settled on a cast-iron Dutch oven that was a little over 5 quarts. The clams weren’t totally submerged, and the high sides allowed me to stir them without spilling.

I served my steamed clams as a main course with jasmine rice since this recipe made me think of Thai food. I can’t recall if it was in the original blog post or the comments, but serving crusty bread was mentioned as a side, and that sounds like it would be even better than rice.

Just added the clams to the broth

Turkish Lokma

0

I know I’ve said I’m not a huge fan of fried foods, but I’m still on a mission to challenge myself and try new things in the kitchen. This recipe for Turkish Lokma fulfills both of those mandates and fits in with this week’s Turkish theme. However, unlike the Turkish Gozleme with Minced Lamb I just made, this is an authentic Turkish recipe. It sounds simple and doesn’t have a lot of ingredients. Let’s find out if that means it’s easy too.

Lokma is another traditional Turkish dessert, but the good news is that it’s not as challenging as baklava. It’s one of the easiest dessert with some very simple ingredients. It’s nothing more than fried sweet dough, but I must warn you that it’s addictive! Since these are bite size, you might not realize how many you eat, these taste so darn good!

Recipe Author: Zerrin at Give Recipe
Get the recipe

The Ingredients

The list of ingredients for this recipe looks longer than it really is. That’s because some of the ingredients used in the lokma dough are also used in the syrup. Oh, and water is two of those ingredients, so it doesn’t count from a grocery shopping perspective.

I actually had everything needed except for the instant dry yeast. I found packets of active dry yeast at the store, but nothing labeled instant dry yeast. Thank goodness for Google! A quick search and I learned it’s also called bread machine yeast. Problem solved.

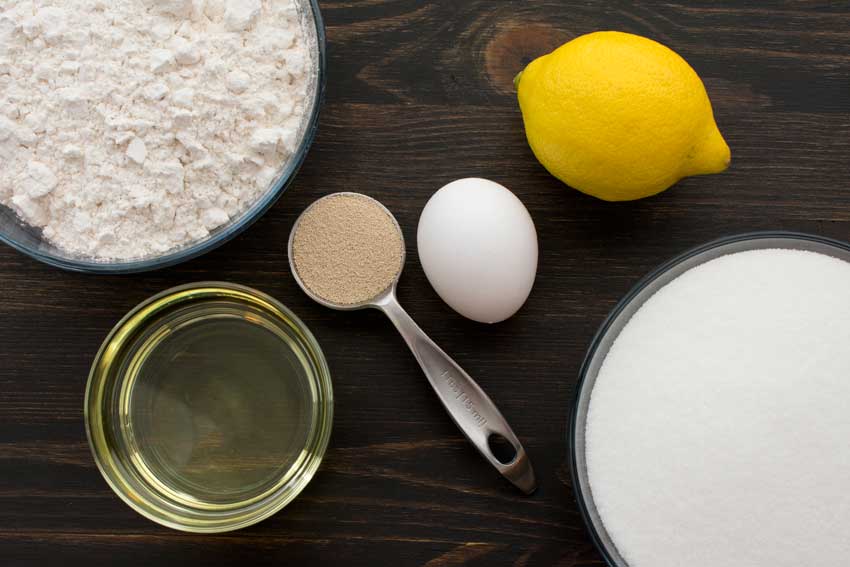
Turkish Lokma Ingredients
Flour, instant dried yeast, egg, lemon, sugar, and sunflower oil

The Process

My lokma took a total of 1 hour and 42 minutes from start to finish, which was within 3 minutes of the time listed. That includes 1 hour for the dough to rise and 15 minutes to soak in the lemon syrup.

I did have to make the lokma twice, though, as my first batch didn’t turn out well at all. I forgot that my air conditioner was on full blast when I set the dough aside to rise. It didn’t look any bigger after an hour, but I went ahead and fried it. I ended up with dense, undercooked, and definitely not golden clumps of dough.

The second try resulted in the lovely lokma you see pictured. The difference? A couple of things. First, I made sure to have a warm place for the dough to rise. I wet two tea towels, wrung them out, and microwaved them for 45 seconds. Then I moved one to the side of the microwave using tongs and covered the bowl with the other (also using tongs because both towels were hot). Then I closed the lot into my microwave for an hour. After an hour, the dough had risen significantly in the warm oven and felt lighter and airier than the first batch.

Next, I doubled up the sunflower oil so the dough would have plenty of room. Then I dropped 5-6 spoonfuls into the hot oil at a time and fried them until the dough puffed up and turned golden brown. That took about 2 minutes per batch, and I had to turn the dough balls to make sure they cooked evenly.

After letting the fried lokma rest on a paper towel covered wire baking rack, I placed them in a 9'x13' baking dish and poured the lemon syrup over them. I let them soak for 15 minutes, turning them a couple of times to ensure they were all well coated. This batch was exactly what I thought lokma would be: light, non-greasy, and sweet treats.

Soaking the fried lokma in the lemon syrup

Turkish Gozleme with Minced Lamb

I’ve been wanting to make a lamb dish, and it’s been a while since I made Turkish food. Coincidence? I don’t think so. I’ve also been looking to challenge myself a little more in the kitchen, and this Turkish-inspired gozleme recipe is like nothing I’ve ever made. Meat pies stuffed with ground lamb, feta cheese, veggies, and spices sounds beyond delicious and like a fair amount of work using skills I’m not sure I have. Challenge accepted!

Savoury homemade flatbreads from scratch filled with ground lamb, spices, herbs and feta cheese. You won’t be able to eat just one!

Recipe Author: Joanna Cismaru at Jo Cooks
Get the recipe

The Ingredients

After reading over the list of ingredients for this gozleme recipe, I was sure everything would be easy to find except the ground lamb. I don’t buy ground meat very often, so I was pleasantly surprised to find a nice variety at my local grocery store that included ground lamb.

Everything else was easy to find, just as I expected. I did have to buy a bag of frozen chopped spinach that was about double what the recipe called for. Then I had to weigh out the right amount when I was ready to make my gozleme. Even without a scale, I’m sure I could have eyeballed the amount without much impact on the final outcome.

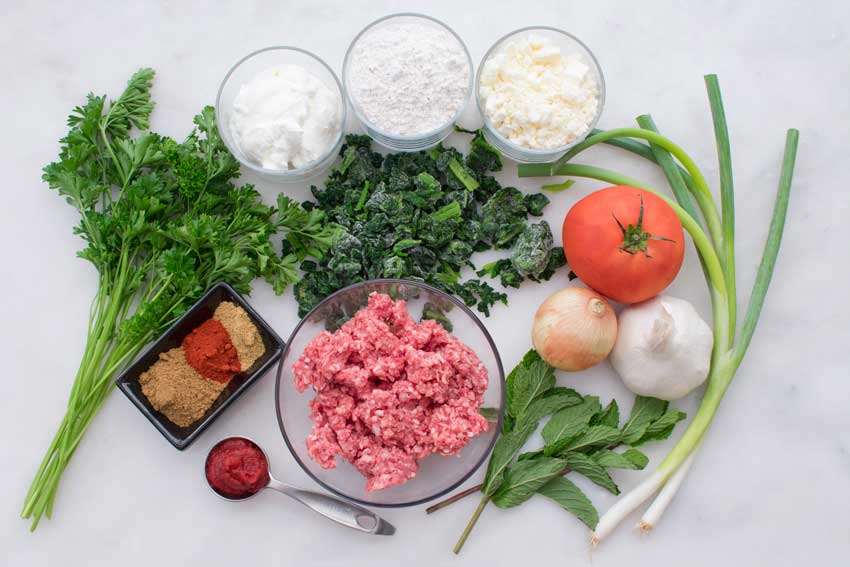
Turkish Gozleme with Minced Lamb Ingredients
Ground lamb, tomato paste, coriander, smoked paprika, cumin, parsley, Greek yogurt, flour, feta cheese, frozen spinach, green onions, tomato, onion, garlic, and mint

The Process

The instructions for this recipe broke everything down really well and were easy to follow. The prep work took me 23 minutes, cooking took 52 minutes, and the total time for this recipe was 1 hour 15 minutes, just as listed on the recipe.

I did find that I had to roll the dough out very thin to get it to the specified size. That had me worried at first, but it really wasn’t an issue. I did notice a few small holes after I folded the dough around the filling, but dampening the dough with a little water and pinching it closed was an easy fix.

The cooking times went faster than listed. I found that each side took only 2-3 minutes instead of 3-4 minutes. I would recommend carefully lifting the gozleme with a spatula after 2 minutes to check and see if it is browning or burning. To me, it seemed like the goal is more to cook the dough and just warm the filling. Plus there is no real danger of undercooking since the meat is cooked before it’s added to the dough.

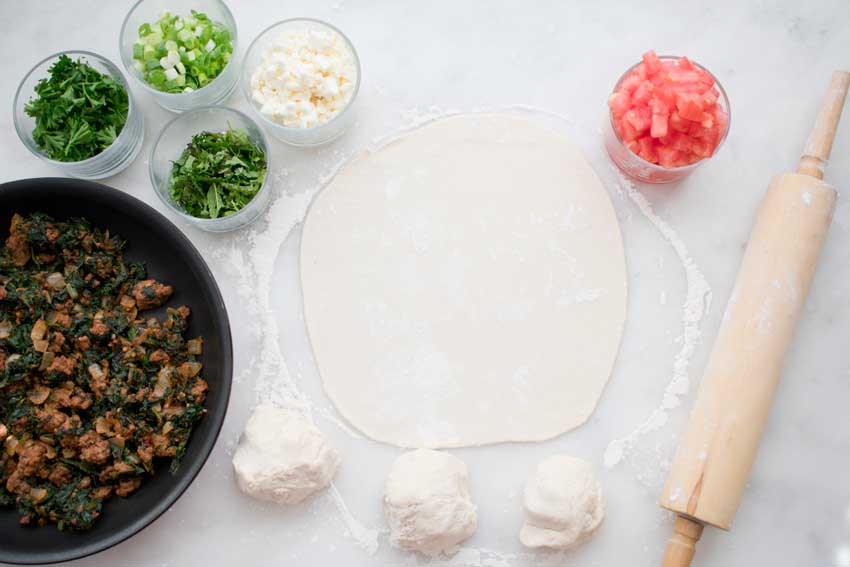
Getting ready to fill the dough

Snickerdoodle Latte

1

I am becoming a regular coffee drinker again. I took a break for a while, but I’ve gotten back into the habit ever since I made Pakistani Coffee with Cinnamon and Cardamom. I’m a sucker for sweet, creamy coffee, especially with some added flavor like cinnamon. This Snickerdoodle Latte recipe checked all those boxes for me. Not to mention no special equipment is needed, so I had no excuse not to give this recipe a try.

Snickerdoodle Latte. This warm, comforting coffee drink is loaded with cinnamon and hints of brown sugar. Plus it’s easily made at home!! No fancy equipment needed! You will be making lattes every day they’re so easy!!

Recipe Author: Serene at House of Yumm
Get the recipe

The Ingredients

There wasn’t a lot to this recipe, and I’m so okay with that. Plus everything is pretty basic so it’s inexpensive and easy to find. I had everything on hand except the milk and light brown sugar. Technically I did have the sugar, but it was dark brown sugar. I’m sure would have worked just as well as light, but I like to stay true to the recipe if I’m blogging the review. I also lucked out and had leftover cinnamon sugar from the Cinnamon Donut Muffins I just made.

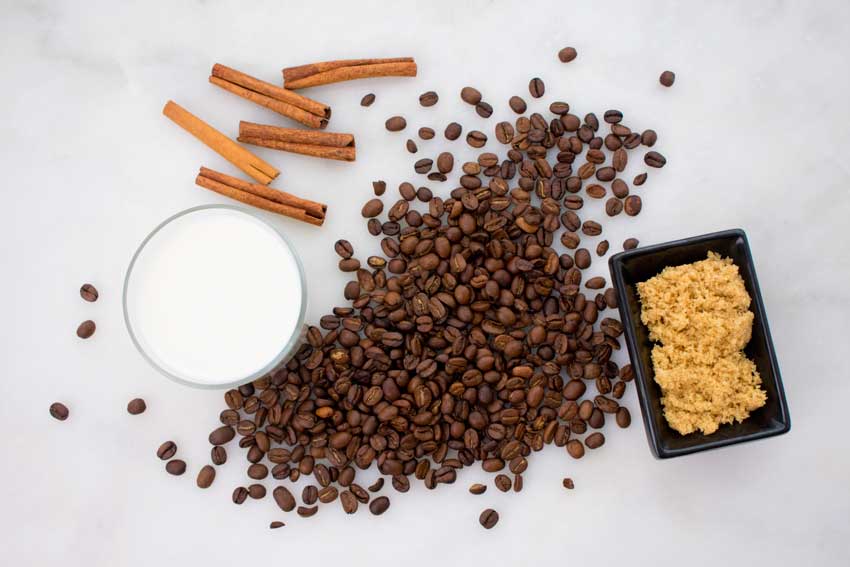
Snickerdoodle Latte Ingredients
Milk, cinnamon, coffee, and light brown sugar

The Process

The recipe lists total time as 2 minutes, but mine took 9 minutes. I’m guessing that’s because I included time to grind the beans and brew the coffee in a French press. Once the coffee is brewed, however, putting this drink together is a snap.

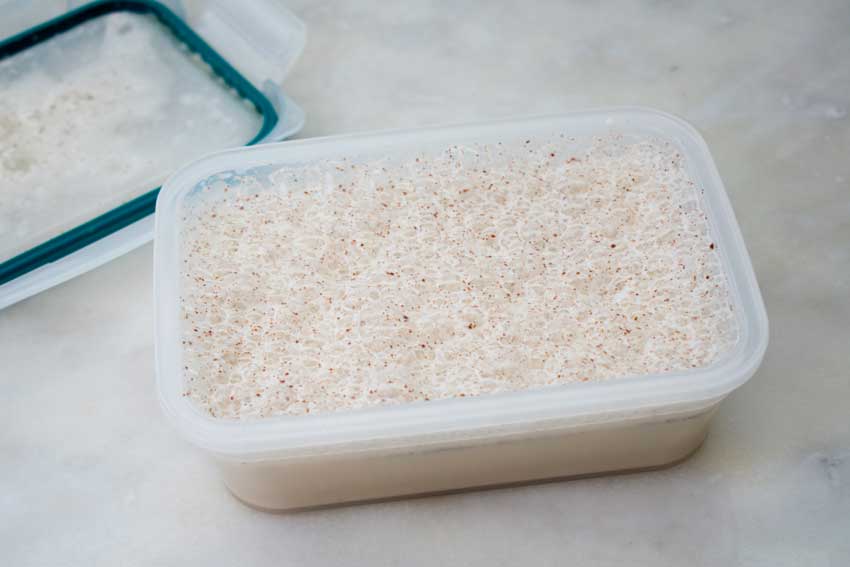
While the coffee brewed, I had plenty of time to blend the sugar, cinnamon, and milk. I added everything to an airtight storage container and gave it a good, long shake. It had tons of bubbles when I removed the lid, but they disappeared pretty quickly. I didn’t even have to spoon any bubbles out by the time I added the milk to the coffee.

Shaken milk, cinnamon, and brown sugar

Cinnamon Donut Muffins

0

Since I started this week with comfort food, I thought I would continue that theme with this Cinnamon Donut Muffin recipe. I do enjoy cinnamon sugar donuts, but they’re a rare treat. I’m just not that into fried foods, and they’re not easy to make at home. However, muffins are no problem for me, so I couldn’t pass up this recipe.

Cinnamon donut muffins will become a favorite to make for breakfast or anytime you want a sweet treat.

Recipe Author: The Southern Lady at The Southern Lady Cooks
Get the recipe

The Ingredients

This recipe is full of kitchen staples like flour, butter, and sugar that are easy to find and inexpensive. I happened to be out of eggs, or I would have had everything needed to make these cinnamon donut muffins. How great is that?!

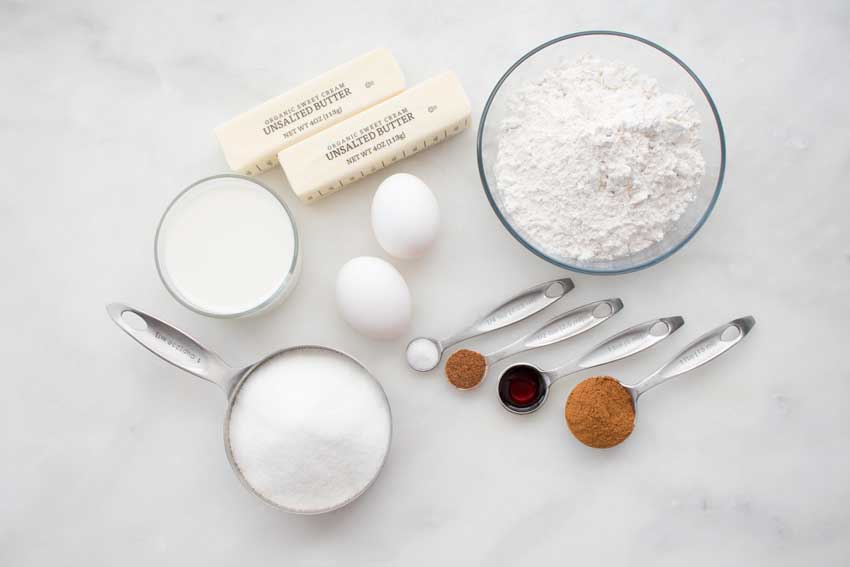
Cinnamon Donut Muffins Ingredients
Milk, butter, flour, cinnamon, vanilla extract, nutmeg, salt, eggs, and sugar

The Process

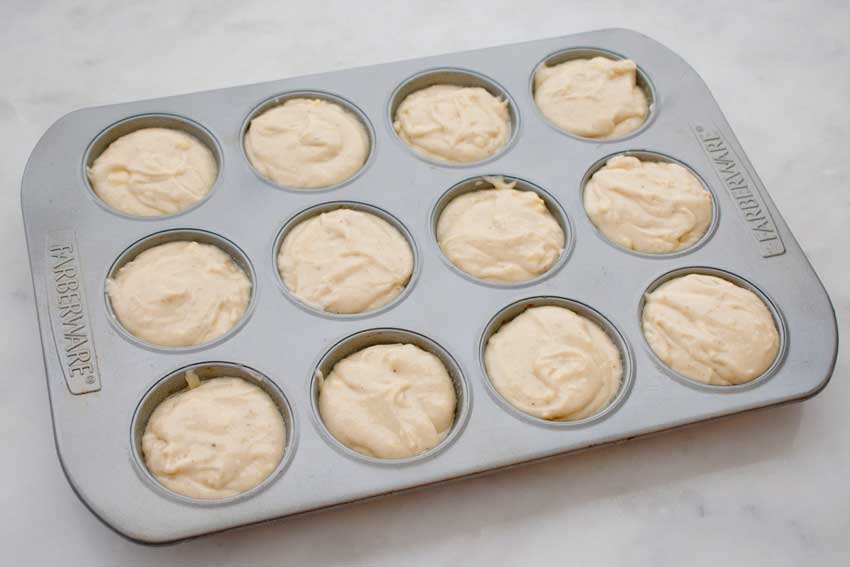
Making these muffins was easy and went very smoothly. I did get a touch “creative” (read: lazy) when I decided to use all the batter to make 12 muffins instead of 18. I ended up really large muffin tops, but they did cook in the allotted 35 minutes. (Do they make muffin pans for 18 muffins? I need to look into that…) Anyway, the total time for this recipe was as follows:

  • 12 minutes prep work
  • 35 minutes to cook
  • 7 minutes to add topping
  • 54 minutes total time

They were cool enough to handle about 30 minutes after taking the pan from the oven, so I got the ingredients for the topping ready to go. Making the cinnamon sugar was just a matter of putting the ingredients into an airtight container and shaking until blended. Melting the butter was slightly more problematic. Let’s just say I no longer trust my microwave’s melt butter setting. It’s a little too enthusiastic.

On my first try I dipped a muffin into the melted butter then immediately dipped that into the cinnamon sugar. There was still lots of butter on the top of the muffin, and the topping looked wet and clumpy. Shaking the butter off didn’t fix the problem, but I found this method gave me nice results:

  1. Dip a muffin in the melted butter and set aside.
  2. Next, dip a second muffin in the melted butter and set aside.
  3. Take the first muffin and dip it in the cinnamon-sugar topping. Twist it to make sure it gets coated thoroughly.
  4. Keep a spoon handy, and use it to spoon the topping over any spots that were missed.
  5. Dip a third muffin in the melted butter and set aside (the idea is you always have one extra buttered muffin), then dip the second muffin you set aside earlier in the cinnamon sugar and spoon the mixture over any gaps.
  6. Keep repeating this pattern until all the muffins have been topped.

I’m guessing this allowed the excess butter to soak into the muffin and made the cinnamon sugar topping look like the author’s pictures.

Muffin pan filled with batter

Creamy Garlic Herb Mushroom Spaghetti

Ah, comfort food. It’s practically a necessity, but it isn’t necessarily healthy. That’s why this recipe for Creamy Garlic Herb Mushroom Spaghetti got my attention. The sauce is made with milk instead of cream, it has only one tablespoon of butter per serving, and it’s made with whole wheat pasta. So while it’s not a plate of steamed vegetables, it’s been lightened up enough that I won’t feel guilty helping myself to a big dish of it.

This Creamy Garlic Herb Mushroom Spaghetti is total comfort food! Simple ingredients, ready in about 30 minutes.

Recipe Author: Lindsay at Pinch of Yum
Get the recipe

The Ingredients

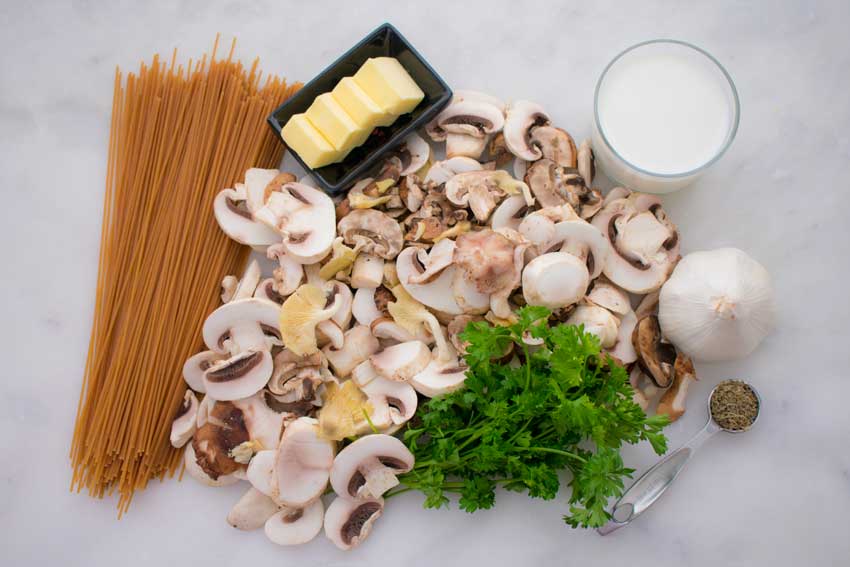
There’s nothing complicated about the ingredients, and nothing was difficult to find. I had planned to buy 16 ounces of sliced mushrooms, but I noticed they only came in 8- or 12-ounce packages. Two 8-ounce packages would have been an easy option, but then I noticed the 4-ounce package of gourmet mushrooms nearby. It was a mix of sliced baby bella, shiitake, and oyster mushrooms. I decided to mix that with the plain mushrooms to make my mushroom spaghetti a little fancier.

Creamy Garlic Herb Mushroom Spaghetti Ingredients
Whole wheat spaghetti, mushrooms, butter, milk, garlic, herbes de Provence, and parsley

The Process

Just as I had hoped, this mushroom spaghetti dish was very easy to make. Buying the mushrooms already sliced cut down on a lot of prep work, and I was able to make the sauce while the pasta cooked.

Everything went smoothly, but make sure you watch the sauce closely after you add the milk–it thickens very quickly.

My times were pretty close to those listed:

  • 9 minutes prep
  • 19 minutes cooking
  • 28 minutes total
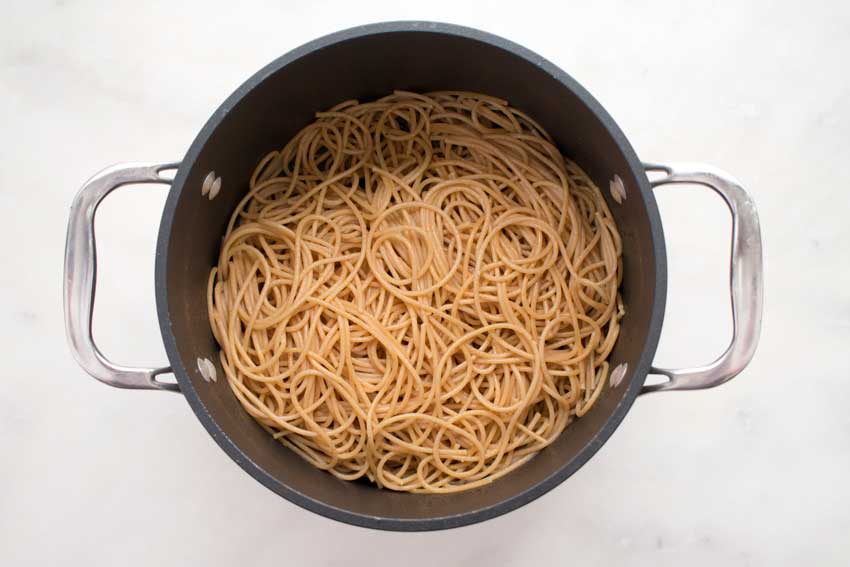
Cooked whole wheat spaghetti
Cooked whole-wheat spaghetti

Sweet Moroccan Mint Tea

0

I know it’s cooling off in many areas, but here in South Florida, it’s still hot. This Sweet Moroccan Mint Tea recipe can be enjoyed hot or iced, so it will fit with whatever the weather is like in your area. And it’s no coincidence that it fits right in with the spiced chicken wraps I made earlier this week. Isn’t it wonderful how things work out sometimes?

This refreshing staple of North African culture is easy to make and incredibly refreshing.

Recipe Author: Sue at The View From Great Island
Get the recipe

The Ingredients

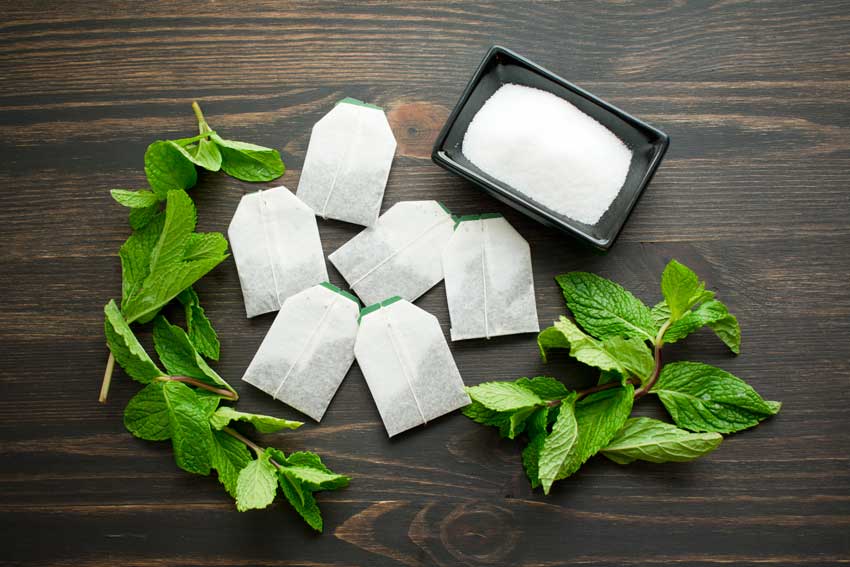
Like the rosemary lemonade I made recently, this mint green tea recipe has only four ingredients. I had the water and sugar, so all I needed to pick up from the grocery store was a bunch of fresh mint and green tea (I opted for decaf).

Sweet Moroccan Mint Tea Ingredients
Green tea, mint, and sugar

The Process

This recipe says it can be enjoyed hot or iced, so I tried it both ways. Brewing was the same for both versions. I boiled four cups of water and let four teabags steep for three minutes (any longer and the tea can get bitter). Then I added 1/4 cup of sugar and stirred until it dissolved. Total time for this step was 6 minutes.

For the hot tea, I added two sprigs of mint to each glass, then poured the hot tea. I waited a few minutes for the mint to steep before I started drinking.

For the iced version, I added four sprigs of mint to the pot after I starred in the sugar. I let the mint steep while the tea cooled a little. I removed the mint after a few minutes (it had turned brown), poured the tea into a pitcher, and let it chill for an hour before serving over ice.

Which version of this mint green tea was better? I think I preferred the hot version, but both were really good.

Steeped green tea
Steeped green tea
Sweet Moroccan Mint Tea

Green Tea (Hot or Iced)

The Hungry Pinner
Prep Time 3 minutes
Cook Time 3 minutes
Total Time 6 minutes
Course Drinks
Servings 4

Ingredients
  

  • 4 cups water
  • 4 green tea bags
  • ¼ cup sugar (or 3 tablespoons honey) or to taste

Instructions
 

  • Bring water to a rolling boil.
  • Remove from heat and add tea bags. Steep for 3 minutes.
  • Add sweetener and stir until dissolved.
  • Serve warm or refrigerate for 1-2 hours and serve over ice.

Notes

Need to scale this recipe? The ratio is 1 tea bag + 1 tablespoon sugar per cup of water. If using honey, it's 1 3/4 teaspoons per cup.