Home Blog Page 45

Hazelnut Italian Hot Chocolate

0

I don’t have a huge sweet tooth, but when I have the urge Nutella is pretty high on my list of favorites. So is chocolate–especially dark chocolate–which is why this Hazelnut Italian Hot Chocolate recipe called my name. I usually make my hot chocolate from a mix. I know, I know. Once in a while, I’ll use cocoa powder and milk to make the real thing. This recipe sounds like it will take that to the next level, and I have the feeling it will be a fun trip.

This Hazelnut Italian Hot Chocolate, or Cioccolata Calda alla Nocciola, is a seriously indulgent thick hot chocolate recipe made with real chocolate, hazelnut liqueur and Nutella.

Recipe Author: Michelle at A Tipsy Giraffe
Get the recipe

The Ingredients

Most everything was either in my pantry or super easy to find. The only exception was the hazelnut liqueur. It was easy to find, but I had to make a special trip the the liquor store to get it. I paid a little over $20 for a 750ml bottle. It wasn’t hugely expensive, but it was the most expansive ingredient.

The only thing I couldn’t find was a bar of milk chocolate. I was in the baking section, so maybe milk chocolate for baking isn’t a thing (I’m far from a baking expert). There was only dark chocolate on the shelf, so I improvised and grabbed a bag of milk chocolate chips. The chocolate had to be chopped anyway, so this gave me a little head start on that step.
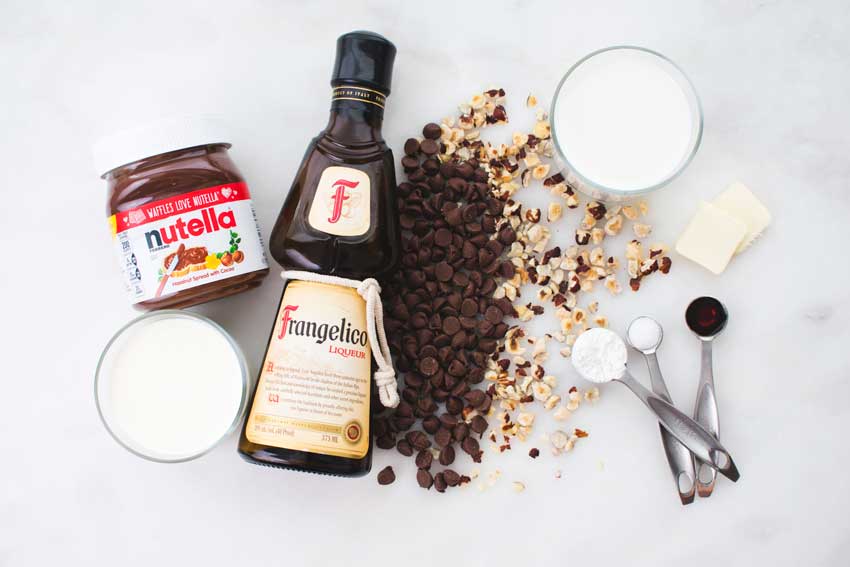
Hazelnut Italian Hot Chocolate Ingredients
Nutella, milk, hazelnut liqueur, milk chocolate, chopped hazelnuts, heavy cream, butter, cornstarch, salt, and vanilla extract

The Process

This Italian hot chocolate recipe wasn’t difficult to make, but it did take me a lot longer than specified. I spent 23 minutes making it versus the 13 minutes listed on the recipe. That doesn’t include time to garnish and serve, but that was very fast.

I made the hot chocolate, then the Nutella sauce, and finally the whipped cream. That worked okay, but I would switch the order to whipped cream, hot chocolate, then Nutella sauce. The reason is the whipped cream took the longest of the three, and the sauce cooled very fast.

Hazelnut Whipped Cream

This step took the most time to prepare. I used a stand mixer to whip the cream, but you can use a hand mixer or food processor too. I have made whipped cream in my food processor in the past, and it’s faster than the other two methods. Just turn the processor on and pour in the whipping cream (mix in the hazelnut liqueur first so they blend together).

Italian Hot Chocolate

The hot chocolate took a few minutes, but it was very easy to make. I used milk chocolate chips and chopped them up before I added them to the pan. However, I still noticed some small chunks of chocolate that just wouldn’t dissolve no matter how much I whisked. If you can, buy a bar of milk chocolate and shave or grate it so it melts thoroughly.

Nutella Sauce

This step was super fast since the ingredients just need to be microwaved for a few seconds in a small dish. Ten seconds melted the Nutella, and a quick stir blended it with the milk. It made a thick sauce, and I didn’t need to add any extra milk.

To Serve

This Italian hot chocolate is very thick and rich, so either serve in a small mug or only fill a regular mug part way. Then spoon in some whipped cream, drizzle on the Nutella sauce, and sprinkle with chopped hazelnuts. I didn’t time this step, but I’d say it took 1-2 minutes.
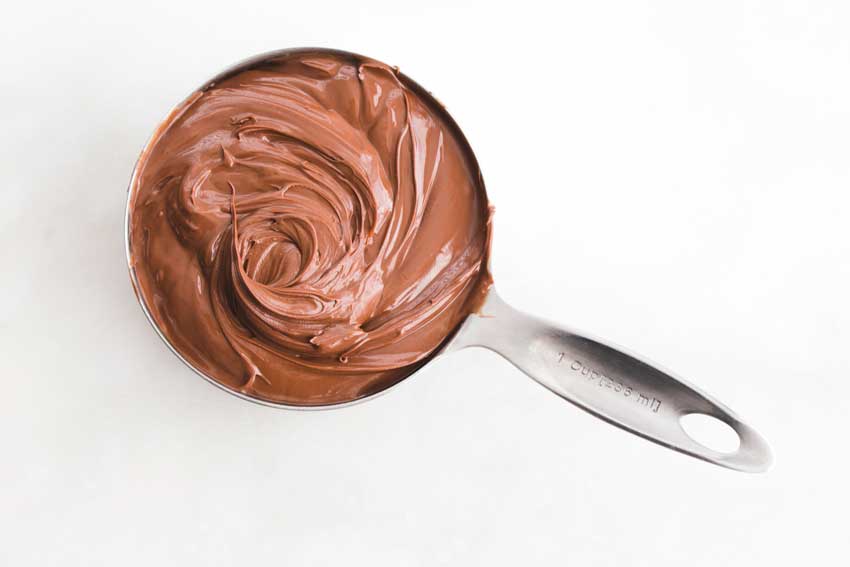
One cup of Nutella hazelnut spread

Green Beans with Tarragon

0

Every good ham needs a side dish, and this recipe for Green Beans with Tarragon sounds perfect. Why? Besides being full of things I like, it sounds like it will be quick and easy too. Plus it’s always good to add something green to your plate. I’m bad about that—carbs usually win out over greens for me. However, this recipe sounds like an easy way to add one of my favorite vegetables to my plate. I’m all for that!

This is my husband Jack’s go-to recipe for preparing green beans. There’s just something about the green beans paired with tarragon and the light garlic seasoning that really enhances the flavor of the green beans.

Recipe Author: Jack and Martha Pesa at A Family Feast
Get the recipe

The Ingredients

This recipe has just a few ingredients, and I had most on hand. All I had to shop for was the produce. The fresh tarragon and green beans were only a few dollars. It actually felt a little weird to only need two inexpensive items for part of my Christmas dinner, but I’m not complaining.

Green Beans with Tarragon Ingredients
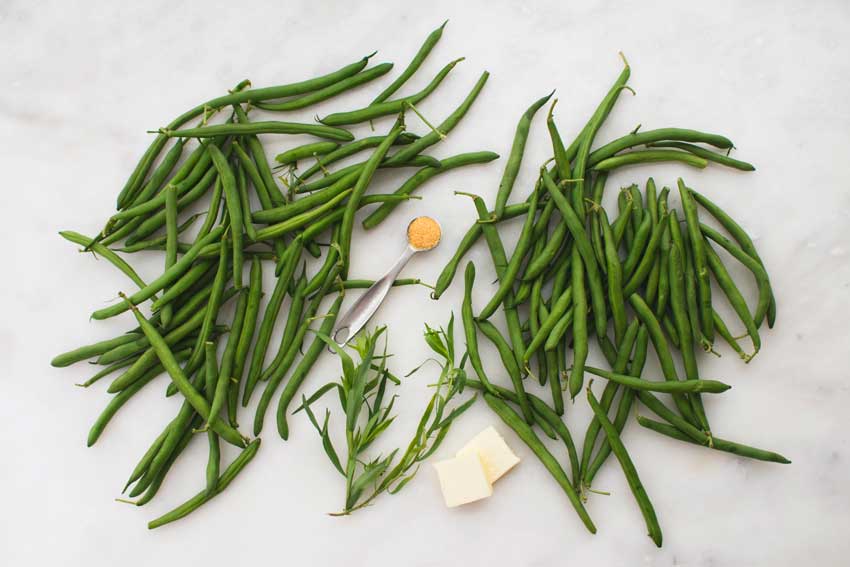
Green beans, tarragon, garlic powder, and butter

The Process

My tarragon green beans were ready in just 15 minutes. I put a 4-quart pot of water on the stove to boil while I snapped the stems off the green beans. The water wasn’t quite ready by then, so I went ahead and mixed the rest of the ingredients in a ramekin so they would be ready.
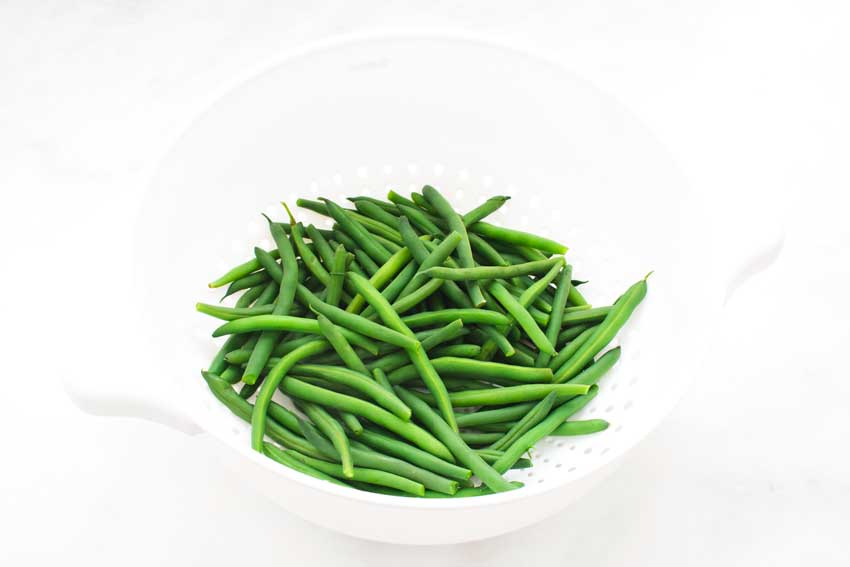
The water was boiling by that time, so I put the green beans in for 6 minutes (I like them pretty tender). Once they were ready, all I had to do was drain them, put them back into the pot, and stir in the butter and seasonings. That’s it!

Draining the boiled green beans

Bourbon Orange Glazed Ham

The holiday season is in full swing, and Christmas is almost here. I made a ham last year, and my husband loved it so much I decided to make one this year too. In fact, this is going to become a new Christmas tradition for us. This year I found a recipe that uses one of our favorite things in the glaze: bourbon. I might have drooled a little when I read this Bourbon Orange Glazed Ham recipe, and my husband’s eyes lit up when I told him about it. Ham and bourbon must be the best idea ever—why didn’t we think to combine the two?

This post was originally published on December 3, 2018. The text and photos were updated on December 6, 2021. The review and rating have not been changed.

Sticky, sweet, tangy, and full of flavor… this bourbon mustard and orange glazed ham is one that you’ll be happy to have as the star of your holiday meal!

Recipe Author: Amanda at The Chunky Chef
Get the recipe

The Ingredients

The author recommends a particular brand of ham in the blog post with this recipe (I forget the name, but there’s a link in her post), but I went with an $11 grocery store ham. The brand she recommends looked and sounded incredible, but it was way out of this year’s budget. It will go on my try it when I can list for sure though.

Tip: A nice, thick layer of skin and fat on the ham is ideal for roasting. They both help keep the meat moist while cooking and the fat adds a bit of flavor, IMO. The skin is pretty easy to remove once cooked and can be saved to make cracklings.

Other than the ham, all I had to buy was a jar of orange marmalade. I had the rest of the ingredients on hand, including the whole-grain Dijon mustard. I think I have a real thing for mustard—I have at least four different types in my refrigerator. Is that weird?

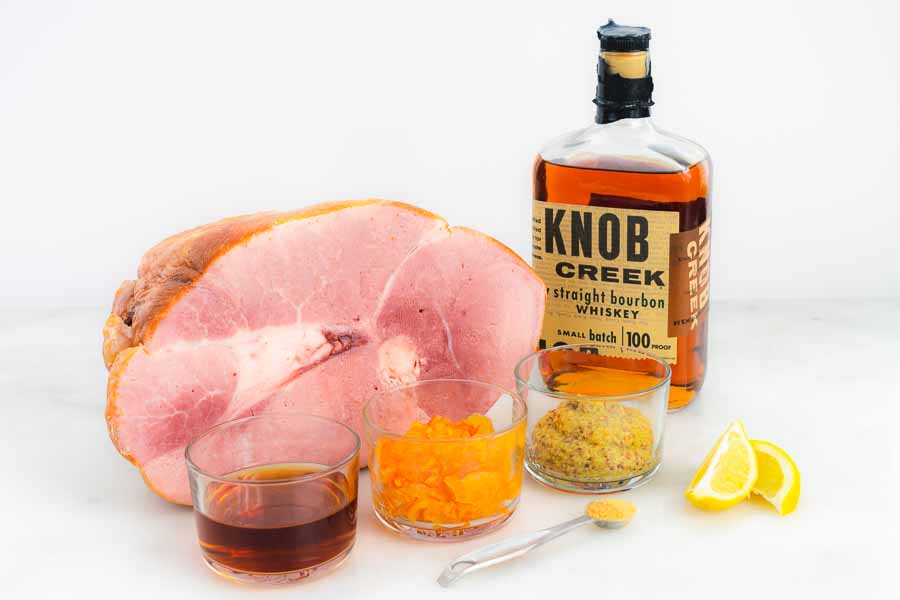
Ham, bourbon, maple syrup, orange marmalade, whole grain dijon mustard, ginger, and lemon juice

The Process

Glazed ham has to be one of the easiest dishes to make, and this recipe was no exception. I’d say scoring the ham is the most labor-intensive part of the process, and that really isn’t much work at all with a sharp chef's knife. The rest is just a matter of mixing up the glaze ingredients and brushing them onto the ham a few times.

As far as special equipment goes, you will need a roasting pan with a rack and a basting brush. Tip: be sure you have plenty of aluminum foil on hand. I had just enough to cover the ham but not enough to also line the bottom of the baking pan. That sticky glaze dripped off the ham and burned onto the bottom of the pan. I had to soak and scrub it a few times to get it clean. You want to avoid that, trust me!

Even though you’re really just reheating the ham since it’s already cooked, it does take a while. Here is how my time broke down:

  • 8 minutes to prep
  • 2 hours to cook (my ham was about 6 1/2 pounds)
  • 9 minutes to increase the oven temperature
  • 20 minutes to cook*
  • 20 minutes to rest
  • 2 hours 57 minutes total

*For the last 5 minutes I turned the broiler on to caramelize the glaze.

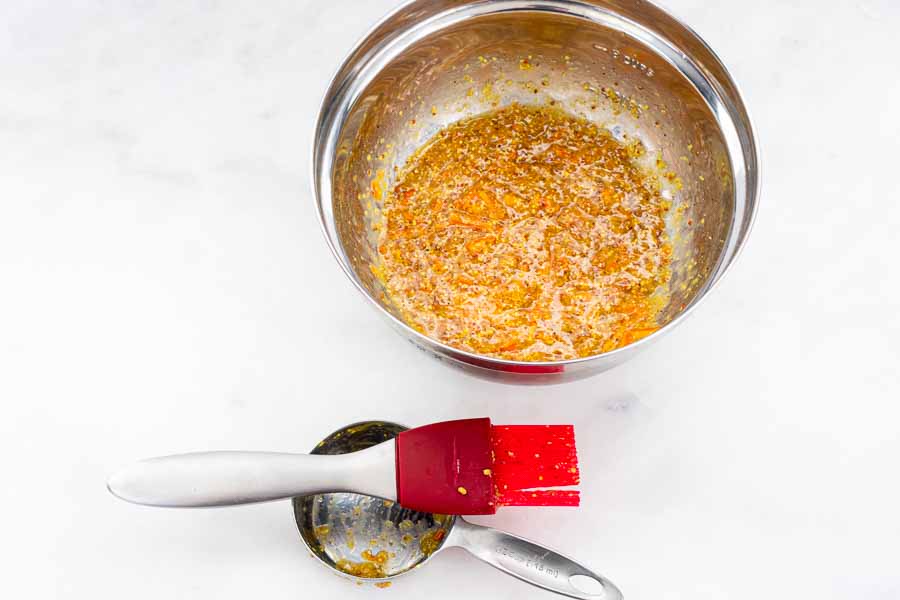
Bourbon orange glaze with a silicone pastry brush

Pecan Cobbler

0

My craving for Southern food just wouldn’t be complete without dessert, and cobbler is a pretty Southern dessert. This Pecan Cobbler recipe isn’t the traditional fruit cobbler recipe I’m used to, but it does remind me of another favorite Southern dessert: pecan pie. How delicious does that sound? It’s almost like getting two desserts in one. I love it!

This decadent Southern dessert recipe is super easy to make. The cobbler and sauce are created in one pan. The luscious, velvety texture makes the perfect bite…after bite…after bite!

Recipe Author: Paula at Call Me PMc
Get the recipe

The Ingredients

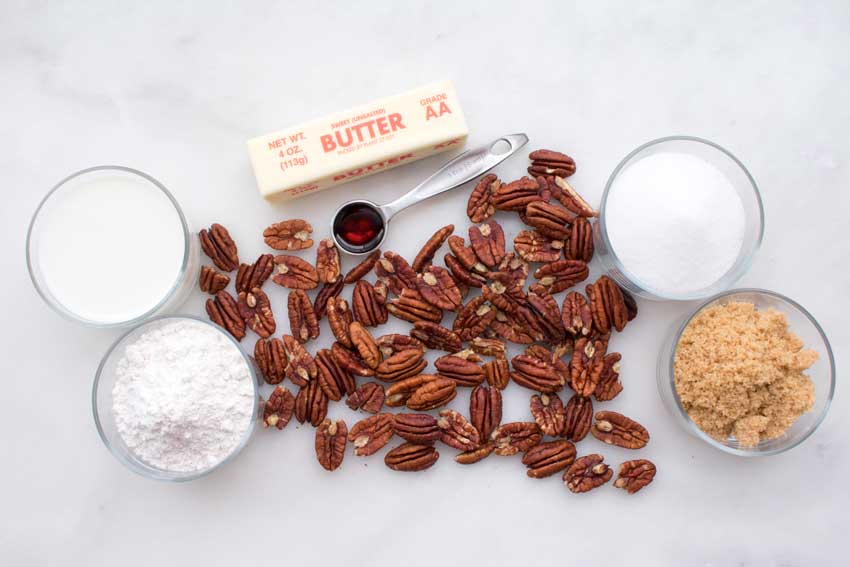
The good news is the list of ingredients for my pecan cobbler was nice and short. It was also filled with several items I keep on hand, so I didn’t have to buy a lot. Really, all I had to add to my shopping list was butter, milk, and pecans. The bad news is the pecans were kind of pricey at $10 for a bag. I used most of the bag for this recipe with just a little bit left over.

Pecan Cobbler Ingredients
Pecans, self-rising flour, milk, butter, vanilla extract, sugar, and brown sugar

The Process

I have never made a cobbler before, but the process was pretty straightforward. I spent 12 minutes on prep work and 35 minutes cooking for a total of 47 minutes. That doesn’t include time to cool a bit before serving.

The instructions were easy to follow, but I came very close to making a mistake in step 4. That step says to add sugar, and I almost added the granulated and brown sugar when just the granulated sugar should have been added. The brown sugar doesn’t go into the cobbler until step 6.

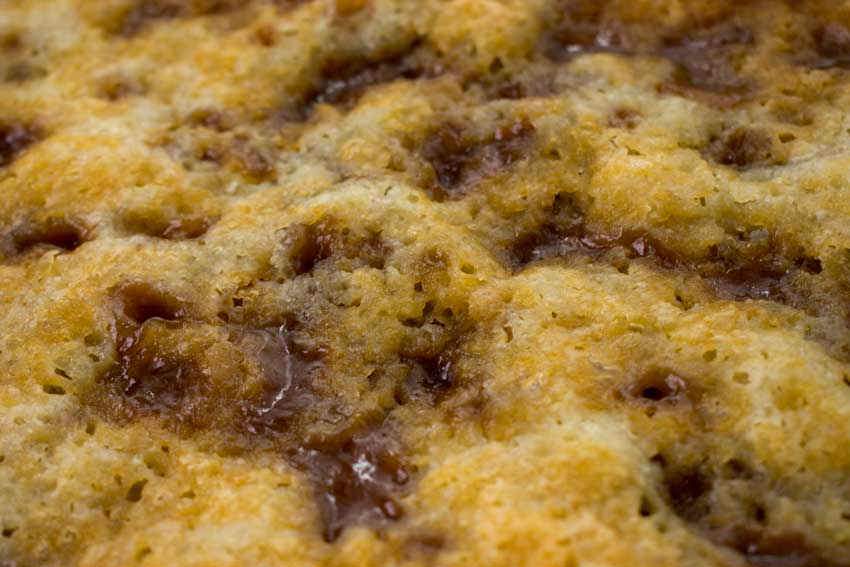
Making this dessert was just a matter of mixing up a few ingredients, then layering the mixture with the rest of the ingredients in a baking dish. No problem. Then you have to pour hot water over the layered ingredients. What? It looked and sounded weird to me since I had no idea how to make a cobbler, but it all worked out. I ended up with a crisp and gooey pecan cobbler that was to die for.

Pecan Cobbler

Southern Chicken and Corn Chowder

I had a craving for some Southern food this week, and this Southern Chicken and Corn Chowder recipe sounds too good to pass up. Its packed with lean chicken breasts and vegetables, but it was the bacon that got my attention. There’s something about cooking with bacon that makes a recipe just a little extra. Plus I rarely eat bacon, so this is going to be a treat.

This hearty chicken and corn chowder comes together easily and cooks for a comforting corn chowder you’ll love

Recipe Author: Robyn at Add a Pinch
Get the recipe

The Ingredients

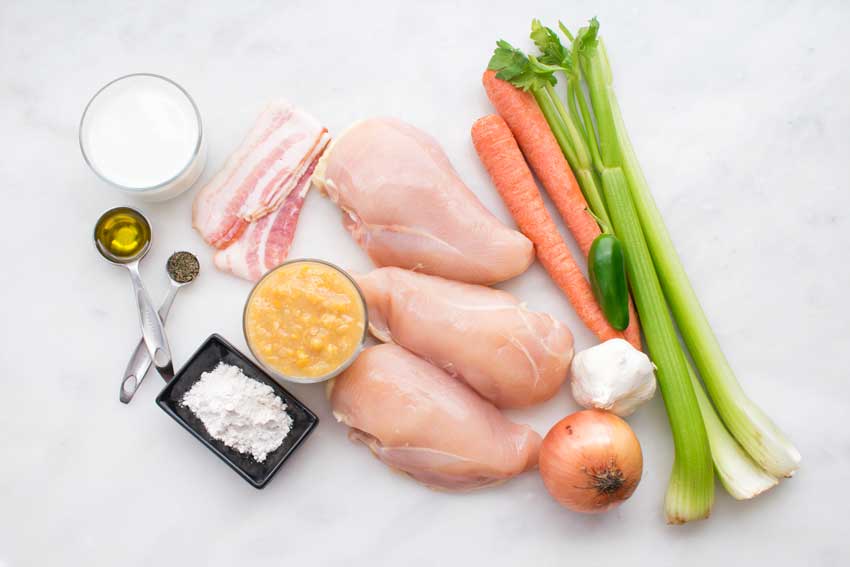
I had some carrots and celery leftover from another recipe, and the dry goods like salt, pepper, thyme, and flour on hand. My grocery list for this recipe wasn’t too long, and everything I needed was easy to find except the frozen creamed corn. I didn’t want to make a special trip to hunt it down, so I substituted (3) 14.75-ounce cans of creamed corn. The frozen creamed corn needed to be thawed, so I figured canned would be one less step, and it worked very well.

Southern Chicken and Corn Chowder Ingredients
Chicken breasts, creamed corn, flour, olive oil, pepper, milk, bacon, carrots, celery, jalapeno pepper, garlic, and onion

The Process

This chicken and corn chowder recipe was pretty easy to make. The entire process took 47 minutes, with 15 minutes for prep and 32 minutes to cook.

I used a 5-quart cast-iron Dutch oven, and it was just big enough for this recipe. Anything smaller would not have worked! A 2-quart saucepan was the right size for the milk mixture.

Other than a large pot, all you need for this recipe is a sharp knife and a cutting board for all the chopping. I thought about using my vegetable chopper, but the old fashioned way worked just as well with less cleanup.

The only slight difficulty I had was managing to constantly stir the milk and flour mixture while the chicken and vegetables were browning. If you can’t multi-task, you will want to make the milk mixture first, then brown the chicken and vegetables. Once you have those mixed, there’s really no work left.

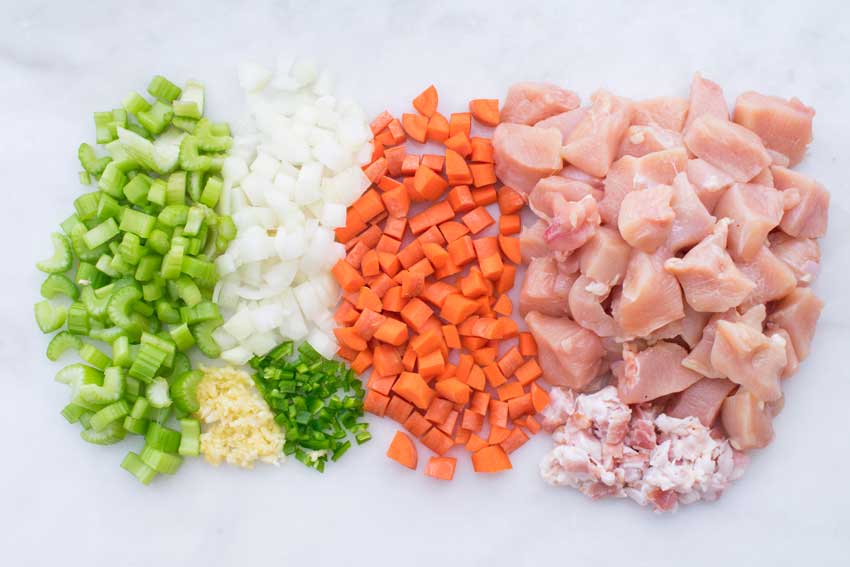
Prepped meat and vegetables
Sliced celery, chopped onion, minced garlic, and jalapeno pepper, diced carrots and bacon, and cubed chicken

Tiramisu Milkshake

If you’ve been reading my blog or just poking around, you may have noticed I like tiramisu. Okay, I LOVE tiramisu. And I’ve made it three ways so far for this blog. Well, today is time for the fourth way: a Tiramisu Milkshake. I am so looking forward to trying this recipe!

Tiramisu Milkshake Recipe – sweet and creamy shake that tastes just like Tiramisu! Serve with ladyfingers and enjoy!

Recipe Author: Anna at Crunchy Creamy Sweet
Get the recipe

The Ingredients

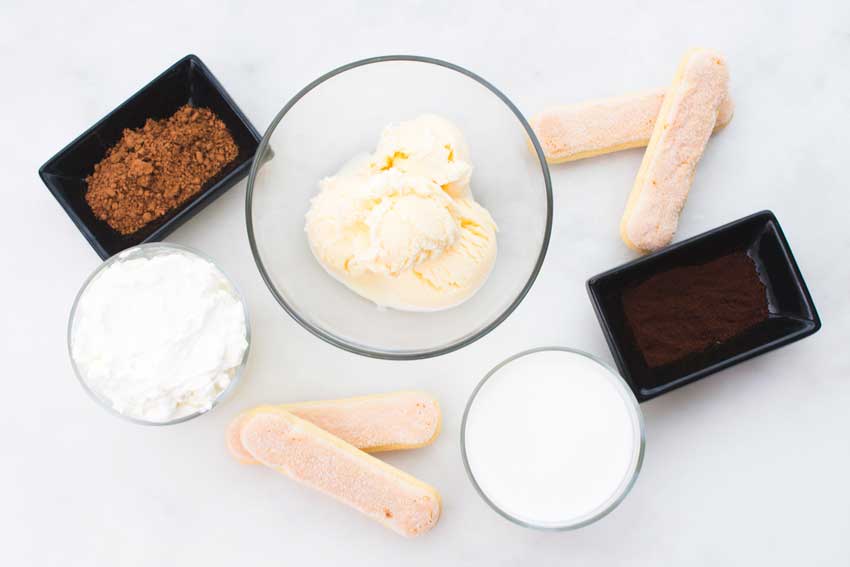
Drink recipes usually have short ingredients lists, and this tiramisu milkshake recipe is no exception. I got really lucky and had everything except the ladyfingers (biscotti savoirdi) garnish.

The vanilla ice cream I had wasn’t the brand called for in the recipe, but I was okay with that. Instead of Breyer’s, I used Blue Bell. I like it for milkshakes because it’s soft and creamy right out of the container. There’s no struggle to scoop it at all, and it’s easy on my blender.

Another substitution I made was the espresso powder. I had instant espresso crystals in my pantry, so I pulled them in my mini-prep and it turned the crystals into a powder.

Tiramisu Milkshake Ingredients
Vanilla ice cream, whipped cream, cocoa powder, ladyfinger cookies, and espresso powder

The Process

I’m sure it’s no surprise this recipe was quick and easy to make. I had my tiramisu milkshake blended and garnished in 3 minutes.

Speaking of garnishes, don’t skip them. They’re usually just decoration, but they really add to the taste of this milkshake. Dipping the ladyfingers in the shake and cocoa powder covered whipped cream was heavenly!

Finally, I used a soda glass for this shake, as you can see in the first picture. The recipe says it makes two servings, but I got just over a glass full. You’ll need to use smaller glasses or double the recipe for two servings.

Tiramisu Milkshake

Lemon Garlic Grilled Zucchini

0

I needed a light side to accompany the rich deliciousness of my porchetta, and preferably a healthy and easy one too. This Lemon Garlic Grilled Zucchini recipe was a perfect fit. It’s healthy, easy, grilled, and has plenty of garlic, all things my husband and I love. Well, I’m more fond of the easy part than he is since I’m doing the cooking, but it’s all good!

Lemon Garlic Grilled Zucchini -Delicious, and the perfect balance of tender and crisp with a lemon garlic sauce that is bursting with flavor in every bite! This zucchini is a side dish that will go well with any meal!

Recipe Author: Katie at Sashing Dish
Get the recipe

The Ingredients

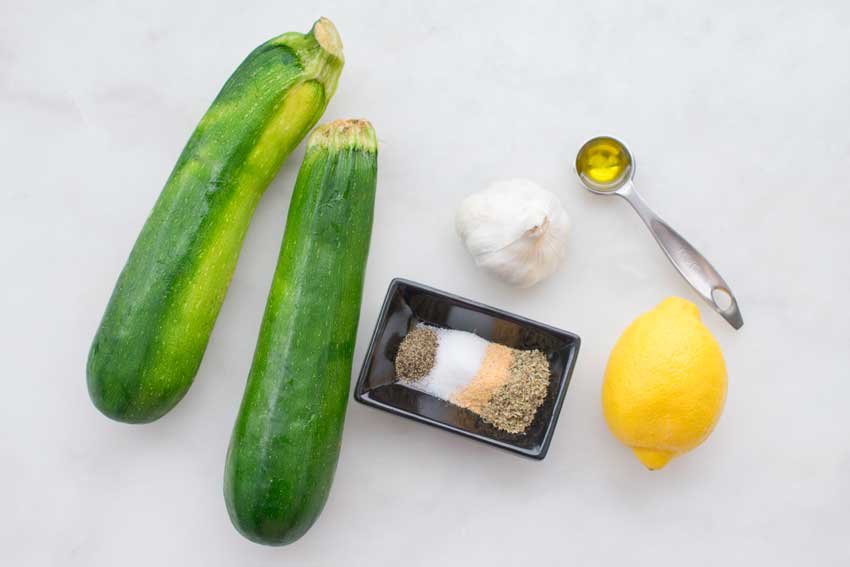
This recipe has something I deeply appreciate: a short list of ingredients. And, bonus, I had several of them on hand. I keep Italian seasoning and garlic powder around for those lazy nights when I just want to make a dish of pasta without chopping anything. Salt, pepper, and olive oil are simply must-haves, and fresh garlic too. That left just the zucchini, garlic, and a lemon for my shopping list. Easy peasy!

Lemon Garlic Grilled Zucchini ingredients
Zucchini, garlic, olive oil, lemon juice, Italian seasoning, garlic powder, salt, and pepper

The Process

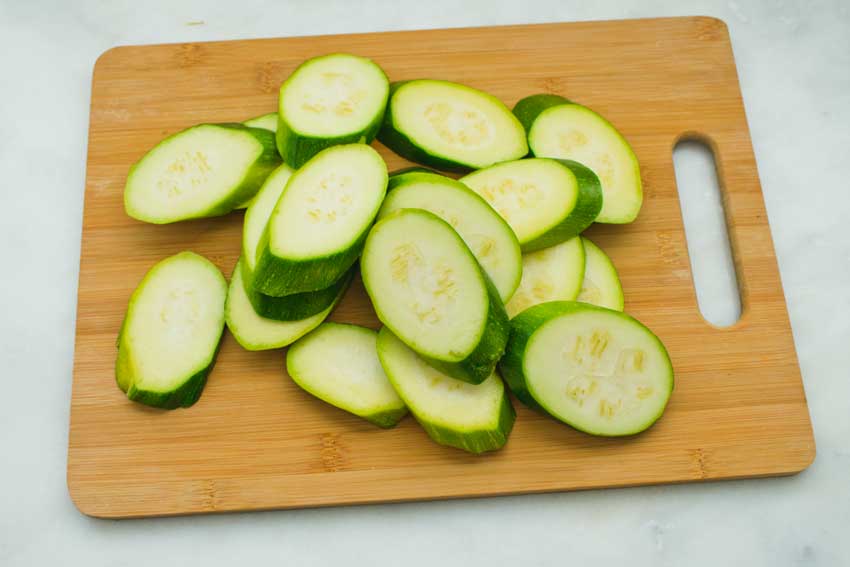
The zucchini needed to marinate for 15 minutes or more, so I prepped it after lunch (that gave it about 2 hours to marinate). It couldn’t have been easier. I added the marinade ingredients to a ramekin and mixed them thoroughly. Then I sliced the zucchini, added it to a ziplock bag, poured in the marinade, and gave it all a good shake.

I grilled the zucchini in a grill pan while the pork roast I was serving it with rested. I had to do it in two batches, so it took a bit longer than the time listed on the recipe. That’s totally on me—it would have been done quicker if I had gone outside to grill. Still, I was pleased with the results and got those nice grill lines. This is how my time was spent:

  • 7 minutes of prep work
  • 16 minutes to cook
  • 23 minutes total (not including time to marinate)
Sliced zucchini
Sliced zucchini

Porchetta

I had never heard of porchetta until I stumbled across this recipe on Pinterest. So what is it? Porchetta is an Italian pork roast. It’s made by wrapping a seasoned pork loin in pork belly, marinating for a day or two, then slow roasting. Then I googled pork belly and found out it was an uncured slab of bacon. Insert Homer Simpson uuuuuugh here. Where has this been all my life? It sounds absolutely mouthwatering!

An Italian way to roast pork that’s so full of flavor (and makes fantastic sandwiches!)

Recipe Author: Caroline at Caroline’s Cooking
Get the recipe

The Ingredients

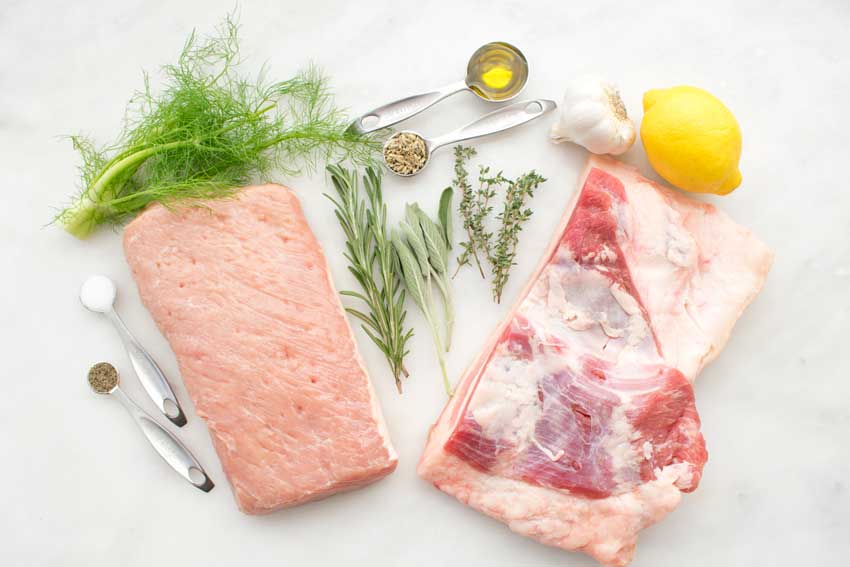
Let’s start with the easy stuff. I always have olive oil on hand, and I had plenty of leftover herbs from this year’s Thanksgiving recipes. That left only a few things to shop for, the pork loin and the pork belly. You know, the major ingredients for this roast.

The pork loin was easy to find, and I picked up a 1 1/2 pound piece for $8.49. The pork belly required some hunting. After visiting three grocery stores, I finally found it at Doris Italian Market. They had packages of small pieces on display, but the butcher was kind enough to cut me a larger two-pound piece.

Porchetta Ingredients
Pepper, salt, pork loin, fennel fronds, rosemary, sage, thyme, fennel seeds, olive oil, garlic, lemon, and pork belly

The Process

The first thing I noticed was the pork belly was not large enough to wrap around the pork loin, no matter how I trimmed it. I would not be deterred, and I watched a few how to make porchetta videos on YouTube. The solution to my problem was to cut my long piece of pork loin into two shorter pieces. Then I butterflied the pork belly to make it longer and thinner. Now both pieces of meat were just the right size for wrapping.

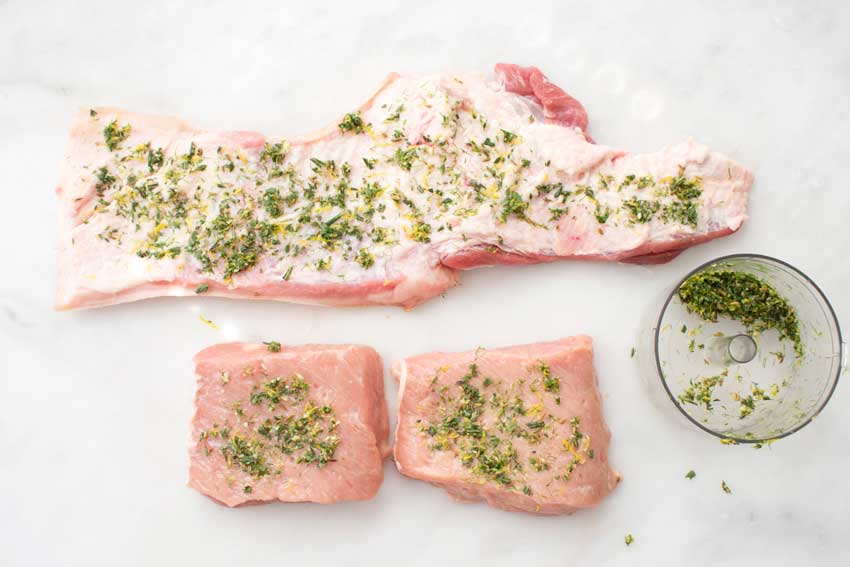
The butterflied pork belly and pork loin halves with marinade paste

One video I watched also showed removing the skin and wrapping the porchetta in it (so the pork loin would be wrapped in the pork belly, and both would be wrapped in the skin). I wanted to keep things simple, so I left the skin on and cut it away as I ate.

Once the meat was cut, I toasted the fennel seeds and used my mini-prep to mix the herbs, spices, lemon zest, and olive oil into a paste. Spreading it onto the pork was simple, then it was time to roll it all up and tie it.

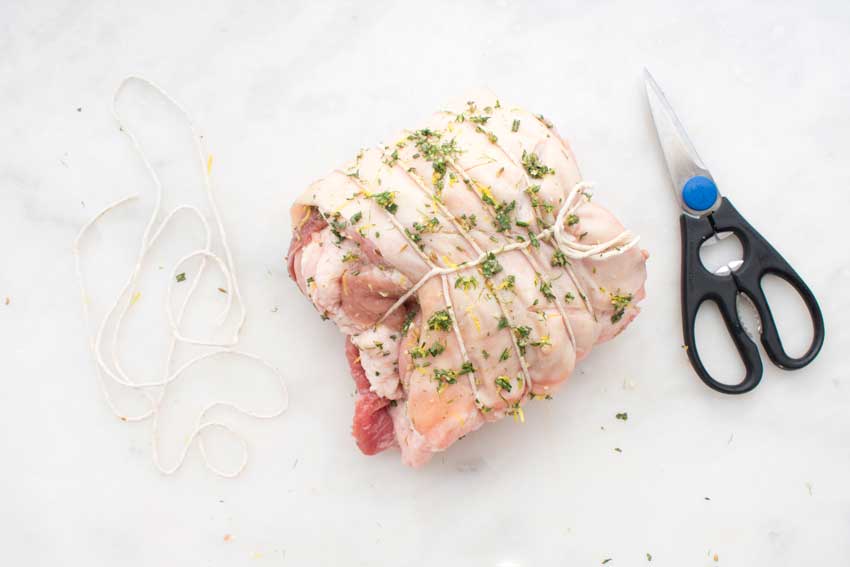
Tying the roast took some patience. I wasn’t sure how much kitchen string I needed, so I measured out roughly 10 feet to be on the safe side. The author linked to really clear written instructions and photos in another of her blog posts. I also saw the technique in the videos I watched.

It wasn’t too difficult to do, but getting the tension right was. Getting the wrap tight enough to hold together but not so tight the pork loin is squeezed out must be an art. My wrapped porchetta seemed flimsy, so I added a crosswise tie of kitchen string to make sure it held together.

The wrapped, tied , and seasoned porchetta
The wrapped, tied, and seasoned porchetta

After two days marinating in the refrigerator, it was time to roast. I let the porchetta sit at room temperature for an hour and a half, then it was onto a roasting rack and into the oven. I had the juiciest, most succulent pork roast I’ve ever tried 2 hours and 20 minutes later.

Here is the breakdown of all the steps and how long the entire process took:

  • 26 minutes to prep
  • 48 hours to marinate
  • 2 hours 20 minutes to roast
  • 10 minutes to stand
  • 2 hours 25 minutes total (not including 48 hours to marinate)

Turkey Soup

The herb roasted turkey I made for this Thanksgiving was amazing! But 10 pounds of turkey for two people means a lot of leftovers. That would normally mean lots of reheated turkey dinners for us, but I thought I’d try something different this year and make turkey soup. This recipe is adapted from my mother-in-law’s fabulous chicken noodle soup (that I must post one of these days).

This warm and comforting turkey soup is an easy way to use quickly up those Thanksgiving leftovers.

The Ingredients

Leftovers. Kidding, there’s more to it than that. First off, you need to make the turkey stock. I did this the day before I wanted to make my turkey soup since it has to simmer for 4-5 hours. I know, it’s a long time, but all you have to do is let the stove do the work while you go about your day. Trust me, it’s so worth it for that delicious stock!

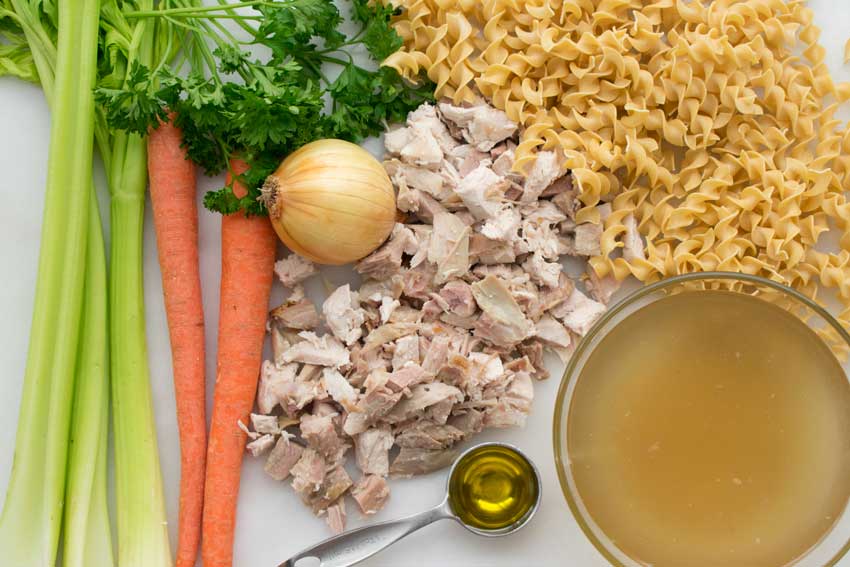
Turkey Soup Ingredients
Leftover turkey, carrots, celery, parsley, onion, egg noodles, turkey stock, and olive oil

The Process

The soup itself is easy and helps use up the leftover carrots and celery from the stock recipe. (I know, the irony of having leftovers from making turkey stock with the leftover turkey!) The complete recipe is below, but here it is in a nutshell:

  • Prep the veggies and turkey meat
  • Cook the veggies in oil until softened
  • Add the meat and stock, simmer for an hour
  • Cook the egg noodles
  • Serve

One thing I wanted to stress was to store any leftover noodles and soup separately. I always used to cook the noodles with the soup, adding them for the last 10 minutes or so. They tasted great, but then I would wind up with soggy noodles in the leftover soup.

My mother-in-law clued me into making and storing the soup and noodles separately to prevent that. Just be sure to drizzle a little olive oil over the cooked noodles and mix well to keep them from sticking together.

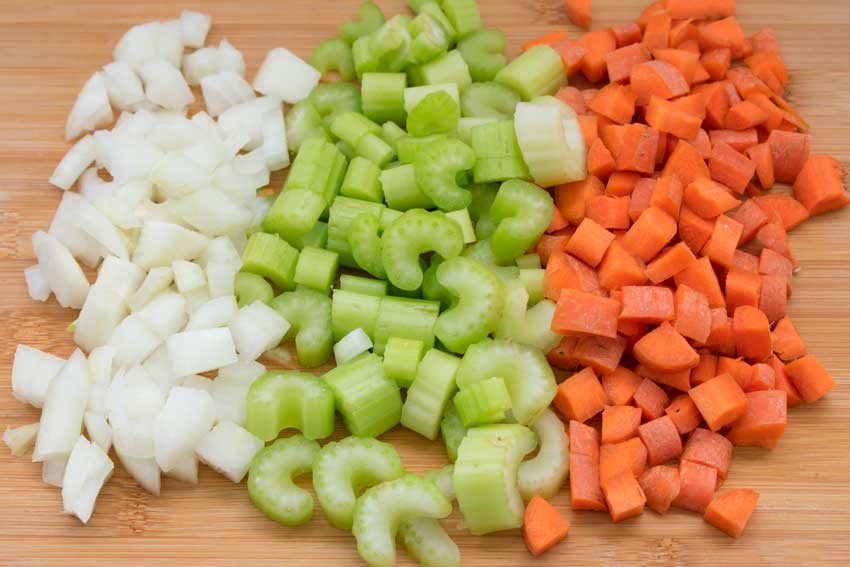
Chopped onion, celery, and carrots
Turkey Soup

Turkey Soup

The Hungry Pinner
This warm and comforting turkey soup is an easy way to use quickly up those Thanksgiving leftovers.
Prep Time 10 minutes
Cook Time 35 minutes
Total Time 45 minutes
Course Main Course
Cuisine American
Servings 6

Ingredients
  

  • 1 tablespoon olive oil
  • 1 medium yellow onion diced
  • 2 carrots diced
  • 3 celery stalks sliced
  • 6 cups turkey stock
  • 2 cups water
  • 2 cups leftover turkey meat (I used half of the breast, a leg, and a thigh) roughly chopped
  • 16 ounces egg noodles
  • additional olive oil
  • salt and pepper to taste
  • parsley chopped, optional

Instructions
 

Turkey Soup

  • Heat the olive oil in a large pot over medium-high heat.
  • Add the onion, carrots, and celery, and saute for 5 minutes or until softened.
  • Add the turkey stock, water, and turkey meat. Bring to a boil then reduce heat and simmer covered for 30 minutes.
  • Check the soup and add salt and pepper to adjust seasonings if needed.

Egg Noodles

  • While the turkey soup is simmering, cook the egg noodles according to the package directions.
  • After draining water, drizzle a little olive oil over the noodles and mix well to keep them from sticking together. Set aside.

To Serve

  • When the soup is ready, add noodles to a bowl then ladle the soup over them and garnish with chopped parsley. 
  • Store any leftover noodles and soup separately to keep the noodles from getting soggy.

Turkey Stock

0

Let’s talk turkey… stock. At its most basic, a stock is made using leftover bones, herbs, and vegetables. It’s a versatile pantry staple I’ve used in so many ways over the years. It can be a base for soups and stews, substituted for water to add extra flavor to most any dish, or even sipped on its own as a light meal or snack.

But to be honest, I usually buy my stock. It’s a matter of convenience and forgetfulness. After all, making stock takes some planning. You need to save the bones, buy the other ingredients, and plan to let it simmer for a few hours. I’m normally not that organized. However, blogging about the recipes I make has made planning my menus important, so this year I have all the ingredients to make turkey stock for the first time. Now to find that stock pot I never get to use…

Have you ever made your own turkey stock? Every time I’ve made a turkey (and I’ve made a TON of turkey’s) I’ve always thrown away the carcass with a bit of a guilty feeling, but making my own sounded like SO much work, and what the heck would I make with Turkey Stock? Now of course I love cooking with Broth’s and Stock’s so I know EXACTLY what I’ll make with the stock! AND it’s SO easy, and fits naturally into the FEAST clean up. In fact you can use any bones to make this bone broth recipe.

Recipe Author: Ashlee Marie
Get the recipe

The Ingredients

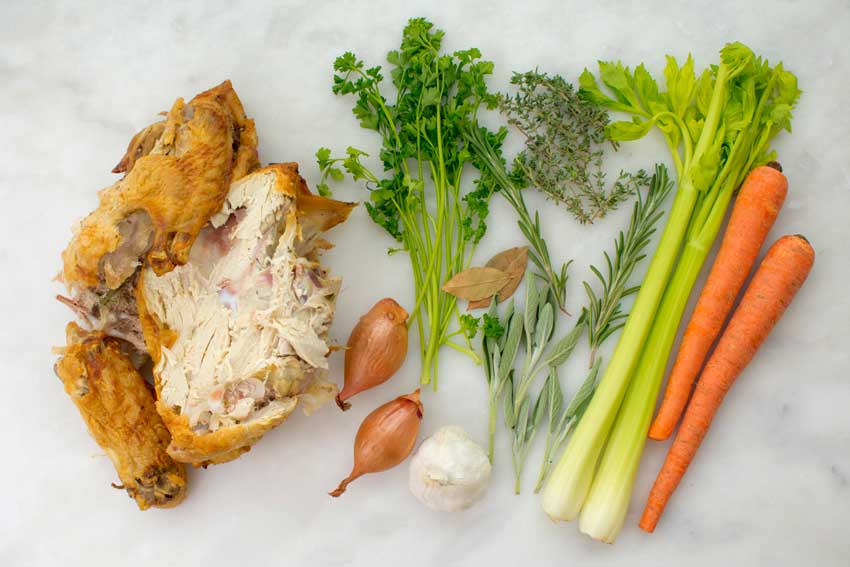
I made an herb roasted turkey for this Thanksgiving, so I have the turkey bones I need to make a big batch of stock. I also had all the herbs needed leftover from that recipe, so all I had to add to my grocery list was the carrots and celery. I’m really happy about that since my intent is to use up my leftovers and not create more.

Turkey Stock Ingredients
Leftover turkey carcass, shallots, parsley, thyme, bay leaves, sage, garlic, celery, and carrots

The Process

I carved all the meat off the turkey the day I made it. This was to make storing the leftover meat easier and give me a head start on my turkey stock. In the process, I broke the carcass into smaller pieces so everything would fit into my stockpot.

The next morning I added the bones to the pot with the herbs and vegetables. Then I covered it all in water, brought it to a boil, and let it simmer for four and a half hours. Toward the end, I tasted the turkey stock and added some salt and pepper to taste.

Yes, it was that easy. The herbs went in whole, with stems and all, and I didn’t even bother peeling the shallots or garlic. I chopped the celery and carrots into thirds so they would fit into the pot and stay submerged. Although looking back, I probably didn’t even need to do that.

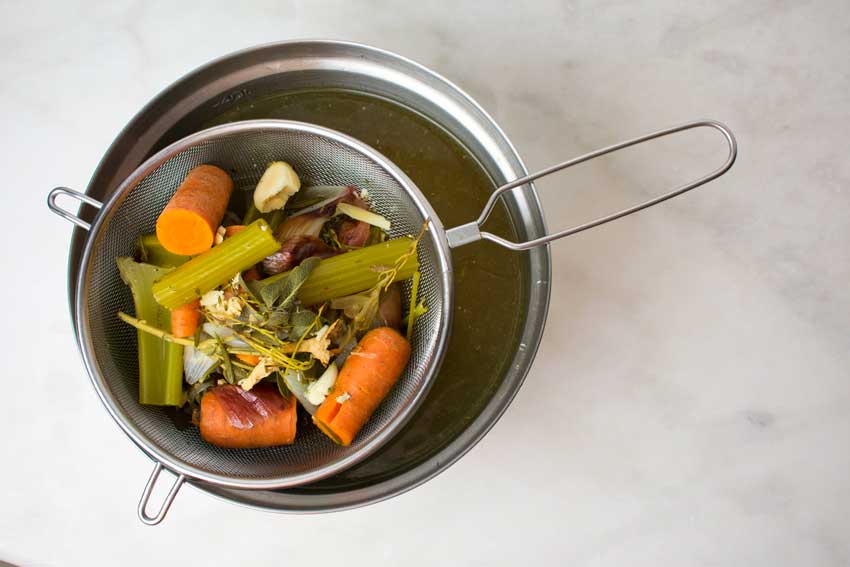
Once the stock was done, I strained it into a large mixing bowl and put the bowl into the refrigerator. This allows the fat to come to the surface and solidify so it can be skimmed away the next day.

After skimming, I ladled my turkey stock into my measuring cup. I divided the 12 cup yield into 6 2-cup servings and stored them in small freezer bags to use later. Just remember to label and date your bags before adding the stock. They’re a lot harder to write in when they’re full, trust me.

Here is the breakdown of all the steps and times to make this turkey stock recipe:

  • 6 minutes to prep
  • 4 1/2 hours to cook
  • 4 minutes to strain
  • Rest overnight in the refrigerator
  • 2 minutes to skim the fat
  • 4 minutes to divide for storage
  • 4 hours 46 minutes total (not including the overnight rest in the refrigerator)
Straining the turkey stock

Maple Manhattan

0

I’ve got the important parts of my Thanksgiving menu covered with Herb Roasted Turkey with Gravy, Roast Asparagus with Red Potatoes and Mushrooms, and Pumpkin Cupcakes with Brown Butter Frosting for dessert. But my Thanksgiving menu just isn’t complete without a cocktail. This year I decided to keep things simple, and that mantra is continuing with the cocktail I selected. This Maple Manhattan recipe looks simple but still keeps with the season thanks to the addition of maple syrup. I think it sounds good, but my husband is not on board. So let’s find out if this holiday twist on a classic cocktail works.

A classic Manhattan gets a fall twist some maple syrup in this Maple Manhattan.

Recipe Author: Pam at Sidewalk Shoes
Get the recipe

The Ingredients

Since the original Manhattan cocktail is a favorite around here, I had most of the ingredients on hand. Sweet vermouth, bitters, maraschino cherries, and maple syrup—check. Surprisingly, I didn’t have the most important ingredient of all: the bourbon. Gasp! Thankfully Mr. Pinner was gracious enough to stop at the liquor store and pick up a bottle of Knob Creek. He can be such a sweetie!

Maple Manhattan Ingredients
Sweet vermouth, bourbon, bitters, maple syrup, and maraschino cherries

The Process

No surprise, I’m sure, that this cocktail was very easy to make. It’s really just a matter of adding everything but the cherry to a cocktail shaker, giving it a good shake, then pouring drinks over ice and dropping in a maraschino cherry to garnish.

My Maple Manhattan was ready in three minutes. Well, I had two Manhattans ready in that amount of time since I doubled the recipe. I had to make one for me and one for my husband to try. The verdict? Check the review below to find out which of us was right about the Maple Manhattan.
The Equipment

Roast Asparagus with Red Potatoes and Mushrooms

0

I considered trying a vegan Thanksgiving dinner this year but my husband was surprisingly unenthused even though eating more plant-based meals was his idea. It’s not that I’m too upset to have roast turkey, and I did find a way to include a vegan dish. Roast Asparagus with Red Potatoes and Mushrooms has some of my favorite vegetables and didn’t look too difficult. Let’s face it, Thanksgiving cooking is rewarding but exhausting (at least for me). I love it when I find a special yet easy dish, and I think this one will fit the bill.

I’m always looking for new recipes to add some variety to the various holiday tables, be it Friendsgiving, Thanksgiving, Hanukkah, Christmas, all the days. We can’t eat the same things over and over. We’re not animals. And as vegans, our festive options could use some expanding.

Recipe Author: Well Vegan
Get the recipe

The Ingredients

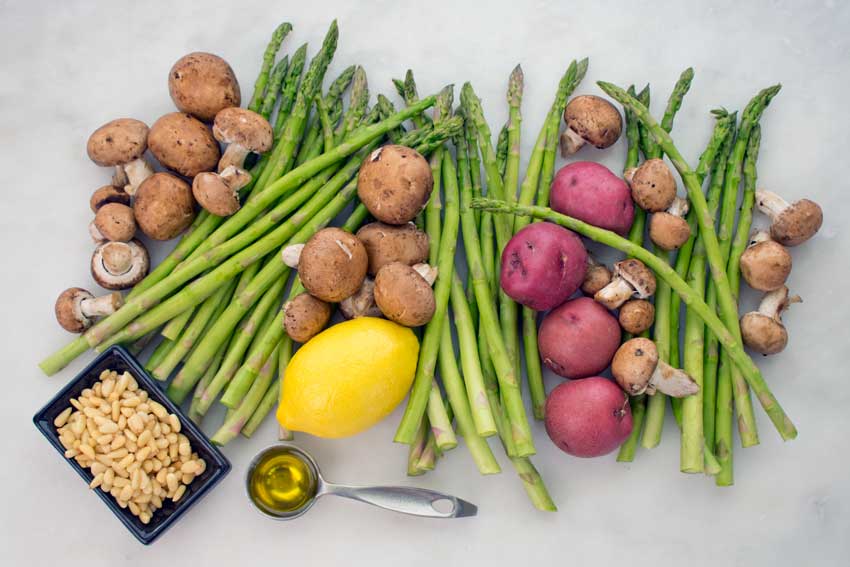
One thing this recipe had going for it was a short list of ingredients that were all easy to find and inexpensive. I did double up on the weight of potatoes from four ounces to eight. Four ounces was literally two tiny red potatoes, and I knew we would feel deprived with one each. Fortunately, the amount I bought seemed just right.

Roast Asparagus with Red Potatoes and Mushrooms Ingredient
Asparagus, pine nuts, crimini mushrooms, lemon, olive oil, and red potatoes

The Process

This roast asparagus recipe was as easy to make as I expected, which was wonderful! I did make some adjustments to it though. First, I didn’t quarter all my mushrooms because they were pretty small, to begin with. I only quartered the larger ones. Next, I used my olive oil sprayer instead of drizzling the oil onto the asparagus. It gave a more even coverage.

Roasting the vegetables went pretty well, but I ended up over-cooking the mushrooms. I think I should have taken them out with the asparagus (after 20 minutes). Next time I’ll roast them together and the potatoes by themselves.

The potatoes were nicely browned and crisp after about 40 minutes, so keep an eye on them. I started with small potatoes and halved them into bite-sized pieces. They were on the small side, and I think they would have burned if I cooked them any longer. Alternately, you could leave them whole and try roasting for the full 50 minutes.
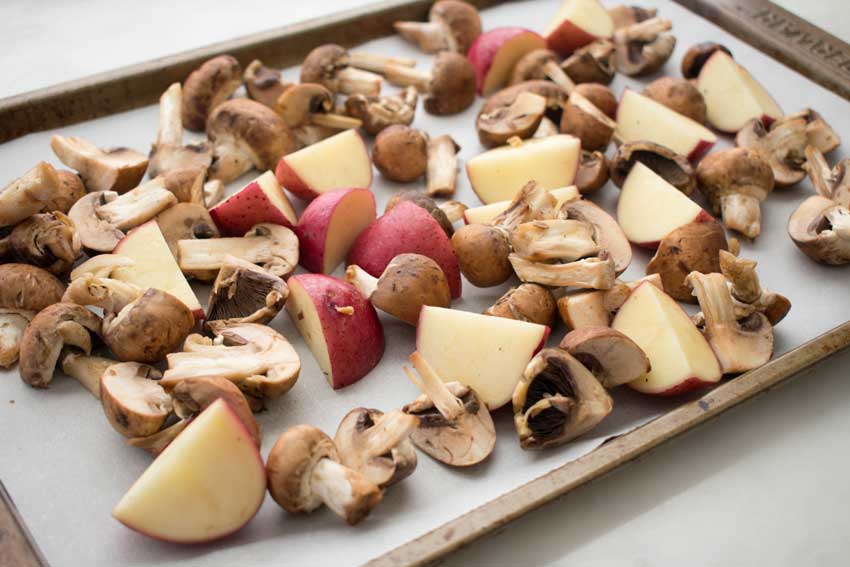
Getting ready to roast the mushrooms and potatoes

The Equipment