Home Blog Page 44

Peruvian Hot Chocolate Infused with Cinnamon and Allspice

0

It’s wintertime, and I had to make this Peruvian hot chocolate recipe the moment I read the title. I know it hasn’t been long since I made Italian hot chocolate, but it’s chocolate! Well, technically hot cocoa, but I’m happy either way. This recipe fits perfectly with this week’s theme and the season, and I won’t have to get out of my pajamas to make it. There’s just something about hot chocolate that requires PJs and cozying up on the sofa—not that I’m complaining!

Peruvian Hot Chocolate infused with Cinnamon and Allspice, the perfect treat on a cold day!

Recipe Author: Amanda at Eat at Our Table
Get the recipe

The Ingredients

This Peruvian Hot Chocolate recipe has a short list of ingredients, and I was lucky enough to have the cocoa powder, cinnamon sticks, and allspice berries in my pantry. I even had milk in my refrigerator for once (it usually goes right into my iced coffee), so I only had to buy the sweetened condensed milk. One ingredient!
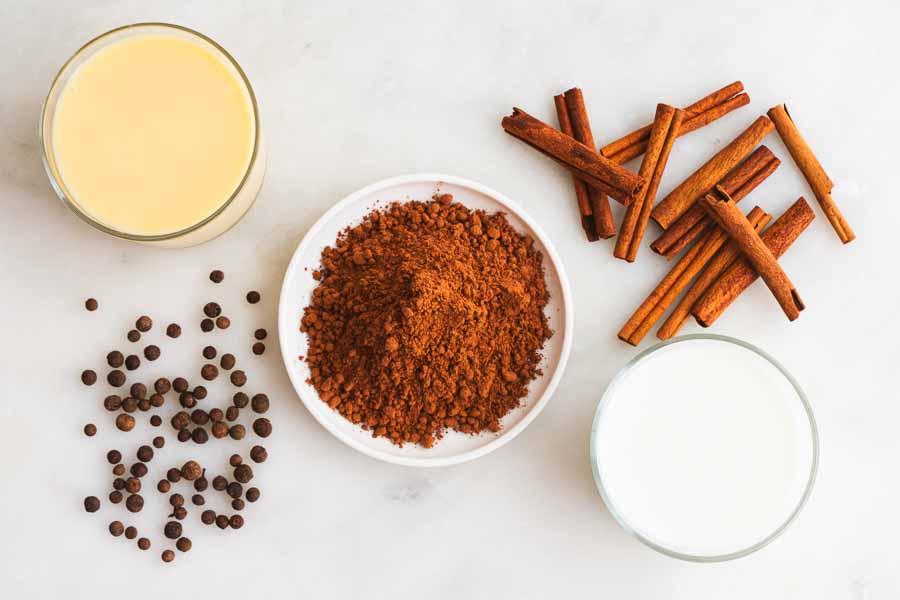
Peruvian Hot Chocolate Ingredients
Cocoa powder, milk, sweetened condensed milk, cinnamon sticks, and allspice berries

The Process

This recipe was super easy to make. If you can boil water, you can make this spiced hot chocolate 🙂 It’s really just a matter of boiling and stirring as you let the whole spices infuse their flavor.

Simply heat the water in a saucepan and start stirring in the ingredients. Let them simmer a bit, add a few more ingredients, and simmer for a bit longer. You can the sweetness as desired at the very end.

I love the taste of dark chocolate, so I found that half a can of the sweetened condensed milk tasted perfect. It was sweet enough to be a treat but still let the cocoa shine through. I was tempted to try adding more condensed milk, but the taste was just too good! Maybe next time I’ll go for a sweeter version.
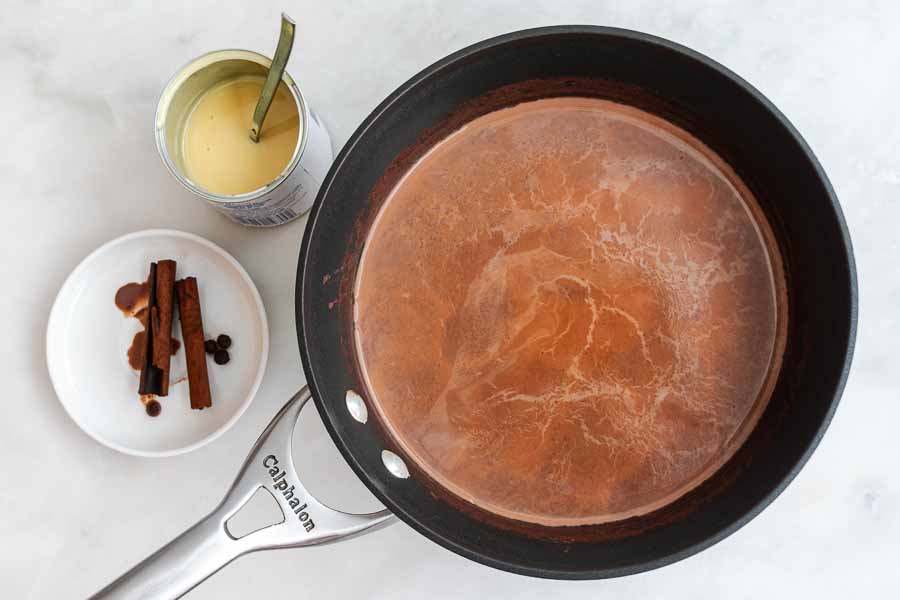
Just before adding the sweetened condensed milk to the hot chocolate

Peruvian Chicken with Green Sauce

After a month of Mediterranean recipes, I need a change. This week I’m going back across the Atlantic and into the southern hemisphere to South America. The first recipe I wanted to try is Peruvian Chicken with Green Sauce. The green sauce in this recipe is a take on Peruvian aji verde. The real thing is made with aji amarillo paste, a Peruvian chili paste, and huacatay paste made with an herb native to Peru. I know I could order these, but I wanted to keep things simple and accessible by using ingredients available in most grocery stores. Otherwise, the green sauce ingredients for this recipe are authentic, so I think I’m in for a treat. Let’s find out!

This is one of the best chicken recipes I have ever made… I definitely plan to make this again, many times over (and I hate repeating recipes… so you know this one has got to be good).

Recipe Author: Sarah at The Gourmet Gourmand
Get the recipe

The Ingredients

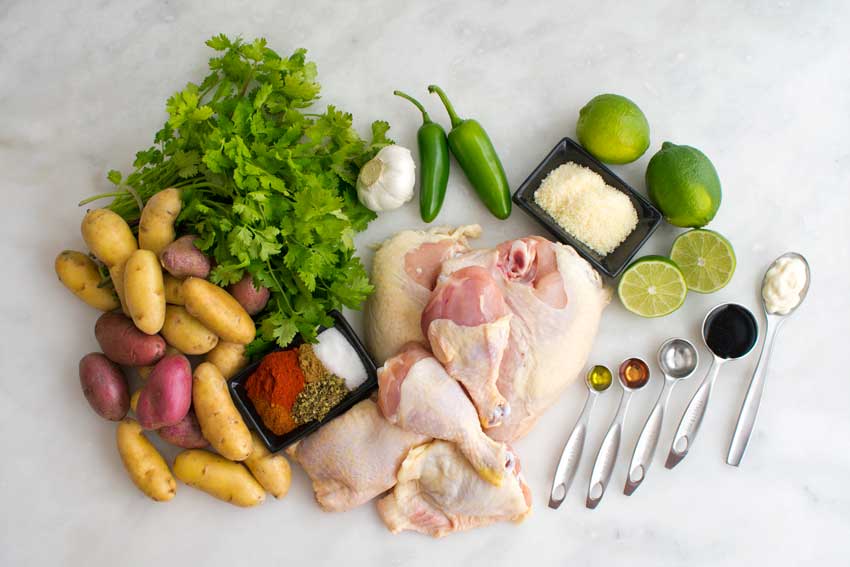
As I mentioned, I didn’t have to special order any ingredients for this recipe. Instead, it uses ingredients that are readily available at my local grocery store. I was even able to find a whole chicken that was already cut into pieces.

I was also able to find the fingerling potatoes, although I thought they were pretty expensive at $5 for a 28-ounce bag. The upside was they were a pre-washed mix of yellow and red fingerling potatoes.

Peruvian Chicken with Green Sauce Ingredients
Chicken, salt, sugar, cumin, chili powder, smoked paprika, oregano, fingerling potatoes, cilantro, garlic, jalapeno peppers, parmesan cheese, lime, mayonnaise, white vinegar, red wine vinegar, and olive oil

The Process

This recipe is made in three parts: marinating the chicken, baking the chicken and potatoes, and blending the green sauce. Here is how my time broke down:

  • 9 minutes to make the marinade
  • 5 minutes to prep the chicken the next day
  • 70 minutes to bake the chicken and potatoes*
  • 1 hour 24 minutes total (not including marinating overnight)

*I made the green sauce while the chicken was baking and refrigerated it until needed.

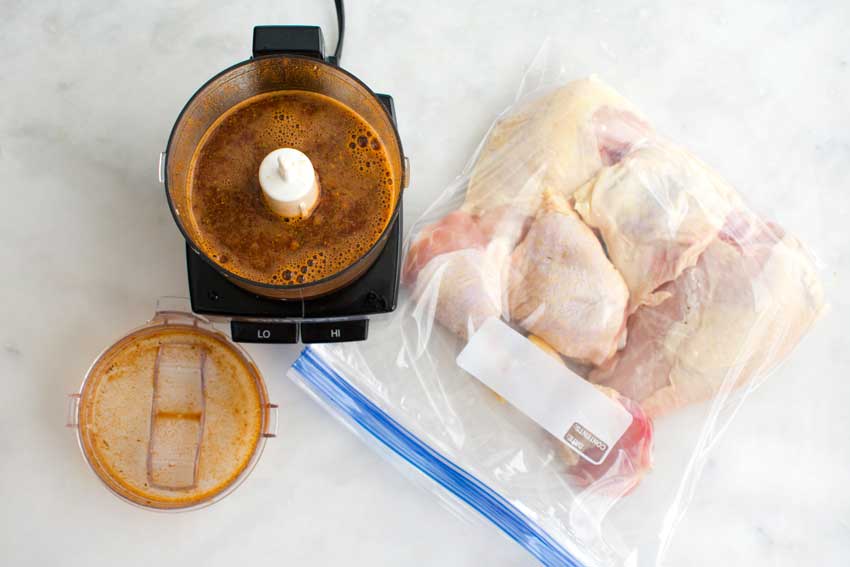
Everything went according to the directions, and the only special equipment needed was a ziplock bag and my mini-prep (used to blend the marinade and the green sauce).

The only thing I wasn’t happy with was the chicken thighs seemed to cook faster than the rest of the chicken. The skin on them was pretty dark when I took the chicken out of the oven, but they tasted okay. Next time I will try buying a whole chicken and cutting it up myself so I can keep the thighs and drumsticks together.

Making the marinade
Making the marinade

French Martini

0

How French is a French martini? I’m not really sure. It might be more of a French-inspired kind of thing, but it sure sounds good. I’m not big on super sweet cocktails, but I usually like sweet cocktails when they are made with juice. This recipe fits that bill by using pineapple juice, Chambord, and vodka. I’m guessing the vodka will disappear once the sweet juice and liqueur are added, but I’m not sure on pairing raspberry with pineapple. Join me as I find out if they work together or not.

Chambord liqueur, vodka, and pineapple juice combine for a wonderful shaken cocktail.

Recipe Author: Ginger at Ginger Wroot
Get the recipe

The Ingredients

Since this is a French martini, I decided to use a Grey Goose vodka since it’s made in France. And it’s a favorite vodka of mine because it’s so smooth. There’s no harsh bite after you sip it, making it ideal for creating a cocktail that can be sipped slowly. Plus it just seemed natural since Chambord is French raspberry liqueur.

The recipe says to garnish with blackberries or raspberries, but the accompanying blog post mentions that a lemon twist would be nice. I opted for that instead of buying a whole pint of berries just to use a couple as a garnish.

French Martini Ingredients
Pineapple juice, Chambord raspberry liqueur, and vodka

The Process

Making my French martini went according to the instructions, and I had it shaken, poured into a martini glass, and garnished with a twist in about half the time listed (2 1/2 minutes instead of 5). In fact, the garnish was probably the most difficult part of this recipe, and it wasn’t difficult at all.

Making a lemon twist is very simple. Just use a channel knife to peel off a short strip of lemon peel then twist it to create the curl. Twisting the peel around something thin like a pencil helps if you have trouble getting the shape to hold.

You can still make a twist if you don’t have a channel knife, but it’s a little more difficult (not much). This short tutorial shows you exactly how to do it.

French Lentil and Spinach Soup

0

My French-themed week is continuing with a surprisingly simple recipe for French Lentil and Spinach Soup. I always expect French recipes to be long and complicated, but this one doesn’t look that way. It’s packed with fresh vegetables, green lentils, and (of course) red wine. There aren’t a ton of spices, so I’m expecting the flavors of the lentils and veggies to really shine through. And it’s vegetarian with the parmesan cheese or easily vegan if you skip it or use vegan cheese. This fits in with my French theme and eating less meat. I can’t wait to try it!

There comes a time during each holiday season in which I need a gastronomical break from sugar, butter, spices, and alcohol. During those times, all I want are monastically seasoned leafy greens, and maybe some legumes. This soup is my current favorite palate cleanser.

Recipe Author: Alanna at The Bojon Gourmet
Get the recipe

The Ingredients

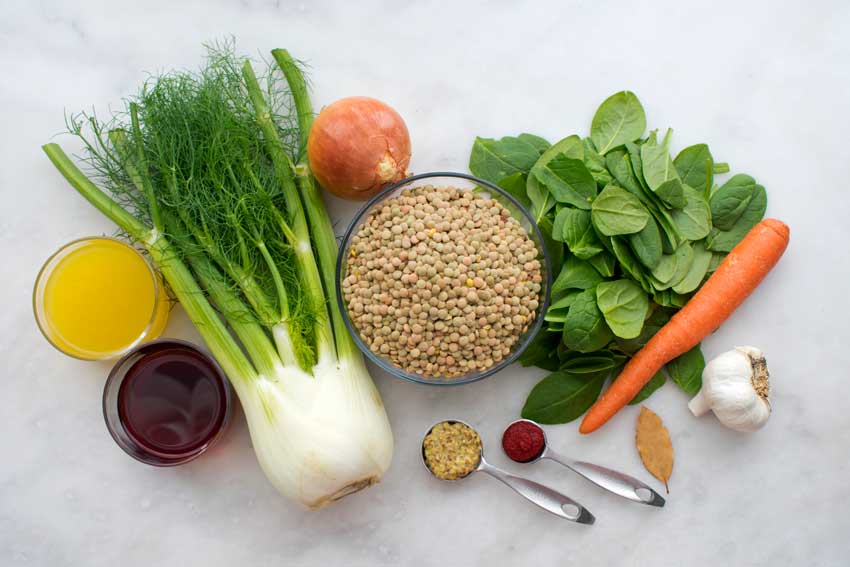
This recipe has a fair amount of ingredients, and I did have a few on hand. Things like the red wine, mustard, and tomato paste. I even had the vegetable stock on hand, but not quite enough. I had about 4 cups, so I added 2 cups of water to balance it out since the recipe said I could use water or vegetable stock.

Most of what I had to buy was fresh produce plus the lentils. Unfortunately, I couldn’t find French green lentils de puy at any of my local grocery stores. I finally gave up and settled for plain green lentils. I could have ordered them online, but they were at least twice as much as they plain green lentils, and I just didn’t want to wait for them to be delivered. Next time I’ll know to plan ahead.

French Lentil and Spinach Soup Ingredients
Green lentils, fennel, red wine, vegetable stock, onion, spinach, carrot, garlic, bay leaf, tomato paste, and stone-ground dijon mustard

The Process

There was a good amount of chopping to be done, but it didn’t take me too long (just 9 minutes). I diced the onion, carrot, and fennel while the olive oil heated in a cast-iron Dutch oven. Then I let it cook as I prepped the rest of the ingredients.

Making this recipe went according to the instructions, but I did change one thing. After I added the vegetable stock and water, I turned the heat up to high and brought the soup to a boil before turning to down to low to simmer. I’m not sure that was the right thing to do as it wasn’t specified in the instructions. It’s more of a habit. Also, the lentils were starting to fall apart after simmering for 30 minutes, so I skipped the extra 10 minutes specified after adding the salt.

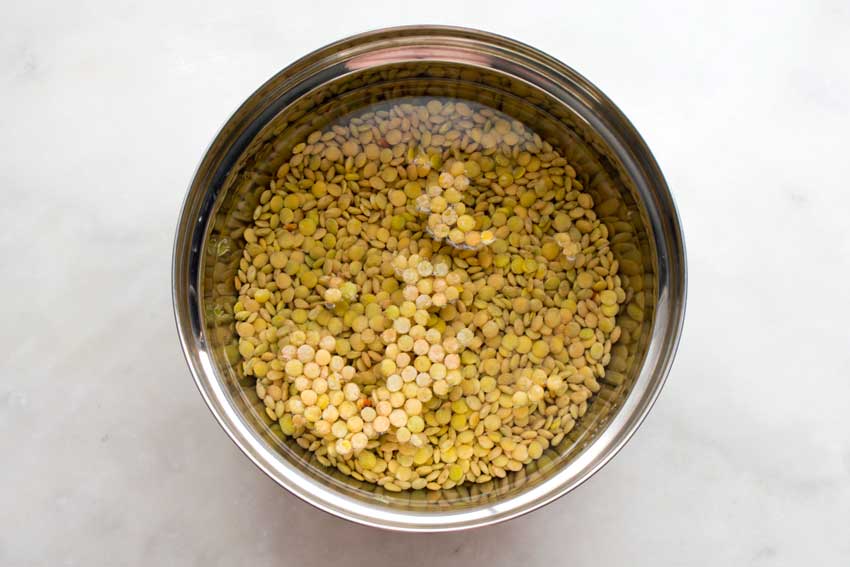
Speaking of lentils, I soaked mine the day before I made this soup for 8 hours. I intended to soak them for 4 hours and make the soup the same day, but life happened. Fortunately, I read that soaked lentils can be stored in the refrigerator for up to 24 hours. Thank goodness! Although, I will probably skip the soaking step next time. I’m getting impatient in my old age LOL!

All in all, this recipe did take a while, but most of the time is inactive (simmering and soaking). Here’s how my time broke down:

  • 9 minutes to prep
  • 55 minutes to cook
  • 1 hour 4 minutes total
Soaking the lentils
Soaking the lentils

French Onion Chicken

My trip along the Mediterranean continues this week with French and French-inspired recipes. Today is a new take on French onion soup: French onion chicken. I’m really eager to try this recipe because I love French onion soup. It’s one of those things I simply cannot pass up when I find it on a menu. I’ve never made it at home, so this is also a new challenge for me, and I love a challenge. So let’s get to it!

French Onion Chicken: caramelized onions under melted gooey cheese all atop braised tender chicken with a French onion style sauce. An excellent option for dinner with friends, but your family will want it for a weeknight dinner option!

Recipe Author: Michele at West Via Midwest
Get the recipe

The Ingredients

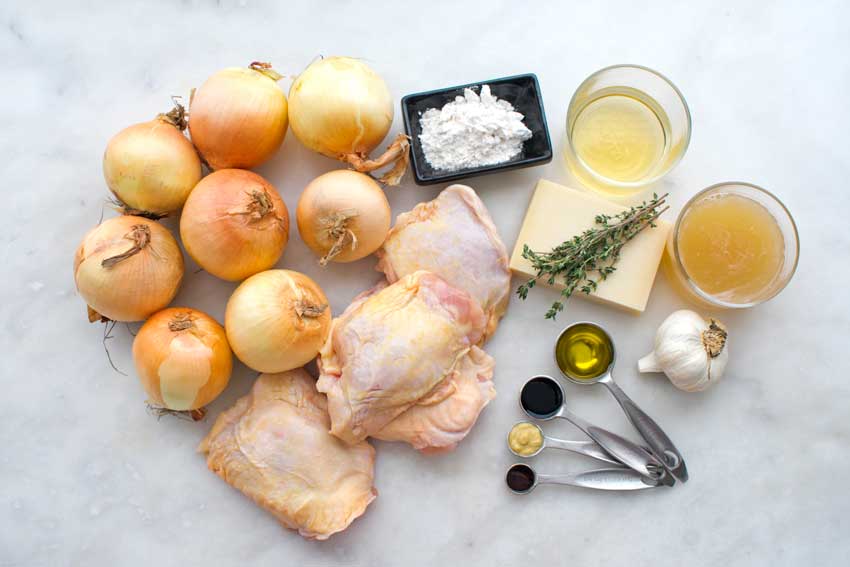
French Onion Chicken Ingredients
Chicken thighs, onions, flour, white wine, thyme, gruyere cheese, garlic, olive oil, Worcestershire sauce, dijon mustard, and balsamic vinegar

This recipe is all about the onions, so I bought an entire three-pound bag for it. It was only $3.99, but it was three pounds of onions for one meal! The chicken and cheese were the priciest items for this recipe at $10.55 and $5.49, respectively. Thyme was on the list of ingredients, but it didn’t specify fresh or dried. I opted for fresh since the picture showed the chicken garnished with a sprig. As far a the rest of the ingredients, I had them on hand. Well, all except for the French bread. I made sure I bought plenty–it’s a must for a French (or French-inspired) dish.

The Process

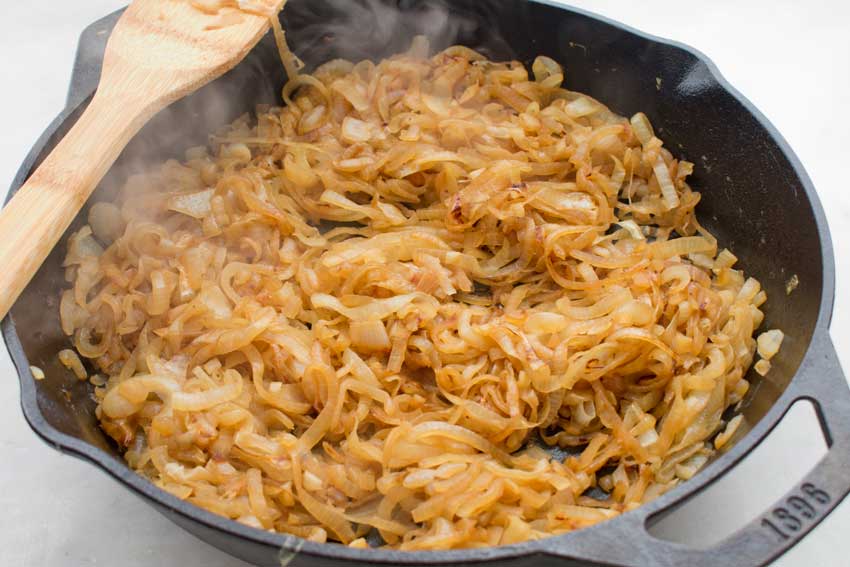
The prep time for this recipe is listed as 15 minutes, but I cut that down to just over six minutes. How? I only prepped the onions since they needed 45 minutes to caramelize. That left me plenty of time to finish the prep work while they cooked.

My mandoline came in really handy for this recipe. I set it on the thickest setting to slice the onions in just a few minutes. Then I gave it a quick rinse while the onions were cooking and switched out the plates so I could grate the cheese.

After that, making this dish went according to the instructions. One thing I wish I did differently was to set the broiler to high. I set it on low to be cautious, and the cheese didn’t brown at all. That didn’t affect the taste, but it would have looked nicer with a little browning.

Caramelized onions
Caramelized onions

Berry Tiramisu Trifle

0

My obsession with tiramisu continues, and this time it’s a recipe for Berry Tiramisu Trifle. How yummy does that sound? I made a lemon berry olive oil cake from this author a while back, and it was just unreal. This Berry Tiramisu Trifle was instantly a must-try when I found it. I know berries are a summer food and it’s the middle of winter, but I just couldn’t resist this new twist on one of my favorite desserts. And I’ve never made a trifle, so this recipe must be tried immediately!

A decadent no bake berry tiramisu trifle made with Mascarpone cream cheese, lady fingers and a blackberry blueberry puree.

Recipe Author: Florentina at Ciao Florentina
Get the recipe

The Ingredients

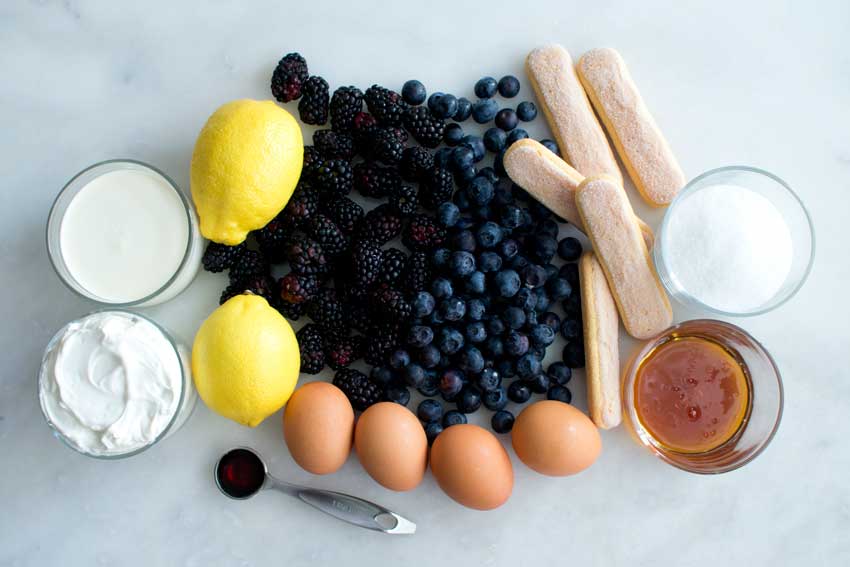
There aren’t too many ingredients that go into this berry tiramisu trifle, and I didn’t have any trouble finding them at my favorite grocery store. The costs did add up, though, as the fresh berries and mascarpone cheese were on the pricey side. I also had to buy the eggs, heavy cream, and lemons. The total cost for all of them was just over $32.

I had a few things on hand like the vanilla, ladyfingers, sugar, and honey. I’m not sure how much extra those would be if I had to buy all of the ingredients at ones. I’d estimate no more than $10.

Berry Tiramisu Trifle Ingredients
Blueberries, blackberries, eggs, vanilla extract, lemons, mascarpone cheese, cream, ladyfinger cookies, sugar, and honey

The Process

This recipe took some time and was pretty involved. Here’s how my time was spent:

  • 35 minutes for prep
  • 1 hour to cool
  • 1 hour 35 minutes total

My stand mixer came in very handy for this recipe and allowed me to multi-task. I started by putting in the heavy cream and sugar to whip up. Then I got the berry mixture started on the stove at the same time.

Once the whipped cream and berry mixture were cooling I got started on the mascarpone cheese. That was easy to mix up, but the key was adding a little bit at a time.

I followed the instructions and divided the mascarpone cheese mixture evenly into two bowls, then added the berry solids to one of those bowls. That gave me a lot more of the berry mixture than the plain, and I ran out of the plain when I made the trifles. I recommend splitting the mascarpone mixture so 1/3 is mixed with the berry solids and 2/3 is left plain. That should give you even amounts of both.

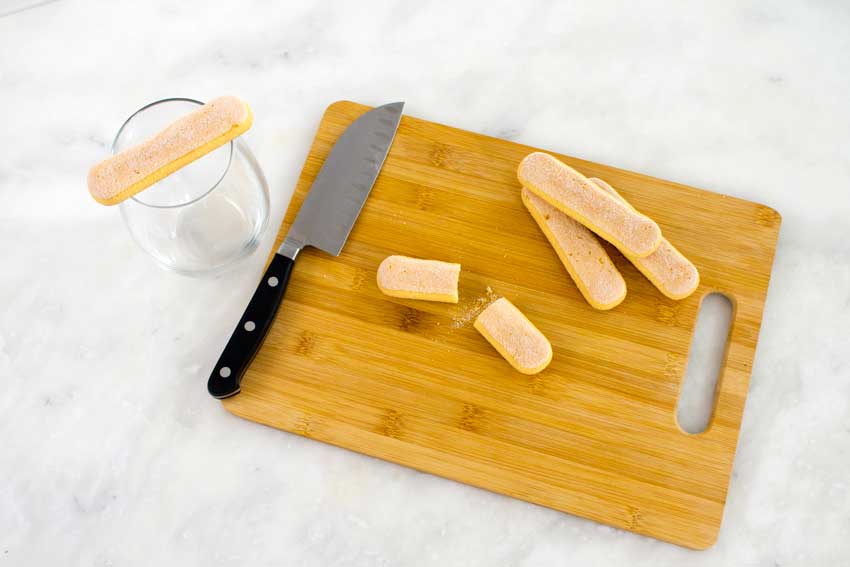
Lastly, I had to cut the ladyfinger cookies in half so they fit into the stemless wine glasses I used. Also, these glasses were pretty large (15 ounces each), so I only got three trifles out of this recipe instead of four. This recipe is pretty rich and filling, so I’d recommend smaller glasses or not filling them to the top.

Halving the ladyfinger cookies so they fit into the glasses

Italian Beef Stew

We finally had a cold snap–it’s really winter now! Well, South Florida winter which means it’s in the 50s at night and 60s during the day, and only for a few days. I had to wear a sweater when I went out. Gasp! So since it’s cold (for me), I had to find a recipe for beef stew. It’s such a winter food for me, and my husband and I both love it. This time I’m making Italian Beef Stew since I’m still in the mood for Mediterranean food. This recipe promises to be way better than plain old beef stew, so let’s find out if it lives up to that claim.

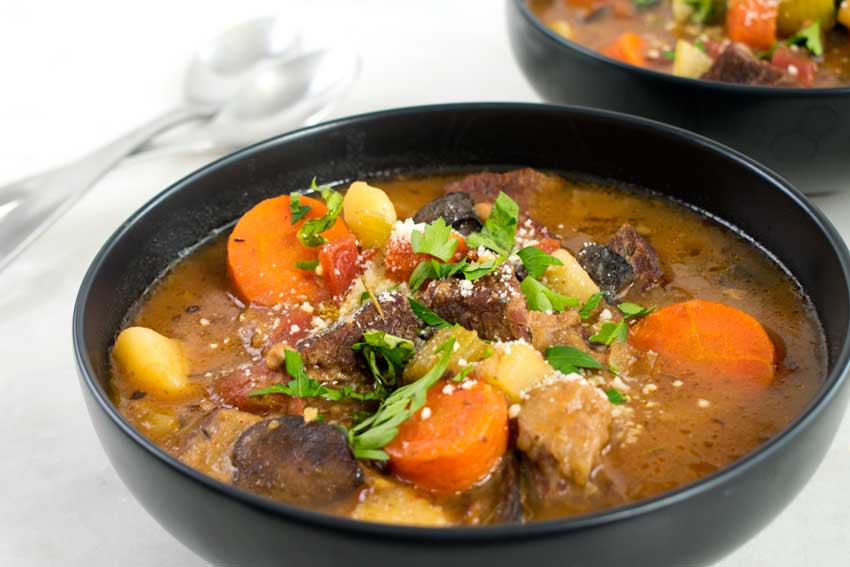
Why make a regular beef stew when you can make an Italian version with more flavor?

Recipe Author: Jaclyn at Cooking Classy
Get the recipe

The Ingredients

So the list of ingredients for this Italian Beef Stew is pretty long. I was a little overwhelmed until I read through it and noticed that a lot of the items are pantry staples I already had. Things like salt, dried spices, flour, and red wine vinegar are always on hand in my house.

That left the meat, canned goods, fresh vegetables, and fresh herbs to buy. That is still kind of a long list, but it’s shorter than the full list of ingredients, and I’m trying to stay positive. It’s the little things! And all the items I had to buy were not hard to find in an average grocery store.

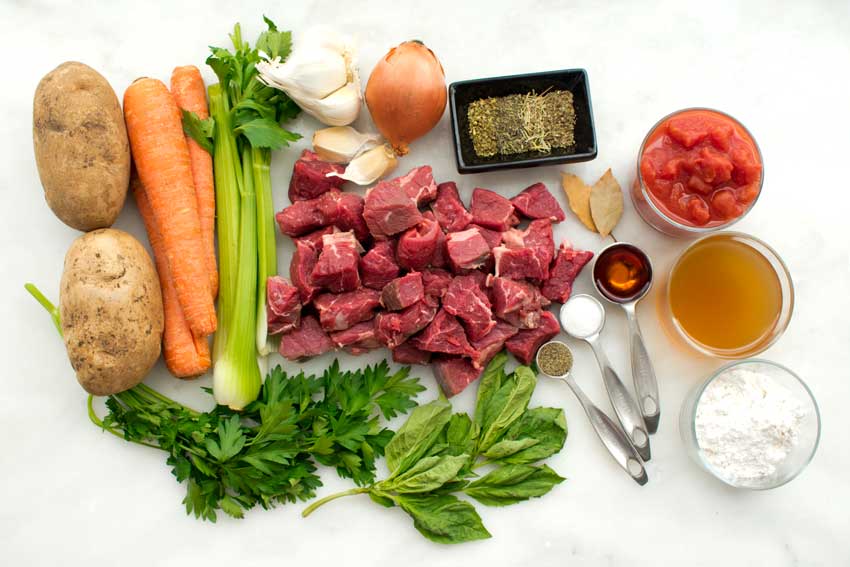
Italian Beef Stew Ingredients
Beef chuck, basil, parsley, russet potatoes, carrots, celery, garlic, onion, oregano, thyme, rosemary, marjoram, bay leaves, tomatoes, beef broth, flour, red wine vinegar, salt, and pepper

The Process

The instructions for this recipe were pretty easy to follow, but I had to read them carefully. Step 2, in particular, is a long paragraph, and it was easy to lose my place as I was cooking.

There is a lot of knife work to do, but it only took me 15 minutes of prep work. I used a few cutting boards since there was so much, reserving one for the meat (I bought a whole chuck roast and cut it into bite-sized pieces).

This recipe makes a big batch of Italian beef stew, so make sure to use a large pot. I used a cast-iron Dutch oven that was just over 5 quarts. That gave me plenty of room for all the ingredients with room to stir without overflowing.

Now don’t let the long time needed to make this beef stew intimidate you. It’s mostly inactive time for the stew to simmer on the stove, so you won’t be standing over the stove the whole time. Mine was even ready almost an hour less than the 4 hours 40 minutes listed. I kept re-reading to see if I left out a step, but I didn’t. Here’s how my time broke down:

  • 15 minutes prep work
  • 3 hours 25 minutes to cook
  • 3 hours 40 minutes total
Italian Beef Stew garnished with parsley, basil, and parmesan cheese

Spanish Gin Tonics

0

Gin and tonics are my favorite cocktail, and I had no idea there was a Spanish version. Until now, that is. My Mediterranean cooking adventure is continuing with a twist on my favorite cocktail. This version is filled with aromatics and promises to be a wonderful drink to sip on a hot day. Yes, it’s still hot here in Fort Lauderdale, despite the fact that it’s “winter.” How do I know it’s winter? It’s only in the 80s during the day instead of the 90s. Bring on the Spanish Gin Tonic!
This post was originally published on December 21, 2018. The text and photos were updated on July 18, 2021. The review and rating have not been changed.

These Spanish Gin Tonics are the perfect refreshing sipper for a hot summer day! Ice cold, filled with aromatics, gin and high quality tonic, they are sure to cool you down!

Recipe Author: Meghan at Fox and Briar
Get the recipe

The Ingredients

I went with my favorite gin, Hendrick’s for a couple of reasons. First, I had it on hand (a big part of my reasoning). Second, it uses cucumber, and that was listed as one of the aromatics that could be added to the Spanish Gin Tonic. And third, I just love the taste and smell of cucumber. It’s so clean and refreshing!

After reading the author’s post, I did decide to splurge on high-quality tonic water. I’ve never tried one because I assumed there wouldn’t be that much of a difference from my standard grocery store stuff.

And, as you can see below, I also used some orange peel, a slice of lime, peppercorns, and juniper berries for my aromatics. Believe it or not, I had the juniper berries on hand. I have no idea why, but it saved me from having to hunt them down and wait for them to be delivered.

The second time I made this cocktail, I happened to have some fresh basil and rosemary on hand. It was just sitting in the crisper with nothing better to do, so I invited it to join my Spanish Gin Tonics.

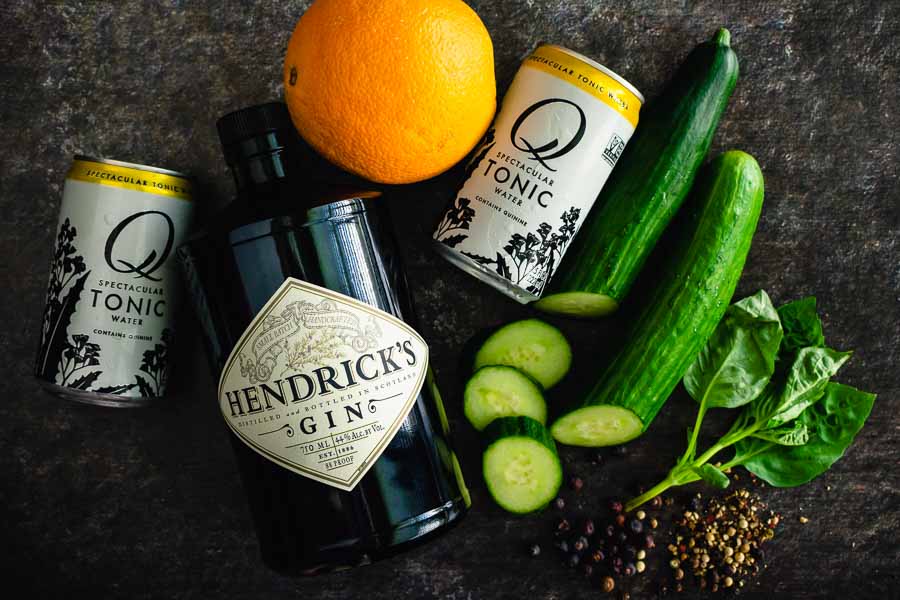
Spanish Gin Tonics Ingredients
Gin, orange peel, tonic water, cucumber, basil, juniper berries, and peppercorns

The Process

Getting the aromatics ready was the biggest part of the work for this cocktail. I used a peeler for the orange peel and made sure not to press too hard. I didn’t want to get the bitter pith with the peel.

My mandoline came to the rescue for the lime and cucumber slices. There’s no way I could have done it with a knife. Well, I would have lost a few fingernails and gotten a thick, lopsided piece of cucumber. Trust me on this.

The rest of the process was super simple. I added the aromatics to the glasses (all except the herbs) and topped them with plenty of ice cubes. Then I measured out the gin and tonic over that and popped in a sprig of basil and rosemary to garnish.

I didn’t measure the peppercorns or juniper berries—I just added a little of each, and voila! Two lovely and delicious-smelling Spanish Gin Tonics.

Spanish Gin Tonics

Vegan Spanish Beans with Tomatoes

0

The One-Pan Spanish Chicken and Rice recipe I made earlier this week was phenomenal, but it was missing something I’m working hard to incorporate more of: vegetables. Luckily, I found this Vegan Spanish Beans with Tomatoes recipe. It’s all veggies with no meat in sight and only uses a few ingredients. This sounds like it could be a terrific budget-friendly meatless meal!

This post was originally published on December 19, 2018. The text and photos were updated on July 24, 2021. The review and rating have not been changed.

These vegan gluten-free Spanish beans are packed with flavour, but are so easy to make in less than 20 minutes with just 7 ingredients! Perfect served with rice or fresh bread and only 125 calories per serving.

Recipe Author: Kate at Veggie Desserts
Get the recipe

The Ingredients

This recipe only has a few ingredients, and it’s a nice mix of fresh and canned foods. I’m a big proponent of fresh food because it’s tasty and healthy, but canned tomatoes and beans are two items I often buy canned. There’s no need to soak the beans, and no need to peel or deseed the tomatoes. That’s a win-win in my book!

I wasn’t sure if the tomatoes I bought were plum tomatoes because it wasn’t listed on the label. I also wasn’t sure if they needed to be whole, halved, or diced. The author’s picture looked like they were diced, so that’s what I went with. I used a 28-ounce can, undrained.

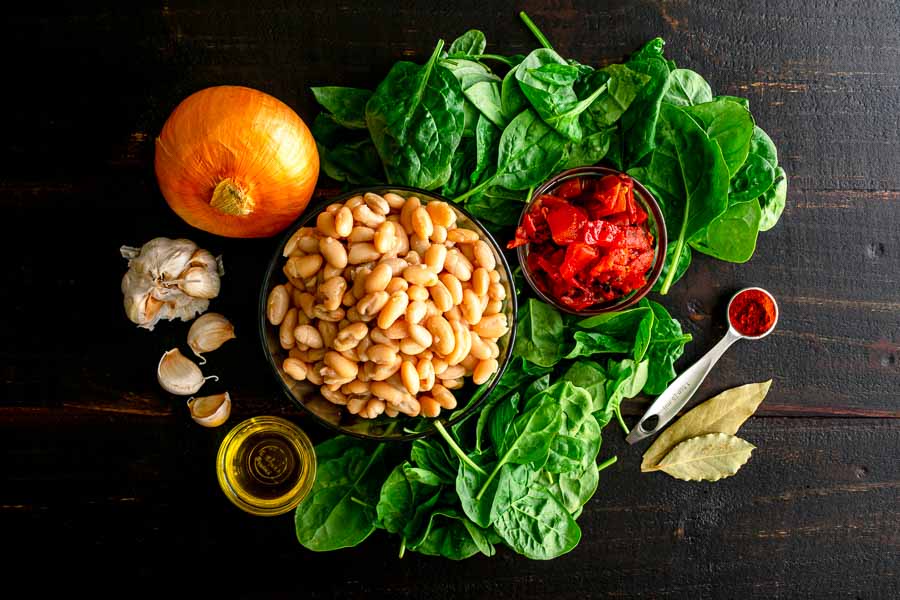
Vegan Spanish Beans with Tomatoes Ingredients
Cannellini beans (substituted for butter beans), baby spinach leaves, canned diced tomatoes, sweet smoked paprika, bay leaves, extra virgin olive oil, garlic, and onion

The Process

This recipe lists a total time of 25 minutes, and I came very close to that at 28 minutes. The prep work took me nine minutes. It consisted of some basic chopping (the onion and garlic) and opening the canned beans and tomatoes.

Cooking went according to the directions and took another 19 minutes, and everything was made on one pan. I love that!

The first time I made this recipe, I wasn’t sure whether the canned tomatoes needed to be drained. I decided to drain them, and my finished dish didn’t have much of a sauce. Tip: Over the years, I have made this recipe many, many times and found that the tomatoes should not be drained. Most of the liquid cooks away, but there’s enough left to make a thick sauce.

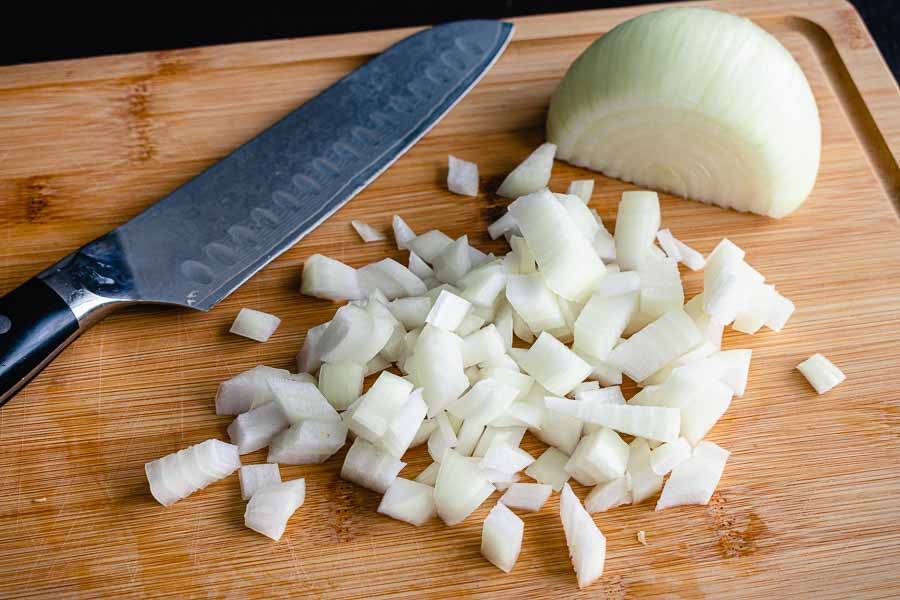
Dicing an onion
Dicing an onion

One Pan Spanish Chicken and Rice

I enjoyed the Mediterranean Salmon recipe I made last week that I decided to continue with the Mediterranean theme. This week I thought I would try Spanish food, and this One Pan Spanish Chicken and Rice sounded like the perfect recipe for that. Chicken and rice have always been a favorite dish of mine, and there are so many ways to make it. This version uses smoked paprika or pimentón. It’s one of my favorite spices, so I’m sure this recipe will be terrific!

This post was originally published on December 17, 2018. The text and photos were updated on August 23, 2021. The review and rating have not been changed.

Easy one pan Spanish chicken and rice is made with simple seasoning that come together with zesty, bold flavors in this one pot, 30 minute meal.

Recipe Author: Tiffany at Creme de la Crumb
Get the recipe

The Ingredients

Just over half of the ingredients for this recipe were dried spices that I had on hand. I also had the rice and vegetable oil in my pantry, so that left only four items to purchase, none of which were difficult to find or expensive.

If you can, I highly recommend ordering your smoked paprika from Seasonality Spices. They sent me a sample a while back, and I was instantly hooked. It was so much better than the stuff I had been buying in my local grocery store. I’m usually all about my budget, but their pimentón is worth a little extra.

One Pan Spanish Chicken and Rice Ingredients
Chicken thighs, chicken broth, lemon juice, smoked paprika, garlic powder, salt, ground cumin, chili powder, coriander, Italian seasoning, white rice, cilantro, and vegetable oil

The Process

Besides the fact that I love chicken and rice, the other thing that sold me on this recipe was it’s made in one pan. That’s music to my ears on those nights that I’m tired but still have to cook dinner.

I have made this recipe a few times over the years, and I have found I prefer it with chicken thighs. The first time I made it for the blog, I used chicken breasts. They were pretty large, so this 30-minute recipe took me 40 minutes. That meant nine minutes to prep and 31 minutes to cook.

However, when I use smaller chicken breasts or thighs, the listed time is spot-on. This recipe is a reliable 30-minute one-pan recipe that’s so tasty. Plus it always gives me a couple of leftovers for lunches since we are a family of two.

The instructions are so easy to follow, and things always go just as they describe. All the techniques needed are very basic, and there’s no special equipment needed either.

Browned chicken thighs coated in the Spanish seasoning mix

Red Wine Chocolate Cake with Dark Chocolate Cream Cheese Frosting

4

I was having a rare craving for something sweet when I stumbled upon this Red Wine Chocolate Cake with Dark Chocolate Cream Cheese Frosting recipe. I knew I would have to make it by the time I read the word ‘cake‘ in the title. The dark chocolate cream cheese frosting part was like hitting the lottery. I like chocolate, but I love dark chocolate. And now I need to know if red wine in a chocolate cake is good, so I cleared my schedule and ordered a set of cake pans. Red wine chocolate cake, here I come!

The only chocolate cake recipe you need! Red Wine Chocolate Cake with Dark Chocolate Cream Cheese Frosting is fudgy, rich, and decadent.

Recipe Author: Angelina at Baked Ambrosia
Get the recipe

The Ingredients

The ingredients for this cake weren’t unusual, and I was able to find everything I needed at my local grocery store. I tried to find the 7 Moons red wine the author used in her recipe but no luck. Instead, I found a comparable California red blend called Apothic Dark. The description on the label made it sound like it would pair well with chocolate, and some of my husband’s wine-loving friends really like this brand. It was better than I hoped!

And one nice thing about this recipe I need to mention is that it uses cocoa powder instead of shaved chocolate. It’s so much easier to measure out the cocoa powder rather than shaving and melting the chocolate! Just be sure you have plenty of cocoa powder on hand because this recipe calls for 1 1/2 cups.

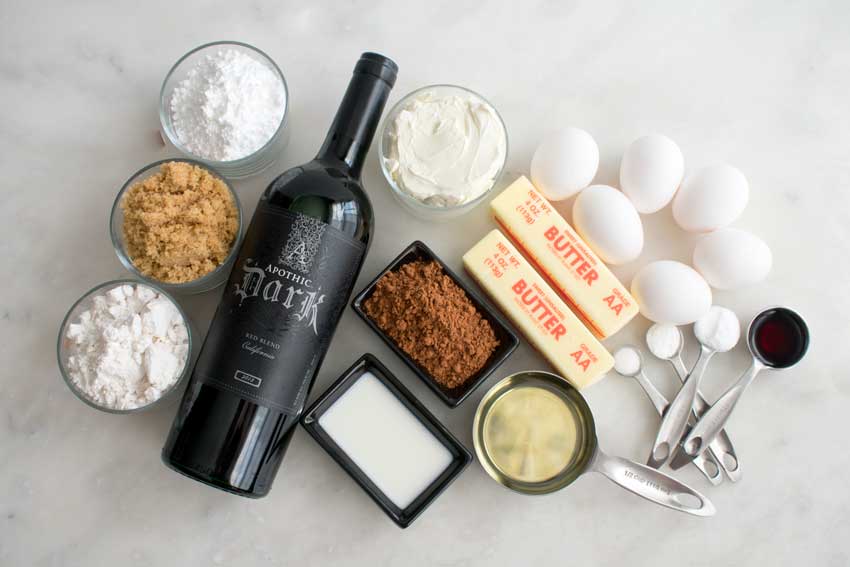
Red Wine Chocolate Cake Ingredients
Powdered sugar, brown sugar, flour, red wine cream cheese, cocoa powder, milk, eggs, butter, baking powder, baking soda, salt, vanilla extract, and vegetable oil

The Process

My red wine chocolate cake took a bit longer than the 45 minutes listed on the recipe. Here is how the time broke down for me:

  • 27 minutes to prep the cake
  • 35 minutes to bake (the frosting was made while baking)
  • 12 minutes to assemble and frost
  • 1 hour 14 minutes total (not including time to cool)

The Cake

First up was making the cakes. One of the first steps was creaming the butter, oil, and sugar for 10 minutes. The recipe says to use an electric mixer which could be a hand or stand mixer. I chose a stand mixer as it sounded like the more convenient option.

I changed up the order of the steps since the stand mixer gave me some free time. A few quick checks and some bowl scraping was all I needed to do to the butter mixture. I sifted the flour and greased the cake pans while the butter mixture was creaming.

Once the batter was mixed up I poured it into the cake pans and popped them into the oven for 35 minutes. I washed out my stand mixer’s bowl and got everything ready to make the frosting.

The Frosting

I had some trouble mixing the frosting, and I think it was because I added all the ingredients to the mixer bowl at once. My mixer struggled because the frosting was so thick, and I had to remove about half of it, mix that, and add the rest. Adding the dry ingredients a little at a time would probably prevent that.

The Assembly

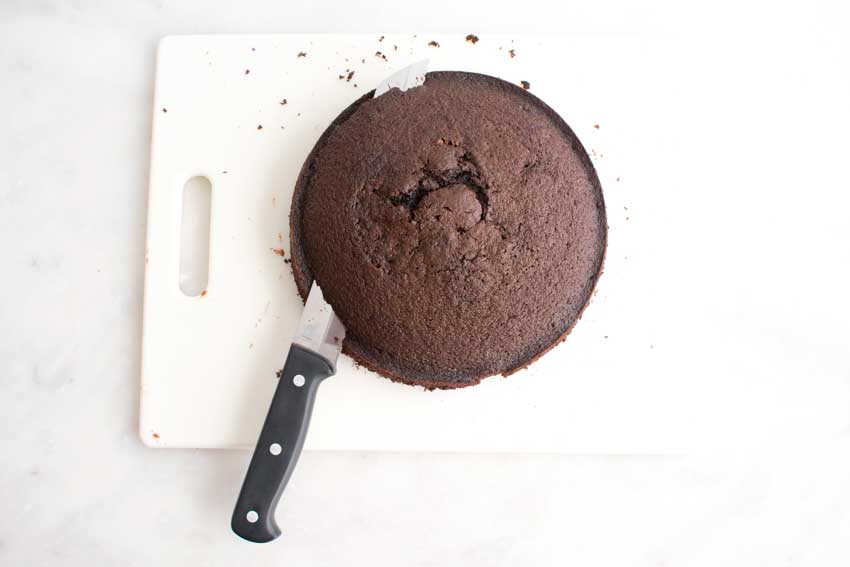
Once the cakes were cooled it was time to assemble everything. I did have to level them since the centers rose to a small dome shape. The outer edges were level, so I ran a serrated bread knife along them to level out the center. It was very quick and easy to do.

Next, I added a layer to my cake stand and started frosting. This recipe made more than enough frosting, so I spread it very generously over the layers. In fact, I had a little frosting left over when I was finished.

Leveling the cake
Leveling the cake

Mediterranean Salmon

This year’s Christmas holiday dinner was divine, but now I’m craving something on the lighter side. I haven’t had salmon in a while, so I headed over to my seafood board on Pinterest to find a new salmon recipe to try. This Mediterranean Salmon more than fit the bill since it includes a side of fennel and cherry tomatoes to go with the salmon. I love finding recipes for the entire meal in one, so I’m super excited to try this one!

Pan-roast salmon filets with fennel bulb and cherry tomatoes for a delicious gourmet meal that’s ready in just 20 minutes!

Recipe Author: McCormick via Life, Love, and Good Food
Get the recipe

The Ingredients

Despite this recipe being for a main and a side, the list of ingredients wasn’t very long. A lot of the ingredients were spices, along with olive oil and sugar, and I had all those in my pantry. I had to stop by the seafood counter for a salmon fillet and the produce department for the fresh ingredients.

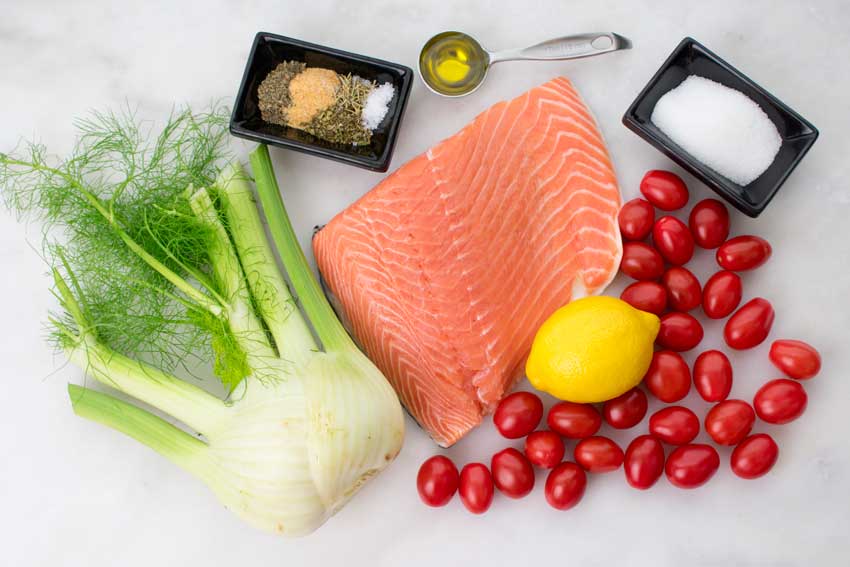
Mediterranean Salmon Ingredients
Salmon, fennel, basil, garlic powder, oregano, rosemary, sea salt, olive oil, sugar, cherry tomatoes, and lemon

The Process

My Mediterranean Salmon was ready in only 21 minutes–a really short amount of time for a full meal.

I was afraid the salmon would fall apart easily since it had to be flipped. Fortunately, salmon is a firm fish, and I’m sure keeping the skin on and using a nonstick skillet helped too. Flipping it with a pair of tongs was very easy, and the filets didn’t fall apart.

Another worry was that the fennel and tomatoes would not cook enough in the five to six minutes specified. I cooked everything for six minutes and loved how it turned out. The tomatoes were beginning to split their skins, and the fennel softened but still had a little crisp texture.

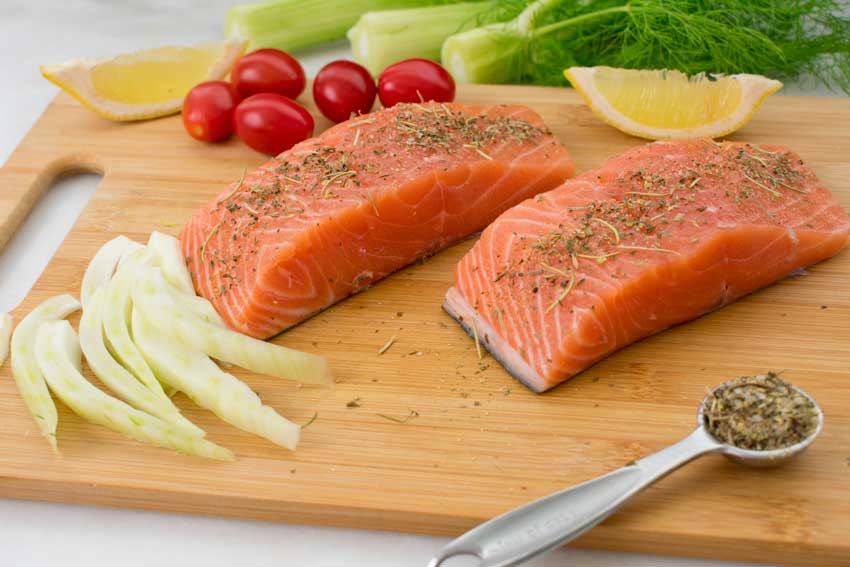
Seasoning the salmon filets