Home Blog Page 43

Jamaican Gungo Peas Soup (vegan)

0

Earlier this week I made a recipe for something I’ve already tried, Jamaican Oxtail Stew. Now I want to try a recipe for something I’ve never tried Jamaican Gungo Peas Soup. Gungo peas are pigeon peas a favorite comfort food of mine. And this recipe is for a vegan version of this soup, making it a healthier but hopefully just as tasty version. Let’s find out!

This easy Jamaican Gungo Peas Soup is so delicious and hearty, perfect for the colder months. Full of flavor with gungo peas, yellow yam, carrot, and dumplings.

Recipe Author: Michelle at Healthier Steps
Get the recipe

The Ingredients

Since this soup is vegan, it’s packed with vegetables and spices. I had to buy all the vegetables, and I found everything except the yellow yams. They were listed as optional, so I didn’t worry about leaving them out too much.

This recipe also calls for dumplings, and you’ll need three ingredients to make them: flour, water, and salt. I had all of these on hand, so no worries there.

Jamaican Gungo Peas Soup (Vegan) Ingredients
Gungo (pigeon) peas, salt, onion, potato, garlic, red bell pepper, flour, scotch bonnet pepper, green onion, carrot, thyme, allspice berries, ginger, and coconut milk

The Process

First up was boiling the gungo peas for 45 minutes. I’m not sure if this step was necessary with canned peas since they’re already tender, but I did it anyway. Next time I think I’ll skip that step and reduce the amount of water to account for evaporation.

While the gungo peas were boiling, I prepped the rest of the ingredients and made the dumplings/spinners. I’ve never made spinners before, so I checked YouTube because I wanted to see how to do it. I used the recipe I found on Healthier Steps (linked from the gungo peas soup recipe) and the methods in this video.

Making the dumplings/spinners

Once the gungo peas were finished boiling, I got started on making the soup. It went very smoothly, but I wasn’t sure when to add the spinners. I quick search on Google and I decided to add them between steps four and five, giving them 20 minutes to cook. They were floating but the time the soup was finished, which meant they were finished cooking.
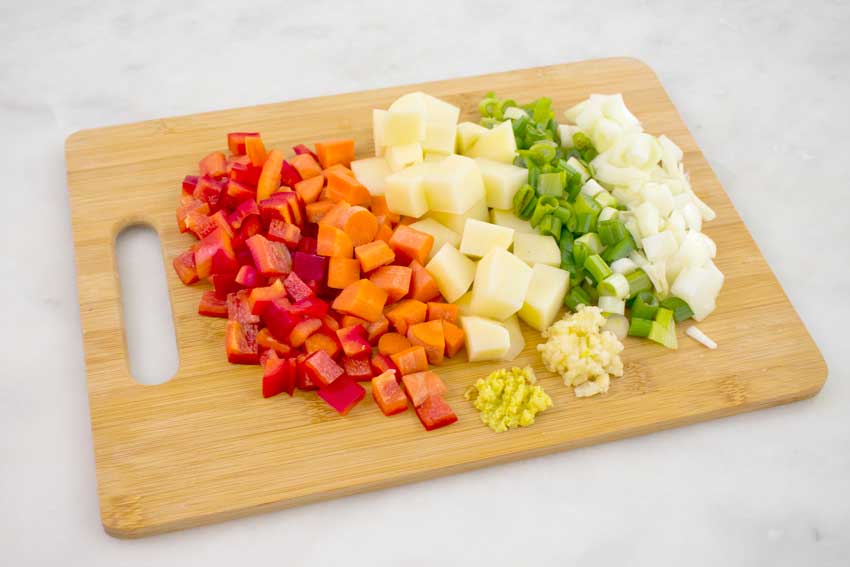
Chopped vegetables
Chopped red bell pepper, carrots, potato, ginger, garlic, green onions, and onion

Jamaican Oxtail Stew

There are lots of versions of oxtail stew out there, but Jamaican oxtail stew is something special. It’s also something I’ve never made at home. I’ve been lucky to live near good Jamaican restaurants pretty much everywhere I have called home, so I’ve honestly never considered making it myself. Until now, that is.

Jamaican Oxtail Stew – This braised oxtail with butter beans not only have a complex note from allspice but also that familiar garlic, thyme, scotch bonnet and onion medley. Fall off the bone tender.

Recipe Author: Imma at Immaculate Bites
Get the recipe

The Ingredients

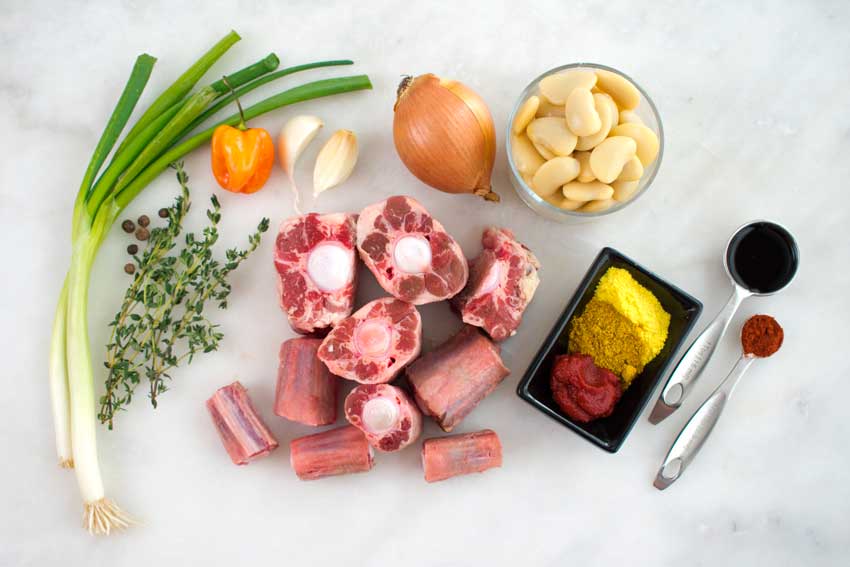
The list of ingredients for this recipe is long-ish, but don’t let that put you off. There are a lot of pantry staples like cooking oil, tomato paste, and spices. Most of what I had to buy was the produce, canned butter beans, and oxtail.

By the way, oxtail isn’t really from an ox. It’s a generic name for cattle tails, and most likely from an ordinary cow. I found a package that was a little over two pounds for just under $20.

Personally, I thought the price was a little high at $5.99 per pound. However, I did get two batches of stew out of it because I split the package in half and froze the extra. I also found it at my regular grocery store, so I suppose I paid for convenience too.

Jamaican Oxtail Stew Ingredients
Oxtail, thyme, allspice berries, green onions, scotch bonnet pepper, garlic, onion, butter beans, Worcestershire sauce, tomato paste, chicken bouillon powder, curry powder, and smoked paprika

The Process

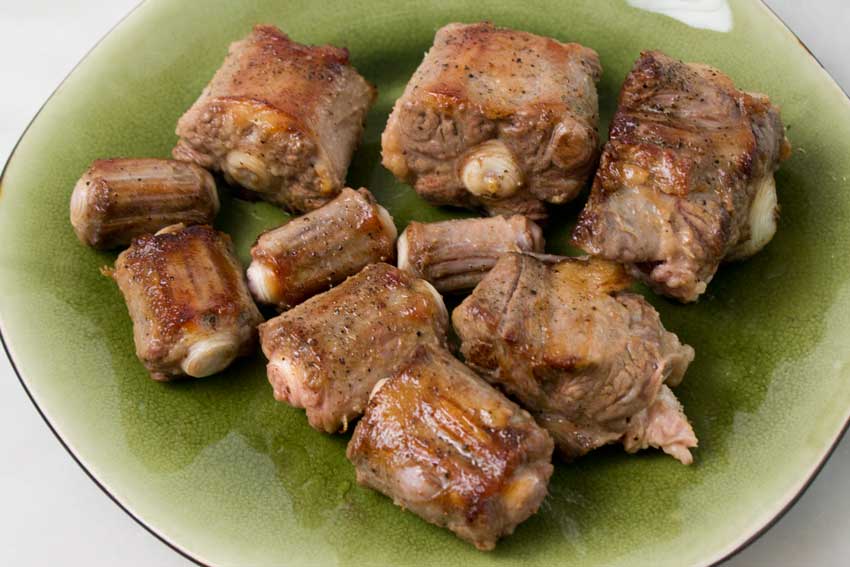
A 5.3-quart cast iron Dutch oven was the perfect size for this stew. It also gave the oxtail a nice sear. Speaking searing the oxtail, a pair of tongs will be your friend for this step. I used them to hold the pieces in place because they tended to roll when left alone.

Otherwise, making this stew went according to the instructions and was really simple. Most of the process was just letting the stew simmer on the stove for a few hours. Even the prep work wasn’t much. Here is how the steps broke down for time:

  • 9 minutes to prep
  • 2 hours 43 minutes to cook
  • 2 hours 52 minutes total
Browned oxtail
Browned oxtail

Oxtail is a fatty cut, so you will want to pay attention to how much oil is left in the pot after browning. I was expecting to have to drain some excess oil, but it turns out that I was left with about three tablespoons. It’s just something to be aware of because you can end up with an oily broth if there is too much leftover.

At step four, I followed the author’s advice and initially added four cups of water. I did end up adding the additional two cups during the cooking process to keep the oxtails covered. The broth was a bit thin for my liking, but you could either use less water or thicken it with cornstarch if you prefer a thicker broth.

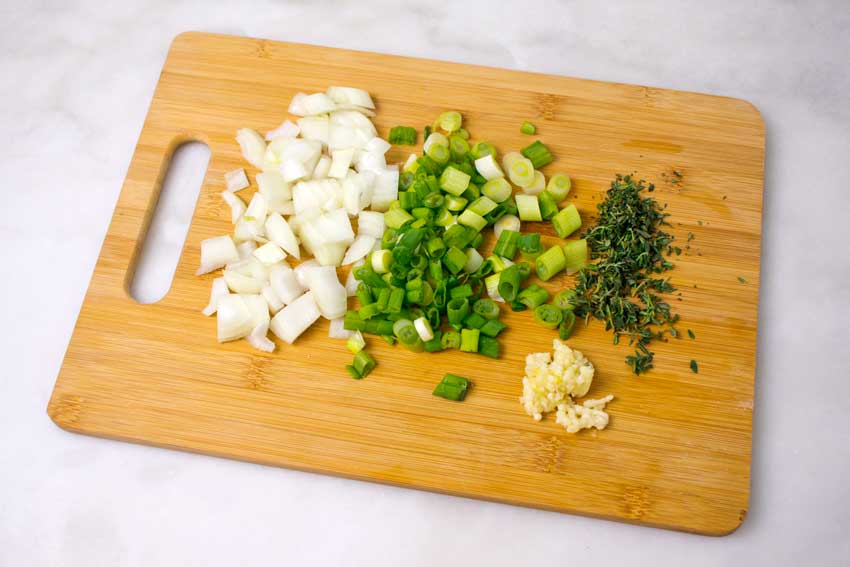
Chopped onion, chili peppers, thyme, and garlic
Chopped onion, green onions, thyme, and garlic

Rice with Pigeon Peas (Arroz Con Gandules)

When I decided to make pernil, I was over the moon when I read that it’s normally served with pigeon peas and rice. My dad was Bahamian, and pigeon peas and rice (we call them peas and rice) are favorite Bahamian comfort food. What would have been his 77th birthday passed recently, and the timing was so right to try a new recipe for peas and rice. He loved food in general, Caribbean food in particular,  and was a big fan of my cooking. Miss you, Dad ?

Rice with Pigeon Peas { Arroz Con Gandules } is one of my favorite Puerto Rican recipes usually served on Holidays and special occasions, made with long grain rice, Spanish tomato sauce, sofrito, pigeon peas, green olives, and seasoned with Sazon Seasoning with achiote, kosher salt, and freshly ground peppers.

Recipe Author: Heidy at The McCallum’s Shamrock Patch
Get the recipe

The Ingredients

The list of ingredients for this recipe wasn’t too long, but I had to buy most of the items. Nothing was expensive, and I was able to find everything at my usual grocery store.

One item that might be confusing is the adobo. It comes as a powdered seasoning or more of a sauce. I had adobo sauce on hand, so I chose to use that. However, now that I look back, I think the recipe calls for adobo seasoning. Fortunately, only 1/4 teaspoon was needed, so I doubt it made much of a difference in the taste.

Oh, and if you’ve never used sazon seasoning, you’ll love it! You can add it to anything and it magically makes it better. I’m not kidding! But be careful because it turns anything it touches yellow–fingers, dish towels, countertops… You get the idea, so use with caution.

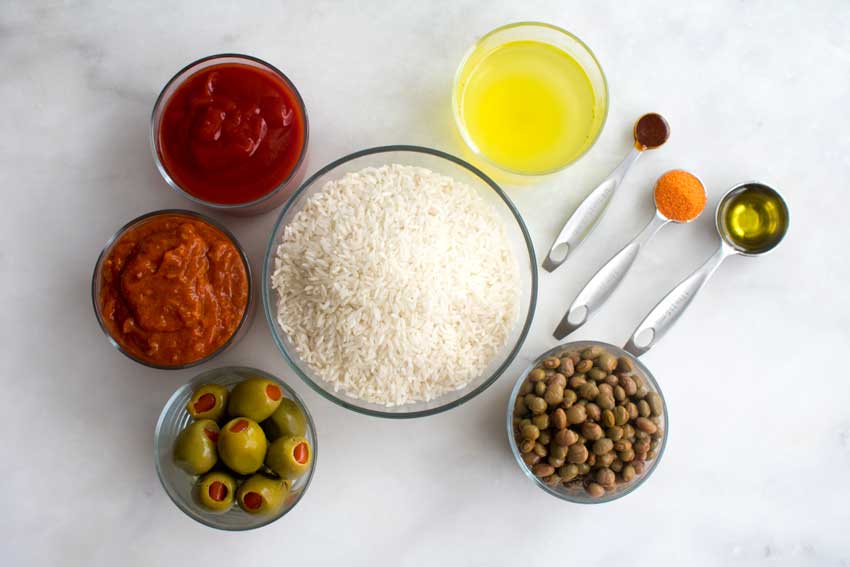
Rice with Pigeon Peas (Arroz Con Gandules) Ingredients
Rice, green olives, sofrito, Spanish tomato sauce, chicken broth, adobo, sazon with achiote, olive oil, and pigeon peas

The Process

A 4.5-quart pan was just the right size for this recipe, but the instructions were a little confusing.

Steps one and two calls for adding the olives. I added them at step one and didn’t have any problems. I don’t think it would make a huge difference if they were added at step two.

The real confusion for me came at step three and four. Step three says to boil the rice until most of the water has been absorbed. Then step four says to cook the rice until it’s tender (about 30 minutes).

My thinking was the rice would burn if I cooked it that way, so I skipped the part of step three that called for boiling until most of the water was absorbed. The reason was I knew the water would absorb anyway if I followed step four, and that’s exactly what happened. I think I would have ended up with a bunch of burned rice if I had followed the instructions exactly.

Rice with Pigeon Peas (Arroz Con Gandules) Process

Pernil (Puerto Rican Pork Shoulder)

This recipe for pernil caught my eye while I was skimming through one of my Pinterest boards. I haven’t made a pork recipe in a while, and this sounded way too good to pass up. Why? I love Caribbean food and garlic, and pernil is both. Plus I’ve never tried it, and I am always up for trying new things, so let’s find out how delicious this Puerto Rican pork shoulder recipe is.

This is a delicious way to cook pork. I got this recipe from my boyfriend who is from Puerto Rico. This also makes excellent, moist meat for Cuban sandwiches.

Recipe Author: Michelle Figueroa at Genius Kitchen
Get the recipe

The Ingredients

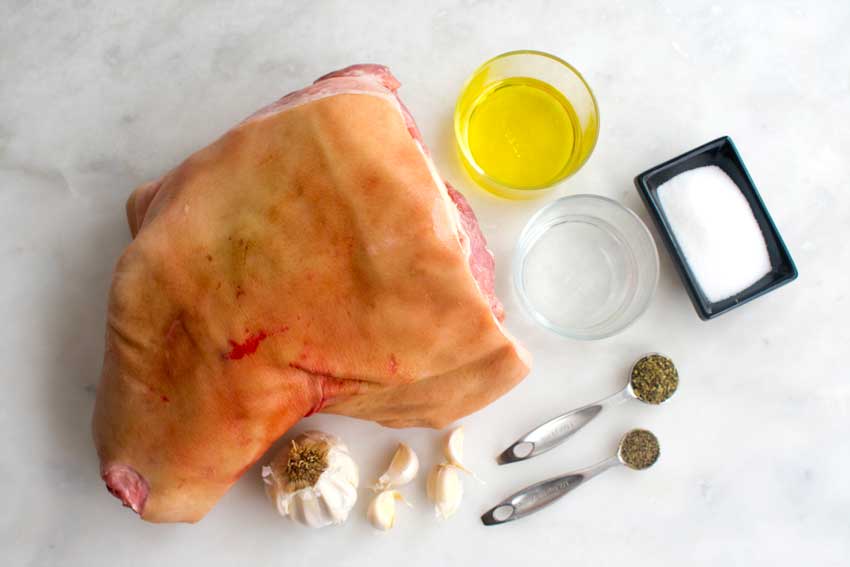
There aren’t many ingredients in this recipe, and I had all but one on hand. All I had to buy was the pork shoulder, and it turns out that eight pounds is a pretty average size for this cut of meat. The picnic pork shoulder I bought was just under eight pounds and just under $8. It was a very inexpensive cut!

Pernil (Puerto Rican Pork Shoulder) Ingredients
Picnic pork shoulder, olive oil, white vinegar, salt, oregano, black pepper, and garlic

The Process

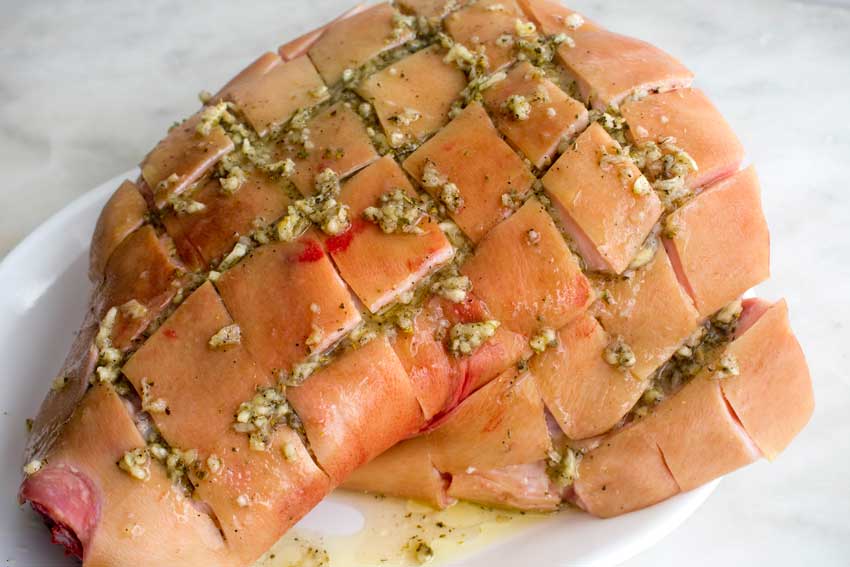
The first part of this recipe is marinating the pork shoulder, and the first step to that is scoring the skin. I keep my knives sharp, and I still had some trouble cutting through the skin. It was tough, so be patient with it.

Next was making the marinade, and that was easy. The instructions say to crush the herbs using a mortar and pestle, but don’t worry if you don’t have one (I have one, but it was way too small for 12 cloves of garlic). My garlic mincer really did most of the work, so I didn’t need to worry about crushing the garlic. Instead, I put the herbs into a small bowl and used the back of a fork to blend the herb mixture into a paste. Then I added the liquids and gave that a good stir.

Once the marinade is ready, you need to pour it over the scored pork shoulder and work it into the skin so it penetrates into the meat. Once that’s done, the recipe says to place the pork shoulder into an aluminum pan, cover, and refrigerate.

I changed the recipe here and put the pernil into a large plastic bag–it was actually a crockpot liner, but it was the perfect size. I just bagged the pork shoulder, closed the bag with a twist tie, and placed it into the refrigerator to marinate for about 18 hours.

The reason I marinated the pernil this way is I don’t use disposable aluminum pans after seeing a very bad accident with one. My father in law was cooking a Thanksgiving turkey in one, and lots of juices collected in the bottom. The flimsy pan collapsed when he was taking the turkey out of the oven, and his hands were burned very badly by the hot liquid that spilled. If you use a disposable aluminum pan, please be very careful!

I chose to use a regular roasting pan instead, but I will say it had some disadvantages. Although it was sturdy, the roast did stick to the bottom. Also, I had to soak the pan overnight before I could get it totally clean.

Actually cooking the pork shoulder was very hands-off, but it did take a long time. Here is the breakdown of the entire process:

  • 15 minutes to make the marinade and prep the pork shoulder
  • 18 hours to marinate
  • 6 hours to cook
  • 24 hours 15 minutes total
Marinating the pork shoulder

Hungarian Crepes Stuffed with Cherries

0

It’s been a while since I’ve reviewed a dessert recipe, so what better way to end my week of Hungarian recipes with Hungarian Crepes Stuffed with Cherries? I love cherries and have never made crepes, so this should be fun! I have to admit I’m a little nervous, though, because crepes are hard to make, right? Or not? Only one way to find out, and that’s to give this recipe a try!

Recipe Author: Aniko at Paprika & Paprika
Get the recipe
(scroll down for English)

The Ingredients

There aren’t a ton of ingredients in this cherry crepe recipe, and I had several on hand. It’s full of basic ingredients I keep around like flour, sugar, powdered sugar, salt, and soda water (seltzer).

I also had the cherry liqueur on hand from one of my first posts for an Aviation gin cocktail. The bottle was around $30, and it’s pretty big. It’s going to last forever at this rate!

I only had to buy three items: eggs, milk, and a can of cherry pie filling. I know, I could have gone with fresh cherries, but I wanted to save some time and effort by using canned.

Oh, and I did make one substitution. I used cornstarch instead of potato starch. I had the cornstarch in my pantry and didn’t want to buy a bag of potato starch I might not use for anything else. I’m sure tapioca would have also worked.

Hungarian Crepes Stuffed with Cherries Ingredients
Canned cherries in syrup, soda water, granulated sugar, powdered sugar, milk, flour, cherry liqueur, egg, and cornstarch (substituted for potato starch)

The Process

This recipe was written with metric measurements, but so my measuring glass came in very handy since it has ml’s. The cherries and flour are measured by weight.  Fortunately, the canned cherries had that listed (595 grams) but I did have to weigh the flour. Here are all the imperial measurements so you don’t have to convert them:

  • flour: 150 grams = 1 1/4 cups
  • milk: 300 ml = 1 1/4 cups
  • soda water: 100 ml = 3 ounces

Next, I had to decide how much of the sugar and cherry liqueur to use since measurements are not given. I knew the cherry filling would be very sweet, so I settled on one tablespoon of sugar for the crepes. I had no idea how much “half a glass” of cherry liqueur was, so I decided to use three ounces. That was half of the measuring glass I used to measure the other liquid ingredients.

The crepe batter went together very smoothly, and I let it chill for an hour. Now it was time to start cooking! I made a few mistakes here because I didn’t research crepe-making techniques. Even so, I don’t think I did too badly for my first try at crepes.

First, I used a 10-inch skillet when I should have used an 8-inch skillet. I had to use a 1/2 cup+ of batter so it covered the bottom of the pan, and I only got five crepes because of the large size (the recipe lists 12). I could have used less with a smaller skillet and swirled it around to get it to cover the bottom and make the crepes thinner. Lastly, I added oil between each crepe. I later read you can make a few crepes before adding more oil. This was after reading several articles on making crepes, so consult the Google if you need more guidance.

While the crepes were frying, I got started on the cherry filling. It was super easy to make in a small saucepan between flipping the crepes. Here is how long the entire process took:

  • 5 minutes to prep
  • 1 hour to chill the batter
  • 22 minutes to cook the crepes and filling
  • 2 minutes to assemble crepes (two)
  • 1 hour 29 minutes total
Making the crepes
Making the crepes

Hungarian Mushroom Soup

0

After that delicious Hungarian Beef Goulash recipe, I’m looking forward to trying another Hungarian dish. This time I’m going with Hungarian Mushroom Soup. It uses paprika and another classic Hungarian ingredient: sour cream. I don’t know about you, but I adore sour cream. However, I’m not very imaginative with it, and I almost always end up with it on a baked potato or burrito. I’m super excited to try it in this new soup recipe!

This Hungarian Mushroom Soup with Fresh Dill is rich, with hints of smokiness and a great umami flavor. It’s the perfect bowl of soup to warm up with this season!

Recipe Author: Erin at Platings and Pairings
Get the recipe

The Ingredients

The list of ingredients for this soup wasn’t too long, but I did have to buy most of the ingredients. And it figures that the items I needed, dairy and vegetables, were on the opposite sides of the grocery store. Oh well, I got my steps in while shopping LOL!

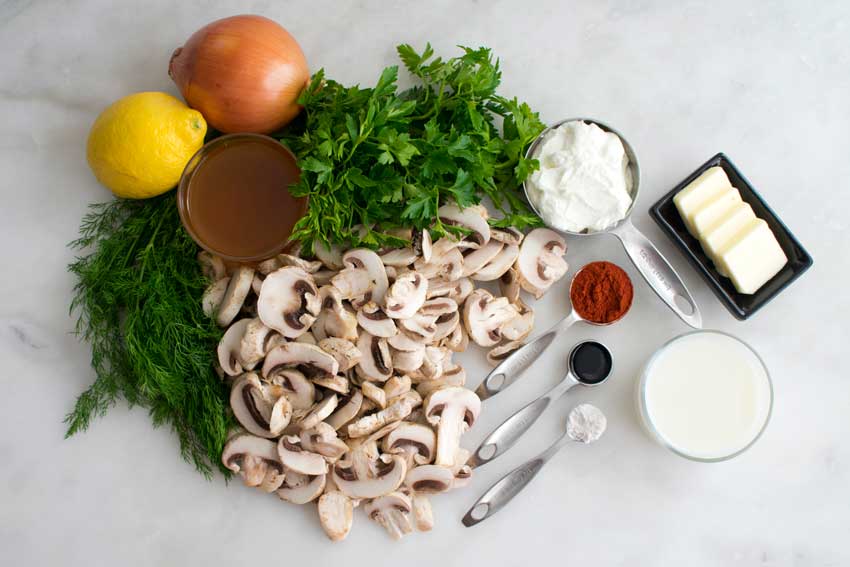
As you can see below, I opted for sliced button (white) mushrooms to cut down on the prep work. I also went with vegetable stock and reduced fat sour cream to save a little on the fat and calories.

Hungarian Mushroom Soup Ingredients
Sliced mushrooms, dill, lemon, vegetable stock, onion, parsley, sour cream, butter, milk, paprika, soy sauce, and flour

The Process

A large saucepan and less than an hour are about all it took to make this creamy mushroom soup. And it was ready in the time specified. Here is how my time broke down:

  • 11 minutes to prep
  • 28 minutes to cook
  • 39 minutes total

The instructions were short and clearly written, so I didn’t have any trouble following them as I cooked. This soup went together very smoothly!

One small thing I did change was in the final step. I held aside some of the sour cream, parsley, and dill as garnishes. I mixed most of them in then swirled the extra sour cream in the soup. Sprinkling the rest of the chopped herbs over everything was the final step. It was an easy garnish that barely added a minute to the total time for this recipe.

Hungarian Mushroom Soup

Hungarian Beef Goulash

Late last year my aunt Margie went to Hungary and brought me back a gift bag that included Hungarian sweet paprika. I swooned! Then I spent ages combing through my Pinterest boards to decide how I was going to use that lovely paprika. This is not a decision to be made lightly, and I debated it for a while. In the end, I decided to start with a classic goulash. So let’s finally open that paprika and find out what it’s like to make this Hungarian Beef Goulash recipe with authentic Hungarian paprika.

Hungarian beef goulash is a spicy beef stew with onions and plenty of paprika. Here’s an easy recipe for this classic dish where everything cooks in a single pot.

Recipe Author: Julia at Savory Tooth
Get the recipe

The Ingredients

I was a little surprised at how short the list of ingredients for this recipe was. I’m not sure why since I’ve never made goulash before, but I assumed there would be tons of ingredients and I would need to do lots of prep work. Not so!

In fact, I had most everything on hand, and I only had to shop for the fresh ingredients and the vegetable broth. All were easy to find, and the beef was about $20 for 3.2 pounds. A little pricey at first glance, but then again it was a lot of meat.

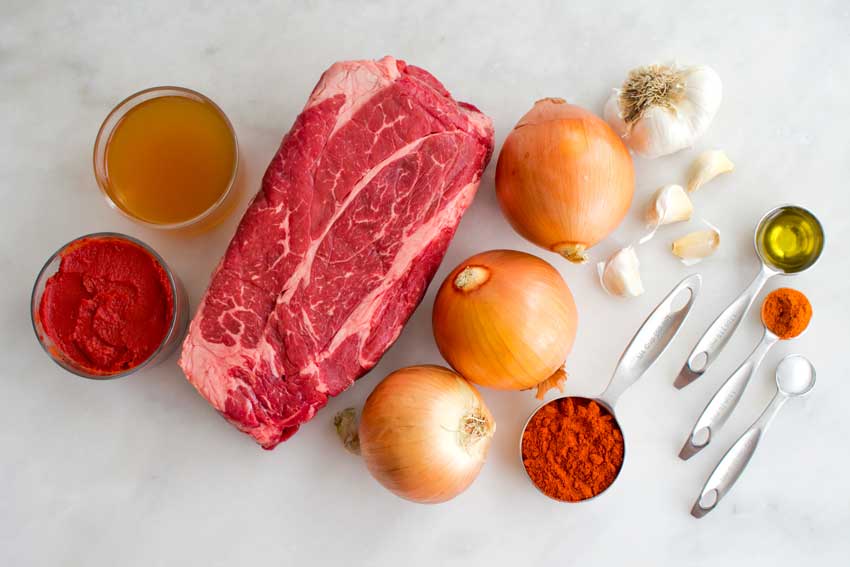
I did my usual of buying a whole chuck roast and cutting it into smaller pieces. That way I get the cut of meat I want and the pieces are the size I want. It’s worth that little bit of extra effort.

Hungarian Beef Goulash Ingredients
Beef stew meat, tomato paste, vegetable broth, onion, garlic, olive oil, cayenne pepper, salt, and sweet paprika

The Process

The instructions for this beef goulash recipe were short and easy to follow, and it was ready in the amount of time specified. Here is how my time was spent:

  • 11 minutes to prep
  • 2 hours 13 minutes to cook
  • 2 hours 24 minutes total

The only time I was unsure about the instructions was at step 3 when it said to brown the beef in the pot with the onions and garlic. I used a 5-quart pot, but it was very crowded (there were a lot of onions), and the beef really didn’t brown well. Fortunately, not getting a nice sear on the beef chunks didn’t seem to affect it, and it still cooked up to be tender and juicy.

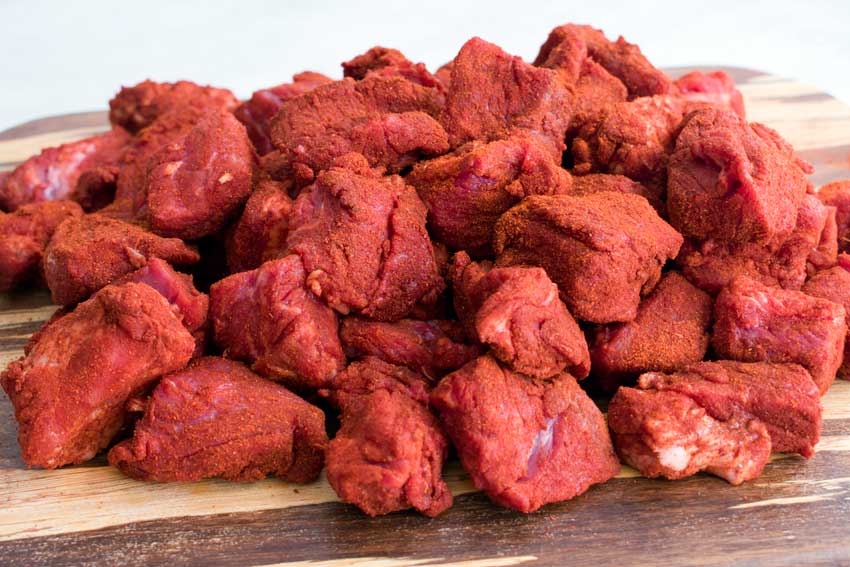
Beef chunks coated in a mixture of paprika and cayenne pepper

Mexican Quinoa Stew

I decided to make this Mexican Quinoa Stew recipe for a few reasons (besides the fact that it sounds delicious). It obviously keeps with this week’s Mexican theme, plus it’s healthy, vegan, and I’ve never tried quinoa. I know, I’m really late to the trendy food party on this one, but I’d like to think I’m making up for that now. The author says I’ll love it, so let’s find out if I do!

You’re going to love this Mexican quinoa stew! It’s hearty, easy to make and tastes amazing.

Recipe Author: Kate at Cookie and Kate
Get the recipe

The Ingredients

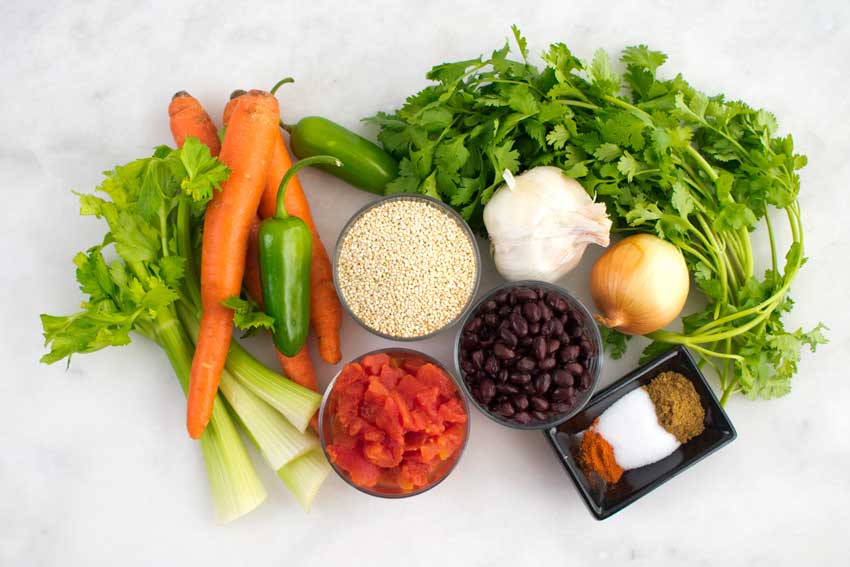
The list of ingredients for this quinoa stew is a bit long at 15 items, and that doesn’t include the optional garnishes. I wish I could say a lot of the ingredients were pantry staples, but no such luck. This time I had to buy most of the ingredients to make this recipe. There was some good news though. Most of what I had to buy was canned vegetables and produce, and nothing was expensive or hard to find. My regular grocery store even had the quinoa, though I did have to spend some time scanning the shelf for it.

Mexican Quinoa Stew Ingredients
Quinoa, diced tomatoes, celery, carrots, jalapeño peppers, cilantro, garlic, onion, black beans, cumin, salt, and cayenne pepper

The Process

With all the fresh vegetables you would think this recipe took ages to prep (I sure did). You would be wrong. Here’s how my time was spent:

  • 10 minutes to prep
  • 30 minutes to cook
  • 40 minutes total

My prep and cooking times didn’t align exactly with the times on the recipe, but my total time was spot on. I love it when that happens!

I think the reason my prep time was quicker (10 minutes instead of 15) was that I used my vegetable chopper. There was so much chopping needed that the small amount of extra cleanup was worth it.

And I think the reason my cooking time was longer was that I don’t have an immersion blender. Instead, I ladled a little of the soup into my regular blender then returned it to the pot. I’m not sure I was happy with the texture after. The stew was chunkier before I blended some, and I think it looked more appealing.

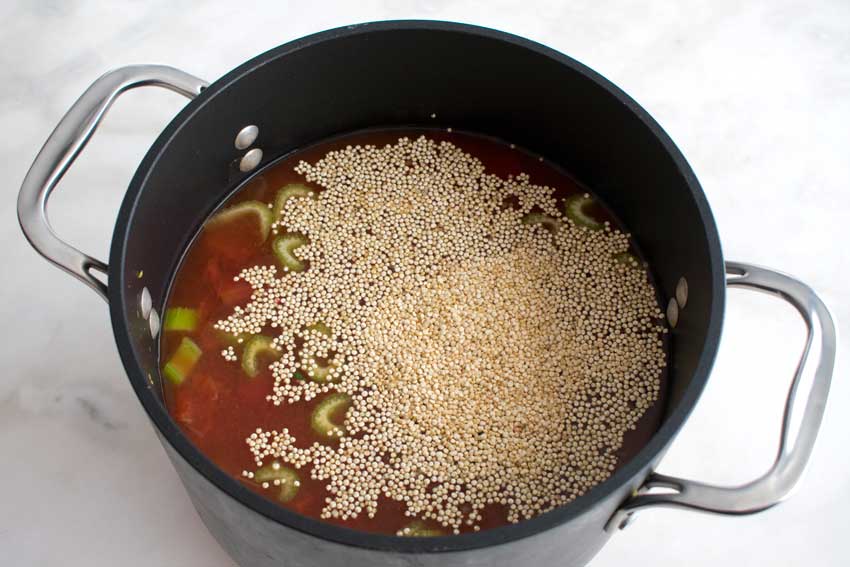
Just added the quinoa to the pot

Easy Fish Tacos with Lime Crema

0

Looking over my posts from the past few weeks, I noticed that something was missing: seafood. And since I have been focusing on Latin American food, this fish taco recipe just seemed like a natural. Now I love tacos, but I rarely make them. Why not? The terrific Mexican/Spanish restaurant that’s less than a mile from my house! It makes takeout too tempting sometimes, but I’m going to change that today. It’s not my first time making tacos, but it is my first time making fish tacos. Let’s find out if they really are as easy as promised.

When lime and cilantro come together with fish, a mouthful of exquisite flavour is born. Try these easy fish tacos with lime crema and see for yourself!

Recipe Author: Sam at Ahead of Thyme
Get the recipe

The Ingredients

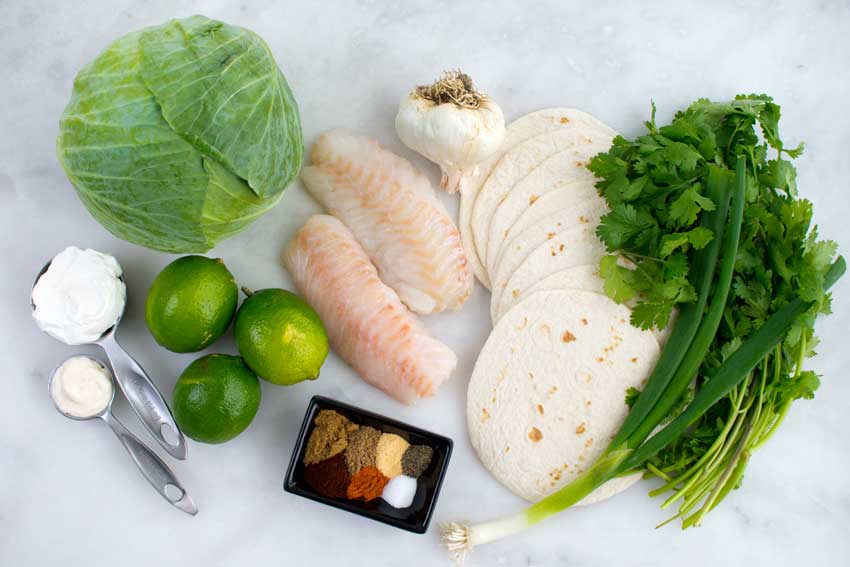
The list of ingredients for this recipe looks kind of long, but don’t panic! I’d say about half of it is spices I already had in my pantry. That left a few items to shop for, but not too many. I had to buy fresh items like the fish (I chose cod), dairy, and produce, but everything was easy to find at my regular grocery store.

Easy Fish Tacos with Lime Crema Ingredients
Cod, limes, mayonnaise, sour cream, cabbage, garlic, tortillas, cilantro, green onion, pepper, salt, garlic powder, red pepper, coriander, paprika, and cumin

The Process

This recipe for fish tacos is divided into three parts: the lime crema, slaw, and tacos. Well, really four if you count preparing the fish separately from assembling the tacos. Fortunately, you can work on the lime crema and slaw while the fish is marinating and cooking. The whole process took me 29 minutes, and here is how I did it.
Fish

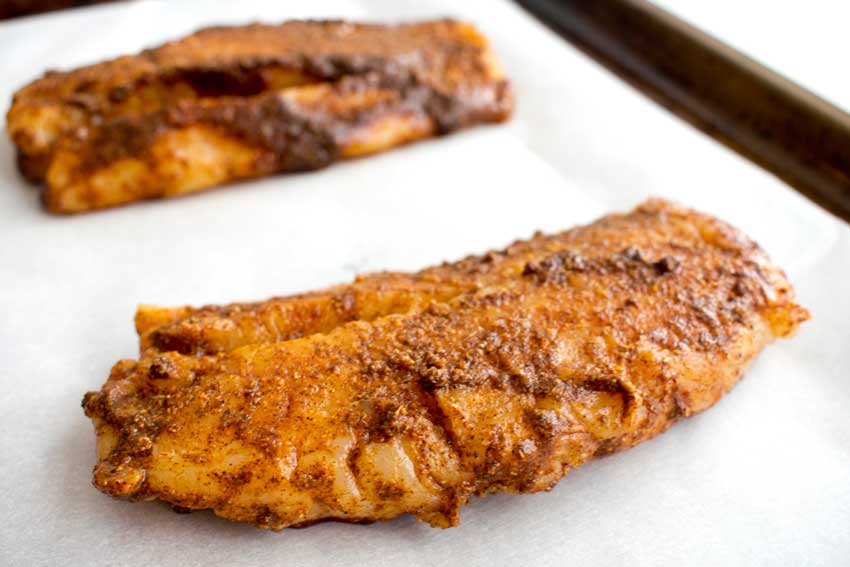
Although it isn’t the order the instructions were written in, I started with the fish since it has to be marinated first. Mixing up the marinade and dipping the fish in it was as easy as it sounds. This was the perfect time to get the oven preheated too.

Lime Crema

While the fish was marinating in the refrigerator, I got to work on the lime crema. I added all the ingredients to my mini-prep and pulsed it a few times to get it mixed thoroughly. Easy peasy!

Marinating the fish
Marinating the fish

Slaw

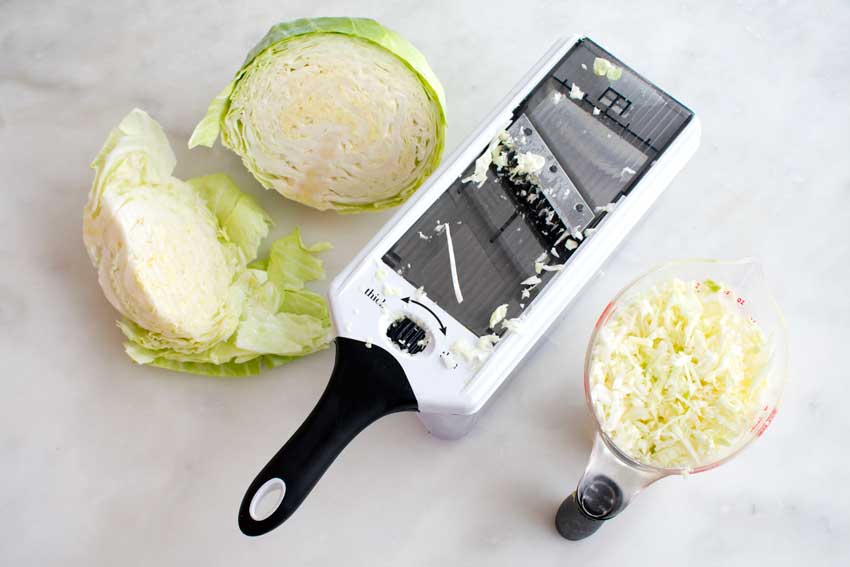
Between the lime crema and slaw, I popped the fish into the oven. Then I got to work shredding the cabbage with my mandoline. It made very short work of it! A little more slicing and dicing, then I just mixed the rest of the ingredients with my shredded cabbage. From there all I had to do was wait a few minutes for the fish to finish cooking.
Assembly

Assembling the tacos was as simple as described, and I didn’t have any trouble doing it. Well, it was difficult getting the soft taco shells to stand up for photos, but that’s not something most people will have to deal with LOL!

The only slight confusion I had with this recipe was the quantity. The recipe says it yields four tacos, but it calls for eight soft taco shells (tortillas). I got eight tacos out of this recipe, so maybe it’s four servings of two tacos each?

Shredding the cabbage

How to Cook Rice (The Brazilian Way!)

I’m sure it’s no surprise to my regular readers that I decided to make rice with the Brazilian black beans I wrote about earlier this week. I’m not sure if this is how they’re traditionally served, but I love my rice and beans! And to be honest, I’m not sure I know how to have beans without rice. So without any further ado, let’s get the Brazilian take on rice.

So what’s so special about the way Brazilians cook rice? The way we season it! We add onions and garlic to the rice and it makes all the difference in the world. Just trust me on this one. I dare you try my way and tell me you prefer plain tasteless rice instead. I know (I simply know!) that you will never go back to eating boring unseasoned rice again.

Recipe Author: Olivia at Olivia’s Cuisine
Get the recipe

The Ingredients

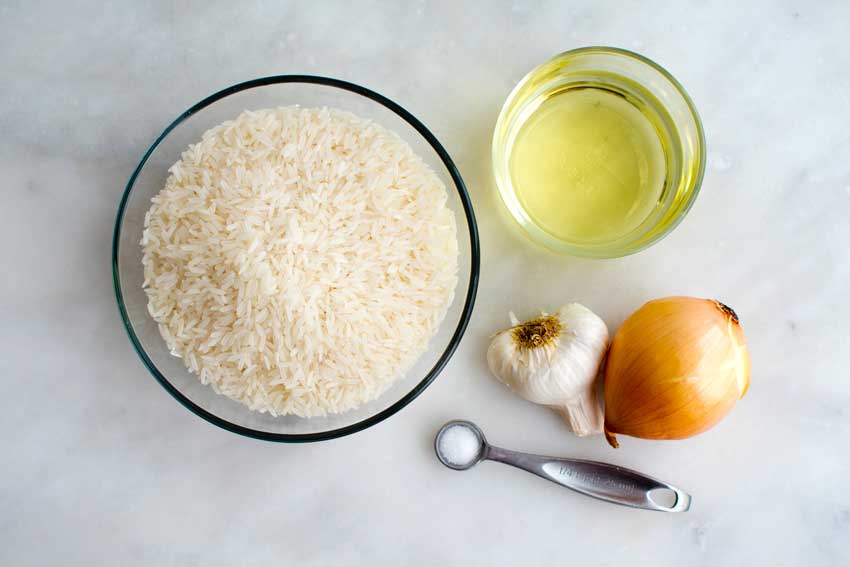
Along with plain old water, this picture shows all the ingredients for Brazilian rice. Seriously, five basic items and water is all you need. I actually had everything on hand, so there was no grocery shopping required to make this recipe. How awesome is that?!

Brazilian Rice Ingredients
Long-grain white rice, vegetable oil, onion, garlic, and salt

The Process

This recipe was slightly more effort than cooking plain rice, but not much. Here is how my time broke down:

  • 6 minutes to prep
  • 27 minutes to cook
  • 5 minutes to rest
  • 38 minutes total

The extra work is chopping and cooking the onion and garlic plus cooking the rice a bit (steps 1-4). Those steps took me 13 minutes, and the rest was letting the rice cook then rest. All in all, Brazilian rice is very easy to make and doesn’t require any special equipment or techniques.

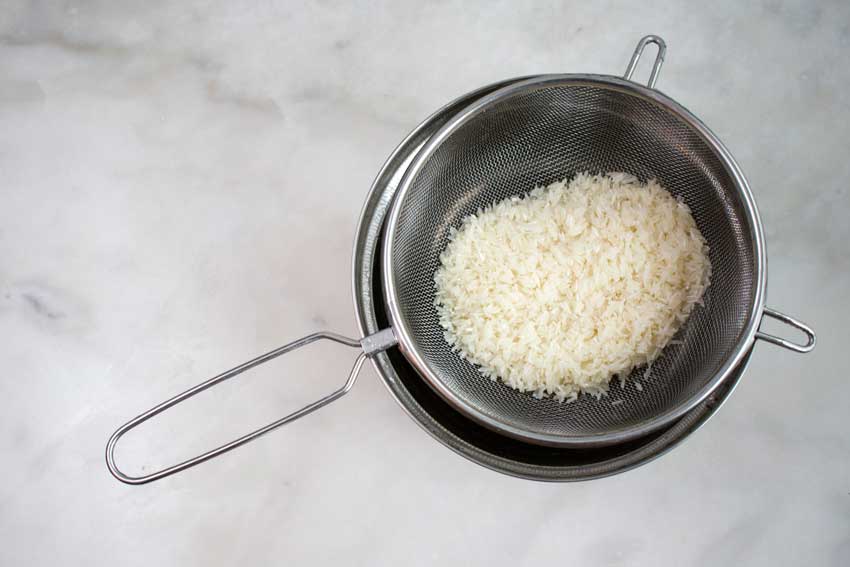
Rinsed and drained rice

Brazilian Black Beans Without a Pressure Cooker

0

Beans and rice are a regular on my menu, but I’m always down for trying out new ways to make them. And since I’m trying our Brazilian recipes this week, I simply had to try this recipe for Brazilian Black Beans. What else would I serve with Garlic Butter Brazilian Steak? I don’t make black beans with a proper recipe–I just add ingredients and taste to see if everything works. This recipe uses some of the ingredients I  normally use plus a few that I don’t. So let’s find out what Brazilian black beans are like!

These nutritious and filling Brazilian black beans are a cooked with onions and garlic and seasoned perfectly with coriander, cumin, and oregano. What’s not to love?

Recipe Author: Amy Nash at House of Nash Eats
Get the recipe

The Ingredients

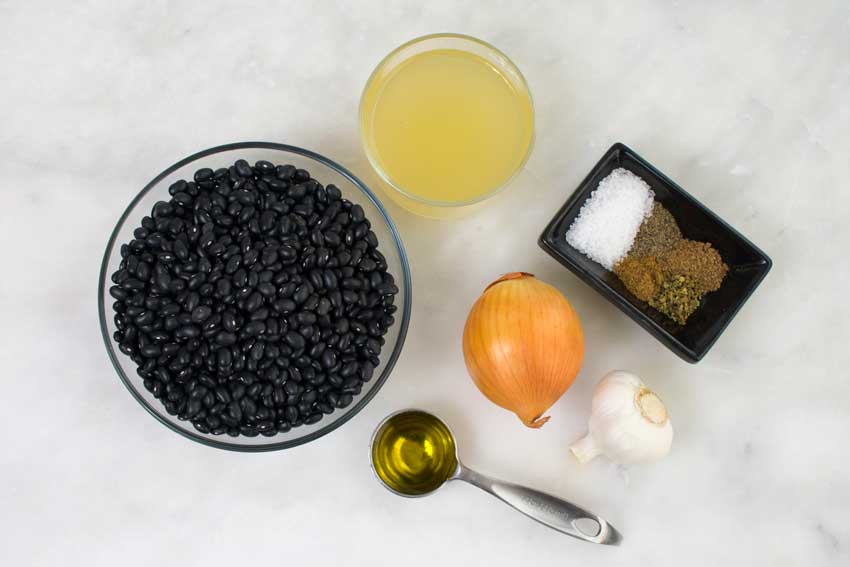
I always use canned black beans, but this recipe calls for dry beans. No problem there as the dry black beans were easy to find, as were all the other ingredients I had to buy (garlic, onion, and chicken broth). All the other ingredients were in my pantry.

Brazilian Black Beans Ingredients
Black beans, chicken broth, salt, pepper, cumin, coriander, oregano, onion, garlic, and olive oil

The Process

I don’t cook with dry beans very often because they need to be soaked for so long, but this recipe includes a really easy quick soaking method. Instead of soaking for hours or overnight, my beans were soaked in one hour.

Although the soaking time is significantly cut down, this recipe does take some time. Here is how long it took from start to finish:

  • 13 minutes to prep the beans
  • 1 hour to soak the beans
  • 1 hour to cook the beans
  • 7 minutes to prep the rest of the ingredients
  • 15 minutes to finish cooking
  • 2 hours 35 minutes total

Thankfully most of that is inactive time while the beans are soaking and cooking.

The instructions were very clear and easy to follow, so although this recipe takes a long time to make, it isn’t difficult at all. Just be sure to use a large pot so you have plenty of room to stir the ingredients without spills.

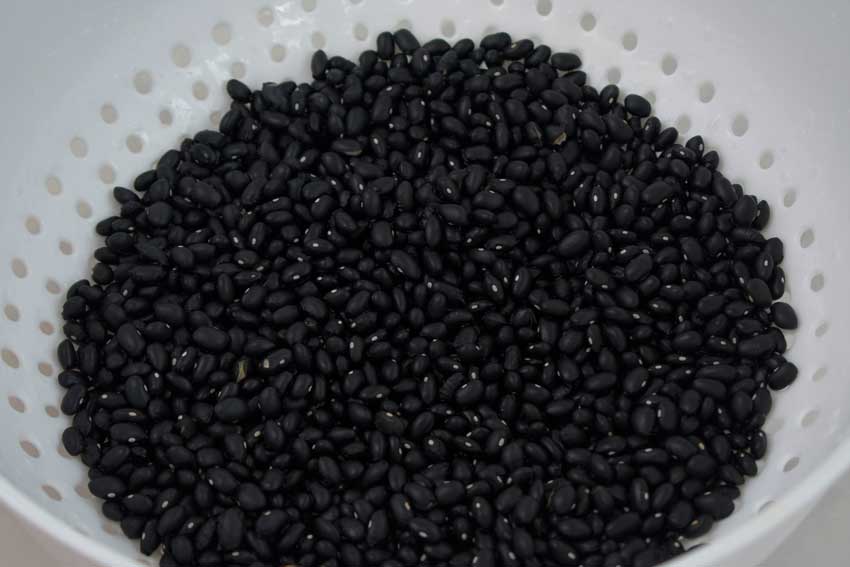
Rinsed black beans
Rinsed black beans

Garlic Butter Brazilian Steak

My foray into South American food is continuing this week with a Brazilian theme. One of my favorite birthday celebrations was at a Brazilian steakhouse, so this Garlic Butter Brazilian Steak recipe sounded like the perfect way to start the week. I do like garlic, butter, and steak, so I’m betting this recipe is going to be one I make again. Let’s find out if it lives up to my expectations!

Garlic Butter Brazilian Steak – the juiciest and most tender steak with a golden garlic butter sauce. Takes 15 minutes and dinner is ready

Recipe Author: Bee at Rasa Malaysia
Get the recipe

The Ingredients

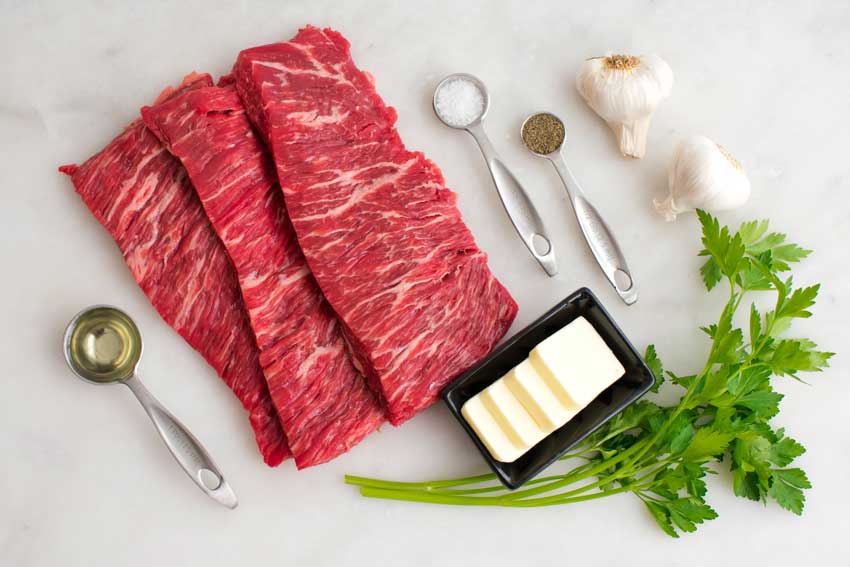
One thing I love is a recipe with a short list of ingredients, and this one didn’t let me down. With just seven items, I had a very short grocery list. Actually, I had everything but the garlic, parsley, and meat, so I really had a short list!

Although it’s not mentioned in the recipe, the author does say in the accompanying post that you can use skirt steak, flank steak or flap meat as they are all very tender. I chose flap meat because I couldn’t find plain skirt steak. For some reason, my local grocery store only had seasoned cuts in stock.

Garlic Butter Brazilian Steak Ingredients
Skirt steak, salt, pepper, garlic, parsley, butter, and vegetable oil

The Process

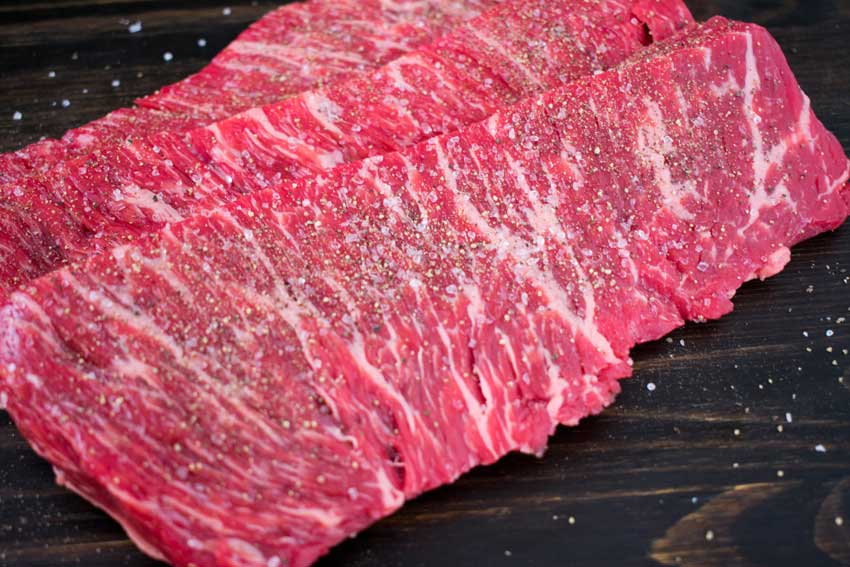
This recipe is made in two parts, and both were quick and easy. First, just season the steak with salt and pepper, then brown it for 4-6 minutes.

Next, saute the butter and garlic until it turns a golden color and spoon it over the steak when you serve. Just make sure you don’t use a dark-colored skillet so you can see when the butter starts to brown. I used the same skillet for the steak and butter, making this a one-pan recipe.

This recipe lists the total time at 15 minutes, but mine took slightly longer at 18 minutes. That includes time to chop the parsley and garnish the steak with it. It’s still very fast, and this would make an excellent quick weeknight dinner.

Skirt steak seasoned with salt and pepper