Home Blog Page 40

Mango Coconut Daiquiri

I had a few mangoes left over after the Crispy Jamaican Jerk Salmon with Mango-Basil Vinaigrette I made earlier this week, and I had to find a way to put them to use. The first thing that came to mind was the Mango Pudding recipe I tried last April. My husband has been bugging me to make it again, and this would be a perfect time. That took care of one mango–two more to go, so it was off to Pinterest to hunt for mango recipes I’ve pinned. A drink recipe seemed appropriate, and I had some coconut rum leftover from another recent recipe, Grilled Pineapple with Coconut Rum Sauce. It was serendipity!

There’s nothing quite like a refreshing tropical Mango Coconut Daiquiri made with fresh mango, coconut rum, and coconut cream on a hot summer day.

Recipe Author: Krissy Allori at Self Proclaimed Foodie
Get the recipe

The Ingredients

Another recipe with only a few ingredients and I’m not mad about it! In addition to the mango and coconut rum, I had to buy a lime, heavy whipping cream, and a can of coconut milk. The recipe calls for a teaspoon of coconut cream, and I skimmed that off the top of the coconut milk and used the rest for another recipe.
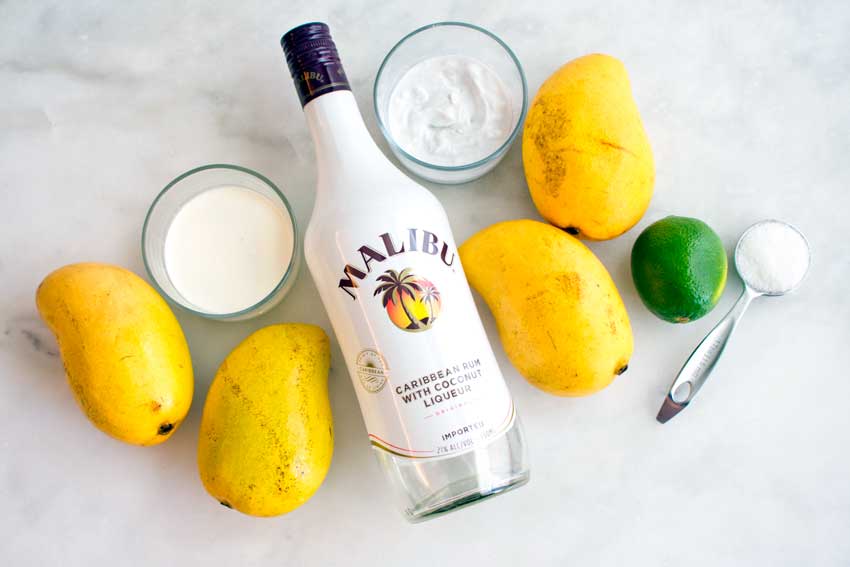
Mango Coconut Daiquiri Ingredients
Mango, coconut rum, heavy whipping cream, coconut cream, lime, and sugar

The Process

This mango coconut daiquiri recipe had three main parts. Here is what they were and how long each took:

  • 33 minutes to prep and macerate the mango
  • 4 minutes to make the whipped cream (done while mango was macerating)
  • 3 minutes to make and garnish the daiquiri

My total time for this recipe was 36 minutes which was far more than the 15 listed. I don’t think the time listed included macerating the mango, and I’m guessing that’s most of the discrepancy. I also made the coconut whipped cream while the mango was macerating, so that took four minutes off my time and would just account for the remaining discrepancy.

Anyway, back to making the recipe. First up was macerating the mango to soften the fruit and extract the juice. That meant coring and peeling a mango, but I have a few tricks to do this quickly. My mango corer and a small glass took care of what only looks like the hard part.

Once the mango was macerating I moved on to the whipped cream topping. I used my hand mixer, but I had some trouble getting it to whip up because there was so little. I had to double the recipe to make enough to whip. Problem solved, and I had extra sweet, coconut whipped cream. Total win-win!

Finally, it was time to make the mango coconut daiquiri. My trusty blender and a couple of martini glasses were all I needed. Once the cocktail was blended, I added a dollop of the coconut whipped cream to the center and used a teaspoon to swirl it a bit. I used my channel knife to make a lime twist since I forgot to buy berries to garnish as the recipe says to (in my defense they weren’t listed in the ingredients, just the final step).
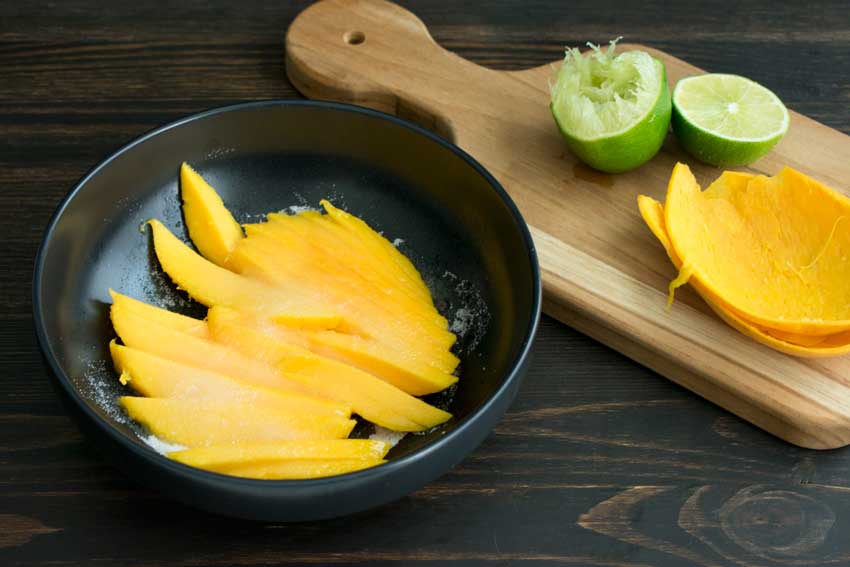
Macerating the sliced mango

Crispy Jamaican Jerk Salmon with Mango-Basil Vinaigrette

After last week’s Chicken Fried Steak, I needed something light, and I wanted to get back to my summer theme. This Crispy Jamaican Jerk Salmon with Mango-Basil Vinaigrette recipe is exactly how to do both. It’s light, healthy, and tropical. And it’s a complete meal with the salmon as a main plus a side salad. Need more convincing? The total time listed is a mere 30 minutes. I know! It looks and sounds like it’s a gourmet meal that would take a lot longer to make. And, as usual, there’s only one way to find out, and that’s to make it.

What if I told you this is the best meal I’ve eaten in Idunnohowlong? Crispy spiced salmon with field greens and avocado, tied together with sweet mango-basil vinaigrette? A meal that takes no more than 30 minutes to prepare? I’m almost at a loss for words.

Recipe Author: Julia at The Roasted Root
Get the recipe

The Ingredients

There are plenty of fresh ingredients in this jerk salmon recipe, and that meant a bit of shopping. I had a few of the staples, but I had to head to the grocery store for the salmon fillet plus the fresh produce and herbs and spices.

I couldn’t find a salad mix that explicitly said “field greens”, so I opted for spring mix. It has a nice variety of greens. The fact that’s it’s also colorful was a bonus–I have to confess that I enjoy colorful food.

And although I could have bought the jerk seasoning, I decided to use the homemade spice blend I had on hand. This is the recipe I use, and it’s wonderful! The addition of brown sugar caramelizes when you cook over high heat and helps give whatever you use it on a nice sear.

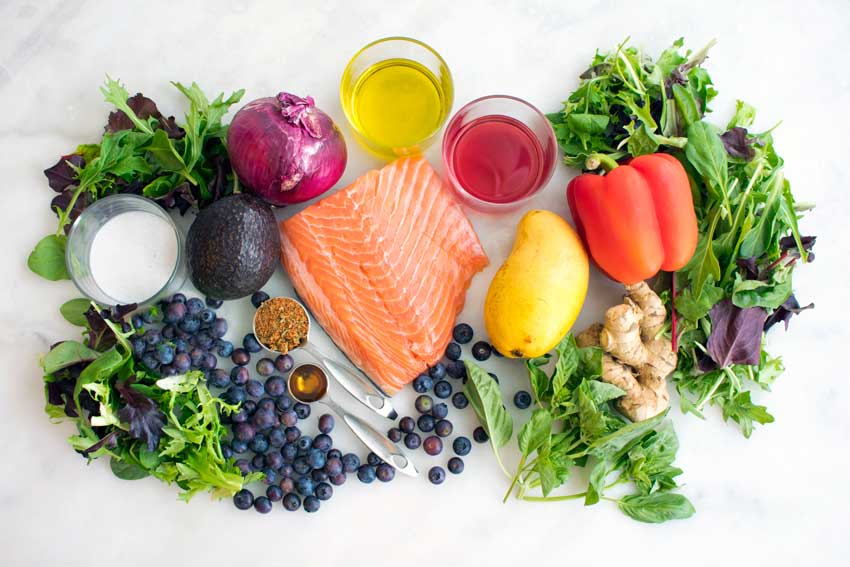
Crispy Jamaican Jerk Salmon with Mango-Basil Vinaigrette Ingredients
Salmon fillet, jerk seasoning, maple syrup, blueberries, spring mix, coconut milk, avocado, red onion, olive oil, red wine vinegar, red bell pepper, mango, ginger, and basil

The Process

So, my biggest question about this recipe was whether it really took 30 minutes, and I’m very pleased to say yes. Here is how my time broke down:

  • 16 minutes to prep
  • 12 minutes to cook
  • 28 minutes total

I followed the instructions in the order given, and began with the mango-basil vinaigrette. All it took was some chopping and a quick zip through my mini-prep. There was a little bit of leaking since this recipe makes a lot of salad dressing, but it wasn’t too bad. A larger blender would prevent that.

Next up was the salad. It was the bulk of the work for this recipe since it required the most chopping and slicing. Once that was done, all I had to do was mix everything up in a large bowl. I did make one change, though, and threw the blueberries in on top after mixing. Otherwise, they would have sunk to the bottom of the bowl.

While I was making the salad and dressing, I had been preheating my broiler on high. It was ready by the time I got to the fish. Then it was just a matter of seasoning it and popping it into the oven for 12 minutes. Definitely the easiest part of the whole meal!

I served the fish over the fish over the salad. First I added the salad with some dressing to a plate, then I topped it with a slice of jerk salmon and topped that with a bit more dressing.

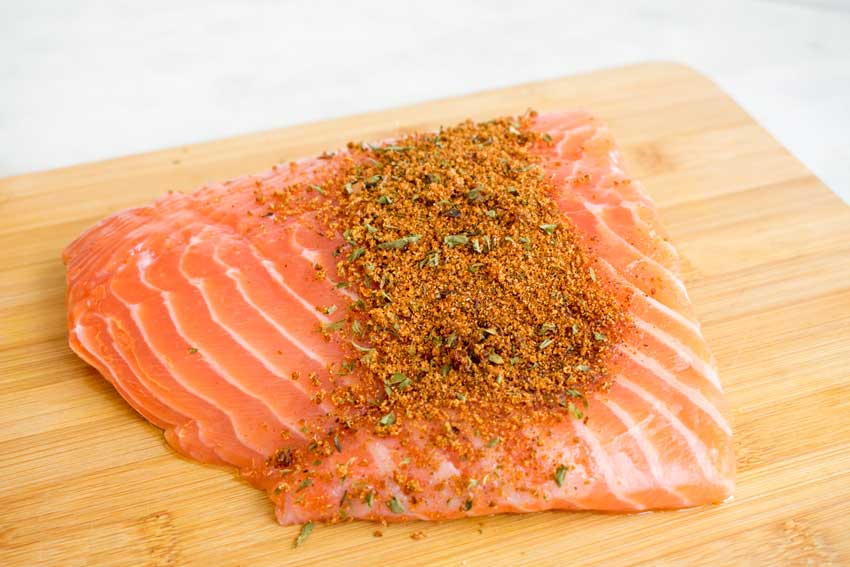
Seasoning the salmon fillet

Southern Pecan Pie Muffins

Since I already strayed from my summer recipe theme with the Chicken Fried Steak recipe I just made, I decided to try another Southern recipe. My first ideas were pretty typical, either collard greens or a drink made with sweet tea. Then I found these Southern Pecan Pie Muffins while scrolling through my dessert board. I love pecan pie, but my husband is a lot less enthusiastic about it, claiming it’s too sweet. Could these muffins be the perfect compromise I never knew existed? I must find out!

Only 5 ingredients and it tastes JUST like a Pecan Pie in muffin form! These always get gobbled up so fast that I usually have to double the recipe!

Recipe Author: Brandie at The Country Cook
Get the recipe

The Ingredients

I was conflicted about the ingredients for this recipe. On one hand, the list was short and full of pretty basic stuff. Awesome! On the other hand, there were only five ingredients. Five! That’s less than the filling for my go-to pecan pie recipe.

I was still game to try this recipe, so I went through my pantry and refrigerator to see what I had on hand and what I needed to buy. Then it was off to the grocery store to pick up what was missing.

And don’t forget the paper cupcake liners and cooking oil spray. They aren’t listed in the ingredients, so they’re easy to forget.

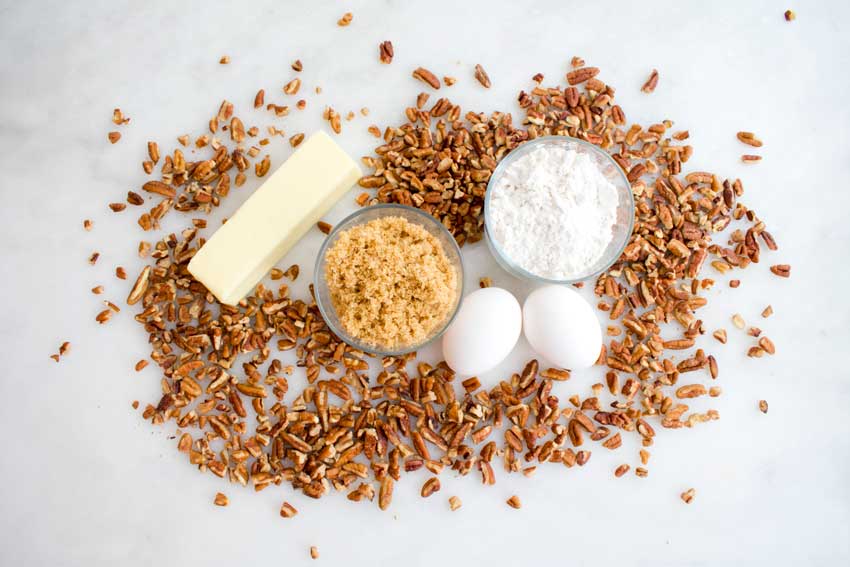
Southern Pecan Pie Muffins Ingredients
Pecans, butter, brown sugar, flour, and eggs

The Process

The instructions break this recipe down into simple, easy to follow steps. I didn’t have any trouble following them at all.

Another thing I liked was only basic tools were needed. Just a couple of mixing bowls, a wooden spoon (well, the wooden part was just because I happen to have one), and a muffin pan. You could probably get away with skipping the paper cupcake liners, but they make clean up so much easier!

The times listed were pretty accurate, and I came within one minute of the 35 minute total. Here is how my time broke down:

  • 11 minutes to prep
  • 25 minutes to cook
  • 36 minutes total

As you can see from the main photo, I followed the instructions for the optional pecan topping. The muffins were still soft in the center after 15 minutes in the oven, so the chopped pecans stuck to them with a very gentle pat after I sprinkled them on. I think they added a little something to the appearance.

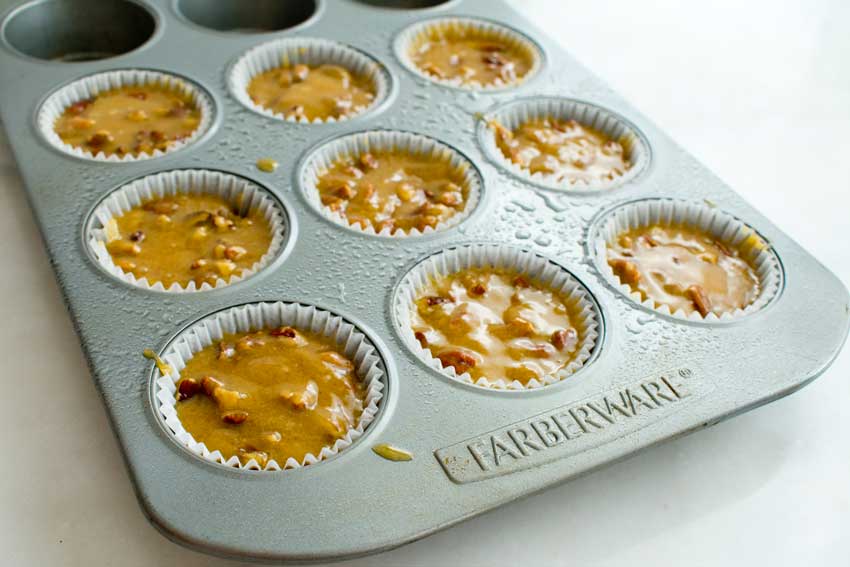
Muffin tin filled with batter

Chicken Fried Steak (Country Fried Steak)

Have you ever started a project with an idea of where you wanted it to go and had it end up somewhere entirely different? This week’s theme is a great example of that. I wanted to continue with summer-themed recipes since the weather has been in the 90s lately. You know, something on the light side or maybe grilled. Then I came across this Chicken Fried Steak recipe and all that went out the window. This is good old fashioned southern comfort food that I don’t associate with summer at all. And I’m totally fine with that.

Chicken Fried Steak Recipe (Country Fried Steak) – Cube steak recipes are taken to a new level with this crunchy, crispy, flavorful and tender chicken fried steak recipe. It’s the best country fried steak on the web!

Recipe Author: Jocelyn Delk Adams at Grandbaby Cakes
Get the recipe

The Ingredients

One thing I really liked about this recipe was it’s filled with basics. I had quite a few items on hand (flour, cornstarch, spices, etc.), so I only had to buy a few things. Mainly extra vegetable oil for frying, the cube steak, produce, and milks. My local grocery store had them all, and they weren’t pricey.

I have to point out that I will usually use lemon juice and regular milk as a substitute for buttermilk when I bake. Don’t do that here! There is something about soaking meat in real buttermilk that tenderizes it and adds a nice flavor to the breading. It’s worth buying for this type of recipe even if you don’t use it all.

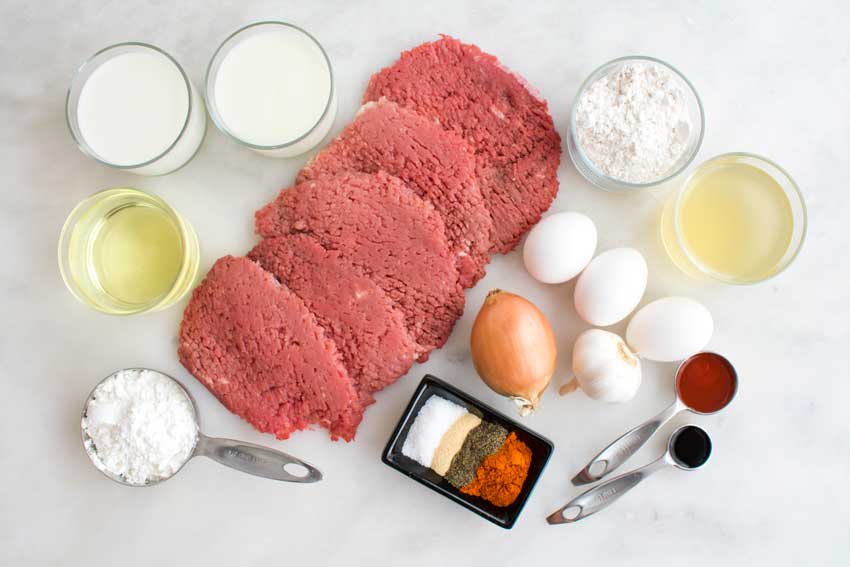
Chicken Fried Steak Ingredients
Cube steaks, vegetable oil, milk, buttermilk, flour, chicken broth, eggs, onion, garlic, hot sauce, Worcestershire sauce, cayenne, black pepper, garlic powder, salt, and cornstarch

The Process

Although I love chicken fried steak, I’ve never made it until now. It’s one of those dishes that’s not exactly healthy, so I don’t have it very often. Instead, it’s a rare treat, and those treats include food being brought to my table. Sometimes even I don’t want to cook.

Anyway, back to making the chicken fried steak. This recipe had a good amount of ingredients and steps, but it wasn’t difficult to make at all. The instructions broke the steps down into two main parts: making the steaks and making the gravy. It took about half an hour longer than the 2 hours 10 minutes listed. Here’s how the steps broke down for me:

  • 3 minutes to make the buttermilk marinade
  • 2 hours to marinate and prep
  • 5 minutes to bread the steaks
  • 15 minutes to refrigerate the breaded steaks
  • 10 minutes to fry the steaks (4 @ 2 minutes per side)
  • 10 minutes to make the gravy
  • 2 hours 43 minutes total

Making the Steaks

First up was the steaks. This started with making a buttermilk marinade and leaving the steaks to tenderize in it for two hours. I used my largest mixing bowl for this step, but a small baking dish would work too. The important thing is to make sure the steaks are completely submerged.

I made the breading and prepped the gravy ingredients while the steaks marinated. I also cleared out a shelf in my refrigerator so I could fit a baking sheet inside. The breaded steaks need to be refrigerated for 15 minutes, and I don’t normally have that much room in my refrigerator.

One thing not listed in this recipe was how long to fry the steaks. I bought a package of five, so I used the extra as a test (it’s not included in my time breakdown). I found 2 minutes per side to be perfect. It crisped the breading nicely and cooked the steaks thoroughly.
Also, I used a 12-inch cast iron pan to fry the steaks, and I used about 4 1/2 cups of oil. It didn’t completely submerge the steaks, but I had to flip them anyway, so I didn’t worry about it. It did let them float enough so they didn’t rest on the bottom of the pan. That let the breading on the bottom fry up nicely.

Another thing to mention is it’s easy to splash the hot oil when you are putting the steaks into the pan and flipping them. I avoided this by using a large spatula to lower the steaks into the pan and tongs to flip them. Using the spatula to add the raw steak also kept it from falling apart. The raw cube steak tore when I tried using the tongs to add it to the pan.

Making the Gravy

While I let the steaks rest on wire cooling racks covered with paper towels, I got started on the gravy. After all the work of making the steak, this part was pretty quick and easy. The only thing that went wrong was I overcooked the garlic. I could tell by how brown it turned in the pan and later when I tasted the gravy. You might want to add it later than the shallot/onion so it only cooks for one minute or a little less.

Despite the mishap with the garlic, I had a nice, if garlicky, gravy in just 10 minutes. It was nice and thick–just the way I like it.

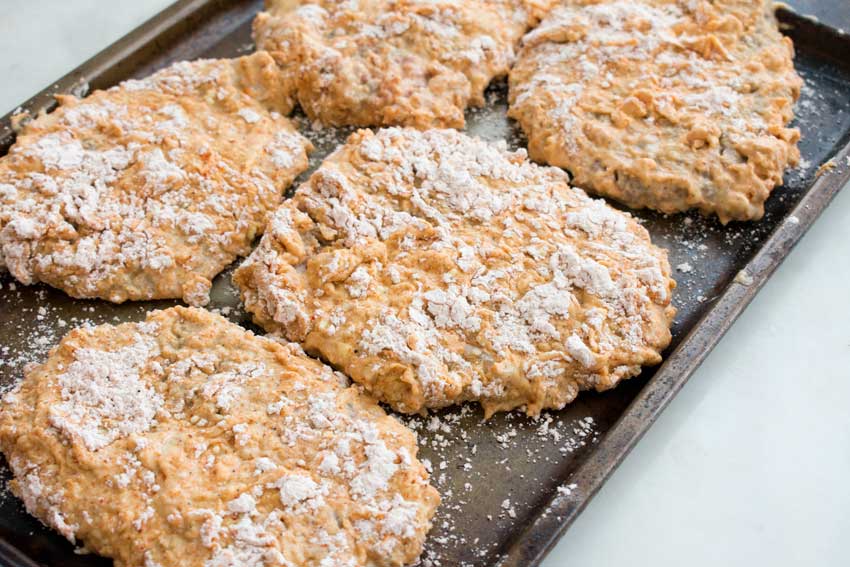
Breading the cubed steak

Grilled Pineapple with Coconut Rum Sauce

Is it a surprise that I had pineapple on my mind after the Teriyaki Burgers with Grilled Pineapple I just made? I’m thinking that’s a no LOL. The grilled pineapple topping was probably my favorite part of that burger, so I wanted to try it as a dessert. Adding a coconut rum sauce had me completely sold on this recipe. It’s time to fire up the grill again and give this Grilled Pineapple with Coconut Rum Sauce recipe a try.

Grilled Pineapple with Coconut Rum Sauce. Sweet, juicy, caramelized grilled pineapple drizzled with a creamy coconut rum sauce. Tropical paradise!

Recipe Author: Serene at House of Yumm
Get the recipe

The Ingredients

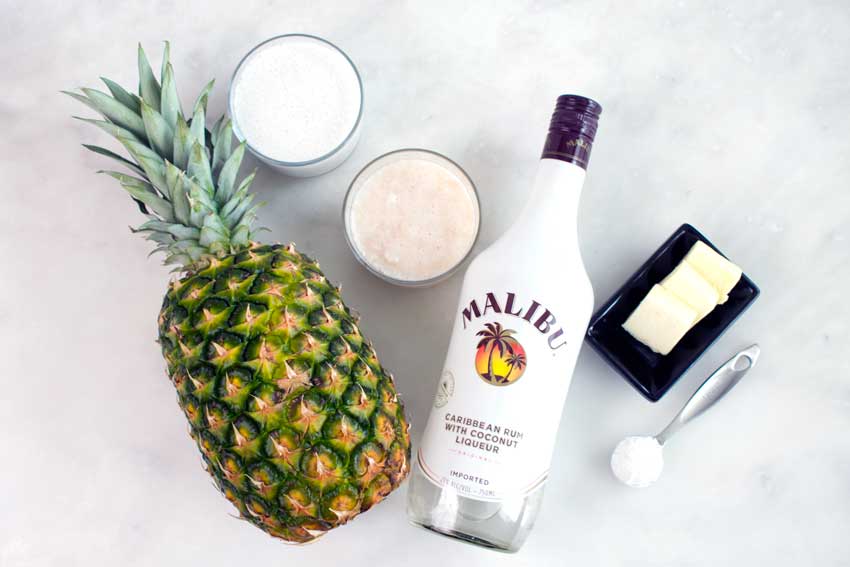
Okay, the grilled pineapple part of this recipe was easy. All I had to do was buy a pineapple. The coconut rum sauce was slightly more complicated–and I mean slightly. I picked up the coconut milk when I bought the pineapple, then I went across the street to the liquor store for the cream of coconut (I used Coco Lopez brand) and coconut rum. Really complicated, right?

The Process

This recipe was just as easy to make as it looked. I had my sauce made and skewered pineapple grilled in just 23 minutes–right on time.

I make kebabs pretty regularly, so I used my metal skewers. No soaking needed, so that saved me some time. One thing to note if you use metal skewers is they get very, very hot! Be sure to use an insulated glove when you turn/pick them up.

The instructions said to make the coconut rum sauce first so it could cool, and that’s exactly what I did. It was very easy to mix up in a small saucepan.

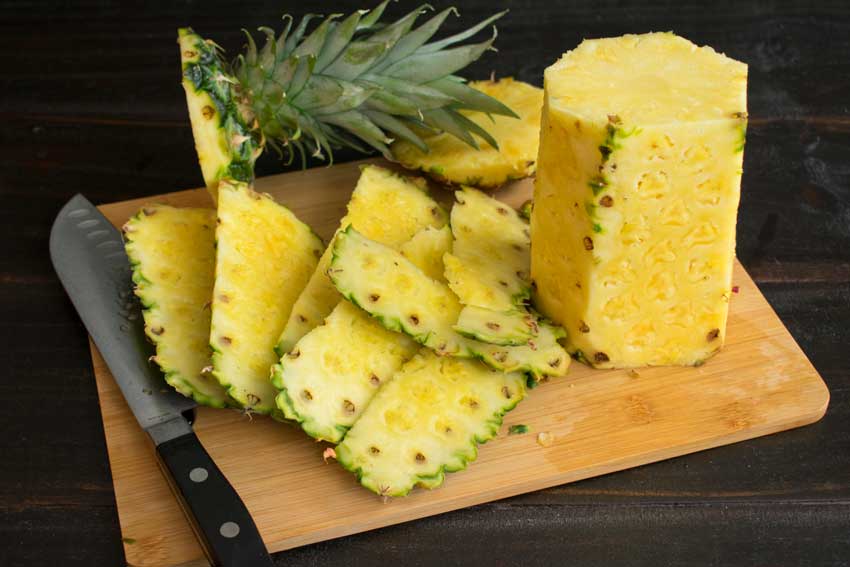
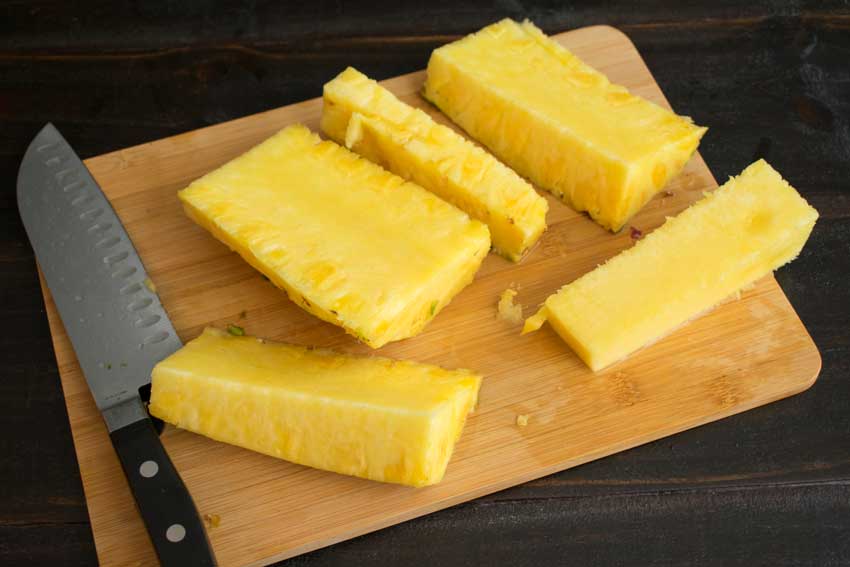
Next up was the pineapple. I started by peeling it with the leaves still attached. It makes it easier to hold onto. Once peeled, I removed the leaves and base, then I cut the fruit away from the core and into strips. The pictures with the recipe look like the pineapple was skewered at this point, but I went further and cut the strips into bite-sized pieces before I skewered them.

Peeling the pineapple

This video shows how to peel and cut up a pineapple. It’s not as hard as you think it is! In fact, it’s pretty quick and easy. The technique is the same as I used except they cut off the leaves before peeling instead of after. I suppose it’s a matter of preference.

Once the pineapple was ready, it was on to the grill for about 8 minutes. I skipped the rack that came with the skewers and put them right on the grate. The rack would have elevated the skewers slightly, and I wanted to be sure the pineapple charred and caramelized. I cooked them for 4 minutes then rolled them to the opposite side for another 4 minutes.

Coring the pineapple

Teriyaki Burgers with Grilled Pineapple

Most weeks I have no problem coming up with ideas for The Hungry Pinner, but not this week. I was really struggling after combing through my pins, so I asked my husband for suggestions. He surprised me by suggesting teriyaki. Teriyaki? Hmmm. I know I’ve had it, but it’s been a very long time. And I think I liked it, so why not blog it? So I went back to my boards and found Teriyaki Burgers with Grilled Pineapple. Grilled burgers with a healthy twist, topped with a slice of pineapple. This I had to try.

Hawaiian Teriyaki Burgers. Moist, juicy chicken or turkey burgers topped with a sweet and tangy teriyaki burger sauce, grilled pineapple, and onion.

Recipe Author: Erin at Well Plated by Erin
Get the recipe

The Ingredients

Now that I had decided on a recipe, the next logical step was grocery shopping. I ordered my groceries from Whole Foods delivery this week because I was having a fibromyalgia flare-up. It makes getting around difficult and painful, so a big shopping trip was out of the question.

Whole Foods delivery service is usually excellent, but this week there were a few issues. First, the ground turkey listed on their website was listed as 94% lean. The recipe calls for 93% lean, so I wasn’t sweating the slight difference. However, the ground turkey they delivered said it was 99% lean on the packaging. Eeek! That sounded like the makings of a very dry burger.

Another issue I had was with the fresh ginger. I thought the pieces they delivered were very small, but that wasn’t a big deal. Then I started peeling a piece as I was preparing my burgers. That’s when I realized it wasn’t ginger at all but turmeric root. Ugh! They are not interchangeable. Fortunately, a quick Google told me I could substitute ground ginger. It wasn’t ideal, but it saved me since I had already started cooking.

Otherwise, the rest of the ingredients I ordered were just as expected. The only thing I couldn’t find was the whole wheat panko bread crumbs. I just used regular panko instead.

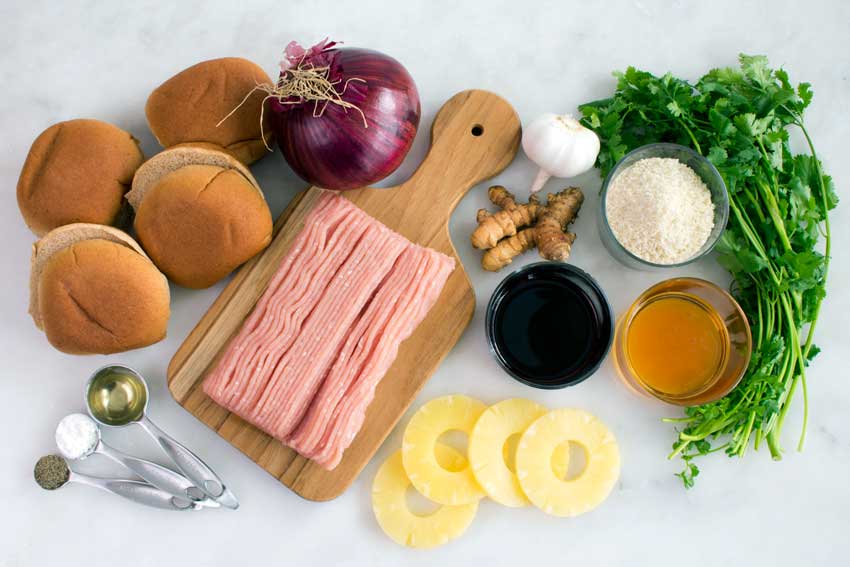
Teriyaki Burgers with Grilled Pineapple Ingredients
Ground turkey, whole wheat hamburger buns, red onion, garlic, ginger, panko bread crumbs, cilantro, honey, soy sauce, pineapple rings, rice vinegar, cornstarch, and black pepper

The Process

Making these teriyaki burgers was very straightforward and divided into two major parts: making the sauce and making the burgers. Here is how the times broke down:

  • 15 minutes to prepare the sauce and form the burgers
  • 30 minutes to refrigerate the burgers
  • 16 minutes to grill
  • 3 minutes to assemble 4 burgers
  • 62 minutes total

The instructions were clear and easy to follow as written. The sauce was the easiest part of this recipe, and all I needed was a small saucepan to make it. It did thicken up pretty fast though, so be sure to keep an eye on it.

Grilling the pineapple, onions, buns, and burgers was a bit more work, but mostly because I had to gather the food and tools to grill outside. A long spatula and basting brush were essential tools here. I’m sure I don’t have to mention that it’s not fun to get too close to a hot grill.

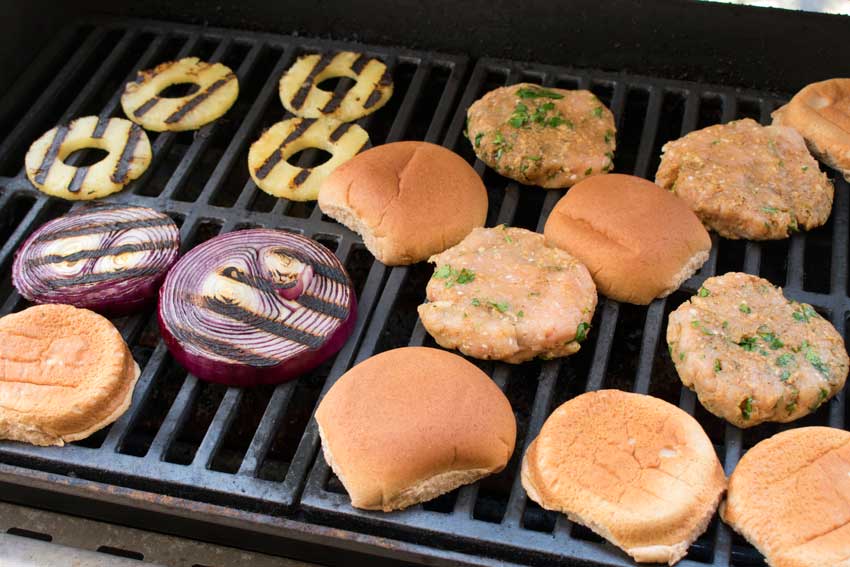
As you can see, I didn’t really plan when I laid out the food on the grill. It ended up being a fit everything where there’s space situation, but it all worked out.

The burgers had rested for five minutes by the time I brought everything inside, and it was time to assemble them. No extra condiments were needed, so this step was just a matter of layering the grilled items and extra teriyaki sauce on the buns. Super simple!

Grilling the burgers, pineapple, onions, and buns
Grilling the teriyaki burgers, pineapple rings, red onions slices, and whole wheat buns

Greek Salad

Growing up in Orlando, Florida, my mom’s Greek salad was a regular on the summer menu. There’s something about the heat and humidity that called for lighter meals, and this salad was an easy, delicious way to do that. We often ate it as a poolside dinner. Our backyard was full of trees and flowers, and it was just a beautiful place to be. Rain trees, pampas grass, hibiscus bushes, bougainvillea, ferns, and oleander surrounded the cool blue water. It was a tropical paradise, especially to a kid who had lived in apartments for years. I miss it, but I’ll always have the memory of it. So, without further ado, here is what might be my favorite summer recipe ever: Greek Salad.

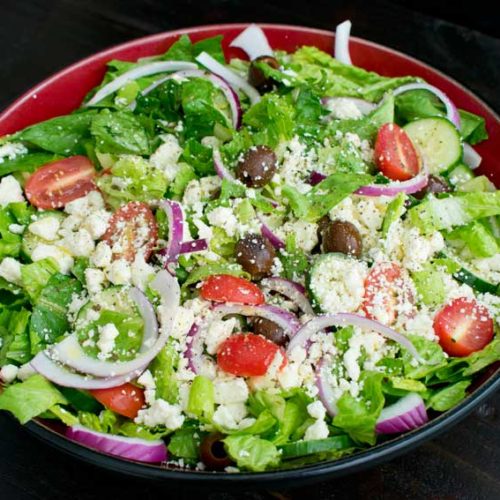
This Greek salad is a regular on my menu. I love the salad ingredients, but the dressing is what keeps me coming back to this recipe.

The Ingredients

This recipe is full of flavor, and the ingredients are all easy to find at my regular grocery store. I like to keep things flexible, so don’t sweat it if you want to leave out an ingredient or two. I have to confess that I only add the tomatoes once in a while for my husband. I love them cooked, but raw tomatoes just aren’t my thing.

I also change up the amount of lettuce I use. Sometimes the store stocks huge heads of romaine, and one is plenty. Other times, I have to buy two smaller heads so I have enough lettuce.

The cucumber I happened to use for this recipe was a seedless or English cucumber. I’ve grown to love them because they have thin skin and I don’t need to seed them. My mom’s recipe originally used regular cucumber that was unpeeled or seeded. I started peeling and seeding them just because of personal preference, so feel free to add whichever variety you prefer.

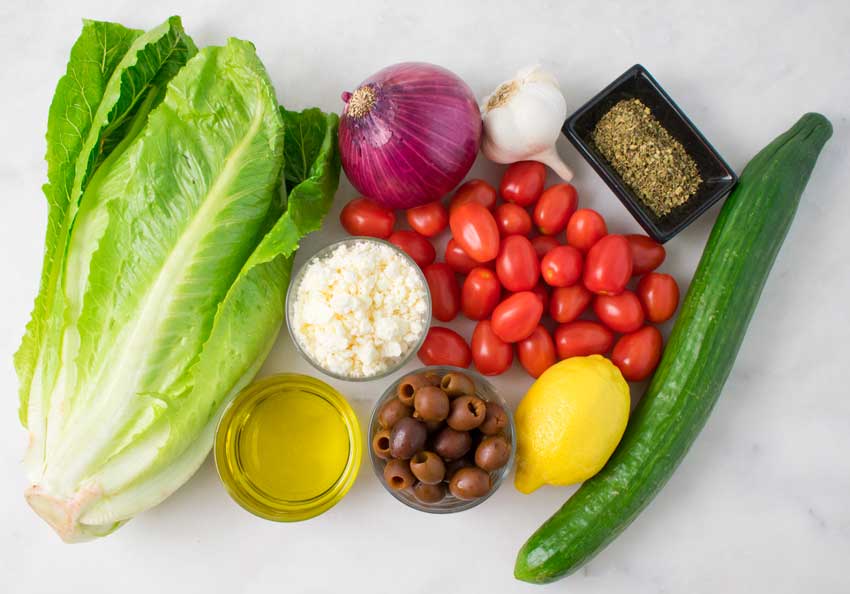
Greek Salad Ingredients
Romaine lettuce, red onion, garlic, oregano, English cucumber, lemon, black olives, olive oil, feta cheese, and grape tomatoes

The Process

There’s absolutely no cooking involved here, just a bit of chopping and shaking up the salad dressing. I like to start things off by prepping the vegetables since that’s the bulk of the work. A mandoline will speed things along. It’s not a requirement, but I especially love it for getting the red onion sliced very thin. I find that thick slices of raw onion overpower the salad’s other flavors.

Once the salad is made, then I add the dressing ingredients to a sealable container and give them a good shake. Lately, I’ve been using a small Snapware leftover container, but I’ve used a cocktail shaker and empty water bottle in the past. No matter what type of container you use, the important part is that it seals so you don’t have a huge mess on your hands.

That’s it. Chop some vegetables, open a can, and shake up the salad dressing. It takes me less than 15 minutes, and I never get tired of this salad (and I’m not really a salad person). I hope you love it as much as I do!

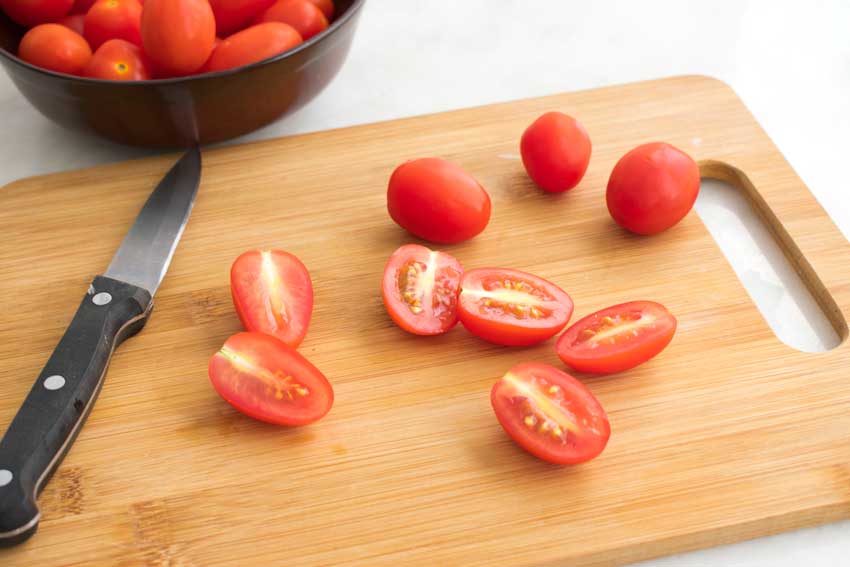
Halving the grape tomatoes
Greek Salad

Greek Salad

The Hungry Pinner
This Greek salad is a regular on my menu. I love the salad ingredients, but the dressing is what keeps me coming back to this recipe.
Prep Time 12 minutes
Total Time 12 minutes
Course Salad
Cuisine American, Greek
Servings 6

Ingredients
  

  • 1 head romaine lettuce cut into 1/2" pieces *
  • 6 ounces pitted black olives drained
  • 1 pint grape tomatoes (about 12 ounces), halved
  • 1 small or 1/2 large red onion thinly sliced
  • ½ English cucumber thinly sliced **
  • 4 ounces feta cheese crumbled
  • salt and pepper to taste

Salad Dressing

  • ½ cup extra virgin olive oil
  • ¼ cup fresh lemon juice (1 large or 2 small lemons)
  • 1 clove garlic pressed or minced
  • 1 teaspoon dried oregano
  • ¼ teaspoon salt or to taste

Instructions
 

  • Toss the salad ingredients together and top with crumbled feta cheese.
  • Mix the salad dressing ingredients together in a sealed container and shake to blend.
  • Pour the dressing over the salad, top with salt and pepper,  and enjoy!

Notes

* You can use 1 large or 2 small heads of romaine
** You may substitute a regular cucumber, peeled and seeded, if desired

Greek Style Grilled Lamb Chops

I have been craving lamb lately and could not resist this recipe for Greek Style Grilled Lamb Chops. Summer is here, and what better way to break in my grill than with one of my favorite foods? Plus it gives me an excuse to make Greek salad to go with it and to post my recipe (stay tuned for that). This is a total win-win for my tastebuds!

Lamb chops in a Greek style marinade with olive oil, lemon, garlic and oregano that are grilled to smokey perfection!

Recipe Author: Kevin at Closet Cooking
Get the recipe

The Ingredients

This recipe doesn’t have a ton of ingredients, and I’m not mad about that. It’s lamb chops (I chose shoulder chops) and a few easy to find items for the marinade. We’re talking dried oregano, garlic, lemon juice, olive oil, salt, pepper, and plain yogurt.

The plain yogurt is optional but I’ll let you in on a secret: it makes the meat char nicely. I’ve learned that over the years, mostly with Indian food and chicken in particular. A yogurt marinade can be magical.

Greek Style Grilled Lamb Chops Ingredients
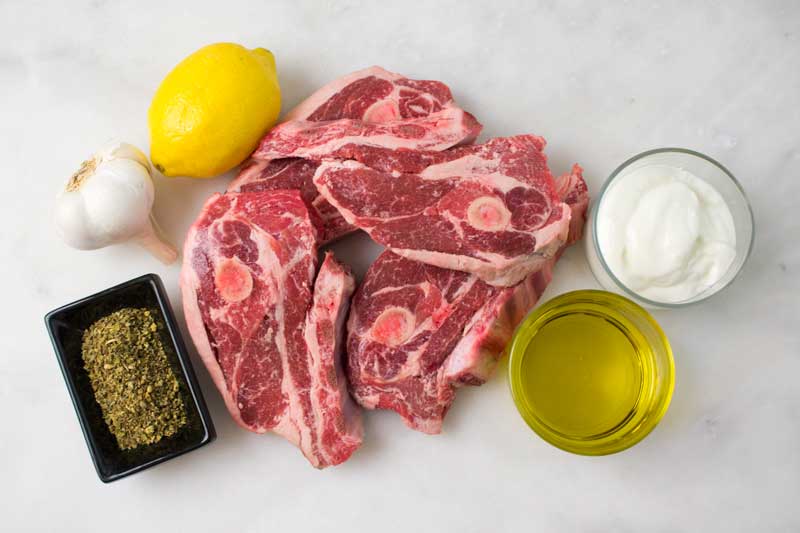
Lamb shoulder chops, dried oregano, garlic, lemon, plain yogurt, and olive oil

The Process

The marinade was super easy to mix up. I just added all the ingredients to a large sealable container, stirred, then added the lamb chops. I had to layer them, so I was sure to spoon the marinade in between the chops and over the top layer.

I intended to grill these luscious lamb chops, but rain happened. Grilling in light rain is possible since we have a partially covered patio, but this rain chose not to be the light kind. Fortunately, the recipe does give instructions for broiling and pan-frying.

I opted to broil my lamb since it’s close to grilling. That meant turning my broiler to high and letting it preheat for 10 minutes (same thing I do when I grill). Then I had to find my broiler pan–it was hidden under my kitchen sink with all the other big pans I rarely use.

I gave each side 3 minutes under the broiler, but I wasn’t happy with the lack of charring. I gave the second side an extra minute to see if it would help but no luck. Boo! I really wanted nicely charred lamb chops like the picture with the recipe, but I was afraid of overcooking them. I’d rather have uncharred lamb than overcooked lamb. The extra time gave me pretty well-done lamb chops with just a touch of pink in the middle, but they were still juicy.

Here is how the times broke down for the entire process:

  • 9 minutes to prep the marinade
  • 7 minutes to broil
  • 16 minutes total*

*Not including marinating overnight

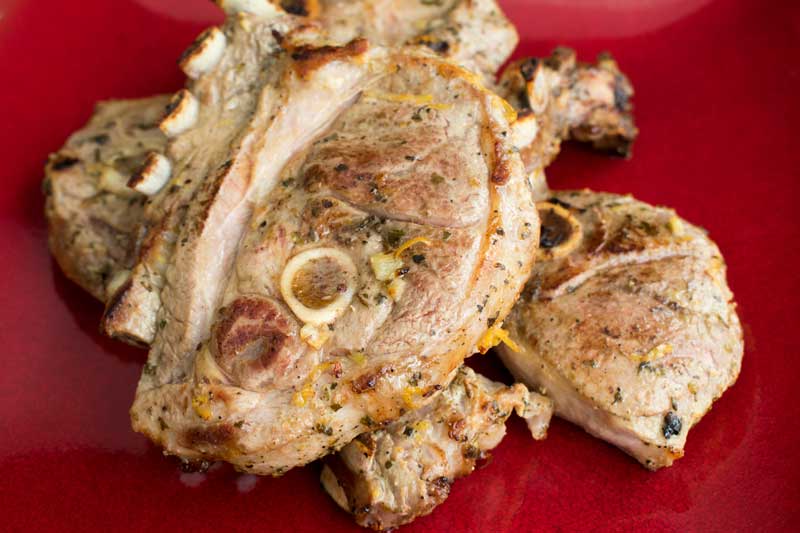
A close-up view of the lamb chops

Very Berry Bellini

The Saucy Italian Drunken Noodles recipe I just made gave me the idea for today’s post. I wanted to make something Italian with a bit of a twist and it needed to have alcohol. This Very Berry Bellini recipe seemed tailor-made. The classic Bellini is made with prosecco and peach puree. This berry version keeps the prosecco and substitutes a variety of fresh berries and vanilla simple syrup for the peach puree. And it sounds amazing!

Today we’re bumping up the berry factor and making very berry bellinis. Made with a trio of berry goodness: strawberries, raspberries and blueberries. It’s fruity, slushy and I’m willing to bet you won’t be able to stop at just one.

Recipe Author: Paula at Bell’ Alimento
Get the recipe

The Ingredients

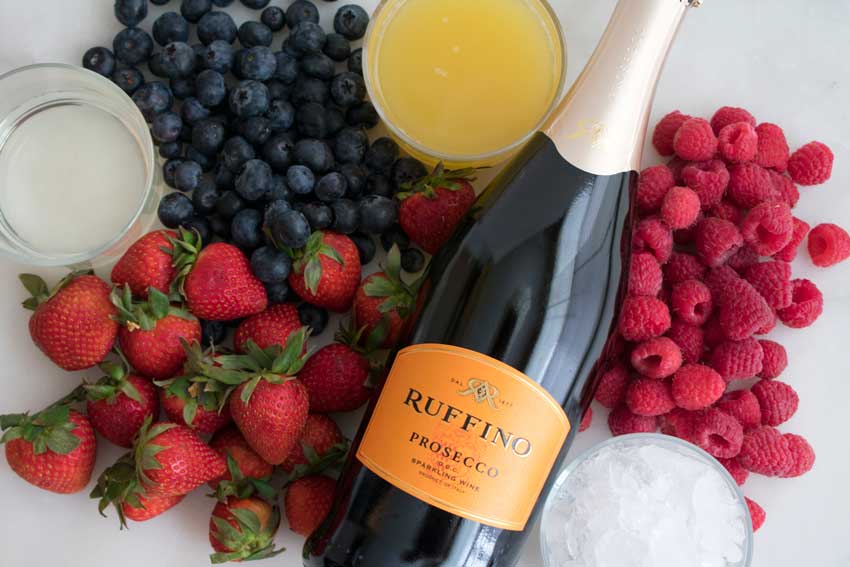
The nice thing about this recipe is that it’s full of delicious summer berries. I love any excuse to eat (or drink in this case) berries! They were easy to find at my local grocery store, along with the prosecco.

I’m sure I could have found vanilla simple syrup at a larger liquor store, but I didn’t even look. Simple syrup is easy to make with sugar, water, and vanilla extract, and I had all of those things in my pantry. It saved me a trip and a few dollars, but I did have to take the time to make it and let it cool.

Very Berry Bellini Ingredients
Prosecco, strawberries, blueberries, vanilla simple syrup, raspberries, and ice

The Process

The instructions for this recipe couldn’t have been simpler: put all the ingredients into a blender and blend. Real-life just didn’t cooperate for me, at least on my first try.

The First Try

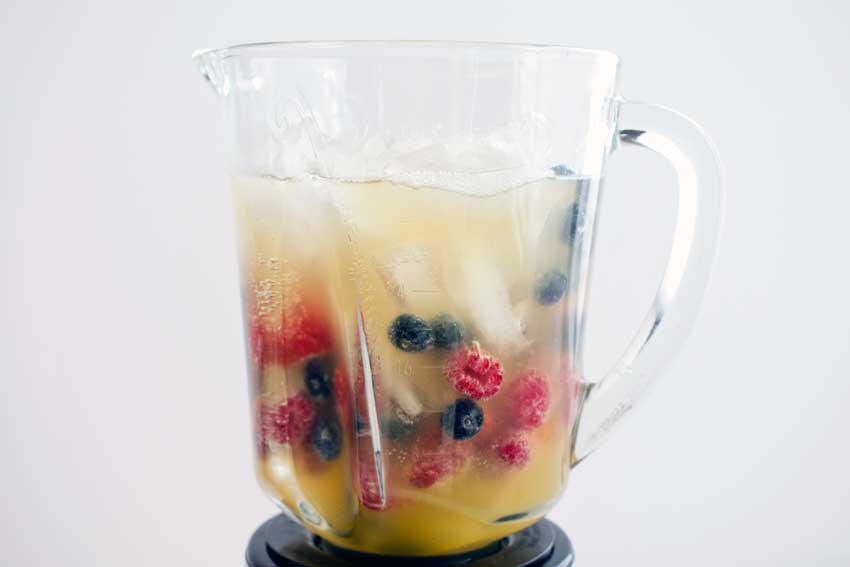
I made a huge mess the first time I blended up a batch of Very Berry Bellinis. It all seemed to be going well until I started blending. My blender’s pitcher holds 40 ounces (5 cups), and it had plenty of room for all of the ingredients. So far, so good.

Then I hit the pulse button a few times. It turns out there wasn’t enough room for all the ingredients plus the foam caused by blending a carbonated beverage like prosecco. I had sweet pink foam all over my kitchen counter. Oops!

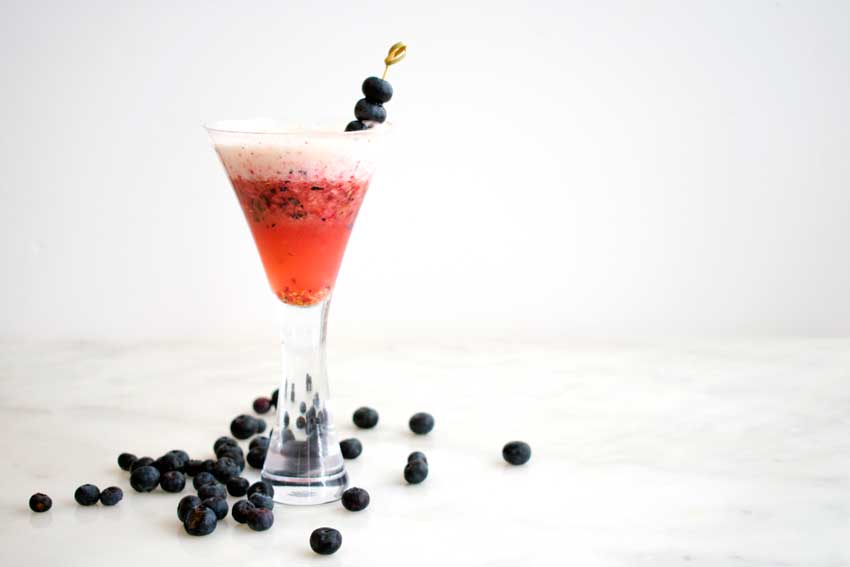
After cleaning up the mess, I had to sample and photograph my bellini (in that order). The upside was a damn good berry bellini. However, I noticed the drink separated into layers very quickly (picture below). From top to bottom it was foam, berry slush, and liquid. It didn’t look much like the photos with the recipe, and I was kind of bummed about that. I was also determined to find a solution.

All the ingredients in the blender
All the ingredients in the blender (first try)

The Second Try

The next day I gave the Very Berry Bellini recipe another try with some modifications. First, was quartering the strawberries. They were small, to begin with, but I got more into the measuring cup by cutting them into smaller pieces. More berries are always good!

Second, no blending the prosecco. I started by blending everything else and testing the consistency. It wasn’t as thick as I wanted, so I added another cup of ice cubes for a total of 3 cups. I would have used crushed, but my icemaker has decided I no longer need crushed ice.

Then I poured my berry slush into a large pitcher and slowly stirred in the prosecco with a long bar spoon. It did foam a bit, but nothing like blending it the day before. The results were what you see in the main picture with this post. This version looked a lot like the author’s pictures, and I think I could taste more of the prosecco.

My theory is that I was able to blend the berries more this time, and that gave it a richer color and smoother consistency. It did eventually separate a little, but it took longer and wasn’t as dramatic as the first try. This is the version I’ll stick with.

The Bellini separated into layers on the first try

Saucy Italian Drunken Noodles

I try to mix things up for The Hungry Pinner, and this week seemed like a pasta week. With that in mind, I went hunting through my Pasta board for something interesting. Obviously, it needed to be full of things I like, but I also wanted to try something different. After all, this blog is about expanding my cooking horizons. Saucy Italian Drunken Noodles is what I ended up choosing for a few reasons. First, I’ve never tried pappardelle pasta, and I rarely cook with sausage. Those check the “different” box. The rest of the ingredients–sweet bell peppers, tomato, and white wine, to name a few– check the “things I like” box. This recipe sounds like it has the potential to become a favorite. But there’s only one way to know for sure, and that requires a trip to the market and some cooking. Let’s go!

I love using inspiration as my guide when it comes to food, the same way I try to use it when it comes to everyday living. So when I sat down to come up with a few comforting and cozy pasta recipes to share over the next few posts, I thought back on a scrumptiously unique and tasty Thai noodle dish called “Drunken” Noodles that I used to get quite often from a nearby restaurant that has since relocated, and imagined how delicious it could be to make an Italian version of the dish. Why not, right?

Recipe Author: Ingrid Beer at The Cozy Apron
Get the recipe

The Ingredients

Saucy Italian Drunken Noodles does have a fairly long list of ingredients, but it’s full of easy-to-find and relatively inexpensive ingredients. I had no trouble finding them all in a single shopping trip.

The pappardelle pasta was a little pricier than, say, spaghetti, but still affordable. How much more? We’re talking $6.99 for 12 ounces of pappardelle versus $0.99 for 16 ounces of spaghetti at Whole Foods. I wouldn’t pay that much for an everyday pasta dish, but it’s not terrible for a once-in-a-while dish.

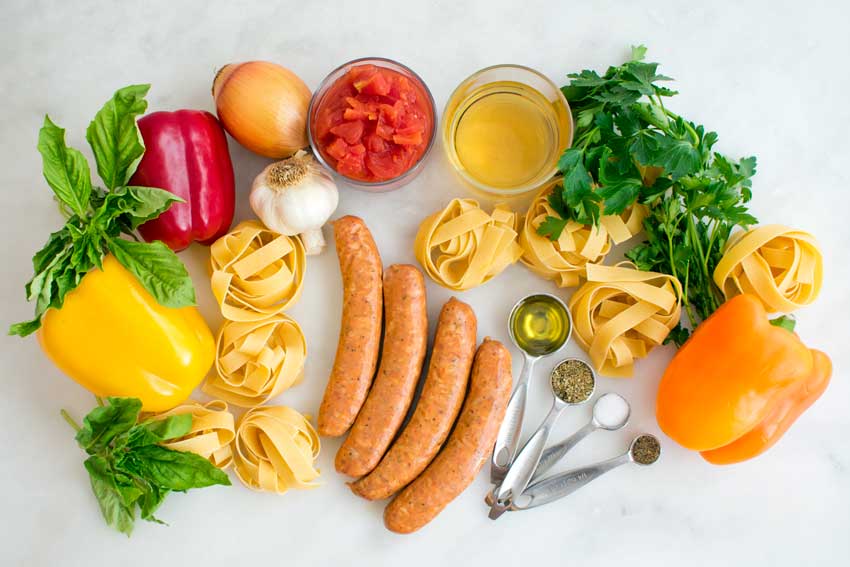
Saucy Italian Drunken Noodles Ingredients
Spicy Italian sausage, pappardelle noodles, basil, yellow bell pepper, red bell pepper, garlic, onion, diced tomatoes, white wine, Italian parsley, orange bell pepper, olive oil, Italian seasoning, salt, and pepper

The Process

I have to say that I thought making this recipe would be a lot more difficult than it actually was. And I have absolutely no reason behind that fear–just me being neurotic, I guess.

The instructions were pretty easy to follow, but I did have to check the author’s pictures to see how to cut the bell peppers. The list of ingredients says “thinly sliced”, and I wasn’t sure if that meant julienned strips or thin rings. Based on her pictures, I chose the julienne them. I also cut the onions into similarly long, thin strips.

Making the sauce was most of the work, but it really wasn’t difficult. It did require a lot of hands-on/active time, so I couldn’t make the pasta at the same time. The instructions were written so the sauce was prepared, then the pasta, so I wasn’t surprised that I couldn’t cook both together. I like to multitask to save time, but I totally get why I couldn’t in this recipe.

The total time for this recipe was 40 minutes from start to finish. It wasn’t quite a “quick” recipe since it was over 30 minutes, but not by too much. This could still be a weekday meal, though. You could even shave some time off by pre-slicing the bell peppers.

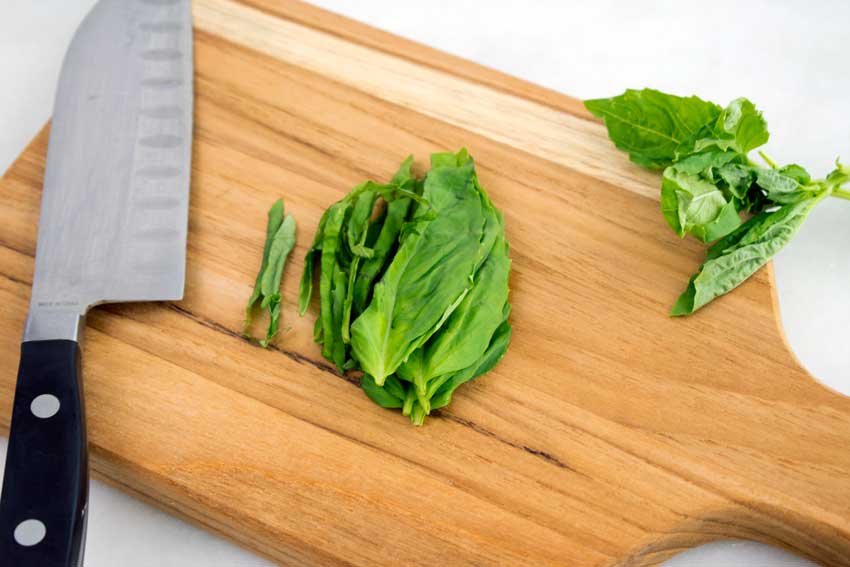
Julienned basil leaves
Julienned basil leaves. Stack the leaves and cut them into thin strips.

Meyer Lemon Greek Butter Cookies (Kourabiedes)

I had lemons on my mind (and tastebuds) after the Grouper with Lemon-Caper Butter recipe I made earlier this week. But how to top it? These Meyer Lemon Greek Butter Cookies (Kourabiedes) might just be how. I’ve wanted to make this recipe for a long time, but I’ve never been able to find the Meyer lemons. Until now that is. The stars aligned when I found the lemons I needed for this recipe, so I have to make it.

Meyer Lemon Greek Butter Cookies {Kourabiedes} are classic Greek holiday cookies with a refreshing citrus twist. They’re so easy to make, and are perfect for your holiday baking!

Recipe Author: Marcie at Flavor the Moments
Get the recipe

The Ingredients

I had good luck finding most of the kourabiedes ingredients for this recipe at my local grocery store with the exception of the unbleached flour. I subbed ordinary all-purpose flour.

This recipe did have a couple of items that were on the pricey side. First, the Meyer lemons were $3.99 for a bag of four. The really expensive item was the almond meal at $11.99 for a 1-pound bag. It made a difference in the texture of the cookies, but I really need to find a way to use the rest to justify that price.

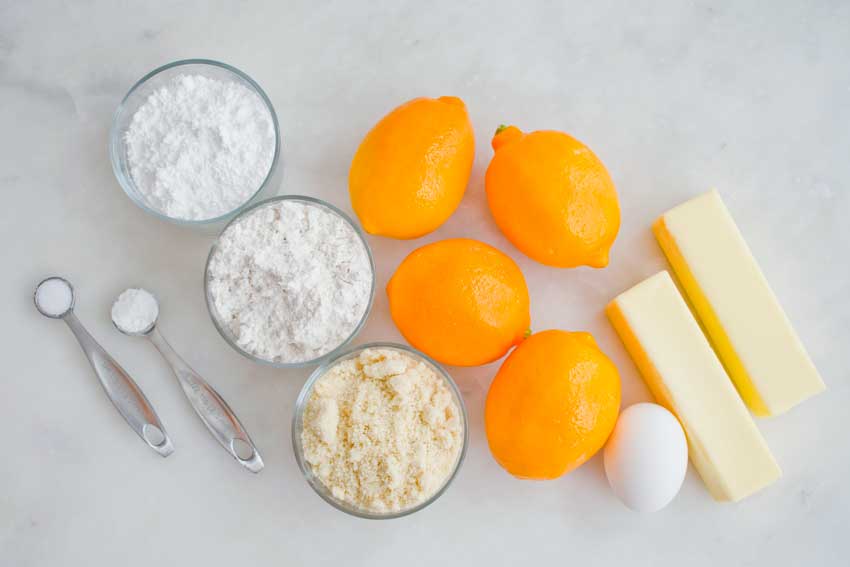
Meyer Lemon Greek Butter Cookies (Kourabiedes) Ingredients
Meyer lemons, almond meal/flour, all-purpose flour, baking powder, salt, butter, and egg

The Process

I’m not much of a baker, and it’s rare for me to make cookies. I think I have a mental block to baking in general. One day maybe I’ll have the money for therapy to explore this…

But I was so excited about finding Meyer lemons that I was able to set aside my baking issues and give this kourabiedes recipe a try. I have to say it went very smoothly and wasn’t nearly as much work as I thought it would be.

The hardest part was remembering to set the butter on the counter to soften for a couple of hours. I always forget that part! The rest of the steps went according to the instructions. I even had all of the equipment I needed: a mixer, a zester, parchment paper, cooling racks, and baking sheets. My egg yolk separator and citrus reamer came in handy, too, but you can make this recipe without them.

As far as time went, here is how it broke down:

  • 23 minutes to prep
  • 20 minutes to bake
  • 10 minutes to cool
  • 4 minutes to roll in powdered sugar
  • 57 minutes total

While that is in line with the total time listed on the recipe, I wonder if that’s because I made my cookies too bog. The recipe says it makes 36 cookies, but I ended up with 20. That’s totally my fault, but I think the recipe intended baking the cookies in 2 batches.

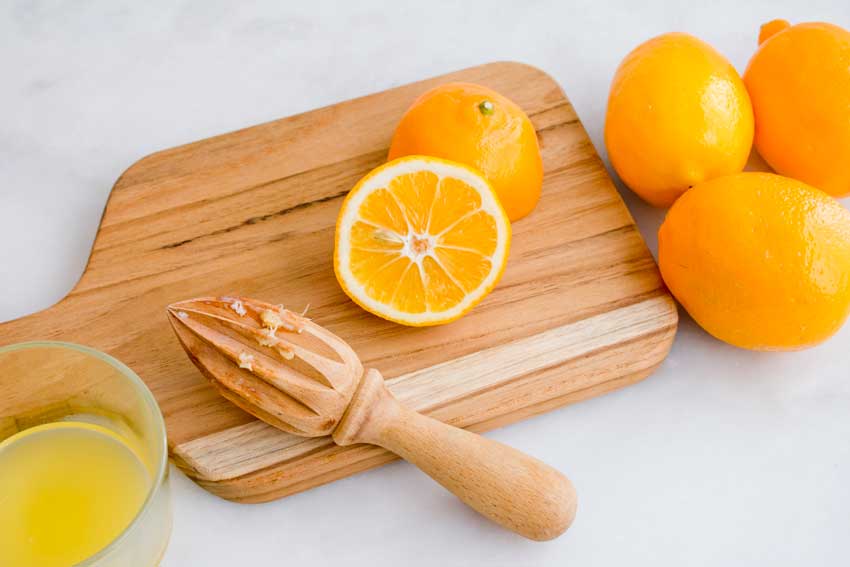
Juicing the Meyer lemons

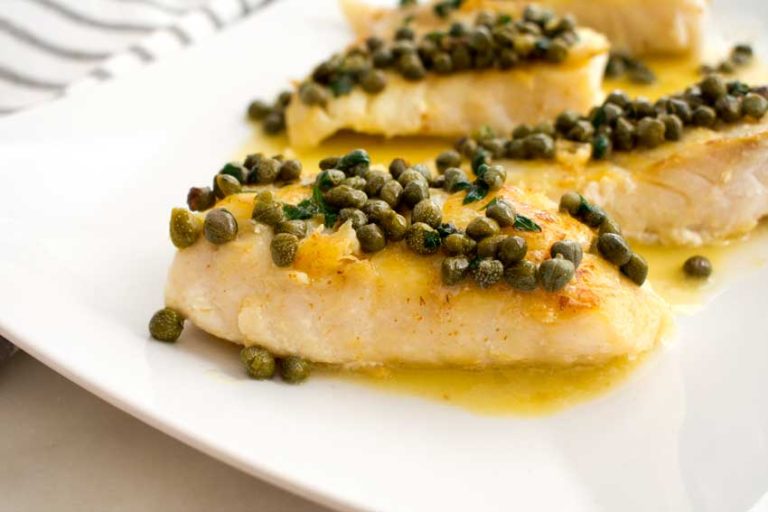
Grouper with Lemon-Caper Butter

I normally find recipes for the week then shop for the ingredients, but I switched things up this week. I found a deal on one of my favorite types of fish and went on the hunt for the perfect way to make it. This Grouper with Lemon-Caper Butter recipe won out. It’s simple, quick, and sounds like it will be very easy to make. And it’s full of things I love like grouper (duh!), lemon, and capers. That combination sounds like a delicious combination I’m sure to love, but there’s only one way to know for sure. Let’s get cooking!

Chefs Jon Shook and Vinny Dotolo, Ambassadors for All-Clad cookware, have come up with this easy and delicious fish recipe. They used the All-Clad d5 Brushed Stainless-Steel Fry Pan for this Grouper with Lemon-Caper Butter recipe.

Recipe Author: Chefs Jon Shook and Vinny Doto at Real Food Traveler
Get the recipe

The Ingredients

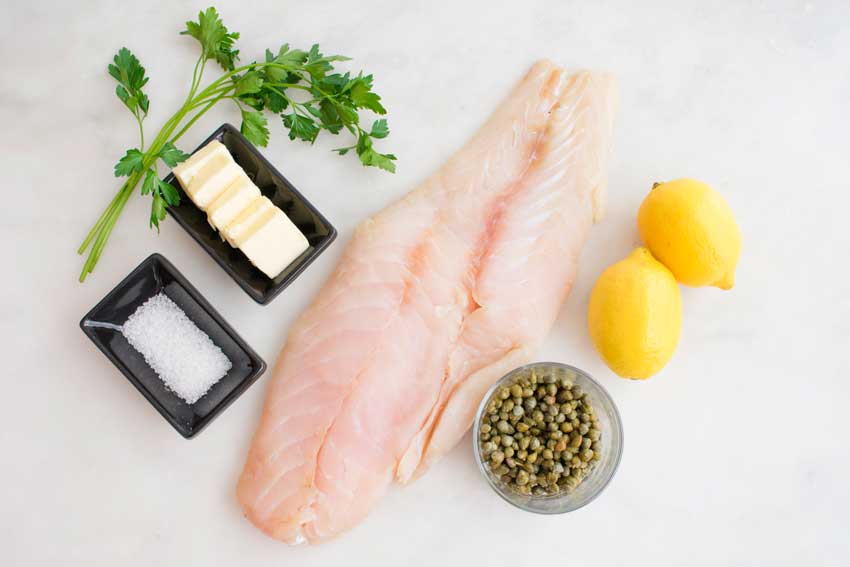
With only a few ingredients, this recipe was easy to shop for even though I had to buy almost everything. Capers, butter, lemons, and parsley were easy to find and inexpensive. The grouper was the big ticket item.

I lucked out and got a deal on the grouper–about 1 1/2 pounds for $20. I have a habit of checking the fish counter when I shop, and I’ve been seeing grouper for $24.99 a pound. It’s more affordable to just go out for grouper at that price. It’s about the same price even with the tip, and I don’t have to cook or do the dishes. This was still a little splurgy but not too much. And you have to treat yourself now and then.

Grouper with Lemon-Caper Butter Ingredients
Grouper fillet, kosher salt, butter, flat-leaf parsley, lemons, and capers

The Process

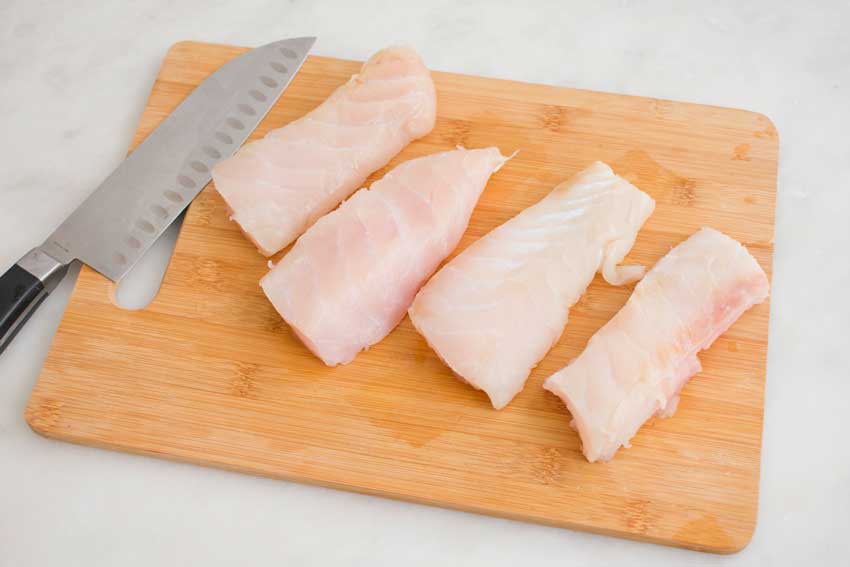
Grouper with Lemon-Caper Butter was ridiculously quick and easy. It was ready in just 12 minutes, and that includes time to cut the fillet into smaller pieces.

Everything went pretty smoothly, but I did have a little trouble with the fish sticking to the pan despite using tons of butter. I’m a little torn about the stainless pan versus non-stick.

On one hand, the stainless gives a nice sear and allowed me to see the color of the butter. A non-stick pan can give a good sear if pre-heated properly, but the dark color would make it impossible to tell if the butter has burned. Despite the sticking, I think I’d still go with the stainless pan. Grouper is a firm fish and tends not to fall apart like flakier varieties. It can handle a little sticking.

Grouper fillet cut into individual servings