Home Blog Page 4

Biang Biang Noodles

Have you ever wanted to try making noodles? I have wanted to give it a try for the longest time. The only thing that kept me from it was the equipment. I couldn’t afford it at first, but now I’m unsure if I would use it enough to justify the expense and precious cabinet space. Then I ran across this Biang Biang Noodles recipe. The noodles are hand-pulled, and the only equipment I needed to buy was a $6 mini rolling pin. So yeah, I finally get to try making noodles. I’m so excited!

Biang Biang noodles are thick noodles that could double as a belt. It is said that one biang biang noodle can fill an entire rice bowl (and it’s true!). Learn how to make these surprisingly easy noodles – I promise, you’ll be as stunned as I was as to how fun and tasty they are!

Recipe Author: Lorraine Elliott at Not Quite Nigella
Get the recipe

The Ingredients

The good news about this recipe is almost all the ingredients were in my pantry. I had everything from the flour to the spices and soy sauce.

I wasn’t sure what type of vinegar to use and went for distilled white vinegar since it’s the standard. At least it is here in the U.S., but I think any type would do as it was not a prominent flavor in the finished sauce.

All I had to shop for was pork mince (ground pork), garlic, green shallots (green onions or scallions), and peanut oil. I found all of them except the peanut oil. A quick search revealed it’s a neutral oil and canola oil was the top substitute. I had that on hand, so that was one less thing I had to buy.
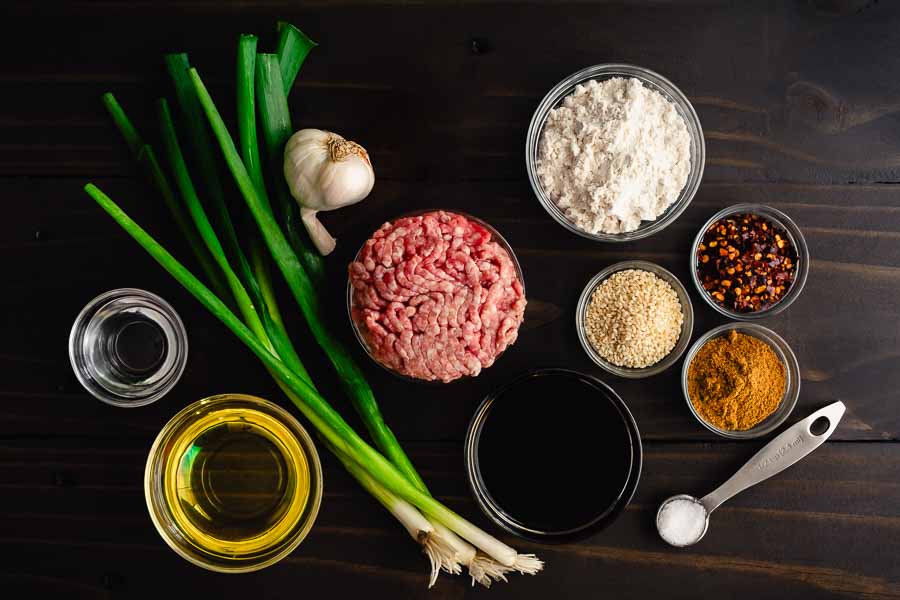
Biang Biang Noodles Ingredients
Ground pork, all-purpose flour, chili flakes, sesame seeds, cumin, salt, soy sauce, green shallots, canola oil (substituted for peanut oil), white vinegar, and garlic

The Process

This recipe is for the biang biang noodles and a spicy chili sauce to top them with. I chose to add pork mince to mine, but it’s optional. Leave it out to make your biang biang noodles vegan. And spoiler: you probably won’t miss it.

Prepping the Noodles

This recipe kicks off with making the noodle dough, and it couldn’t have been easier. All I had to do was add the ingredients to the bowl of my stand mixer. I mixed them with a wooden spoon until they came together, placed the bowl in the mixer, added a dough hook, and let the machine do the kneading.

Tip: Mix the ingredients until the flour is absorbed before turning on your stand mixer. That way you don’t get the poof of flour dust at the start. Even my stand mixer’s spatter shield can’t contain the cloud of flour, and this simple step does.

Don’t have a stand mixer? You can still make this recipe! You’ll have to do the kneading by hand, but kneading isn’t difficult. The kneading time is the same, and you should have a smooth, well-mixed dough at the end.

Next, I shaped the dough into a small disc and used my bench scraper to divide it into eight portions. Once the dough was portioned, I stopped to oil my hands. Then I took each section and rolled it into a small cylinder that was similar to a small cucumber or large dill pickle. Finally, I placed each piece of dough onto a plate, covered it with plastic wrap, and let it sit for three hours.
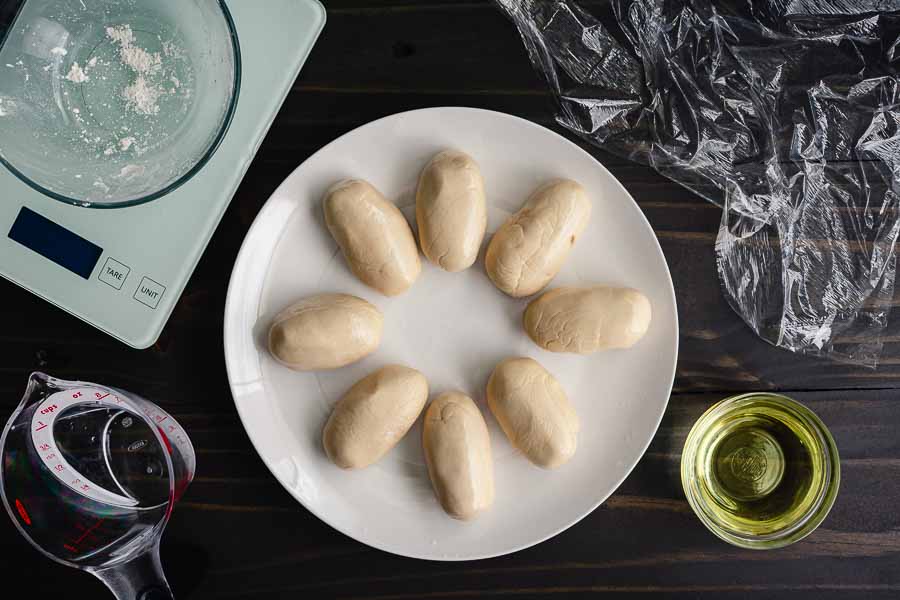
Kneaded and divided noodle dough coated with oil

Finishing the Prep Work and Making the Sauce

I began prepping the chili oil sauce while the dough was kneading. Most of it was done by the time the kneading was finished, so I paused that and finished the dough prep work before continuing on the sauce.

I went back to the sauce prep work once the dough was covered and relaxing. That meant a little chopping, measuring, and toasting the sesame seeds. You can buy them toasted, but the ones I had on hand were not.

Tip: To toast the sesame seeds, preheat a dry skillet on medium heat for 2-3 minutes. Add the sesame seeds and stir or toss frequently (about every 30 seconds) until they turn golden brown and fragrant, keeping a very close eye on them so they don’t burn. Once they are toasted to your liking, remove them from the pan to cool. They will continue to toast if you leave them in the hot pan even if you remove the pan from the heat and can even burn if the pan is particularly hot.
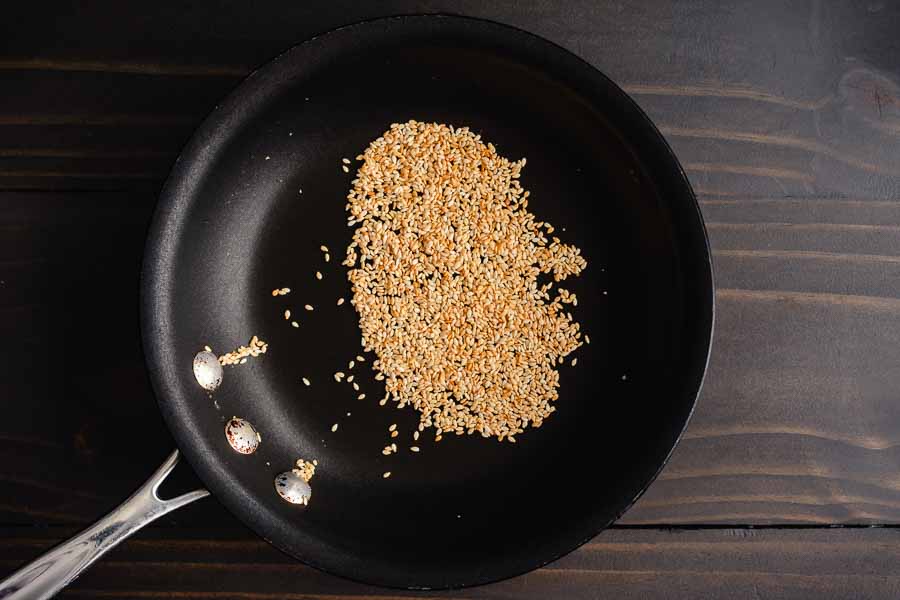
Toasted sesame seeds in a skillet
I toasted the sesame seeds just before making the sauce

Making the Sauce

I made the sauce around 2.5 hours into the dough relaxing. It was so quick and easy to make! All I had to do was add the ingredients to a 2.5-quart saucepan and cook until the pork was done.

I added the ground pork in large pieces and broke it up with a wooden spoon as I cooked. It ended up crumbling into very small bits even though I wasn’t particularly rough. That turned out to be a good thing, though, because the small bits of pork stuck to the noodles.

Pulling and Cooking the Noodles

Now it was time to make the noodles. I won’t lie, I was nervous, but this part was as easy as the author made it look! The water was already boiling since I had put it on to boil while I made the sauce. it was bubbling by the time I was ready to make the noodles.

I made and cooked the first 2-3 noodles one at a time to make sure I had the hang of it. The post with this recipe had detailed instructions, lots of photos, and a video (as well as their fascinating history). All that made me confident I could do this, and I was right. I did the thing 😊

First, I rolled one section of dough flat. Then I pressed the rolling pin into the center to create a dent. Tip: Press hard to make tearing the dough neater and easier.

Stretching dough into a wide noodle
Just beginning to stretch the rolled-out dough into a noodle

Next, I tore the dough and started pulling. I stretched short sections of the dough as thin as I could manage without it breaking. Resting the dough made it very stretchy, and I was able to get noodles that were 5-6 feet long!
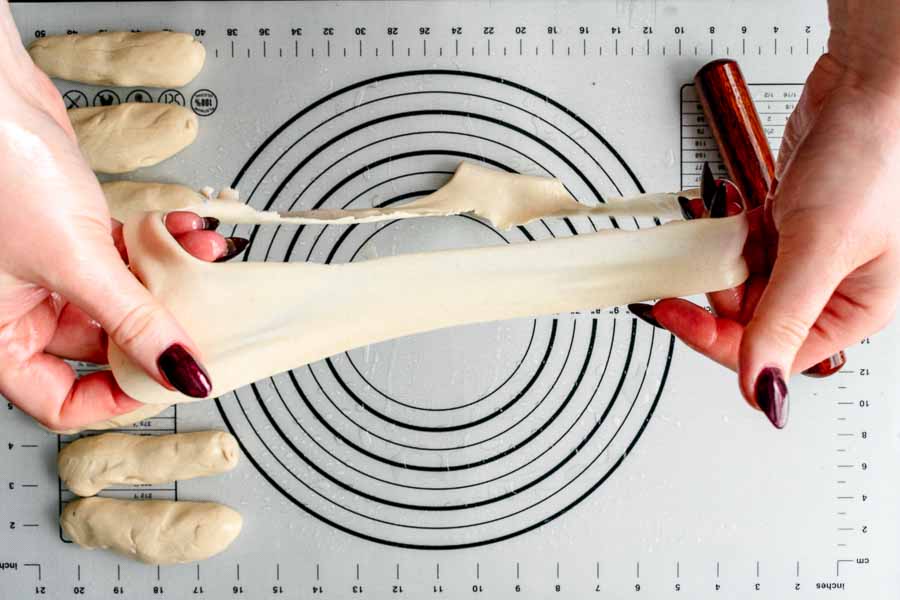
Stretching dough into a wide noodle

When I felt the noodle couldn’t be stretched any further, I dropped it into the boiling water. I didn’t time the cooking, but it was fast! The noodle floated to the top after 60-90 seconds.

Tip: Drizzle the cooked noodles with a little oil to keep them from sticking together if they sit for more than a minute or two.

Finishing Up & Serving

I stretched the last few noodles and set the dough aside before cooking them, keeping them separate so they didn’t stick together. Then I dropped them into the water one at a time since the pot I used wasn’t very large.

I was almost done, but the sauce wasn’t quite finished. I mixed in 1/2 cup of the water from the noodle pot before topping the noodles and serving them with spring rolls and dumplings.

Timing

This recipe lists 30 minutes to prep, 3 hours to rest the dough, and 15 minutes to cook. That’s a total of 3 hours and 45 minutes, and I came close to that. Here’s how my time was spent:

  • 13 minutes to prep the dough
  • 3 hours to rest the dough
  • 3 minutes to cook the sauce
  • 19 minutes to pull and cook the noodles
  • 3 hours 35 minutes total

Honestly, I expected to go way over the time listed since I have never made noodles before. I was very careful and fussed over a few steps and still came in just under the total time.

Banana Cinnamon Muffins

0

Okay, storytime! Bear with me because it will sound odd at first, but I promise you that today’s Banana Cinnamon Muffins will fit in by the end. My family is me, my hubby, and one adorable rabbit named Louie a.k.a. King Louis Giuseppe Rabbitini, III (pronounced “the turd” because he fills his litterbox with them). And let me tell you, the title of king is more than a funny honorary. Our four-pound Dutch rabbit runs the house, and he has a strict schedule.

Louie gets a bunny salad between 9 and 10 a.m. every morning, a small amount of pellets with that as well as in the evening, and treats begin promptly at 5 p.m. Every day at 5 Louie will head over to the table with his jar of treats and the begging commences. From then on he will beg every time we walk by it. Try resisting that cute face and twitchy nose. It can’t be done!

Louie’s treats are mostly healthy hay-based cookies made for rabbits, but we also give him a bit of banana a few times a week. Our king has levied a fruit tax, and it’s due every time we peel a banana. That means we always have bananas on hand, but sometimes I over-buy and we don’t eat them all.

Banana bread usually happens when I notice brown bananas, but I wanted to try something different this time. That something different is this recipe for Banana Cinnamon Muffins. And yes, I paid King Louie his fruit tax when I made them.

These banana cinnamon muffins have a soft and moist crumb, complete with an incredible banana flavor. But their distinctive quality is definitely their crunchy muffin top—each has a super tall and wide dome, all thanks to a generous sprinkling of cinnamon sugar on every muffin.

Recipe Author: Michelle Lopez at Hummingbird High
Get the recipe

The Ingredients

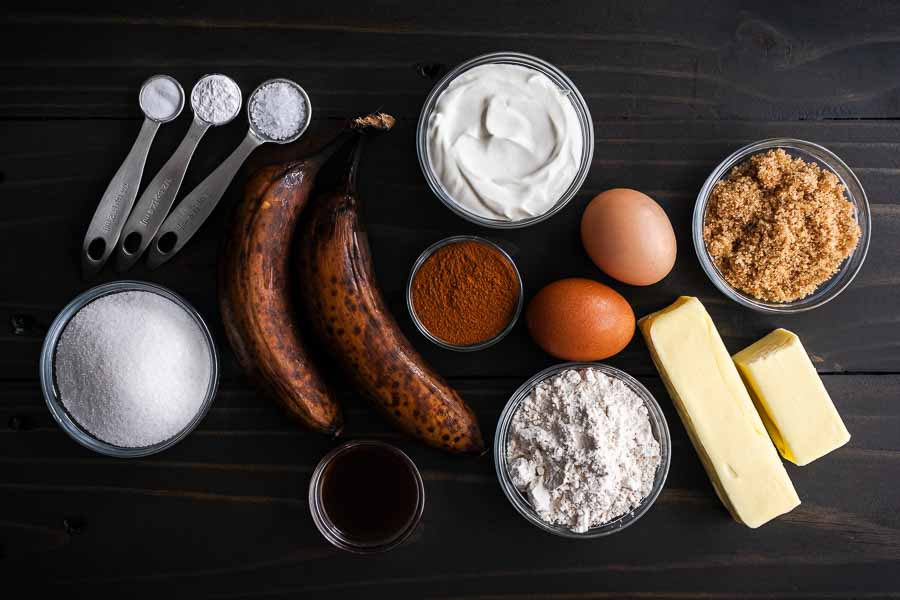
I had plenty of over-ripe bananas, so the first ingredient was taken care of. By the way, the recipe’s tips were spot-on and 2 1/2 peeled bananas weighed 283 grams. And speaking of weight, I weighed all the ingredients that had weights listed.

My next step was to check my pantry and refrigerator to see what else I had. I headed over to my pantry and began checking off dry goods. I had them all! Things were looking good when I moved on to the refrigerator. I needed eggs, butter, and sour cream, and I found them all. That’s right, a no-shopping recipe that would help use up things I already had. I love these types of recipes!

Banana Cinnamon Muffins Ingredients
Very ripe bananas, sour cream, ground cinnamon, eggs, light brown sugar, unsalted butter, all-purpose flour, vanilla extract, granulated sugar, baking soda, baking powder, and kosher salt

The Process

This recipe is a long one (three printed pages), but it’s broken down pretty well. I loved the checkboxes for each ingredient. It really helped me keep my place. The only thing I wished it also had was the notes/tips included in the blog post.

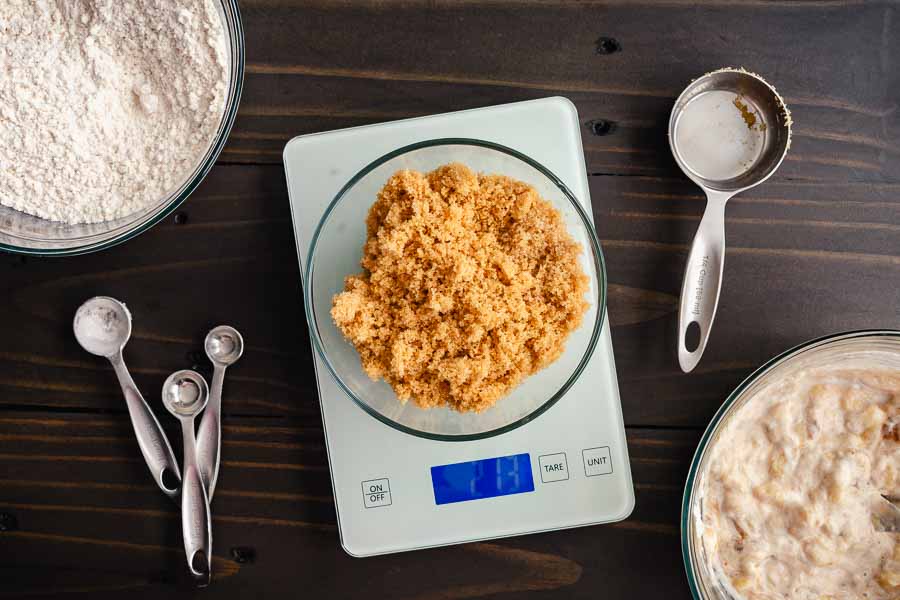
Tip: Weighing the ingredients is quick and helps with accuracy. It has become my favorite method since I’m not the greatest baker, and I keep my digital kitchen scale handy.

Making the Batter

Making these Banana Cinnamon Muffins was similar to the Brown Butter Banana Bread recipe that’s become my go-to. I had to mash the bananas and mix in a couple of other liquids. Then I had to whisk the dry ingredients together.

But before I could mix the liquid and dry ingredients, there was an extra step that reminded me of baking a full-on cake. This muffin recipe had me cream the butter and sugar. I used my stand mixer with a whisk attachment for this step so I could do a little tidying up as it mixed.

Why cream the butter and sugar, you might ask? It does a few things, the most obvious being that it distributes the sugar more evenly. But more importantly, screaming the butter and sugar adds air bubbles that expand during baking and increase the volume of the baked goods. In this case, it helps the muffins expand and form large domed tops.

Once the recipe’s three components were ready, I mixed them to create the batter and let it rest in a covered bowl for an hour.

Weighing brown sugar on a digital kitchen scale
I used weights when provided for the ingredients

Filling the Muffin Pans

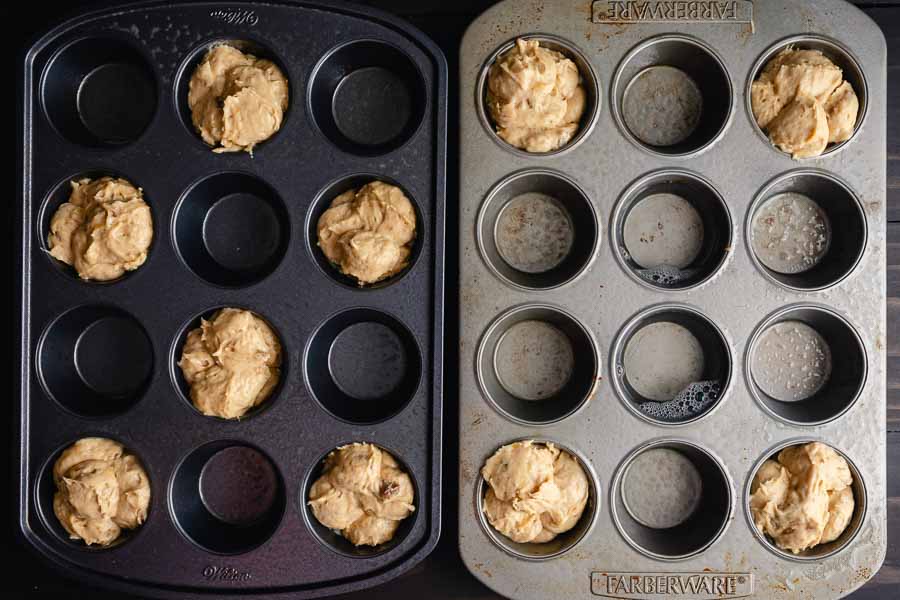
It was time to add the batter once I sprayed the muffin pans with tons of cooking spray, and I used a 1-tablespoon cookie scoop for this step. To keep it as accurate as possible, I leveled each scoop by using a knife to scrape away any excess. For some reason, I had enough batter for an extra muffin. I’m not one to turn down an extra muffin!

I do think I should have placed them like the first pan, but at the moment placing them in the corners felt right. My thinking was it would allow the tops to spread out freely. However, putting the batter in the corners made it impossible to fill every other cavity with water, and I was only able to fill the center two.

Batter in muffin pans
I had enough batter for 10 muffins

The cinnamon-sugar topping needed to go on before baking, so mixing that up was my next step. It was simple to do, but I was a little worried I wouldn’t have enough for the extra muffin. It turns out I had enough to generously top all ten muffins.

Baking the Muffins

Once it was time to bake, I was not sure if I would bake the muffins one pan at a time or together. I chose together, but that meant I had to use two racks in the oven. I placed one in the middle and one just below it.

At the halfway point (10 minutes), I rotated each pan 180 degrees and switched racks. The muffins passed the toothpick test at 20 minutes, but they burned a little. You can see it on the edges of the muffin tops and the bottom portions that toughed the pans.

I immediately looked for a reason this happened and the solution. Baking the muffins too close to the heat source (on a rack lower than the middle position) sounded like the reason. The solution would be placing the muffin pans on a sheet pan and baking on the middle rack.

I would like to try baking both pans at the same time, but I would place the second rack just above the middle instead of just below. And I would still rotate the pans and switch racks at the halfway point. Of course, I will update this post with the results.

Banana Cinnamon Muffins on a wire cooling rack
Cooling my Banana Cinnamon Muffins on a wire rack

All that was left was to cool the muffins. I followed this step carefully, and the muffins came out fairly easily. The sugar topping caramelized around the edges of the tops, but an offset spatula helped me loosen them while keeping them intact. Once that was done, I let the muffins finish cooling in the pan, and the muffins popped right out when it was time to serve.

Timing

This recipe lists the following times:

  • 10 minutes to prep
  • 10 minutes to cook
  • 20 minutes bake time
  • 40 minutes total

The cooking time puzzles me because none of the ingredients needed cooking before being added to the batter. Time for the batter to rest and the muffins to cool were also not included, but that isn’t too unusual. I find a lot of recipes don’t include in the times listed.

Here’s how my time was spent:

  • 16 minutes to make the batter
  • 1 hour to rest the batter
  • 9 minutes to fill the muffin pans
  • 3 minutes to make and apply the cinnamon-sugar topping
  • 20 minutes to bake
  • 15 minutes to cool in the pan
  • 4 minutes to loosen tops and remove muffins from the pans
  • 20 additional minutes to finish cooling in the pan
  • 2 hours 7 minutes total

If I adjust the time listed to include 1 hour for the batter to rest and 35 minutes to cool, that would bring the total time up from 40 minutes to 2 hours 15 minutes. That’s right in line with my total time.
Vegan Apple Tart

0

I found this Vegan Apple Tart recipe on Instagram, which sparked a memory. When I was younger, maybe in middle school or a little older, my mom had a Crisco cookbook with an apple tart recipe. The book had an apple tart recipe that I became fixated on. I can’t say I was an avid baker, but I kept trying to make this tart.

I didn’t have any special equipment and had never seen an apple tart before. Each time I ended up with a pile of sliced apples on top of a pastry. It was tasty but far from what an apple tart should look like! I’d say closer to a galette but not even as pretty as that. It was a mess, and I gave up after a few tries. I didn’t see what an apple tart looked like until I was an adult. That brought back my earlier attempts, and here I am. I finally have an apple tart recipe with pictures that just happens to be vegan.

Vegan apple tart with a buttery shortcrust pastry and juicy caramelized cinnamon apples. You only need 6 common pantry ingredients to make this simple dessert!

Recipe Author: Anthea at Rainbow Nourishments
Get the recipe

The Ingredients

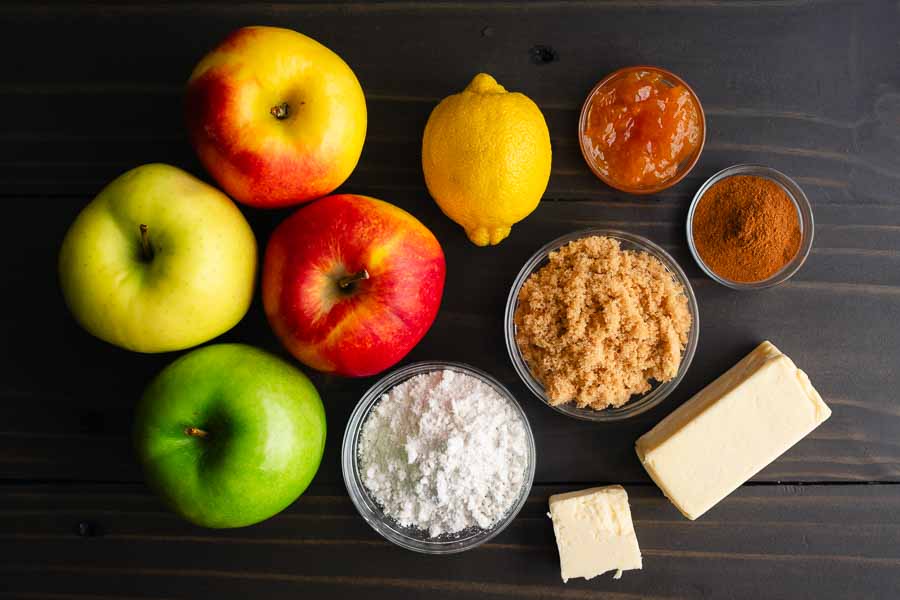
This Vegan Apple Tart only has eight ingredients. One of those ingredients is cold water, so there are only seven ingredients to buy at most.

My pre-shopping check found all-purpose flour, brown sugar, and ground cinnamon. I also had lemons, so I decided to include the optional squeeze of lemon juice. All I ended up shopping for were the apples, vegan butter, and apricot jam.

I had a couple of golden delicious apples on hand, but I needed more for this recipe. As soon as I walked in I was greeted with a display of ambrosia apples. I had never heard of them, so I whipped out my phone and found they were sweet, crisp apples that were great for baking. I grabbed a few along with some granny smith apples.

My regular grocery store stocks vegan butter, so I had a few choices. Unfortunately, none of them were unsalted although the packaging said they were “great for baking”. I grabbed a package despite the sodium listed in the ingredients and crossed my fingers.

Vegan Apple Tart Ingredients
Apples, lemon juice, apricot jam, ground cinnamon, brown sugar, vegan butter, and app-purpose flour

The Process

This recipe has a lot of steps, but they are broken down into sections to make things easier to manage. Here’s how I did it:

Making the Crust

This tart was made entirely from scratch, so that meant starting at the bottom with the crust. It mixed up just like any other, and I chose to use my food processor to make it quicker and easier.

The crust seemed a little dry when I emptied the food processor bowl onto my work surface, but it kneaded together easily. Most pie recipes say to form the dough into a disc, wrap it up, and chill it before rolling it out. This recipe skipped that and went straight to rolling out the dough and putting it into the tart pan.

I cut out a circle of parchment paper to line the bottom of the pan, but I completely missed the step of greasing the tart pan! Thankfully all the vegan butter in the crust plus the nonstick coating kept the tart from sticking to the pan. The parchment made it easy to slide the baked and cooled tart off the bottom piece of the pan and onto a plate.

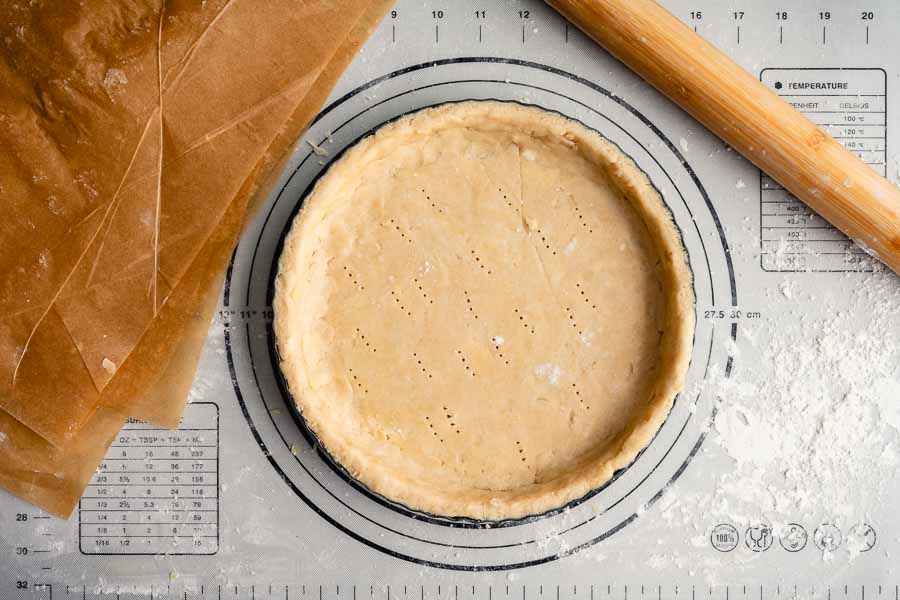
I have a 9.5-inch tart pan, so I rolled out the dough to a diameter a bit larger than that so I would have enough to cover the bottom and sides. For this pan, a diameter of 11 inches would have been enough, with a bit to trim away. Then I had a great idea to strengthen the edges so I had a picture-perfect crust!

Unbaked tart crust
I folded the excess crust inward and smoothed it into the bottom of the crust to reinforce the edges

Tip: Reinforce the edges of the crust so they don’t break. Roll out the dough to the diameter of your pan plus about 2 inches. That will give you enough to cover the bottom and sides of the pan plus an extra inch. Instead of trimming away the extra, fold it inward and gently smooth the extra into the dough where the edge meets the bottom of the pan.

As you can see above, the sides of my tart’s crust were a bit thick. That little bit of extra dough reinforced the edges so they didn’t break when I later removed the tart from the pan and sliced it.

The instructions say to chill the crust but not for how long. I chilled mine for 20 minutes while the oven preheated. Then I added a piece of parchment paper plus my pie weights and blind-baked it for 15 minutes.

Preparing the Filling & Assembling my Tart

I prepared the filling while the pie crust baked. Step one was easy and might have taken me two minutes at most. Step two was tricky and took me a couple of tries. I’m really glad I bought extra apples because I needed them!

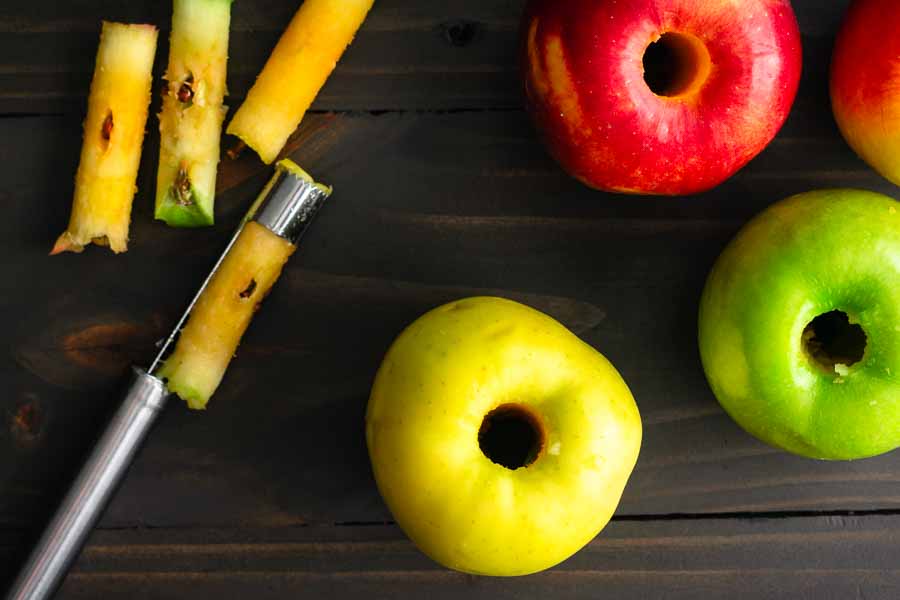
Coring the Golden Delicious, Granny Smith, and Ambrosia apples

Slicing the Apples: What Didn’t Work

Once I cored the apples, I tried sliding them with my mandoline. That went okay at first, but the mandoline was a little too narrow. The apple quickly got too wide and hit the edges of the mandoline, wearing off the peel that makes this tart so pretty.

No problem, I said to myself. So I tried sliding the apple with my trusty chef's knife. The slices looked very thin, and I thought I was set. I sliced up five apples and just threw those slices into a large mixing bowl.

Once I got to add them to the pan, I realized my mistakes. First, I had to sort through the bowl to stack a few slices of each type of apple. Once I managed that I realized my second mistake. The apple slices were too thick to be flexible. That meant I couldn’t get them to hug the curve of the pan. I tried and tried but I had to admit defeat and start again.

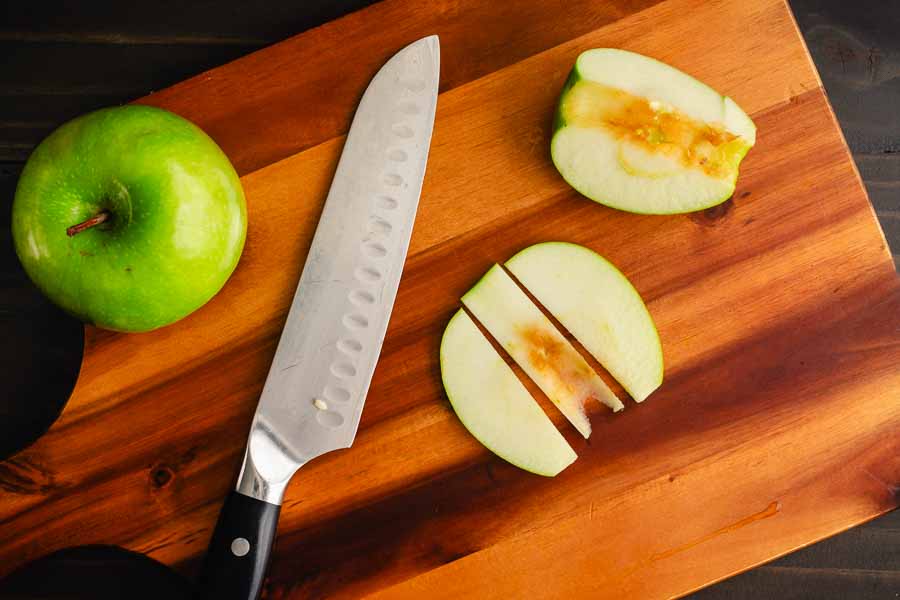
Slicing a Golden Delicious apple

Slicing the Apples: What Worked

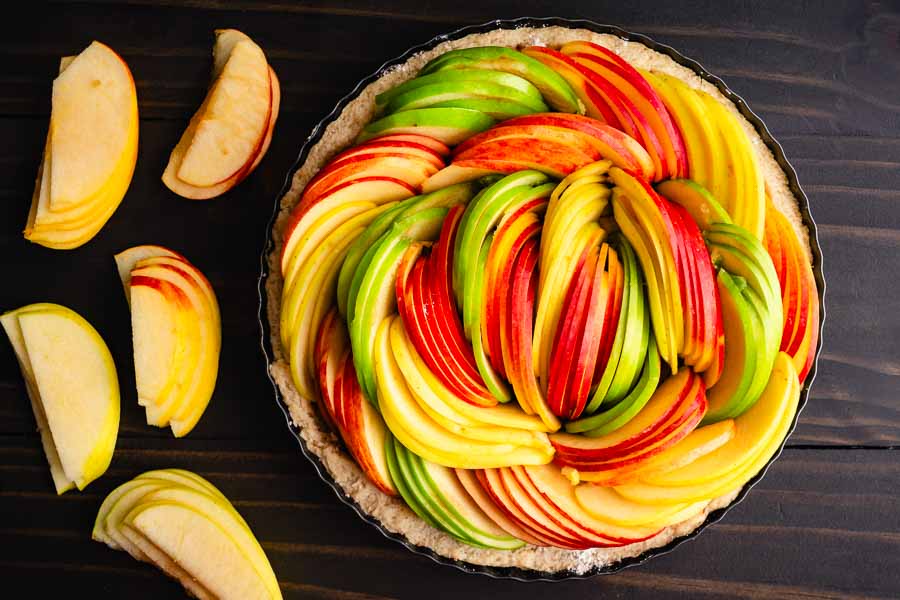
This time I went back to my mandoline. I found that quartering the apples before slicing them was the trick. As I sliced each quarter as thin as possible, I removed and stacked the slices on a cutting board. (That might make more sense if you take a look at the photo of the unbaked tart below.)

I divided each quarter into 2 stacks when I began so the apples could bend and hug the curve of the outside of the pan. Fanning them out also helped. I alternated them between Ambrosia, Golden Delicious, Ambrosia, and Granny Smith.

The apples needed to bend less as I got to the center of the pan. I began adding more apples to make thicker stacks. The recipe said the apples shrink when they cook, so I jammed in as many slices as I could to get a tight fit.

When I was ready to add them to the crust, things went very smoothly. I just had to grab a stack of the color/type I wanted and position it before adding another. I ended up using 2 Ambrosia, 2 Granny Smith, and 1 Golden Delicious apple with a few leftover slices.

Tip: Mandolines are great tools, but they can be dangerous due to the exposed blades. Always use the handpiece to move the food over the blade, never your fingers. A cut-resistant glove is also a great idea.

Unbaked Vegan Apple Tart
Keeping the slices together made it easier to add them to the pan

Finishing Up

Once the apples were in the pan, the hard work was over. I brushed the apples with melted vegan butter, sprinkled the cinnamon mixture on top, and popped the pan into the oven.

Tip: The removable bottom of the tart pan is easy to accidentally pop out when you are handling it with oven mitts. Place your tart pan on a sheet pan to make it safer to move in and out of the oven.

My Vegan Apple Tart was ready after 45 minutes of baking. The last step was brushing on some apricot jam. I let the tart cool before cutting onto it so the slices wouldn’t fall apart. And, I’m happy to say, that the leftovers were easy to reheat in the microwave—just 30 seconds a slice was perfect for me.

Timing

This recipe lists 30 minutes to prep, 1 hour 10 minutes to cook, and 1 hour 40 minutes total. Here’s how my time was spent:

  • 16 minutes to prep the crust
  • 20 minutes to chill the crust
  • 15 minutes to blind bake the crust
    • 12 minutes to prepare the filling (while the crust was baking)
  • 20 minutes to assemble
  • 45 minutes to bake
  • 1 minute to brush with apricot jam
  • 1 hour 57 minutes total

I went 17 minutes over the total time listed, but that doesn’t surprise me. I took my time with the crust and positioning the sliced apples, so I’m sure the delay was in one or both of those spots. Also, I omitted the times for slicing the apples by hand and trying to position them in the crust since that method didn’t work. This only includes slicing with the mandoline.

One Pan Rosemary Chicken Thighs with Cranberry Sauce

My quest to use up Christmas dinner leftovers continues with the cranberries from the Spiced Cranberry Bourbon Old Fashioned with Sugared Cranberries recipe. That recipe calls for a whole bag of sugared cranberries, but the sugar rinses right off if you don’t use them. I did that and used a few to garnish my Christmas duck but still had plenty left over. I could have frozen them, but I did some searching and found this quick and easy One Pan Rosemary Chicken Thighs with Cranberry Sauce. That not only used up a lot of the cranberries but my leftover rosemary too (also from the duck). Perfect!

This festive one skillet dish comes together quickly with the perfect combination of ingredients.

Recipe Author: Christina Musgrave at Tasting with Tina
Get the recipe

The Ingredients

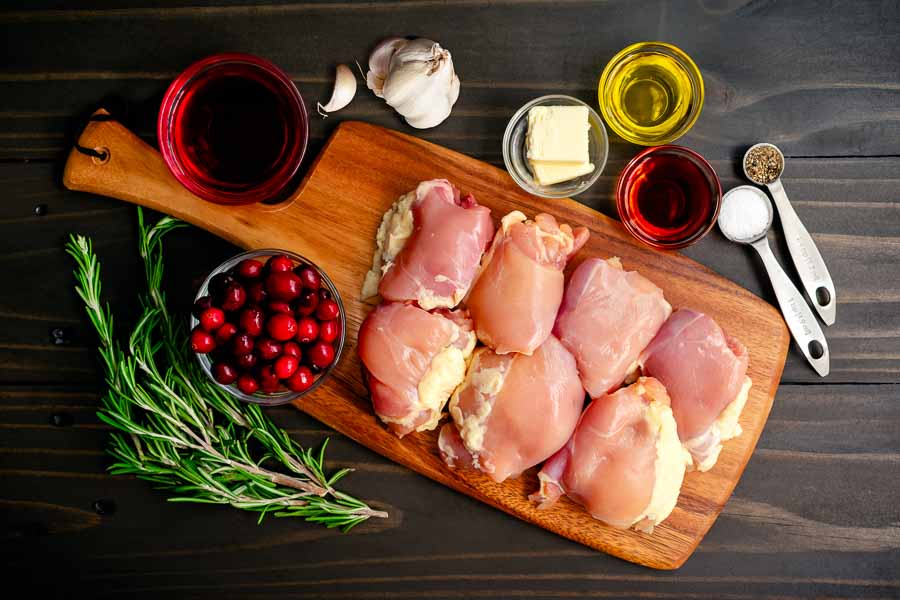
My pre-shopping kitchen check found a lot of the ingredients for this One Pan Rosemary Chicken Thighs with Cranberry Sauce recipe. As I mentioned above, I had the cranberries and rosemary in the refrigerator along with a bottle of cranberry juice and butter.

My pantry held red wine vinegar, salt, pepper, fine sea salt, coarse (kosher) salt, black pepper, olive oil, and garlic. That’s everything except the chicken thighs. I love it when that happens!

One Pan Rosemary Chicken Thighs with Cranberry Sauce Ingredients
Boneless, skinless chicken thighs, butter, olive oil, red wine vinegar, salt, pepper, rosemary, fresh cranberries, cranberry juice, and garlic

I actually searched my freezer for chicken thighs, but I must have used them (they are my favorite cut of chicken). So it was off to the store to buy the one ingredient on my list, but my regular grocery store’s selection of chicken thighs is dodgy. I’m not sure if they sell out fast or if they don’t stock them much because people prefer chicken breasts. Maybe a combo of both?

At any rate, I was lucky to find them, and they only had boneless and skinless chicken thighs. That was good and bad. Good because I wouldn’t have to debone them (they either have them with both or without either). But bad because the recipe’s blog post talks about how good the browned skins are. I love chicken skin when it is browned and really crispy, but I hate it if it falls short of that even a little. Oh well. I can’t be that disappointed since the skins are the least healthy part.

The Process

This One Pan Rosemary Chicken Thighs with Cranberry Sauce recipe broke down the steps nicely, but I did change the order. I started the prep work first (of course) and put my 12-inch cast iron pan on to preheat when I was almost done. This recipe has it right at preheating for 4-5 minutes and adding the oil just before you begin cooking.

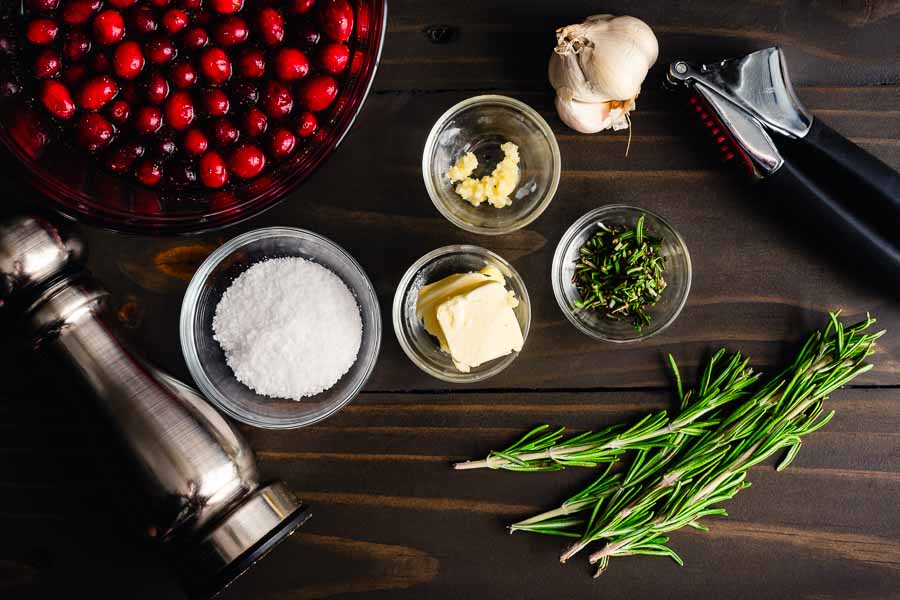
Prepped ingredients (excluding chicken)
There wasn’t a ton of prep work and it took less than 10 minutes

Next, I put the chicken thighs into the hot pan to sear. Adding the cool chicken to hot oil meant tons of spatter, so my spatter screen was mandatory. My stove and nearby counter would have been an oily mess without it plus it was a safety issue.

Tip: Cold chicken doesn’t cook evenly. To avoid a cold, underdone center set the chicken on the counter 15-30 minutes before cooking so it can come up to room temperature.

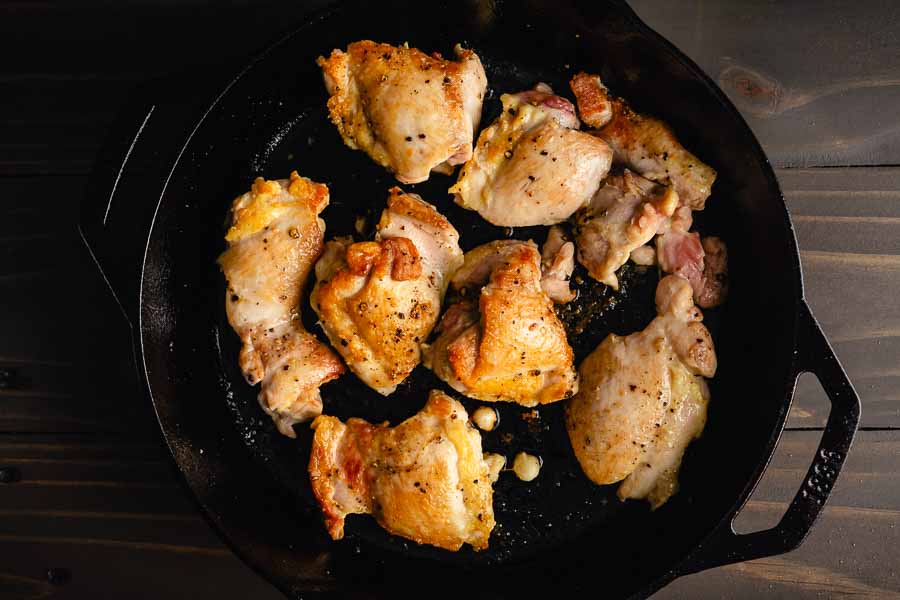
Browned chicken thighs in a cast-iron pan

I cooked my chicken thighs for a total of 15 minutes and removed them to a paper towel-lined pan to drain any excess oil. Then I cooked the garlic and rosemary followed by adding the cranberry sauce ingredients, deglazing, and simmering for 5 minutes. All that was left was to add the chicken to the pan, spoon the sauce over it, and melt the butter. A few extra sprigs of rosemary were the perfect garnish and added some color.

Tip: Contrary to popular belief, it is safe to cook acidic foods in a non-enameled cast iron pan for short periods if the pan is well-seasoned. If you need to cook acidic foods for a long time choose an enameled cast iron pan.

Timing

This recipe lists 5 minutes to prep, 25 minutes to cook, and a total time of 30 minutes. My times differed a little, but the end result was pretty much the same. Here’s how my time was spent:

  • 8 minutes to prep
  • 20 minutes to cook
  • 28 minutes total

I have a feeling I could shave a few minutes off that time by changing the order of the steps to:

  1. Preheat the pan
  2. Season the chicken and begin the other prep work
  3. Add the chicken to the pan and finish the other prep work as it cooks
  4. Continue with steps 5-7

I’ll be sure to let you know next time I make this recipe.

Mascarpone Toast with Burst Tomatoes

0

My quest to use up leftover ingredients from my Christmas dinner continues. This Mascarpone Toast with Burst Tomatoes should take care of the last bits of mascarpone cheese. It’s intended as a breakfast meal, and tomatoes for breakfast are a new thing for me (unless you count the sauce on leftover pizza). I used to hate eating or working with fresh tomatoes, but somehow my tastebuds changed their mind and I love roasted tomatoes now, especially grape tomatoes. I don’t know why, but I’m just going with it 🙂

Transform your breakfast routine with our mouthwatering Mascarpone Toast, garnished with explosive burst tomatoes. It’s a simple recipe that packs a punch of flavor!

Recipe Author: Linda at The Wanderlust Kitchen
Get the recipe

The Ingredients

Like the Fettuccine with Lemon Mascarpone Sauce I just made, this recipe is very simple with just a few ingredients. I had mascarpone cheese in the refrigerator, and the spices in my pantry.

That left the crusty bread and cherry tomatoes to shop for. As usual, I couldn’t find cherry tomatoes and had to substitute grape tomatoes. They aren’t as sweet as cherry tomatoes—quite the opposite, I imagine. Instead of being sweet, they have a little tartness that makes them so good!

I considered buying a loaf of sourdough bread, but they only had it thinly sliced. None of the unsliced loaves of bread were crusty. That meant I could try another store or bake my own bread.

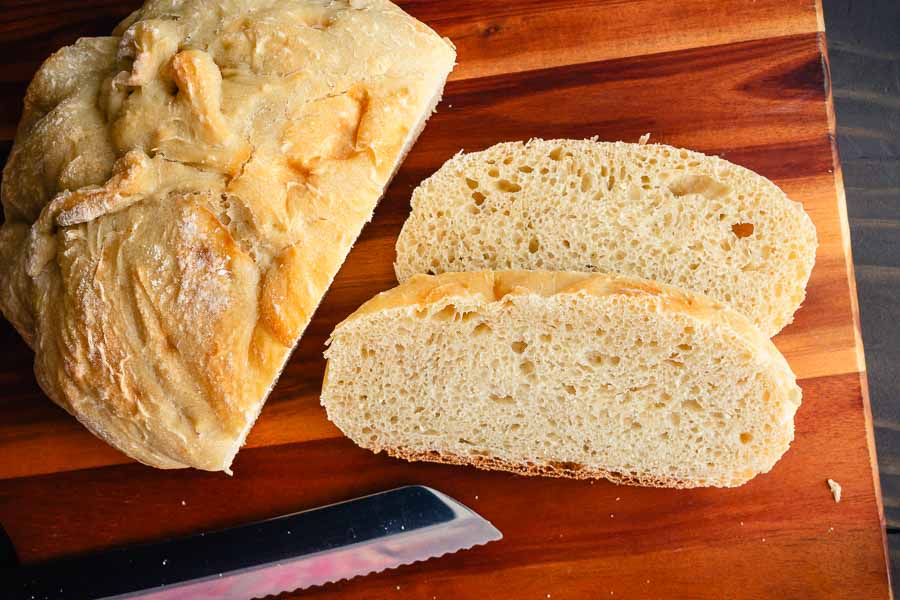
I hate running around, so I decided to bake a loaf of Easy Crusty French Bread. This was the first bread recipe I ever made. It is truly an easy recipe that doesn’t require kneading, a stand mixer, or any bread-making knowledge. And it makes a damn good loaf of bread in about 2 1/2 hours.

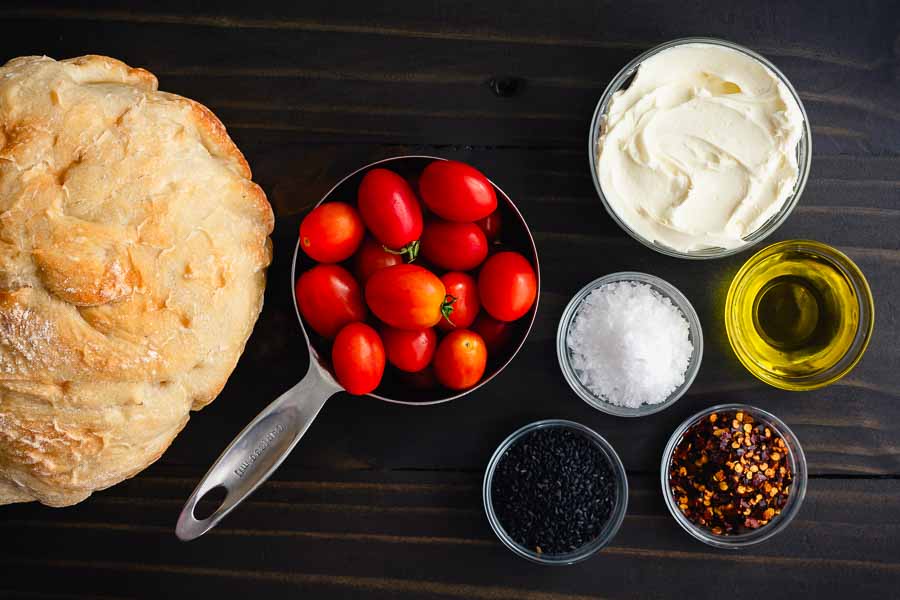
Mascarpone Toast with Burst Tomatoes Ingredients
Grape tomatoes, mascarpone cheese, extra virgin olive oil, sea salt flakes, red pepper flakes, black sesame seeds, and crusty French bread

The Process

I made a loaf of bread the day before I wanted to try this Mascarpone Toast with Burst Tomatoes. Before storing it I made sure it was completely cooled and tightly double-wrapped it with cling wrap. It was still nice and soft when I cut into it the next day.

This recipe begins with toasting the bread, so I cut two thick slices popped them into my toaster oven/air fryer combo, and let it do its thing. Meanwhile, put my 10-inch cast-iron skillet on the stove to preheat for 4 minutes.

Tip: Cast iron doesn’t transfer heat well, so it needs more time to preheat than aluminum and stainless steel pans. Preheat cast-iron pans for 4-5 minutes, and add the oil right before you begin to cook.

Freshly sliced homemade crusty French bread

Once the skillet was heated, I added the tomatoes and let them cook. The pan was very hot, so I made sure to pay close attention and move the tomatoes around as they cooked. I like my tomatoes well done, so I let them burst and char a little.

I was able to add the mascarpone to the toast while the tomatoes cooked, but that was as far as I could go until the tomatoes were done. They didn’t take much longer, and I added them to the toast along with the black sesame seeds, red chili flakes, and olive oil.

It’s not part of the recipe, but I used a different olive oil to top the toast. I happened to have a bottle of basil-infused olive oil in my pantry. It was perfect for this recipe!

Timing

This recipe lists 5 minutes to prep, 5 minutes to cook, and a total time of 10 minutes. My Mascarpone Toast with Burst Tomatoes took 13 minutes. I’m sure the extra time was because I like my tomatoes well done and let them cook until they were a bit charred.

Fettuccine with Lemon Mascarpone Sauce

0

I made some delightfully garlicky Roasted Garlic Mascarpone Mashed Potatoes for Christmas and had some leftovers. Not just Christmas dinner leftovers but also a few ingredients like mascarpone cheese. I hate to waste food, so I went on a mission to find recipes for my leftover ingredients. This Fettuccine with Lemon Mascarpone Sauce stood out because of its simplicity. I don’t know about you, but I’m not in the mood to cook anything complicated after all the cooking I did over the holidays.

The mascarpone melts and blends magically with the lemon. A bit of lemon zest and the oils are released in the butter, transcending into this perfect cream.

Recipe Author: Giangi Townsend at Giangi’s Kitchen
Get the recipe

The Ingredients

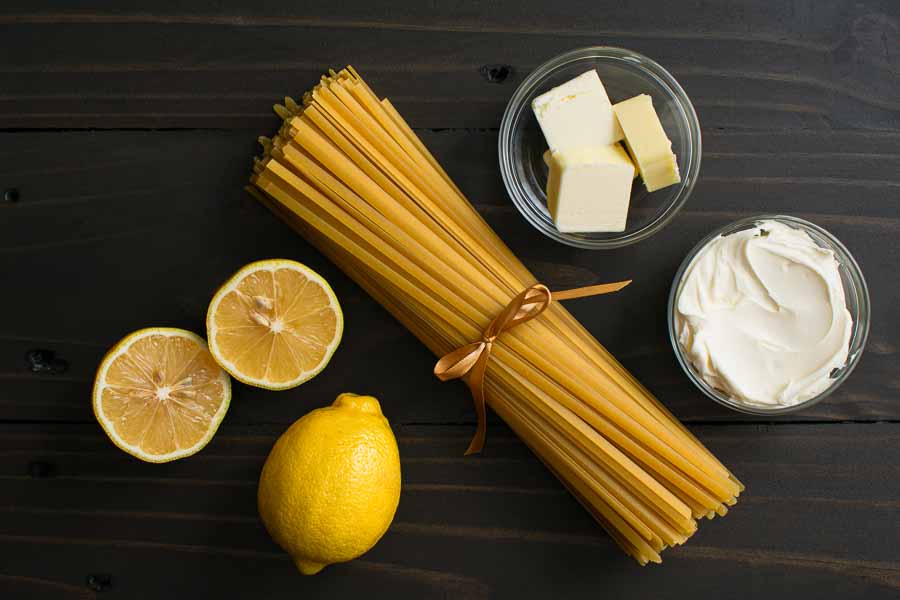
This recipe has just five ingredients—four if you lump together the lemon juice and zest. I had mascarpone cheese and butter on hand as well as a package of spaghetti but no fettuccine. I like to stay true to the recipe the first time I make it, so that meant I had some shopping to do. Fettuccine and lemons were just a quick shopping trip away at my usual grocery store.

Fettuccine with Lemon Mascarpone Sauce Ingredients
Fettuccine pasta, unsalted butter, mascarpone cheese, lemon zest, and lemon juice

The Process

This recipe was wonderfully easy to make. The bulk of the work was cooking the fettuccine. One pound (16 ounces) is a lot of fettuccine, so I cooked it in my 5.5-quart Dutch oven. It was wide enough that I didn’t have to break the noodles and deep enough for me to stir them to prevent sticking.

Tip: Don’t forget to salt your pasta water. I use 1 tablespoon of sea salt per 4 quarts of water.

The water took a while to boil, but once it did it took 9 minutes for the noodles to cook to al dente. It used to be hard for me to remember to reserve pasta water, so I had to get strategic.

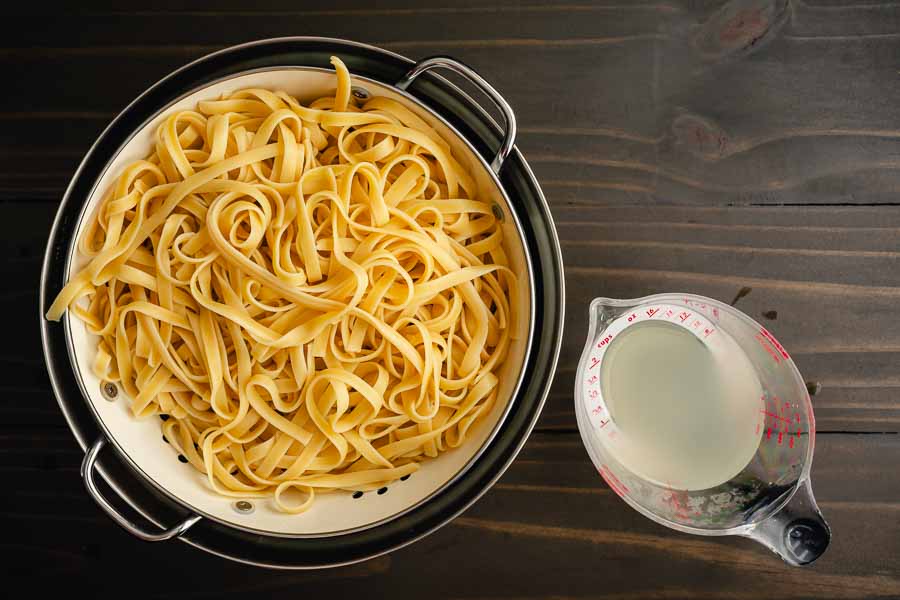
Tip: To keep myself from accidentally discarding the pasta water, I nest a colander inside a large metal mixing bowl and place both into my sink. When the pasta is ready, I don a pair of oven gloves to protect me from the steam. Next, I pour the water into the nested colander, then lift it out and set it aside to drain. I scoop out however much pasta water I need and discard the rest.

Reserve 1 cup of pasta water
Place a colander over a mixing bowl to catch some of the pasta water in case it’s needed for the sauce.

Finishing Up

Once the linguine was drained, I returned it to the pan and added the butter, lemon juice, mascarpone cheese, and half the lemon zest. I wasn’t sure, but re-reading the instructions sounds like I should have only added half the mascarpone and adjusted it and the lemon zest.

I was almost happy with the consistency and added about 1/4 cup of the pasta water to get it just right. The warmth of the pasta and the pan helped melt the butter and cheese quickly so both easily mixed in.

This wasn’t a saucy dish, but the pasta was far from dry. Adding a little more lemon zest at the table worked for me, but hubby thought it was lemony enough right out of the pan. I served it with Chicken Breasts With Fresh Sage and steamed broccoli.

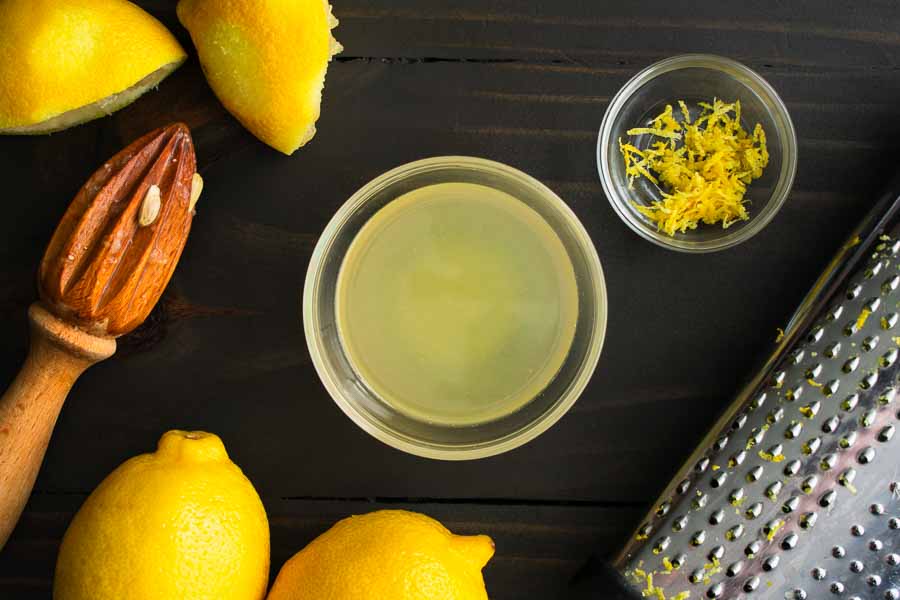
I used fresh lemons for the zest and juice

Timing

This recipe lists 5 minutes of prep time, 15 minutes of cooking time, and a total time of 20 minutes. Here’s how my time was spent:

  • 21 minutes to cook and drain the pasta
  • 4 minutes to add in the remaining ingredients and mix
  • 25 minutes total

Twelve minutes of the pasta’s time was filling the pot and waiting for it to come to a boil. I’m sure that’s the reason I went a little over the total time listed. That’s more of my stove’s fault, not the recipe’s.

Chicken Breasts With Fresh Sage

After Christmas dinner and the leftovers were gone, I still had plenty of leftover ingredients. Fresh herbs from the roast duck, mascarpone cheese from the mashed potatoes, and more. I needed to use them up, so I sat down with a cup of Spiced Christmas Coffee, opened Pinterest, and started searching for recipes. Making Christmas dinner was exhausting, so I looked for simple recipes with just a few ingredients and (hopefully) quick cooking times. This Chicken Breasts With Fresh Sage recipe fits that bill perfectly, and it would use up the delicate fresh sage. It would have been the first ingredient to spoil, so I had to use it up ASAP.

This chicken breast recipe is from Trattoria by Patricia Wells. I’m adding it because it goes very well with the Lemon Risotto recipe that I posted. Moreover, it’s so easy with tons of lemony flavor.

Recipe Author: Trattoria by Patricia Wells (Posted at Food52 by Julie Bee)
Get the recipe

The Ingredients

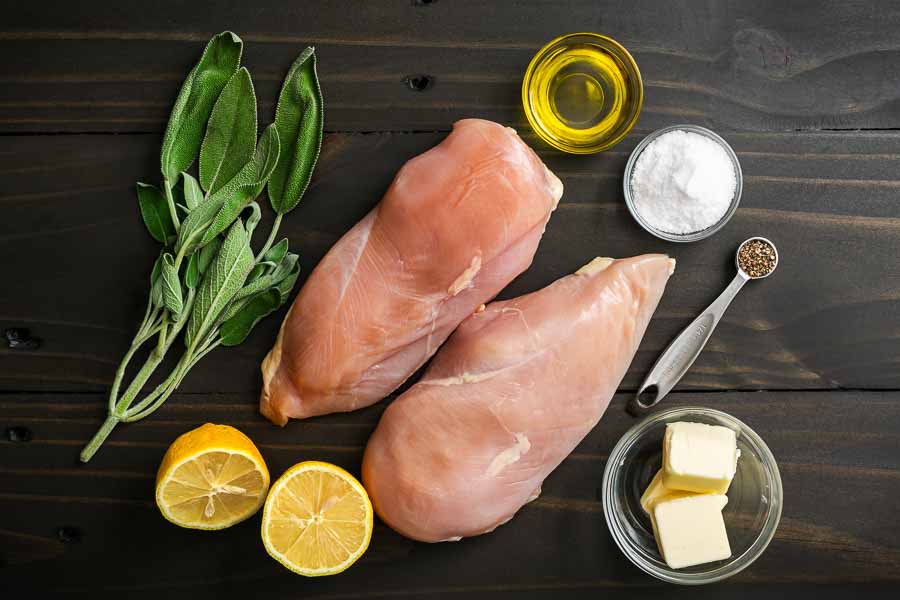
As I mentioned, I had the fresh sage on hand. It has a few black spots here and there, but it was still in pretty good shape. I also had extra virgin olive oil, unsalted butter, sea salt, and black pepper in my pantry.

All that was left to shop for was boneless, lemons and skinless chicken breasts. Both were easy to find at my usual grocery store.

This recipe calls for four chicken breasts, but I only bought two since it’s just my husband and me. That was the only ingredient I reduced, though, since I wanted plenty of sauce and sage leaves.

Chicken Breasts With Fresh Sage Ingredients
Boneless, skinless chicken breasts, extra virgin olive oil, sea salt, freshly ground black pepper, unsalted butter, lemon juice, lemon zest, and fresh sage leaves

The Process

This recipe is short, and it has three main sections: marinating, cooking the chicken, and making the glaze.

Marinating the Chicken

My Chicken Breasts With Fresh Sage began with marinating the chicken. The marinade was a simple three-ingredient mixture, and the chicken only had to marinate for 30 minutes. I expected to have to pound the chicken to tenderize it, but the marinade took care of that in addition to adding flavor.

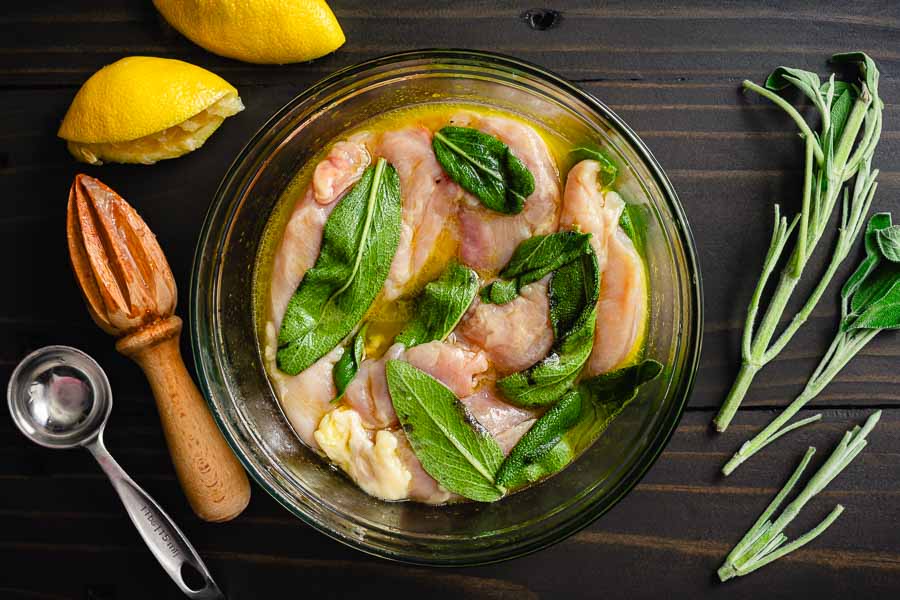
I mixed up the marinade in a 1.5-quart mixing bowl and tucked the chicken breasts into it. The small-ish size was perfect! Flipping the chicken over after placing it into the marinade made sure I got plenty of the mixture on all sides.

Chicken breasts marinating in a 1.5-quart mixing bowl
Marinating the chicken breasts in extra virgin olive oil, lemon juice, and fresh sage

Tip: Pick a few sage leaves out of the marinade before adding the chicken. Add the chicken breasts to the marinade and flip them over once or twice to distribute the marinade. After that, place the reserved sage leaves on top so you get the marinade and sage flavors on both sides.

I had plenty of time to prep the rest of the ingredients while the chicken marinated. Once it was finished marinating I came very close to simply discarding the marinade like I normally do.

Tip: Be sure to save the marinade! Most recipes have you discard it, but this one uses it to make a glaze/sauce.

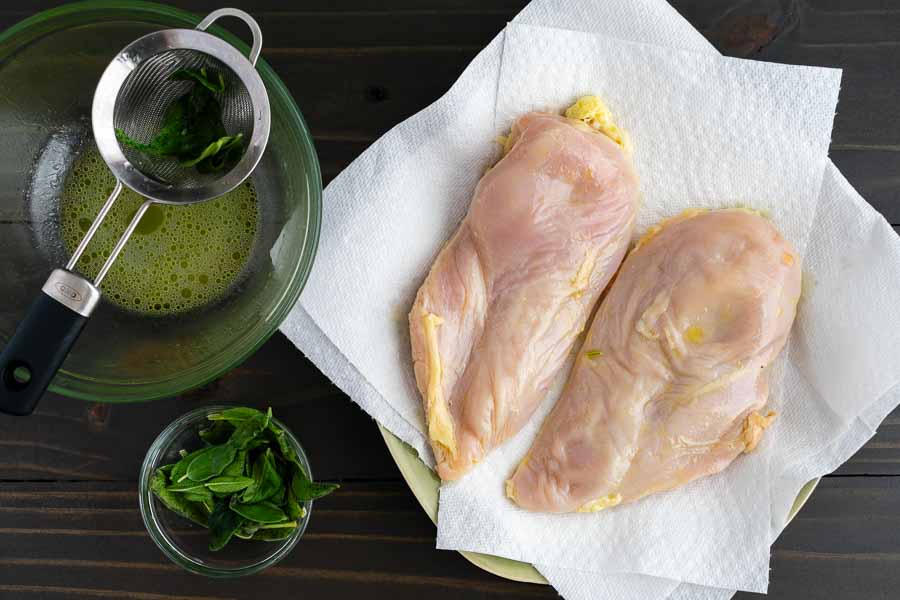
Marinated chicken breasts on a plate lined with paper toewls
Thoroughly pat the marinated chicken dry to ensure it sears well

Cooking the Chicken and Sage

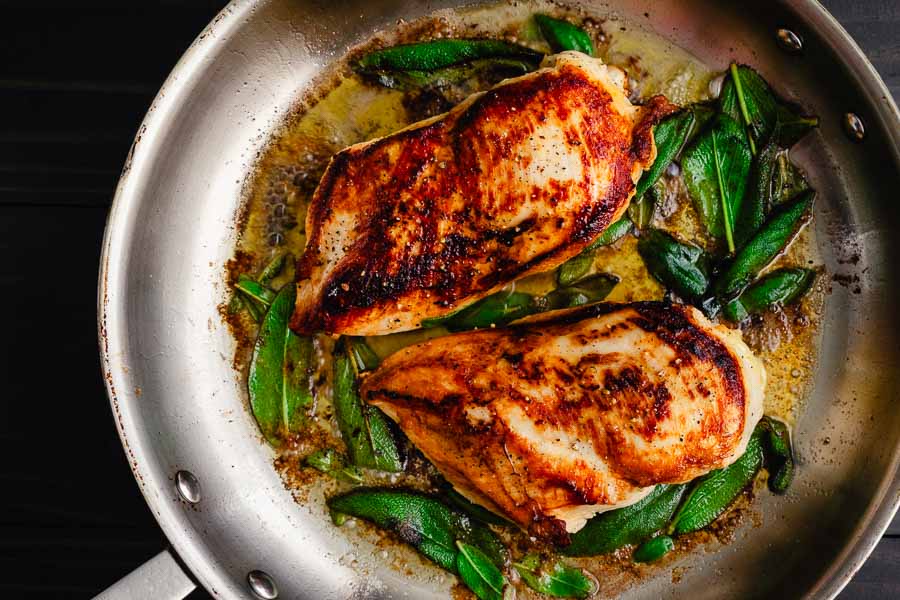
Next, I removed the sage leaves from the marinade, patted the chicken dry, and moved on to cooking. The chicken needs a good sear, so my first thought was a cast-iron skillet. However, acidic lemon juice isn’t good for the seasoning on a cast-iron pan. I ended up using a stainless steel skillet since it is non-reactive but still gives a good sear.

Tip: An empty stainless steel skillet needs 2-3 minutes to preheat properly. Also, butter burns easily so don’t add it until just before the chicken.

I preheated the skillet to medium heat (5 out of 10 on an electric stove) since the chicken breasts needed to cook for 10-15 minutes. That might sound low, but it seared and kept the chicken from burning as you can see from the photo.

Cooking two chicken breasts in a stainless steel skillet
A 12″ stainless steel skillet seared the chicken nicely

I added the olive oil, let the butter melt, then placed the chicken breast and sage leaves into the pan for 5 minutes. I flipped the chicken after that and added a meat thermometer to make sure it cooked properly. These breasts were thick, and I wanted to make sure they reached a safe internal temperature.

Tip: The minimum safe internal temperature for chicken is 165°F according to the USDA. Place a meat thermometer into the thickest part of the chicken breast for at least 60 seconds to get an accurate reading.

My chicken took another 17 minutes to reach 165°F. I flipped it a few times to keep the outside from burning. It helped, but there were plenty of burnt bits left in the pan. I also removed the sage 8 minutes after the first flip (13 minutes total).

I have never fried sage before and liked the taste, but I am pretty sure mine would be considered scorched, something the recipe said not to do. The leaves were crispy, and I did like them, but next time I would remove them around the 10-minute mark.

Making the Glaze

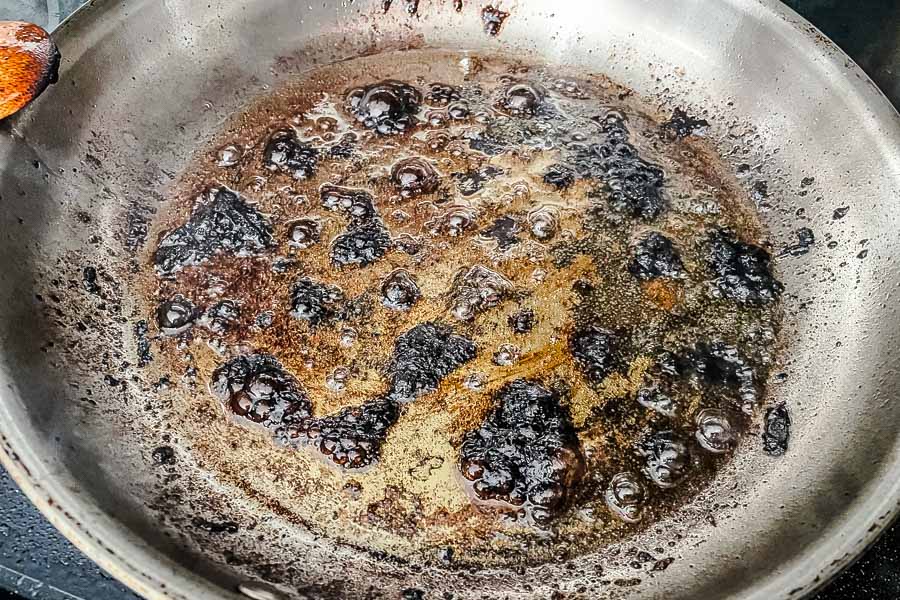
Once the chicken and sage were removed I poured away the extra fat and juices then added the reserved marinade to make the glaze. I expected to deglaze the pan with the reserved marinade, but that’s not what happened.

The marinade just sizzled away and became steam. Or maybe more burnt bits at the bottom of the pan—it was hard to tell, but I had a very dry pan. I tried adding more olive oil and lemon juice to the pan, but I couldn’t get the glaze to work.

Trying to make the glaze in the same pan the chicken cooked in didn't go well
The reserved lemon marinade steamed away and I was left with burt chicken bits

In the end, I grabbed a small non-stick skillet and added three tablespoons each of olive oil and lemon juice. I let that cook down until it thickened then added a tablespoon of butter. Somehow there were black bits in the new pan (burnt lemon juice?), so I strained it before pouring it over the chicken.

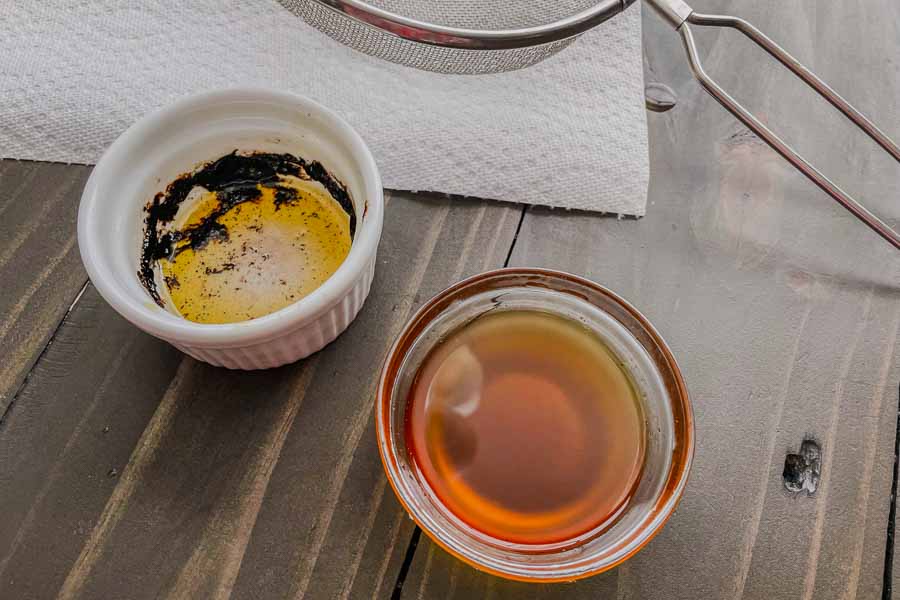
I’m not sure what happened to cause the black bits you see in the ramekin (below), but the sauce and chicken didn’t taste burnt at all. The strained sauce was a beautiful golden brown and looked similar to browned butter although the butter wasn’t in the pan long enough to brown.

Strained lemon glaze
I had to strain the glaze before pouring it over the chicken

Timing

This recipe lists 45 minutes to prep and 20 minutes to cook for a total time of 1 hour 5 minutes. Here’s how my time was spent:

  • 4 minutes to prep the marinade
  • 30 minutes to marinate
  • 40 minutes to cook the chicken and make the glaze
    • includes 22 minutes to cook the chicken to 165°F
  • 1 hour 14 minutes total

Using thick chicken breasts increased the cooking time, and I’m sure my trouble with the glaze did too. Honestly, I expected to go more than 10 minutes over, so I’m happy with this time.
Spiced Christmas Coffee

0

I’m not a morning person, so a cup of coffee is a must to wake me up. I look forward to this time of year because I can find Barnie’s Santa’s White Christmas Coffee. It’s my favorite flavor of coffee ever, but I haven’t seen it on the shelves for the past couple of years. That’s why this Spiced Christmas Coffee grabbed my attention. I have a feeling it will be along the lines of my M.I.A. flavored coffee, so I need to give it a try ASAP.

This Christmas Spiced Coffee brings together the cozy flavors of the season for a mug of pure joy! You can make it in your favorite coffee maker and top with whipped cream or add milk and sprinkles!

Recipe Author: Rebecca Hubbell at Sugared and Soul
Get the recipe

The Ingredients

My pantry was stocked up, so I had all of the ground spices and the powdered sugar. The only thing I was missing was coffee. I was almost out thanks to my Vietnamese Coffee addiction, so I had to buy more. I didn’t have time to order it, so I grabbed a bag of dark roast at my regular grocery store.

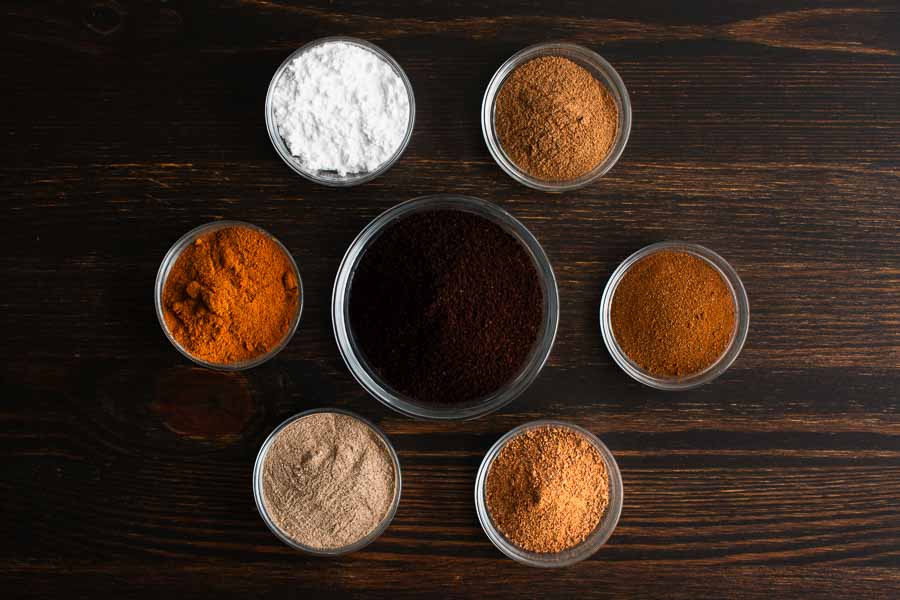
Spiced Christmas Coffee Ingredients
Ground dark roast coffee, powdered sugar, cinnamon, cardamom, nutmeg, cloves, and allspice

The Process

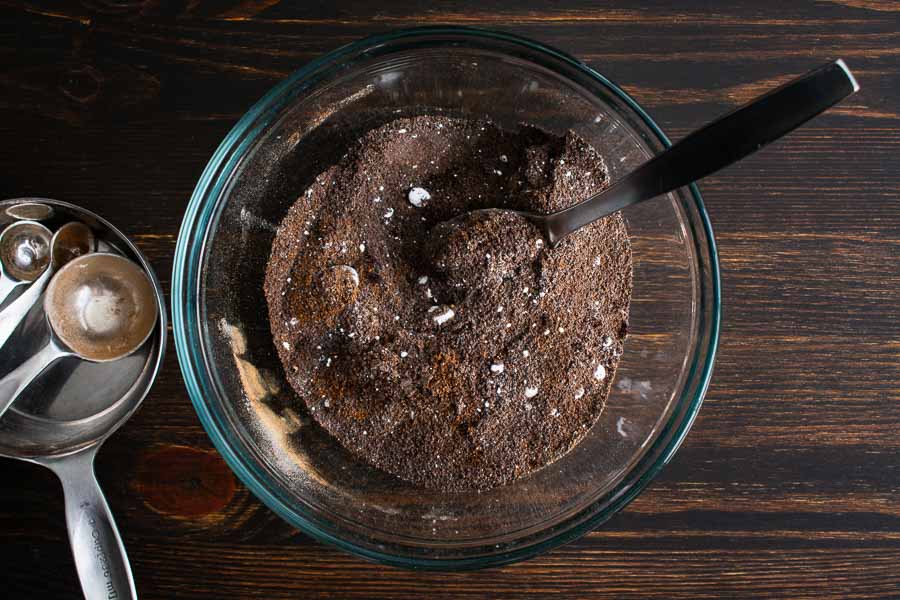
Making my Spiced Christmas Coffee was so simple! Just add everything to a bowl, mix well, and brew. It’s not unusual to find clumps in my ground spices, especially the nutmeg, but they break apart easily. The only problem I had was the clumps of powdered sugar didn’t break apart as easily.

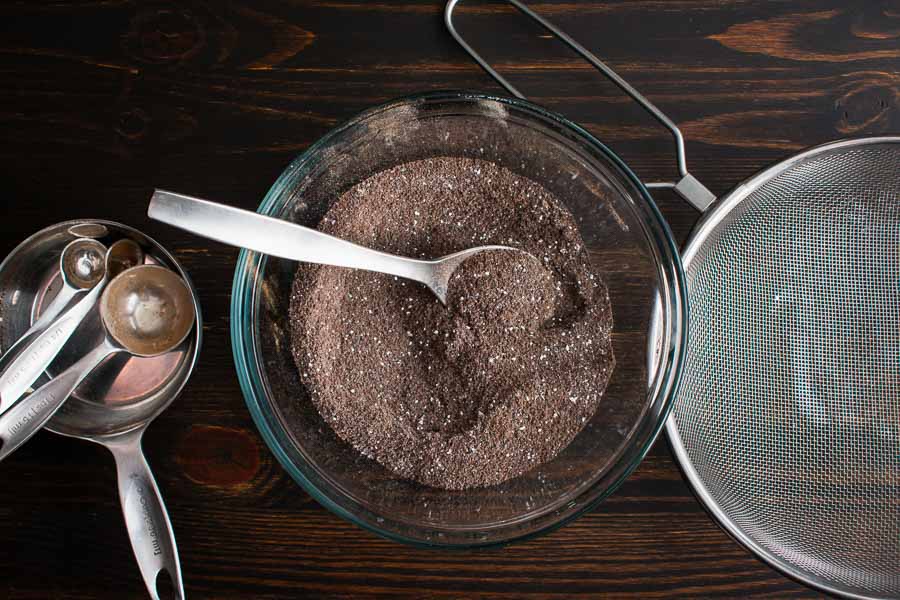
Unsifted Spiced Christmas Coffee Process
I didn’t sift the powdered sugar and found clumps of it in the coffee mixture

I tried mashing them with the back of a spoon, but the powdered sugar clumps were there to stay. My brain had a whole inner conflict going on while I did this. Should I sift the coffee? Can I sift the coffee? Will the coffee grounds fit through the sifter?

The answer was yes in this case. I had bought a finer grind than I usually do, so the coffee, spices, and powdered sugar sifted right through my mesh strainer. As you can see, there were still some tiny bits of powdered sugar even after sifting. They were super small, though, and they dispersed into the coffee evenly.

Tip: SIft the spices and powdered sugar into the coffee grounds to break up clumps.

Sifted Spiced Christmas Coffee Process
Sifting the coffee removed the clumps of powdered sugar

The only thing left was to brew up a few cups of coffee. I chose my French press for that. I normally buy a coarser grind when I brew my coffee that way, so I wasn’t sure how this fine grind would do. I’m happy to say it worked and brewed up some strong coffee, my favorite kind.

Timing

This recipe lists 5 minutes to prep and 5 minutes to cook. I assume the cooking time is for brewing in this case. The times were accurate, though I would have spent less time on prep work if I hadn’t sifted the powdered sugar. Here’s how my time was spent:

  • 3 minutes to mix
  • 2 minutes to sift
  • 5 minutes total

Brewing time depends on the amount and method, so I’m not using that in my time rating. If you’re interested, I brewed up 32 ounces of coffee, so it took 5 minutes to boil the water plus an additional 4 minutes to brew. Measuring and pressing added another minute, so the total time was 10 minutes from coffee grounds to mugs of coffee.

I also decided to be a bit extra and make whipped cream and pipe it onto the coffee. I didn’t time it, but it probably took me 5-10 minutes. Simply whipped some heavy whipping cream would have produced whipped cream that melted really fast. My go-to Stabilized Whipped Cream adds a little sugar and vanilla to make delicious whipped cream that lasts.

Christmas Roast Duck With Cranberry-Orange Glaze

My Christmas dinners have always had a ham or turkey as the centerpiece. I wanted to try roast goose or duck for ages, but hubby hates duck. This year I decided to just go for it since we will have our “real” Christmas dinner at his parent’s house. I settled on this Christmas Roast Duck With Cranberry-Orange Glaze, and hubby happily ordered pizza, his favorite thing ever, from his favorite pizza place. The only duck I have ever tried was Pan-Seared Duck Breast with Port Wine Reduction, and I am so excited to make my first roast duck!

Make the holidays special with this Christmas roast duck with cranberry-orange glaze! Featuring perfectly crisp skin and a spiced glaze full of festive flavors, this roast duck adds elegance to your holiday table.

Recipe Author: Amanda McGrory-Dixon at Burrata and Bubbles
Get the recipe

The Ingredients

Since Thanksgiving, I have been scoping out the frozen poultry section at my usual grocery store. They have had geese in years past, but this year it was only turkeys and ducks (which is why I chose duck for my menu). I must have checked that section on every shopping trip since Thanksgiving, and the week I decide to buy a duck I find it almost empty. All they had were turkey breasts and cornish hens.

After panicking for a few seconds, I decided to do something I never do: ask for help. I checked at the meat counter, and they had a frozen duck in the freezer in the back. What a relief! I got a 6.71-pound duck for $26.77 ($3.99 per pound).

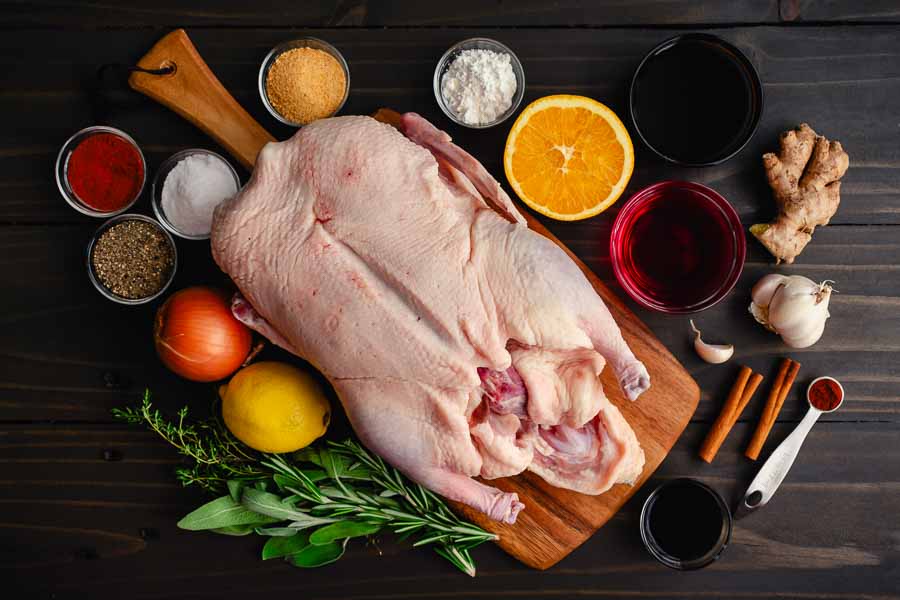
I had already found everything else I needed, which wasn’t a lot. Things like the onion, lemon, herbs, ginger, and a couple of oranges for fresh-squeezed orange juice and zest. I had the rest, including cranberry juice, on hand.

Christmas Roast Duck With Cranberry-Orange Glaze Ingredients
Whole duck, cornstarch, orange juice, orange zest, unsulphured molasses, ginger root, cranberry juice, garlic, cinnamon sticks, cayenne pepper, balsamic vinegar, rosemary, sage, thyme, lemon, onion, black pepper, sweet paprika, salt, and garlic powder

The Process

The post with this Christmas Roast Duck recipe is a must-read if, like me, you have never roasted a whole duck. There are some steps in the process I have never run across with turkey, chicken, or cornish hen. I felt much more confident once I read through the whole process a couple of times.

Prepping the Duck

Since I bought a frozen duck, my first step was to thaw it. This was admittedly easy to do by simply placing it in the refrigerator 4 days before I planned to make this recipe. The inside still had a few ice crystals on day three, and I couldn’t get the innards out. Placing it in a large bowl of water for an hour completely thawed it and saved the day.

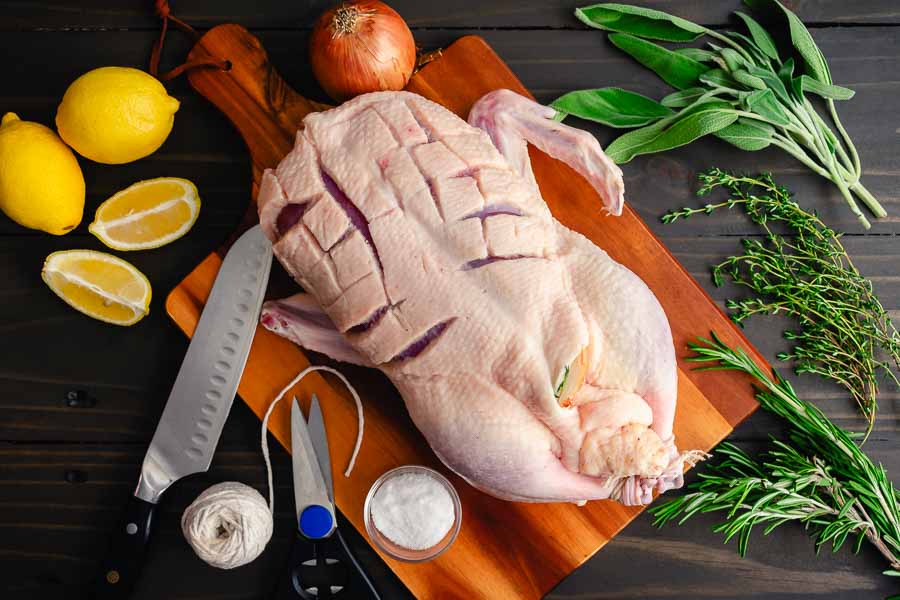
Now that Daffy was thawed, I had some prep work to do. A whole duck has an extra flap of skin at the neck that needs to be trimmed away. This duck needed to be stuffed with herbs, lemon, and onion. Nothing needed to be peeled, and the lemon and onion just cut into quarters. I have made a few roast turkeys and chickens that have similar stuffing.

Next, I tied the legs with kitchen string and scored the skin over the breast. I used a sharp knife and too much pressure at first, cutting all the way to the meat in spots. Once I got the hang of it, I eased up on the pressure and cut through the skin to expose the fat but not the meat.

The final step was to thoroughly dry the bird and then generously salt the outside. I put my salted duck onto a wire cooling rack placed in a sheet pan to catch the drips. The whole thing went into my refrigerator overnight.

Prepping the duck before refrigerating overnight

Roasting the Duck

The next day I removed the duck from the refrigerator and let it come to room temperature for 30 minutes while the oven preheated. During this time I mixed up the dried spices and rubbed them over the outside of the bird. I also lined the bottom of my roasting pan with foil, added the rack, and placed the spice-rubbed and stuffed bird on that.

The last step before going into the oven was to add a meat thermometer to the inside thigh. Mine is digital, so I set it to beep when the turkey reached 165°F. I also set a timer for the recommended time on the duck’s wrapper for a 6-7 pound bird which was 2 hours 35 minutes. The duck needed to be glazed during the final 15 minutes of roasting. I set a second timer for that and moved on to the glaze.

The glaze came together quickly. I boiled everything but the cornstarch and orange zest. Then I mixed the cornstarch with a little water to form a slurry, added it to the pan, and whisked until the mixture thickened. Lastly, I took the pan off the heat, mixed in the orange zest, and set the glaze aside until it was needed.

Finishing My Christmas Roast Duck

I had been working on the side dishes while the duck cooked. I should have kept a better eye on it, but I had a beeping meat thermometer and timers set. What could go wrong?

When I checked on the temperature I happened to jiggle the display, and it started beeping. The reading was 196°F! The timer still had 18 minutes to go, and my bird was way overdone!

The worst part was I had set the correct temperature on the meat thermometer and reduced the oven’s temperature to 350°F. I have no idea why the thermometer didn’t beep sooner. (I feel like I should pause here and mention the meat thermometer I linked to earlier is not the same brand that failed here.)

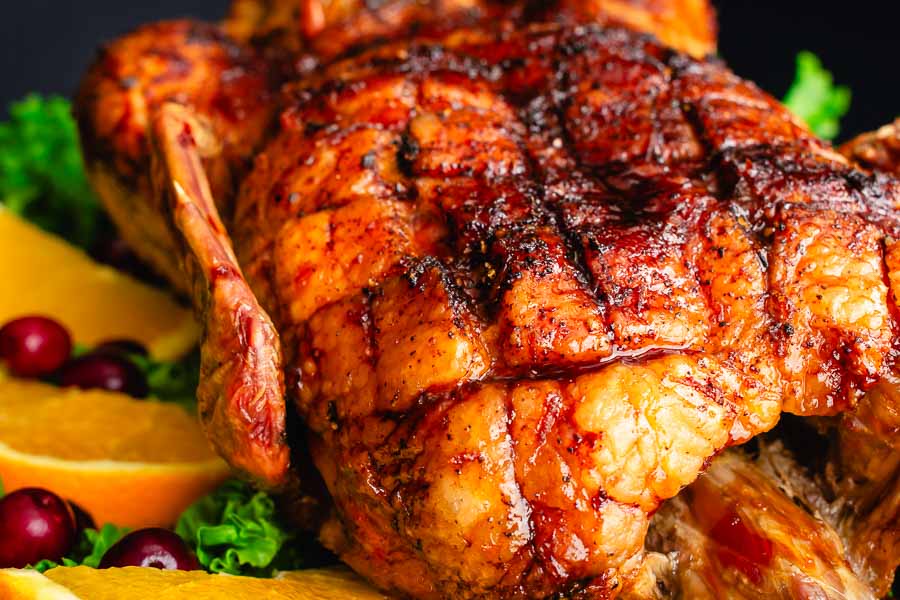
The only thing I could do was brush on the glaze, but I was anticipating a dried-out husk of a Christmas Roast Duck. I let it roast for another 15 minutes before removing it from the oven and tenting it with foil.

The layer of fat kept the breast from drying out even though I overcooked the duck

Timing

This recipe lists 20 minutes to prep, 2 hours 20 minutes to cook, and 2 hours 40 minutes total. Here’s how my time was spent:

  • 10 minutes to prep the duck
  • 30 minutes to come up to room temperature
    • 3 minutes to rub with dried spices
  • 15 minutes to roast at 425°F
  • 2 hours 13 minutes to roast at 350°F
    • 28 minutes to make the glaze
  • 15 minutes to glaze in the oven
  • 15 minutes to rest
  • 3 hours 38 minutes total

My total time also includes things I’m sure are not included in the times on the recipe like 30 minutes to come to room temperature and 15 minutes to rest after roasting. I expected the cooking time to vary some based on the weight of the duck. Time to refrigerate overnight is not included.

Brussels Sprouts with Bacon, Pecans, and Cranberries

0

I try to include at least one green in meals, and Christmas dinner is no exception to that rule. This year’s green side is Brussels Sprouts with Bacon, Pecans, and Cranberries. I’m keeping characteristics of last year’s Christmas dinner menu with Brussels sprouts and bacon while trying to make it healthier.

Last year I chose Brussels Sprouts Gratin, which was Brussels sprouts mixed with bacon and roasted in a creamy cheese mixture. It was so delicious (because bacon and cheese), but not exactly healthy at 1,538 calories per serving and 142 grams of fat.

Of course, it’s the kind of recipe I would only make once a year, but I couldn’t help but wonder if there was a healthier recipe for Brussels sprouts that was still special enough for a holiday dinner. This Brussels Sprouts with Bacon, Pecans, and Cranberries caught my eye because bacon. It’s also a healthier option at 407 calories per serving and 34 grams of fat.

Christmas Brussels Sprouts with Bacon, Pecans, and Cranberries will add color and vibrancy to your holiday table! This crispy and crunchy salad might become one of your family’s favorite Christmas side dishes! Dried cranberries provide a sweet contrast to the savory Brussels Sprouts. There is a bit of crunch from toasted pecans and chopped cooked bacon.

Recipe Author: Julia at Julia’s Album
Get the recipe

The Ingredients

This Brussels Sprouts with Bacon, Pecans, and Cranberries recipe has only six ingredients, and four are named in the title. The remaining ingredients are olive oil and salt, and I had both. I also had bacon in the freezer and dried cranberries because I make Apple Cranberry Bacon Kale Salad regularly.

That left just Brussels sprouts and pecan halves on my shopping list. I found them all at my usual grocery store. I chose large sprouts for a couple of reasons. First, peeling and trimming a few large Brussels sprouts is faster than tons of tiny ones. Secondly, it’s quicker and easier to flip larger Brussels sprout halves when roasting.

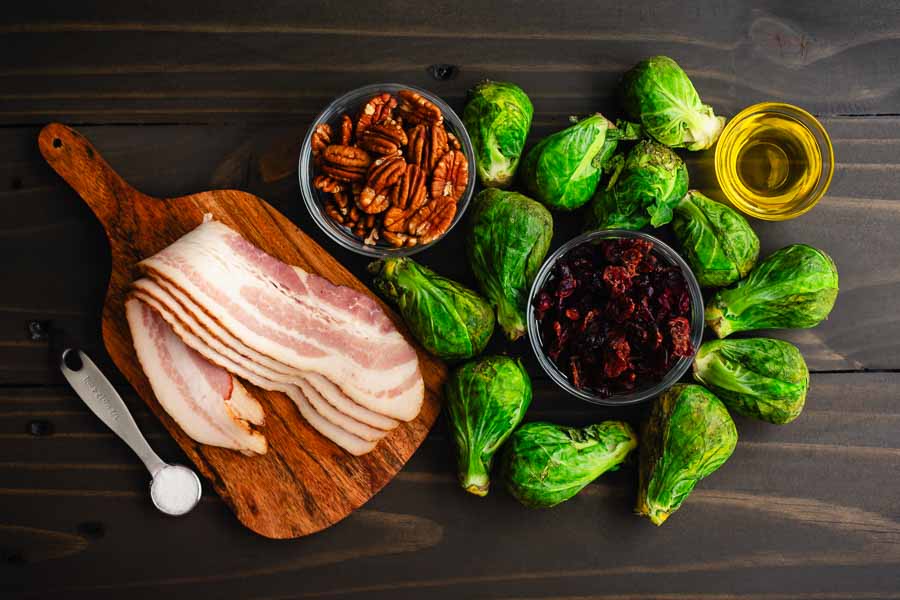
Brussels Sprouts with Bacon, Pecans, and Cranberries Ingredients
Brussels sprouts, dried cranberries, olive oil, bacon, pecan halves, and salt

The Process

This recipe’s ingredients are cooked separately and then tossed together much like a salad. There are sections for each ingredient, but I did them in a different order than listed.

Toasting the Pecans

Instead of beginning with the Brussels sprouts, I chose to toast the pecans first. It was a simple matter of placing a piece of parchment paper onto a sheet pan, adding the pecans, and toasting them for 20 minutes. My oven was in use roasting the main course, so I toasted the pecans in my air fryer/toaster oven combo on the bake setting.

Tip: The pecans didn’t look much different coming out of the oven than they did going in. I had to try one to make sure it was toasted enough. Toasting changes the texture and it was noticeable when I bit into the pecan.

Cooking the Bacon

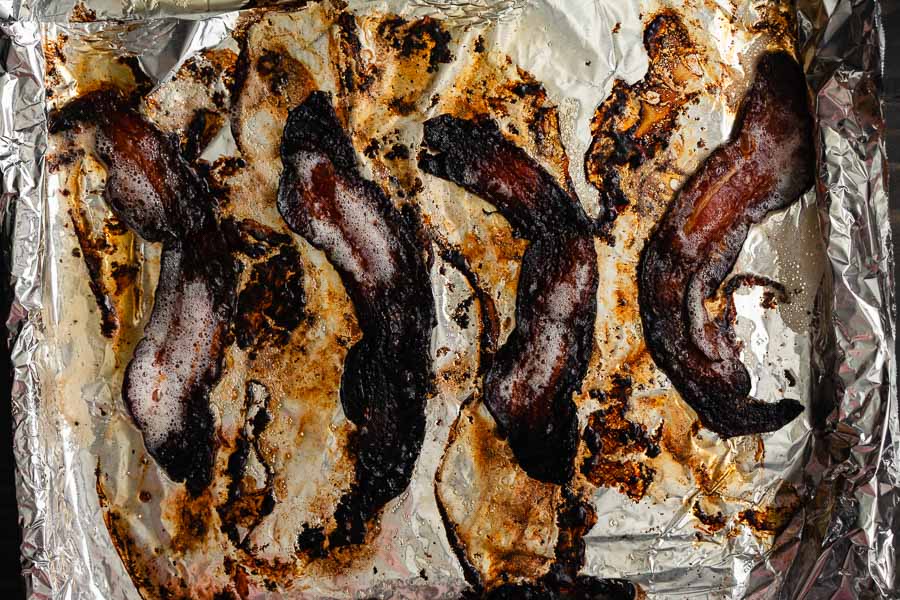
After the pecans were done, I lined a sheet pan with foil and baked the bacon (also in the toaster oven and also for 20 minutes). This was my first time baking bacon, and the first round was a disaster. I was busy cooking other things and did not keep an eye on the bacon. It was incinerated!

Overcooked bacon on a foil-lined sheet pan
I didn’t watch the bacon and overcooked it on my first try

Fortunately, I had more and put it into the toaster oven for 10 minutes. It was not ready after that, so I added five more minutes. This time it was perfect, so I removed it from the toaster oven and let it cool.

Roasting the Brussels Sprouts

My oven was free by this time, so I chose to roast the Brussels sprouts in it instead of my toaster oven. I tossed them in olive and salt then placed them cut side on a foil-lined sheet pan.

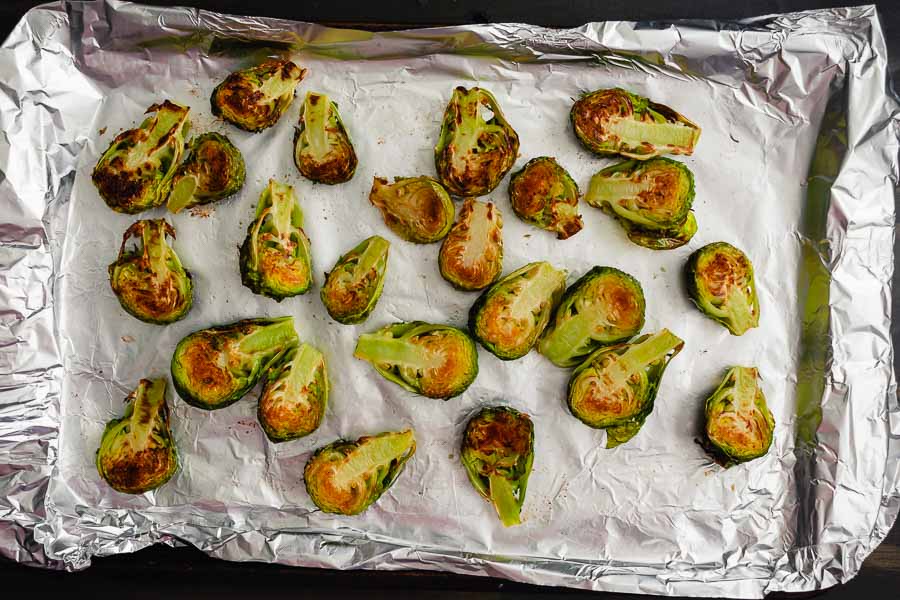
The top side had begun to brown after 15 minutes, and I discovered the bottoms had browned too even though they were facing down. I still flipped all the sprouts and let them cook for another 10 minutes, keeping a close eye on them so they didn’t burn.

Tip: The bacon and Brussels sprouts needed a watchful eye to make sure they didn’t burn.

Roasted Brussels sprouts
The Brussels sprouts were brown on the cut side (bottom) when I flipped them over after 15 minutes in the oven

Finishing Up

I prepped the dried cranberries after I flipped the Brussels sprouts. That was simply adding them to a heat-proof bowl, pouring boiling water over them, and allowing them to soften for 10 minutes. I chose to boil the water in the oven, and it took 3 minutes on high to boil two cups of water.

Once I drained the cranberries and crumbled the bacon, I tossed everything together in a mixing bowl. It didn’t need the optional extra olive oil, so all I had to do was move my Brussels Sprouts with Bacon, Pecans, and Cranberries to a serving bowl.

Timing

This recipe lists 10 minutes to prep, 30 minutes to cook, and 40 minutes total. Here’s how my time was spent on each step:

  • Pecans
    • 2 minutes to prep the pecans
    • 5 minutes to toast the pecans
  • Bacon
    • 2 minutes to prep the bacon
    • 15 minutes to cook the bacon*
  • Brussels Sprouts
    • 7 minutes to prep the Brussels sprouts
    • 20 minutes to roast the Brussels sprouts
  • Cranberries
    • 4 minutes to prep the cranberries
    • 10 minutes to soak the cranberries
  • Assembly
    • 2 minutes to drain cranberries and assemble the dish
  • 33 minutes total

I should note that I did some of these steps concurrently, like prepping the next ingredient as the current one was cooking, which saved a lot of time. If the steps were done consecutively, the total time would increase to 1 hour 7 minutes.

*Time for my first attempt at cooking the bacon in the oven is not included here.

Roasted Garlic Mascarpone Mashed Potatoes

0

Christmas is coming up, and I’m really feeling it this year. Honestly, it can be hard to get into a Christmasy mood when it’s in the mid-80s during the day but not this year. I’m baking Hot Cocoa Cupcakes for a few people and I might even haul a few decorations out of the garage. But Christmas isn’t complete without dinner, and I have put together a simple menu for my husband and me. I’m starting things off with these Roasted Garlic Mascarpone Mashed Potatoes. I’ve been let down by “garlic” mashed potatoes in the past that seem to be missing the garlic. This one includes 2 whole heads of garlic, and I have a good feeling about it. Let’s find out if it’s garlicky enough to live up to its name!

Roasted Garlic Mascarpone Mashed Potatoes take the classic side dish to epic new heights. You won’t be able to resist their rich, roasted garlic flavor and crave-worthy creaminess. Perfect for holiday dinners or to pair with your favorite protein.

Recipe Author: Jamie Vespa MS, RD at Dishing Out Health
Get the recipe

The Ingredients

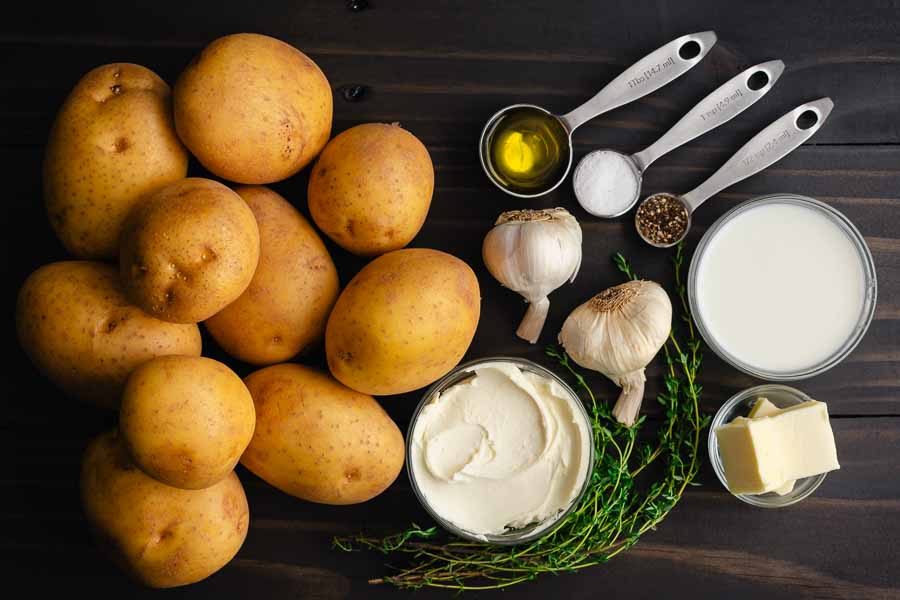
There aren’t a to of ingredients in this recipe, and I had a few on hand. Salt, pepper, and olive oil were all in my pantry. I even had some golden potatoes, mascarpone cheese, garlic, and butter left over from other recipes, but not enough for this one. My usual grocery store had them all, but they were out of chives so I subbed in fresh thyme leaves.

Roasted Garlic Mascarpone Mashed Potatoes Ingredients
Yukon Gold potatoes, extra virgin olive oil, fine sea salt, cracked black pepper, garlic, whole milk, unsalted butter, fresh thyme leaves, and mascarpone cheese

The Process

Naturally, this recipe for Roasted Garlic Mascarpone Mashed Potatoes started with roasting the garlic. I have done this many times for my favorite pasta recipe, Lemon Garlic Pasta. It’s a simple process, but it does take a long time to do. This recipe has a few extra steps, but it’s broken down so they are easy to tackle.

Roasting the Garlic

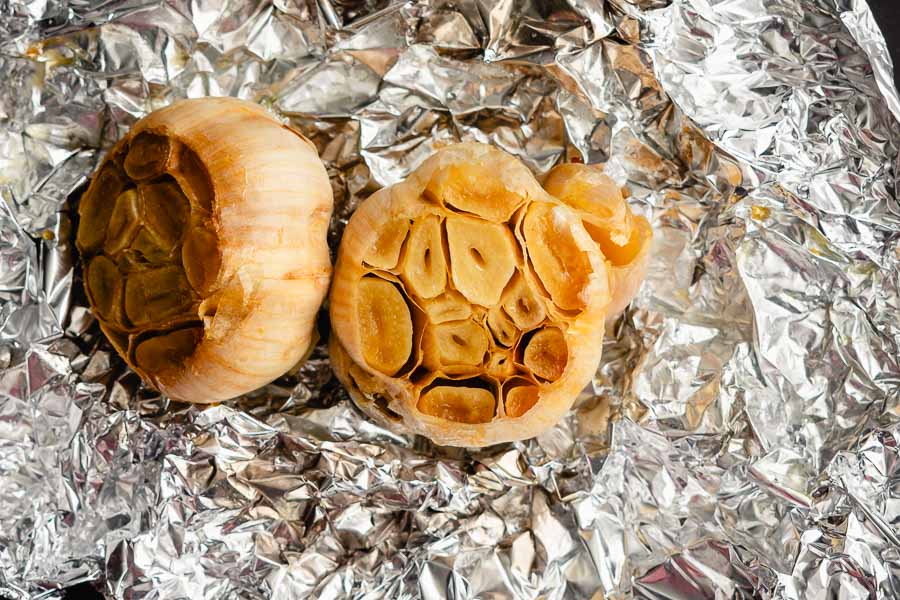
I peeled off the loose outer layers of skin then cut off the bottom of each bulb and placed them onto a piece of foil. After drizzling them with olive oil and sprinkling them with salt, I wrapped them in the foil and placed them in the oven to roast. Forty minutes later I had two piping hot heads of roasted garlic.

Tip: If you’re worried about leaks, place the foil packet on a sheet pan or roast the garlic in an oven-safe dish. I usually roast garlic in ramekin dishes covered with foil, but the dishes are only big enough for 1 had of garlic each.

Roasted garlic bulbs

Making the Potatoes

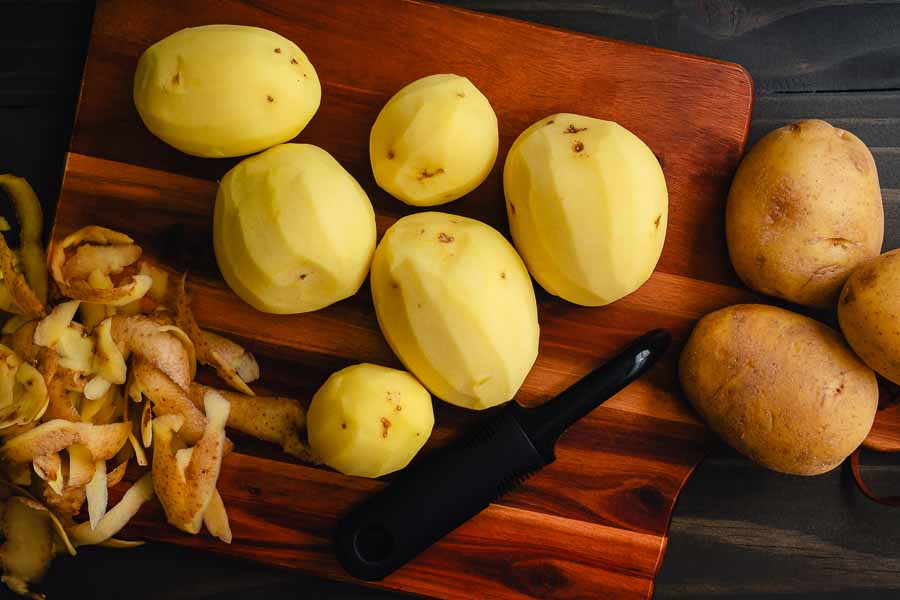
While the garlic roasted, I prepped and cooked the potatoes. If you’ve made mashed potatoes before, you know it’s a simple process, but it can feel like you’re peeling forever. Tip: Select the largest potatoes in the bag to cut down on peeling time.
I peeled the potatoes and then chopped them into fairly large but evenly sized pieces. This is where the recipe got a little different than what I’m used to. Normally I would put a large pot of water on to boil just before peeling and chopping the potatoes. The water would come to a boil before I added the potatoes then I would cook them for 15 to 20 minutes.

Peeling the potatoes

This recipe did things a little differently. It had me put the chopped potatoes into a pot of cold water with a little salt (I used a 5.5-quart Dutch oven). Then the pot went onto the stove to come to a boil with the potatoes already in it. From there things went back to normal, and I let the potatoes boil for 15 minutes before straining and mashing them.

Making the Milk, Mascarpone, and Butter Mixture

I made the milk mixture once the potatoes were done and the roasted garlic had time to cool off. The remaining ingredients (except the garnish) went into a saucepan to warm up.

This part took me 15 minutes because I wasn’t paying attention and put the heat way too low. It took me a while to realize what I had done, so this part took me longer than it had to.

The milk just needs to warm, not boil, so I kept an eye on it. I knew it was ready when the mascarpone cheese and butter melted and the mixture started steaming. I tested it by sampling it with a small spoon to sip it and make sure.

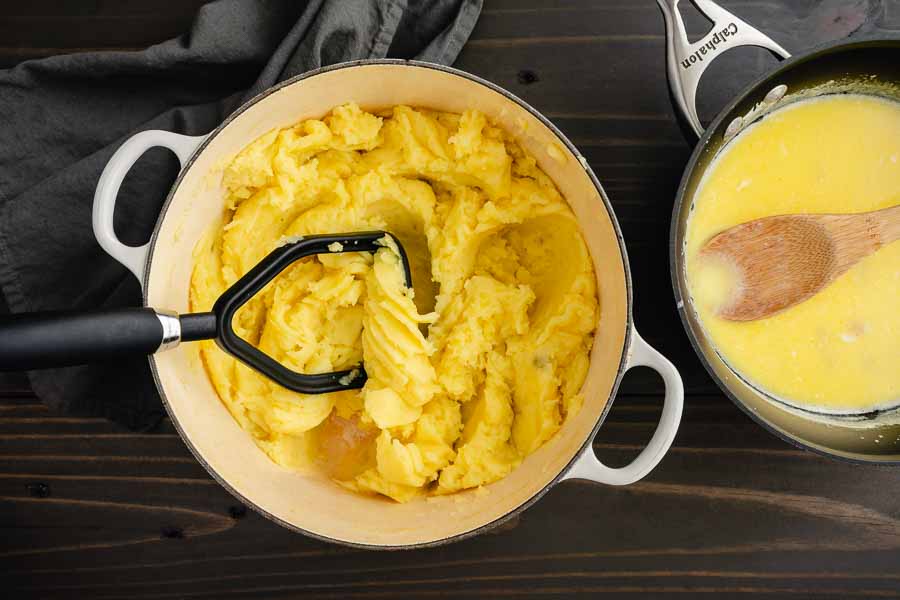
Mashing the boiled potatoes
Mashing the boiled potatoes before adding the buttery milk mixture

Assembly and Garnish

Now it was time to turn all my work into Roasted Garlic Mascarpone Mashed Potatoes. First, I mashed up the potatoes in the Dutch oven I boiled them in. Tip: The masher did a good job, but it didn’t get into the edges of the pot. I had to stir the potatoes a few times (maybe 2-3 times) to move the chunks that accumulated at the edge into the center to be mashed.

Next, I poured the milk mixture over the potatoes and mashed the potatoes again, stirring the outer edges in to make sure everything was mashed well. The garlic was so soft that it just mashed right into the potatoes without any extra work.

All that was left was to make them pretty, so I transferred them into a large serving bowl and added the garnishes. I was able to strip the thyme leaves directly into the potatoes with no chopping needed. They weren’t my first choice, but they were easier than chives since there was no chopping. A few twists of my pepper grinder, and that was it!

Timing

This recipe lists 30 minutes to prep, 1 hour to cook, and 1 hour 30 minutes total. Here’s how my time was spent:

  • 3 minutes to prep the garlic
  • 40 minutes to roast the garlic
  • 15 minutes to prep the potatoes
  • 38 minutes to heat the water to a boil (includes 15 minutes to boil)
  • 15 minutes to make the milk mixture
  • 10 minutes to mash the potatoes with the garlic and milk mixture
  • 2 minutes to garnish
  • 1 hour 24 minutes total

Prepping and boiling the potatoes while the garlic roasted saved a lot of time. Making the milk mixture while the potatoes boiled instead of after they finished would have shortened my total time by 10 to 15 minutes.
Spiced Cranberry Bourbon Old Fashioned with Sugared Cranberries

Even though it’s still warm here, I’m in a Christmas mood. I can’t wait for the Christmas TV shows, but I’m already tired of some of the commercials LOL. This time of year means at least one get-together with the family and friends. A few of us who drink are all bourbon lovers, so there was no way I could pass up this Spiced Cranberry Bourbon Old Fashioned with Sugared Cranberries recipe. I know, it’s a long name, but it’s spices and cranberries (so Christmas!) added to one of my favorite bourbon cocktails. I have a feeling this will be a good one, but I need to do the work to make sure.
This spiced cranberry bourbon old fashioned is the perfect holiday cocktail! The simple syrup is made with fresh cranberries, star anise, cinnamon & clove!

Recipe Author: Molly at Spices in My DNA
Get the recipe

The Ingredients

We are drinking less liquor lately, so I had a bottle of Jim Beam bourbon in my bar along with two bottles of Angostura Bitters. I have no clue why two bottles of bitters, but that sounds like a lifetime supply!

My pantry was my next stop, and there I found I had the cinnamon sticks, whole cloves, sugar, and club soda. And water, of course.

That left me to buy fresh cranberries, star anise pods, whole allspice berries, and oranges for the peel. I bought two 12-ounce bags of fresh cranberries and two oranges to make sure I had plenty of peel.

Spiced Cranberry Bourbon Old Fashioned with Sugared Cranberries Ingredients

The only thing I didn’t check for was maraschino cherries. We always have a jar in the refrigerator door. Always! Too bad I forgot that we threw out everything but the pickled foods when our old refrigerator died.

I had to send hubby out for a jar of cherries, and I loved his selection. He bought a brand we haven’t tried called Sable & Rosenfeld Whiskey Tipsy Cherries. They have that bright red maraschino cherry color and sweetness plus a little bite from being soaked in malt whiskey. A 10-ounce jar was $6.49.

The Process

Before I could make my Spiced Cranberry Bourbon Old Fashioned, I had to make the spiced cranberry syrup and sugared cranberries. I made mine the day before I planned to make the cocktail.

Spiced Cranberry Syrup

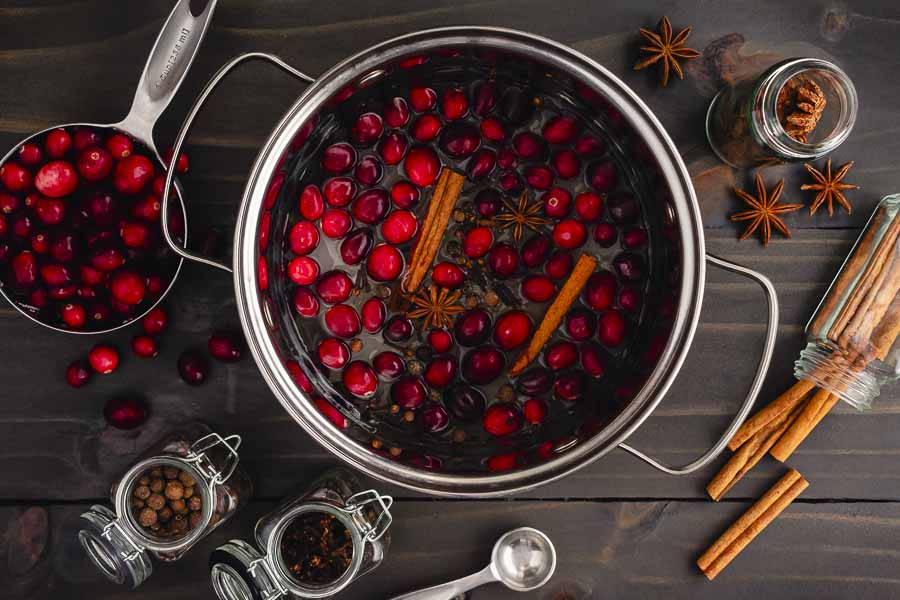
Making this spiced syrup was a cross between making simple syrup and making cranberry sauce. All I had to do was add sugar, water, cranberries, and whole spices to a saucepan, and let it come to a boil.

Once I heard the cranberries start popping I set a timer for four minutes and left everything to a boil. Tip: Popping cranberries can make a mess. Place the pan’s lid askew or use a spatter screen to help contain the red sugary splashes.

Making the Spiced Cranberry Syrup

Once the syrup was cooled, I strained out most of the solids with a regular mesh strainer/colander. It got the spices and berries but not their tiny seeds. I had to use a fine mesh cocktail strainer to get out the seeds.

Tip: Gently press the cranberries with the back of a spoon as you strain to get as much syrup as possible.

Sugared Cranberries

I started on these while the spiced cranberry syrup cooled. I’ve made them before, and they are so easy! This time I made a small batch of simple syrup, then mixed it with the cranberries.

Tip: The recipe says to mix the cranberries in the pan, but my pan was too small. I used a heat-proof mixing bowl instead. It left me to thoroughly mix the berries in the syrup without spills before transferring them to the wire cooling racks to dry.

There were a lot of cranberries in a 12-ounce bag, so I used a large wire cooling rack placed on a sheet pan to dry them. Unfortunately, a bunch of the cranberries were small enough to fall through the squares in the wire rack and onto the sheet pan beneath.

I am lucky enough to have two sizes of cooling racks, one that fits a full sheet pan and one that’s about half the size. The small wire cooling rack has slightly smaller squares, and it saved a lot of those small cranberries. (I’m using the word “small” a lot today!

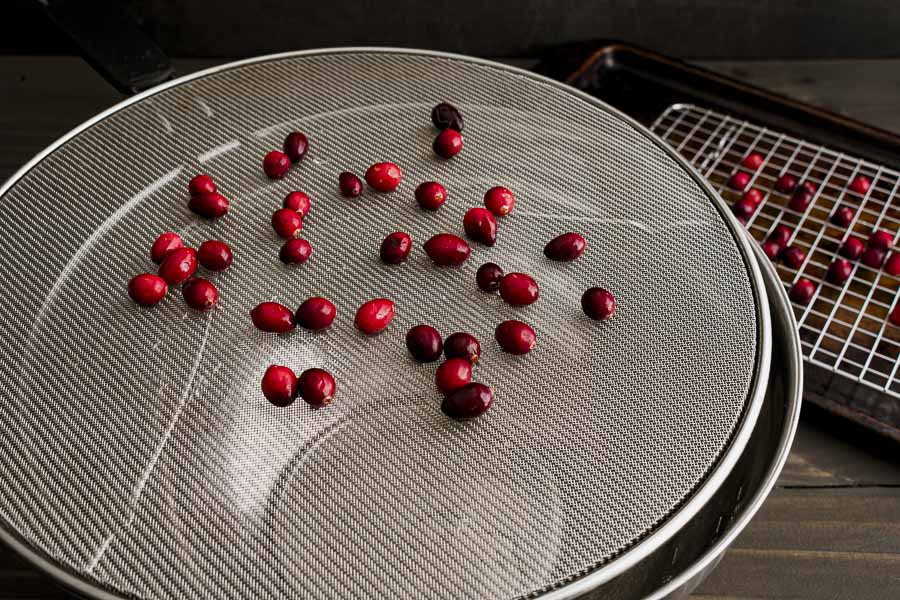
Cranberries drying on a spatter screen on over a mixing bowl
I dried the smallest cranberries on a spatter screen placed over a mixing bowl to catch drips

Tip: A few small cranberries fell through the squares in my smallest wire cooling rack. I could have tossed them and probably not noticed, but I hate to toss perfectly good food. Instead, I placed a mesh spatter screen over a mixing bowl to save the stragglers. It worked a treat!

Making a Spiced Cranberry Bourbon Old Fashioned

Mixing up this cocktail was the same as making a regular old-fashioned, just with some different garnishes. It only took me two minutes, I made it in the glass and stirred it up with a 5-inch cinnamon stick that also served as a garnish. I promise the maraschino cherry is in there too, but it sank to the bottom and got lost in the red liquid.

A channel knife was a quick way to peel off a thin strip of orange peel. I felt tiny splashes of moisture as I ran the channel knife along the orange. It was releasing the aromatic oils that made it smell so good and add to the cocktail’s flavor. Tip: Press lightly when you peel so you only get the peel and not the bitter white pith.

I wanted to have fun with the look of this festive cocktail, so I used my 12-ounce balloon glasses with a large square ice cube. I also added a Christmasy evergreen branch and pinned it to the glass with a mini clothespin.

Tip: Try and place the cranberries on top of the ice cube. The ones that fell off lost their sugar coating. Still pretty, but I love the frosted look.

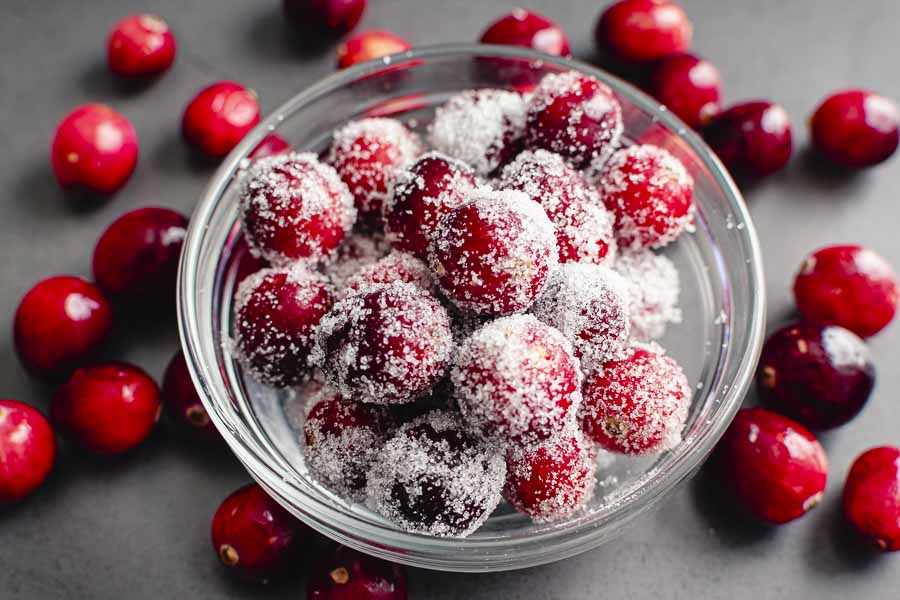
Sugared cranberries
Sugared cranberries

Timing

This recipe lists a total time of 20 minutes. Based on my times I would say that is the active time and does not include cooling or drying time. My active time was 25 minutes, with 1 hour 25 minutes of inactive time. Here’s how everything broke down:

  • Spiced Cranberry Syrup
    • 3 minutes to prep the cranberry syrup
    • 10 minutes to cook
    • 25 minutes to cool*
    • 3 minutes to strain
  • Sugared Cranberries
    • 4 minutes to make
    • 1 hour to dry
    • 3 minutes to roll in sugar
  • Spiced Cranberry Bourbon Old Fashioned
    • 2 minutes to make and garnish
  • 1 hour 50 minutes total

*I let the syrup cool while I started work on the sugared cranberries. That took 5 minutes, so the total cooling time was 30 minutes.