Home Blog Page 39

Roasted Apricots with Mascarpone and Blackberries

The Catalan Lamb Chops with Apricots and Sage recipe I just made had me craving apricots. A quick search of my Pinterest boards showed me I had only pinned a few recipes that used some form of apricots, and only one that used fresh apricots–Roasted Apricots with Mascarpone and Blackberries. In fact, I had pinned this recipe twice. Not that I blame myself–it looks and sounds scrumptious! And apricots are still in season, so I knew I could find them at my local grocery store. You know what that means: it’s time to roast some apricots!

For a quick dessert take advantage of all the beautiful apricots that are still available. Stuff them with sweetened mascarpone and plop a blackberry on top, drizzle with honey or agave and stick them under your broiler. Garnish with pistachios.

Recipe Author: Marie at Proud Italian Cook
Get the recipe
(scroll down for printable version)

The Ingredients

The biggest “problem” with this recipe was there isn’t one. The author shows gorgeous images, and the text in the quote is pretty much it for instructions. I debated posting this recipe since there technically isn’t one, but I love a challenge. I was determined to give it a try because it just looked so good!

So, how did I do it? I’m glad you asked. Here are the ingredients I used:

  • 4 apricots, halved and pitted
  • 1 6-ounce container of blackberries
  • 8 ounces mascarpone cheese
  • honey

I skipped the chopped pistachios for garnishing. Not because I don’t like them–I thought I had some in my pantry but it turns out I didn’t. Next time, though.
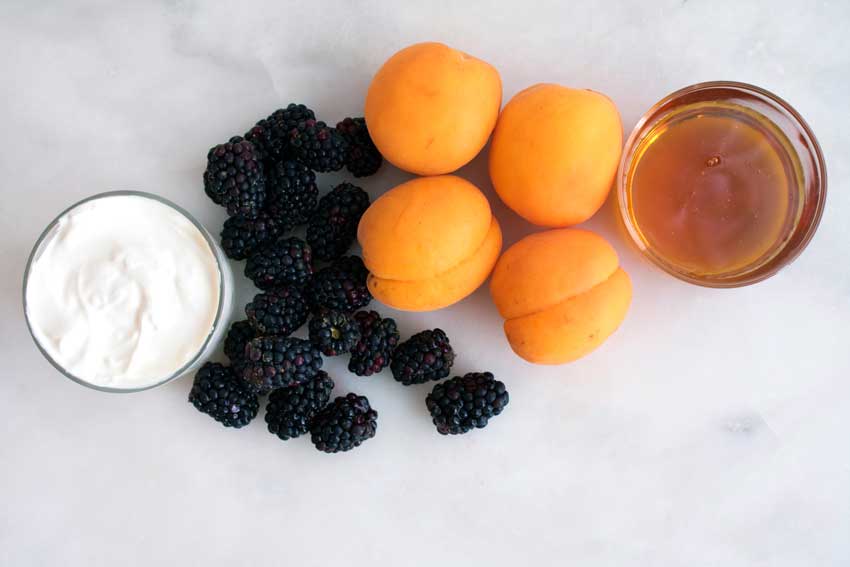
Roasted Apricots With Mascarpone and Blackberries Ingredients
Mascarpone cheese, blackberries, apricots, and honey

The Process

First things first. I have never pitted an apricot, so I found a quick how-to video. It was much quicker and easier than I thought it would be. I was tempted to also peel the apricots, but I decided against it. Their peels are so thin, and the original post didn’t mention peeling them.

Then I placed the halves on a greased broiler pan and filled each with 1 measured tablespoon of mascarpone cheese. After that, I topped them with a whole blackberry and generously drizzled each with honey.

Before roasting
Before roasting

Once the prep work was complete, it was into the oven (I had been preheating my broiler on high while prepping the apricots). I also had the rack on the second-highest level since I wasn’t sure the highest level would allow enough clearance for the pan and filled apricots. I think it would have, but I was playing it safe.

Since no time was given by the author, I kept a close eye on things. The cheese melted pretty quickly, as you can see below, but it didn’t begin to char until the 4-minute mark. That’s when I took them out of the oven–I didn’t want to risk all of the cheese and honey melting away.

Roasting the apricots
Roasting the apricots. This is after 2 minutes under the broiler.

And there you have it. Lovely roasted apricots in just under 10 minutes. They were a tad bit messier than the author’s pics but they tasted soooo good!

In case you’re like me, I’m including a printable version of this recipe below. I just feel better when I have a reference, even with simple recipes.

Roasted Apricots With Mascarpone and Blackberries

Roasted Apricots With Mascarpone and Blackberries

The post that inspired this recipe didn't have a formal recipe. This is a printable version of how I did it.
Prep Time 5 minutes
Cook Time 4 minutes
Course Dessert
Cuisine Italian
Servings 4

Ingredients
  

  • 4 apricots unpeeled, halved and pitted
  • 8 blackberries
  • 8 tbsp mascarpone cheese (I used an 8-ounce container)
  • honey or agave syrup
  • chopped pistachios to garnish (optional)

Instructions
 

  • Place oven rack on the highest level that will allow room for the pan and filled apricots (I used the second-highest). Preheat broiler to high.
  • Spray an oven-proof broiler pan or cookie sheet with non-stick spray and set aside.
  • Halve and pit the apricots. Place the pitted halves on the greased pan.
  • Add 1 tablespoon of mascarpone cheese to each apricot half. Then top with a blackberry, gently pressing it into the cheese so it doesn't roll off. Drizzle each apricot generously with honey or agave syrup.
  • Broil the apricots for approximately 4 minutes, until the cheese has begun to char.
  • Remove from the oven, sprinkle with optional chopped pistachios, and allow to cool slightly before enjoying.

Notes

Recipe inspired by a post from Marie at Proud Italian Cook.


Catalan Lamb Chops with Apricots and Sage

I’ve had my eye on this Catalan Lamb Chops with Apricots and Sage recipe for a while. Lamb is a favorite of mine, and I don’t get to eat it very often. My husband doesn’t like lamb, and marriage is about compromise. Well, that and I just can’t be mean and make him something he hates. But that doesn’t mean I have to make food he likes for my weekday lunches. So this week I decided to treat myself and give this recipe a try just because. Lamb chops braised in a sauce made with apricots, rosemary, and sage sounded too good to pass up. Literally no other reason than that.

These beautifully seasoned, fork-tender shoulder lamb chops are simmered in a heady sauce redolent of vermouth, apricots, sage, tomatoes, and cinnamon. It was inspired by a dish from Spain’s Mediterranean coast. The aromatic combination of ingredients harkens back to the Moorish culture that imparted many lush flavors to the international stew pot. Serve the chops on a bed of wide noodles or mashed potatoes.

Recipe Author: More Than Gourmet
Get the recipe

The Ingredients

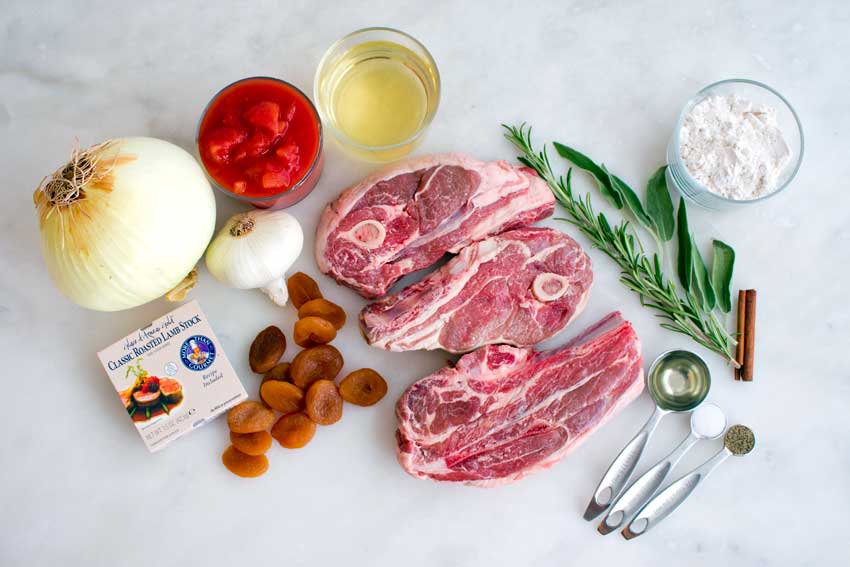
The list of ingredients for these Catalan lamb chops wasn’t too long, and most of the items were easy to find. I had a few things on hand like flour, salt, and pepper, but I had to buy most of the ingredients.

I ordered my groceries online this week, and Whole Foods decided to send me the biggest onion I have ever seen. It was the size of a grapefruit! The recipe calls for a large onion, but this was way beyond that, so I only used half.

The only item I couldn’t find locally was the Glace d'Agneau Gold® Roasted Lamb Stock. Publix and Whole Foods don’t stock lamb stock at all, so I had to order it from Amazon. Thankfully, they had it for just over $5 and delivered it the next day.

Catalan Lamb Chops with Apricots Ingredients
Lamb shoulder chops, dried apricots, lamb stock, onions, garlic, diced tomatoes, dry vermouth, flour, rosemary, sage, cinnamon stick, vegetable oil, salt, and pepper

The Process

The instructions for this recipe were well written and easy to follow. I had my Catalan lamb chops prepped in 20 minutes (that includes everything from steps 1-2). However, there were a couple of things that weren’t explicitly listed.

I wasn’t sure of was how much flour to use in step 1. The instructions say to coat the lamb chops in flour, but an exact amount of flour wasn’t listed. I added 1/4 cup to a large plastic bag (gallon size) and shook each lamb chop until coated. That worked nicely.

The instructions also say to brown the lamb chops, but times weren’t listed. I chose to brown each side for 3 minutes. The meat was a golden brown, but the bone did blacken a bit where it touched the pan. I think I could have reduced the heat a bit, but it didn’t affect the taste.

Other than that, making these Catalan lamb chops went very smoothly. I baked the chops for 1 1/2 hours in my 12-inch cast iron pan, and the meat was falling off the bone when I removed them from the pan. The sauce was a bit thin for my liking, so I boiled it on the stove for 6 minutes while the lamb rested.

Here is how long it took to make this recipe:

  • 20 minutes to prep
  • 90 minutes to cook
  • 6 minutes to thicken the sauce
  • 1 hour 56 minutes total
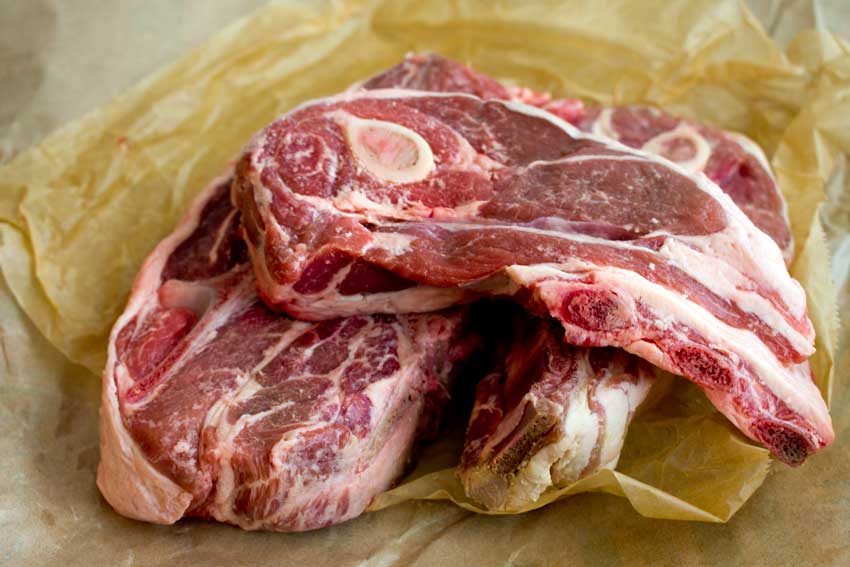
Lamb shoulder chops
Lamb shoulder chops

Chocolate Raspberry Cake

I usually have a theme each week for the recipes I blog, but not this week. I wanted to make a dessert, and there just isn’t one that fits with the Chimichurri Chicken Green Beans Skillet I just made. Chicken, green beans, and chimichurri sauce are delicious, just not for dessert. Not having a theme meant I could choose any dessert I wanted, and I decided on this Chocolate Raspberry Cake recipe. It’s been a while since I’ve made a cake, and I’m thinking summer berries and chocolate sound like a decadent combo.

This Triple Layer Chocolate Raspberry Cake is a SHOWSTOPPER! This recipe features three layers of moist raspberry chocolate cake, raspberry preserves, and rich chocolate frosting. Top with fresh raspberries for an extra lovely presentation.

Recipe Author: Ashley at Baker by Nature
Get the recipe

The Ingredients

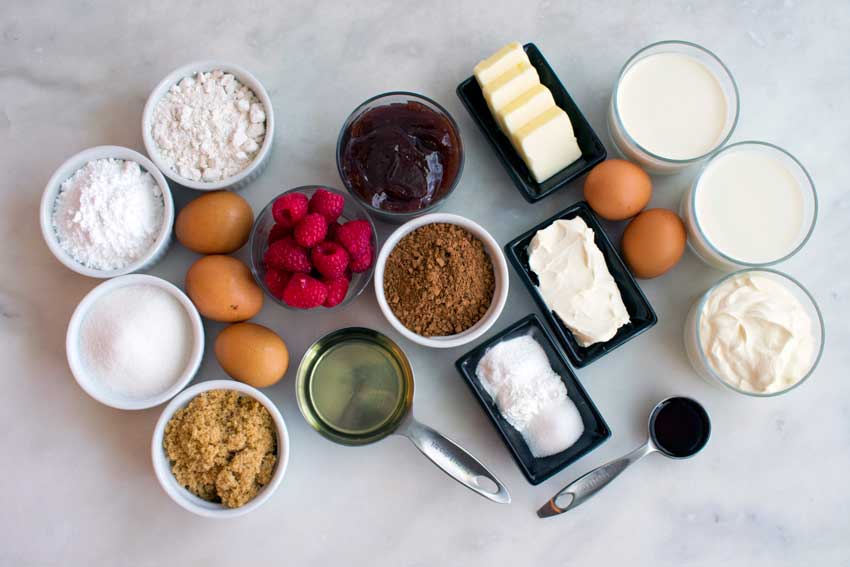
Since the cake and frosting are made from scratch, this recipe had quite a few ingredients. I had a few on hand, but I needed to top up the sugars, cocoa powder, and vanilla extract. I also had to buy the raspberries (fresh for garnish and frozen for the cake), raspberry preserves, eggs, dairy products. That put my grocery bill for this recipe at just over $46.

I know, I know, that’s an expensive cake, but I did have leftovers of several of the ingredients I bought: granulated and confectioners’ sugar, milk, cream, butter, eggs, vanilla extract, cocoa powder, and fresh raspberries.

The items I used up entirely were the frozen raspberries (12-ounce bag), sour cream (16-ounce tub), cream cheese (8-ounce block), and raspberry preserves (9.5-ounce jar). And I think I would have used an entire 8-ounce container of the cocoa powder if I didn’t have some on hand already (I had half a container on hand, bought another, and used half of that).

Chocolate Raspberry Cake Ingredients
Cocoa powder, raspberries, eggs, brown sugar, sugar, powdered sugar, flour, seedless raspberry preserves, butter, heavy cream, milk, sour cream, vanilla extract cream cheese, baking soda, baking powder, salt, and vegetable oil

The Process

This recipe broke down into several parts:

  • Making the cakes and frosting (1 hour 3 minutes)
  • Cooling the cakes (40 minutes)
  • Leveling, frosting and assembling the layers (9 minutes)
  • Chilling the assembled cake (30 minutes)
  • Frosting the top and outside of the assembled cake (5 minutes)

My total time was 1 hour 57 minutes, a good bit faster than the 3 hours 16 minutes listed. After I removed them from the pans, I chilled the cakes in my refrigerator for 30 minutes, and that saved me a ton of time. Also, my cake pans are easy release, so I didn’t need to line them with parchment paper.

This recipe wasn’t without some difficulties, though, but they were my fault. My cake pans are 8-inches, and the recipe clearly says to use 9-inch pans. I wrongly assumed I had the correct size, filled them nearly to the top because I had a lot of cake batter, and they overflowed. That created smoke and a lovely burnt smell that lasted for days. Ugh! It also added 20 minutes to the baking time because the cakes were so thick. The smaller pans would have worked better if I hadn’t overfilled them. I found out too late that 3/4 full is the rule of thumb.

Other than that hiccup, things went pretty smoothly. I remembered to drape a tea towel over my stand mixer when I mixed the powdered ingredients, and that cut down on the usual dust. Mixing flour and powdered sugar is so messy if you don’t have a built-in cover!

Tip: Does your cake stand have a cover? Mine doesn’t so I used my largest mixing bowl to cover the cake (6 quarts). It was much neater and more effective than plastic wrap or aluminum foil since it didn’t touch the cake and stick to the frosting 🙂

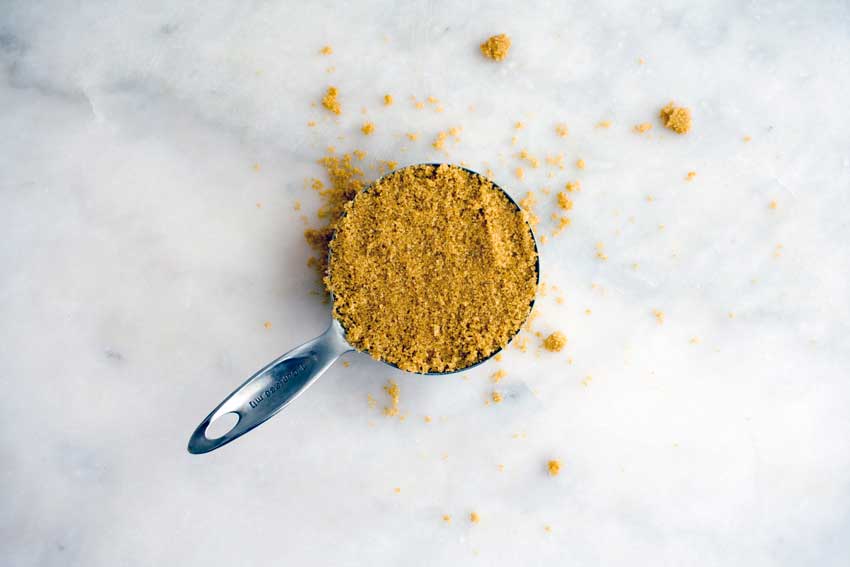
Packed brown sugar
Packed brown sugar

Chimichurri Chicken Green Beans Skillet

I’ve given up on my dream of summertime grilling, and I’m sticking to recipes I can make indoors. I still want to keep to a summery menu though, and this Chimichurri Chicken Green Beans Skillet seems like a great compromise. I associate chimichurri with grilling steaks, so having it with chicken will be new for me. I’m honestly wondering why I never thought to pair the two before. Chicken breasts can get boring, but there’s nothing boring about chimichurri. Plus adding green beans makes this a complete meal, and I love these types of recipes!

I cannot express with words how much my family and I loved this Chimichurri Chicken Green Beans Skillet. It’s far from boring and this sauce is just heaven. Great dish for weeknight dinners!

Recipe Author: Olivia at Primavera Kitchen
Get the recipe

The Ingredients

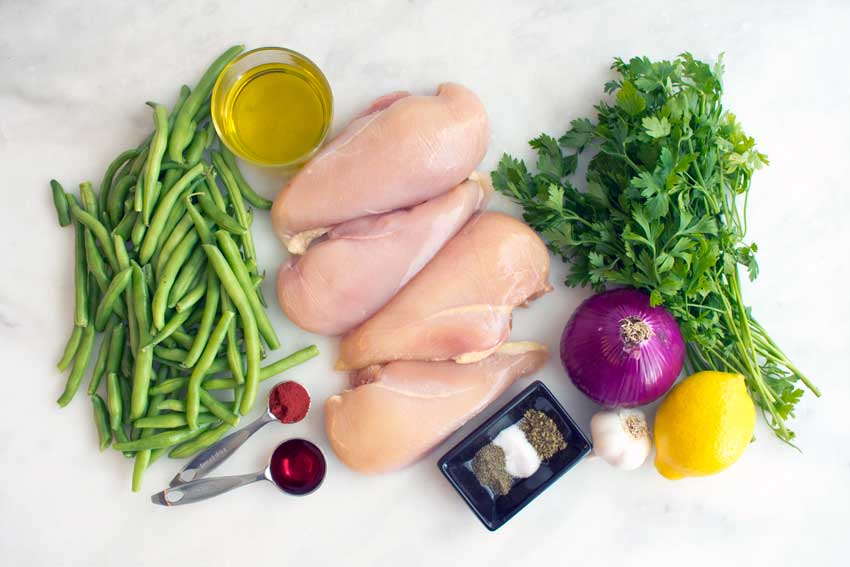
The list of ingredients for this recipe was medium length, and I had a few of the staples in my pantry (oil, vinegar, and spices). That left me to shop for the meat and produce, but none of it was unusual or hard to find at my regular grocery store.

Chimichurri Chicken Green Beans Skillet Ingredients
Green beans, extra virgin olive oil, paprika, red wine vinegar, chicken breasts, parsley, red onion, lemon juice, garlic, oregano, salt, and pepper

The Process

Although this is a skillet meal, I did need two pans to make it–a large pot to boil the green beans and my 12-inch cast-iron skillet.

I started by making the chimichurri sauce while the water for the green beans was heating. My first instinct was to make it in my mini-prep, but I wasn’t sure it would be big enough. I ended up using my food processor, but I think the mini-prep would have worked.

The water was boiling by the time the chimichurri was done, and I boiled the green beans for 5 minutes (I like them on the well-done side). That gave me plenty of time to season the chicken breasts so they would be ready to pan fry.

The green beans were pretty close to done after boiling for 5 minutes, so I only fried them in the skillet for 3 minutes. After removing them from the pan, I fried the chicken breasts for 4 minutes per side.

Here is how my time was spent making this recipe:

  • 15 minutes to prep
  • 17 minutes to cook
  • 32 minutes total

Although this was a quick meal, the recipe listed a total time of 20 minutes, so this went over by 12 minutes. Also, the chicken breasts were nicely seared on the outside, but I found out when I cut into the thicker part that they weren’t fully cooked. The instructions did say 3-4 minutes per side or until cooked through, so that was my fault for not checking (shoulda used my meat thermometer!).

Pounding them thinner with a meat mallet before cooking might have made the 8 minutes enough. As they were, I’d estimate an extra 5-10 minutes would have cooked them through.

Seasoning the chicken breasts

Easy Sparkling Blueberry Lemonade

It’s another hot summer, and I’m craving lemonade. There’s just something about that sweet, tart, deliciously cold drink that screams summer. I’ve tried a few lemonade recipes, and they all have involved adding some type of herb–rosemary, mint, and even lavender. This time I wanted to try something a little different. Easy Sparkling Blueberry Lemonade sounds like just the ‘little different’ that I need. Blueberry and lemon is a wonderful combination, so making it into lemonade just has to be good. And there’s only one way to find out… Let’s make it!

Easy and delicious sparkling blueberry lemonade. The perfect cool down summer drink!

Recipe Author: Chelsea at Chelsea’s Messy Apron
Get the recipe

The Ingredients

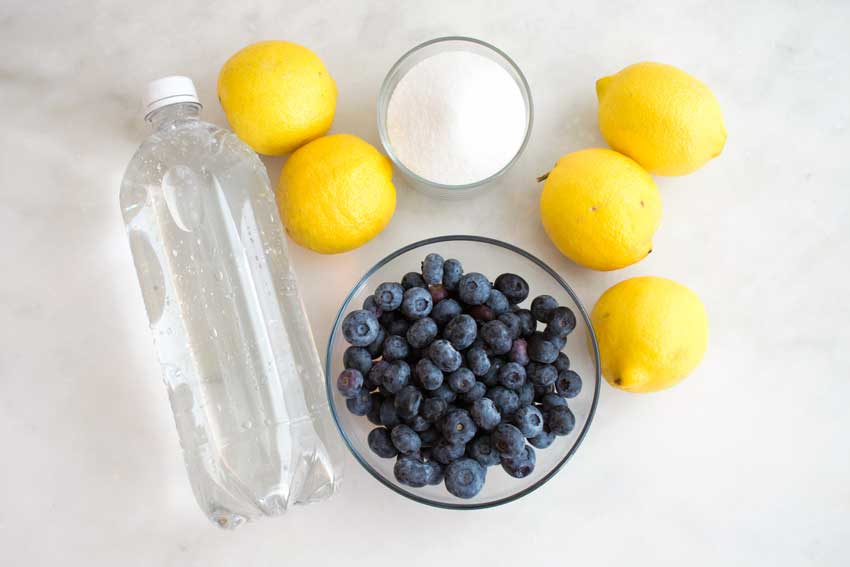
Since the recipe has the word easy in the title, it’s no surprise that there are only a handful of ingredients. I had the sparkling water and sugar (and the ice and water, of course!) on hand, so I only had to shop for 2 ingredients.

The blueberries were the priciest item of the bunch at $4, and the lemons were just under $4. I also bought some fresh mint to garnish my blueberry lemonade. It was just over $2 and completely optional. I just wanted to make my lemonade look pretty for photos ?

Easy Sparkling Blueberry Lemonade Ingredients
Lemons, blueberries, sparkling water, and sugar

The Process

Making this blueberry lemonade recipe was simple, but it took a bit longer than the 10 minutes listed:

  • 14 minutes to prep
  • 2 hours to chill*
  • 1 minute to mix
  • 2 hours 15 minutes total

*I’m assuming the time listed didn’t include chilling the blueberry syrup, so I’m using 15 minutes as my time for comparison.

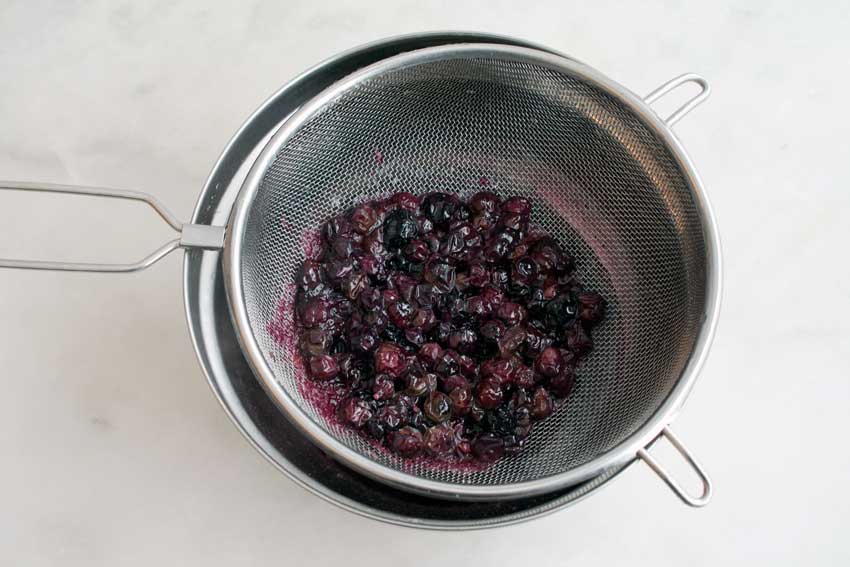
The 14 minutes of prep time includes typical prep work (zesting the lemon, measuring the other ingredients, etc.), simmering the blueberry syrup for 7 minutes, and straining the syrup after. I was also able to juice the lemons while the blueberries were on the stove.

That was the bulk of the work. The rest was chilling the blueberry syrup and mixing everything together. I knew I wouldn’t drink all of the lemonade in a day, so I didn’t mix it all in a pitcher.

Instead, I mixed the lemon juice with the syrup and made individual glasses. This recipe made a touch over 2 cups of syrup, and the ratio I used was 2 parts sparkling water to 1 part syrup mixture. I got all mathematical and worked out the ratio based on the amount of syrup versus 1 liter (4.25 cups) of sparkling water.

Straining the blueberry syrup

Loaded Lemon Artichoke Orzo Soup

I have been in the mood for soup ever since I recently tried Slow Cooker Pork and Black Bean Soup, but I wanted to try something completely different. I’ve had my eye on this Loaded Lemon Artichoke Orzo Soup recipe for a while, and this seemed like the perfect time to try it since the weather is still not cooperating for grilling. I love lemon anything, and the addition of pasta was a bonus. The fact that it’s vegan was even more of an incentive to give it a try as I’m always trying to add more vegetables to my diet. So let’s find out if this vegan soup is as light and delicious as it looks!

This nourishing vegan lemon orzo soup is fully loaded with the addition of artichokes, mushrooms, and great northern beans. It’s wholesome, nourishing, comfort food! Vegan, soy-free, nut-free, dairy-free.

Recipe Author: Stacey Eckert at Stacey Homemaker
Get the recipe

The Ingredients

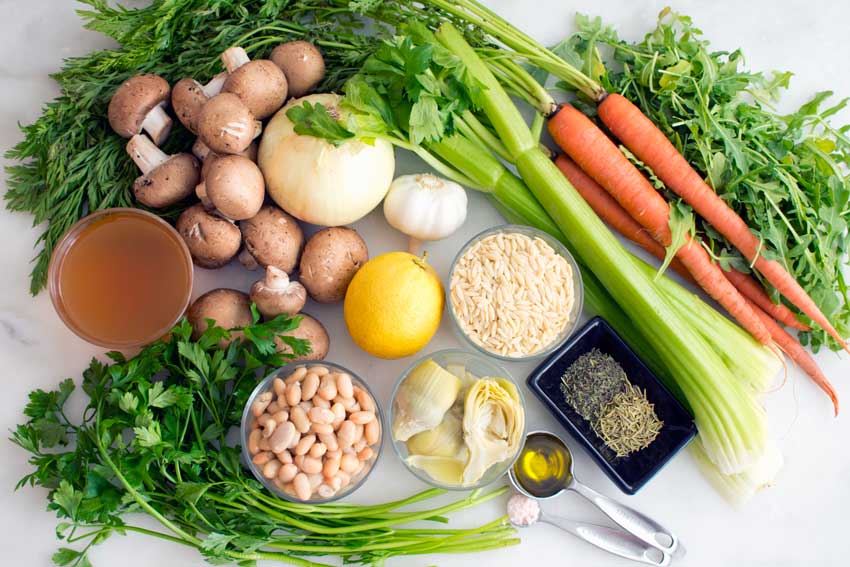
Loaded is definitely an accurate description of this soup! The list of ingredients is on the long side, but I was totally okay with that after I read through all the goodness that goes into this recipe. It’s packed with vegetables like celery, carrots, mushrooms, artichoke hearts, and arugula. I like to cook with fresh ingredients as much as possible, and I was happy to see all the fresh vegetables in the ingredients.

Most everything was stocked at my usual grocery store and reasonably priced (no splurgy items in this recipe at all). The only thing I couldn’t find was the whole wheat orzo. I had regular orzo in my pantry, so I went with that instead of ordering it. Quite frankly, the online prices seemed too high to me.

Loaded Lemon Artichoke Orzo Soup Ingredients
Orzo, lemon, artichoke hearts, great northern beans, flat leaf parsley, vegetable broth, cremini mushrooms, onion, garlic, celery, carrots, thyme, rosemary, olive oil, and Himalayan salt

The Process

Let’s start with the times. My soup took a bit longer than the 30 minutes listed, and I chalk that up to all the vegetables. There was a lot of chopping and slicing to be done, but it’s all core cooking skills and no fancy techniques (whew!). Here is how my time broke down:

  • 15 minutes to prep
  • 26 minutes to cook
  • 41 minutes total

I didn’t do all the prep work at once, though. Instead, I started with boiling the water for the orzo and cutting up the carrots, celery, onion, and mushrooms. I used a 5-quart pot for the soup and a smaller saucepan for the orzo.

Once they were cooking, I moved on to the other ingredients in the order they were needed. I try to do this as much as possible as it cuts down on time. Everything went smoothly, and I didn’t have any questions or doubts about what to do at each step.

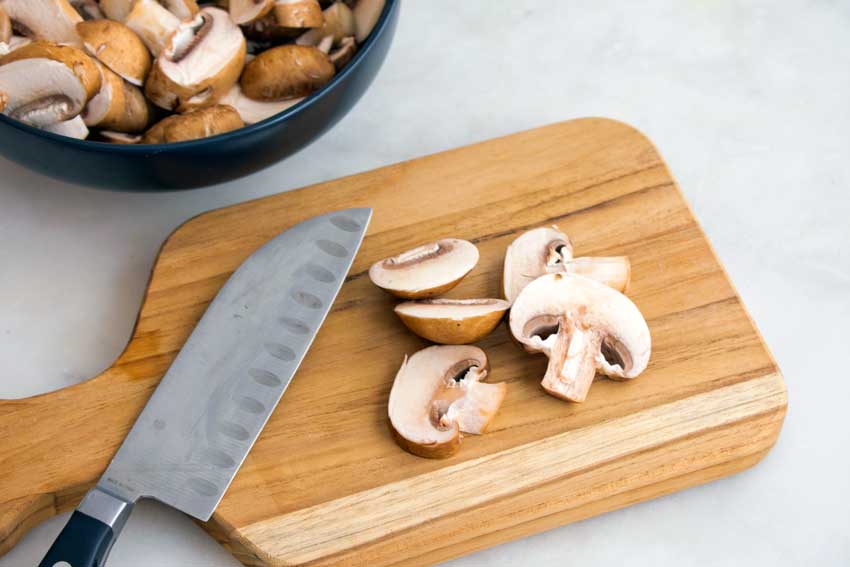
Slicing the cremini mushrooms

Tahini Caesar Salad with Olive Oil Breadcrumbs

Caesar salad is probably my favorite salad. In fact, I think it just edges out my second favorite Greek salad. Just slightly though. But unlike Greek salad, Caesar salad isn’t something I ever make at home. I don’t know why not, but I think I associate it with going out to eat. No matter the type of restaurant, I never pass up a Caesar salad if it’s on the menu. That’s why I was drawn to this Tahini Caesar Salad with Olive Oil Breadcrumbs recipe as soon as I saw it. Even though I’ve never made it, I know Caesar dressing doesn’t typically have tahini in it. That piqued my interest, and I decided to try it. I figured I’d really love it or completely hate it, and I needed to know which. Let’s find out!

Tahini caesar salad is a healthy vegetarian version a classic Caesar salad, with a tahini and lemon-based dressing and crunchy homemade breadcrumbs.

Recipe Author: Karen at Familystyle Food
Get the recipe

The Ingredients

I’m sure it’s no surprise that since this is a salad recipe, it’s full of fresh ingredients I needed to shop for. The individual items weren’t pricey, but they did add up. I spent just over $17 for everything:

  • $5 on dairy (yogurt and parmesan cheese)
  • $7 on produce (romaine lettuce X 3 and a lemon)
  • $5.50 on a loaf of fresh sourdough from the bakery

That might sound like a lot for a salad, but there were plenty of leftovers. Here are some ideas on how to put the extra perishables to use:

I had tahini on hand, but I have trouble finding it locally. Instead, I order it from Amazon. It keeps very well in the refrigerator, but you will need to give it a good stir before using as it separates.

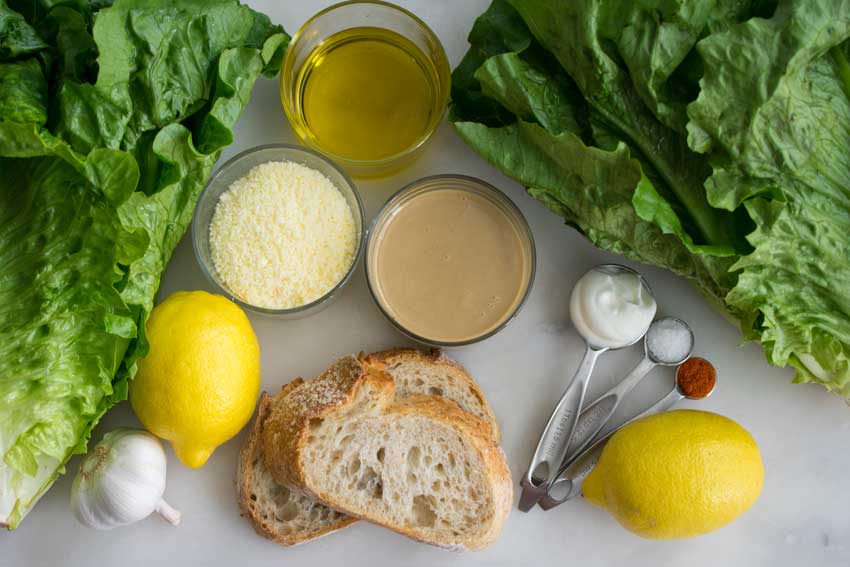
Tahini Caesar Salad with Olive Oil Breadcrumbs Ingredients
Romaine lettuce, garlic, lemons, grated parmesan cheese, extra virgin olive oil, tahini, sea salt, cayenne pepper, and sourdough bread

The Process

The instructions for this recipe were well written and easy to follow, leaving me without any questions or doubts on how to get everything done.

It was also quicker than the 35 minutes listed, and I had my Caesar salad ready in just 23 minutes. Once I had the bread in the toaster oven (I didn’t want to turn on my big oven just for 2 slices of bread), worked on the dressing and lettuce. They were ready before the bread was done, and I even had time to wash up a bit.

One little drawback was there were a lot of dishes to wash, at least for a salad. I used my mini-prep to mix up the salad dressing and my food processor to make the breadcrumbs. The miniprep would have been too small for the breadcrumbs, and I didn’t want them to get soggy by using the food processor to make the dressing first.

Making the breadcrumbs first would solve the problem, but that would mean waiting for them to bake before making the salad dressing. The recipe would take a little longer, but you would have fewer dishes to wash.

Sourdough bread cubes toasted in olive oil

Oven Roasted Pork Tenderloin with Mustard, Garlic and Herbs

This summer has been really hot, and really rainy. The first is par for the course here in Fort Lauderdale, but I’m convinced the second is just to keep me from grilling. It’s a conspiracy, I tell you! So this week’s recipe is one I’ve wanted to try for a while, Oven Roasted Pork Tenderloin with Mustard, Garlic and Herbs. Pork tenderloin is nice and lean, and I think it’s still light enough to work for a summer menu. And although it can be grilled, this recipe is made indoors in the oven. Take that summer rain!

Oven Roasted Pork Tenderloin with Mustard, Garlic and Herbs is baked to perfection and is low in carbs and calories! Only 1 gram of carbs and 246 calories per serving – cannot beat that! This is a quick, healthy and easy way to prepare the best pork tenderloin.

Recipe Author: Olga at What’s In the Pan
Get the recipe

The Ingredients

There are only a few ingredients in this recipe, and they were all either in my pantry or easy to find at my local grocery store. In fact, all I had to shop for was the pork tenderloin.

So, it was off to the store only to find that all the pork tenderloins they had were way more than I needed. I settled on one that was just over 2 pounds for about $15, figuring I would have to increase the cooking time.

It’s been a  while since I have bought a pork tenderloin, and I forgot that they often come 2 to a pack. Score! I decided to cook one and freeze the other. It never hurts to have an extra on hand in case something goes horribly wrong. Nothing did go wrong this time, but I’m sure I’ll find another delicious recipe to use it in.

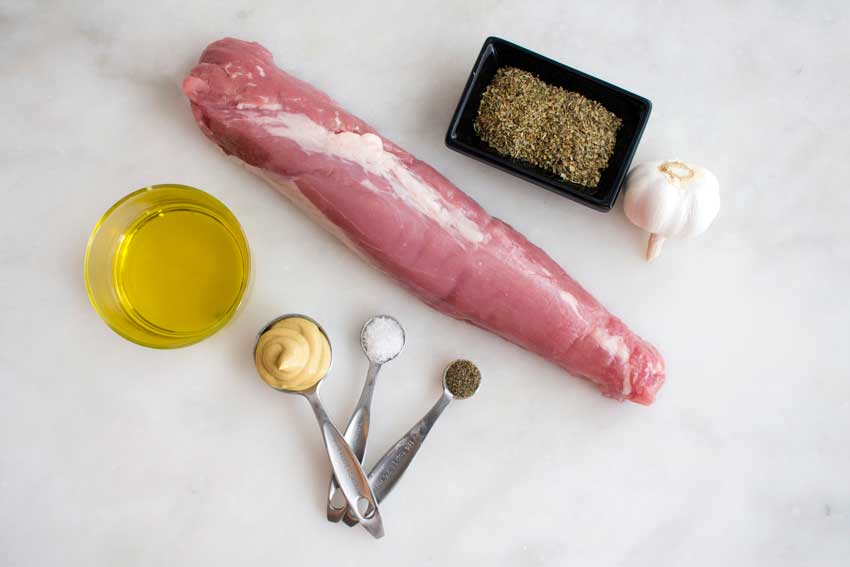
Oven Roasted Pork Tenderloin with Mustard, Garlic and Herbs Ingredients
Pork tenderloin, olive oil, Italian seasoning, garlic, pepper, salt, and Dijon mustard

The Process

I’m pleased to say this recipe was super easy to make. I had it prepped and in the oven in 5 minutes. Well, I had to wait a few minutes for the oven to finish preheating because the prep work was so quick. That time isn’t included in my total, by the way.

The prep work was just putting the pork into a pan and coating it with mustard and herbs. I’m sure you could manage to get the mustard and herb mixture onto the pork without a pastry brush, but it makes it so much cleaner and easier.

Then I stuck the tenderloin with a meat thermometer and put it into the oven for 30 minutes. It was 147 degrees when the timer went off, but the outside hadn’t browned. I had to put it under the broiler for 4 minutes to do that.

The prep work was 5 minutes faster than the time listed on the recipe, so taking the time to brown the pork under the broiler didn’t add to the total time. I had the pork tenderloin ready a minute under the time listed:

  • 5 minutes to prep
  • 30 minutes to roast
  • 4 minutes to broil*
  • 39 minutes total

The recipe’s time didn’t include the extra 5 minutes for the pork to stand after coming out of the oven, so I didn’t include it above.

*Do not broil if you use a glass or Pyrex pan as it can shatter under high heat.

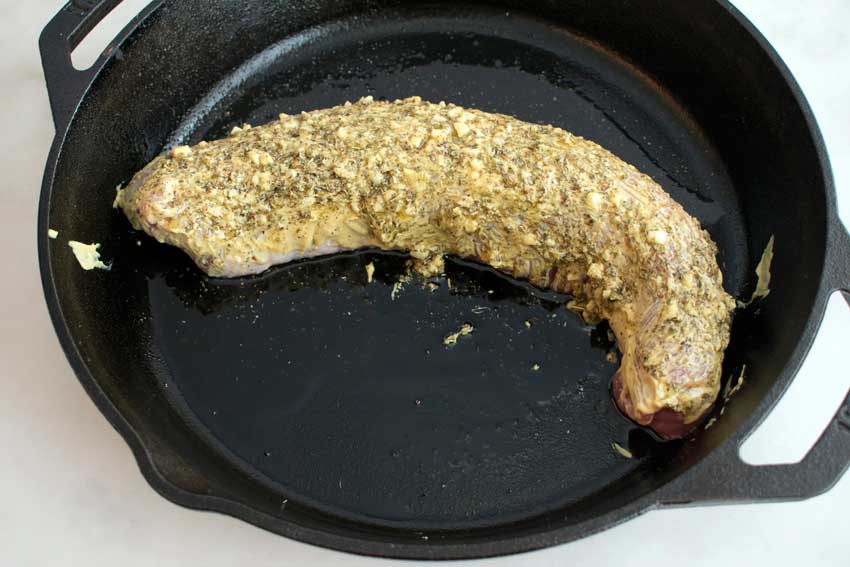
Pork tenderlion coated in Dijon mustard and herb mixture
Pork tenderloin coated in Dijon mustard and herb mixture

Mexican Watermelon Salad

This week’s second post was inspired by two things: summer and the Mexican-style Slow Cooker Pork and Black Bean Soup I just made. Watermelon might as well be the official summertime fruit as far as I’m concerned. I don’t know about you, but I can’t think of a better, healthier treat than watermelon straight out of the refrigerator on a hot day. It’s so sweet and juicy, and the best way to cool off that doesn’t require putting on a bathing suit. This version of watermelon salad adds something new for me—jicama—and I’m really psyched to try it.

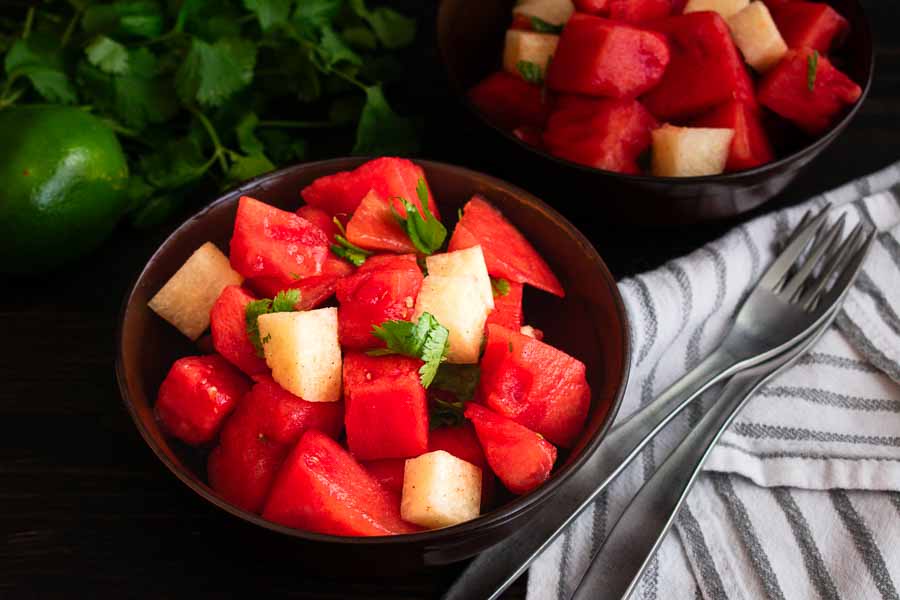
Today I am sharing a new recipe for inspiration. My first instinct was to mix it up with some Mexican flavors, and I’ve gotta say – it turned out really good! Who knew that you could get crunchy, sweet, salty, slightly spicy, and sour all in one dish? Enjoy!

Recipe Author: Kiran Dodeja Smith at 100 Days of Real Food
Get the recipe

The Ingredients

With only six ingredients, I didn’t have a long grocery list. Well, actually our ingredients since I had the salt and chili powder already. I got everything needed for just over $10.

The jicama was a little tricky. I ordered my groceries from Whole Foods this week and chose 1 pound for the jicama. I ended up with one very small jicama (about the size of my fist) that wasn’t enough for this recipe. Apparently, it’s very dense and therefore quite heavy. Mr. Pinner was gracious enough to venture out to our local Publix and find me another, much larger jicama. Half of it was enough for the salad.

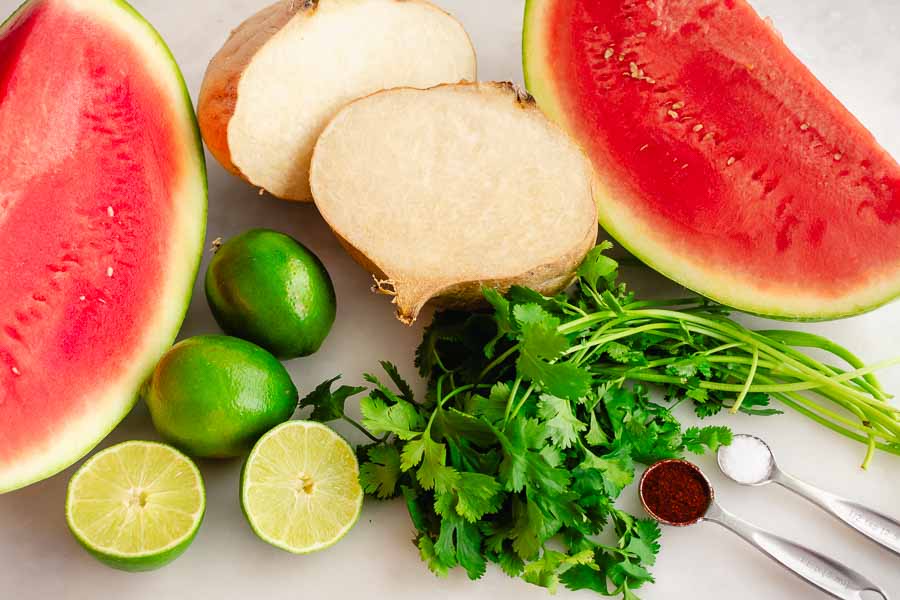
Mexican Watermelon Salad Ingredients
Watermelon, jicama, cilantro, lime, chili powder, and salt

The Process

First up was cutting up the watermelon. It looked like it would take forever, so I went straight to YouTube to see if I could find a better way. Spoiler: I did! This beautiful fruit salad was ready in just 13 minutes thanks to this tutorial titled How to Cube a Watermelon in Record Time.

Next up was the jicama, and I really wish I had checked YouTube for a tutorial on how to peel it. The skin is thick and tough, and my vegetable peeler was no match for it. I ended up using a paring knife and slicing off more of the fleshy white interior than needed. No harm done since the root was huge, but there is an easier way to peel jicama.

The hard work was done! All that was left was chopping the cilantro and mixing the rest of the ingredients to make a dressing of sorts.

Mexican Watermelon Salad Process

Slow Cooker Pork and Black Bean Soup

I really wanted to grill more this week, but it’s been so rainy lately that I’ve been stuck inside. No grilling, but I can still keep with my summer theme, right? Soup seemed like a good idea, and I settled on this Slow Cooker Pork and Black Bean Soup recipe. I do love to use my crockpot! This recipe sounds like it is light enough for the hot weather while being substantial enough to be the main course. To the grocery store!

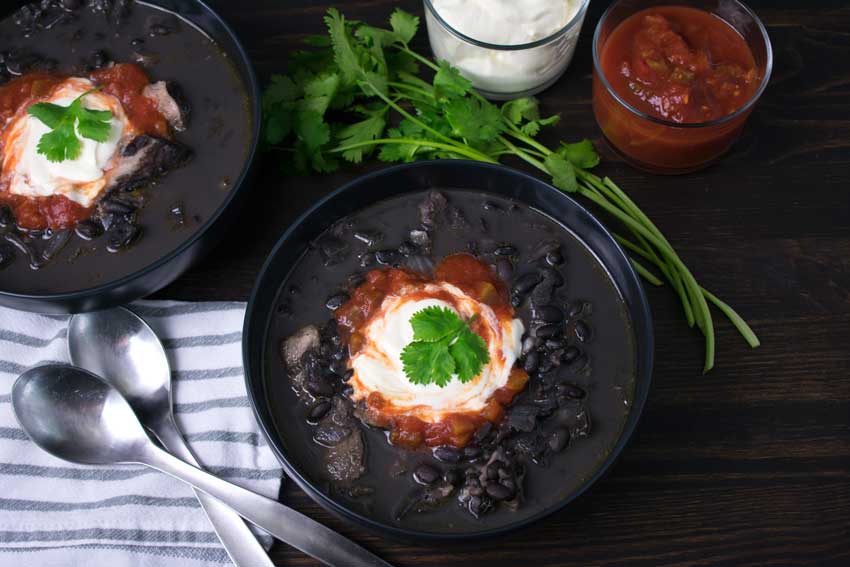
The combination of chipotle chiles and adobo sauce adds a smoky kick to this thick, no-fuss soup. If you want to cut down on the heat, skip the chopped chiles and just use the adobo sauce.

Recipe Author: Woman’s Day Kitchen
Get the recipe

The Ingredients

There weren’t too many ingredients in this recipe, and nothing was unusually expensive. The pork shoulder I found wasn’t boneless, so I bought one that was just over two pounds to compensate.

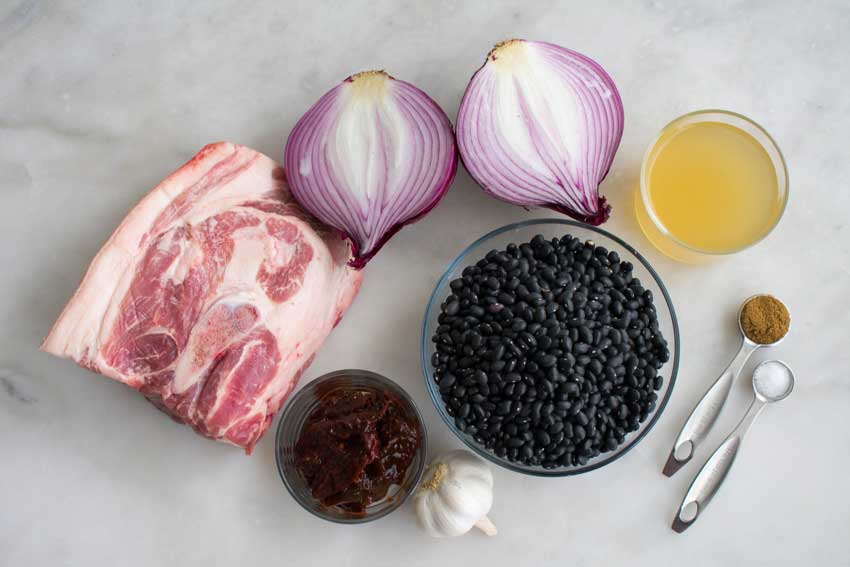
Slow Cooker Pork and Black Bean Soup Ingredients
Black beans, garlic, chipotle peppers in adobo sauce, pork shoulder, red onion, chicken broth, cumin, and salt

The Process

This recipe sounded easy and it was. Unfortunately, I had to make it twice due to technical difficulties. Let me explain.

The Frist Try

Simple instructions, easy prep work, and I had my black bean soup cooking in my crockpot after just 8 minutes. Since I had to have time to photograph the soup before dinner, I chose to cook it on high because it was faster.

After 5.5 hours on high, I took the pork shoulder out to shred, and it wasn’t fall-apart tender like slow-cooked meat normally is. It wasn’t under- or over-cooked, but I did have to work a little to cut it off the bone. It wasn’t too bad, though, and I had it back into the crockpot with the pureed soup in 5 minutes.

Now for the technical difficulties. First, the beans were undercooked. I took a small bite, “yucked”, and put the lid back onto the pot. Maybe the fact that the pork wasn’t boneless caused the problem? I’m really not sure.

At any rate, I was exhausted by this time and asked my husband to put the soup into the refrigerator after it cooled a bit. I headed to bed thinking I’d cook it more the next day and re-sample it. Well, it didn’t make it to the refrigerator, and I had to dump it the next day.

The Second Try

This time I had to hunt for a pork shoulder. Publix didn’t have it, but Winn Dixie had a pork butt that looked like it would work. It was way more than I needed (over 4 pounds), but I was able to cut off a 1.5-ish pound piece and freeze the rest. Oh, and apparently pork shoulder and pork butt are the same things. I don’t get it, but I’m not questioning it.

This time I woke up early enough to cook my black bean soup on low for the full 8 hours, and it was a completely different result. The pork fell apart as I was taking it out to shred, and the beans were cooked perfectly. There was no yuck reaction when I tried it–it was delicious!

My first try at this recipe

Lemon Thyme Gin Spritz

After that incredible Lemon and Oregano Grilled Chicken, I felt the need to try a refreshing lemon beverage recipe. This Lemon Thyme Gin Spritz fit my lemon theme perfectly–it even helped me use the thyme leftover from the chicken. Perfect! Oh, and have I mentioned that I love gin? You might have noticed that if you’ve been reading my blog for a while. But in case you missed it or are new here, I’m a big fan of gin. That may or may not have influenced my willingness to try this recipe…

Crisp and bright with a subtle herbaceous sweetness, Lemon Thyme Gin Spritz cocktails are perfectly refreshing!

Recipe Author: Lauren at Hunger Thirst Play
Get the recipe

The Ingredients

I had a bottle of Martin Miller’s gin leftover from the Strawberry Black Pepper Gin and Tonic recipe I tried a while back, so no need to make a trip to the liquor store. And as I already mentioned, I had thyme leftover from the chicken recipe I just made. Really, all I had to buy for this recipe was extra lemons. Another short grocery list and I’m not mad about it.

Lemon Thyme Gin Fizz Ingredients
Gin, lemons, thyme, sugar, and club soda

The Process

I have a split cooking personality. Part of me loves super easy recipes, and the other part appreciates complex recipes. It really depends on how much energy I have as to which cooking personality is out. This Lemon Thyme Gin Spritz happens to be a nice in-between option. It’s just a little more complex than the average cocktail in that it requires making a thyme-infused simple syrup.

The syrup was easy to make, especially since the thyme leaves don’t need to be stripped from the stems and chopped. Just throw them into the saucepan whole and let them steep. Another thing I liked about this recipe was it makes exactly the amount of simple syrup required. There’s no extra leftover which is a plus if you don’t like it.

It took me 18 minutes to make the simple syrup. I wasn’t ready to make my cocktails when it was finished, so I put it into the refrigerator to chill. The instructions don’t say that’s needed, so I assume you could use it right away if you wanted to. The actual cocktail took me just 3 minutes to mix, pour, and garnish. Total time on this recipe was 21 minutes.

Lemon and Oregano Grilled Chicken

After last week’s mango-themed menu, I feel like my summer menu is back on track. And this week it will stay on track! I found this recipe for Lemon and Oregano Grilled Chicken, and it pretty much begged me to make it. What’s better for summertime grilling than marinated chicken? But my need to try something new wouldn’t shut up, so I’m trying a grilled spatchcocked chicken. Spatchcocking is just removing the backbone and pressing the chicken flat so it cooks faster. I’ve done it in the oven many times, but this will be the first time I’ve ever tried grilling. I’m hoping it’s not too difficult to transfer from the pan to the grill and flip. Let’s find out if it is!

This lemon chicken recipe will bring a zing to meal time!

Recipe Author: Tieghan at Half Baked Harvest
Get the recipe

The Ingredients

Obviously, every recipe starts with gathering or buying the ingredients, and this grilled chicken didn’t have too many. I had the oil, vinegar, and dried spices on hand, so that left the fresh herbs and chicken to shop for. My local grocery store had them all in stock, and they weren’t expensive at all. I got everything needed in one trip for about $15.

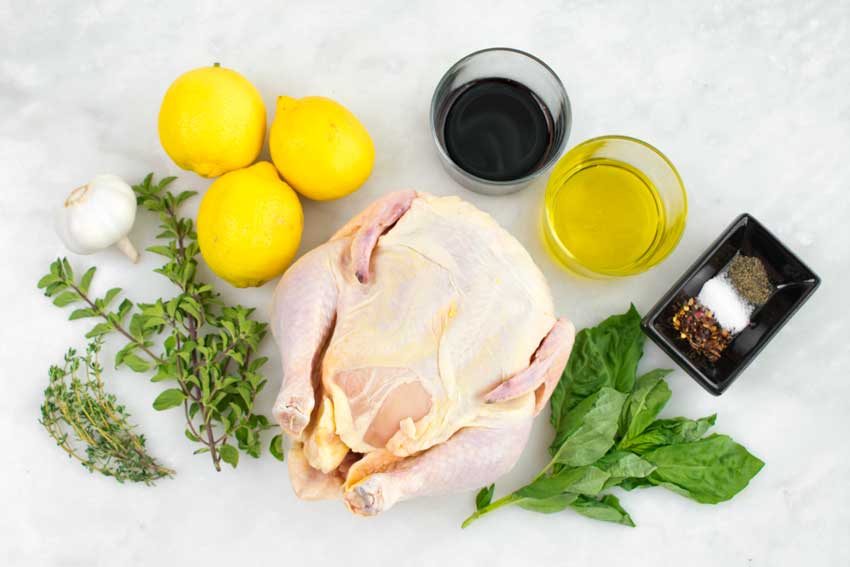
Lemon and Oregano Grilled Chicken Ingredients
Whole chicken, oregano, thyme, garlic, lemon, balsamic vinegar, extra virgin olive oil, black pepper, salt, crushed red pepper flakes, and basil

The Process

Once I had all my ingredients, it was time to get cooking. I followed the instructions in the order given, and that meant starting with spatchcocking the chicken. (I’ve been known to rearrange the steps if I think it will make things go quicker, but not this time.) A good set of kitchen shears is a requirement for this step.

The instructions give a good description of how it’s done, but not everyone learns the same way. If you’re more visual this video shows how it’s done. It also includes a trick to make flipping the spatchcocked chicken easier by using metal skewers.

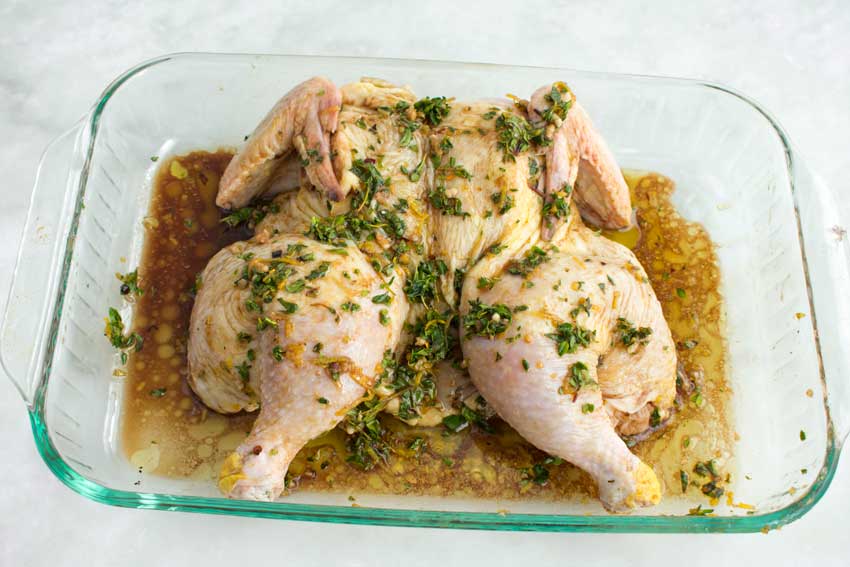
Making the marinade was a simple as it sounds, but I had trouble getting the chicken into a gallon-sized ziplock bag. Instead, I opted for a rectangular baking dish with a lid and let the chicken marinate overnight in that.

It was time to grill the next day, and I couldn’t wait to get started! Things went pretty smoothly, but there were lots of flare-ups caused by the dripping oil-based marinade. After the first five minutes, I realized what was happening, turned off a burner, and moved the chicken to indirect heat for the rest of grilling. The skin was charred, but the problem was fixed.

The entire process took slightly longer than listed. The prep work was right on time, but waiting for the meat thermometer to get to 160 degrees took a little longer than the 35 minutes listed. Here is how my time broke down:

  • 15 minutes for prep work
  • 44 minutes to grill
  • 59 minutes total
Marinating the spatchcocked chicken