Home Blog Page 38

Healthy Salted Caramel Cookie Dough Ice Cream Sundae

0

There are some foods I never wanted to make at home, but this blog has made me more willing to try new things. But Ice cream is something I never thought I would be willing to try. Why not? I thought I needed to buy a machine that I would inevitably use once or twice, regret purchasing, and banish to my garage because I have precious little kitchen storage. Then I started searching for peanut butter recipes to complement the Thai pork dish I just made and found this Healthy Salted Caramel Cookie Dough Ice Cream Sundae recipe. Healthy ice cream? No. Way. Wait, it’s vegan? That gets a raised eyebrow. *Reads recipe* Huh, there’s no peanut butter in it. Pinterest, your search is wonky. No ice cream machine needed? Well, okay then, I’m making ice cream!

This healthy cookie dough ice cream sundae is everything you’d want a sundae to be, plus more. There’s the amazing vegan refined sugar-free salted caramel sauce, the gluten-free cookie dough, and the dairy-free ice cream – which are all individually amazing, but together… they will blow your mind.

Recipe Author: Kat at The Loopy Whisk
Get the recipe

The Ingredients

I expected all kinds of kitchen sorcery and ingredient substitutes to make this recipe, but it was pretty straightforward. It is technically three recipes: salted caramel sauce, cookie dough, and the ice cream, but all of the ingredients are shown below. I even got into the vegan spirit of things and picked up some vegan chocolate chips from Whole Foods.

One change I made after I photographed the ingredients was switching the almonds with some leftover almond meal I found in my refrigerator. I had planned to grind the almonds in my food processor just like the oats. Then I found the almond meal and figured I save myself the effort while using up the leftovers.
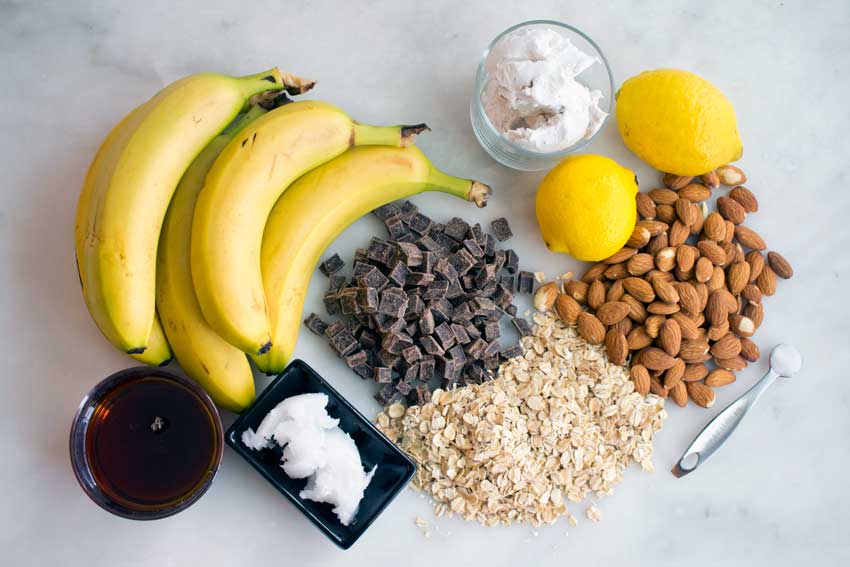
Healthy Salted Caramel Cookie Dough Ice Cream Sundae Ingredients
Bananas, vegan chocolate chips, coconut cream, lemons, almonds, salt, oats, coconut oil, and maple syrup

The Process

Like I mentioned earlier, this is actually three separate recipes (links to the caramel sauce and cookie dough are included in the ice cream recipe). I went into this thinking it would be confusing to have so much going on at once, but it all went very smoothly. There was some strategy involved, though, and this is how I did everything:

  1. Peel, chop, and freeze bananas
  2. Make cookie dough
  3. Make caramel sauce
  4. Blend ice cream and freeze
  5. Assemble and eat

That gave things time to freeze, refrigerate, and cool as needed.  I froze the ice cream overnight in a sealed container. The 8.2 cup size was large enough to comfortably fit all of the ice cream mixture. The low rectangular shape also made layering the ingredients very easy.

The only slight issue I had was getting the food processor to blend the frozen banans. It blended everything that was on the bottom, near the blades but had trouble getting to the bits on top. I had to open it and use a wooden spoon to push the bananas down several times, but it eventually got the job done. Smaller pieces might have been a better idea.

Despite the minor issue with blending the ice cream, I got this recipe done way ahead of the 37 minutes listed. It took me 20 minutes to make everything plus time to freeze overnight. This ice cream was much easier to make than I ever imagined!
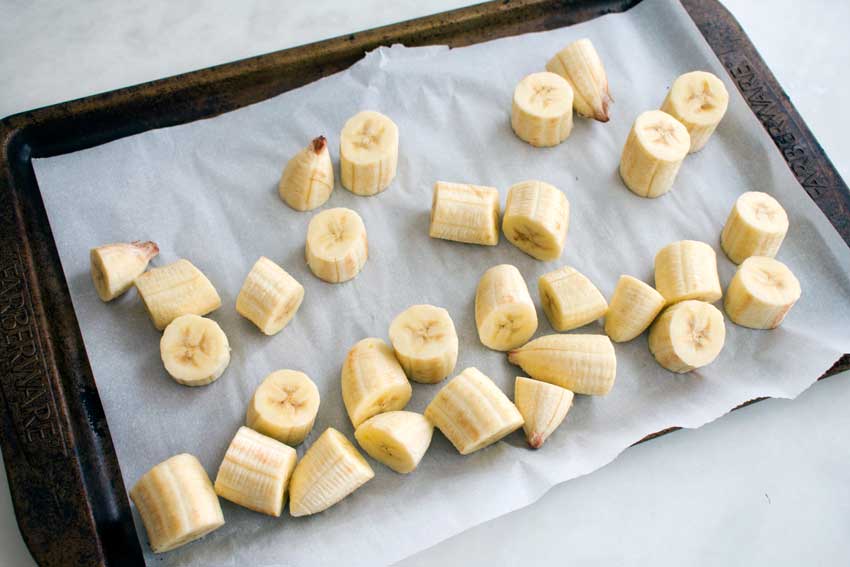
Frozen pieces of banana

Grilled Thai Pork Tenderloin with Coconut Lime Peanut Sauce

Summer rainstorms might be winning the war on grilling, but I have finally won a battle—I have grilled! Yes, for one brief moment, the rain stopped, the clouds, parted, and a few rays of sunshine hit my face. Well, more like I decided to ignore the weather forecast and grill earlier in the day. Either way, it worked, and I was able to make this Grilled Thai Pork Tenderloin with Coconut Lime Peanut Sauce. It’s a small win, but I’ll take it.
This post was originally published on September 3, 2019. The text and photos were updated on July 12, 2021. The review and rating have not been changed.

This Grilled Thai Pork Tenderloin with Coconut Lime Peanut Sauce is packed with delicious flavors and is perfect served with coconut jasmine rice and an easy cucumber salad for dinner.

Recipe Author: Amy at House of Nash Eats
Get the recipe

The Ingredients

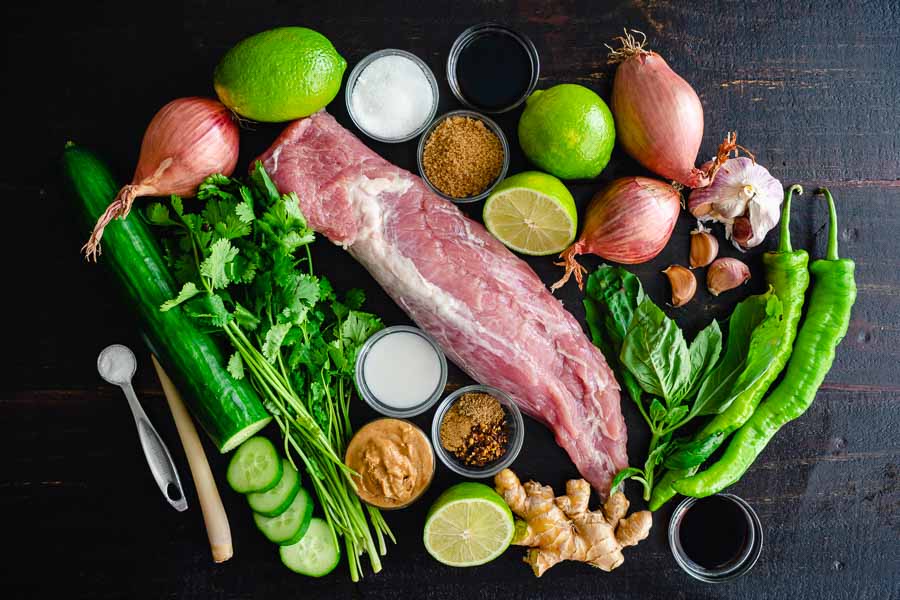
The list of ingredients for this recipe looks long-ish, but most of them are pantry staples for the marinade/sauce. I had to shop for the produce and coconut milk, but I had everything else, even the pork.

Remember the Oven Roasted Pork Tenderloin with Mustard, Garlic, and Herbs I made last month? The package had two pork tenderloins in it, and I froze the extra one. So no shopping for the pork, but I did have to remember to thaw it.

Oh, and I couldn’t find Persian cucumbers, so I went with two English cucumbers. I’m not sure it really needed to be peeled because the skin is so thin, but I did it anyway since it’s in the instructions.

Grilled Thai Pork Tenderloin with Coconut Lime Peanut Sauce Ingredients
Pork tenderloin, sugar, fish sauce, brown sugar, lime juice, shallots, garlic, basil, green chili peppers, soy sauce, ginger, crushed red pepper flakes, ground coriander, ground cumin, coconut milk, peanut butter, cilantro, cucumber, lemongrass, and salt

The Process

The total time given for this recipe was 30 minutes. I love quick recipes, but I wasn’t so sure this one would be that fast. It is for the pork, sauce, and a cucumber salad, after all. It turns out I wasn’t too far from that mark, though. Here is how the time broke down:

  • 9 minutes to make the marinade
  • 10 minutes to make the salad
  • 17 minutes to make the pork and sauce
  • 36 minutes total

That doesn’t include marinating the pork overnight or setting out to come to room temperature before grilling.

Things went very smoothly, but I did change up the order of the instructions. Here is how I went through the steps:

  1. Preheat the grill
  2. Make the cucumber salad
  3. Grill the pork
  4. Heat the marinade/sauce

I wanted to give the cucumber salad as much time as possible to marinate and making it first did just that. The grill was ready by the time it was done, so no waiting for it to preheat.

The sauce was super-easy to heat up while the pork was grilling. I even had time to make some frozen jasmine rice while the pork rested and came up to the proper temperature.

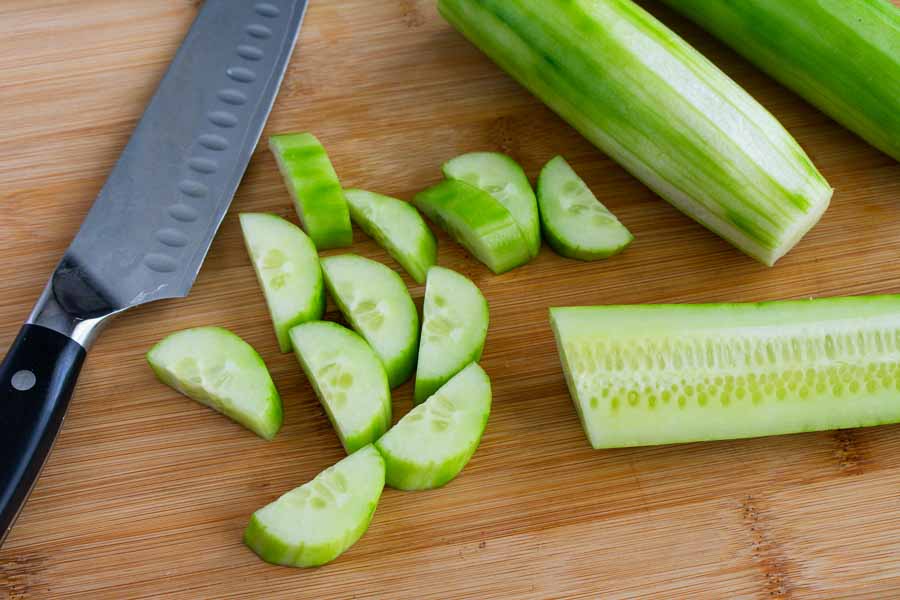
Slicing the cucumber

Easy Kale Salad with Lemon Dressing

0

I needed a healthy side to go with the Oven-Barbecued Beef Brisket I just made, and salad was an easy choice. Then I had to decide which one! I finally settled on this Easy Kale Salad with Lemon Dressing–mostly because of the word “easy”. I knew the brisket would be a lot of work, and I was not about to pair it with a side dish that was also a lot of work. (I’ll save that for Thanksgiving!) This kale salad sounds like a super healthy side to a not so healthy main, and I’m actually looking forward to trying it. My husband doesn’t share my enthusiasm about kale, but I’ll bribe him with the brisket.

Tangy, crunchy, full of incredible lemon flavor mixed with the amazing superfood KALE! This recipe is the best one you will find for Kale salad.

Recipe Author: Amy at Pinch Me Good
Get the recipe

The Ingredients

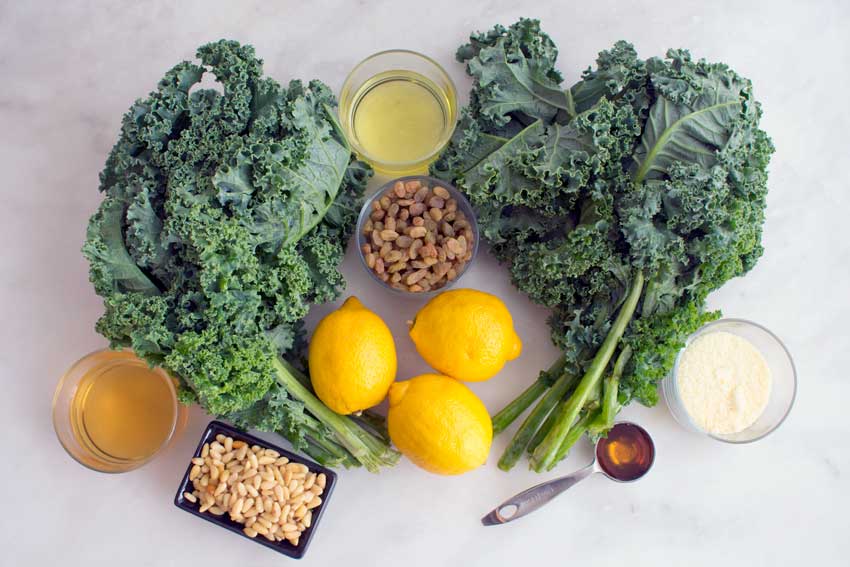
I had a few of the items I needed for this salad in my pantry, and the rest were easy to find. Basics like olive oil, honey, and apple cider vinegar are always around. I also had some pine nuts I needed to use up, so I opted to use them since the recipe said pistachios or any nuts you have on hand (I love recipes that help me use up leftovers!).

That left me to shop for the dairy and produce. As you can see, I got curly kale since that was the only type at the grocery store. And I was pleasantly surprised to find Whole Foods also stocks golden raisins but less delighted when I saw how dry they looked. I know, they’re raisins, but the picture with the recipe had much prettier plumper raisins. I think I have raisin envy!

Easy Kale Salad with Lemon Dressing Ingredients
Kale, golden raisins, olive oil, parmesan cheese, honey, lemons, pine nuts, and apple cider vinegar

The Process

Making this salad was quick and easy and only took me 12 minutes (just a tad bit longer than the 10 minutes listed).

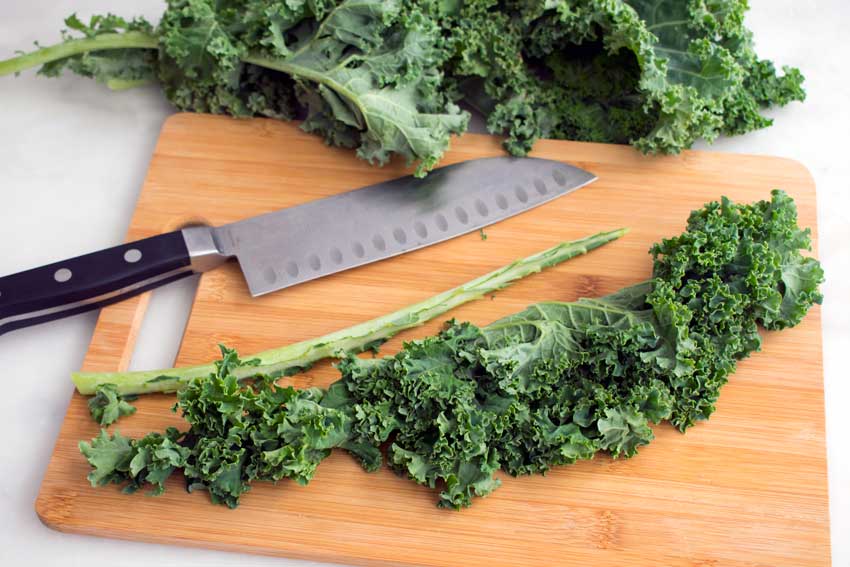
The instructions skip how to prep the kale, but it isn’t difficult. I fold each leaf in half, cut the stem away, then chop it when I have done 2-3 leaves. You can also just tear the kale off the stem in bite-sized pieces.

Once you’ve finished either of those steps, place the kale into a large bowl and massage with your hands. Just grab bunches in your fists and squeeze until you notice the color has darkened slightly. It’s optional, but some people swear it makes the kale less tough and bitter.

The rest went smoothly and according to the instructions, and I had a tasty salad made in just a few minutes.

The only sort of disappointing part about the salad was the golden raisins weren’t very plump (that’s not the author’s fault, of course). They really were shriveled and dry, even for raisins. However, they had plumped up the next day after the leftovers sat in the salad dressing. Next time I make this salad (and I will make it again), I’m going to make 1.5 times the salad dressing so I can soak the raisins in it for a few hours before I add them to the salad.

Stemming and chopping the kale

Oven-Barbecued Beef Brisket

I have to admit that I’m skeptical about this week’s first recipe. I was always taught that real barbecue is smoked for hours, and an oven is just not involved in that process in any way. however, there are two things that have made me willing to give this Oven-Barbecued Beef Brisket recipe a try. The first is the lousy weather that’s making me feel like I live in the northwest instead of South Florida. The second is our favorite barbecue joint closed down. I haven’t had barbecue in a long time, and I must be getting desperate if I’m willing to try making it myself, let alone in the oven (I don’t own a smoker).

This Oven-Barbecued Beef Brisket is so smokey, tender, and juicy. No one will ever guess it wasn’t cooked on the grill.

Recipe Author: Christin Mahrlig at Spicy Southern Cook
Get the recipe

The Ingredients

There are quite a few ingredients in this recipe, but they are broken down into manageable groups: the rub, brisket, and sauce.

The fact that this recipe included a rub was a big factor in why I’m trying it. Good barbecued brisket needs a spice rub. I had everything for this part of the recipe except the dry mustard, but I was able to find that at the grocery store.

The biggest, both size-wise and by cost, is the beef brisket. I found it at my local Whole Foods for $7.99 per pound, and a total cost of $45+. I had a little sticker shock, but it really was a large piece of meat.

Listed with the brisket was a pound of bacon. It’s not something I normally keep around, and I thought buying a pound of bacon would be no big deal. Wrong! Apparently, bacon is packaged in 12-ounce portions instead of 16. So I’ll have a little less bacon than what’s called for. Can’t be too bad, right?

The last group of ingredients was for the barbecue sauce. The fact that this recipe included a rub and a homemade sauce really made me willing to give it a try. Store-bought sauce just isn’t as good. I had to buy the onion and restock my ketchup for this.

So to summarize this, there weren’t many ingredients I needed to buy to make this oven-barbecued beef brisket recipe, but they were on the pricey side.

Oven-Barbecued Beef Brisket ingredients
Beef brisket, bacon, dark brown sugar, cider vinegar, ketchup, onion, chicken broth, chipotle peppers in adobo sauce, cumin, cayenne pepper, onion powder, garlic powder, black pepper, dry mustard, paprika, and light brown sugar

The Process

Brisket making day arrived, and I knew it would be an all-day thing. That meant getting dinner started really early! We like to eat around 5-6 p.m., so I began at 11 a.m. This is how I spent my time:

  • 10 minutes to prep
  • 5 hours to cook
  • 40 minutes to make the sauce
  • 5 hours 50 minutes total

The Spice Rub

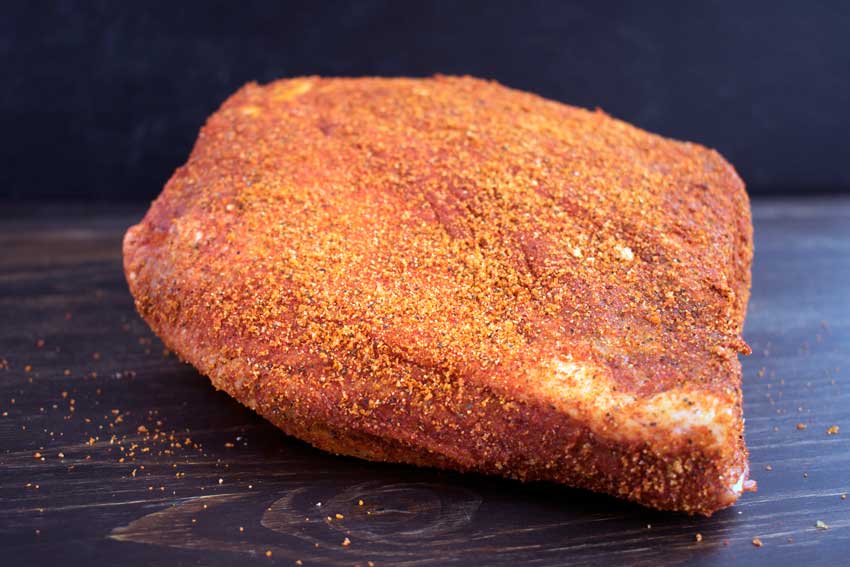
First up was the spice rub. This part was as simple and easy as you imagine. Just mix up the ingredients and rub them all over the brisket. Then enjoy the red stains on your hands LOL (the red coloring actually washes right off).

Beef brisket with spice rub

The Brisket

Next up was laying down a layer of bacon in a broiler-safe 9'x13' baking pan. Since the brisket is finished under the broiler, that means no glass or Pyrex (they can shatter under high heat) and no non-stick (it can release unsafe chemicals at high heat). I only have a Pyrex pan, so I ordered a simple aluminum pan from Amazon.

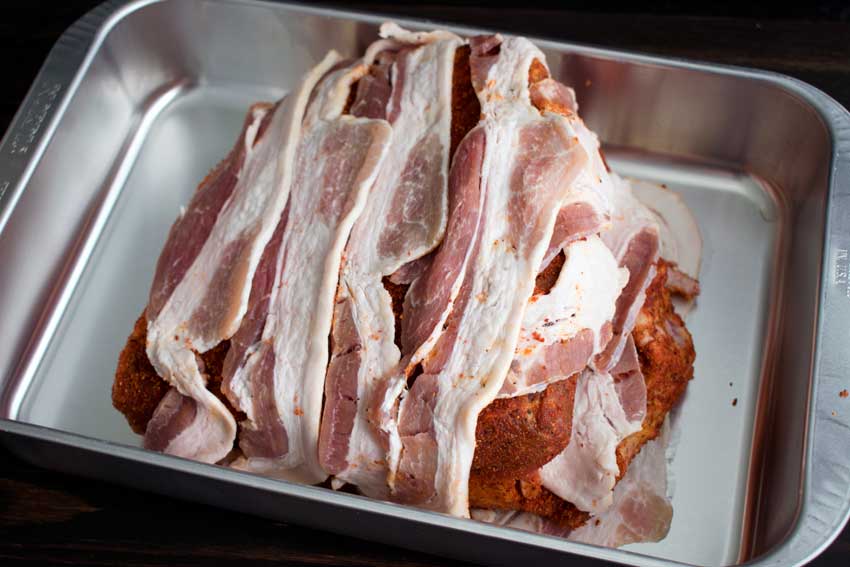
I used kitchen shears to trim the long strips of bacon to fit. Then I added the brisket, fat side down. That struck me as a little odd as the fat being placed on top allows it to melt into the beef and keep it moist. But having the fatty bacon on top should do the same thing, and the brisket is flipped for the last hour of cooking. I’m going to trust in the recipe…

Lastly, I layered the remaining strips and the leftover trimmed bits of bacon over the top of the brisket. The fact that the brisket I bought wasn’t long and thin helped out here. Mine was thicker and more compact lengthwise, so I had just enough bacon. You can see below that my brisket wasn’t covered as thoroughly as the author’s, but it was mostly covered (fingers crossed!).

Beef brisket wrapped in bacon

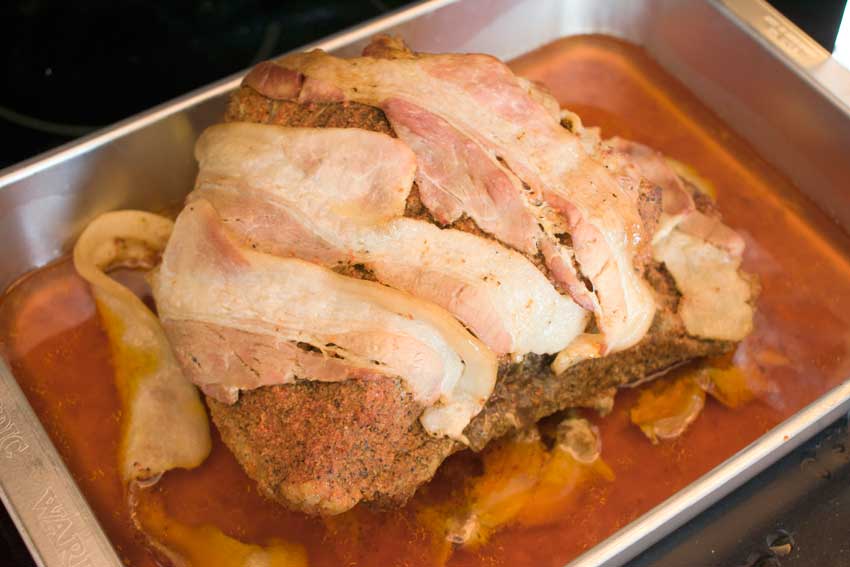
After four hours of anxiously waiting for my oven-barbecued beef brisket to come out of the oven, I was greeted with the picture below. I had no idea if this was good or bad, but I uncrossed my fingers, kept trusting the recipe, and flipped the brisket as instructed.

Two pairs of tongs let me gently flip the brisket without splashing the very hot drippings. The bacon fell off, of course, but the tongs were also excellent for replacing it.

Bacon-wrapped beef brisket after 5 hours in the oven

The Sauce

After five hours of waiting and smelling what I just knew would be a yummy brisket, I was finally able to get started on the sauce. This part of the recipe went just as smoothly as the first two, but I did a couple of things differently.

First, I used a turkey baster to skim most of the oil off the drippings. There was a lot of oil, and skimming it with a spoon would have taken ages. The turkey baster got the majority very fast, and then I used a spoon to skim the last bits. That left me with two cups of drippings for the sauce.

The other thing I did was to use an immersion blender to break up the bits of bacon and onion. I did that to thicken the sauce and make it smoother. It still had some small chunks, but much, much smaller than they were straight out of the pan.

Finishing

I preheated my broiler to high while the sauce was reducing, then I sauced the brisket and popped it into the oven to finish. The recipe didn’t specify, but I put it in fat side up. Five minutes under the broiler gave the brisket a nicely charred bark-like finish. It looked (and smelled) very promising!

Strawberry Basil Lemonade

I had summer in mind when I made the Chicken Cutlet with Lemon Mayonnaise and Arugula Sandwich earlier this week, so I needed a summertime drink to pair with it. I had a few ideas, but I ended up deciding to try this Strawberry Basil Lemonade recipe. Like the chicken sandwich, I just made this recipe pairs lemon and herbs. The addition of summer berries sealed the deal for me.

A pitcher of this thirst quenching Strawberry Basil Lemonade is all you need to make it through the scorching hot summer days!

Recipe Author: Florentina at Ciao Florentina
Get the recipe

The Ingredients

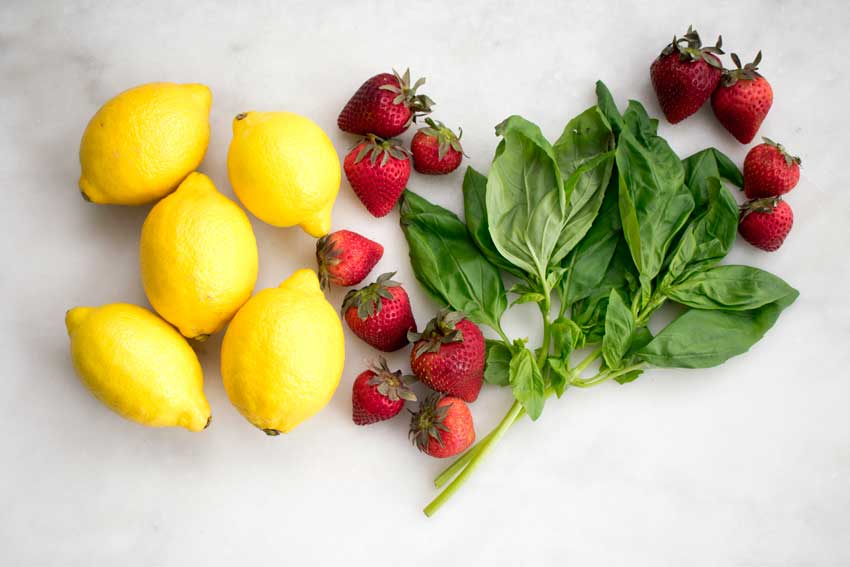
There aren’t many ingredients that go into this lemonade. Just lemon juice, strawberries, basil, honey, ice, and water.

This recipe gives the option of using flat or sparkling water. I chose flat water because it makes a pitcher of lemonade, and I didn’t want to end up with barley carbonated water. There’s just no good in-between stage from flat to carbonated.

Strawberry Basil Lemonade Ingredients
Lemons, strawberries, and basil (I forgot the honey)

The Process

There were only a few steps to make this strawberry lemonade recipe, and it was as easy as I thought it would be. I had a pitcher of lemonade made in the time specified, 10 minutes.

The recipe does call for a food processor, but I think you could make it without. Just mash the berries and finely mince the basil leaves from Step 1 instead. It would be more work, of course, but it’s doable.

The rest went according to plan except for the honey. I like very sweet lemonade, so I ended up doubling the amount of honey from 5 tablespoons to 10. I find that honey isn’t quite as sweet as sugar and tend to use more of it when sweetening my drinks.

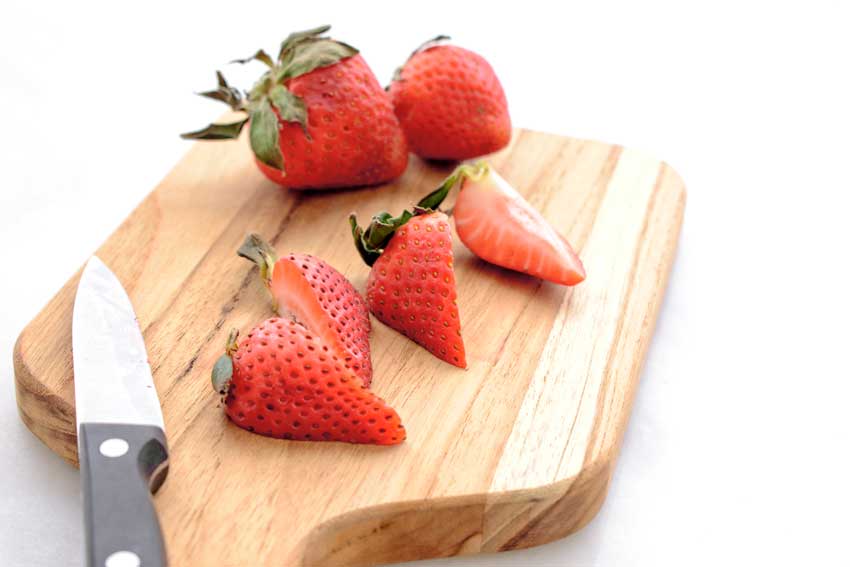
Quartering the strawberries

Chicken Cutlet with Lemon Mayonnaise and Arugula Sandwich

Last week was all about lemon, so you think I would change it up a little this week. Well, I meant to, but it seems that lemon snuck in with this Chicken Cutlet with Lemon Mayonnaise and Arugula Sandwich. How good does that sound, though?

There’s something about the summertime that makes me crave sandwiches and want to grill. Ideally, I combine grilling and sandwiches as much as possible. Since the weather isn’t being grill-friendly, I’m going to get half of my summertime urges met with this chicken sandwich that is made on the stove. I’m really looking forward to trying this recipe!

This Chicken Cutlet with Lemon Mayonnaise and Arugula Sandwich is the ultimate in flavor and crunch!

Recipe Author: Annie at Ciao Chow Bambina
Get the recipe

The Ingredients

Shopping for this chicken and arugula sandwich recipe was easy, and I found all of the ingredients at my local grocery store. Well, those that weren’t already in my pantry and refrigerator.

Although I could have bought four chicken cutlets, I followed the recipe’s instructions and bought two chicken breasts. Cutting them into cutlets was quick and easy, but you could buy cutlets instead to save some time and effort.

One thing I did splurge a little on was the bread. I bought French hamburger buns from the bakery for this recipe. Plain hamburger buns from the bread aisle just didn’t seem fancy enough.

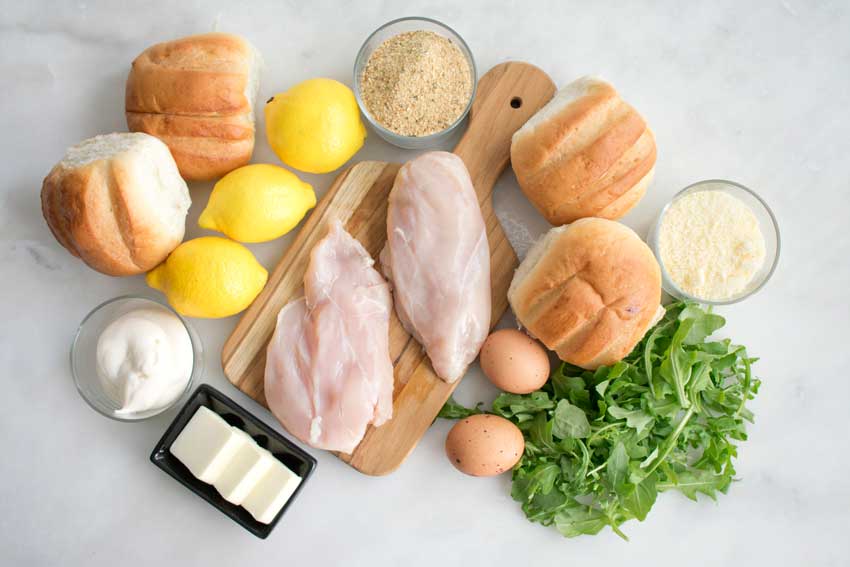
Chicken Cutlet with Lemon Mayonnaise and Arugula Sandwich Ingredients
Chicken breasts, butter, mayonnaise, lemons, French hamburger buns, Italian seasoned breadcrumbs, grated parmesan cheese, arugula, and eggs

The Process

The instructions for this recipe were nice and easy to follow. The whole process went pretty smoothly from start to finish, and I had my chicken and arugula sandwiches made in 27 minutes.

The only slight issue that popped up was that I almost ran out of egg while breading the chicken. I thought I would need to add an extra beaten egg, but it turns out I had just enough to double-bread all four chicken cutlets. Whew!

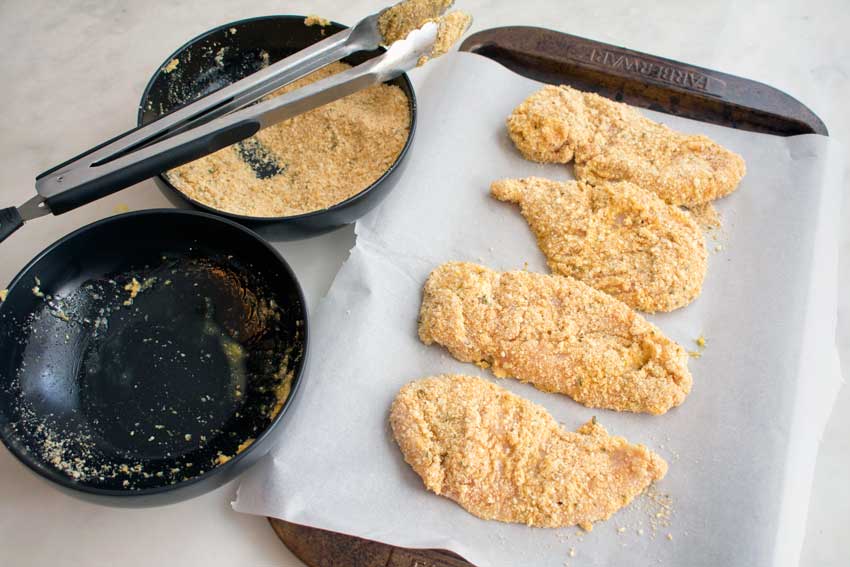
One thing I did do that wasn’t in the recipe was use tongs while breading the chicken. I often use my bare hands for breading and reserve the tongs for frying, but then I end up with breaded fingertips. Yuck! This time I remembered my tongs for both steps (with a quick wash in between) and breading was much neater than I’m used to.

Breading the chicken cutlets

Lavender Lemon Bars

0

After all the dreary raininess that’s been summer, I loved the bright, lemony pasta recipe I just made. So in that vein, I’m trying a bright, lemony dessert this week: Lavender Lemon Bars. My mom always said yellow cheered her up, so I’m going for the same effect with all this lemon. And I need it with all the cloudiness and rain! Seriously, this is supposed to be sunny South Florida, and lately, the sun has been lacking. I kinda miss it.

These Lavender Lemon Bars are a sweet twist on traditional lemon bars! Homemade lavender sugar is used in the crust and filling, to add a light lavender flavor. They’re tangy, sweet, and refreshing!

Recipe Author: Elizabeth at Sugar Hero
Get the recipe

The Ingredients

This recipe is a mix of pantry staples, fresh items, and one that you might need to order. I had the staple items–sugar, flour, vanilla, and salt. I even had the culinary lavender leftover from other recipes (I originally ordered it from Amazon). The fresh lemons, eggs, and butter had to be shopped for, making this a short grocery list.

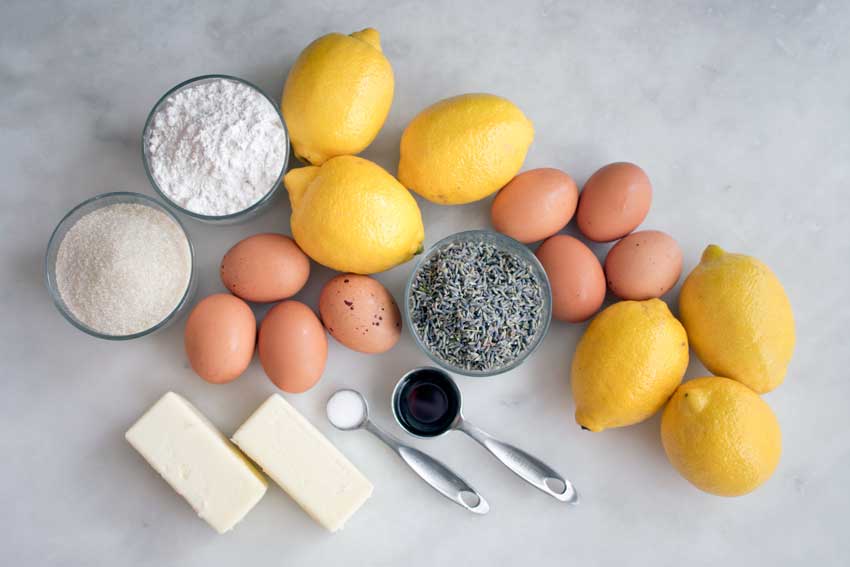
Lavender Lemon Bars Ingredients
Lavender, lemons, vanilla extract, salt, butter, eggs, sugar, and flour

The Process

These lavender lemon bars took a while to make, but they weren’t difficult. I had mine ready in 1 hour 6 minutes, not including time to cool.

The instructions broke the phases down into easy to follow, manageable steps. As far as equipment, you’ll need the basics like measuring spoons and cups, mixing bowls, aluminum foil, and a 9'x13' baking pan.

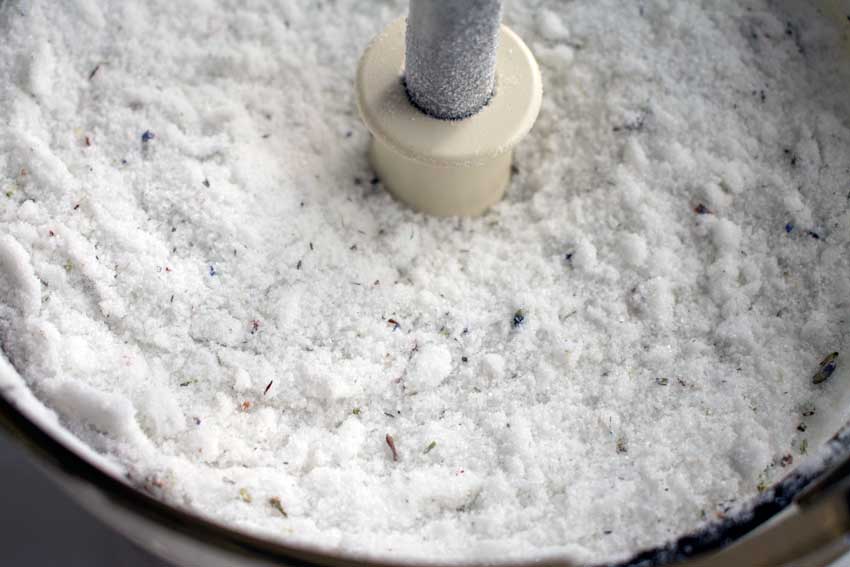
You will also need a blender or food processor to make the lavender sugar. I opted for my food processor because there was a lot of sugar, and the bowl-like shape gave it plenty of room to mix.

Once the ingredients and equipment were gathered, I dove right in. The process went very smoothly, and I didn’t have any ‘what do I do now?’ moments. I even had just the right amount of lavender sugar, so no need to figure hot how to use the leftovers.

The baking times given for the crust and filling were spot-on, and I didn’t have to add any extra baking time (and nothing overcooked, either). After baking, I left the pan out to cool for about an hour then popped on the lid and refrigerated it overnight before cutting.

Lavender sugar
Making the lavender sugar

Lemon Spaghetti with Shrimp

I was in the mood for something on the lighter side this week. Last week’s One Pan Chicken and Potatoes with Garlic Parmesan Spinach Cream Sauce was delicious but on the heavy side. The search of my Pinterest boards began, and I ended up selecting this Lemon Spaghetti with Shrimp recipe to start my week. A quick pasta dish flavored with lemon and topped with shrimp is about as summery as it gets. Perfection!

A bright and bold lemon spaghetti dish with jumbo garlic, lemon shrimps.

Recipe Author: Marisa at Marisa’s Italian Kitchen
Get the recipe

The Ingredients

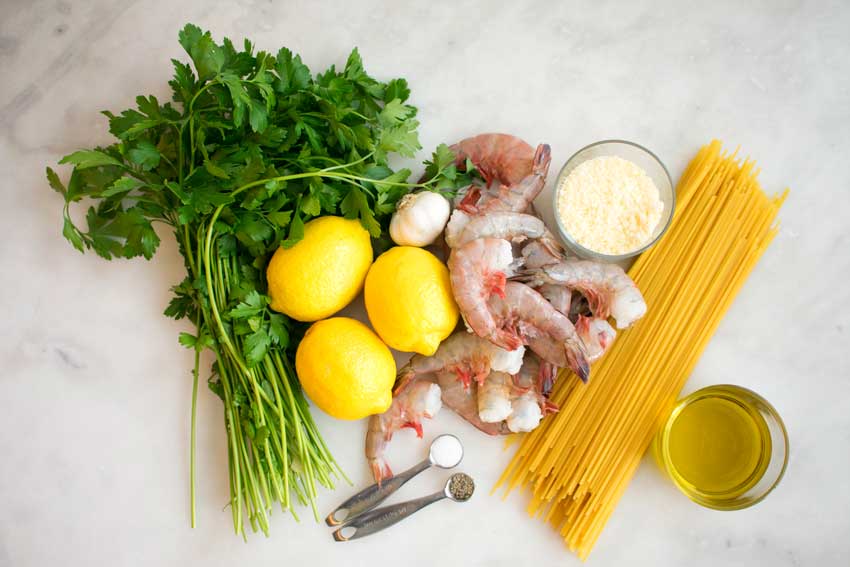
The ingredients list for this recipe looks long, but it’s really not. Things like lemons (zest and juice), salt, and pepper are listed multiple times. Additionally, the rest of the ingredients were staples like spaghetti, garlic, and olive oil.

The most expansive ingredient was the shrimp, of course. I opted for frozen shrimp because my schedule has been crazy lately. I didn’t want to leave fresh shrimp in my refrigerator and have them go bad.

The only downside to that was I didn’t notice they weren’t peeled and deveined. It took me 15 minutes to take care of that once they were thawed (not included in the total time listed in the next section). Not too bad since they were jumbo shrimp, but I would not have wanted to try that with smaller shrimp!

Lemon Spaghetti with Shrimp Ingredients
Shrimp, lemons, parsley, garlic, grated parmesan cheese, spaghetti, extra virgin olive oil, salt, and pepper

The Process

The author broke down the steps to make this lemon spaghetti with shrimp really well. The steps were clear easy to follow. The total time wasn’t listed, but here is how my time broke down:

  • 9 minutes to make the marinade
  • 20 minutes to marinate and make the pasta
  • 5 minutes to cook the shrimp
  • 34 minutes total

The only change I made was to cook the shrimp after the pasta was done. They were still marinating by the time I got to Step 6 (cooking the shrimp), so I simply moved that step to the end. It didn’t cause me any problems at all, and my shrimp were nice and hot when I plated everything.

One thing I feel I should mention is the need for a very large pan for the shrimp and pasta. You need something that will fit an entire 16-ounce package of spaghetti once it’s cooked and allow you to stir/toss it. I used my largest saute pan since it has higher sides than a skillet. It also fit all of the shrimp, so I was able to cook them in one batch.

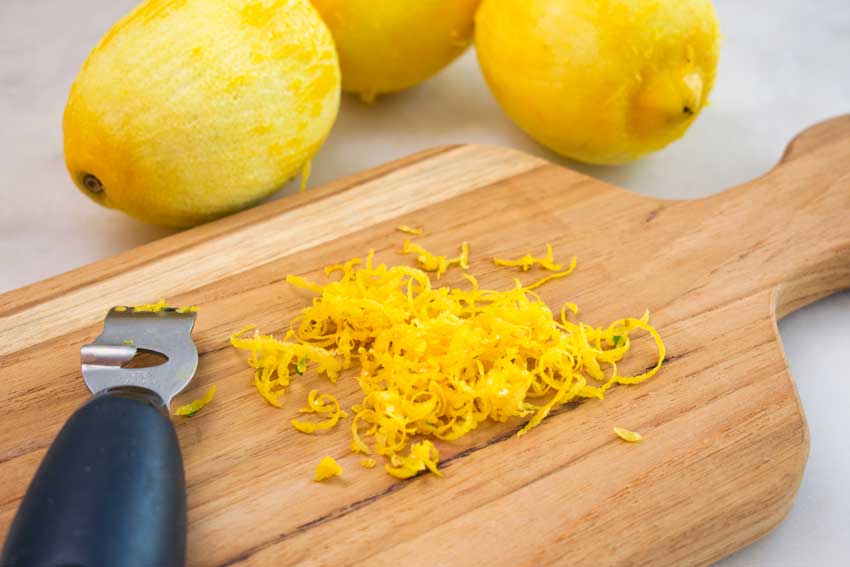
Zesting the lemons
Zesting the lemons

Peaches and Cream Martini

After making One Pan Chicken and Potatoes with Garlic Parmesan Spinach Cream Sauce, I was a little stumped as to what to make next. I made that recipe on impulse instead of planning around a theme for the week. So I just started scrolling through my Pinterest boards in search of inspiration, and I found it in cream. Specifically, this Peaches and Cream Martini recipe. And just like that, my non-themed blog posts for the week became cream themed. I totally meant to do that!?

This Peaches and Cream Martini is fun summer cocktail, perfect for sipping on the patio! Made with fresh peaches, cream liquor and a couple other goodies, this cocktail is cool, creamy and completely delicious!

Recipe Author: Erin Indahl-Fink @ DelightfulEMade via Real Housemoms
Get the recipe

The Ingredients

I had some shopping to do for the ingredients, but nothing was difficult to find. Just a few peaches from the grocery store and a quick trip to the liquor store for the peach schnapps and cream liqueur.

The recipe mentions using Cask & Cream, a brandy-based cream liqueur. Folks, I searched three liquor stores and couldn’t find that brand nor any other brandy-based cream liqueur. As you can see, I ended up settling on Irish cream. It’s a whiskey-based cream liqueur, and I was hoping it had a similar taste to the recommended brand. Fingers crossed!

Peaches and Cream Martini Recipe Review Ingredients
Peach schnapps, peaches, cream liqueur, and triple sec

The Process

Making my Peaches and Cream Martini had two major steps: making the peach puree and making the actual cocktail. Here is how my time broke down:

  • 20 minutes to make the peach puree
  • 3 minutes to make the cocktail
  • 23 minutes total

Making the puree wasn’t difficult, but it did take some time. Most of that was just to peel the peach. I’m including step-by-step instructions below in case you want to try it, but frozen peaches or ready-made peach puree would have been so much easier!

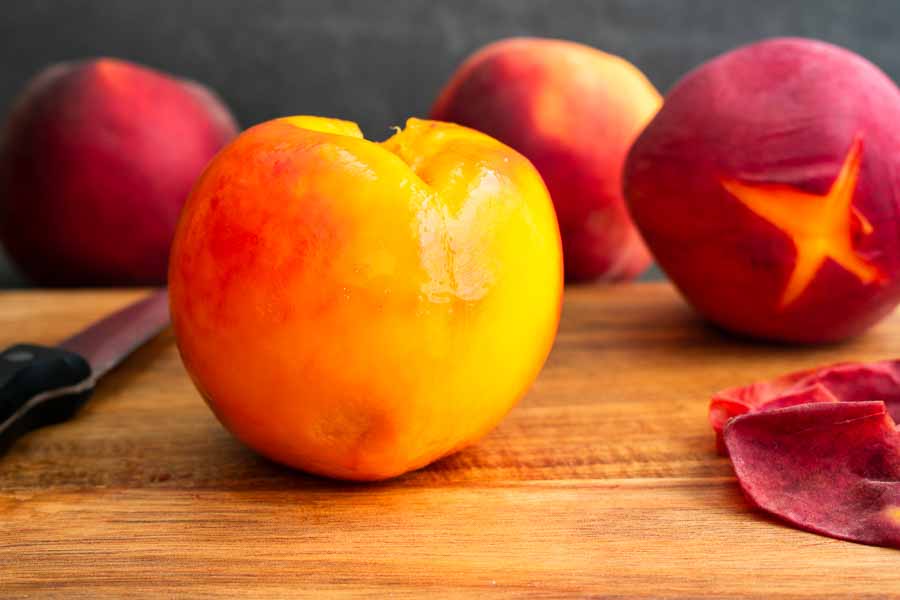
Peeled the fresh peaches
Peeling the fresh peaches

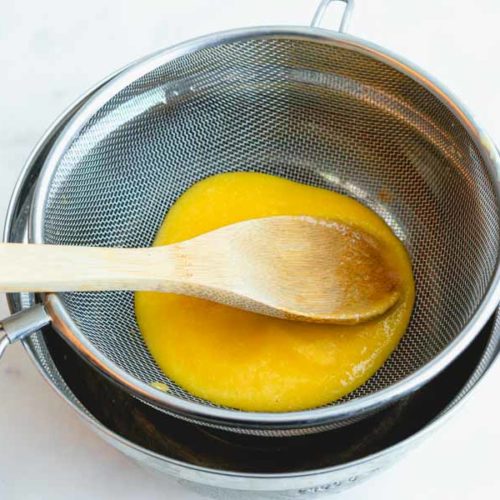
The short version was I blanched the peach so I could peel it. Then I cut it into large chunks, pureed it in a food processor, and strained it through a mesh sieve. I also cut up a second peach for garnishes while the peach was cooling in an ice-water bath.

Once the puree was made, the rest was quick and easy—a peaches and cream martini is your standard shaken cocktail.

Straining the peach puree

Peach Puree

The Hungry Pinner
How to peel and pit fresh peaches and make peach puree.
Prep Time 19 minutes
Cook Time 1 minute
Total Time 20 minutes
Servings 0.5 cup

Equipment

  • paring knife
  • large pot deep enough to submerge the peach
  • mixing bowl deep enough to submerge the peach
  • food processor or blender
  • mesh sieve

Ingredients
  

  • 1 peach or more as needed
  • water
  • ice

Instructions
 

Peel the peach:

  • Bring a pot of water to a rolling boil. The pot should be deep enough to completely submerge the peach.
  • Fill a mixing bowl with ice and water. The bowl, like the pot, should be deep enough to completely submerge the peach.
  • Cut a shallow 'X' into the bottom of the peach (opposite the stem end), just deep enough to cut through the skin.
  • Carefully lower the peach into the boiling water using a slotted spoon. Let the peach blanch for 30 to 60 seconds.
  • Use a slotted spoon to transfer the peach from the boiling water to the ice water bath. Let the peach sit in the ice water for 5 minutes. Remove the peach, empty the ice water, and set the bowl aside to use later.
  • The peach is now ready to be peeled. Begin peeling with your fingers from the end with the shallow 'X' cut into it. Use a paring knife to remove any stray bits of peel if the entire peel doesn't come away.

Pit the peach:

  • Place the peeled peach on a cutting board with the seam on the horizontal, parallel to the cutting board. Cut around the peach along the seam. You will feel resistance when you hit the pit--that's okay. You just want to cut through the flesh so you have 2 halves that are still attached by the pit.
  • Depending on the type of peach, you may be able to grip each half and twist until they come apart, then use the tip of a paring knife to remove the pit and slice each half. If the halves won’t twist apart, use a paring knife to slice the fruit off the pit one section at a time.

Make the puree:

  • Place the peach chunks into your food processor and puree for about 1 minute or until smooth.
  • Remember the bowl used for the ice water bath? Empty that (if you haven't already) and place a mesh sieve over it. Pour the pureed peach into the sieve to strain it. Use a spoon to press the puree through the mesh, discarding any leftover chunks.

Notes

One peach will yield approximately 1/2 cup of puree.

The Peach Puree recipe and some photos were updated on July 18, 2023. Minor text edits were also made, but the review was not changed.

One Pan Chicken and Potatoes with Garlic Parmesan Spinach Cream Sauce

I know, it’s the middle of the summer, and I’m not blogging a “summer” recipe. I’m pretty sure this One Pan Chicken and Potatoes with Garlic Parmesan Spinach Cream Sauce qualifies as comfort food, and sometimes you just need some comfort food. Well, that and the husband had a work trip, so that means I get to make stuff he doesn’t like. Chicken thighs were the first thing that came to mind, so here we go!

One pan chicken and Potatoes with Garlic Parmesan Cream Sauce makes for a nourishing dish perfect for a weeknight. Chicken thighs and potatoes are pan-seared, then finished in a delicious creamy sauce that perfectly combines all the flavors of garlic, tomato, spinach, spices and cheese. It’s truly an entire meal in a single skillet!

Recipe Author: Christina Cherrier at Eatwell 101
Get the recipe

The Ingredients

The list of ingredients for this recipe wasn’t too long. It was packed with fresh vegetables, so I had some shopping to do. But none of the ingredients were difficult to find or unusually expensive. A single trip to my local grocery store was all it took to get everything I needed. I love it when that happens!

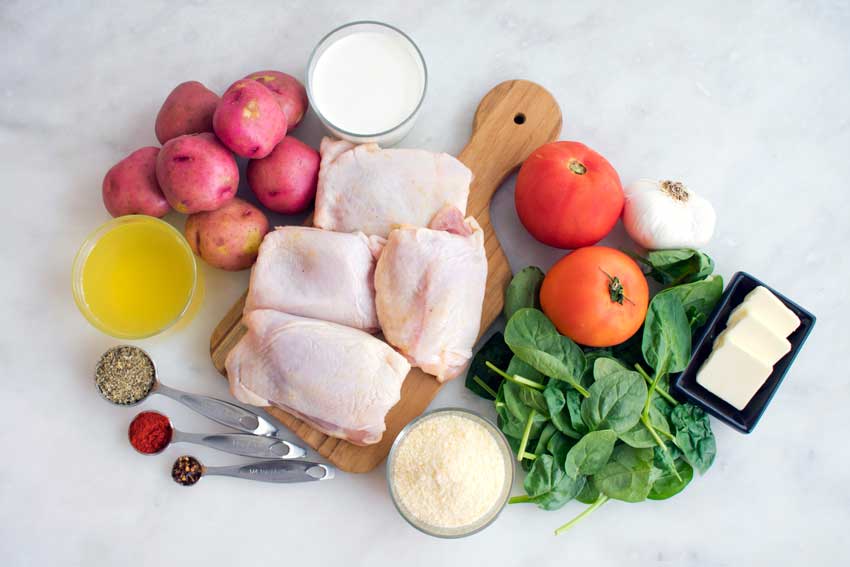
One Pan Chicken and Potatoes with Garlic Parmesan Spinach Cream Sauce Recipe Review Ingredients
Chicken thighs, red pepper flakes, paprika, Italian seasoning, chicken broth, petite red potatoes, half and half, tomatoes, garlic, butter, spinach, and grated parmesan cheese

The Process

The instructions broke this recipe down into easy to follow steps, and I had my parmesan chicken and potatoes ready in 52 minutes.

Everything went according to plan until I got to the final step. I initially cooked the chicken thighs for 15 minutes, but my meat thermometer told me they weren’t cooked through. I ended up adding 10 minutes to get them completely cooked. Not a huge deal because the chicken thighs were very thick, but it’s something to be careful of. No one likes rare chicken!

Also, I noticed the chicken and potatoes stuck to the bottom of the pan. In fact, I had to soak the pan overnight in order to scrape away all the melted cheese and sauce residue. I’m not sure if it was the extra cooking time or that I didn’t stir the sauce enough, though I suspect it was the latter. Be sure to really stir in the cheese and let it melt a bit (Step 5) before you add the chicken thighs back in (Step 6).

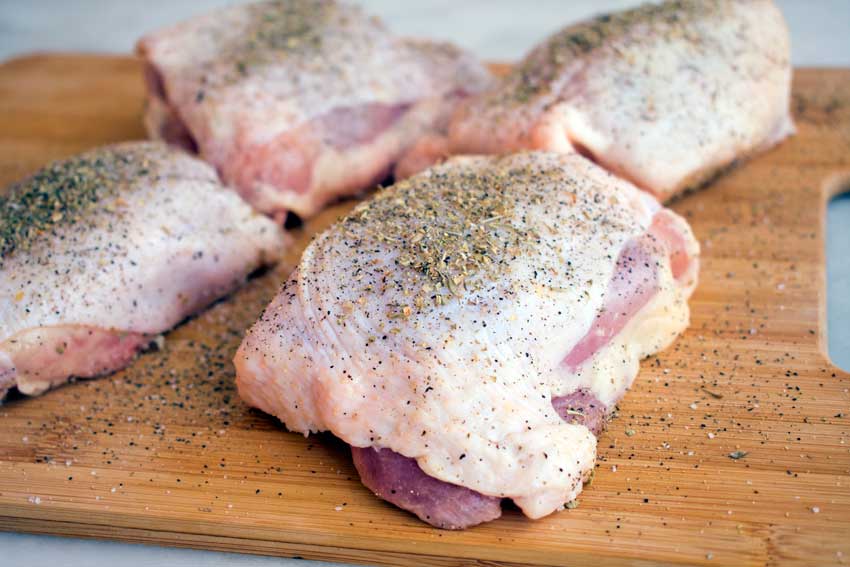
Chicken thighs seasoned with salt, pepper, and Italian seasoning

Cucumber Basil Gin and Tonic

Even though it’s been a cloudy, rainy summer, it’s still hot and humid. The kind of weather that makes me obsess about keeping cool and that obsession has spilled over into my cocktails. (Haha, spilled and I’m talking about drinks!) So when it comes to refreshing summer drinks that take my mind off the heat, gin and tonics are at the top of my list. And the Thai Beef Salad I just made had cucumber and basil, so stumbling upon this Cucumber Basil Gin and Tonic recipe on my Drinks board was beyond lucky. It fits this week’s ingredient theme and will help me beat the heat. Total win-win!

Gin, tonic, basil, elderflower liqueur, lime juice, and cucumber. That’s what you need to make one of the most refreshing and delicious cocktails you’ve ever had. This drink would be perfect to serve up to Dad on Father’s Day, or to lounge outside with on a hot summer day.

Recipe Author: Morgan at Host the Toast
Get the recipe

The Ingredients

Left to my own devices, I’m a gin and tonic kind of girl, but I’m also a bit lazy. Gin, tonic, and ice is my go-to cocktail. I’m usually too lazy to bother with lime, so the ingredients for this cocktail was a little long for me even though it really only has a few ingredients. I would make the worst bartender!

I had the elderflower liqueur but had to shop for everything else. A quick trip to the grocery and liquor stores had me sorted. I even managed to find Q Tonic Water at the grocery store, so I splurged on a six-pack.

Cucumber Basil Gin and Tonic Ingredients
Gin, elderflower liqueur, tonic water, basil, lime, and cucumber

The Process

This isn’t a complicated recipe, and it was easy to make for the most part. I had two drinks garnished and poured in 8 minutes, slightly longer than the five minutes listed.

The slowdown was with the cucumber strips used to garnish the cocktails. My vegetable peeler shaved paper-thin strips of cucumber that were very delicate. They were also very difficult to position inside the glasses. Every time I thought I had them placed, they would fall to the bottom of the glass before I could add the ice. Grr!

I had a much easier time doing the same style of garnish for the Spanish Gin Tonics I made a while back. I used my mandoline on the cucumber garnish for that cocktail, and it gave me thicker slices. They were much sturdier and I had no trouble positioning them in the glass. It made a difference, so I recommend a mandoline if you have one.

Once the cucumbers and ice were taken care of, the rest went swimmingly. It was a simple matter of adding a few ingredients to a cocktail shaker, muddling them, adding ice, and shaking it all. Then just pour, top with tonic (I used one 6.7 ounce bottle per cocktail), and pop in a sprig of basil to garnish. Tada! Two beautiful cocktails to cool down with.

Thai Beef Salad

I was craving steak this week. That’s not unusual, but I wanted to try something different and healthy. This Thai Beef Salad was one of the first pins I happened across, and it sounds absolutely perfect. Salad topped with lean beef is healthy and not how I usually enjoy my steak. That might be why I’m looking forward to making this recipe. It sounds so good and guilt-free!

Thai Beef Salad ~ it’s in a league all by itself, with ribbons of rare steak, tons of fresh herbs like basil, mint, and cilantro, feathery slices of red onion, crunchy cukes, hot peppers, and a tangy garlic ginger dressing ~ can you resist?

Recipe Author: Sue Moran at The View From Great Island
Get the recipe

The Ingredients

Since this salad recipe is chock full of fresh ingredients, I had to buy quite a few items. I had a few things on hand like the oils, sauces, and brown sugar, so I had to buy the meat, vegetables, and herbs.

The recipe gives the option of using whatever cut of beef you like. I found the suggested top sirloin, and it wasn’t too pricey at $6.99 per pound.

And I wasn’t able to find Persian cucumbers, so I bought an English cucumber. One English cucumber is about the size of two Persian cucumbers, so that worked out well.

One thing to note is red leaf lettuce heads are very small. I needed two heads to get the eight large leaves called for in this recipe.

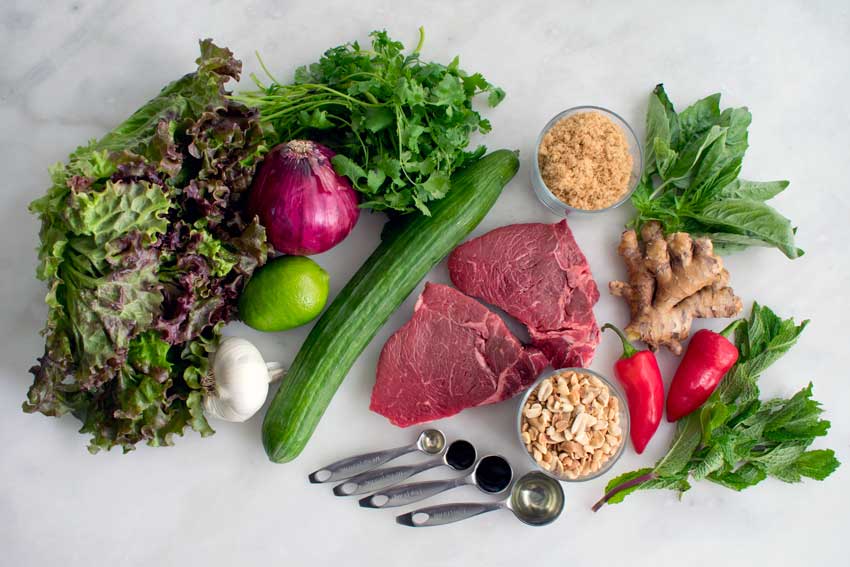
Thai Beef Salad Ingredients
Top sirloin steak, cucumber, garlic, lime, red leaf lettuce, red onion, cilantro, brown sugar, basil, ginger, red chili peppers, mint, peanuts, vegetable oil, soy sauce, fish sauce, and sesame oil

The Process

The instructions for this recipe were very clearly written, and I didn’t have any trouble following them. Other than the time to cook the steaks, no times were listed. I put my iPad’s stopwatch on and got to work on the salad. It was ready and dressed 25 minutes later.

I used the suggested time of 3 minutes per side for the steak. While it cooked, I got to work on the dressing and other prep work, assembling the salad as each ingredient was ready.

The dressing was easy, but it did take me a while to get the ginger minced finely enough. Next time I’ll just mince it a little and mix everything in my mini-prep. It would have emulsified the dressing and minced the ginger all at once.

My mandoline made slicing the cucumber and onion almost instant. Another trick I used was smashing the peanuts in a small ziplock bag using my meat mallet. It’s faster and neater than trying to chop them, and no need to chase down the peanuts that fly off the cutting board (yes, peanuts can fly LOL).

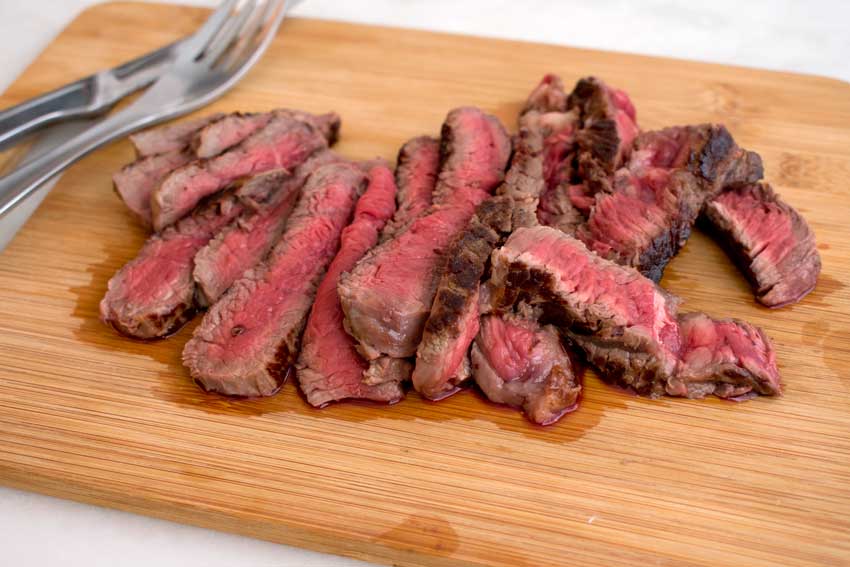
Sliced top sirloin steak