Home Blog Page 37

Maple Vanilla Baked Pears

2

I’m really into Fall cooking mode now, and I have to admit I’m enjoying it a lot. After making a few recipes with apples, I thought I’d give pears a try. This Maple Vanilla Baked Pears recipe sounded so good! Baked pears topped with homemade granola and Greek yogurt. Mmm! My experiences with pears have always involved a can, and granola has always been a sticky bar that barely passes as edible. I have both in my hurricane kit–I don’t eat them because I enjoy them. Well, I’m hoping that is about to change. Fingers crossed!

4 ingredient super simple maple vanilla baked pears that are cooked until warm and soft, completely infused with maple and vanilla, and topped with crunchy granola.

Recipe Author: Sally at Sally’s Baking Addiction
Get the recipe

The Ingredients

I had a lot of the ingredients for this recipe on hand, and all I had to buy were the pears and pecans. Unfortunately, there were only three Anjou pears left, and I had to buy pecan halves instead of pieces. Not a huge deal, though, and I’ll survive this extremely minor inconvenience somehow.
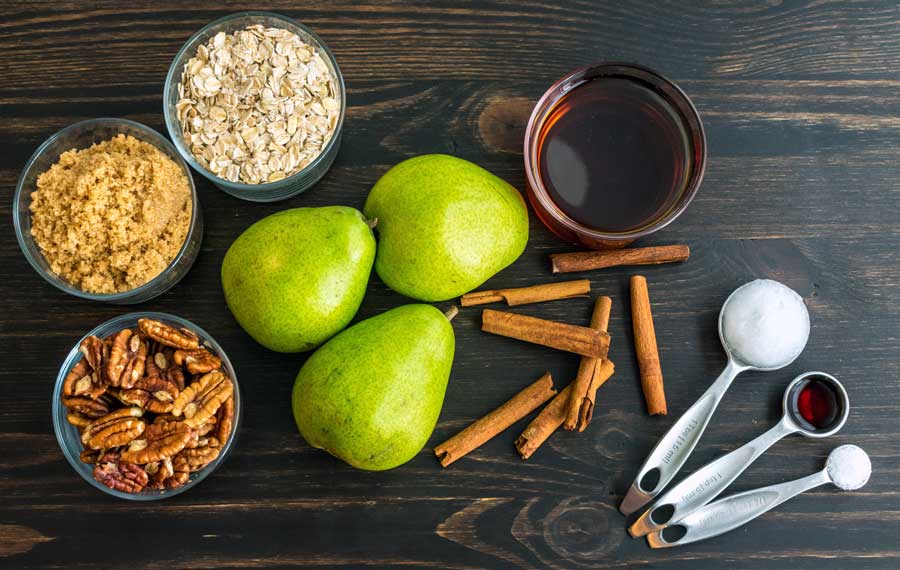
Maple Vanilla Baked Pears Ingredients
D’Anjou pears, pecans, brown sugar, rolled oats, maple syrup, cinnamon, coconut oil, vanilla extract, and salt

The Process

This recipe was really two recipes since I decided to make the Vegan Maple Pecan Pie Granola instead of buying pre-made granola. It was very easy to make, but it added some extra time to this recipe. Here’s how it went:

  • 6 minutes to prep the granola
  • 1 hour to bake the granola
  • 6 minutes to prep the pears
  • 25 minutes to bake the pears
  • 1 hour 37 minutes total (not including time for granola to cool)
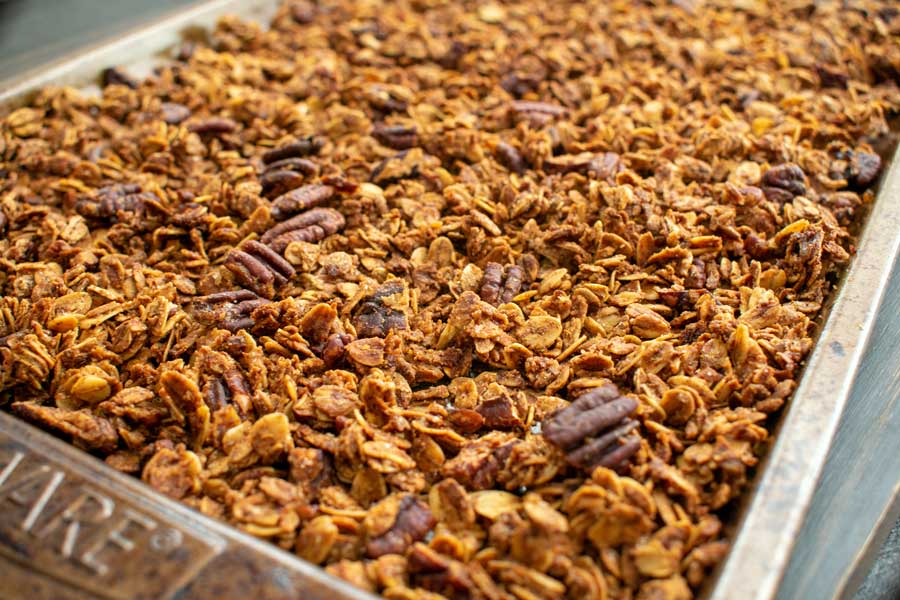
Toasted granola
Toasted granola on a sheet pan

The instructions for both recipes were easy to follow, and I had no trouble at all understanding any of the steps. Even though I’ve never made anything close to the granola or baked pears, everything went very smoothly.

The only step I was thought might be difficult was coring the pears, but it was very simple. The cores weren’t especially hard and were easy to scoop out with a metal teaspoon.

Twenty-five minutes baking in the oven was just the right amount of time. I let them cool just a bit before topping them with Greek yogurt and a bit of the cooled granola. And waiting wasn’t easy–they smelled wonderful! The best part was they tasted better than they smelled. My husband and I loved this healthy treat, and my attitude towards pears and granola has been changed forever.
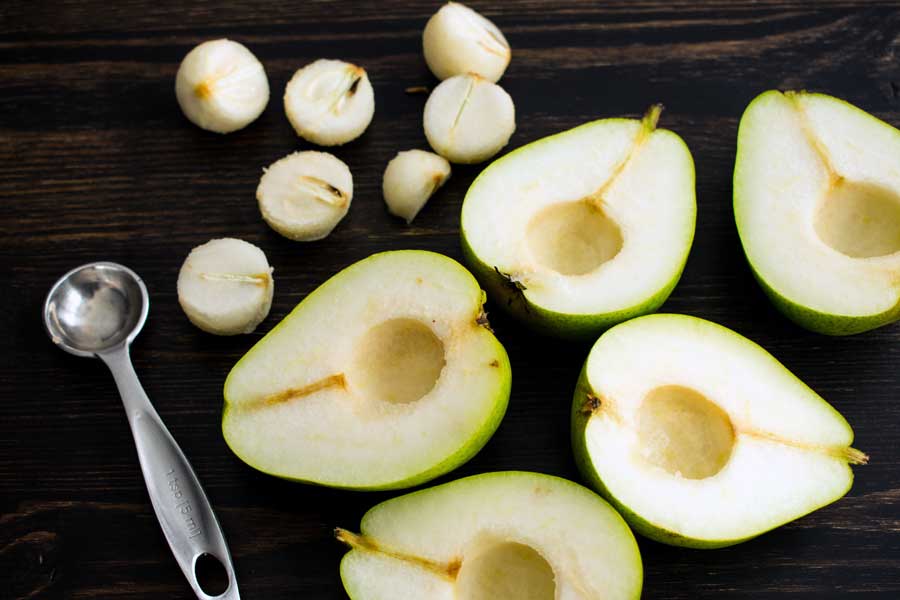
Coring the pears
Coring the pears with a teaspoon

Chicken Mulligatawny Soup

With this week’s recipe comes an admission: I’m a Seinfeld fan. My dad got me into reruns, and I’ve been a fan ever since. One of my favorite episodes was The Soup Nazi, and that’s where I first heard of mulligatawny. I had no idea what it was, but my subconscious must have been paying attention because I was soooo excited when I found this Chicken Mulligatawny Soup recipe.

The accompanying blog post gives the history of this soup, and it was an interesting read. It’s a blend of Indian and British foods that includes an unusual ingredient: apples. I’m also a fan of RuPaul’s Drag Race, so I read “apples” in the Alyssa Edwards “back rolls” voice. If you don’t know what that is, imagine “apples” an incredulous southern accent. Chicken, vegetables, curry, cream—I’m good with all that. Apples? In chicken curry? I don’t know about this…

This post was originally published on October 15, 2019. The text and photos were updated on November 5, 2021. The review and rating have not been changed.

Chicken Mulligatawny curry soup! So EASY to make and absolutely delicious, you will want to make over and over again.

Recipe Author: Elise Bauer at Simply Recipes
Get the recipe

The Ingredients

Indian food might sound exotic, but the ingredients should be easy to find in any well-stocked grocery store. The ingredients list was long-ish but full of pretty basic stuff. I had to buy almost everything for this recipe and had no trouble finding the ingredients nor were they unusually expensive.

This recipe calls for yellow curry powder, and I had a bottle in my pantry (one of the few ingredients I had on hand). I used a blend by Frontier Co-Op. It didn’t specifically say Indian curry, but it was yellow in person, so I went with it. I like this brand because their curry powder is flavorful but not too hot.

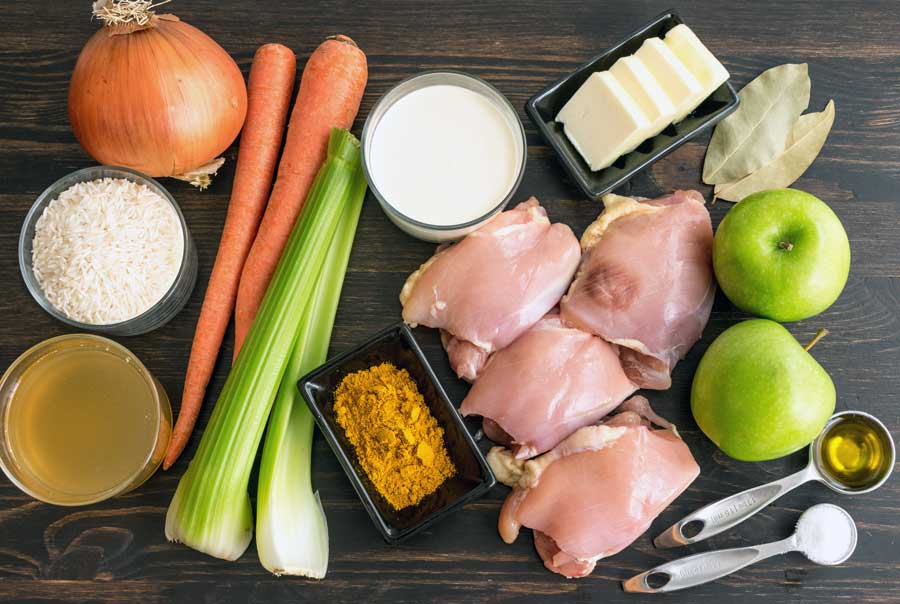
Chicken Mulligatawny Soup Ingredients
Chicken thighs, curry powder, celery, carrots, chicken stock, basmati rice, onion, heavy cream, butter, bay leaves, granny smith apples, extra virgin olive oil, and salt

The Process

The time listed for this recipe was 1 hour, and I came pretty darn close to that. Here’s how my time was spent:

  • 11 minutes for prep work
  • 55 minutes to cook
  • 1 hour 6 minutes total

Not bad, eh?

The instructions broke everything down into easy-to-follow steps, and I wasn’t left with any “what does that mean?” moments. I especially liked the bolded summary text at the beginning of each step. It gave a broad overview of what I would need to do next and was really helpful. Sometimes it’s the little things.

Speaking of little things, I do have to recommend a couple of gadgets to make the prep work easier. A vegetable peeler and apple corer/slicer were really nice to have. They aren’t requirements, but they made my life a little easier.

A large pot is a requirement, and my trusty cast-iron Dutch oven was perfect for this soup. I made it all in one pan! Lastly, a good chef's knife and a large cutting board will make the prep work easier.

Shredding the chicken thighs
Shredding the chicken thighs with two forks

Apple Cider Bourbon Cocktail

0

I’m still stoked that the Fall season is here, even if it doesn’t feel that way. The Juicy & Tender Roasted Pork Loin I just made was a nice way to welcome the season, but I feel like I need a cocktail to really welcome it. This Apple Cider Bourbon Cocktail just screams Fall and I think it will be the perfect followup to that pork roast. Let’s find out!

Apple cider meets a shot of bourbon and they shake things up with apple butter, fresh orange & lime juice and spices.

Recipe Author: Dani Meyer & Candace Simpson at The Adventure Bite
Get the recipe

The Ingredients

I found a bottle of Knob Creek at the back of our bar cabinet–lucky me! It’s slightly stronger than the Bulleit I used in last week’s Blueberry Mint Julep (100 proof versus 90 proof), and I thought that would make it excellent for this apple cider bourbon cocktail. There are a lot of mixers in this recipe, especially apple cider, so I’m thinking stronger bourbon is necessary here.

Speaking of mixers, this one has some citrus, a few spices, and apple butter. I’ve never had apple butter, so I’m looking forward to trying it. The brown sugar is just for rimming the glass and doesn’t actually go into the cocktail.

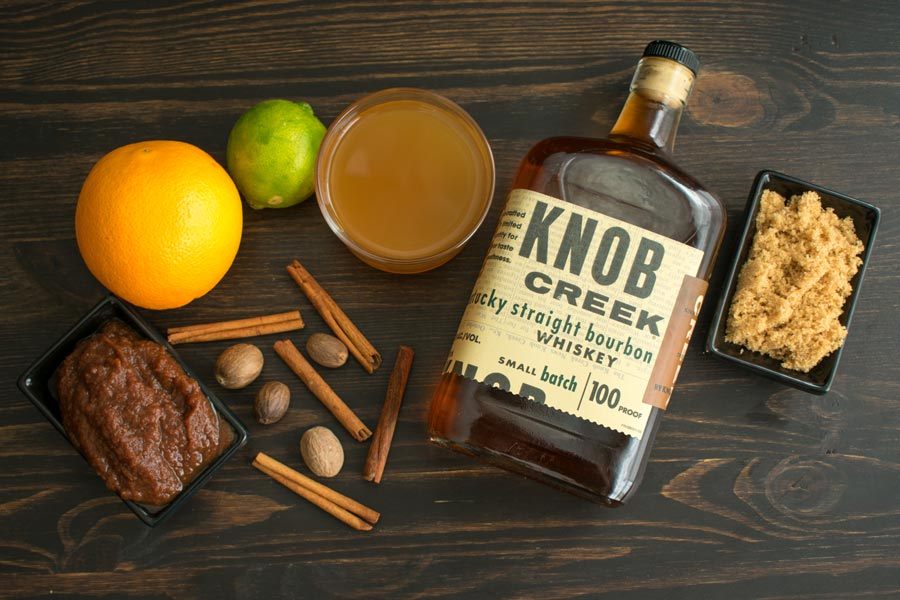
Apple Cider Bourbon Cocktail Ingredients
Apple butter, orange juice, lime juice, apple cider, bourbon, brown sugar, cinnamon, and nutmeg

The Process

So making this bourbon cocktail wasn’t difficult at all, but it did nearly fill my largest cocktail shaker (it holds 25 ounces). Like to the point that I was barely able to add ice. Must have been the 2 shots of bourbon LOL! You might want to make it in two batches if you have a small cocktail shaker.

Otherwise, things went pretty smoothly. The one thing I wasn’t sure of was whether or not to juice the lime and add that to the cocktail. The list of ingredients calls for the juice of one lime, but the instructions only mention the lime in regard to rimming the glass with brown sugar.

I decided to add the lime juice to the cocktail after I rimmed the glasses, and I liked the result. It added just a little lip-smacking tartness to this sweet drink. Or drinks–I got nearly three cocktails out of it.

If you’re in the market for a cocktail shaker, this model is comparable to my large one in looks and features (I don’t know the brand of mine).

Juicy & Tender Roasted Pork Loin

It’s officially Fall! In South Florida, that means it has cooled off from the mid-90s to the high 80s during the day. *sigh* At least I don’t have to rake leaves. Gotta look on the bright side. But in the spirit of the season, I decided to look for a recipe that uses apples. I know they’re available year-round, but they make me think of the Fall season. This Juicy & Tender Roasted Pork Loin sounded delicious, and it’s been a minute since I’ve blogged a pork recipe. So grab a cup of tea, sit back, and read on to find out how this week’s main course recipe worked out.

When you don’t want deja vu turkey for another holiday dinner, hit the reset button with an easy-yet-stunning juicy roast pork loin. You won’t believe how succulent and savory a slice of roasted pork can be with just a simple garlic paste and sprinkle of pepper.

Recipe Author: Patty Catalano at The Kitchn
Get the recipe

The Ingredients

A week or two ago, I made the 30-mile (round trip) journey to my favorite local grocery store chain for meat and fish. One of my finds was a big, beautiful 4-pound boneless pork loin for about $6. I love a good deal!

The rest of the ingredients were all easily found at my regular grocery store (Whole Foods these days). The fresh herbs were probably the most expensive at around $2 each, $6 for all three (sage, rosemary, and mint), but that’s not too bad in my book.

This recipe did give some leeway on the apples, and I chose Fuji and granny smith. I baked the Fuji apples with the pork roast and used the granny smith for the sauce.

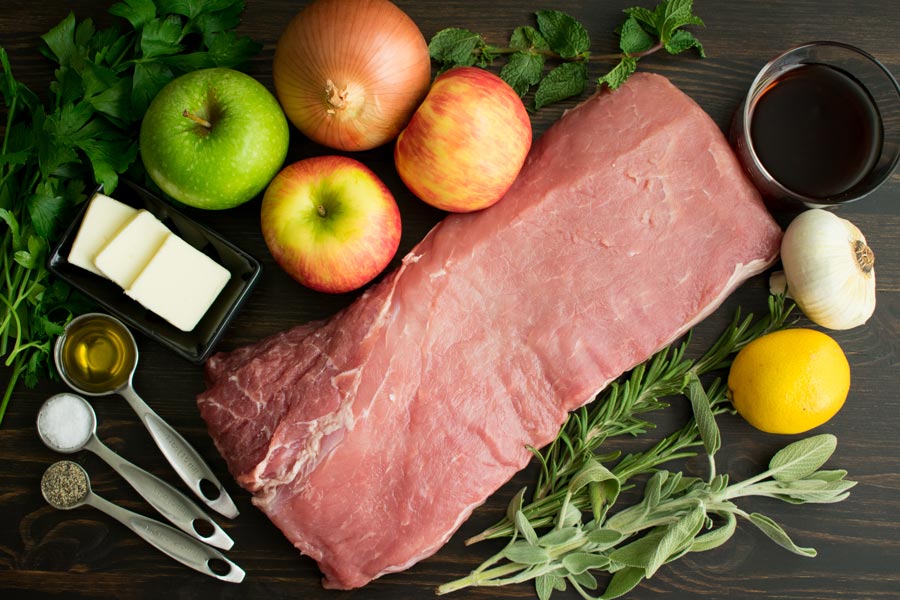
Juicy & Tender Roasted Pork Loin Ingredients
Boneless pork loin, fuji apples, granny smith apple, parsley, onion, mint, maple syrup, garlic, lemon, sage, rosemary, pepper, salt, olive oil, and butter

The Process

This roasted pork loin wasn’t a quick recipe, but it also wasn’t very difficult. Here’s how my time was spent:

  • 10 minutes to prep the pork roast
  • 30 minutes to marinate
  • 17 minutes to brown the pork
  • 50 minutes to roast
  • 20 minutes to rest
  • 2 hours 7 minutes total

Making the garlic paste is the first step. I have to admit I didn’t have much luck following the instructions to make it. Instead, I gave up and used my mortar and pestle–the knife method described just wasn’t making a paste.

Once I made the garlic paste, I tied the roast with some kitchen twine. Then I rubbed on the paste, set the pork aside to marinate for 30 minutes, and finished the prep work. This recipe doesn’t include instructions on how to tie the roast, and it’s completely optional. I decided to because I had a Marth Stewart moment LOL. You can find a super tutorial here if you want to know how it’s done.

Everything went according to the instructions from then on, and I had a really easy time making this recipe. My cast-iron pan was perfect for this recipe. It allowed me to brown the pork roast on the stove, add the apples, onion, and herbs, then roast everything all in the same pan. Super convenient!

My only mistake was not watching the meat thermometer and letting the roast cook to 170℉. I read somewhere that the temperature can increase as much as 10 degrees while the roast rests, so it was well-done (I prefer my pork slightly pink in the middle).

It wasn’t dry–just no pink at all–and this was completely on me. The recipe does say to roast for about 1 hour. I’m guessing 30-40 minutes would have been enough for this roast, so keep an eye on yours.

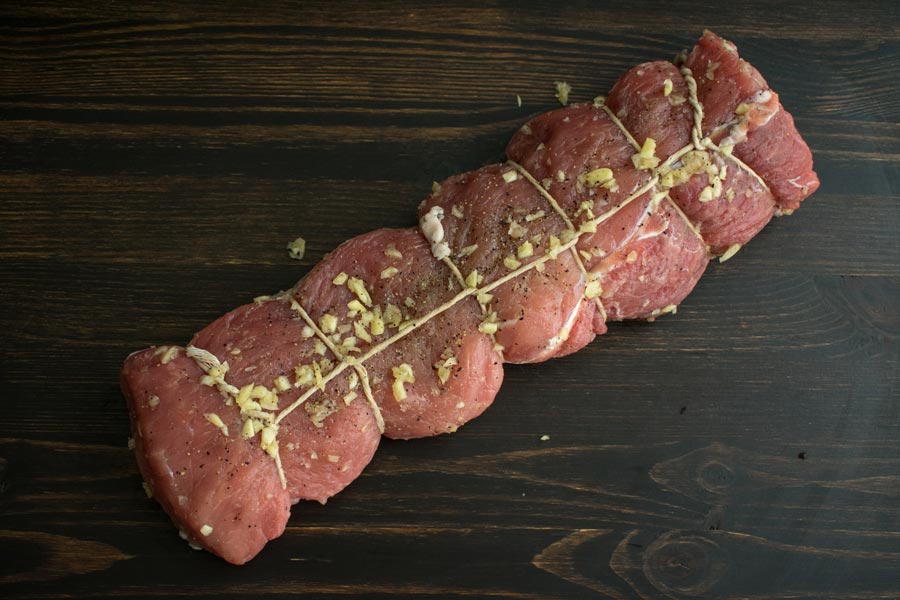
Tied pork loin rubbed with garlic paste
Tied boneless pork loin roast rubbed with garlic paste

Blueberry Mint Julep

It’s been a while since I’ve made a bourbon cocktail, and I thought I’de give a new one a try this week. I’m not entirely sure why, but this Blueberry Mint Julep got my attention as I scrolled through my the bourbon section of my Drinks board. I’m trying to remember if I’ve ever tried this classic cocktail, but I can’t recall ever trying one. So now I’m really looking forward to making this recipe and sipping on a classic Southern cocktail with a blueberry twist. I’ve got a bottle of Kentucky bourbon sitting on my bar, and I’m practically running to the grocery store for the rest of the ingredients. Let’s go!

This blueberry mint julep is an easy, seasonal, and fun twist on the classic summer cocktail that’s almost too pretty to drink – almost.

Recipe Author: The Team at Our Salty Kitchen
Get the recipe

The Ingredients

Seltzer, simple syrup (recipe below) and bourbon are staples in this house. I like to keep my bar stocked with basics in case we have company. Well, company and/or a stressful day, if I’m being completely honest.

That left me with just blueberries and mint to buy. Another super short grocery list of items from the same department, my favorite kind!

Blueberry Mint Julep Ingredients
Bourbon, blueberries, mint leaves, simple syrup, and soda water

The Process

I went into this the same way I normally do, by following the instructions as closely a possible. They seemed clear and were easy to follow. However, the resulting blueberry mint julep cocktails looked a lot different from the author’s pictures. If you compare them, hers look like they were stirred after the ice was added. Mine were not because the instructions didn’t say to.

No biggie, until it came to the taste test. My husband, a real bourbon lover, graciously taste-tested with me. We did not use straws and both got sips of just bourbon and soda at first. I tried to add a straw, but the ice was too packed. Waiting for it to melt diluted the bourbon and finally allowed a straw to slip into the glass.

After a stir, the flavors of the mint, blueberries, and simple syrup became apparent. It was a whole different drink, and I enjoyed it. Still, I was left feeling I did something wrong, so I googled how to make and drink a mint julep. There’s a lot more history to this cocktail than I realized, and I knew I needed to give it another try.

Blueberry Mint Julep
My first try at this recipe

Take-Two

Apparently, there are a lot of opinions on how to make a mint julep, but there are a few constants (besides bourbon and mint). I learned a major part of making a mint julep is the ice. Never cubes, and not just regular crushed ice from your ice maker, but finely crushed or shaved ice. So for my second try, I put ice cubes into a ziplock bag and smashed the bejesus out of them with a meat mallet. It was kind of fun!

The next change I made was to add the seltzer before adding the ice. That allowed me to stir all the ingredients to make sure the flavors melded. Then I piled on as much ice as I could fit into the glasses.

Oh, and I switched to a rocks glass. The traditional mint julep glass is a small metal cup (for lack of a better word), but I wasn’t going to go all out and buy special glasses just to make a cocktail. I’m not that fancy. A rocks glass seemed a little closer than a tall collins glass.

While I was photographing them, I noticed they frosted up like the traditional metal cups. The taller collins glasses didn’t do that, so I really think the rocks glasses were a better choice.

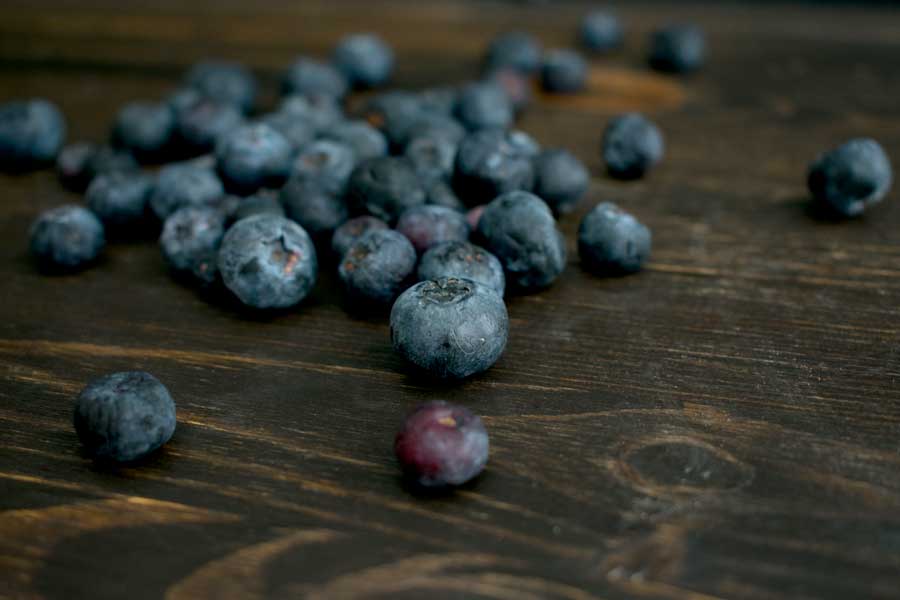
Fresh blueberries
Fresh blueberries just waiting to be muddled in a cocktail
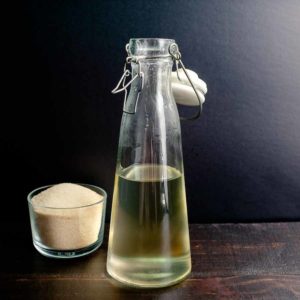
Simple Syrup

Simple Syrup

The Hungry Pinner
A quick and easy-to-make staple of any well-stocked bar. This recipe yields approximately 12 ounces of simple syrup.
Prep Time 5 minutes
Cook Time 5 minutes
Cool 1 hour
Total Time 1 hour 10 minutes
Course Drinks
Servings 12 1-ounce servings
Calories 63 kcal

Ingredients
  

  • 1 cup water
  • 1 cup sugar of your choice (I use organic sugar, which gives the syrup an amber tinge)

Instructions
 

  • In a small saucepan, bring the water to a boil.
  • Reduce heat to medium and add the sugar. Stir until dissolved (the mixture will become clear when the sugar is dissolved).
  • Remove from heat and allow to cool. The simple syrup can be refrigerated in a bottle or other airtight container for up to 4 weeks.
Keyword bartending, mixology, simple syrup, sugar

Sun Dried Tomato Basil Mahi Mahi

0

I just loved the Broiled Steak & Asparagus with Feta Cream Sauce I made last week, but it felt very indulgent to have all that red meat. I think I was feeling a little guilty over that, so I went on the lookout for a lighter main course recipe for this week. This Sun Dried Tomato Basil Mahi Mahi jumped out because it was light, easy, and I’ve never blogged a mahi mahi recipe. Until now, that is. And now for something completely different (and a random Monty Python reference)!

Tender, firm and flaky mahi mahi fillets pan seared with delicious combination of shallots, sun dried tomatoes, and basil. It’s a very simple combination of ingredients but there is so much flavor, it goes perfectly with the fish. You can serve it with many different side dishes as well as in tacos and sandwiches.

Recipe Author: Lyuba at Will Cook for Smiles
Get the recipe

The Ingredients

I made a trip to my favorite local fish and meat market, Penn Dutch, and found a lovely 1.7-pound mahi mahi fillet for about $10. (Actually, I made a haul and a half of meat and fish, so much, much more is to come from that trip.)

I found the rest of the ingredients at my usual grocery store. An 8-ounce jar of sun-dried tomatoes was the most expensive item at $5. This recipe calls for 6 ounces of the tomatoes, but I couldn’t find that size. I ended up eyeballing it and used about 3/4 of the jar.

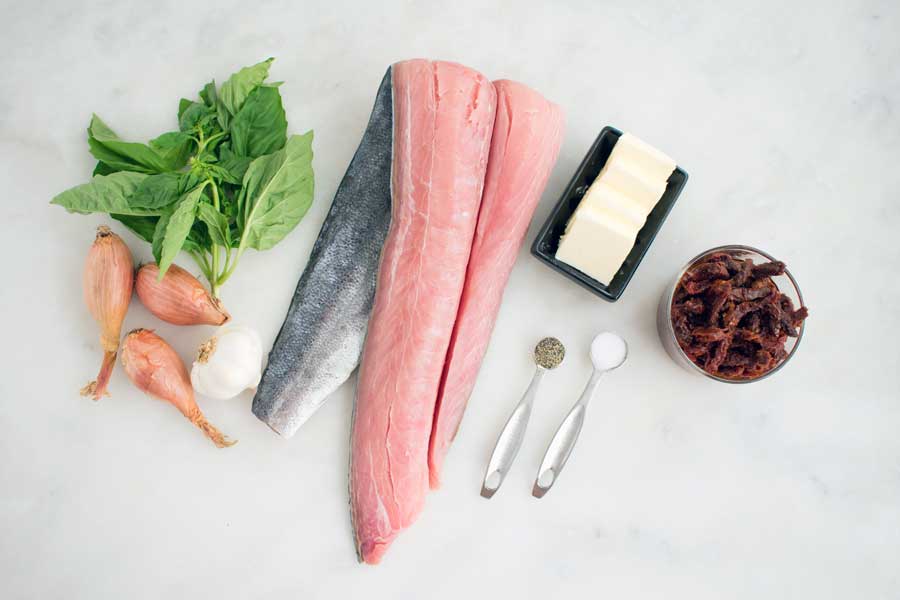
Sun Dried Tomato Basil Mahi Mahi Ingredients
Shallots, basil, mahi mahi fillet, butter, sun-dried tomatoes in oil, salt, and pepper

The Process

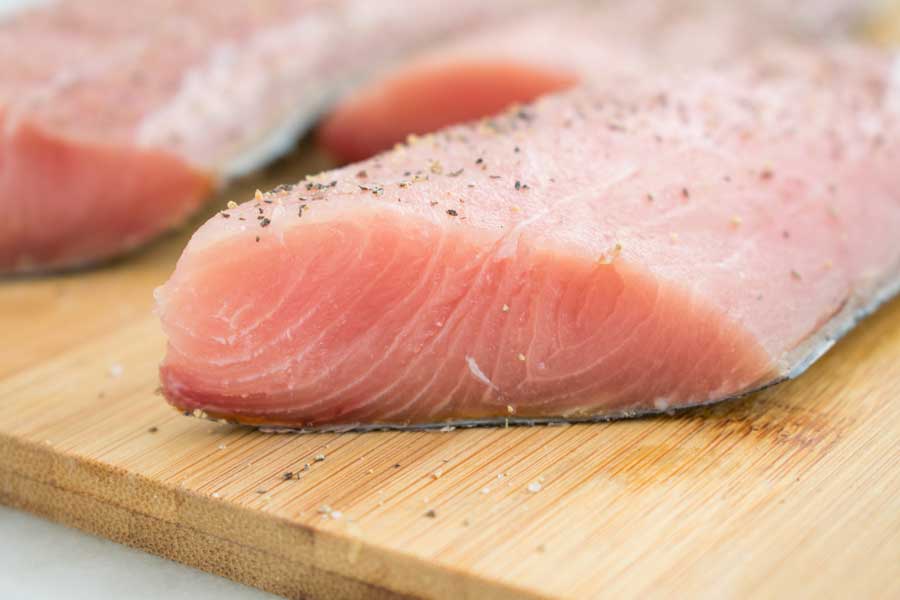
This recipe didn’t specify whether the fish needed to be skinless, so I left the skin on. I find it’s easier to remove the skin after the fish is cooked. And even though I had to cut the larger fillet into individual portions (5 total), I still had this recipe made in a mere 24 minutes.

The instructions for this recipe broke down the steps nicely, and they were so easy to follow. However, I do recommend reading the entire accompanying post, especially if you’ve never made mahi mahi.

It’s easy to overcook and dry out this fish, and the author has some tips that I found helpful. Remember, you can always cook it more if it’s underdone, but overdone can’t be fixed. Also, the internal temperature will keep increasing after you remove the fish from the pan. I believe 5-10 degrees is the norm.

I thought the fillet I bought was on the thin side, and I reduced the searing time (Step 4) from 4-5 minutes per side to about 3 minutes per side. The fish is returned to the pan for another minute in Step 6, so it’s okay if it’s a tad undercooked after searing.

Herbed Couscous Pilaf

0

After what might have been the perfect weeknight steak dinner, I’m sure you were expecting me to make a cocktail or dessert, not a side dish. It’s true, the Broiled Steak & Asparagus with Feta Cream Sauce I just made doesn’t need a side dish, but I couldn’t pass up this Herbed Couscous Pilaf. The truth is I’m not a confident menu planner. I don’t know the ‘rules’ of pairing food, I just pick things I like and hope for the best. And I lucked out this week! So without further ado, let’s give this ‘unnecessary’ side dish a whirl!

I adapted this recipe I found in the October 2010 issue of Cooking Light that was healthy, flavorful, and delicious. This recipe is extremely quick and simple to make – which is perfect for a busy week night.

Recipe Author: Pam @ For the Love of Cooking
Get the recipe

The Ingredients

I had some difficulties, shall we say, in finding the ingredients for this recipe. On the surface, things looked great. I found all the ingredients online and placed my order.

I’ve had trouble finding whole wheat couscous in the past, and I was delighted to find it available this week. Only I didn’t realize it was pearl couscous, and the grains are much larger than the regular couscous I’m used to. That meant this type would take longer to cook than what was specified in the recipe, though I didn’t realize that until I was cooking (more on that later).

I was also pleased to find garlic olive oil until I got the text saying it was out of stock. No biggie, I figured I could try another store or order it and stumbled upon a recipe for Garlic-Infused Olive Oil. No extra trip for a single ingredient needed, just some EVOO, a few garlic cloves, and half an hour of simmering. I can do that!

Lastly, I couldn’t find a small can of chicken broth, so I used powdered bouillon. It’s quick, never spoils, and so good to have around for these situations.

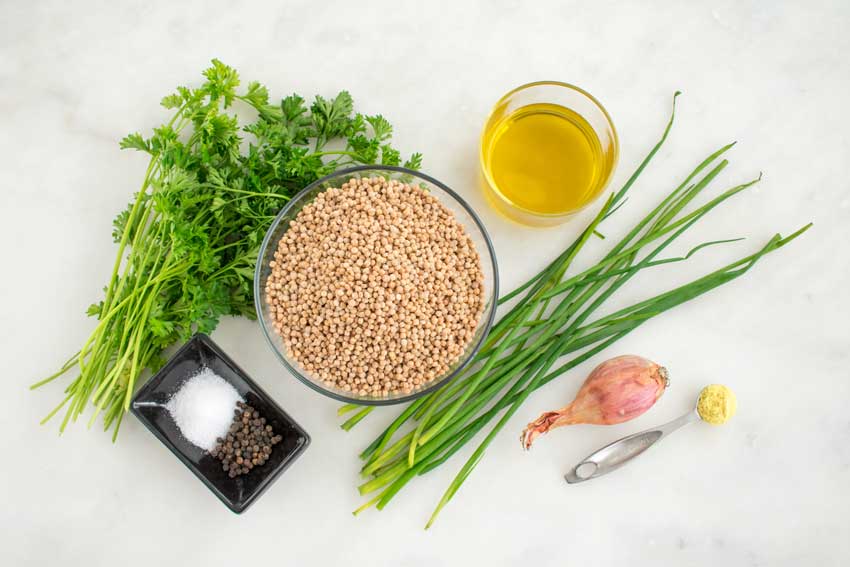
Herbed Couscous Pilaf Ingredients
Whole wheat pearled couscous, salt, pepper, parsley, garlic olive oil, chives, shallot, and chicken bouillon powder

The Process

It turns out that this was a quick and easy recipe, although the pearl couscous did make the cooking time longer than what was listed. The time listed was 15 minutes, and the larger couscous grains doubled that to 30 minutes. And it was worth it!

Everything went according to the instructions until I noticed the water hadn’t been absorbed after standing for 5 minutes. Then I read the back of the couscous bag and realized the problem (duh!). I put the pan back on the stove and cooked it until the water was absorbed. That did the trick.

I do try to follow the recipe as closely as possible, so I felt this one needed a do-over to keep things fair. I made it again a couple of nights later with regular couscous. It wasn’t whole wheat, but the grains were much smaller, reducing the cooking time greatly.

This time the herbed couscous pilaf was ready in 15 minutes, but it didn’t have quite as much flavor as the whole wheat version. Not that it wasn’t delicious (it really was) but the whole wheat version kind of blew it away.

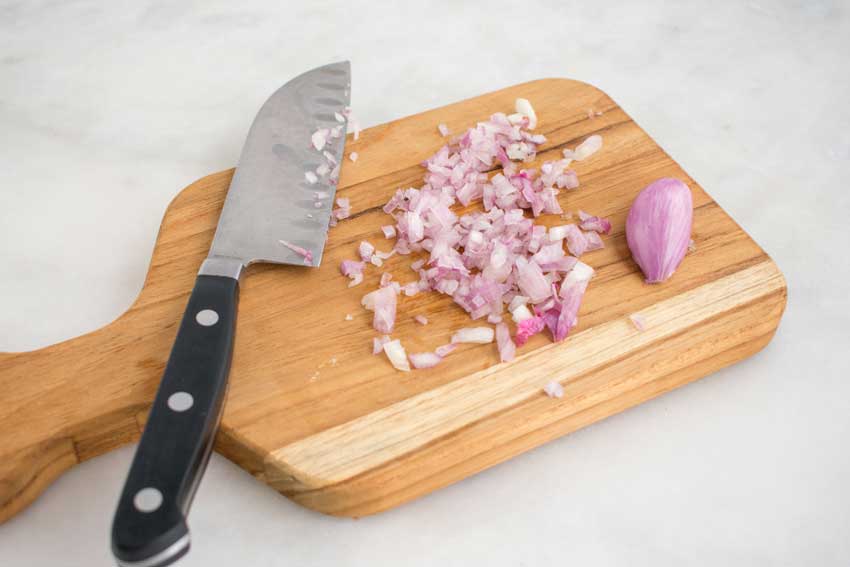
Minced shallot
Minced shallot

Broiled Steak & Asparagus with Feta Cream Sauce

Something this blog has been wonderful for is getting me out of my cooking rut. Yup, it happens to us all, and I have to confess that steak and asparagus was one of my regulars when I was in that rut. And now you’re probably wondering why on earth I’m choosing to make it for my blog this week. I actually haven’t made it in a long time, which is kind of a miracle. Oh, and there’s the matter of the feta cream sauce that’s included with this broiled steak and asparagus recipe, not to mention that it’s a quick one-pan deal. It has a lot going for it, and it’s practically guaranteed to be a hit around here. Let’s find out if it lives up to expectations.

Here’s a super quick dinner for your springtime arsenal — meaty sirloin tip steaks cook oh-so-quickly on a wire rack under the broiler, while the asparagus below soaks up all of the flavorful juices from the meat. An easy blender sauce with punchy chives and feta makes a great accompaniment.

Recipe Author: Molly Gilbert via Kitchn
Get the recipe

The Ingredients

There really aren’t a ton of ingredients in this recipe, but that’s not surprising. It’s supposed to be easy, and a long, complex list of hard to find items just wouldn’t work.

I didn’t have trouble finding anything at my usual grocery store, but the steaks were a bit on the thin side. The recipe calls for them to be 1″ to 1 1/2″ thick, and these were more like a 1/2″ thick. That actually worked out well since it’s just the two of us (the recipe a-written is for four servings). I’ll just have to adjust the cooking time so I don’t end up with overdone steaks.

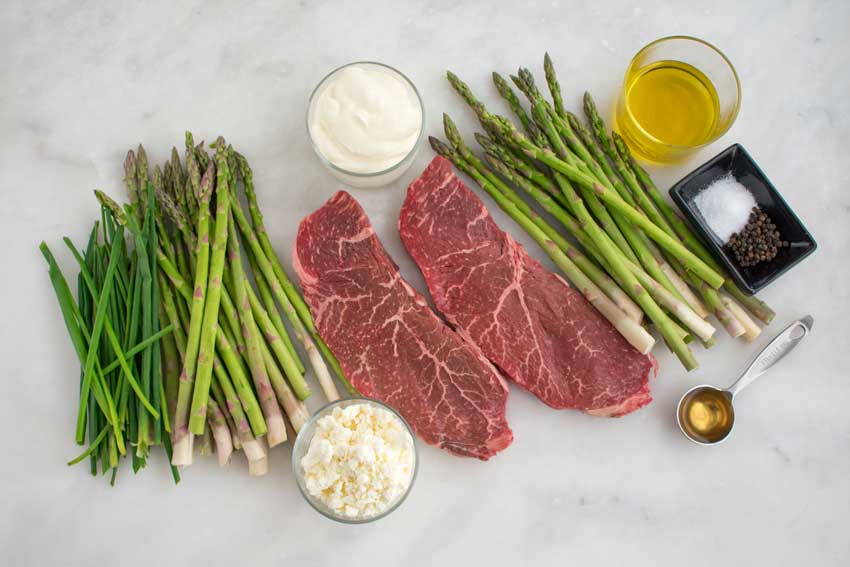
Broiled Steak & Asparagus with Feta Cream Sauce Ingredients
Sirloin steaks, crumbled feta cheese, asparagus, sour cream, extra virgin olive oil, salt, pepper, and apple cider vinegar

The Process

Making this broiled steak and asparagus recipe was as quick and easy as I imagined it would be. I had a sumptuous dinner done in a mere 25 minutes. Here’s how I spent my time:

  • 15 minutes to prep
  • 6 minutes to cook (broiler setting: High)
  • 10 minutes to rest
  • 25 minutes total

Things went pretty smoothly, but I had one minor hiccup. I was only able to fit about 1 1/2 bunches of asparagus on the sheet pan. I really crowded them on there, too, but there was no way I was going to get them all to fit. Next time I’m just buying one bunch. It’s plenty for the two of us.

Broiling and letting the steaks rest took 16 minutes, which was more than enough time to make the feta sauce. I whipped it up by putting all the ingredients into my mini prep and pulsing until smooth. It was ridiculously easy.

The moment of truth was when I cut into the steaks. I reduced their cooking time from 8-10 minutes to 6 minutes, and they were the perfect medium-rare we like.

I was also worried the asparagus would be undercooked, but it was also done to our liking, a little charred, and not too soft. The spears were on the thin side which turned out to be ideal for the reduced cooking time.

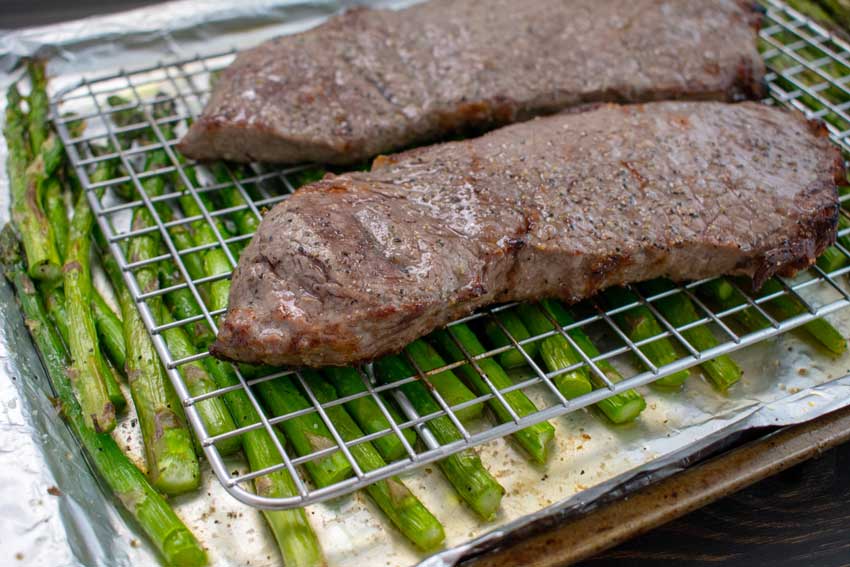
Broiled steaks and asparagus on a foil-lined sheet pan

Anne Frid Cocktail (Sweet Paul’s Norwegian Wood Cocktail)

0

I’m sure it’s no surprise to hear that I actually select and make recipes a couple of weeks ahead. Well, I try to, but life… When I chose to review the Anne Frid Cocktail recipe I was sitting in my house at the end of August, waiting for Dorian to arrive at my doorstep. Even though hurricanes are nothing new, this one was pretty nerve-wracking for a while. South Florida ended up getting lucky, but Abaco and Grand Bahama were devastated. I’m half Bahamian, and the reports hit me pretty hard. I know it’s off-topic, but please help if you can. #BahamasStrong

We all need a cocktail after this weekend. Hurricane Irene was nice enough to drop by, she didn’t to much damage, acted more like an angry lady, did her stuff and left. Anyway, I need a cocktail to keep me going and this one is my all time favorite. I call it the Anne-Frid. Named after my favorite singer in ABBA.

Recipe Author: Paul “Sweet Paul” Lowe at Sweet Paul Magazine
Get the recipe

The Ingredients

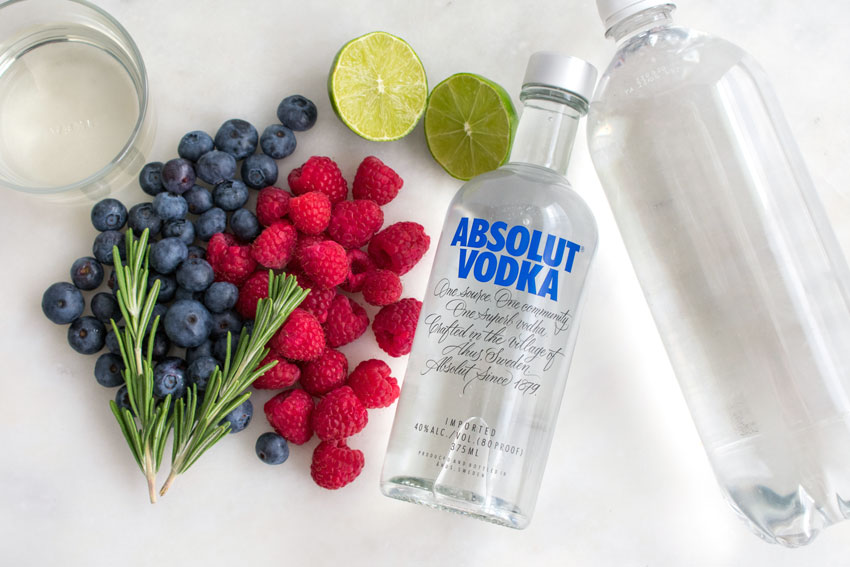
There isn’t a list of ingredients for this recipe, so I had to improvise. Reading the instructions and looking closely at the accompanying slideshow told me everything I needed. The “berries” mentioned are blueberries and raspberries.

I always keep a bottle of homemade simple syrup (recipe below) in the refrigerator, and plain seltzer is a must in this household, as well as vodka. Plus I had leftover rosemary from the Creamy Lemon and Herb Pot Roasted Chicken I posted the other day. That narrowed down my list of ingredients to buy to just the fruit.

Anne Frid Cocktail (Sweet Paul's Norwegian Wood Cocktail) Ingredients
Rosemary, blueberries, simple syrup, raspberries, lime, vodka, and seltzer

The Process

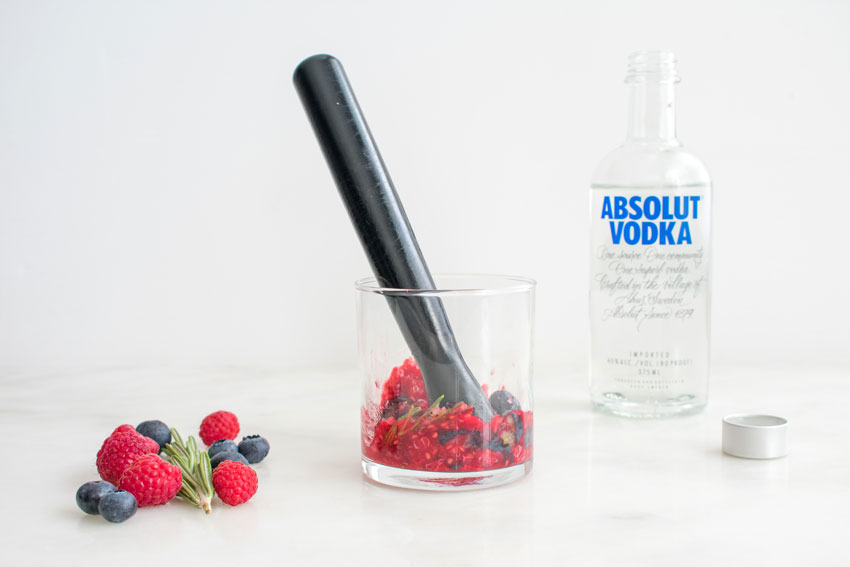
The amounts of berries aren’t listed in the instructions, so I guesstimated them. I filled 1/3 cup measuring cup with a mix of blueberries and raspberries. I used an 11.5-ounce rocks glass, and that looked similar to the pictures with the recipe.

I’m used to muddling mint for mojitos, and that’s done pretty gently. The idea is to just release the oils. I took a different approach for this and smashed the berries because that’s how it looked in the recipe’s pictures.

The quantities of lime and simple syrup were given (BTW, 2cl = 4 teaspoons), but not the vodka and soda water. I used a 1.5-ounce shot of vodka, but I didn’t measure the soda water. A gentle stir mixed everything up, and I had a sweet, fruity Anne Frid Cocktail in just 2 minutes.

Here is the list of ingredients with the quantities I used:

  • 1/3 cup mixed berries (raspberries and blueberries)
  • 2 sprigs of rosemary (1 to muddle and 1 to garnish)
  • Juice of 1/2 a lime
  • 4 teaspoons simple syrup
  • 1.5 ounces of vodka
  • soda water
  • ice

Simple Syrup

Simple Syrup

The Hungry Pinner
A quick and easy-to-make staple of any well-stocked bar. This recipe yields approximately 12 ounces of simple syrup.
Prep Time 5 minutes
Cook Time 5 minutes
Cool 1 hour
Total Time 1 hour 10 minutes
Course Drinks
Servings 12 1-ounce servings
Calories 63 kcal

Ingredients
  

  • 1 cup water
  • 1 cup sugar of your choice (I use organic sugar, which gives the syrup an amber tinge)

Instructions
 

  • In a small saucepan, bring the water to a boil.
  • Reduce heat to medium and add the sugar. Stir until dissolved (the mixture will become clear when the sugar is dissolved).
  • Remove from heat and allow to cool. The simple syrup can be refrigerated in a bottle or other airtight container for up to 4 weeks.
Keyword bartending, mixology, simple syrup, sugar

Creamy Lemon and Herb Pot Roasted Chicken

0

It’s still summer weather in South Florida, but I hear things are turning toward Autumn in other parts of the country. Yes, it’s still in the 90s, rainy, and a hurricane just blew by us, but I’m kind of craving some Autumn/Winter kind of food. This Creamy Lemon and Herb Pot Roasted Chicken recipe sounds like a good way to fulfill that craving without being too heavy. And it’s been a long, long time since I’ve pot-roasted a chicken. Yup, I need to give this recipe a try ASAP. To the grocery store!

This creamy lemon and herb pot roasted chicken is simple to make, decadent, and bursting with fresh flavors. See how easy it is to make chicken in a Dutch oven! You will love this one pot meal.

Recipe Author: Natasha at Salt & Lavender
Get the recipe

The Ingredients

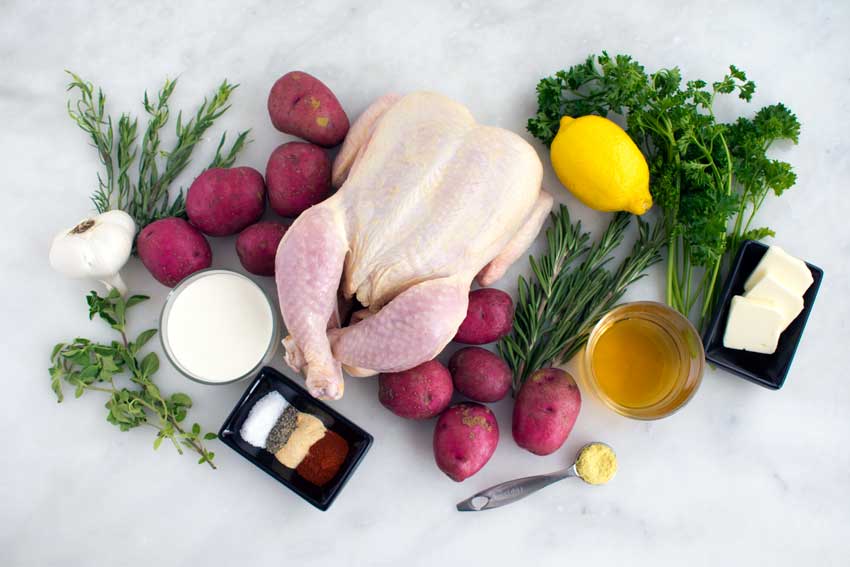
The list of ingredients isn’t too long, and I had the dried spices, butter, and wine. That left me to shop for the chicken, cream*, and produce. Most everything I needed to buy was easy to find and reasonably priced. The chicken was the most expensive items at $13.16 for a 4.4-pound bird.

The only thing that was impossible to find was a 10-ounce can of chicken broth. It was either 32-ounces or more. I decided to use bouillon powder instead. I was able to make the exact amount I needed and nothing went to waste.

* One pint of heavy cream is 2 cups, exactly the amount needed for this recipe.

Creamy Lemon and Herb Pot Roasted Chicken Ingredients
Chicken, cream, oregano, garlic, tarragon, petit red potatoes, lemon, parsley, butter, dry white wine, rosemary, chicken bouillon powder, smoked paprika, garlic powder, pepper, and salt

The Process

The instructions for this recipe were clear and easy to follow, and making it went very smoothly. In fact, I had the initial prep work done before the oven was preheated. Here’s how my time broke down:

  • 8 minutes to prep
  • 7 minutes for the oven to finish preheating
  • 90 minutes to cook**
  • 1 hour 45 minutes total

That was right in line with the 1 hour 40 minutes listed on the recipe.

I used a 5.3-quart cast iron pot***, and it had plenty of room for the chicken and potatoes. In fact, I thought it was a little big even after I added the potatoes. Then I opened the oven door after the last 45 minutes and saw how the sauce was boiling almost to the top. It turns out the pot was the perfect size to avoid messy spills.

After 90 minutes in the oven, my meat thermometer read 176℉, so I knew the chicken was thoroughly cooked. I tried to remove the rosemary sprigs, but they fell apart. The chicken pretty much did too, not that I’m complaining. It was so tender and juicy!

** I finished the prep work (Step 3) while the chicken was cooking. It took me 6 minutes.

*** I love my Ikea Senior casserole and use it all the time. It performs like a much more expensive Dutch oven. Ikea does sell it online in case you don’t have one in your area, and I highly recommend it. They also sell it on Amazon, but it’s much more expensive for some reason. Maybe it’s the free shipping? I’m not sure as I bought mine locally.

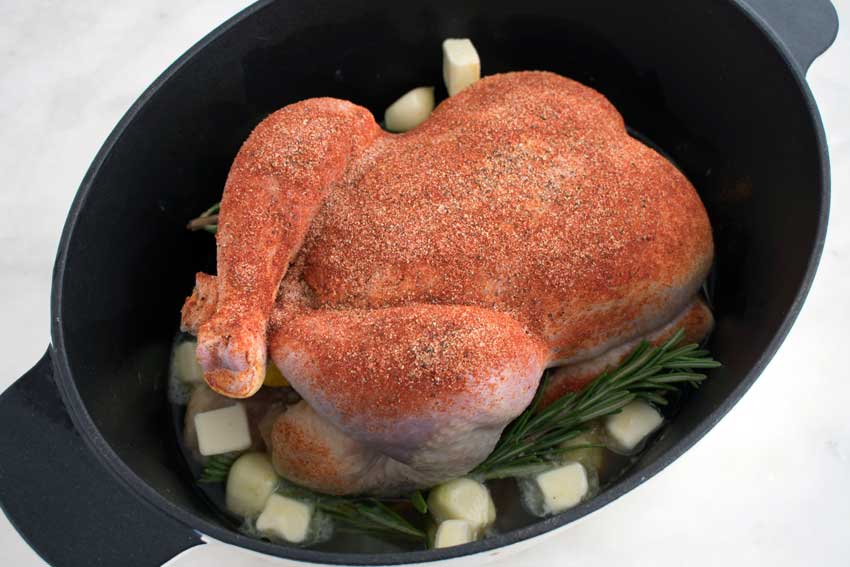
Seasoned chicken that's ready to go into the oven (Step 2)
Seasoned chicken that’s ready to go into the oven (Step 2)

Charred Lime & Jalapeño Margaritas

0

What on earth can I make to go with the Margarita Shrimp Tacos I just made? Hmmm… This could be a tough one. Oh, wait, no it’s not–I’ll make a margarita! I have pinned tons of margarita recipes, but this Charred Lime & Jalapeño Margaritas recipe stood out. It caught my eye because it reminded me of the Charred Lemon, Rosemary and Coriander Gin and Tonics I made when I first started my blog. It’s not even close to Cinco de Mayo, but I really don’t care. I need a margarita (or two)!

These Charred Lime & Jalapeño Margaritas put all others to shame. Smoky, citrusy, and oh-so refreshing, this margarita is fit for Cinco de Mayo.

Recipe Author: Lauren Grant at Zestful Kitchen
Get the recipe

The Ingredients

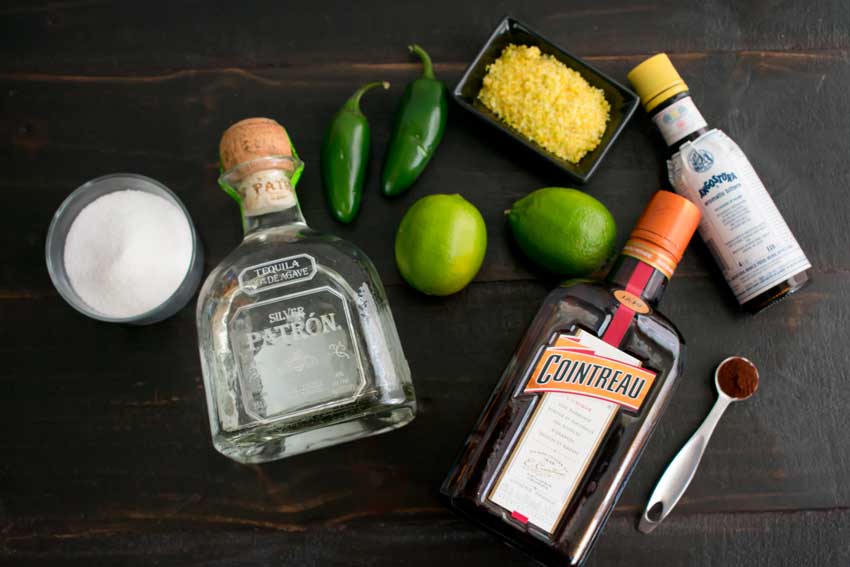
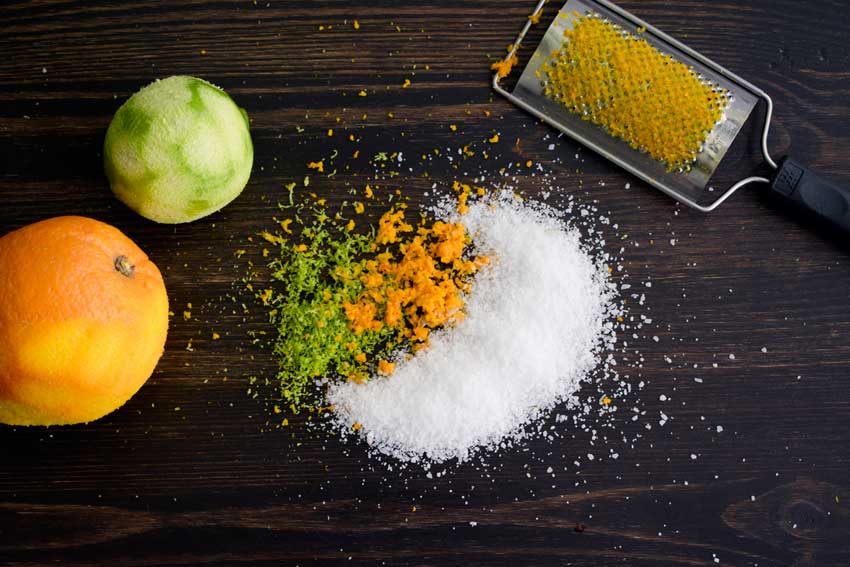
I lucked out and had a lot of the ingredients for this margarita recipe. I had to buy the produce, tequila, and salt. I’m no margarita expert, and I thought margarita salt was just coarse salt. Not true! It’s actually a blend of coarse salt and citrus zest.

You can buy it, but I decided to make mine using this margarita salt recipe. It was super easy and the fresh orange and lime zest was so good! It only took 5 minutes and made exactly the amount needed for the Charred Lime & Jalapeño Margaritas recipe. Nice!

Charred Lime & Jalapeño Margaritas Ingredients
Sugar, silver tequila. jalapeño peppers, margarita salt, limes, bitters, and orange liqueur

The Process

I did need to plan a little when I decided to make this cocktail. None of the steps were difficult, but the jalapeno simple syrup needed time to cool before I could use it. Here’s how I spent my time:

  • 5 minutes to make the jalapeno simple syrup*
  • 13 minutes to make and garnish the margaritas
  • 18 minutes total (*Cooling time for the simple syrup not included)

I actually made the simple syrup the day before the margaritas, then I popped it into the refrigerator overnight. I imagine it was cooled in an hour or two, and I probably could have made the margaritas the same day if I made the syrup that morning. I’m just not that motivated in the A.M.

Times to char the jalapenos and limes were not listed, but they only took a few minutes in my grill pan:

  • 3 minutes to char the limes
  • 4 1/2 minutes to char the jalapenos

I mixed the chili powder into the margarita salt and rimmed the glasses while I waited on the limes and peppers. Then it was just a matter of juicing the charred limes and shaking up the margarita ingredients. I’m not usually a garnish person, but they really made these drinks so pretty.

Making the margarita salt

Margarita Shrimp Tacos

0

I had some leftover frozen shrimp from the Lemon Spaghetti with Shrimp I made not long ago, and I couldn’t wait for an excuse to use them. I love seafood, so it wasn’t hard to convince myself to give these Margarita Shrimp Tacos a try. Tacos and shrimp with any and all the toppings I love? Bring it on!

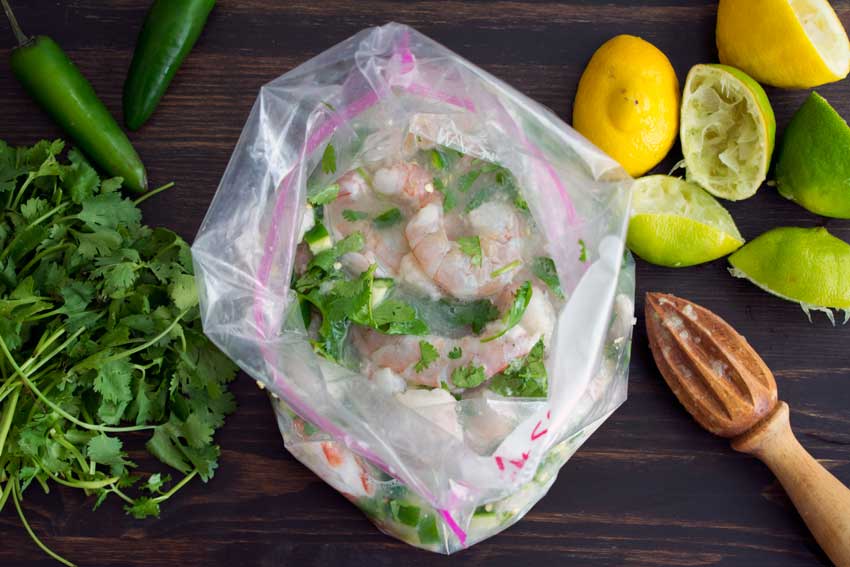
Great tacos for a quick dinner. Especially good for Cinco de Mayo! The shrimp are quickly marinated in margarita ingredients!

Recipe Author: Nick at Macheesmo
Get the recipe

The Ingredients

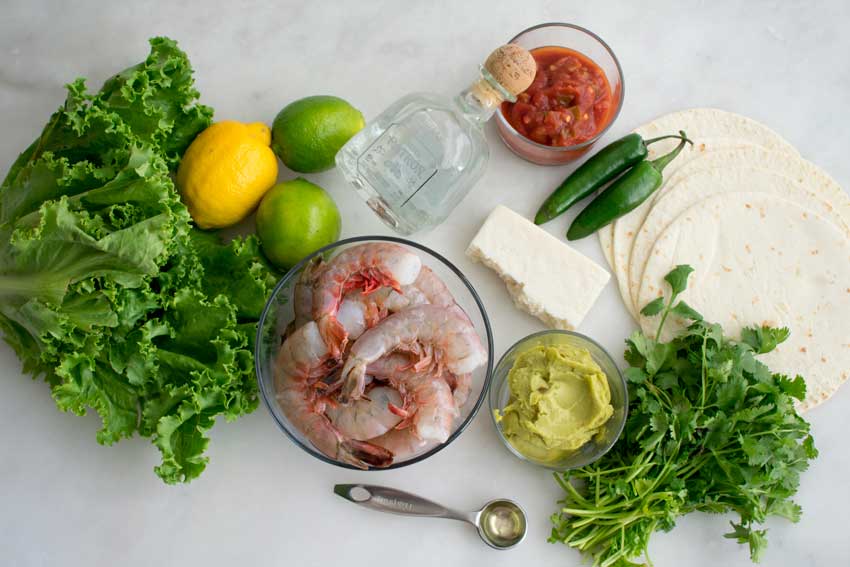
So you already know I had the shrimp, but I did have to but most everything else. Whole Foods had everything I needed, even the cotija cheese. If you’ve never had it, it’s a mild white cheese that crumbles easily. Some recipe I have say you can substitute grated parmesan, but I think cotija is milder.

Another thing I’m glad I tried is Whole Foods’ spicy guacamole. To be honest, I only ordered it because I thought it would be a good prop for photos. I ordered the regular, but they were out, so I opted for the spicy version as a substitute. Now I have to be honest, I don’t care for avocado. I eat it in sushi, but to me, it doesn’t have any taste. Same with most guac, but this stuff was positively addictive. Words I never thought I would say: I love guacamole!

Margarita Shrimp Tacos Ingredients
Shrimp, lettuce, lemon, limes, tequila, salsa, jalapeños, cotija cheese, flour tortillas, cilantro, guacamole, and olive oil

The Process

Have I already mentioned that this recipe was incredibly easy? If not, now I have. The instructions break the steps down into simple, easy to follow steps. Here’s how I spent my time:

  • 8 minutes to peel and clean the shrimp (you can skip this by buying cleaned shrimp)
  • 20 minutes to marinate the shrimp
  • 4 minutes to cook the shrimp
  • 32 minutes total

I opted not to chop the shrimp so that probably saved me a minute or two of prep time. I also prepped the toppings while the shrimp were marinating, so everything was ready to assemble by the time the shrimp was cooked.

Tip: Just before serving, heat the tortillas in the microwave. Place a few on a plate, cover with a damp paper towel, and nuke them for 30 seconds. Keep them covered with a tea towel to keep them warm. They will be softer and more pliable than they were straight out of the package.

Marinating the shrimp