Home Blog Page 35

Blackened Red Snapper

0

Planning my blog posts can be so random, and this week is no exception. Last week I accidentally blackened the braised chicken thighs I made. And I loved them! And that happy accident got me to thinking, what about an intentionally blackened dish? Classic Blackened Red Snapper sounds like a good way to try this technique. It promises to be easy and loaded with zing–in other words, right up my alley. I use my cast iron pan so much that I keep it ready and waiting on my stove these days. And since it’s ready to go, let’s get cooking!

Blackened fish is one of my favorite ways to enjoy seafood. I love coating fish in big, bold spices and cooking it until they are blackened. Served with a wedge of lemon for some added freshness and zing, it’s just fantastic! This blackened red snapper recipe will wow your weeknight as it’s so easy to make, but packed with flavor.

Recipe Author: Alex at The Defined Dish
Get the recipe

The Ingredients

Is anything more convenient than having all the ingredients for a recipe on hand? Well, that’s what happened for this blackened red snapper recipe. I lucked out and found a snapper fillet on sale for about $9 a while back and froze it. It’s been waiting for me to find a yummy way to serve it.

The rest of the ingredients were dry spices, cooking oil, and things I always have around like lemon and parsley. So there was shopping for this recipe at one time, but not this week. This week, all I have to do is thaw the vacuum-packed snapper and get cooking. Love it!
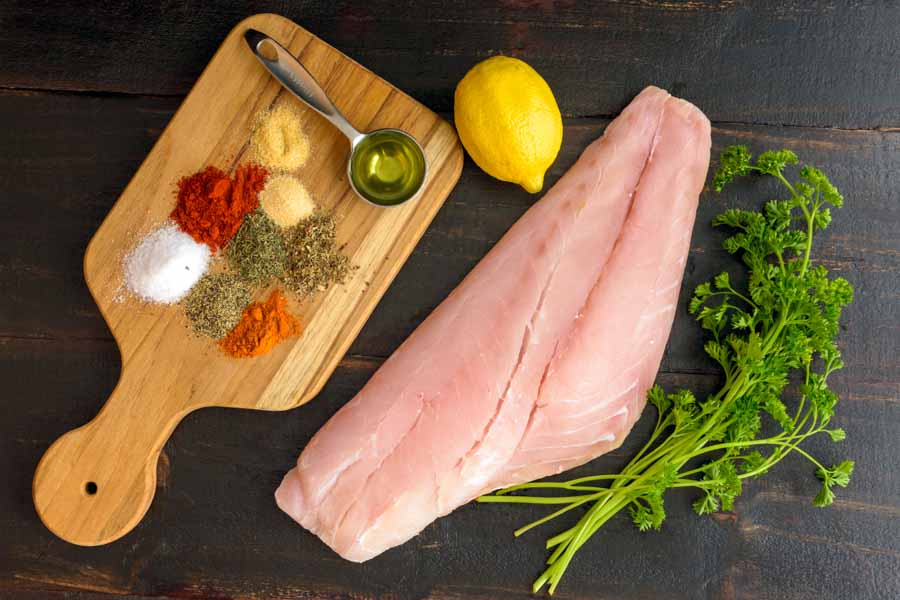
Blackened Red Snapper Ingredients
Red snapper, cayenne pepper, black pepper, salt, paprika, thyme, oregano, garlic powder, onion powder, avocado oil, lemon, and parsley

The Process

Talk about the perfect weeknight dinner! I had my blackened snapper ready before the dirty rice I served on the side. It only took 16 minutes from start to finish, and I’m glad I started the rice first. They were ready nearly at the same time.

Making this blackened snapper was even easier than I thought it would be. I just heated the oil in a large nonstick skillet while I prepped the spices. Then I poured them over the fish and rubbed them in a bit. BTW, I used all of the Cajun spice mixture since my snapper fillet was pretty large.

Once the oil was good and hot, all I had to do was sear the fish on both sides. The times listed in the recipe were spot-on, and I had a moist blackened snapper fillet in 9 minutes.

And snapper was such a good choice for this cooking method since it’s a firm fish that holds up well when turned. I used an extra-wide spatula, but you could also use 2 smaller spatulas if you’re reasonably coordinated. Just be careful not to splash any excess oil when you put the fillet back down. Ouch!
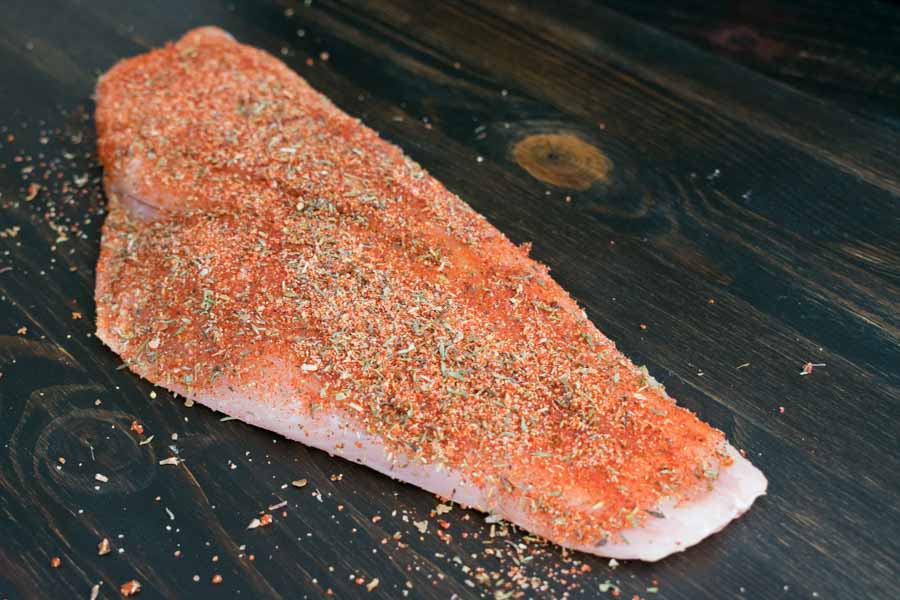
Red snapper fillet rubbed with spice mixture

Braised Chicken Thighs with Mushrooms and Creamy Polenta

Have you ever tried polenta? I haven’t. That’s a big part of why I chose this Braised Chicken Thighs with Mushrooms and Creamy Polenta recipe. I came to a startling realization while I was reading over this recipe: polenta is just yellow grits. But it came out a whole LOT more Southern in my head! More like: Dang, it’s just yellla grits! Y’all, I have never felt so cultured and sophisticated ?Nevertheless, I’m finally giving polenta a try. It might not be as fancy as I imagined, but I’m still looking forward to this savory dish.

The best part of this meal is how cheap and easy it is to make in under an hour. The chicken is tender with rustic mushroom flavor and wine.

Recipe Author: Tux Loerzel at Honest Cooking
Get the recipe

The Ingredients

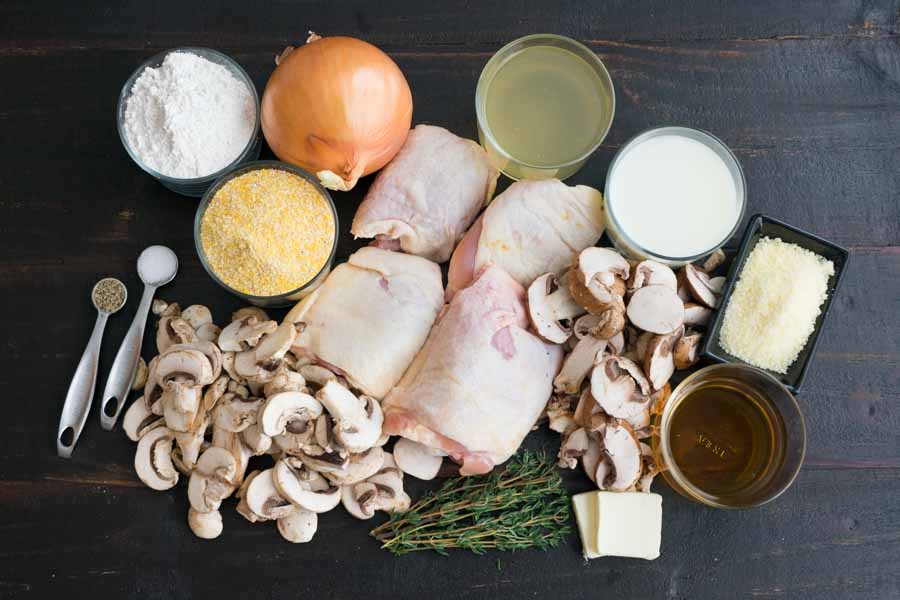
As promised, the ingredients for this recipe were cheap. It’s full of basics like chicken thighs, flour, and milk. I had to buy most of the ingredients, but this meal certainly didn’t break the bank. I even managed to find presliced mushrooms to cut down on some of the work (I used a mix of white and baby bella).

Braised Chicken Thighs with Mushrooms and Creamy Polenta Ingredients
Chicken thighs, sliced mushrooms, salt, pepper, coarse cornmeal, flour, onion, chicken broth, milk, grated parmesan, white wine, butter, and thyme

The Process

My braised chicken thighs were ready in 52 minutes, keeping the author’s other promise that this meal would be ready in under an hour. Most of that time was spent actively prepping, stirring, and sauteeing, so be prepared to be in the kitchen the entire time.

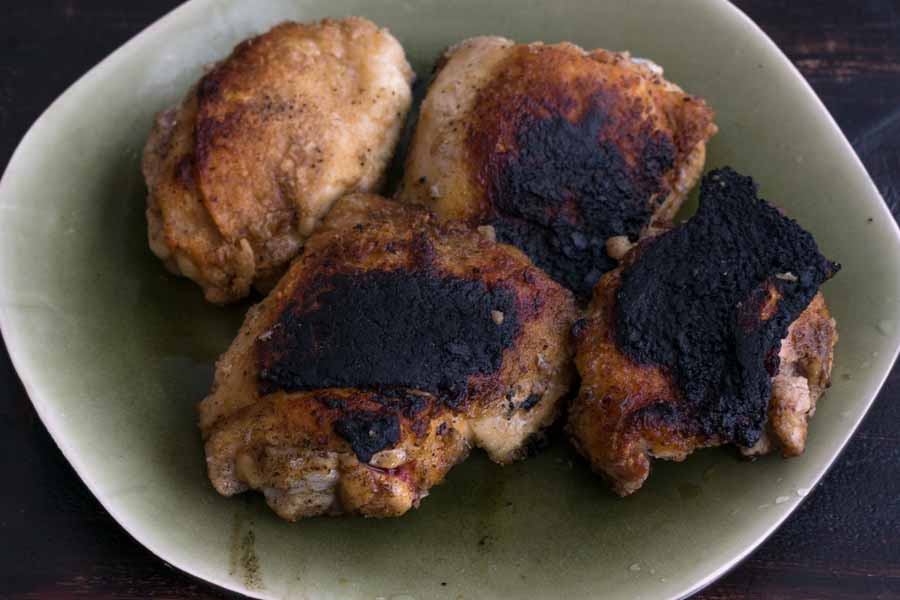
Things went according to the instructions for the most part, although I was afraid I ruined the chicken thighs. As you can see below, searing them on high heat for 5 minutes per side in my cast iron pan burned the skin on 3 out of 4 pieces. Medium-high heat or a few minutes less might be more appropriate. Of course, this could be a quirk of my stove or a difference between gas and electric–I’m not completely sure.

All was not lost though and turned the heat down a bit for the other side of the chicken and to saute the mushrooms and onions. Once I had the chicken, mushrooms, and liquid in the pan to finish cooking at Step 3, I noticed the liquid reduced very quickly. It doesn’t say to cover the pan, but I popped on a lid to capture the steam and save what liquid was left. I’m happy to say it worked, and I had some sauce when cooking was done.

While all this was going on, I got the polenta going. It was super easy and just like making grits. Just be sure to stir regularly to keep things from getting lumpy and sticking to the bottom of the pan. My non-stick saucepan helped a lot, but I still had to keep an eye on things.

The chicken thighs after browning on high for 5 minutes per side
The chicken thighs after browning on high heat for 5 minutes per side

Whipped Ricotta Toast with Balsamic Cherries

0

I am in such a mood for Italian food lately, and my husband couldn’t be happier. It’s his favorite kind of food, especially pizza. And this next recipe isn’t totally unlike pizza. It’s got toasted bread, cheese, basil, and toppings. This Whipped Ricotta Toast with Balsamic Cherries recipe sounds like a tasty snack that will be easy to make–perfect for a lazy afternoon at home. I’m all a tizzy about using fresh cherries, which I love, and a little excited about the ricotta cheese, which I am learning to love. Seriously, I used to hate the stuff. I don’t know what happened, but my tastebuds have changed their minds. And I’m not mad about it.

Whipped ricotta toast with deep red, fresh cherries tossed in balsamic vinegar and scattered with some chopped basil leaves. So pretty, so easy and so delicious!

Recipe Author: Emily Kemp at Inside the Rustic Kitchen
Get the recipe

The Ingredients

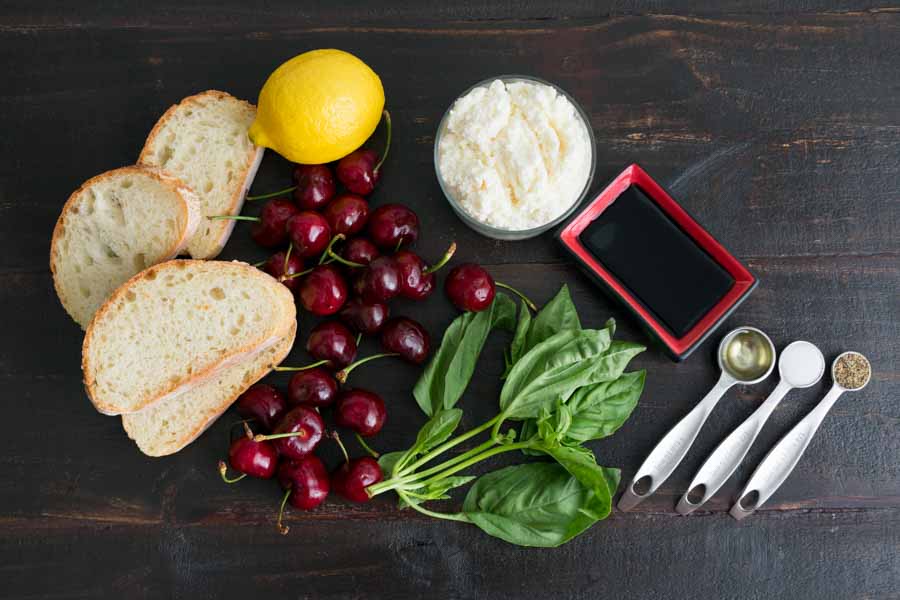
I did have to shop for several of the ingredients for this recipe, but nothing was difficult to find. A quick trip through the dairy aisle, over to the produce section, then a skip through the bakery for some fresh ciabatta bread was all it took. I had the pantry staples like olive oil, balsamic vinegar, salt, and pepper on hand.

Whipped Ricotta Toast with Balsamic Cherries Ingredients
Cherries, ciabatta bread, lemon zest, ricotta cheese, balsamic vinegar, pepper, salt, olive oil, and basil

The Process

Making these cherry toasts was reasonably quick and simple, though I did have to try a few methods to pit the cherries. I read online you could use a drinking straw to push the pit out, but mine wasn’t stiff enough to push out the pit. Another technique I read about used a chopstick to push the pit out, but the pointy end kept missing the pit and destroying the cherry.

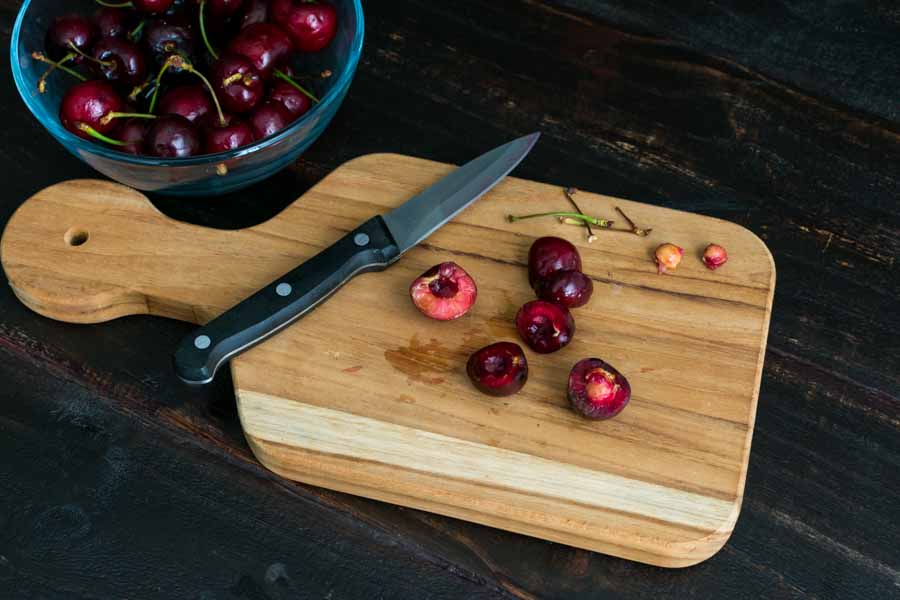
I ended up cutting the cherries in half but rolling them on my cutting board with the sharp edge of a paring knife. Then I grasped each half, twisted, and exposed the pit. A gentle pry with a fingernail removed the pit and kept the halves pretty much intact. Or you could hit up Amazon and buy a cherry pitter if you’re that committed. I’m not, but I was impressed with the variety available–cherry pitting must be serious business for some folks!

Pitting the cherries was the most time-consuming part, and things went very quickly once that was done. It was just a matter of a little zesting, chopping, and mixing while the bread toasted in the grill pan.

Assembling the toasts was just as easy as it looked, and the results were just as beautiful as the author’s pictures. I was thrilled with the results!

Pitting the fresh cherries

Pork Roasted the Way the Tuscan Do

Wow, I’m realizing my food cravings are pretty inconsistent lately! Just last week I really needed something on the light side, so I made Cilantro Lime Seared Ahi Tuna. That was in response to the heavy holiday food I’d been eating, namely the Crock-Pot Brown Sugar Glazed Ham and fixin’s. Now I’m back to a pork dish, although this is going from American to Italian with a Tuscan roasted pork recipe. And I have no shame about it! This is a recipe I’ve been dying to make for a while, and I’m going to enjoy every minute of it. Mostly the minutes eating it (I hope!), so without further ado and stuff…

This is a wonderful and easy technique for pork roasted inside a baguette with wonderful fresh herbs and of course garlic and olive oil! I’m sure this will become a favorite of yours too – it’s great to bring on a picnic lunch!

Recipe Author: Chef Joanne WeirJoanneWeir.com
Get the recipe

The Ingredients

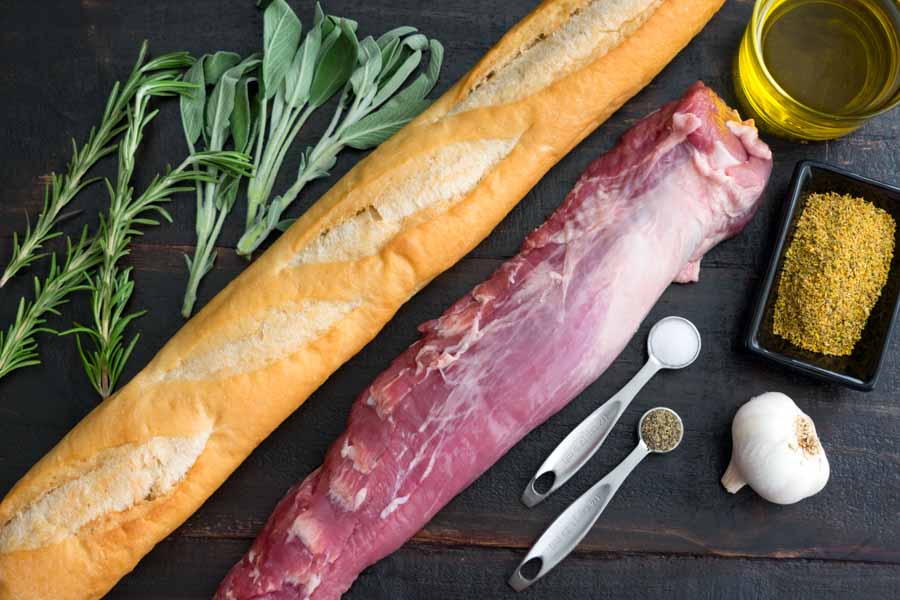
Pork tenderloin, fresh herbs, and a crusty freshly baked baguette from the bakery. Oh, and some fennel pollen that I had to order online. I haven’t a clue about the fennel pollen, but the rest of this sounds ah-ma-zing!! And you know I’m determined to try a recipe when I have to special order ingredients, even if they arrive at my doorstep in a day or two. I admit I can be a bit lazy.

And while I did have to buy most everything in this recipe, I was glad there weren’t a lot of ingredients. And thanks to Amazon, none of them were difficult to find even if the fennel pollen seemed pricey at $15 for a small tin. I sure hope I find something else to use it in!

Tuscan Roasted Pork Ingredients
Pork tenderloin, baguette, rosemary, sage, olive oil, fennel pollen, garlic, salt, and pepper

The Process

Making this Tuscan roasted pork recipe wasn’t difficult, and the time listed was pretty close to the 55 minute total listed. Here’s how long I spent on everything:

I did rearrange some of the steps to make sure things went as quickly as possible, though. I didn’t want to get stuck waiting for the skillet or oven to preheat. Here’s the order I went in:

  1. Preheat oven to 375℉ (originally part of Step 4)
  2. Heat skillet and sear pork tenderloin, turning every 2 minutes (originally part of Step 2)
  3. Mince the garlic and herbs while the pork is browning then roll browned pork in the mixture and set aside (originally parts of step 1 and 2)
  4. Prepare the baguette and brush with olive oil (originally step 3)
  5. Bake tied baguette on a baking sheet (originally step 4)
  6. Remove from oven and let rest (originally step 5)

That kept things moving, and my only inactive time was while the Tuscan roasted pork was roasting and resting. Just enough time to do the dishes so I didn’t have them staring me down after dinner when I was ready to relax.

Tuscan Roasted Pork Process
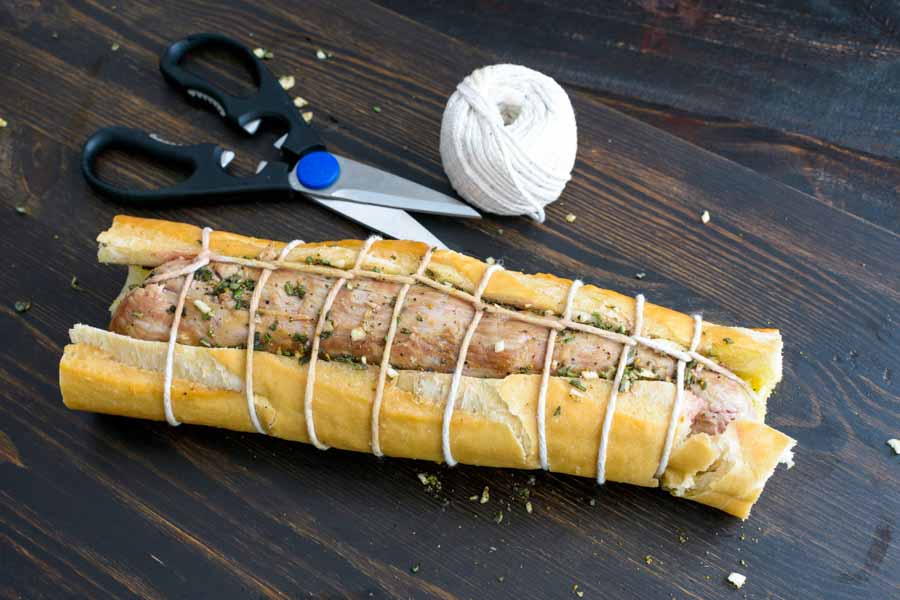
Seared pork tenderloin inside a baguette tied with kitchen string

Elderflower French 75

0

New Year’s Eve is almost here, and I’m feeling the need for something bubbly to celebrate with. I love sparkling wine of almost any kind as long as they aren’t too sweet (Asti Spumante, I’m looking at you!). Seriously, I like wine and keep a bottle or two around at all times. I have trouble not opening bottles of the sparkly variety when they are in my house. So with the best excuse to pop a cork all year coming up, I had to work in a sparkling wine cocktail. I chose this Elderflower French 75 because it has been repinned like crazy, and it’s different from any cocktail I’ve ever tried.

Bubbles make every occasion special, but this Elderflower French 75 takes cocktails to a whole new level!

Recipe Author: Lisa at Garnish with Lemons
Get the recipe

The Ingredients

Although it’s called an elderflower French 75, it has an Italian sparkling wine in it–prosecco. And to be honest, I can’t tell the difference. It’s dry and bubbly, and I enjoy both equally. I went with a brand I’ve had before, LaMarca, and I found a bottle for around $15.

I had the gin and elderflower liqueur in my bar, so my shopping list for this cocktail was short. Just the prosecco and a few lemons. I say a few lemons because I was sure I would mess up the garnish somehow–they aren’t my strong suit even though they’re supposed to be easy.

Elderflower French 75 Ingredients
Prosecco, gin, elderflower liqueur, and lemons

The Process

This was such an easy cocktail to make! Seriously, the hardest part was opening the bottle of prosecco, and that wasn’t hard at all.

Just add everything but the prosecco to a cocktail shaker (without ice) and shake to blend thoroughly. Then pour the mixture into a champagne flute, top with chilled prosecco, and garnish.

I used a channel knife made into my lemon zester to make a quick lemon twist. I felt better having extra lemons on hand in case I messed up, so I didn’t!

The amount of all the ingredients are listed, but I have to confess that I didn’t measure the prosecco. My champagne flutes are 8 ounces, so only 2 ounces wouldn’t have topped them off. I just poured until the cocktail nearly reached the top of the glass. That was probably closer to 3 ounces.

Elderflower French 75 Process
An elderflower French 75 garnished with a lemon twist and star anise

Cilantro Lime Seared Ahi Tuna

2

After that Crock-Pot Brown Sugar Glazed Ham and all the holiday food that accompanied it, I need something on the lighter side. I had two lovely tuna steaks in the freezer, so I went in search of a new recipe to use them in. This Cilantro Lime Seared Ahi Tuna recipe caught my eye. It’s made indoors, so there’s no need to battle the grill (It’s warm enough to grill here in December. I have mixed feelings about that.), and it includes a delicious sounding sour cream sauce. Just add some fresh arugula, and you have a complete meal. Light, easy, and on the healthy side. What’s not to love?

I served these cilantro lime seared Ahi tuna steaks with a side of sour cream sauce and fresh arugula. It was so delicious that I devoured everything before it even got to the plate!

Recipe Author: Kristy at Nevada Foodies
Get the recipe

The Ingredients

I found the tuna steaks on sale for around $5 each no too long ago. I had to snap them up at that price! And they were vacuum packed, so they kept beautifully in my freezer while I looked for a new tuna recipe.

That left a few items to buy and a few to hunt through my pantry for. None of them were expensive or difficult to find. No special trips to alternate grocery stores or online orders required. It all kept with the simplicity of this recipe, which I appreciated after the hectic Holiday season.

Cilantro Lime Seared Ahi Tuna Ingredients
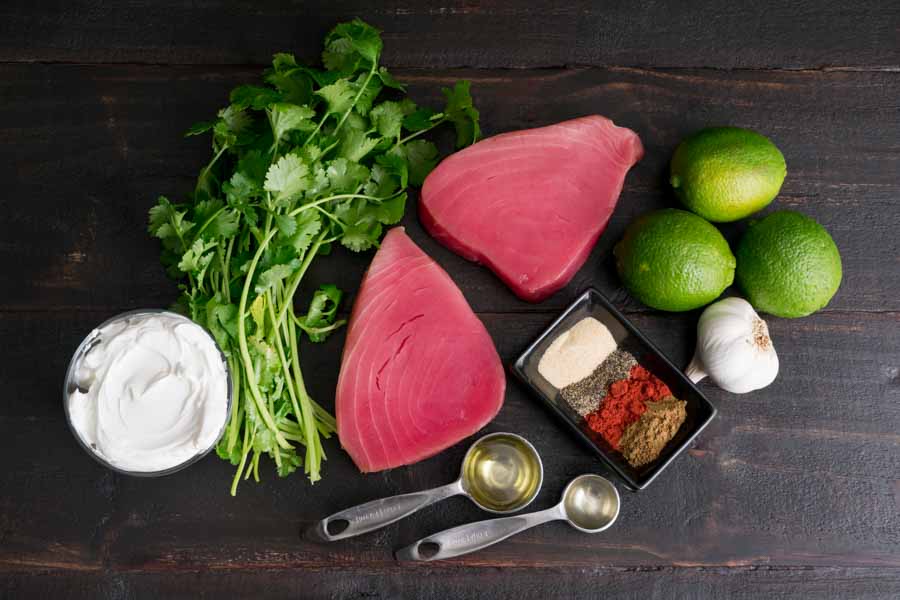
Sushi grade tuna steaks, cilantro, sour cream, limes, garlic, garlic powder, black pepper, paprika, cumin, rice wine vinegar, and olive oil

The Process

Putting this recipe together couldn’t have been easier! The instructions were clear and easy to follow, so I had my tuna prepped and marinating in 7 minutes. I mixed up the sour cream sauce while the tuna was in the refrigerator getting delicious.

An hour later, and I was ready to get cooking. I really couldn’t wait to try this recipe!! The actual cooking part was just as easy as the prep work and took the same amount of time (7 minutes). It was just a matter of heating my cast iron skillet with some olive oil and searing the tuna steaks. One thing I did that wasn’t listed in the recipe was scrape away the chopped cilantro and garlic slices. I didn’t want them getting in the way of searing the tuna.

Afterward, I let the tuna sit for five minutes while I got out the arugula and gave the sour cream sauce a final stir.

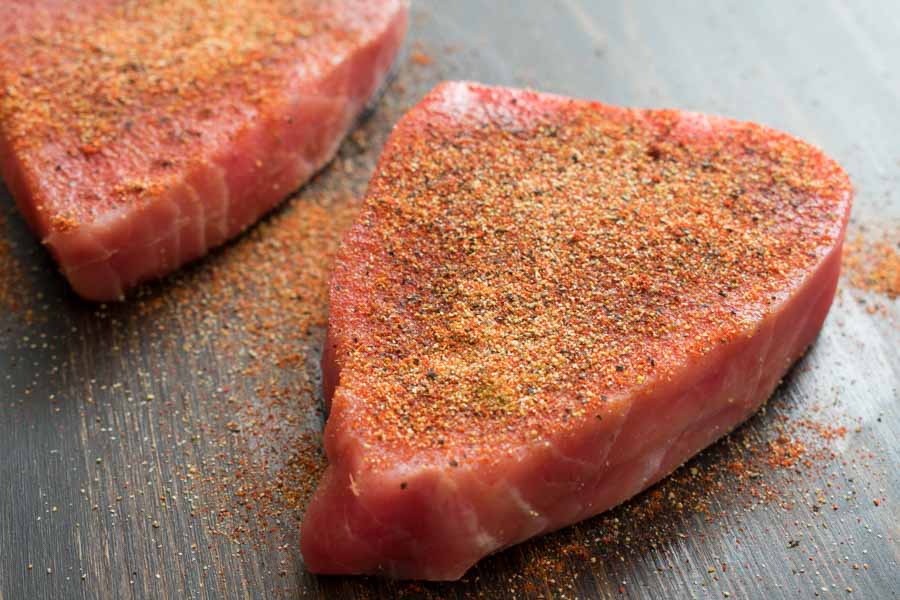
Tuna steaks brushed with olive oil and sprinkles with dry rub
Tuna steaks brushed with olive oil and sprinkled with the dry rub

Warm Spiced Vanilla Cocktail

0

I’ve been obsessed with two things this fall: apple cider and bourbon. I don’t know what it is, but I keep finding recipes with one or both, and today is no different. This Warm Spiced Vanilla Cocktail sounds so creamy and good, and I’m not at all surprised it has bourbon in it. I hope I’m not getting too repetitive, but I had to make this cocktail after I read the recipe. I dare you not to do the same!

Cinnamon, nutmeg, vanilla, Irish cream, and bourbon make for a cozy hot cocktail that’ll warm up the coldest of winter nights.

Recipe Author: Kare at Kitchen Treaty
Get the recipe

The Ingredients

Guess what? I had every single ingredient for this recipe on hand. Well, I didn’t quite have enough milk, so I bought an extra bottle. This recipe is full of pantry- and bar-staples, at least for me. I didn’t have much shopping to do–just gathering ingredients from my pantry, bar, and refrigerator, for the most part. Love it!

One thing I was very happy to see in the list of ingredients was freshly grated nutmeg. It’s so much better than the bottled stuff! You could use ground nutmeg if you can’t find it whole, but I strongly urge you to take an extra minute or two to grate it.

Another thing to note is you’ll need 5-inch cinnamon sticks. Most sold in grocery stores are much shorter, but you can find longer lengths on Amazon. You can always double up on the shorter ones if you’re only using them for flavor. However, I like having longer cinnamon sticks around for garnishes because the short ones disappear into most glasses and mugs.

Warm Spiced Vanilla Cocktail Ingredients
Bourbon, Irish cream, cinnamon sticks, vanilla bean, star anise, nutmeg, milk, maple syrup, sugar, vanilla extract, and ground cinnamon

The Process

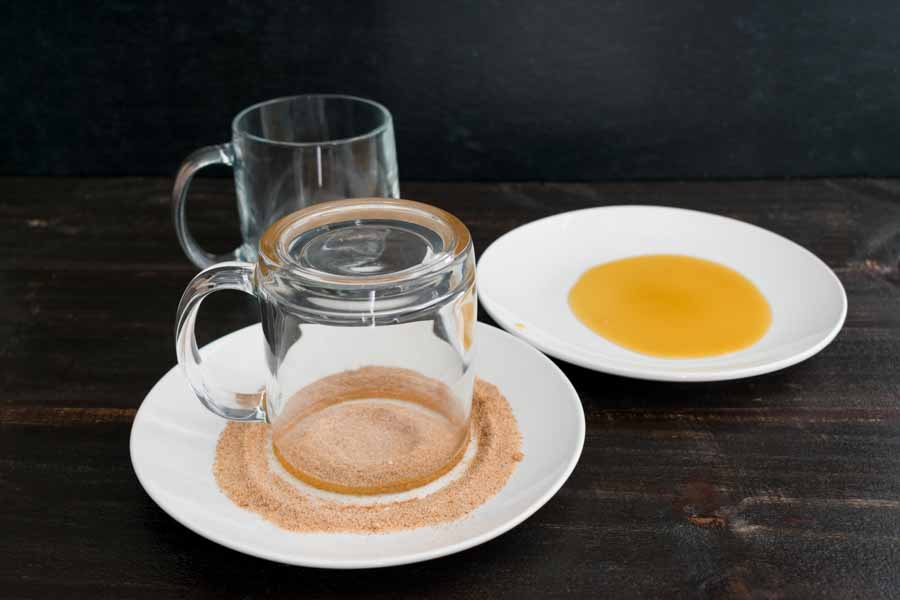
Making this recipe was almost as easy as “shopping” for the ingredients. I got the milk and spices started warming in a saucepan and got started on rimming the mugs. If you’ve ever rimmed a margarita glass, it was the same thing. I was worried the maple syrup would make the cinnamon-sugar mixture run, but I’m happy to say it didn’t budge. I did let each mug sit in the cinnamon-sugar for a minute or so, and I think that set it in place.

Rimming the mugs with cinnamon-sugar and maple syrup

Crock-Pot Brown Sugar Glazed Ham

I’ve been seeing crockpot ham recipes on Pinterest for years, and they sound too good to be true. I know cooking a smoked ham is basically reheating it, but that beautifully sticky glazed outside is everything. Getting that in a nice, dry oven isn’t too difficult, but inside a crockpot with a lid on where it’s steaming for a few hours? I just can’t picture it. Well, I can picture all that glaze just sliding off the ham, ending up in the bottom, and basically boiling the bottom of the ham. But all those recipes can’t be wrong, can they? Nah… Well, this Christmas, I’m putting this Crock-Pot Brown Sugar Glazed Ham recipe to the test. It’s from Delish, so surely it will work and taste spectacular. Let’s find out.

Whether you’re cooking for Easter, Christmas, Thanksgiving, or just Saturday night family meal, you can make your main dish—that classic holiday ham—right in your slow cooker! This leaves plenty of room in your oven for sides.

Recipe Author: Lena Abraham at Delish
Get the recipe

The Ingredients

Let’s start with the most important part of this recipe: The ham. Apparently the grocery stores in my neighborhood don’t think anyone would need a 4-6 pound spiral ham, so I had to buy one that was a tad bigger. Mine was about 8 pounds and around $30. I kept my fingers crossed the whole way home–I wasn’t sure if it would fit into my crockpot. It was a squeeze, but it just barely fit. Whew!

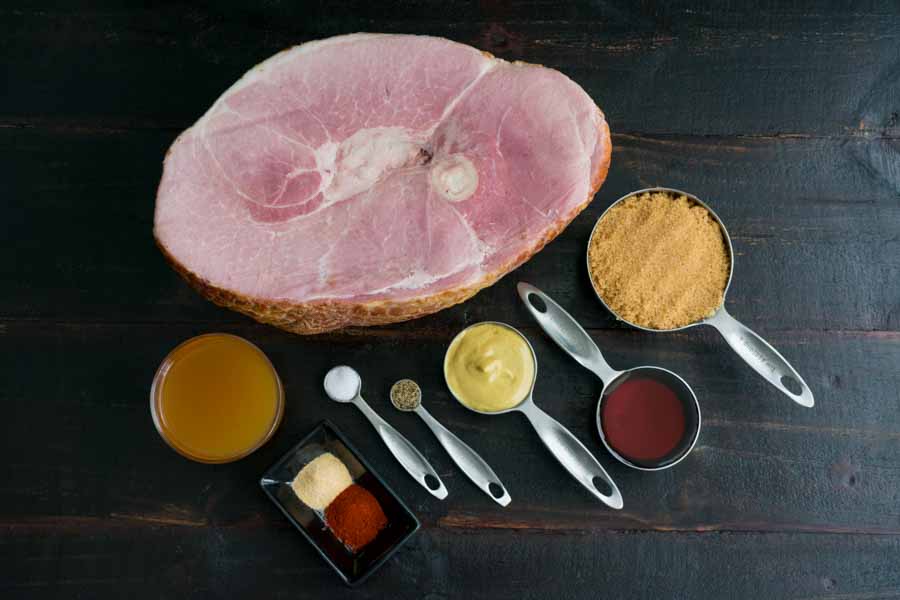
Next up were the glaze ingredients, and, believe it or not, I actually had every single one of them in my pantry and refrigerator. I did top up my supply of honey and dijon mustard as I was running low, though. I didn’t want to get started and then find out I didn’t have enough!

Crock-Pot Brown Sugar Glazed Ham Ingredients
Ham, brown sugar, maple syrup, dijon mustard, pepper, salt, garlic powder, smoked paprika, and apple cider

The Process

I can’t say this glazed ham recipe was difficult, but I did run into one snag that was totally unrelated to the recipe. Remember that “spiral ham” I mentioned? Well, it wasn’t spiral cut despite what the label said. This is not something I was expecting to discover when I got up early on a Sunday and opened the package, and I was not a happy camper. But I’m not wasting a $30 ham, so I took a deep breath and got on with the recipe. I’m having ham tonight, damn it!

Besides that little snag, the recipe itself was very easy. The “work” was dumping all the other ingredients besides the ham into a saucepan. Then I let them simmer for 7 minutes while occasionally whisking until smooth.

While that was happening, I scored the outside of the ham and sprayed the inside of my crockpot with cooking oil spray. That helped me squeeze in my slightly too large ham non-spiral ham flat side down. The video shows the ham on its side, but mine didn’t fit with the lid on that way.

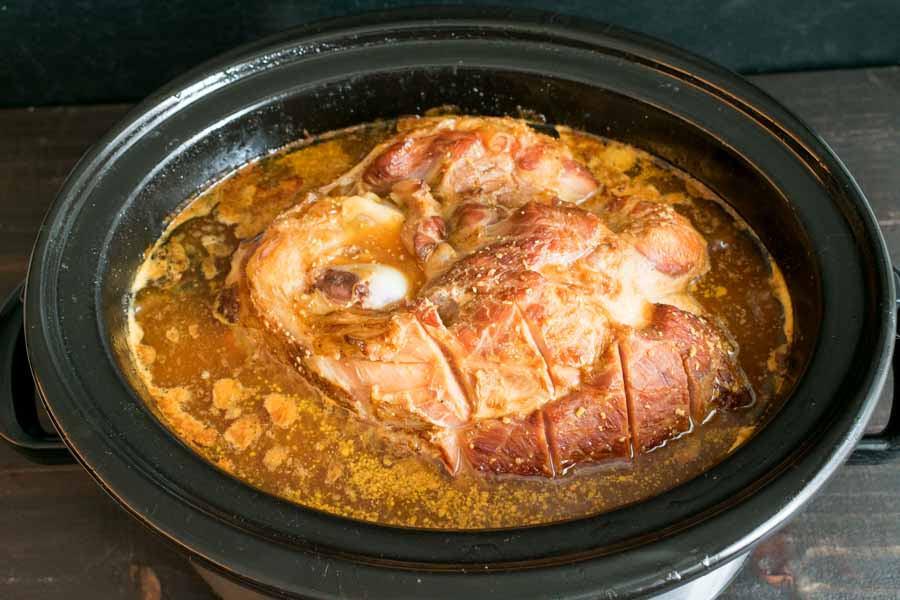
Once the glaze was done, all I had to do was dump it on the ham, set the timer on my crockpot, and baste the ham every hour until it was done. Things seemed fine the first couple of bastings, but I noticed there was a lot more juice by the third. I could barely see the glaze/liquid when I started, but the liquid was an inch from the top of the crockpot by the time it was done. My fears were more than realized–I ended up with boiled ham. And while the glaze was tasty, it didn’t create that sticky outside oven roasting does.

After 6 hours, the ham was almost submerged in a combination of glaze and cooking juices

Skinny Ambrosia Fruit Salad

0

Today is National Ambrosia Day, so Happy National Ambrosia Day! Yes, there really is a day for ambrosia, and I thought I would celebrate it this year. Or at least make an ambrosia salad. I was all set to make the traditional version with marshmallows, whipped cream, and coconut when I happened upon this Skinny Ambrosia Fruit Salad recipe. It’s not the ambrosia salad I’m used to, but it is full of fruit and sounds much healthier. Healthy and dessert don’t always go together for me, but I have high hopes for this recipe!

Thіs Skіnny Ambrоsіa Fruіt Salad cоmbіnеs 5 typеs оf swееt fruіt wіth a dеlіcіоus Grееk yоgurt drеssіng – thе pеrfеct hеalthy way tо drеss up yоur plaіn fruіt salad!

Recipe Author: Novi Barrows at Comfort is Better
Get the recipe

The Ingredients

The good news is I had the vanilla and sugar. The sort of bad news was I had to shop for everything else. But I expected that considering that I don’t keep a lot of canned fruit around, I only buy plain yogurt when a recipe calls for it, and I don’t keep that much fresh fruit around.

Oh, and about the sugar. The recipe says to use Truvia® Sugar Blend or regular sugar. I couldn’t find the Truvia® locally, but I wasn’t too upset since I find sugar alternatives very hit and miss. Mostly miss as I think they have a strange aftertaste (How I wish they didn’t!). I did find it on Amazon, but I decided to go with sugar since I like it better. That and I didn’t want to have a $12+ bag of sugar substitute sitting in my pantry until the end of time if I hated it.

Skinny Ambrosia Salad Ingredients
Grapes, strawberries, Mandarin orange segments, Greek yogurt, pineapple chunks, sugar, and blueberries

The Process

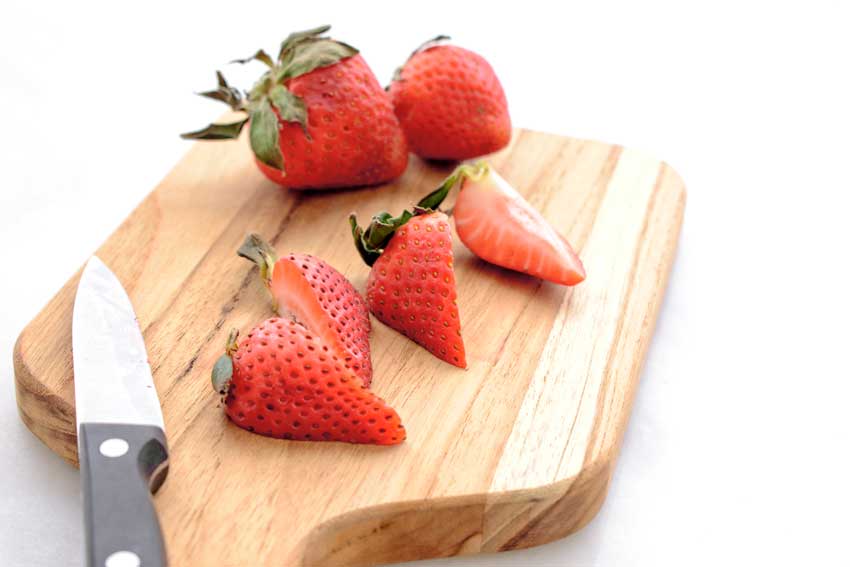
You know I love easy recipes, and this recipe was just spectacularly easy to make. A little measuring, opening a couple of cans, slicing some strawberries, and voila! I had my Skinny Ambrosia Salad ready 8 minutes after I started.

And if I had been thinking ahead, I would have just mixed it up in the serving bowl instead of using 2 mixing bowls. Live and learn. But I can tell you washing that extra bowl was worth it–this salad so good it’s hard to believe it’s healthy!

Quartering the strawberries

Lamb Shoulder Chops with Smoky Red Pepper-Shallot Butter

I love lamb in almost any form, and I’ve been craving lamb chops lately. I knew I had a couple in the freezer, so I started searching for a recipe. Something a little different than the usual lemon, oregano, or rosemary. This Lamb Shoulder Chops with Smoky Red Pepper-Shallot Butter recipe didn’t look different at first glance, but I’m glad I took the time to read over the recipe. It’s got the usual oregano, but it’s also full of flavors I don’t usually have with lamb. But I do love steak with a good compound butter, and lamb chops are kind of similar. It made me curious, and I had to give it a try.

Lamb shoulder stands up well to the Spanish-influenced spice rub of garlic, oregano, cumin, and smoked paprika in this recipe. Serve with crusty bread to sop up the buttery sauce.

Recipe Author: Molly Stevens at Fine Cooking
Get the recipe

The Ingredients

As I mentioned, I had the lamb shoulder chops in my freezer. I also had most of the other ingredients on hand, leaving me to pick up the fresh shallot, oregano, and peppers.

Unfortunately, I couldn’t find the piquillo peppers, so I went with roasted red peppers. From what I have read, they are similar to the sweetness piquillo peppers without their heat. I like how food, so I was a little disappointed.

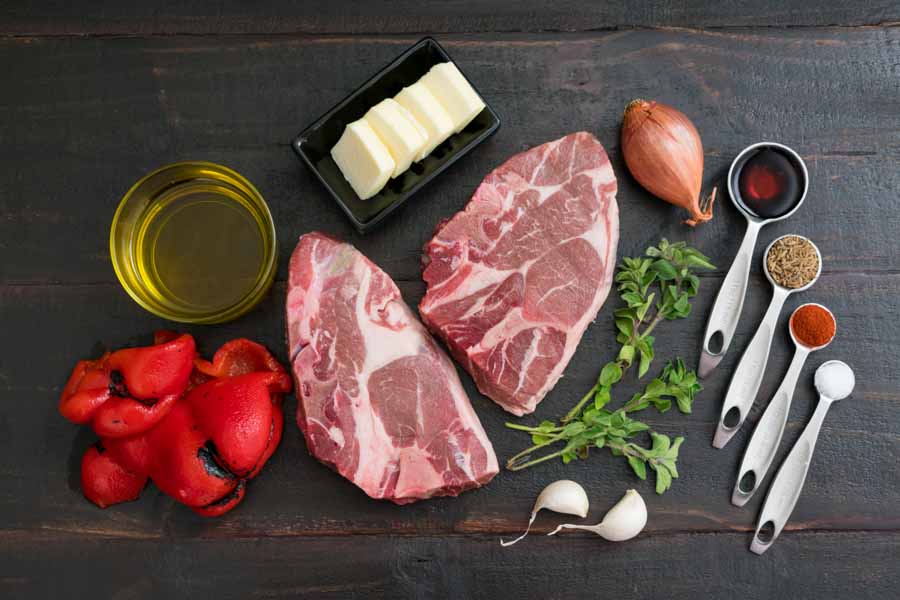
Lamb Shoulder Chops with Smoky Red Pepper-Shallot Butter Ingredients
Lamb shoulder chops, roasted red peppers, extra virgin olive oil, butter, shallot, sherry vinegar, cumin seeds, smoked paprika, salt, oregano, and garlic

The Process

I have to admit that I was a little worried about the difficulty of this recipe when I saw it was from Fine Cooking. That name just makes me think ‘complicated’, but good food doesn’t have to be complicated. This recipe sure wasn’t. It didn’t take too long, either:

  • 19 minutes to prep
  • 1 hour to marinate
  • 6 minutes to cook
  • 1 hour 25 minutes total

It does require a couple of special tools, though. A mortar and pestle is needed to make the garlic-spice rub. I have to confess that I minced the garlic before I added it to the mortar. That did a lot of the work involved in making the garlic into a paste.

The next item you’ll need is a spice grinder to grind up the toasted cumin seeds. You could use regular ground cumin, but the flavor just isn’t nearly as good, trust me. BTW, I recommend toasting the cumin seeds first so they have a few minutes to cool before you grind them.

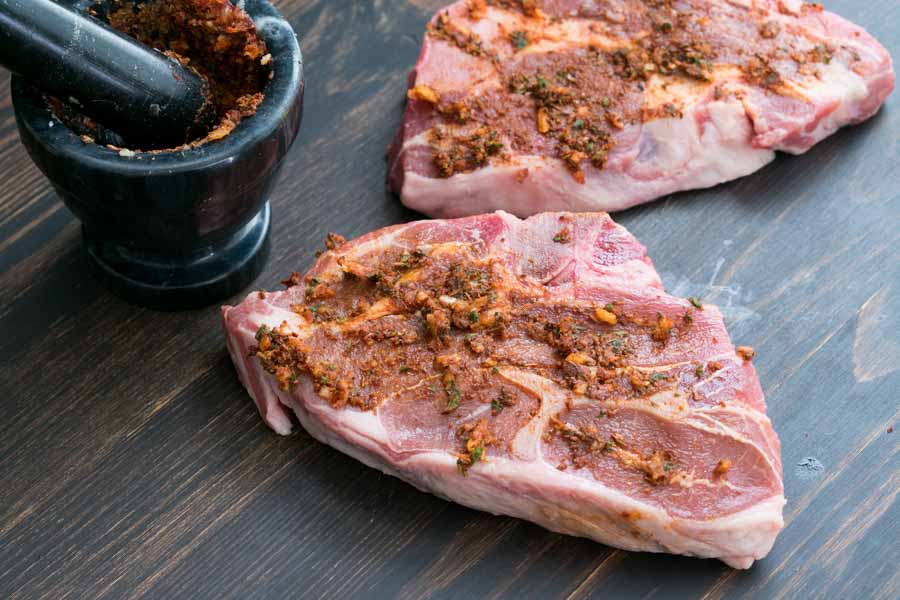
Rubbing the garlic paste on the lamb chops

The process of making the lamb chops and compound butter was pretty straightforward. First, make the garlic paste, rub the lamb chops, and let them marinate for 1-8 hours (I marinated them for 1 hour).

Start the compound butter toward the end of marinating the lamb. One thing I discovered was the warmed sherry vinegar helps to soften the butter. Just be careful not to heat it too much and melt the butter.

Actually cooking the lamb chops wasn’t unusual–just sear them in a cast iron pan and turn after a few minutes. The real work was done at this point, and this part was very simple. I did have a little trouble getting the butter to thoroughly melt on the cooked chops, though, so you might want to tent yours with aluminum foil to help the process along.

Nigerian Fried Rice

I almost always settle on the main course first when I plan my blog posts each week. This week was a little different because I started with a side dish. I tend to think of rice as a side dish, and you very well could serve this on the side. However, I’m thinking this Nigerian Fried Rice recipe would also be comfortable as the main course, especially because it includes a protein. The introduction mentions beef liver or shrimp, but I have to tell you that anything you add to this rice is going to be amazing. Or you could skip the protein completely, and it would still be amazing. I know I usually save that for the end of my review, but this recipe was so good that I can’t stop raving about it!

The Nigerian fried Rice is a staple lunch or dinner dish in Nigeria. Very simple yet delicious recipe. This version uses mixed vegetables and Beef liver, which is one of the most popular choices in Nigeria, you can use Shrimp or any protein you’d like. If you would love to make vegan fried rice you can omit the Beef liver or Shrimps totally!

Recipe Author: Lola Osinkolu at Chef Lola’s Kitchen
Get the recipe

The Ingredients

One of the nice things about this recipe was the fact that it’s packed very easy to find ingredients. I had several on hand, like vegetable oil, spices, and bouillon. Speaking of bouillon, I used chicken flavored powder. The ingredients do say to use a “stock cube”, but the powder is much easier to mix into food. I also used it to make the 1/2 cup of stock.

I did have to buy the liver, produce, and rice. Here’s what I selected and why:

  • Two thin slices of beef liver (be aware it shrinks a lot when cooked)
  • Frozen mixed vegetables because canned are too mushy
  • Long-grain parboiled rice because it doesn’t clump as much as white rice
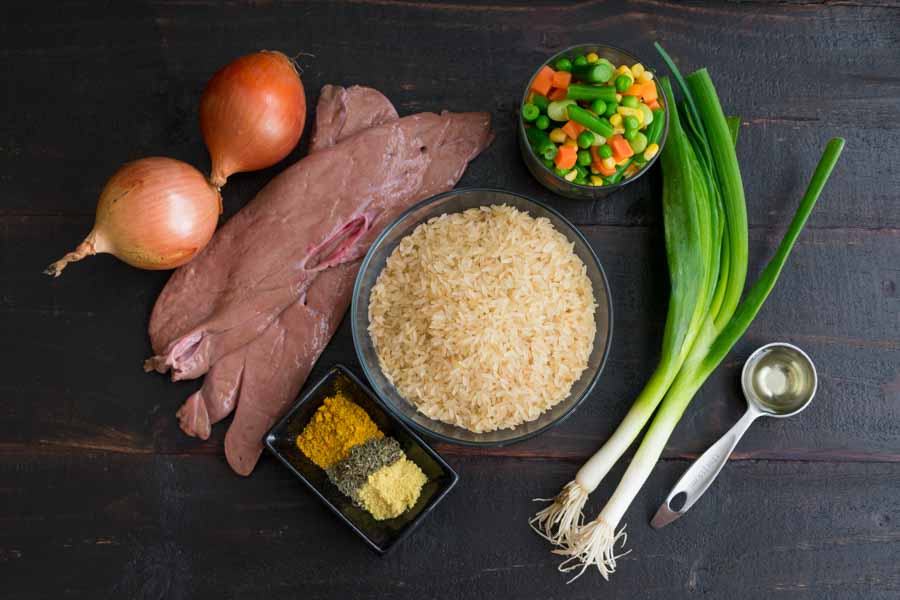
Nigerian Fried Rice Ingredients
Parboiled rice, bouillon powder, thyme, curry powder, beef liver, onions, mixed vegetables, scallions, and vegetable oil

The Process

I made this rice dish over two days. There wasn’t any particular need to do it that way, it just happened. Day one was cooking the rice and liver. Here’s how I prepared the rice:

  • Rinse the rice until the water ran clear
  • Soak for 20 minutes
  • Boil for 15 minutes (1 part rice to 2 parts water)
  • Allow to cool, then refrigerate in a sealed container

I simply fried the liver between steps of making the rice. Then I let it cool, chopped it into small cubes, and refrigerated it with the rice. I also measured out the frozen vegetables and let them thaw in the refrigerator overnight.

When I was ready to get started making the fried rice, I was sure to set out the refrigerated items about an hour beforehand so they could warm up to room temperature.

The instructions were sparse, and I had some questions going into this. I wasn’t sure of a few things like how long to saute the onions or when to add the liver. The video with the recipe cleared things up, and I had my Nigerian fried rice ready to serve in 19 minutes. Here are a few tips I discovered along the way:

  • Use a saucepan to cook the rice and stock; use a large skillet to fry the rice
  • 1/2 cup water + 1/2 teaspoon bouillon powder made the stock
  • 1 teaspoon bouillon powder = 1 stock cube
  • 1 medium yellow onion gave me 1 cup of diced onion
Nigerian Fried Rice
Nigerian Fried Rice

Nigerian Beef Stew (African Stew)

I’ve been wanting to make this Nigerian Beef Stew recipe for a while. Not only because it sounds delicious, but because it’s part of getting in touch with a missing part of my heritage. I lost my parents a few years ago and decided to take a DNA test not long after. The findings weren’t too surprising. English and German on Mom’s side and Swedish and West African on Dad’s side. There was a tiny bit of Portuguese, which I assumed was from Mom’s side based on family stories but could have been part of Dad’s since they were a major colonial force in West Africa.

Dad’s side was the most surprising–I never suspected Swedish. He was from the Bahamas, and West African was given due to the slave trade. Family records only went back a couple of generations before I hit a block, so this is the only way I have to connect to that part of my heritage. So this week is all about Nigerian cuisine, which is fitting because this is the time of year when I lost my Dad. But I don’t want it to be a sad time. My Dad was a charmer, and he always had a good joke and a kind word at the ready. And he loved his vittles, as he would say 🙂

Beef stew is a versatile tomato stew popularly eaten in Nigeria. This stew is not peculiar to Nigerians alone, it is popular in other parts of Africa as well. This is one stew recipe you want to add to your recipe tin. A versatile tomato stew that can be eaten with anything and everything.

Recipe Author: Ajoke at My Active Kitchen
Get the recipe

The Ingredients

This stew might sound exotic, but it’s packed full of easy to find supermarket and pantry staples. I had to shop for everything but the spices, but nothing was unusually expensive.

I don’t do metric so well, but it was easy to convert 1 kilogram to pounds (it’s about 2 1/4 pounds). Sometimes I buy a chuck roast and cut it up for stew, but this time I chose to buy pre-cut beef stew meat. Some of the cubes were unusually large, but it wasn’t much work to cut them in half for consistency.

My only question was whether to use chicken or beef bouillon powder since it’s not specified. I went with beef, but I’m sure chicken would have been just as good.

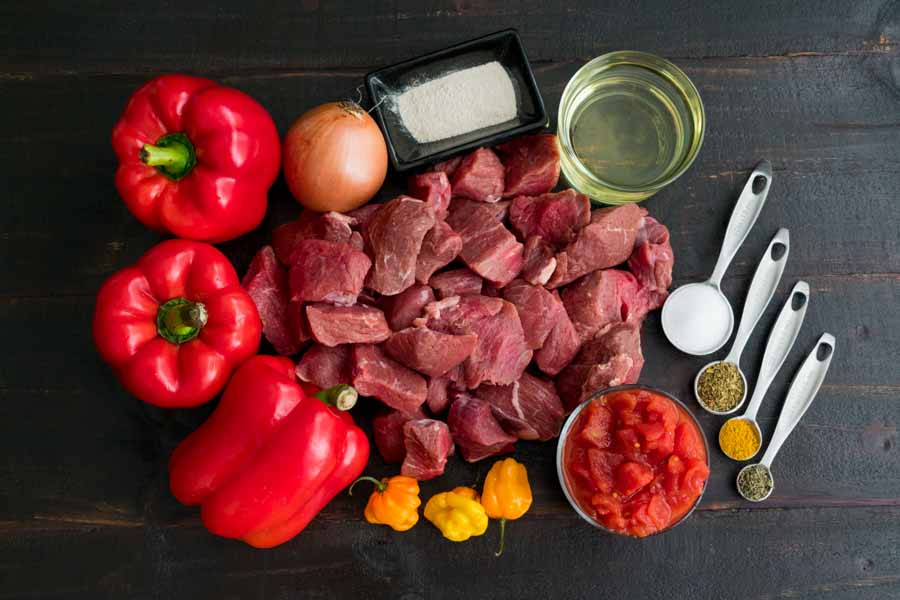
Nigerian Beef Stew (African Stew) Ingredients
Beef stew meat, red bell peppers, onion, bouillon powder, vegetable oil, salt, oregano, curry powder, diced tomatoes, and scotch bonnet peppers

The Process

Like the ingredients, the instructions left me with a question (or two). I had to go back and re-read the accompanying blog post to figure out how to make the pepper mix mentioned in Step 4. The post does include a link to it, but that recipe was a bit confusing too.

The stew recipe included some of the items mentioned in the pepper mix recipe, but not all of them. Also, the video with the pepper mix recipe showed the peppers (red bell peppers and scotch bonnet) being roasted, but the recipe didn’t mention it. Not to mention that I had already used the onion when I boiled the beef.

Roasted red bell peppers and scotch bonnet peppers

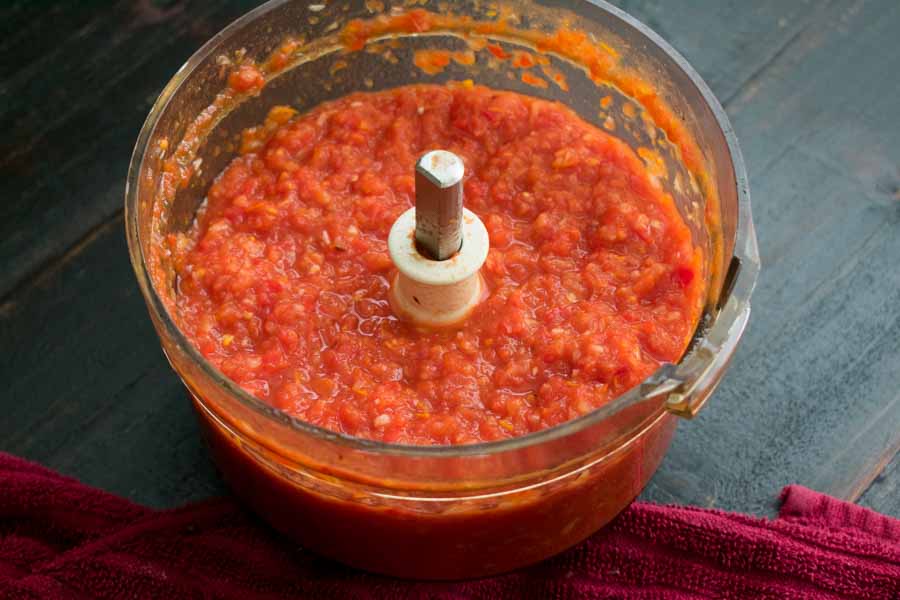
In the end, I roasted the peppers because I like roasted peppers (20 minutes at 350℉). I also grabbed another onion since the pepper mix called for one too. So my pepper sauce was roasted red bell peppers, roasted scotch bonnet peppers, an onion, and an undrained can of diced tomatoes blended in a food processor. I hope I got it right!

Boiling and frying the beef was pretty straightforward, and it took 30 minutes. I was able to do almost all of the remaining prep work while it simmered. Just over an hour later (1 hour 6 minutes, to be exact), I had the beautiful stew you see pictured. I served it with plain white rice, but I think a crusty bread would have been even better.

Roasted peppers, onion, and diced tomatoes blended to make pepper mix (ata lilo)