Home Blog Page 34

Guinness Chocolate Cake with Irish Buttercream

0

So my Saint Patrick’s Day/wedding anniversary celebration is off to a great start! My husband and I loved the Irish Chicken I just posted. In fact, he raved about it. It’s going to be made again, for sure. But after such a delicious meal, dessert is a must. This is a celebration, after all! And no mere store-bought, prepackaged dessert will do. No, this is a special occasion that calls for something spectacular. This Guinness Chocolate Cake with Irish Buttercream caught my eye, and it sounds all kinds of perfect for the occasion. Time to dust off my cake pans and plug in my hand mixer. It’s baking time!

Guinness Chocolate Cake with Irish Buttercream features an easy, fudgy, and moist cocoa cake with Guinness beer and thick creamy and sweet Irish cream buttercream. The perfect St. Patrick’s Day cake!

Recipe Author: Tessa Arias at Handle the Heat
Get the recipe

The Ingredients

As you can see, there are a lot of ingredients in this recipe. The buttercream takes an entire pound of butter! I had a few on hand, but I had to top up a few basics to make sure I didn’t run out. Overall, though, no unusual or difficult to find ingredients, but you might need to stop at a liquor store for the Irish cream.

One nice discovery I made was being able to buy the Guinness individually. If you’re not a stout drinker, this is the way to go. My local Whole Foods sells them for $1.79, and 1 bottle is all you need (there will be a couple of sips leftover).

Remember those red wine poached pears I posted last week? I made this cake the day after I made that recipe, and I used the same chocolate. It was a good deal, but I’ve finally learned my lesson. I’ll use better chocolate next time–it wasn’t worth the savings in this recipe. You’ll find out why in the next section.
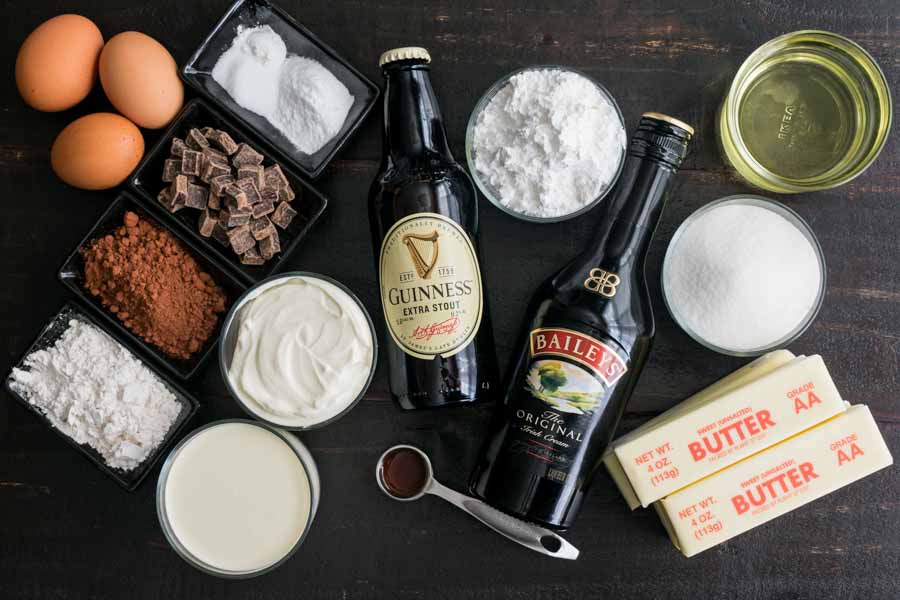
Guinness Chocolate Cake with Irish Buttercream Ingredients
Guinness, sour cream, vanilla extract, heavy cream, flour, cocoa powder, dark chocolate, eggs, baking soda, baking powder, salt, powdered sugar, Irish cream, vegetable oil, sugar, and butter

The Process

I went into this Guinness chocolate cake recipe knowing it would take a while, so I was mentally prepared for the work ahead. I’m not the best baker, so I expected it to take longer than the time listed.

This recipe took me 1 hour 43 minutes, which was, not surprisingly, a little longer than the 1 hour 25 minutes listed. Here’s how my time was spent:

  • 1 hour 17 minutes to make the cakes and buttercream
  • 26 minutes to make the chocolate drip, assemble, and frost
  • 1 hour 43 minutes total

That doesn’t include 1 hour for the cakes to cool, and I don’t think the author included that time in what was listed on the recipe, either.

Most everything went according to the instructions, but I did have some difficulties. One was my fault and one I have no explanation for. Let me explain.

The Cake and Buttercream

I started with the cakes and had no trouble mixing them up. I put the pans into the oven and moved onto the buttercream. As I was mixing the buttercream I started to smell something burning. I was worried I was burning out my hand mixer, but it wasn’t that (thank goodness!). It was the cake batter that had overflowed and was burning on the bottom of my oven.

I used the correct size of cake pans, so I have no idea why this happened. All I can do is recommend you put a sheet pan on the rack below the cake pans in case this happens to you. It will save you from the smoke, smell, and cleaning your oven the next day.

The cakes also had a depression in the middle, which the author warns can happen in the accompanying post. After cooling, I followed her advice and leveled them with a long serrated bread knife.

Back to that buttercream. It mixed up without a hitch, but this recipe made way more than I needed to frost the cake (and I was generous with it). No to worry—buttercream freezes well, and I think I will use the rest on cupcakes. BTW, I’m not counting this as a problem with the recipe; it’s more like a windfall if you ask me.

The Chocolate Drip

Once the cakes were cooled, I started on the chocolate drip (AKA ganache). Making it wasn’t a problem, but I used cheap chocolate that didn’t give me the beautiful results I wanted. I knew the chocolate would be grainy from my experience with it from the Red Wine Poached Pears with Chocolate & Cardamom I posted last week.

Straining the chocolate sauce took care of that problem, and I thought it would work for this recipe too. It did help, but the cheap chocolate was also very oily. It didn’t drip, it separated and plopped onto the cake stand.

I scraped most of it off the sides, tried to cover it with more buttercream, and tried again. Letting the ganache cool more helped, and I eventually got a few nice looking drips. Lesson learned (finally): no more cheap chocolate!
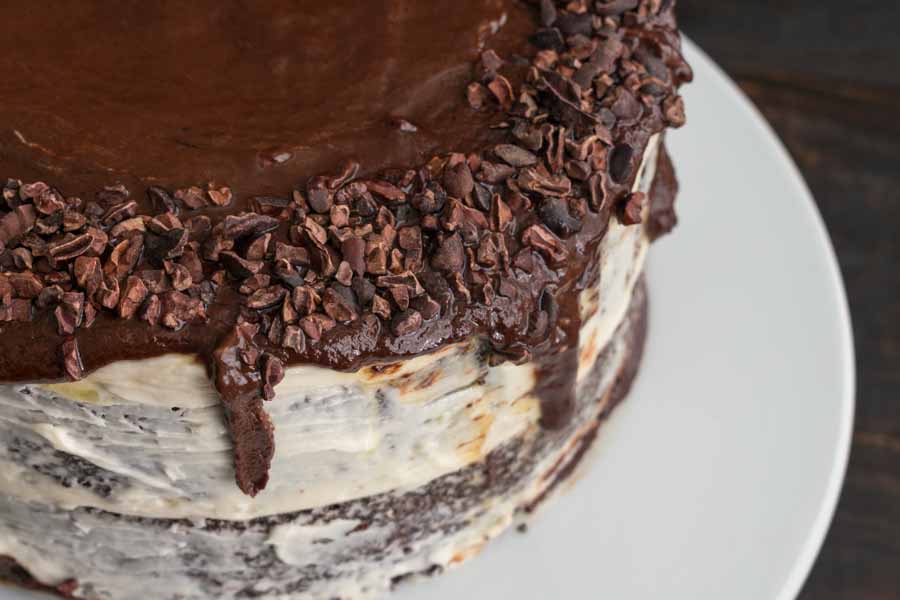
The finished cake topped with chocolate ganache and sprinkles

Irish Chicken

Saint Patrick’s Day is coming up, and that means another wedding anniversary. This is our 13th. It doesn’t feel like it’s been that long, but here we are. Every year, I make a couple of Irish and/or Irish-inspired dishes for the double holiday. This year I’m giving this Irish Chicken recipe a try. I know chicken probably isn’t the first thing most people think of for Saint Patrick’s Day, but this dish does have a few things in common with corned beef. Don’t laugh! It’s full of potatoes, cabbage, onions, and spices, which is a big part of your typical corned beef and cabbage recipe. Just change out the meat and skip the carrots. Oh, and it sounds like it’s going to be quicker and easier. I love corned beef and cabbage, but maybe, just maybe, I’ve found an easier alternative. Let’s find out!

Here’s an alternative dish for St. Patrick’s Day! It’s Irish Chicken with Cabbage, Potatoes, Bacon and Onions. I can’t begin to tell you how good this was. It’s all cooked in one pan and then after assembling, into the oven it goes.

Recipe Author: Mary Ellen at Recipes, Food & Cooking
Get the recipe

The Ingredients

I can’t say whether this is an authentic/traditional Irish recipe, but I’m guessing Irish-inspired because of all the spices. My understanding of Irish cuisine is that it’s marked by simple ingredients with few spices. At any rate, this recipe does include ingredients typically found in Irish cuisines like chicken, bacon, cabbage, onion, and potatoes.

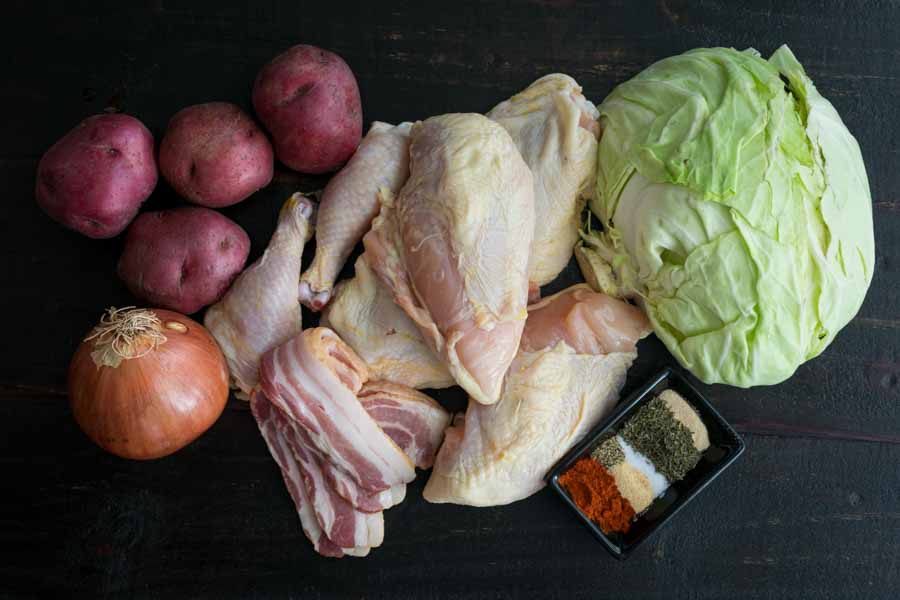
These simple ingredients were all easy to find kitchen staples. I had all of the spices on hand, so that left me to shop for the meat and vegetables. I even bought a whole chicken and cut it apart myself. I found a video that showed how to do it in a minute. The instructor is a pro chef, so I didn’t even try to go that fast. Instead, it took me 3 minutes, but it was amazingly easy.

I’m going this route from now on! The whole chicken I bought was $7.10 for 3.57 pounds. I estimate the cost of buying the breasts and legs separately at $18.56. I saved significantly for 3 minutes of work.

Irish Chicken Ingredients
Chicken, bacon, onion, potatoes, cabbage, onion powder, thyme, salt, pepper, garlic powder, and sweet paprika

The Process

So making this Irish chicken was simple and went according to the instructions. Here’s how my time was spent:

  • 20 minutes to prep
  • 9 minutes cooking on the stove
  • 50 minutes baking in the oven
  • 1 hour 19 minutes total

That was a little longer than the 1 hour 5 minutes listed, but not that much.

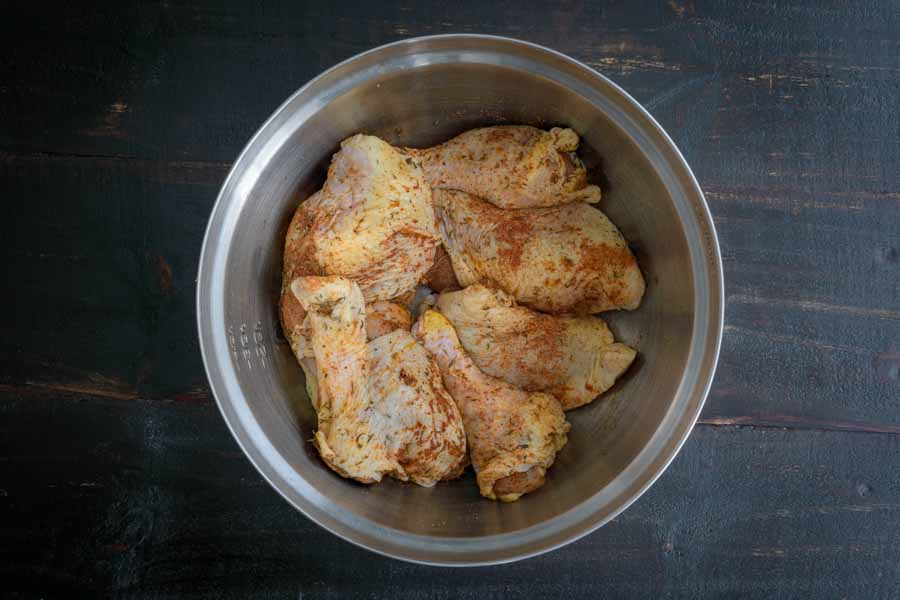
Really, everything went according to the instructions, and I followed them to the letter for the most part. The only change I made was to the chicken. I lifted the skin on all the pieces and put some of the spices underneath so they would be in contact with the meat. I also some on the outside of the skin, but that was mostly for presentation purposes.

I have to say it worked a treat. I highly recommend using this method when seasoning any poultry with skin. It makes such a huge difference in the flavor, especially if you don’t eat the skin.

And although it’s not specified, I used my 12-inch cast-iron pan for this recipe. It had enough room to mix the cabbage, onions, and potatoes and for the chicken pieces. I’m not sure a smaller pan would have worked.

Marinating the chicken in spices

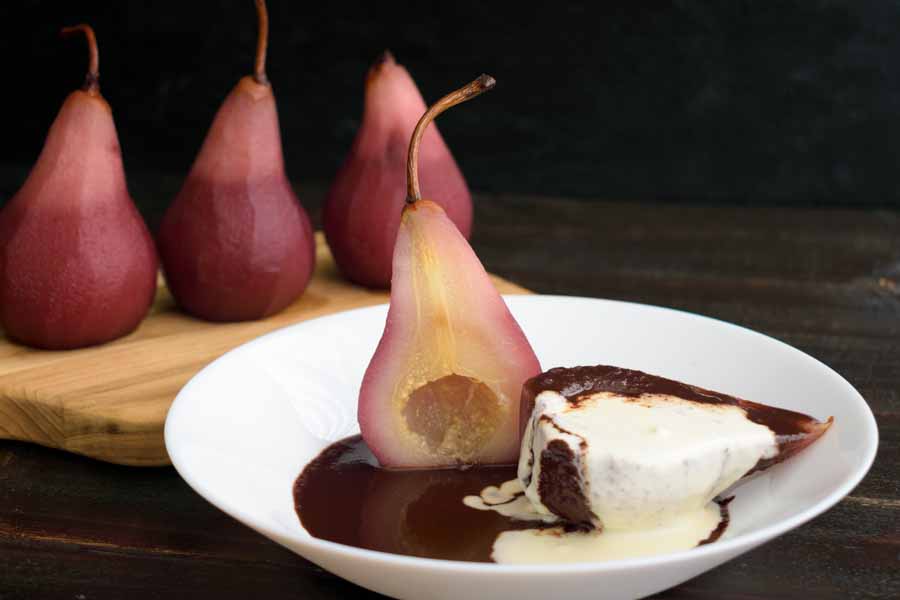
Red Wine Poached Pears with Chocolate & Cardamom

Since this week started out with wine on Mulled Wine Day, I thought I would stick with wine as this week’s theme. I’ve made several recipes with wine for The Hungry Pinner, and I noticed most of them involve meat. The only exception was the Red Wine Chocolate Cake, my first foray into using wine in dessert recipes. I kept that in mind when hunting for a recipe for today and came up with these Red Wine Poached Pears with Chocolate & Cardamom. If I thought the title sounded good, I was completely on board when I read the recipe. Fresh pears poached in spiced red wine, drizzled with dark chocolate sauce and topped with mascarpone cream. Yeah, I need to make this recipe ?

Gorgeous pears poached in spice-infused wine until they are tender and gorgeous and lovely. Then, the wine used for poaching gets reduced down until it’s super syrupy. AND THEN (!!!) dark chocolate gets whisked in to create the most decadent, most addictive wine chocolate sauce ever.

Recipe Author: Molly at Yes to Yolks
Get the recipe

The Ingredients

I’m happy to say the ingredients for this recipe were easy to find at my regular grocery store. I had to stock up on quite a few items, with the mascarpone cheese being the most expensive item at $5.99.

I was even able to find organic bosc pears for $4.66 (they were priced at $2.99 per pound). If you prefer anjou, they can be found for $1.69-$2.99 per pound, with organic being the higher end.

I don’t usually splurge on organic, but I wanted to use the bosc pears since the author recommended them. I saved money on the wine–I found a bottle of Three Wishes Cabernet Sauvignon for $2.99. It was shockingly good too!

Finally, one trick I’ve learned over the years is to use chocolate chips when chopped chocolate is called for. It’s cheaper, saves me the work of chopping it, and saves me a little time. I found a 12-ounce bag of 67% dark chocolate for $3.99, making the cost for this recipe about $1.33.

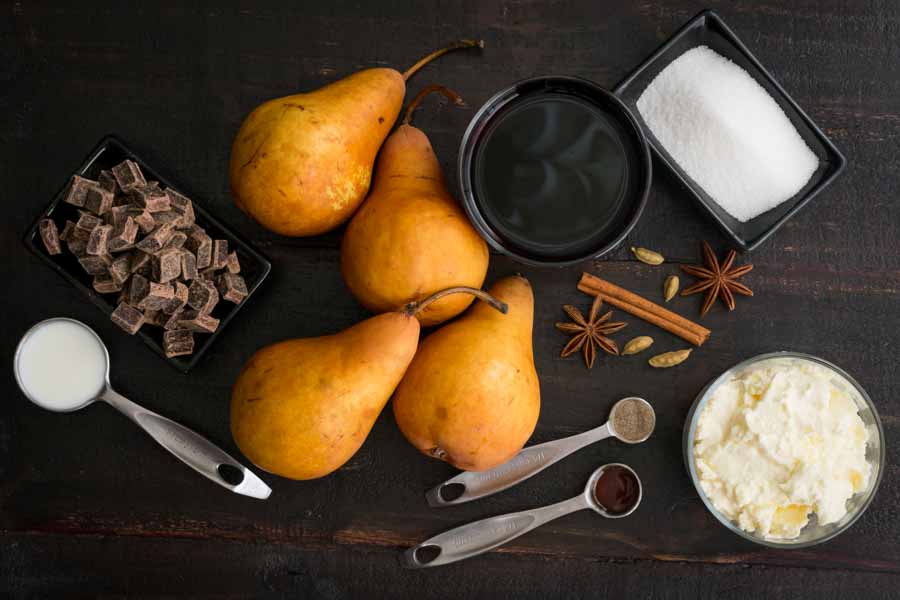
Red Wine Poached Pears with Chocolate & Cardamom Ingredients
Bosc pears, milk, dark chocolate, dry red wine, sugar, cardamom pods, star anise, cinnamon stick, mascarpone cheese, ground cardamom, and vanilla extract

The Process

These red wine poached pears sounded amazing, but they take a while to make. The active parts really aren’t that difficult. It’s the inactive parts—cooling and chilling—that take several hours.

I could have made these in a single day if I allowed 6+ hours for cooling and chilling, but I’m not that ambitious. The poached pears need to be refrigerated at least 4 hours but up to 24 hours. I decided to go with the longer time and make this recipe over the span of 2 days.

Day 1: Poaching the pears

This part was very simple on paper, but it did take the longest if you count cooling and refrigeration. Here’s how I spent my time:

  • 11 minutes to prep
  • 20 minutes to poach the pears
  • 2 hours to cool to room temperature
  • 2 hours 33 minutes total

Then I popped the entire pot into the refrigerator overnight, so roughly 24 hours chilling.

I used the smallest saucepan I have, but I’m not sure of the size. I think it’s 2 to 2.5 quarts. Unfortunately, the wine mixture covered about 1/3 of the pears. I doubled up on it (wine, water, sugar, and spices), and that covered about 2/3 of the pears.

The only drawback to the extra liquid was the pears fell over easily because they float. I had to right them several times before they would all stay standing. Then the wine mixture really started simmering, and 3 of the 4 pears fell back over. I gave up. The pears were all floating sideways as they poached.

I stood them back up while they cooled to room temperature. Surprisingly, they stayed upright as I moved the pan in and out of the refrigerator, so the pears stood upright while they chilled overnight. I’m not sure that was a good thing, though, since you can see the submerged parts ended up being much darker than what was exposed.

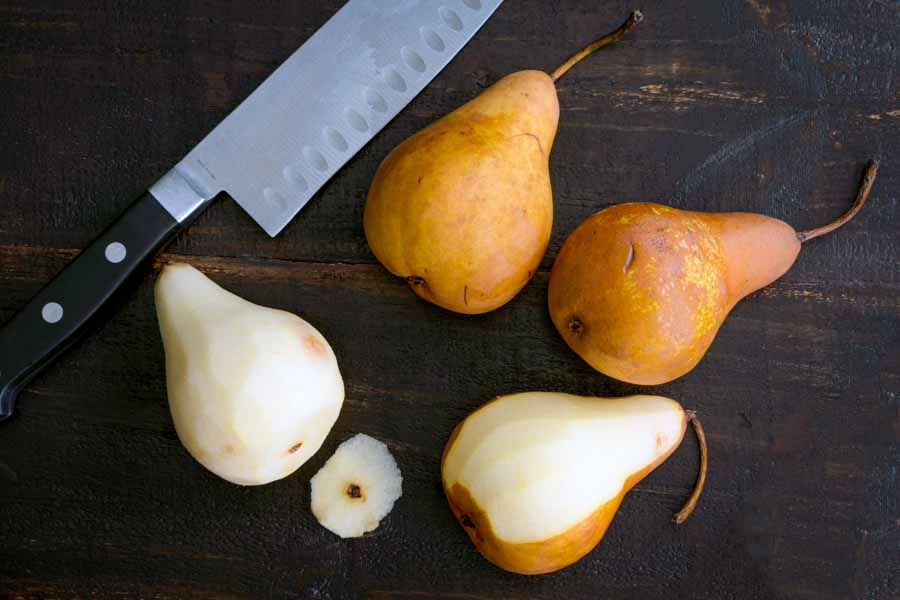
Peeling the pears
Peeling the pears

Day 2: Finishing up

The first thing I did was halve the wine mixture for the chocolate sauce. Not that I didn’t want to double up on the chocolate sauce too, but I didn’t have enough chocolate, LOL. Anyway, I ended up with about 1 1/2 cups of the spiced red wine.

Making the chocolate sauce and mascarpone cream went smoothly and according to the directions. I had a serving of red wine poached pears served up in 24 minutes.

  • 2 hours to warm the pears and mascarpone cheese
  • 24 minutes to make the cream and sauce
  • 2 hours 24 minutes total (day 2)
  • 4 hours 57 minutes grand total (both days)

My only complaint with this recipe has to do with the chocolate I chose. It was budget-friendly, but it wasn’t designed for melting and turned out grainy (you can see it in the photo below). I strained the chocolate sauce through a mesh sieve for the main photo and it removed most of the graininess.

Something I want to point out is the mascarpone cream and chocolate sauce were very thin. Also, my favorite way to serve these pears was by drizzling the chocolate sauce onto the plate, adding the pear, then drizzling the pear with the mascarpone cream. I wasn’t really able to taste the mascarpone cream when I served them as suggested.

Red Wine Poached Pears with Chocolate & Cardamom

One-Pot Red Wine Pasta

0

I don’t know about you, but I love carbs! Pasta is one of my favorite ways to consume carbs, and it’s so flexible. It can be simple or complex, and you can make it into a side dish or a main course, which is what I’m going to do today. A big plate of pasta and a glass of wine is a nice, quick meal my husband and I love. This One-Pot Red Wine Pasta might even save me a step since the wine is in the pasta. Or not–I’m pretty sure I’ll still need a glass of wine with it, but a little extra wine flavor can’t hurt, right? Nope!

Favorite part about cooking with wine: drinking the remaining wine with dinner. Wine and I are best buds.

Recipe Author: Emma Chapman at A Beautiful Mess
Get the recipe

The Ingredients

While there aren’t a ton of ingredients in this recipe, I had to shop for most of them. The good news is nothing was hard to find or spendy.

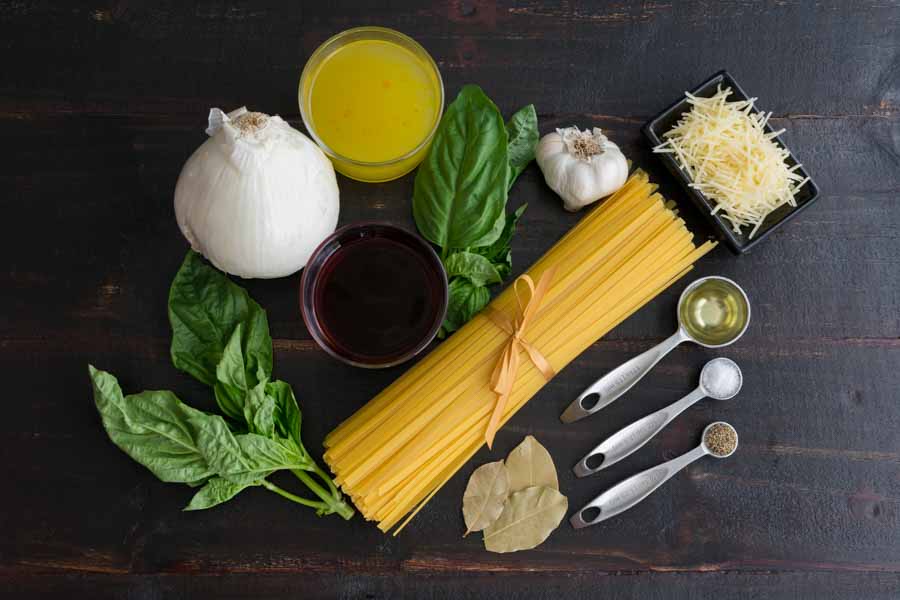
Although I did find white onion, they were on the large side. I kind of made my own small white onion by using half of the large one pictured below.

And let’s talk wine. I usually keep boxed wine around because my husband isn’t a wine drinker, I don’t drink it that often, and I mostly use it for cooking. This recipe uses 2 cups of wine, and a 750 ml bottle (the standard size) is a little over 3 cups. That’s just enough for the pasta and a glass or two of wine to go with it. So buy a bottle and enjoy, knowing there won’t be any leftovers wasted.

One-Pot Red Wine Pasta Ingredients
Linguine, basil, red wine, white onion, vegetable stock, garlic, parmesan cheese, olive oil, salt, and pepper

The Process

I keep finding easy recipes, and this one is no exception. How easy was it? Well, it only required a little bit of chopping and some measuring. I had it prepped and on the stove cooking in just a few minutes. Here’s how I spent my time:

  • 7 minutes to prep
  • 8 minutes to bring to a boil (my vegetable stock had been in the refrigerator)
  • 8 minutes to cook
  • 22 minutes total

I’m sure I would have shaved off a few minutes if the vegetable stock had been at room temperature when I started. I had opened the carton the day before, and it had been stored in the refrigerator overnight.

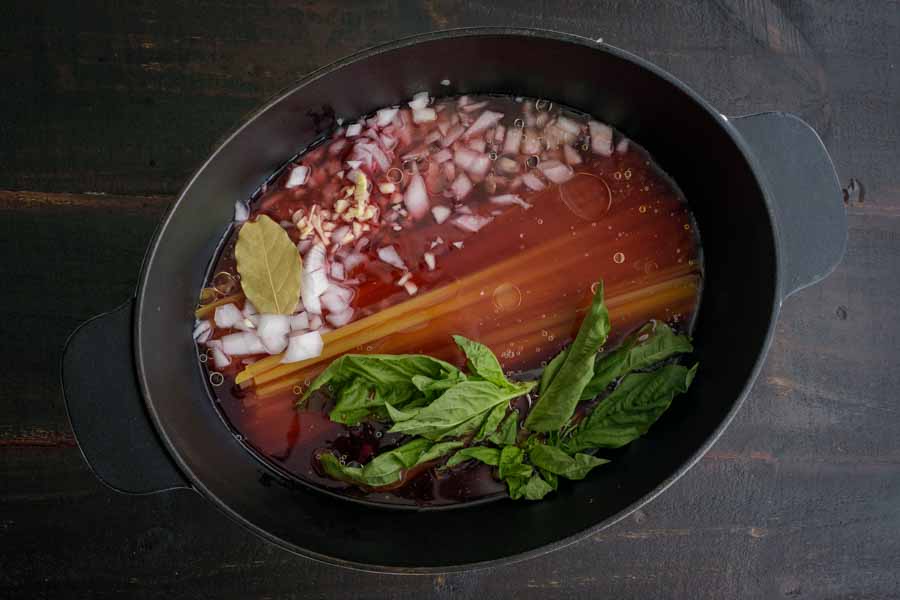
I will confess that I didn’t think this one was going to work after I added the wine, vegetable stock, and water to the pot. The liquids submerged the other ingredients, and I had doubts as to whether the pasta could absorb it all. But 8 minutes later I had al dente linguine in a creamy purplish sauce. That’s right, pasta with no draining required. Love it!

I served my One-Pot Red Wine Pasta with shredded parmesan cheese and a little chopped basil. I don’t think I cut the onion up finely enough, but otherwise what I ended up with was very close to the photos with the recipe.

All the ingredients have been added to the pot, and it's ready to cook
All the ingredients have been added to the pot, and it’s ready to cook

Broccolini with Lemon Tahini Dressing

0

Lately, I’ve noticed a pattern: Each week I’m blogging a main course and either a beverage or a dessert. Sides have disappeared from The Hungry Pinner, and that needs to change. A quick scan of my Pinterest boards and I found this Broccolini with Lemon Tahini Dressing recipe. It’s the perfect follow up to the Lemon Garlic Swordfish I just made. I even thought about serving them together, but it might have been way too much lemon for one meal. So this recipe is going to accompany our weekly red meat, a simple steak in this case. The lemon tahini dressing will be the star of this meal, and for once I’m looking forward to the side dish more than the main course.

The broccolini has a crunchy roast bite. The lemon tahini dressing? I want to top in on EVERYTHING. It’s tangy and creamy. You’re gonna love the tahini up in there. It’s got a hummus vibe but with sesame oil.

Recipe Author: The Oh She Glows Cookbook by Angela Liddon via Shutterbean
Get the recipe

The Ingredients

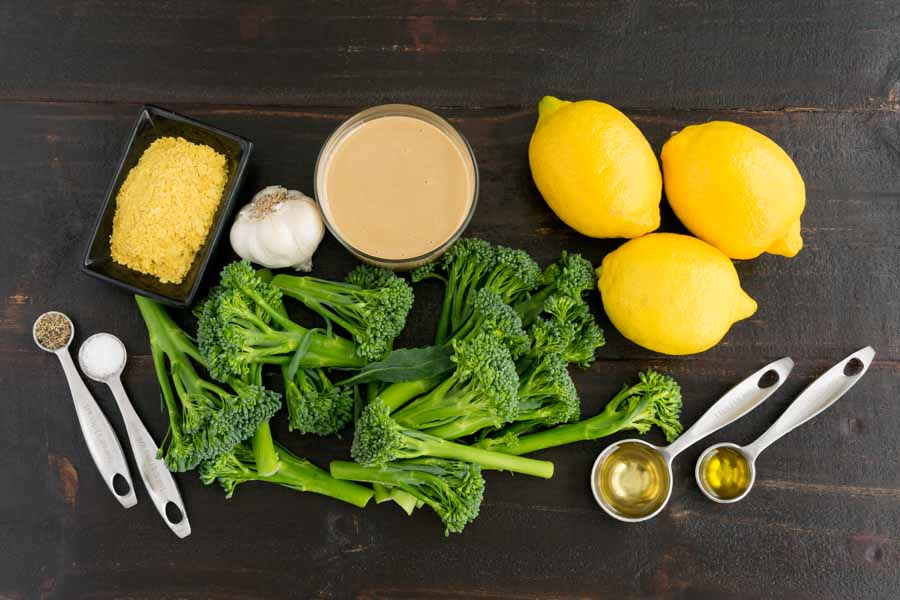
In the vein of the Lemon Garlic Swordfish I just made, this recipe features lemon and only has a handful of ingredients. That food blogger’s pantry came in handy again, and I had most of the ingredients on hand. I just had to buy some extra lemons, the broccolini, and the nutritional yeast.

And let’s talk about nutritional yeast for a second. I had a vague idea of what it was, and I was half right. It’s a nutritional supplement that’s used by vegetarians as a nutritional supplement. I thought I could skip it, but I found out it’s also used as a condiment. It’s known for its nutty taste, so I bought a bottle just for this recipe. At around $6, it was available locally and fairly inexpensive to try.

By the way, I discovered that broccolini has a few other names. The package I bought was labeled broccoletti (and only half a pound). I took a chance and bought it since it looked like broccolini. Worst case I could find a broccoletti recipe to make instead. It turns out that broccolini and broccoletti are the same things. And it’s also called broccolette, sweet baby broccoli, and a few more less common names. Not confusing at all.

Broccolini with Lemon Tahini Dressing Ingredients
Broccolini, salt, pepper, nutritional yeast, garlic, tahini, lemons, sesame oil, and olive oil

The Process

I’ve been lucking onto some easy recipes lately, and this Broccolini with Lemon Tahini Dressing is no exception. Talk about an easy side dish! I think it took longer for the oven to heat than it did to do all the prep work.

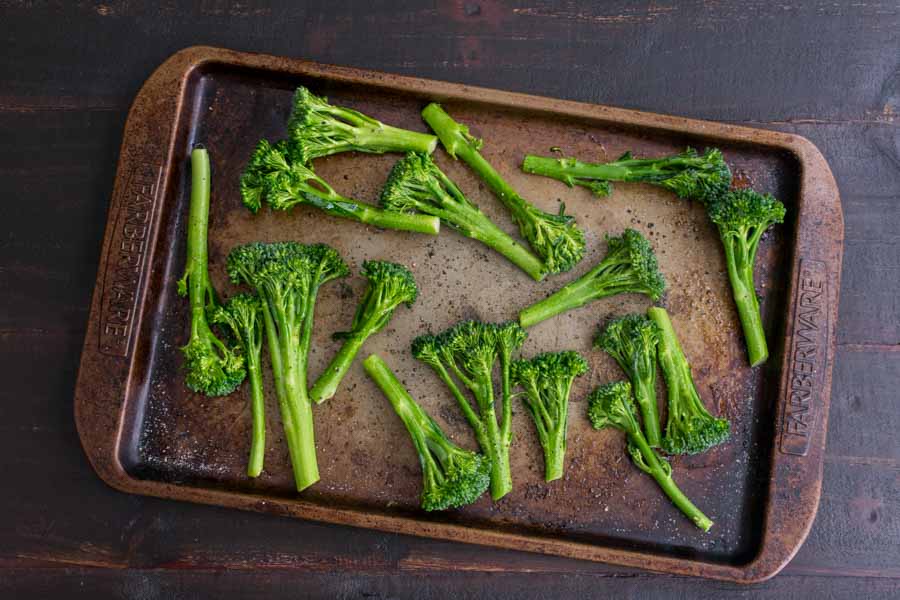
Getting the broccolini ready took all of 2 minutes. No, that’s not a typo. All I had to do was drizzle it with some olive oil and season with salt and pepper. Then I popped it into the oven for 15 minutes while I made the dressing.

I didn’t time the dressing, but it was fast. All I had to do was measure the ingredients into my mini-prep and blend. I did have some leftover after I drizzled it onto the roasted broccolini, but I also only roasted half the amount called for. I’ll find a use for it–it’s so good!

Broccolini tossed with olive oil and seasoned with salt and pepper

Lemon Garlic Swordfish

0

The last time I made swordfish, I wanted to try something different. I gave One-Pan Sicilian Swordfish with Spicy Olive Oil Poached Tomatoes a try, and I wasn’t disappointed. But this time around I’m going for something a little simpler with classic flavors. You can never go wrong with lemon, butter, and garlic. Lots and lots of garlic! This Lemon Garlic Swordfish promises to be simple, easy, and tasty (I know, what recipe doesn’t promise to be tasty?). I’m hoping it will let the taste of the fish come through and not be total garlic overload. Only one way to find out…

This buttery Lemon Garlic Swordfish is stunningly delicious. This recipe results in a tender, flavor-packed fish that tastes like you spent way more time on it than you did.

Recipe Author: Amy at Chew Out Loud
Get the recipe

The Ingredients

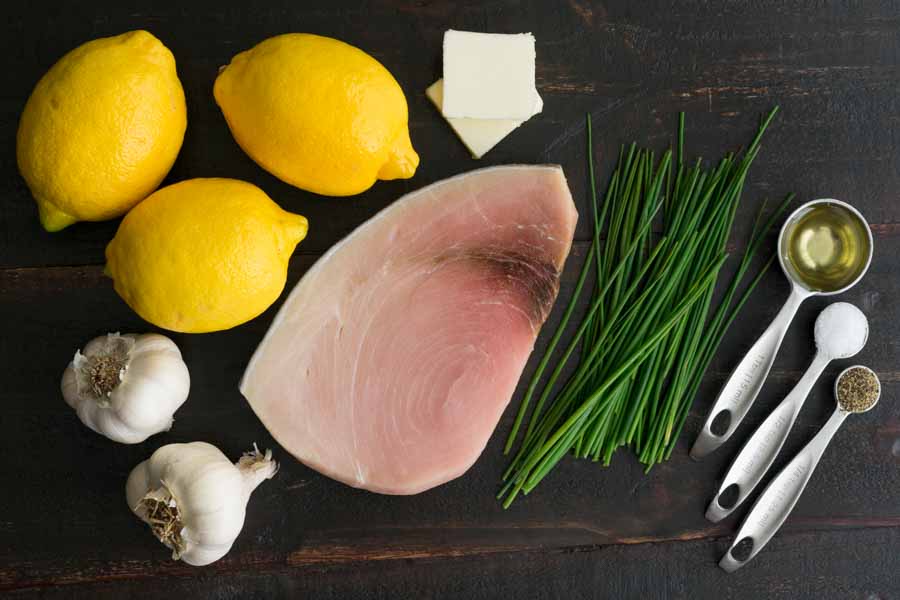
There were only a few ingredients in this recipe, and I had to shop for a few. I had the swordfish in my freezer, so that left me needing the lemons, garlic, and chives. I spent less than $6 for the fresh ingredients. The swordfish fillet was (I think) around the same, so this recipe cost me about $12.

Lemon Garlic Swordfish Ingredients
Swordfish fillet, garlic, lemons, butter, chives, olive oil, salt, and pepper

The Process

The thing I love about preparing fish is it’s usually quick and easy. I’m happy to say this lemon garlic swordfish recipe was no exception.

A zester or grater is a must, along with a couple of pans. I used a small skillet for the butter sauce and a large ovenproof skillet for the fish. A garlic press would be helpful but isn’t a requirement.

As far as cooking skills, you’ll mainly need to know how to zest a lemon and chop a few herbs. Actually cooking everything is incredibly simple. You just sear the swordfish on the stove and finish it in the oven. Then mix up the sauce ingredients until the butter is melted and pour it over the swordfish fillet.

Since this dish is ready in no time, I wanted a side that was also easy. I chose steam-in-bag green beans. I just popped them into the microwave, and they practically took care of themselves.

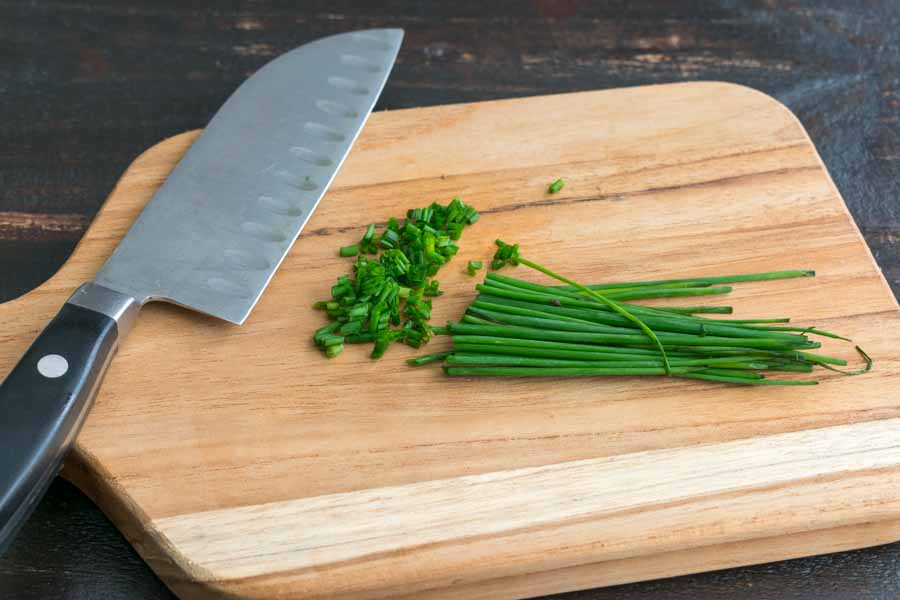
Chopping the fresh chives

Masala Paal (Spiced Milk)

0

If you’ve read my blog before, you might have noticed that I tend to have a theme each week. Not always but I do try. This week I’m sticking with the theme of Indian food. After the Indian Tomato-Cilantro Chicken, I wanted to give this Masala Paal recipe a try. Now I love Indian food, but I am a die-hard ice-cold milk kind of person. I utterly hate it with my milk starts to warm up, and I’ve always thought it was weird to purposely warm it up. And now I’m making a warm/hot milk recipe. It’s something I feel like I need to try at least once, so here goes.

‘Masala Paal (Masala Milk)’, a healthy hot beverage for the cold winter day. It is basically milk boiled with a blend of wonderful Indian Spices and nuts.

Recipe Author: Revathi Palani at Revi’s Foodography
Get the recipe

The Ingredients

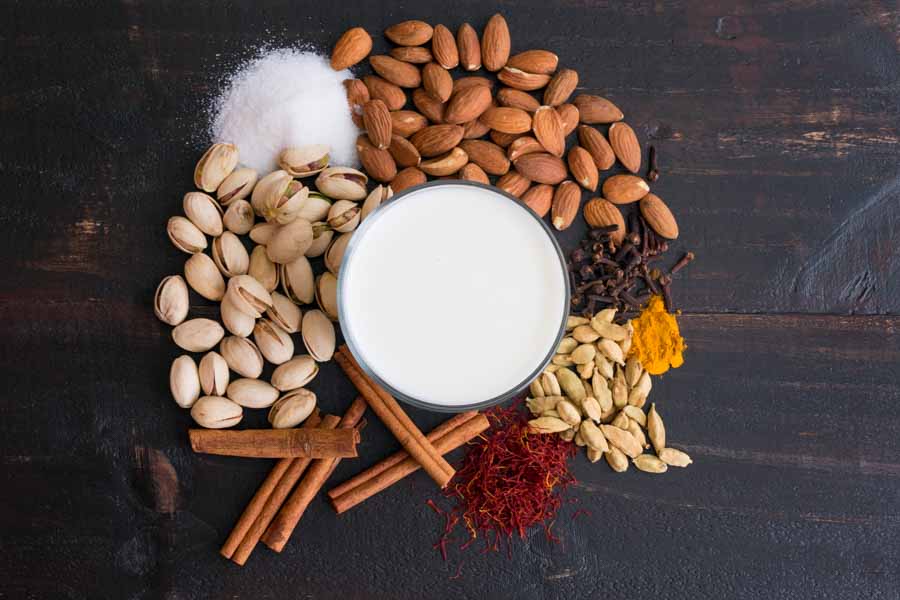
I cook Indian food pretty regularly, so I didn’t need to buy a lot of the ingredients for this recipe. Plus blogging about food twice a week tends to keep my pantry very well stocked. I had all the spices: cloves, cardamom pods, turmeric, and saffron threads, plus the sugar. That left me to shop for the milk, almonds, and pistachios.

It goes without saying the milk was easy to find (I bought whole milk). I also didn’t have trouble finding whole, shelled, unroasted, unsalted almonds. I didn’t have quite as good of luck with the pistachios, but they worked. I had to buy them unsalted, roasted with shells, but shelling pistachios is so easy that I didn’t mind.

I had a good amount of almonds and pistachios leftover, but they keep well. I’ll use them in other recipes or as snacks.

Masala Paal (Spiced Milk) Ingredients
Milk, cinnamon sticks, pistachios, sugar, almonds, cloves, turmeric, cardamom pods, and saffron

The Process

Making masala paal really is simple and took me 24 minutes, but I do have some tips for you. First, use a nonstick saucepan to boil the milk. Start it on medium, and turn it down it starts to steam and bubble. That, along with frequent stirring, helps keep the milk from burning and sticking to the bottom of the pan.

The water for soaking the pistachios and almonds can be boiled in the microwave. It saves an extra pot and some time. Just be sure to let them cool for a minute or two before you skin them. Squeeze each nut between your thumb and forefinger, and the skin will slide right off.

Speaking of soaking things, sort of, I made a little adjustment to the cardamom pods. I used the flat side of a kitchen knife to slightly crush the cardamom pods before I added them to the milk. Their flavor comes from the seeds inside, and cracking the pods open lets the milk get to that flavor.

From what I’ve found, a mixie (Step 1) is a cross between a blender and a grinder. I don’t have one, and I was tempted to try my spice grinder, but I’m not sure if it’s safe for liquid. I ended up using my mini-prep, and I think it worked okay.

You’ll need a slotted spoon. It will let you fish the nuts out of the boiling water, fish the whole spices out of the milk, and stir the masala paal.

Oh, and the chopped almonds and pistachios I used as a garnish mostly sank into the milk. I couldn’t tell them apart from the nuts that made up the coarse paste from Step 1.

Finally, this recipe made just a little more than my largest mug could hold. I ended up drinking half of it and reheating the rest the next night.

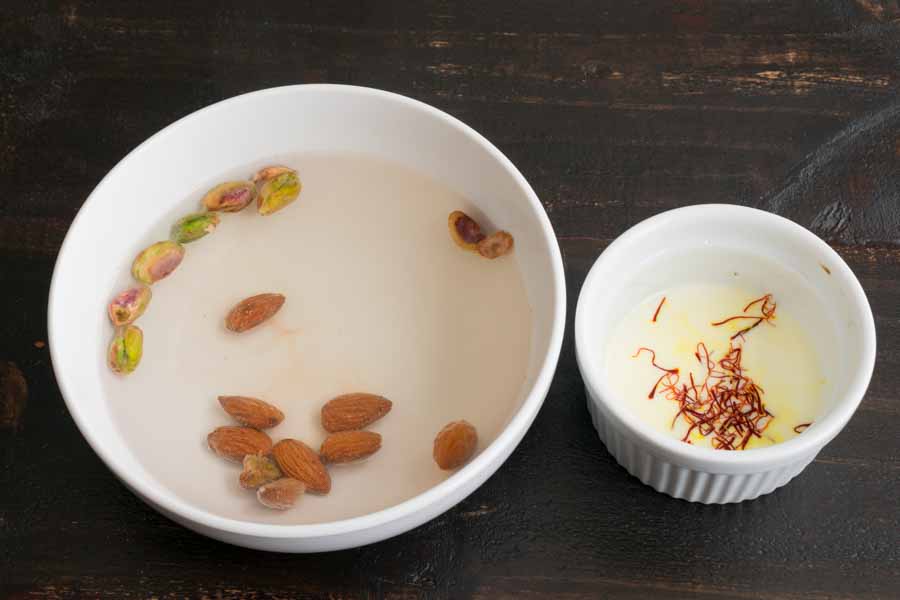
Soaking the nuts and saffron

Indian Tomato-Cilantro Chicken

Happy birthday to me! Happy birthday to me! Today is my 45th birthday, and I’m celebrating with one of my favorite cuisines. I utterly adore Indian food, and this Indian Tomato-Cilantro Chicken sounds recipe like it was written just for me and my husband. This might not be authentic Indian cuisine, but it uses lots of flavors found in Indian food, and I’m pretty stoked to try it. It promises bold flavors with a silky sauce and it’s made with chicken breasts. Getting the hubs to eat dark meat can be tough, and he’s very averse to bones and skin. Boneless, skinless chicken breasts are his jam. So we’re celebrating at home with something we both love, lots of Indian food. And he’s totally doing the dishes because it’s my birthday, and birthday girls don’t do dishes, damn it!

This Indian Tomato-Cilantro Chicken is full of flavor from tomatoes, cilantro, garlic, Serrano chilies, onion, ginger and several spices that will make your mouth water before you even taste this deliciousness!

Recipe Author: Linda at The Wanderlust Kitchen
Get the recipe

The Ingredients

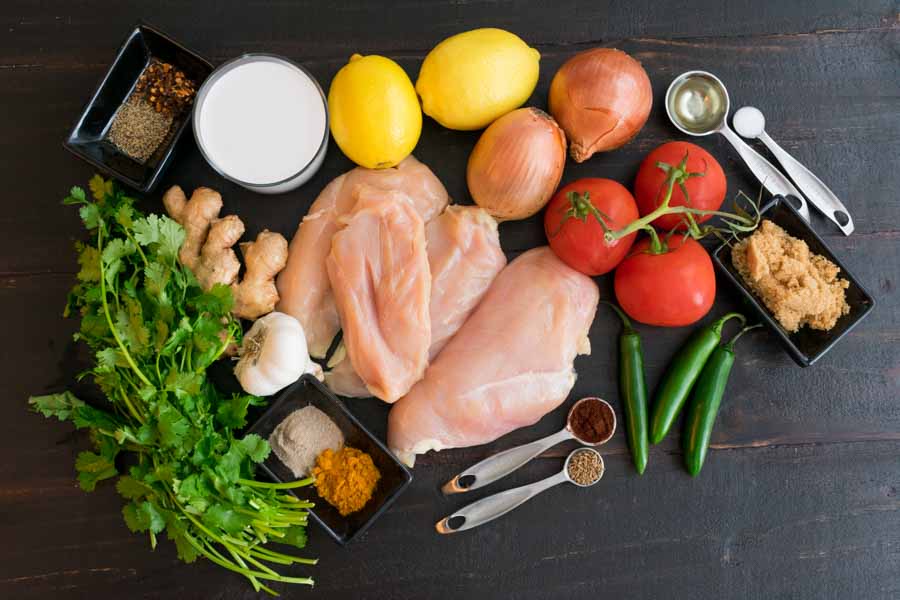
The list of ingredients for this recipe is on the long side, but you should be able to find everything at a good-sized grocery store. I had all the spices, sugar, and vegetable oil on hand, but I did have to buy several things. The chicken, produce, and coconut milk were all on this week’s shopping list.

Indian Tomato-Cilantro Chicken Ingredients
Chicken breasts turmeric, cardamom, cilantro, garlic, ginger, black pepper, red pepper flakes, coconut milk, lemons, onions, vegetable oil, salt, tomatoes, brown sugar, serrano peppers, chili powder, and cumin seeds

The Process

Most of the time I prep the first step or two of a recipe, start cooking, and finish the prep work as I cook. This recipe didn’t have much time between steps, so I had to prep everything before I started cooking.

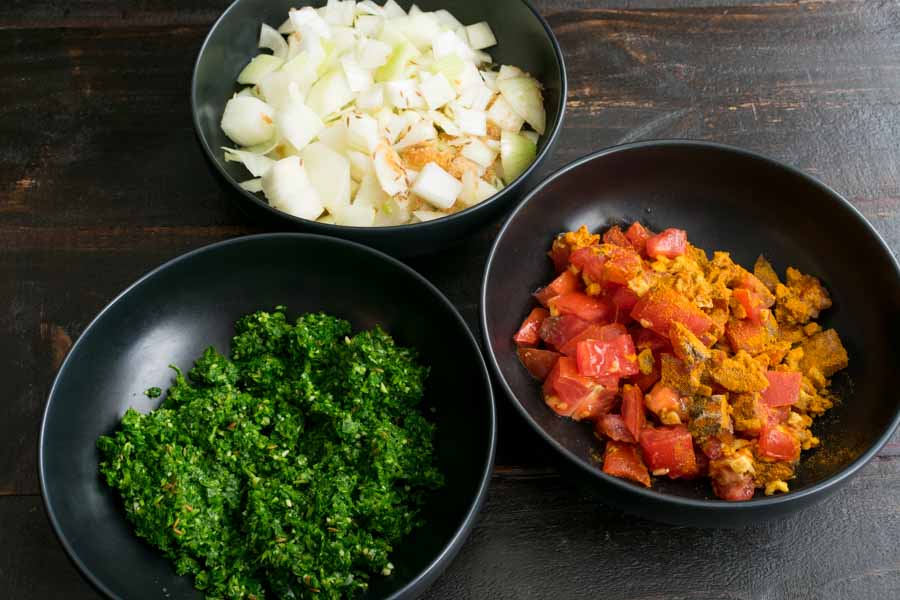
There were 4 main parts to the prep work, and you can see the prepped vegetables and spices below. I broke the prep work down as follows:

  • Chop and marinate the chicken
  • Make the cilantro paste (you’ll need a food processor for this step)
  • Chop the onions and add the brown sugar and spices
  • Dice the tomatoes, mince the ginger, and add spices
The cilantro paste, chopped vegetables, and spices prepped and ready to go

I ran into a question about the spices while I was prepping the onions. That step says to add cumin, but I had already used it in the cilantro paste. It also says “cumin” in both steps, but the ingredients list “cumin seeds”. I used a 1/2 teaspoon of cumin seeds in both, but I have doubts. Using ground cumin in the cilantro paste would have made more sense to me.

I also ran into another question when I began cooking. The ingredients list “vegetable oil”, but the instructions say “grapeseed oil”. I used vegetable oil, but I have the feeling either would have worked just fine.

The total time listed for this recipe is 30 minutes with an optional 1 hour to marinate the chicken. It took just a little longer, but not by much. Here is how my time was spent:

  • 5 minutes to prep the chicken
  • 1 hour to marinate the chicken*
  • 29 minutes to cook
  • 1 hour 34 minutes total

* I finished the prep work while the chicken was marinating and didn’t include it in the total time. It took me 17 minutes.

Finally, I used a deep saute pan for my tomato-cilantro chicken. It had plenty of room for all the ingredients and to stir without spilling.

Black Forest Cupcakes

0

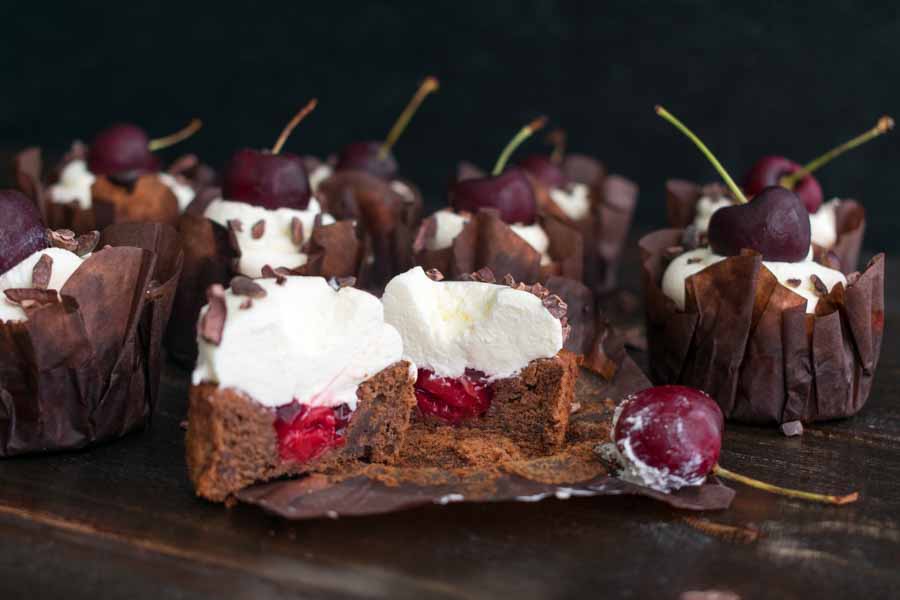
Bet you thought my cherry obsession was over? I did go on a bit of a cherry bender for a while. I mean, the Grilled Cherry Milkshakes and the Whipped Ricotta Toast with Balsamic Cherries did take care of my cherry cravings, at least for a while. And now they’re back! This time I’m letting them take the form of dessert with this Black Forest Cupcakes recipe. I think this is going to be the best of both worlds: fresh and canned cherries. Yes, I admit my shameful love for the sugary, syrupy canned cherry pie filling. These cupcakes are each filled with a canned cherry and topped with a fresh cherry. Oh, and there’s chocolate. Because chocolate.

Black forest cupcakes – your favorite cake in a petite cupcake size. Amazing and delicious. Get the recipe now.

Recipe Author: Bee at Rasa Malaysia
Get the recipe

The Ingredients

There are a dozen ingredients in these Black Forest Cupcakes, and I had to shop for nearly all of them. Nothing was difficult to find, but I did have sticker shock at the price of the fresh cherries. I guess they’re not in season, and all I could find was organic. They were $11.29 for a 1.13 pound back. Eek! But they won’t go to waste.

I also sprung for the cake flour instead of using the all-purpose flour in my pantry. From what I’ve read, cake flour makes a difference in the texture. We shall see.

The rest was a few dollars here and there, with the chocolate being on the higher end at $5.16. I opted for wafers because they melt well, but that also caused me to buy chocolate sprinkles to decorate the cupcakes. I could have saved a few dollars buying a chocolate bar and shaving the extra for decoration, but sometimes convenience is worth a little extra.

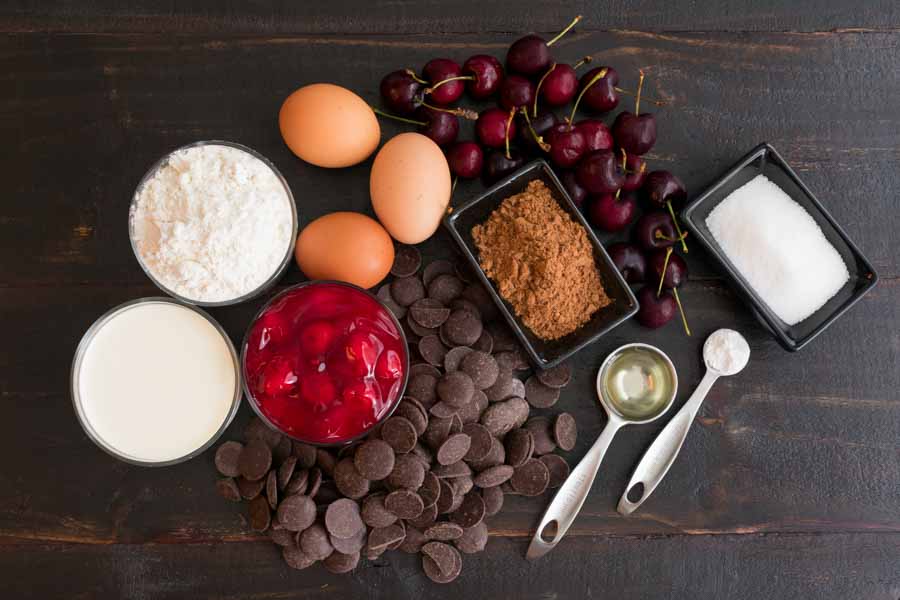
Black Forest Cupcakes Ingredients
Dark chocolate wafers, cherry pie filling, heavy whipping cream, cake flour, eggs, fresh cherries, cocoa powder, sugar, cream of tartar, and corn oil

The Process

Making these black forest cupcakes can be broken down into 3 sections: making the cupcakes, filling them, and topping them. That might sound complicated, but these cupcakes really weren’t that much work.

There are a few pieces of equipment you’ll need, like a kitchen scale. The measurements for many of the ingredients are given in weights.

A stand mixer will also come in very handy, though you could also use a hand mixer. The beauty of the stand mixer is you can mix up the meringue and whipped cream while you are doing other steps, so it speeds things along. You could technically beat the egg whites and cream by hand, but you will be there for a looooooong time!

Here’s how my time broke down:

  • 19 minutes to prep the cupcakes
  • 25 minutes to bake
  • 16 minutes to fill and top
  • 1 hour total (cooling time not included)

The Cupcakes

I started out by adding the meringue ingredients to my stand mixer and turning it on high. Meringue can take ages, and I wanted to get a head start on it. I made the chocolate mixture in the meantime, and it was still ready before the meringue.

Once the meringue is folded into the chocolate mixture, it’s just a matter of filling the cupcake liners and baking them. The 25 minutes listed was the perfect amount of time.

I didn’t time the cooling process, but I’d say it was about an hour. I let them cool in the muffin tin for 10 minutes, then I placed them on wire cooling racks.

The Filling

Filling the cooled cupcakes was very simple. Even though they weren’t as tall/thick as some cupcakes I’ve made in the past, I didn’t have any trouble. The canned cherries were very small and didn’t need a lot of room. I used a teaspoon to make a small divot in the center of each cupcake then added some filling and a cherry.

If you’re into gadgets, you can use a cupcake corer. I’ll admit I’ve been eyeing this one for a while. But I don’t bake filled cupcakes all that often, so I’ve never bought it.

The Toppings

I actually started beating the whipping cream before I filled the cupcakes. I wanted to make sure it was super fluffy, and it did take a while. The recipe doesn’t specify how much heavy whipping cream to use, so I just guessed.

I used 1 cup of whipping cream and added 2 tablespoons of sugar for a little extra sweetness. The recipe notes say the cupcakes aren’t very sweet, so I thought a little extra sweetness here would be nice, and I was right.

Once the whipped cream was nice and thick, I added it to a piping bag and topped the cupcakes. There was just enough, but don’t get crazy or you’ll run out.

Then I topped my beautiful creations with a fresh cherry and some chocolate sprinkles, and voila! Gorgeous black forest cupcakes. I felt like a real baker LOL.

Black forest cupcake with cherry filling

Grilled Cherry Milkshakes

Whew! After those lightened up Cheeseburger Stuffed Shells, my first thought was to find a milkshake recipe. This Grilled Cherry Milkshakes recipe sounded like the perfect followup. Burgers and milkshakes are such a classic American combo, and I haven’t had a milkshake in ages. And, like those stuffed shells, this is a lightened up version of good old-fashioned comfort food. Plus I finally get to try grilled cherries. I have to admit I was a little disappointed when I didn’t get to grill them for the Whipped Ricotta Toast with Balsamic Cherries I made a while back. Not that they weren’t good, but grilled cherries!

Grilling a milkshake is kind of impossible. However, grilling the cherries you’re going to put in said milkshake is totally possible.

Recipe Author: Ashley at Edible Perspective
Get the recipe

The Ingredients

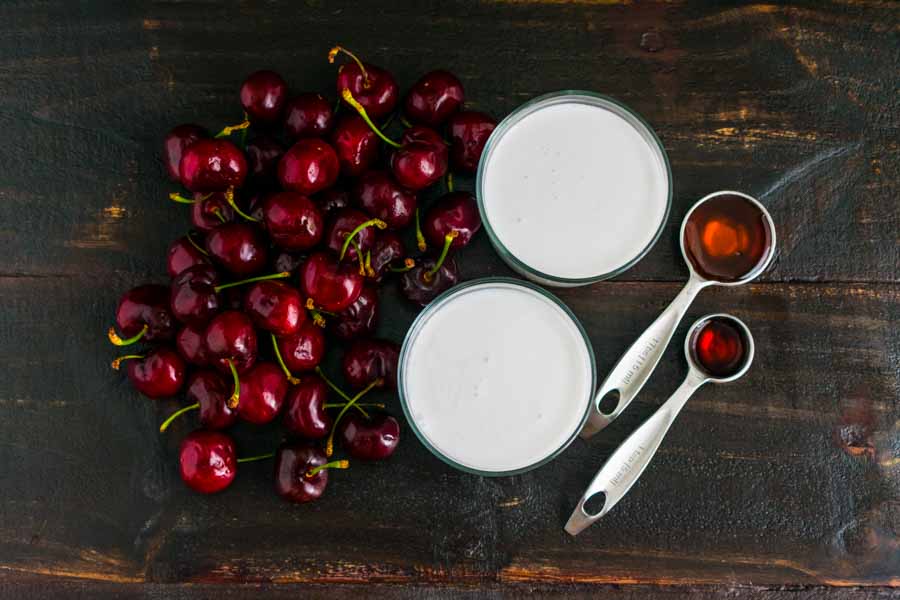
As you can see, there are only a few ingredients in this recipe. I had the vanilla extract and honey on hand. That left me to shop for the fresh cherries and both types of coconut milk (lite and regular). Not a terrible shopping list at all!

Grilled Cherry Milkshakes Ingredients
Bing cherries, full-fat coconut milk, light coconut milk, honey, and vanilla extract

The Process

Making these grilled cherry milkshakes wasn’t difficult, but it did take some planning. First, I had to buy an ice cube tray so I could freeze the full-fat coconut milk into cubes. Prepping them only took two minutes to do, including thoroughly mixing the coconut milk with an immersion blender. However, I had to wait overnight for the cubes to completely freeze.

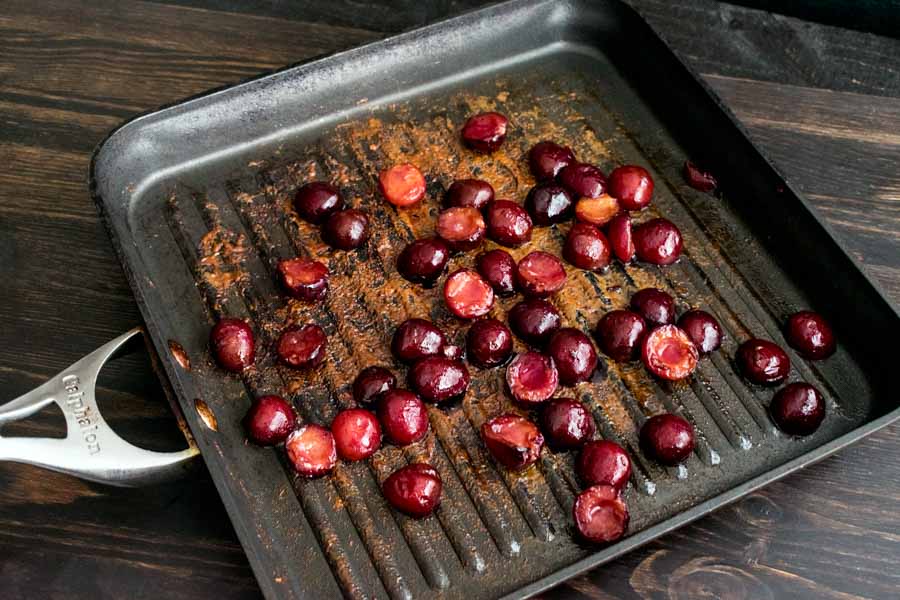
I grilled the cherries the same day I prepped the coconut milk cubes because they also had to cool in the refrigerator. They took me 16 minutes to cut in half and pit, then another 10 minutes to grill on the stove. The recipe does say to use a grill pan on a grill heated to 375℉, but I don’t have an indoor grill. Instead, I kept my stove on medium-low, and I think I got good results. No charring, but also no burning.

The next day I mixed the frozen coconut milk ice cubes with the chilled light coconut milk in my food processor. I opted not to use my blender because the cubes were on the large side, and my food processor is more powerful than my blender. I didn’t have any trouble blending up two batches of coconut milk, and I put both into the freezer for an hour to firm up a bit.

Then I rinsed out my food processor and pureed the grilled cherries so they would be ready to go when the frozen coconut milk mixture was. I couldn’t wait! Actually making the milkshakes was the quickest and simplest part. All I had to do was divide the grilled cherry between two glasses, top with the frozen coconut milk mixture, and stir.

Grilling the cherries

Lasagna Grilled Cheese

Okay, I have a confession to make: I’m on a little bit of a comfort food bender. But unlike the Cheeseburger Stuffed Shells I made last week, this isn’t a lightened up or healthier version. Nope, this Lasagna Grilled Cheese recipe is a full-on pan-fried grilled cheese sandwich with not one but two types of cheese plus a few extras. Hungry yet? I sure am!

Bright tomato and creamy ricotta are the essence of lasagna. These are critical ingredients. For added flavor we’re adding fresh basil, salt, pepper and butter. Mozzarella cheese work as cheesy glue and as an extra layer of delicious! Let’s sandwich!

Recipe Author: Joy Wilson at Joy the Baker
Get the recipe

The Ingredients

I looked high and low for canned cherry tomatoes locally and had absolutely no luck. And everything I read led me to believe that there wasn’t a good substitute. Fortunately, Amazon came to my rescue, although I did have to buy a six-pack for $14.99. Pricey, but I know I’ll use them in this and other recipes.

The other items I needed were all grocery store basics, and I had no trouble finding them. Thankfully none of them were as splurgy as the tomatoes, and I didn’t break my grocery budget too much this week.

One thing to note though is there will be extra ciabatta, ricotta, mozzarella, and tomatoes. You might want to double up on the recipe or find other ways to use up the leftovers. Spoiler alert: I doubled up on the recipe.

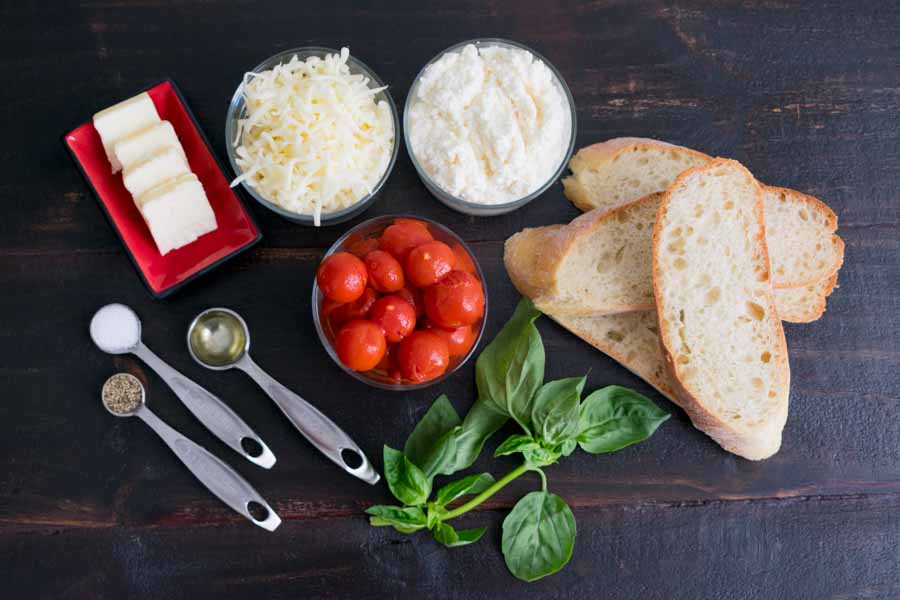
Lasagna Grilled Cheese Ingredients
Canned cherry tomatoes, basil, olive oil, salt, pepper, butter, mozzarella cheese, ricotta cheese, and ciabatta bread

The Process

These lasagna grilled cheese sandwiches were easy to put together, but I did have to take care until the cheese melted. I had a few tomatoes slip out and a drip or two of ricotta, but nothing close to a disaster. I just tucked things back in and continued cooking. Here is how my time broke down:

  • 7 minutes to prep
  • 5 minutes to cook
  • 3 minutes to rest
  • 15 minutes total

The only minor question I had was whether or not to put shredded mozzarella on all four pieces of bread. On one hand, I had plenty of mozzarella; on the other, it could make spreading the ricotta difficult. I ended up adding the shredded mozzarella to all four slices. I don’t believe you can ever have too much!

Something I did notice was that I cut the bread quite thick, and that made the cheese take longer to melt. Putting the lid on the skillet helped things along, but I had better results when I made the second batch with thinner bread.

Also, I used ciabatta bread and it made for fairly small sandwiches. Cutting it on the bias (diagonally) gave me bigger pieces. Two of those each made a nice lunch for my husband and me.

Adding the cheese and tomatoes to the bread

Cheeseburger Stuffed Shells

Even though I live in warm South Florida, there’s something about the winter season that makes me crave comfort food. It is a touch cooler than the summertime, so there’s no better time to eat heavier foods. But I’m also conscious of all those pesky details like fat and calories, so lightened-up versions of said comfort foods are never a bad idea in my book. That’s where these Cheeseburger Stuffed Shells came in. I’m all about a cheeseburger or a cheesy pasta dish, and both of those things together? OMG!! And this is a lightened-up version with a whole lot less guilt than I ever imagined possible. I think I’m in love, and I haven’t even started cooking!

Healthy, skinny, lightened-up cheeseburger stuffed shells with tomato meat sauce, mustard seasoning, lettuce, and cheese.

Recipe Author: Brandi Crawford at Stay Snatched
Get the recipe

The Ingredients

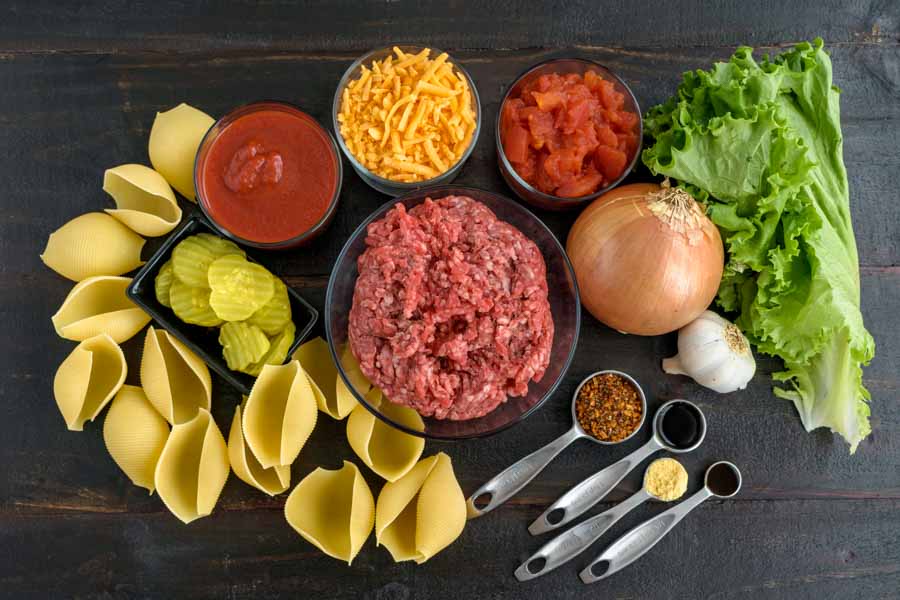
I really liked the fact that this recipe for cheeseburger stuffed shells uses lean ground beef and reduced-fat shredded cheese. Cutting out fat always gets a big thumbs up from me. Using no salt added tomato sauce was also a plus, and I took it further by also buying no salt added diced tomatoes. There’s plenty of salt in the dill pickle slices, and I can always add more if I feel it’s needed.

The jumbo pasta shells, produce, liquid smoke, and burger seasoning rounded out my shopping list. My local Publix sells the Weber brand recommended in the ingredients list, but they were out of it when I was there. I bought McCormick Grill Mates Hamburger Seasoning instead (link so you can see the packaging).

When I looked into ordering the Weber Gourmet Burger Seasoning online I found it was much more expensive than what I found locally (around $7 online versus $2 locally). I decided to substitute the McCormick seasoning since I’ve never tried the Weber brand and the price was so much better. This may end up being another bottle of seasoning that hangs out in my pantry for a few years, and I’ll feel better about it if I spend less.

Cheeseburger Stuffed Shells Ingredients
Ground beef, jumbo shells, sliced dill pickles, tomato sauce, shredded cheddar cheese, diced tomatoes, lettuce, onion, garlic, burger seasoning, liquid smoke, mustard powder, and Worcestershire sauce

The Process

The instructions for this recipe broke down nicely and were easy to follow. Here’s how my time broke down:

  • 31 minutes from prep through step 12
  • 30 minutes to bake
  • 61 minutes total

I’ve never made stuffed shells before, but the process was very similar to making spaghetti with meat sauce or lasagna. The basic steps were to boil the pasta, make the tomato sauce, stuff the shells, and bake. And that all went really well up until the shell stuffing part.

I quickly found out it’s not a good idea to hold the pasta shell in your bare hand while you spoon in lava-hot meat sauce. I wasn’t worried because the pasta had cooled. Yeah. Once I figured out that resting the shell in the casserole dish and then stuffing it was a better idea, things got much less painful.

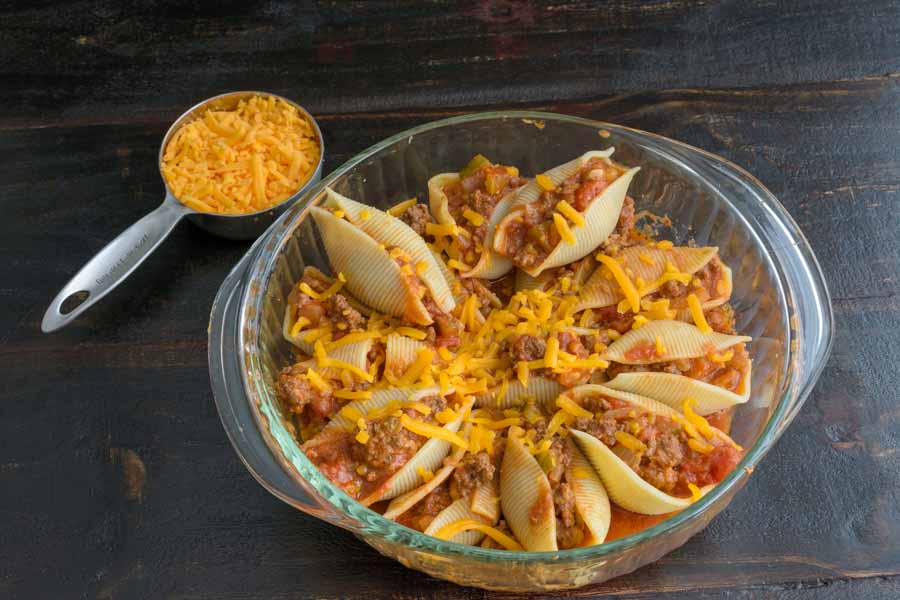
It really wasn’t that bad, though, and I had my shells stuffed in short order. You can see the results below with some of the shredded cheese sprinkled on top. Then it was into the oven for 30 minutes, and out popped warm cheeseburger-ey goodness.

Cheeseburger Stuffed Shells before going into the oven
Before going into the oven

One thing I’m glad I did was use bigger pans that I thought I would need. A deep sauté pan for the sauce gave me the room to stir everything thoroughly without making a mess. I’m sure it also contained some of the grease spatter. And a 4.5-quart pan worked nicely for the jumbo pasta shells. There was plenty of room for the shells to boil without sticking to the pan.

My 2-quart casserole dish worked pretty well for actually baking the shells though it was a little bit of a squeeze to get in all the stuffed shells. They also seemed to expand while they baked in the oven, and this dish was just deep enough for everything. I would not risk using a smaller dish.

And finally, one small change I made was chopping up the pickles before mixing them into the tomato sauce. They’re in there, but you can’t see them.

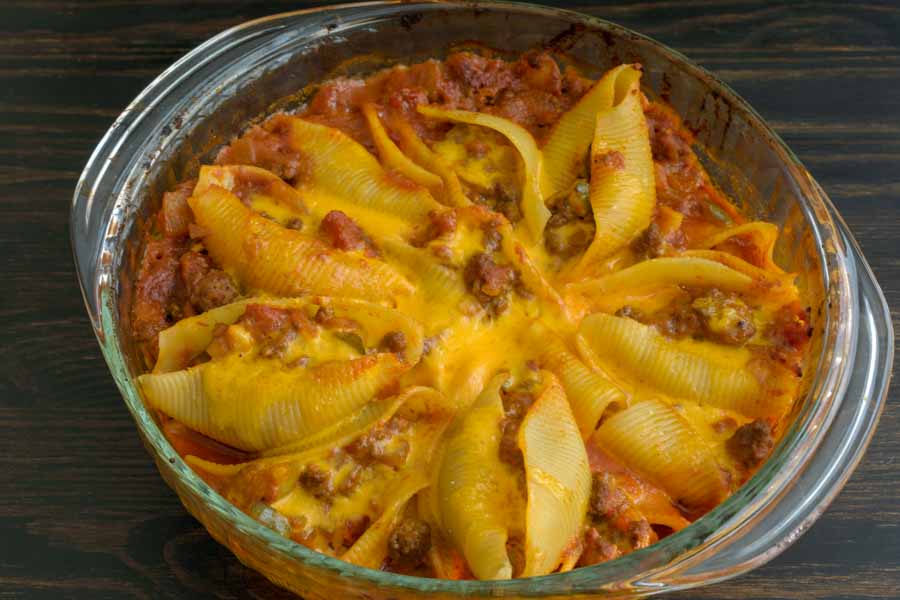
Cheeseburger stuffed shells after baking for 30 minutes
After baking for 30 minutes