Home Blog Page 33

Burnt Sage and Blackberry Sangria for Two

Those Grilled Flank Steak Tacos I made earlier this week were oh so good! But I needed an equally delicious drink to accompany them. Good thing I found this Burnt Sage and Blackberry Sangria for Two! Like the tacos, this sangria mixes traditional ingredients with a few unexpected ingredients. But what really attracted me was the fact that it’s a small batch of sangria. Most recipes I’ve come across require an entire bottle of wine plus fruit juice. It’s way more than I can drink in one serving since I’m the only one in the house who drinks it. This recipe sounds like it will solve my problem of leftover (and not as good as when I first made it) sangria. Let’s find out!

This is way more complex of a Sangria than I thought I would be able to get out of it. This is due to an extreme case of being flustered, tired, and combatting a cold. To sum it up, I was too lazy to check in on it after the first day and just let it sit for two days in the fridge. Result: a sangria for cocktail lovers.

Recipe Author: Elana at Stir and Strain
Get the recipe

The Ingredients

The ingredients for this sangria recipe were all available in my area, but I had to visit three stores to get them all. That’s a lot of effort for me, but I was pretty motivated. The wine, sage, blackberries, and limes were all found at Publix. Then I had to hit up Fresh Market for the blood oranges, and Winn Dixie for the bourbon.

I used one of my favorites, Bulleit Bourbon, instead of the Four Roses the recipe calls for. Winn Dixie had Four Roses, and I’ve wanted to try it, but it was $50 a bottle. Yikes! I’ve heard it’s good, but that was too splurgy for my budget. Bulleit was half that.
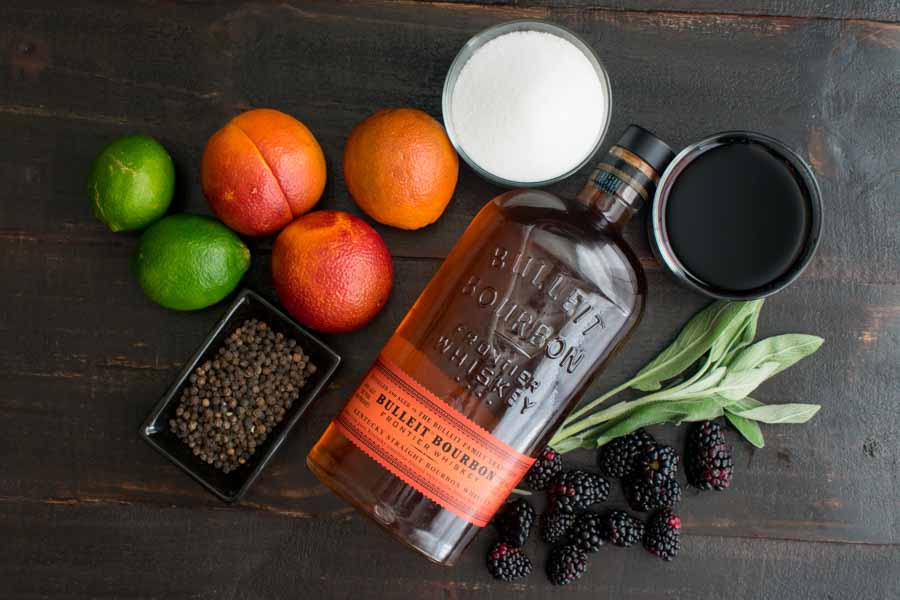
Burnt Sage and Blackberry Sangria for Two Ingredients
Bourbon, black peppercorns, limes, blood oranges, sugar, red wine, sage, and blackberries

The Process

This sangria has to sit in the refrigerator for 2 days, so I made it well ahead of when I planned to drink it. That can be good and bad. Good if you’re throwing a party and want to have your drinks prepared ahead of time. Bad if you run out. Very bad LOL!

The sangria needing to steep for a couple of days wasn’t surprising, but the addition of black pepper simple syrup struck me as unusual. My experience has been the sweetness in sangria comes from fruit juices. However, the addition of black pepper was intriguing, so I went with it.

The syrup was easy to make. Just put the sugar, water, and half the black peppercorns into a small saucepan to heat. I placed the other half of the peppercorns into a ziplock bag and lightly smashed them with a meat mallet.

I mixed up the other ingredients while the simple syrup was steeping and cooling. Then all I had to do was add it to the sangria and pop it into the refrigerator for a couple of days. Mixing everything up took 22 minutes.

The recipe says to store the sangria in a mixing glass topped with a Boston strainer. I hate the way wine and liquor taste when they oxidize, so I went a different route. Instead, I chose a small, sealed 2-cup container that the sangria nearly filled. That way there was very little air inside the container and none got in. It kept everything nice and fresh.
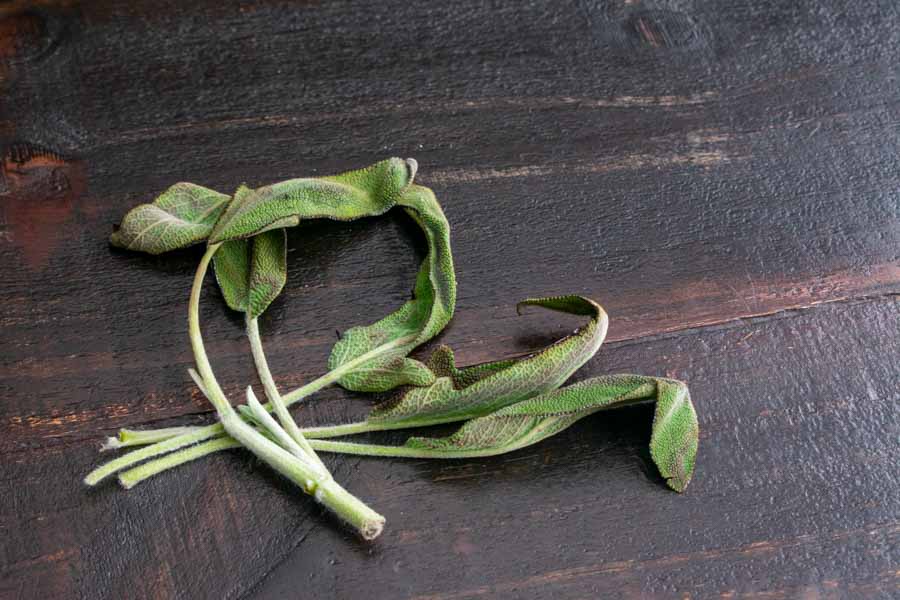
The burnt sage leaves
Burnt sage leaves

Grilled Flank Steak Tacos

I know I just made tacos a couple of weeks ago, but I’m putting them back on the menu. Those Korean Beef Tacos were incredible, but I’m going a more traditional route this week with these Grilled Flank Steak Tacos. I love tacos! They are an easy meal that each diner can customize to their taste, making them a terrific option for picky eaters. I really like the fact that this recipe includes grilled beef and a ton of veggies in the form of fresh guacamole and pico de gallo. I’m learning to love avocados and raw tomatoes, so this could turn out well or be a disaster. Fingers crossed!

Get your grill game on! We are making tacos. Topped off with fresh pico de gallo and guacamole, these easy-to-make Grilled Flank Steak Tacos are juicy, bright and super flavorful. Plus, as a part of the recipe I am sharing my foolproof works-every-time flank steak taco marinade recipe.

Recipe Author: Aysegul Sanford at Foolproof Living
Get the recipe

The Ingredients

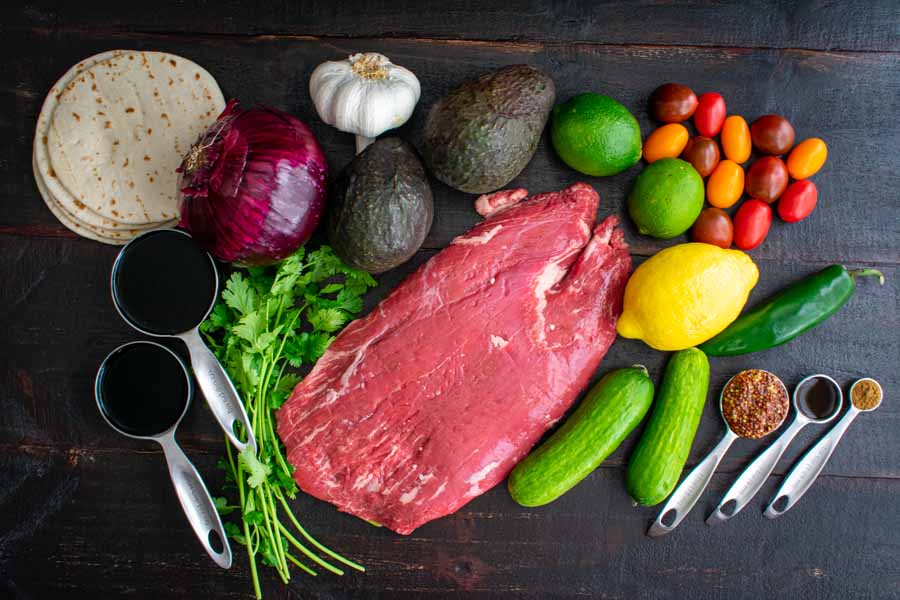
This recipe has a long list of ingredients, but they were pretty easy to find. I had a few things in my pantry, but I still had to shop for quite a bit. Mostly the fresh produce and the flank steak.

The recipe specifies a pound and a half of flank steak, and I found a package that was just a touch over that. It was 1.6 pounds for just under $17.

I did have trouble finding corn tortillas that were the right size, though. I ended up buying mini flour tortillas instead. They come 12 to a package, so I had the right amount with no leftovers to go to waste.

Finally, I found a bag of small seedless cucumbers that were the perfect size for these mini tacos. And I bought a variety pack of cherry and grape tomatoes. This was the only type of cherry tomatoes available, and I liked that they were colorful.

Grilled Flank Steak Tacos Ingredients
Flank steak, cilantro, soy sauce, balsamic vinegar, tortillas, red onion, garlic, avocado, lime, cherry tomatoes, lemon, jalapeño, cucumber, whole grain mustard, Worcestershire sauce, and cumin

The Process

Looking at this recipe made me feel a bit overwhelmed, but the way it’s divided into four sections made it very manageable. It was actually pretty easy when I focused on one portion at a time. Here’s how I spent my time:

  • 7 minutes to prep the marinade
  • 1 day to marinate the flank steak
  • 13 minutes to make the pico de gallo
  • 10 minutes to make the guacamole
  • 6 minutes to cook the flank steak
  • 7 minutes to rest the flank steak
  • 2 minutes to slice the flank steak
  • 1 day 45 minutes total

That broke down to these steps:

  1. Marinate the flank steak
  2. Make the pico de gallo
  3. Make the guacamole
  4. Cook and carve the flank steak

Pico de Gallo and Guacamole

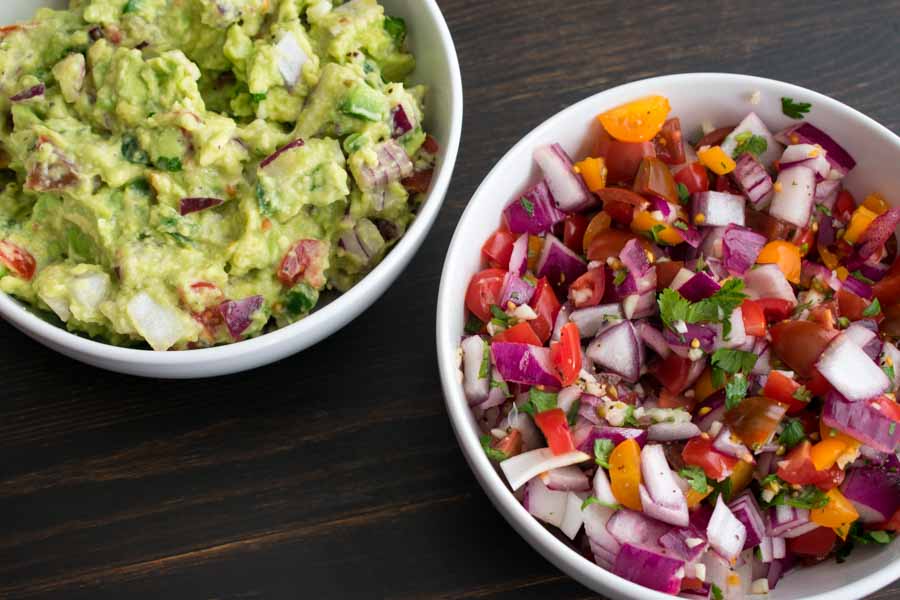
Most everything went according to the instructions, and I made the pico and guac in just over 20 minutes. There was a lot of vegetable chopping involved, but it wasn’t difficult. (I’ve never made guacamole before, but it was really easy!)

I did have a moment of confusion while making the pico de gallo. The ingredients list red onions twice–once as 1/2 a red onion, and again as 1/4 cup red onion. I chose the first option. The finished pico seemed like it was all onion, but it tasted good. Looking back, the 1/4 cup option might be a better choice.

After the onion overload on the pico, I decided to reduce the amount of onion in the guacamole. Instead of 1/2 a red onion, I used 1/4 of a red. The Haas avocados I used were on the small side, so reducing the onion worked out well. The consistency chunky, but I like it that way.

Flank Steak

I did have trouble when it came time to grill the steak, but that didn’t have anything to do with the recipe. This was my first time grilling this year, and I couldn’t get the grill to light (bad words happened). Fortunately, there are instructions in the blog post with this recipe for making the flank steak on the stove, so I got out my large cast iron pan and went that route. Day saved!

After that disaster was averted, everything continued per the instructions. I made 12 cute little tacos. There were leftovers (meat, guac, pico, and toppings), but they didn’t last long. I used them to make a taco bowl for lunch one day. They were too good to let them go to waste!

Guacamole and pico de gallo

Coconut Lime Mojito Shooters with Blueberry

Are you a shot person? I can’t say I am, though I did them occasionally when I was younger. These days, I’m more of a cocktail kind of person, but I’m making an exception today. These Coconut Lime Mojito Shooters with Blueberry are essentially tiny little cocktails. They look pretty, and I think they’ll taste good. I know blueberry sounds like an odd addition to a mojito, but I love Blackberry Mojitos, and blueberry isn’t much of a stretch from that. And I did love the Coconut Mint Margaritas I made a while back, so I have a good feeling about this recipe. But there’s only one way to know for sure, so let the cooking begin!

These creamy coconut lime mojito shooters with a hit of blueberry are your new tropical getaway. This simple lime mojito shot has a wonderful balance of flavors and is so easy to put together.

Recipe Author: Amanda Powell at A Cookie Named Desire
Get the recipe

The Ingredients

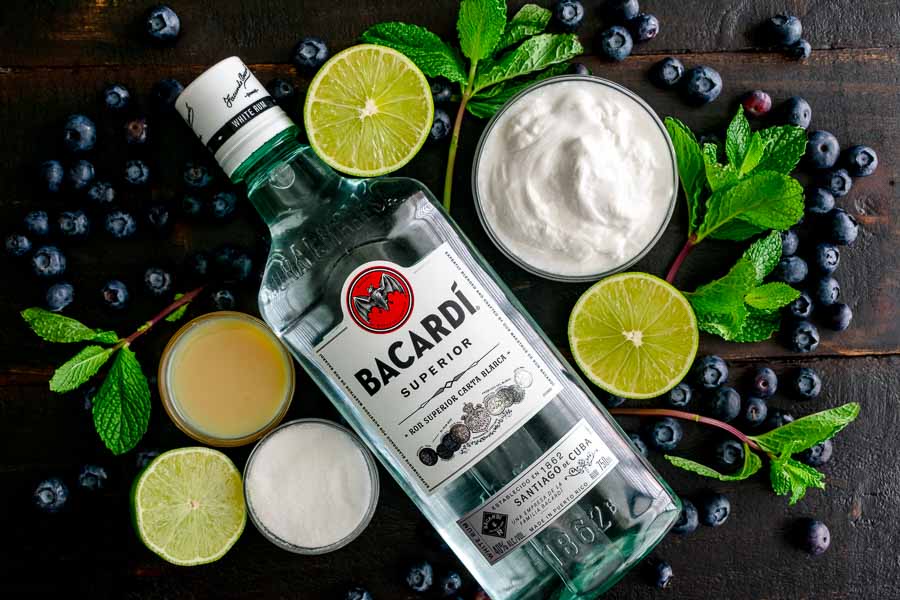
I suppose these coconut lime mojito shooters have a lot of ingredients, but I didn’t really notice that until I started writing this. Fortunately, everything was easy to find at my usual grocery store, with the exception of the rum. I had to make a stop at the liquor store for that, but it’s across the street from the grocery store.

Coconut Lime Mojito Shooters with Blueberry Ingredients
White rum, lime juice, coconut milk, blueberries, mint leaves, sugar, and sweetened condensed milk

The Process

The instructions for this recipe were okay, and my coconut mint mojito shooters were ready in 20 minutes. The biggest issues I had were with the mojito and pouring so the blueberry syrup wasn’t disturbed.

Making the Blueberry Syrup & Coconut Cream

Things went smoothly at first. I got the blueberry syrup made and into the refrigerator with no problems. Then I got started on the coconut mojito part.

Tip: I used an old trick of mine for getting the coconut milk cream/fat/solids out of the can: I turned it upside down and opened the bottom. That allowed me to pour out the water, and I was left with the cream. Easy peasy.

However, the coconut cream was super thick, and there was no way a whisk was going to break it up. I turned to my trusty mini-prep to handle the job. It easily whipped up the coconut cream and condensed milk to a smooth consistency. (By the way, I halved the recipe, and the mini-prep was just big enough. Otherwise, I would have needed my full-size blender.)

Here’s where some confusion came up. The next step was to muddle the mint, lime juice, and rum. Well, if you add all that liquid, then the mint leaves float. This is not conducive to muddling. I had to fish them out, muddle them separately, and put them back in.

Pouring the Shooters

The next step says to add the blueberry syrup to the shot glasses, then add the mojito. I had a coconut cream mixture and a separate rum mixture at this point. They needed to be blended together, even though that isn’t listed in the directions. Oops!

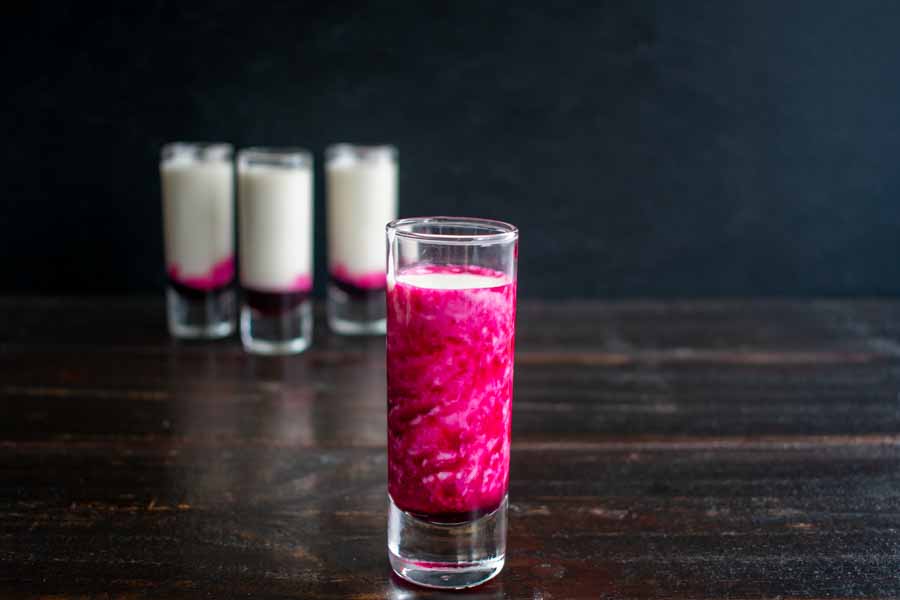
Once that was done, I started filling the glasses and immediately made the mistake you see in the photo below. Apparently, if you pour the mojito directly onto the syrup, it doesn’t layer.

Tip: I figured out that tilting the glass so the mojito poured down the side layered it beautifully. You could also try pouring it over a bar spoon, but the glasses are a bit small for that. I have a feeling that method would end in a mess.

And finally, to create more of an ombre effect, I stirred the shooters with a metal skewer. The skewer was long enough to reach the bottom of the glass, and the thinness didn’t displace the liquid and cause the shooters to overflow.

Tilt the glass when pouring the mojito on top of the blueberry syrup or this will happen

Blueberry Lavender Honey Pie

Happy Blueberry Pie Day!! Sadly, it’s not a paid day off, but it does involve a tasty treat. But I didn’t want to make a plain blueberry pie because it sounded boring. No, I had to be a little extra and find this Blueberry Lavender Honey Pie recipe. Then I decided a little extra wasn’t enough. No, I felt the need to be full-on extra, so I decided to try decorating my pie like those Instagram pie makers. So I scoured Pinterest for decorating ideas, ordered a set of cookie cutters, and stopped by the grocery store. I’m not the strongest baker, so let’s see what happens.

I was inspired by my daily breakfast of blueberries with Greek yogurt and honey for this recipe. This pie mixes plump blueberries with a hint of floral lavender, honey and a swirl of cream.

Recipe Author: Kylie Mazon-Chambers at Cooking with Cocktail Rings
Get the recipe

The Ingredients

I was surprised to see the list of ingredients for this recipe was so short. But I’ve never made a blueberry pie before, and I’m sure I imagined it would be a lot more complex than it actually is.

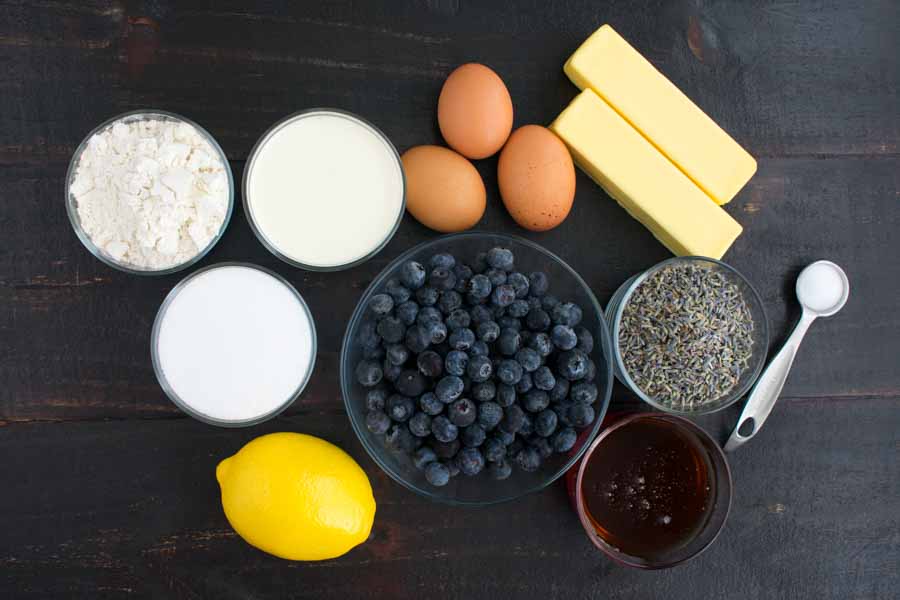
Most of the ingredients were basics, and I didn’t have any trouble finding them. I was really unsure of how much blueberries to buy. A little research told me 1 pint of blueberries was about 2 cups, so I bought 3 pints. I ended up using 2 1/2 pints for this pie.

The only ingredient I couldn’t find at the grocery store was the culinary lavender. Fortunately, I still had some in my pantry. I had to grind it in my mini-prep, but that only took a couple of minutes.

Blueberry Lavender Honey Pie Process Ingredients
Blueberries, lemon, sugar, flour, cream, eggs, butter, culinary lavender, salt, and honey

The Process

As you can see from the photos, my blueberry pie decorating was successful. It took a while, but I’m pleased with the results. Here’s how my time broke down:

  • 14 minutes to prepare the pie dough
  • 12 minutes to prepare the bottom crust
  • 10 minutes to bake the bottom crust
  • 5 minutes for the bottom crust to cool
  • 1 hour to decorate the pie
  • 40 minutes to bake
  • 2 hours 21 minutes total (not including time for the dough to chill)

I have to say that making this pie went smoothly for the most part. The only things that didn’t go according to the instructions were making the dough and macerating the blueberries.

The Pie Dough

I’ve made pie dough before, so I knew it wasn’t coming together properly after I added the ice water. It just wouldn’t stick together and kept crumbling. I ended up adding another 4 tablespoons of ice water (for a total of 8 tablespoons) to get it to the right consistency. Then I split the dough in half and refrigerated overnight it in discs pressed between plastic wrap.

The Filling

The next day I got started on the filling first. I wasn’t sure how aggressively to smash the blueberries, but I think I was too conservative. They were supposed to release juices during the hour they were macerating, but I didn’t notice any at the end of the hour. I was afraid that would make the filling too wet, but it turned out fine.

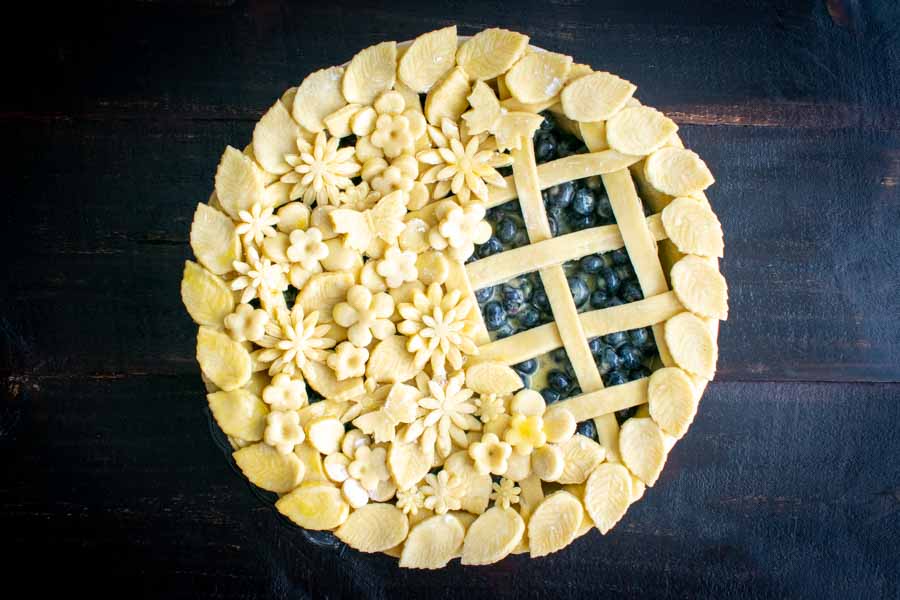
The decorated pie before brushing it with the egg wash and baking

Decoration and Baking

Rolling out the pie dough was a little tough at first because the dough was so cold. I should have taken it out of the refrigerator before I started the filling so it could warm up a little. The second half of the dough did warm up a little while I was making the bottom crust, and it was much easier to handle.

Then it was time to start decorating! I created a wide lattice to give the floral cutouts some support. Next, I used a set of cookie cutters to make the flowers, leaves, and butterflies for the top crust. A pastry brush to apply a beaten egg was all I needed to stick them down. It wasn’t difficult, but I took my time and designed it as I went.

Once it was all done, I started brushing on the eggwash. Then I realized I needed to take a photo and the eggwash was obscuring some of the detail. You can see a bit on the lower lefthand portion of the crust in the above photo. Sorry about that!

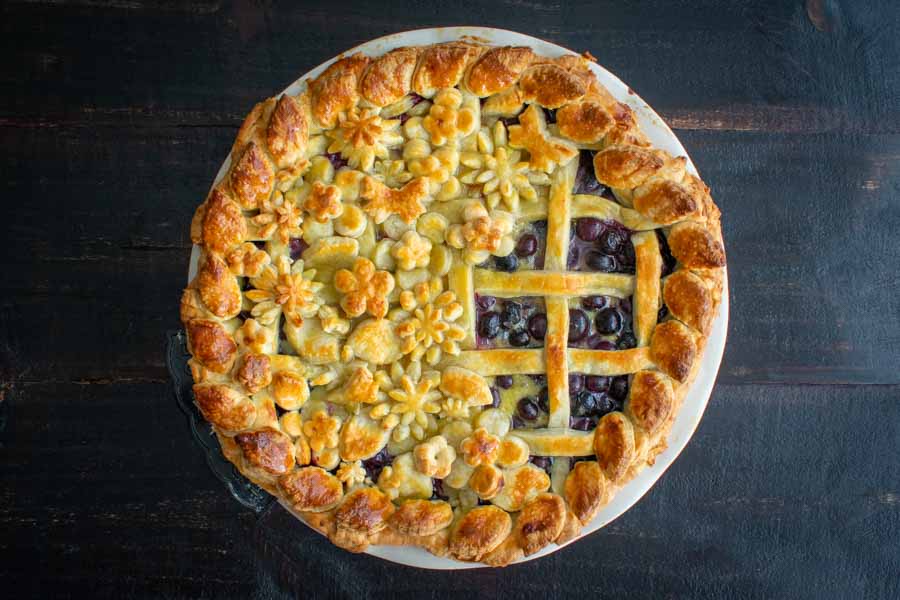
Forty minutes after the pie went into the oven, and I removed the lovely, golden Blueberry Lavender Honey Pie you see below. The pastry puffed a bit, distorting the design, but I think it’s pretty good for my first ever decorated pie. Definitely much prettier than just adding a crumble on top!

The pie after baking for 40 minutes


Sake Mojito

I thought Asian-Latin fusion cuisine was crazy, but those Korean Beef Tacos I just made were so good! So maybe this fusion cuisine thing isn’t so weird after all. Maybe, LOL! So I thought I would keep going with this theme just to make sure. Today it’s Japanese-Cuban fusion cocktails with the Sake Mojito. It sounds just as odd to me as Korean tacos, but look how that turned out. Still, sake with mint and lime? I don’t know about this…

Refreshing sake mojito with crushed mint and a splash of lime, perfect for that warm day in the backyard.

Recipe Author: Nami at Family Spice guest post at Just One Cookbook
Get the recipe

The Ingredients

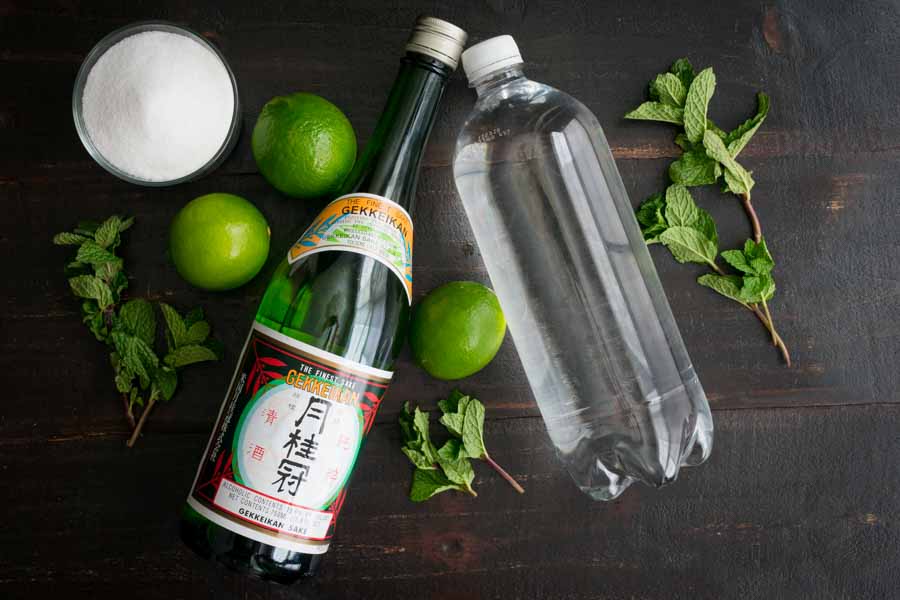
Most of the ingredients are basics that are easy to find in typical grocery stores, even the sake. Don’t believe me? Check the wine section at a local grocery store. Mine keeps it on a bottom shelf, but it’s there.

I’ve heard the brand I bought, Gekkeikan, called the Budweiser of sake and my local grocery store stocks it for around $10. I normally only cook with this brand because it’s on the dry side (I prefer sweet sake), but I thought a dry sake would work best for this cocktail. Spoiler alert: it did!

Sake Mojito Ingredients
Sake, mint leaves, lime, sugar, and club soda

The Process

This sake mojito was simple to make and only took me 4 minutes. Although I enjoy flavored syrups and infusions, there was none of that here. Just a little muddling and shaking to blend the mint, lime, sugar, and sake.

And speaking of sugar, there isn’t much to this cocktail. I’m the kind of person who likes my cocktails on the crisp side, so that wasn’t a disappointment.

In addition to the ingredients, this cocktail recipe calls for the following equipment:

So how was my sake mojito? Keep reading to find out!

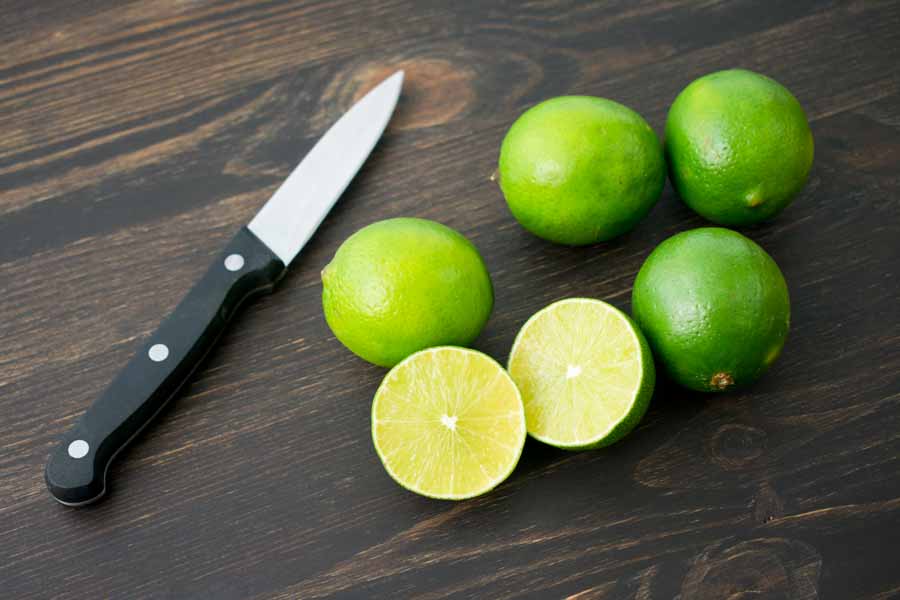
Cutting the lime
Cutting the lime

Korean Beef Tacos

Have you ever heard about a restaurant over and over again, but you never get to try it? Mine is an Asian-Mexican fusion place in Orlando called Tako Cheena. My husband travels to Orlando a few times a year, and he almost always hit up Tako Cheena while he’s in town. I admit I had trouble wrapping my head around the concept of pairing Asian and Mexican, but my husband raves about this place. One of his favorite dishes is their Korean Beef House Takos. I decided I want to give this unique cuisine a try, so this week I am, but from home. Korean Beef Tacos anyone?

Whoa. Guys. These are the most mind-blowing tacos EVER! Filled with everyone’s favorite Korean beef, caramelized kimchi + Sriracha mayo!

Recipe Author: Chungah at Damn Delicious
Get the recipe

The Ingredients

Shopping for this recipe was pretty easy. I even managed to find a jar of kimchi for $5.99. It was enough to make this recipe twice. Everything else was pretty standard and easy to find.

I have to tell you not to worry if you can’t find sesame seeds. They looked pretty, but I couldn’t taste them.

Also, I bought the smallest tortillas I could find. They looked like the typical taco or fajita size, but they seemed very big once I filled them. This size only made 4 tacos while the recipe said it made 12 tacos. I’m guessing the author used smaller tortillas, but I couldn’t find them.

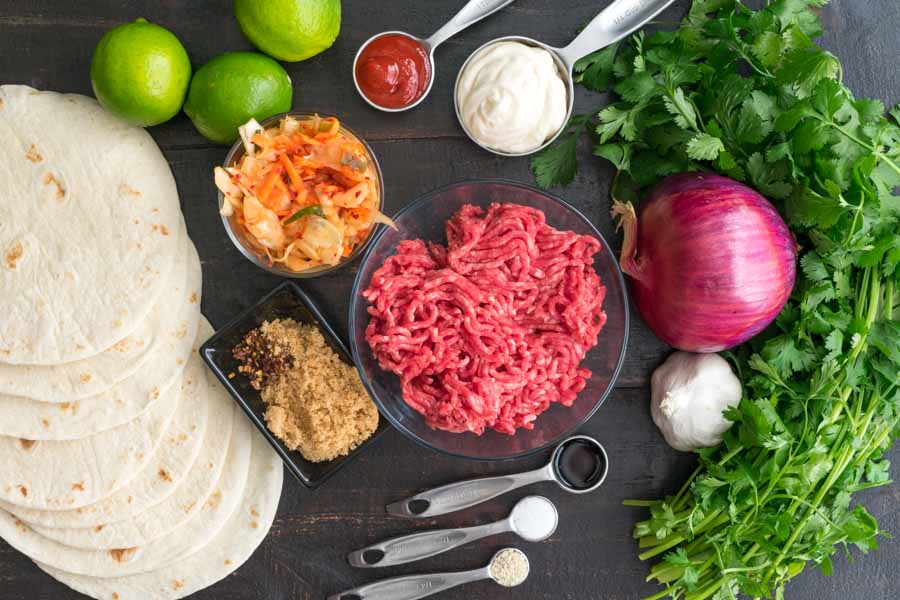
Korean Beef Tacos Ingredients
Ground beef, brown sugar, red pepper flakes, ground ginger, flour tortillas, kimchi, limes, sriracha, mayonnaise, cilantro, red onion, garlic, soy sauce, sugar, and sesame seeds (sesame oil and vegetable oil not shown)

The Process

I like to do some of the recipe prep and finish the rest while I am cooking. However, this recipe worked much better with everything prepped before I began. I got a lot of use out of my ramekins—they were the perfect size to hold the prepped ingredients.

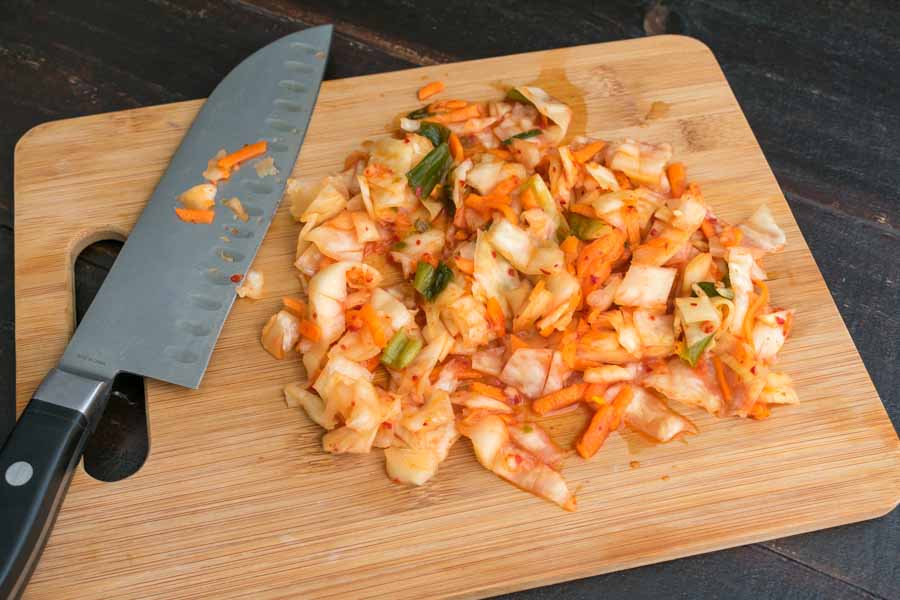
The prep work was simple and it flew by. Nothing was surprising until I got to the kimchi. The recipe says “chopped kimchi”, but kimchi is made of shredded vegetables. However, the jar I bought had some large strips of cabbage. I gave it a quick chop to break those up because I hate chomping on a big piece of a topping and pulling it out with my teeth.

Cooking was just as smooth as the prep work. Just be sure to keep a couple of small bowls ready for the finished ground beef and kimchi (I used regular soup bowls).

Also, I used my largest skillet for both the beef and the kimchi. I just wiped it out with a paper towel between the two so the kimchi didn’t taste like the beef.

As I mentioned in the previous section, I only got 4 Korean beef tacos out of this recipe instead of the 12 listed. Eight ounces of ground beef isn’t a lot, and I ended up doubling the recipe. My husband and I had 3 tacos a piece for dinner, and there were a couple leftover for lunch the next day.

Finally, the all-important time. I didn’t time the prep work and cooking separately and instead just timed everything from start to finish. It took me 24 minutes to prep and cook everything. That doesn’t include time to assemble the tacos, but I’m positive I would still be under the 35 minute total listed on the recipe if I had included it.

Chopping the kimchi
Chopping the kimchi

Bourbon Cheesecake with Boozy Chocolate for Two

Two things I dearly love are bourbon and cheesecake. And if I had to choose between the two? Uhhhhh… I’d choose bourbon cheesecake because that’s an impossible choice! And, thanks to today’s recipe, I now know that’s a thing. With chocolate. Yes, Bourbon Cheesecake with Boozy Chocolate for Two is a thing, and I simply could not resist giving it a try. It sounds indulgent, but the individual portions will keep my sweet tooth from getting out of hand. Nice!

Bourbon Cheesecake with Boozy Chocolate for Two is the perfect small batch dessert for your sweetheart. Creamy bourbon cheesecake with a shortbread crust topped with smooth chocolate sauce heated with more bourbon.

Recipe Author: Heather Tullos at Sugar Dish Me
Get the recipe

The Ingredients

It’s been a while since I’ve made a cheesecake, but this recipe seems to have fewer ingredients than most recipes. It could be the simple chocolate topping, but I’m not looking it up. I’m just going to enjoy the fact that I don’t have to buy a million ingredients.

I did have to pick up a few things, but they were all basics. And, I have noticed, vanilla extract is getting expensive. Stock up if you find it on sale!

I also had to make a trip to the liquor store for a new bottle of bourbon. I do run out once in a while LOL. If you’re not a big bourbon drinker, buy a mini—you need just under 2 tablespoons for this recipe. A 50ml mini will be just enough with a few drops to spare. My favorite brands (in no particular order) are Knob Creek, Jim Beam, and Bulleit.

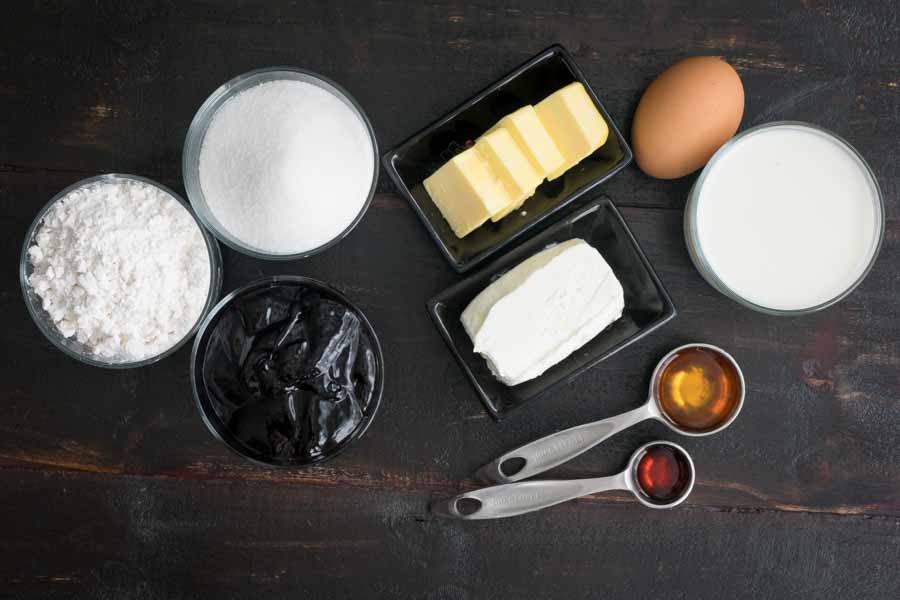
Bourbon Cheesecake with Boozy Chocolate for Two Ingredients
Cream cheese, chocolate sauce, flour, sugar, butter, egg, cream, bourbon, and vanilla extract

The Process

This bourbon cheesecake wasn’t too difficult, but it did take a while. They had to cool to room temperature in the hot oven, and that took a few hours. But I’m getting ahead of myself. Let’s start with the times:

  • 15 minutes to prep
  • 30 minutes to cook
  • 3 hours to cool in the oven
  • 2 minutes to make the chocolate sauce and top the cheesecakes
  • 3 hours 47 minutes total (chilling time not included)

First up was the crusts. Mixing the dough was easy, but I ended up with sticky fingers. That caused problems as I pressed the dough into the mini cheesecake pans. A little extra flour took care of that issue, though, and I parbaked the crusts while I made the cheese filling.

The cheese filling was as easy as the instructions made it sound, and I had it mixed up in just a few minutes. It was ready to pour into the crusts when they were done. And that was when I discovered the reason for only making the crusts come halfway up the side of the pans—that’s the level the filling went to. Duh!

Baking was fairly quick, and I’m happy to report there was no water bath needed. However, cooling in the oven meant waiting a few hours. Then it was into the refrigerator overnight because it was the end of the day at this point. Perfect if I was eating the cheesecake that night, but not so good for photos.

I picked things up the next afternoon with the bourbon chocolate sauce. Once it was ready, it was time to remove the cheesecakes from their pans. I noticed the recipe didn’t call for them to be greased, so there was some apprehension. I (desperately) hoped the nonstick pans and all the butter in the crust would probably keep things from sticking, and they did.

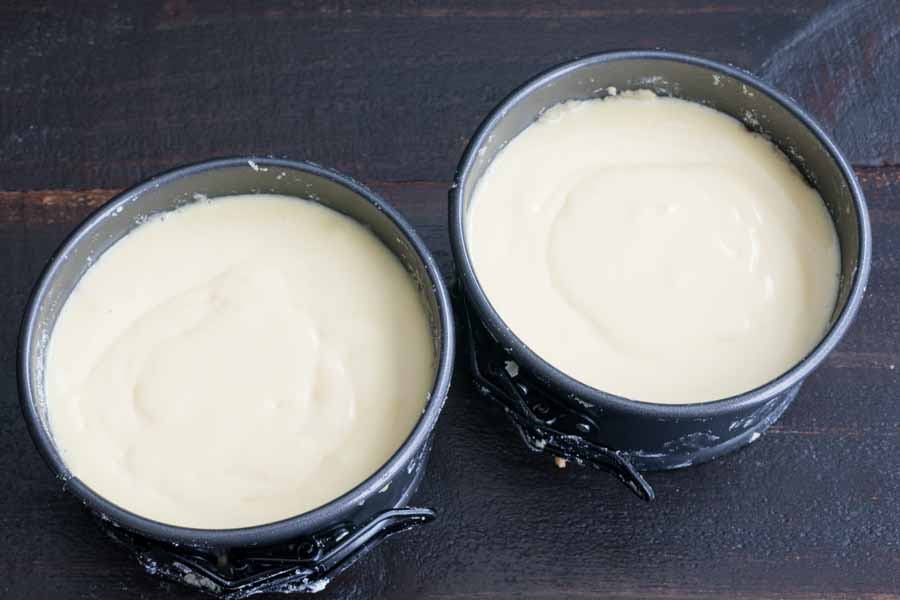
The cheesecake filling has been poured and it's ready to bake
The cheesecake filling has been poured and it’s ready to bake. As you can see, it only filled the mini springform pans halfway.

Poor Man’s Prime Rib

I have a problem: I have champagne taste and a sparkling wine budget. This usually isn’t a bad thing–I just have to plan those occasional champagne splurges, and it makes me appreciate them. The first recipe I’m trying this week is in that spirit: Poor Man’s Prime Rib. I love me some prime rib, but it’s not something you’ll find on my table at home. In a restaurant for a special occasion, sure, but restaurants sell prime rib a few slices at a time. An entire standing rib roast (AKA prime rib) that’s not even cooked is a lot more than your average prime rib dinner. But can any other cut of meat compare? I have my doubts, but I’m going to find out.

This is seriously the best way to cook a roast. It makes an inexpensive piece of meat taste like prime rib! Tender and delicious!

Recipe Author: Flavorite
Get the recipe

The Ingredients

As I mentioned above, the main reason I tried this recipe was the rice of a standing rib roast. It’s an expensive cut of meat. While I was shopping for my Poor Man’s Prime Rib, I took a look at the real thing and almost fainted.

It was on sale for $9.39 per pound, making one roast about $60. Pretty splurgy, but the regular price is what gave me the vapors—it was just over $98. That’s right, almost $100 for a roast that would still need to be cooked by yours truly.

I noped right out of that and over to the eye round roast that was priced a lot more reasonably at $5.29 a pound. It was 4 pounds and just over $22. That’s a downright steal compared to the standing rib roast!

The rest of the ingredients were simple seasonings I had in my pantry: salt, pepper, garlic powder, and onion powder.

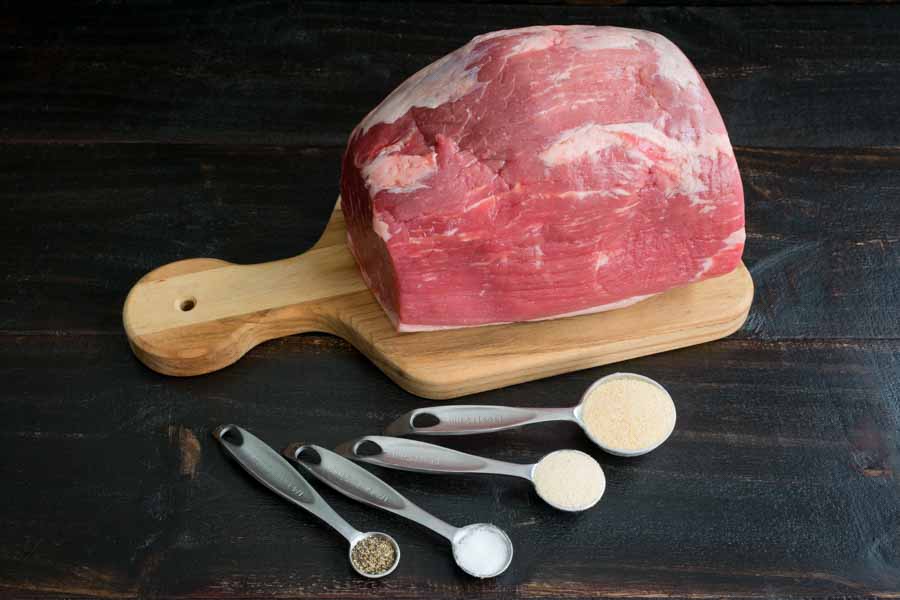
Poor Man's Prime Rib Ingredients
Eye of round roast, garlic powder, onion powder, salt, and pepper

The Process

Preparing my Poor Man’s Prime Rib was almost as easy as tackling that one-item shopping list. Scratch that—it was easier since I didn’t have to leave the house.

Preheating the oven to 500ºF took a while, but I didn’t include that in my time. I just turned the oven on and prepped the roast while it preheated.

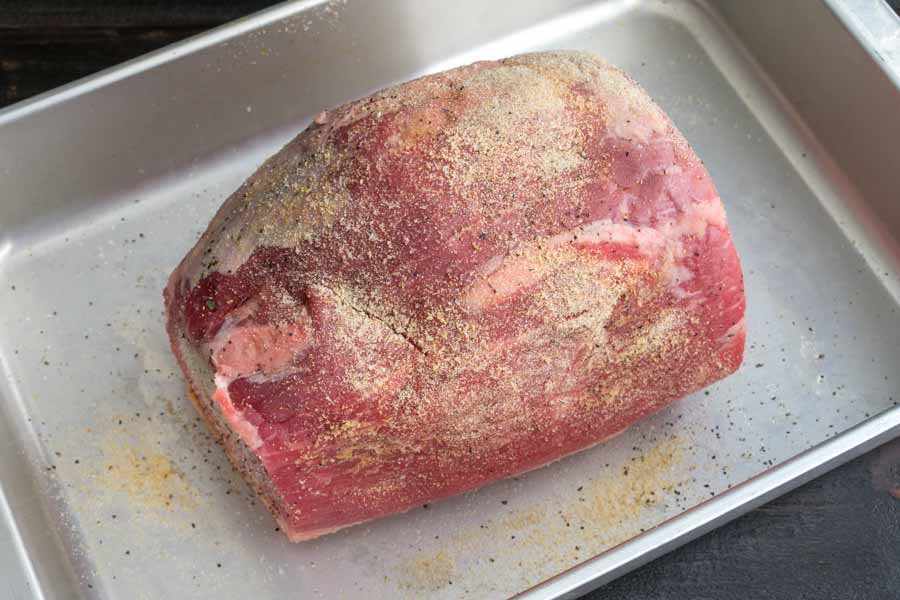
The prep work was nothing but sprinkling the meat with the seasonings. I skipped the bottom because it had a fairly thick layer of fat, but I did season the top and sides. After that, it was into the oven. Here is how my time was spent:

  • 3 minutes to prep
  • 2 hours 58 minutes to cook
  • 3 hours 2 minutes total

I had to adjust the time since my roast was larger than 3 pounds. Fortunately, the recipe says to roast for 7 minutes per pound, then turn the oven off and let it sit for 2 1/2 hours. The internal temperature was supposed to have been at least 145ºF, but my roast was 132ºF.

I thought about putting the roast back into the oven to cook more, but I ended up serving it as-is. I cut from both ends for dinner that night and saved the rest for leftovers. It had to be reheated anyway so that cooked it a little more.

The seasoned roast, ready to go into the oven

Cast Iron Buttermilk Cornbread

I’m pretty sure that all Southern comfort food must be accompanied by cornbread. It’s an unwritten rule that I’m happy to follow! I’ve made my share of cornbread over the years, and I have to confess that I usually use a box of mix. That little blue and white one that’s sold in every grocery store for about a dollar. I can recall making cornbread from scratch about twice, once with sage and once with bacon. So why am I trying this simple Cast Iron Buttermilk Cornbread? Well, I wanted something that wouldn’t compete with the gravy in the Southern Smothered Oxtails I just made. I also need a good, go-to cornbread recipe, and this seems like it will fit the part. Let’s find out!

Images were updated on June 12, 2023. The text and review were not changed.

All ingredients are mixed in one bowl and then baked in a cast iron skillet. Moist and tender, you won’t find a dry crumb with this cornbread!

Recipe Author: Julie Murkerson at This Gal Cooks
Get the recipe

The Ingredients

I had almost everything I needed for this recipe in my refrigerator and pantry. That left me to purchase a few things like eggs, butter, and buttermilk.

I often use the trick of adding lemon juice to milk instead of buying a whole bottle of buttermilk. I can’t drink the stuff (yuck!), so the leftovers go to waste. No more! I found out buttermilk can be frozen. I’m going to freeze the leftovers in ice cube trays and use as needed.

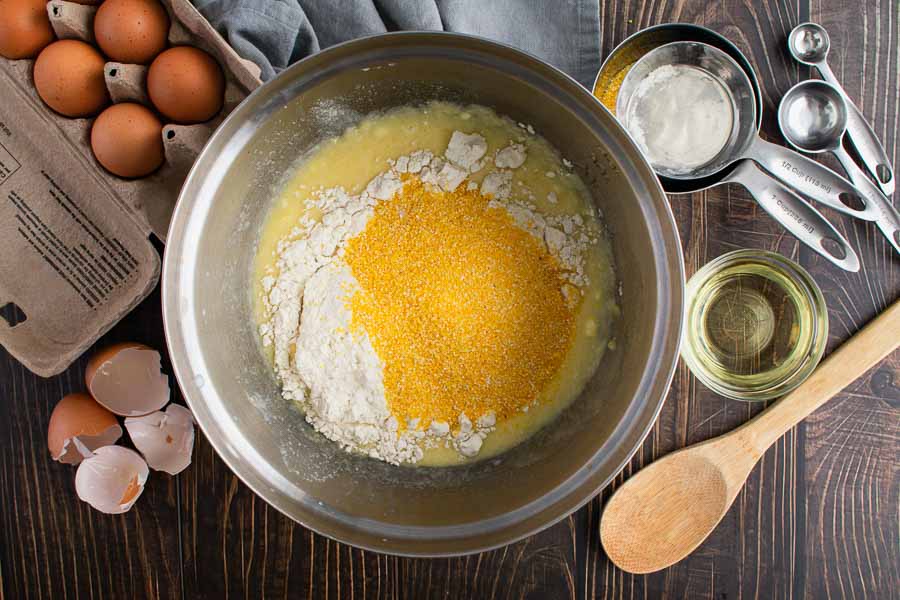
This recipe calls for cornbread (of course!) but doesn’t specify what type. I had a bag of coarsely ground yellow cornmeal leftover from the Braised Chicken Thighs with Mushrooms and Creamy Polenta I made a while back. That would have made very crumbly cornbread, so I mixed it with some finely ground cornmeal—2 parts coarse to 1 part fine. The finished cornbread was a little crumbly, as it should be, but held together nicely.

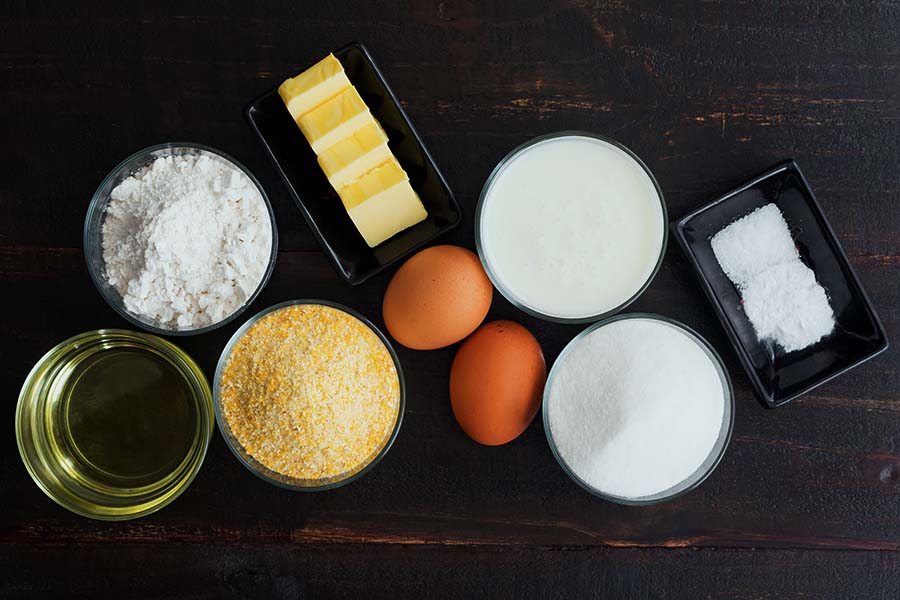
Cast Iron Buttermilk Cornbread Ingredients
Cornmeal, vegetable oil, flour, butter, eggs, buttermilk, sugar, baking soda, and salt

The Process

This buttermilk cornbread was almost as easy as using the boxed mix. Really, most of the work was mixing the ingredients together, if you call that work. Everything went very smoothly, and I had a beautiful skillet of cornbread baked in 38 minutes.

One thing I found unusual but liked was preheating the cast iron skillet in the oven. I’m convinced that gave the cornbread the lovely golden brown edges you see in the photo. It was crisp on the outside but moist on the inside. I found I didn’t need butter or gravy with it.

I do have to recommend doing one thing differently than instructed. When I spread the vegetable oil in the pan, I used a pair of tongs to hold the paper towel. Past experiences have probably made me overly cautious when dealing with hot pans and oil, but better safe than sorry.

Mixing the ingredients in a large bowl

Southern Smothered Oxtails

It’s been cold, and I’m craving comfort food. Amazing how that happens! Southern food is my go-to comfort food category since it was one of the cuisines I grew up on. You would think that made my recipe search easier, but you would be wrong. Searching “Southern” in my Pinterest boards pops up a lot of delicious-looking recipes, making the choice a tough one. But after hours of searching (kidding!), I settled on these Southern Smothered Oxtails. I’ve never had them this way, so it will be a somewhat new experience. But anything that’s covered in gravy has to be good, right? Let’s hope!

These oxtails are slow-cooked until they are fall-off-the-bone tender, then smothered in a homemade onion and garlic gravy. You can’t beat this flavor!

Recipe Author: Rosie at I Heart Recipes
Get the recipe

The Ingredients

As you can see, there aren’t a lot of ingredients in this recipe. I’m perfectly fine with that. It’s full of inexpensive basics like flour, vegetable oil, and Worcestershire sauce. Pantry staples that I had on hand. That left me to shop for a few fresh items.

I recently read that oxtails have become a popular ingredient in homemade stock and bone broth. That explains why they have gone from an inexpensive cut to $6.99 a pound. On the plus side, they are easier to find, and I’ve noticed meatier cuts.

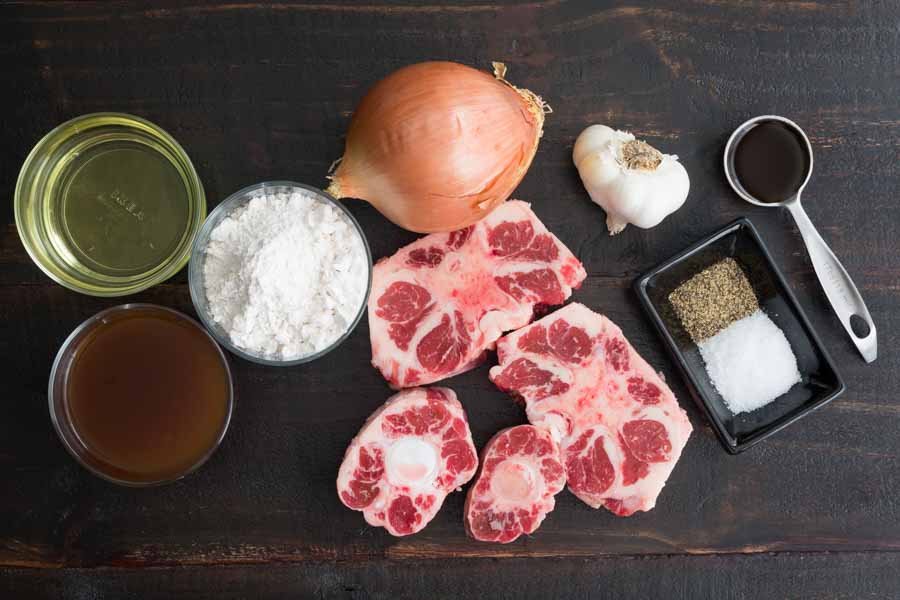
The photo below shows about a pound of the oxtails in a range of sizes. This is a great example of how oxtails can vary in size. In the past, I’ve even found much smaller pieces than the smallest shown. These bigger pieces are much, much nicer.

Southern Smothered Oxtails Ingredients
Oxtails, flour, beef broth, vegetable oil, garlic, Worcestershire sauce, pepper, and salt

The Process

I have to say this recipe was easy to make. I’m sure that’s no surprise since there are so few ingredients. There’s was a bit of a trade-off, though, since it had to slow cook for hours. Here’s how my time was spent:

  • 20 minutes to prep
  • 8 hours to cook
  • 8 hours 20 minutes total

That was exactly what was listed on the recipe, and I was happy about that. Not so happy that I had to get up super early to allow it to cook all day, but I’ll get over it.

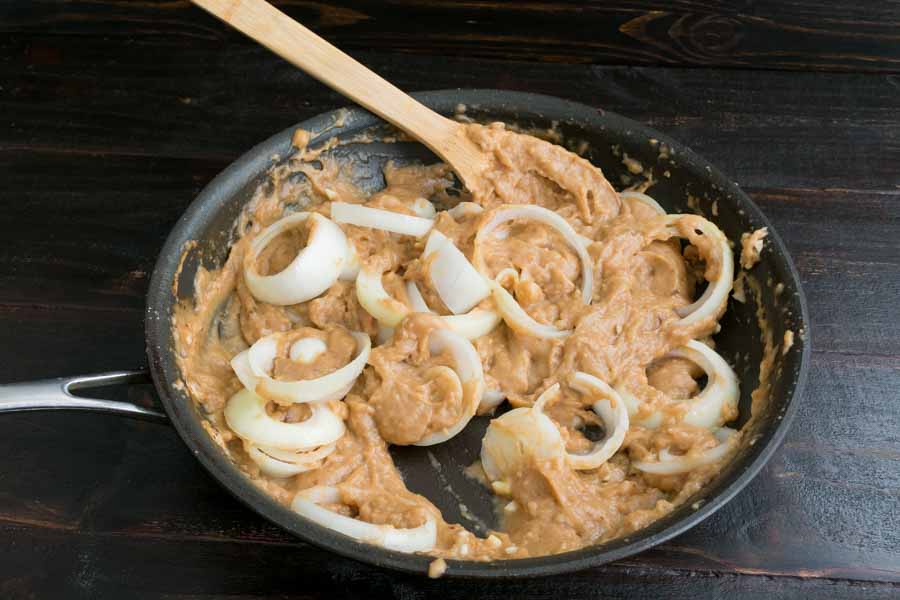
Things went according to the instructions at first, but I ended up with really thick gravy. Even after adding all the beef broth it was almost as thick as peanut butter. I hoped the condensation in the crockpot would add moisture, but that didn’t happen fast enough.

The gravy was starting to burn and stick to the sides, so I added an extra cup of water after 3 hours. That got things rolling, and I had a nice gravy by the time the oxtails were done. Not too thin or too thick, and it clung to the oxtails as gravy should.

The gravy was really thick!

Easy Tuscan Roast Chicken

Sometimes I feel like going all out on a beautiful dinner, and sometimes (most of the time) I just want to make something that’s easy and reasonably healthy. This Easy Tuscan Roast Chicken is the rare recipe could work for both. It promises not to be too complicated, but it has plenty of classic seasonings. I can see it as the centerpiece for a nice dinner with all the fixings–just add fresh vegetables, potatoes, and a homemade dessert. On the flip side, I can see serving it with some steam-in-bag vegetables and a side of bread for a simple and easy dinner.

Succulent roast chicken flavored with fresh rosemary, garlic and lemon and cooked with white wine. So easy and absolutely delicious.

Recipe Author: Alida Ryder at Simply Delicious
Get the recipe

The Ingredients

One thing I loved about this recipe was that it had only a few ingredients, and they were all easy to find and/or inexpensive basics. I had to buy almost everything for this recipe, and I spent about $15 total. I’d say I got about 3 servings out of it, though, since the chicken I bought was about 3.5 pounds. The recipe calls for a 4-4.5 pound chicken, but I bought a smaller chicken because it’s just the 2 of us.

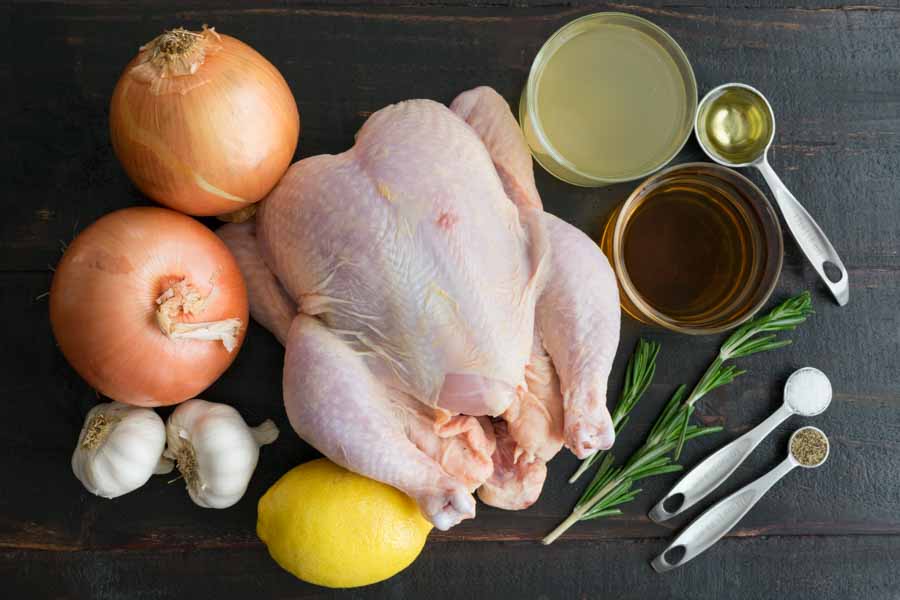
Easy Tuscan Roast Chicken Ingredients
Whole chicken, lemon, garlic, onions, chicken stock, olive oil, white wine rosemary, salt, and pepper

The Process

Making this recipe was easy, just like the name promised. The first thing I did was convert the oven temperatures from Celcius to Fahrenheit. My oven’s temperature settings go in units of 5, so I had to round some of the conversions. These are the temperature settings I used:

  • 200℃ âž” 390℉ (Step 1)
  • 160℃ âž” 320℉ (Step 6)
  • 220℃ âž” 430℉ (Step 7)

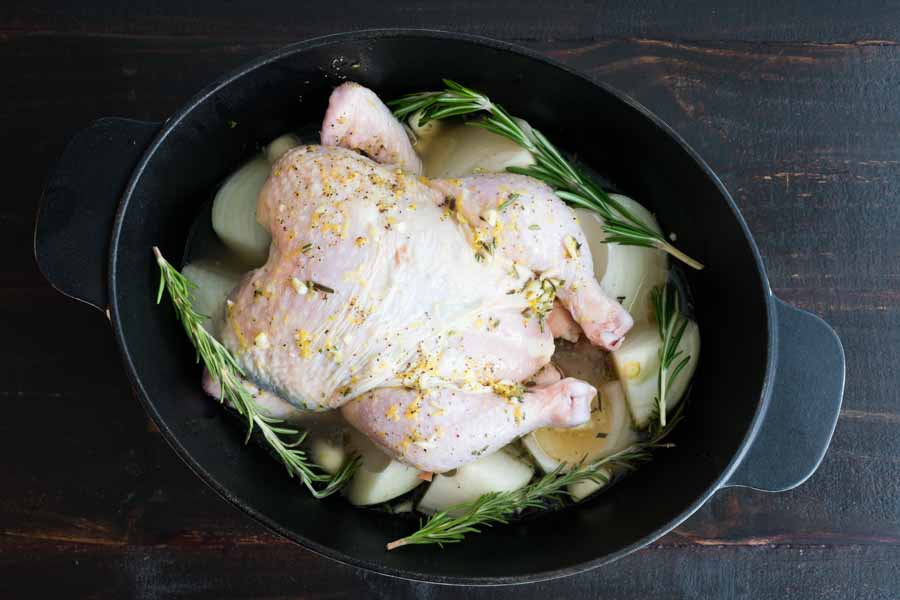
Once that was done, I just had to chop some herbs, rub the chicken, and throw it all into a large pot. I used a cast-iron Dutch oven that was a little over 5 quarts, so it fit everything with room to spare. It would have easily worked for the 4-pound chicken the recipe called for.

Although the prep work wasn’t difficult, it did take a lot longer than the 5 minutes listed, relatively speaking. This is how long I spent on this Tuscan roast chicken recipe:

  • 16 minutes to prep
  • 1 hour to cook
  • 10 minutes to rest
  • 1 hour 26 minutes total

Things went very smoothly up until Step 7 when the temperature was turned up to crisp the chicken skin. I checked the chicken after 5 minutes, and it still looked raw, so I gave it another 5 minutes and no change. I was afraid I would overcook it, so I turned the broiler on high and gave it another 5 minutes. That did the trick, and I opened the oven door to the beautifully browned (and not overcooked) chicken you see pictured.

Chicken, onions, and rosemary ready to go into the oven

Honey Thyme and Sweet Cherry Grilled Brie

Brie is my all-time favorite type of cheese. And it’s creamy and delicious, and it seems more indulgent than it actually is. I know, that surprised me too. Brie cheese has a higher water content than hard cheeses, so it’s actually lower in fat than, say, cheddar. It’s also lower in carbs if that’s a consideration for you. Still, I don’t have it often (I should!), so this is a real treat for me. It also continues my recent cherry binge. They’re full of antioxidants, so feel free to binge on them! That brings me to this week’s recipe for Honey Thyme and Sweet Cherry Grilled Brie. I don’t usually make appetizer recipe, but with all the delicious things in the title alone, I simply couldn’t pass this up. So enough talk; let’s get cooking!

Grilled brie with a delicious fruity topping.

Recipe Author: Tieghan at Half Baked Harvest
Get the recipe

The Ingredients

Despite cherries being out of season, I was able to find them. Just be warned that you might pay a premium when they are out of season. I found organic cherries for $9.99 per pound at Whole Foods. Conventional (non-organic) cherries were $4.99 per pound at my local Publix.

The brie cheese can vary greatly depending on the brand. I bought an 8-ounce wheel for $8. That’s definitely on the low end, though, and I’ve seen brie go as high as $27.99 per pound. My advice is to buy what’s in your budget. I’ve certainly never had an issue with the $8 brie.

I had the bourbon on hand, but I did use different brands each time I made this recipe (more on that in the next section). Jim Beam Devil’s Cut for the first and Knob Creek for the second. I drink both brands and have only good things to say about them. I’m also a fan of Wild Turkey. If you’re not a bourbon drinker, omit it or buy a mini.

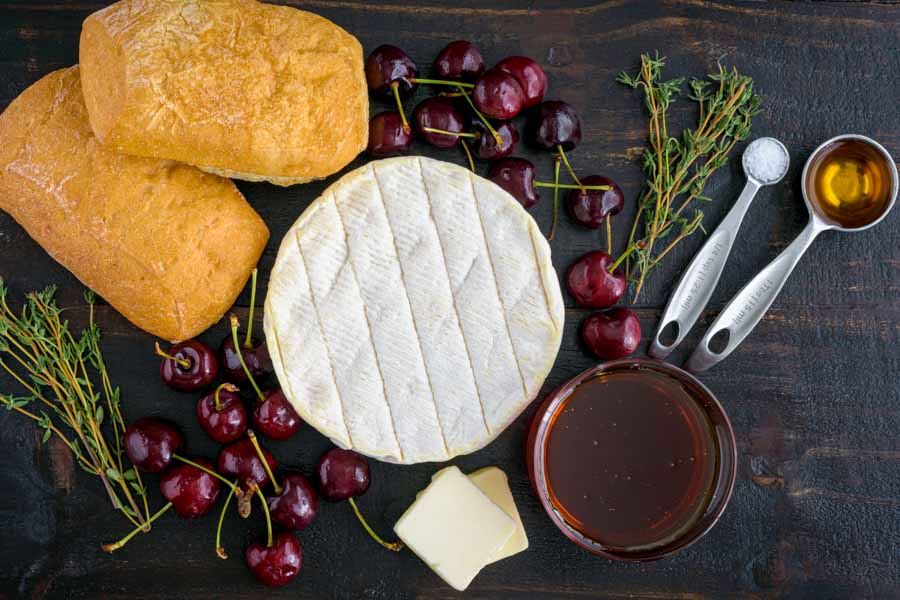
Honey Thyme and Sweet Cherry Grilled Brie Ingredients
Brie cheese, cherries, thyme, ciabatta bread, sea salt, bourbon, honey, and butter

The Process

So I went into this recipe thinking it would be a breeze, and I would end up with gorgeous pictures of a super-tasty appetizer. Then life happened. I made a big mistake on my first go at this baked brie: I let the brie warm up to room temperature before I grilled it.

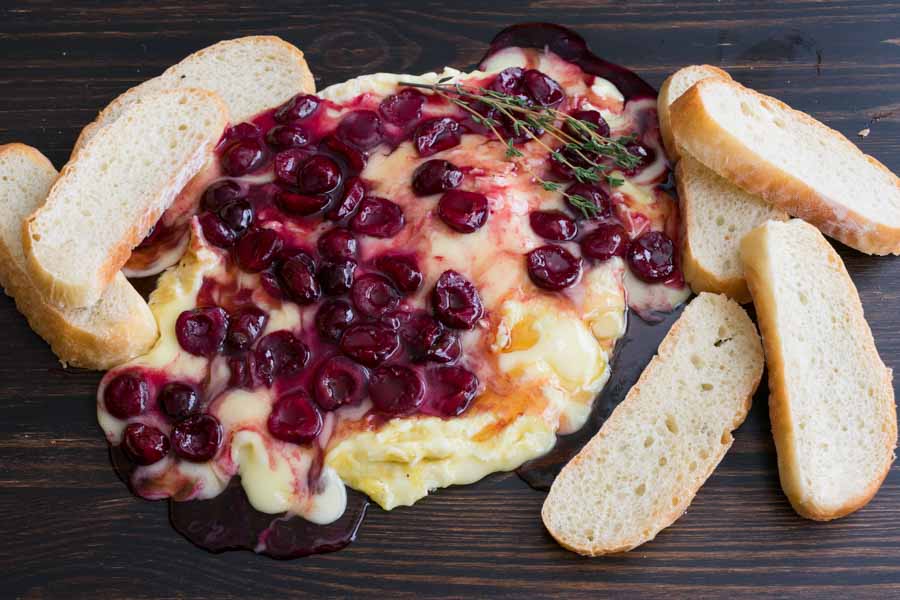
As you can see below, the whole thing just melted into a puddle. I swear I didn’t break it or overheat my grill pan. But the cheese was so warm by the time it hit the pan that it was oozing after 2 minutes. I was barely able to flip it, let alone get it out of the pan and onto my carving board. Don’t even ask me about cleaning the pan.

So the big lesson is not to take the brie out of the refrigerator until you are ready to grill it. Serving a puddle of brie on a carving board surrounded with toasted ciabatta bread and calling it rustic doesn’t fool anyone. It’s delicious, but it’s still a puddle of cheese and cherries.

Take-Two: Success!

My second try at grilled brie ended in the main picture of this post. Success! The only thing I changed was not allowing the brie to warm to room temperature before I grilled it. I literally left it in the refrigerator until my grill pan was warmed and ready to go.

I grilled the chilled brie for 2 minutes per side this time. It was enough to add the grill marks and get the cheese somewhere between softened and melted. I liked the consistency—it was soft enough to spread without falling apart. In other words, perfection!

Oh, and about the bourbon. I used 2 tablespoons in my first attempt and only 1 in my second, and I have to say that I preferred a single tablespoon. I know, shocking as I am a bourbon fan!

My first try at this recipe didn't go so well
My first try at this recipe didn’t go so well