Home Blog Page 31

Baba Ganoush

Baba ganoush is a traditional eggplant dip that is made all over the Middle East and the Mediterranean. It’s also one of my favorite Lebanese foods, and I just can’t pass it up when I visit a Lebanese restaurant. Well, I haven’t found a favorite Lebanese restaurant since I moved to Fort Lauderdale, so I’m taking things into my own hands and making baba ganoush today. It doesn’t look difficult, and I know my husband will love it (he’s never tried it). Let’s find out if it’s as easy as it looks!

Baba Ganoush is a popular Middle Eastern eggplant dip. Enjoy it with fresh vegetables or pita bread. Vegan & gluten-free!

Recipe Author: Manali at Cook with Manali
Get the recipe

The Ingredients

As usual, I had the tahini and spices for this recipe on hand, but I had to buy most everything else. That wasn’t a problem, though, as my local grocery store had everything I needed. The olive oil was the most expensive item, of course, and only a small amount was needed for this recipe.

Tahini is something I always keep around because it’s a terrific addition to dips and salad dressings. It’s getting much easier to find, and my favorite local grocery stores stock it. If yours don’t, there’s always Amazon (I use LiOR tahini). And like the olive oil, a little bit goes a long way. I keep opened jars in the refrigerator, and they last for months.
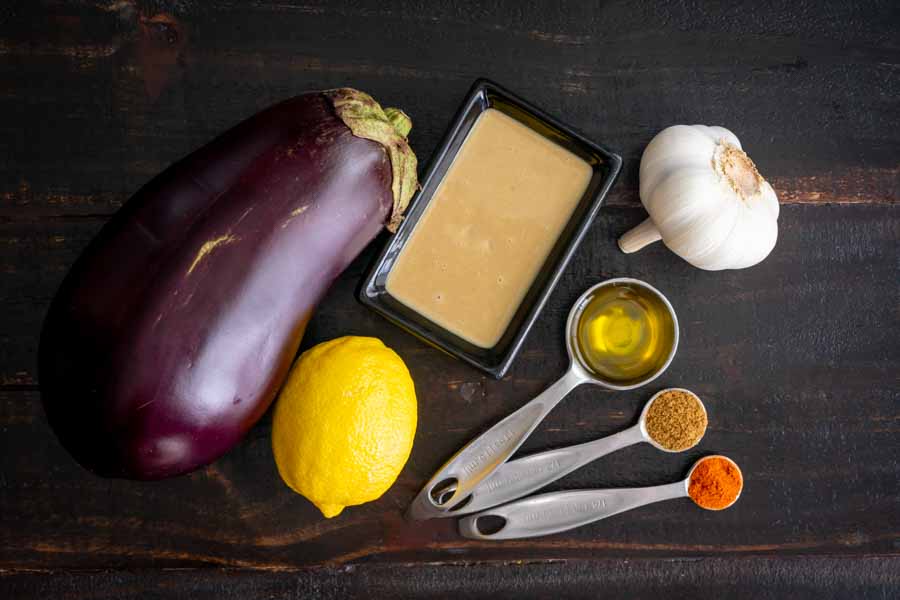
Baba Ganoush Ingredients
Eggplant, tahini, garlic, olive oil, cumin, cayenne, and lemon

The Process

The first step to making baba ganoush is roasting the eggplant. This recipe gives instructions on how to do that over an open flame on a gas cooktop, however, I have an electric stove. Not to worry, though, because you can roast eggplant a number of ways.

I chose to broil mine in the oven using the tutorial linked above. It took just a little longer than the gas stovetop method described in the recipe (20 minutes instead of 15). That gave me more than enough time to prep the rest of the ingredients while it was in the oven.

A few minutes to let the steam dissipate, and I was ready to peel the charred eggplant. The skin practically fell away, and scooping out the eggplant couldn’t have been easier. Just be careful since it’s pretty hot!

Making the baba ganoush was very quick and easy thanks to my food processor. I know I mention my mini-prep in a lot of posts (I do use it a lot!), but this is a job for a full-sized food processor.

I had my baba ganoush whipped up and garnished in just a few minutes. The total time for this recipe was 32 minutes. The recipe listed 25, but five of those extra minutes was because I broiled my eggplant in the oven.
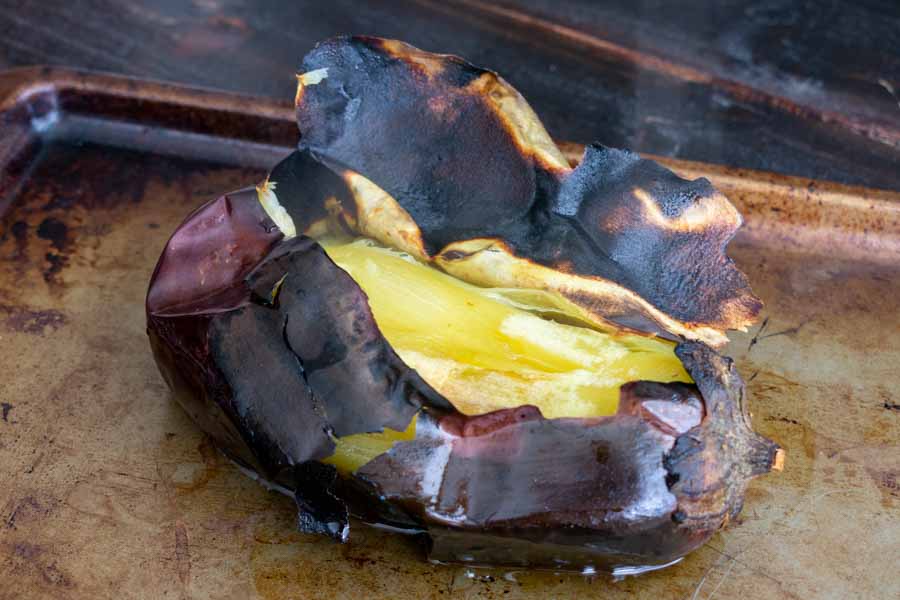
Broiled eggplant
Broiled eggplant

Lebanese Chicken Fatteh

I’m a bit of a foodie. I absolutely love to try new foods, as I’m sure you have guessed. In fact, I can’t think of a cuisine I don’t like, but I do have my favorites. Lebanese food is definitely one of those favorites, so I’m particularly excited to make this Lebanese Chicken Fatteh recipe. It’s basically a Lebanese dinner bowl that’s packed full of things I love: chicken breast, chickpeas, pine nuts, and pita topped with a garlic yogurt sauce. It sounds incredible, and I can’t wait to give it a try!

This authentic Lebanese Chicken Fatteh is an amazing combo of flavors made with yogurt, spiced shredded chicken, chickpeas, toasted pine nuts & pita bread!

Recipe Author: Yumna Jawad at Feel Good Foodie
Get the recipe

The Ingredients

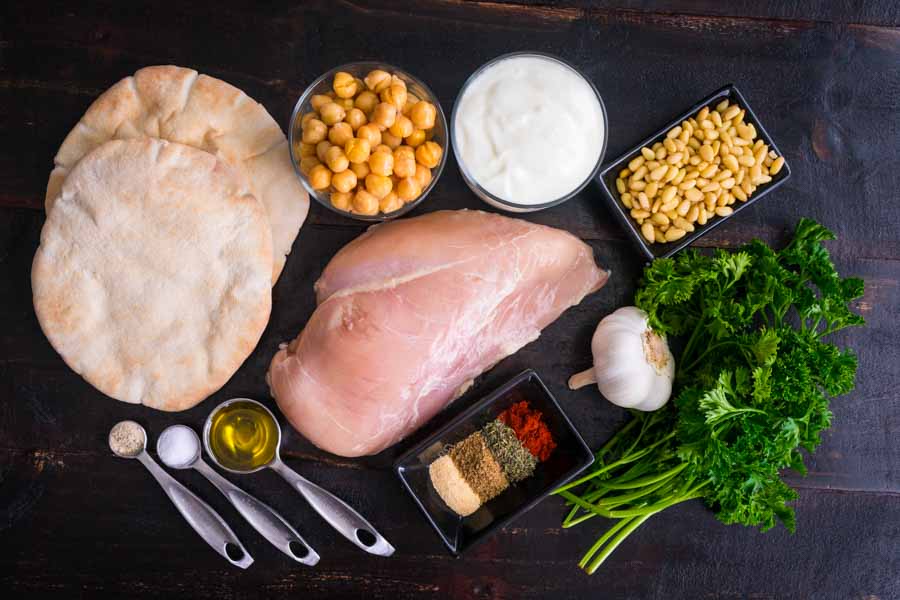
Lebanese food might be something new for you, but the ingredients for this dish aren’t unusual or hard to find. It’s full of spices you probably have on hand, ordinary chicken breast, and other ingredients stocked in most grocery stores. I found everything I needed in a single shopping trip to my regular grocery store.

Lebanese Chicken Fatteh Ingredients

The Process

The instructions for this recipe were well written, and I didn’t have any trouble making it. Although it has quite a few steps, everything was broken down into easy to handle chunks.

This recipe does list a total time of 25 minutes, and I didn’t come close to that. My Lebanese Chicken Fatteh took 40 minutes from start to finish, and I have a feeling the chicken was to blame for the slow-down. Let me explain.

I followed the instructions in the order they were written, and cooking the chicken breast started midway. The upside was I was able to use the same pan to toast the pita, toast the pine nuts, and fry the chicken. And I was able to make the garlic-yogurt sauce while the chicken cooked, but there was a ready long wait before the chicken was ready.

Next time, I’ll add a second skillet and start the chicken first, then move onto toasting the bread and nuts. I’m sure they’ll still be ready before the chicken, and this would cut down on the total time.

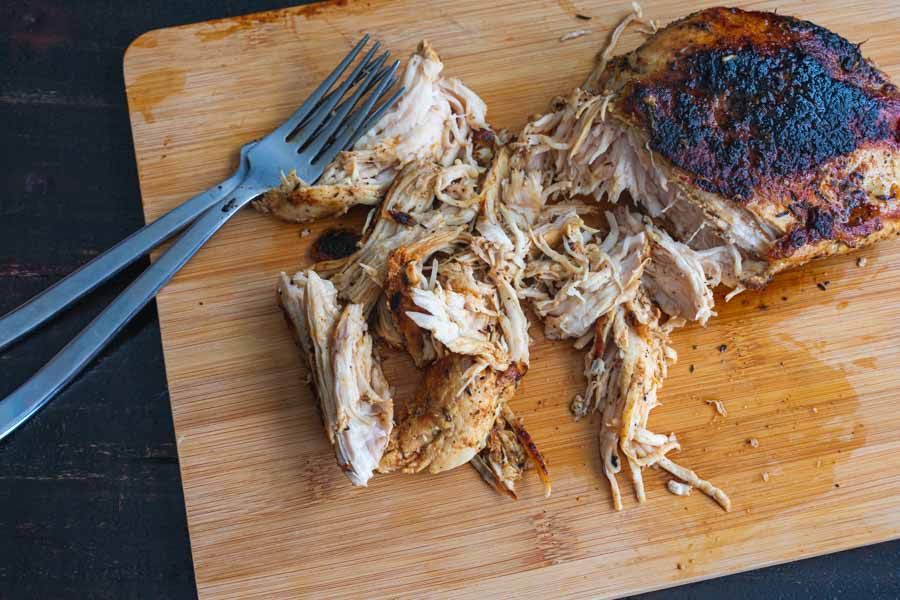
Shredding the chicken

Lemony Arugula Salad with Couscous, Cucumbers and Feta

I’ve never been a big salad person, so I’m always trying to incorporate them into my diet. Whether as a main, starter, or side, I’ve found some darn good salad recipes on Pinterest. Now that I think about it, maybe I am a salad person now. (Ha! Never thought I’d say that.) My latest find is this recipe for Lemony Arugula Salad with Couscous, Cucumbers, and Feta. It’s chock full of yummy things I love like cucumber, couscous, and feta cheese. Plus it’s an excuse to use some preserved lemons. They have such a unique flavor, and I don’t get a chance to use them often. I have a batch that I made recently, and I’m super-stoked to introduce them to my husband. Le’ts get started!

This lemony arugula and couscous salad is crave-worthy. Once you make it, you’ll be itching to make it again.

Recipe Author: Joanne at Inspired Taste
Get the recipe

The Ingredients

The list of ingredients for this salad is medium length, and it does have a few specialty items. First up was the seedless cucumber. They’re getting easier to find, but they can be pricey—as much as $4 each. If you can’t find one, just used a peeled and seeded regular cucumber.

Next up was the pearl couscous. Also called Israeli couscous, the grains of this type are much larger than regular couscous. I happened to have some whole wheat pearl couscous leftover from another recipe (Herbed Couscous Pilaf), so that’s what I used for this recipe too. I find it’s more flavorful, but it can be hard to find.

Lastly is the preserved lemons. I like to make mine since it’s very simple to do, but it does take a month of soaking in salted lemon juice for the lemons to become preserved. If you can’t wait, you can always buy them. I’ve only seen them at Fresh Market, specialty grocery stores, and Amazon.

The rest of the ingredients should be easy to find. I happened to shop on a day that the store ran out of fresh basil, though, but I did find a good substitute. A lightly dried version found in the produce section worked just as well and is supposed to keep for much longer. This could be a game-changer! I inevitably have some of my fresh basil go bad, and I’ve managed to kill a few basil plants.

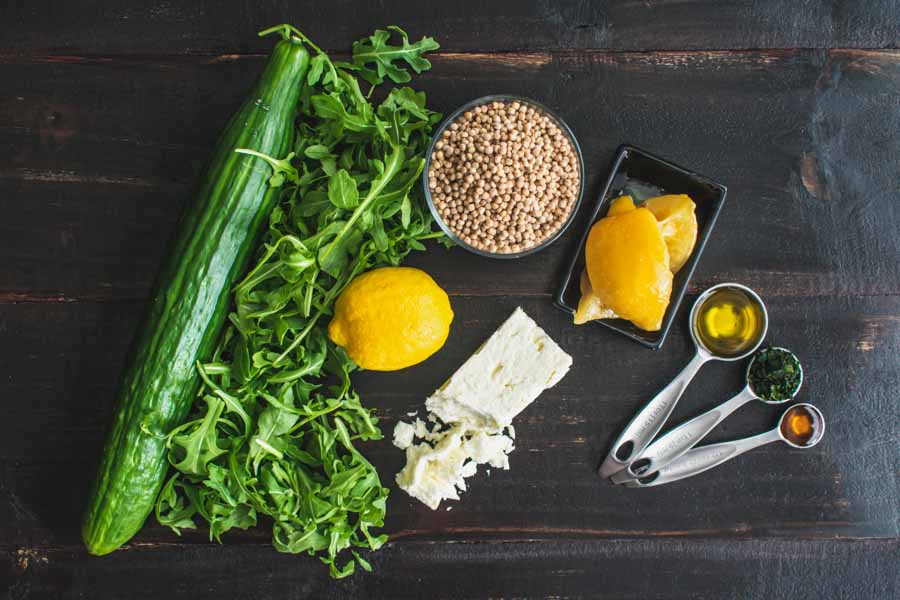
Lemony Arugula Salad with Couscous, Cucumbers and Feta Ingredients
Seedless cucumber, arugula, pearl couscous, lemon, feta cheese, preserved lemon, extra virgin olive oil, basil, and honey

The Process

The first step to this salad is making the couscous. Thankfully, it’s one of the easiest things ever to prepare! I got mine started in a small saucepan and moved onto prepping the rest of the ingredients.

The rest of the prep work was also very easy and went smoothly. I started by making the salad dressing. The recipe doesn’t specify, but I used my trusty mini-prep to mix it up. I love it for salad dressing because it emulsified it a bit and also chops the ingredients. The biggest benefit, though, is that oil-based dressings don’t separate as quickly.

Once the dressing was done, a quick bit of chopping finished off the prep work. All I had to do was wait for the couscous to finish before I could more further. That didn’t take long, though, and I soon had my lemony arugula salad assembled and ready to serve. Here’s how my time broke down:

  • 14 minutes to prep (includes time for the couscous to cool)
  • 10 minutes to cook
  • 24 minutes total
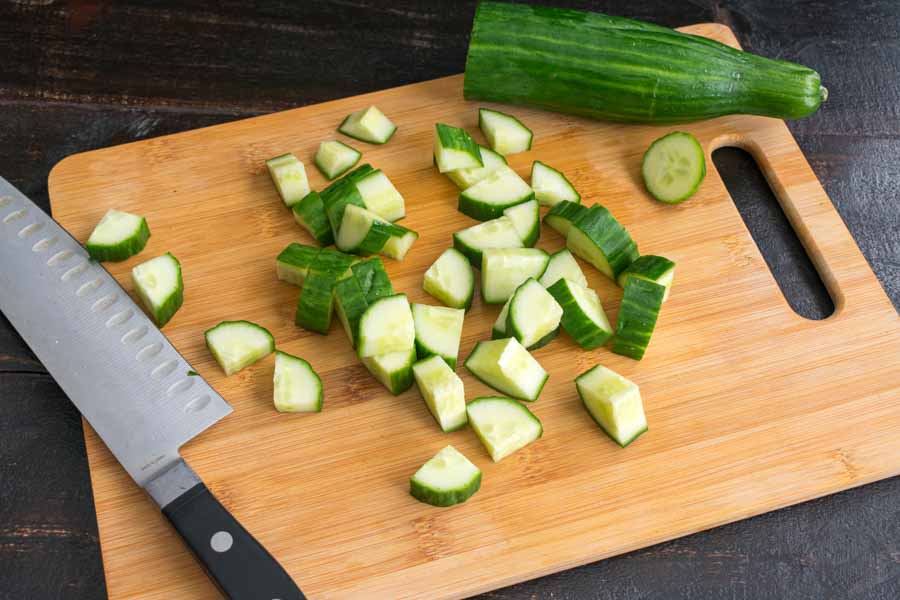
Chopping the cucumber

Light Lemon Garlic Pasta with Salmon

Ever feel like some comfort food in the middle of the summer? Sometimes I do, but I also don’t want anything too heavy since it’s in the upper 90’s this time of year. My summertime go-to comfort food is pasta, and I’m always looking for new ways to make it. This Light Lemon Garlic Pasta with Salmon looks like the ideal summertime comfort food for me. Pasta plus lemon, garlic, and my favorite fish? Yes, please!

Here’s one of my favorite light, summery, sunny type pastas. This light lemon garlic pasta with salmon also has the good fortune of being healthy! It’s all about simplicity and freshness. With fresh basil, garlic, lemon juice, olive oil, capers and salmon, you practically have summer on a plate.

Recipe Author: Farah at The Cooking Jar
Get the recipe

The Ingredients

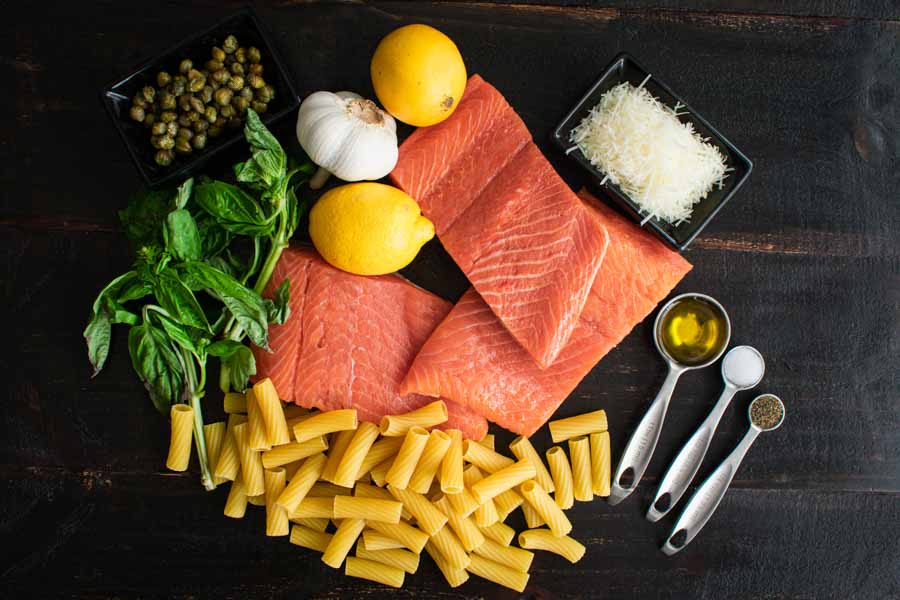
This recipe doesn’t have too many ingredients, and I’m fine with that. I found everything I needed in a single shop, with the salmon being the most expensive item (I believe it was around $12 for a pound and a half). I used it all for this recipe even though it only calls for a pound of salmon.

Of course, I managed to find the very last bunch of basil on the shelf, and some of the leaves were starting to turn black at the edges. I made sure to use it right away! I also subbed a bag of finely shredded parmesan for freshly grated. My husband doesn’t like the freshly grated stuff, and I’m willing to compromise on this.

Light Lemon Garlic Pasta with Salmon Ingredients

The Process

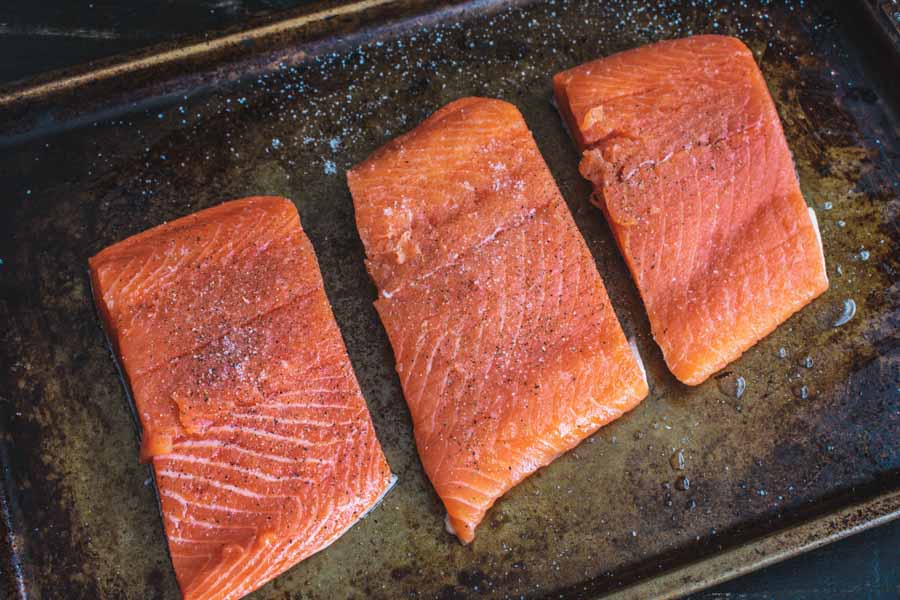
Can you boil water? Then I think you can make this recipe. The instructions were so easy to follow, and the process was very simple. Just boil some rigatoni and bake the salmon after sprinkling with salt and pepper.

In fact, the only difficulty I had with this recipe was cleaning up the baking sheet I used for the salmon. I didn’t put enough olive oil on it, and the skin stuck a bit. Aside from that minor inconvenience, things went very smoothly, and I had my Light Lemon Garlic Pasta with Salmon ready in 26 minutes.

By the way, I saved the capers until last and sprinkled them on top of the mixed pasta and salmon. This recipe doesn’t call for many, and I knew they would settle to the bottom of the dish as soon as I mixed them in.

Salmon fillets seasoned with salt and pepper

Sweet Caramel Cinnamon Baked Plantains

Do you have a kitchen nemesis? Something that no matter how many times you have tried to cook it, it just doesn’t work? I have two: hardboiled eggs and plantains. That last one is particularly embarrassing considering my Caribbean heritage. So many people have given me tips and tricks on how to make these starchy members of the banana family, and they almost always mention that plantains are so easy to make. I am inevitably unsuccessful, leading me to conclude that they are not. Well, today I’m giving it another try with this Sweet Caramel Cinnamon Baked Plantains recipe. It’s been years since I’ve worked up the courage, and now I’m going to blog it for the world to see. I hope this isn’t too embarrassing!

This post was originally published on July 16, 2020. The text, photos, and review were updated on August 1, 2021.

Ripe plantains have so much flavor, but this recipe brings out every bit of sweetness, like plantain candy! These sweet caramel cinnamon baked plantains are paleo, vegan, and contain no refined sugar.

Recipe Author: Michele Rosen at Paleo Running Momma
Get the recipe

The Ingredients

Besides the plantains, there are only a handful of ingredients in this recipe. I happened to have them all on hand, so that left me to shop for the plantains.

Silly me, I chose to buy green plantains because I wasn’t planning to make this recipe immediately. I figured they would ripen on the counter for a few days, then I could make this recipe. Nope. Fourteen days later, and they are finally ready (I think). Fingers crossed!

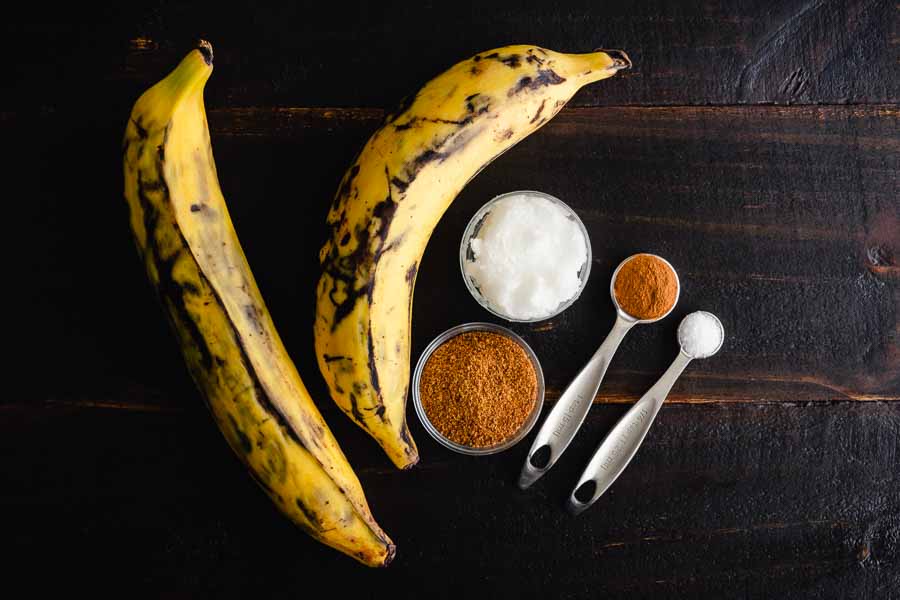
Sweet Caramel Cinnamon Baked Plantains Ingredients
Plantains, coconut oil, coconut sugar, cinnamon, and sea salt

The Process

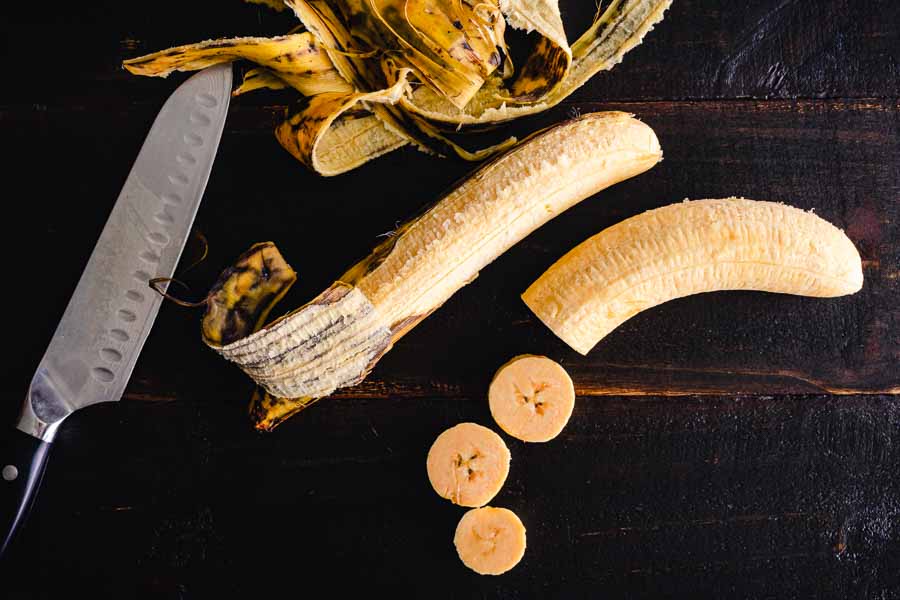
This recipe was pretty easy to make, and the only trouble I had was some stubborn plantain peels. They are significantly thicker than banana peels, and they did not just shuck off. It took a few minutes and the assistance of a paring knife to peel both plantains.

Peeling and slicing the plantains

Once I had them peeled and sliced, I melted the coconut oil. It took 20 seconds in the microwave with a quick stir at the halfway point. Then I tossed the plantain slices with the coconut oil in a small mixing bowl and placed them on a parchment-lined baking sheet.

Mixing the cinnamon sugar was as simple as it sounded (I chose to use 2 tablespoons of palm sugar because it’s not as sweet as refined sugar). Then I sprinkled it over the plantain slices and popped the baking sheet into the preheated oven.

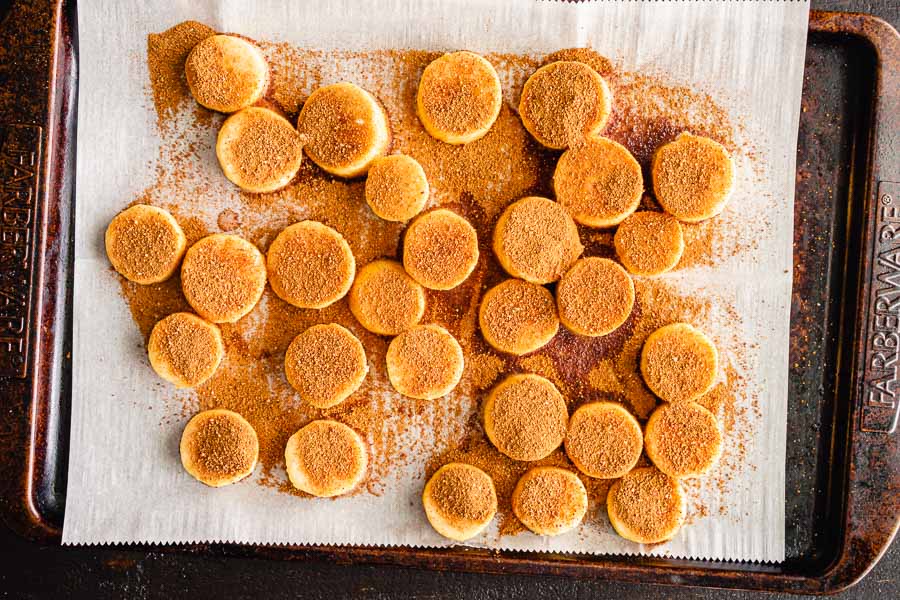
Cooking went smoothly and took 25 minutes. I used a spatula to turn all the plantains after 15 minutes of cooking. One thing I noticed at this point was the tops were well-coated in the cinnamon sugar, but the bottoms were bare. It gave me a little concern, but I decided to trust the recipe.

Sliced plantains tossed in melted coconut oil and sprinkled with a mixture of coconut sugar, cinnamon, and sea salt

Here’s how my time broke down:

  • 14 minutes to prep
  • 25 minutes to cook
  • 39 minutes total

Read on to find out how my Caramel Cinnamon Baked Plantains turned out.

Sweet Caramel Cinnamon Baked Plantains Update

This rare Pinterest fail has been on my mind lately, and I decided I had to give it another try. I’m so glad I did! Very ripe plantains are the key to success here. I made sure to pick up yellow and brown plantains at the grocery store. In addition, I kept them on my kitchen counter for a few days to make extra sure they were ripe.

The difference was apparent as soon as I started peeling them. I had to use a knife to make a cut in one end, but I was able to peel the plantains with my hands.

I also noticed a big difference in the texture as soon as I made the first slice. They were much less starchy and the texture was moister.

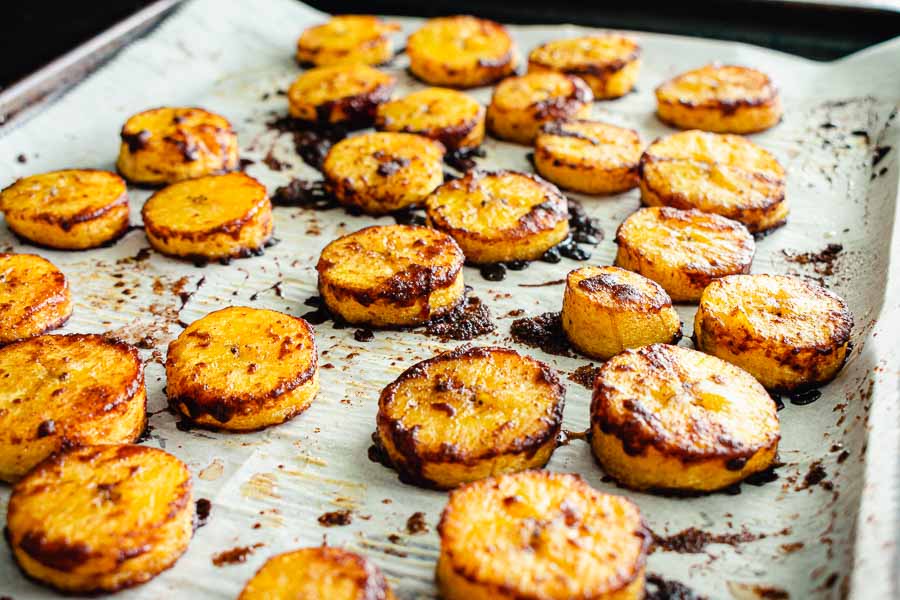
The rest of the process was the same, but this time the results were spectacular! The plantains were soft with a sticky sweet cinnamon coating. Perfection!

The finished plantains on a parchment-lined sheet pan

Jamaican Jerk Pork Ribs

I’m really excited to make this week’s recipes! It’s summertime, and I need to grill, so a rack of ribs sounds really good right now. These Jamaican Jerk Pork Ribs were just too irresistible. I love ribs and Jamaican food, and putting them together has got to be a good thing. Plus they promise to be nice and spicy, and I’m always down for some spice. Let’s find out if these jerk ribs are as good as the jerk pork at my favorite Jamaican restaurant.

These Jamaican Jerk Pork Ribs are rubbed with a mouthwatering sweet and spicy paste made of three main ingredients: chile peppers, allspice, and thyme. Mind you not for the faint of heart!

Recipe Author: Kevin at Kevin is Cooking
Get the recipe

The Ingredients

So, there aren’t too many ingredients in this recipe, and most of them are dried spices. I happened to have all of them in my pantry and had very little shopping to do. In fact, I just had to buy a rack of ribs and a bottle of vegetable oil. The best part? The ribs were only $8.50. Talk about a cheap meal!

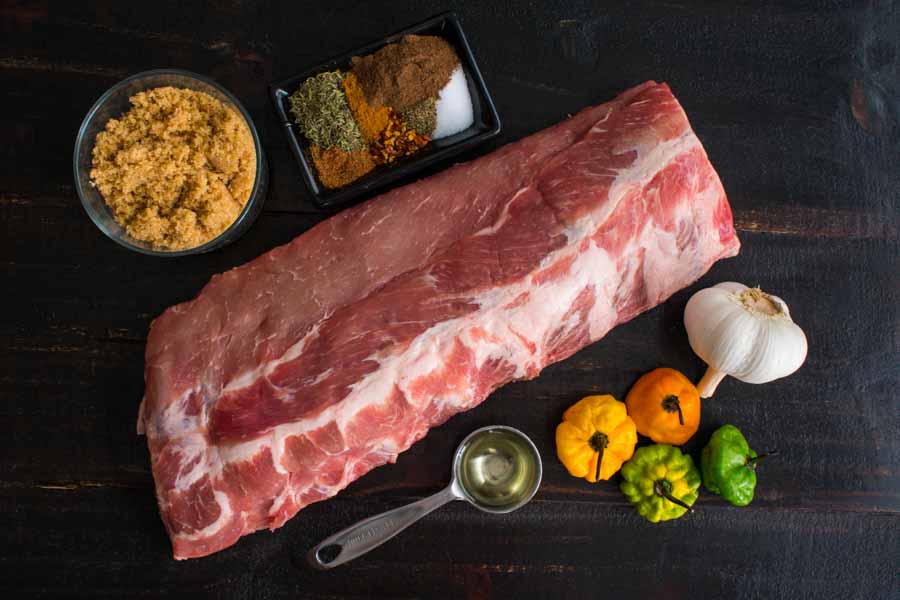
Jamaican Jerk Pork Ribs Ingredients
Pork ribs, brown sugar, allspices, thyme, nutmeg, cinnamon, red pepper flakes, salt, pepper, garlic, scotch bonnet peppers, and vegetable oil

The Process

This recipe is fairly simple, but it does take a while. Here’s how my time was spent:

  • 12 minutes to prep and apply the rub
  • 1 hour 30 minutes to cook
  • 10 minutes to rest
  • 1 hour 52 minutes total (plus time to marinate)

The Rub

This part wasn’t difficult, but I did have to take some precautions. Gloves are very important because the scotch bonnet peppers are HOT, especially when they’re raw! I’ve chopped jalapeno peppers without gloves and ended up with a burning sensation underneath my fingernails for hours. I shudder to imagine that with scotch bonnet peppers.

First things first. Get a few things done without the gloves if you’re not used to wearing them (they felt very strange to me). Measure the vegetable oil, spices, and brown sugar, peel the garlic cloves, and peel the silver skin off the back of the ribs. If the silverskin is slippery, use a paper towel to help you grip it. It should come off without much effort.

Also, make sure you have a plan for how you will store the rubbed ribs. Mine came in a plastic-wrapped styrofoam tray, so I re-wrapped it in plastic wrap. I tore off a couple of large pieces and placed the tray on it, leaving plenty of extra plastic wrap to wrap over the ribs once I placed them on the tray.

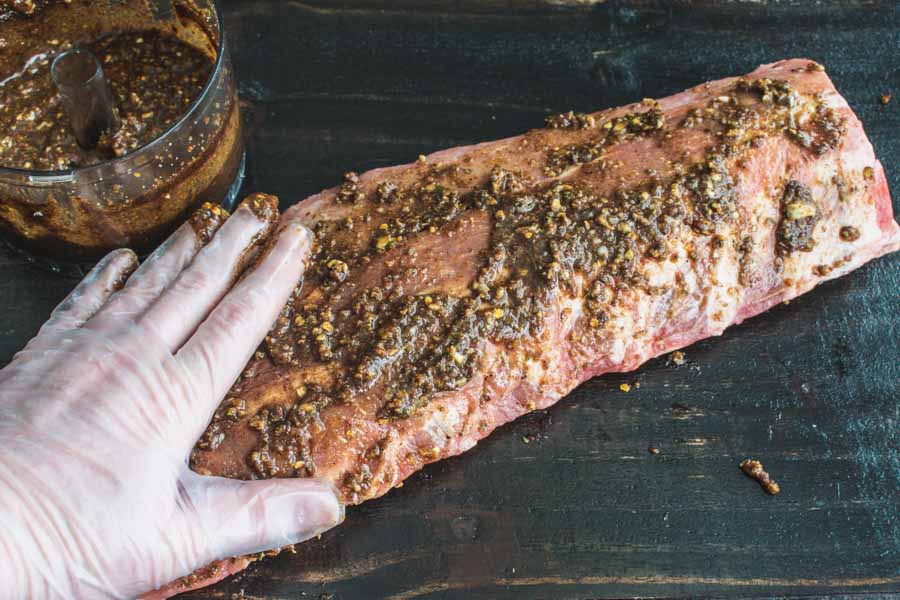
Then it was time to put on my gloves, cut the tops off the peppers, and add them to my mini-prep with the rest of the ingredients. Pulsing for a minute or so had the rub blended to a smooth paste, and it was time to rub it onto the ribs. I put it onto the bottom first then placed the ribs onto the styrofoam tray and rubbed the top. The rub would have (sorry about this) rubbed off if I did the top first.

I made sure to wash all of my equipment next while I was still wearing my gloves. After removing them, I wrapped the plastic wrap over the ribs and placed them into the refrigerator to marinate overnight.

Applying the jerk rub

Cooking

The next day, it was time to grill up some ribs! And it rained. I decided to make them in the oven instead. This part was incredibly simple.

I placed the marinated rack of ribs on an oiled cookie sheet and baked them for an hour and a half, making sure to cover them with aluminum foil after the first 45 minutes. Letting them sit on the counter for a few minutes was the next step, and it was rough! The yummy smell of the ribs had already been torturing me for the last 45 minutes.

The final step in the process was to cut the individual ribs. They are very tender, so make sure your knife is very sharp or they will fall apart. I had great results with a finely serrated steak knife.

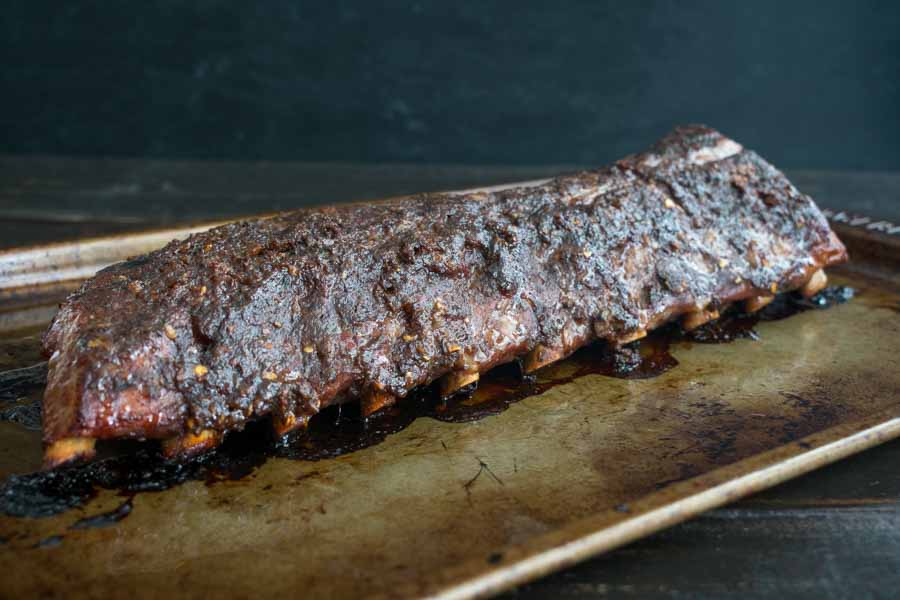
Just out of the oven
Just out of the oven. About 1/4 inch of the bone is exposed when they are done.

Coconut Blood Orange Margaritas

Last time I made tacos, I paired them with sangria. This time I wanted to try something a little different. Blood orange is spectacular! And it was so good in that sangria that it was still on my mind all these weeks later. I’m sure that’s what drew me to this recipe for Coconut Blood Orange Margaritas. I’m not a huge tequila person, but I do enjoy a margarita now and then. There’s nothing about this that doesn’t sound good, so let’s find out if putting them all together makes them even better!

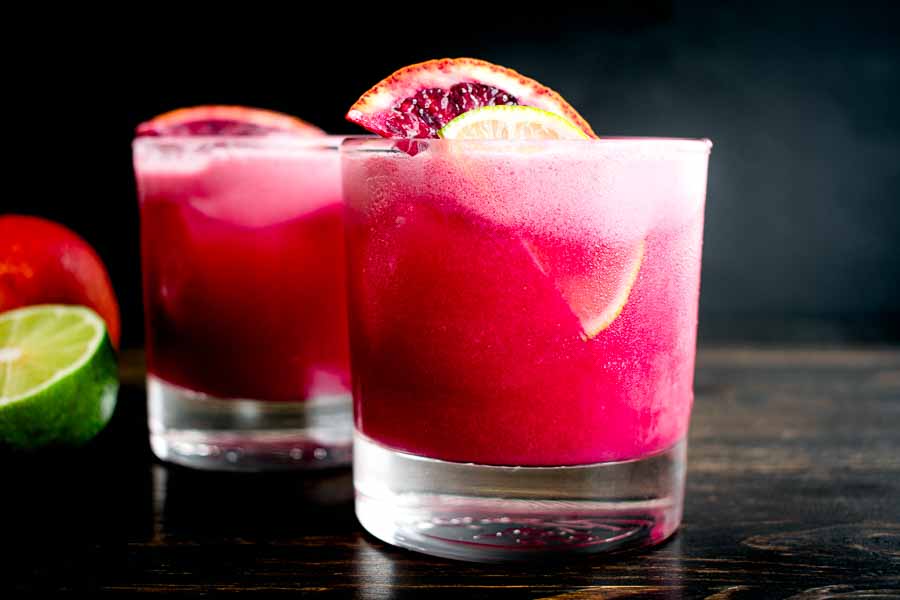
Creamy coconut margaritas with a splash of sweet blood orange juice and lime.

Recipe Author: Leah Bergman at Freutcake
Get the recipe

Update (4/24/24)

Blood orange season has just passed, and I had a lot of fun making new blood orange recipes. I also revisited this recipe for Coconut Blood Orange Margaritas because it was so good, and, to be honest, I was never quite satisfied with the photos. I loved the bright pink color, but the recipe’s pics were a lighter pastel pink.

When I first made this recipe, I used Coco Real cream of coconut per the recipe. This time I picked up a can of Coco Lopez, and it made a big difference! These margaritas were the same cotton candy pink as the recipe photo and also had a little bit of lighter foam on top. They also began to separate after a few minutes, and you can see that in the blog post for this recipe.

I’m not sure why the drastic difference in the margaritas happened. The only thing that was different was the cream of coconut. Perhaps I shook this one longer, or added more ice to the shaker? Maybe this batch of blood oranges wasn’t as red. I don’t think I will ever know.

The main photo at the top is the updated version. The original review is below and hasn’t been updated, and the original photo is at the end.

The Ingredients

There are only four ingredients in this recipe, but I did have to go on the hunt for them. The limes came from my local grocery store. The blood oranges must be too fancy for Publix, but I did find them nearby at Fresh Market. A one-pound bag had 6 oranges and was around $5.

The tequila and cream of coconut were easy to find at my local liquor store. The author lists the Coco Real brand, and I found a bottle for $4. It’s very similar to Coco Lopez, but it comes in a squeeze bottle instead of a can. I think either one would work for this recipe.

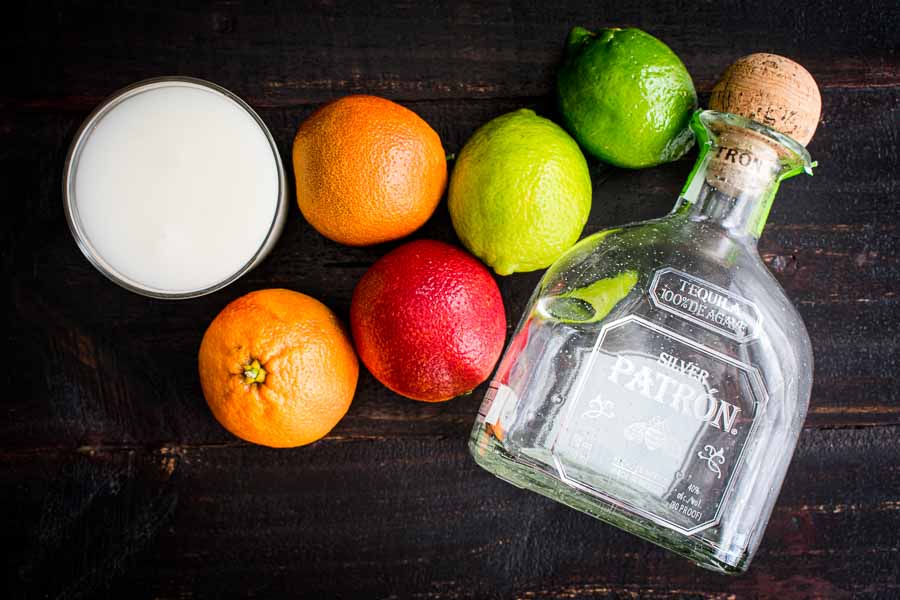
Coconut Blood Orange Margaritas Ingredients
Blood oranges, cream of coconut, limes, and silver tequila

The Process

This drink wasn’t difficult to make, but break out your juicer. The blood oranges don’t have a lot of juice, and I used three to make two margaritas. They also have seeds, so a juicer makes it faster and easier to get strained blood orange juice.

A citrus reamer worked find for juicing the limes since they were seedless. Actually, I should say lime since I only needed one to get one ounce of juice.

That’s the hard work for this recipe. The rest was measuring and shaking the ingredients in a cocktail shaker and garnishing the finished drinks. I had mine done in 8 minutes.

By the way, you’ll need to use small glasses for this recipe if you want to fill them. My usual rocks glasses are 11.5 ounces, and they were far from full. These 8-ounce glasses were a gift, and this recipe filled both to the top with 3-4 ice cubes. A 9-ounce glass should be perfect with ice and a little buffer between the top of the glass and the margarita.

Coconut Blood Orange Margaritas
The first time I made this recipe resulted in bright pink margaritas

Buffalo Cauliflower Tacos with Avocado Crema

Whew! Those Red, White, and Blueberry Bacon Burger with Basil Aioli burgers I made last week were sooo good!! Grilled burgers, melty cheese, crispy bacon… But they were also crazy rich, and now I’m in the mood for something lighter. And I’m always in the mood for tacos. These Buffalo Cauliflower Tacos with Avocado Crema sound like a spicy way to eat a bit healthier this week. This recipe has tons of fresh veggies, a healthy dose of hot sauce, and “good” fat from avocados. I can’t think of a reason not to make it!

This colorful, spicy, crispy, mega-yum recipe was inspired by the amazing buffalo “wings” at J. Selby’s in Saint Paul and this recipe from Sarah Sullivan. Thanks to both sources of inspiration!

Recipe Author: Lindsay at Pinch of Yum
Get the recipe

The Ingredients

There aren’t too many ingredients in this buffalo cauliflower tacos recipe, and nothing was unusually expensive. It’s full of basics like fresh vegetables, sour cream, flour, and milk. I had to buy most everything but didn’t have any trouble finding most of the ingredients.

The only thing I couldn’t find was the Frank’s Hot Sauce. I did find another brand, and I mixed it with a couple I had in my pantry to get as close as possible to the taste of Frank’s. I used a blend of Cholula Chili Garlic, Crystal, and Tabasco hot sauces.

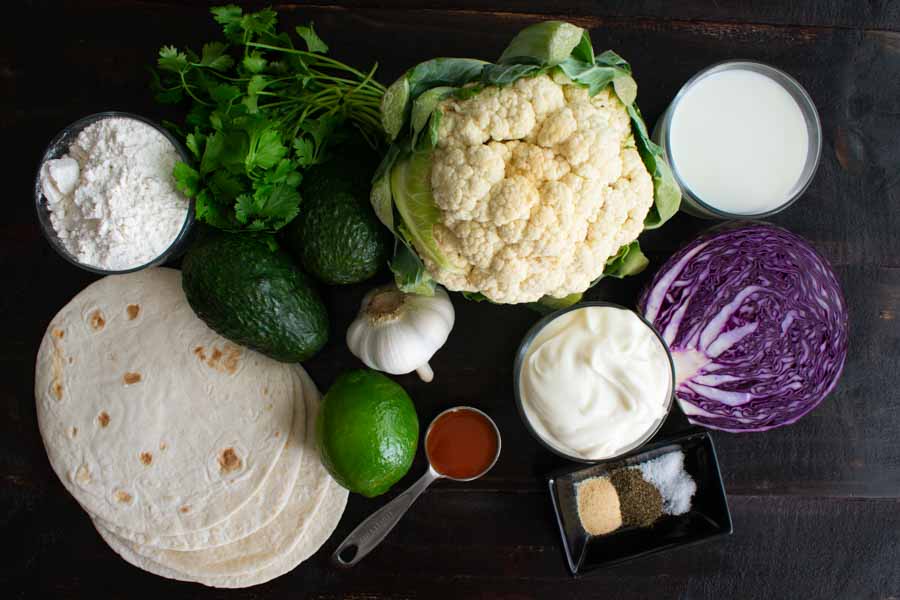
Buffalo Cauliflower Tacos with Avocado Crema Ingredients
Tortillas, flour, cilantro, avocados, garlic, lime, hot sauce, garlic powder, pepper, salt, sour cream, cauliflower, milk, and cabbage

The Process

It seems like there’s a lot going on with this recipe, but it was actually pretty easy to make. Let’s go over each of the four parts: cauliflower, avocado crema, slaw, and assembly.

Making the Cauliflower

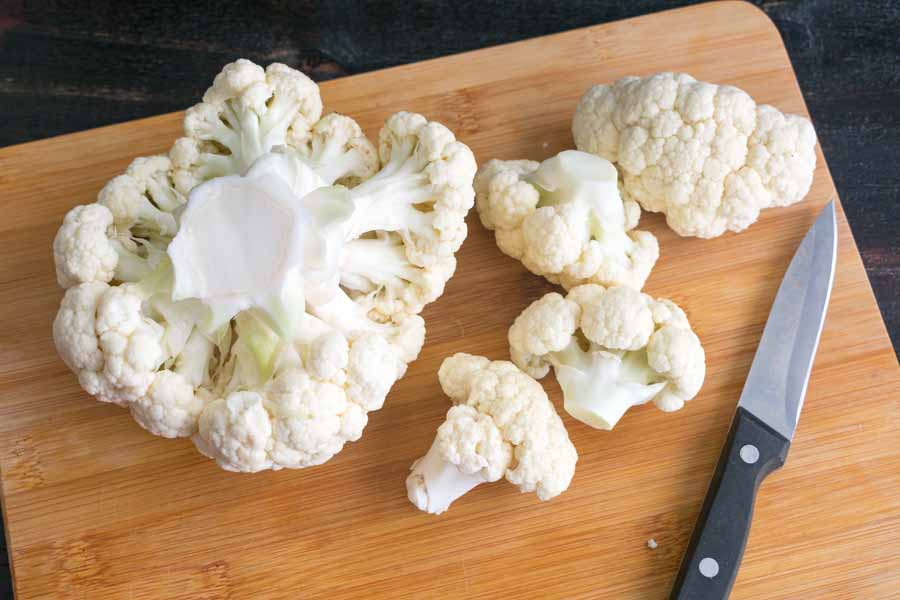
The cauliflower was the bulk of the work, but it wasn’t difficult. I started by cutting it into bite-sized florets. Then I used a pair of tongs to dip a few pieces at a time, shaking off the excess and placing them on a parchment-lined baking sheet. The batter was nice and thick, so it clung to the cauliflower, but that also made it tough to shake off. Some of my cauliflower baked into a batter puddle, but I just cut off the excess when I took it out of the oven.
While the cauliflower baked, I mixed up the hot sauce. I couldn’t find Frank’s brand hot sauce, so I blended three brands to try and get as close to the taste as possible (it worked pretty well). Then I placed the hot sauce blend into a medium mixing bowl and got to work on the avocado crema.

Making the Avocado Crema

This is where I had a bit of trouble, but that was because I can’t tell a ripe avocado from an unripe avocado. Mine were a lot harder than any avocado I’ve ever encountered before, so I’m guessing they weren’t ripe. But it was too late to turn back, so I forged ahead. The finished avocado crema tasted fine, but there were tiny bits of avocado in it that weren’t so aesthetically pleasing. No amount of blending in my mini-prep could make it totally creamy.

Finishing the Cauliflower and Making the Slaw

Right about when the avocado crema was done, the cauliflower was ready to be tossed in the hot sauce. That part was as straightforward as it sounds, and then it was back into the oven for 10 more minutes. That gave me plenty of time to shred a 1/4 of the cabbage with my mandoline and toss it in some of the crema.

Putting it All Together

All that was left was to assemble and taste my newly created buffalo cauliflower tacos. This, of course, was my favorite part. After 47 minutes of cooking, it’s nice to have a little reward. Read on for my final verdict on this recipe.

Cutting the cauliflower into florets

Blueberry Coconut Sparkler

What’s better to follow up the Red, White, and Blueberry Bacon Burger with Basil Aioli than a red, white, and blue cocktail? maybe a red, white, and blue dessert, but today it’s going to be a cocktail. This Blueberry Coconut Sparkler is a cute and clever way to incorporate all the colors of the flag in what promises to be a sweet and tasty cocktail. Best of all, I’m making it with Malibu coconut rum which is only 20% alcohol. This cocktail will have a little more oomph than a beer and a little less than most liquor. It sounds like a good in-between to me!

Summer is in full swing, so it’s time to cool off with this Blueberry Coconut Sparkler! This drink recipe is refreshing and fun…and perfect for the 4th of July!

Recipe Author: David at Spiced
Get the recipe

The Ingredients

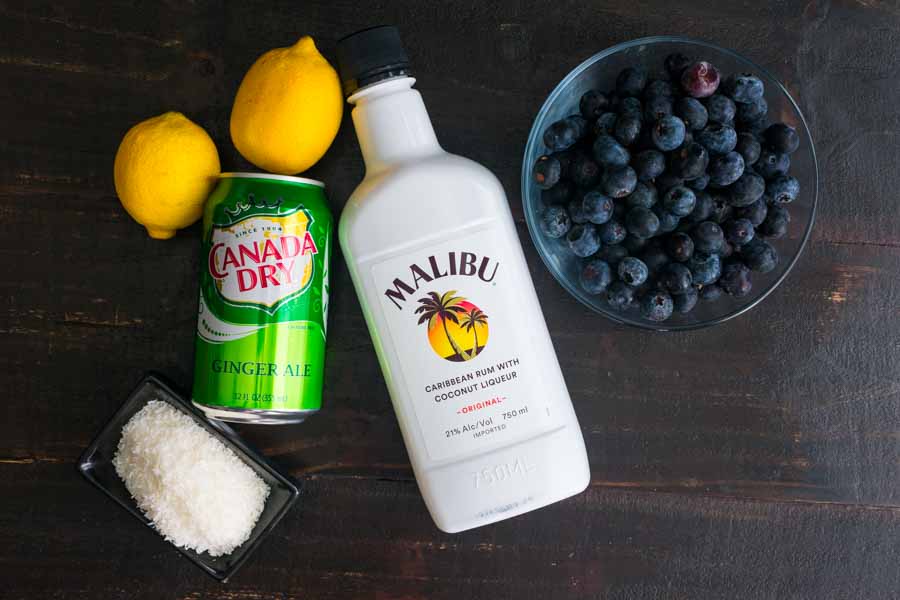
Just five ingredients are needed for this cocktail, and they’re all easy to find and reasonably priced items. One thing to note is the coconut flakes for the garnish are listed optional, but I had to have them! I found unsweetened grated coconut flakes just for this recipe. Coconut flakes are smaller than grated coconut, and I’m sure that made using them to rim the glasses much easier.

Blueberry Coconut Sparkler Ingredients
Coconut rum, ginger ales, lemon, blueberries, and grated coconut

The Process

Making my Blueberry Coconut Sparkler cocktails was pretty quick and easy. This is a batch cocktail, meaning the recipe makes enough for several cocktails at a time. This is a great recipe for crowds! I had a batch made and two glasses garnished in just 7 minutes.

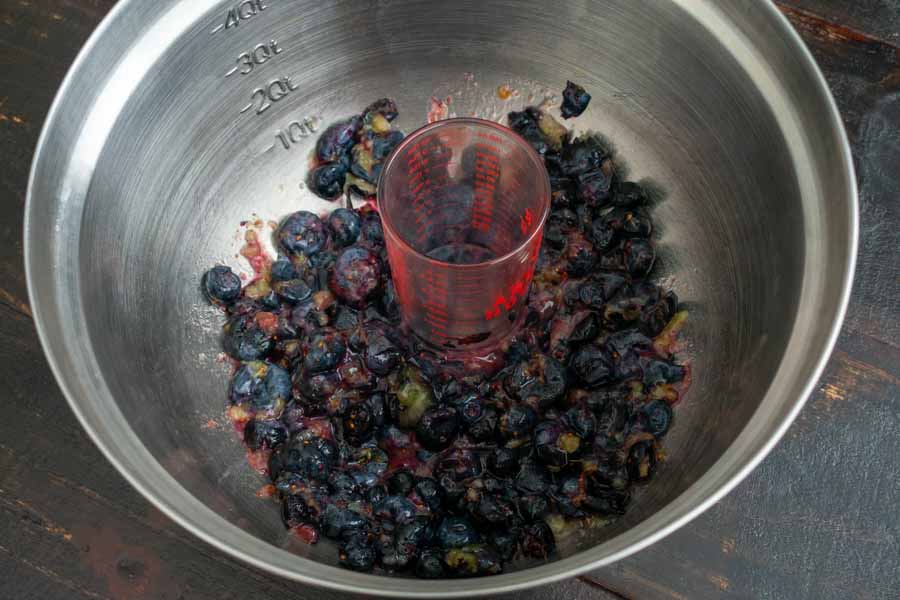
My first move was to make the blueberry garnishes, then I muddled the rest of the blueberries per the recipe instructions. I did this in a medium mixing bowl with my measuring glass (anything with a flat bottom will do). It only took light pressure to crush the berries and release their juices. A mesh sieve placed over a small mixing bowl was perfect to strain out the blueberry solids and then mix the rest of the ingredients.

With the cocktail mixed, it was on to rimming the glasses. I cut an extra lemon into wedges and ran one around the rim of each glass. Then I dipped each rim into a saucer of the coconut flakes and voila! After that, all I had to do was add ice cubes, pour the cocktails, and pop in the blueberry garnishes I made earlier.

Muddling the blueberries with a measuring glass

Red, White, and Blueberry Bacon Burger with Basil Aioli

Independence Day is this Saturday, and I feel the need to celebrate with a backyard cookout. Burgers are always great for that, but I wanted to make it extra special with this Red, White, and Blueberry Bacon Burger with Basil Aioli recipe. I’ve had burgers with bacon and aioli, but blueberries? I know what you’re thinking because I’m thinking the same thing. But the blueberries are simmered into a compote with balsamic vinegar, so I’m thinking it will be more tart than sweet. Whether or not it’s good with a bacon cheeseburger remains to be seen. But we all know there’s only one way to find out, and that’s to make this recipe. Let’s get grilling!

This Red, White, and Blueberry Bacon Burger with Basil Aioli is a mouthful in every sense! A perfectly seasoned and grilled hamburger gets topped with rich havarti cheese, blueberry balsamic compote, red onions, arugula, and an easy basil aioli, all on a brioche bun. Perfect for Memorial Day, the 4th of July, or any other day of the year!

Recipe Author: Amy Nash at House of Nash Eats
Get the recipe

The Ingredients

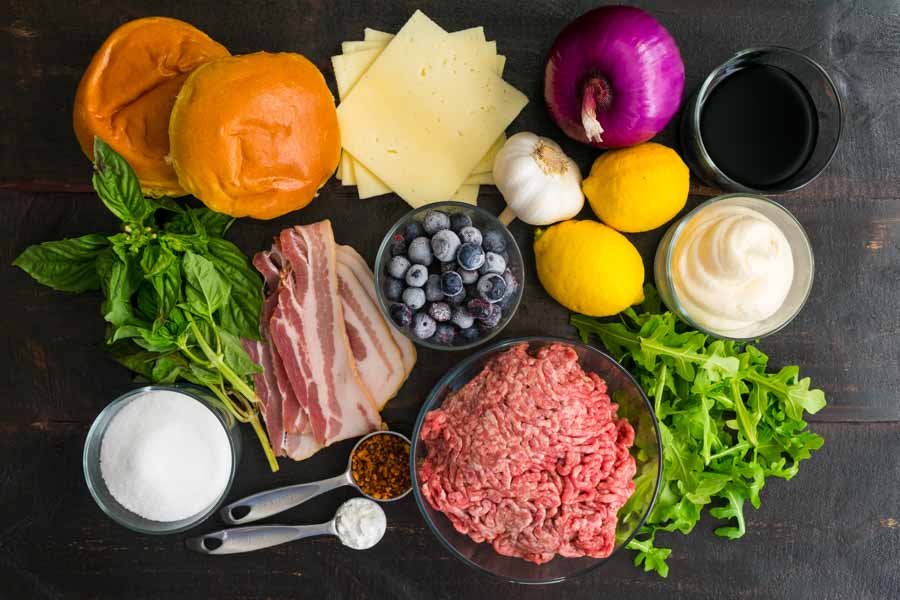
These burgers sound complicated, and they do have quite the list of ingredients. But despite the crazy run on groceries (I’m writing this in April), I didn’t have any trouble finding in the ingredients. I did opt for frozen blueberries, though, since I had exactly the amount I needed in my freezer. I’m trying to buy only what I need and since demand is so high.

And although the author recommends a specific brand of burger seasoning, I used the McCormick seasoning I had in my pantry. I don’t know how they compare, but the McCormick is good (I used it on these Cheeseburger Stuffed Shells), and I didn’t want to order a nonessential item right now.

Red, White, and Blueberry Bacon Burger with Basil Aioli Ingredients
Frozen blueberries, bacon, hamburger seasoning, cornstarch, sugar, basil, brioche buns, Havarti cheese, red onion, garlic, lemons, balsamic vinegar, mayonnaise, arugula, and ground beef

The Process

When I printed this recipe I was three pages long ? But things went very smoothly once I got started. It was a pleasant surprise! The instructions break things down into manageable sections. I was grateful for since I was cooking these burgers by myself.

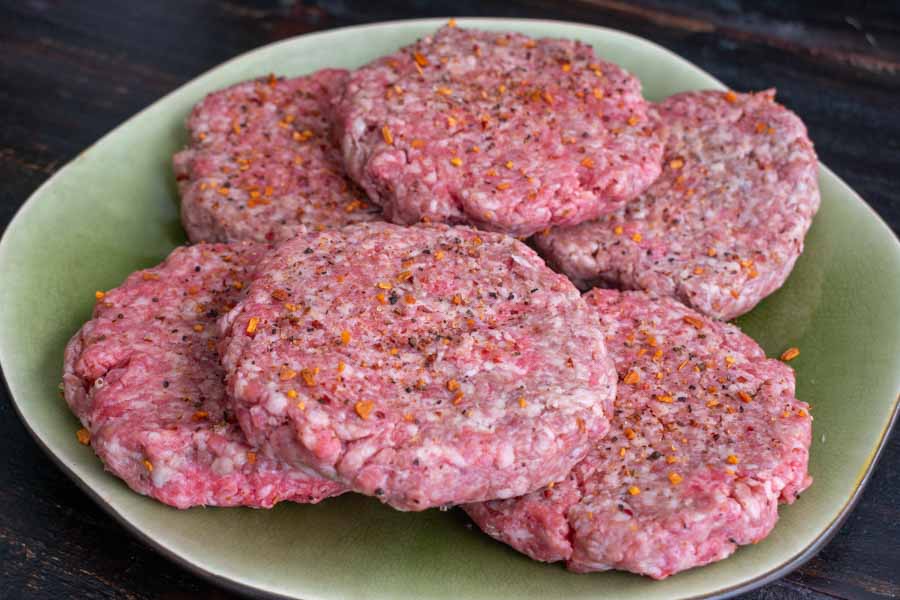
I started by frying the bacon and prepping the burgers. Pre-made hamburger patties are usually the way I go, but I decided to make them myself this time. And I’ve learned from past mistakes to make the patties a little bigger in diameter than the buns. The burgers will shrink when they grill and end up closer to the size of the buns.

Once the bacon was done, it was onto the blueberry compote and basil aioli. I got the blueberry compote to simmering in a small saucepan, but I wasn’t sure if it needed to be covered. I went with uncovered since it wasn’t specified, then I got started on the aioli. All I need to do to mix it up was to blend it in my mini-prep. Easy peasy.

The blueberry compote was still simmering by the time the aioli was done, so I ran outside and got the grill lit and started preheating. After stirring the cornstarch slurry into the compote and removing it from the heat to cool, it was onto grilling the hamburgers. I grilled them for 4 minutes per side and brought them back inside to rest for 5 minutes.

Then it was time to assemble these beauties, snap a few photos, and chow down. Read on for the final verdict.

Seasoned hamburger patties ready to go onto the grill

Blackberry and Meyer Lemon Gin and Tonics

I’ve made my share of gin and tonics for this blog with all kinds of ingredients: cucumber, mint, basil, various citrus fruits, etc. I’ve even made one with strawberries, but this recipe for Blackberry and Meyer Lemon Gin and Tonics promises to be something very different from what I’ve previously tried. Why? It’s got berries, mint, and citrus, which aren’t new, but it also has simple syrup (recipe below). I’ve never encountered a gin and tonic recipe with sweet syrup before. I’m a bit appalled and curious at the same time. A sweet gin and tonic? This is one of those recipes I have to try to find out if it’s good. Let’s get to it!

The good thing about gin and tonics and that the base of the drink is already there: gin, and tonic. You can add pretty much anything you want to this drink and it will be yummy. This however has been by far my favorite flavor collaboration. I hope you all enjoy it as much as I did!

Recipe Author: Teri + Jenny at Spoon Fork Bacon
Get the recipe

The Ingredients

The ingredients weren’t difficult to find, but I did have to hot up two stores. The gin from my local liquor store, and the rest from the grocery store across the street. The gin was, of course, the most expensive item at $23, but very much worth it. Hendrick’s got me back into gin when I had all but stopped drinking it.

The mint, blackberries, Meyer lemons, and tonic water were around $15. All told, this was a pricey couple of drinks! But the good news is there were leftovers of all the ingredients. I highly recommend these Meyer Lemon Greek Butter Cookies (Kourabiedes) to use up the lemons!

And although the recipe says regular lemons can be substituted for Meyer lemons, I didn’t want to go that route. Meyer lemons aren’t as tart as regular lemons, and they have a slight sweetness to them. They are very unique! If you can’t find them, try using equal parts of freshly squeezed lemon and orange juice as a substitute.

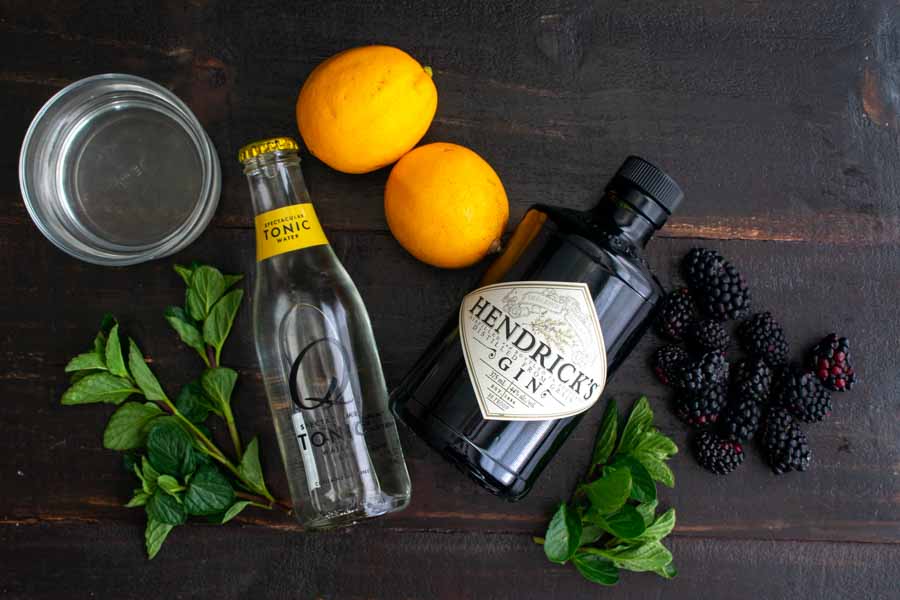
Blackberry and Meyer Lemon Gin and Tonics Ingredients
Gin, tonic water, mint, simple syrup, Meyer lemons, and blackberries

The Process

Reading over this recipe, it was obvious that it wasn’t going to be difficult to make. In fact, it only took me 6 minutes to make and garnish 2 drinks (I halved the recipe since my husband doesn’t drink gin). I gathered my ingredients and tools and got to it.

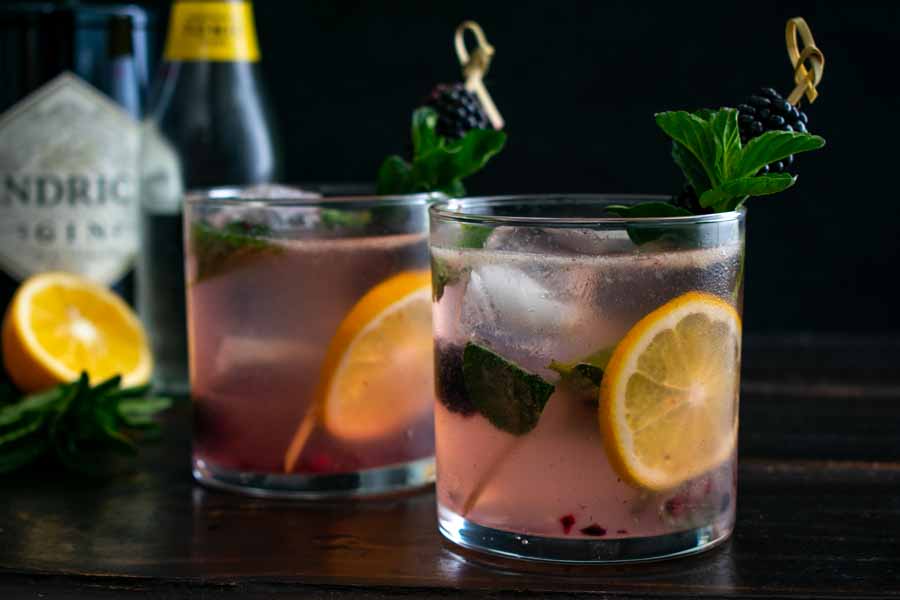
I ended up making 2 attempts at it because I wasn’t happy with my first try. The first one, shown below, was exactly as written with 3 blackberries per glass. As you can see, the color of the finished cocktail was a light lavender color and not quite as dark as the drinks shown with the recipe. My theory is the blackberries I used were quite small.

A couple of days later I tried it again. This time I added 9 blackberries to each glass and thoroughly crushed them to release a much dark purple juice as possible. This time the color of my Blackberry and Meyer Lemon Gin and Tonics was much darker and resembled the photo I had pinned and had in mind when I made these cocktails. I later realized that the photo was from another site and the authors’ pictures were somewhere in between my versions.

My first attempt at this recipe using only 3 blackberries per glass
Simple Syrup

Simple Syrup

The Hungry Pinner
A quick and easy-to-make staple of any well-stocked bar. This recipe yields approximately 12 ounces of simple syrup.
Prep Time 5 minutes
Cook Time 5 minutes
Cool 1 hour
Total Time 1 hour 10 minutes
Course Drinks
Servings 12 1-ounce servings
Calories 63 kcal

Ingredients
  

  • 1 cup water
  • 1 cup sugar of your choice (I use organic sugar, which gives the syrup an amber tinge)

Instructions
 

  • In a small saucepan, bring the water to a boil.
  • Reduce heat to medium and add the sugar. Stir until dissolved (the mixture will become clear when the sugar is dissolved).
  • Remove from heat and allow to cool. The simple syrup can be refrigerated in a bottle or other airtight container for up to 4 weeks.
Keyword bartending, mixology, simple syrup, sugar

Mediterranean Baked Cod Recipe with Lemon and Garlic

0

I’m an omnivore, but sometimes I get tired of eating meat. I needed a break this week, so I went looking for a fish recipe since it’s been a minute since I’ve made any. That’s when I happened upon this Mediterranean Baked Cod Recipe with Lemon and Garlic. I’ve come across it a few times, and I’ve wanted to make it for a while. Well, now is a perfect time! I’m thinking this with a salad will make a nice lunch. Let’s find out!

Best baked cod recipe out there! Prepared Greek style with a few spices and a mixture of lemon juice, olive oil and lots of garlic. Bakes in 15 mins!

Recipe Author: Suzy at The Mediterranean Dish
Get the recipe

The Ingredients

There aren’t too many ingredients in this baked cod recipe, and I had a few on hand. Well, I had the spices, the extra virgin olive oil, butter, and flour. I had to shop for the fresh items, but I didn’t have any trouble finding them.

The cod fillet was not surprisingly the most expensive item at $12 for about a pound. The recipe calls for a pound and a half, but supplementing that nice big fillet with a little piece of fish seemed weird.

The author of this recipe has an online shop with tons of Mediterranean oils and spices in case you can’t find them locally or simply prefer her brand. They all look amazing! However, I had extra virgin olive oil and Spanish paprika (also called pimenton or smoked paprika) on hand, so that’s what I used. The COVID-19 pandemic is still going strong, and I didn’t want to order something that wasn’t essential. It’s dangerous out there 🙁

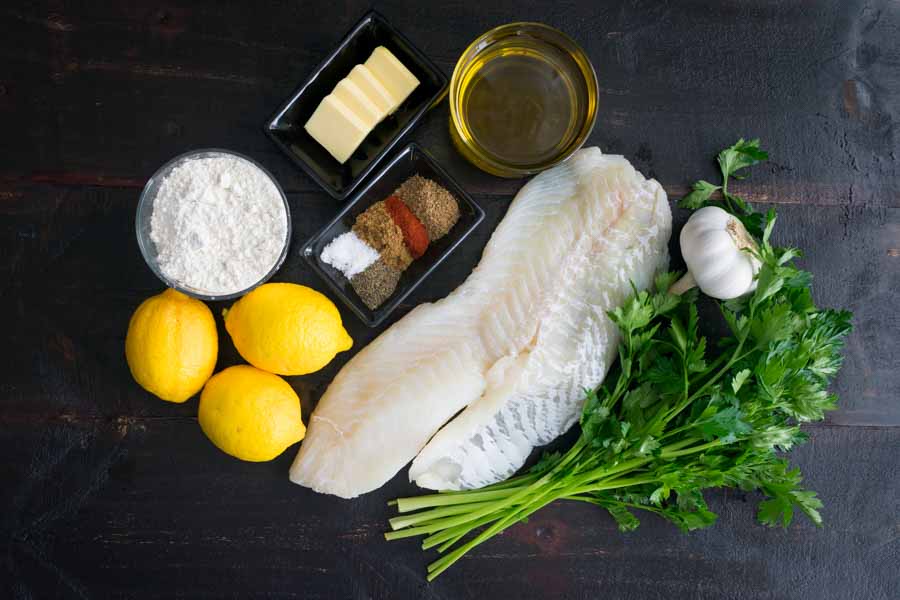
Mediterranean Baked Cod Recipe with Lemon and Garlic Ingredients
Cod fillet, lemons, flour, salt, pepper, cumin, Spanish paprika, cumin, butter, extra virgin olive oil, garlic, and parsley

The Process

The time given for this recipe is 22 minutes, and I had mine done in 24 minutes. Not bad for such a delicious entree! The instructions broke everything down into easy to follow steps, but I did have some difficulties of my own making. Here’s how my time was spent:

  • 10 minutes to prep
  • 14 minutes to cook
  • 24 minutes total

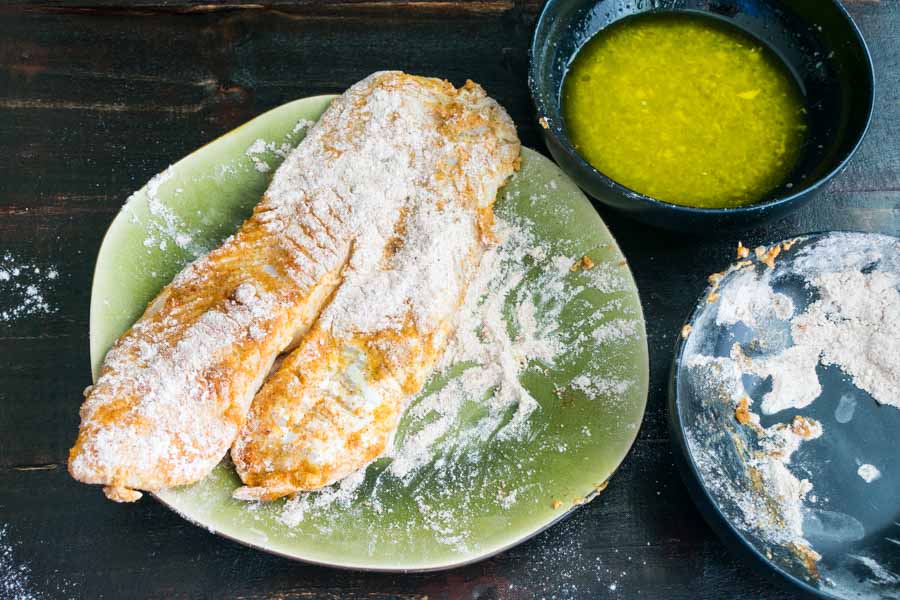
First up, I used soup bowls to bread the cod because they are the shallowest bowls I have. The cod fillet was much too big for them, and I ended up moving the flour to a dinner plate. A combination of dredging in the flour and spooning it over the fish did the trick. Of course, I could have also cut the fish into smaller pieces, but I didn’t think of that.

My next oops moment was when I fried the cod on the stove. I don’t know what I was thinking when I used tongs to flip the fish! (It’s been a while since I’ve cooked fish, and that’s what I di with steaks.) It survived but a few marks in the breading seemed to be the only damage done. I should have used a large spatula.

The rest of the process went smoothly, and I had a beautiful baked cod fillet in no time at all. Fair warning: the fish will be fall-apart tender when you take it out of the oven. I served it from the cast-iron pan I baked it in.
Breading the cod fillet