Home Blog Page 30

Butternut Squash Stuffed Shells

I made stuffed shells for the first time a while back, and I’ve been looking forward to trying them again. Those Cheeseburger stuffed Shells were so good! This time around I’m going with a vegetarian option that seems to fit the season: Butternut Squash Stuffed Shells. And this recipe sounds crazy good. Pasta, cheese, creamy sauce, and butternut squash. You better believe I can’t wait to try this comfort food that seems to have been made for the Fall!

Get ready to see something messy. These butternut squash stuffed shells are tops.

Recipe Author: Jessica at How Sweet Eats
Get the recipe

The Ingredients

The list of ingredients for these stuffed shells is on the long side, but it’s mostly basics. In fact, I had most of them on hand. The milk, flour, butter, garlic, nutmeg, and olive oil are all things I usually have in my kitchen. I even had the jumbo shells, mozzarella, and some parmesan leftover from recipes I have made recently.

The parmesan I had was very finely shredded instead of grated, but it worked nicely. I would not have substituted if I bought a fresh package of parmesan unless I couldn’t find grated. But since I had something similar, I used it rather than letting it go to waste.

That left me to buy a whopping a few things: butternut squash, fresh sage, a shallot, and mascarpone cheese. The mascarpone is probably the most “exotic” ingredient in this recipe. If you can’t find it, make a mascarpone cheese substitute out of cream cheese, heavy whipping cream, and sour cream.
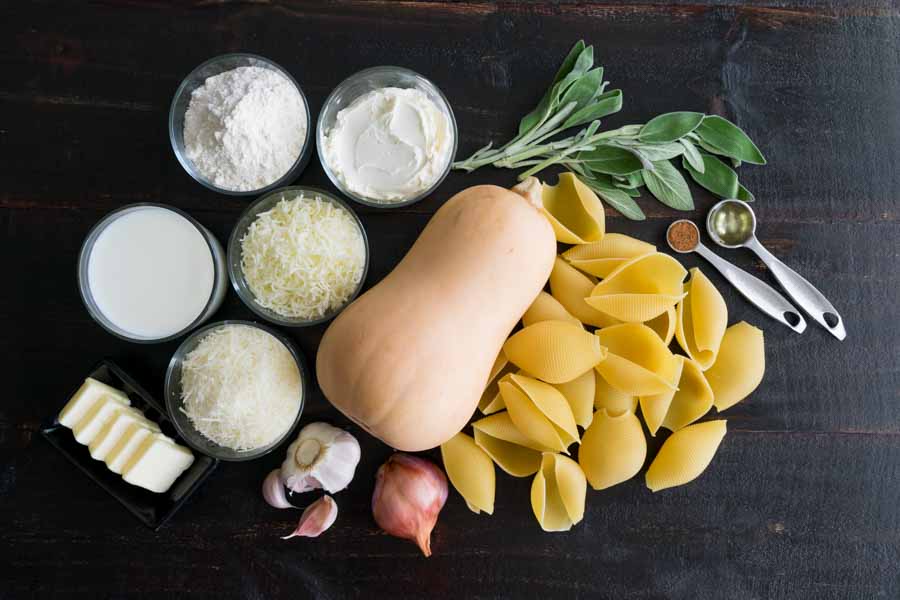
Butternut Squash Stuffed Shells Ingredients
Butternut squash, shallot, garlic, butter, parmesan cheese, milk, mozzarella cheese, flour, mascarpone cheese, sage, olive oil, nutmeg, and jumbo pasta shells

The Process

These stuffed shells were ah-ma-zing, but I had questions. The recipe isn’t as specific as what I’m used to, and I had to pause and reread a few times before I was sure of what to do next. For example, the butternut squash needs to be cubed before roasting, but the size of the cubes isn’t specified. Maybe I overthought it, but cubes can be a tiny dice to an inch or more. I settled on larger one-inch cubes, and that seemed to work just fine.

Things moved along pretty smoothly once I got the squash into the oven (step 1), but there were long pauses while I waited for them to be done. Step 2 had several actions, and I had them all done well before the squash finished roasting. I was particularly happy about the shells having plenty of time to cool before I had to stuff them. There was even more than enough time to finish prepping all the other ingredients and do some tidying up.
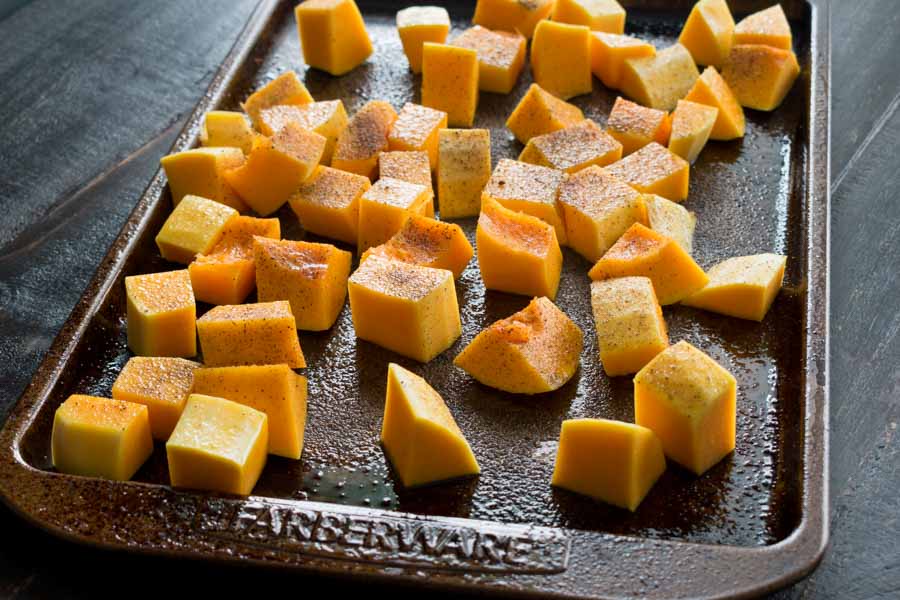
Cubed butternut squash seasoned with nutmeg, salt, and pepper

Once I had the roasted butternut squash mashed with the remaining ingredients, it was time to stuff the cooled shells. I used a measuring tablespoon and started with what I estimated to be 1 1/2 tablespoons of puree. That seemed to over-stuff the shells, though, so I switched to 1 tablespoon. That worked a treat, and I didn’t have any extra squash mixture leftover.

My next question came up during the bechamel. The ingredients don’t include the parmesan with it (it’s listed as a topping), but the instructions do. I mixed it into the sauce as instructed, so the only toppings I used were the shredded mozzarella and the sage leaves.

Oh, the sage! There is no instruction given for them, so I took a close look at the picture. It looks like the leaves are slivered, so that’s what I did. I’m pretty sure they aren’t whole unless they are incredibly small.

So I had some questions on the fly, but nothing I couldn’t figure out. This recipe did take a while, so I had time to pause and think when I wasn’t certain about something. Here’s how my time was spent:

  • 1 hour 12 minutes to prep
  • 25 minutes to cook
  • 1 hour 37 minutes total
The Royal Affliction

0

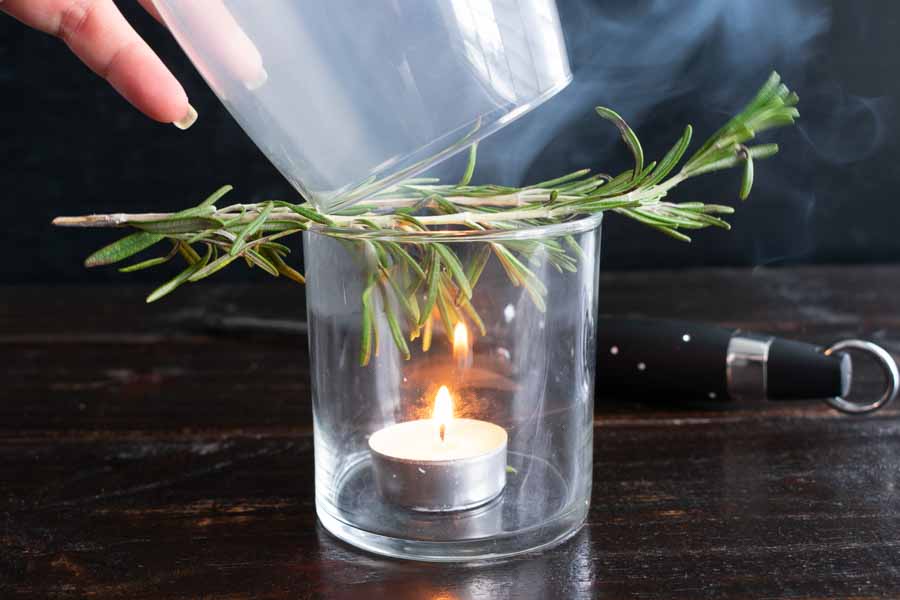
This week started off so nicely with Seattle-Style Smoked Salmon Chowder, and I thought I would continue the smokey theme with a cocktail. Unfortunately, it’s not easy to find a smoked cocktail recipe that doesn’t require a cocktail smoker. Yes, they look like they would be fun to play with, but this is something I just wouldn’t use enough to justify buying one. My cabinet space is already nonexistent! Just when I thought my quest was impossible, I found The Royal Affliction. It’s a smoked scotch-based cocktail that only requires a tea light. I can handle that.

Woodsy, rosemary tinged smoke fills the glass. Those notes infuse through the lightly sweetened berry flavor with tart background highlights. The Black Grouse is mellowed out and given an almost honey quality, while also heightening the smoky flavor. Even when you no longer can see the smoke, it stays with the drink from first to last sip.

Recipe Author: Anindita Putri at Easy Cooking Recipes
Get the recipe

The Ingredients

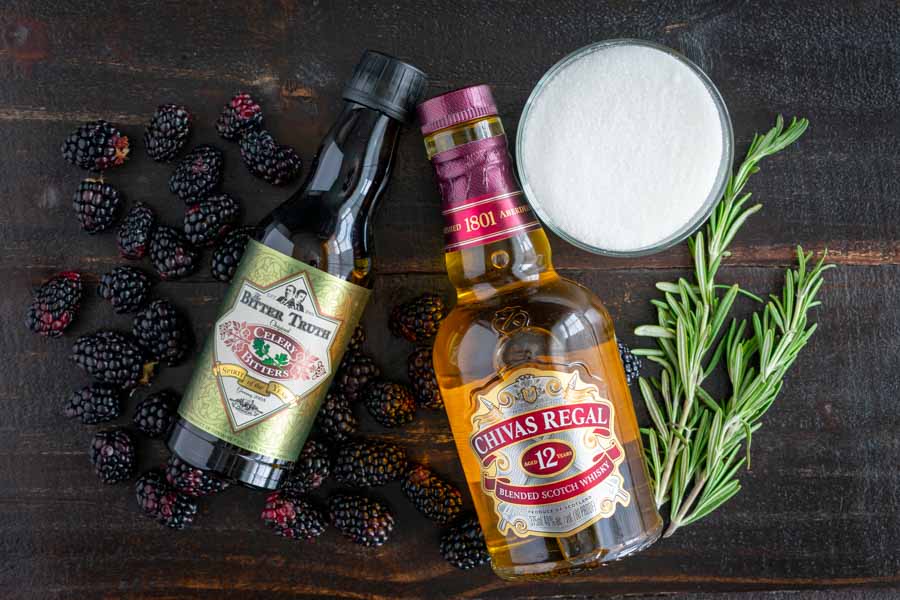
Since I didn’t have to invest in a cocktail smoker, I was okay with being a little splurgy on a bottle of scotch for this recipe. And I couldn’t find it! Well, the Black Grouse brand called for in the recipe. I had a bottle of Chivas Regal, though, so I went with that.

I had equally bad luck with Scrappy’s Celery Bitters. Once again, I went with what I had on hand. But that’s where the bad news ends. I was able to find the blackberries, sugar, and rosemary with no problem. I know, it’s not much, but I’ll take it!

The Royal Affliction Ingredients
Blackberries, celery bitters, scotch, sugar, and rosemary

The Process

This cocktail has two parts: the blackberry syrup and the cocktail itself. The blackberry syrup was the majority of the work, and I made mine the day before I planned to make the cocktail. It was ready to go the next day when I made the cocktail.

Everything went according to the instructions, but I wasn’t sure what the author meant by “cleaned sprigs of rosemary”. I was thinking the leaves should be stripped off so I would be charring only the main stem. However, the photos with this recipe show rosemary sprigs with leaves, so I left them on. Leaves on made more sense to me (so they would flavor the smoke).

Prep, cooking, and total times aren’t listed with this recipe, but my time estimate wasn’t too far off. Here’s how my time was spent:

  • 5 minutes to prep the blackberry syrup
  • 30 minutes to cook
  • 3 minutes to make the cocktail
  • 38 minutes total (not including cooling time)

One last note on charring the rosemary. Since the tea light needs to be placed in a container (I used a rocks glass), you’ll probably need a long torch-style lighter to reach the wick.

Capturing the rosemary smoke in a cocktail glass
Capturing the rosemary smoke in a [eafl id="7910" name="stemless wine glass" text="cocktail glass"]

Seattle-Style Smoked Salmon Chowder

1

Have you ever been to the Northwest? I haven’t, but it’s on my bucket list. The closest I’ve come is a visiting on a culinary journey. Well, I’m continuing that journey today with this Seattle-Style Smoked Salmon Chowder. It’s full of typical chowder ingredients like potatoes, onion, and cream. And it also has one that I rarely see cooked: smoked salmon. but I love salmon in all forms except canned, so I’m willing to bet I will like this chowder. Let’s find out!

A smoked salmon chowder loaded with tender potatoes, cream cheese for creaminess, and capers for a little added zing! This tastes just like the stuff they serve at the Seattle Pike Place Market!

Recipe Author: Marzia at Little Spice Jar
Get the recipe

The Ingredients

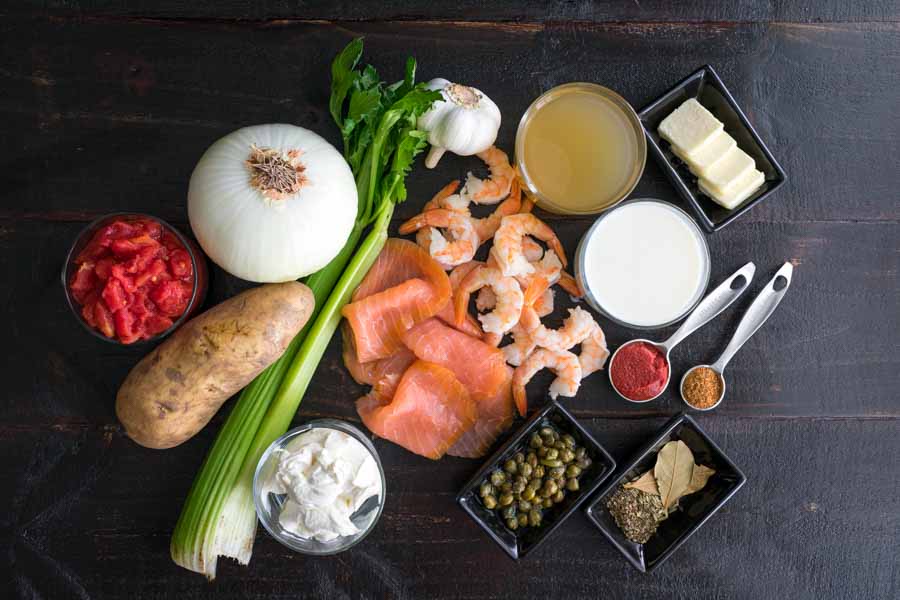
This smoked salmon chowder has a long-ish list of ingredients, but they weren’t too difficult to find. Of course, I had a few things on hand like the capers, spices, and tomato paste. I did have to buy the vegetables and seafood, though, and that was where I had some trouble.

The recipe calls for thick-sliced smoked salmon, but I couldn’t find any that mentioned that on their packaging. I just bought one and hoped for the best. It ended up being quite thin, but that didn’t seem to be an issue with the finished chowder.

I had selected unpeeled, raw shrimp when I ordered my groceries. I was okay with peeling them and thought I would use the peels to make a seafood stock. Well, they were out, and I ended up with peeled, cooked shrimp, so I had to use chicken stock. Both worked out, though. The shrimp just need to be warmed through, so using pre-cooked shrimp saved me a few minutes of cooking time.

Seattle-Style Smoked Salmon Chowder Ingredients
Smoked salmon, cream cheese, celery, potato, diced tomatoes, onion, garlic, shrimp, chicken broth, butter, heavy cream, tomato paste, Old Bay seasoning, bay leaves, fennel seeds, dried basil, and capers with brine

The Process

Making this smoked salmon chowder was very straightforward, and I didn’t have any difficulty. The instructions were very easy to follow!

First up was the prep work. I forgot to break it out in my time, but I think it took about 12 minutes. I usually do just enough prep work in order to get the cooking started, then I finish up as I cook. However, this recipe moves fast, so I decided to get most of the prep work out of the way first. The only thing I did once I started cooking was to chop the smoked salmon and shrimp.

The recipe took me 39 minutes from start to finish, and I chose not to chill it before serving. I did have leftovers the next day, though, and I didn’t notice much of a change in the flavor. I think the potatoes absorbed some of the flavors but that’s the only difference I noticed.

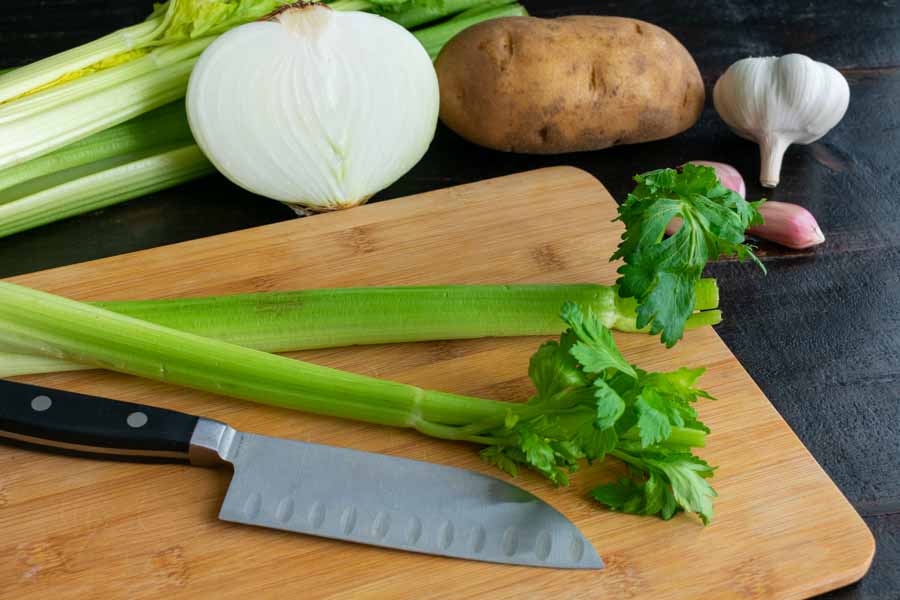
Prepping the vegetables

Chocolate Overnight Oatmeal Smoothie

0

It’s been a long time since I’ve reviewed a smoothie recipe, and that changes today. I have plenty of delicious sounding recipe saved to my Drinks board, but this one seemed to fit in. Why? Well, like the Fried Chicken Livers I just made, this recipe looks indulgent but it’s really healthy. It also gets a bonus for having chia seeds–I’ve been looking for a reason to try them but have never gotten around to it. This smoothie is packed full of goodness and promises to taste good. Let’s find out if it does!

Chocolate lovers rejoice! Take overnight oats to a whole new level of deliciousness with this thick and creamy Chocolate Overnight Oatmeal Smoothie. Silky and smooth, it’s got that stick-to-your-ribs feeling of a bowl of oats that’ll keep you satisfied for hours.

Recipe Author: Amanda at Running with Spoons
Get the recipe

The Ingredients

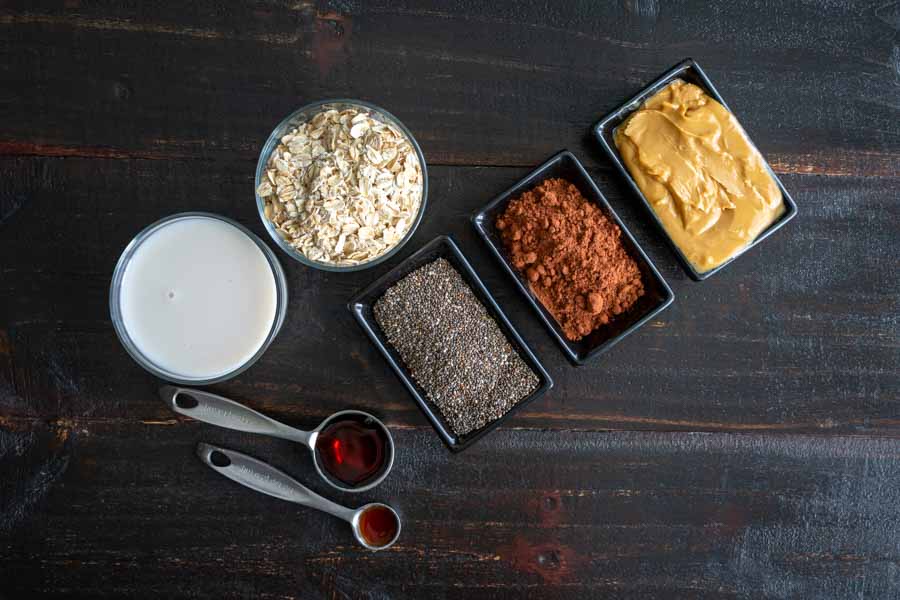
Most of the ingredients for this oatmeal smoothie were just hanging out in my pantry. I had the all-important oats plus the cocoa, maple syrup, and vanilla extract.

That left me to buy the almond milk and chia seeds, but both were readily available at my favorite grocery store. The organic chia seeds I bought were $10.99 for 15 ounces. This is one time that I regret not ordering them, though, since I found much better deals on Amazon.

Chocolate Overnight Oatmeal Smoothie Ingredients
Unsweetened vanilla almond milk, maple syrup, vanilla extract, chia seeds, rolled oats, cocoa powder, and almond butter

The Process

Making my oatmeal smoothie was so easy! I’m a fruit smoothie kind of person, but this smoothie had no peeling or chopping involved. Instead, all I had to do was add all of the ingredients to a blender and let everything sit overnight. The next day I blended it all and enjoyed my smoothie. Here’s how my time was spent:

  • 3 minutes to prep the smoothie
  • 2 minutes to blend
  • 5 minutes total (plus sitting overnight in the refrigerator)

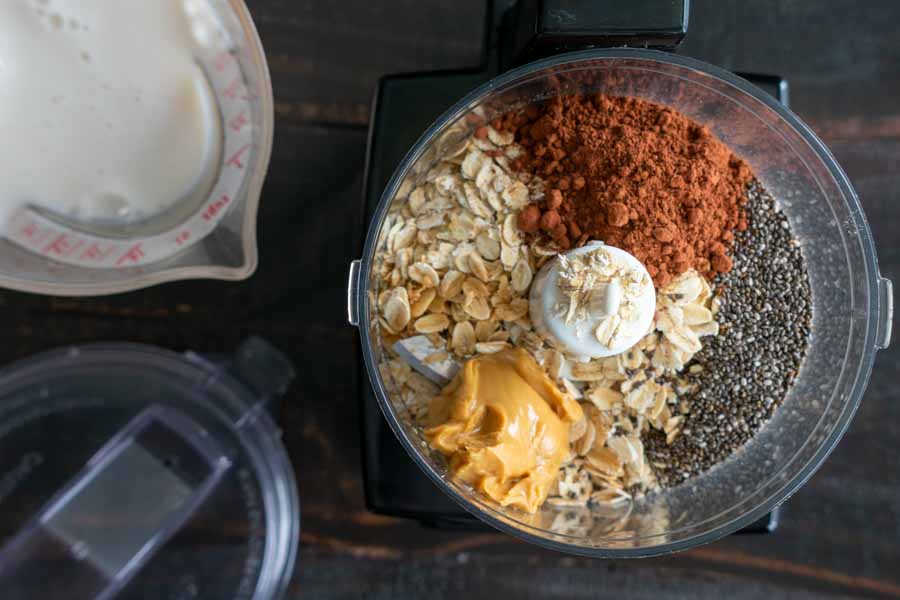
I chose to use my mini-prep instead of my full-size blender. It was just big enough to hold a single serving and easier to fit into an already full refrigerator.

All the oatmeal smoothie ingredients except the almond milk in my mini-prep

Fried Chicken Livers

One of my favorite foods ever is chicken livers. And although my mom made them best, I do love trying them in new recipes, and that’s what today is all about with this Fried Chicken Livers recipe. Well, that and my new discovery that chicken livers aren’t as unhealthy as I always thought they were. They are high in cholesterol, but they are also rich in things like iron, protein, folate, and other vitamins and minerals. The conclusion I drew from reading several articles is my previous rule of chicken livers once a year was overly cautions. I can have chicken livers a little more often, and I will.

So, chicken livers must be the cheapest source of protein you can buy that taste’s half good. The problem is a lot of people hate the “livery” taste which is normally because they are cooked to death. Luckily adding a few simple spices to your chicken livers and cooking for ‘just’ the right amount of time will ensure you have a tasty meal (like we have here) or side or starter.

Recipe Author: Mongolian Kitchen
Get the recipe

The Ingredients

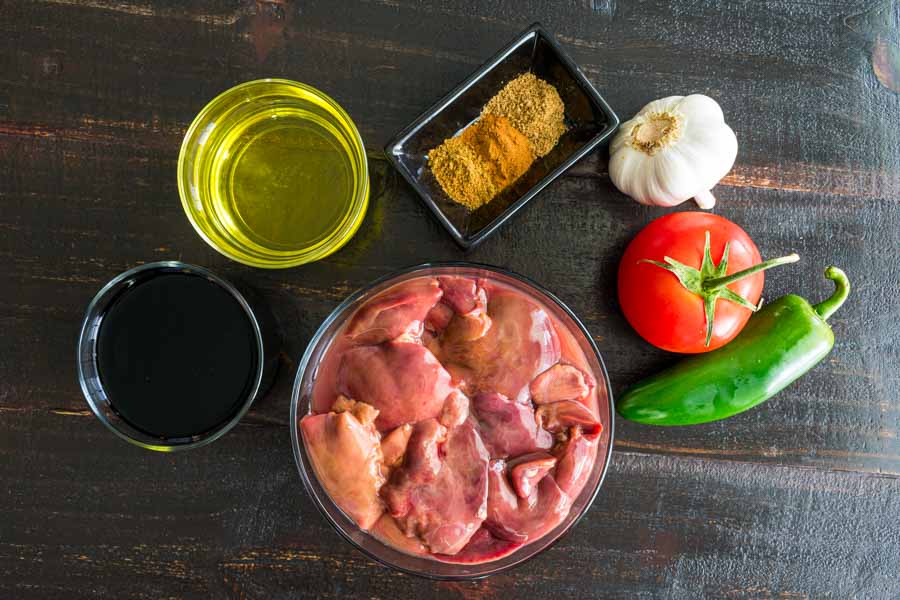
This fried chicken livers recipe is simple, from the list of ingredients to the steps to cooking it. Let’s start with the ingredients. I had most of the ingredients on hand either as leftovers (the chili pepper and garlic) or items I regularly keep in my pantry (the spices, oil, and vinegar). In fact, all I had to buy were the tomato and chicken livers, and you know how I love those super-short grocery lists!

Fried Chicken Livers Ingredients
Chicken livers, balsamic vinegar, olive oil, cumin, cinnamon, cardamom, garlic, tomato, and chili pepper

The Process

The instructions for this recipe were short and to the point. Basically, do a little chopping, then throw everything into a skillet, cover, cook for 10 minutes, wander off to do the dishes and come back to finish up. I did give everything a little stir after it was all in the pan. I couldn’t’ help myself.

There was a moment of hesitation when I saw the chili pepper didn’t have to be chopped or sliced. It seemed odd to me, and I didn’t think it would add any flavor without being cut, but when in Rome, as they say.

After the 10 minutes was up, I raised the heat to high and stir-fried the livers for 5 minutes. The tomatoes had almost disintegrated by the time I started this step, and they were completely unrecognizable after. I was a little concerned about that, but I kept going—the smell was too good not to!

One note on the chicken over prep work. It wasn’t specified in the instructions, but I separated the livers into halves before adding them to the pan. It’s just a preference I have—I hate having to separate them after they are cooked.

The entire process was very quick and easy. It took me 5 minutes to prep everything and 19 minutes to cook, for a total of 24 minutes.

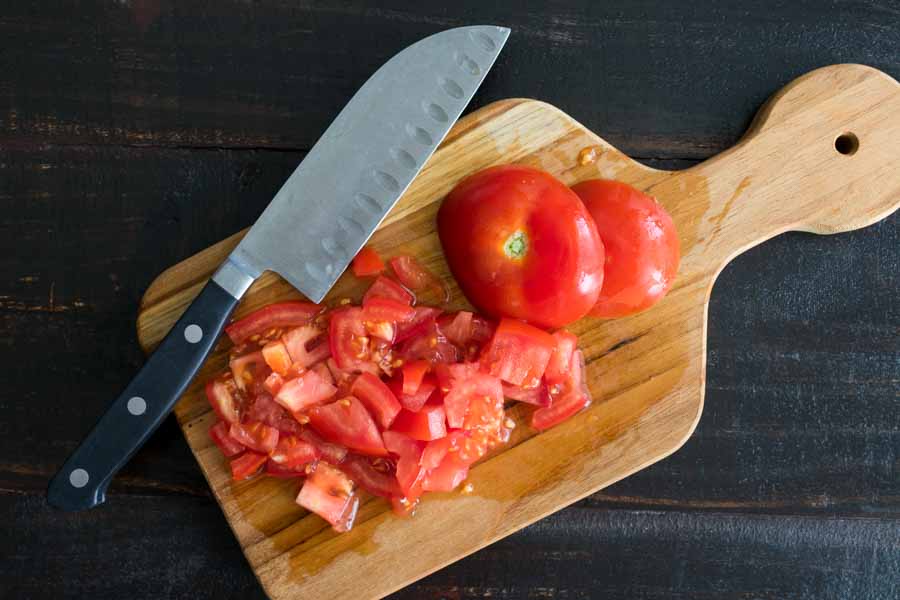
Chopping the tomato
Chopping the tomato

Filet Mignon in Mushroom Sauce

Some things seem like they were made to go together, and I find that’s true for beef and mushrooms. It’s such a good combination, whether it’s a mushroom and Swiss burger, stroganoff, or steak topped with mushroom sauce. Well, that last one is the combo I’m focusing on today with this Filet Mignon in Mushroom Sauce recipe. Every once in a while I find a good deal on filet mignon, and I end up freezing a few nice steaks. Sometimes I save it for a special occasion, but I usually can’t wait. I inevitably declare a random “special occasion” and cook up a nice meal for no real reason other than I can. It’s good to treat yourself, and today is one of those random “special occasion” days.

An easy, excellent recipe for filet mignon. The mushroom wine sauce is mouthwatering and will give you plenty of recipe requests. Perfect for any occasion.

Recipe Author: Natasha at Natasha’s Kitchen
Get the recipe

The Ingredients

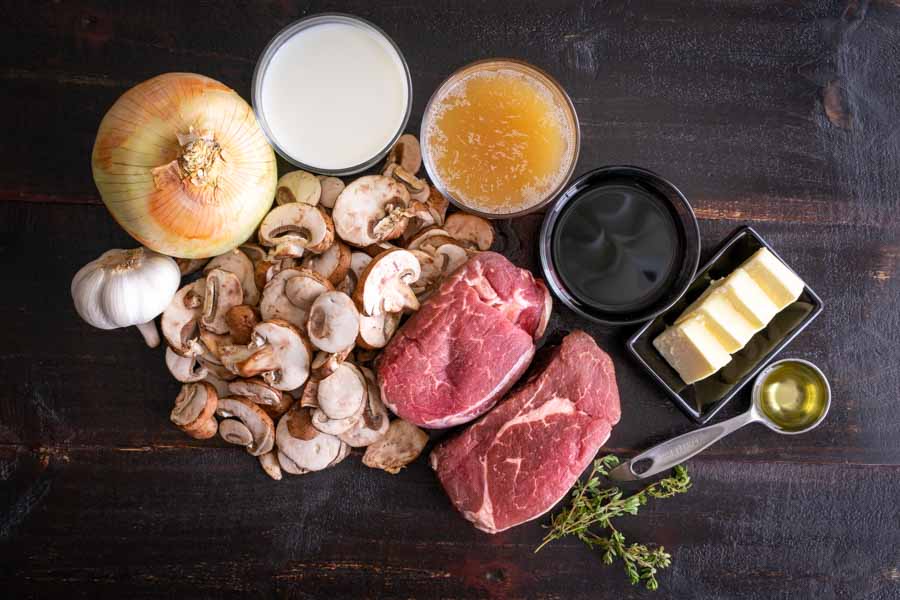
Two filet mignon steaks, check. I had them in the freezer, just waiting for this recipe. The most important ingredient was taken care of, but I still had to buy most everything else. That wasn’t a problem, though, and my usual grocery store had everything I needed. I even managed to find the mushrooms already sliced.

Filet Mignon in Mushroom Sauce Ingredients
Filet mignon, cremini mushrooms, garlic, onion, heavy cream, beef broth, merlot, butter, olive oil, and thyme

The Process

One nice thing about filet mignon is that it’s quick to cook since it’s best when rare to medium-rare. That was true for this recipe, and the steaks took only six minutes (3 minutes per side). However, the mushroom sauce took a bit more time and effort, bringing the total time up to 39 minutes, just short of the 45 minutes listed.

Although this recipe took significantly more time than simply searing the steaks, the effort was well worth it. Making the mushroom sauce involved simple cooking techniques and a little waiting. But everything went according to the instructions, and I didn’t have any issues.

Since the mushrooms were pre-sliced, I had a lot of the prep work already done. In fact, I was able to finish the prep work while the mushrooms cooked (step 1). It was close, though, because stripping the leaves off the thyme took a while. You might want to prep it in advance if you want to take things at a leisurely pace.

As far as special equipment goes, this recipe doesn’t have any. Everything I used was very basic including measuring spoons and cups, a kitchen knife, a cutting board, and a large cast-iron pan.

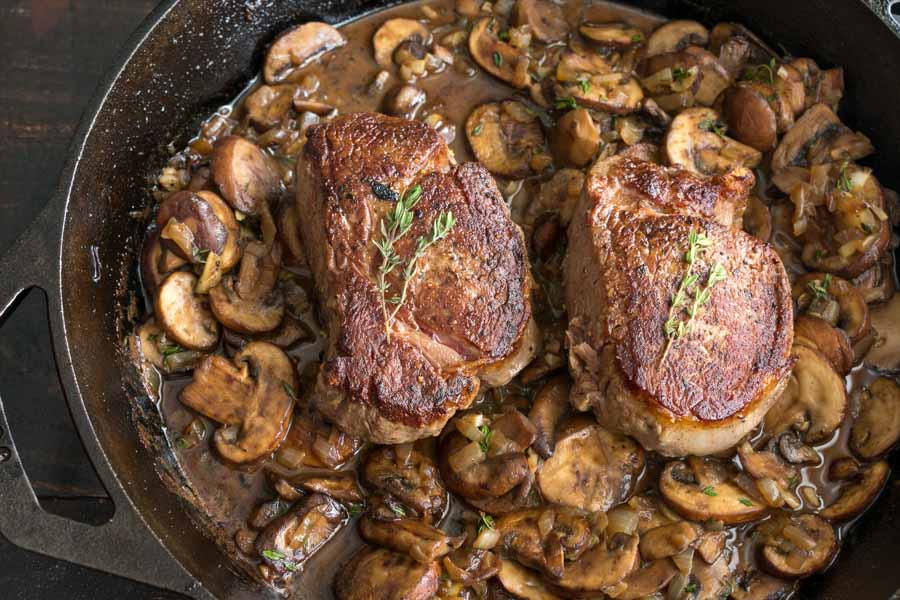
Filet mignon and mushroom sauce in a cast iron pan

Summer Breeze Cocktail

0

Have you ever tried a cocktail with cilantro? No? Neither have I, but I’m about to! I’m no stranger to cucumber cocktails or adding herbs to cocktails, but cilantro will be a first. This Summer Breeze Cocktail recipe is full of things I know I like: vodka, prosecco, mint, lime, and cucumber. The addition of cilantro is what made me choose it, though. I have to admit that I can’t really wrap my head around a drink made with cilantro. But there’s only one way to find out if it’s good, and that’s to give this recipe a try!

Summer Breeze Cocktail is an easy summertime drink that will cool you off on a hot day! Cucumbers mix with limes, prosecco & vodka to flavor up your day!

Recipe Author: Linda Warren at 2 Cookin’ Mamas
Get the recipe

The Ingredients

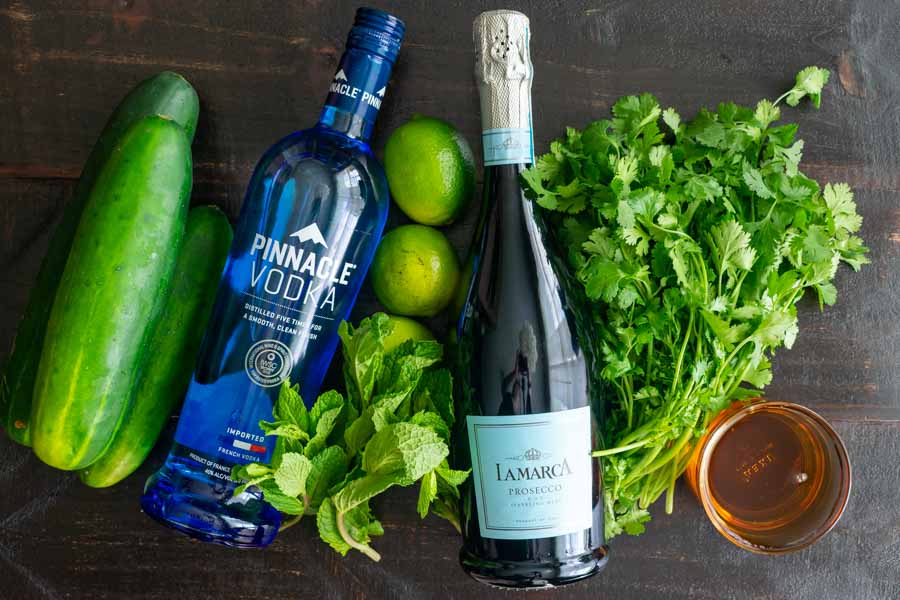
I had to shop for everything in this recipe except the salt and prosecco. I know weird combo! But the shopping list for this recipe was short, and everything was easy to find. My local grocery store even had the agave nectar. I’ve never tried it, so I’m looking forward to finding out how sweet it makes this recipe.

The mint I bought was the kind that comes in the small clamshell containers. They don’t have much inside, and I used two containers to get one cup of mint leaves.

Summer Breeze Cocktail Ingredients
Cucumbers, vodka, limes, mint, prosecco, cilantro, and agave nectar

The Process

This recipe was a little more involved than most cocktails, but the work paid off. First up was to make the juice. The author recommends a Ninja blender, but I had to go with my trusty smoothie blender. Maybe one day…

Back to the recipe. It went according to the instructions and was pretty easy. There was some peeling, chopping, and juicing involved, but it wasn’t difficult at all. I expected to use at least three of the cucumbers I bought (I bought four), but two cucumbers gave me a little over three cups once I peeled and chopped them.

I also got out my electric juicer for this recipe. It made juicing four limes almost effortless and was worth having to was a few extra pieces when I cleaned up.

Once everything was blended, I put a mesh strainer over a mixing bowl and poured in the cucumber mixture. I used a wooden spoon to stir the mixture so it would drain faster. Then I took the back of the spoon and pressed the pulp until I couldn’t get any more liquid out of it.

The vodka mixture went into a pitcher and I let it chill overnight before I added the prosecco. Here’s how my time was spent on this recipe:

  • 12 minutes to make the vodka mixture
  • 5 minutes to add the prosecco and make garnishes
  • 17 minutes total (time to chill not included)
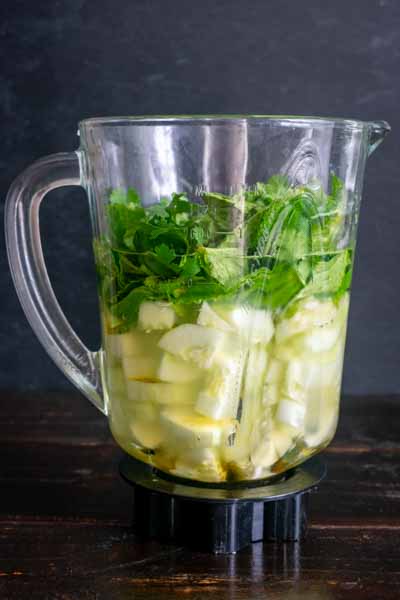
Getting ready to blend the cucumber, mint, cilantro, agave nectar, lime juice, and vodka

Arugula with Slow-Roasted Cherry Tomatoes and Burrata

0

I have a problem… with raw tomatoes. I just don’t like them. They’re okay in things like pico de Gallo or anything that has enough other flavors to cover up the raw tomato taste. This is, at worst, an occasional minor inconvenience for me. However, it completely eliminates Caprese salad from my diet. Those beautiful salads made of fresh mozzarella, sweet basil and slices of tomato drizzled in olive oil. They look so lovely, but I just can’t deal with the raw tomato. Well, this Arugula with Slow-Roasted Cherry Tomatoes and Burrata recipe might have solved that problem. Let’s find out!

An off-season version of Caprese salad made with roasted grape tomatoes, burrata and peppery arugula.

Recipe Author: Emily Pater at West of the Loop
Get the recipe

The Ingredients

One of the appealing things about this recipe was the fact that it only has a handful of ingredients. I had to shop for most, but my regular grocery store had most everything.

One thing that did cause me some mild confusion was the type of tomatoes. The title says cherry tomatoes, but the ingredients list calls for grape tomatoes. I was going to buy cherry tomatoes, but the store only had grape. Decision made.

Unfortunately, the packages of tomatoes weren’t measured in pints. They were measured in pounds, and I’m clueless on how to convert a measurement of volume to weight. I ended up just guessing that two pounds of grape tomatoes would be enough since it looked like a lot.

And I picked the day they were out of fresh basil. Fortunately, I had some lightly dried basil on hand, so I substituted that. One container is the equivalent of a large bunch of fresh basil, so I used about half to approximate a small bunch of basil.

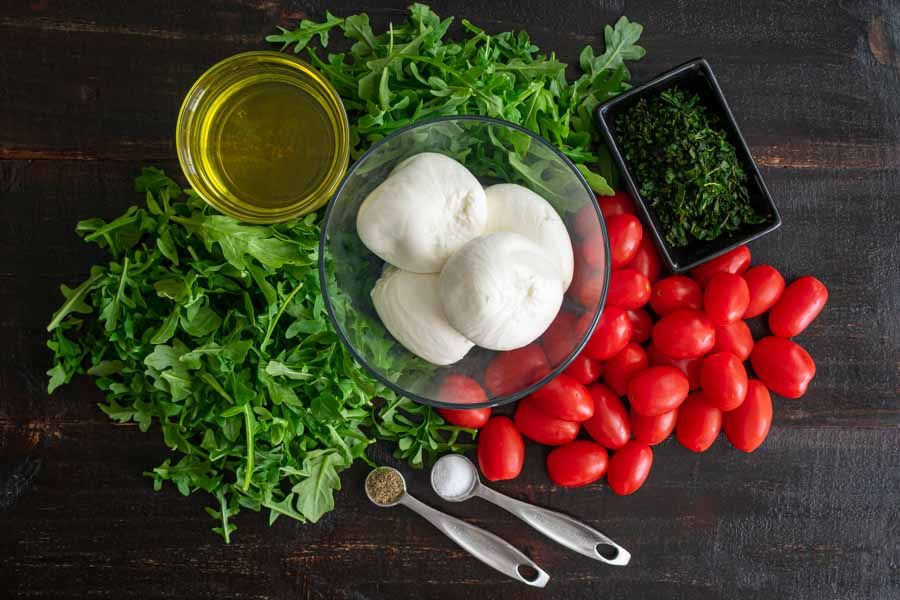
Arugula with Slow-Roasted Cherry Tomatoes and Burrata Ingredients
Burrata, arugula, olive oil, basil, grape tomatoes, salt, and pepper

The Process

Preparing this salad wasn’t difficult at all, but it did take some time to roast the tomatoes. Three hours, to be specific. I planned to have this salad with dinner, so I started it just after lunch.

Since I’m a perfectionist, I cut each tomato individually and didn’t use any shortcuts. (I know, I’m nuts!) It didn’t take long, though, and I had them ready to go into the oven in seven minutes.

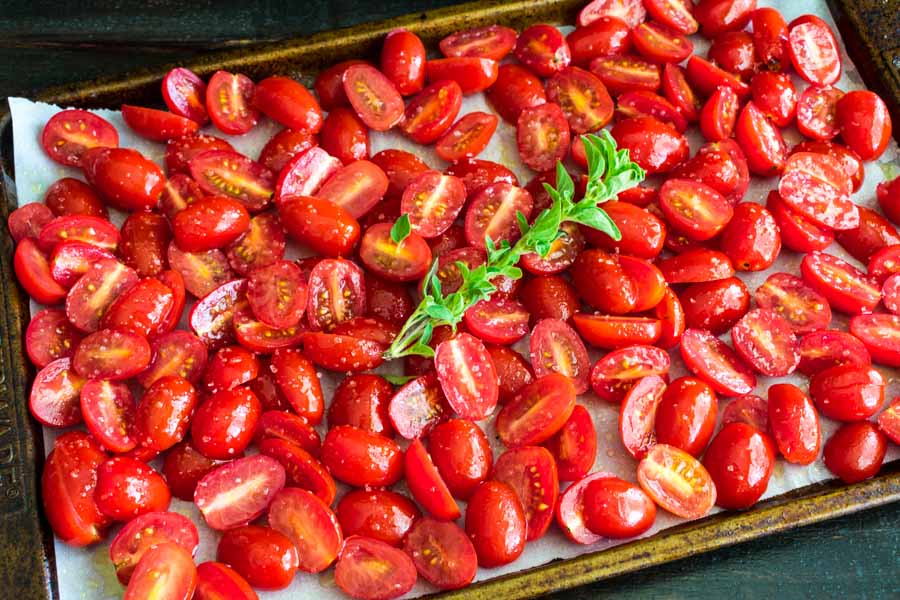
It’s not in the ingredients list, but the instructions say a sprig of rosemary or thyme may be added to the tomatoes. I happened to have some fresh oregano, so I added it to the sheet pan. I’m not sure it imparted much flavor, or it was extremely faint if it did.

Grape tomatoes and oregano before roasting

I finished putting the salad together once the tomatoes were done. It gave them a few minutes to cool down, and they did cool down pretty quickly.

Although I served the salad on a platter, it was easier to mix it in a large bowl and transfer it to the platter. That way the liquid from the roasted tomatoes thoroughly coated the arugula leaves and acted like a salad dressing.

Once they were transferred to a plate, I finished up by topping the salad with the burrata, olive oil, basil, salt, and pepper. Here’s how my time was spent on this recipe:

  • 7 minutes to prepare the tomatoes
  • 4 hours to roast the tomatoes
  • 4 minutes to mix the salad
  • 4 hours 11 minutes total
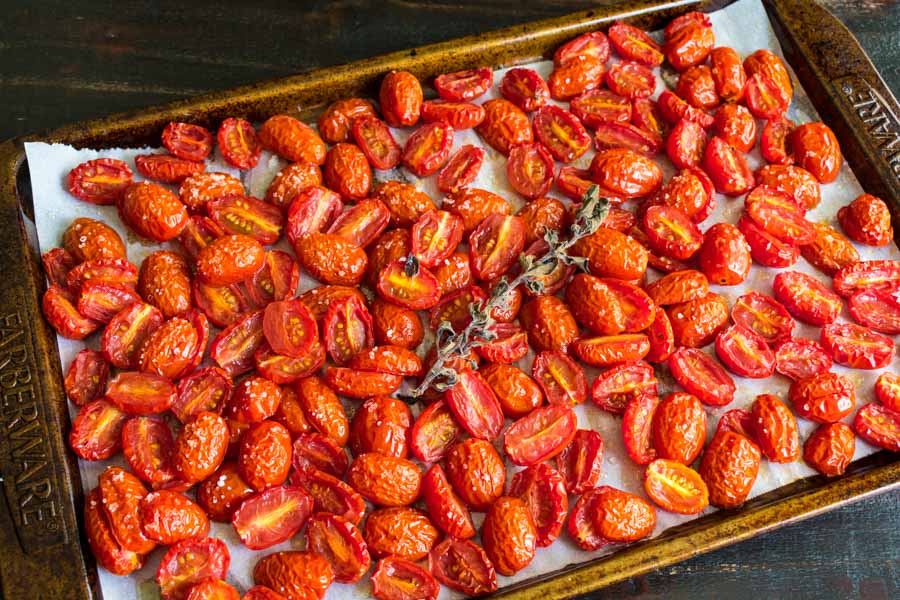
Roasted grape tomatoes and oregano
Grape tomatoes and oregano after slow-roasting for three hours

Slow Cooker Bourbon Baked Beans

0

Baked beans are such a classic summertime side dish! They work with barbecue, picnics, cookouts–pretty much any meal that you can eat in the backyard or on the patio. I’ve had some great baked beans, and they have one thing in common: they come from a restaurant. Canned baked beans are just not the same. But this Slow Cooker Bourbon Baked Beans recipe is full of everything that makes good baked beans: molasses, brown sugar, bacon, and spices. The addition of bourbon promises to make it extra special. Could this be the recipe that changes my mind on homemade baked beans? I’m skeptical, but then again… Bourbon.

No need to heat up the kitchen in any way, shape, or form for your summertime BBQ. With this Slow Cooker Bourbon BBQ Baked Beans recipe, you can let your beans simmer away on the low heat setting in your crockpot all morning.

Recipe Author: Christin Mahrlig at Spicy Southern Kitchen
Get the recipe

The Ingredients

When I decided to make this recipe, I didn’t notice that the main ingredients were canned pork and beans. It seems like cheating because I imagined starting with dried beans, but I went with it because baked beans were the perfect side dish for the Summertime Fried Chicken Sandwiches with Tangy Slaw I just made.

The list ingredients for this recipe are on the long-ish side, but it’s full of easy to find items. I had a few things in my pantry like the spices, mustard, and ketchup. The rest went onto my grocery shopping list, but I didn’t have trouble finding any of them.

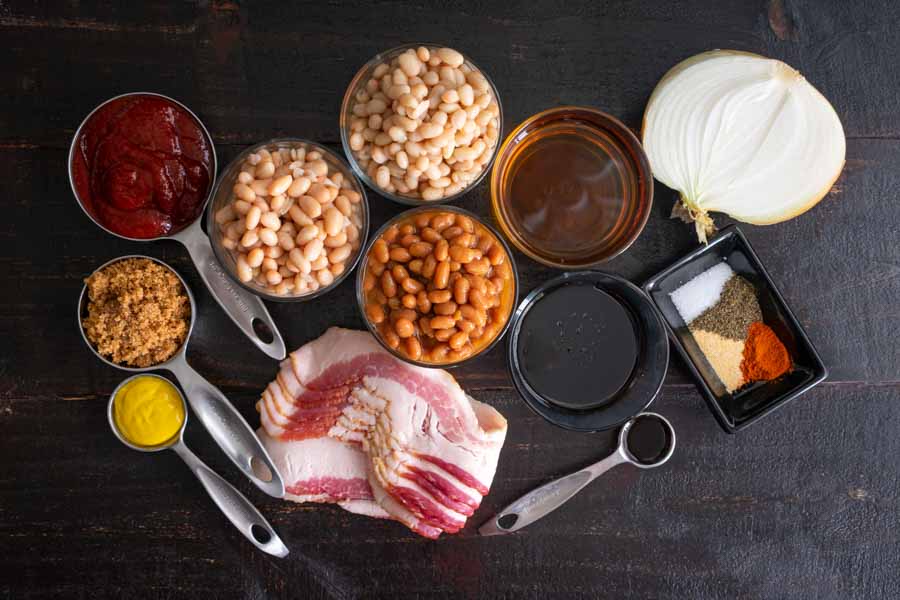
Slow Cooker Bourbon Baked Beans Ingredients
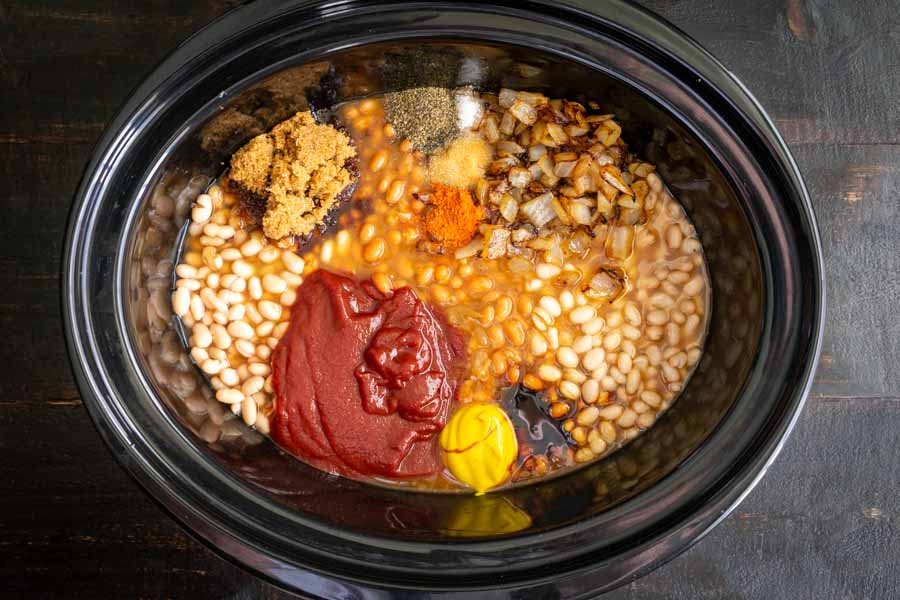
Pork and beans, bacon, mustard, brown sugar, ketchup, northern beans, navy beans, bourbon, onion, salt, pepper, garlic powder, cayenne pepper, molasses, and Worcestershire sauce

The Process

Making these baked beans wasn’t quite as simple as dumping everything into my slow cooker, but it was pretty close. I did have to fry the bacon and chop and fry the onion and garlic, but that was easy enough.

And I did dump everything else into the crockpot while they were cooking. Then it was just a matter of stirring it all together and waiting for it to be ready. Well, not quite all since the bacon had to be added toward then end of cooking, but you get the idea.

Only the cooking time in the crockpot was listed, but here is how my time was spent:

  • 17 minutes to prep
  • 4 hours 20 minutes to cook
  • 4 hours 37 minutes total
All the ingredients in a 6-quart crockpot

Summertime Fried Chicken Sandwiches with Tangy Slaw

Have you been grilling this summer? I sure have! My propane grill gets used a lot and that’s especially true in the summer. But today I’m keeping the summer part and losing the grill. Instead, I’m going to fry, something I rarely do. However, this Summertime Fried Chicken Sandwiches with Tangy Slaw recipe sounds way too good to pass up. Fried chicken and coleslaw is a classic summertime treat, so I’m sure my grill will get over it.

SUPER YUMMY fried chicken sandwiches loaded with Swiss cheese, bacon, pickles, slaw, and honey dijonnaise. Yum!

Recipe Author: Lindsay at Pinch of Yum
Get the recipe

The Ingredients

Alright, there are a lot of ingredients in this recipe! But they are broken down into sections according to how they are used, and that helped me keep my sanity. I had to buy quite a few of the ingredients for these fried chicken sandwiches, but they were all easy to find.

Although I had them on hand, I bought extra cooking oil (I couldn’t find peanut, so I used canola) and mayonnaise. I used a lot of both, and I needed the extras. Oh, and I had some creole seasoning on hand (always), so I used that as the seasoning in the marinade and breading.

One thing I didn’t have to buy was the buttermilk. I recently started freezing my leftover buttermilk, and it worked like a charm in this recipe. I thawed eight 1-ounce ice cubes to make one cup of buttermilk.

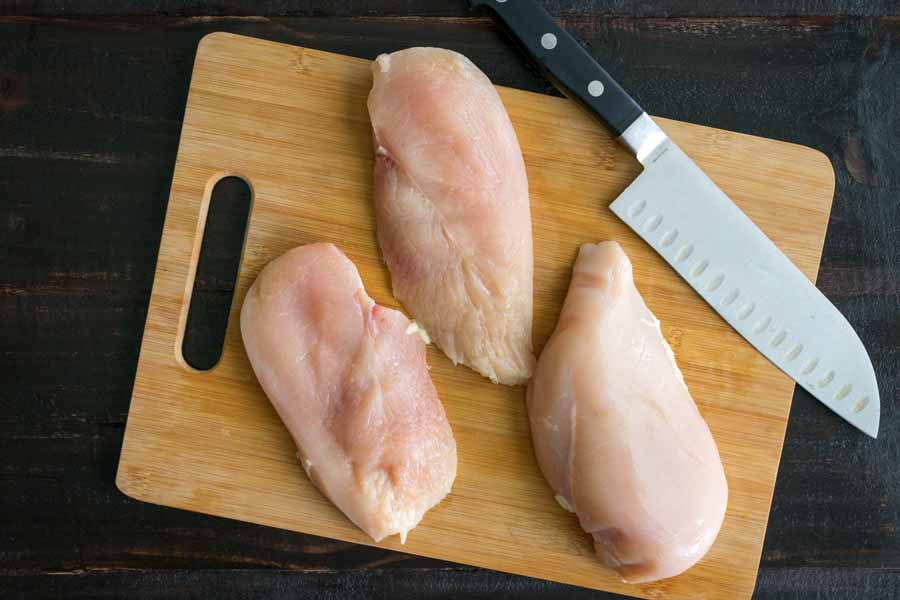
Lastly, you might only need to buy one chicken breast (two teardrop-shaped halves). I bought four per the recipe and only needed two because I cut each one into thinner fillets. Four chicken cutlets would also work if you want to eliminate some work.

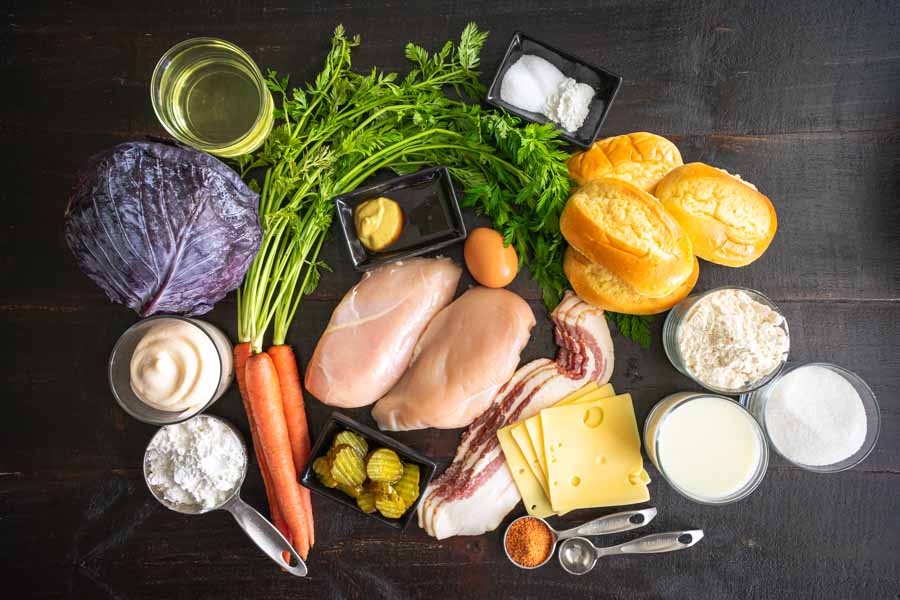
Summertime Fried Chicken Sandwiches with Tangy Slaw Ingredients
Chicken breasts, pickles, carrots, cornstarch, mayonnaise, cabbage, vegetable oil, dijon mustard, honey, egg, salt, baking powder, brioche buns, flour, sugar, buttermilk, Swiss cheese, creole seasoning, vinegar, and bacon

The Process

Like the ingredients, the instructions were broken down nicely. There was a lot to do, but having it split into manageable chunks really helped.

First up was getting the chicken marinated. Once I had the breasts filleted, I mixed up the marinated and popped it into the refrigerator for four hours.

About an hour before it was ready, I got started on the rest of the prep work: mixing up the breading ingredients, frying up some bacon to top the sandwiches, and making the slaw. That gave me plenty of time to get everything ready and clean up before I fried the chicken.

My mandoline came in very handy for the coleslaw! By the way, I only used about 1/4 of the head of cabbage and one carrot for the slaw. That made more than enough for my fried chicken sandwiches, though, and I had plenty of leftovers.

Filleting the chicken breasts

For a recipe with so many moving parts, this one went very smoothly. I was impressed! Here’s how my time was spent:

  • 4 minutes to make the marinade
  • 4 hours to marinate the chicken
  • 21 minutes to bread and fry the chicken in 2 batches
  • 4 hours 25 minutes total
And here is how long it took for the prep work I did while the chicken was marinating:

  • 2 minutes to make the breading
  • 10 minutes to make the slaw
  • 6 minutes to fry the bacon
  • 2 minutes to make the honey dijonnaise
  • 20 minutes total
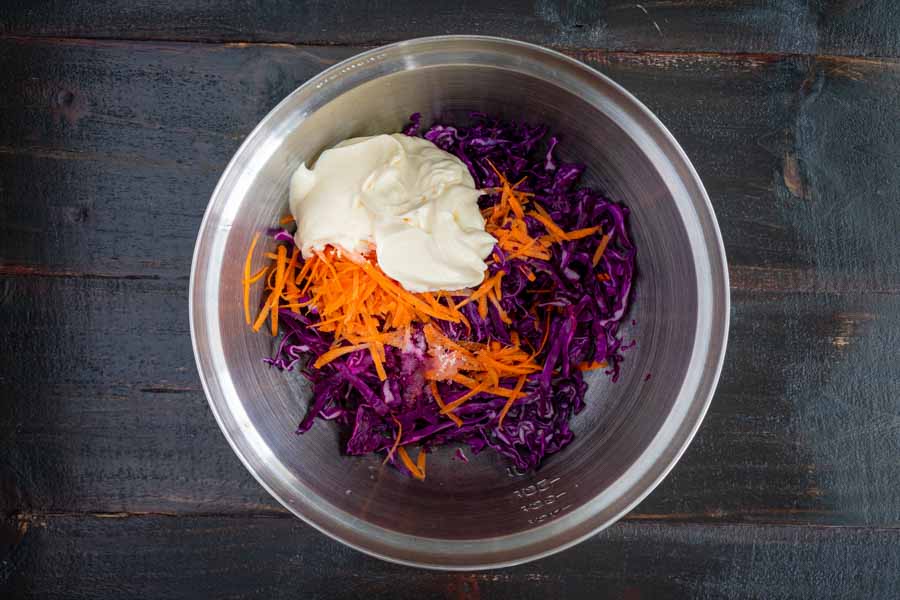
Ingredients for the slaw
Ingredients for the slaw. I used red cabbage to make it colorful.

Warm Kale Salad with Goat Cheese, Pine Nuts and Sweet Onion Balsamic Dressing

0

I was never a salad person before I started this blog, but I’ve become one. I think that’s one of the best things to come out of this endeavor! And I’ve blogged lots of salads, but this week’s salad recipe is something new: a warm salad. Specifically, Warm Kale Salad with Goat Cheese, Pine Nuts and Sweet Onion Balsamic Dressing. I’ve never heard of a warm salad made with greens, so I was instantly intrigued. Kale, goat cheese, pine nuts, and balsamic dressing are all great, but warm? This is one of those recipes I have to try because it sounds so odd to me, even though it’s filled with things I like. Let’s get started!

A bright, fresh salad made of tuscan kale, creamy goat cheese and pine nuts, tossed with a warm sweet onion balsamic dressing. Simple and so tasty!

Recipe Author: Katie at Veggie and The Beast
Get the recipe

The Ingredients

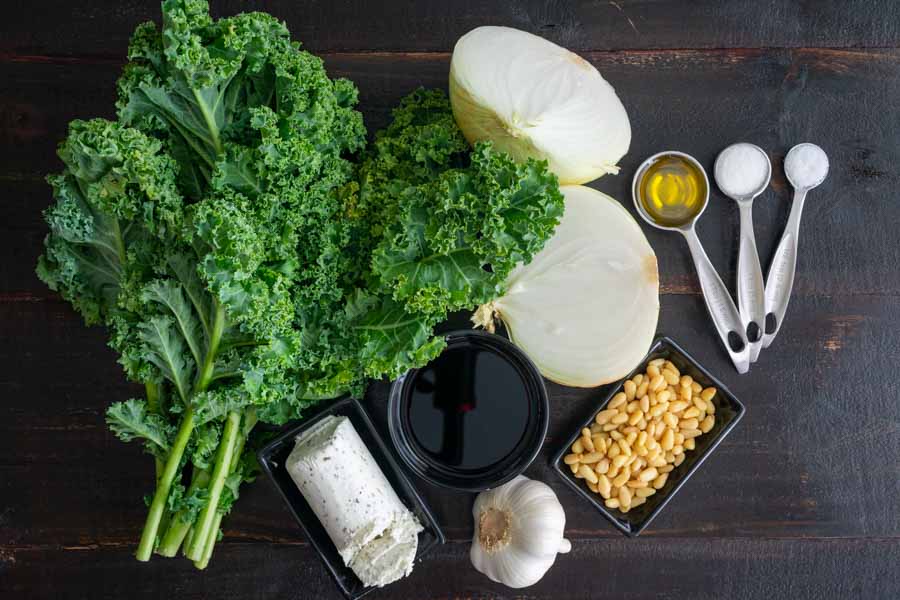
So my warm salad journey began with gathering the ingredients, of course. I had most of the ingredients on hand, and I think all I had to buy was the kale and goat cheese.

The smallest package of goat cheese I found was four ounces, which was a little over the three ounces listed in the recipe. I used it all in the salad so nothing went to waste. More goat cheese is a good thing in my book!

I also ended up with a block of herbed goat cheese. I couldn’t find plain, but I figured the extra flavor wouldn’t hurt.

Warm Kale Salad with Goat Cheese, Pine Nuts and Sweet Onion Balsamic Dressing Ingredients
Kale, onion, olive oil, sugar, salt, pine nuts, garlic, balsamic vinegar, and goat cheese

The Process

The instructions for this recipe were short and easy to follow. Everything went according to plan, and I had my onions and garlic cooked up in just a few minutes. I was even able to prep the other ingredients while they cooked in the olive oil (I used my smallest skillet).

Then I poured the hot oil, onions, and garlic into my mini-prep and blended it with the balsamic vinegar to make the salad dressing. The oil was very hot, but it wasn’t a problem.

The only part I was worried about came in step three. It says to pour the blended salad dressing over the kale and massage thoroughly. The dressing was still steaming hot, and I was worried about burning my hands. I very cautiously began this step, and I was pleasantly surprised to find the dressing had cooled significantly. I was able to comfortably and safely massage the salad addressing into the kale per the instructions. Whew!

I did change up the next step just a little, though. Pine nuts (and nuts in general) always fall to the bottom of a salad when tossed with the rest of the ingredients. For that reason, I decided to sprinkle them on top after I tossed the kale and goat cheese.

I almost forgot to mention that I toasted the pine nuts, too. It wasn’t in the instructions, but I love them toasted, so I went for it. It was quick and easy to do in my toaster oven.

The total time for this recipe was 12 minutes. That is pretty close to the 10 minute time listed on the recipe. Toasting the pine nuts might be the reason for the extra couple of minutes.

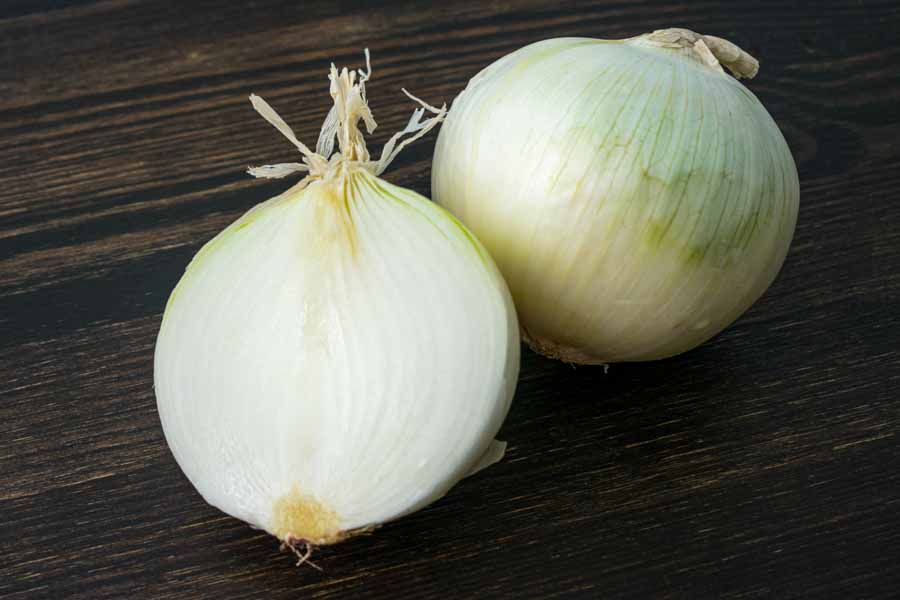
Peeled onion
Peeled onion

Steak Fajita Skewers with Cilantro Chimichurri

South Florida summers are hot and humid, making my air conditioner my favorite thing in the world. But sometimes I need to go outside, and grilling is one of the best reasons for that. My grill gets used a lot when the weather is clear, and I’m going to put it to use right now with this recipe for Steak Fajita Skewers with Cilantro Chimichurri. I make these Vegan Fajitas all the time, and they are phenomenal! And they are a good bit of work to serve and clean up with all the a la carte toppings. I’m hoping these convenient looking skewers will help with that. Let’s find out!

Steak Fajita Skewers with Cilantro Chimichurri are perfect for summer grilling! Big, juicy pieces of steak, sweet bell peppers and red onion all topped with an amazing cilantro chimichurri sauce. Healthy grilling never looked so good!

Recipe Author: Danae at Recipe Runner
Get the recipe

The Ingredients

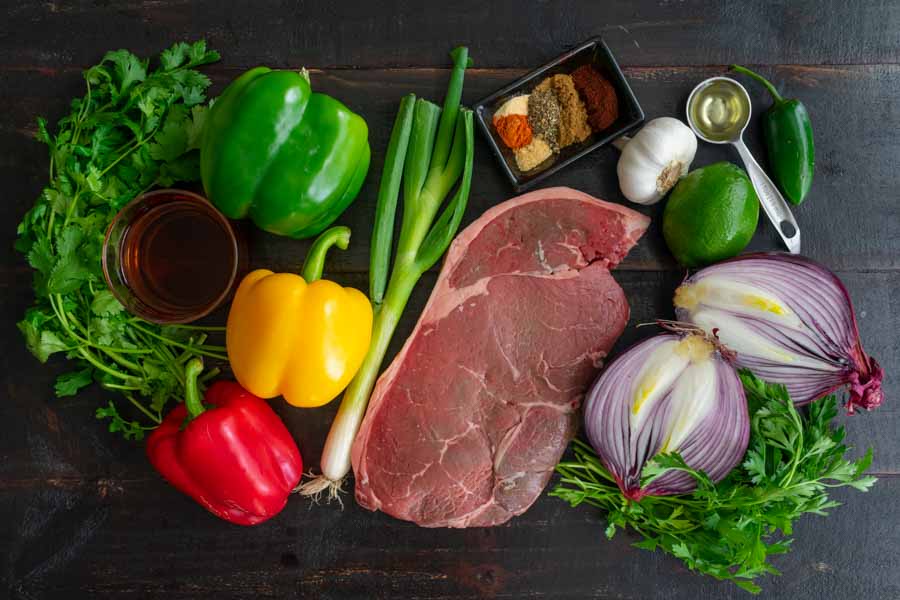
There are a lot of ingredients in these fajita skewers, and I was a little intimidated at first glance. When I printed the recipe, the ingredients took a little over a whole page! However, a closer look calmed me right down.

About half of the ingredients are dried spices, oil, and vinegar which I had in my pantry. I still had to buy the steak and quite a few veggies, and my local grocery store had everything. The top sirloin steak was the most expensive item at $10.30 for 1.7 pounds, and most of the produce was a few dollars or less.

Steak Fajita Skewers with Cilantro Chimichurri Ingredients
Top sirloin steak, green onion. red bell pepper, yellow bell pepper, red wine vinegar, cilantro, green bell pepper, onion powder, cayenne pepper, granulated garlic, oregano, cumin, chili powder, garlic, olive oil, jalapeno pepper, lime, red onion, and flat-leaf parsley

The Process

Heads up, you have to plan ahead for this recipe since the steak needs to marinate. The good news is that only a few hours in the spice mixture produces a lot of flavor. I marinated mine for about 3 hours. Here’s how the rest of my time was spent:

  • 5 minutes to prep the steak
  • 7 minutes to prep the vegetables
  • 6 minutes to make the chimichurri
  • 8 minutes to thread the skewers
  • 9 minutes to grill
  • 35 minutes total
The recipe doesn’t say the vegetables need to be marinated, but I prepped them and mixed them with the spices when I prepped the steak. I also mixed up the chimichurri in my mini-prep at the same time.

When it came time to grill, I opted for the longest time listed. The chunks of steak were pretty big, and I wanted to make sure they were cooked properly. I also rotated the skewers every few minutes to make sure they were cooked on all sides. The time was perfect, and the chunks of meat were cooked medium doneness with a little charring on them and the vegetables.

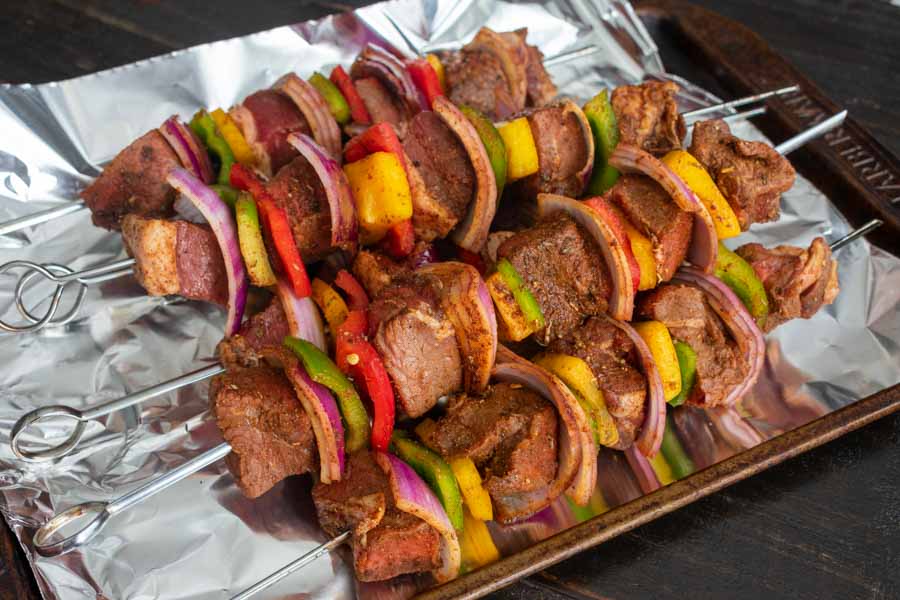
Speaking of the vegetables, I want to point out that there are a lot of them once they are cut up. I put a piece of onion plus two colors of peppers between each chunk of steak. That used up all the peppers and most of the onion. I also started and ended each skewer with steak to keep the vegetables from sliding around or off the end.

Skewers threaded with meat and vegetables just before grilling
Skewers threaded with marinated steak and vegetables