Home Blog Page 27

Greek Ravani / Revani

6

I started this blog in May of 2017, and one of the first recipes I made was Turkish revani. It was delicious! A dense cake made of semolina flour that was soaked in a lemon simple syrup. I had never had anything like it before or since. Until now, that is! I have found a few versions of revani in my journies through Pinterest, but this Greek Ravani is different enough to deserve a blog post. The main difference is the use of coconut, but it doesn’t stop there. Read on to find out how different this Greek version is.

Looking for a traditional Greek Ravani recipe? This locally sourced recipe with step by step instructions will help you make the most syrupy, fluffy, tasty ravani cake!

Recipe Author: Eli K. Giannopoulos at My Greek Dish
Get the recipe

The Ingredients

The basics ingredients of Greek Ravani were similar to its Turkish cousin: eggs, sugar, flour, and baking powder are included in both. This version is also soaked in lemon simple syrup, but it is made with lemon juice, not zest. That’s where the similarities pretty much end.

This version uses butter instead of oil and yogurt, and there is no semolina flour in it at all. That was a big surprise. Semolina four is commonly used to make pasta, and it’s finer than all-purpose flour. That made a denser cake that easily held together after soaking in syrup.

But the biggest difference was the addition of grated coconut and orange zest to the cake. Turkish revani had a plainer cake that relied on the syrup for its citrus flavor. This promises to be a much different cake.
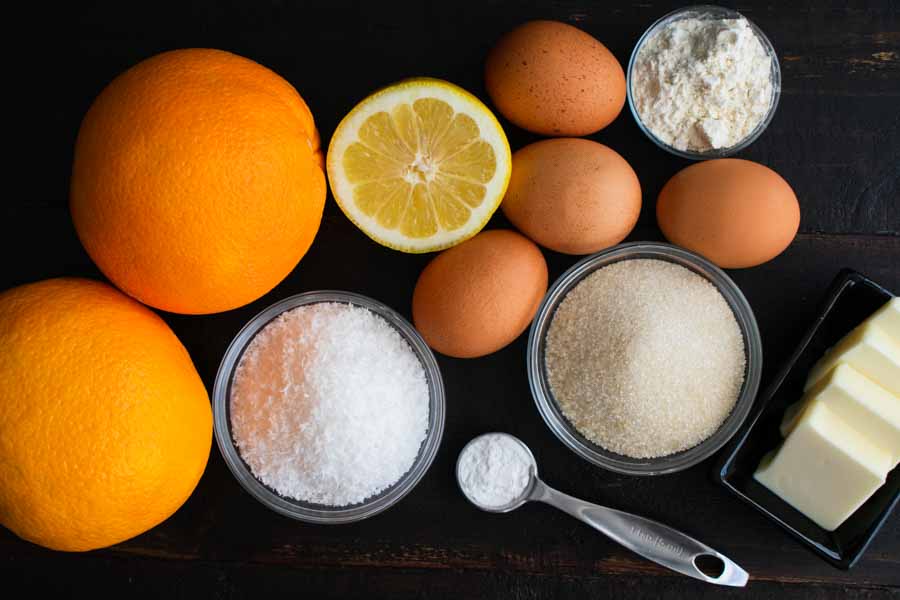
Greek Ravani / Revani Ingredients
Orange zest, lemon juice, eggs, flour, butter, sugar, baking powder, and coconut flakes

The Process

Even making these cakes was very different, and the Greek Ravani was more complex. The Turkish version was so simple. Make the syrup and let it cool, then mix up the cake ingredients in a single bowl, bake, and add the cooled syrup.

Greek Ravani used more steps and included separating the eggs and beating the egg whites into a meringue. The instructions promised this would create a fluffy cake and eliminate any eggy smell. I don’t remember that happening in the Turkish revani, but I went with it anyway.
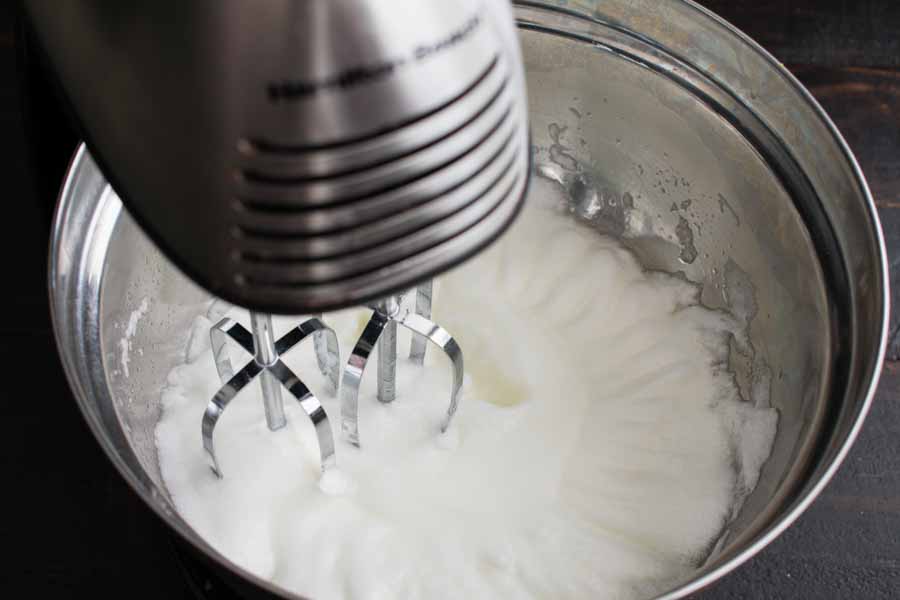
Beating the egg whites in a stand mixer

But before all that, I had to start with creaming the butter and sugar. I’m so glad I had a stand mixer for this cake! A hand mixer will work, but you might end up with a sore arm by the time you’re done!

I separated the eggs while the butter and sugar were mixing and added them to the stand mixer’s bowl. Then it was time to clean the beaters so I could make the meringue. I really appreciated the extra information about the beaters and bowl needing to be dry before I started.
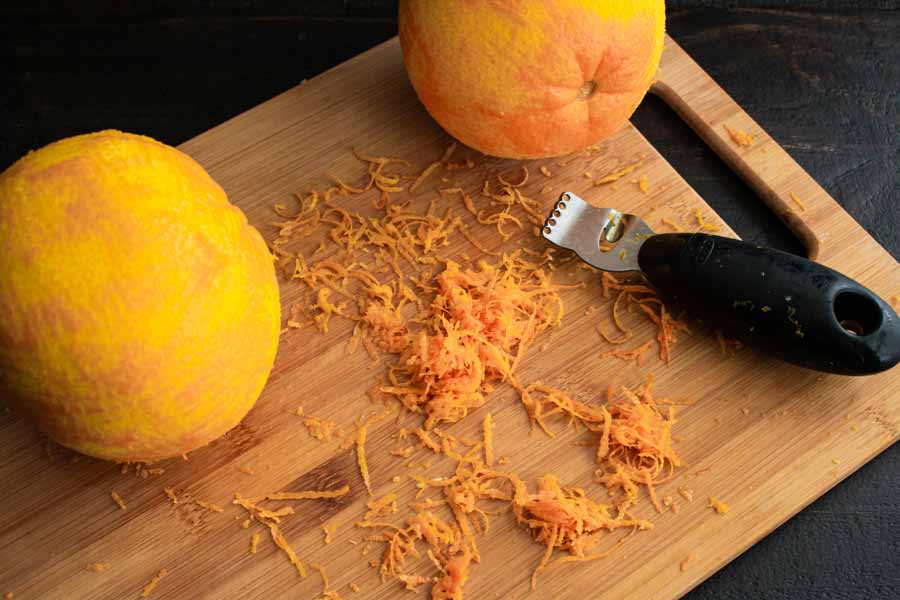
Zesting the oranges
Zesting the oranges

While the egg whites were being beaten, I mixed up the dry ingredients in yet another mixing bowl and zested the oranges. Then it was time to mix everything together to create the batter.

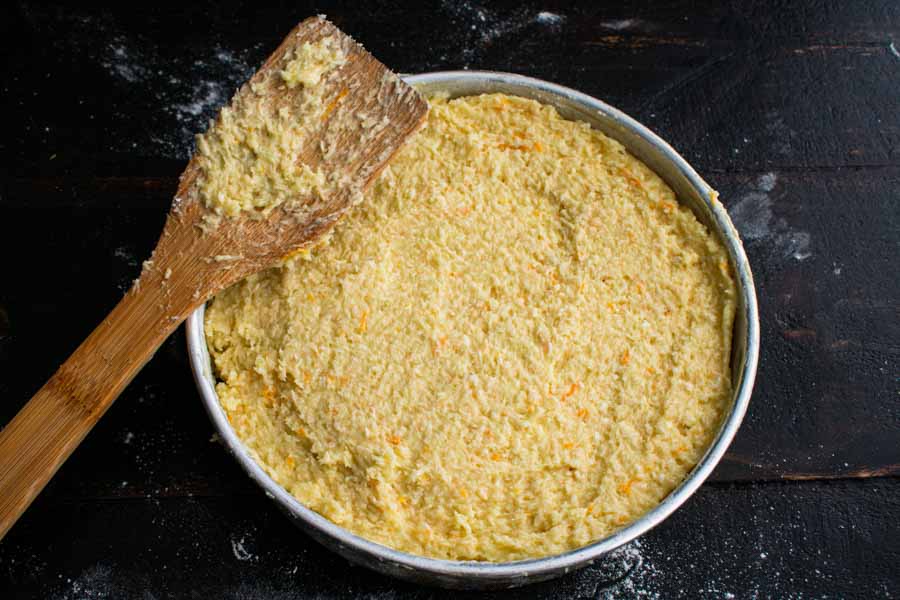
After that, I buttered and floured a cake pan and added the batter. (BTW, these quick release cake pans were perfect for this recipe.) It was very thick and came up to the top of the pan. It wasn’t in the instructions, but I placed the cake pan onto a sheet pan in case it overflowed (it didn’t).
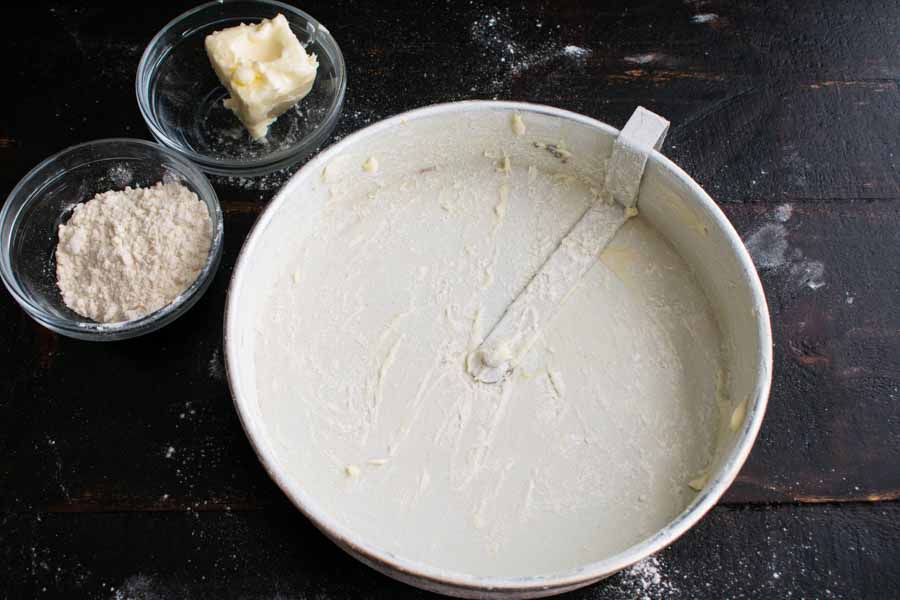
flouring the cake pan
Flouring the cake pan
The batter in an 8-inch cake pan

The Syrup

The syrup also has similarities and differences. Both used lemon simple syrup, but the Turkish version uses lemon zest and is made before the cake and cooled in the refrigerator. Then it was poured over the cake, and the lot was chilled before serving.

In Greek Ravani, the syrup is made after the cake and uses lemon juice. Then the warm syrup is poured over a slightly cooled cake, and the soaked cake is refrigerated to cool before serving, just like its Turkish counterpart.

Conclusion

Overall, this version had a lot more steps and took quite a bit longer to make. It had some similar ingredients and methods but it made a much different cake. Here’s how my time broke down:

  • 26 minutes to prep
  • 45 minutes to bake
  • 30 minutes to cool the cake
  • 13 minutes to make the syrup
  • 6 minutes to pour the syrup over the cake
  • 2 hours total
Greek Chickpea Soup With Lemon & Oregano (Revithosoupa)

0

I’m always up for Greek food! And although I love lamb, my husband doesn’t. That’s okay, though, because it keeps me from getting boring or overdoing the red meat. So this week I’m going in a completely different direction and trying a vegan Greek recipe. This Greek Chickpea Soup With Lemon & Oregano (Revithosoupa) still sounds delicious and has the benefit of being healthy, guilt-free, and cheap. I will have to invest some time waiting for it to simmer, but I’m betting the payoff will be worth it. Let’s find out!

This nutritious soup needs only a handful of ingredients to put together and can be made either in the instant pot or on the stovetop.

Recipe Author: Fotini at Real Greek Recipes
Get the recipe

The Ingredients

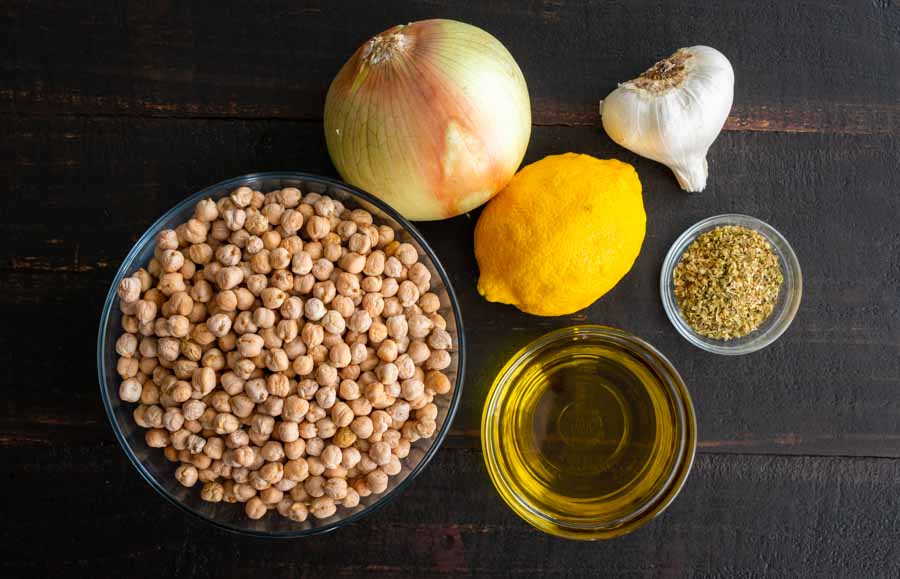
This revithosoupa recipe has a whopping six ingredients, and they’re pretty basic items. I did have to make a special trip to find the dried chickpeas, though. My local Whole Foods only carries canned ?

Greek Chickpea Soup With Lemon & Oregano (Revithosoupa) Ingredients
Chickpeas, onion, lemon, garlic, oregano, and olive oil

The Process

Making this revithosoupa was easy, but it did require a little planning because the chickpeas need to be soaked overnight. That wasn’t exactly difficult, and I soaked them in a medium mixing bowl left on my countertop overnight. Just be sure to add plenty of water because the chickpeas will absorb it as they soak. You don’t want to wake up to still dry chickpeas.

I also had to plan ahead when I was ready to cook since I don’t have a pressure cooker. This recipe has instructions for that and stovetop cooking, but the stovetop method requires 2-3 hours of simmering.

Once I figured out when I needed to get things started, actually making this soup was super easy. I did a little bit of chopping, converted liters to cups (8 1/2), and got cooking. Or simmering (I used a 5-quart pot).

I planned to let the soup simmer for three hours, but I found the chickpeas were nice and soft after two hours. All that was left to do was add the 6.3 ounces of olive oil and simmer for just 30 minutes more before finishing with the oregano and lemon juice.

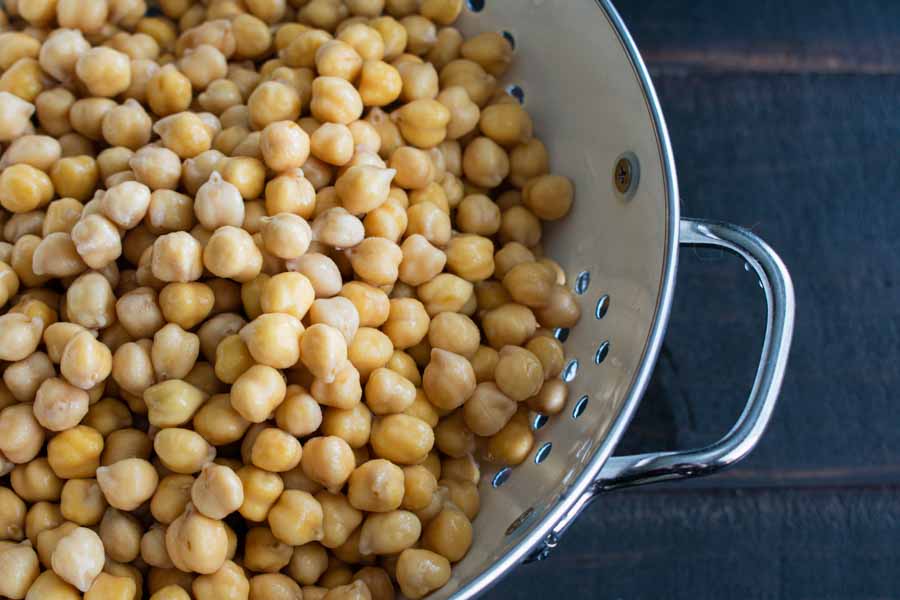
Draining the chickpeas after soaking overnight

Sausage Stuffed Shells with Spinach

Let’s talk about my newest obsession, stuffed shells. I had never made stuffed shells before I started The Hungry Pinner, and now I can’t get enough of them. They aren’t nearly as difficult or time-consuming as I always imagined they would be, and the filling options are endless. I’ve made Cheeseburger Stuffed Shells and Butternut Squash Stuffed Shells, and today I’m trying a new filling with these Sausage Stuffed Shells with Spinach. This recipe has only a few ingredients and promises to be savory, cheesy comfort food that’s perfect for the season. Let’s find out!

This easy stuffed shells recipe with sausage, spinach, tomato, and ricotta cheese will make just about anyone reach in for more.

Recipe Author: Adam + Joanne at Inspired Taste
Get the recipe

The Ingredients

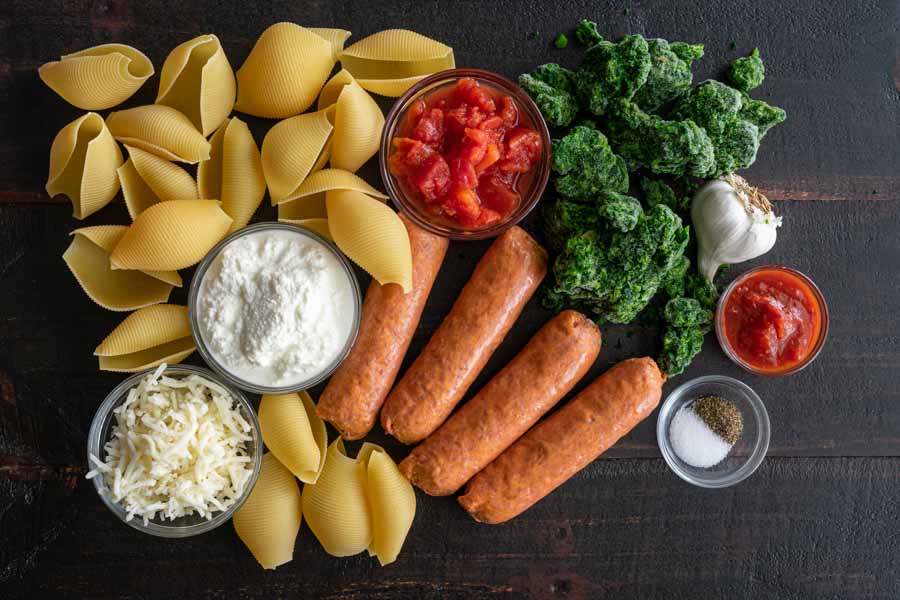
The ingredients for this stuffed shell recipe are all easy to find basics, so no special trips or online orders were needed. I notice there was some flexibility with the sausage, though, and I chose mild Italian sausage since it is a favorite.

Unfortunately, the bulk sausage I ordered was out of stock, and the delivery shopper substituted Beyond Sausage hot Italian sausage. I’ve never tried it, but their burgers are good, so I have high hopes for this plant-based sausage.

Sausage Stuffed Shells with Spinach Ingredients
Sausage, jumbo shells, mozzarella, ricotta, diced tomatoes, frozen spinach, garlic, marinara, salt, and pepper

The Process

This recipe takes about an hour to make and has four main parts: boiling the shells, making the filling, assembly, and baking. Here’s how my time was spent:

  • 32 minutes to prep
  • 25 minutes to bake
  • 57 minutes total

This recipe had some prep work to do before I got started cooking. First up was boiling the water for the shells while I peeled the casings off the sausages and thawed the spinach (I soaked it in water to thaw it). I also pressed the garlic cloves and drained the canned tomatoes.

Looking back, maybe the tomatoes didn’t need to be drained. The directions mention reducing the liquid while the filling cooks, so I’m not sure I did the right thing even though the filling turned out well.

Peeling the casings off the sausage links

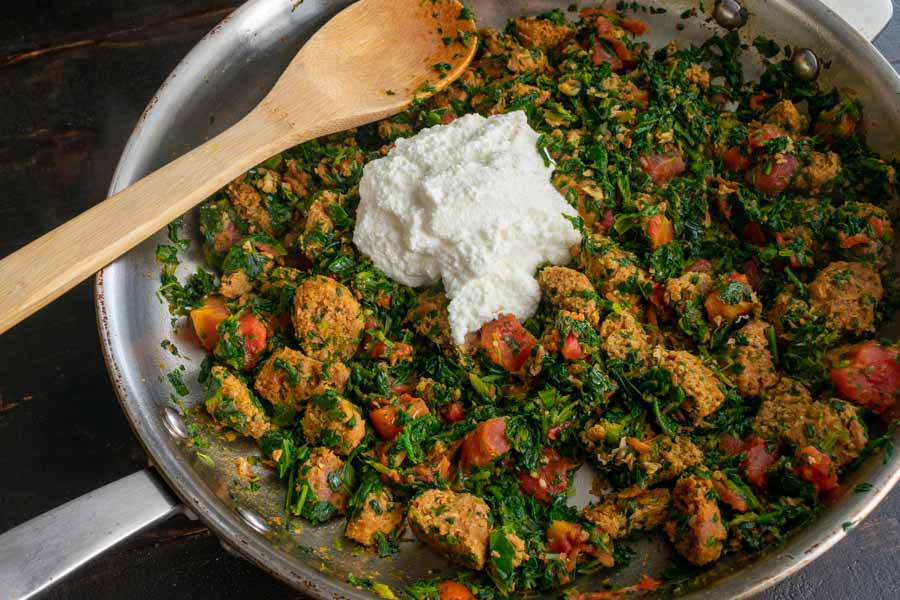
Once I was ready to start making the filling, things went very smoothly. I browned the sausage in a large skillet, then I added the remaining ingredients as directed. The shells were ready by the time I had the ricotta stirred in–perfect timing!

I used a deep pie plate to bake the filled shells, but a casserole dish would also work. The recipe says it makes enough filling for 16 shells, but I filled all 20. They just fit into the dish with enough room for the shredded mozzarella topping. Then it was into the oven to bake and melt the cheese. Oh, the anticipation!!

Adding the ricotta to the sausage mixture

Oreo-Stuffed Double Chocolate Cookie Cups

0

I feel like I need to make something rich and decadent. Maybe it’s a reaction to the healthy One-Pot Vegan Mushroom Stroganoff I just made. Ever feel like you deserve a treat after you’ve “been good”? I do, and way too often! Well, today’s recipe promises to be that rich, decadent treat I’m craving. These Oreo-Stuffed Double Chocolate Cookie Cups are loaded with chocolate and combines cookies and brownies into a cupcake-like creation. As far as I’m concerned, that’s pure genius! Join me in discovering this recipe and find out if it’s as good as it sounds.

These Oreo-Stuffed Double Chocolate Cookie Cups are crisp on the edges, chewy in the middle and absolutely LOADED with chocolate! Frosted or unfrosted — you decide!

Recipe Author: Ashley Fehr at The Recipe Rebel
Get the recipe

The Ingredients

These Oreo-Stuffed Double Chocolate Cookie Cups are loaded with chocolate! White chocolate, milk chocolate, cocoa powder, and chocolate cookies. I’ve died and gone to heaven!

I was able to find everything at my usual grocery store, even white chocolate chips. The recipe just says chopped white chocolate, so I figured using chips would be just about the same thing.

I did have to substitute Whole Foods' 365 sandwich cookies for the Oreos, though, and they aren’t quite as good as the real thing. I think Oreos have more chocolate in them, but these weren’t terrible.

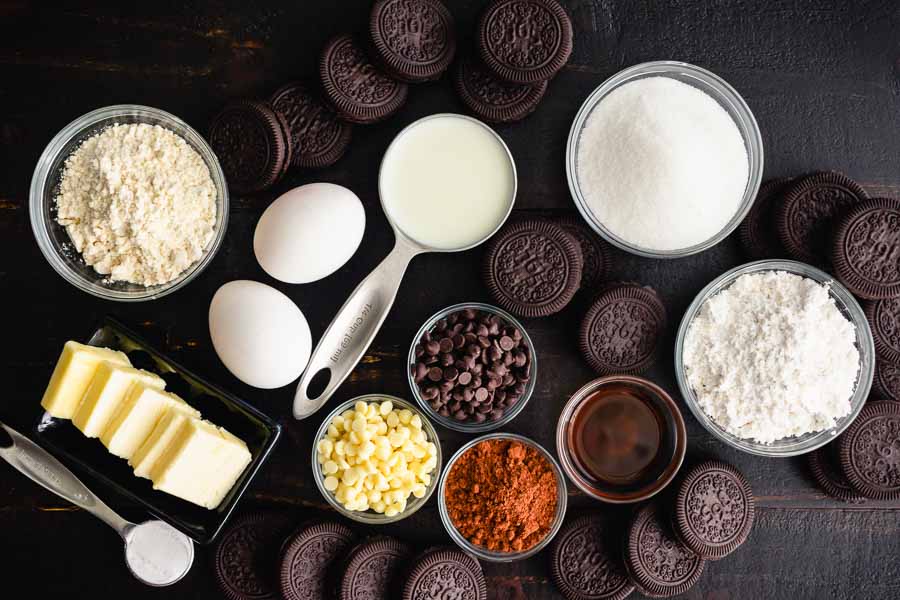
Oreo-Stuffed Double Chocolate Cookie Cups Ingredients
Sandwich cookies, milk, granulated sugar, powdered sugar, vanilla extract, mini chocolate chips, cocoa powder, mini white chocolate chips, baking soda, butter, eggs, and flour

The Process

The first thing to note with this recipe is that it makes 24 Oreo-Stuffed Double Chocolate Cookie Cups, so you will need an extra muffin tin. I ordered an extra one, and I’m so glad I did. By making all 24 cookie cups at once, I was able to distribute the brownie batter without coming up short.

The next tip is to set the sticks of butter on your counter to soften for a couple of hours before you plan to start baking. It’s not something that’s specified in the recipe, but it will make beating the batter and frosting much easier. It will also make the frosting smoother. Don’t believe me? This cake shows what happens when your butter is too cold, and it’s not pretty.

Here’s how my time was spent:

  • 23 minutes to prep the cookie cups
  • 21 minutes to make the frosting*
  • 9 minutes to frost and garnish the cookie cups
  • 53 minutes total

*Includes baking the cookie cups for 14 minutes.

Making the Cookie Cups

Okay, so now that we have all our muffin tins, it’s time to get down to baking! This recipe is nicely divided into sections, so it’s easy to follow. It starts with making the brownie batter, and you’ll need a mixer for this part since the batter gets thick. I think you could use a hand mixer if you had to, but a stand mixer is the way to go here.

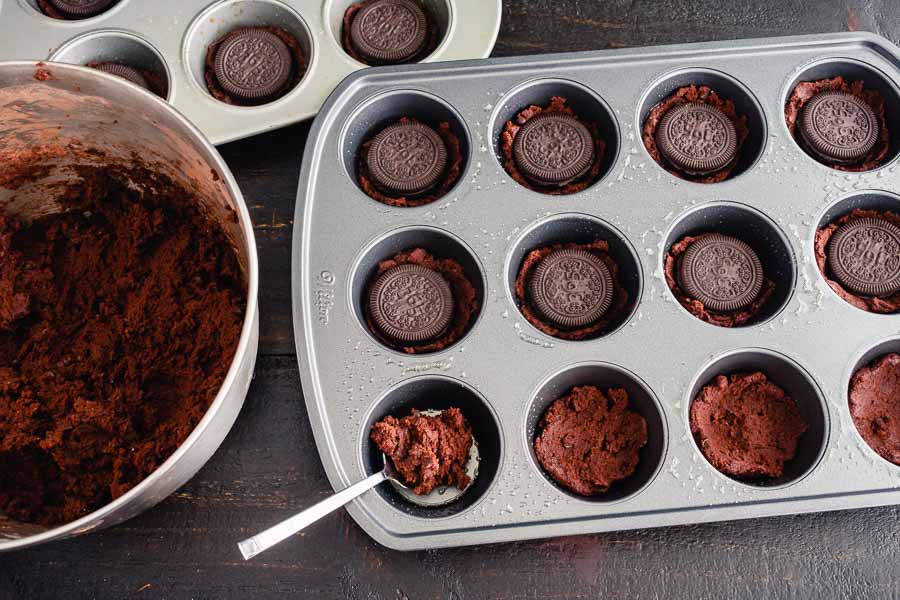
Once you have that thick, chocolatey batter mixed up, start filling your muffin tins. I used a regular teaspoon to scoop out dollops of batter. Then I used the back of the spoon and my fingertips to smooth it into the bottom of the muffin tins. This part was a little messy but not difficult.

Filling the muffin tins with brownie batter and sandwich

After adding the cookies, it was the same to add the tops of the cookie cups. I came up a little short here, but it was easy to remove a little bit of batter from some of the first cups I finished to make up for the shortage.

It all worked out in the end, but I have to warn you to work quickly. As the batter warms up, it gets stickier and stickier. I had to spray my fingertips with cooking spray toward the end to keep the batter off them and in the muffin tin.

Making the Frosting

While the brownies were baking, I rinsed off the beaters and mixing bowl so I could make the frosting. The recipe says frosting is optional, but c’mon! It’s not Oreo without the cream filling, er, topping.

This is where I should have paid more attention, and things would have gone faster. The white chocolate and milk need to be melted together in the microwave then set aside to cool for 15-20 minutes.

If I had planned right, I would’ve started with this step before I made the cookie cups. Then the chocolate mixture would have been ready to go when I wanted to start the frosting. Since I didn’t plan ahead, I had to wait for the mixture to cool. Kinda boring, but I did have some dishes to do to pass the time. Funsies!

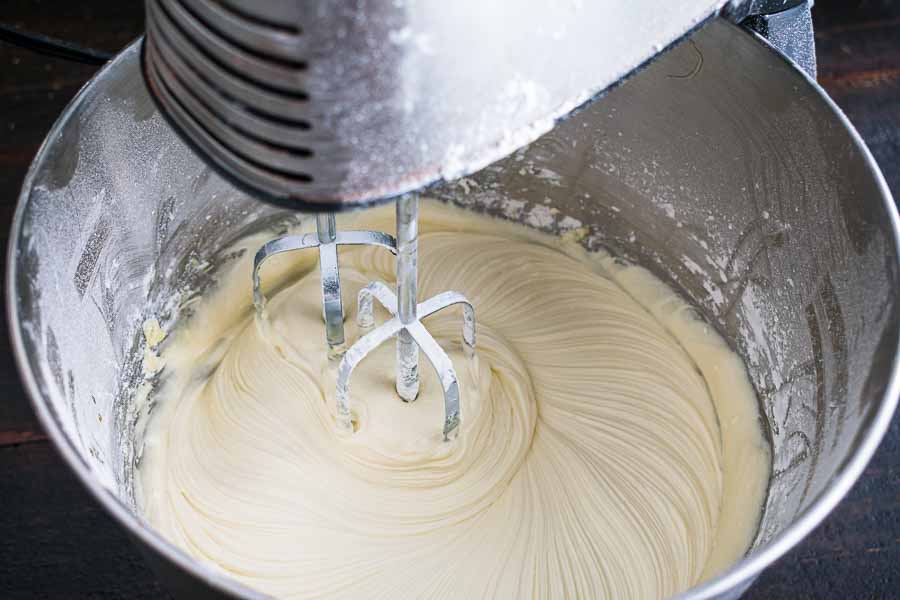
After that, making the frosting was very simple. The powdered sugar did its usual thing and dusted my stand mixer and everything within a 1-foot radius. Covering the mixer with a tea towel would have helped contain the dust, but I forgot it.

Mixing up the white chocolate frosting in a stand mixer

Frosting and Decorating

With the cookie cups cooled and the frosting ready, it was time to decorate. It took me about 10 minutes to remove the brownies from the muffin tins, add a dollop of frosting and cut up extra cookies for a garnish.

I came up a little short with the frosting, so don’t go too crazy with it. You can always add a little more if you have extra. I scooped off a little from the ones with a lot of frosting to make up for the ones that didn’t have enough at the end. everything worked out, and I topped them all with cookie bits.

However, I don’t recommend frosting all of your brownie cookie cups at once. The reason is the brownie gets hard when you store it, and you need to reheat it in the microwave for a few seconds. If it has frosting on it, the frosting melts and it’s not as good somehow.

Next time, I will keep the frosting in a separate sealed container and add it as I eat the cookie cups. That will allow me to reheat them as needed (and they are soooo much better warm!). I supposed I could also keep a container of cookie bits, but I’ll probably skip that part since the garnish doesn’t really affect the taste.

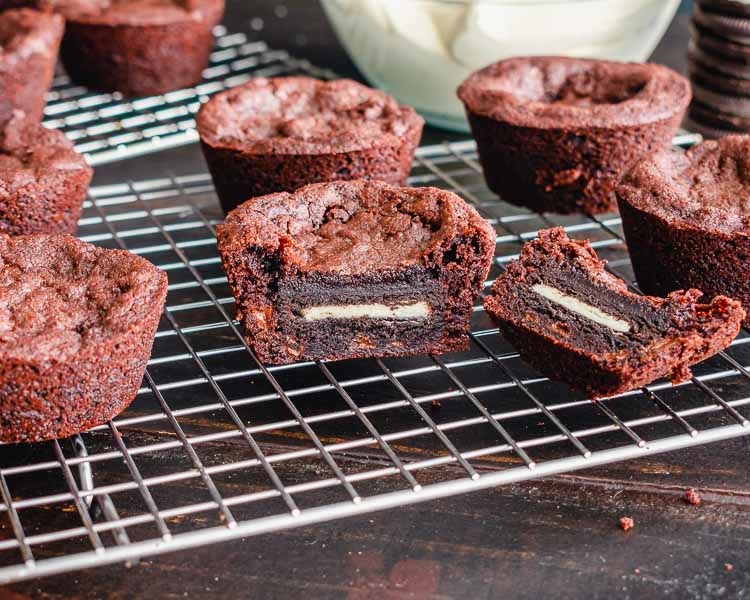
The cookie cups before being topped with frosting

One-Pot Vegan Mushroom Stroganoff

0

I’m a big fan of beef stroganoff, and I make it pretty regularly. Beef, mushrooms, and pasta in a thick, creamy sauce is always a winner around here. But what if it didn’t have the beef? I’ve heard of chicken stroganoff, but that doesn’t sound as good. I just imagine dry chunks of chicken, and that completely kills the idea. Then I happened on this One-Pot Vegan Mushroom Stroganoff recipe, and it made me pause. Stroganoff without the beef suddenly seemed appealing. I do like a meatless meal now and again, so vegan far isn’t unusual around here. And this recipe is made in one pot in 30 minutes. Yeah, I need to give this a try.

Learn how to make this creamy Mushroom Stroganoff with one pot and just 30 minutes of your time.

Recipe Author: Jasmine at Sweet Simple Vegan
Get the recipe

The Ingredients

Sometimes finding vegan ingredients can be a challenge, and that was the case with this recipe. While I was surprised to learn that not all wine is vegan, I didn’t look for vegan wine. I went with a bottle of Three Wishes pinot grigio. It’s good and it’s a steal at $2.99 a bottle.

I did have trouble finding vegan beef flavored broth, though. My regular grocery store didn’t have it, and it was pretty pricey on Amazon. I was going to settle for vegetable broth when I stumbled on mushroom broth. It sounded perfect, so that’s what I used.

Speaking of mushrooms, I found sliced portabella mushrooms. But whether they were sliced or not, and no matter the variety, mushrooms only come in eight-ounce containers. The recipe calls for 10 ounces of mushrooms, but it was not to be. I didn’t want to buy an extra container and risk wasting the leftovers.

The downside to those pre-sliced mushrooms was they were apparently not the freshest. The photo below was taken the day after I got them, but they look like they had been in my refrigerator for far longer. Whole Foods, you let me down.

One-Pot Vegan Mushroom Stroganoff Ingredients
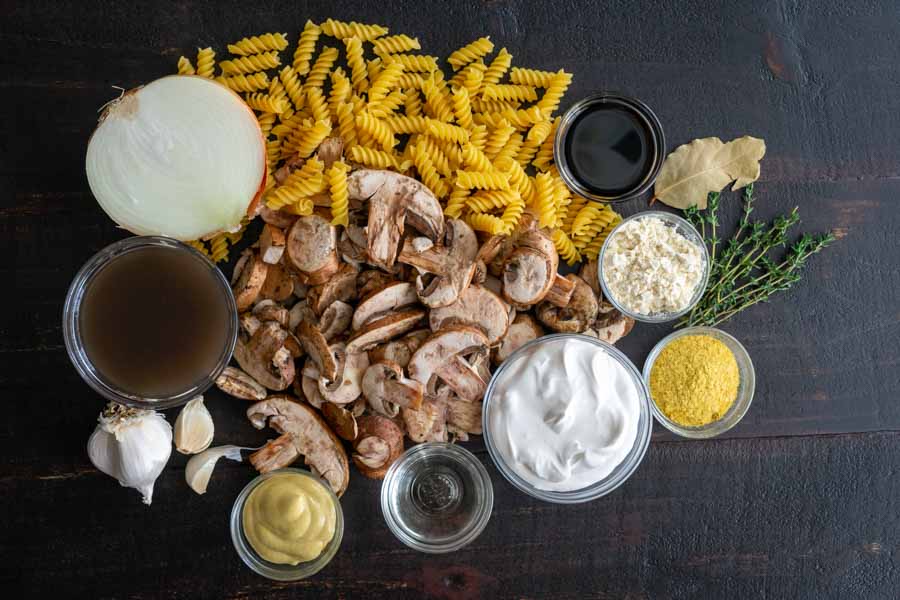
Baby bella mushrooms, dijon mustard, garlic, mushroom broth, onion, rotini pasta, tamari, bay leaves, thyme, flour, nutritional yeast, vegan sour cream, and white wine

The Process

The first thing I noticed when I started cooking was this recipe doesn’t call for any cooking oil. I fully expected the lack of oil to result in burned food, but I’m happy to say I was wrong. Using a couple of tablespoons of broth instead worked and kept things from burning.

This recipe moves pretty quickly, so I prepped and measured out the ingredients in advance. Having everything ready to go into the pot kept things moving along, and I had this mushroom stroganoff ready in 34 minutes.

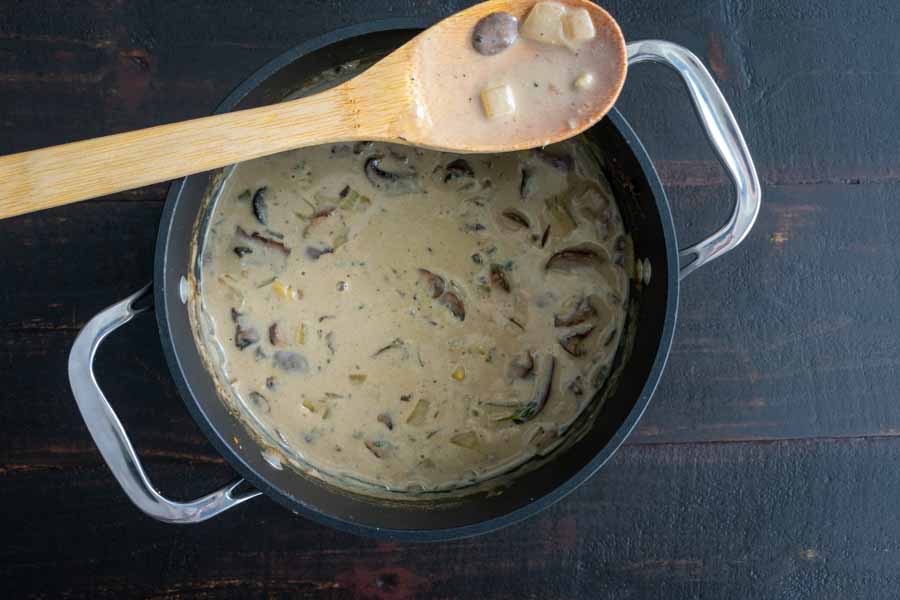
I did notice that there was a lot of sauce even after the pasta finished cooking. I thought it might absorb more, but it didn’t. Next time I think I will increase the amount of rotini. This recipe calls for eight ounces, but it might be able to handle the whole 16-ounce box so that yummy sauce doesn’t go to waste.

The stroganoff had so much sauce that it covered the pasta entirely

Ghreyba (Coconut Moroccan Cookies)

0

After that unbelievably tasty Moroccan Beef Stew, I’m still feeling the need for dessert. Moroccan, of course! And what better way to dessert than with butter cookies and a cup of tea? Or a glass of milk if you prefer something cold. This Ghreyba recipe checks all those boxes and it has coconut, which I adore. I think we have something here, but there’s only one way to know for sure, and that’s to make these cookies. Let’s get to it!

These coconut Moroccan cookies are made with semolina flour. Covered in powder sugar and with a hint of orange.

Recipe Author: Lizet Bowen at Chipa by the Dozen
Get the recipe

The Ingredients

With just seven ingredients, this ghreyba recipe promises to be super simple, and I’m all for that. Being a devout coconut lover, I had a couple of bags of grated coconut in my pantry. That left me to shop for the rest of the ingredients, and my regular grocery store had most of them.

They didn’t have the semolina flour, though, so I had to order it. I found a big bag for $7.99, and it had more than enough flour for this recipe. Don’t worry about having extra—I have a couple of other recipes that will use up the leftovers.

And although I could have bought bottled orange peel, I opted for fresh (there’s nothing like fresh citrus zest!). I planned to freeze the leftovers, but I used all of the zest.

Ghreyba (Coconut Moroccan Cookies) Ingredients
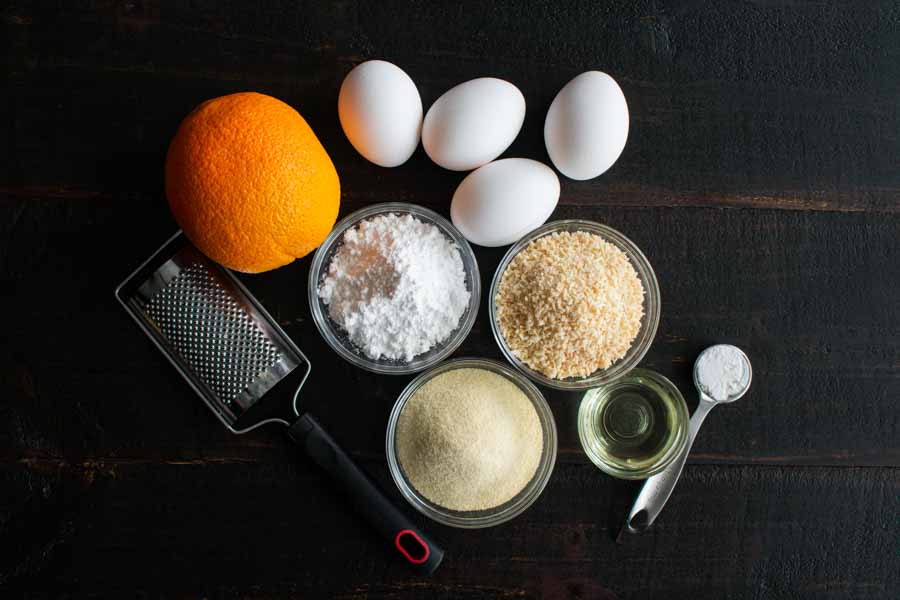
Semolina flour, powdered sugar, orange peel, eggs, grated coconut, baking powder, and vegetable oil

The Process

This ghreyba recipe promised to be difficult to mess up, but my luck with cookies comes and goes. Today it went, and my first try at this recipe wasn’t too successful.

The cookies tasted wonderful, but they didn’t look so good. I used a tablespoon to make what I judged to be 1.5-inch balls of dough. I was way off! The balls of dough were too big, and I only got 36 cookies out of it (the recipe says it makes 70).

To add more insult to injury, the cookies melted together, stuck to the baking sheets, and the bottoms burned a bit. The ones that didn’t break apart when I pried them off the baking sheets with a spatula were good, so I decided to give this recipe another try.

My first attempt resulted in cookies that were too big, melted together, and burned on the bottom.

My second try went so much better! This time I used my teaspoon to measure and the cookies were much smaller. In fact, they might have been a tad too small as I managed to make 84 cookies. That’s seven dozen!

I was able to get a dozen cookies on each sheet pan, and I can fit two sheet pans in my oven. That meant I had to bake four batches of cookies. Here’s how my time was spent:

  • 15 minutes to prep the first batch
  • 15 minutes to bake each batch (I prepped the rest of the cookies while the 1st batch baked)
  • 3 minutes to rest
  • 1 hour 23 minutes total (not including time to cool)
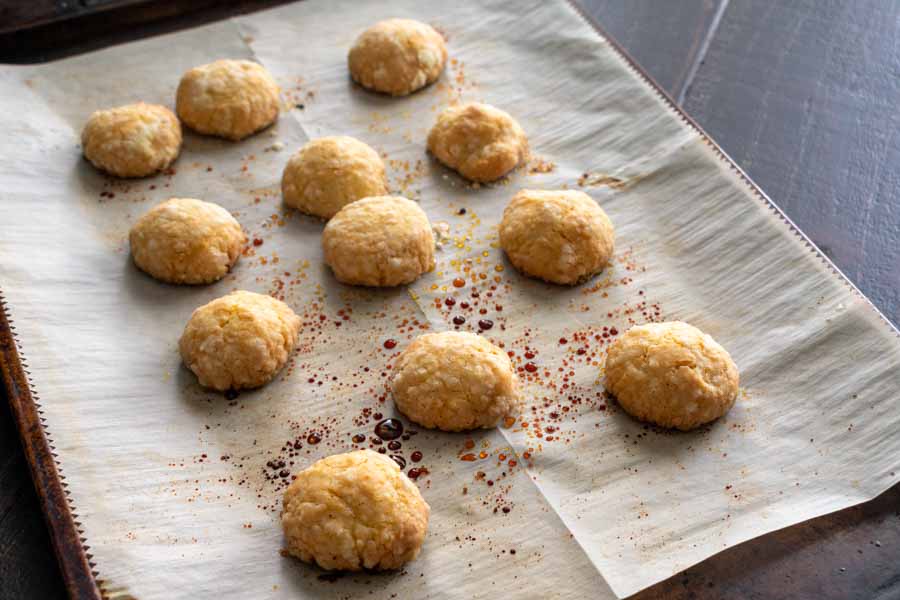
Oh, and this time I lined the sheet pans with parchment paper so the cookies wouldn’t stock. The bottoms still browned thanks to the sugar caramelizing, but they didn’t stick. Also, I stumbled upon parchment sheets instead of the usual roll. These sheets are cut to size and they don’t curl up. Genius!

Parchment paper kept the grhyeba cookies from sticking to the sheet pan

Moroccan Beef Stew

Years ago there was an incredible site called Cooking.com that was full of the most amazing recipes. It’s long gone, but I still treasure the recipes I found there. One of my favorites is a Moroccan Beef Stew recipe with harissa sauce. My husband and I never get tired of it, but it is a lot of work, so I don’t make it very often. Well, I stumbled across another Moroccan Beef Stew recipe that also includes harissa sauce, and I was hesitant to even try it. How could it possibly be as good as the recipe I’ve been making for so long? Still, it was a bit different and sounded like it would be easier to prepare. I do like the sound of that, so I’m giving in and cheating on one of my favorite recipes. This better be good!

Moroccan Beef Stew is hearty, flavorful and perfect for a chilly night! It’s perfect slowly simmered on the stovetop, in the oven or pressure cooker.

Recipe Author: Carol at From a Chef’s Kitchen
Get the recipe

The Ingredients

There were some similarities with my tried and true Moroccan Beef Stew recipe like some of the vegetables and spices, but there were more differences. Namely in the variety of vegetables and the addition of dried apricots. Also, the list of ingredients was a good bit shorter than my old recipe.

None of these items were difficult to find, though, and my usual grocery store had most everything I needed. The only items I couldn’t find were the dried chilis for the harissa. I had to order both the smoked chipotle peppers and the New Mexico chilis from Amazon.

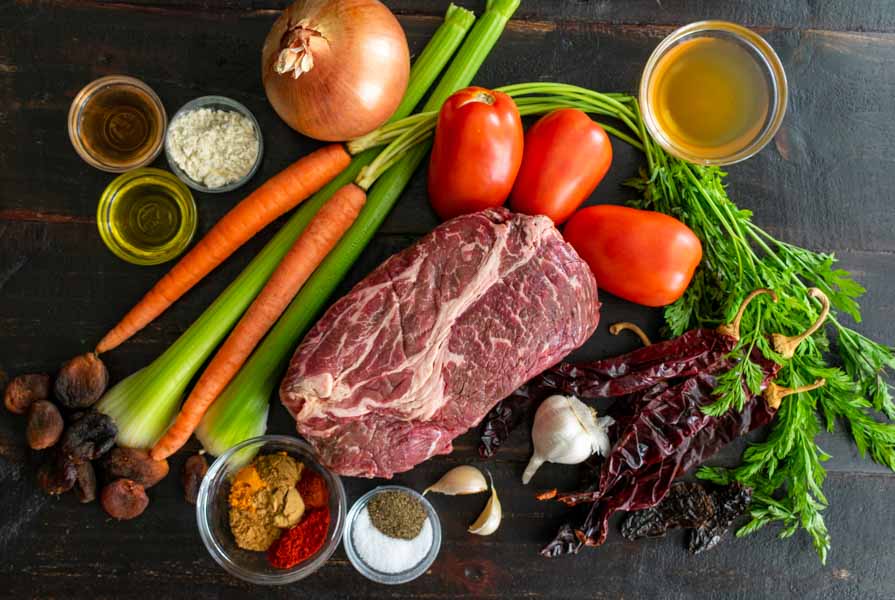
Moroccan Beef Stew Ingredients
Beef chuck, coriander, turmeric, cumin, ginger, cayenne, dried apricots, celery, carrots, olive oil, red wine vinegar, all-purpose flour, onion, plum tomatoes, beef broth, dried New Mexico chili peppers, dried chipotle peppers, garlic, salt, and pepper

The Process

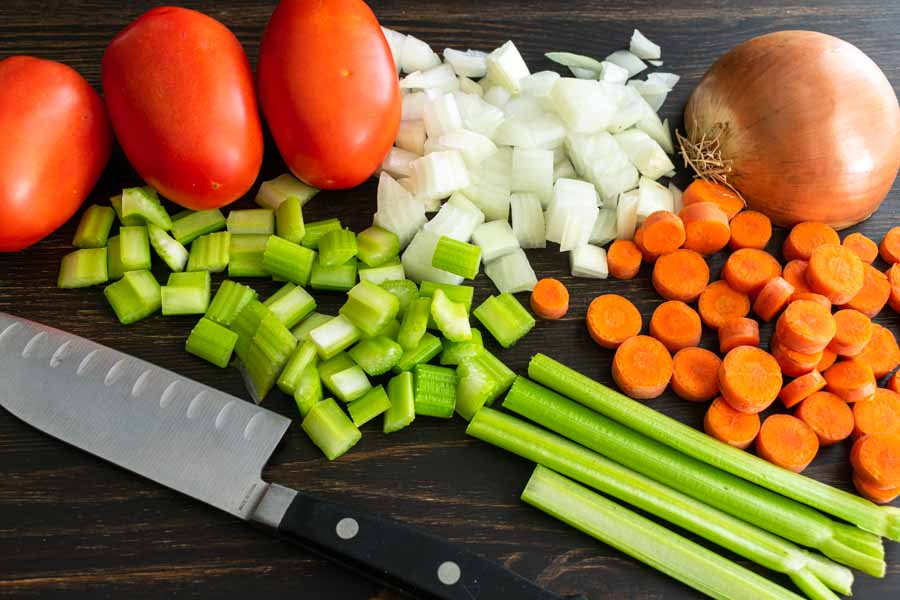
Many times I will do just enough prep work in order to get started cooking and finish as I go. I changed that up for this recipe and prepped everything before I get started. That meant chopping the vegetables and chuck roast and measuring out the spices.

Once everything was ready, I dusted the beef chunks with the flour, salt, and pepper mixture and browned them in a 5-quart Dutch oven. It took me two batches to get them all, and my tongs were very helpful with turning to make sure each side was seared.

I did skip ahead a little while the beef was browning and got the harissa started. The chilis need to soak in boiling water for 20 minutes to soften, and that was simple enough to do at the same time as the beef.

With all the beef browned, it was time to add most of the vegetables, spices, and beef broth. I let that simmer for an hour and a half (the maximum time because I wasn’t in a hurry) while I finished the harissa.

Preparing it went as smoothly as the stew did. I wasn’t sure how to seed the chilis, but pulling out the stems and rinsing them under cool water did the trick. Then it was into my mini-prep with the rest of the ingredients to be turned into a spicy sauce.

Lastly, my times lined up perfectly with those listed in this recipe:

  • 29 minutes to prep
  • 1 hour 45 minutes to cook
  • 2 hours 14 minutes total
Chopping the vegetables

Raspberry Truffle Brownies

0

How do you like your brownies? With nuts or without? What about caramel? How about frosting, are you a fan or not? I’m usually for brownies with nuts and/or fruit but without frosting, while my husband insists with frosting is best. Well, this week I’m making these Raspberry Truffle Brownies which are topped with chocolate ganache. I know I said I’m not into frosting on brownies, but no one ever said anything about chocolate ganache. This changes everything! (I’m only sort of kidding.) But this is a nice compromise for us, and I’m looking forward to giving them a try.

A layer of brownie, a layer of raspberry jam, and a layer of chocolate ganache make up these delicious Raspberry Truffle Brownies. Gluten-Free and dairy-free.

Recipe Author: Tessa Fisher at Salted Plains
Get the recipe

The Ingredients

One thing surprised me about this recipe, and that was there are no fresh raspberries in it. I guess I had this Chocolate Raspberry Cake recipe stuck in my head. But these Raspberry Truffle Brownies get their berryliciousness from raspberry jam. I actually like this idea a lot since it’s more like real truffles.

Another thing I found interesting was that this recipe is gluten-free and uses vegan chocolate chips. I’ve tried vegan chocolate, and I can’t tell the difference, but I’ve never had gluten-free brownies. I have hope for this recipe, though, since it replaces all-purpose flour with almond flour (I’ve had good results with almond flour in the past).

This recipe also replaces dairy milk with coconut milk, but it’s not vegan since it does call for eggs. Replacing them with a vegan egg substitute would be a very easy change if you want your brownies to be vegan and not just vegetarian.

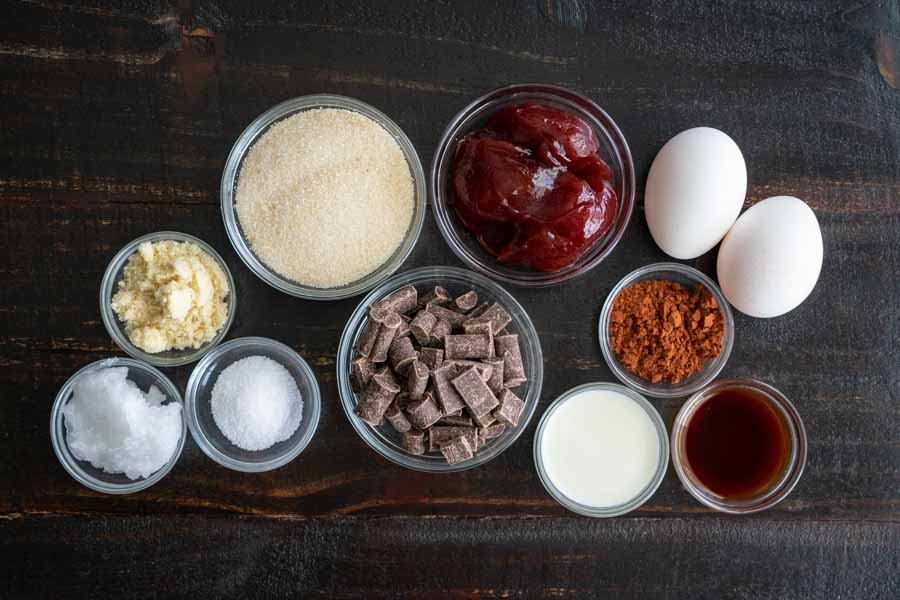
Raspberry Truffle Brownies Ingredients
Vegan chocolate chips, salt, coconut oil, almond flour, sugar, raspberry jam, eggs, cocoa powder, vanilla extract, and coconut milk

The Process

These brownies break down into three phases: making the brownies, making the ganache, and chilling until it’s set. Here’s how my time was spent:

  • 16 minutes to prep the brownies
  • 43 minutes to bake
  • 1 minute to add the ganache
  • 60 minutes total (not including time to chill)

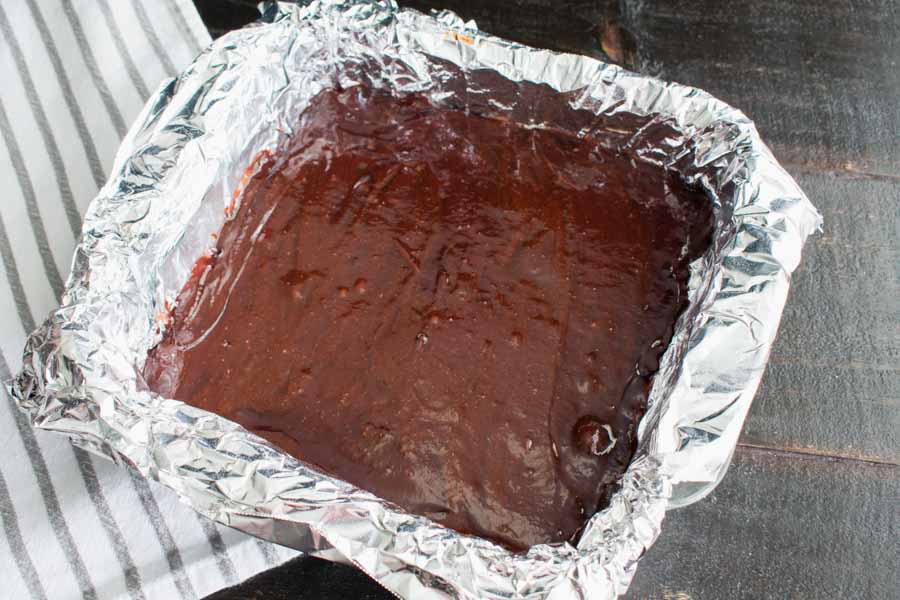
You’ll need some parchment paper to line your baking pan, so make sure you have some on hand. I usually do, but of course, I ran out just in time for this recipe. Aluminum foil worked just as well, but I made sure to spray the inside of it with cooking spray (the opposite of the instructions for parchment).

With that problem solved, I moved onto the brownies. I was always taught to stir brownie batter by hand, but this recipe called for a hand mixer. I went with it knowing it might make the brownies very dense and chewy instead of cake-like. Hey, this recipe is already breaking some brownie rules, so let’s break a few more LOL!

Things moved along smoothly until I was ready to add the raspberry jam. Instead of dolloping it on per the instructions, I heated it in the microwave until it was syrupy and poured it over the batter. That trick always works for me.

Then it was into the oven for 33 minutes. I got the ganache prepped while the brownies baked, but they were far from done when I gave them the toothpick test. It was back into the oven for another 10 minutes to firm them up.

I used that extra time to mix up the ganache, and the brownies were ready for it this time. Then I put a lid on everything and it was into the fridge for the ganache to set up overnight. The waiting was so hard!

Baking pan lined with aluminum foil
I ran out of parchment paper, so I used aluminum foil to line the pan

Mediterranean Salmon in Parchment Paper

0

Last week’s Sweet Corn, Peppered Bacon and Shrimp Chowder recipe was absolutely amazing, but I’m still in the mood for seafood. Well, I’m always in the mood for seafood, to be honest, so this week I’m going to try a fish dish. Salmon, to be more specific, with this recipe for Mediterranean Salmon in Parchment Paper. I’ve made salmon in parchment before, and it was glorious. So glorious that I need to try it again, but I’m going to change it up some so I (and you) don’t get bored. Let’s find out if this version is as good as the last.

Low-carb Mediterranean Salmon in Parchment Paper is an easy, flavorful dinner recipe perfect for those who eat paleo, keto, or simply love clean meals.

Recipe Author: Julia at The Roasted Root
Get the recipe

The Ingredients

Mediterranean salmon calls for a whole salmon fillet that weighs about 1 3/4 pound to serve five people. I’m serving two, so I bought a 1-pound fillet for just over $16. The store had both coho and sockeye salmon, and I opted for the oiler sockeye. I’ve tried coho before, and it’s easy to overcook it and dry it out.

The rest of the ingredients were mostly canned and bottled items like capers, olives, and spices, with the exception of the fresh dill. They were all either things I had on hand or were easy to find at my regular grocery store.

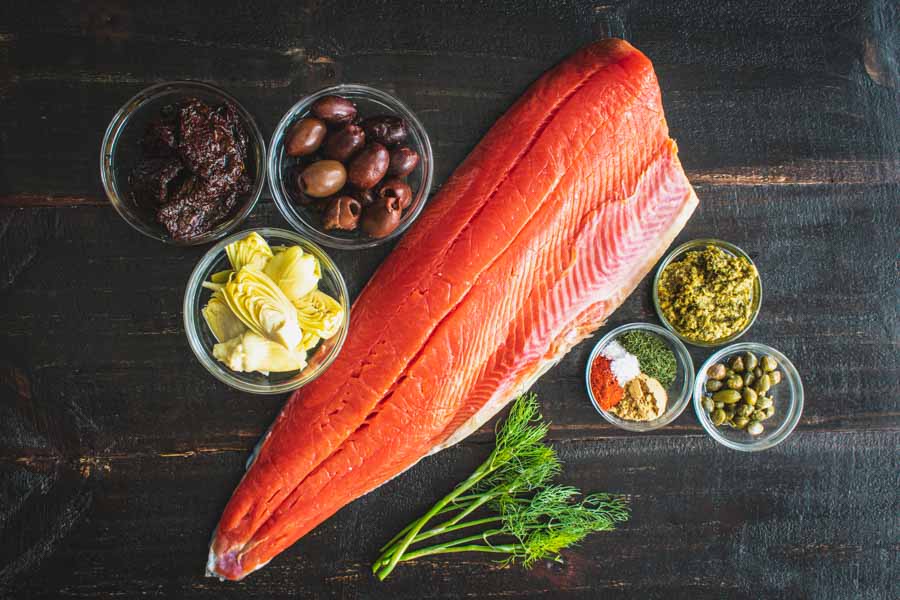
Mediterranean Salmon in Parchment Paper Ingredients
Salmon fillet, artichoke hearts, kalamata olives, pesto, capers, dried dill, salt, paprika, ground ginger, and fresh dill

The Process

I have to say that making this Mediterranean salmon was very easy! It was really just adding the toppings to the fish, wrapping it all up, then baking it.

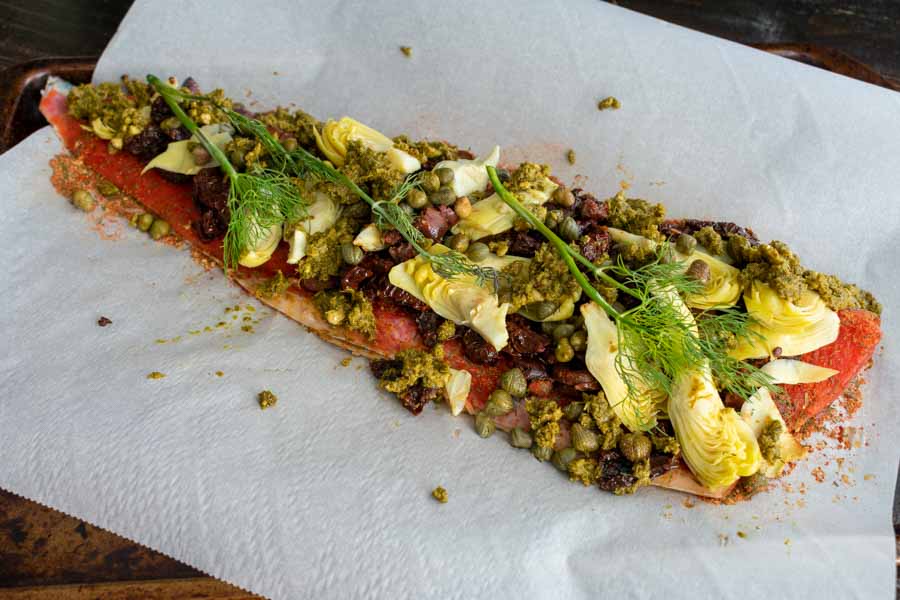
There was a little chopping involved, but it went very quickly. I did switch things up just a little, though. I thought the pieces of sun-dried tomato were too large, so I cut them into thin strips. Also, I decided to skip chopping the dill, instead laying the whole sprigs onto the filet.

The salmon fillet after the toppings have been added

There is one thing I would change at this step, and that’s the order I added the toppings. I just went down the ingredients list, and that left the pesto until last. I dolloped it on, but I think spreading it over the fish before adding anything else would have been easier. It might have given the other toppings something to stick to as well.

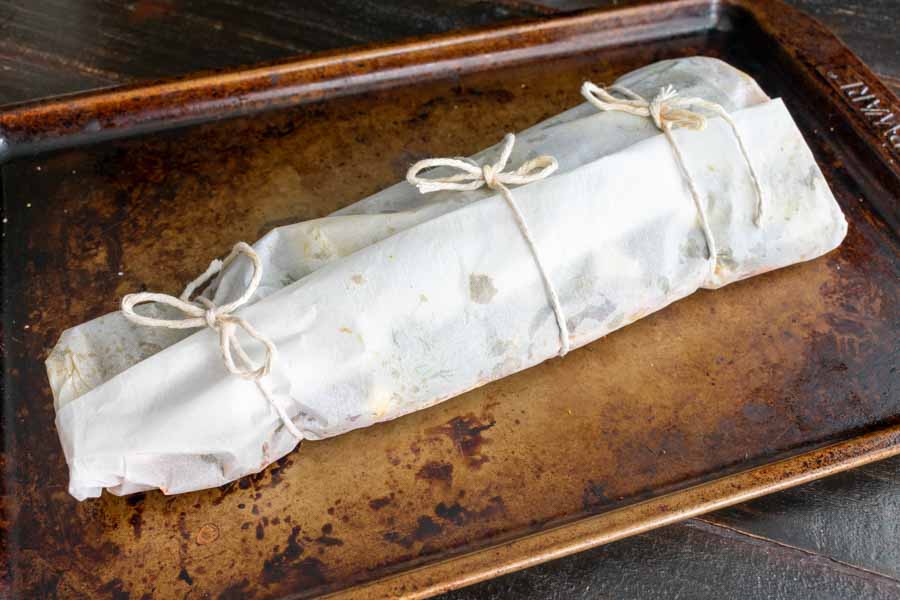
The final step was wrapping the filet in parchment paper and securing it with kitchen string. It’s important to create a tightly sealed packet, so I had to fold the tail end of the filet under so it would fit with enough room to fold the edges. Then it was onto a sheet pan and into the oven to bake for 20 minutes.
The salmon filet wrapped in parchment paper secured with kitchen string

Maple Syrup Cocktail

0

I love breakfast, but I’m not a morning person. That means I usually grab some leftovers or, if I’m feeling particularly ambitious, I make a smoothie. But I do miss traditional breakfast foods like bacon, eggs, and pancakes, so I’ll order them for dinner once in a while. Well, now I can also have some of those flavors in a cocktail! This Maple Syrup Cocktail is not only made with maple syrup but it’s also garnished with bacon bits. Oh my! And since cocktails are usually made later in the day, I’m all about giving this recipe a try!

A fun, creamy cocktail sweetened with maple syrup and garnished with waffles and homemade bacon bits! It’s breakfast in a glass!

Recipe Author: Sugar and Charm via Tablespoon
Get the recipe

The Ingredients

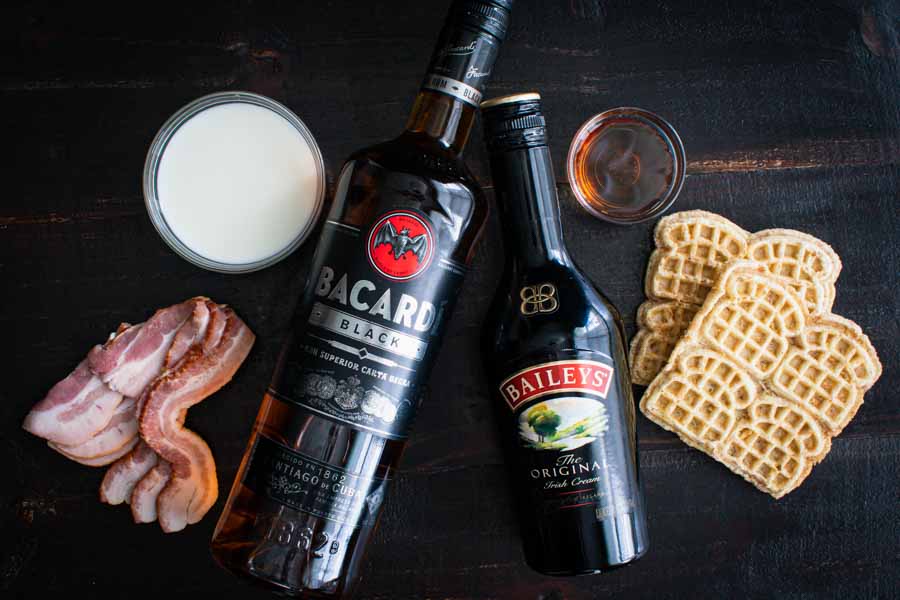
Most of the ingredients for this cocktail were easy to find or things I had on hand. I had the dark rum and Irish cream, but I had to pick up the bacon, milk, maple syrup, and waffles.

The waffles were the hard part. Well, sort of. The only mini waffles I could find were from Eggo, and they were cinnamon toast flavor. I thought the flavor was a bonus, but I didn’t care for the toast shape and ended up cutting them into rounds.

Maple Syrup Cocktail Ingredients
Bacon, milk, dark rum, Irish cream, maple syrup, and waffles

The Process

First up was making the bacon. I fried it up the night before while I was making dinner, but I completely forgot to time it. Doh! But I think I’ve made enough bacon in my life to safely say it took about 10 minutes to get it nice and crispy.

The cocktail and garnish were up next, and the whole process took me four minutes. This is the first cocktail I have ever made that required me to pop something into my toaster, and it was a little weird.

The cocktail portion was really standard—just add ice and the liquid ingredients to a cocktail shaker and shake. Then top with a sprinkle of bacon bits. I chose the smallest bits because drinking large chunks of bacon didn’t sound like it would be pleasant.

The toaster popped while I was making the cocktail, so the garnish was ready to prep. I wanted a round garnish, so I used a tablespoon and paring knife to cut one out. Then I added a small slit so the waffle would stay on the side of the martini glass. It worked a treat!

Cutting out a waffle garnish
Using a tablespoon and paring knife to cut out a round waffle garnish

Sweet Corn, Peppered Bacon and Shrimp Chowder

0

It’s a new year, and I had so much trouble deciding what recipe to start out with. Do I want sweet? Savory? Spicy? I must have pinned thousands of recipes to choose from, and just couldn’t decide. After bouncing back and forth between a few options, I chose D) all of the above with this Sweet Corn, Peppered Bacon and Shrimp Chowder. It promises all of the flavors I was considering in one dish. There, that was easy LOL!

Sweet Corn, Peppered Bacon and Shrimp Chowder is everything you could dream up in a soup and then some.

Recipe Author: Victoria Townsend at Dash of Savory
Get the recipe

The Ingredients

This recipe does have quite a few ingredients, but nothing too unusual. As usual, I had a few of the basics on hand like the butter, oil, and spices. That left me to shop for the meat, produce, chicken stock, and beer, all of which were readily available at my regular grocery store. They even had conveniently shucked corn cobs, which eliminated the frustration of trying to get rid of all the cornsilk. It’s the little things.

Sweet Corn, Peppered Bacon and Shrimp Chowder Ingredients
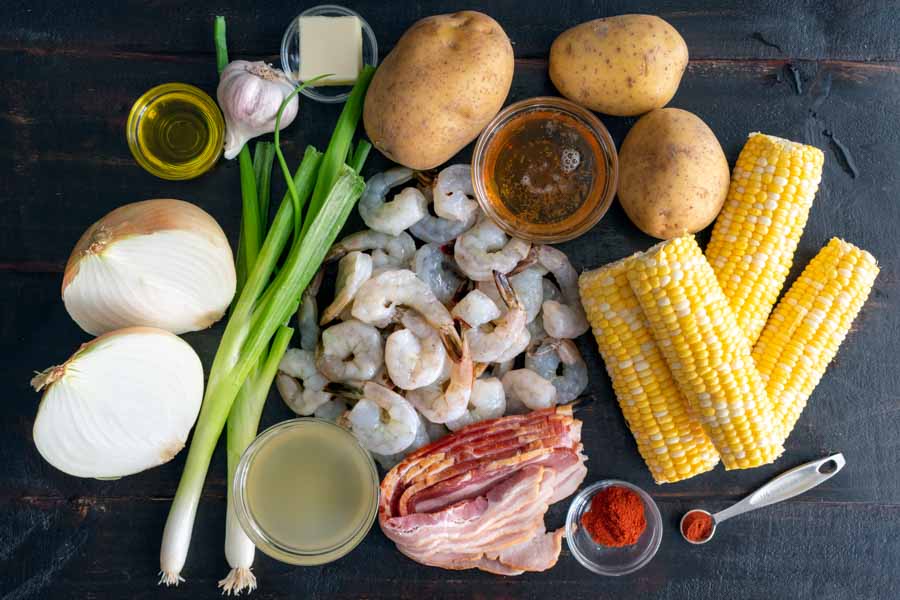
Shrimp, chicken stock, green onions, sweet onion, olive oil, garlic, butter, gold potatoes, ale, sweet corn, cayenne pepper, smoked paprika, and bacon

The Process

This recipe had a lot going on at the outset, but it wasn’t too much to handle. The instructions broke it all down into easy to follow steps that took a total of 1 hour 7 minutes to complete.

The oven took a few minutes to preheat, so I ended up cooking the corn and diced potatoes at the same time. That left me 20 minutes to prep the rest of the ingredients, which was plenty of time. I even managed to get the bacon fried up in my 5-quart Dutch oven.

The potatoes were done after about 15 minutes, so I drained them and had them pureed in my food processor before the corn was finished.

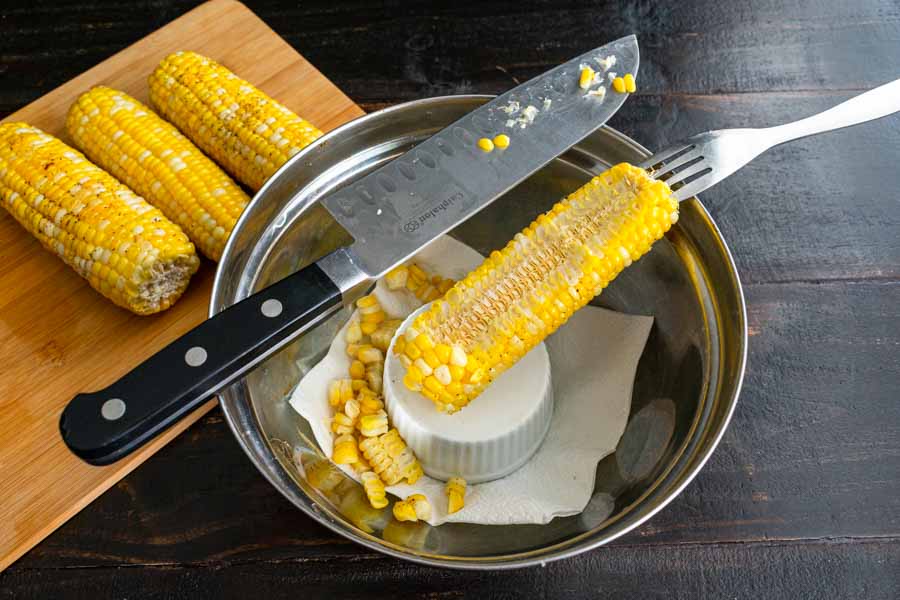
The corn finished just as I was done with that, so I got started removing it from the cob just as instructed. As I started, I noticed the ramekin I used as a platform in the mixing bowl slipped a little, so I placed a napkin underneath it. That fixed the slipping, and removing the corn was simple.

With all that done, it was time to start the chowder. Things continued to go smoothly until I got to step 10. It starts with ‘Stir in the and’ but the what? I used the process of elimination to figure out it was corn, and that got things back on track. I had my Sweet Corn, Peppered Bacon and Shrimp Chowder ready to serve a few minutes later.

Cutting the corn off the cob

Raspberry Mimosa Cocktail

0

I don’t know about you, but I do love a mimosa. Or two. I don’t think I can have just one! I also happen to love raspberries, so a raspberry mimosa is a no-brainer. It can’t possibly get any better, right? Wrong! Try making those raspberries into a sweet frozen dessert called granita first, then add that to a mimosa. Boom! I have no idea what granita is, but it sounds a lot like sorbet, and I’m about to try making it.

These raspberry mimosa cocktails are a special treat! They are made with a creamy frozen raspberry granita and topped with sparkling wine. Perfect for New Years cocktails or a refreshing summer drink, this mimosa recipe is sure to be your new favorite!

Recipe Author: Julie & Debbie at Cooks with Cocktails
Get the recipe

The Ingredients

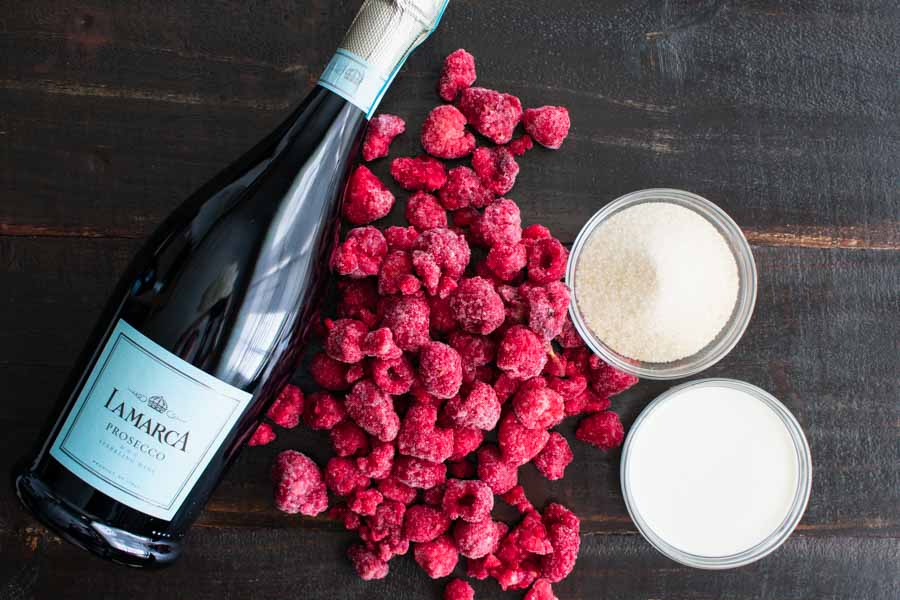
I had some shopping to do for this recipe, but it was minimal. My usual grocery store had everything I needed in stock. They even had a bottle of my favorite La Marca prosecco which happened to be recommended by in the blog post that accompanied this recipe. Great minds LOL!

Raspberry Mimosa Cocktail Process Ingredients
Prosecco, frozen raspberries, sugar, and half-and-half

The Process

Most of the “work” for this recipe is in making the raspberry granita, but it was a very simple process. The entire process took me 15 minutes.

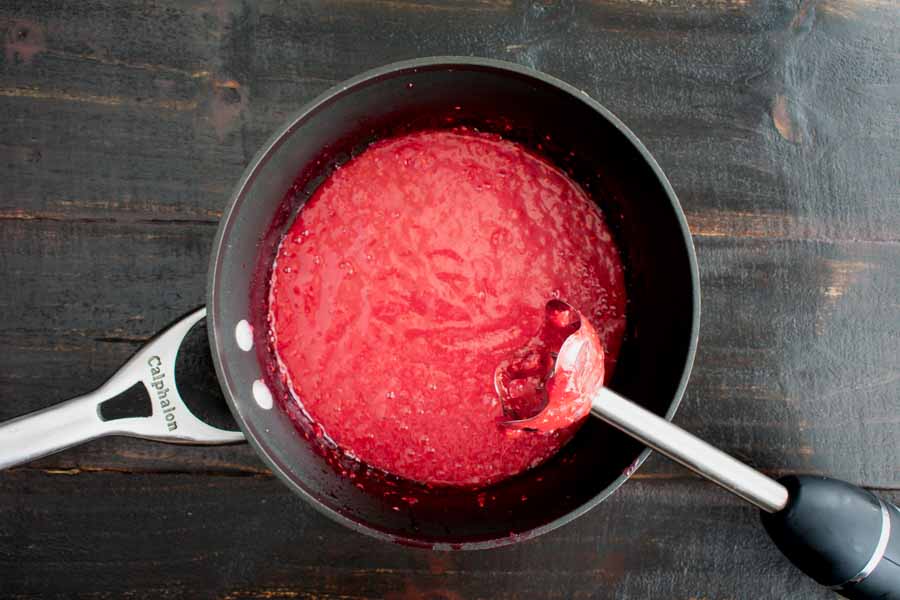
I started by melting the frozen raspberries in a small saucepan and stirring in the sugar. Once they were melted, I gave them a quick stir with my immersion blender, then I strained the puree into a storage container.

Pureeing the raspberries with an immersion blender

The pureed raspberries were quite thick, but I found that stirring them with a wooden spoon helped push the mixture through the mesh sieve. I was tempted to skip this step, but I’m glad I didn’t because there were tons of seeds left in the strainer. I was really surprised at the amount, and I’m glad they didn’t end up in my mimosas.

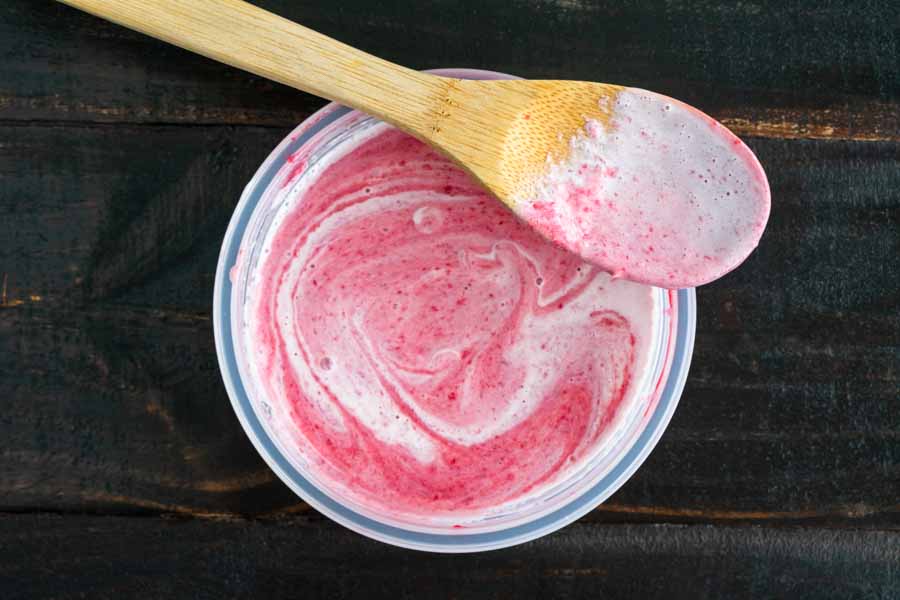
From there all I had to do was stir in the half-and-half and freeze the granita. I left it in the freezer overnight to make sure it was set. And the next day I had a giant raspberry ice cube.

I was able to scrape off enough granita to make a few mimosas, but it was a struggle. After I finished my second raspberry mimosa, I started researching granita to find out if something had gone wrong (I really wasn’t sure if this was the norm for granita).

I found an article full of tips and tricks on how to make granita. It’s a little more involved than what’s in this Raspberry Mimosa recipe, but not too much. I’ll use this method next time.

Mixing the raspberry puree with the half-and-half