Home Blog Page 26

Baghrir (Thousand Hole Crepe)

That One Pan Moroccan Lemon Olive Chicken I just made was incredible! And I’m still in the mood for Moroccan food (no surprise there). But what? I didn’t need a side to go with that chicken, and I couldn’t find any Moroccan cocktail recipes on my Pinterest boards. Dessert was the only option. That led me to Baghrir (Thousand Hole Crepe). I’ve made crepes once before, so I’m pretty sure I can make these. But there’s only one way to find out, and that means I need to get cooking.

Baghrir is a Moroccan crepe prepared with semolina flour that features tiny holes at the top. It can be served plain or with butter and honey.

Recipe Author: Mike Benayoun at 196 Flavors
Get the recipe

The Ingredients

The ingredients list for this recipe was nice and short, just the way I like them. I had the sugar, salt, and an incredible organic raw honey on hand, so I only had to buy a few more items.

My usual grocery store had everything I needed: semolina flour, butter, and active dry yeast. I did have to buy the yeast in a strip of three packets, but the extra will keep. One packet was just enough for this recipe.

The only thing they didn’t have was the orange blossom water. It’s listed as optional, but I decided to order a bottle. This recipe only uses a couple of tablespoons, but there are plenty of other uses for orange blossom water, so the extra won’t go to waste.
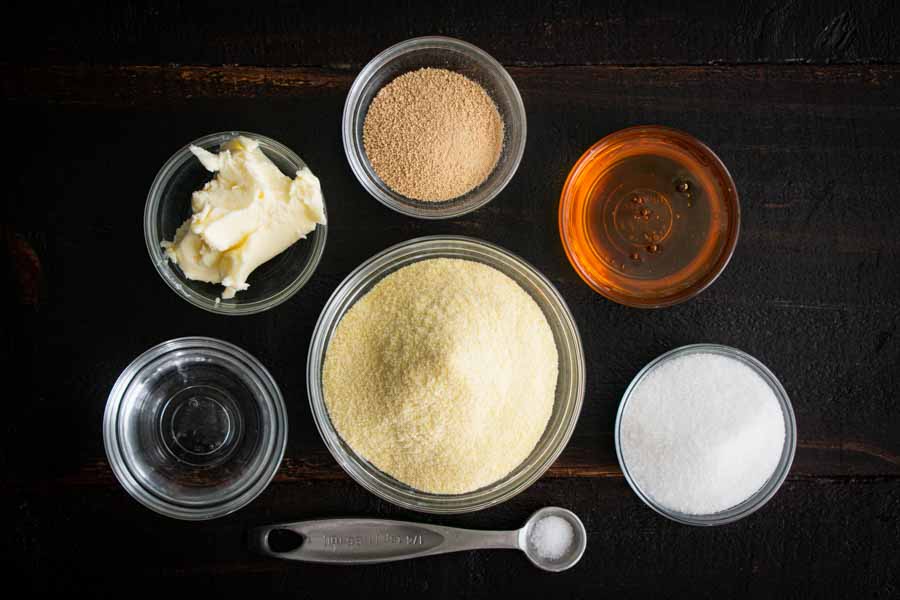
Baghrir (Thousand Hole Crepe) Ingredients
Semolina flour, orange blossom water, butter, active dry yeast, honey, sugar, and salt

The Process

Can you make pancakes? Then you can make baghrir. The process is slightly more complex, but the cooking part is almost exactly the same. Here’s how my time was spent:

  • 6 minutes to prep the batter
  • 30 minutes for the batter to rest
  • 36 minutes to cook the baghrir (including sauce)
  • 1 hour 12 minutes total

Prepping the Baghrir Batter

First up is proofing the yeast. Don’t worry if you don’t know what proofing is, because it’s super easy. All you need to do is add some warm water, sugar, and yeast to a bowl, then wait for the yeast to foam up. I used hot tap water and let the yeast proof while I prepped the rest of the ingredients.
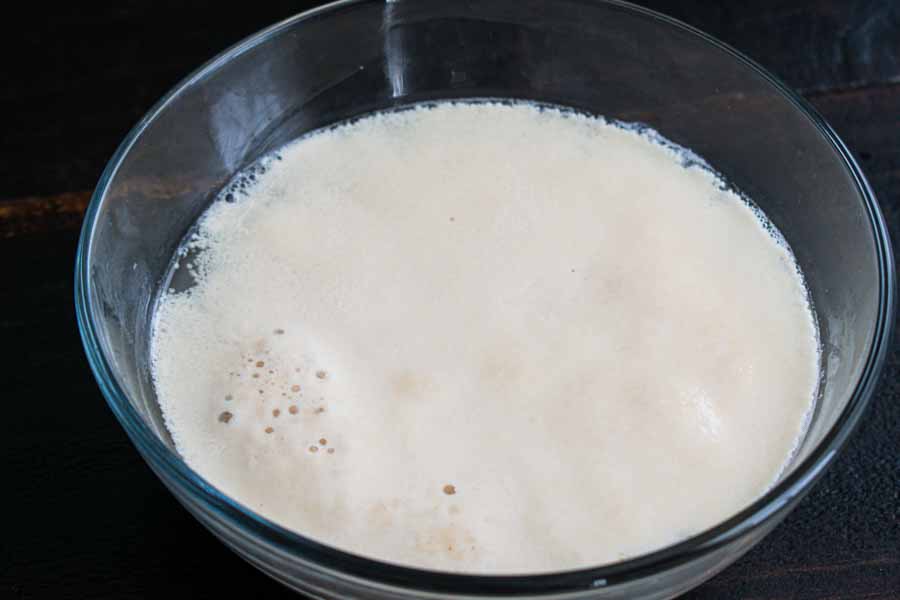
Proofing the yeast in a bowl of warm water and sugar

While the yeast did its thing, I got started on the rest of the batter. Unlike pancakes, this involved a blender to mix everything. I used my food processor because it has a dough blender attachment, but it sounds like any old blender will do.

This part is almost as simple as the last. Just add everything to the blender (including the yeast mixture) and blend away. I had to add some extra water to get the dough to the right consistency. I’d say I added at least 1/2 cup, maybe more, but it was hard to measure exactly—I was more concerned with getting the consistency right.

Once the batter is mixed up to the right consistency, I put the lid back onto the food processor bowl and let it rest for 30 minutes.
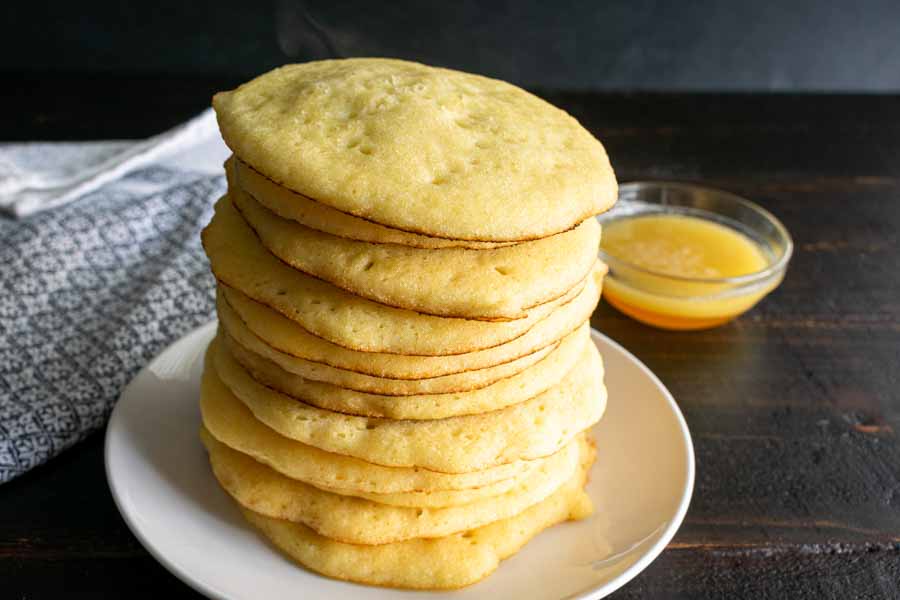
A stack of all the baghrir I made
A stack of all the baghrir I made (sorry, I forgot to count how many)

Cooking the Baghrir

Now it as time to get cooking! This is the part that almost exactly like making pancakes, but there’s no flipping involved. I go out a 10-inch non-stick skillet, measuring cup (1/4 cup), and a large spatula. It’s not listed in the recipe, but I also used a bit of canola oil spray on the pan.

I preheated the pan on 5 out of 10, and then I got started. All I did was spray the pan, pour in 1/4 cup of batter, and wait. I noticed that the top of the baghrir hadn’t cooked after two minutes, so I increased the time to 3 minutes. That was perfect, and I could see the top of the crepe was cooked (the batter gots slightly darker).

I continued along like that for several baghrir, and then I got impatient. It couldn’t possibly hurt to increase the heat to 6, right? I gave it a try, and the baghrir started cooking up in 2 minutes. I was onto something! Or so I thought.

Even such a slight increase in the heat burned the bottom of the crepes a little. It wasn’t terrible, but I could taste it. Lesson learned: it’s better to wait a little longer for unburned baghrir.

The sauce was the easiest part of this recipe, and I did it while the baghrir cooked. Just add the butter to a small pan, let it melt, add the rest of the ingredients, and stir. It only took a couple ofminutes, and the sauce was just amazing. You do not want to skip it!
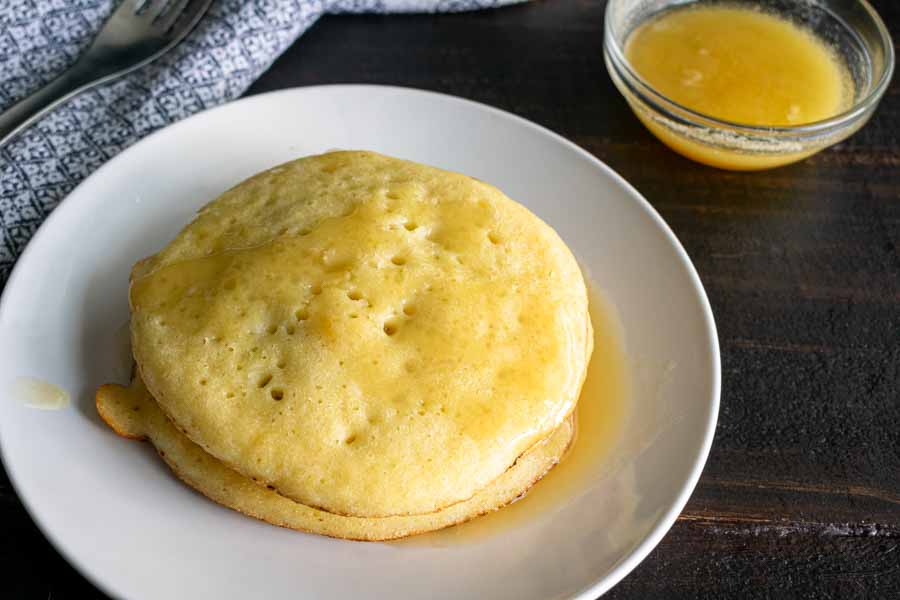
Baghrir drizzeld with honey-butter sauce

One Pan Moroccan Lemon Olive Chicken

One Pan Moroccan Lemon Olive Chicken. I don’t even know where to start with what got my attention first. One-pan recipes are my jam on any given night, and I’m always down with lemon, olives, and chicken. But Moroccan food is probably what sealed the deal. I love it! All the spices and flavors are always a hit around here, and getting me to try a new Moroccan recipe is never difficult. See how easy that was? I’m going to try a new one right now!

Traditionally cooked in a tangine, [Djej M’Chernel] is a wonderfully flavorful and fragrant chicken dish that combines two of my favorite flavors – lemons and olives.

Recipe Author: Nancy Buchanan at A Communal Table
Get the recipe

The Ingredients

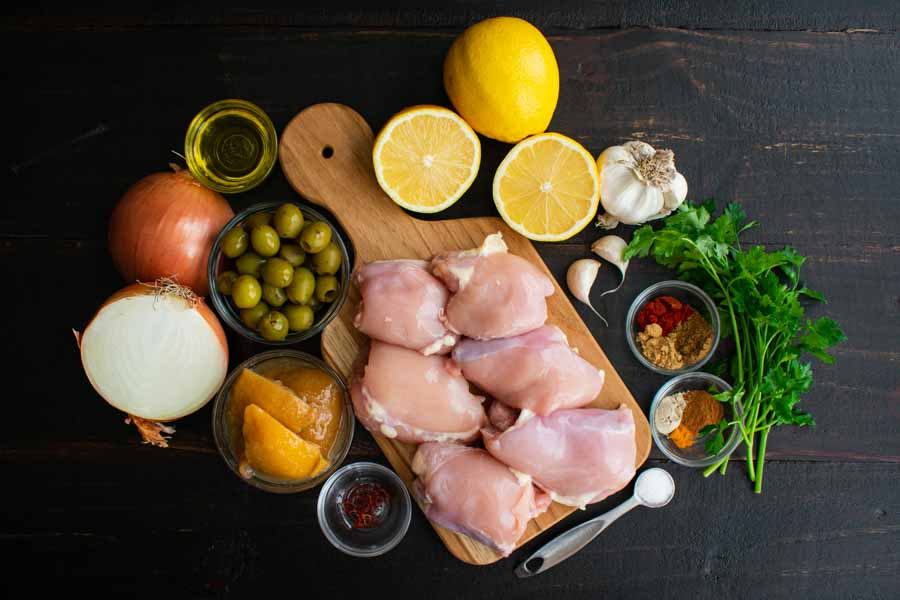
The first thing I do when getting ready to make any recipe is to check and see what I have on hand. Since I love exotic food and I’m a food blogger, I probably have more than most people would have on hand. That came in very handy for this recipe!

I had all the spices (there were quite a few), the preserved lemons, and the olive oil. That left me to buy the chicken, olives, and other produce items. None of these were difficult to find at my regular grocery store.

This recipe gives the option of using chicken breasts or thighs, and I chose thighs. I find them more flavorful and less prone to drying out. They also cook up faster since they are thinner.

I also noticed that this recipe calls for canned olives. I never really paid too much attention, but I usually buy pimento-stuffed olives in a jar. The canned olives aren’t stuffed and have what I can only describe as a softer taste. Jarred olives might overpower this recipe.

One Pan Moroccan Lemon Olive Chicken Ingredients
Chicken thighs (boneless & skinless), lemons, garlic, parsley, paprika, cumin, ground ginger, turmeric, cinnamon, ground white pepper, salt saffron, preserved lemon, onion, olives, and olive oil

Almost done! The one spice you might have an issue with is saffron. It’s expensive for a very small amount. If it’s out of your budget, don’t worry about it! Honestly, just add a pinch of turmeric instead or skip it altogether.
And lastly, there are the preserved lemons. I make mine, so I almost always have some on hand. My local grocery stores don’t carry them, so it’s either make them or order online. But the good news is they last for a long time, and you will find yourself looking for ways to use them–they’re delicious!

The Process

I prep as I cook most of the time, but I decided to prep everything first for this recipe. That meant some dicing, mincing, and measuring out the spices. It really wasn’t bad, though, and only took me 10 minutes before I was ready to get cooking.

A large skillet or saute pan will be perfect for this recipe, and I chose my trusty 12-inch cast-iron pan. it’s always on my stovetop anyway!

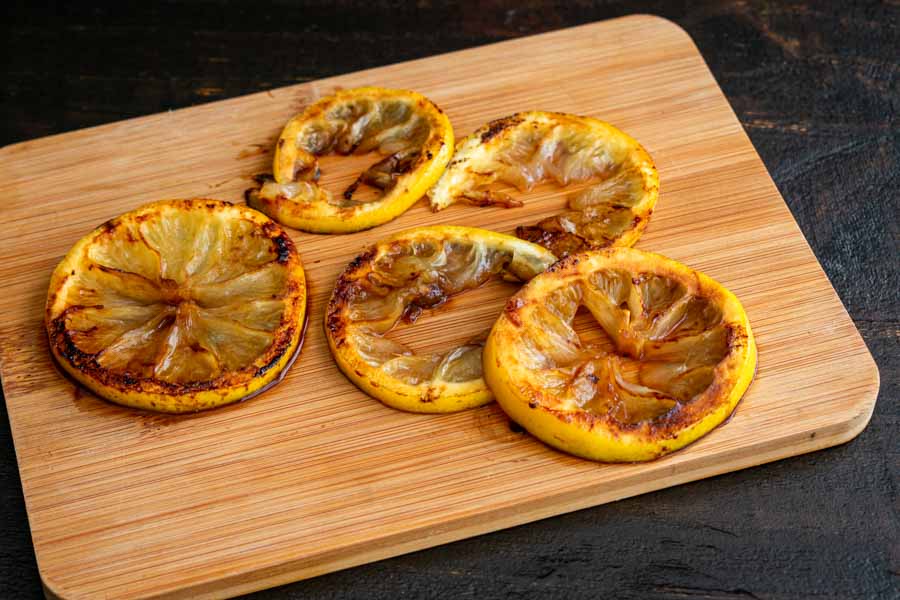
First up was to caramelize the slices of lemon that would be used as a garnish. I just popped them into the pan since I oil my cast iron after each use. The thinner slices browned fastest, but they all were nicely charred after three minutes. Best of all, they didn’t stick to the pan.

Caramelized lemon slices

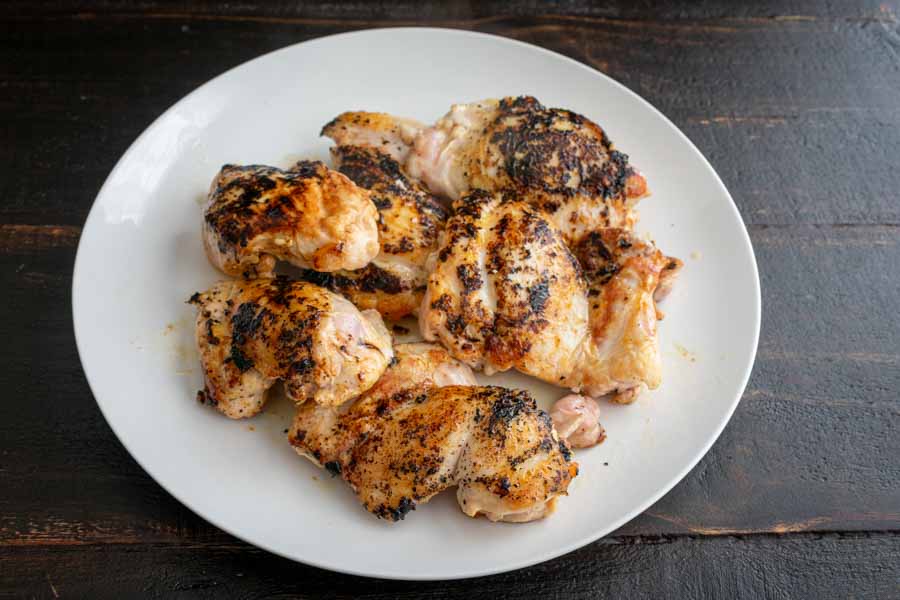
Now it was onto the chicken. I browned mine for three minutes on each side since the thighs were on the thin side. Take your time with this and just let the chicken do its thing. Getting a nice crust on the chicken makes a big difference in the finished dish!

Browned chicken thighs

From here it was all about getting those spices cooked up, and this part smelled so good! Start by cooking up the onions, then add the ground spices. After that, deglaze the pan with the saffron water, and add the browned chicken back into the pan. Cover and let the chicken braise for 15 minutes, and you’re almost done.

Once the chicken is ready (mine was done in 15 minutes), remove from the heat and add the olives, lemon juice, and preserved lemon. Give it all a good stir, and serve over couscous. It really was that easy!

Conclusion

Making this recipe seemed like it went according to the recipe, and I didn’t need to add any extra time to get the chicken thoroughly cooked. However, my One Pan Moroccan Lemon Olive Chicken took a bit longer than the 35 minutes listed. Here’s how my time was spent:

  • 10 minutes to prep
  • 38 minutes to cook
  • 48 minutes total

Portuguese Chocolate Mousse with Chocolate Salami

0

After reading the title of this post, you might be thinking what I was the first time I read it. Portuguese Chocolate Mousse with Chocolate Salami—wait, what? Chocolate salami??!! I don’t blame you. These are not two things that go together, but I assure you that there is no actual salami involved in this recipe. The name just describes how a chocolate and biscotti mixture is rolled up into a tube that resembles a salami. But the name is memorable, and it certainly got my attention. I simply have to try it!

Traditional Portuguese chocolate mousse served with crumbled ‘Chocolate Salami’Portuguese, European, Chocolate, Mousse, Cookie – a sliceable chocolate fridge cookie.

Recipe Author: Kate at Katie at the Kitchen Door
Get the recipe

The Ingredients

I’ve never made mousse or chocolate salami, but the list of ingredients really isn’t very long at 12 items. I had the granulated and powdered sugar on hand, as well as the liquors. This recipe gives you options for the liquor. I chose Cointreau orange liqueur for the chocolate salami and spiced rum for the mousse.

I found everything else at my usual grocery store except for the high-quality cocoa powder. That had to be ordered, and I ended choosing between the brand the author suggested, Valhrona, and Droste. I chose Droste since it was recommended a few times in articles and on message boards and it was a few dollars cheaper.

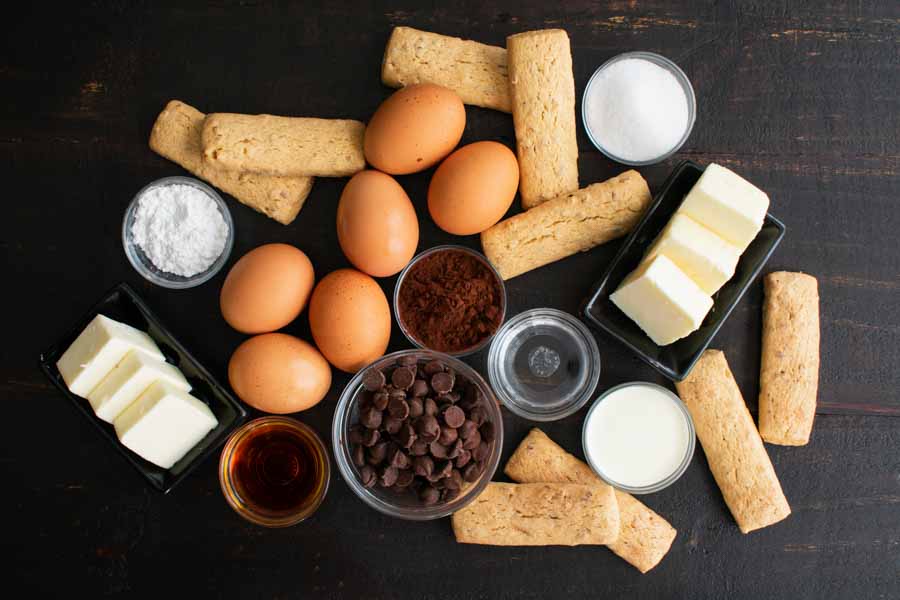
Portuguese Chocolate Mousse with Chocolate Salami Ingredients
Unsalted butter, eggs, powdered sugar, biscotti, granulated sugar, salted butter, heavy cream, semi-sweet chocolate chips, spiced rum, Cointreau, and cocoa powder

The Process

You might have guessed after reading the name of this recipe that it is made in two parts, and you would be correct. Here’s how my time was spent:

  • 13 minutes to prep and cook the chocolate salami
  • 15 minutes to cool
  • 3 minutes to shape the chocolate salami
  • 26 minutes to prep the chocolate mousse
  • 2 minutes to garnish with the chocolate salami
  • 59 minutes total (not including time to chill overnight)

And I have to tell you that I went into this recipe thinking it would be really difficult, but it really wasn’t. Yes, it’s somewhat complex, but it’s written in a way that makes it easy to follow. Here’s how it went.

Making the Chocolate Salami

I started off with the chocolate salami simply because the recipe lists it first. I kicked things off by making a chocolate mixture in a small saucepan. There was a lot of whisking involved, but it really wasn’t too bad.

From there I think I deviated a little from the recipe because I used my stand mixer with a whisk attachment instead of continuing to whisk by hand with a balloon whisk. I used it to beat the egg yolks and then mix them with the cooled chocolate mixture, and things turned out nicely with a little less work on my part. Yay!
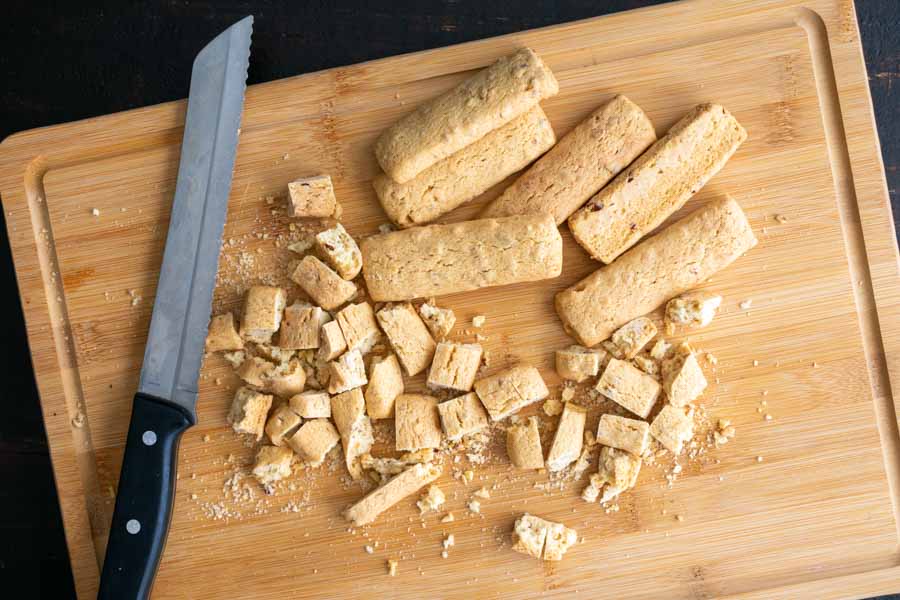
Cutting the biscotti into small pieces
Chocolate Salami, step 3: Cutting the biscotti into small pieces using a serrated knife

Then it was time to chop up the biscotti with a serrated knife (I used a bread knife) and add them to the chocolate-egg yolk mixture. Most of them ended up in the mixture, but I couldn’t help nicking a few pieces!

I rinsed out the stand mixer and go ready to make the chocolate mousse while the cookie mixture cooled. Soon enough, it was time to shape and refrigerate it. I couldn’t find wax paper, so I used parchment paper. They are both designed not to stick to things, and it worked almost as well. I did have a few tiny pieces stick to it when I finally unwrapped it, but they came off easily enough.

Making the Chocolate Mousse

My mousse making experience involves a packet of mix and some warm milk, so this was a totally new experience for me, and I was a little nervous. I’m happy to say that nervousness was completely unfounded. This part went just as smoothly as the chocolate salami.

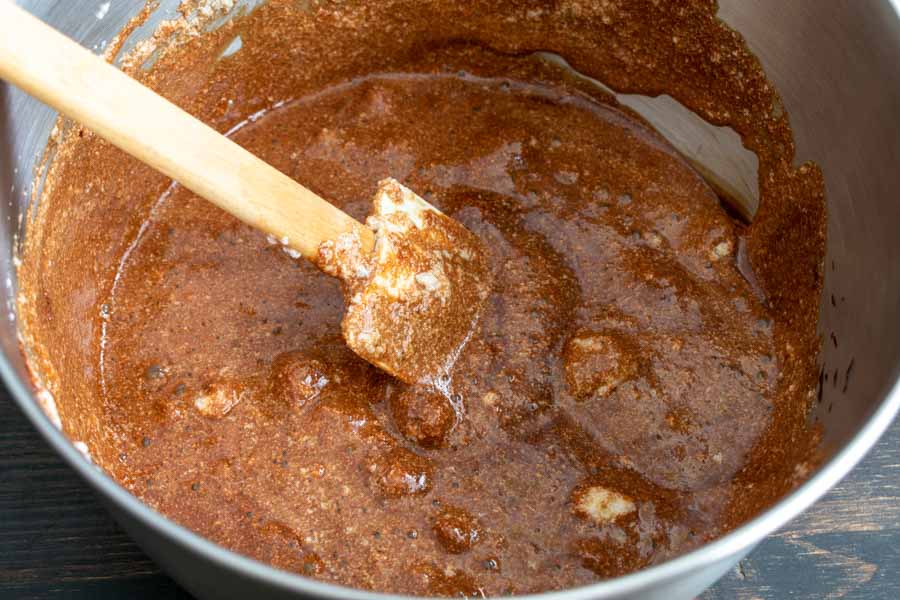
The first step was to put most of the ingredients into a double boiler and melt them while stirring constantly with a rubber spatula. Much like making the chocolate salami, the next step was to beat the egg yolks and then mix them with the chocolate mixture. Tip: If you don’t have a double boiler, you can DIY one with a mixing bowl and saucepan. Just make sure the mixing bowl is heat-proof (metal) and it fits snugly over the pan.

I used my stand mixer with the whisk attachment, but you could do this by hand with a balloon whisk pretty easily. Actually, using a balloon whisk might have been a better idea because I had to clean the whisk attachment before I was able to move on to the next step, beating the egg whites.

Beating the egg whites until they for soft peaks
Chocolate Mousse, step 6: Beating the egg whites until they for soft peaks

It took me about 15 minutes to beat the egg whites until they were thick enough to form the soft shiny peaks this recipe requires. I did have to tilt the bowl and scrape down the sides, so it wasn’t a turn the machine on and leave it kind of process. Maybe if I had a very nice stand mixer, but mine is a budget mixer (one day Kitchenaid, one day).

Then it was time to mix the fluffy egg whites with the aforementioned chocolate concoction. Honestly, I’m not sure I did this part right. The goal is to fold in the egg whites without deflating them. My egg whites seemed to form lumps, and I felt like I overmixed in order to get rid of them. I don’t know a lot about mousse, but I know it shouldn’t be lumpy.

Folding the egg whites into the cooled chocolate mixture
Chocolate Mousse, step 6: Folding the egg whites into the cooled chocolate mixture

Once the mousse was smooth, I poured it into four coupe glasses and carefully placed them into the refrigerator to chill. The recipe says for at least two hours, but I opted to chill everything overnight to be safe.

Putting it All Together

The next day I was so excited to see how things turned out! I carefully unwrapped the chocolate salami, then I sliced it and cut the slices into chunks. I’d say I put about two slices worth onto each mousse and still had about 1/3 leftover.

I sliced the leftover chocolate salami into rounds and ate it like cookies, but there was room to add more to the mousse. It would have covered it completely, but that’s not a bad thing! I just didn’t do it for photos.

One thing I did notice was the powdered sugar was never mentioned (it’s listed in the ingredients for the chocolate salami). After re-reading the blog post, I see the chocolate salami was rolled in it. I skipped it.

Poached Salmon with Fennel & Lemon

0

How do you feel about salmon? Personally, I love the stuff! Smoked, fried, baked, poached, and raw—it’s all good. Poaching is my go-to cooking method because it’s so easy. Like no recipe required easy. But I’m always up for trying something new, and this Poached Salmon with Fennel & Lemon sounds delicious, makes a whole meal with side, and uses one pan. It also uses a different poaching technique than my usual method, and that really got me interested. So let’s find out if I can poach salmon as well with a recipe as without.

This poached salmon recipe uses an aromatic broth to infuse the fish with flavor while keeping it moist.

Recipe Author: Adam Dolge at EatingWell Magazine, April 2020
Get the recipe

The Ingredients

This recipe has a medium length list of ingredients, but it’s really not bad. A lot of the ingredients are spices and seasonings that you might have on hand.

My shopping list was short: salmon, fennel, lemon, and butter. I had the garlic and other seasonings on hand. I even had some leftover pinot grigio in the refrigerator thanks to my Vacu Vin.

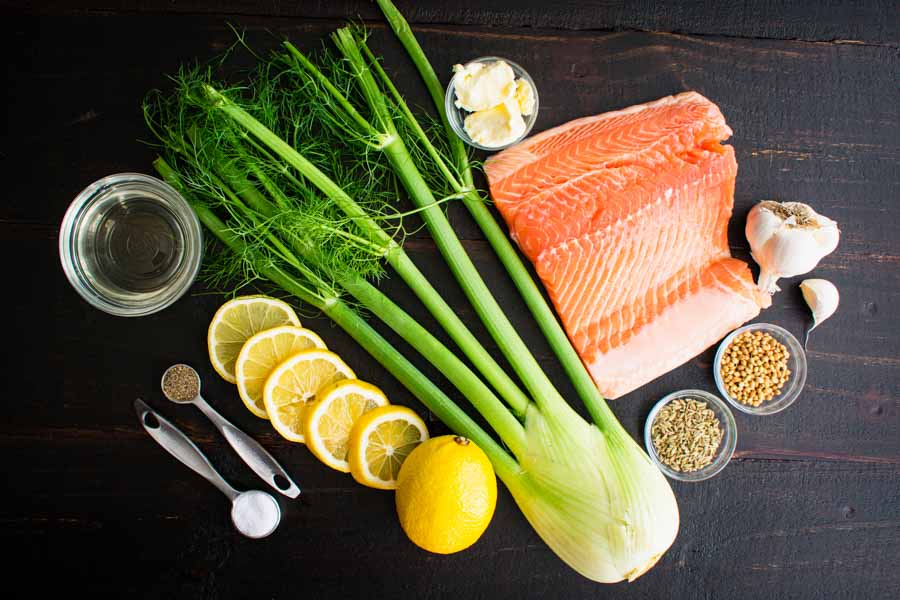
Poached Salmon with Fennel & Lemon Ingredients
Salmon fillet, garlic, coriander seeds, fennel seeds, fennel, lemon, salt, pepper, white wine, and butter

The Process

As I said, poaching is my go-to cooking method for salmon, but I usually just throw in whatever I have instead of using a recipe. Here’s how I usually do it:

  • Add the liquid to a saucepan. Some combination of white wine, chicken broth, and/or water are my usual poaching liquids.
  • Add seasoning. Lemon, garlic, salt, and pepper are almost always among the seasonings. I also use thyme and dill a lot—leftover fresh herbs if I have them or dried if I don’t.
  • Bring the seasoned liquid to a gentle boil then add the salmon fillet. Cover, turn the heat down to low, and simmer for 10-12 minutes, depending on the size of the fillet.

It’s an easy peasy and healthy dinner with a side of veg. This recipe was a change for me, and I had to work to ignore some ingrained habits and actually measure my ingredients.

Trying a Different Poaching Method

Prep was easy, with just a little slicing of the fennel and lemon being the most work. It took me all of seven minutes to get everything ready to go.

One thing that did stick out was that the ingredients were added to a cold saute pan, then the pan was placed on the stove to be heated. I’m so used to preheating!

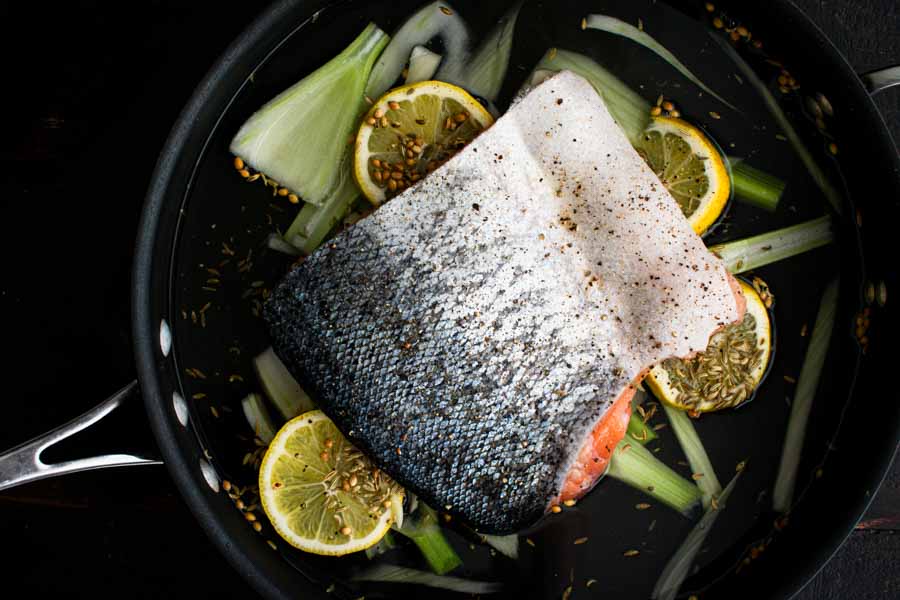
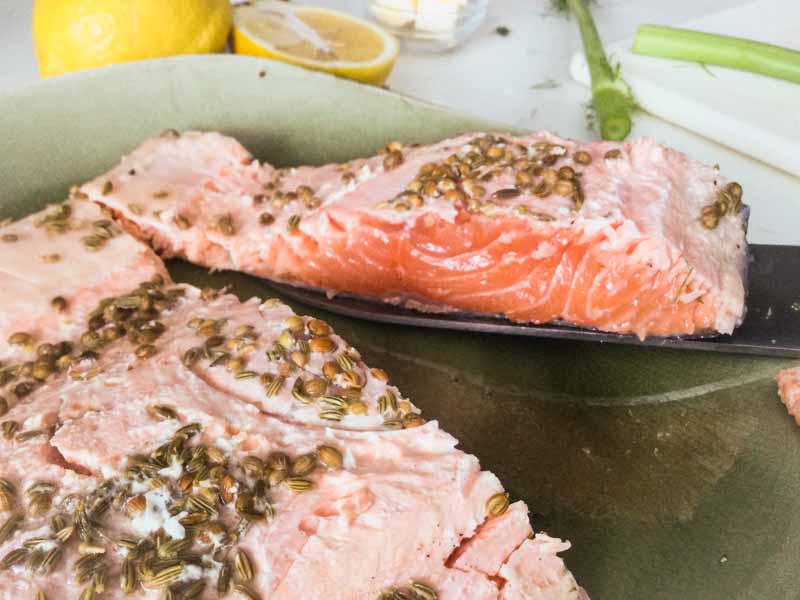
I also tend to put the salmon into the pan skin-side down, and this called for the opposite. This method allowed the herbs and lemon to season the fish better, though. (You can see in the main photo how the coriander and fennel seeds stuck to the salmon.)

Prepped salmon and fennel in a saute pan
The salmon prepped and ready to cook in my largest sauté pan. I should have cut the fillet into 3-4 pieces instead of leaving it whole.

Things went okay, but it did take a long time for the liquid to come up to a simmer with the heat set at medium. I tried being patient, but I ended up increasing the heat to high after about seven minutes. I dropped it back down to low once it was gently boiling.

Oops, I Kinda Did it Wrong

Things were going well until I got to the end of Step 1 and transferred the “cooked” salmon to a plate. While the fennel was boiling, I cut into the fish and saw that it was pretty raw in the middle. I don’t mind rare, but this was too rare.

After re-reading the recipe, I saw that I should have cut the salmon into four portions before adding it to the pan. This was far from a disaster, though, and easily fixed with a bit more poaching. Plus the whole salmon fillet made a lovely photo if I do say so myself 🙂

I let the fennel finish cooking and used a slotted spoon to remove it from the pan, leaving in the lemon slices. Then I sliced the salmon into three pieces (my fillet was a little small), brought the liquid back up to a boil, and added the salmon back to the pan to simmer for another five minutes. That did the trick, and my salmon was now cooked as it should have been.

The salmon was way underdone after poaching for 3 minutes because I left it whole

I continued with the recipe as it was written from there, and everything went as expected. I had three lovely servings of salmon and fennel served up in just a few more minutes. Here’s how much time was spent on the entire recipe:

  • 7 minutes to prep
  • 27 minutes to cook
  • 34 minutes total

Although I had to add an extra five minutes to the salmon, I finished within the recipe’s 35 minute time. I don’t know how I did it, but I’m happy that I did.

Garlic Mushroom Grilled Cheese

Everyone likes grilled cheese sandwiches, and I’m no exception. They’re the best when the weather cools down and that need for comfort food hits. The furthest north I have ever lived is Central Florida, but I guess I still have that need to pack on some pounds for the winter LOL! I tried a Lasagna Grilled Cheese last year, and it was glorious. This year I have found this Garlic Mushroom Grilled Cheese, and it sounds like it will be a savory masterpiece. I’m a big fan of savory dishes, so let’s find out if this recipe is as good as it sounds.

Garlic butter fried mushrooms and aged cheddar cheese make this mushroom grilled cheese the ultimate easy lunch or dinner recipe.

Recipe Author: Alida Ryder at Simply Delicious
Get the recipe

The Ingredients

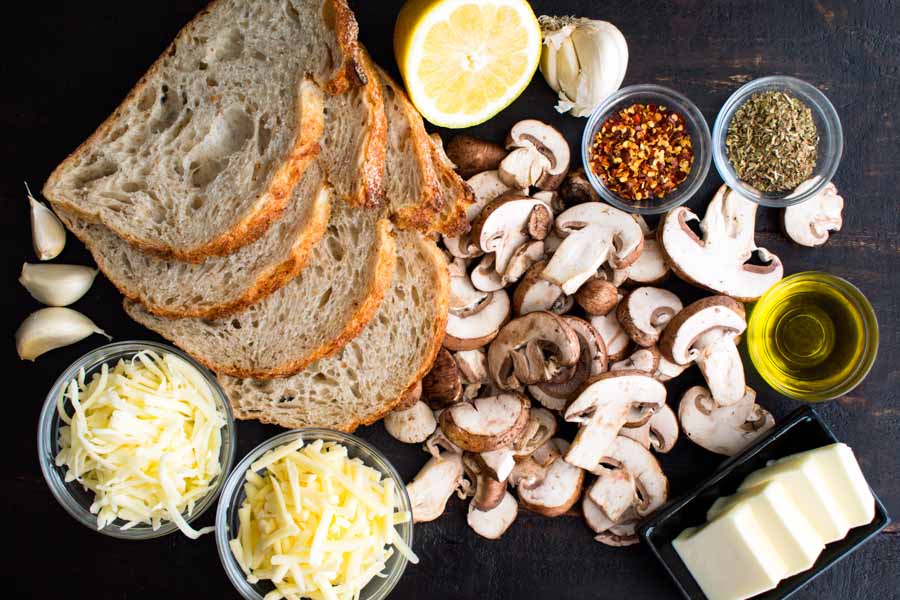
The major ingredients in this sandwich are grated cheese and sliced mushrooms. And sliced bread if you really want to get technical. you can grate and slice everything yourself, but I opted not to. I made sure to buy sliced mushrooms and bread alone with grated mozzarella and sharp cheddar cheeses. I’m not looking for extra work!

The rest of the ingredients were all simple things that I either had in my pantry or were easy to find. No special trips or online orders were required for this recipe, and I am very happy about that.

Garlic Mushroom Grilled Cheese Ingredients
Sourdough bread, lemon juice, garlic, mushrooms, chili flakes, oregano, olive oil, butter, sharp cheddar cheese, and mozzarella cheese

The Process

So this grilled cheese does have the extra step of sauteing the mushrooms, but I think it’s still a pretty simple recipe. Here’s how my time was spent:

  • 13 minutes to prep and make the mushrooms
  • 3 minutes for the first sandwich
  • 5 minutes for the second sandwich
  • 21 minutes total

The recipe is for four sandwiches, but that would have been too much for us. However, I estimate the total time at 33 minutes if I made all 4 sandwiches. That’s in line with the 30 minutes listed on the recipe.

I prepared the mushrooms & garlic in my largest skillet and also used it to toast the sandwiches. No need for a second pan and more dishes to wash. I was able to prep the rest of the ingredients as they fried.

Olive Oil?

My only moment of confusion was when I got started cooking. Although I had read over the recipe, I missed the fact that there is olive oil in the ingredients list but nowhere in the instructions.

The instructions do say to use 2 tablespoons of butter to saute the mushrooms, so I saved the oil for frying up the sandwiches. I figured the olive oil would add a little flavor, and it did.

The instructions also say to fry all the sandwiches at once, but even a 12″ pan wouldn’t fit them all. I decided to fry them up one at a time. The first grilled cheese was done at 5 1/2 (out of 10 on an electric stove) for 3 1/2 minutes total. The outside toasted nicely, but he inside could have melted a touch more.

I turned the heat down to 4 for the second grilled cheese and let it fry for 5 minutes, flipping it twice. I also added a lid (borrowed from my largest saute pan) while it cooked to trap the heat and help the cheese melt. The result was the perfect grilled cheese! The outside was crispy and the inside was nice and gooey.

Garlic Mushroom Grilled Cheese Process
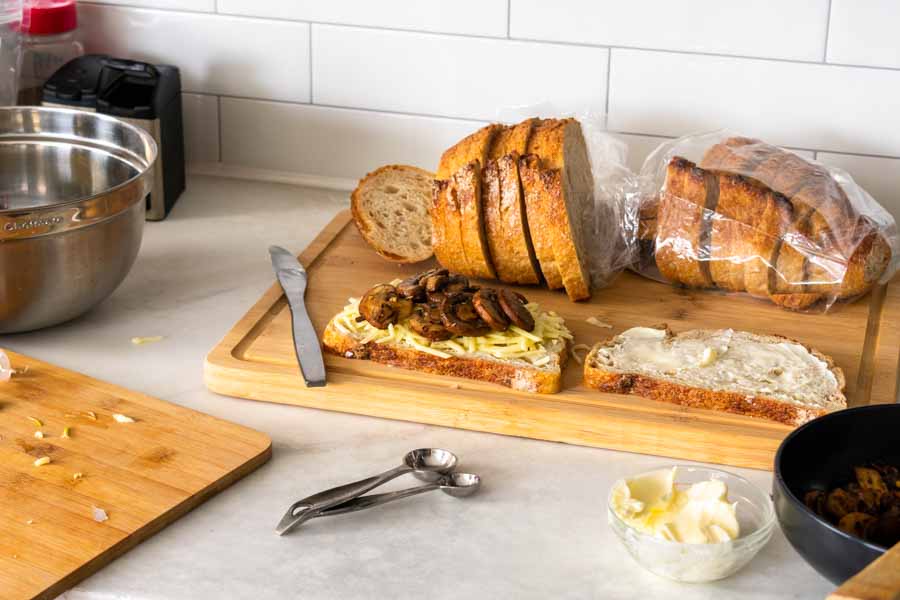
Assembling a Garlic Mushroom Grilled Cheese sandwich

A Few Tips

Salt and pepper are listed “to taste”. I like to start small and add if needed. I used 1/4 teaspoon of salt and pepper, and I was very happy with the amount of both.

Cold butter is hard and impossible to spread. I set mine out a few hours before I made this recipe, and it was very easy to spread.

As I just mentioned, cover the pan while your grilled cheese(s) cooks. It traps the heat and helps melt the cheese.

And lastly, I discarded the garlic cloves after the mushrooms were finished. I didn’t think anyone would want to bite down on a whole clove of garlic in their sandwich.

Epic Chocolate Stout Cake with Chocolate Bourbon Sour Cream Frosting

0

How good does Epic Chocolate Stout Cake with Chocolate Bourbon Sour Cream Frosting sound? I think it will indeed be epic, and I was looking forward to trying a slice tonight. Alas, it’s not to be 🙁 Y’all, it’s one of those days! It’s December 2020, and I’m working way ahead for my blog. This is a good thing, right? Not today!

I just royally messed up my first attempt at this recipe. I was grooving along to some music while I cooked, and I was having a good time. But I skimmed the recipe, didn’t pay attention, and either messed up or just skipped over a few steps. Then I cleaned up (baking is messy for me), nearly slipped on some water I spilled, and my garbage disposal just stopped in the middle of it all.

I got mad for the first time in a while, and that surprised me. But it was mildly cathartic, and I think I vented some pent-up frustrations I didn’t realize I had with some angry dishwashing. But I’m over it, and I’m hitting the reset on Epic Chocolate Stout Cake with Chocolate Bourbon Sour Cream Frosting. I’m making a list of the ingredients I need to give this recipe another try, without music. I’ll save that for recipes I’ve made before.

My chocolate cake will always be made with a nice chocolate stout.

Recipe Author: Jackie Dodd Mallory at The Beeroness
Get the recipe

The Ingredients

The ingredients list for this chocolate stout cake recipe wasn’t too long, and I had a few things on hand (as usual). I had to buy the dairy products, chocolate, and some extra sugar. But I wasn’t too concerned with finding any of that–most grocery stores sell this stuff.

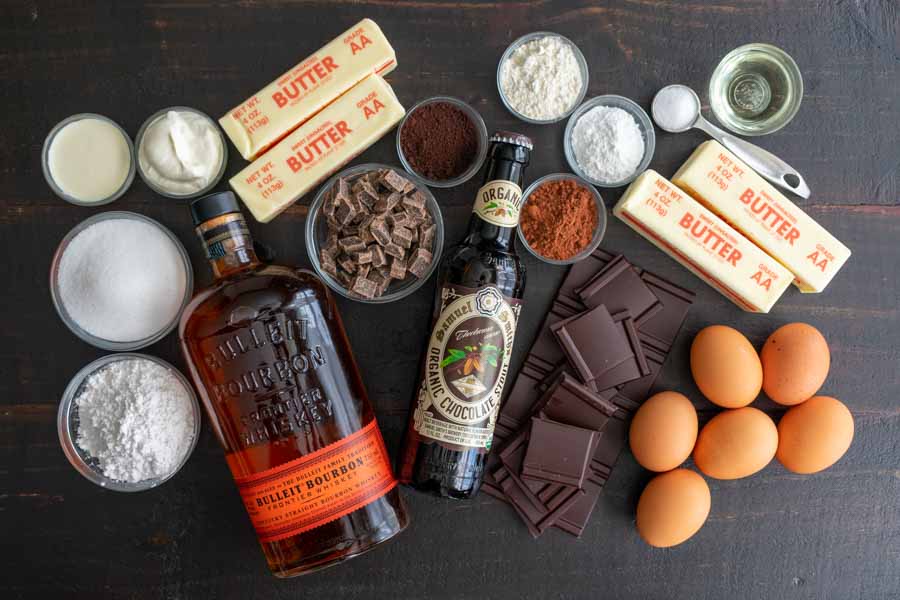
The only ingredient I thought might require a special trip was the chocolate stout. But, happily, it didn’t. Whole Foods had a 4-pack of Samuel Smith’s, so I was able to include it in my regular weekly grocery order. Nice!

Epic Chocolate Stout Cake with Chocolate Bourbon Sour Cream Frosting Ingredients
Powdered sugar, granulated sugar, heavy cream, sour cream, butter, bourbon, dark chocolate chips, chocolate stout, cocoa powder, flour, baking powder, kosher salt, canola oil, dark chocolate, and eggs

The Process

I’m not even going to talk about my first attempt at this cake since it was so bad and completely my fault. Let’s pretend it didn’t happen.

This recipe can be broken down into a few steps:

  • Making the cakes
  • Making the frosting
  • Assembly

Making the Chocolate Stout Cake

You’ll need a mixer for this part, and preferably a stand mixer. Don’t worry if you don’t have one, though. It is possible to use a hand mixer instead (I did it for years), but a stand mixer will make it easier.

A few other items you’ll need are extra mixing bowls, a double boiler, and three 8-inch cake pans. The recipe does say you can use two cake pans and a muffin tin for the extra batter. You’ll end up with a shorter cake, but you won’t waste any batter. Nice!

Tip: Because of my previous mistakes (I know, I said I wasn’t going to talk about it), I kept a pen handy and checked off each step as I completed it. It really helped keep me on track this time.

When I gave this recipe my full attention, the steps were easy to follow and took me 26 minutes. Most of this part was done with my stand mixer except for adding the dry ingredients. They were stirred in by hand, and I appreciated that. It was a lot less messy than mixing them with an electric mixer.

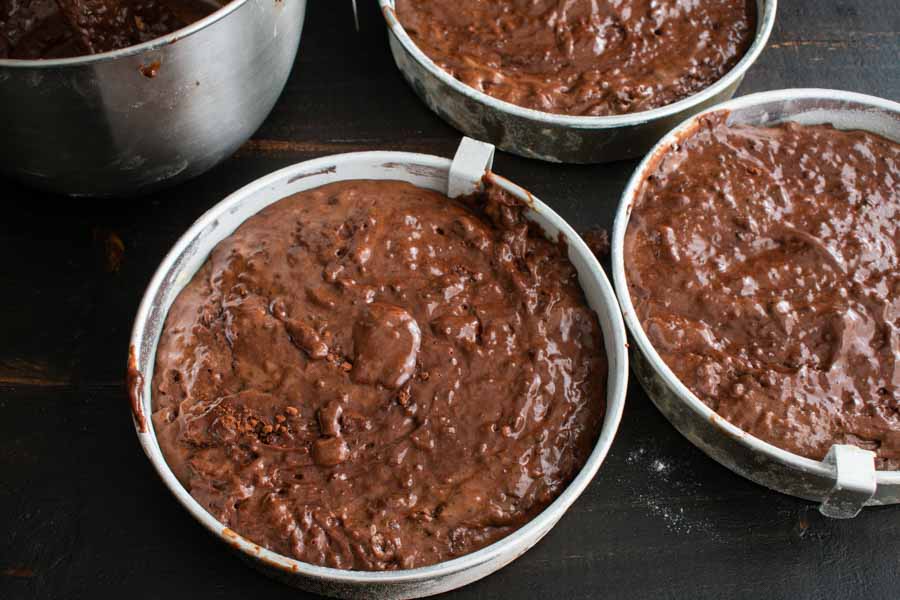
The recipe called for baking the cakes for 20-25 minutes, which sounded pretty standard. Unfortunately, my cakes didn’t pass the toothpick test after 25 minutes, and I had to add some time. The batter was still clinging to the toothpicks after an extra 10 minutes, but I pulled them out of the oven anyway. I didn’t want to overcook the cakes and dry them out.

The batter was lumpy like brownie batter

Making the Chocolate Bourbon Sour Cream Frosting

I had some cleaning up to do while the cakes baked because I needed to reuse the stand mixer and double boiler to make the frosting. They cleaned up pretty quickly, though, and I was able to get back to work in just a few minutes.

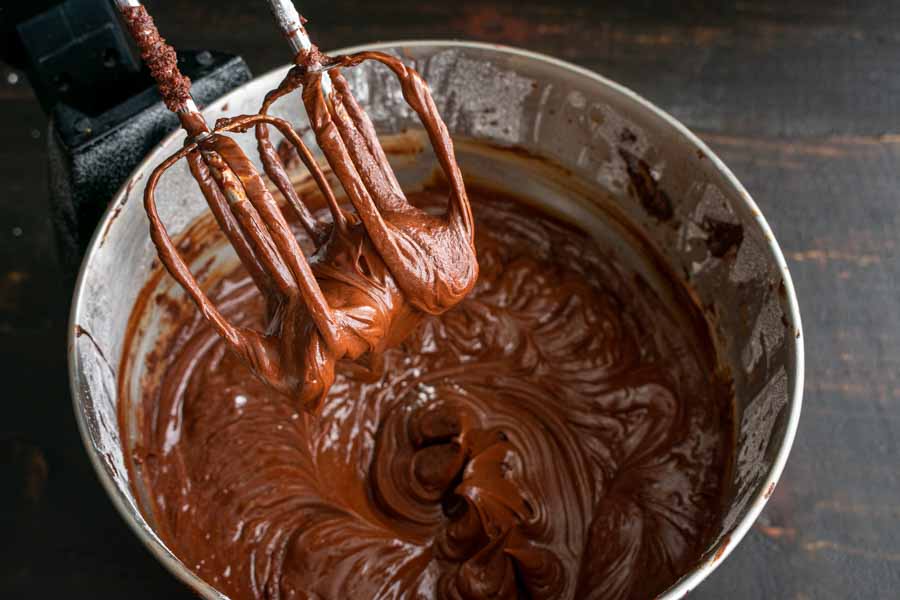
Mixing up the frosting was very easy, but it did differ from the cake batter on one important point. This part required me to mix the powdered ingredients in the stand mixer which can get messy.

I took this part slowly and placed a tea towel over my stand mixer to minimize the mess. It wasn’t perfect, but it helped a lot. I had the frosting mixed up (relatively mess-free) in 15 minutes.

Mixing the frosting in my stand mixer

The cakes and the frosting were ready to cool around the same time. Cooling the frosting was simple: just place the bowl into the refrigerator. The cakes took a little more planning.

First, I let them cool on wire cooling racks for 30 minutes. The racks let air circulate around the pans, cooling them faster. After that, I turned each cake onto a parchment-covered plate and placed them all into my refrigerator. I let them cool in there for another half hour.

Tip: I left the frosting in the refrigerator with the cakes, and this did cause a slight issue when I frosted the cake. The very outside of the frosting that touched the metal bowl cooled more than the rest. It got a little chunky and was hard to spread. It wasn’t a huge issue, but it’s something to be aware of. Next time, I won’t’ put the frosting into the refrigerator with the cakes, not before.

Assembly

With the cakes and frosting chilled, it was time to assemble them into a proper cake. I was ready to go! I got out my cake stand and offset spatula and go to it.

It’s not listed in the recipe, but my first impulse was to level the cakes. I tried this on the first layer and quickly realized it wasn’t necessary. The cakes were all pretty level right out of the pans.

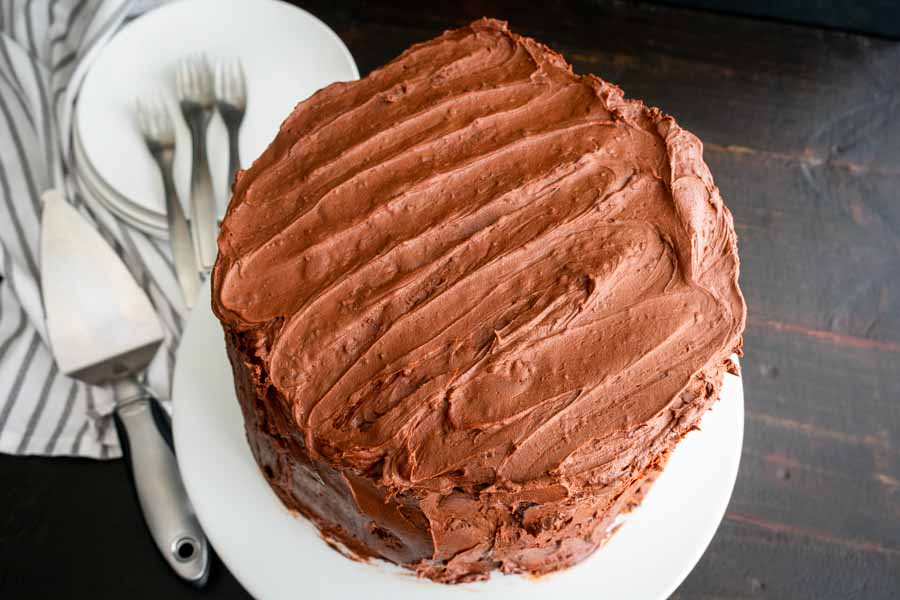
Assembly pretty much went as you would think, but I did have a little trouble getting the frosting smooth. The cakes were pretty crumbly, and the crumbs ended up in the frosting. I like to think of it as a little extra texture LOL!

Oh, and this recipe made up plenty of frosting, so there was no worry of a shortage. I was able to be pretty generous throughout the process. It helped hide the crumbs some.

The finished cake
The finished cake

So how long did it all take? I’m glad you asked:

  • 26 minutes to prep the cake
  • 35 minutes to bake the cake
  • 15 minutes to prep the frosting (made while the cake baked)
  • 1 hour to cool the cakes and frosting
  • 16 minutes to assemble
  • 2 hours 17 minutes total

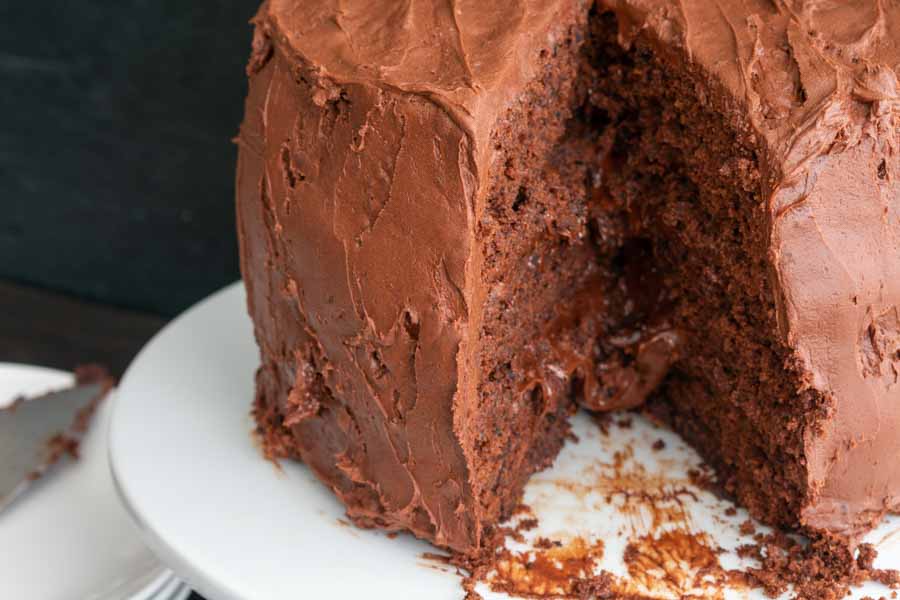
Oh, remember that toothpick test that I mentioned earlier? The cakes seemed solid when I removed them from the refrigerator, but they were still a little soft in the center. I couldn’t see it until I sliced into the cake for the photos. It was far from ruining the cake, though, and more or less created a fudgy center.

The frosting on the inside of the cake was so gooey!

Irish Scallop Bisque

0

My anniversary is coming up on St. Patrick’s Day, and I always love to make some Irish-themed recipes around this time. It’s a nice reminder of our wonderful wedding day. (Excuse me while I get all the feels). I started with the usual corned beef and cabbage, but I’m trying to go deeper into Irish cuisine. This Irish Scallop Bisque definitely isn’t something I think of for St. Patrick’s Day, but I’m excited to try it. We both love scallops, and I’ve never tried making a bisque. Sounds good to me!

Luxurious flavors abound in this creamy bisque! It’s perfect as an elegant starter course, or a light main course with bread and a salad…

Recipe Author: Tamara at Beyond Mere Sustenance
Get the recipe

The Ingredients

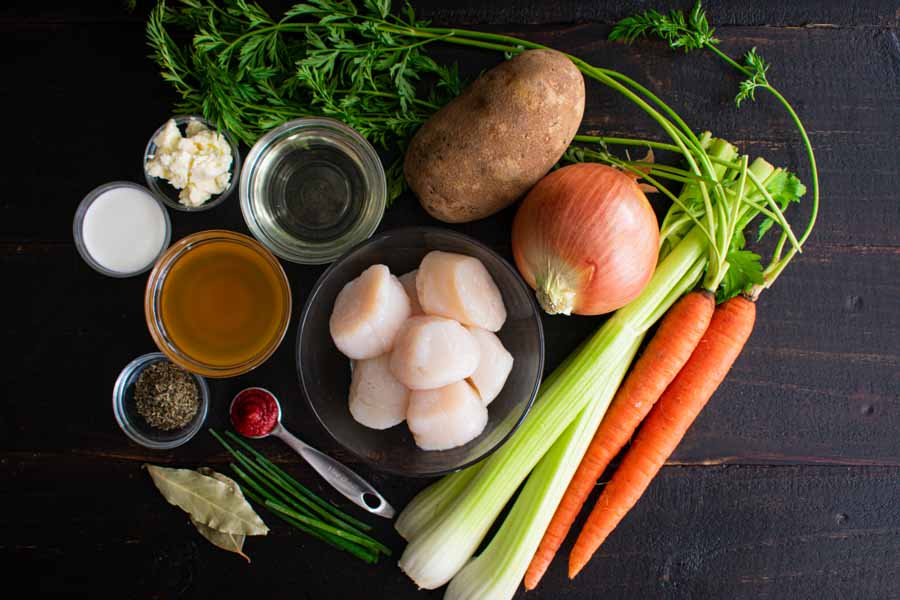
I had the spices and a few of the ingredients on hand like the vegetable oil and tomato paste. I had to buy quite a few ingredients, though, but this recipe is chock full of basics that were easy to find at my usual grocery store. No worries about getting carrots, celery, onion, or a russet potato.

I don’t really drink white wine, so I went with a wonderful budget find of Three Wishes Chardonnay. At $2.99 a bottle, it’s a grocery store find that’s perfect for cooking.

Of course, I had to buy scallops. I keep a lot of ingredients on hand, but scallops aren’t one of them. I chose to buy them frozen for a couple of reasons. First, they can be stored for much longer than fresh. Fresh scallops really should be used within 24 hours of purchase. I knew there would be a few days between buying the scallops and making the bisque, so frozen was perfect for me.

The second reason I opted for frozen scallops was the price. A 24-ounce bag of frozen scallops was $26.99 while fresh scallops were prices at $21.99 per pound (8 ounces). There were enough scallops in the bag to make this recipe twice, which is a good backup in case something goes wrong. If not, I have extra for another recipe.

Finally, this recipe calls for seafood stock. This was the one ingredient I was worried I wouldn’t be able to find. Thankfully, Whole Foods carries seafood stock, so no special orders or extra trips were required.

Irish Scallop Bisque Ingredients
Scallops, russet potato, onion, celery, carrots, chives, bay leaves, tomato paste, thyme, seafood stock, half-and-half, vegetable oil, and butter

The Process

I tend to prep just enough ingredients to get a recipe started, then finish the prep work as I cook. This recipe really needs to have everything prepped beforehand, but it was quick work. I had it done in the 5mnutes specified.

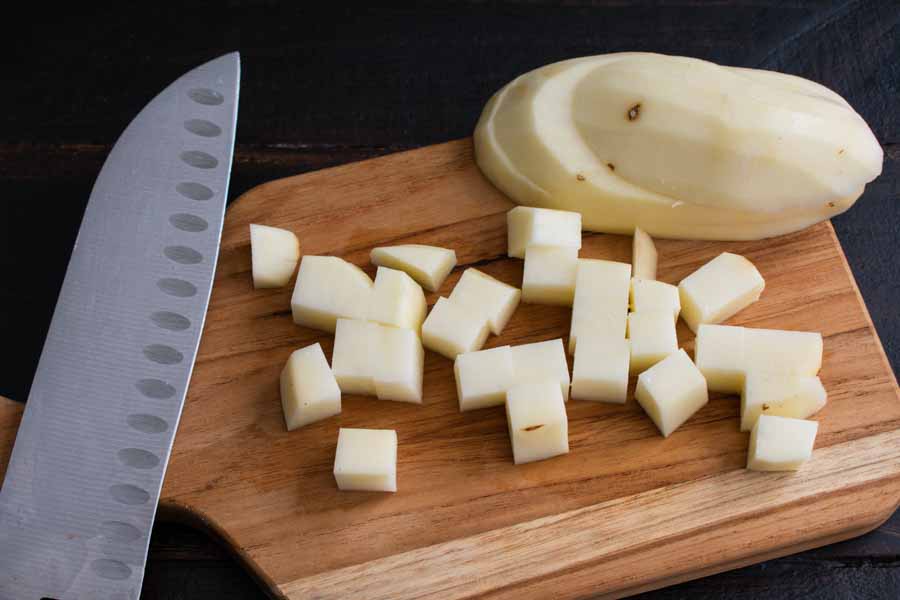
By the way, it’s not specified, but I peeled the potato. The vegetables will ultimately be pureed, and peels would not make a smooth bisque.

Dicing the peeled potato

A good-sized pan is a must for this recipe, especially if you will be using an immersion blender to puree the bisque. I opted for a 4.5-quart pan, and it was just big enough to contain the accidental (and inevitable) splashes.

A pair of tongs will also be very useful. I used them to remove the large pieces of celery and bay leaves before I pureed the vegetables. They were also helpful for flipping and retrieving the scallops from the skillet.

Oh, that reminds me to tell you about “wet” versus “dry” scallops. Apparently, wet scallops are very common and have been treated with a solution that makes them absorb more water. That water is exuded when the scallops are cooked and causes them to steam instead of sear.

I dried my scallops thoroughly, and there was still plenty of moisture in the pan. They only seared a little bit, as you can see in the main photo. That was unfortunate, but they were still tender and tasty.

Lastly, the time to sear the scallops isn’t specified. My scallops were pretty big, so I cooked them for 90 seconds per side, for a total of 3 minutes.

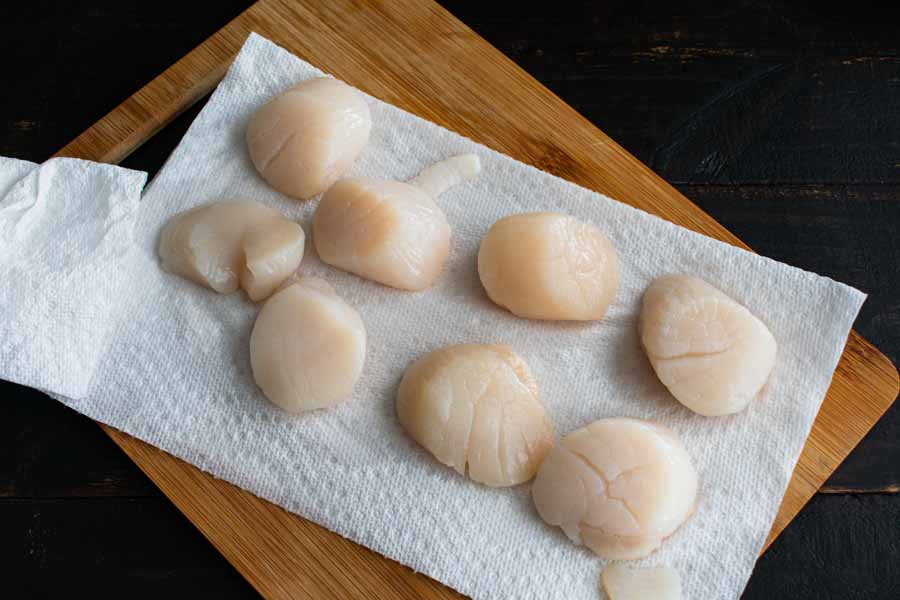
Drying the scallops
Drying the scallops on a paper towel

Conclusion

Things went very smoothly with this recipe, and I really appreciated the tip about keeping the celery in large pieces and removing it before pureeing. But despite how easy it seemed, this recipe took me a bit longer than the 40 minutes specified. Here’s how my time was spent:

  • 5 minutes to prep
  • 49 minutes to cook
  • 54 minutes total

I’m guessing the slow-down happened at a few points in the process. The first must have been when I pureed the bisque. It took me a few passes with the immersion blender to make sure all the vegetables were thoroughly broken up.

Next was seasoning the newly pureed bisque. It took me a few tries to add salt and pepper, taste, and continue to adjust. I estimate I added a teaspoon of salt and 1/4 teaspoon of pepper. The starchy potatoes really soaked up the salt, so I used more than I expected to.

Lastly, I had to wait a few minutes for the skillet to get good and hot before I tried to sear the scallops. That and dry scallops will give you a good sear.

Mahogany Manhattan

I think my love for bourbon has been well documented here, but it’s always nice to have a reminder every now and then. Right? Right! A couple of years ago I made a Maple Manhattan as part of my Thanksgiving menu, a simple but nice seasonal variation on a classic cocktail. But it’s been a while, and I think it’s time for another variation on this classic with the Mahogany Manhattan. It’s a chocolate-cherry take on the Manhattan, and I think it sounds even better than the Maple Manhattan. Let’s find out!

Named the Mahogany Manhattan for its deep reddish-brown color this cherry chocolate Manhattan variation is sweet, earthy and spicy. Perfect sipping for these long winter nights.

Recipe Author: Christine at Mid-Life Croissant
Get the recipe

The Ingredients

I had a lot of shopping to do for this cocktail! I normally have bourbon and vermouth, but I was out of both. Plus I needed the Heering cherry liqueur and chocolate bitters. I literally had to buy all of the ingredients!

The cherry liqueur and chocolate bitters were a tad unusual, so I had to make a trip to Total Wine to find them. It’s really not far out of my way and worth it for those hard to find items.

They usually have everything even remotely related to cocktails, so I was surprised when they didn’t have the Luxardo cherries. I, however, had a jar of maraschino cherries in my refrigerator.

I plucked out a few cherries and soaked them in some Luxardo cherry liqueur for about a week before I planned to make my Mahogany Manhattan. The cherries are just a garnish, so this should be a big deal.

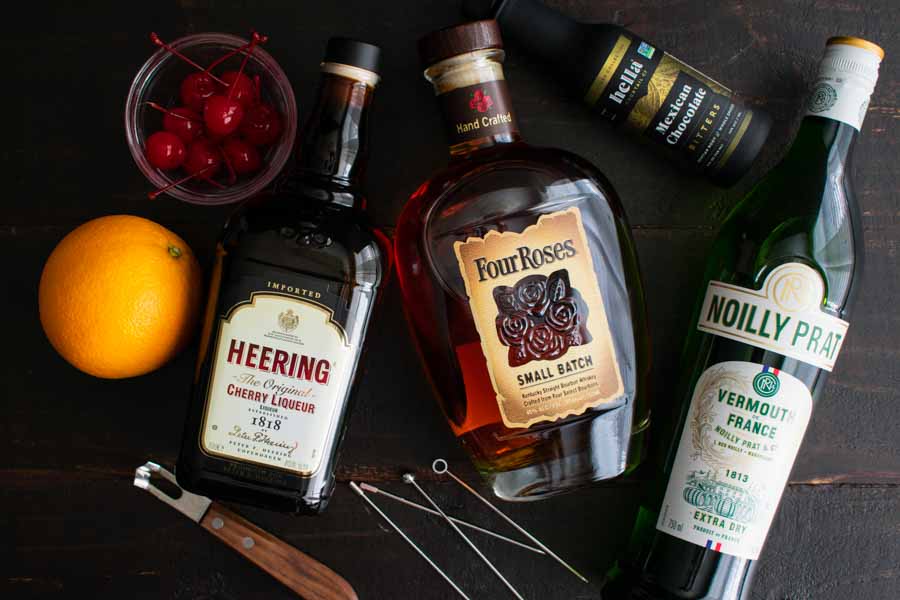
Mahogany Manhattan Ingredients
Cherry liqueur, bourbon, chocolate bitters, and dry vermouth

The Process

I am quite fond of stirred cocktails for get-togethers. It’s nice to watch them being prepared, and the fact that there’s no loud shaking (or worse, blending) allows you to talk to your guests.

This version might have an extra ingredient, but it’s made the same way as its namesake and ready just as quickly. Basically, add ice to a shaker (or mixing glass if you want to go for a Mad Men vibe), add the liquors, stir, and strain into a coupe glass.

Well, there is also the extra step of rubbing a bit of orange peel around the rim of the glass and garnishing it with a cherry and a twist. These might sound like they are skippable, but I strongly disagree.

The aromatic oils from the orange peel add something to the whole experience. Not to mention that the garnishes are beautiful and easy to make. Trust me, it’s worth an extra minute to add them, so break out the channel knife and cocktail picks!

Making the orange twist with a channel knife

Chimichurri Roasted Chicken

Let’s talk chicken, roasted chicken, that is. I love it! Seriously, roast chicken is such an easy and inexpensive meal. I have several roast chicken recipes I make regularly, but I’m always game to try a new one. And that brings me to this week’s first recipe: Chimichurri Roasted Chicken. I tried Chimichurri Chicken Green Beans Skillet last year, and it was pretty good. But chicken breasts are never as good as a whole roasted chicken in my book. There’s just something about that slow cooking with the bones in and skin on that makes it more flavorful and juicier than a boneless, skinless chicken breast. Now imagine that with the addition of chimichurri, and you’ll understand why I want to try this recipe.

Awesomesauce. Ha. I’m not usually one for modern slang, but this is one situation where this silly word actually applies, because it really is a sauce that is awesome.

Recipe Author: Lindsay and Taylor at Love & Olive Oil
Get the recipe

The Ingredients

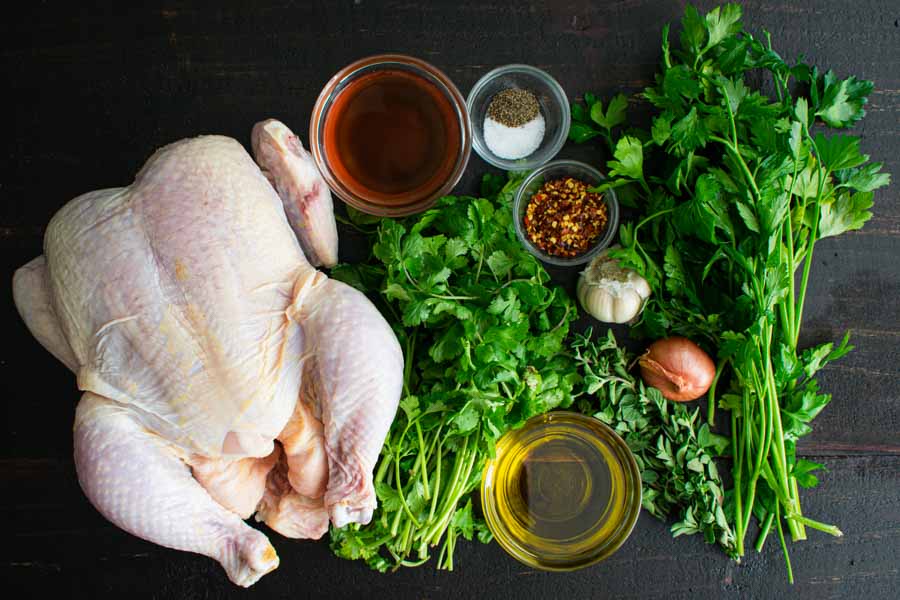
This recipe is made up of a few basic ingredients. I had a few things on hand like olive oil, red wine vinegar, and spices. That left me to shop for the fresh ingredients, and my usual grocery store had them all.

The chicken I bought was 4.47 pounds, so slightly larger than the 3-4 pounds listed. It also priced out at $2.99 per pound for a total of $13.37. Not bad when you compare with boneless, skinless chicken breasts that are $6.99+ per pound. Even when you account for the waste (bones and skin) with a whole chicken, it’s still a good deal.

Oh, and the chicken’s wings were tucked when I took it out of the package. I left them tucked and thought about tieing the legs. I decided not to, but it’s always an option if you prefer a neater presentation.

Chimichurri Roasted Chicken Ingredients

The Process

I’m all about my cast iron pans, and this recipe used a new cast iron cooking technique for me: preheating the pan with the oven. I always keep my 12-inch cast iron pan on my stove so it’s ready to go. It has two handles which make it perfect for moving in and out of the oven.

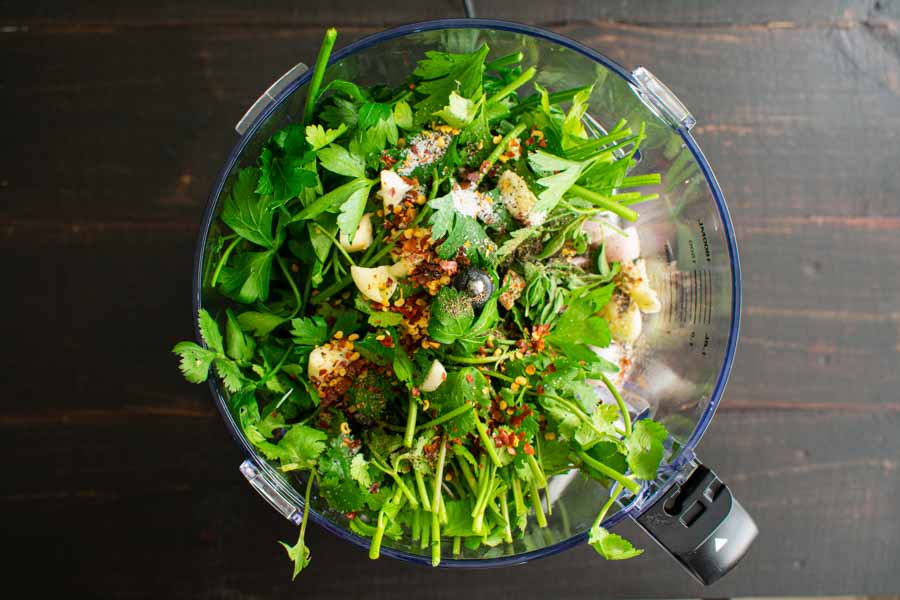
After that, I got to try out my new food processor for the first time (finally!). The chimichurri isn’t complicated, but you do need a large food processor to fit all of the ingredients. A mini-prep just won’t do in this case.

Mixing up the chimichurri in a food processor

After a quick zip through the food processor, I was ready to prep the chicken. I gave it a quick rinse, patted it dry, and placed it on a clean cutting board. Yes, I rinse my chicken (and other meat), but I am very careful to keep the water on a low setting so it doesn’t spatter across my kitchen. I just can’t not rinse it!

Add the Chimichurri Carefully

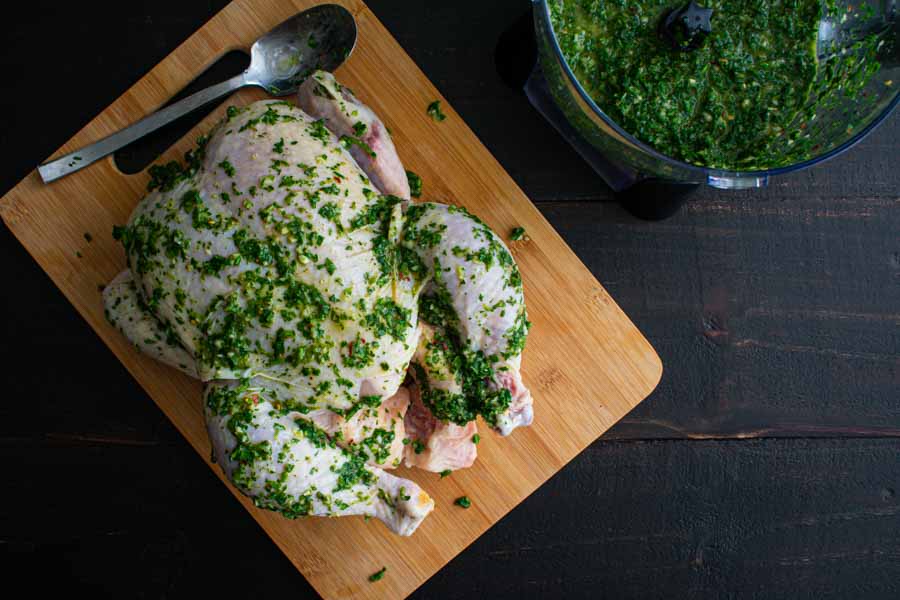
With my chicken prepped, it was time to season it with the chimichurri. I used a combination of a spoon and rubbing with my bare hands to coat as much of the bird as possible.

Do be careful here because I almost made the mistake of dipping my spoon back into the food processor after it had touched raw chicken. Yuck! Pour what you plan to put on the chicken into a small bowl to keep things sanitary. Actually, you’ll need to add more chimichurri later in the cooking process, so have two small bowls ready.

Covering the chicken in chimichurri sauce before roasting

Finishing Up

The rest of the process was really just waiting for the meat thermometer to reach 165℉. I did add a touch more chimichurri after 45 minutes, but I still had plenty left to serve with the chicken.

Here’s how my time was spent on this recipe:

  • 9 minutes to prep
  • 51 minutes to cook
  • 5 minutes to rest
  • 65 minutes total

That’s just 5 more minutes than the 1-hour total time listed on the recipe. I expected it to take longer since my chicken was half a pound larger than the recipe called for, so I’m quite happy with this time.

Lentil Bolognese

At its simplest, bolognese is ground beef in a thick tomato sauce. It’s traditionally served over wide noodles like tagliatelle, but I think I’ve had it most often over spaghetti. In fact, the sauce mom used to make was a version of bolognese. I grew up on bolognese and never knew it! Ah, fond memories. But today I’m going to try a meatless version of that sauce I love with this vegetarian Lentil Bolognese recipe since I’m trying to make healthier choices these days. This vegetarian bolognese looks and sounds wonderful, but will I miss the meat? Let’s find out!

This lentil bolognese is incredible! Super hearty, loaded with vegetables, saucy, rich and decadent. You won’t even miss the meat!

Recipe Author: Jessica at How Sweet Eats
Get the recipe

The Ingredients

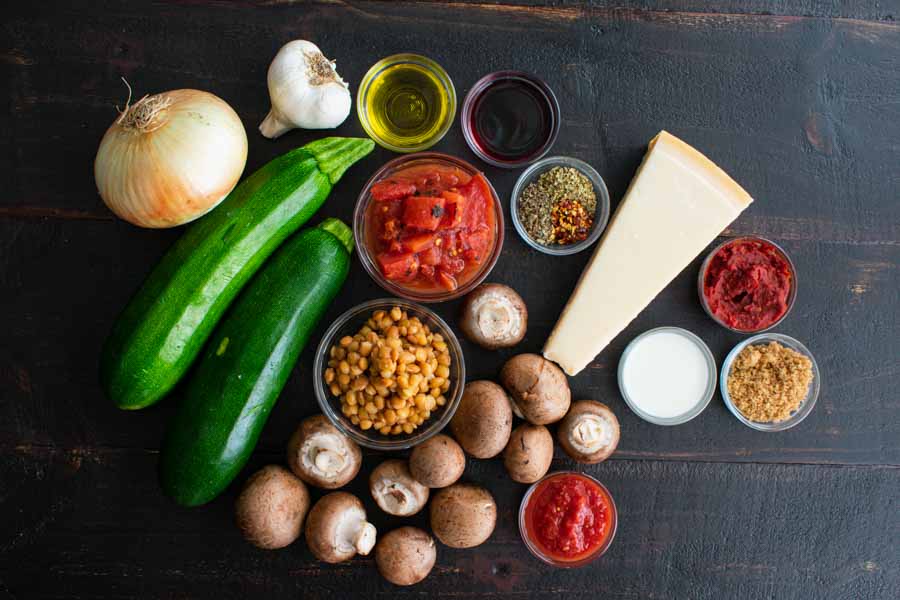
Not surprisingly, this recipe is packed with vegetables. The lentils were no surprise, nor were the tomatoes, onion, garlic, or mushroom. The zucchini was, but I’m game—I love zucchini!

By the way, the recipe calls for two 14-ounce cans of lentils. I was only able to find 15.5-ounce cans. But more lentils can’t be a bad thing.

I even splurged on a wedge of Parmigiano-Reggiano instead of the pre-grated stuff I usually buy. This recipe didn’t use much of it, but this hard cheese keeps for a long time. I almost always use the entire wedges when I buy them. It’s a great excuse to make more Italian food!

Lentil Bolognese Ingredinets
Lentils, mushrooms, zucchini, onion, garlic, olive oil, red wine, diced tomatoes, basil, oregano, red pepper flakes, parmesan cheese, tomato paste, half and half, brown sugar, and crushed tomatoes

The Process

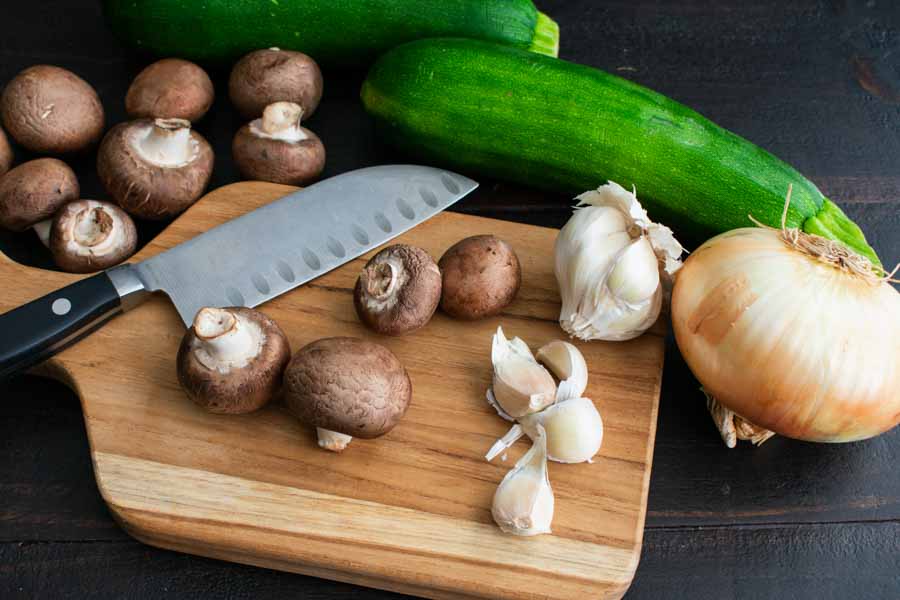
Since there was a good amount of chopping to do, I decided to prep everything before I started cooking. The prep time listed for this recipe was 15 minutes, and I had everything ready in 14 minutes. Right on time!

A 5-quart Dutch oven was the perfect size for this bolognese sauce, and I cooked everything but the pasta in it. A 4.5-quart pot on another burner while I prepped the sauce was perfect for a package of linguine I had in my pantry. It was finished long before the sauce, but draining it and drizzling some olive oil over it kept it at the ready.

Cooked fettuccine drizzled in olive oil

But back to the bolognese sauce! The recipe is broken down into easy to follow steps, and I had no problems at all. In fact, everything went very smoothly since I did all of the prep work beforehand.

The total time for this recipe was a little under the 1 hour 15 minutes listed. I had it ready in 59 minutes, and I have to say it was beautiful. And needless to say, it smelled wonderful!

Chopping the vegetables

Yuca Con Mojo (Cuban style)

0

When I decided on Boliche, I wanted to keep to the Cuban theme for the week. I figured a side dish was in order, and it wasn’t long before I settled on Yuca Con Mojo. I’ve had yuca (a.k.a. cassava) many times, including Yuca Con Mojo, but I’ve never made it myself. My Latinx friends warned me long ago that peeling yuca is not a pleasant task, so I’ve always had it at restaurants or as takeout. I decided to take the plunge when I found this recipe and that I could buy peeled, frozen yuca. No one ever told me! And now I have no reason not to try making yuca.

If you love Cuban cuisine, then you definitely don’t want to miss out on some yuca con mojo. This side dish consists of cassava (yuca) that is boiled until tender then simmered in a garlic zest infused citrus sauce.

Recipe Author: Charla at That Girl Cooks Healthy
Get the recipe

The Ingredients

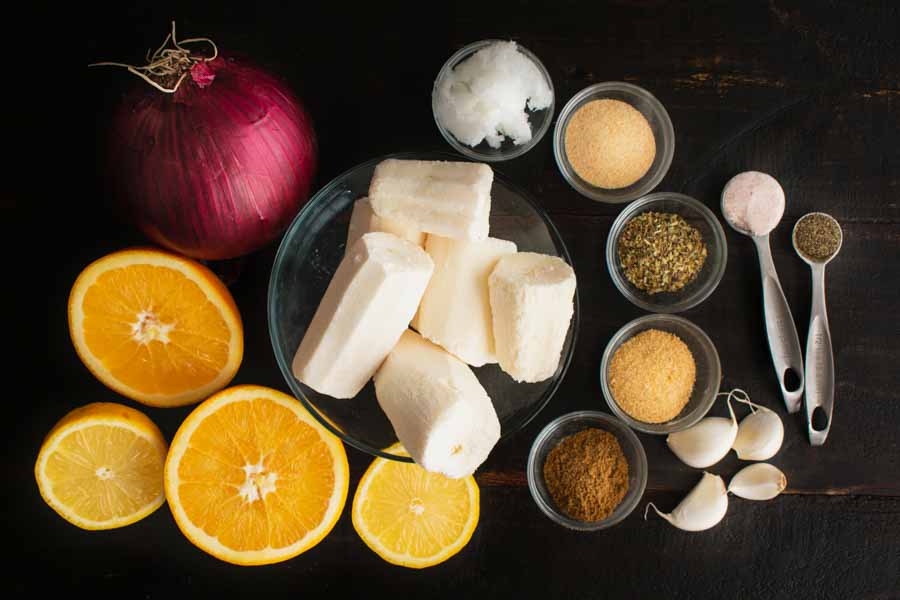
Most of the ingredients were in my pantry or easily found. I had all of the spices including the Himalayan pink salt, but I have an overstuffed pantry. If you don’t have it, I’m sure plain old table salt will work just fine.

The only item that might be difficult to find is the frozen yuca. I couldn’t find it at Whole Foods, my usual grocery store, but it was available at Publix. A one-pound bag was an inexpensive $1.65, and it didn’t even need to be thawed!

The only thing I skipped was the optional coconut nectar. It was available, but I didn’t want another bottle taking up space in my already packed pantry. This is not something I could see another use for, so it would gather dust. I decided to skip it.

Frozen yuca, coconut oil, garlic powder, oregano, Himalayan pink salt, black pepper, onion powder, garlic cloves, cumin, lemon, orange, and red onion

The Process

This Yuca Con Mojo recipe was not difficult at all! This recipe includes instructions for fresh and frozen yuca, so I got to skip right to step four. It doesn’t mention thawing the yuca, and a quick check of the bag said not to thaw it before boiling it for 30 minutes. That meant tossing the salt and some of the spices into a pan along with the frozen yuca. Easy!

I moved onto prepping the remaining ingredients while the yuca boiled. It was simple things like slicing an onion, measuring spices, and juicing the citrus. I had all that done long before the yuca was fork-tender.

Stemming the boiled yuca

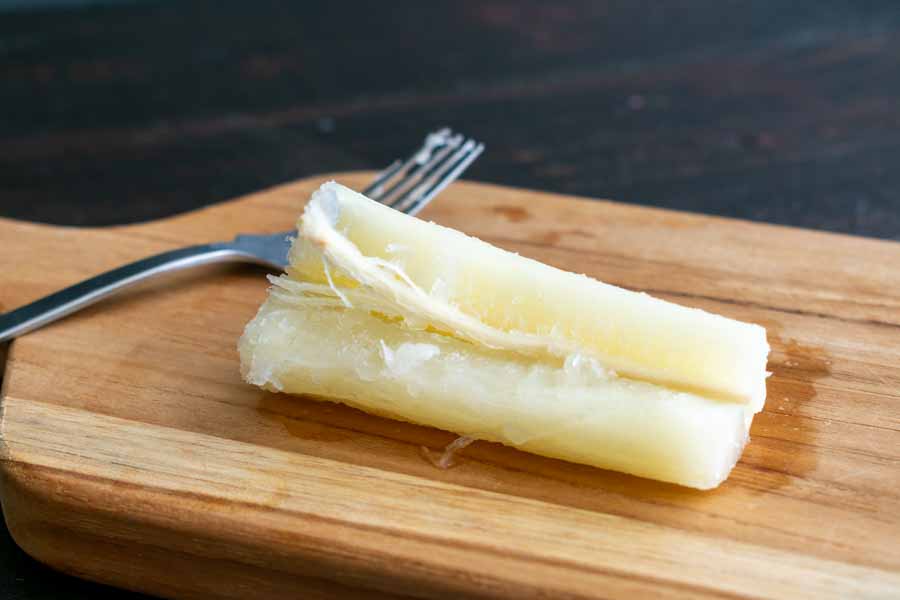
Once it was ready, I drained it and noticed the pieces of yuca had split into halves and quarters as it boiled. That exposed the woody stems in the center, and they were easy to pull out with a fork. Just be careful as the yuca is very hot!

With the yuca stemmed (BTW, I did not cut it any smaller), I started the mojo sauce. I used my largest skillet, and it was the perfect size. This part was very quick and easy—just heat the coconut oil, add the remaining ingredients, and saute for five minutes. Just stir carefully as the yuca is delicate.

Here’s how long the entire process took:

  • 36 minutes to boil the yuca
  • 13 minutes to stem the yuca and saute in mojo sauce
  • 49 minutes total
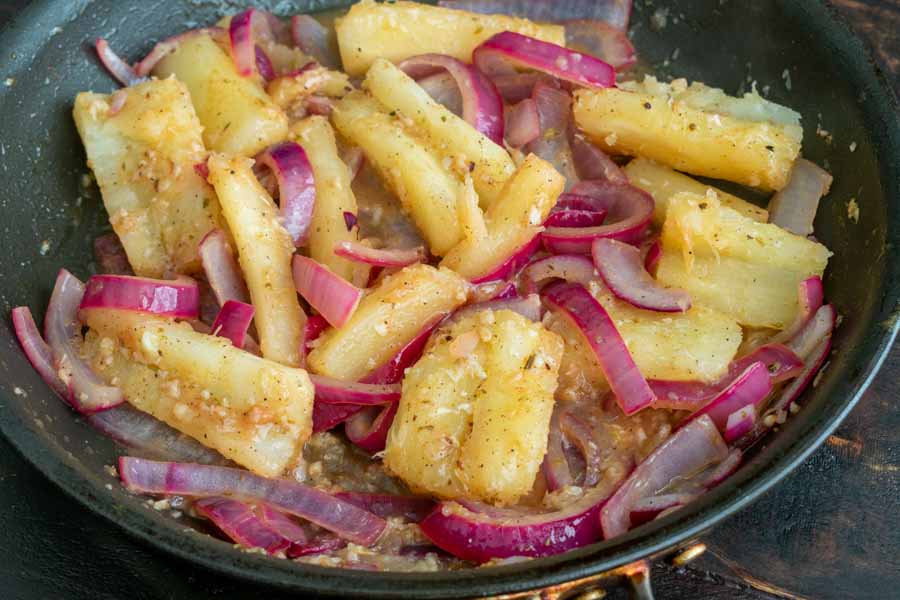
This recipe filled my largest frying pan

Boliche

How long has it been since you’ve had pot roast? It’s been a while for me, and I don’t think I’ve ever blogged one. Eek! My mom used to make one almost every Sunday. It was a simple meal she would make in the slow cooker, sometimes with potatoes and carrots, sometimes without. Either way, it never disappointed. Well, today I’m going to blog a slightly more complicated version. This is Boliche, a Cuban pot roast that’s stuffed with chorizo and olives, then slowly cooked in a tomato and onion sauce. It sounds absolutely incredible, and I can’t wait to try it!

Cuban boliche is a tender slow cooked beef roast stuffed with chorizo and olives. The citrus marinade brings out some wonderful flavors.

Recipe Author: Analida Braeger at Analida’s Ethnic Spoon
Get the recipe

The Ingredients

This recipe has been only radar for a long time, but I could never find a top round roast that was big enough. The ones I found were about 2 pounds and cut like a steak, which is way too flat to stuff. Folks, I started getting desperate. I even thought about buying two of the top round steaks and tying them together.

That just didn’t sound like it would be true to the recipe, so I started looking for another boliche recipe and they all used eye round roasts. Aha! And when I went back to the blog post with this recipe, I noticed the photos of the roast looked like and eye round, not a top round. It made sense since top round is more heavily marbled and likely to fall apart as it’s cooked.

Eye round was easy to find, and I got a 3-pound roast for $18.27. The recipe calls for a 4-pound roast, but I have to work with what I can find, you know?

Everything else was easy to find, and the store even had a good selection of chorizo. Boar’s Head makes an 8-ounce package that was exactly the size needed for this recipe. Perfect!

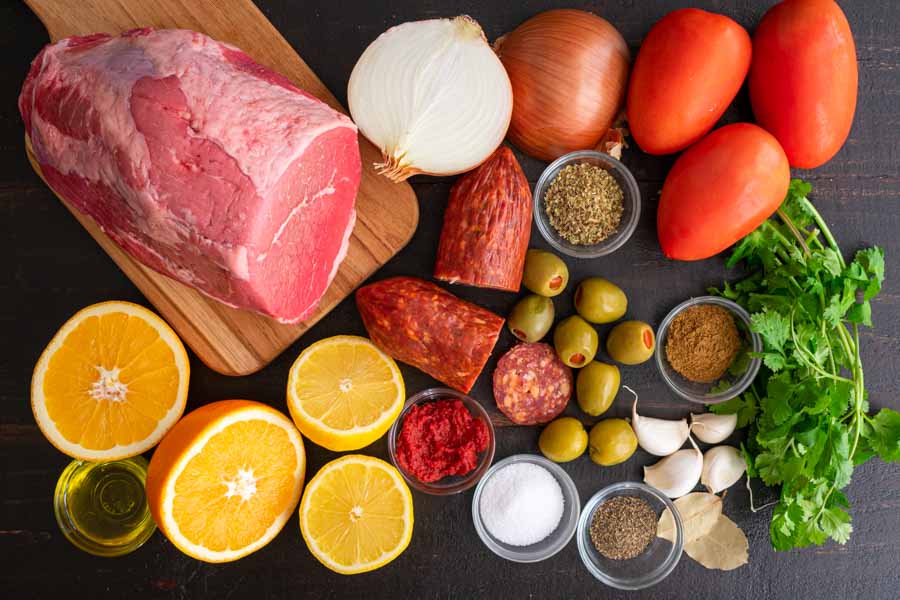
Boliche Ingredients
Eye round roast, onion, Roma tomatoes, oregano, chorizo, stuffed olives, cumin, cilantro, garlic, bay leaves, black pepper, salt, tomato paste, lemon, orange, and olive oil

The Process

I have to be honest and tell y’all that I was a little intimidated by this recipe. The roast didn’t seem nearly big enough to accommodate all the chorizo plus the olives, and I was resigned to having some leftover. Not that it would go to waste, mind you!

This recipe was very thorough, and it started with marinating the meat. A juicer comes in handy here, but it’s not a requirement. A gallon-size ziplock bag is a requirement. I had the roast marinating in just 3 minutes, and I left it in the refrigerator overnight.

The real work started the next day, and this recipe does require a lot of time and attention. I started my boliche around noon so I could have it ready for an early dinner.

First up was the prep work. I often prep as I cook, but I wanted to have everything ready to go when I needed it. That meant dicing the onions, garlic, and tomatoes, measuring out the spices, and tying the cilantro sprigs together with a bit of kitchen string.

Before I go any further, here is how my time was spent:

  • 3 minutes to prep the marinade
  • 20 minutes to stuff the boliche
  • 5 minute to brown and add the remaining ingredients
  • 3 hours to cook
  • 3 hours 28 minutes total (not including time to marinate overnight)

Stuffing the Boliche

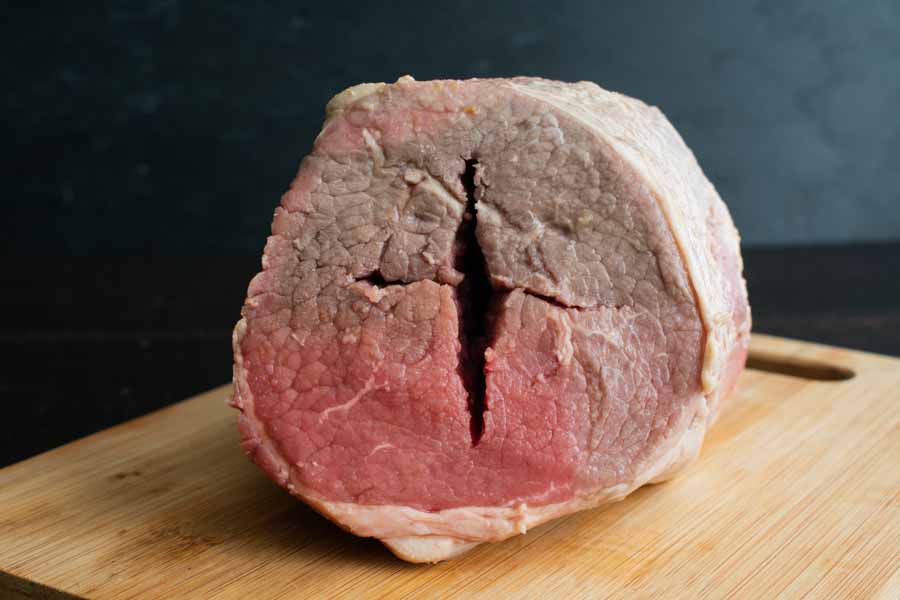
I did have to make some adjustments since I couldn’t find a 4-pound roast. Nothing major, just a reduction in cooking time and the opening in the meat. This recipe and the accompanying blog photos show a horizontal slit. I decided to use a cross pattern to allow for more stuffing in my smaller roast. It worked, and I managed to fit in all the chorizo and olives.

Cutting the roast for stuffing
Cutting a cross shape into the eye round roast allowed for more stuffing

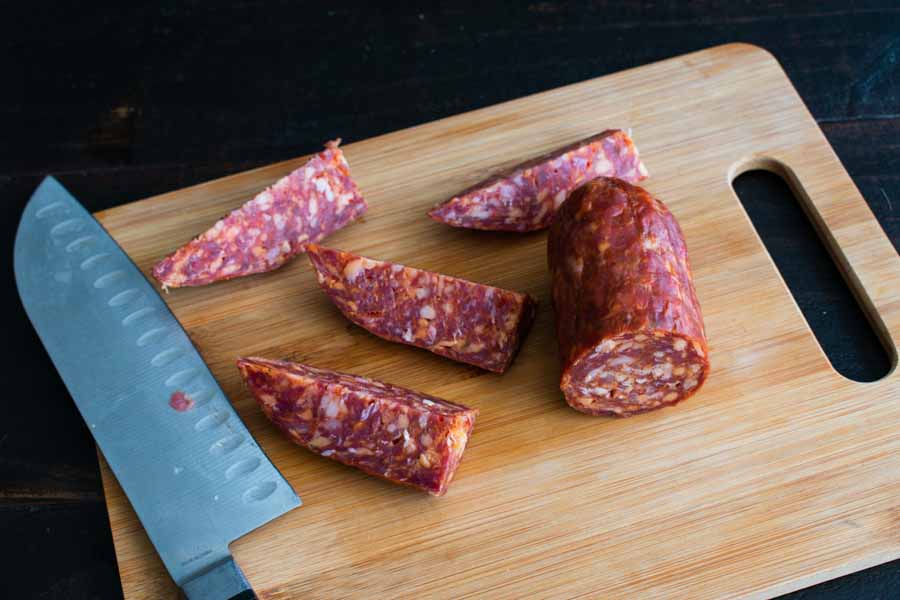
Another thing I noticed in the blog post photos that the author cut the chorizo into long, thin strips. Cutting it into eighths and stuffing in the pointy end in first worked a treat. I started with half the chorizo, then the olives, then the rest of the sausage.

Cutting up the chorizo
I cut the chorizo into eighths to make it easier to stuff into the eye round roast

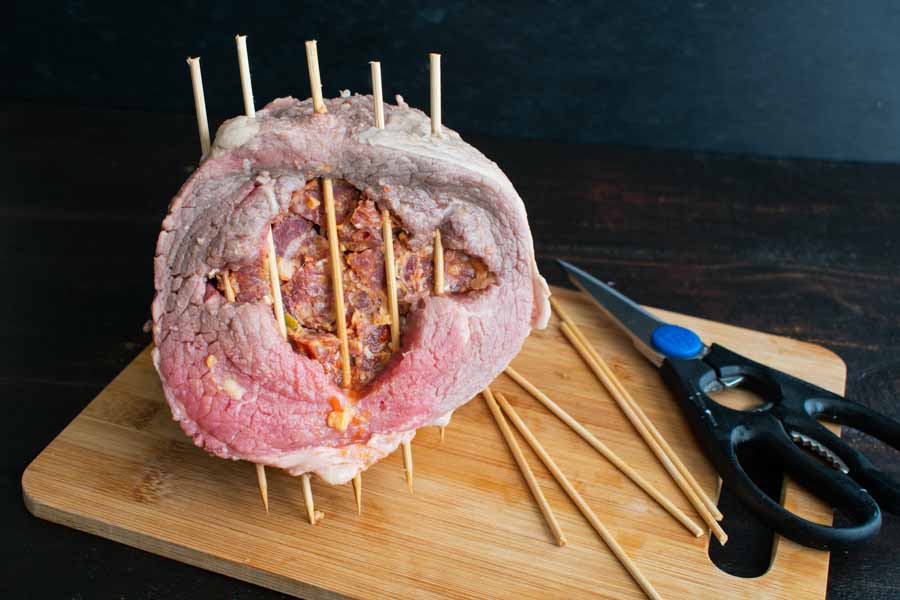
Once the stuffing was taken care of, I grabbed a package of bamboo skewers and used them to secure everything. This roast has to be rotated as it cooks, so I used a pair of kitchen shears to cut the skewers down. I actually cut them down a little more after I took this photo.

Closing the boliche with bamboo skewers

Cooking the Boliche

Now it was time to start cooking! This part was easy, just brown the boliche on all four sides, then add the remaining ingredients and cook for a few hours. A 5-quart cast-iron Dutch oven was the perfect size for this recipe.

I made several dishes to accompany the boliche, so I was in the kitchen most of the time it was cooking. It wasn’t too much of a pain to turn it every 15 minutes for the next 3 hours, but I can see how it could get annoying.

Serving

What did I make with the boliche? I’m so glad you asked! The recipe suggests serving with plantains, but I can’t cook plantains worth a darn. Instead, I made my favorite black beans and rice recipes plus some yuca con mojo.