Home Blog Page 25

Herbed Olive Tapenade With Goat Cheese Bruschetta

I don’t make appetizers very often because… Well, they aren’t something we really ever need, and I tend to buy pre-made if we do. It’s just a time-saver if I’m cooking dinner and dessert. However, when I came across this Herbed Olive Tapenade With Goat Cheese Bruschetta, it triggered some nice memories. Let me explain.

When I lived in Orlando, a close friend would throw a big Halloween party every year. She would cook (pretty much the only time she ever cooked), set out quite the spread, and invite what seemed like half of Orlando. It was always marvelous, and I miss those parties. But anyway, one year I helped with cooking and my job was the appetizers. One of the dishes I made was a delicious olive tapenade. It was a hit, but I’ve since lost the recipe. This Herbed Olive Tapenade With Goat Cheese Bruschetta sounds somewhat similar (If my memory is correct), so I’m hoping I have found a replacement. Let’s find out!

I put all of my favorite ingredients together for this fresh & tasty starter.

Recipe Author: Jen O’Brien at City Farmhouse
Get the recipe

The Ingredients

This recipe was written into a blog post, and there wasn’t a downloadable/printable version of it. Instead, I had to read over the post a couple of times and type it into my recipe software then print it out for reference. I’m hoping I got everything correct!

I found most everything I needed with a couple of exceptions. First, the green olives I found aren’t labeled manzanilla or stuffed with pimento. They were what came up when I searched the Whole Foods site for “manzanilla olives”, so I’m hoping that’s what they are.

My next, um, glitch was with the bread. I ordered a baguette, but they were out. I ended up with par-baked ciabatta bread. From what I’ve found online, this will be fine.

By the way, have you ever heard of par-baked bread? Me neither, but it’s my new favorite thing. It’s partially baked bread that’s sold in airtight bags. You have to bake it for 10-15 minutes to finish baking it before serving. Yes, it’s more work, but what I love is that the bread doesn’t go stale while it sits on my counter, waiting to be eaten. No more baguettes hard enough to be used as bats! No more un-sliceable ciabatta! I can have fresh bread and still only order groceries once a week.
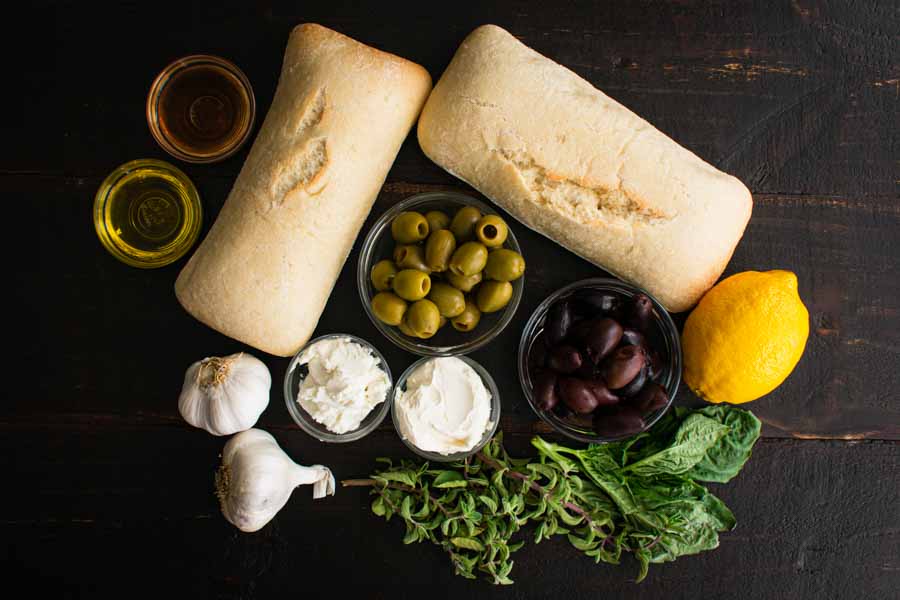
Herbed Olive Tapenade With Goat Cheese Bruschetta Ingredients
Manzanilla olives, kalamata olives, ciabatta bread, lemon, basil, oregano, cream cheese, goat cheese, garlic, extra virgin olive oil, and red wine vinegar

The Process

The instructions for this recipe were a little general in areas, but I think I figured it out. First off, let me start with the times, then I’ll get into the details of the how-to.

  • 17 minutes to prep and cook
  • 5 minutes to assemble
  • 22 minutes total

That first 17 minutes includes 15 minutes to bake the bread. I made the tapenade and cheese spread while it was in the oven.

The Bread

I kicked off my Herbed Olive Tapenade With Goat Cheese Bruschetta with the bread since it would take the longest time. It was quite simple, though. First up was preheating the oven to 350℉.

I started slicing the bread along the shortest side and immediately realized the pieces were tiny. All wasn’t lost, though, and I was able to switch to slicing on the diagonal to make the pieces larger.

Then I added some extra virgin olive oil, salt, and pepper to a shallow soup bowl. Next, I dipped one side of each piece of bread into the mixture and placed them oil side up on a sheet pan. I popped that into the oven for 10 minutes and moved onto the tapenade while the bread toasted.
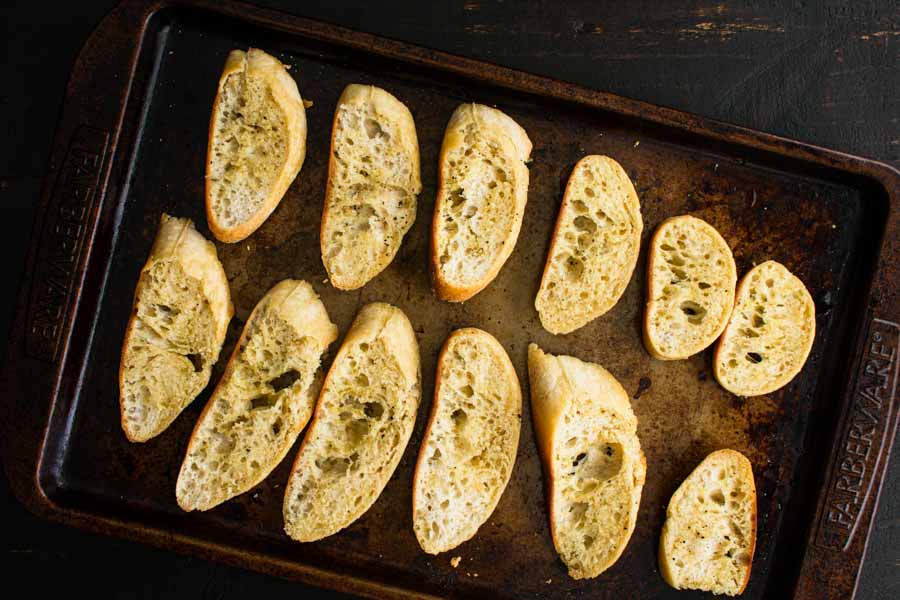
The toasted bread on a sheet pan.

The Tapenade & Cheese Spread

This was the real “work” of this recipe, but it only took a few minutes. It’s mostly chopping and dicing the ingredients, then mixing them up in a bowl. There’s not much more to say—it was truly that easy.

The cheese spread was even easier. I put both the chevre and cream cheese into a shallow bowl and folded them together.

The oven timer went off as I was finishing up the tapenade and cheese spread, and I noticed the bread hadn’t browned. I left it in the oven for another five minutes while I finished up, and everything was ready at the same time.

Assembling the Bruschetta

This part was a little messy, but the results looked good. I started by spreading the cheese onto the bread. There was a good amount of it, so I was able to be generous with it.

Once the cheese was used up, I started spooning on the tapenade. I quickly realized I didn’t want to scoop liquid in the bottom of the bowl with the tapenade, so I switched to a slotted spoon. I was able to pick up a little tapenade and let the liquid drain before I added it to the bread.

Of course, bits and pieces of olives and herbs fell off, but I found a simple and easy solution to that problem. Tip: Use your hands to lightly press the tapenade into the cheese. It will help hold everything together.

The assembled bruschetta

Cajun Chicken Burger

I don’t know how you feel about hot and spicy foods, but I love them! In fact, I keep a selection of hot sauces in my pantry just in case I need to add some flavor to most anything. Not so much that I can’t taste the food it’s topping, but enough to add some zing is how I like it. That’s a big part of why I’m making this Cajun Chicken Burger. The other reason is I’m trying to make healthier food choices. I love a good, juicy, cheesy, hamburger, just not the fat and calories that go along with it. I’m hoping this recipe will be a tasty substitute to its less healthy cousin. Let’s find out!

If you are looking for a lean burger this BBQ season, then chicken burgers are the way to go! Don’t stick with a plain chicken burger when you can have this Cajun Chicken Burger.

Recipe Author: Dannii at Hungry Healthy Happy
Get the recipe

The Ingredients

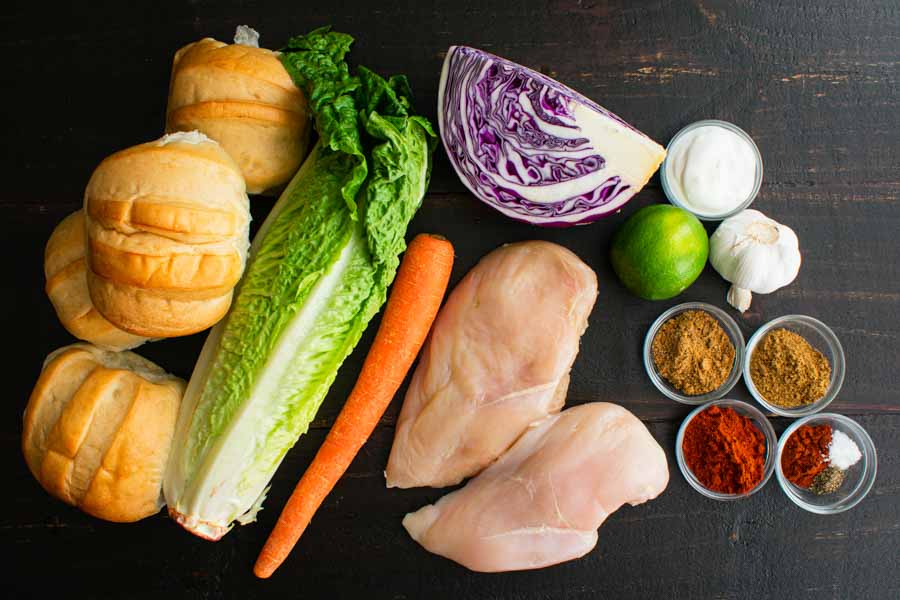
There aren’t a ton of ingredients in this recipe, and about half of them are spices I happened to have on hand. I had to shop for the free items, and I found most everything at my usual grocery store.

They didn’t have the little gem lettuce, but a quick google told me hearts of romaine were a good substitute. I’m betting a package of them was pricier than a single head of little gem lettuce, but I’ll use the extras. Most likely, they will go to my rabbit, Louie, but a caesar salad is also a possibility.

The bakery was also out of ciabatta rolls that day. I substituted some French hamburger rolls instead. They’re French bead in bun form, and they are a wonderful upgrade from plain old hamburger buns.

Cajun Chicken Burger Ingrdients
French hamburger rolls (substituted for ciabatta rolls), heart of romaine (substituted for the little gem lettuce), red cabbage, carrot, chicken breasts, smoked paprika (pimentón), cayenne pepper, salt, pepper, cumin, coriander, garlic, lime, and plain Greek yogurt

The Process

Before I began my prep work, I made sure to oil and preheat the grill. This recipe is very fast, so you’ll want to make sure your grill is ready to cook when you are.

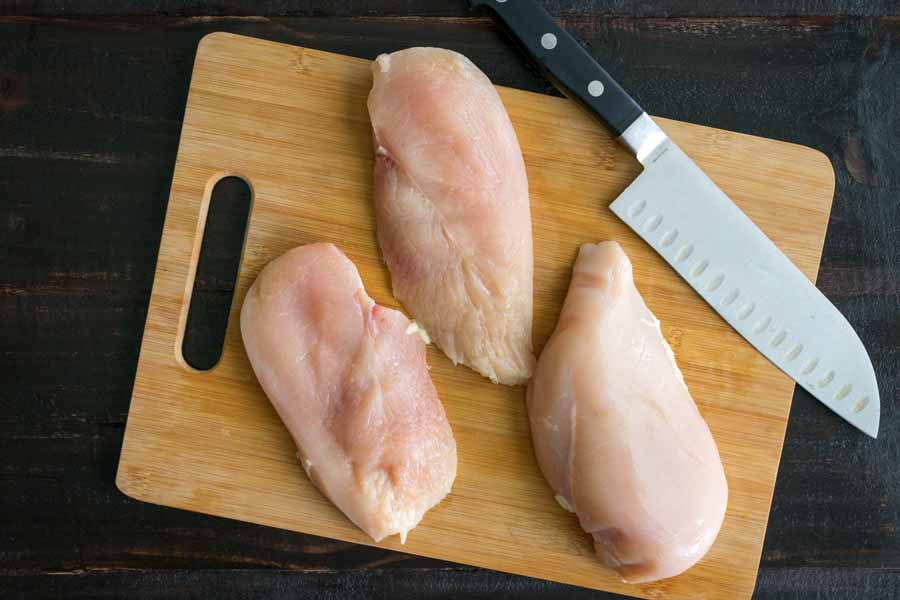
Since this recipe is for four Cajun Chicken Burgers, I had to start the prep work by filleting the chicken breasts. It’s an easy cut that only takes a minute or two with a good sharp knife. It also saved me from having to pound the chicken breasts to an even thickness.

Filleting the chicken breasts

Tip: If you want to skip this step, you can buy chicken cutlets. They are thinner and more have a more even thickness. I suppose you could also buy four chicken breasts if you are cooking for big eaters ?.

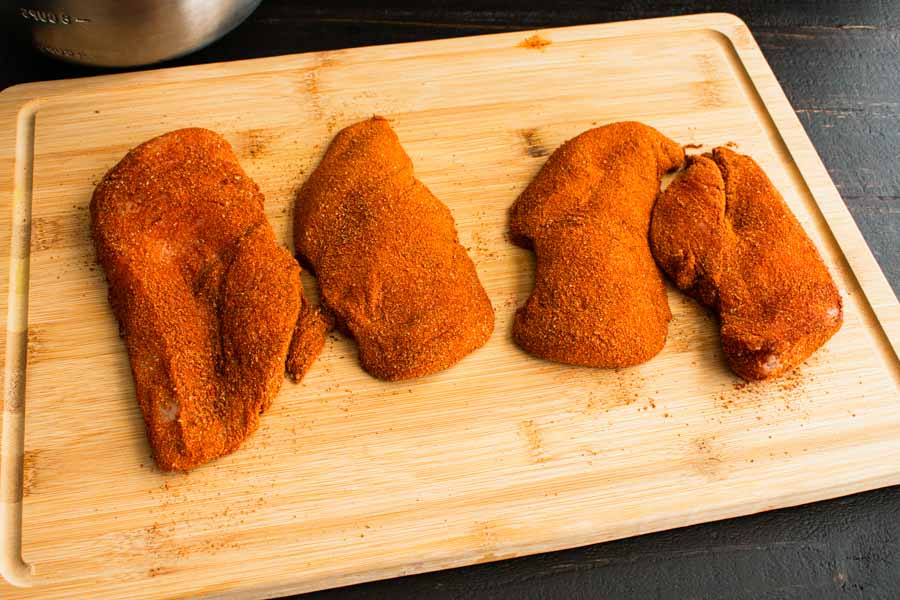
Once the chicken was filleted, it was time to mix up the spices and season them. I did this in a medium-sized mixing bowl so I had room to flip the chicken breasts. This recipe made plenty of the spice mixture, and it thoroughly coated the chicken. I even had a little leftover that I had to toss.

Finishing Up

The chicken cutlets coated in the spice mixture

The total time listed for this recipe was 13 minutes, and I really tried to make it. Unfortunately, grilling by myself made it impossible, and my Cajun Chicken Burgers took 20 minutes. Still, not bad at all for a complete meal.

While I was grilling the chicken, I ran inside to grate the carrot and shred the cabbage. By the time that was done, it was time to flip the chicken. Then it was back inside to shred the lettuce and back outside to get the chicken.

I finished up making the slaw and slicing the hamburger buns when I got inside. Assembling the sandwiches was simple but messy (so was eating them, that slaw just falls right off!). I will warn you that there will be leftover slaw. I’m not a real coleslaw lover, so I’ll either leave it for my husband to snack on or use it to top some tacos.

Lemon Cupcakes with Lemon Raspberry Buttercream

It feels like I just made cupcakes, and here I am making another batch. I guess I’m just in that kind of mood. Then again, when am I not in the mood for a cupcake? Their small size makes them ideal treats when I need a snack or a small dessert. Plus the varieties are endless. the last recipe I made was Moscow Mule Cupcakes, and that was strictly for me and my likes. This time I’m taking my husband’s tastes into account (which just so happen to align with mine ?) and making these Lemon Cupcakes with Lemon Raspberry Buttercream. He’s hinted at lemon with strawberry or raspberry for a while, and now it’s time to give his idea a try.

Deliciously light and fluffy lemon flavored cupcakes that start with a boxed mix, and then are topped with the ultimate in lemon raspberry buttercream, and garnished with fresh berries. This lemon raspberry flavor combo is a winner.

Recipe Author: Rachael at Eazy Peazy Mealz
Get the recipe

The Ingredients

This recipe seems like it has so few ingredients, and I’m not mad about it. Not at all! The main reason is it uses pre-packaged cake mix. I has the flour, flavoring, and leavening ingredients already mixed in.

The recipe calls for a 16.25-ounce package of white cake mix. I only found one brand at Whole Foods, and it was a 15.25-ounce box. I thought about adding some extra flour since that’s mostly what cake mix is. In the end, I didn’t and things worked out just fine.

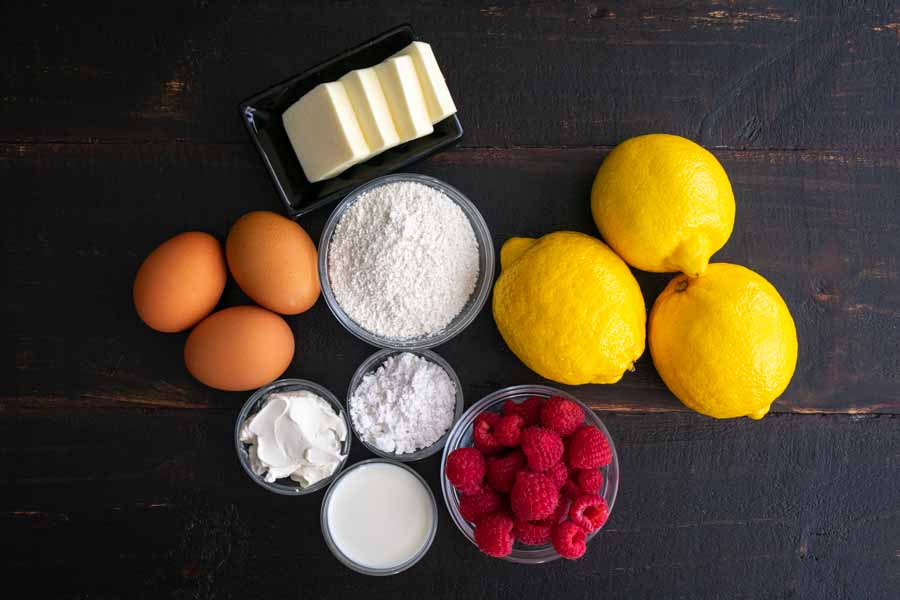
As you can see, the rest of the ingredients were pretty simple. Milk, eggs, butter, etc. The recipe does list cream cheese as an optional ingredient in the buttercream, but I added it. I just happened to have 4 ounces leftover from another recipe. Love it when that happens!

Finally, I needed some fresh raspberries for the buttercream, and I found a pint of them. That gave me more than enough for the frosting and garnishes. Plus I bought a container of blackberries and strawberries.

Lemon Cupcakes with Lemon Raspberry Buttercream Ingredients
Butter, lemons, raspberries, milk, cream cheese, powdered sugar, white cake mix, and eggs

The Process

I have to say that this recipe was pretty easy to follow. Using the cake mix probably cut down on a few steps like it did the ingredients. Anyway, here’s how my time was spent:

  • 9 minutes to prep the cupcakes
  • 18 minutes to bake (includes 12 minutes to make the buttercream)
  • 18 minutes to cool
  • 9 minutes to ice and garnish
  • 54 minutes total

Making the Lemon Cupcakes

I think all cupcakes recipes kick off with making the cupcakes, and this one was no different. And thanks to my stand mixer, making these was pretty quick and easy. It was really just a matter of adding the ingredients to the bowl, mixing them thoroughly, and pouring the batter into the lined muffin tins. Tip: You’ll need two muffin tins since this recipe makes 18 cupcakes.

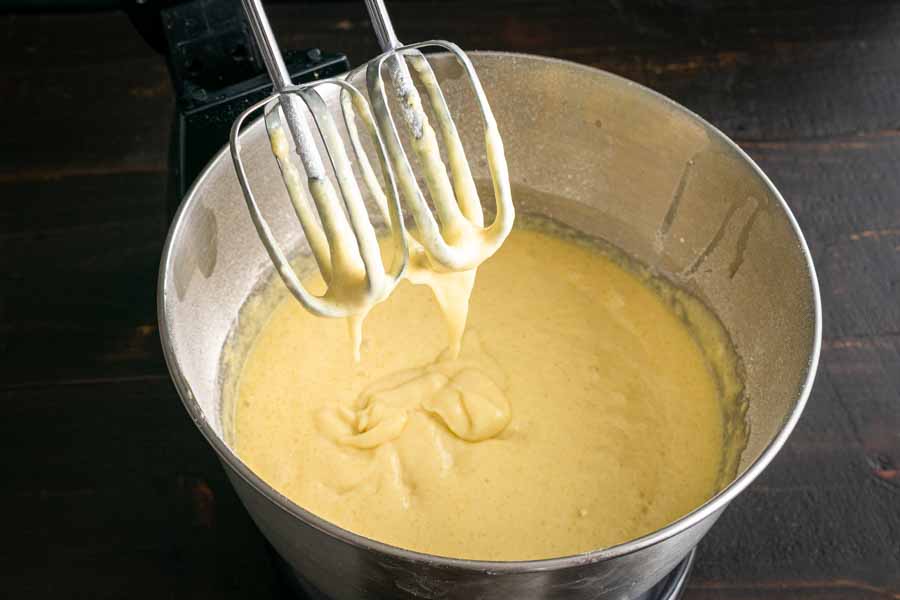
Mixing up the cupcake batter

Making the Lemon-Raspberry Buttercream

Once the cupcakes were in the oven, I cleaned up my stand mixer and got started on the buttercream. Like the cupcakes, this was mostly a matter of putting the ingredients into the bowl and mixing them up. Then I put the freshly made buttercream into a piping bag and chilled it in the refrigerator while the cupcakes finished baking and cooled.

Decorating the Lemon Cupcakes with Lemon Raspberry Buttercream

About 20 minutes later, I was ready to frost and decorate my cooled cupcakes. the buttercream was still soft, and I thought that would be a good thing. Unfortunately, it began to separate as I was piping it on. Oh no!

I was worried it would essentially melt off the cupcakes before I could garnish them with the berries. It kind of started to on some of the cupcakes, but the berries helped disguise it. I made sure to snap the photos very quickly and get the cupcakes into the refrigerator. My hope was chilling the buttercream would solidify it somewhat, and it did.

We loved the cupcakes, and the frosting was the best part. However, it needed to be thickened up. Fortunately, I found out what to do next time with a quick Google. Tip: Adding some extra powdered sugar will thicken buttercream.

I do wish I had realized it was too thin before I piped it on, but baking is not my area of expertise. But I like to stay positive, so I’m calling this a learning experience.

A Note About the Butter and Eggs

It’s not part of the instructions, but I set my butter, eggs, and cream cheese out a few hours before I planned to cake. That allowed them to soften and come up to room temperature.

Why? It helps them trap air and makes lighter, fluffier baked goods. And don’t worry if you forget—the internet is full of tips and tricks to bring your ingredients up to room temperature faster than that.

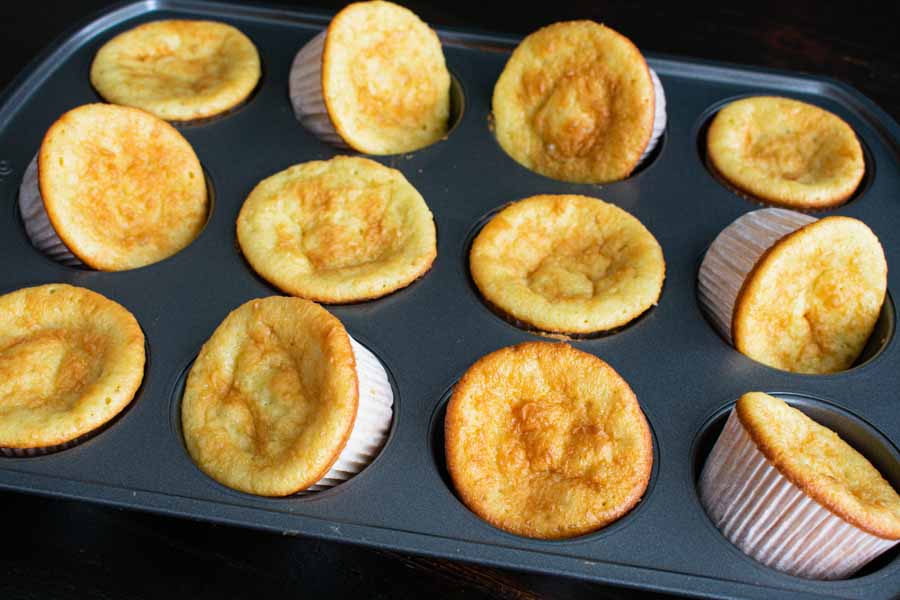
The cooled cupcakes
The cooled cupcakes before frosting and decorating

Mushroom Zucchini Lasagna Rolls

We love Italian food and have it often. One of my husband’s favorite dishes is eggplant rollatini, and he often gets it when we have takeaway from our favorite Italian restaurant. have you ever tried it? It’s delicious, but it looks complicated. All those thin strips of eggplant carefully filled, rolled, and baked. I’ve never attempted anything like it, but I’ve thought about it. Well, now I’m finally going to try something similar with this Mushroom Zucchini Lasagna Rolls recipe. It’s very similar to rollatini in the ingredients and technique. I’m kind of nervous about this one. Wish me luck!

These Mushroom Zucchini Lasagna Rolls are AMAZING and Clean Eating Approved!

Recipe Author: Rachel Maser at CleanFoodCrush
Get the recipe

The Ingredients

I was a little surprised when I saw how short the list of ingredients for this recipe is. It’s just over a dozen items, and that includes staples like salt, pepper, olive oil, and Italian seasoning.

I had to shop for the fresh items, of course, but everything was easy to find at my usual grocery store. I’ll have extra ricotta, mozzarella, and parmesan cheeses, but I’ll find uses for them.

Oh, and I did find a nice marinara since the recipe calls for something high quality. The brand I bought (Rao’s) also happened to be the only one sold in a 15.5-ounce jar. Every other brand was about double that. The recipe calls for 16 ounces, so I figured that would be close enough.

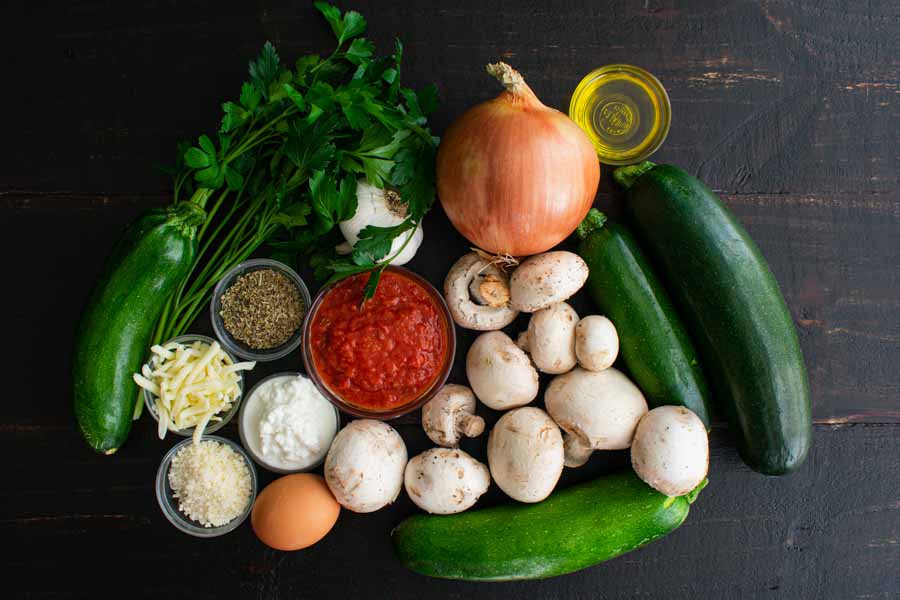
Mushroom Zucchini Lasagna Rolls Ingredients
Marinara sauce, mushrooms, zucchini, egg, ricotta cheese, grated parmesan cheese, shredded mozzarella cheese, Italian seasoning, parsley, onion, and extra virgin olive oil

The Process

This recipe doesn’t list times (prep, cooking, total), but I went into it expecting it to take a while. I did, but I was quite pleased with the results. Here’s how my time was spent:

  • 42 minute to prep (includes baking the zucchini strips)
  • 15 minutes to cook
  • 57 minutes total

The Zucchini

Things started off with the zucchini. It has to be sliced thinly, but I had no idea how thin. I went with about 1/8″. My mandoline was a lifesaver here, and it gave me plenty of strips of zucchini. In fact, I had so many that they filled both my sheet pans with some leftover. I used a 9'x13' baking dish lined with parchment paper for the extras.

The recipe says to lightly brush the zucchini with one tablespoon of olive oil. Apparently, I didn’t go lightly enough, and I ended up using two tablespoons. Oh well, more EVOO flavor is never a bad thing! Then it was into the oven for 12 minutes while I prepped the remaining ingredients.

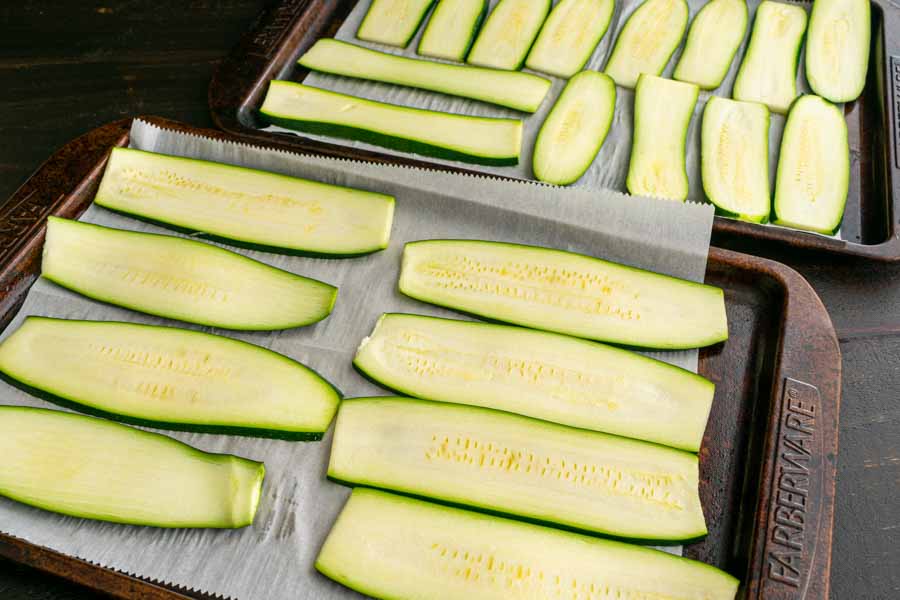
The thinly sliced zucchini strips on parchment paper lined sheet pans
The thinly sliced zucchini strips on parchment paper-lined sheet pans

The Mushroom Sauce

While the zucchini strips were baking, I got started on the mushroom sauce. This was a lot of slicing and dicing, but it wasn’t too bad. My mandoline has several attachments, and it made finely dicing the onion ridiculously fast. I did the rest of the chopping the old fashioned way.

I also managed to get the cheese mixture done while the zucchini was baking, and I was ready to cook the sauce by the time it was ready. That was simple sauteeing for about nine minutes.

Assembling the Mushroom Zucchini Lasagna Rolls

This was the part that I was worried about, and it was a little challenging. First off, let me say that you should give the filling a few minutes to cool down before you begin.

The recipe printout doesn’t have a photo, so I was working with the written instructions and my memory of the blog post. The post shows six big rolls in a skillet, but I just couldn’t get mine that size. I found smaller rolls much easier to handle, so I made 18 smaller Mushroom Zucchini Lasagna Rolls.

Even with all those rolls, I ended up with a few extra strips of zucchini. I even had to double up the shorter strips to make them long enough to roll.

I ran out of the cheese mixture towards the end, but that didn’t surprise me. The recipe said to add two spoonfuls to each piece of zucchini, but I wasn’t sure what size spoon. Two teaspoons? Tablespoons?

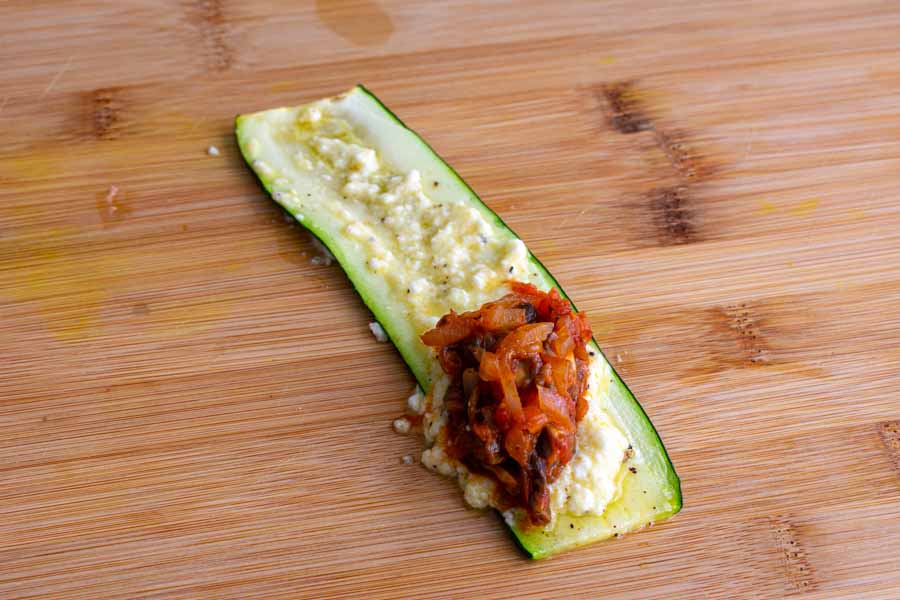
In the end, I just spread some cheese the length of the zucchini so it would act like glue to hold the roll together. Then I spooned some mushroom sauce onto the end and carefully rolled it up. There was some leakage out the sides, but most of the rolls held together well. That was the hard part. The rest was sprinkling on some shredded mozzarella and baking for 15 minutes.

A strip of zucchini tolled with the cheese mixture and mushroom sauce

Sparkling Grapefruit & St. Germain Cocktail

I’ve made a few elderflower cocktails for this blog, and they never disappoint. Now I’m going to give another one a try, this Sparkling Grapefruit & St. Germain Cocktail. Growing up, a half grapefruit was a pretty typical breakfast for me, and grapefruit juice was almost always in the refrigerator. But for some reason, I rarely ever have anything grapefruit anymore. That makes this recipe an extra treat, and I can’t wait to try it!

An easy and delicious four ingredient, low calorie cocktail is calling your name!

Recipe Author: Raquel at Horses and Heels
Get the recipe

The Ingredients

I had a bottle of St. Germain Elderflower Liqueur on hand. That $30 bottle may last me forever! That left me to shop for the rest of the ingredients and garnish.

The lime and cucumber were easy to find, but I had to change things up with the grapefruit sparkling water. I couldn’t find La Croix, so I bought what I could find.

Whole Foods had grapefruit seltzer in their 365 Everyday Value brand. They also carry Spindrift Grapefruit Seltzer, and the best part was they were both available by the can. It was nice not to have to buy two cases of seltzer I might not like just to make this recipe.

St. Germain Elderflower Liqueur, lime juice, grapefruit sparkling water, and cucumber to garnish

The Process

This cocktail was easy to make, and I had mine mixed and garnished in four minutes. First, I added ice with grapefruit and lime wedges to a stemless wine glass. I chose it because it holds a lot (much more than you expect when you look at it). I decided to skip the cucumber, but I’m sure it would have been good.

Then I filled a cocktail shaker with more ice, juiced a lime into it, and topped it off with the elderflower liqueur. I gave it a good shake and poured the freezing cold mixture into the prepared glass.

The recipe doesn’t mention what to do with the grapefruit seltzer, but I assumed pouring it over the liqueur was the next step. I gave it all a quick stir with my bar spoon, and my first Sparkling Grapefruit & St. Germain Cocktail was ready to enjoy.

I tried the 365 brand first, and I have to tell you that I almost gulped it down, it was so good! Thankfully, the St. Germain has a relatively low alcohol content of 20%, so I didn’t get tipsy.

I made another Sparkling Grapefruit & St. Germain Cocktail with the Spindrift seltzer the next day. This brand has actual grapefruit juice in it instead of just grapefruit flavoring. I thought this version was sweeter at first, but it had more of a grapefruit/citrus taste at the end. I liked both, but I think I preferred the first version.

Easy Baked Fish with Garlic and Basil

0

I love fish, but I don’t get it very often because I’m usually cooking for two. Mr. Pinner isn’t a fan, and tuna (in almost any form) and fish and chips are the only ways he likes fish. But there are ties when I cook just for myself, and today is one of those days. I’ve been craving seafood when this Easy Baked Fish with Garlic and Basil popped up on my radar. I also adore Mediterranean food, so this sounds like the perfect pairing. Let’s find out if this recipe will satisfy my seafood craving.

Easy, tender baked fish infused with garlic and basil. The secret to this juicy fish is in the quick fish marinade with a few spices, garlic, fresh basil, a little citrus and extra virgin olive oil.

Recipe Author: Suzy at The Mediterranean Dish
Get the recipe

The Ingredients

One of the things I liked about this recipe was that the type of fish was a little flexible. That makes it easy to customize to your personal taste and the availability of fish in your area. The author suggests halibut, and I was able to find a beautiful .9-pound fillet for $17.99.

The rest of the ingredients were either pantry staples I had on hand or produce that was easy to find. In fact, I even found peeled shallots. I had no idea you could get them already peeled, and I love it—I can see what I’m getting through the clear plastic packaging.

I’ve had some bad experiences with shallots, and I’ve bought plenty of that looked good but were black and moldy underneath the peel (I always buy an extra or two because of this). I think the reason is they often sit on store shelves for a while. The ends of these were a little dry, but they were easy to trim off.

Easy Baked Fish with Garlic and Basil Ingredients
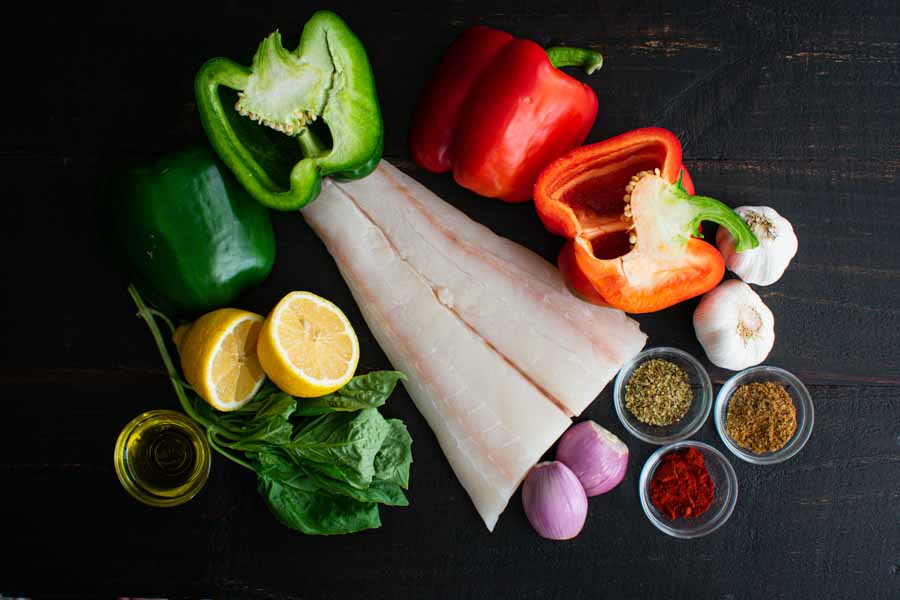
Halibut fillet, basil, extra virgin olive oil, lemon, green bell pepper, red bell peppers, garlic, coriander, oregano, sweet paprika, and shallots

The Process

This recipe was so easy to make, and that’s fortunate because it has “easy” in the title! There is some slicing and mincing involved, but I find it therapeutic. Here’s how my time was spent:

  • 9 minutes to prep the marinade
  • 30 minutes to marinate
  • 15 minutes to bake
  • 54 minutes total

That’s right in line with the times listed on the recipe. I also want to add that I prepped the bell peppers and shallots while the fish was marinating. That took six minutes.

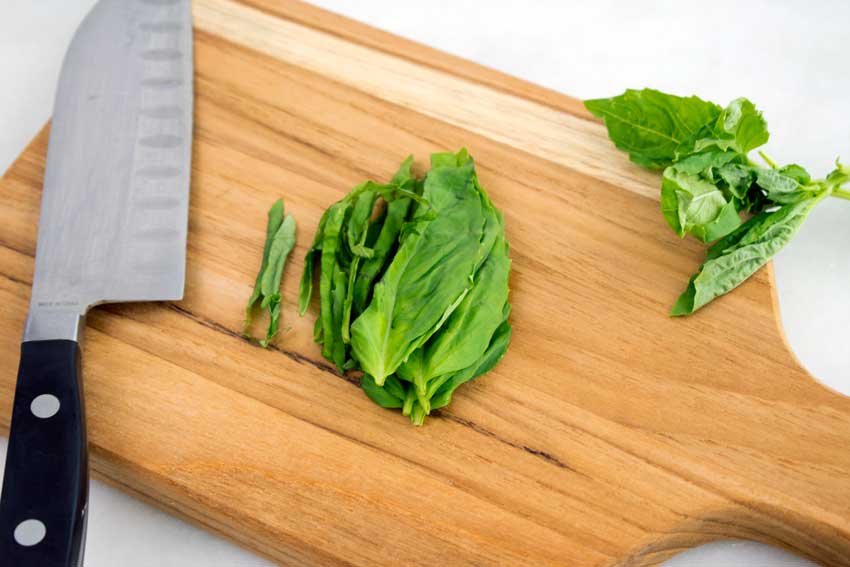
Julienned basil leaves
To julienne, the basil leaves spread the leaves out and stack them. Then slice them lengthwise into thin strips.

Also, I don’t think I sliced the bell peppers correctly. I didn’t look closely at the photo as I was cooking, so I chose long thin strips. I noticed afterward that the recipe shows horizontal slices that are more like rounds. The rounds are prettier, but I’m sure it makes no difference as far as taste.

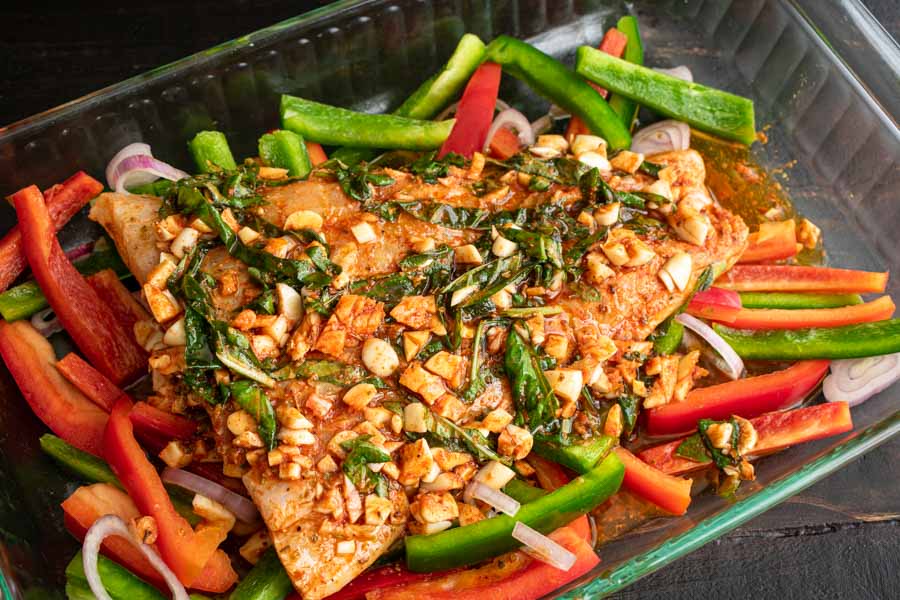
One thing I noticed about this recipe that was a little unusual was that the marinade isn’t discarded. Instead, you place the fish into a baking dish and pour the marinade over it. I’m so used to recipes saying to discard the marinade. But I liked keeping the marinade and all the garlic, basil, and other flavors in it.

The marinated fish fillet in the baking dish with the bell peppers and shallots
The marinated fish fillet in the baking dish with the bell peppers and shallots. It didn’t look much different when it came out of the oven.

Another somewhat interesting thing I noticed was that this dish looks almost the same going into the oven as coming out. I had to really look at it to pick out the differences. The cooked basil does turn brown/black, and there is more liquid in the bottom of the baking dish.

You really have to test the fish’s doneness by flaking it with a fork or using a meat thermometer. However, I find the meat thermometer difficult with think cuts like fish fillets.

A Note About Garlic

Finally, I wanted to mention that I chose to leave the garlic in somewhat larger chunks than a mince this recipe called for. The larger chunks didn’t cook completely, and that gave me plenty of raw garlic flavor and spice. If you aren’t as into it, mincing or pressing it into finer pieces that cook more will mellow the flavor somewhat.

Moscow Mule Cupcakes

0

Most of the time I select recipes to blog that sound good to me. However, every once in a while I find one that sounds so unusual that I’m not 100% sure about it. These Moscow Mule Cupcakes are one of those recipes. I do love a Moscow mule, and I do love a cupcake, but together? Vodak, ginger beer, and lime in cupcake form? This is either going to be really good or absolutely terrible. I’m leaning toward really good, especially after looking at the author’s beautiful photos. But there’s only one way to know for sure, and that’s to bake some cupcakes.

These Moscow Mule Cupcakes are so fun – just like the cocktail! A moist ginger cupcake is topped with a ginger-lime frosting and I love them so much!

Recipe Author: Lindsay at Life, Love and Sugar
Get the recipe

The Ingredients

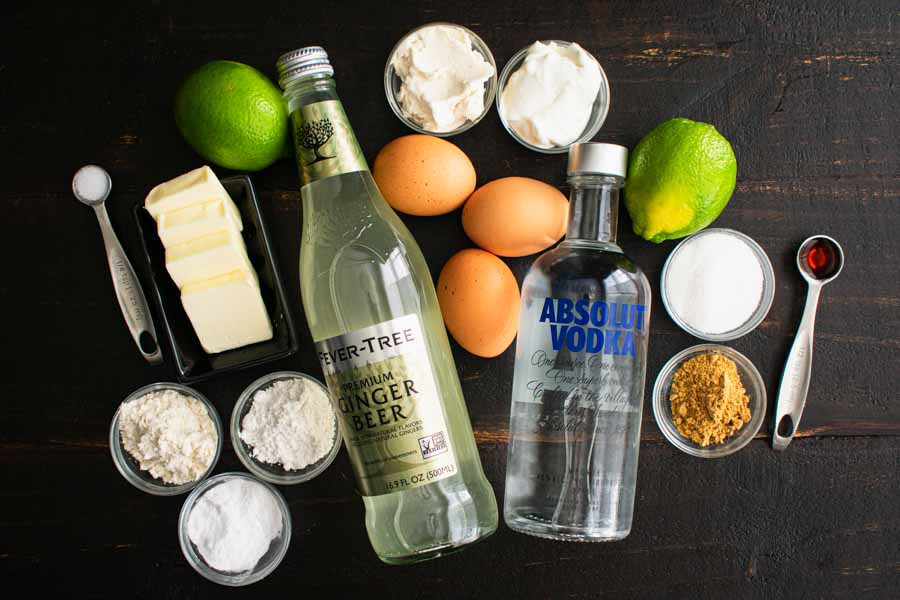
This recipe meant a trip to the grocery store and a trip to the liquor store, as well as a look-see at my pantry. I had a few of the dry goods, and I even had a few eggs in my refrigerator.

That left me to shop for some extra powdered sugar (the frosting needs six cups), some shortening, butter, and ginger beer. I decided to spring for Fever-Tree since A.) the liquor store had it, and B.) I really like their tonic water.

Even if the cupcakes don’t work out, I’ll be able to make myself a Moscow mule or two as consolation. That reminds me, I’ll need to pick up a couple of extra limes…

Moscow Mule Cupcakes Ingredients
Ginger beer, vodka, lime, granulated sugar, ground ginger, baking powder, flour, powdered sugar, butter, salt, shortening, sour cream, and eggs

The Process

The biggest issue I have with baking is remembering to set out the eggs and butter so they come up to room temp. I actually remembered to do that one Sunday, so I spent the afternoon baking and decorating. Here’s how my time was spent:

  • 21 minutes to prep the cupcakes
  • 17 minutes to bake and make the frosting
  • 4 minutes to cool in the pan
  • 10 minutes to frost and garnish
  • 52 minutes total (not including time to cool on wire racks)

Making the Cupcakes

Like all cupcake recipes, I started out with making the cupcakes. This recipe was written out so nicely that I didn’t have any trouble following along. I really appreciated that since I’m not the greatest baker!

After the oven and muffin pan were set up, the next step was to cream the butter and sugar for 3-4 minutes. I got the rest of the ingredients ready to go while the stand mixer was going, but it did take me an extra minute or two. Oh well, better over creamed than under.

The rest was very easy. I didn’t have any trouble knowing when to add ingredients or how much, and my batter came together perfectly. There did seem to be a lot of it, though, and my muffin tin cups were almost completely filled.

The recipe does say it makes 12-15 cupcakes, but my tin only holds 12. Fortunately, there was no overflowing, and I ended up with 12 cupcakes that were just a little taller than the pan. Perfect for frosting!

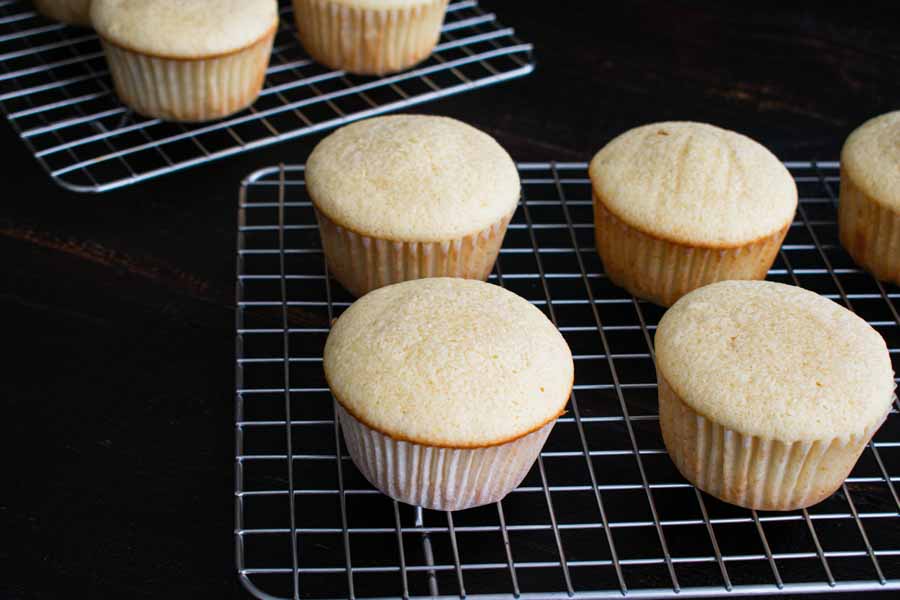
Cooling the cupcakes on wire racks

Making the Frosting

I did a quick clean up of my stand mixer while the cupcakes were baking, then I got started on the frosting. This part was just as easy as the cupcakes, and I didn’t have any trouble getting the frosting mixed up.

I did end up adding about 2 tablespoons of additional ginger beer to get the right consistency, but I think I could have added a little more. That wasn’t apparent until I started piping on the frosting and noticed air bubbles in the buttercream. Thinning it with a little more ginger beer would probably have helped the texture, but at least they didn’t affect the taste. Live and learn!

Putting it All Together

I left the cupcakes to cool in wire racks while I washed up, and they were room temperature by the time I was finished. I didn’t time this, but I’d say it took 10-15 minutes. Not long at all.

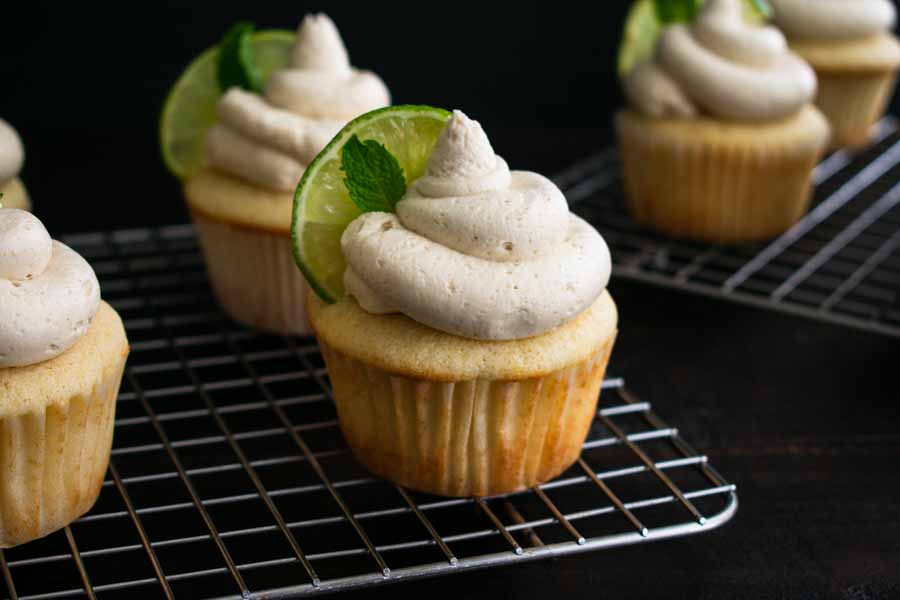
I had my piping bag loaded up with the frosting, so all I had to do was slice up a lime and pull off a few small mint leaves. It’s been ages since I’ve piped frosting, but it came back pretty fast! I did have to redo a couple, but this recipe made more than enough frosting for that.

In fact, I usually end up doubling frosting recipes so I don’t run out, so I was really pleased to have extra leftover. Placing the lime slices was easy, but I did have to use a toothpick to press the end of each mint leaf into the frosting. I think they came out pretty good, though!

Moscow Mule Cupcakes

Chicken Tzatziki Bowl

I know what you’re thinking: Another bowl already? And also with a Mediterranean theme?! I know but bear with me here. That Mediterranean Steak Bowls recipe made great big bowls of awesome, but I almost didn’t make them. Gasp!! It was between that recipe and this Chicken Tzatziki Bowl recipe because they both sounded so good. Well, I decided not to just choose one so here we are with another Mediterranean bowl option. Yes, this one uses a few of the same ingredients, but it sounds like the flavors will be different enough that we don’t get bored. Let’s find out what my “runner up” recipe is like!

Smoky yogurt-marinated grilled chicken served over quinoa and Mediterranean-inspired tomatoes, cucumbers, and olives with tzatziki and Feta.

Recipe Author: Gina Homolka at Skinny Taste
Get the recipe

The Ingredients

This recipe is actually two recipes because you also need to make Skinny Tzatziki for a topping. Hey, it’s in the title! So I made sure to print out both recipes (this can be a challenge for me LOL) and then I made up my list and went grocery shopping.

I needed most everything but the olive oil, red wine vinegar, and spices. I even had some kalamata olives on hand, and I assumed they would be a close enough kind of substitute for castelvetrano olives. Oh, but no.

Even though I used them, it turns out castelvetrano are large green olives with a mild flavor. It turns out that the black olives I thought I saw in the tiny recipe picture were actually charred spots on the chicken. Is 46 too soon for glasses?

The majority of the items that I did have to shop for were easy to find, even the feta. It comes in a somewhat large Tupperware-like container because it’s soaking in brine. I thought I was getting a huge block of cheese I would never use up, but the actual cheese inside isn’t terribly large. Enough for 2-3 feta dishes, I’m sure, but that’s easy for me. It won’t go to waste!

The only ingredients I couldn’t find were the three Persian cucumbers. Sometimes they have them, sometimes they don’t. I ended up substituting a second English cucumber for them and it worked a treat.

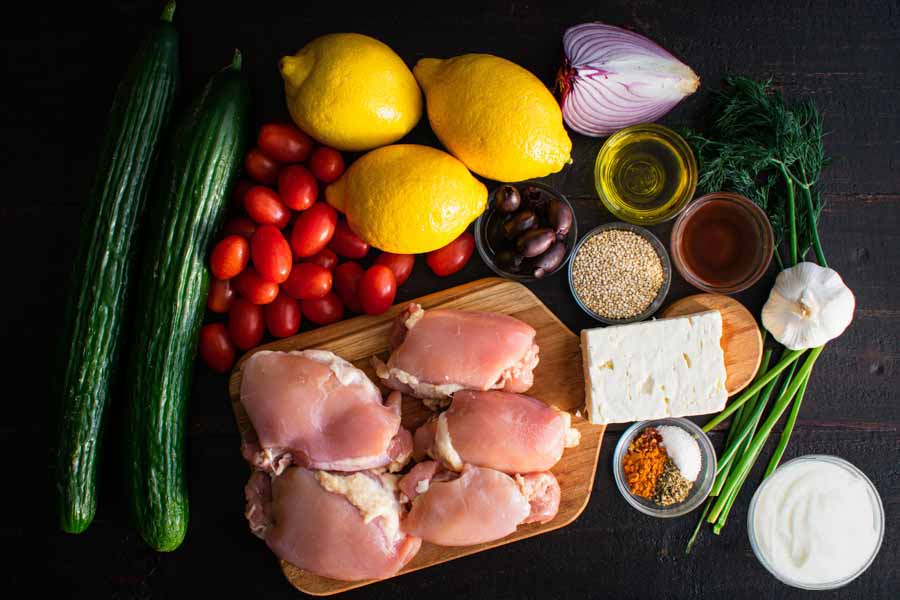
Chicken Tzatziki Bowl Ingredients
Boneless skinless chicken thighs, seedless cucumbers, grape tomatoes, lemons, black olives, red onion, extra virgin olive oil, dill, red wine vinegar, quinoa, feta cheese, plain yogurt, chives, salt, turmeric, oregano, red pepper flakes,

The Process

The main recipe is divided into three parts plus you have to make the tzatziki, so let’s say four parts:

  • The chicken
  • The tzatziki
  • The salad
  • The bowls

Ideally, I would make the chicken marinade and tzatziki the day before, but that’s not how it went. I did make the tzatziki the day before, but I completely forgot the marinade until the day of. Here’s how my time was spent:

  • 9 minutes to make the tzatziki (not including time to strain the yogurt)
  • 6 minutes to prep the marinade
  • 26 minutes to finish the prep work
  • 4 minutes to thread the skewers
  • 20 minutes to cook and assemble the bowls
  • 1 hour 5 minutes total (not including time to marinate)

Making the Tzatziki Sauce

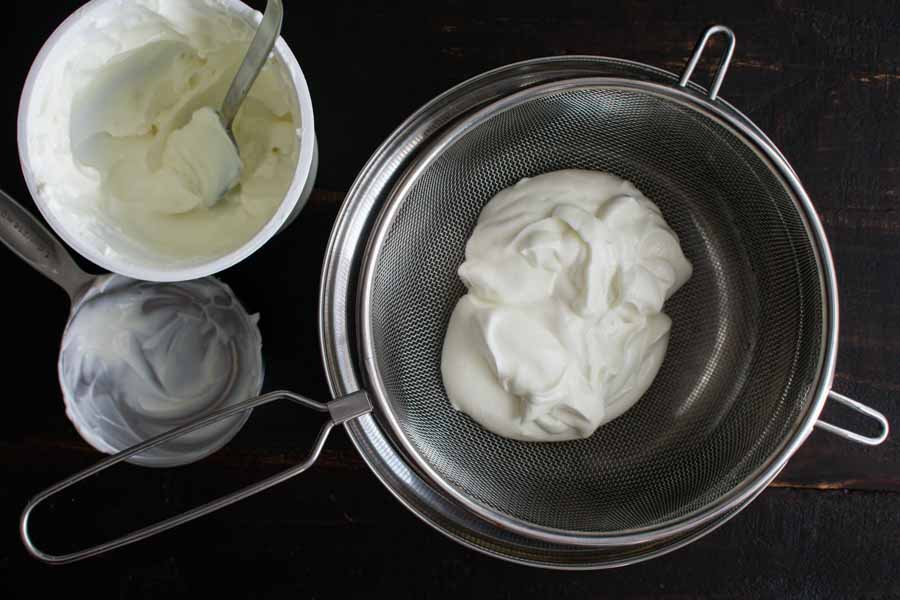
First up for the tzatziki was straining the yogurt to remove excess moisture. I used placed one cup of yogurt into a mesh strainer placed over a small mixing bowl. Then I put the bowl into the refrigerator to drain for a couple of hours while I puttered around the kitchen. I used Greek yogurt, so there wasn’t much liquid in the bowl. I’m sure that would not be the case with regular yogurt, though.

Draining the yogurt in a mesh sieve placed over a mixing bowl

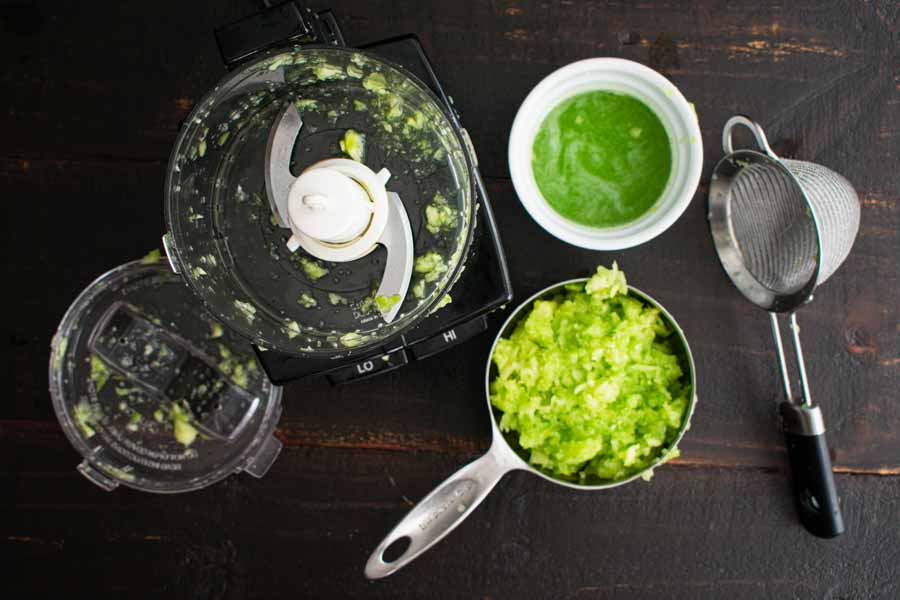
Once I started making the tzatziki, I did have a little trouble with the cucumber. I peeled it, chopped it into smaller pieces, and put them all into my mini-prep. This should have been done in smaller batches because there were a lot of big chunks left. I ended up removing the pulp and pulsing the rest of the cucumber chunks in two batches as I should have from the start.

Then I used my other sieve (a small mesh designed for cocktails) to strain the cucumber pulp by gently pressing on it with my fingertips. By the way: you can save that leftover cucumber juice to make a Tart and Crisp Cucumber Gin Fizz.

Pressing the juice out of the cucumber pulp

Continuing on, the rest of the process was a little bit of chopping then mixing up all the ingredients with the strained yogurt. I did make one small change to the recipe, though. I like smooth tzatziki, so I used my garlic press instead of just crushing the garlic as listed. That way you get the garlic flavor (maybe more) but you don’t end up biting into a big piece of garlic.

Making the Chicken Tzatzkik Bowls

The next morning was when I realized I forgot to marinate the chicken, but there was still time. The recipe says it needs to be marinated 1-8 hours, and I estimate I got in 5-6 hours.

About an hour before I planned to grill the chicken, I got started on prepping the other ingredients. That meant a lot of chopping, slicing, and measuring, as well as cooking up the quinoa.

Because I absolutely hate raw tomatoes, I also made a change to the recipe here. Instead of halving them, I skewered them and grilled them with the chicken. I used my metal skewers because they hold more than bamboo skewers.

Threading the grape tomatoes onto skewers so they can be grilled
Threading the grape tomatoes onto skewers so they can be grilled (The recipe doesn’t call for the tomatoes to be grilled, but I don’t like them raw.)

Speaking of bamboo skewers, I actually used them for the chicken. While I love my metal skewers, they are much too big to serve with bowls. I shortened four bamboo skewers so they were just a little longer than my bowls’ diameters and made sure to soak them while I did my prep work.

I also made sure to run outside and preheat the grill during my prep work, so it was ready to go when I got the chicken skewered. The chicken cooked up nicely in 15 minutes, and I’d say I took 10 minutes for the tomatoes (I like them cooked well).  Then I took all that back into the kitchen, mixed up the salad part with the grilled tomatoes, and assembled the Chicken Tzatziki Bowls.

Blood Orange and Raspberry Mojito

I have tried my share of mojito recipes, but this cocktail never gets old! I’m not really a rum person, but the classic mojito changed my mind. Now I simply can’t resist ordering one when I find it on the menu. And then Pinterest came along, and I discovered soooo many variations. It seems like you can mix in an endless variety of fruits to make mojitos, and I am here for it! This time, I’m trying a recipe that adds blood oranges and raspberry to the traditional rum-based cocktail. I like both, but I’m not sure about combining them. Let’s find out if this Blood Orange and Raspberry Mojito works.

Blood Orange And Raspberry Mojito Recipe – tartly sweet, simple to make cocktail, that tastes delicious.

Recipe Author: Mira at Cooking LSL
Get the recipe

The Ingredients

I had to buy most of the ingredients for this cocktail. That meant a trip to the grocery store and the liquor store. Most everything was easy to find, but I’ve only been able to find blood oranges at Whole Foods.

The closest looking orange I’ve found elsewhere are cara cara oranges. A little research says they aren’t the same as blood oranges, though. It seems that regular navel or Valencia oranges are the preferred substitutes. They aren’t as pretty as blood oranges, but they are easy to find.

The only ingredient I sort of had on hand was the simple syrup. I say kind of because I had to make my own. It’s very simple, though (pun intended), and I made up a batch the day before I planned on making this recipe.

Simple Syrup

Simple Syrup

The Hungry Pinner
A quick and easy-to-make staple of any well-stocked bar. This recipe yields approximately 12 ounces of simple syrup.
Prep Time 5 minutes
Cook Time 5 minutes
Cool 1 hour
Total Time 1 hour 10 minutes
Course Drinks
Servings 12 1-ounce servings
Calories 63 kcal

Ingredients
  

  • 1 cup water
  • 1 cup sugar of your choice (I use organic sugar, which gives the syrup an amber tinge)

Instructions
 

  • In a small saucepan, bring the water to a boil.
  • Reduce heat to medium and add the sugar. Stir until dissolved (the mixture will become clear when the sugar is dissolved).
  • Remove from heat and allow to cool. The simple syrup can be refrigerated in a bottle or other airtight container for up to 4 weeks.
Keyword bartending, mixology, simple syrup, sugar
Blood Orange And Raspberry Mojito Ingredients
Rum, seltzer water, blood oranges, limes, raspberries, mint, and simple syrup

The Process

For the most part, making a Blood Orange And Raspberry Mojito is pretty much the same as making a classic mojito. I had mine done in 4 minutes, just short of the 5 minutes listed.

First up was muddling the mint leaves and rum. The trick with muddling is to crush the leaves a little to release the mint oil. You don’t want to break them up. I had a little trouble with this part. The leaves float in the rum, and that made it difficult to muddle them. Tip: Muddle the mint leaves before adding the rum, but be very gentle.

After that, it’s time to add ice, simple syrup, and get juicing. I like to use large ice cubes in my drinks because they melt slower, and I don’t end up with a watery cocktail. That means keeping ice cube trays in my freezer, but they don’t take up much room. Tip: Add slices of blood orange with the ice if you want to use them as a garnish. Adding them after the ice can be difficult.

Juicing the blood orange and lime was simple. I used my citrus reamer instead of getting out the juicer, but the red blood orange did get messy. Be careful if your counters stain easily!

Juicing the raspberries took a little more effort, but it worked out. I used my muddler and then fingers to press the raspberries through a small mesh sieve. Since the glass was full of ice at this point, I had to hold the sieve above it as I worked the raspberries through with the muddler. Tip: Juicing the raspberries before adding the ice would have been easier. That way I could have rested the sieve on the rim of the glass.

There wasn’t much room for sparkling water after adding everything else, but I did manage to get a splash or two into my mojito. The rum and simple syrup settled to the bottom of the glass, so I made sure to give my cocktail a good stir to mix everything together. Then it was time to take a sip and find out if this beautiful cocktail tasted as good as it looked.
Slicing the blood oranges

Mediterranean Steak Bowls

I have made a few bowls for this blog, and I have to say I’ve liked every one of them. They’re such great meal options! Depending on the meal/recipe, you can get your protein, vegetables, and carbs all in one recipe served in one bowl. The extra planning you have to do for a typical meal is gone. Poof! All you have to do is round up the ingredients and get cooking. I love it! These Mediterranean Steak Bowls are loaded with plenty of things I love, one I’m kind of meh on (tomatoes), and promise to be reasonably quick (ready in 45 minutes). They sound like the dinner of my dreams. Well, my dreams when I’m cooking dinner, not a 5-star chef. Let’s find out if this recipe will make my dreams come true!

This Mediterranean Steak Bowl with Herbed-Yogurt Dressing is proof that food served in bowls just tastes better. A bed of crisp greens and veggies provides the perfect contrast to creamy hummus, sweet grilled tomatoes, and tender steak. And the dressing plus a sprinkle of salty feta cheese brings it all together for a restaurant-quality meal at home.
Recipe Author: Jessica Beacom at The Real Food Dietician’s
Get the recipe

The Ingredients

The list of ingredients for this recipe takes up almost the entire first page, but don’t let that intimidate you! Spoiler alert: You’ll get a great big bowl of awesome when you combine them.

I had to buy most everything but the oil, seasonings, and olives, but nothing was difficult to find. The flank steak was the priciest item on my shopping list, but it wasn’t unreasonable. I found an exactly 1-pound cut for $9.99.

The type of cucumber isn’t specified, but I opted for an English cucumber. They’re large, and I love cucumber. They are also seedless with very thin skin, so no peeling or seeding is needed. These cucumbers are a little pricey compared to your run-of-the-mill cucumber but worth it in this case.
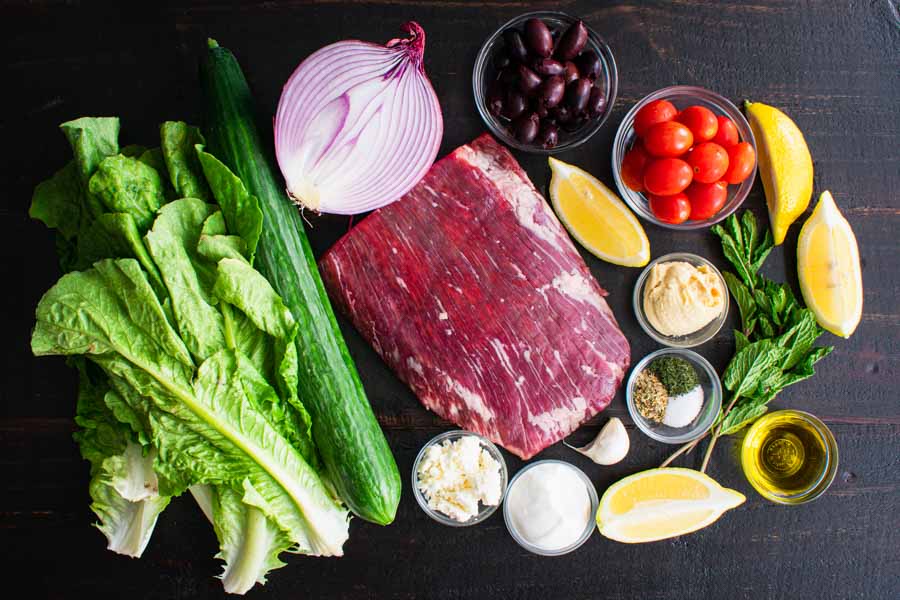
Mediterranean Steak Bowls Ingredients
Flank steak, cucumber, romaine lettuce, red onion, black olives, grape tomatoes, lemon, garlic hummus, mint, dill, oregano, salt, olive oil, garlic, yogurt, and feta cheese

The Process

This recipe has two parts: making the herbed yogurt dressing and making the bowl ingredients. Here’s how my time was spent:

  • 4 minutes to make the herbed yogurt dressing
  • 34 minutes to make the bowls
  • 38 minutes total

Herbed Yogurt Dressing

The dressing says it can be stored for up to 5 days, so I decided to whip it up the day before the bowls. This part was incredibly easy, and I had it done in 4 minutes. I did do things slightly different from the recipe, though. Instead of whisking the ingredients together in a small bowl, I used the container I planned to store the dressing in.

A 2-cup sealed container was big enough to hold all the ingredients and let me stir everything very thoroughly. I’m not sure if what I did qualified as whisking, but I made sure everything was well blended.

After that, I popped the lid on, put the dressing into my refrigerator, and wandered off to do whatever it is I do for the remaining 23 hours 56 minutes of the day.

Steak and Vegetable Skewers

This recipe gives you the option of grilling your steak outside or broiling it in the oven. While I do appreciate the option, I opted to grill it outside. It’s a little less convenient when I’m cooking in my kitchen and grilling on the patio, but it’s manageable and worth it for that grilled flavor.

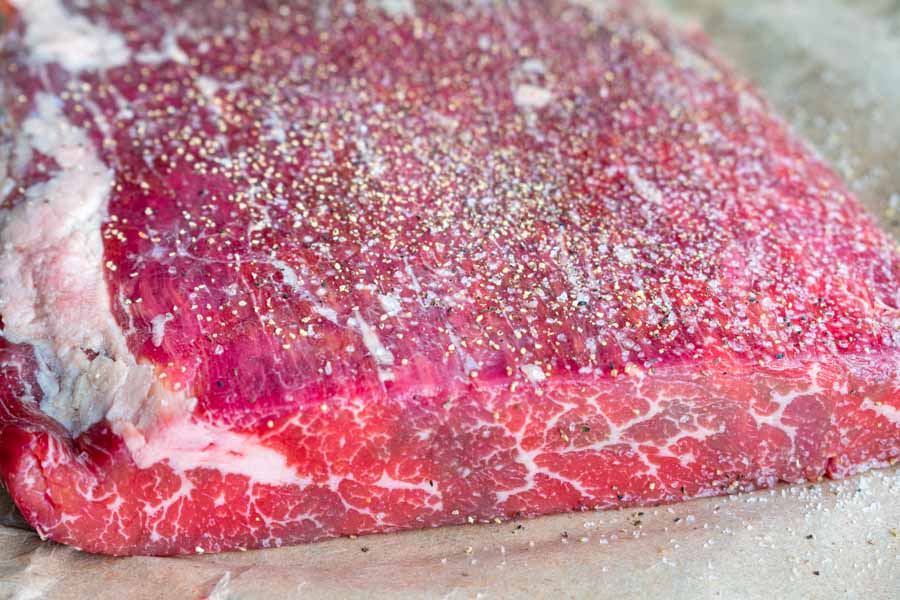
Flank steak seasoned with salt and pepper

I started off by preheating the grill (I use propane, so it’s easy) and then started on the flank steak and skewers. The steak was simple, just sprinkle with salt and pepper. The vegetable skewers were also easy but took a little more time.

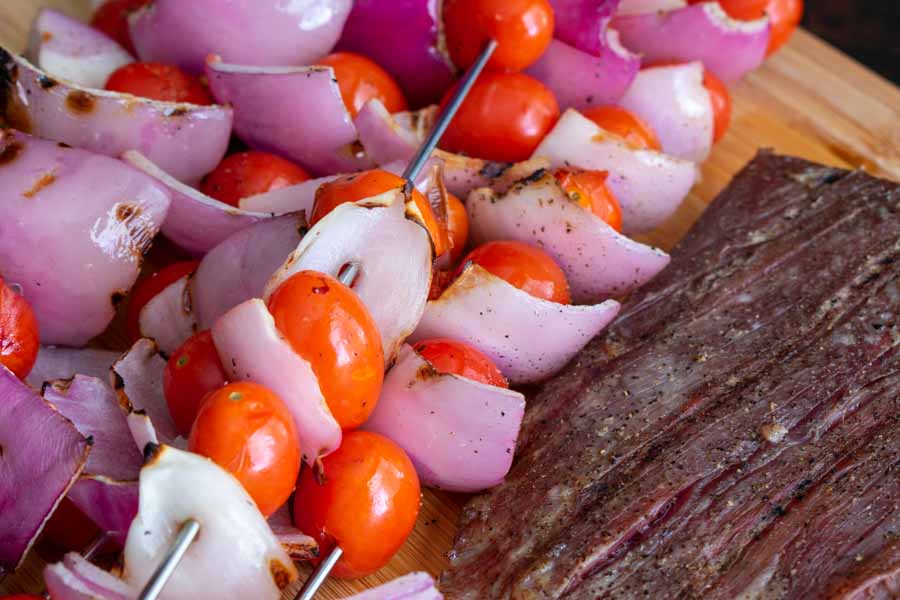
Once I got the tomatoes and onions onto the skewers, I gathered up my equipment and moved this production outside to the grill. I like my beef on the rare side, so I opted for the shortest grill-time listed, 4 minutes per side. The vegetables needed to be grilled for 5-8 minutes, so that worked out perfectly. I grilled them at the same time, then I moved back into the kitchen.

After covering the meat and vegetables with a piece of foil, I finished prepping the rest of the ingredients. That involved plenty of chopping and measuring, but it was easy to do. By the time I finished that and made up 2 Mediterranean steak bowls, only 34 minutes had gone by. Nice!

The grilled vegetable skewers and flank steak

Elderflower Spanish Gin and Tonics

If you don’t read my blog regularly, you might not know that I’m kind of into gin and tonics. Like a lot. and the funny thing is that I never imagined there would be much variation in this classic cocktail before I started this blog. I mean, it’s gin and tonic water with some ice and lime. What else is there? Turns out there’s plenty, yet another one is this Elderflower Spanish Gin and Tonics recipe. I’ve tried Spanish Gin Tonics, and I’ve even tried a G&T with grapefruit, so I’m very curious to find out if combining them will be a Pinterest success or failure. Only one way to find out…

Recently, I have been seeing Spanish style Gin & Tonics pop up on menus and they have changed the G&T game for me! England can take credit for the creation of the original, but the Spanish used their sense for flair to make this classic drink really shine!

Recipe Author: Ashley Rose at Craft and Cocktails
Get the recipe

The Ingredients

I usually have a few ingredients in my pantry, and that was the case with this recipe. You’d think I had the gin and maybe the tonic water since I’m such an avid gin and tonic fan, but you would be wrong. No, the only item I had on hand was the dried juniper berries. Weird, huh?

That left me to shop for everything else, and that meant a couple of trips. My regular grocery store had grapefruit and rosemary, of course. They also had Fevertree Tonic Water, but not the elderflower flavor. That and the St. George Botanivore Gin required a trip to Total Wine.

Elderflower Spanish Gin and Tonics Ingredients
St. George Botanivore Fin, juniper berries, rosemary sprigs, Fevertree Elderflower Tonic, and pink grapefruit

The Process

This drink was quick and easy to make once all the prep work was done (and I use the term “work” loosely). First up was the ice. I’m the kind of person who usually gets my ice from the dispenser without another thought, but that’s changing. Larger ice cubes take longer to melt, allowing you to sip your cocktail longer. This is a good thing, so I now keep a couple of ice cube trays in the freezer just for these occasions (and I’m not a great planner LOL).

You also have to chill the glass you plan to use for half an hour. It sounds like a small thing you could skip, but trust the recipe here! A chilled glass makes a big difference for pretty much any cold beverage and especially cocktails.

Next up, gather your ingredients and supplies. It’s a short list, especially the supplies: a knife to cut the grapefruit and a measuring glass or jigger. This drink is mixed in the glass, so all you need is something to measure the gin.

I didn’t even measure the tonic water. Instead, I added all the other ingredients and poured the tonic over them until the glass was filled. It took most of the bottle and I’m sure was close enough to the six ounces listed in the recipe.

Tip: Add the grapefruit before adding the ice. It was a little difficult to get the slices into the glass after filling it with ice cubes.

Slicing the pink grapefruit

Pinchos Morunos

One of the nicest things about living in South Florida is that we can grill year-round. We used to grill at least once a week, but we’ve been slacking off lately. Well, that’s about to change! Since the weather is presumably warming up in other parts of the country, I thought I would find a recipe that involves grilling. I stumbled across this recipe for Pinchos Morunos (Spanish Pork Kebabs), and now it’s officially time to fire up the grill and give this recipe a try.

Pinchos Morunos are a delicious Spanish tapas. These little pork kebabs are marinated and grilled then served with a paprika aioli sauce for a great summer appetizer.

Recipe Author: Annemarie at Just a Little Bit of Bacon
Get the recipe

The Ingredients

There really aren’t a lot of ingredients in this recipe, and I’m not mad about it. A lot of them are spices, and I lucked out and had all of them on hand. I did have to shop for the produce, pork tenderloin, and eggs, but they were all easy to find.

The pork was, of course, the most expensive item at $13.99 per pound or $15.95 for a 1.14-pound piece. I thought that was on the high side, and a quick Google showed me I was right. Pork tenderloin is available in my area for as little as $3.99 a pound. It’s worth looking around if you are on a budget (been there!).

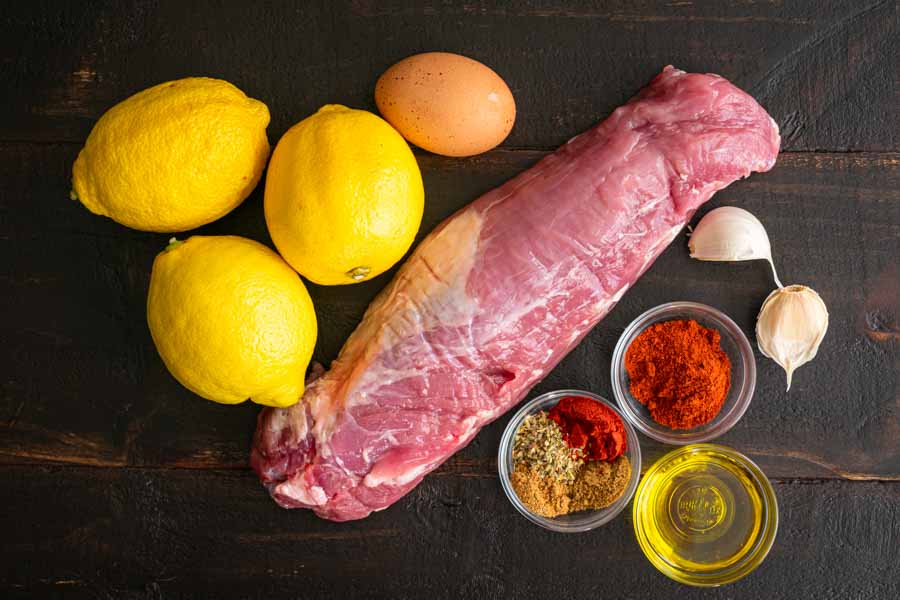
Pinchos Morunos (Spanish Pork Kebabs) Ingredients
Pork tenderloin, lemons, egg yolk, garlic, smoked paprika (pimenton), olive oil, paprika, cumin, coriander, and oregano

The Process

This recipe can be split into three parts:

  • Making the marinade
  • Grilling the pork
  • Making the aioli

I kind of forgot that I needed to grill the marinating pork in my refrigerator and ended up rushing through the last 2 parts at the same time. It happens this time of year when the sun sets early and I need to photograph my dinner LOL. Because of that, I wasn’t able to break out the time to make the aioli from grilling the kebabs. Here’s how my time was spent:

  • 7 minutes to prep the marinade
  • 20 minutes to cook and make the aioli
  • 27 minutes total (not including 24 hours to marinate)

Making the Kebabs

first up was making the marinade, and it was very simple to do. Just remove the silverskin from the tenderloin, mix up the marinade ingredients, and put it all into a sealed container. I used a gallon-size ziplock bag and press out as much air as possible.

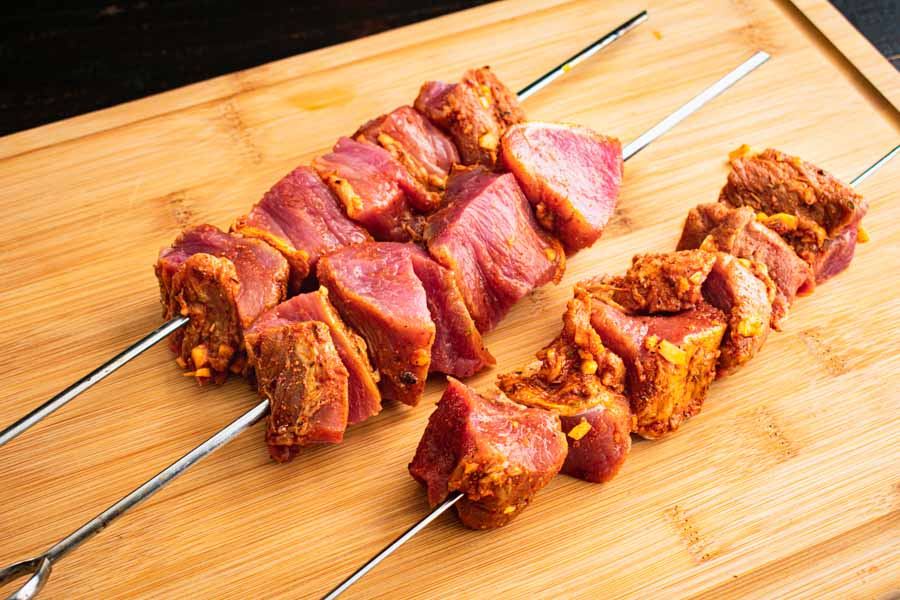
The next afternoon it was time to get grilling. It really didn’t take long to cut the pork into chunks, thread them onto skewers, and grill them up. I was especially glad to have my metal skewers since I was in a rush because they don’t need to be soaked for an hour like bamboo skewers.

Because the grill was preheating while I prepped the kebabs, it was ready to go when the kebabs were. I took my equipment with me out to the patio and got to it. The time listed was spot on, and the meat thermometer read 140℉ in 9 minutes.

The marinated pork cut into pieces and threaded onto the skewers

Making the Aioli

Since I was in a rush, I ran inside and got the aioli started while the kebabs grilled. I used the whisk attachment on my stand mixer to speed things along. This part went precisely as listed, but the aioli was a lot thinner than I expected. The aioli was thick enough to cling to the kebabs like gravy, but I expected it to be more like mayonnaise.

I’m wondering if it was because I didn’t mix it long enough or the mixer wasn’t effective because the bowl was too big, and as a result, the ingredients were too shallow for the whisk to reach. Next time I will use my mini-prep for the aioli since it’s designed to mix up smaller amounts.

"<yoastmark