Home Blog Page 24

Southern Style Black-Eyed Peas

I just made a delicious Chicken Fried Chicken, and I needed an equally Southern side dish to go with it. There’s plenty to choose from: macaroni and cheese, collard greens, mashed potatoes—the list goes on and on. I was considering a few recipes when I found out my husband has never had black-eyed peas. What?! I had to fix that, so this recipe for Southern Style Black-Eyed Peas went right to the top of my shortlist of possible sides. Let’s get some South in his mouth ASAP!

A slow-cooked recipe for traditional Southern black-eyed peas with ham hocks (or ham bone).

Recipe Author: Mandy Rivers at South in Your Mouth
Get the recipe

The Ingredients

Y’all know I love a simple recipe with only a few ingredients, and these black-eyed peas fit the bill. they have just 6 ingredients, and two of those are salt and pepper. I had that and the butter, which left me a 3-item shopping list. What I needed was pretty inexpensive, too, with the $8 3-pack of hocks being the most expensive item (I froze the extra one).

Dried black-eyed peas, yellow onion, and ham hocks were all I needed. I made sure to find smoked ham hocks for that extra flavor. It makes a big difference, and I highly recommend them. They go by several other names too, so if you can’t find smoked ham hocks, look for pork hocks, pork knuckles, ham shanks, or smoked hocks.
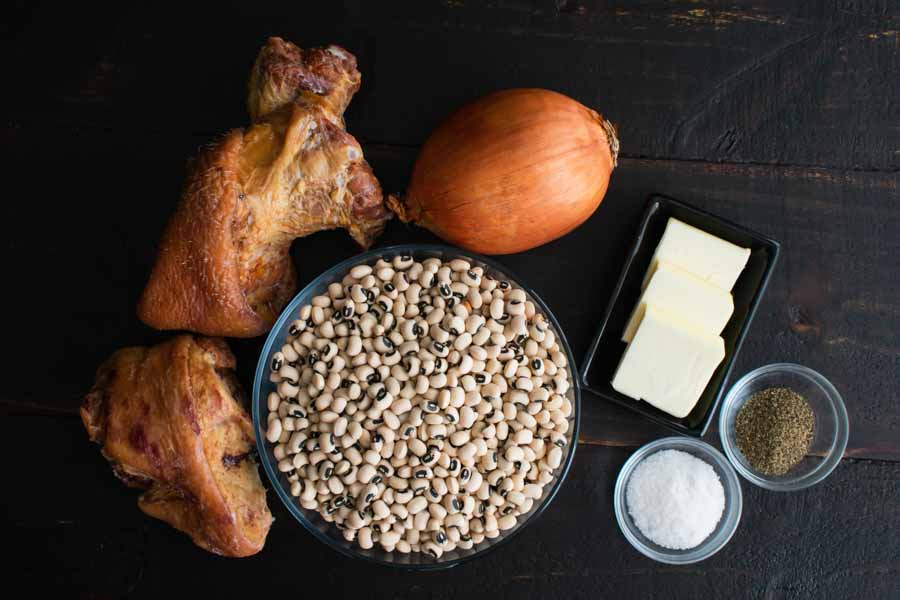
Southern Style Black-Eyed Peas Ingredients
Dried black-eyed peas, smoked ham hocks, onion, butter, salt, and pepper

The Process

These Southern Style Black-Eyed Peas are slow-cooked on the stove, so no need for a crockpot. I imagine you could modify the recipe for a crockpot, but I followed the recipe and used the stove. Here’s how my time was spent:

  • 10 minutes to prep
  • 4 hours to cook
  • 4 minutes to adjust seasonings
  • 1 additional hour to finish cooking
  • 5 hours 14 minutes total (not including time to soak beans)

Soak the Peas

I started this recipe by soaking the beans overnight. I used a large mixing bowl and added enough water to submerge the beans by a few inches. They will double in size as they soak, and you don’t want them to expand and go above the water. The peas on top will dry out if they do.

Prep and Start Cooking

Due to the long cooking time, I started cooking the next day right after breakfast. The prep work was quite simple, and I had it done in 10 minutes, as listed on the recipe. Really, the prep work is dicing an onion and sauteeing it in a large pan with the butter. Then add everything else, stir, and wait.
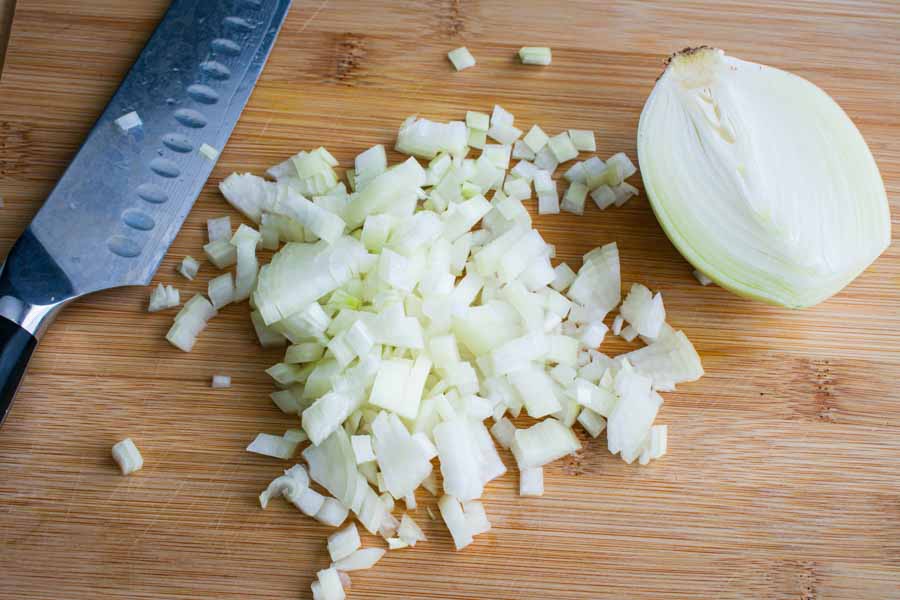
Finely dicing the onion

Speaking of pans, I used a 5-quart pan, and it was just the right size. I was able to fit all the ingredients and stir with no problems. But although there was plenty of room, the ham hocks weren’t completely covered. I made sure to turn them each time I stirred the peas, and they cooked up just fine.

Adjust the Seasonings & Finish Cooking

After 4 hours, I removed the ham hocks from the pot and placed them on a large cutting board to cool for a few minutes. Then I used a kitchen knife and fork to remove the meat and chop it into small pieces. The meat was so tender that it pretty much fell off the bone.
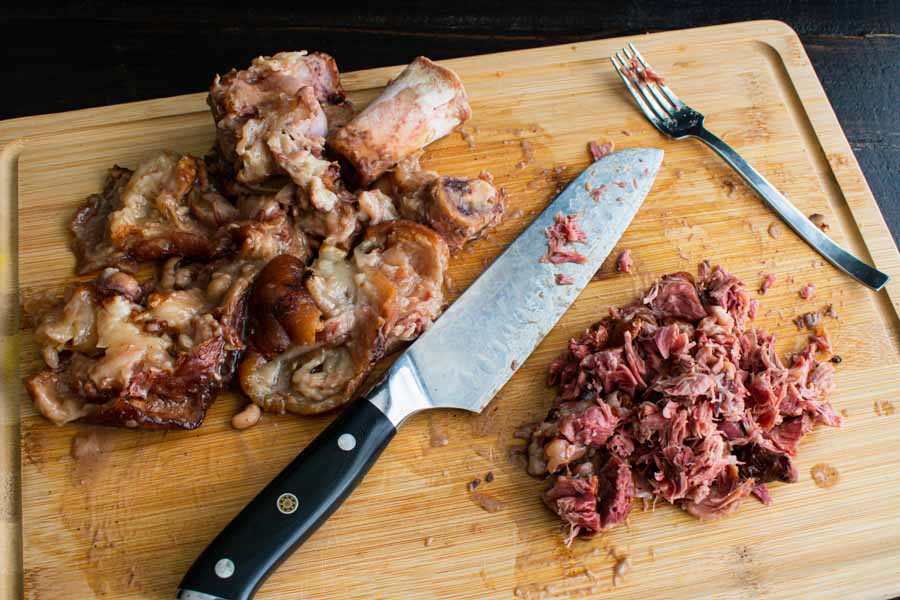
Removing the meat from the cooked ham hocks

Once the ham was added back to the pan, I gave everything a good stir and tasted as I adjusted the seasonings. I didn’t measure, but all I did was a bit more salt and pepper. The beans were nice and creamy, so I put the lid back on and finished cooking them for another hour.

As I mentioned, I served them with Chicken Fried Chicken, but without rice or any other toppings. They didn’t need it! These black-eyed peas would also be great with these Southern recipes:
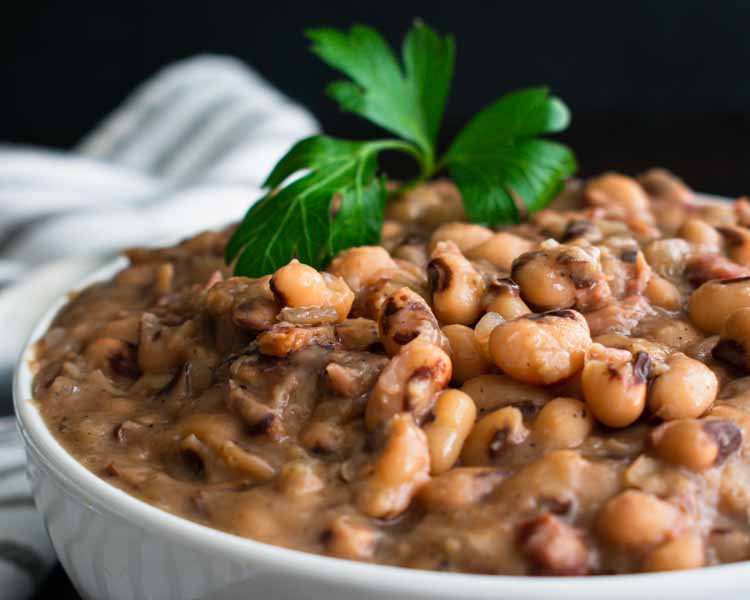
Chicken Fried Chicken

My mom was a Southern lady, and she passed on a lot of wonderful things to me. One of them was the love of Southern food. It’s glorious, and but my favorite thing ever will always be Mom’s fried chicken. Man, I miss her fried chicken! But today I’m going to try something along those lines with this Chicken Fried Chicken recipe. And yes, it’s complete with gravy, as any chicken fried meat should be. Let’s find out how this recipe fares.

Easy and delicious this Chicken Fried Chicken is a quick and flavorful dinnertime recipe that brings the whole family to the table, with minimal ingredients it’s a simple and comforting meal.

Recipe Author: Alli at Tornadough Alli
Get the recipe

The Ingredients

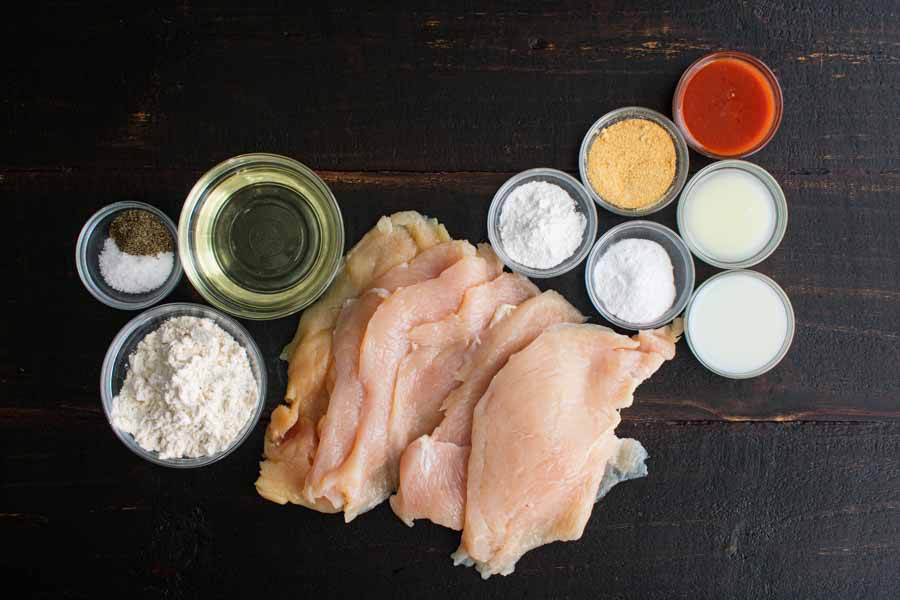
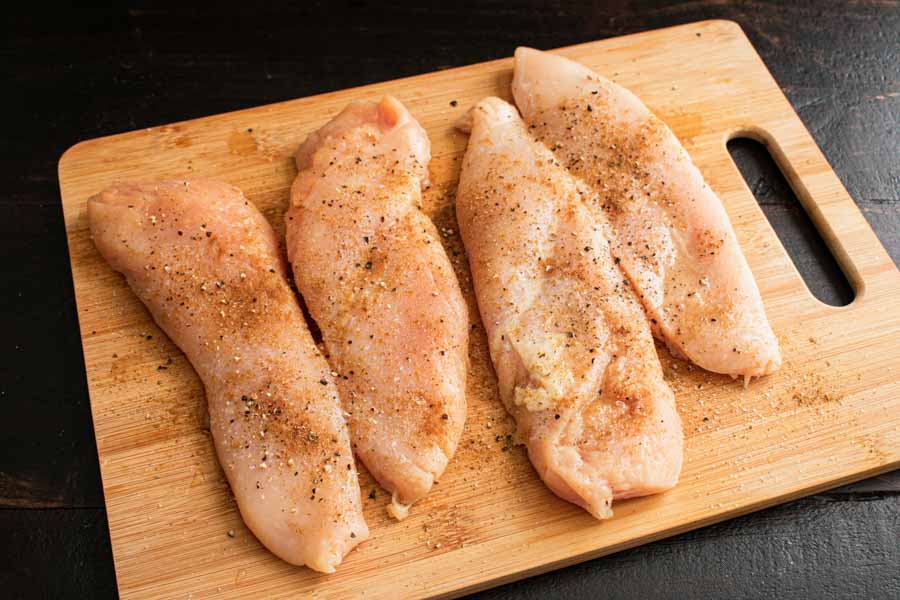
I’ve made chicken fried steak before, but never chicken fried chicken. The process looks to be the same, though. They don’t make cubed chicken, so this recipe uses thinly sliced chicken breasts.

I immediately thought that meant chicken cutlets, but these seemed a bit thinner. Some were as thick as a cutlet, but some were even thinner than that. Like translucent thin, as if a cutlet had been filleted.

I had most everything else in my pantry and freezer, but I did have to buy a couple of things. I topped off my vegetable oil and picked up some milk. That was it. A short shopping list—my favorite kind.

Chicken Fried Chicken Ingredients
Thinly sliced chicken breasts, flour, salt, pepper, vegetable oil, baking soda, baking powder, milk, buttermilk, garlic powder, and hot sauce

The Process

Making chicken fried chicken was similar to chicken fried steak. It doesn’t take too long, and it’s fairly easy to do. Here’s how my time was spent:

  • 10 minutes to prep
  • 15 minutes to fry the chicken
  • 6 minutes to make the gravy
  • 31 minutes total

That’s right in line with the recipe, which lists 10 minutes to prep, 20 minutes to cook, 30 minutes total.

Making the Chicken

I started by heating my oil in a large cast-iron pan. The exact amount isn’t listed in the recipe, so I guesstimated. It wasn’t deep enough to cover the chicken, but they were able to float. I popped the meat thermometer in and set it to beep at 325℉ per the recipe. BTW, I use an electric stove and set it on 4/10. It was the perfect temperature.

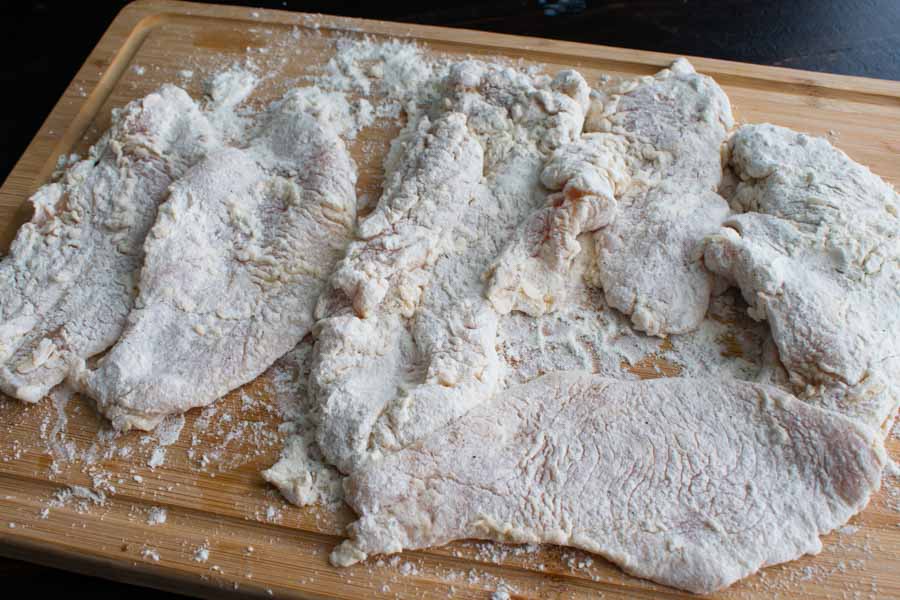
After that, it was time to prep. Next up was the prep work. I began with the breading, and it was very simple to do. Just mix up the dry ingredients for the breading in one bowl, and the liquid with egg for a wash/dip in another. Then dip each piece of chicken in the flour mixture, then the wash, then back into the flour. Done!

The battered chicken breasts before frying

The oil took a few more minutes to come to temperature, then it was time to get cooking. I was able to fry 3 pieces of chicken at a time. I fried the thin ones for 3 minutes per side and the thicker pieces closer to 5 minutes per side. It’s can be hard to tell when fried foods are done, so I let the color of the breading guide me.

Tip: A pair of tongs will come in really handy for this recipe. I used while breading to keep my fingers clean and to turn the chicken in the oil.

Making the Gravy

Once the chicken was fried and set aside on paper towels to absorb the extra grease, I got started on the gravy. The cast-iron pan full of oil was hot, hot, hot! So I carefully pushed it to the back of the stove and used a saucepan for the gravy.

First up was carefully spooning the hot oil into a metal measuring cup and adding it to the saucepan. I can’t overstate that this needs to be done very, very carefully! From there, the process is mostly whisking in the flour and milk. After that, season to your liking, and you’re ready to serve!

For Goodness Saké

I have to finish out this Asian-themed week with a cocktail. I thought about dessert, but it’s a cocktail kind of week. After a bit of searching through my Pinterest Drinks board, I found the perfect cocktail recipe: For Goodness Saké. How clever is the name? I love it! I don’t see many sake recipes on Pinterest, so this is a must-try. I love sake, but I can take or leave pickled ginger. To be honest, I mostly leave it on the side of the plate. Not this time! This time I’m going to throw it into my cocktail. (Never thought I would say that!)

An intriguing mix of sake and pickled ginger in this cocktail.

Recipe Author: Jay and Leah at Gastronom Cocktails
Get the recipe

The Ingredients

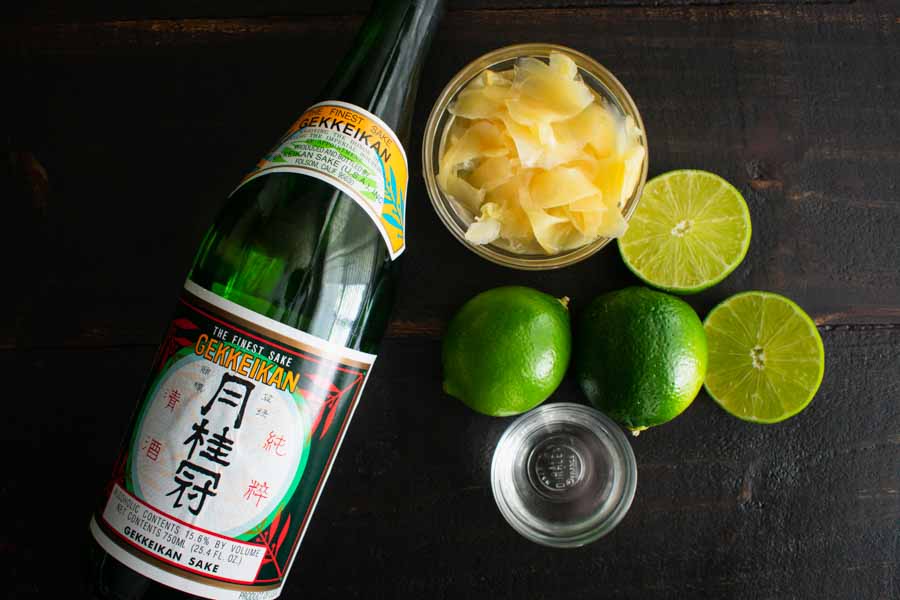
This cocktail only has a few ingredients, but I had most of them on hand. I had a bottle of sake on my bar, simple syrup (recipe below) in the refrigerator, and pickled ginger in my pantry. Funny story about that.

I have difficulty getting around, so I order my groceries from Whole Foods most of the time. They’re pretty good about letting me know if something is out of stock and suggesting a replacement. Well, I must have missed that ginger was out of stock one day, and they automatically a replacement in my order.

As I went through my groceries, I found the jar of pickled ginger. I think I laughed, then I just put it in my pantry and thought it would sit there, unopened, forever. Then I ran across this For Goodness Saké, and I almost jumped for joy—that pickled ginger would be used after all!

So all I had to buy for this recipe was a few limes. Easy-peasy and 3 limes set me back a whole 50 cents.

For Goodness Saké – A Saké and Ginger Cocktail Ingredients
Saké, pickled ginger, lime juice, and simple syrup

The Process

I have said it for a long time, but I need a mixing glass. Well, this time I finally bought one so I could properly make this drink.

I even broke out the ice trays and used ice cubes instead of the wedges that come out of the refrigerator door. Fancy!

Making my For Goodness Saké cocktail was nice and easy. Just add all the ingredients except the slice of ginger to the mixing glass with ice, stir, and string into a coupe glass.

I tried getting the ginger to look like it does in the recipe photo, but it kept flopping over. Other than that, things went smoothly, and I had a cocktail to enjoy in 3 minutes.

Simple Syrup

Simple Syrup

The Hungry Pinner
A quick and easy-to-make staple of any well-stocked bar. This recipe yields approximately 12 ounces of simple syrup.
Prep Time 5 minutes
Cook Time 5 minutes
Cool 1 hour
Total Time 1 hour 10 minutes
Course Drinks
Servings 12 1-ounce servings
Calories 63 kcal

Ingredients
  

  • 1 cup water
  • 1 cup sugar of your choice (I use organic sugar, which gives the syrup an amber tinge)

Instructions
 

  • In a small saucepan, bring the water to a boil.
  • Reduce heat to medium and add the sugar. Stir until dissolved (the mixture will become clear when the sugar is dissolved).
  • Remove from heat and allow to cool. The simple syrup can be refrigerated in a bottle or other airtight container for up to 4 weeks.
Keyword bartending, mixology, simple syrup, sugar

Asian Salmon Sandwiches with Sesame Slaw

0

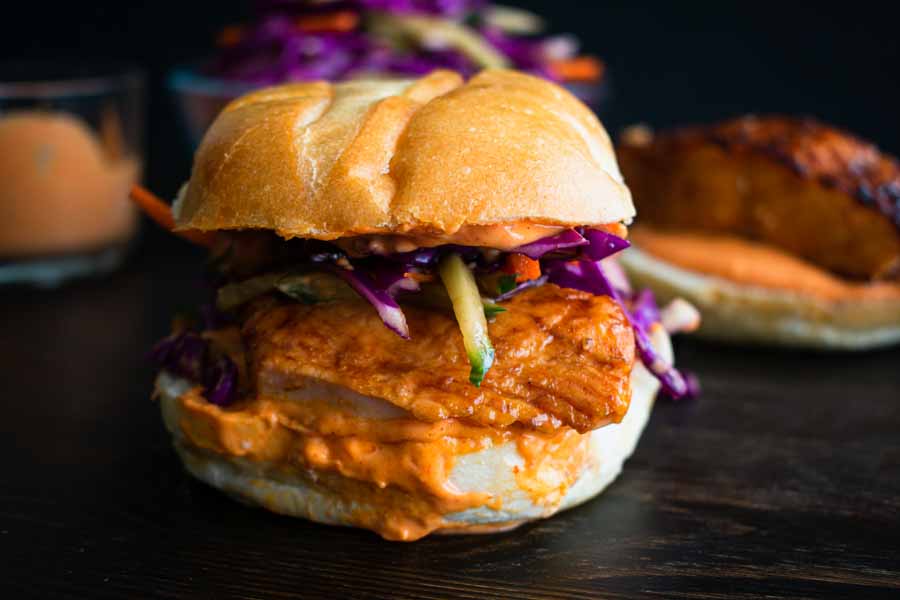
I have made salmon several times for this blog, but I have never made it on a sandwich. I made it as simple fillets, in salads, soups, and pasta, but no sandwiches. That is about to change with this recipe for Asian Salmon Sandwiches with Sesame Slaw. I do love salmon, but my husband not so much. But this time he said he wanted to give it a try. I was shocked! But I made sure to add an extra salmon fillet to my grocery list. I can’t wait to see his reaction!

This yummy sandwich features an Asian marinated Alaska salmon fillet with a tasty sesame slaw! It’s a quick and delicious meal that can be made in a little over 30 minutes!

Recipe Author: Joscelyn Abreu at Wife Mama Foodie
Get the recipe

The Ingredients

This recipe has quite a few ingredients, so I had some shopping to do. Thanks to last week’s menu of Korean recipes, I had a few things on hand. Still, there was a lot of shopping to do.

Thankfully, nothing was so unusual that I had to order it. I found everything I needed at my local grocery store. They had fish fillets, vegetables, and hoisin sauce. I also picked up some of my favorite french hamburger buns at the bakery.

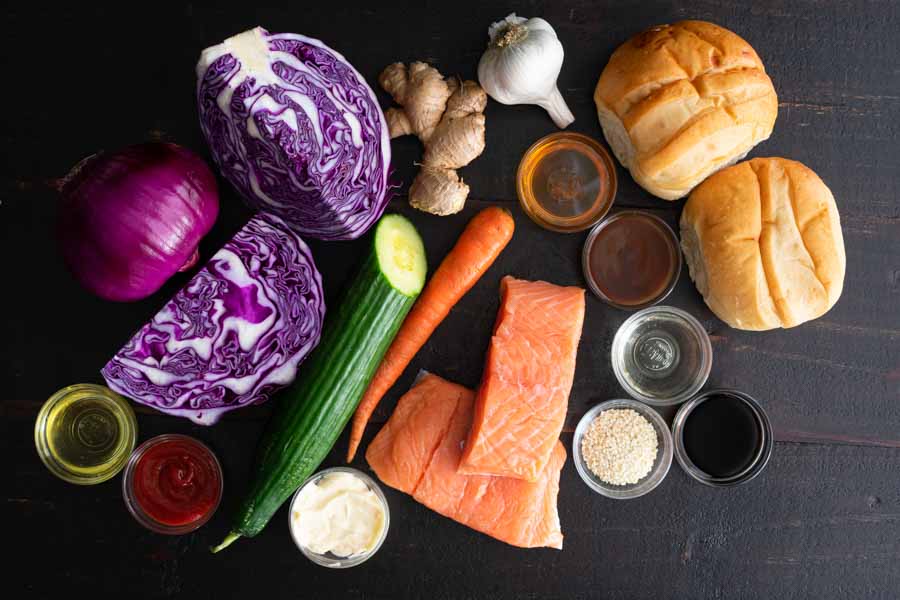
Asian Salmon Sandwiches with Sesame Slaw Ingredients
Salmon fillets, mayonnaise, carrot, English cucumber, sriracha sauce, sesame oil, red cabbage, red onion, ginger, garlic, buns, honey, hoisin sauce, rice vinegar, sesame seeds, and soy sauce

The Process

With so many ingredients, I expected this recipe to take a long time to make. Oh, but no. It was relatively quick. Here’s how my time was spent:

  • 30 minutes to prep (16 minutes active time)
  • 7 minutes to cook and assemble
  • 37 minutes total

That was just 2 minutes longer than the 35 minute time listed on the recipe.

The salmon needs to be marinated, so the marinade is the first thing I had to make. It only took a minute to mix it up and add the salmon fillets.

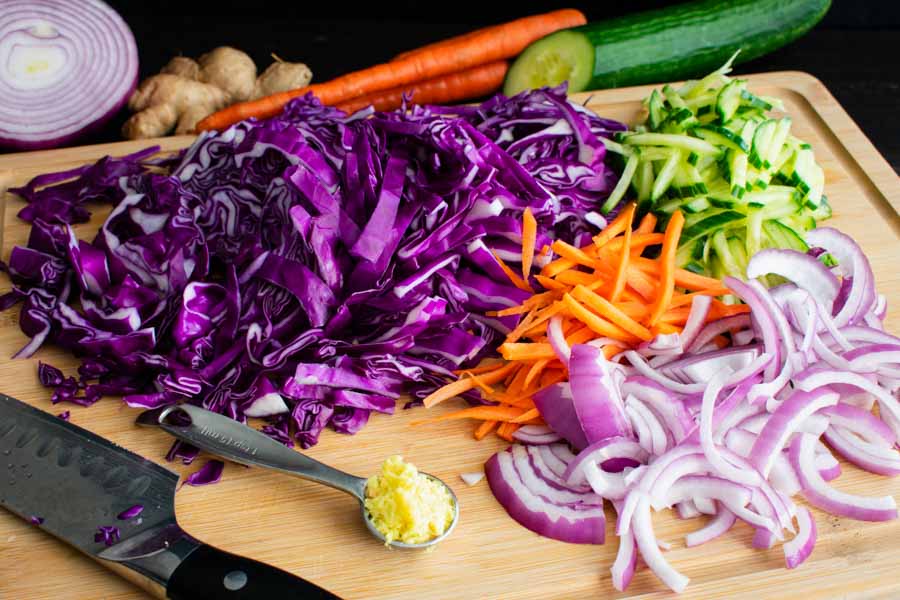
After that, it was onto the slaw. There was a lot of shredding and slicing involved, and my mandoline took care of most of it. It even grated the ginger! That was the bulk of the work, and all I had to do was mix up the dressing and toss the slaw.

Shredded red cabbage, julienned English cucumber, julienned carrots, and grated ginger

Mixing up the Sriracha mayonnaise was as easy as it sounded. Just two ingredients and a little bit of stirring did the job.

All that was left to do was slice the hamburger buns and wait for the salmon to finish marinating. I turned the broiler on while I waited. I also added some vegetable oil to a cast iron pan and placed it in the oven to warm.

When it was time to broil the salmon, the oven and pan were nice and hot. I used tongs to place the salmon into the pan and poured the hoisin sauce over them. Since the pan had been preheated, it only took 4 minutes to cook the salmon.

The only thing left after all of that was to assemble my Asian Salmon Sandwiches with Sesame Slaw. They were so messy but so good!

Pajeon

I’m not done with Korean food for this week, and today I’m trying this Pajeon recipe. What is Pajeon? And how to you pronounce it? Let me explain. First, it’s pronounced like ‘paa-jaan’. And yes, I had to look it up. As to what it is, it’s potato pancakes with other vegetables mixed in and a soy-based dipping sauce. Reading the recipe made me think of latkes, and I’ve had my share of those, along with plenty of sour cream to dip them in. Pajeon, however, sounds different enough that I want to try it. I’m all for adding veggies to dinner, so let’s find out if this recipe is a Pinterest success.

Pajeon is a savoury pancake filled with variety of meat and vegetables having spring onions as the prominent one. Batter is commonly made out of a mixture of eggs, wheat flour and rice flour.

Recipe Author: Raymund at Ang Sarap
Get the recipe

The Ingredients

I had a few items on hand, but I had to shop for a few items. My sesame oil went bad, and I was out of rice vinegar. I had the basics like vegetable oil, salt, pepper, flour, brown sugar, and soy sauce. I even had some gochugaru on hand. Mine was finely ground instead of coarse flakes, but I went with it.

The rest of what I needed was easy to find at my usual grocery store. I wasn’t sure of what kind of potatoes would be best, so I looked it up. Starchy russets were recommended a few times, so that’s what I bought.

One page did say the julienned potatoes would need to sit in a strainer so the moisture would drain away. I didn’t think mine were terribly wet, so I skipped that. It wasn’t in this recipe anyway.

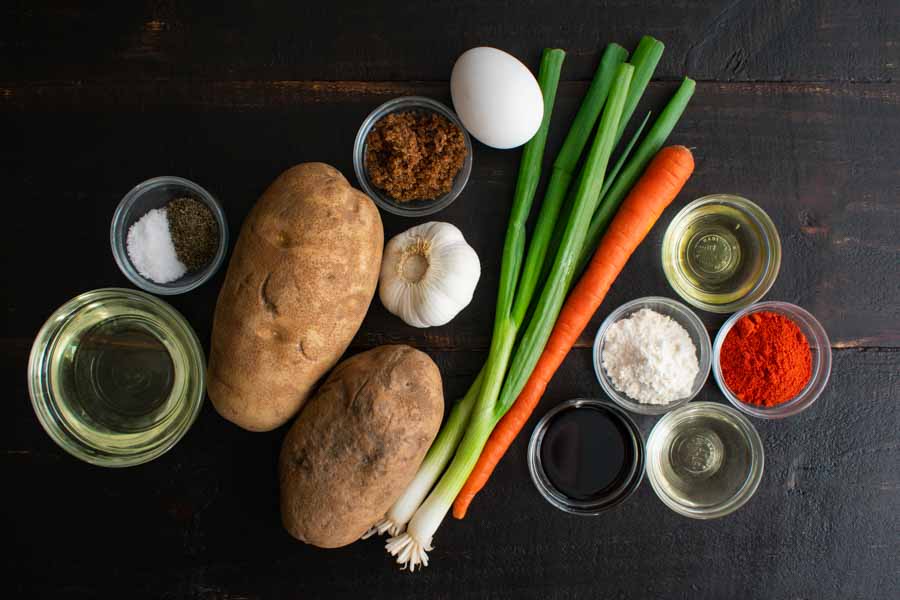
Pajeon Ingredients
Salt, pepper, vegetable oil, russet potatoes, brown sugar, garlic, egg, green onions, carrot, sesame oil, flour, gochugaru, soy sauce, and rice vinegar

The Process

I did most of the prep work before I even touched the stove. I know, that’s what you’re supposed to do, but I have a habit of prepping while I cook. Not this time.

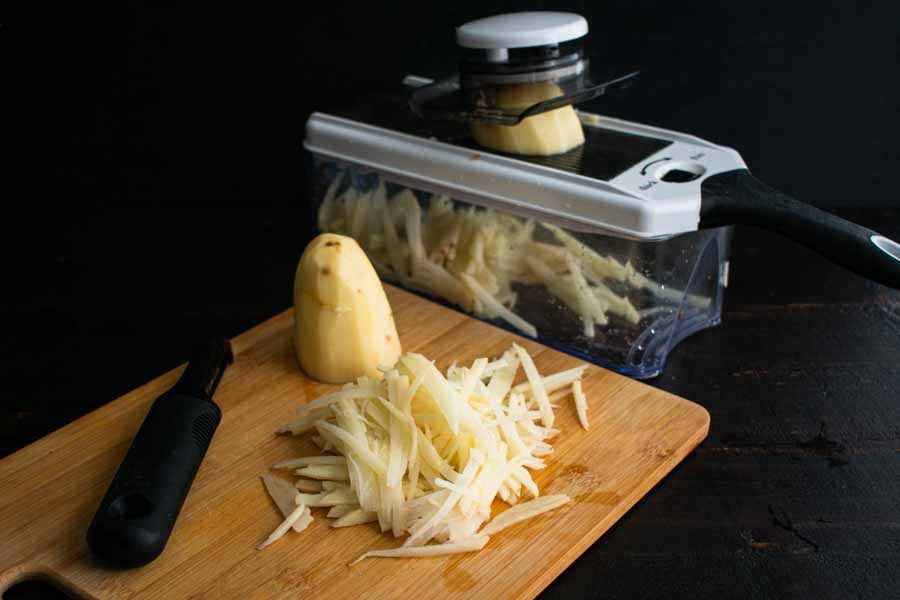
The bulk of the prep work involved the vegetables, so that’s where I started. It didn’t say to, but I went ahead and peeled the potatoes before I julienned them. Then I got out my mandoline, slid in the julienne attachment, and got to work. I also used it on the carrots. Doing all this by hand would have driven me mad. The scallions did have to be cut up the old-fashioned way, but they were pretty easy to do.

Using a mandoline to julienne the potatoes

Making the Dipping Sauce

After that, I put the sesame seeds into my toaster oven‘s tray and toasted them at the 1 1/2 setting. By that I mean I literally toasted. I left the breast slot open and pushed the arm down as if I was toasting a bagel. I use this trick because it shuts off automatically. Otherwise, I would forget the oven was on until I smelled something burning.

While the seeds toasted, I measured the other ingredients into a saucepan and started heating them. The sesame seeds finished when I adding the last ingredients, and I threw them in too. The brown sugar dissolved in a few minutes, and I set the pan aside with the lid on to keep the dipping sauce warm.

Making the Pajeon

The vegetables were all ready, but I had to make the batter. That was a simple mixture of flour, water, and egg with some salt and pepper for seasoning. Don’t worry if it sounds a little bland—the dipping sauce is the star of this show.

Once the veg was added to the batter, I noticed it was quite thick. I added an extra 1/2 cup of water to thin it out.

Now it was time to start cooking! I grabbed a 10-inch nonstick skillet and added 1 tablespoon of vegetable oil. I let it heat thoroughly with the dial set at 5/10 before I added the batter.

While the oil was heating, I divided the batter evenly into four bowls and found my largest spatula. Each pancake had to cook for 4 minutes per side or 8 minutes each. I added another tablespoon of oil after the second pancake and didn’t have any trouble with them sticking. In fact, I probably could have used less oil, but I like to be cautious with new recipes.

Recipe Times

Here is how my time was spent:

  • 13 minutes to prep
  • 46 minutes to cook
  • 59 minutes total

My prep time was right in line with the 15 minutes listed on the recipe, but the cooking time was a different story.

The recipe listed an 8 minutes cook time which is correct if you can cook all 4 pancakes at the same time. Mine took up most of the pan, so there was no way I could make more than 1 at a time. Add the cooking time for the dipping sauce, and you see why my Pajeon took about an hour.

Ojingeo Bokkeum (Spicy Stir-fried Squid)

0

I had never tried Korean food before I started The Hungry Pinner. It was one of those cuisines I always wanted to try, but I somehow never got around to it. My first Korean dish was bulgogi, and I loved it. And I have loved every Korean and Korean fusion recipe I have tried since. Today I’m going to add another Korean dish to my repertoire with Ojingeo Bokkeum (Spicy Stir-fried Squid). It’s been a minute since I’ve made squid, and it’s something I enjoy. Now I’m going to try it Korean style. Let’s see how it goes.

Ojingeo bokkeum is a spicy stir-fried squid dish. If you love squid and spicy food, this flavor packed dish is easy to make with a few staple Korean ingredients.

Recipe Author: Hyosun at Korean Bapsang
Get the recipe

The Ingredients

This recipe calls for a whole 14-ounce squid, but I can never find them that way. The best I could do was a pound of cleaned squid tubes for $10.99. Not that I needed a whole pound of squid, it was just the minimum order.

Since I had pre-cleaned squid, I had to figure out the amount I needed. The general rule is 2/3 the amount of the whole squid to account for the waste from cleaning. That came to 8.4 ounces, or half a pound (14 X 0.6 = 8.4), about half a pound. I froze the extra.

Most of the remaining ingredients were easy to find at my regular grocery store. They had everything except the gochujang (Korean chili pepper paste) and gochugaru (Korean chili pepper flakes). I had the gochugaru on hand, but I had to order the gochujang paste from Amazon.

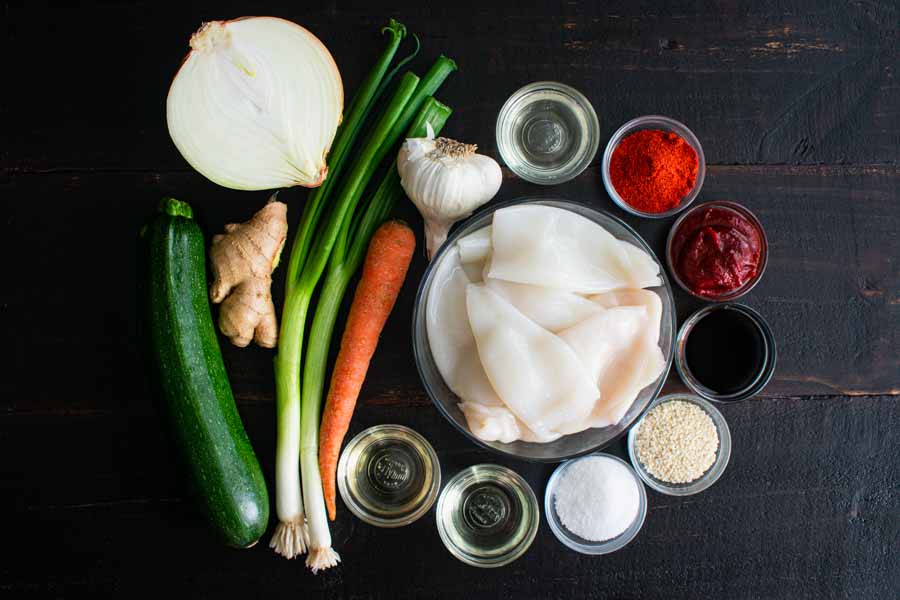
Ojingeo Bokkeum (Spicy Stir-fried Squid) Ingredients
SQuid, corn syrup, gochugaru, gochujang, soy sauce, sesame seeds, sugar, sesame oil, vegetable oil, carrot, scallions, ginger, zucchini, onion, and garlic

The Process

I saved some time and steps by buying cleaned squid. Here’s how it broke down:

  • 16 minutes to prep
  • 7 minutes to cook
  • 21 minutes total
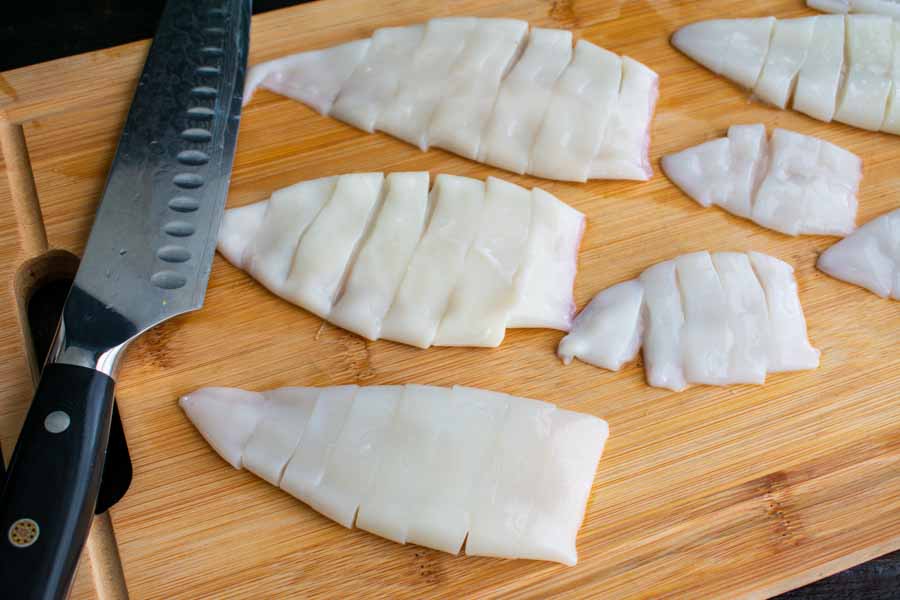
Slicing the squid tubes into rings

I’m one of those people who likes to prep just enough to get started, then finish up as I cook. But this is a stirfry, and it cooks fast. That meant everything needed to be prepped before I started cooking.

Sometimes prepping before cooking sounds like it will take forever. It really doesn’t! I have found out it can be kind of relaxing to focus on the prep work and not worry about anything else. With that in mind, started a pot of rice on the back burner, then I sliced, chopped, mixed, and marinated my way through steps 1-4.

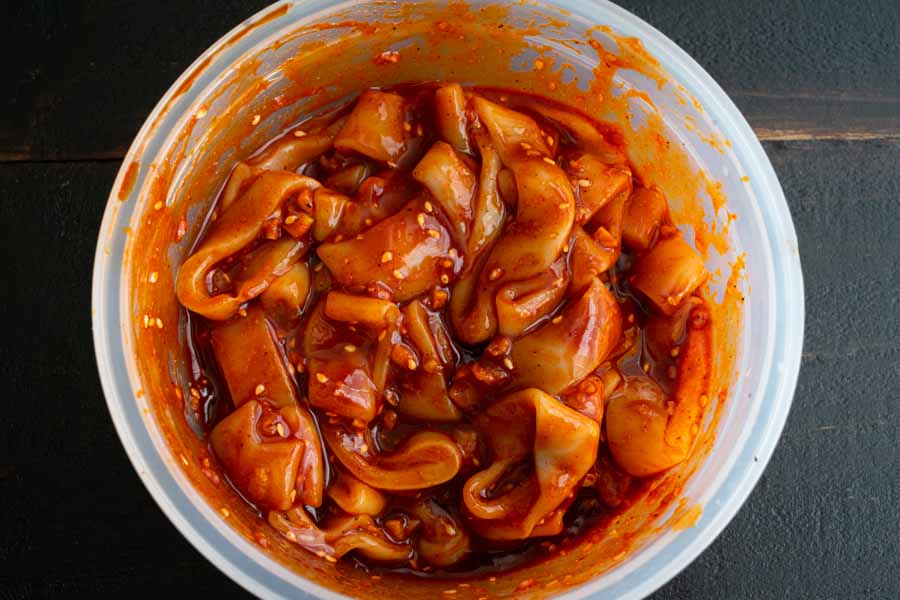
Marinating the squid

I was completely ready once it was time to cook. Things did go very quickly, and there was no walking away from the stove once I began. I stirred and fried my way through the rest of the recipe in what seemed like moments.

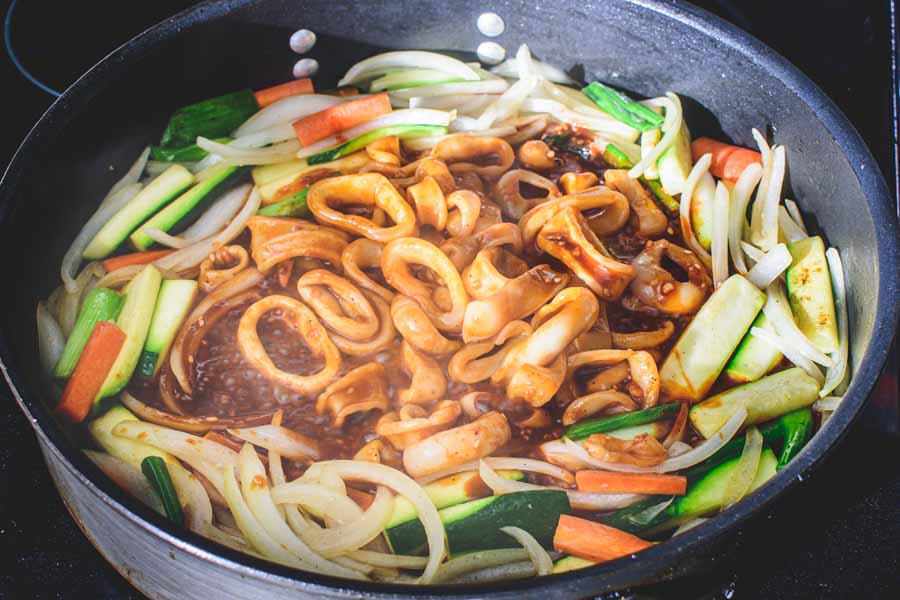
A wok isn’t in my collections of pans, so I used a 5-quart saute pan. It was big enough to fit all the ingredients and allow me to stirfry them. Plus, the deep sides kept things inside the pan.

Stirfrying the marinated squid and vegetables

Slow Cooker Cuban Black Beans

After posting Cuban Chicken with Onions (Pechuga a la Plancha), you know I have to do a post on beans and rice. It’s a must with Cuban food! Now, I know you can just open a can of black beans, but that’s not how I roll. Okay, it sometimes is, but not today! These Slow Cooker Cuban Black Beans promised to be an authentic side dish, and they sound easy to make. Just a few ingredients and a slow cooker usually mean a no-fuss dish. Let’s find out if this recipe is that easy.

A truly authentic, delicious, and simple recipe for Cuban Black Beans made in the slow cooker. Even better when eaten on the second day…a perfect make-ahead meal.

Recipe Author: Bianca at Casablanca Cooks
Get the recipe

The Ingredients

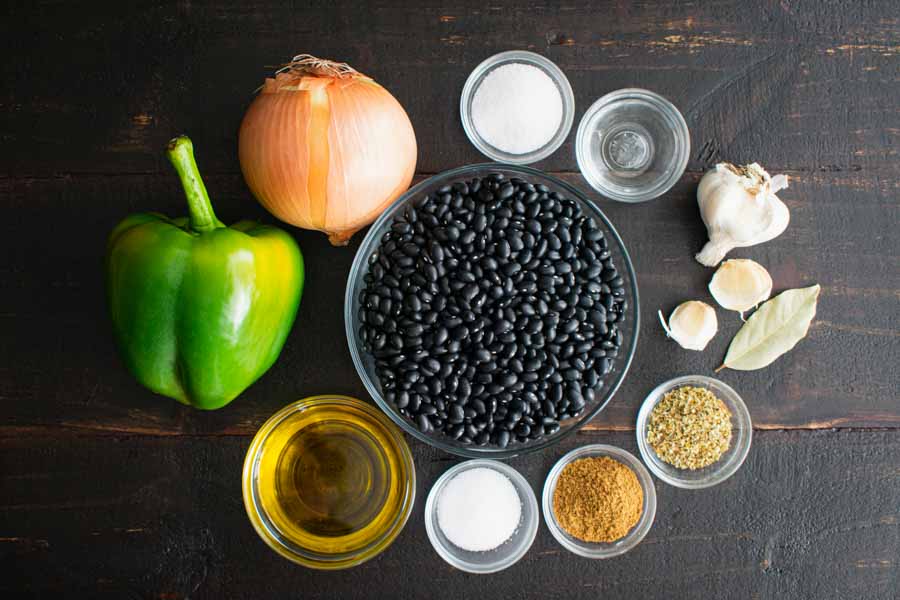
There are a dozen ingredients in this recipe, but about half of them are spices. I had those on hand, along with the vinegar, sugar, and olive oil. That left me to shop for the fresh ingredients and the dried black beans.

Speaking of black beans, I really appreciated that this recipe included the correct amount of water for multiple sizes. I managed to find a 16-ounce package of dried beans, so I used the larger amount of water.

Slow Cooker Cuban Black Beans (Frijoles Negros) Ingredients
Dried back beans, green bell pepper, yellow onion, sugar, white vinegar, garlic, bay leaf, dried oregano, ground cumin, salt, and olive oil

The Process

Think cooking dried beans is a pain because you have to remember to soak them beforehand? Not with these Slow Cooker Cuban Black Beans! No soaking was required, which is perfect for me since I usually forget that part.

The 6-7 hour cooking time did mean I had to get up early to get things started, though. Here’s how my time was spent:

  • 19 minutes to prep
  • 6 hours to cook
  • 2 minutes to season
  • 6 hours 21 minutes total

That was right in line with the 6 hours 20 minutes listed on the recipe.

As I mentioned, I had to get up early to make these beans, and I was a zombie that morning! Even so, this recipe was easy enough to follow that I had everything chopped, sauteed, and seasoned before I was fully awake.

If you’re a morning zombie or just plain in a hurry, you can always prep everything the night before. Chop the bell pepper, onion, and garlic and keep them in the refrigerator. Then measure out the spices and keeping them in a sealed container on the counter. You can also measure out the water and keep it in a pitcher on the counter. Everything will be ready to go the next morning.

Really in a hurry? Saute the bell pepper, onion, garlic, and spices. Allow it to cool for 20-30 minutes, then place it into a sealed container and refrigerate. All you’ll need to do in the morning is add the sauteed mixture to the slow cooker with the beans and water.

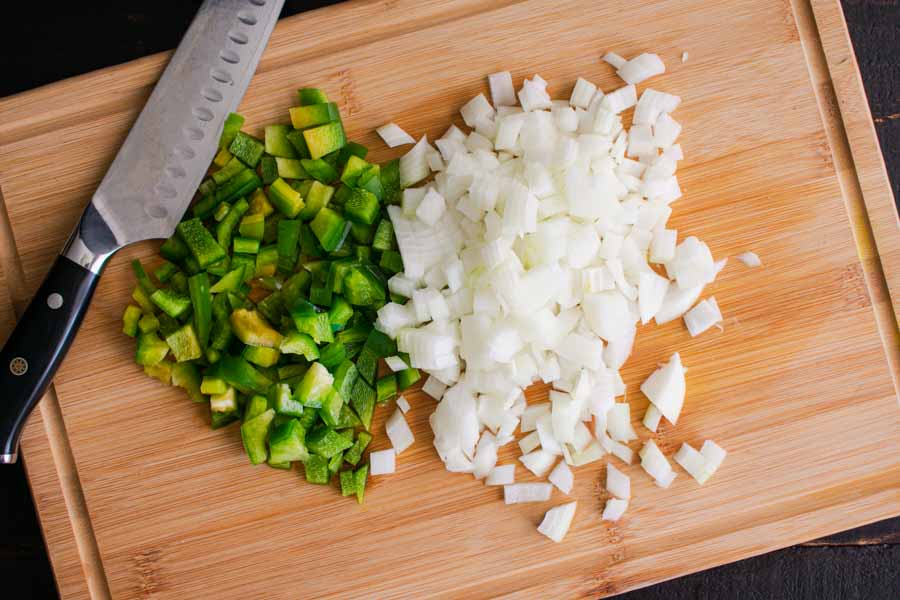
Chopped bell pepper and onion

Cuban Chicken with Onions

I live in South Florida, where there is Cuban food a-plenty. It’s wonderful! In fact, one of our favorite places to get Cuban food is about a mile up the street. We both have foods we love on the menu, but I think my husband and I can agree that our favorite dish is pollo a la plancha. It’s a marinated chicken breast that’s grilled and served over onions, and it’s the best chicken dish ever. Evah! So when I was reading this Cuban Chicken with Onions (Pechuga a La Plancha) recipe, I thought it sounded a lot like our beloved pollo a la plancha. There were a few differences, but I love the idea of being able to make our beloved Cuban dish at home. Let’s find out how the two compared.

By the way, pechuga a la plancha means “grilled breast” and pollo a la plancha means “grilled chicken”. The two are used interchangeably to refer to the same recipe, and it is also sometimes (though less often) called pechuga de pollo a la plancha or “grilled chicken breast”. Pollo a la plancha seems to be the most often used, but now you know in case you encounter the alternate names.

A homemade Cuban Chicken that tastes like your favorite restaurant’s Pechuga a la plancha! Pan-fried chicken with lime & sautéed onions never tasted better!

Recipe Author: Linda Warren at 2 Cookin’ Mamas
Get the recipe

The Ingredients

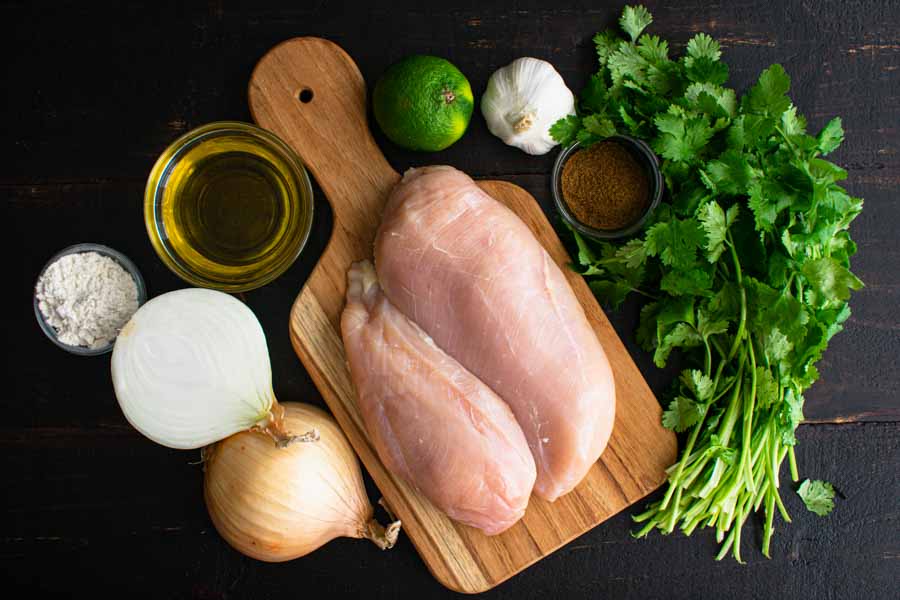
Cuban food might sound exotic to some, but the ingredients for this recipe were so easy to find. Boneless, skinless chicken breasts, olive oil, onion, and all the rest are easily found at most grocery stores. I had to shop for most everything, but this was a budget-friendly meal for sure.

Cuban Chicken with Onions (Pechuga a la Plancha) Ingredients
Chicken breasts, sweet yellow onion, flour, olive oil, lime, garlic, cumin, and cilantro

The Process

The total time for this recipe was listed at 35 minutes, and my experience was right in line with that. Here’s how my time was spent:

  • 18 minutes to prep
  • 20 minutes to cook
  • 38 minutes total

Prepping the Chicken

The first steps in this recipe involve the chicken. I had two chicken breasts and needed to cut them in half per the ingredients list. My instinct told me to cut them horizontally to make cutlets, despite the instructions saying to cut them in half lengthwise. It took me a moment to figure it out, but it makes sense since the next step is to pound the chicken thin. Cutlets might let you skip that step, though.

After I had them cut and pounded, I added the seasonings. Lime juice was first so the dry spices would stick better. Doing it the opposite way essentially washes off the spices. This recipe doesn’t give exact amounts for the spices, so the photo below was my best guess. I think the salt and pepper were fine, but I could’ve gone a little heavier on the cumin. Next time.

Once the chicken was seasoned, I dredged the chicken in flour and set it aside so I could start on the onions.

Finishing Up

Most of the work was done at this point, and all that was left was the cooking. I followed the instructions and cooked the onions and garlic first. My 5-quart saute pan allowed plenty of room to stir without spills.

After removing them from the pan with a slotted spoon, it was time to grill up the chicken. I opted to cook it for the full eight minutes, four minutes per side. It worked perfectly, and I had four juicy, fully cooked through chicken breasts in short order.

Then it was onto a serving platter (because I’m fancy), topping with the onions, and finally a garnish of chopped cilantro and lime wedges. Chef’s kiss!

Sautéed Fennel with Garlic

How do feel about fennel? I love it, and I’ve made all kinds of recipes with it, both ground as a spice and with the actual fennel bulb (Fun fact: fennel is an herb, not a vegetable). This simple herb has a licorice flavor that gets more subtle the longer it’s cooked and adds flavor to whatever it’s cooked with. It’s delicious with roasted chicken, salmon fillet, or all by itself. That brings me to today’s recipe, Sautéed Fennel with Garlic. It looks like a smile yet flavorful side dish that I’ll love, but there’s only one way to know for sure. Let’s get cooking!

This recipe from Greece: The Cookbook embodies everything we love about a good vegetable side dish. It’s quick and easy to prepare, so you can focus on making the rest of the meal, and the flavors are simple and clean.

Recipe Author: The Team at Tasting Table
Get the recipe

The Ingredients

This recipe promises to be quick and easy, and it’s off to a good start. It has a whopping seven ingredients, and that’s including salt and pepper. Nice!

I even had most of the ingredients on hand. I did have to shop for the tomato juice and fennel bulbs, but they were easy to find at my usual grocery store.

The only downside to this dish is fennel can be a little pricey. The bulbs I found were $2.99 each, $10.61 for four. I’ve found them for as much as $3.79 each. That’s an expensive side dish for me, so I kept the main simple (I had some steaks in the freezer, bought on sale, of course).

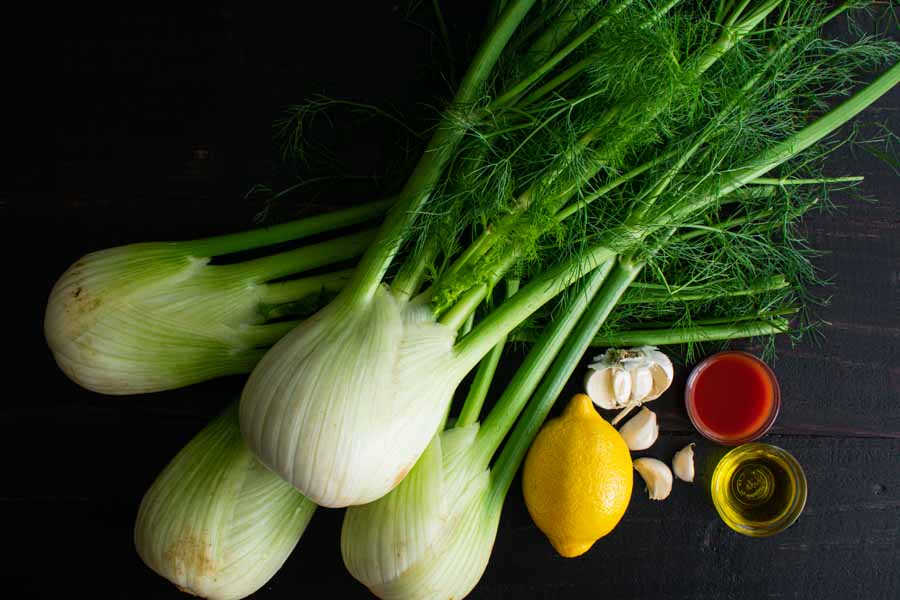
Sautéed Fennel with Garlic Ingredients
Fennel bulbs, garlic, tomato juice, extra virgin olive oil, and lemon

The Process

Sautéed Fennel with Garlic promised to be quick and easy, and it mostly delivered on that promise. The recipe lists a total time of 30 minutes, but it took me 38 minutes.

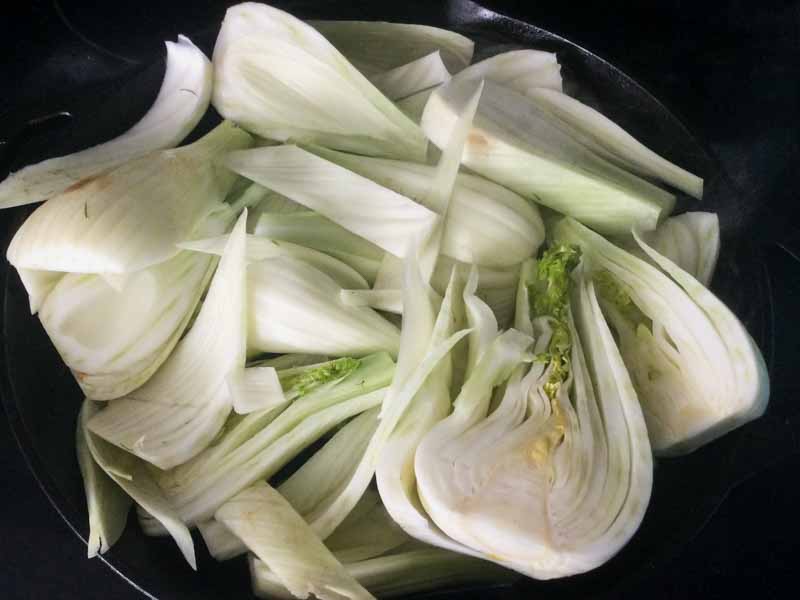
The prep work was very simple, with just a little slicing, mincing, and measuring involved. There was a lot of fennel once it was trimmed and quartered, so I chose one of my biggest pans, a 12-inch cast-iron pan.

Sautéed Fennel with Garlic Recipe Review
Quartering the fennel bulbs

Unfortunately, there was too much fennel to saute it all ad once. The pan was way too crowded with all of the fennel, so I removed half and sauteed it in two batches.

That was what added the extra eight minutes to the total time, but it was worth it. Sauteeing in smaller batches allowed the fennel to come into contact with the hot pan and brown a bit, adding some extra flavor.

I have a feeling even if I had used my biggest pan, a 5-quart saute pan, I would not have been able to saute the fennel in a single batch. I will have to test that theory!

Sautéing the quartered fennel bulbs
My 12-inch skillet was too small to sauté all the fennel at once. I had to remove half and sauté in 2 batches to get a good sear.

With both batches of the fennel browned, it was time to finish things up. That was easily done by adding the tomato juice, salt, and pepper, then simmering the covered pan for 10 minutes.

After that, I removed the pan from the heat and added the lemon juice and fennel fronds. Done! I had a beautiful side dish to serve with dinner.

Garlic Butter Shrimp Pasta

I’m always up for a plate of pasta, and we have it regularly. Sometimes it’s just simple pasta with a little garlic and butter, other times it’s full-fledged recipe time with lots of sauce and toppings. Today I’m making a recipe that’s somewhere in between the two. This Garlic Butter Shrimp Pasta is somewhere between the two, but more toward the simple side. I’ve made something similar before, but this recipe skips the parmesan cheese and marinating the shrimp. It sounds even easier, and I’m always down for an easy pasta recipe.

This garlic butter shrimp pasta, adapted from Williams Sonoma Taste, is easy to make and so comforting.

Recipe Author: April at Girl Gone Gourmet
Get the recipe

The Ingredients

With only 9 ingredients (7 if you group all the lemon items together), this recipe was easy to shop for. I had the spaghetti and white wine on hand and bought the rest. The butter, parsley, garlic, and lemon were only a few dollars.

The shrimp were the most expensive item at $9.99 per pound, making this meal a budget-firendly treat. I actually ended up buying a whole pound because that was the minimum order. But rest assured, no shimp was wasted in the making of this recipe!

Actually, the shrimp I bought were peeled and deveined, but they still had their tails on. They’re removed in the photo below because I started making the recipe before I photographed the ingredients. I was really looking forward to it and got ahead of myself.

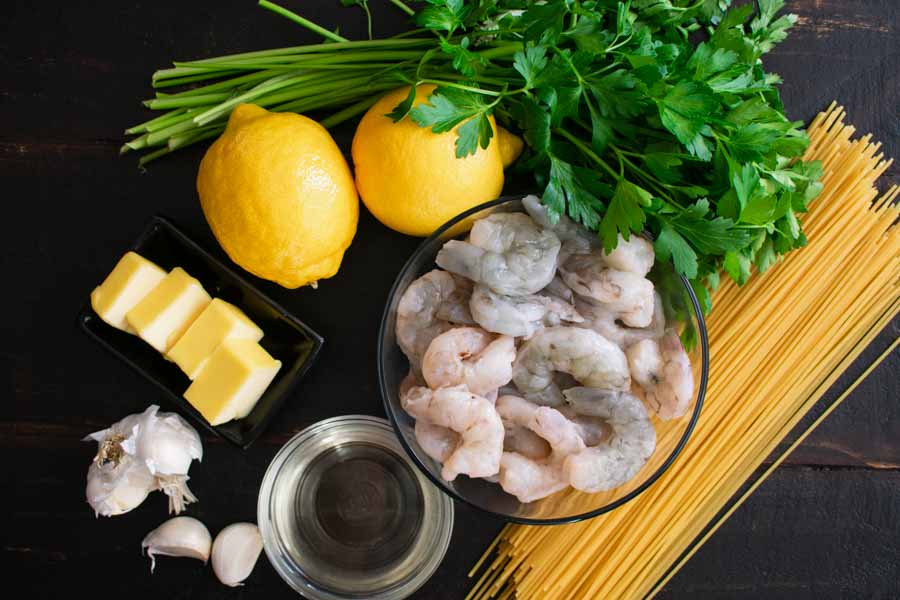
Garlic Butter Shrimp Pasta Ingredients
Shrimp, white wine, garlic, butter, lemons, parsley, and spaghetti

The Process

I’m always down for a quick and easy dinner recipe, and this Garlic Butter Shrimp Pasta delivered. I had mine on the table in just 19 minutes from start to finish.

First up is boiling the spaghetti. I loved that this recipe included advice on how to salt the water. I’ve found that salty water makes for better pasta. I even taste the water (before it boils) to make sure I’ve salted it enough.

While the pasta simmered away I prepped the shrimp and butter sauce ingredients. Shrimp is the best when it comes to a quick meal, especially when you buy them peeled and deveined. Mine still had their tails on, but removing them only took a minute or two.

The rest of the prep work was a little zesting, chopping, and measuring a few ingredients. I also pressed the garlic. It’s a fast and thorough way to mince it.

After that, it was into a large saute pan to cook with just a little butter. I removed them when they were done and worked on the sauce. This step was also very quick, but I did get a little carried away with the whisk. Nothing that didn’t clean up easily, but I could have dialed it down a little.

Once the garlic butter sauce was finished, all I had to do what add the shrimp and spaghetti to the pan and toss with tongs to coat. I wasn’t paying close attention, so I don’t remember when the spaghetti finished. I did have a colander waiting in the sink, and it didn’t for long once it was drained.

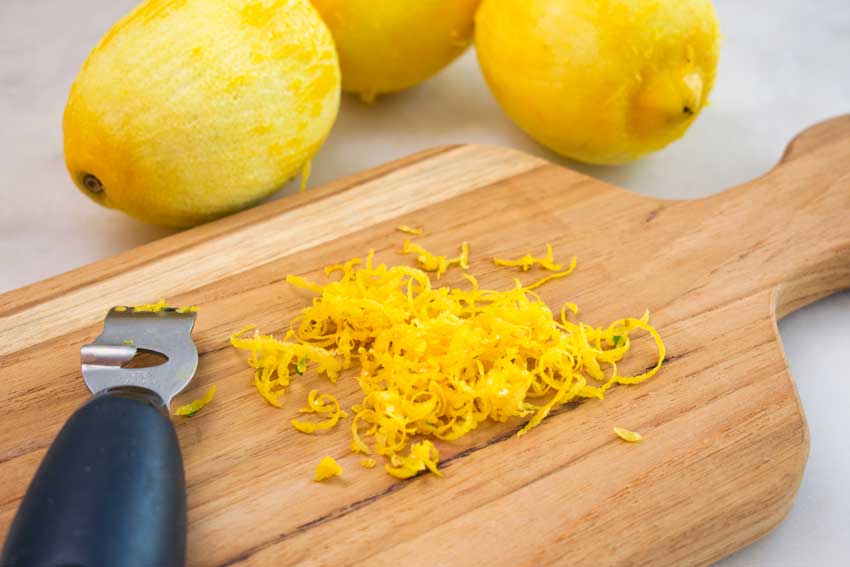
Lemon zest
Lemon zest

Greek Quesadillas

It’s hard to believe I’ve made over 460 recipes for this blog, but I’ve never made quesadillas. Not once! Suer, I’ve made plenty of tacos and burritos, but they just aren’t the same as quesadillas. They’re good, but they don’t have the cheesy goodness of a quesadilla. And they’re not as easy to make if I’m completely honest. Well, not only have I found a recipe for quesadillas to blog, but it’s Greek-Mexican fusion Greek Quesadillas. How’s that for a quesadilla recipe?! So let’s get cooking, I’m excited to introduce quesadillas to my blog!

All the best Greek favors come together in this EPIC cheesy quesadilla, topped with an easy homemade Greek yogurt tzatziki sauce!

Recipe Author: Chungah at Damn Delicious
Get the recipe

The Ingredients

This recipe had the flour tortillas you expect, but that’s where the similarities to your typical quesadilla end. These Greek Quesadillas are packed with all kinds of Mediterranean flavors instead.

They start with frozen chopped spinach. I usually prefer fresh ingredients, but I like the convenience of frozen, especially for this. There’s none of the endless rinsing involved with spinach, and I didn’t have to wonder if it would shrivel down to nothing. The package I found was 16-ounces, though, so I had to weigh out 10 ounces after I thawed it. (I saved the leftovers for lunch.)

The other toppings were kalamata olives, feta cheese, and sun-dried tomatoes. I had no problem finding them, but I only found halved tomatoes. I had to julienne them myself. It sounds fancy, but all that meant was taking a few minutes to cut them into thin strips.

Oh, and then there’s the tzatziki sauce to go with these delicious-sounding quesadillas. If you’ve never had it, you should! It’s a yogurt-based sauce with garlic, cucumber, fresh herbs, and lemon. It’s versatile, too, and you can put it on almost anything. I never worry about making too much because we always finish it off. Anyway, onto the cooking!

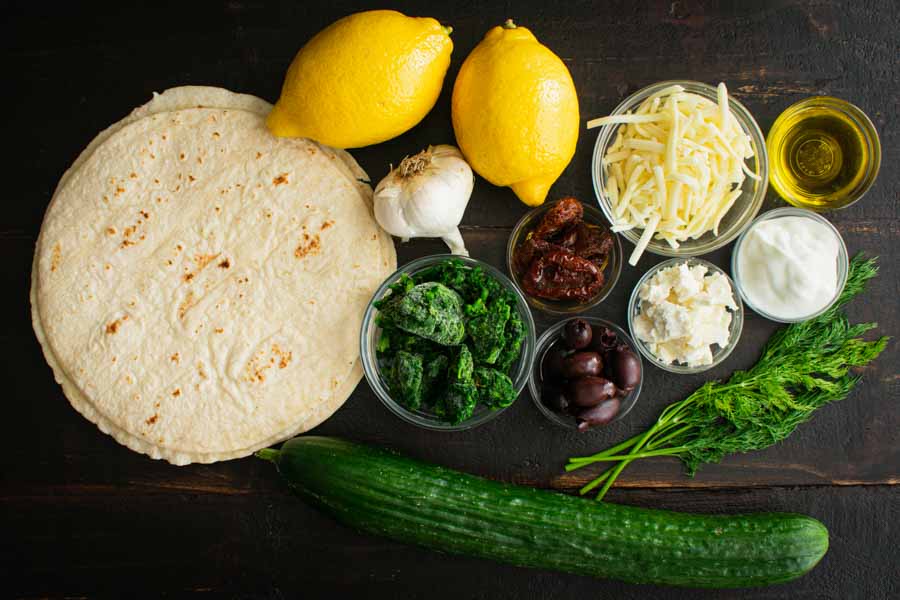
Greek Quesadillas Ingredients
Flour tortillas, garlic, lemons, shredded mozzarella cheese, extra virgin olive oil, plain yogurt, crumbled feta cheese, dill, English cucumber, pitted kalamata olives, frozen chopped spinach, and sun-dried tomatoes

The Process

This recipe is a two-parter: the tzatziki and the quesadillas. While I could have made the tzatziki a day or two ahead (it usually keeps for about a week), I decided to make everything in one go. Here’s how my time was spent:

  • 10 minutes to make the tzatziki and prep the quesadillas
  • 10 minutes to cook the quesadillas
  • 20 minutes total

Making the Tzatziki Sauce

I actually started this recipe by putting weighing out 10 ounces of frozen spinach. Then I put it into a mesh strainer, placed that on a small mixing bowl, and added some water. I changed the water once while making the tzatziki sauce, and the spinach was ready to go once that was finished.

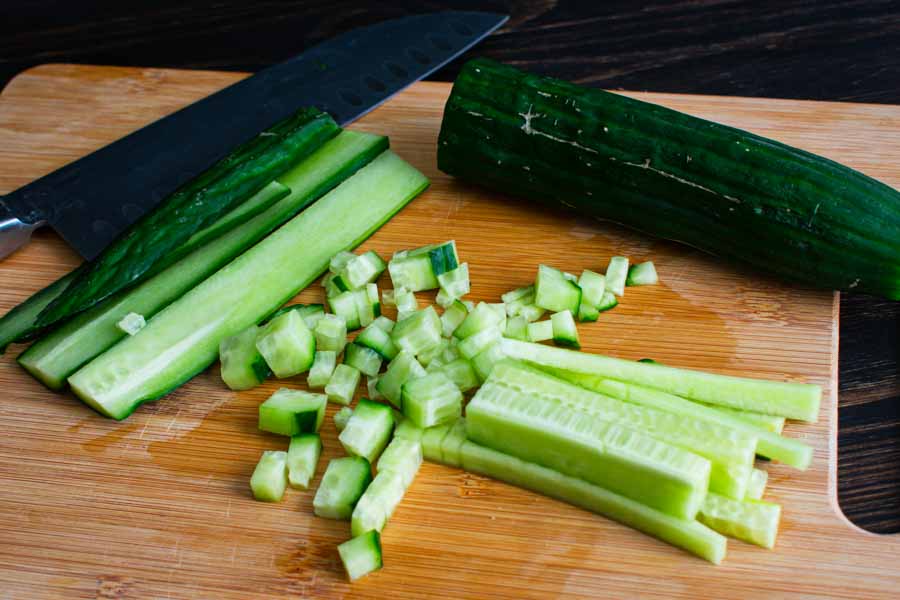
The tzatziki was easy to make, and I had it done in just a few minutes. This version is a little chunky since the cucumber is finely diced instead of grated. It’s not my favorite way to have it, but I did get to work on my knife technique a little.

Finely chopping the English cucumber for the tzatziki sauce

Really, making tzatziki is a little chopping and then mixing everything together. This version did surprise me with the addition of lemon zest, but more lemon is usually a good thing as far as I’m concerned.

Making the Greek Quesadillas

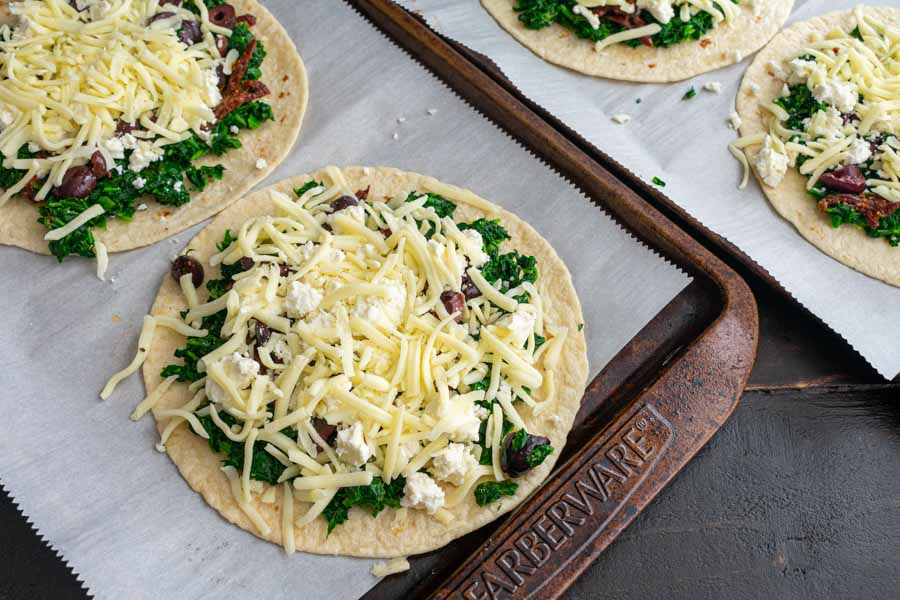
This part was just as easy as the tzatziki! Just line a couple of sheet pans with parchment paper, add four tortillas, and top with the remaining ingredients. Then place four more tortillas on top and pop the sheet pans into the oven for 10 minutes.

What comes out of the oven is cheesy, crispy goodness! They were a little difficult to cut because they were so hot, and I probably should have waited a few minutes to do that. But I’m impatient, and I made it work. A serrated bread knife was the key to my success. It cut the quesadillas into quarters without shredding them.

Adding the topping to the first layer of tortillas

Honey Sage Gimlet

Ah, the gimlet, one of my favorite cocktails. I’m sure I mentioned that in my last gimlet post, but that was way back in 2018. Back then, I tried a Blueberry Basil Vodka Gimlet recipe that was a little outside of my comfort zone. It turned out to be amazingly good, so I didn’t hesitate to add this Honey Sage Gimlet recipe to my blog. The addition of honey to a gimlet is also a bit out of my comfort zone, but sometimes good things arrive in unusual packages. Let’s find out if this recipe is as good as the last.

This gimlet recipe is a version that I love! It uses fresh lime juice sweetened with a bit of honey and sage to give it a delicious balance. It is simple and refreshing in the way that good summer cocktails are.

Recipe Author: Cyd Converse at The Sweetest Occasion
Get the recipe

The Ingredients

Cocktail recipes can be as simple as two ingredients or waaay more complicated. This one was closer to the simple side with five ingredients, so it wasn’t very intimidating.

I had a bottle of St. George Gin leftover from the Elderflower Spanish Gin and Tonics I made a while back. It was a nice, dry gin that I enjoyed, so I’m using it again for this recipe.

And we always keep seltzer around, and raw honey for our tea. I even found a couple of limes lying around. That left me to shop for the fresh sage leaves, which were readily available at my usual grocery store. It was a short shopping trip.

Honey Sage Gimlet Ingredeitns
Soda water, gin, lime juice, sage leaves, and honey

The Process

In addition to having only a few ingredients, this cocktail was easy to make and even had a simple garnish. I have to say I like that when I’m the bartender. It’s not an area I’m particularly confident in, believe it or not.

Anyhoo, mixing up my Honey Sage Gimlet was about as easy as I thought it would be. I got out my ice cube trays, stemless wine glasses, and a few other tools and got started. The flat side of a meat mallet was ideal for bruising the sage leaves, and my measuring glass came in handy for the gin. Don’t have these? No worries! You can use the back of a spoon to bruise the sage, and a tablespoon to measure the gin (2 ounces = 4 tablespoons).

The glasses I used hold a lot, so I loaded them up with ice cubes. That may not have been the best idea since the honey settled to the bottom of the glass. I had to carefully maneuver a thin bar spoon past the ice so I could stir the honey. As you can see, it didn’t completely dissolve, but I still ended up with a very enjoyable cocktail in 4 minutes from start to finish.

A good amount of the honey stuck to the spoon when I stirred the cocktail

The next day, I tried the second method, shaking my Honey Sage Gimlet. It took me 5 minutes to make and garnish my cocktail this way. The honey seemed to dissolve into the gin and lime juice, and I didn’t have clumps of it in the bottom of my glass. However, I found a clump of honey and sage leaves at the bottom of my cocktail shaker when I emptied it. That explained why this version had more of a lime flavor and less (almost no) sage flavor. It was still good, but I preferred the stirred version.