Home Blog Page 23

Deviled Egg Pasta Salad

When I decided to make those Chilli and Beer Barbecue Pork Ribs, I knew I needed something to go with them. But what? Well, I just made potato salad, so that was out. Then I stumbled on this Deviled Egg Pasta Salad. Aw yeah! Deviled eggs and pasta salad, but without all the fuss of making deviled eggs? It’s a twofer of summertime classics that are both perfect with cookouts and it’s ready in 20 minutes. Yes, please!

Deviled egg pasta salad with macaroni noodles. Light on the mayo and big on flavor, this dish is a hit at cookouts or summer gatherings! Great way to use leftover hard boiled eggs.

Recipe Author: Kelly at Trial and Eater
Get the recipe

The Ingredients

I only had a few things on hand (mayo, salt, and paprika), but the ingredients were all easy-to-find basics.  I can’t imagine a grocery store not stocking them. Mine does, but they happened to be out of chives the day I shopped. I even looked at another store, and they were out too! No worries, though, because the green part of some scallions is a good substitute.

Also, I had to buy a 16-ounce package of macaroni and weigh out the 8 ounces this recipe calls for. I never thought I would have much use for a kitchen scale, but I’m so glad I have it. If you don’t have one, you can always use a measuring cup to figure out how many cups are in a package and halve it that way.
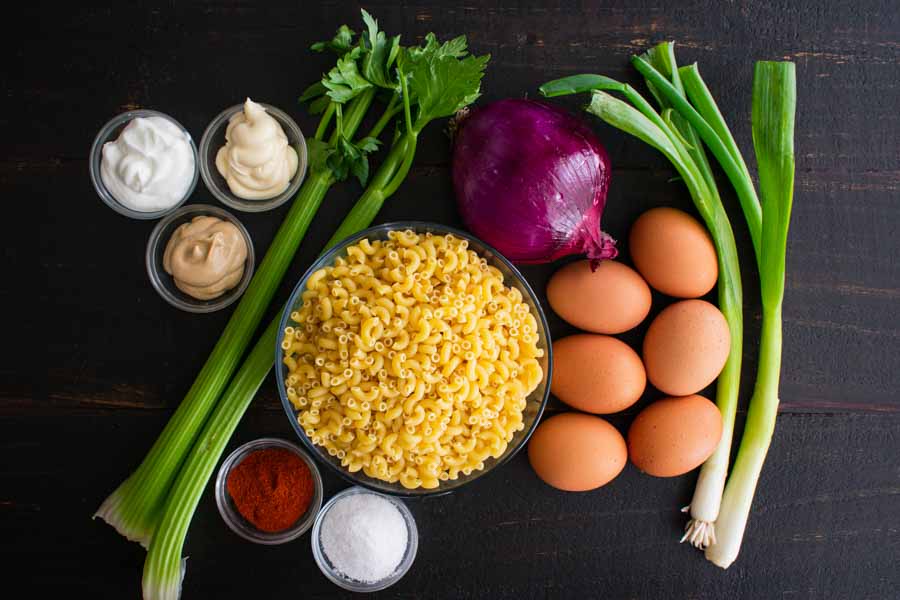
Deviled Egg Pasta Salad Ingredients
Macaroni pasta, red onion, scallion greens (substituted for fresh chives), eggs, sea salt, paprika, celery, dijon mustard, mayonnaise, and plain Greek yogurt

The Process

Let me start by telling you I ended up making this salad twice. The first time was good but had a little too much onion for our liking. Still, we both felt it was good enough to try to perfect, so I made it again the next week. Here’s how it went.

The First Try

The time listed on the recipe is 20 minutes, but it took me 30 minutes on my first attempt. I think the reason was that I didn’t start with hard-boiled eggs. Instead, I put the eggs into my egg cooker while I prepped the rest of the ingredients and began cooking. Once they were done, I had to cool them by running cold water over them.

But I’m getting ahead of myself. I actually started things off by putting a pan of water on the stove to boil. After that, I popped the eggs into the egg cooker and then started all my chopping and measuring.

The macaroni finished right after the prep work, and the eggs just after that. The timing was perfect, and nothing felt rushed. Plus the instructions were easy to follow and involved basic cooking techniques. There was very little (if any) inactive time.

Once the photos were done, I boxed up the salad in a large sealed container and popped it into the fridge to chill overnight. The recipe says to add more mayo or yogurt if the salad dries out, but it was perfectly fine when I served it the next day.
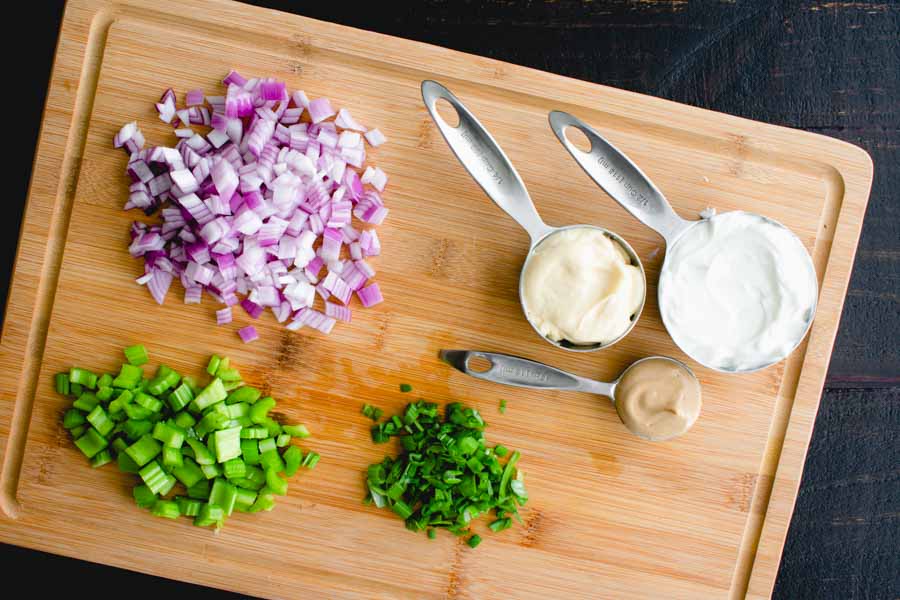
The prepped red onion, celery, scallion greens, dijon mustard, mayonnaise, and plain Greek yogurt

The Second Try

As I mentioned earlier, my husband and I like the Deviled Egg Pasta Salad, but there was just a little too much onion, even after reducing it to half an onion. Still, the leftovers didn’t last long, and I knew I had stumbled on something wonderful.

I decided to try making the salad again the next week with a couple of changes. Reducing the red onion from 1/2 to 1/4 was the main change. The other was using previously hard-boiled eggs instead of cooking them with the rest of the salad. I always keep them around for snacks, so this wasn’t any extra work.

This time things went faster. I did most of the work while the macaroni boiled. First, I chopped the onion and celery and put them into a medium mixing bowl. Next, I peeled and halved the eggs. The whites were chopped and added to the mixing bowl with the onion and celery.

The yolks went into a smaller bowl with the yogurt, mayonnaise, and mustard. I used a fork to crumble the yolks as I mixed everything together, then I added it to the mixing bowl with the rest of the prepped ingredients.

The macaroni was done by then, so I drained it, rinsed it under cold water, and added it to the mixing bowl. Then I sprinkled on some salt, paprika, and chopped green onion and gave it all a thorough mixing (I wasn’t concerned about photos this time). This was the way to do it! It only took me 15 minutes, and we both liked it better.
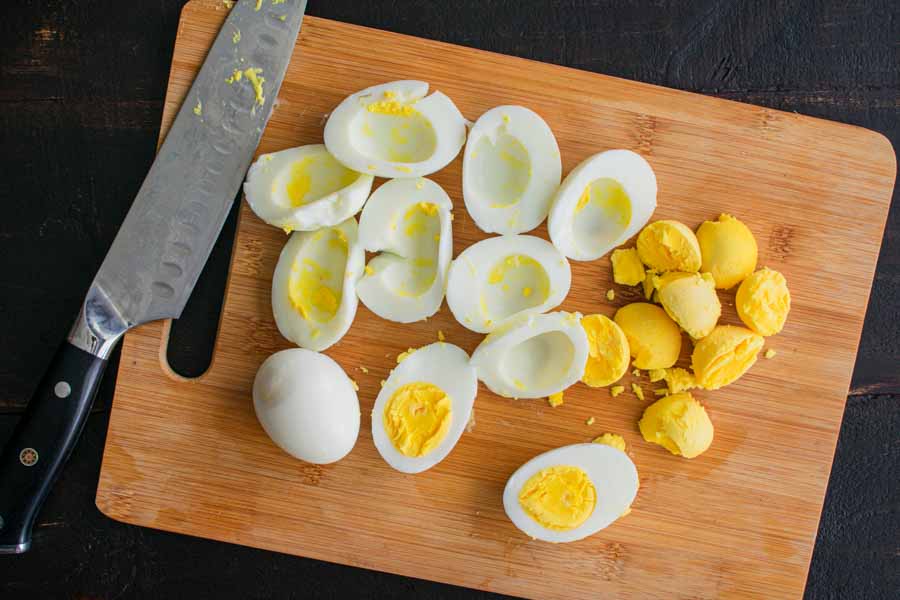
Removing the egg yolks

Chilli and Beer Barbecue Pork Ribs

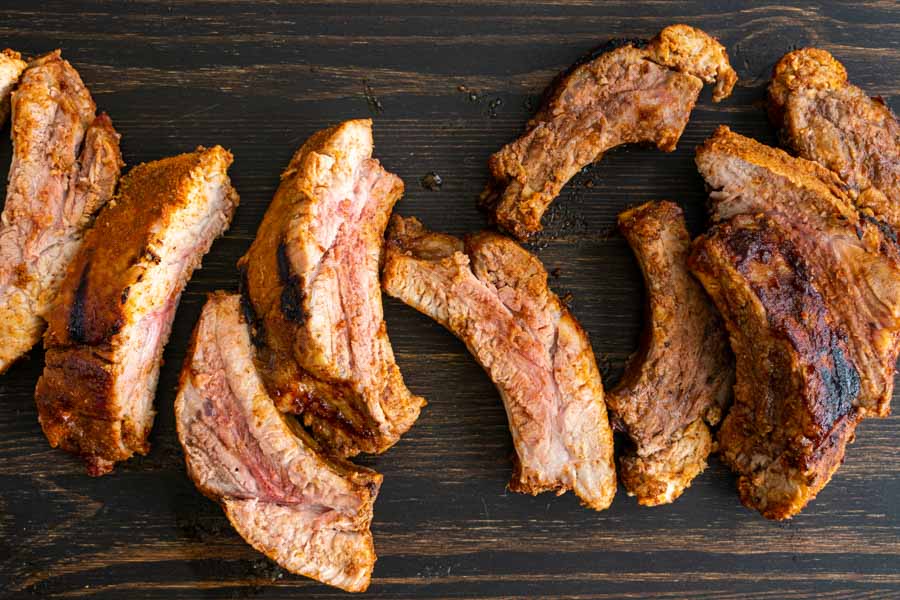
It’s summer! And summer means lots of grilling happens around here. This week I wanted to try something I haven’t done in a long time: ribs. A cold beer in my hand is my favorite way to grill in the summer heat, so this Chilli and Beer Barbecue Pork Ribs recipe sounds perfect for me. I know the first rib recipe I did had beer too, but this recipe is different enough that I think it’s worth trying. The main differences are a 2-hour period for the dry rub to infuse the meat (and, I’m assuming, tenderize it) and a much quicker cooking time of 35 minutes. I’m always down for a quick, easy recipe, so let’s find out if this one delivers.

While the recipe can be made a day ahead to enhance the flavours, you can allow the ribs to infuse for about 2 hours. Then 35 minutes in the oven and they were ready to devour. Finger-licking good!

Recipe Author: Martyna Angell at Wholesome Cook
Get the recipe

The Ingredients

Like most recipes I make, I had a few ingredients on hand like the spices, olive oil, and ketchup. That left me with a few things to shop for, but my regular grocery store had everything. Or so I thought.

I have mobility issues, so I order my groceries online. The website showed a rack of ribs for $13.98, but I got it in pieces. One package had about five separate ribs, and the other one had two small pieces that were about 1/4 a rack each. (They’re sometimes called cheater racks.)

Folks, I was not having that! I ended up going out to another local grocery store and picking up the rack you see in my photos. It was $10.77 and frozen, but thawing it wasn’t a big deal. I just put it into the refrigerator overnight, and it was ready to cook the next day.

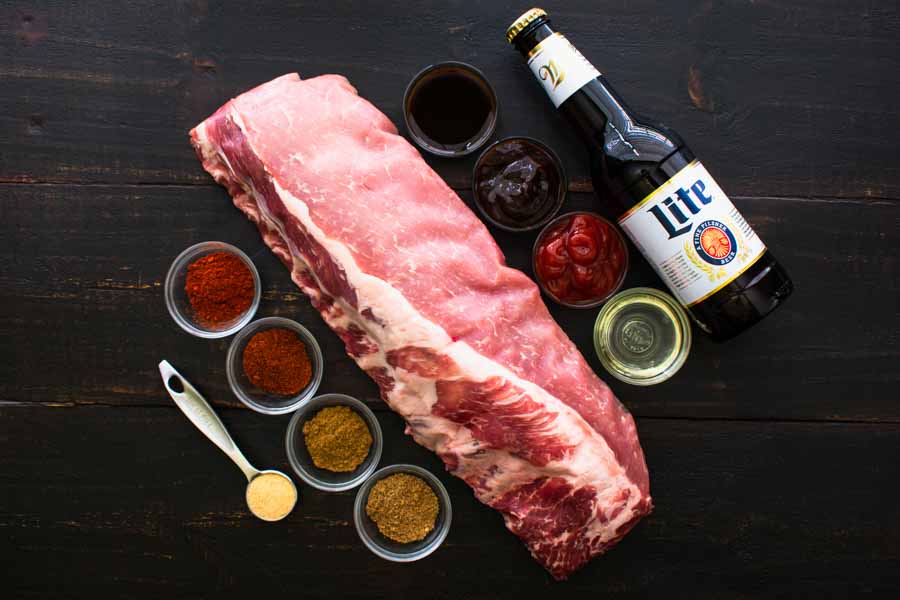
Chilli and Beer Barbecue Pork Ribs Ingredients
Pork ribs, Worcestershire sauce, beer, barbecue sauce, ketchup, olive oil, coriander, cumin, garlic powder, smoked paprika, and chili powder

The Process

Making these Chilli and Beer Barbecue Pork Ribs couldn’t have been easier. They did take a little planning because the spice rub has to sit on the ribs for a couple of hours before they’re cooked, but it wasn’t a big deal. Here’s how my time was spent:

  • 4 minutes to prep and rub the ribs
  • 2 hours to marinate
  • 30 minutes to cook in the oven
  • 5 minutes to grill
  • 33 extra minutes on the oven
  • 3 hours 12 minutes total

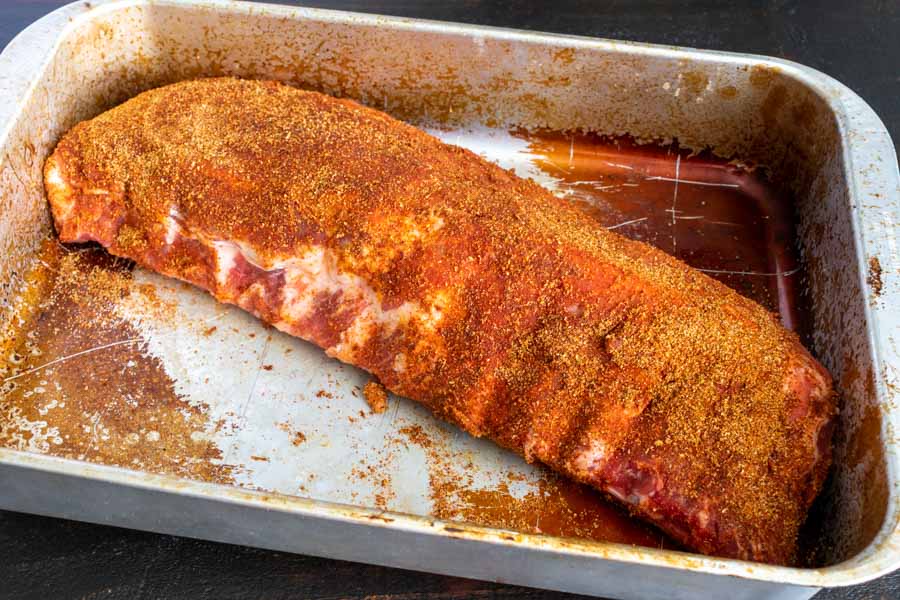
The prep work was very fast. Just rinse the ribs, pat dry, mix up all the spices, and rub them on both sides of the rack. Then it was into the refrigerator for 2 hours so it could absorb all that flavor.

Since the first part of the cooking process was in the oven, I made sure to marinate the ribs in an oven-proof dish. That way I could take it straight from the refrigerator to the oven. Well, I did have to add the beer to the pan and cover it, but the pan I have has a lid, so that made it even easier.

Spice rubbed rack of ribs in a baking dish

I mixed up the glaze and preheated the grill while the ribs cooked. When they were done, I just took everything outside, glazed the ribs, and grilled them face-down for 5 minutes. The curve of the ribs prevented good grill marks, but I was more concerned with the glaze caramelizing.

Oh No!

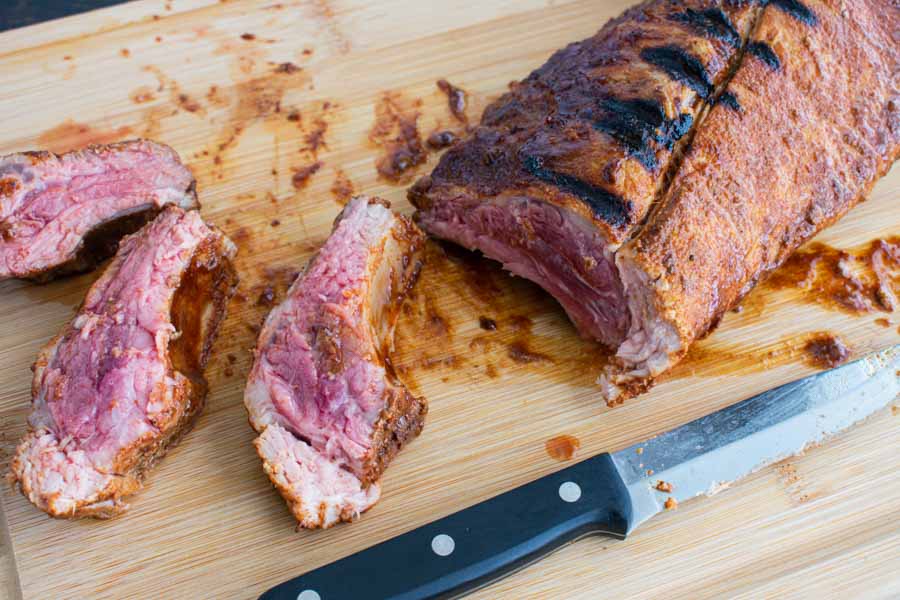
I was a little disappointed that the sauce didn’t caramelize very much, but the ribs smelled great. I was ready to eat, so I took them inside and began cutting them apart to serve. That’s when I saw that the inside of the ribs was nowhere close to done.

The ribs were not done after cooking for the specified time
The ribs were not done after cooking for the specified time, and the internal temperature was 128℉

My meat thermometer confirmed this with an internal temperature of 128℉. Pork should be at least 145℉ (for rare), so I pushed the cut ribs against the rest of the rack and put the dish back into the oven.

The meat thermometer beeped 33 minutes later when the meat reached 160℉ (well-done). I removed the rack from the oven and let it sit for another 5 minutes before I finished cutting apart the ribs. They were still a little pink in the middle, but I served them since they were at a safe temperature.

Chimichurri Potato Salad

I grew up in the South, and one thing I learned from a very early age is that potato salad is serious business down here. It’s a must for just about any occasion, especially summertime grilling and barbecue. There are many different ways to make potato salad, but they always involve potatoes (of course!), mustard, mayonnaise, celery, onion, pickles, hard-boiled eggs, and various spices. Until now. Today I’m trying my first potato salad with almost none of that. None! I’m shook, but I’m a chimichurri fiend, so I’m willing to give this Chimichurri Potato Salad a try. Let’s find out how it is!

My chimichurri potato salad is packed with flavor from the fresh herbs and garlic! It’s the perfect healthy and easy to prepare side dish that’s ideal for those who do not like creamy potato salad.

Recipe Author: Natasha Bull at Salt & Lavender
Get the recipe

The Ingredients

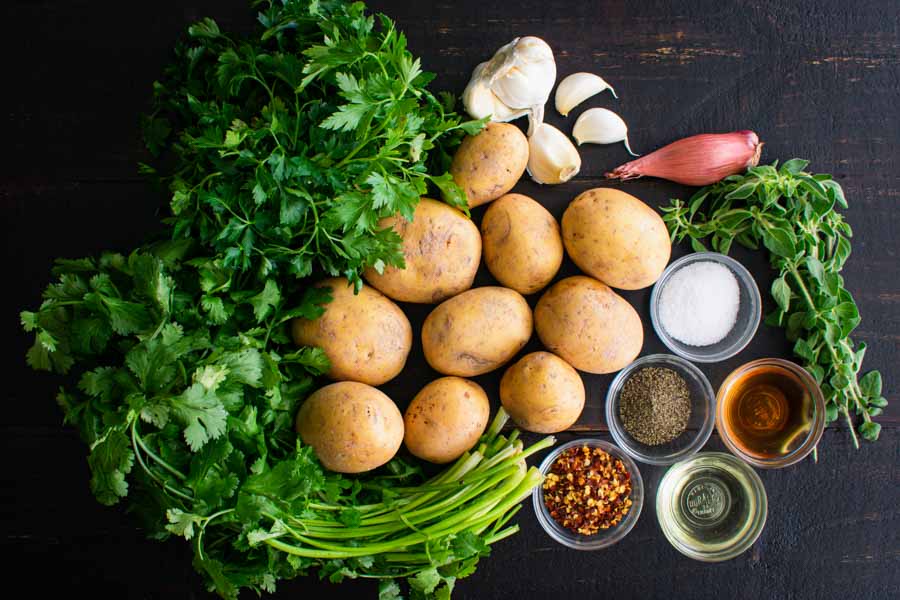
Obviously, the main ingredient for this recipe is potatoes, but they need to be “little potatoes.” The only thing I could find that fit that description was a 24-ounce bag of mini yellow potatoes. Yellow potatoes are a good all-around use potato, and the fact that the bag was exactly 1.5 pounds was perfect for this recipe.

I had the spices and red wine vinegar, but I did have to buy the fresh herbs and some olive oil. It was all easy to find, though, and no online orders were required.

Chimichurri Potato Salad Ingredients
Mini yellow potatoes, garlic, shallot, oregano, salt, pepper, red wine vinegar, olive oil, red pepper flakes, cilantro, and parsley

The Process

The total time listed on this recipe was 35 minutes, and I found that to be pretty accurate. Here’s how my time was spent:

  • 10 minutes to prep
  • 15 minutes to cook
  • 10 minutes to cool
  • 1 minute to mix up the salad
  • 36 minutes total

The instructions were easy to follow, and there were no uh-oh moments. I started by putting a 4.5-quart pan on the stove to boil while I prepped the rest of the ingredients.

The potatoes don’t need to be peeled, which I loved. They do need to be cut in half, and that worked for all but the largest one. I quartered it to keep the pieces all a uniform size.

Once they were done, I drained them into a large colander and left them to cool for 10 minutes. After that, all that was left to do was mix everything together. Then I popped the finished Chimichurri Potato Salad into the refrigerator to chill and let the flavors meld. I actually served it the next day.

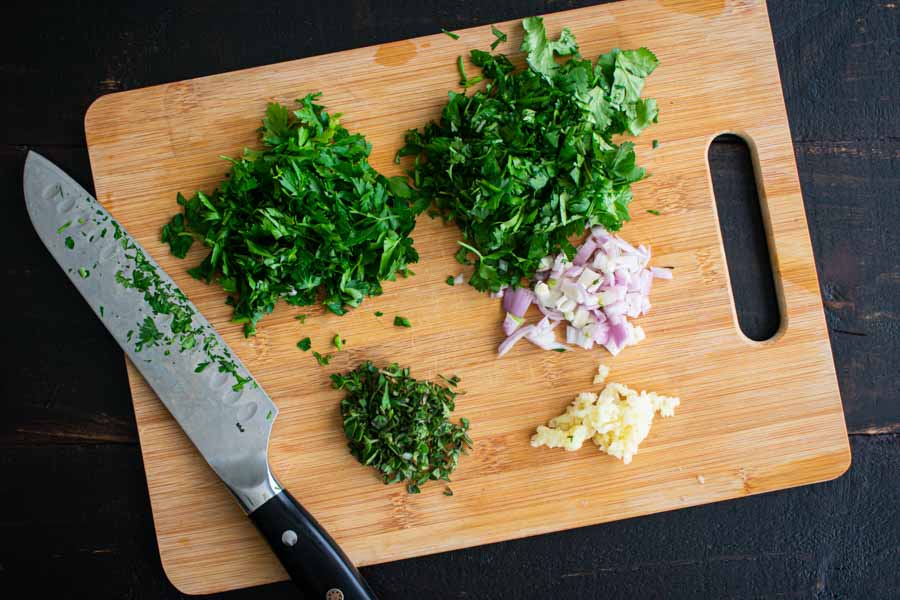
Chopped cilantro, parsley, shallot, and oregano with minced garlic

Bourbon Marinated Grilled Flank Steak

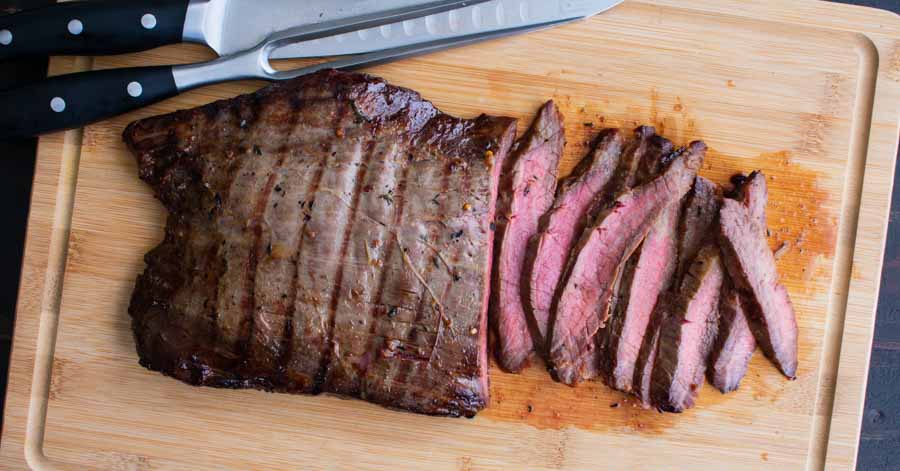
I’ve made some wonderful recipes this summer, but I haven’t used my grill for any of them. The horror! I feel like I need to make up for this oversight, and that means the big daddy of grilling: steak. I combed through my Pinterest boards to find a tempting grilled steak recipe and came up with this Bourbon Marinated Grilled Flank Steak. Not only is it a steak, it’s a giant 1.5-pound steak and it’s soaked in bourbon. If that doesn’t make up for mot grilling until now, I don’t know what will!

One of the easiest and most flavorful marinades for steak EVER! Despite the soy sauce, this is not an Asian dish — the bourbon and brown sugar, shine through!

Recipe Author: Lisa at Garlic & Zest
Get the recipe

The Ingredients

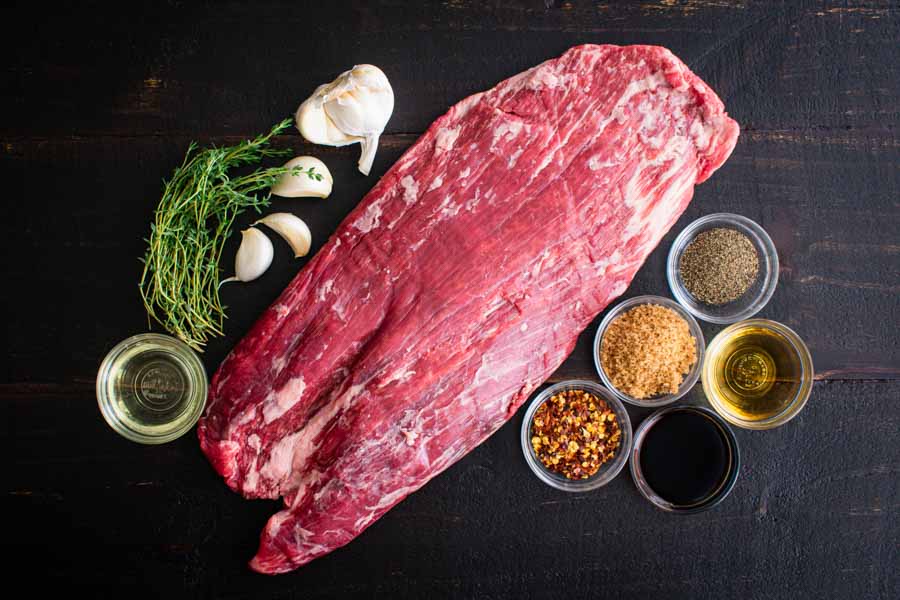
This recipe calls for 1.5 pounds of flank steak, so that was at the top of my shopping list. I found a 2-pound flank steak for $14.99 a pound. It sounds like a lot, but it’s not too bad when you realize it serves six. Thinking of it as $5 per serving makes it sound reasonable.

Next up was the bourbon. I didn’t have to shop for that, but I did peruse my bar cabinet. We had a bottle of Jim Beam, the brand suggested in the recipe, so that’s what I used in the marinade.

I had a few other things on hand like brown sugar, spices, and olive oil. I also had tamari, so I used that instead of soy sauce since I prefer it. That left me to shop for fresh thyme and garlic. Easy!

Bourbon Marinated Grilled Flank Steak Ingredients
Flank steak, olive oil, thyme, garlic, pepper, brown sugar, bourbon, soy sauce, and red pepper flakes

The Process

You know I love an easy recipe, and this Bourbon Marinated Grilled Flank Steak was about as easy as they come. Here’s how my time was spent:

  • 10 minutes to prep
  • 10 minutes to cook
  • 5 minutes to rest
  • 25 minutes total (not including time to marinate)

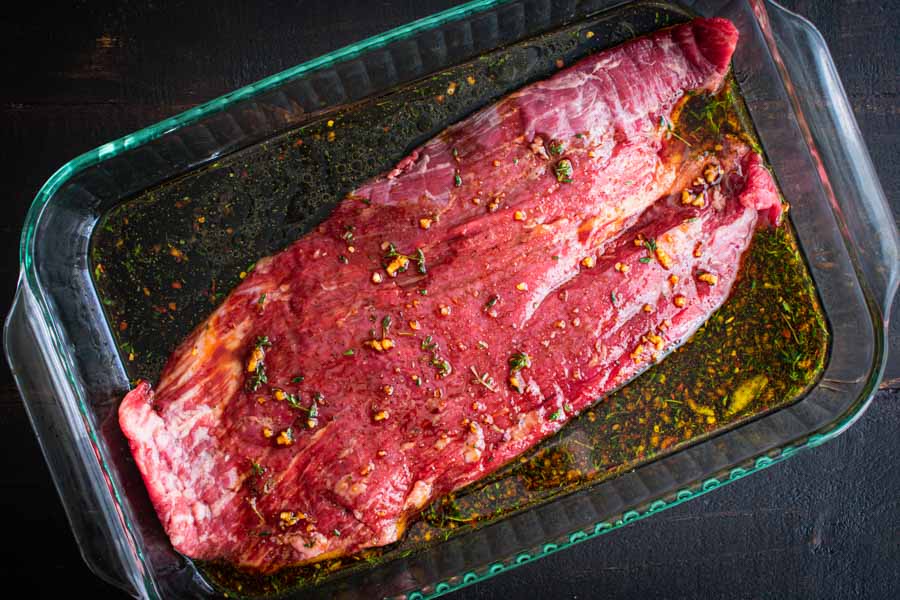
The marinade was the bulk of the work for this recipe, but it really was simple to make. I added all the ingredients to a mixing bowl, whisked them to mix well, then poured the marinade over the steak.

The flank steak was way too big for a ziplock bag, so I used a 9'x13' baking dish to marinate it. My dish comes with a lid, so it worked out very well. I did have to flip the steak a few times, but it wasn’t much trouble. I just flipped it whenever I opened the refrigerator over the next 24 hours.

Marinating the flank steak in a shallow baking dish

Grilling my Bourbon Marinated Grilled Flank Steak was so easy! All I had to do was preheat the grill (for about 10 minutes), dab the steak with a paper towel, and grill for 5 minutes per side. Then I let it rest for another 5 minutes and carved it into thin strips to serve.

You might ask why I dried the steak. That’s because moisture creates steam, and steam prevents a good sear. Tip: A dry steak (or any cut of meat) sears better on the outside, keeping the inside juicy.

Carving the Bourbon Marinated Grilled Flank Steak

Lemon Mousse with Blackberries

It occurs to me that I haven’t posted a dessert recipe in a while. To be honest, dessert just hasn’t been on my mind. It’s summertime, and my brain is full of recipes for the grill, burgers and sandwiches, and salads—things I associate with this time of year. I also associate berries and lemonade with the summer, so this Lemon Mousse with Blackberries seems like the perfect summertime dessert. The fact that it has only three ingredients is a huge bonus. Let’s find out if it’s as good as it sounds!

A simple summer masterpiece with only three ingredients.

Recipe Author: Sarah at Salt Jar
Get the recipe

The Ingredients

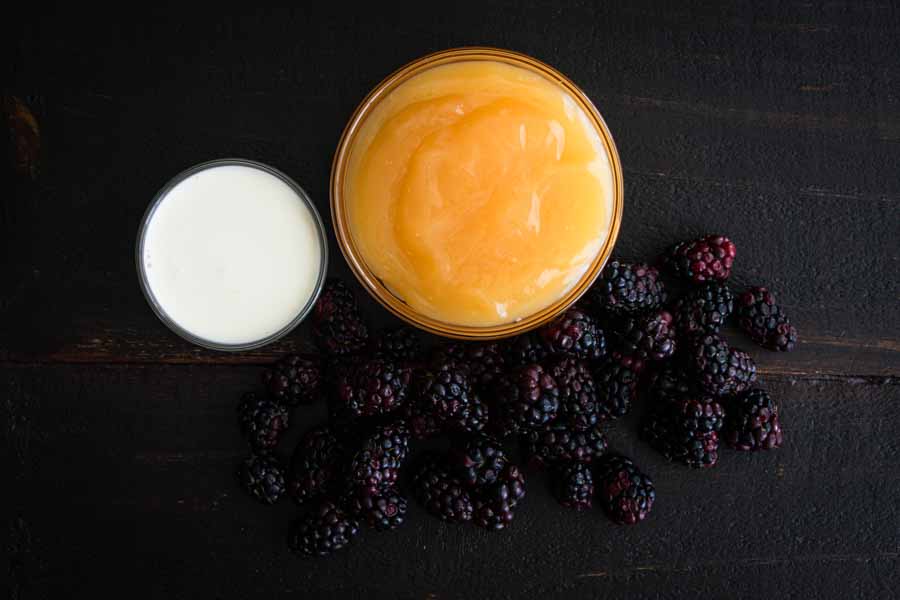
I had blackberries leftover from the Sparkling Blackberry Tea Cocktail I made recently, so all I had to buy was the lemon curd and whipping cream. I knew whipping cream wouldn’t be a problem, but I’ve never bought lemon curd. It turns out that it’s not hard to find at all. My regular grocery store had a 12.7-ounce jar for $4.79. That’s enough to make this recipe twice.

Lemon Mousse with Blackberries Ingredients
Lemon curd, blackberries, and cream

The Process

Making this recipe was as easy as I thought it would be. Here’s how my time was spent:

  • 13 minutes to prep
  • 2+ hours to chill
  • 2 hours 13 minutes total

I used a stand mixer and spent about 10 minutes whipping the cream into stiff peaks. While that was happening, I weighed out 6 ounces of lemon curd.

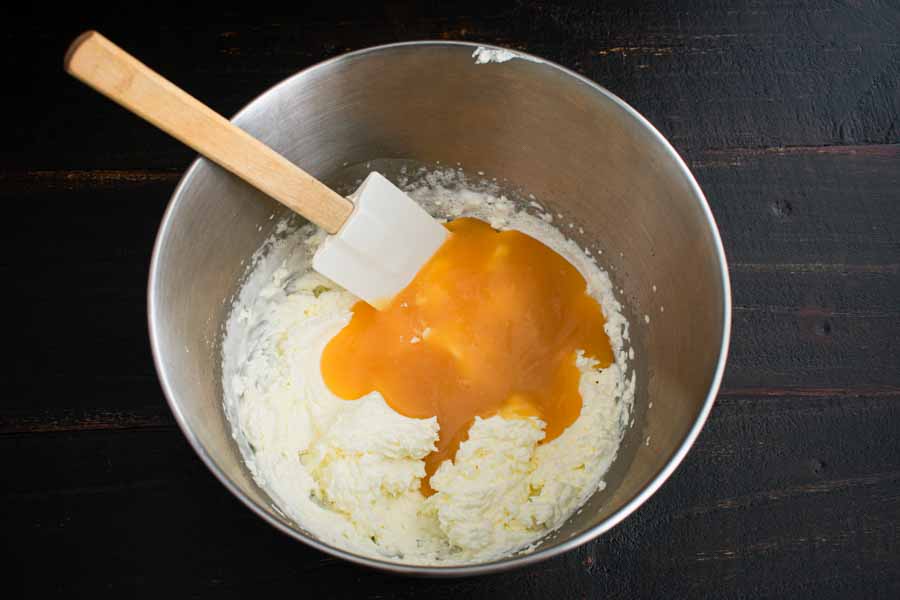
Once the whipped cream was ready, I used a spatula to fold in the lemon curd. From there, I added the mousse to coupe glasses, covered them with plastic wrap, and popped them into the refrigerator.

The recipe says to refrigerate for at least 2 hours, but I left mine overnight. The next day, I added the blackberries and took some photos of the finished product while trying to resist gobbling them all up!

One thing to note is the number of servings isn’t listed on the recipe. I divided the mousse into 3 moderate servings. I think I could have made it 4 servings, but they would have been very small.

Folding the lemon curd into the whipped cream

Chicken Pad Thai

I have been trying very hard to eat healthier, and it’s paying off. I have lost a lot of weight since I started my journey, and I feel great! A lot of that is thanks to cooking at home a lot more and ditching the takeout. And although I am happy with my homemade food, I do miss a few things like pad Thai. It was always a favorite takeout dish, so I was really excited to find this Chicken Pad Thai recipe on Pinterest. It promises to be better than takeout, and that’s a bold claim. Join me as I give it a try!

Rave reviews have been pouring in for years for this better-than-take-out Chicken Pad Thai. It’s a quick-and-easy family favorite ready in just 30 minutes!

Recipe Author: Tiffany at Creme de la Crumb
Get the recipe

The Ingredients

The list of ingredients for this recipe is on the long-ish side at 17, but I didn’t have any trouble finding what I needed at my regular grocery store. I had a few things on hand like the soy sauce, fish sauce, ketchup, sugar, eggs, and spices.

That left me with a good amount to shop for, but nothing was unusually expensive. I was worried that I wouldn’t be able to find the flat rice noodles, but the store actually had several brands, types, and sizes available. I found an 8-ounce box for $3.29.

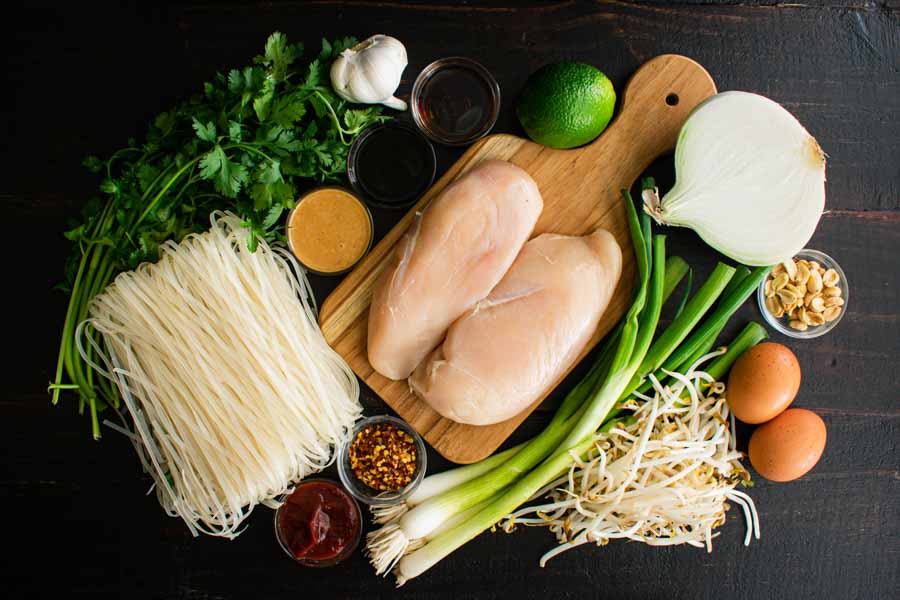
Chicken Pad Thai Ingredients
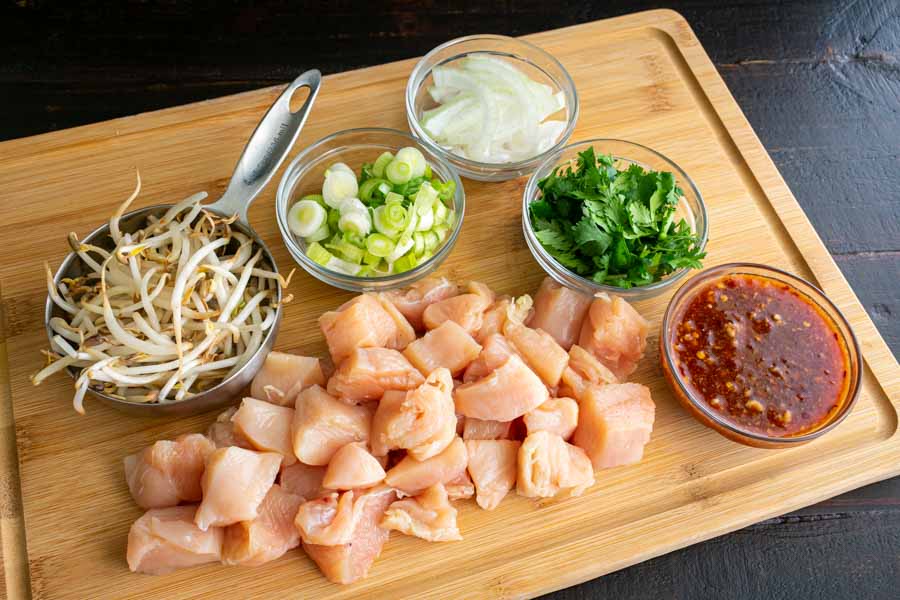
Chicken breast, lime, white onion, peanuts, eggs, bean sprouts, green onions, red chili flakes, ketchup, flat rice noodles, cilantro, peanut butter, fish sauce, soy sauce, and garlic

The Process

I’ve never made pad Thai before, and for some reason, I imagined it would be complicated. Oh, but no. This recipe was pleasantly quick and easy to make, and I had it ready in the time listed. Here’s how my time was spent:

  • 13 minutes to prep
  • 17 minutes to cook
  • 30 minutes total

I started things off by prepping, measuring, and heating water for the noodles (I used a 4.5-quart pan). This recipe moves quickly, so it really helped to have everything ready to go.

Next, I started cooking the chicken. Since it needed to be stirred constantly, I really wasn’t able to do much else for about 8 minutes. However, I did have a quick moment to add the rice noodles to the boiling water towards the end. The noodles only take 4 minutes to cook, and I timed it so they would be ready right after the chicken.

Once the noodles were safely draining in a colander, I moved onto frying the eggs. (The next step in the recipe is mixing up the sauce, but I did that with the rest of the prep work.) Things moved quickly from there, and I had my Chicken pad Thai mixed up in just a few more minutes, complete with a garnish of crushed peanuts.

The prepped ingredients and sauce

Do I need a wok?

Let’s take a moment to talk about equipment, specifically the pan. This recipe gives the option of using a wok or a large pan, and I seriously considered buying a wok. What stopped me? My cabinets are already stuffed with pots and pans, and I can’t justify buying a pan I would rarely use and have no room to store.

I decided to do a quick search for the best alternative to a wok, and I found a couple. One was a sauté pan because it has high sides. The more popular option was a plain old skillet because it has sloped sides, similar to a wok.

I have both types of pans, but I ended up using my 12-inch non-stick skillet after reading 10 Reasons to Stir Fry with a Frying Pan Instead of a Wok by Maggie Zhu. I did have to be more cautious when I was stir-frying because of the shorter sides, but I think it worked very well. A few bits of food jump did out of the pan when I stirred too hard, but it wasn’t any worse than usual.

Chicken Pad Thai

Sparkling Blackberry Tea Cocktail

I don’t know about you, but I have a need for iced tea when it’s hot outside. And since I live in South Florida, that’s pretty much year-round. I mostly stick to just adding sugar, but every now and then I’ll add something a little more adult. That usually means a touch of bourbon, but then I found this Sparkling Blackberry Tea Cocktail, and my choice of liquor was turned upside down. Instead of my usual bourbon, this recipe adults up the tea with sparkling wine and dry vermouth. I know, it blew my mind too! Tea with sparkling wine and vermouth? This sounds like one of those recipes I’ll either love or hate. Let’s find out which!

This Sparkling Blackberry Tea Cocktail combines tea, blackberries, sparkling wine and dry vermouth for a festive sparkling cocktail that’s perfect for holiday parties.

Recipe Author: Erin at Platings and Pairings
Get the recipe

The Ingredients

My husband and I are tea drinkers, so I had a good selection on hand. Still, I looked for the type mentioned in the recipe, but it’s no longer made. Shame, because it sounded so good! But after going through every tea in the house, I narrowed my choices to Earl Gray and French vanilla. The French vanilla won out.

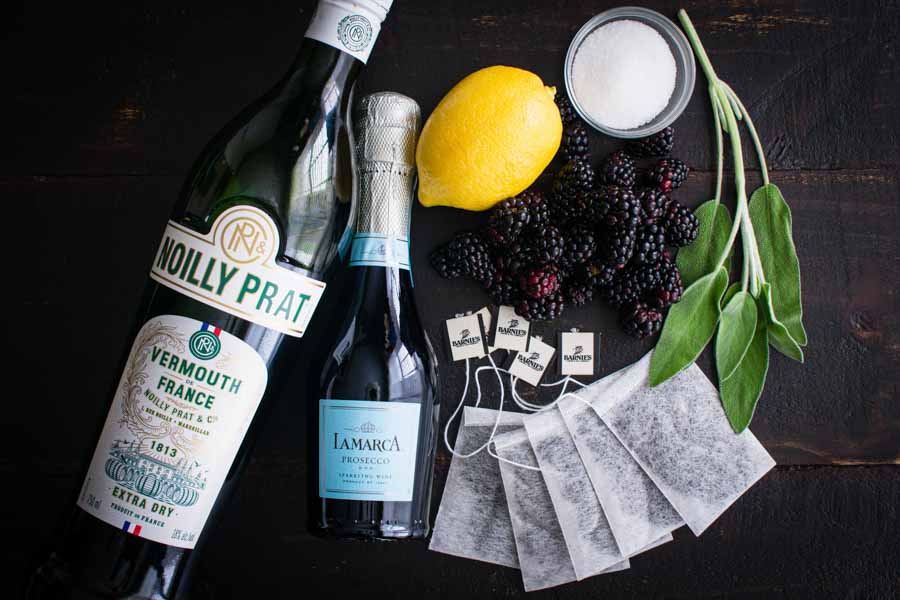
I had sugar, of course, and a bottle of dry vermouth on the bar. That left me to shop for the sage, blackberries, lemon, and sparkling wine. I chose my trusty favorite, LaMarca Prosecco. Tip: A 187ml bottle of prosecco is enough to make two cocktails.

Sparkling Blackberry Tea Cocktail Ingredients
Dry vermouth, sparkling wine, lemon, sugar, sage, blackberries, and tea

The Process

This cocktail was easy to make, but I did have to plan ahead so the simple syrup and tea concentrate were able to cool. I suppose I could have made them the same day, but I decided to make them the day before the cocktail. Here’s how my tie was spent:

  • 31 minutes to prep the syrup & tea (not including time to chill)
  • 4 minutes to make the cocktail
  • 35 minutes total

That’s in line with the 30-minute total time listed on the recipe.

Prepping the Ingredients

The tea concentrate was easy to make with the blackberry simple syrup. I started boiling water for both, then pulled one saucepan aside to steep the tea bags. That left me free to see to the blackberry simple syrup, which required a little more work.

Not much more, mind you, but I did have to make sure the sugar dissolved, then wait for the berries to steep. The tea finished while I was waiting, so I wrung out the bags over the back of a spoon and put the mixture into a sealed container.

After that, I strained the syrup through a mesh sieve, pressing the blackberries with the back of a wooden spoon to make sure I extracted all the flavor. The syrup went into another sealed container, and both went into the refrigerator to chill overnight.

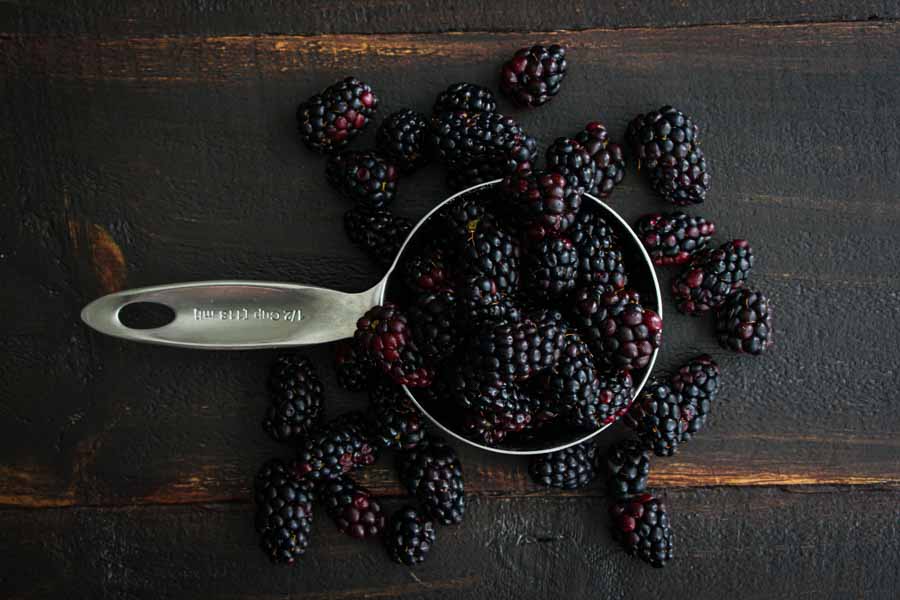
Measuring the blackberries for the simple syrup

Making the Cocktail

The next day was time to find out if I had made the right decision on the flavor of the tea. Would French vanilla work with prosecco and dry vermouth? I have to tell you I was anxious to find out!

So I got out a stemless wine glass, ice cube trays, and cocktail picks. I went all out, and it was a lot of fun. Four minutes after I began, I had a lovely Sparkling Blackberry Tea Cocktail sitting on my kitchen counter, just waiting to be sampled.

Nando’s Portuguese Chicken Burgers

Summer is in full swing, and there’s something I need to make: a good burger. It’s practically a requirement for this time of year! Now, I’m all about the ground beef patty, but I just couldn’t pass up this spicy chicken burger recipe. Although I’ve never heard of Nando’s, I do love anything that’s hot and spicy. This recipe for Nando’s Portuguese Chicken Burgers sounds hot, spicy, and incredibly delicious. And you know I have to make the baked potato wedges to go with it! What’s a burger without fries?

I don’t think Nando’s is huge in America yet, but let me tell you, it has a cult following in Australia. I really mean it when I say this is probably my most requested recipe. If you’ve never tried Nando’s before, you are in for a treat if you try this. The marinade is incredible!

Recipe Author: Nagi at Recipe Tin Eats
Get the recipe

The Ingredients

At 20 items (not including the potato wedges), this recipe’s ingredients list is on the long side. Fortunately, I had a few of them in my pantry, like the malt vinegar, cooking oils, and spices. That left me to buy the rolls, yogurt, meat, and produce, which wasn’t so bad.

I found everything I needed at my usual grocery store except for the bird’s eye chili peppers. The recipe’s notes list Thai chilis as a substitute, but I couldn’t find them either. I ended up using the other substitute listed in the notes: cayenne pepper. I always have cayenne around!

Nando's Portuguese Chicken Burgers Ingredients
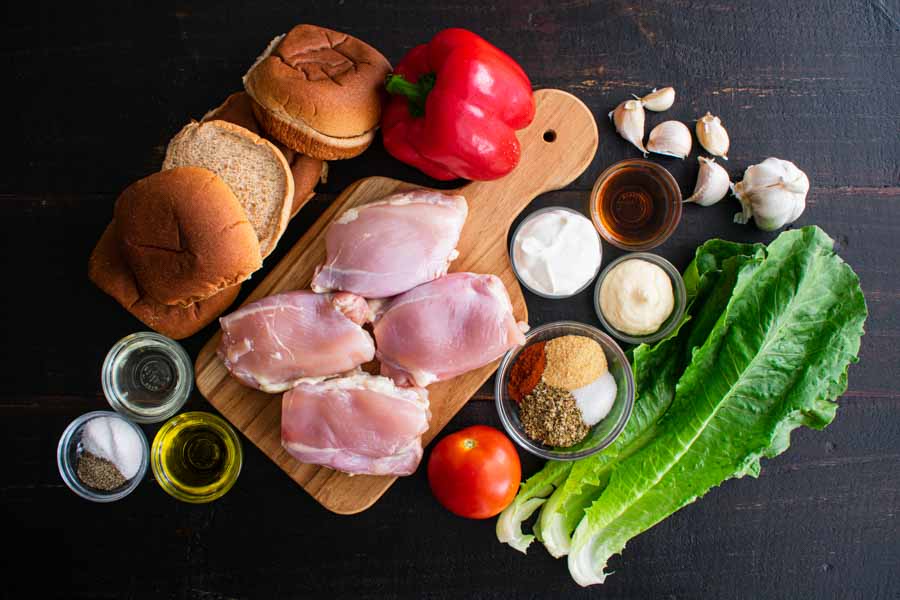
Chicken thighs, red bell pepper, garlic, malt vinegar, Greek yogurt, mayonnaise, romaine lettuce, cayenne pepper, onion powder, sugar, oregano, tomato, olive oil, salt, and pepper (missing: paprika)

The Process

These Portuguese chicken burgers might have a lot of ingredients, but they were pretty quick and easy to make. Here’s how my time was spent:

  • 9 minute to prep
  • 15 minutes to cook
  • 24 minutes total

The chicken needs to be marinated for 3-24 hours, so I got this recipe started the day before I planned to serve it. In less than 10 minutes, I had the peri peri marinade mixed up, the chicken thighs marinating, and the pink sauce made.

And although I had some red food coloring on hand, I decided not to add it to the sauce. It was naturally reddish-brown from the paprika, cayenne, and red bell pepper, so I let it be. That meant the pink sauce ended up more of a peachy color, but I’m okay with that.

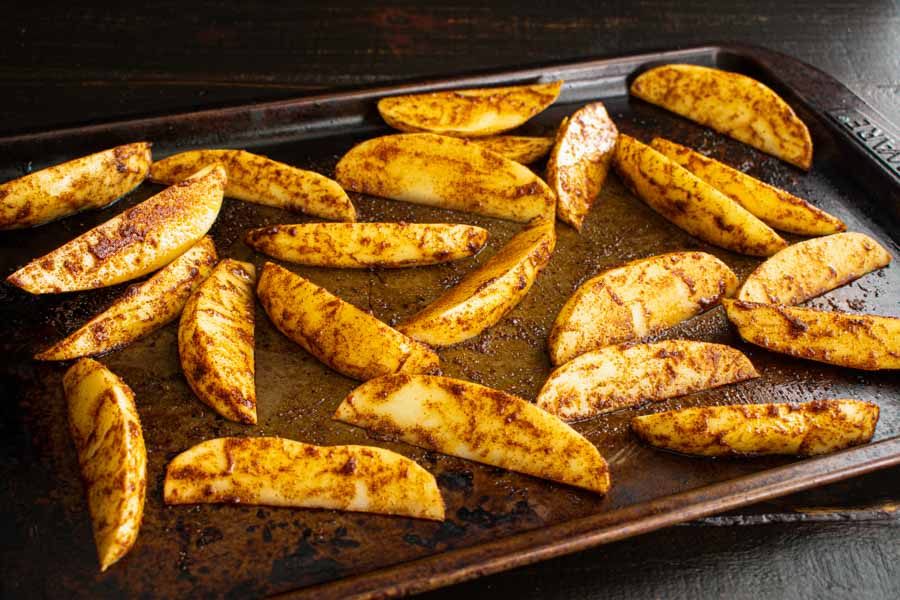
The next day, I started things off with the Easy Potato Wedges. They were prepped and ready to cook in 10 minutes,  just as the recipe listed. And 40 minutes after they went into the oven, I had crispy outside, soft inside baked potato wedges on my plate.

Potato wedges tossed in olive oil and spices to go with my Nando's Portuguese Chicken Burgers
Potato wedges tossed in olive oil and spices

But back to the burgers! They were even easier to make. I just removed the chicken from the marinade and cooked it up on the stove in a cast-iron pan. Five minutes on the first side and four minutes on the flip side was just the right amount of time.

While the chicken fried, I prepared the rolls with lettuce and tomato slices. All I had to do was add the cooked chicken with some pink sauce, and my copycat Nando’s Portuguese Chicken Burgers were ready to eat.

Samosa Potatoes

Samosas are one of my favorite Indian appetizers. If you haven’t had them, let me introduce you. Samosas are a mixture of meat, vegetables, and spices wrapped in a thin pastry then baked or fried. Peas and potatoes are a popular filling, at least in my experience, so I was delighted when I came across this recipe for Samosa Potatoes. Why not make samosas? I did–once. It went okay, but it took forever and they didn’t taste nearly as good as in the restaurant. The leftovers also got soggy in the refrigerator. No, I think I’ll leave samosas to the professionals, but I’m hoping these Samosa Potatoes will be an easy make-at-home substitute.

I had these potatoes at my friend Divya’s house and thought they were brilliant – they tasted just like the filling of a samosa. Such a great idea for an Indian side dish. So I recreated them at home.

Recipe Author: Jennifer Pallian BSc, RD at Foodess
Get the recipe

The Ingredients

At 14 ingredients, this recipe could have quite the shopping list if you need to buy everything. Fortunately, none of the required ingredients are unusual or hard to find. As usual, I had the spices on hand, along with the oil and butter. I even had some frozen peas hanging around.
That left me to buy the fresh vegetables and ginger root, which was very manageable. The only item I didn’t have was the asafoetida, but it is listed as optional. I did look for it, but Whole Foods didn’t have it. I have a feeling this is a specialty market or internet order item.

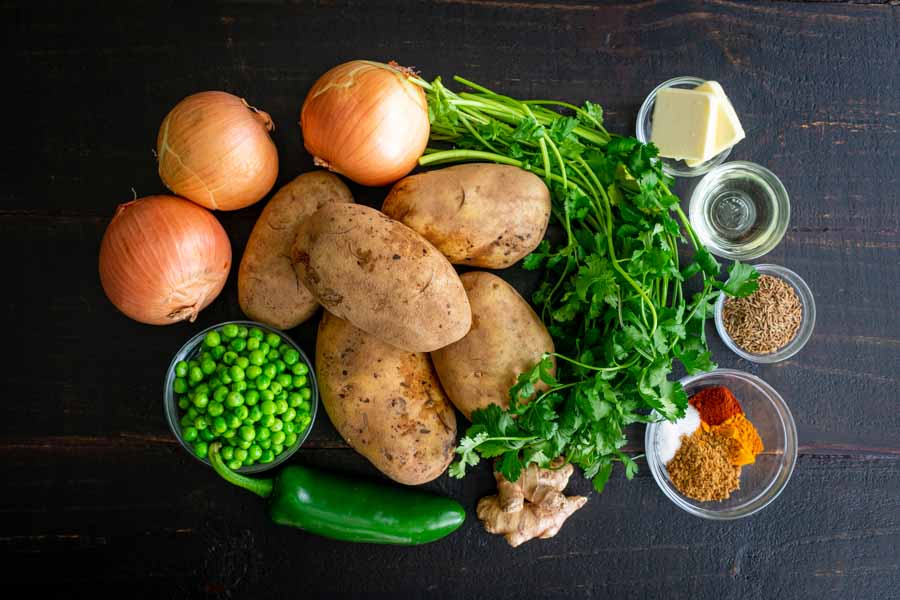
Samosa Potatoes Ingredients
Russet potatoes, onions, cilantro, butter, vegetable oil, cumin seeds, cayenne pepper, turmeric, garam masala, salt, ginger, jalapeño pepper, and thawed frozen peas

The Process

This recipe lists a 35 minutes total time, and that’s exactly how long it too. My times didn’t break down the same, though, and it took me longer to prep and less time to cook. Here’s how it broke down:

  • 20 minutes to prep
  • 15 minutes to cook
  • 35 minutes total

Instead of my usual minimal prepping before beginning to cook, I prepped everything beforehand. That meant doing a fair bit of peeling, dicing, and grating, but nothing more advanced than that. I also put a pot of salted water on the stove for the potatoes and let it come to a boil.

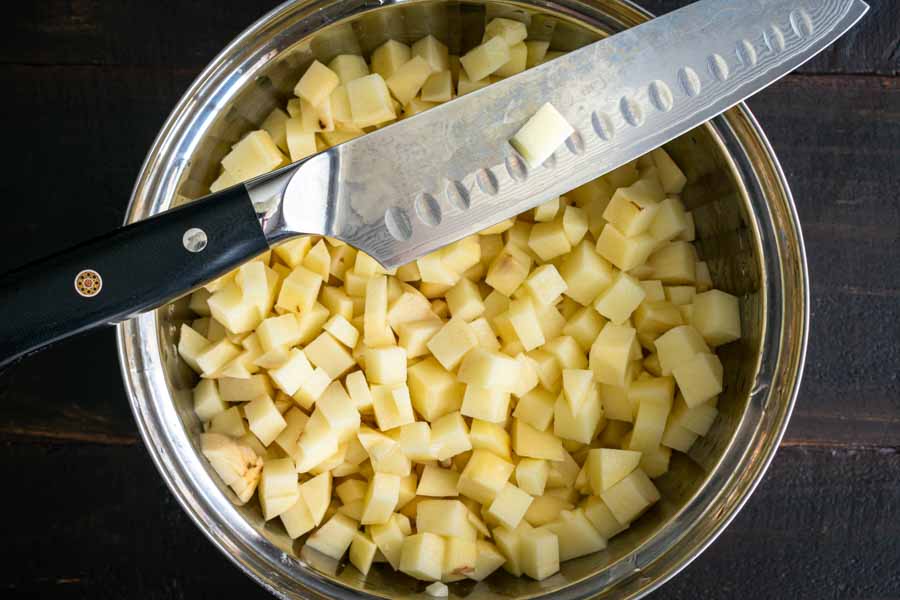
The water was ready by the time everything was prepped, and my first step was to get the potatoes started. Tip: Cutting the potatoes into small pieces helps them cook faster. A 4.5-quart pot was a perfect size for them.

Next, it was time to fry the spices. I used a 5-quart Dutch oven for this part. It was big enough for the prices and to eventually add the potatoes, plus it helped contain the oil spatters.

The potatoes were ready when the spices finished (about 10-15 minutes). All that was left was to add them to the Dutch oven with the peas and mix them with the spices and some salt. Well, that and getting to enjoy this fragrant dish that was making my stomach growl by this point!

Peeled and diced russet potatoes

Kadai Paneer Gravy

I’ve been on a bit of a spicy food kick lately, and I’m loving it! For me, spicy food just doesn’t get old, and I enjoy trying spicy foods from around the world. Indian food is a personal favorite, so I’m going to continue that trend with this Kadai Paneer Gravy recipe. It has plenty of spices, a little heat, a lot of vegetables, and some paneer cheese in a silky smooth sauce. I have made paneer before in Palak Paneer, but it’s been a while. Looks like I need to dust off the recipe and give it another try!

Kadai paneer gravy is a mouthwatering recipe made from paneer cooked in a spicy gravy made of onions, tomatoes, capsicum and traditional Indian spices. It is one of the most popular Indian curries and cooked throughout the world.

Recipe Author: VegeCravings
Get the recipe

The Ingredients

This recipe has a long-ish list of 17 ingredients, but most of them were easy to find. I had the spices on hand (of course!), but most of them can be found at the supermarket these days. The only one you might have trouble with is the dried fenugreek leaves, but they can be ordered.

Most of the remaining ingredients are fruits and vegetables you can find at any grocery store. Things like tomatoes, onions, garlic, and green peppers. You’ll also need some cream and, of course, paneer cheese.

You can buy paneer at Whole Foods, but I have never found it at any other major supermarket. It can always be found at an Indian market or you can give homemade paneer a try (it’s very easy!). I made mine a day or two before the Kadai Paneer Gravy, and I found that the linked recipe made about 500 grams (18 ounces) of paneer.

Oh, and you’ll also need some butter, ghee, or vegetable oil. It’s not listed in the ingredients, but it is in the instructions. I used about 2 tablespoons of vegetable oil.

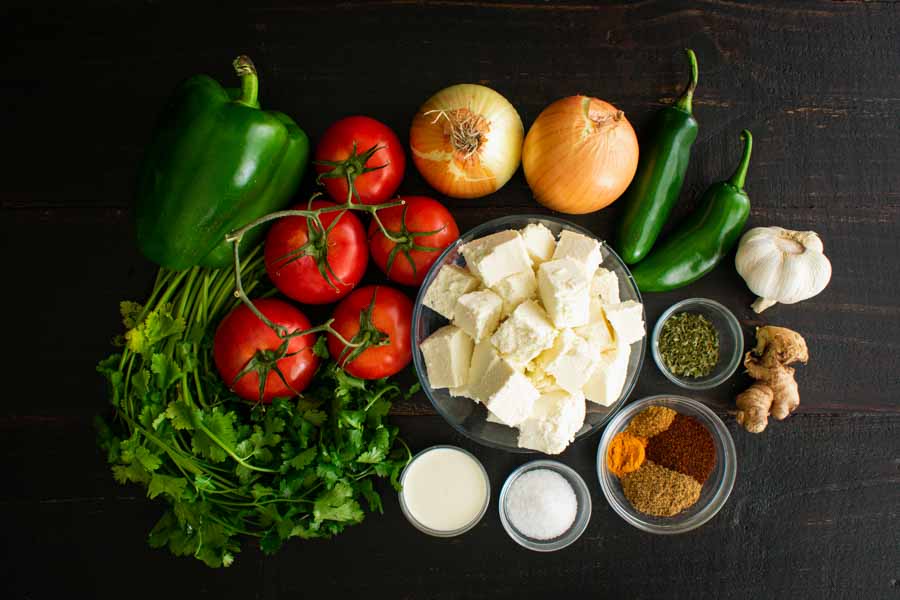
Kadai Paneer Gravy Ingredients
Paneer, onions, green chili peppers, garlic, dried fenugreek leaves, ginger, coriander powder, chili powder, garam masala, turmeric powder, salt, cream, cilantro, tomatoes, and green bell pepper

The Process

With my paneer ready and waiting, I dove right into this recipe. A quick read-through told me I would need to have the ingredients prepped and ready before I started cooking. Here’s how my time was spent:

  • 15 minutes to prep
  • 25 minutes to cook
  • 40 minutes total

And that was right in line with the times listed on the recipe.

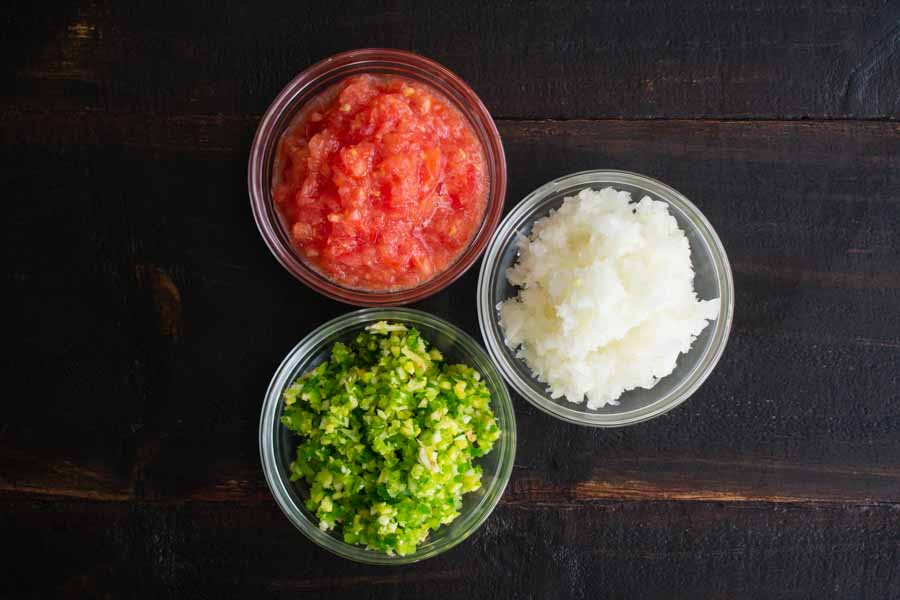
My food processor got a workout with this recipe since I had to make 3 purees (and a quick rinse between each). I did roughly chop the onions, tomatoes, and jalapenos before pureeing them. I also seeded the jalapenos, but I didn’t bother seeding the tomatoes since their seeds were so small.

With that done, I measured out the remaining ingredients and got cooking. I don’t have a Kadai or wok, so I opted for a 5-quart cast-iron Dutch oven. The large bottom and high sides gave me plenty of room to stirfry the ingredients without making a mess of the stove.

Then I just followed the steps to a tasty Kadai Paneer Gravy. They were broken down into easy-to-follow chunks, and having my ingredients at the ready ensured things went smoothly. Making this recipe was a pleasure!

Pureed tomatoes, onions, and a mixture of green chili peppers, ginger, and garlic

Hemingway Daiquiri {Papa Doble}

Do you like to read? I do! I have loved reading ever since I was a kid and, I make sure I read a little every day. And yes, I was that geeky kid who actually read and liked most of the books I was assigned to read in school. One of my favorites was Ernest Hemingway‘s A Farewell to Arms, so this recipe’s name grabbed my attention. And as a native Floridian who has made the trek to the Keys to visit Hemingway’s house and drink at his favorite bar, Sloppy Joe’s, I feel I have a duty to learn how to make a Hemingway Daiquiri (aka Papa Doble).

Hemingway daiquiri – icy cold, citrusy and slightly sweet, this is the famous Papa Doble, or double frozen daiquiri, that Earnest Hemingway loved so much – a pure bliss on a hot day.

Recipe Author: Viktoria at Viktoria’s Table
Get the recipe
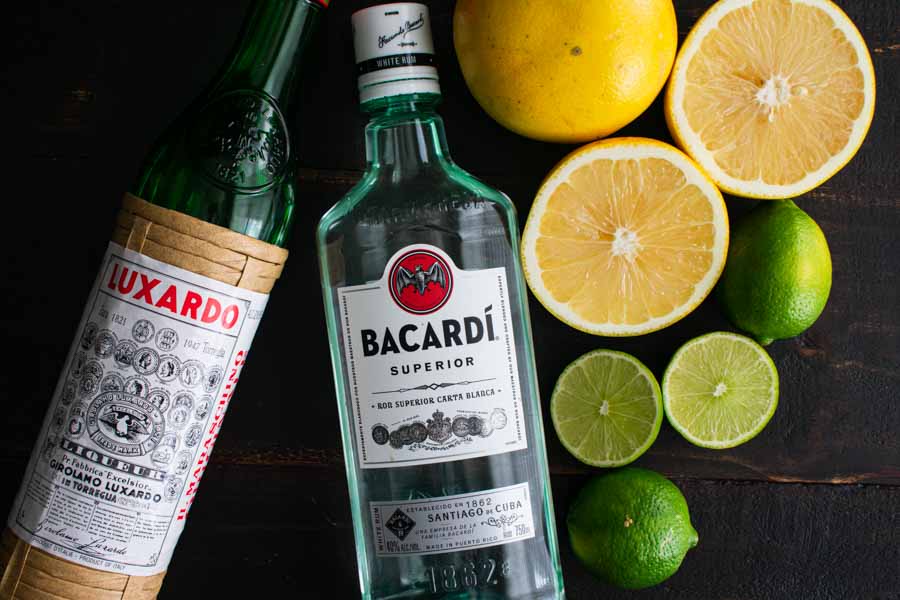
Hemingway Daiquiri {Papa Doble} Ingredients
Maraschino liqueur, white rum, grapefruit, and limes

The Ingredients

There aren’t a lot of ingredients for this cocktail, and you know I’m not mad about it. In fact, I had the rum and maraschino liqueur on hand.

Actually, I had two kinds of maraschino liqueur on hand: Luxardo and Heering. I chose the Luxardo because it’s clear. Heering is a dark burgundy/brown color and might have changed the color of the daiquiri.
All I had to shop for was limes and grapefruit. I chose a regular white grapefruit because it wouldn’t affect the cocktail’s color. Then I found a red grapefruit in the crisper, and I decided I would try this with both

The Process

The good news is there are only a few ingredients and no cooking involved in making a Papa Doble. The bad news is you need a blender and zester, and a juicer is very handy to have.

The recipe gives a total time of 5 minutes, but my Papa Doble took 9 minutes including the garnish. Here’s how things went.

Rimming the Glasses

Since this is an icy/slushy cocktail, I decided to rim the glasses first. That actually made things much easier since I had to zest the limes before I juiced them. Trying to zest a juiced lime (or any citrus fruit) is the worst! It almost guarantees scraped knuckles.

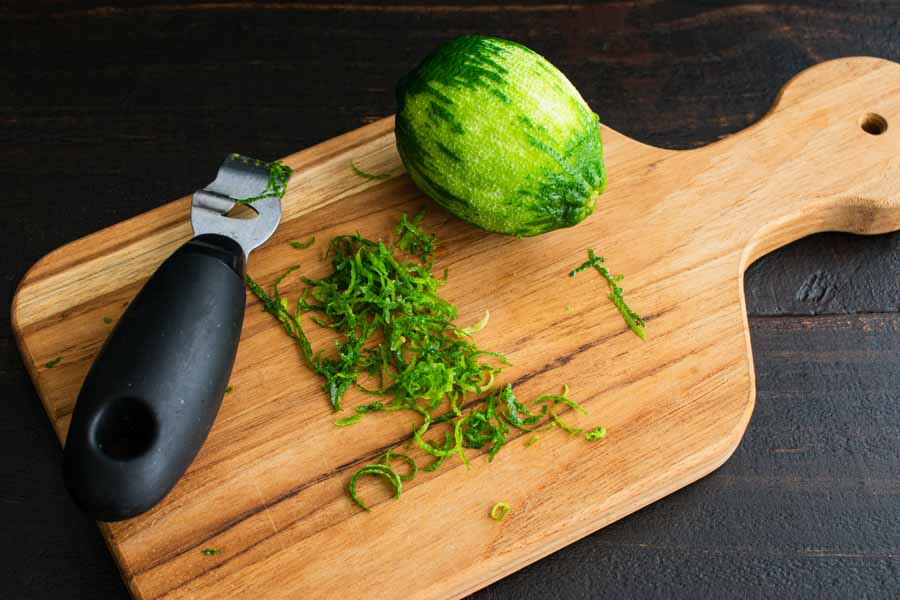
Zesting a lime
Zesting a lime

Anyway, I gave the limes a quick zesting, chopped the strips of zest, and mixed them with a couple of tablespoons of sugar in a small ramekin. Then I poured the mixture onto a small plate and gently jiggled it until the sugar was spread evenly.

To rim the glasses, I poured a little water onto another plate, dipped a glass into it, then dipped it into the lime zest-sugar mixture. Gently moving the glass around in the sugar gave the rim a thorough coating, and I repeated the same steps for the second glass.

You can also use a slice of lime or grapefruit instead of water. They both have their pros and cons, though. Citrus can be messy, and water tends to drip. However, I think the sugar adhered to the water much better than lime (you know I tried it both ways!).

Blending the Papa Doble

Rimming the glasses was the main work for this recipe. The actual cocktail was quick and easy to blend. It’s literally putting the rest of the ingredients into a blender and pushing a button to blend.

I added slices of lime to garnish, and voila! Two Papa Dobles for my husband and me to sample. Actually, a little over two of the glasses I used. Oops!?

Oh, and remember that red grapefruit I found in my crisper? I used that with the Heering cherry liqueur to see if there was any difference in the flavor and color. The cocktail was pink, as I imagined it would be, but the sour flavor was a little softer.

Hemingway Daiquiri {Papa Doble} made with pink grapefruit and Heering cherry liqueur

Blackened Fish Burger and Sriracha Mayo

So you might be thinking ‘Didn’t she just review a fish sandwich?’ Yes. Yes, I did, and it had some similar ingredients like sriracha mayonnaise and red cabbage. So why even bother with this Blackened Fish Burger and Sriracha Mayo? Two reasons: 1) It looks and sounds delicious, and 2) My husband agreed to try it. He is so picky about fish that I was shocked when he agreed to try the last fish sandwich. I about fell over dead when he liked it. Now that he has agreed to try another fish sandwich, you better believe I’m not wasting the opportunity!

This blackened fish burger + sriracha mayo is a quick and easy weeknight meal that is healthy and bursting with flavor! Ready and on your table in 30 minutes!

Recipe Author: The Team at Oh, Sweet Basil
Get the recipe

The Ingredients

So this Blackened Fish Burger and Sriracha Mayo does have similar ingredients as the last fish sandwich like red cabbage, sriracha hot sauce, and mayonnaise. And, of course, buns and fish.

Brioche was the main suggestion, so that’s what I went with. Although I did opt for a healthier version with whole-grain brioche buns. Really, you can go with whatever you like.

Sea bass was the suggested fish, but the recipe does give the option of using any firm fish you like. I love sea bass, but it’s really pricey at $30 a pound. I tried to find something a little more budget-friendly and ended up with a nice halibut fillet. It even looks a lot like sea bass and was almost as expensive at $24 a pound. Not much of a savings, but still a savings. Have to stay positive ?

I had the spices and grapeseed oil in my pantry, so the only remaining items on my shopping list were arugula and red (purple) cabbage. Oh, and you’ll need some butter. Tip: It’s not listed with the ingredients, but you’ll need to butter the bread before you toast it.

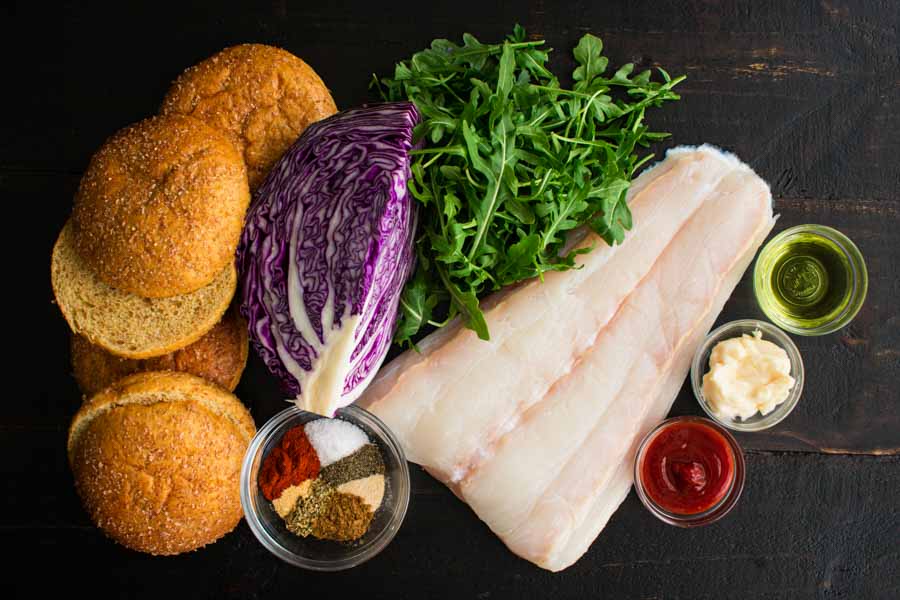
Blackened Fish Burger and Sriracha Mayo Ingredients
Halibut fillet, arugula, grapeseed oil, mayonnaise, sriracha sauce, cayenne pepper, black pepper, smoked paprika, salt, garlic powder, onion powder, oregano, cumin, whole wheat brioche buns, and red cabbage

The Process

I always like to break down recipes to make them easier to handle, so I broke this one into 5 parts:

  1. Making the rub and prepping the fish
  2. Prepping the cabbage/slaw
  3. Making the sriracha mayo
  4. Cooking the fish and cabbage plus toasting the buns
  5. Assembly

That made a recipe with 15 steps seem much more manageable. In fact, I would say it was quick and easy at about 20 minutes from start to finish. Here’s how my time was spent:

  • 15 minutes to prep
  • 6 minutes to cook
  • 21 minutes total

The Prep Work

This, as usual, is the bulk of this recipe’s work. I found it all to be very simple and easy to follow with no special equipment needed. First up, preheat the oven and line a sheet pan with foil. Your equipment prep is now done. Oh, and don’t grease the foil (more on that later).

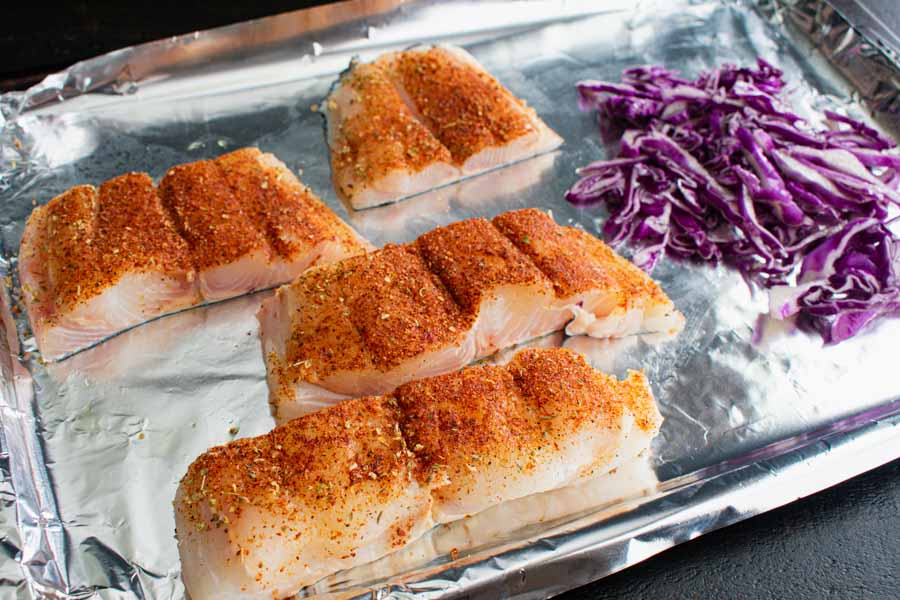
Then I got into the food prep with the rub and added it to the whole fish fillet. Then I cut it into 4 portions and placed it onto a foil-lined baking sheet.

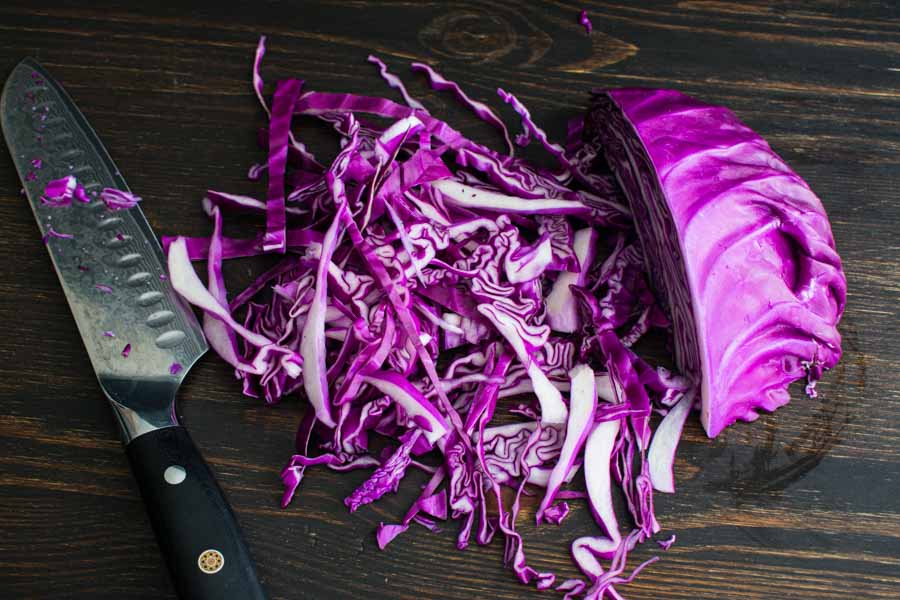
Shredding the cabbage

Next up was shredding some cabbage and mixing it with the grapeseed oil and 2 teaspoons of salt. It sounded like a lot of salt, but I went with it. Since my fish was thick enough to cook for 6 minutes, I added the cabbage to the baking sheet and popped it into the oven.

Cooking and Assembly

Getting ready to bake the fish and cabbage

As the fish and cabbage baked, I mixed up the sriracha mayonnaise and buttered the brioche buns. I toasted the buns during the last 2 minutes of baking, and everything was ready at the same time.

Remember when I told you not to oil the baking sheet? Here’s where that comes in handy. Tip: The fish skin will stick to the foil, so gently sliding a spatula between the fish and the skin will lift it right off skin-free and ready to add to your sandwich.

And since the cabbage was mixed with grapeseed oil, it doesn’t stick at all. Toss the foil and rinse your pan for cleanup. Low key genius.

Assembling my Blackened Fish Burger and Sriracha Mayo was as easy as you would imagine, though it was on the messy side. We aren’t too formal around here, so I just went with it.