Home Blog Page 21

Raspberry Baked Donuts with a Raspberry Glaze

Are you a donut person? I like them, but they’re not something I have regularly. In fact, I can’t remember the last time I had one. I do remember making them when I was a kid, but I deep fry food at home so rarely these days that I have never thought about making them. Then I found this Raspberry Baked Donuts with a Raspberry Glaze recipe, and my whole donut outlook changed. You can bake donuts??!! Sign me up!

These Raspberry Baked Donuts with Raspberry Glaze are naturally pink with no food coloring and are bursting with berry flavor! They are super easy to make and are dairy-free with a gluten-free option!

Recipe Author: Laura at Joy Food Sunshine
Get the recipe

The Ingredients

One thing I love about baking is that a lot of the ingredients will keep for a long time in my pantry. I had a lot of the ingredients because of that. Things like old-fashioned oats, coconut oil, baking powder, baking soda, salt, sugar, honey, and vanilla extract were all just waiting for me in my pantry!

I even had some almond milk in the refrigerator, so my grocery list for this recipe was surprisingly short. Powdered sugar and fresh raspberries were not a problem, but I couldn’t find freeze-dried raspberries.

I had to order them, but I was able to get them quickly for about $6. I think there was enough in the bag to make this recipe 2-3 times. Or you could always use the extra to top your cereal or oatmeal.
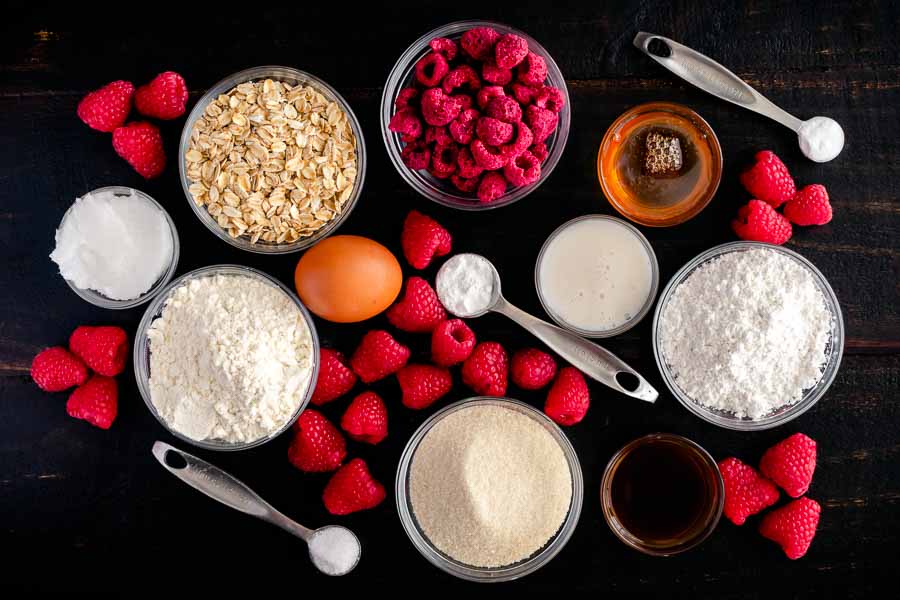
Raspberry Baked Donuts with a Raspberry Glaze Ingredients
Freeze-dried raspberries, holey, salt, fresh raspberries, powdered sugar, almond milk, baking powder, vanilla extract, sugar, baking soda, flour, egg, coconut oil, and old fashioned oats

The Process

This Raspberry Baked Donuts with a Raspberry Glaze recipe was divided up into manageable sections, and that made it a breeze! Here’s how my time was spent:

  • 18 minutes to prep the donuts
  • 15 minutes to bake the donuts
  • 35 minutes to cool the donuts
  • 3 minutes to glaze and sprinkle
  • 1 hour 11 minutes total

The recipe lists 5 minutes to prep, 15 minutes to cook, with a 20-minute total time. When I have a discrepancy like that, it’s usually because the recipe’s times don’t include cooling. My total time not including cooling was 36 minutes. It’s still a good bit more than the time listed, though.

Making the Donuts

This raspberry baked donuts recipe utilizes a blender throughout, so it’s a must. No mini-prep here, I broke out the full-sized blender for this.

The first part of the recipe is mixing up the dry ingredients. It makes a pinkish powder that becomes the base of the donut batter. After that’s done, a quick rinse of the blender and I was onto the raspberry puree, but more on that later.

To make the batter, I added the liquid ingredients to the blender along with the powder I made in the first part. It was blended at the push of a button, and I transferred it into a plastic baggie.
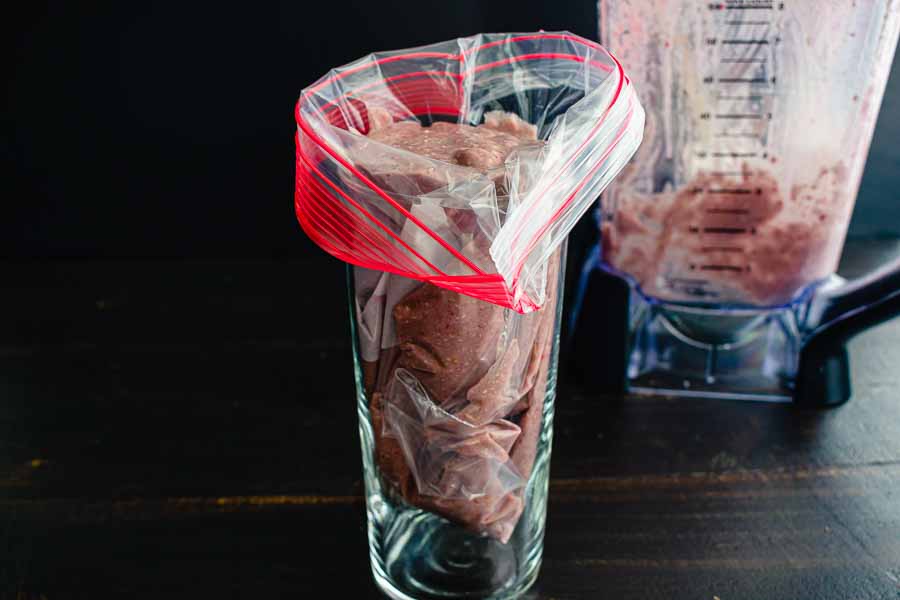
I used a tall glass to help fill the ziplock bag with batter

It’s not in the instructions, but I used a quart-sized ziplock bag. Tip: Placing the bag inside a tumbler (A.K.A. highball or Collins glass) made filling it much easier. Then I pressed out as much air as I could and cut a small hole into one corner with my kitchen scissors.

That made piping the filling into the donut molds so easy. Oh, I almost forgot about those! The instruction only said to grease them, not how or with what. Tip: Canola oil spray made was a quick and thorough way to grease the donut molds.

As you can see, I chose silicone donut molds. They were inexpensive at $6 for two, and the flexible material made it easy to remove the donuts from the pan. The only small drawback was they had to be placed on a sheet pan because they were so flexible/floppy. If you don’t have sheet pans, a metal donut pan might work better for you.
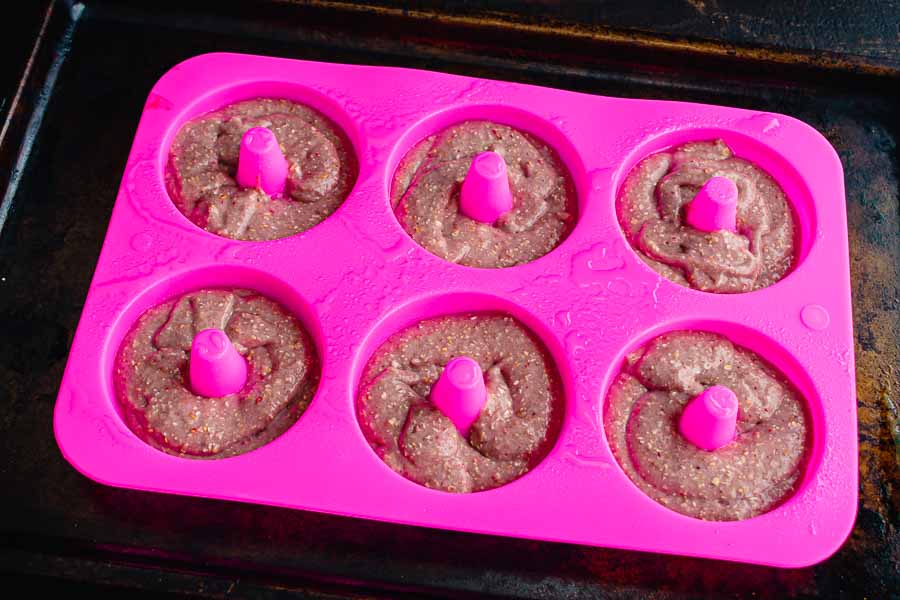
The batter in a silicone donut mold

Making the Raspberry Puree

This is technically part of the donut-making process, but I wanted to talk about it separately. With a good blender, it was quick and easy to do. However, the recipe doesn’t say to strain out the seeds.

I was so into the whole process that I didn’t notice all the seeds in the puree at first. I made the donuts with the unstrained puree, and I wish I hadn’t. When I chewed the baked donuts, I feel the seeds, and I felt like I had to brush my teeth as soon as I was finished.

I didn’t notice the seeds until I had the donuts in the oven and I began to make the glaze. That’s when saw the seeds and took a moment to strain them. Tip: Pressing the puree through a mesh sieve placed over a mixing bowl created a smooth raspberry puree.
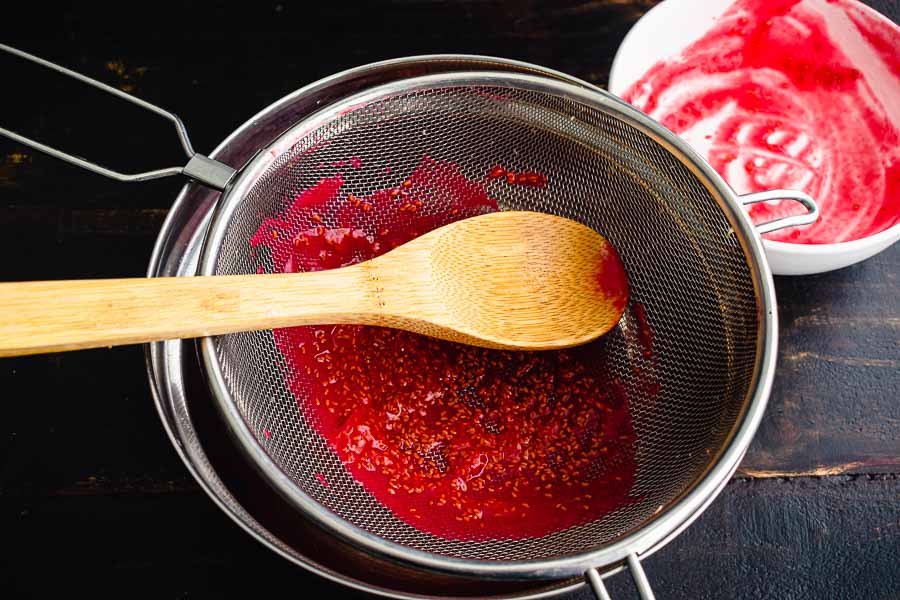
Straining the seeds out of the raspberry puree

Making the Glaze

After that was done, I made a smooth, beautiful glaze by simply mixing the puree with some powdered sugar. It didn’t seem like there was enough puree to absorb all the sugar at first, but it dissolved as I kept stirring. The result was a lovely pink glaze that was ready and waiting to be poured over the donuts.

I poured the glaze into a small measuring cup to await the cooled donuts. It took almost 45 minutes until the donuts were ready for the glaze, and it did thicken a bit. I was able to make it work by stirring it, but I made it much too soon. Tip: Don’t make the glaze until the donuts are cooled and ready for it.

Finally, I completely forgot to get sprinkles, so I improvised to decorate the glazed donuts. I used the crumbs from the bottom of the bag of freeze-dried raspberries as impromptu sprinkles. I loved how they turned out!

Blackberry Glazed Salmon

0

I usually choose recipes because they have something in them I like. Salmon is a great example of that. But isn’t it a huge bonus when a recipe has a couple of things you like (or love)? I think so, and that’s exactly why I am making this Blackberry Glazed Salmon today. I love blackberries, and I never get enough of them! Pairing them with salmon might be a genius move. Let’s find out if they work together.

This easy blackberry glazed salmon is a quick and delicious way to get in more heart-healthy omega-3s and antioxidants. Made with only 6 ingredients and in 15 minutes, you can get a healthy dinner on the table quickly!

Recipe Author: Kaleigh at Lively Table
Get the recipe

The Ingredients

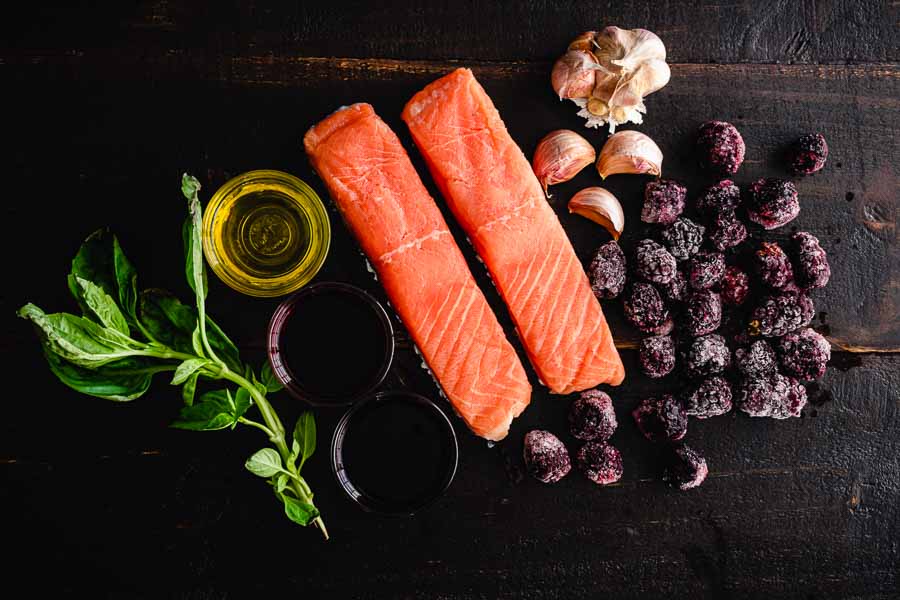
Short ingredient lists are wonderful, and this recipe only has eight ingredients. Balsamic vinegar, red wine, black pepper, and avocado oil were all in my pantry. I even had a bag of blackberries in the freezer. I usually like fresh ingredients, but I wasn’t about to buy something I already had.

That left the garlic, basil, and salmon fillets. I also went with frozen salmon fillets since they are already cut into perfect portions. It makes things easier, and I’m all about that!

Blackberry Glazed Salmon Ingredients
Salmon fillets, garlic, blackberries, balsamic vinegar, basil, red wine, and avocado oil

The Process

I can’t believe such a beautiful recipe was so quick and easy! I had my Blackberry Glazed Salmon ready in a mere 19 minutes. That was even faster than the 25 minutes listed, and I thought that would be amazingly quick.

This recipe kicks off with the blackberry glaze. All I had to do was add all the ingredients except the salmon and oil to a small saucepan and wait for it to simmer. Once that happened, I used a potato masher to mash the blackberries. Then I let the glaze simmer and thicken while I made the salmon. Tip: Reserve 1-2 blackberries per fillet for garnish.

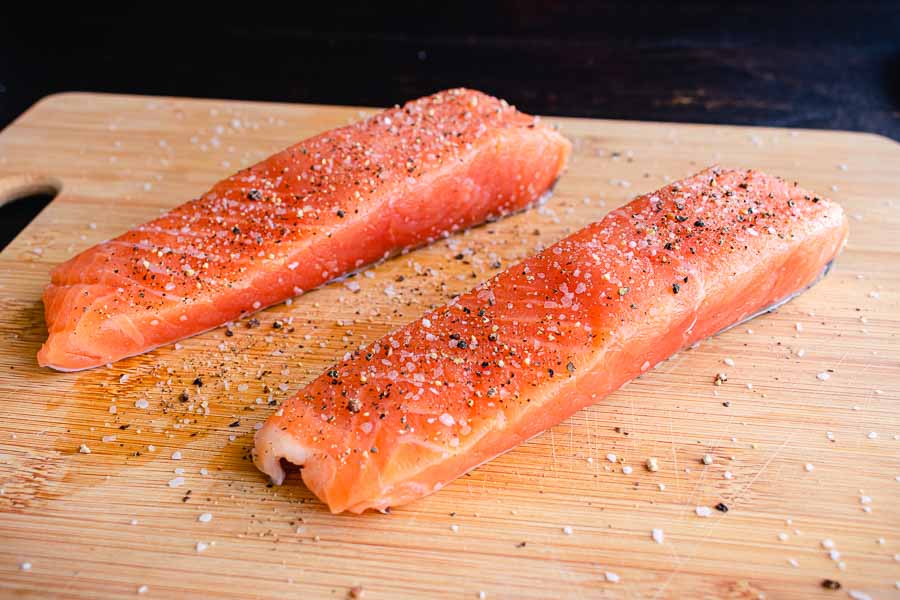
If you thought the glaze was easy, then the salmon will blow your mind! Heat the avocado oil in a nonstick skillet and season the salmon fillets. I used kosher salt and freshly ground pepper to make it a little extra special. Then pan fry the salmon for 4 minutes per side. I sliced a few basil leaves while the salmon cooked.

The blackberry glaze was ready about a minute before the salmon. Perfect timing! All that was left was to plate the freshly cooked salmon fillets and spoon on a bit of the glaze and top with a few slivers of basil.

Salmon fillets seasoned with kosher salt and freshly ground black pepper

Brown Butter Bourbon Pecan Chocolate Chunk Blondies

0

That White Chocolate Latte I made last week really got to my sweet tooth, so I decided I needed to do some baking this week. I’ve found it’s the best way to take care of almost any craving for sweets! I found this Brown Butter Bourbon Pecan Chocolate Chunk Blondies as I was perusing my Pinterest dessert board, and I just lit up. This was it! Chocolate, bourbon, and pecans all in one dessert! Plus I have never, ever, in my entire life made or had a blondie. All I knew was they were dessert bars that were somehow related to but not brownies. Well, they are brownies, but they don’t have chocolate in the batter. Huh. Well, they do have chocolate chunks, so I’ll give them a try!

Brown Butter Bourbon Pecan Chocolate Chunk Blondies are chewy, crunchy, and loaded with gooey pockets of chocolate!

Recipe Author: Ashley Manila at Baker by Nature
Get the recipe

The Ingredients

I usually have a lot of baking recipe ingredients in my pantry, but that wasn’t exactly the case here. I was running out of everything but salt! No matter, a quick stop at the liquor store, then a swing by the grocery store, and I was ready to bake.

Looking back at the photos, I think the author bought a chocolate bar and cut it into chunks. I didn’t have a photo with me when I did my shopping, so I just bought semi-sweet chocolate chunks. I’m sure chocolate chips would have worked too.

I did remember that the pecans in the photos were in big pieces, so I bought pecan halves and barely chopped them. I was tempted to get chopped pecans since they’re cheaper, but the pieces were tiny.

While you’re at the grocery store, remember to pick up some non-stick spray and parchment paper. You’ll need both, and they’re not on the ingredients list.

Brown Butter Bourbon Pecan Chocolate Chunk Blondies Ingredients
Semi-sweet chocolate chunks, egg, butter, pecans, bourbon, vanilla extract, salt, flaky sea salt, flour, cinnamon, and light brown sugar

The Process

When Brown Butter Bourbon Pecan Chocolate Chunk Blondies day came around, I was raring to go! I made sure to set the eggs on the counter when I made breakfast so they would be at room temperature when I was ready to bake.

Here’s how my time was spent:

  • 15 minutes to prep
  • 24 minutes to bake
  • 1 hour to cool
  • 1 hour 39 minutes total

That’s a good deal more than the 50 minutes listed, but I think that’s because I allowed some extra time for the blondies to cool. I wanted to be extra sure they were set before I cut into them.

Browing the Butter

This recipe kicks off with browning a stick of butter. It’s simple to do and fairly quick. If you don’t know how this is a great written and video tutorial on how to brown butter.  A light-colored pan is really helpful for this step, but the only one I have is a huge cast-iron Dutch oven.

I ended up using my smaller saucepan and kept a very close eye on the butter. It wasn’t too difficult for me since I have lots of experience browning butter. Tip: No matter what type of pan you use keep an eye on it because butter can go from browned to burned really fast.

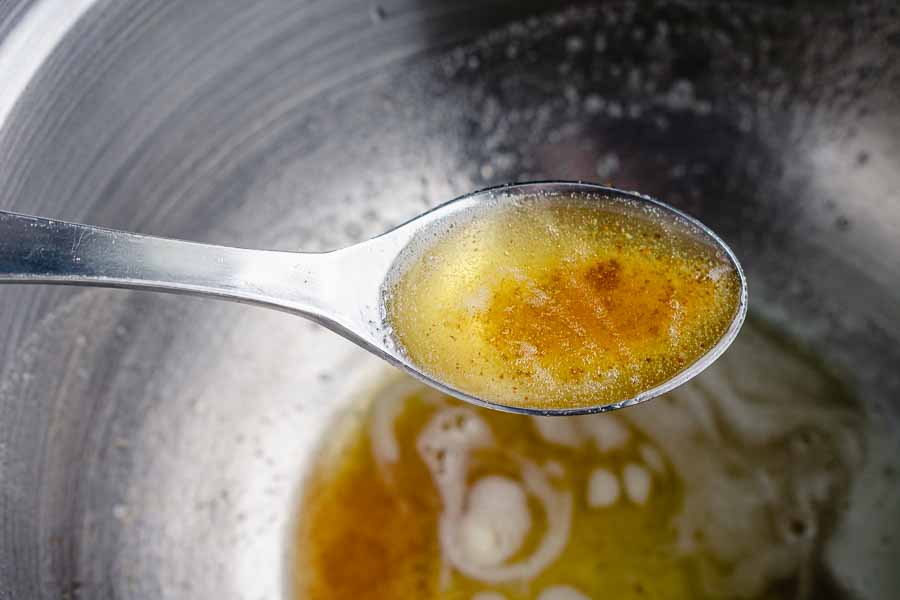
Browned butter in a heat-proof mixing bowl

Finishing Up

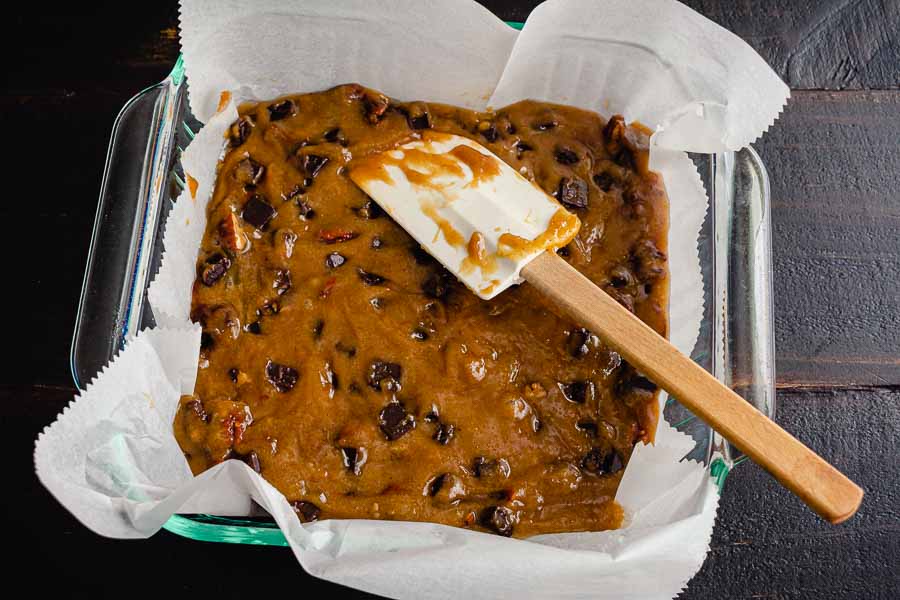
Once the butter was ready, I poured it into a metal mixing bowl and finished up the batter. It was stirred by hand, so it was very simple to make. Tip: The batter was quite thick, so a silicone spatula was very helpful in spreading it around the pan.

As you can see in the photo below, the chocolate chunks were pretty obvious, but the pecans were hard to see. Unfortunately, the chocolate and pecans seemed to sink into the batter as the blondies were baking. You can barely see either of them in the main photo.

I was a little disappointed by that, so I’m going to have to make these again sometime (darn it all!). I’m planning to try holding some of the chocolate and pecans chunks to the side and sprinkling them on top of the batter once it’s spread in the baking dish. I’ll be sure to update this post and let you know what happens!

The batter in a parchment-lined 8"x8" baking pan
The batter in a parchment-lined 8″x8″ baking pan

Jacked Up Cajun Shrimp

0

I haven’t had shrimp since August, and I’m feeling the need for some. That Florida Shimp Pie was excellent, so whatever recipe I choose has a lot to live up to. After a thorough search, I found this Jacked Up Cajun Shrimp recipe, and I think it has some potential. It’s shrimp in a spicy Cajun bourbon-butter sauce, and it sounds phenomenal! Let’s find out if it lives up to my expectations.

This shrimp recipe would make a perfect appetizer. Make sure when you serve the “Jacked Up Cajun Shrimp” you have plenty of french bread to dip into the sauce.

Recipe Author: Kim Seghers at This Ole Mom
Get the recipe

The Ingredients

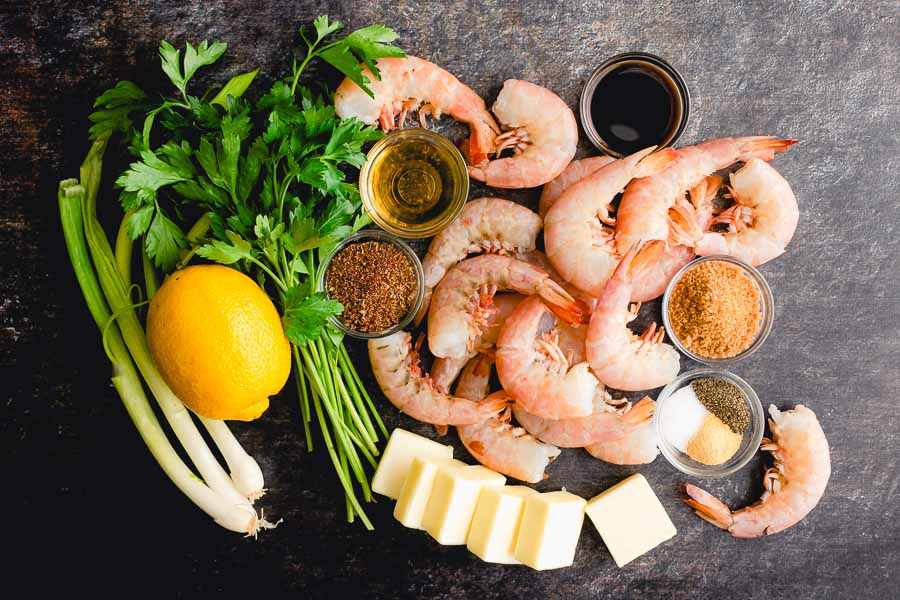
I had some shopping to do for my Jacked Up Cajun Shrimp, but not too much. I had the Cajun seasoning on hand as I like to make my own. It’s great on literally everything! And Worcestershire sauce(I like Lea & Perrins) and brown sugar are pantry staples for me.

That left me to shop for fresh ingredients like butter, parsley, lemons, and green onions. I also happened to be out of bourbon, so I picked up a bottle of Jim Beam. Nothing fancy, but a solid bourbon.

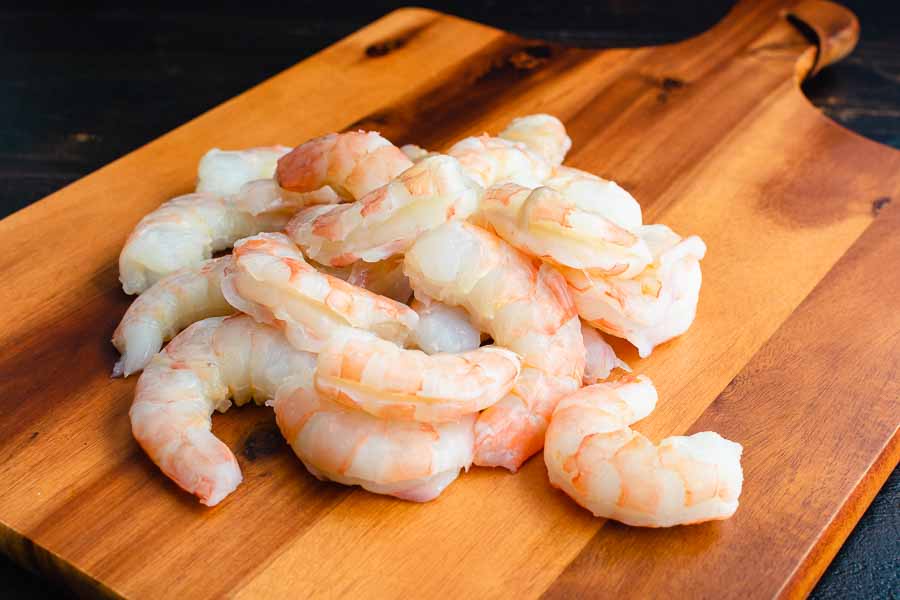
I was able to find the 16/20 (per pound) shrimp, but not peeled and deveined. I could only find shell-on, so I had to do the peeling and deveining myself.

Jacked Up Cajun Shrimp Ingredients
Shrimp, Worcestershire sauce, brown sugar, salt, pepper, butter, green onions, lemon juice, parsley, Cajun seasoning, and bourbon

The Process

As I mentioned above, I had to peel and devein the shrimp myself, so that’s where I started. Here’s how my time was spent:

  • 10 minutes to peel and devein the shrimp
  • 8 minutes to prep
  • 15 minutes to cook
  • 33 minutes total

The recipe lists 10 minutes to prep, 15 minutes to cook, and a total time of 25 minutes. If I didn’t have to peel and devein the shrimp, my time would have been 23 minutes.

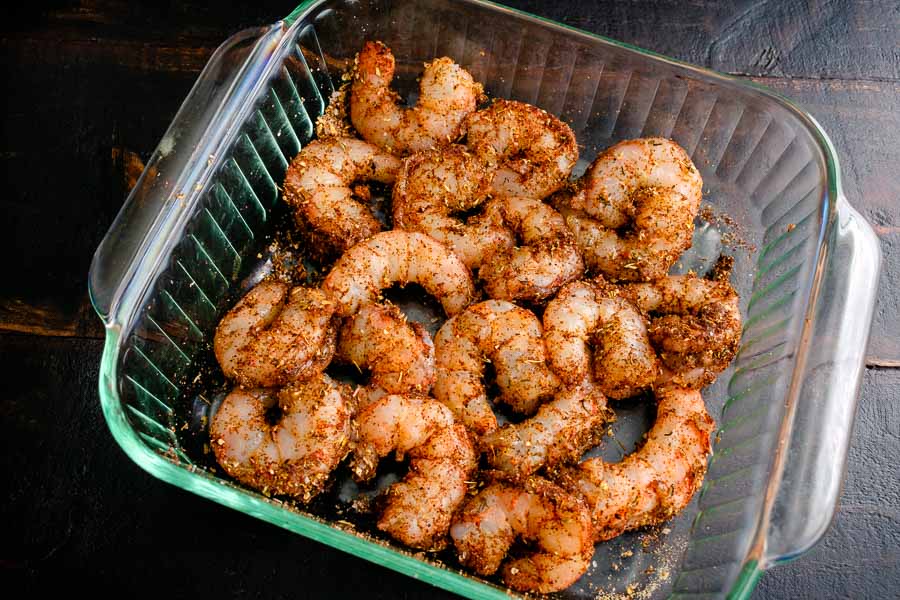
Making this recipe was so simple! I placed the shrimp in a square baking dish and seasoned them with Cajun seasoning, salt, pepper, and granulated garlic. Then I used my hands to toss them to make sure both sides of the shrimp were seasoned, making sure to put them back into a single layer when I was done.

Peeled and deveined shrimp

Mixing up the sauce went according to the instructions, and I had it taken care of in no time at all. Then I poured it over the shrimp and placed the baking pan into the preheated oven.

Oh, about the preheat. That’s the only thing that might have gone awry with this recipe. I read it in advance, so I knew to preheat the oven. However, preheating isn’t mentioned until step 4, so it could be easy to miss.

Otherwise, I had no problems, and I had a beautiful dish of Jacked Up Cajun Shrimp 15 minutes later. I had baked some French bread earlier in the day, and I served it freshly sliced with the shrimp. Yum!

Seasoned shrimp
Seasoned shrimp

White Chocolate Latte

0

Even though I don’t drink coffee every day like I used to, I still love it. I use it in desserts a lot, especially chocolate desserts, but a coffee drink is a rare treat for me. I try to make it special when I do have it, which is why I’m giving this White Chocolate Latte recipe a try. It looks and sounds like the coffee house drinks I used to love. Well, I still love them, just not as often LOL! So, today I’m becoming a barista and whipping up a fancy coffee drink right in my own kitchen. I hope this isn’t too complicated, because I’m barely functional in the morning!

Delicious, easy, homemade white chocolate latte recipe that will have you sipping lattes whenever you want!

Recipe Author: Julie Evink at Julie’s Eats and Treats
Get the recipe

The Ingredients

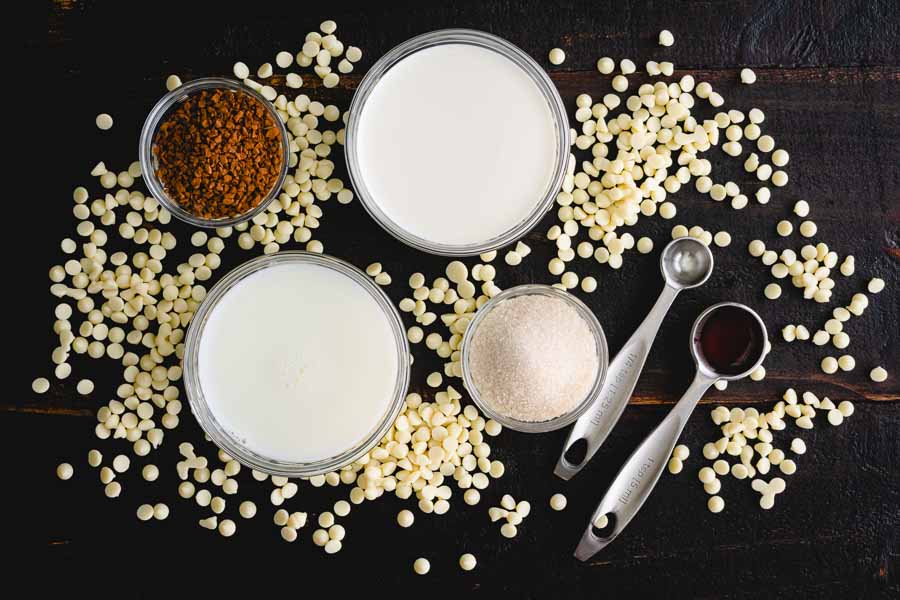
This is a little more than my usual coffee, but oh so worth it! I had the vanilla and almond extracts, as well as the sugar in my pantry. I had some leftover mini white chocolate chips from the Oreo-Stuffed Double Chocolate Cookie Cups I made waaaay back in January. I even had some leftover milk from the Skinny Fettuccine Alfredo I just made.

I had to buy the rest, but that was only two items: instant coffee and half and half. What grocery store doesn’t carry those? Needless to say, shopping was easy.

White Chocolate Latte Ingredients
Half and half, white chocolate chips, almond extract, vanilla extract, sugar, low-fat milk, and instant coffee

The Process

The total time listed to make this White Chocolate Latte recipe is listed as 15 minutes. I had mine made and garnished in 9 minutes. Yes, it was a little more work than a cup of instant coffee with cream and sugar, but not that much.

All I had to do was heat the milk, half and half, white chocolate chips, and instant coffee in a saucepan. Tip: Use a non-stick pan and keep the heat at medium. It will keep the milk from burning and sticking to the bottom of the pan. It takes a little longer, but you won’t have burned milk chunks floating in your latte, and the pan will be easier to clean.

I kept stirring until the chocolate chips melted, then I removed the pan from the heat and added the vanilla and almond extracts. Boom! My White Chocolate Latte was ready in under 10 minutes.

A quick squirt of canned whipped cream and dusting of cocoa powder finished things off. I used about 1/4 a teaspoon of cocoa powder and sifted it through a fine mesh strainer. Honestly, though, the latte was so good that I didn’t notice either of them, but they look cute in the photos.

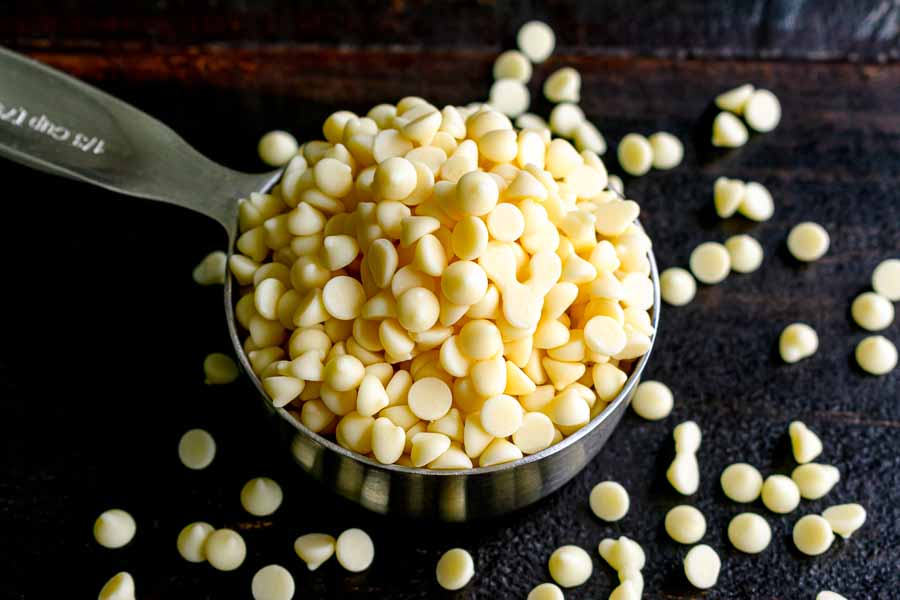
White chocolate chips

Creamy Chicken Stew

It’s October, winter is almost here, and I’m in the mood for some comfort food. After an exhaustive search (kidding!) of Pinterest, I found this Creamy Chicken Stew recipe. It’s full of chicken and vegetables and promises a hearty, creamy broth. The fact that it includes instructions for the stovetop, crockpot, and Instant Pot really sold me. Although I don’t have an Instant Pot (yet), I do love my crockpot. Being able to toss a bunch of ingredients in, press a button, and come back to a delicious meal a few hours later is my jam. Then again so is the whole stovetop thing. Well, on most days. Anyhoo, let’s give this one a try!

This Creamy Chicken Stew recipe is simple to make and tastes great with biscuits or dumplings. Make it on the Stove Top, Crock Pot, or Instant Pot!

Recipe Author: Stephanie at The Cozy Cook
Get the recipe

The Ingredients

I think I only had the olive oil, butter, and Italian seasoning in my pantry. That left me with a good amount of things to shop for, but that wasn’t a problem.

This recipe is full of cooking basics like onion, potatoes, and chicken breasts. It also takes advantage of cream of chicken soup for the broth base and a packet of ranch seasoning for flavor.

While most of the ingredients are fresh, there is an option to use frozen green beans. I took advantage of that to up the convenience factor.

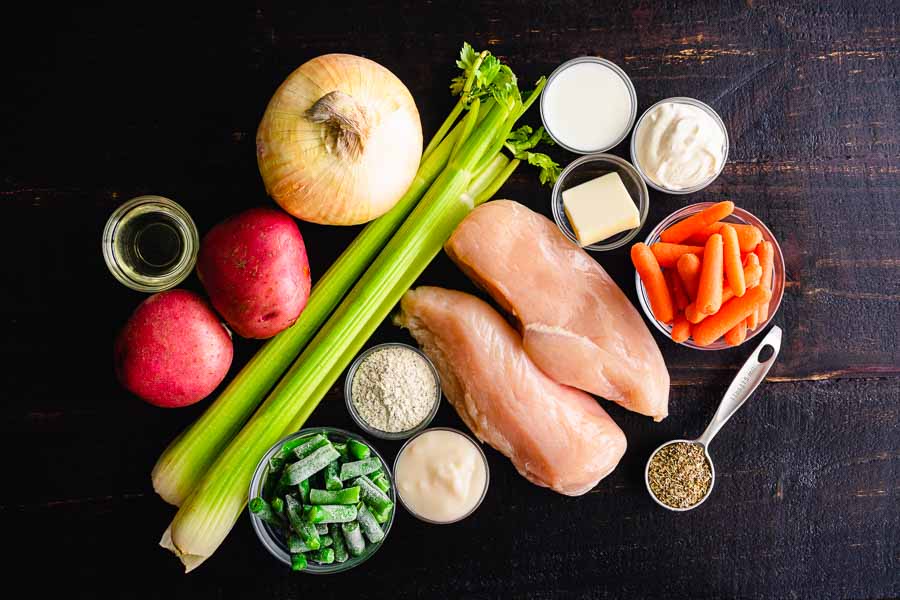
Creamy Chicken Stew Ingredients
Chicken breasts, butter, milk, sour cream, baby carrots, Italian seasoning, cream of chicken soup, ranch dressing mix, frozen green beans, celery, potatoes, olive oil, and onion

The Process

Y’all, making this recipe was a pleasure. It mostly went according to the instructions, and I had it ready in just over an hour. Here’s how my time was spent:

  • 11 minutes to prep
  • 1 hour to cook
  • 1 hour 11 minutes total

Although I like the fact that crockpot instructions were included, I decided to make my Creamy Chicken Stew on the stovetop.

Naturally, I started off with the prep work. That was mostly measuring a few ingredients and cutting the chicken and vegetables into bite-sized pieces. This is where I had my only moment of confusion with this recipe.

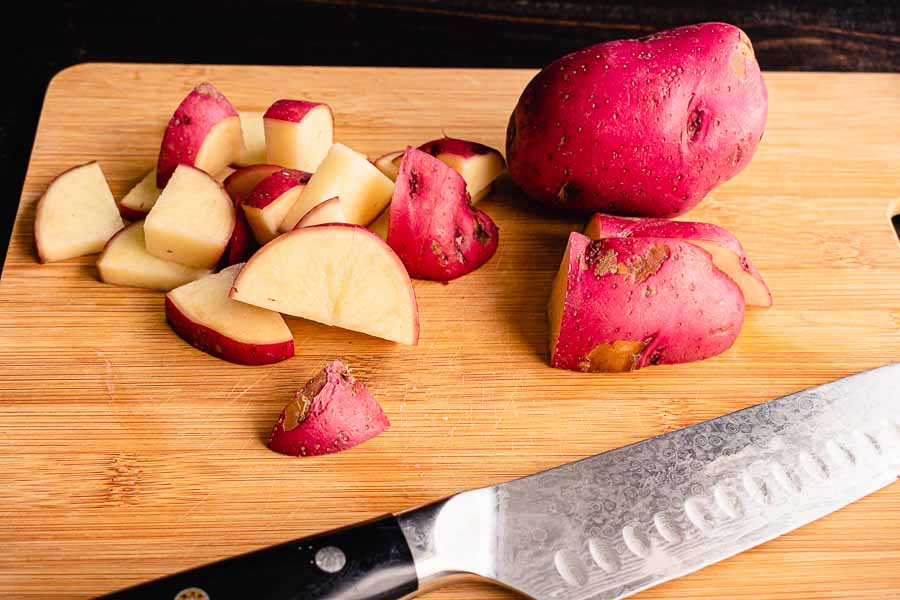
The instructions say to slice the potatoes, but that didn’t seem right to me. I used red potatoes that would have made large slices for a soup. Instead of slicing, I also cut the potatoes into bite-sized pieces.

Oh, and speaking of cutting, the baby carrots aren’t. Just toss them into the pot for an extra touch of convenience. And speaking of pots, my 5-quart Dutch oven was made for this recipe.

Once I began cooking, things went very smoothly. I started out by sauteeing the seasoned chicken for 7 minutes. The rest went according to the instructions, and my Creamy Chicken Stew was ready to serve a short time later.

Chopping the potatoes
Chopping the potatoes into bite-sized pieces

To Serve

This Creamy Chicken Stew is certainly hearty enough to serve as a meal, but it also gives a couple of optional sides. The accompanying post includes a link to a buttermilk biscuit recipe and instructions for dumplings.

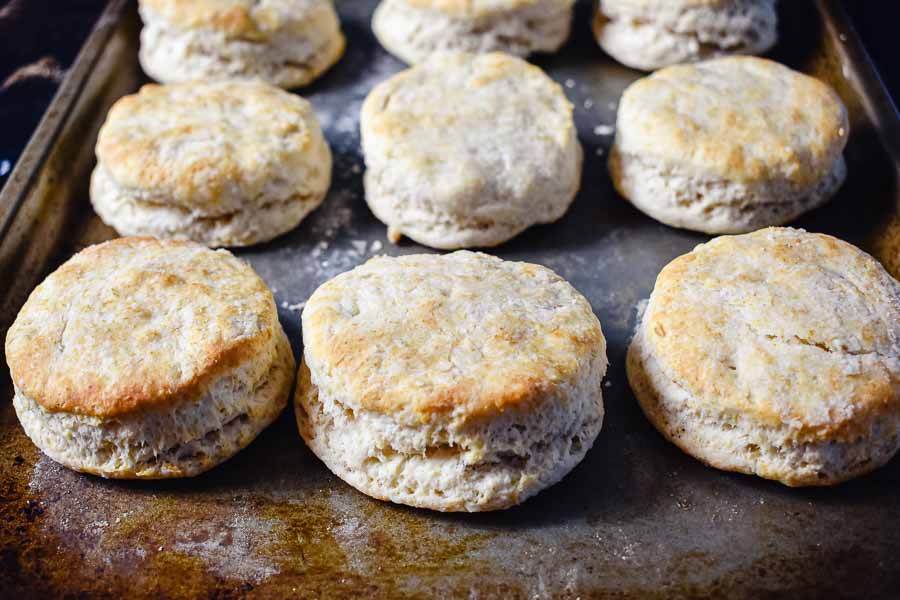
My husband doesn’t care for dumplings, so I opted to make biscuits. While the author’s Buttermilk Biscuits recipe does sound delicious(!!), I have to admit that I used my favorite biscuit recipe. They were a last-minute addition, I had all the ingredients handy, and I have made it so often that I’m sure I could make it in my sleep. If I had planned better, I would have tried those buttermilk biscuits.

Homemade Biscuits
Homemade biscuits, the perfect side to a hearty soup or stew

Turkish Menemen

Eggs are a source of protein I often overlook. I view them as breakfast food, and I’m not the type of person who cooks breakfast. My morning “cooking” is blending a smoothie or reheating leftovers in the microwave. I’d love to try more breakfasts from around the world, but I’m just not awake enough in the morning LOL! However, this blog has taught me eggs can make a quick and easy dinner. Don’t believe me? Check out these Mexican Baked Eggs. They were delicious! And in that vein, I am trying another egg dish for dinner, but from the opposite side of the world. Turkish Menemen is filled with eggs, vegetables, and spices, and promises to be very quick and easy. Let’s find out!
Turkish Menemen Recipe is an amazingly tasty breakfast, lunch and dinner recipe. Summer tomatoes and green peppers combine with eggs in a pan to make this simple, quick and oh so yummy meal.

Recipe Author: Zerrin at Give Recipe
Get the recipe

The Ingredients

Ah, I do love a recipe with a short ingredient list that’s filled with easy-to-find basics, and this Turkish Menemen has exactly that. I had to shop for everything but the salt, pepper, and olive oil, but I didn’t have a problem finding anything.

I went with 28 ounces of canned diced tomatoes to really up the easy factor. The only thing I wasn’t sure of was the green peppers. I had to scroll through the photos in the blog post to confirm whether I needed to buy a green bell pepper or hot peppers.

Hot peppers were the way to go, but I can’t tell you what type they were because they were listed as “long hot green peppers”. Not very helpful and not too accurate—they were really quite mild. Based on the photos I have found, I think they are Italian frying peppers or Anaheim peppers. It’s hard to tell for sure, so I hope the photos are helpful.

Turkish Menemen Ingredients
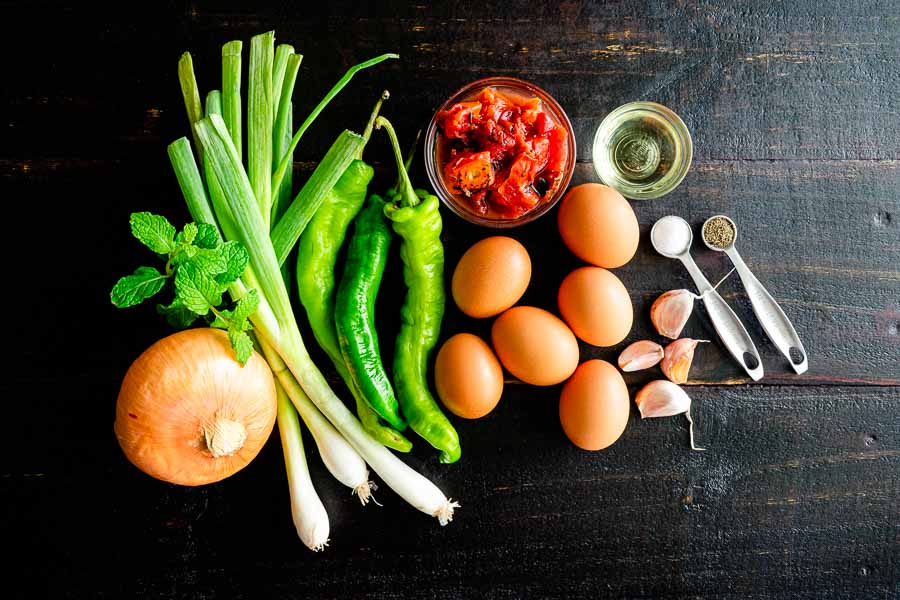
Eggs, tomatoes, olive oil, salt, pepper, garlic, green peppers, green onions, onion, and mint

The Process

The blog post with this recipe says there are two options for this recipe: scrambling the eggs or something more similar to poaching. The recipe describes the latter option, so that’s how I made mine.

I did cook the eggs a little longer than the time listed to harden the yolks a bit. I also added a lid to the pan during the extra couple of minutes, and I think I overdid it. It was still good, but the eggs were too hard to dip the bread into. Anyway, here’s how my time was spent:

  • 10 minutes to prep
  • 30 minutes to cook
  • 40 minutes total

That was significantly more than the 25-minute total time listed, even if I take into account the extra 2 minutes for the eggs. I think the slow-down happened in a few places.

The first was in the prep work, which took me 10 minutes instead of 5. The next might have been in the first step, sauteeing the onion and peppers. I spent 5 minutes on that, but the instructions only say to saute until soft.

I know part of the slowdown was with the eggs. I chose to cook them for the maximum time of 10 minutes, then I added another 2 because I didn’t think the yolks were hard enough. If I had followed the recipe’s times, I could have had it done at 36-38 minutes. Still a lot longer than 25 minutes, though.

Despite the longer total time, I didn’t have any trouble with this recipe. Things went smoothly, but I did make the mistake of draining the tomatoes before adding them. That was on me and adding a little water (maybe a 1/3 cup) fixed things right up.

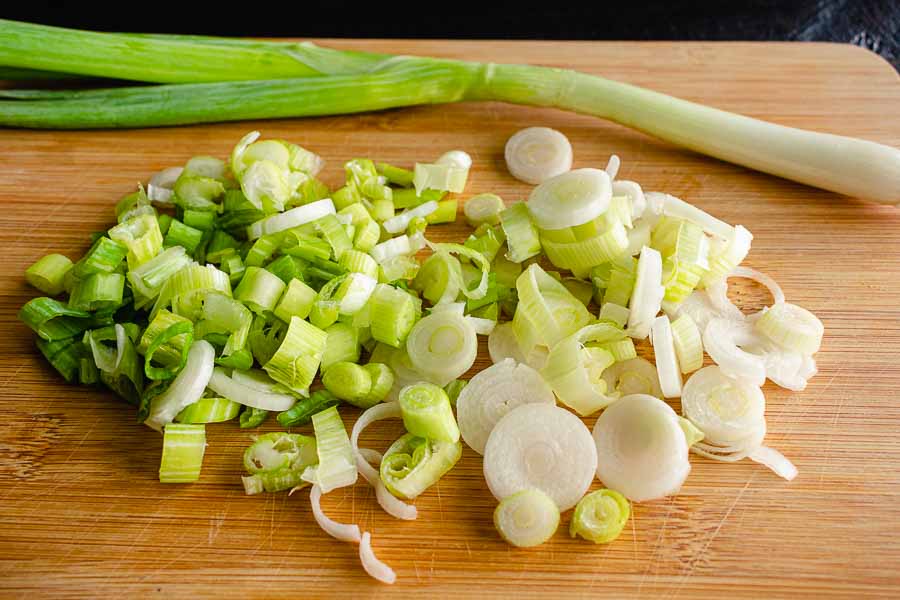
Sliced green onions
Sliced green onions

Easy Turkish Lahmacun

I have always loved trying new foods, and I have discovered so many through my blog. Turkish food was one of those discoveries, but it’s been a while since I’ve blogged any new Turkish recipes. That needs to change, so this week I have decided to try two recipes I have had my eye on for a while. I’m starting with this Easy Turkish Lahmacun. It’s a Turkish flatbread that’s topped with a spiced meat mixture and baked like a pizza. This recipe uses store-bought pizza dough to shave off a lot of prep time and effort. I’m all for making things easy, so let’s give this recipe a try!

Think of Lahmacun (Lahamajoun) as super thin, crispy Turkish pizza (or flatbread) topped with a flavor-packed mixture of minced meat with peppers, tomato, fresh herbs and earthy spices. I take a major shortcut by using quality store-bought pizza dough. But the secret is in the spice mixture.

Recipe Author: Suzy at The Mediterranean Dish
Get the recipe

The Ingredients

The ingredient list for this Easy Turkish Lahmacun recipe isn’t too long, and several of the items are spices. I had all but the Aleppo-style pepper in my pantry, but that was easy enough to order.

I had the olive oil, garlic, and shallot, but I had to shop for everything else. No worries, though, because the ingredients were all easy to find basics. I even found a pound of freshly made pizza dough for about $3. This recipe only needs a half pound, so I froze the extra.

Easy Turkish Lahmacun Ingredients
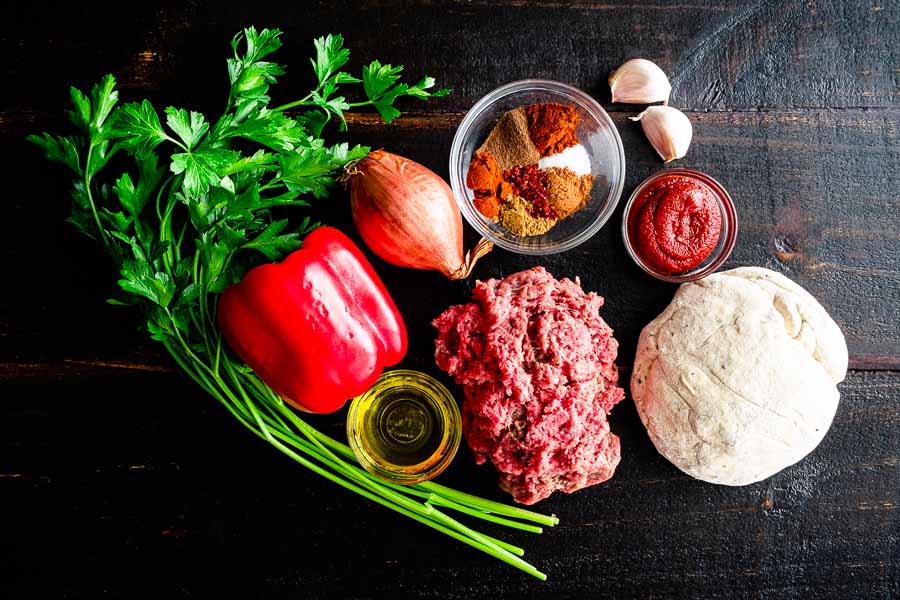
Ground beef, smoked paprika, allspice, cumin, Aleppo-style pepper, cinnamon, cayenne pepper, salt, garlic, tomato paste, store-bought pizza dough, olive oil, red bell pepper, parsley, and shallot

The Process

I came pretty close to the 25 minutes total time listed on this recipe. Here’s how my time was spent:

  • 20 minutes to prep
  • 9 minutes to cook
  • 29 minutes total

Easy Turkish Lahmacun certainly was easy! I started out by making the topping. That involved a little chopping and measuring, but my food processor did most of the work.

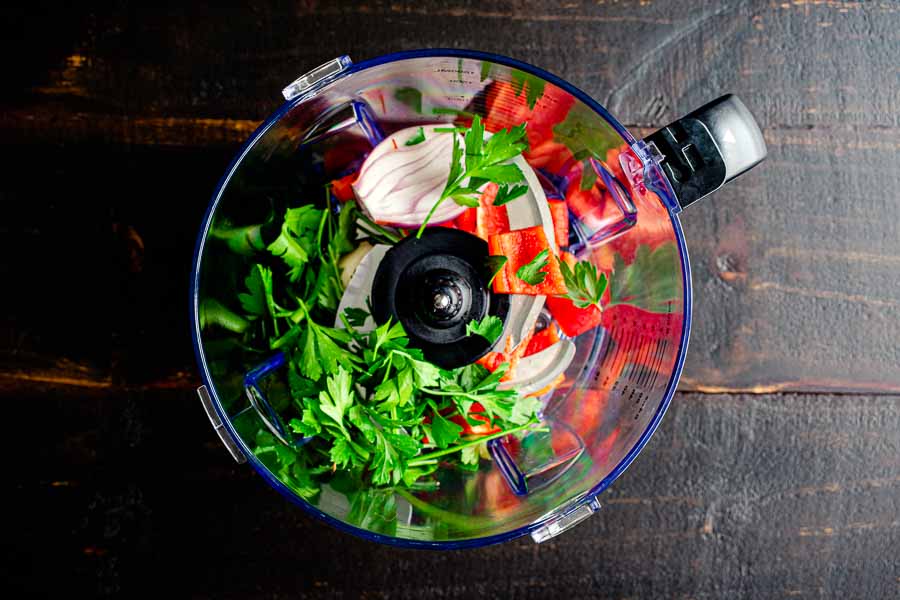
Red peppers, shallot, garlic, and parsley pulsed in a food processor

After that, I sprinkled some flour onto my largest cutting board and rolled out the dough. I was able to fit two pieces onto each of my sheet pans and cook all four lahmacun at once. The recipe made it sound like they would need to be cooked in batches, so I was really pleased.

I had enough topping to add five measured tablespoons to each rolled-out piece of dough. That was a little more than the 3-4 tablespoons listed, but it didn’t seem like too much to fit.

Then it was into the oven for 5-7 minutes to bake. I started with 5 minutes and increased by 2 minutes after checking for doneness. I ended up with a total baking time of 9 minutes to get the dough crusty around the edges.

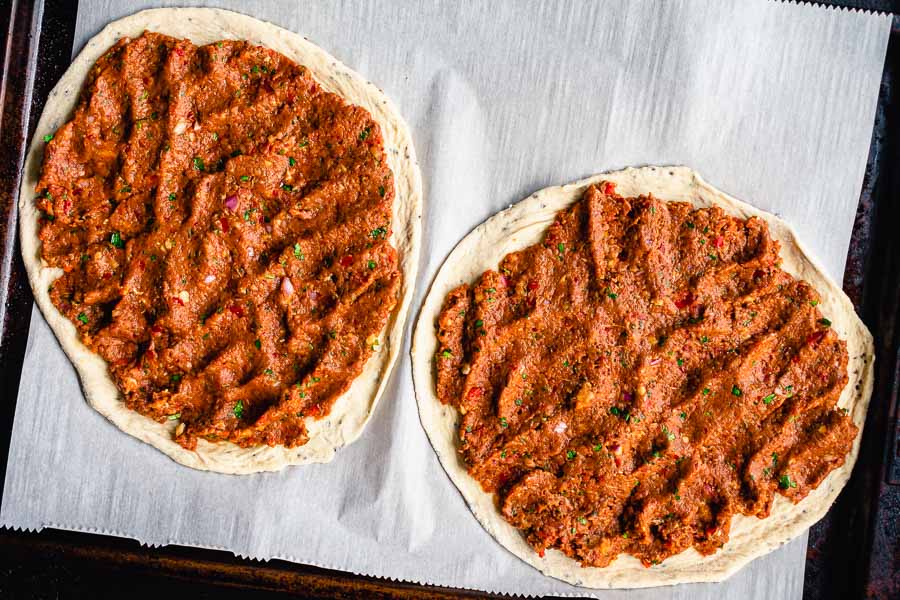
As I removed the lahmacun from the oven, I noticed some grease pooled on the ground beef topping. You can see it soaked into the crust a bit before I had a chance to take photos. Otherwise, they looked like the author’s photos.

Prepped lahmacun just before baking

Soffioni Abruzzesi

2

After trying a lower-calorie Italian dish earlier this week, Skinny Fettuccine Alfredo, I’m going in the opposite direction. I’m sticking with the cheese theme, but I’m switching from parmesan to ricotta. Specifically, ricotta-filled pastries called Soffioni Abruzzesi. Ricotta is good when it’s used in a savory dish, but I absolutely love it when there’s sugar involved. These delectable-sounding pastries have a sweet lemon-ricotta filling that I’m dying to try. Let’s get to it!

Soffioni Abruzzesi are cute little Italian cupcakes or muffins filled with fluffy Ricotta cream. They are easy to make and so delicious.

Recipe Author: Iryna at Lavender & Macarons
Get the recipe

The Ingredients

I always expect pastry recipes to have a ton of ingredients, but this one does not. It has 10 ingredients, but nothing unusual or difficult to find. We’re talking basics

I had the eggs, granulated sugar, vanilla extract, and flour. That left me to do a little shopping, but not much. I love it when that happens!

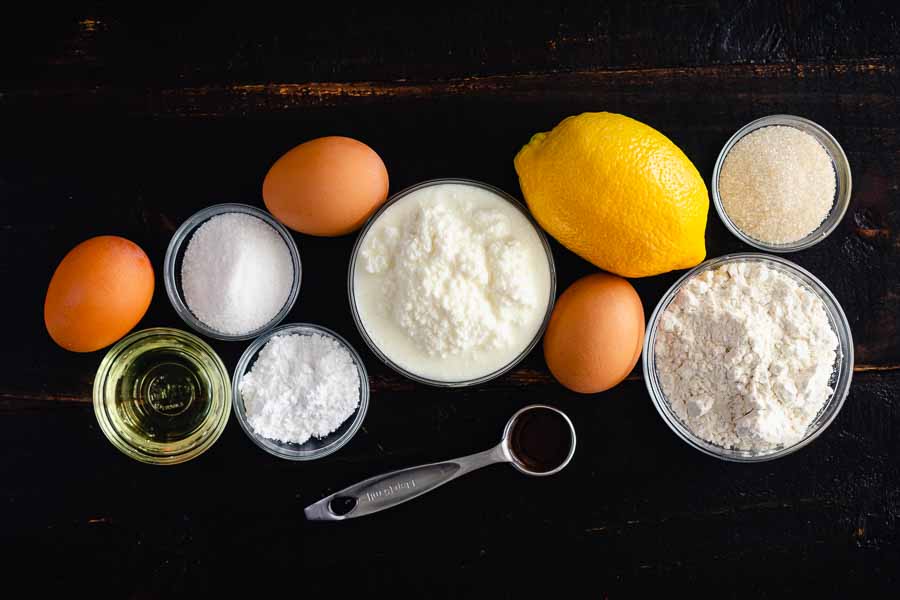
Soffioni Abruzzesi Ingredients
Eggs, olive oil, salt, icing sugar, ricotta cheese, vanilla extract, lemon zest and juice, granulated sugar, and flour

The Process

Baking isn’t my specialty, so it’s not a surprise when I have some difficulties with a baking recipe. This one didn’t go perfectly, and I ended up remaking it. Here’s how it went:

  • 6 minutes to make the crust
  • 1 hour to chill the crust
  • 27 minutes to make the filling and assemble
  • 45 minutes to bake
  • 2 hours 18 minutes total

This recipe is divided into manageable sections, so it didn’t seem too overwhelming even though there is a lot to it.

Making the Crust

The first part is making the crust, and this is where my trouble began. Things went well up until the part when I had to for the dough into a ball. It was very crumbly and barely held together.

Things didn’t magically improve after an hour in the refrigerator. It kept splitting as I rolled it out, and was just difficult to work with.

The second time I made the Soffioni Abruzzesi, I tried adding a tablespoon of water per the author’s suggestion (from the post comments). It helped, but not much, so I added another tablespoon of olive oil to the dough.

The extra olive oil made the dough hold together, but it was right on the edge of being too soft. It worked out, but I wish I had tried adding the oil a teaspoon at a time until the texture was right.

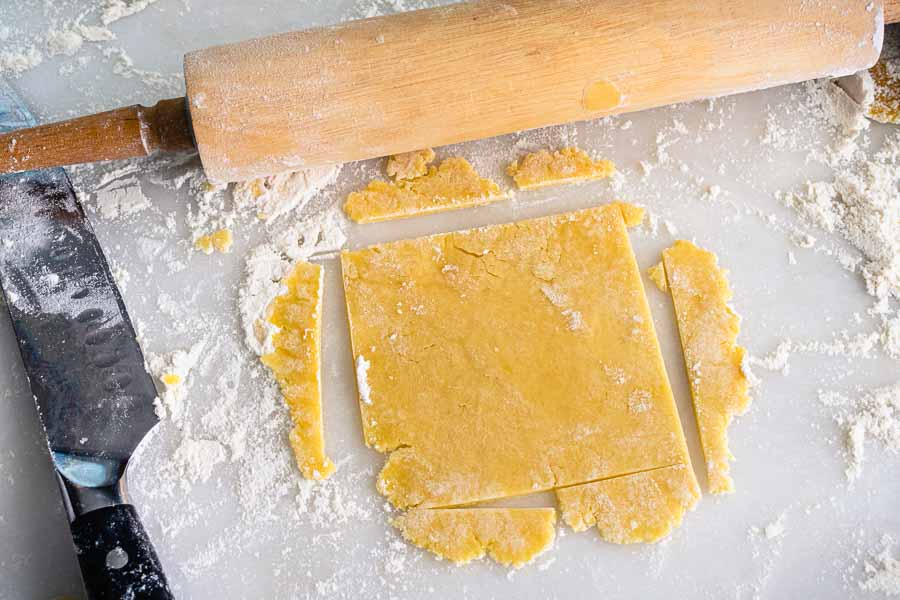
After I rolled out the crust, I cut it into squares

Making the Filling

This part went according to the instructions, but I did find a way to speed up the process on my second try. Instead of beating the egg whites after I made the egg yolk-ricotta mixture, I did them in tandem.

Putting the egg whites into my stand mixer and letting it work while I made the egg yolk-ricotta mixture saved me about 10 minutes.

Assembling the Soffioni Abruzzesi

This step was a pain the first time around, but it wasn’t so bad the second time. I think the texture of the dough was the key.

After dividing the dough into six portions, I rolled each one into a ball. That kept the shape even as I rolled out the dough, but I still trimmed it into squares just to make it look nice. It was a quick little extra that made a difference, I think.

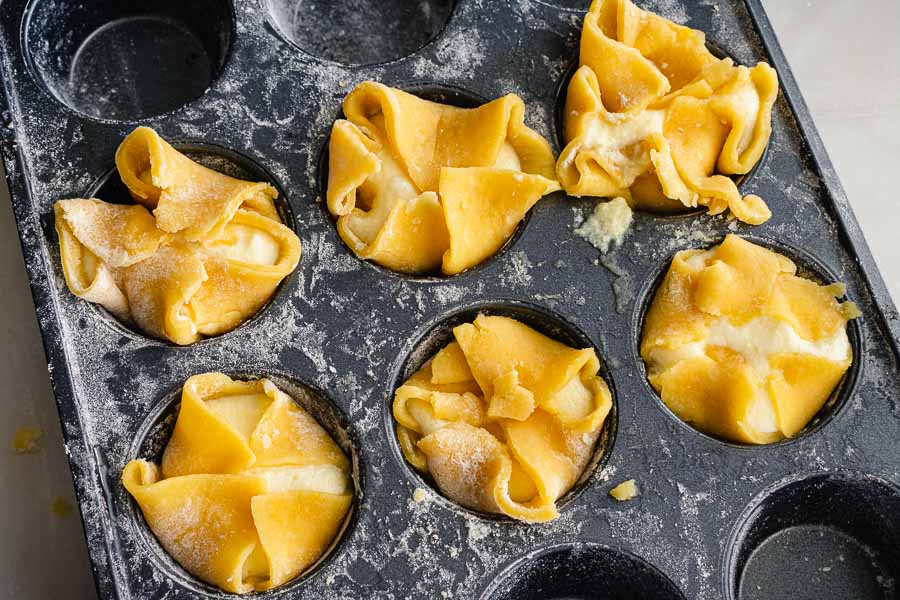
I positioned each square over the floured muffin tin, filled them with the ricotta mixture, and gently closed the corners. Looking back, staggering the crusts would have made things easier, but grouping them together wasn’t too bad.

The unbaked Soffioni Abruzzesi with the pastry folded over the ricotta filling

Baking

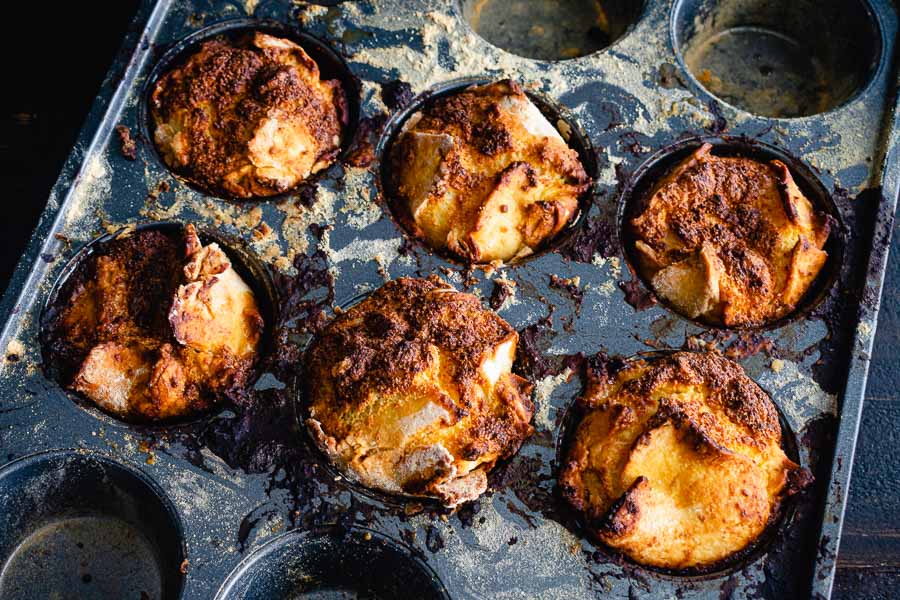
By this point, I thought the work was done, and I sat back and listened for the oven timer. Unfortunately, the first batch of Soffioni Abruzzesi came out extra crispy (shown below). They tasted good once I dusted them with powdered sugar (also shown below), but I wasn’t thrilled that they burned.

My first attempt at this recipe resulted in burned Soffioni Abruzzesi

The second time I made the Soffioni Abruzzesi, I made sure the tops didn’t burn. I baked them per the first part of the instructions, and the edges were brown after the initial 30 minutes.

The second half of baking is just turning down the heat to 350℉. The recipe says not to open the oven door, but I broke the rules the second time around. I opened the oven door so I could place a sheet of foil over the Soffioni Abruzzesi. I didn’t tuck it in—I literally placed it on top of the muffins and quickly closed the door.

The sheet of foil kept the tops from burning like the first batch, as you can see in the main photo. This batch of Soffioni Abruzzesi was beautiful!

The Soffioni Abruzzesi filling is cake-like after baking

Skinny Fettuccine Alfredo

It might not look like I’m trying to eat healthier after last week’s Argentinean-Style Grilled Short Ribs With Chimichurri, but I really am. I haven’t given up “bad” foods, but I have greatly reduced them to occasional treats. That’s why this week’s Skinny Fettuccine Alfredo recipe jumped out at me. It’s a healthier version of pure comfort food, and I’m all for that! But can it be nearly as good as the real thing without butter or cream? I sure hope so!

Only 500 calories a serving and tastes just as good as the original! Best of all this recipe ready in less than 20 minutes!

Recipe Author: Kelley Simmons at Chef Savvy
Get the recipe

The Ingredients

I had some shopping to do for my Skinny Fettuccine Alfredo, but the ingredients were all easy to find basics. I had the basics like salt, pepper, and flour, but that was it. I had to shop for everything else, including 1% milk. I don’t keep dairy milk around, but the unsweetened vanilla almond milk I always have just wouldn’t have done it for this recipe!

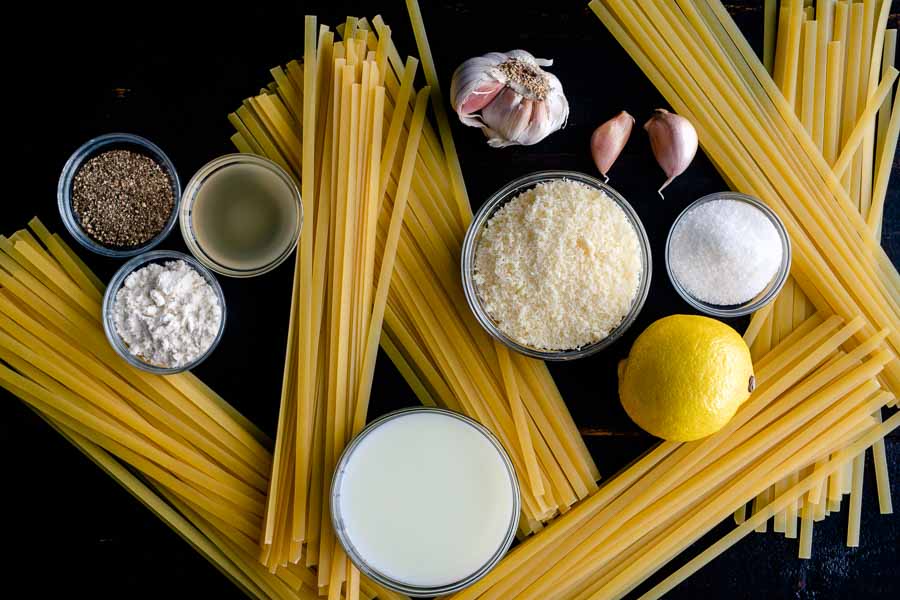
Skinny Fettuccine Alfredo Ingredients
Fettuccine, garlic, parmesan cheese, salt, lemon juice, 1% milk, flour, chicken broth, and black pepper

The Process

I haven’t had fettuccine Alfredo in ages, and I don’t think I’ve ever made it. New recipes can be a little anxiety-inducing, but this one really was easy. Here’s how my time was spent:

  • 11 minutes to prep
  • 8 minutes to cook
  • 19 minutes total

In this case, prep work includes prep work done before and after cooking. Things like measuring ingredients, mincing the garlic, and juicing the lemon were done before the cooking began. After cooking prep includes tossing the cooked pasta in the Alfredo sauce, seasoning, and garnishing.

I absolutely loved that this recipe was so quick! I put the pasta water on to boil, prepped the ingredients, and go cooking. Being able to let the pasta boil on the back burner while I made the Alfredo sauce really sped things along.

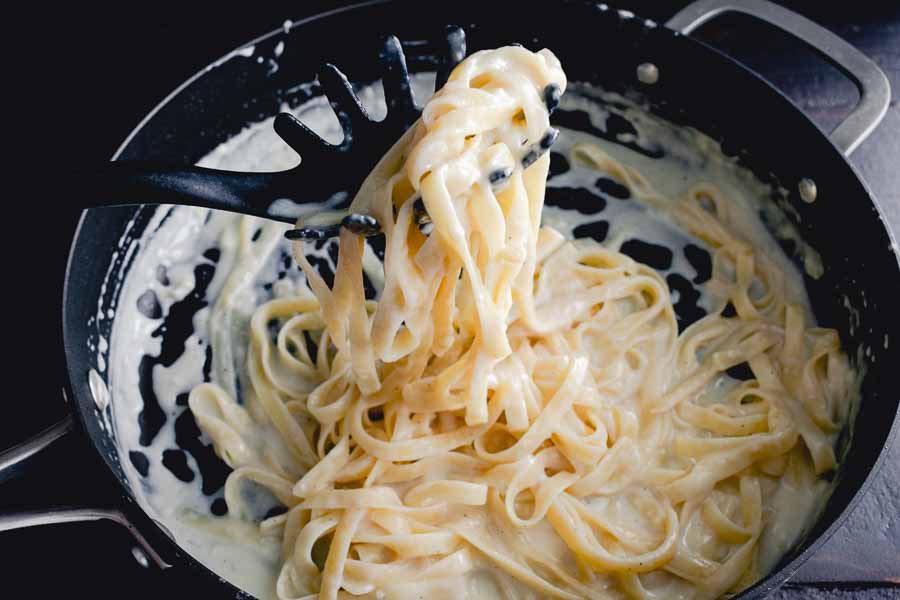
The “work” in this recipe was the Alfredo sauce, and that was really just a lot of stirring. A large nonstick saute pan provided plenty of room to make the sauce and stir in the fettuccine plus made cleanup easy.

I used a large saute pan to make the alfredo sauce
I used a large saute pan to make the Alfredo sauce

Roasted Herb Mustard Potatoes

0

Bite-sized honey gold potatoes, ghee, rosemary, black pepper, salt,  stoneground mustard, and Is there anyone who doesn’t enjoy roasted potatoes? They’re like the chicken of side dishes: they’re versatile and everyone likes them in some form. Whether they’re part of the recipe or a side you add, potatoes can do it all. Looking back, I see that I’ve done a potato recipe every month since June. Hunh. I didn’t intentionally do that, but I’m going to continue the accidental tradition with this Roasted Herb Mustard Potatoes recipe. It looks like it will be an easy and tasty roasted potato side dish, and I’m here for it. Let’s give it a try!

These garlicky, herb and mustard roasted potatoes are baked to crispy perfection. This Whole30 and paleo side dish takes just minutes to throw together for an easy weeknight dinner and are delicious enough to be a crowd pleaser at any holiday meal.

Recipe Author: Bailey at Whole Kitchen Sink
Get the recipe

The Ingredients

Eight ingredients is a medium-length, but you only have six if you eliminate salt and pepper. Not too shabby. I had to shop for everything else, but most of it wasn’t a problem. Stoneground mustard, fresh rosemary, and garlic are all pretty easy to find. I even managed to find ghee on the oils aisle (I thought it would be in the dairy case because…  butter).

The only item I was iffy about was the type of potatoes. The store only had regular size (fist size-ish) potatoes or tiny one-bite potatoes. I was hoping to find fingerlings, which are two-three bites, but no such luck. I bought the bite-sized yellow potatoes, but I was worried they would be too small and overcook. Eek!

I also bought some red potatoes as a backup. My thinking was that I could cut them into fingerling potato-sized wedges. I hate to plan for failure, but I can always use the backup potatoes for something else if everything works out.

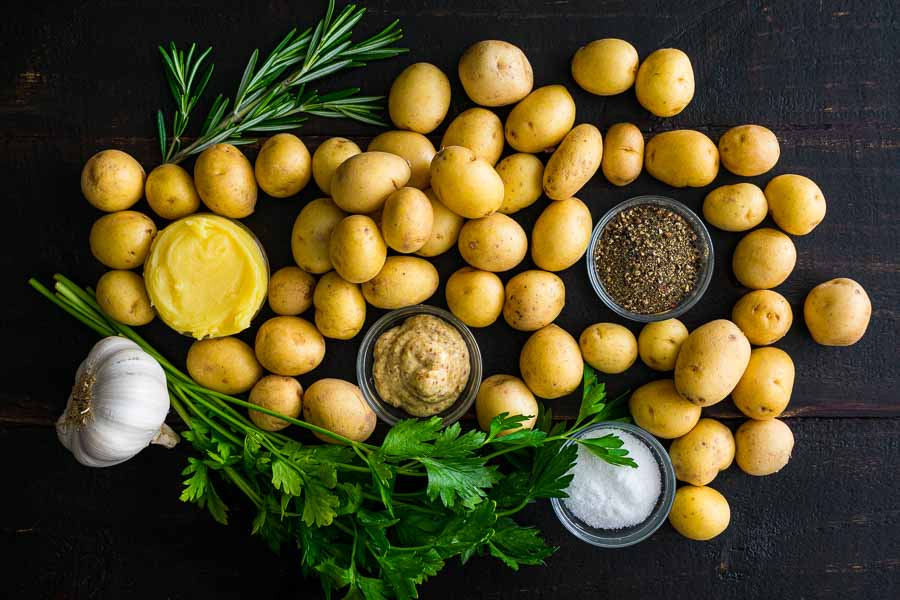
Roasted Herb Mustard Potatoes Ingredients
Bite-sized honey gold potatoes, black pepper, sea salt, Italian parsley, stoneground mustard, ghee, and garlic

The Process

The instructions for Roasted Herb Mustard Potatoes were simple and listed a total time of 35 minutes. I came close to that, but the slowdown was my fault. Before I explain that, here’s how my time was spent:

  • 10 minutes to prep
  • 30 minutes to cook
  • 40 minutes total

Now for the mistake that slowed me down a bit: I refrigerated my ghee after I opened it. It was rock hard, and I had to chip it put with a paring knife. Tip: Apparently, ghee belongs in the pantry so it keeps creamy consistency. Lesson learned a tad too late (if only bothered to read the packaging!).

So in between prepping the other ingredients and slicing the potatoes, I microwaved the ghee in 10-15 second bursts, stirring in between. It took a total of 40 seconds to melt it, and then I was able to mix it with the other seasonings.

Thankfully, the rest of this recipe went very smoothly. I halved all but a few super tiny potatoes and mixed them into the mustard seasoning. Then I popped them onto a sheet pan, making sure to put the cut sides down.

The potatoes are coated with the mustard-herb mixture and ready to go into the oven

Then it was into the oven for 15 minutes, a quick flip with a spatula, and back into the oven for another 15 minutes. I kept a close eye during the last 15 minutes because I expected the tiny potatoes to burn. They didn’t! Some did get pretty golden, but none of them burned. Whew!

Almost forgot—I chopped some parsley to garnish while the potatoes were cooking. A quick transfer to a serving bowl plus a sprinkle of that parsley, and voila! A lovely side dish, if I do say so myself.

Argentinean-Style Grilled Short Ribs With Chimichurri

0

Have you ever tried beef ribs? I did once, and I hated them. It was just after I got married, and we had moved into our first apartment. I found a package of beef ribs on a shopping trip and decided to give them a try. I don’t remember what recipe I used, but they were the toughest, dryest, most flavorless things that have ever come out of my kitchen. They were so bad that I didn’t even serve them, and they went straight into the trash, never to be served again. Fast forward to today, and I’m gearing up to make these Argentinean-Style Grilled Short Ribs With Chimichurri. I keep hearing how wonderful beef ribs are, and I have finally decided to give them another chance. I hope I don’t regret this!

Fresh herbs, garlic, olive oil, and red wine vinegar come together in a tangy sauce that works wonders on steak, contrasting the heavier flavors and textures inherent to beef.

Recipe Author: J. Kenji López-Alt and Joshua Bousel at Serious eats
Get the recipe

The Ingredients

So, here we are, and I have to find flanken-style beef ribs for a grilled short ribs recipe. Well, it turns out this cut isn’t something my usual grocery store carries. They had English cut beef ribs, which are cut parallel to the bone. Then there are flanken ribs that are cut across the rib bones, so instead of one long bone running through the meat, you get 4-5 cross-sections of bone.

Flanken style is a totally new cut for me. I had to do some (online) hunting and ended up ordering from Wild Fork. They had 3-pound packages of 4 ribs for $6.98 a pound. Not too bad, and the ribs were very meaty.

That left me to raid my pantry for the spices, vinegar, and olive oil. I had them all, so all I had to do was pick up some fresh parsley and oregano, which my regular grocery store had. Easy peasy.

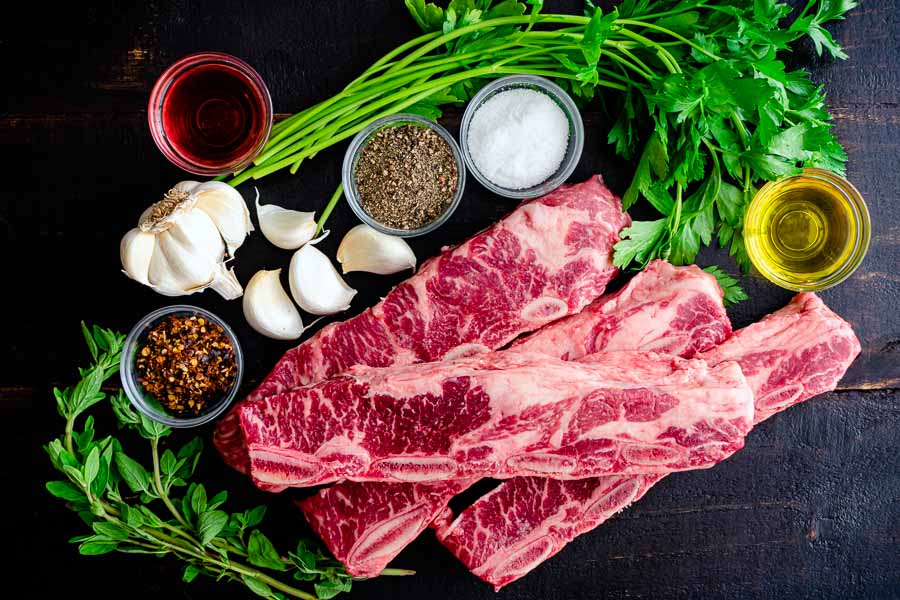
Argentinean-Style Grilled Short Ribs With Chimichurri Ingredients
Flanken beef ribs, oregano, red pepper flakes, garlic, red wine vinegar, ground pepper, kosher salt, parsley, and extra virgin olive oil

The Process

One of the reasons I selected this grilled short ribs recipe was that it sounded so easy, and it was. This recipe was actually two separate recipes, and each had its own time listed. The ribs totaled 30 minutes, and the chimichurri totaled 15 minutes. I planned for everything to take 45 minutes, but things went faster than that:

  • 7 minutes to prep
  • 10 minutes to preheat the grill
  • 11 minutes to grill
  • 28 minutes total

I could have saved a few minutes by preheating the grill while I made the chimichurri, but I didn’t realize it at the time.

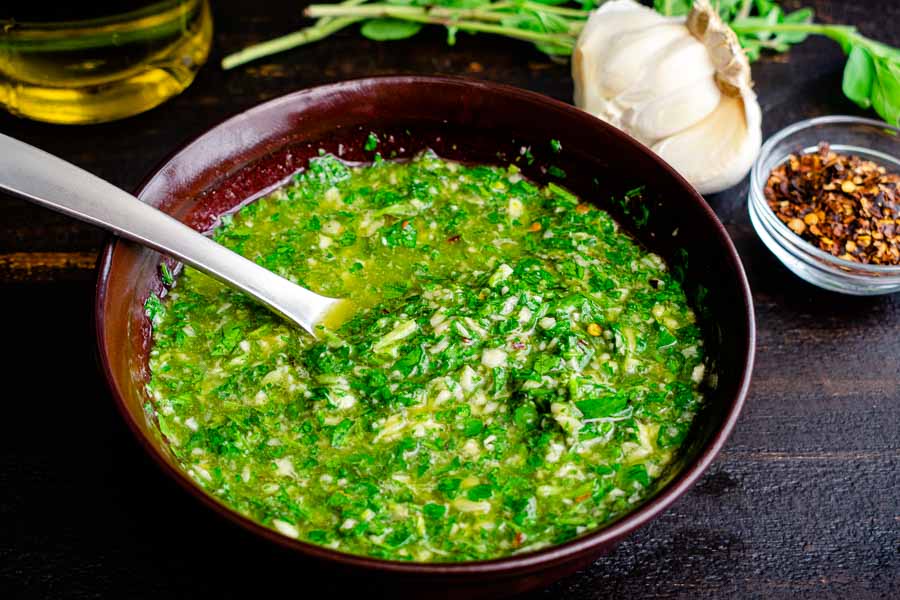
The prep work was really making the chimichurri. It’s literally adding the ingredients to a food processor and blending until smooth. I scraped down the sides with a spatula a couple of times, but that was it. The rest of the prep work was sealing the ribs with salt and pepper.

Grilling

After that, I ran outside to preheat the grill and oil the grate. I have a propane grill, so I only turned on one of the two burners per the instructions.

Freshly made chimichurri

Oh, and I need to share a new trick I came up with. We always do this back and forth shuffle when we grill because we take the raw meat out on a plate, bring the dirty plate back inside, and take a second clean plate back out for the cooked meat. It’s kind of a pain because our patio isn’t close to the kitchen, and there are plenty of obstacles between the two.

Tip: Prep your meat on nested sheet pans, and take everything outside at once. When you put the meat onto the grill, move the dirty sheet pan underneath the clean one. Then you can cook and bring everything back inside all at once.

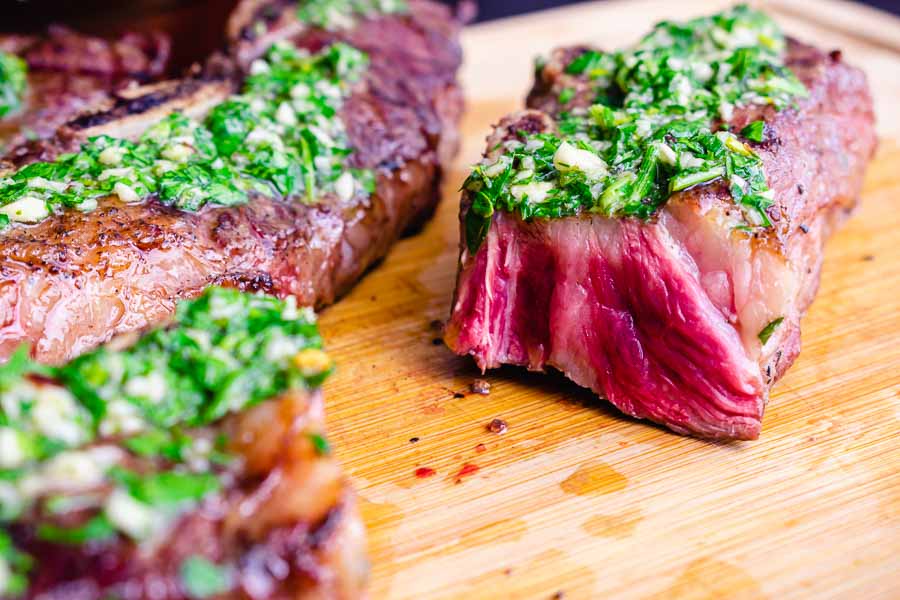
Grilling the ribs was as simple as you would imagine. I kept the lid closed as much as possible and used tongs turned the ribs about every two minutes. It took an extra minute for the meat thermometer to reach 125℉, and that was the only “difficulty” I had. Well, that and keeping my husband at bay. The smell of the ribs lured him outside and got him very interested in dinner.

The ribs were pretty rare after reaching an internal temperature of 125℉