Home Blog Page 20

Mini Eggnog Cheesecakes

0

Today is the second post from my 2021 Christmas Menu. After kicking things off with Holiday Gin & Tonic cocktails and Homemade Eggnog, I’m moving to dessert. I know, weird order, but the rest of the dinner will be posted next week. It just worked out that way, but I’m not mad about it. I got to make and photograph a cute and tasty cocktail, sweet eggnog, and these Mini Eggnog Cheesecakes this week. They’re cute, seasonal, and promise to be quick and delicious. Let’s give them a try!

Cute, creamy, delicious, simple to make, and perfect for your holiday party dessert table.

Recipe Author: Melisha at Finding Time To Fly
Get the recipe

The Ingredients

Despite this being a cheesecake holiday dessert, these Mini Eggnog Cheesecakes don’t have a lot of ingredients. What’s even better is they’re all basics that should be found in any grocery store around this time of year.

I had the sugar, flour, vanilla extract, and nutmeg in my pantry. That left me to buy Graham crackers, butter, cream cheese, and eggnog. The last one got me curious about making eggnog, and I ended up doing just that—I made this Homemade Eggnog recipe the day before I planned to bake.
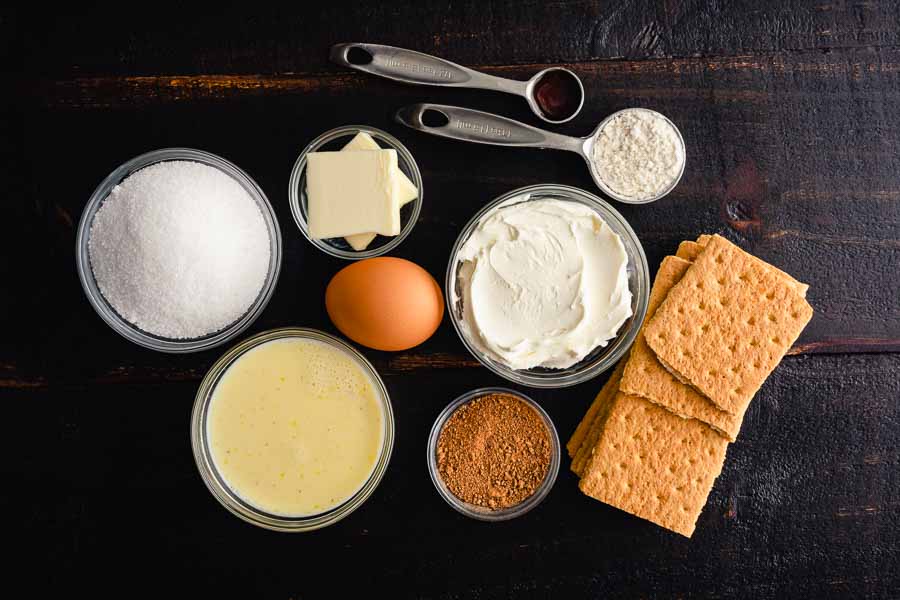
Mini Eggnog Cheesecakes Ingredients
Cream cheese, flour, vanilla extract, graham crackers, nutmeg, eggnog, egg, sugar, and butter

The Process

According to my 2021 Christmas menu these Mini Eggnog Cheesecakes are made the day before dinner, so that’s exactly how I tested the recipe. I also made this Stabilized Whipped Cream the day before to see how it held together. Here’s how my time was spent:

  • 15 minutes to prep the cheesecakes
  • 20 minutes to bake
  • 5 minutes to top with whipped cream
  • 40 minutes total

That’s 10 minutes more than the time listed and does not include time to cool. A little disappointing, but the recipe was as easy as promised.

The prep work started at the bottom with the crust, and this part took me 6 minutes. I placed 5 graham crackers into a ziplock bag, pushed out the extra air, and crushed them with a rolling pin.
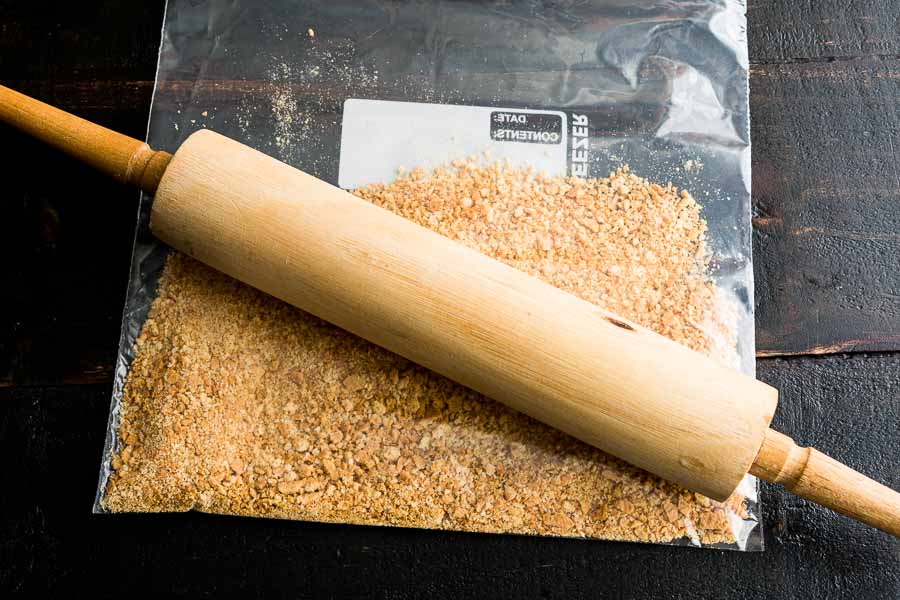
Crushing the graham crackers using a rolling pin

After that, I melted the butter in the microwave and mixed it with the crumbs in a mixing bowl. After the mixture came together, I poured about 2 tablespoons per cup and used a measuring glass to gently press it into perfect little crusts.

Pressing the graham cracker crumb mixture into the cupcake liners using a measuring glass

When I was ready for the filling, I softened the unwrapped packages of cream cheese in the microwave for 15 seconds each. Then I cut one of them in half and put the extra back into the refrigerator.

I used my stand mixer to make the filling, and it pretty much did all the work for me. Then I spooned the filling into the prepared muffin tin and baked for 20 minutes. The Mini Eggnog Cheesecakes need to cool in the pan, so I left it on the counter for a solid hour. Once it was at room temperature, I covered it tightly in aluminum foil and refrigerated the pan overnight.

While the cheesecakes were baking, I spent 6 minutes making the whipped cream. then I loaded it into a piping bag with a star tip. I stored the prepped bag of whipped cream on its side overnight with the mini cheesecakes.

It took all of 5 minutes to top the cheesecakes the next day, and that included a few practice squeezes to make sure they looked good. I don’t think it was as crisp as the day I made it (see my Homemade Eggnog post for that), but it still looked pretty darn good for whipped cream I expected to dissolve.

Oh, and I skipped the extra nutmeg topping because the eggnog and cheesecakes had plenty. I think it would have been okay, but I played it safe.

Homemade Eggnog

0

My Christmas 2021 menu is off to a good start thanks to the Holiday Gin & Tonic I just made. I do love a nice cocktail! This Homemade Eggnog wasn’t originally going to be part of my Christmas menu this year, but then I needed some eggnog… What happened was my dessert recipe needed some eggnog, and eggnog is impossible to find in September. Since I’m working so far ahead, my only option was to make it myself. Thank goodness I found this Homemade Eggnog recipe! It looks easy and promises to be the best eggnog recipe ever. Spoiler, it’s pretty damn good, and I ended up adding it to my holiday menu because it was so yummy. It’s a non-alcoholic drink recipe, but you can always change that if you’re so inclined.

The BEST Homemade Egg Nog recipe! Thick and creamy with the perfect mild flavor and hint of nutmeg. You’ll never buy store-bought eggnog again!

Recipe Author: Lauren Allen at Tastes Better from Scratch
Get the recipe

The Ingredients

All I know about eggnog is it’s made with eggs and you can find a carton of it in the dairy section in December. There are a few other things in it, but nothing that isn’t stocked in your average grocery store.

I had the nutmeg, cinnamon, salt, vanilla extract, and sugar on hand. That left me to buy some eggs, milk, and heavy cream. That was all conveniently in the dairy section, making shopping even easier. Love it!

Homemade Eggnog Ingredients
Egg yolks, milk, cinnamon, salt, nutmeg, vanilla extract, sugar, and heavy whipping cream

The Process

There are a few steps involved, but this recipe wasn’t all that difficult. The recipe lists a total time of 25 minutes, but I had my Homemade Eggnog ready in less. Here’s how my time was spent:

  • 6 minutes to prep
  • 11 minutes to cook
  • 17 minutes total (not including time to cool)

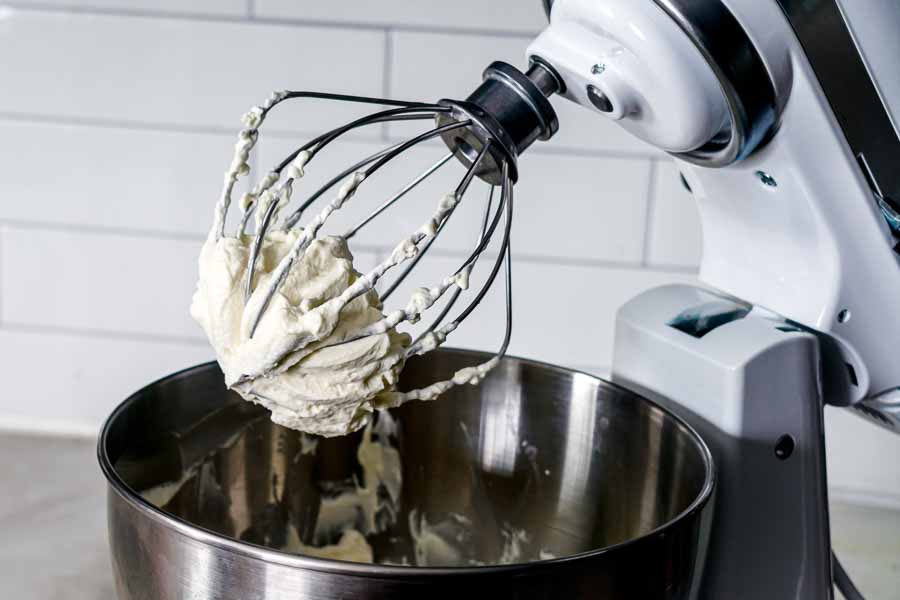
I started out by separating the egg yolks and mixing them with the sugar. My stand mixer with the whisk attachment was perfect for the job.

I started heating the milk, cream, and spices in a saucepan while the eggs and sugar mixed. Once it was close to bubbling, I ladled a few scoops into a measuring cup that had a pour spout. That made it easy to slowly pour into the egg mixture while the stand mixer was running on low speed.

Then I poured the tempered egg mixture back into the saucepan and continued to whisk until it reached 160℉. It reached that temperature quickly, and then I removed the pan from the heat and added the vanilla.

I noticed some chunks of egg yolk in the mix when I poured it back into the saucepan. It bothered me a little, so I strained the eggnog as I poured it into a pitcher (you can let the eggnog cool in the pan if you don’t have a heat-proof pitcher). Now that my eggnog was perfect, I let it stand on the counter for about an hour before covering it and refrigerating overnight.

The recipe doesn’t mention whipped cream or cinnamon sticks to garnish, but they are both shown in the recipe’s photo. I had to have them, too, so I whipped up some whipped cream. I served my eggnog in Irish coffee mugs with piped whipped cream sprinkled with cinnamon plus a long cinnamon stick. So cute!

Making fresh whipped cream for garnish

Holiday Gin & Tonic

0

It’s the beginning of December, but it’s hard to tell when you live in South Florida. Well, it’s hard to tell if you’re going by the weather, but it still feels like Christmas. I love this time of year, so I like to go all out for the big holiday dinner. I’m pretty proud of this year’s Christmas dinner menu—it’s a good one! I’m kicking it off with this Holiday Gin & Tonic. I managed to find the fillable ornaments, and I am so psyched to give this recipe a try!

This Holiday Gin and Tonic is full of the festive flavours of cranberry and clementine. This is going to be your new favourite G&T.

Recipe Author: Michelle at A Tipsy Giraffe
Get the recipe

The Ingredients

As usual, I had a few things on hand for this recipe. Sugar, simple syrup, apple cider vinegar, and orange bitters. I even had a beautiful navel orange sitting on my counter. That left me with a medium-ish list, but it wasn’t too bad.

I found all the produce at my regular grocery store. They didn’t have clementine juice, so I bought a bag of clementines to juice myself. Fresh juice is always better, so I’m kind of happy that happened.

I had to run to Total Wine for the liquor and tonic water. I tried to find the sloe gin closer to home, but it’s apparently a bit of a specialty item around here.

Holiday Gin & Tonic Ingredients
Sloe gin, orange peel, rosemary, gin, cranberries, tonic water, clementine juice, sugar, apple cider vinegar, orange bitters, simple syrup, and lemon juice

The Process

This is one of those 2-part recipes since you have to make the cranberry shrub from another recipe on this blog. I read that and immediately visualized a cranberry bush, but that’s not the kind of shrub here. This is a vinegared syrup infused with aromatics and used to flavor cocktails. Interesting premise and the idea of vinegar in a cocktail has piqued my interest!

Here’s how my time was spent:

  • 8 minutes to make the cranberry shrub
  • 2 minutes to make the sugar-frosted rosemary sprigs
  • 4 minutes to make the cocktail
  • 14 minutes total

Cranberry Shrub

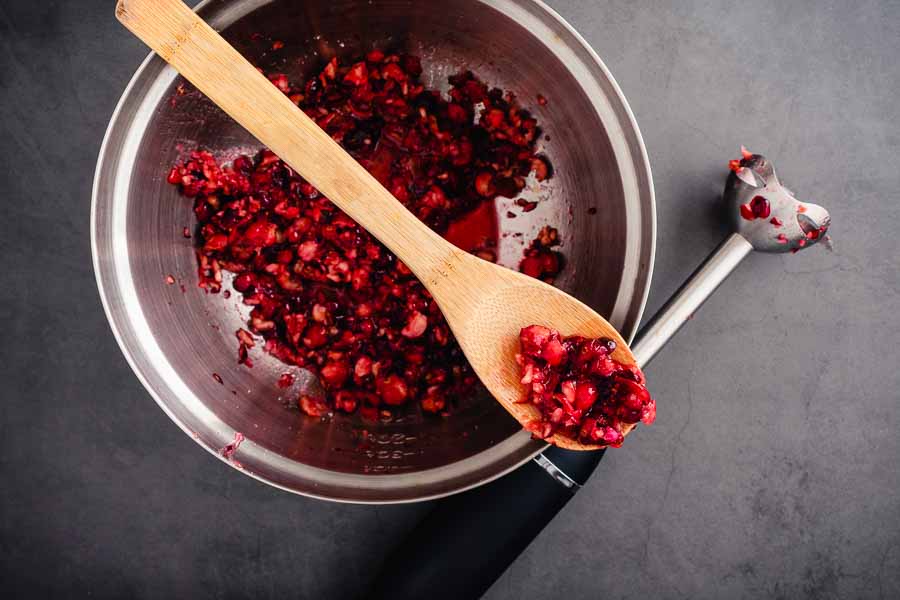
The shrub was simple and only took me 6 minutes. I put the cranberries and sugar into a mixing bowl and used my immersion blender to mix. Cranberries aren’t particularly juicy, so this wasn’t anything like blending soup or sauce. Instead, I had to set it into the cranberries, pulse, then lift and repeat in another area.

The recipe does mention this can also be done in a food processor, and I was tempted to try that. The only thing that stopped me was that it’s hard to keep from over-blending. The immersion blender was much more controlled, only took a few minutes, and had less clean-up.

Once the cranberries and sugar were blended, I used a vegetable peeler to peel the orange. The recipe specifies no pith with the peel, so simply peeling it as if I were going to eat it would not have worked. The pith is bitter, and I’m guessing the flavor would ruin the shrub.

The final step was stirring in the apple cider vinegar. I transferred the mixture from a mixing bowl to a sealed container and made sure to stir it daily for a week. It saved some space versus the mixing bowl and kept my refrigerator from smelling like apple cider vinegar.

After a week, I strained the shrub once with my regular mesh strainer, and again with my fine cocktail strainer. It removed the tiny cranberry seeds I didn’t realize were there and gave me a perfectly smooth shrub.

Making the cranberry shrub with an immersion blender

Sugar-Frosted Rosemary Sprigs

Making the cocktail started out with the frosted rosemary sprig garnish. I didn’t follow the instructions to the letter. Instead, I used a shallow bowl for the simple syrup and the sugar.

First, I placed three rosemary sprigs into one bowl and poured the simple syrup over them. I also used my fingers to swish them around a little since ended up floating in the syrup.

Once the rosemary was thoroughly wet, I put it into a second shallow bowl and poured the sugar over it. I didn’t think it was frosted enough, so I sprinkled on more sugar until I was happy. Then I placed both sprigs onto a wire cooling rack with a paper towel underneath. The sugar gets everywhere, even with the slightest bump!

Holiday Gin & Tonic

The actual cocktail might have been the easiest part of this whole process. I started things off by juicing two clementines and a lemon. Then I filled a mixing glass with ice cubes, measured in everything but the tonic water, and gave it a good stir.

I originally thought I would serve the cocktail inside a martini glass in a fillable ornament with tonic water at the ready to pour in afterward. Unfortunately, the cocktail didn’t fill the ornament all the way, and it just didn’t look right (see below).

Instead, I decided to mix the cocktail with tonic water and filled the ornaments to the max. Way cuter! A funnel made it easy to fill three fillable Christmas ornaments, and I served each in a champagne saucer filled with frosted cranberries and a frosted rosemary garnish. I loved this version!

The recipe did include instructions to frost the rosemary, but I used the method in the recipe below. I tried the recipe’s method, but dipping the rosemary in simple syrup and immediately coating it in sugar made things drippy. My recipe takes longer, but allowing the simple syrup to dry first and makes the sugar frosting last without clumping.

Holiday Gin & Tonic
My original idea was to serve the ornament filled with the cocktail without tonic water
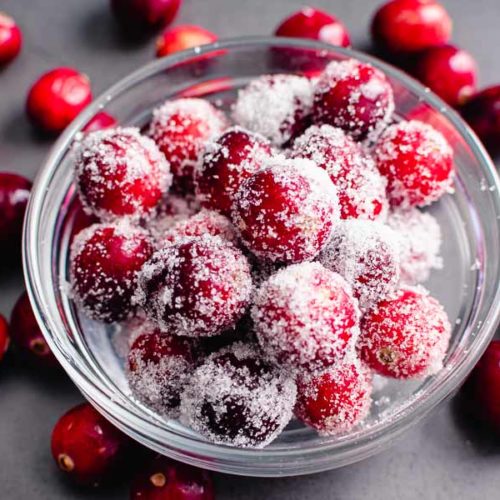
Sugared Cranberries

Sugared Cranberries (No cooking required!)

The Hungry Pinner
Sugar-covered cranberries make a festive Christmas garnish for drinks, desserts, and more! This method can be used with other types of fruit too. Try it with strawberries, blueberries, grapes, etc.
Prep Time 10 minutes
Dry 1 hour
Total Time 1 hour 10 minutes
Course Garnish
Servings 1 cup

Equipment

  • mixing bowl
  • slotted spoon
  • wire cooling rack

Ingredients
  

  • 1 cup fresh cranberries
  • 1 cup sugar
  • ½ cup simple syrup * See notes

Instructions
 

  • Place cranberries into a small mixing bowl. Pour the simple syrup over them and stir to thoroughly coat each cranberry.
  • Using a slotted spoon, remove the cranberries from the bowl and place them onto a wire cooling rack. Allow to dry for at least 1 hour.
  • Pour half the sugar into a small mixing bowl that is completely dry. Add the cranberries, then pour the rest of the sugar over them. Gently stir to ensure all the berries are coated with sugar.
  • Remove the cranberries with a slotted spoon. Use immediately or store refrigerated in an airtight container for 2-3 days.

Notes

*Simple syrup can be bought ready-made or easily made at home with this Simple Syrup recipe.

Roasted Garlic and Rosemary White Bean Dip

Sometimes I feel like I’m getting into a recipe rut. It happens, but breaking out of them can be fun. Once I realize I’m in a recipe rut, I start looking for a way to get out of it. That can mean stretching my tastes and/or skills or just making something I haven’t had in a long time. Well, I recently found myself in a bit of a rut, and I went right to Pinterest to break out of it. I stumbled on this Roasted Garlic and Rosemary White Bean Dip, and I had an aha! moment. I haven’t made a dip since 2018 when I blogged Carrabba’s Bread Dipping Oil. That is about to change, and my rut is officially over!

This scrumptiously creamy Roasted Garlic and Rosemary White Bean Dip is loaded with flavor and simple to prepare. Roasted garlic is pureed with cannellini beans, fresh rosemary leaves for a creamy addictive dip. Serve with toasted naan or pita for a crispy way to dip.

Recipe Author: Laurie at Simply Scratch
Get the recipe

The Ingredients

This recipe only has a few ingredients, so it’s important to make them count. I had to buy a few things like cannellini beans, garlic, and rosemary. The rest was waiting in my pantry.

I always keep extra virgin olive oil and regular olive oil on hand. This recipe says olive oil, but I switched it to EVOO. I normally follow recipes I blog to the letter, but when I use olive oil as a garnish (per the instructions), I like EVOO. It has so much more flavor than regular olive oil.

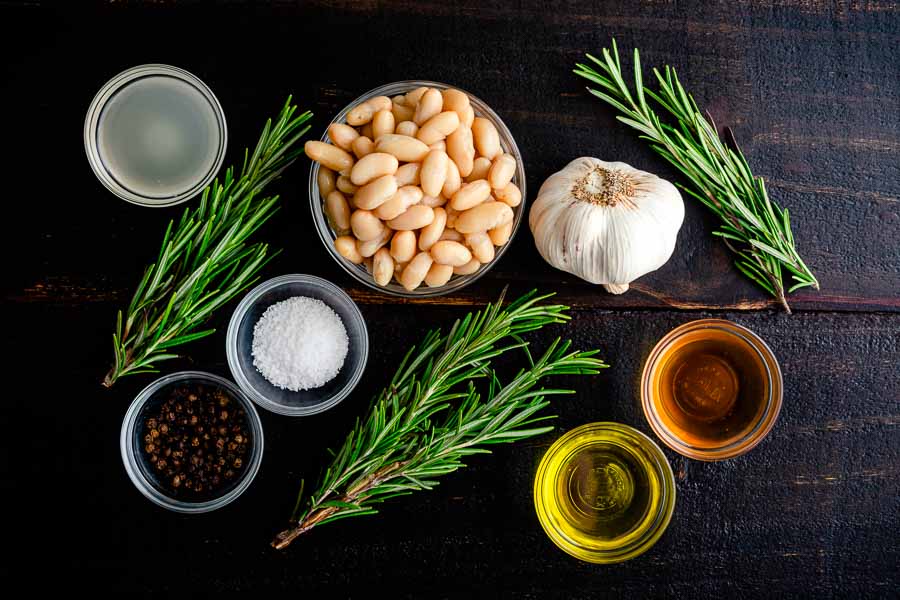
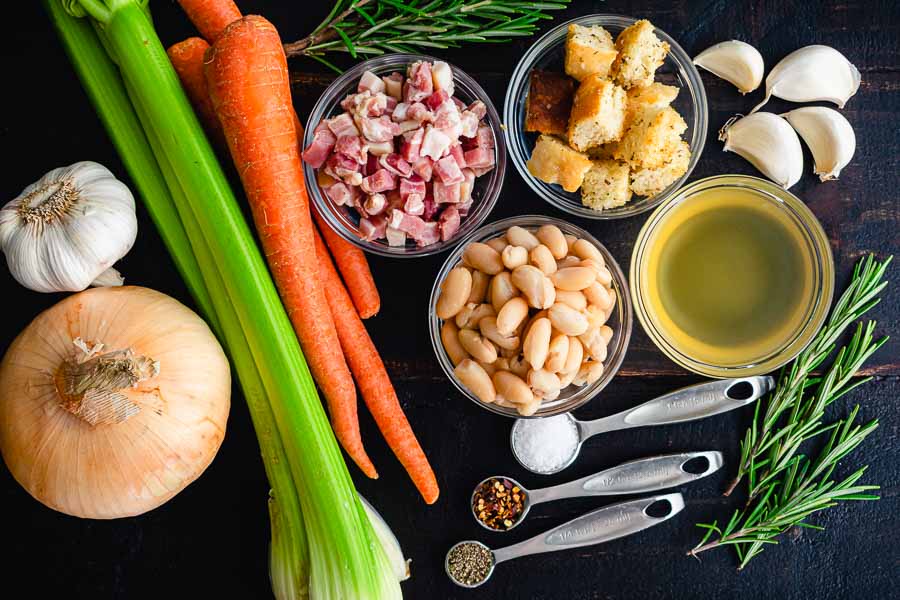
Roasted Garlic and Rosemary White Bean Dip Ingredients
Cannellini beans, garlic, rosemary, red wine vinegar, olive oil, salt, pepper, and chicken broth

The Process

Making this dip was simple to do with a good blender. It took me just a hair longer than the 35 minute time listed. Here’s how my time was spent:

  • 2 minutes to prep the garlic
  • 20 minutes to roast the garlic
  • 10 minutes to cool the garlic
  • 7 minutes to make the dip
  • 39 minutes total

Roasting the Garlic

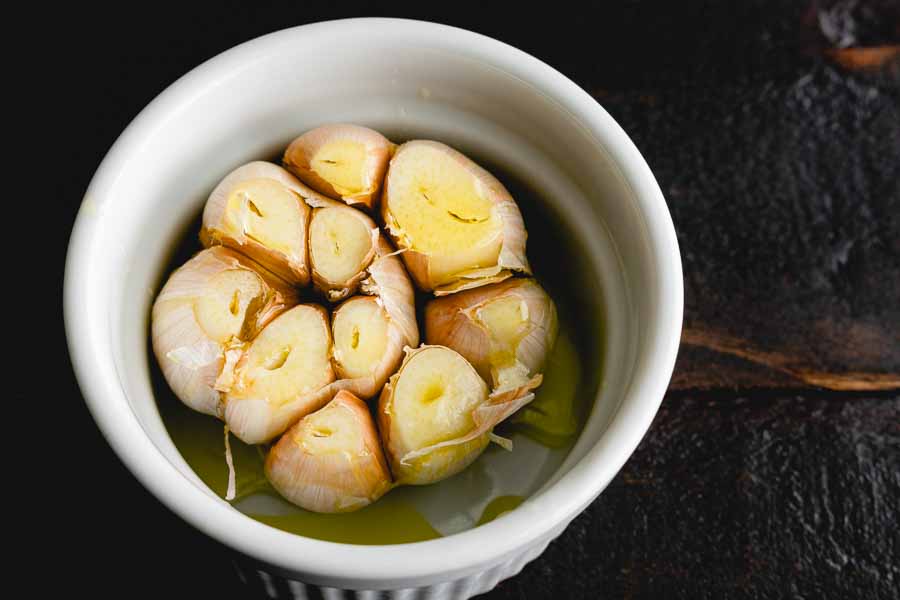
It was no surprise that the first step in making this Roasted Garlic and Rosemary White Bean Dip was roasting the garlic. What was surprising was how it was done. I’m so accustomed to trimming the ends of a garlic bulb, placing it into a ramekin, drizzling it with olive oil, wrapping it in foil, and roasting it for about 45 minutes (shown below).

Getting ready to roast a head of garlic in extra virgin olive oil using a small ramekin
This is how I usually roast garlic, plus a foil cover over the dish

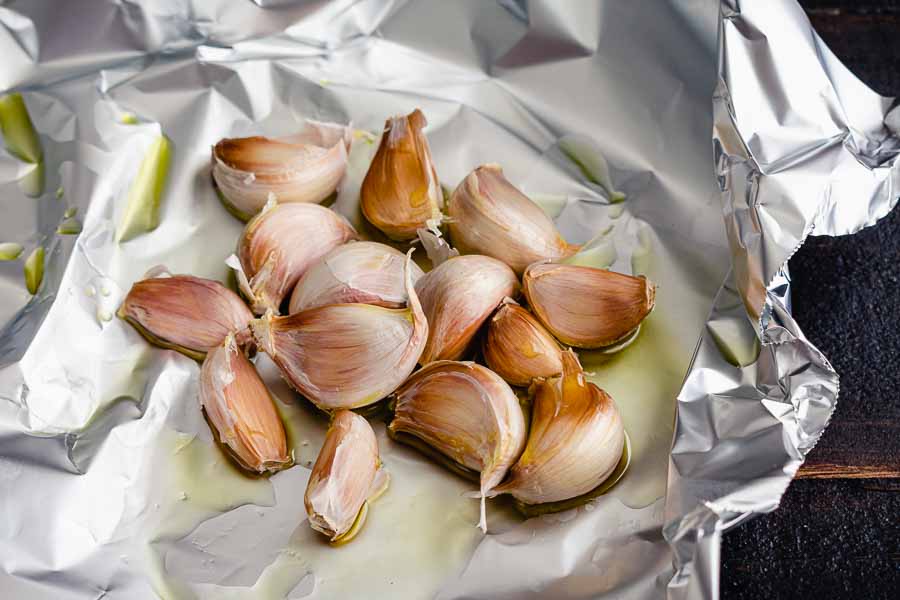
However, that’s not how the instructions said to do it. Instead, they say to break up a head of garlic without peeling the cloves. Then place the cloves on some aluminum foil, drizzle with olive oil, close the foil, and roast.

Besides the difference in the container, the time was also about half: 20-25 minutes versus the usual 40-45. Do you mean I can roast garlic in half the time? I have to try this! I did as instructed, except I used my toaster oven instead of heating my regular oven for this tiny parcel. It worked perfectly!

Garlic cloves drizzled in olive oil
Garlic cloves drizzled in olive oil before roasting

Finishing Up & Serving

Once the garlic cloves were cooled, after 10-15 minutes, they were very easy to peel. The rest of the recipe was simply placing the ingredients into a blender and pressing a button. Well, I did have to chop some rosemary while the garlic was roasting, but that was super quick.

I served the dip with lightly salted pita chips and thought it was quite good. Then I had the leftovers over the next day or two, and wow! What an improvement just sitting in the refrigerator made. The flavors melded, and the dip became positively addictive.

Creamy White Bean Soup With Rosemary & Pancetta

0

There’s just something about this time of year that calls for a nice stew or soup for dinner. It’s not cold here in Fort Lauderdale, but I think my brain doesn’t know the difference. Maybe it’s constantly running the air conditioner that tricks me into thinking it’s cold? Nah! Still, I want soup, and this Creamy White Bean Soup With Rosemary & Pancetta sounds irresistible. Plus, I don’t think I have ever cooked with pancetta, bacon’s unsmoked cousin, so I’m excited to give this recipe a try.

A Tuscan inspired soup hearty enough to be a main course.

Recipe Author: Deborah Mele at Italian Food Forever
Get the recipe

The Ingredients

The ingredients for this Creamy White Bean Soup With Rosemary & Pancetta are on the long-ish side, but nothing was difficult to find. I only had a few of the spices on hand, so I had to shop for most everything. However, nothing was difficult to find at my regular grocery store.

Onions, carrots, celery, etc. are everyday items for me. The only thing I wasn’t familiar with was pancetta. I’ve heard of it, but I’m not sure if I have ever cooked with it. Fortunately, I found a 4-ounce package of diced pancetta for $5.99. It was just barely enough for this recipe, so nothing went to waste.

FYI, I went with canned cannellini beans instead of going to the trouble of soaking and cooking dried beans. I have my limits, and that’s one of them. Why add hours to a recipe if you don’t have to?

Finally, I had half a loaf of homemade French bread, so I skipped buying Italian bread at the store. They’re so similar, and I found my French bread worked perfectly for croutons.

Creamy White Bean Soup With Rosemary & Pancetta Ingredients
Cannellini beans, pancetta, French bread, garlic, chicken broth, rosemary, salt, chili flakes, pepper, carrots, celery, and onion

The Process

The first thing I noticed about this recipe was that it called for a stockpot. I have one, but I rarely use it. I prefer to make soup in a Dutch oven because it has shorter sides than a stockpot and that makes stirring and sauteeing easier. My stockpot is 8-quarts, so I was expecting a huge batch; however, I think my 5-quart Dutch oven would have worked (I’ll have to test the theory one of these days!).

Once the pot was sorted, I got started on my prep work. The pancetta was conveniently pre-diced, but the rest of the vegetables weren’t. No worries, though, because 14 minutes later, I had everything prepped and measured so I could get cooking.

The instructions were easy to follow, and I had a wonderful smelling soup simmering on my stove. That meant I was ready to get started on the croutons, so I grabbed a medium-sized skillet and got back to work.

The croutons were very simple and were done before the soup. I set them aside and a few minutes later the soup was ready to be pureed. I ladled half of it into a large mixing bowl and used an immersion blender to puree it. Then I returned it to the pot, gave it a good stir, and it was ready to serve up.

The total time spent on this recipe was 53 minutes, which was right in line with the 50 minutes listed.

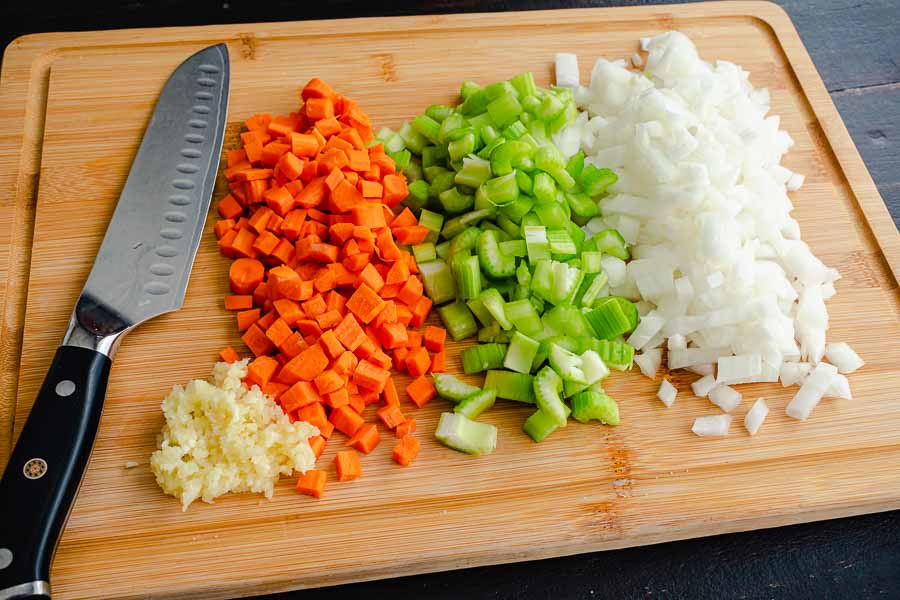
Minced garlic with finely chopped carrots, celery, and onions
Diced garlic, carrots, celery, and onions

Healthy Gluten-Free Apple Crumble Breakfast Parfait

0

After all that heavy but delicious holiday food, I thought it would be nice to try something on the healthy side. Well, a quick search of my Pinterest boards for the word ‘healthy‘ brought me to this tasty treat. How good does a Healthy Gluten-Free Apple Crumble Breakfast Parfait sound? Frankly, it sounds like a dessert to me, but I’m not opposed to a treat in the morning once in a while. So let’s find out if this breakfast/dessert is as good as it sounds.

This gluten-free Apple Crumble Breakfast Parfait tastes like dessert for breakfast, but it’s a healthy option to start your day.

Recipe Author: Elaine at Flavour & Savour
Get the recipe

The Ingredients

Ah, simple recipes. I’m not gonna lie and tell you I’m all Martha Stewart 100% of the time. Not even close! Who has the time? No, simple recipes are the bulk of what I make, and this Healthy Gluten-Free Apple Crumble Breakfast Parfait only has five ingredients. Five!

I had the kosher salt (always, it’s a kitchen staple) and the coconut palm sugar. I originally bought a bag of coconut sugar to make Cardamom Cinnamon Turmeric Iced Tea, and I’m just about done with the bag as of this recipe. It’s not quite as sweet as granulated white sugar, but it does have a nice and unique flavor. If you don’t have it, good old-fashioned brown sugar will also work.

This recipe calls for butter or oil, so I opted for coconut oil. I had butter, but coconut oil seemed like a good choice since I was already using coconut palm sugar.

That left me to buy plain Greek yogurt (I chose fat-free), apple-cinnamon granola, and apples. All were stocked at my usual grocery store, so no special orders were needed. The apple-cinnamon granola even had chunks of freeze-dried apple in it!

I decided on Fuji apples because of their mellow taste and medium texture, but any type will do here. They are ultimately sauteed until they are soft, so they don’t need to be especially crisp like granny Smith apples (although I do love a nice granny Smith!).

Healthy Gluten-Free Apple Crumble Breakfast Parfait Ingredients
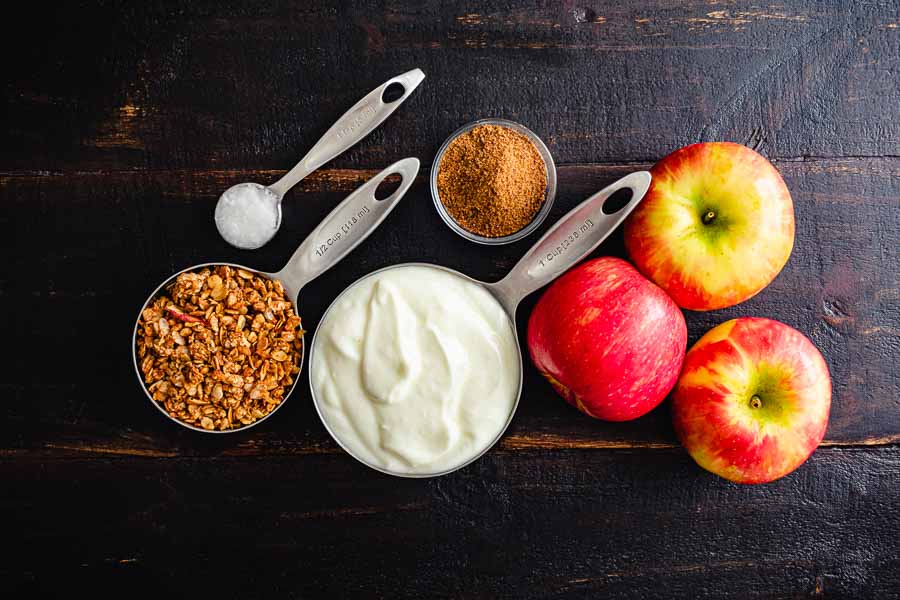
Apple cinnamon granola, coconut oil, coconut palm sugar, plain Greek yogurt, and Fuji apples

The Process

I’m so not a morning person, sp my morning routine is very simple. Feed my bunny Louie, then feed me as I read the news with the TV in the background. I like to make myself smoothies for breakfast since they are very simple, and that’s all my sleep-deprived mind can handle.

Complicated breakfasts are saved for the rare days that I can get out of bed and go somewhere (and I mean rare!). That’s why this Healthy Gluten-Free Apple Crumble Breakfast Parfait was ideal for me.

The first step in this recipe is prepping and sauteeing the apples. I decided to peel mine, but peeling is optional. In fact, I’m not sure I needed to take the time and effort with the thin-skinned Fuji apples.

Then it was into a 12-inch skillet to sautee for 3 minutes. I liked that size because it had plenty of room to spread the apples into a single layer and stir them. After that, I added the coconut palm sugar, gave the apples a good toss or two to coat, and removed them from the heat. Tip: I put the apples on a gel ice pack to cool them quickly. I keep one in the freezer just for cooling food.

Now it was time to put my parfaits together. Talk about easy! I just scooped in 1/4 of the apples, granola, yogurt, and another 1/4 of the apples. Then I sprinkled on a little extra granola, and voila! Two beautiful apple crumble breakfast parfaits in cute Irish coffee mugs.

My total time was 10 minutes, exactly what was listed in the recipe. I ate one immediately and put the other into the refrigerator for the next day. I had to test the author’s claim that it would stay crispy overnight, and it did.

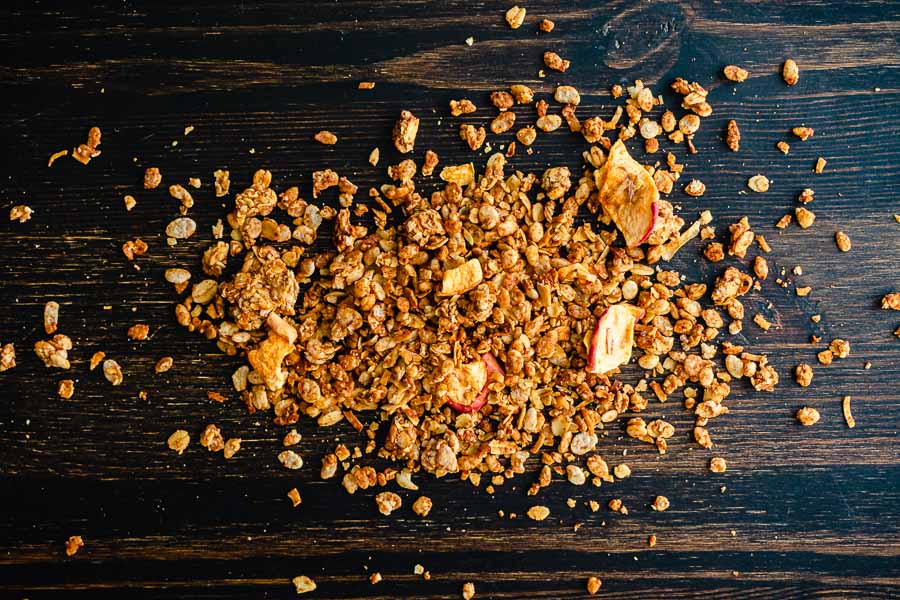
The apple cinnamon granola I bought had bits of dried apple mixed in

Pecan Pie Bites

0

I make my Thanksgiving menu months ahead of the big day, and I thought I had this one worked out ages ago. I planned to make pecan pie cupcakes, but the closer it got to baking time, the less I wanted to make them. It wasn’t because I wasn’t looking forward to eating them—I was just exhausted, and making 36 cupcakes and buttercream frosting from scratch sounded like climbing a mountain. Then I stumbled on this Pecan Pie Bites recipe the night before I was planning to bake, and I went for a last-minute menu change. It was the best idea!

The stress of baking a fresh pecan pie on Thanksgiving is unnecessary. These bites are so simple to whip together with very little forethought. Crescents provide a buttery flaky crust for the classic pecan pie filling. It’s a Thanksgiving miracle.

Recipe Author: Makinze Gore at Delish
Get the recipe

The Ingredients

I usually have a few things on hand, but I had almost everything in my pantry and refrigerator. Yay!

A quick search through my pantry and I found brown cooking spray, sugar, vanilla extract, kosher salt, and pecan pieces. The recipe does call for roughly chopped pecans, and I was planning to buy pecan halves and chop them myself. This saved me a step.

My refrigerator was holding onto some butter, the egg, and a bottle of corn syrup. It ended up there after I opened it, and it was still perfectly good. All I had to do was set it on the counter to warm to room temperature.

The only thing I had to buy was the tube of crescent rolls. This part seemed easy, but it turns out I bought the wrong size. I had no idea crescent rolls come in 8- and 12-ounces. I bought the 12-ounce tube (the “Grands!” label should have clued me in), but the recipe calls for the 8-ounce size. No biggie—it all worked out.

Pecan Pie Bites Ingredients
Pecan pieces, corn syrup, crescent roll dough, brown sugar, egg, vanilla extract, cooking spray, kosher salt, and butter

The Process

This recipe looked so easy in the video and the 5-minute prep time seemed too good to be true. Well… it was. That’s not to say this recipe wasn’t easy! This is how my time was spent:

  • 14 minutes to prep
  • 15 minutes to bake
  • 30 minutes to cool
  • 30 minutes to refrigerate
  • 1 hour 29 minutes total

The dough was the most difficult part, and some of that is on me. I think the shape of the dough I bought was more rectangular than the dough from the video. I noticed that as I rewatched the video a couple of times so I could see how the dough was cut into 24 squares. (Here’s a clearer guide to cutting the dough.)

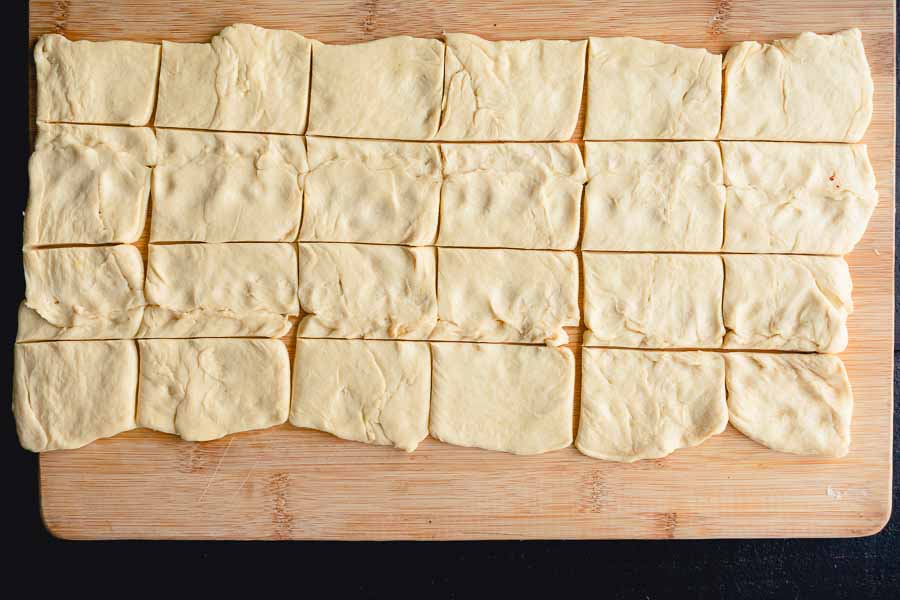
Crescent roll dough cut into (sort of) squares

I did it wrong the first time and ended up with 18 pieces. But the dough is forgiving, and I was able to pinch it closed and re-cut it. The pieces were more rectangular than square, but I was able to stretch them a bit as I placed them into the mini muffin tin.

Next up was mixing the filling, and that was super easy. Literally, put everything into a mixing bowl and stir to blend. I used a small spoon to fill each cup, and I ended up with something that looked a lot like the video.

Pecan Pie Bites before baking

All the work was done, and it was time to bake my Pecan Pie Bites. I started off at 15 minutes, and that was perfect. Unfortunately, the reality is messier than Pinterest videos, and the filling bubbled over. A lot.

I left the pan cool for 30 minutes, and slowly removed each bite. The baked-on filling was still flexible, and I gently pried off the difficult spots with a paring knife. Tip: Don’t wipe off the extra cooking spray before baking. I did (I was trying to be neat), but it would have helped with the removal situation. I didn’t time this part, but it took me a lot longer than I imagined.
Pecan Pie Bites after baking

Bourbon Sweet Potato Casserole with Sweet ‘n’ Savory Bacon Pecans

0

Every Thanksgiving dinner menu needs some awesome sides, and one of those dishes needs to be potatoes. It’s a must, but there are a lot of options. Mashed potatoes are pretty standard around here, but I decided to switch it up this year. I decided to go with sweet potatoes when I came across this Bourbon Sweet Potato Casserole with Sweet ‘n’ Savory Bacon Pecans recipe. I know, it’s a long name, but that name is chock full of wonderful things. Let’s find out if this sweet potato casserole tastes as good as it sounds!

The classic sweet potato casserole we know and love, but topped with sweet and savory bacon pecans.

Recipe Author: Tieghan at Half Baked Harvest
Get the recipe

The Ingredients

As the name implies, there are quite a few ingredients in this recipe. None of them were hard to find or expensive, though. As usual, I did have a few things on hand like the bourbon, vanilla extract, spices, flour, and eggs.

I hit up my usual grocery store for most everything else. I could have gotten the bacon from there too, but I decided to get it at Wild Fork (where I bought my turkey). Their Applewood Smoked Berkshire Thick Uncured Bacon was the only thick-cut bacon they had, but I was very happy with it.

Bourbon Sweet Potato Casserole with Sweet ‘n’ Savory Bacon Pecans Ingredients
Sweet potatoes, bourbon, egg, brown sugar, egg, cinnamon, cayenne pepper, bacon, pecan pieces, salted butter, milk, sage, flour, rosemary, and vanilla extract

The Process

This Bourbon Sweet Potato Casserole can be made up to two days ahead, so that’s exactly what I did. Make-ahead Thanksgiving dishes are wonderful! Spreading the work over a few days saves me every year. Here’s how my tie was spent on this recipe:

  • 1 hour to bake the potatoes
  • 29 minutes to prep
  • 35 minutes to cook
  • 2 hours 4 minutes total

That was a little more than the 1 hour 50 minutes listed, but not by much.

Prepping the Sweet Potato Casserole

Baking the sweet potatoes for an hour kicked things off. Then I cut them in half and set them aside to cool while I prepped the pecan topping. Cooking the bacon is the first step here, and I made sure mine was extra crispy.

While the bacon drained, I mixed up the rest of the ingredients in a mixing bowl. Then I chopped the drained bacon and added it to the mix.

The potatoes were cooled by the time the topping was done, so I peeled the skins away and mashed them up. Like the topping, the next step was to mix in the rest of the ingredients.

With the filling and topping done, I moved on to the assembly. I spooned the mashed sweet potatoes into a baking dish and topped them with the pecan-bacon mixture. Then I wrapped the dish with a couple of layers of plastic wrap and popped it into the refrigerator.

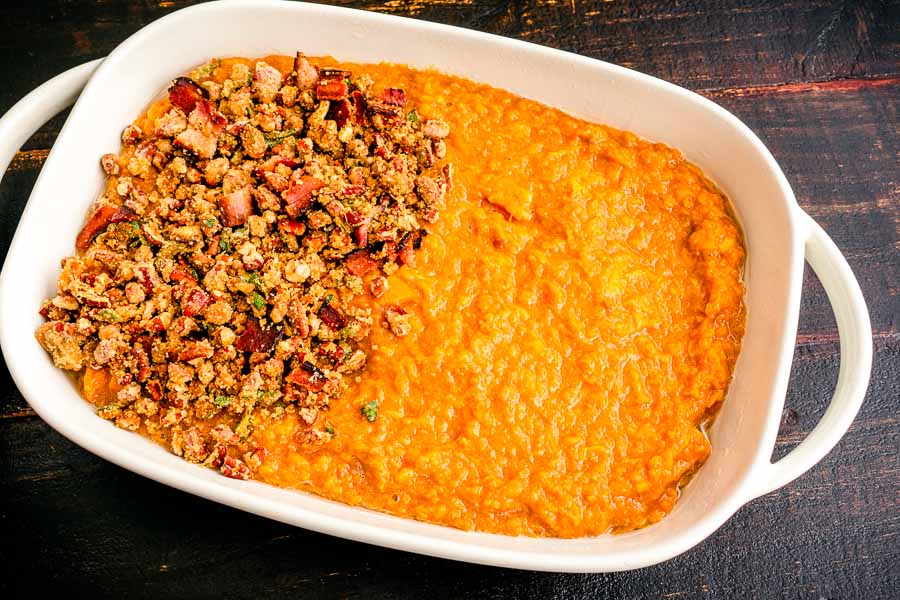
Topping the mashed sweet potatoes with the bacon-pecan mixture

Cooking the Sweet Potato Casserole

On the day of dinner, this was the easiest dish to prepare. Well, next to the cranberry sauce, but all I had to do was take that out of the refrigerator! okay, I did have to wait 11 minutes for my oven to preheat and unwrap the dish, but that’s not exactly difficult.

Then it was into the oven to bake for 35 minutes, and I worked on prepping the Bacon Wrapped Sausage Stuffing while the casserole cooked. Once it was done, I transferred it to my oven’s warmer drawer until dinner was ready to serve. It was piping hot, and the topping was nice and crunchy.

Bacon Wrapped Sausage Stuffing

0

Thanksgiving is in full swing, and the turkey was not only beautiful but juicy and easy to make. Next up on this year’s Thanksgiving menu is the stuffing. No Thanksgiving dinner is complete without it! After scrolling through Pinterest, I noticed a lot of stuffing recipes include sausage. That’s not something we eat often, but I decided to give it a try. I settled on this Bacon Wrapped Sausage Stuffing recipe because bacon. I can’t turn down bacon, and working it into the biggest meal of the year was irresistible. Let’s get into it!

This recipe is not just for holiday dinners, it’s so good you’ll be eating this all year round.

Recipe Author: Erren Hart at Erren’s Kitchen
Get the recipe

The Ingredients

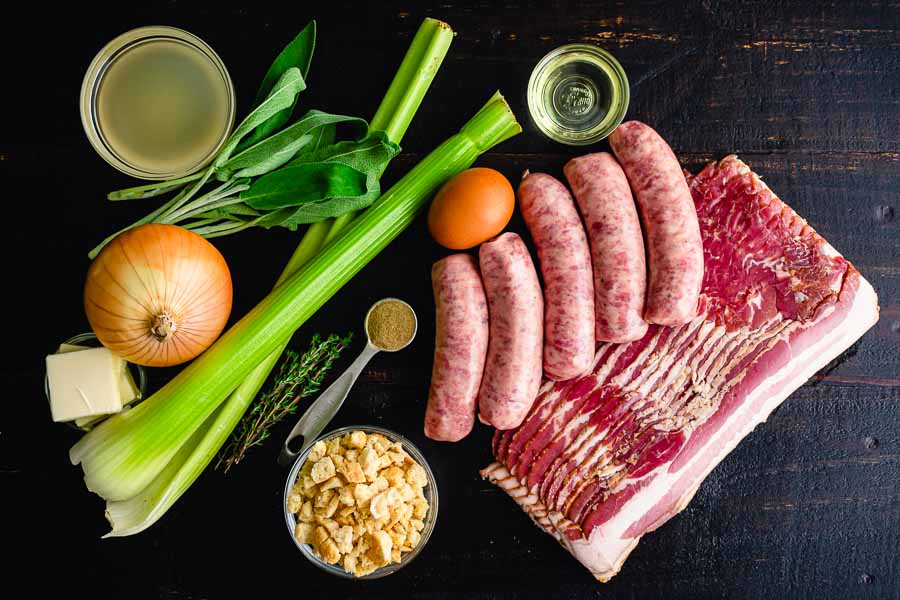
This recipe is all about the bacon and sausage, so I made sure to get something special. Since I had to go to Wild Fork for my turkey, I also got the bacon and sausages there. I chose their Argentinian Style Pork Sausages and Original Country Bacon. One package of each was exactly enough for this recipe.

Bacon Wrapped Sausage Stuffing Ingredients
Breadcrumbs, poultry seasoning, thyme, celery, butter, onion, chicken stock, sage, olive oil, egg, sausage, and bacon

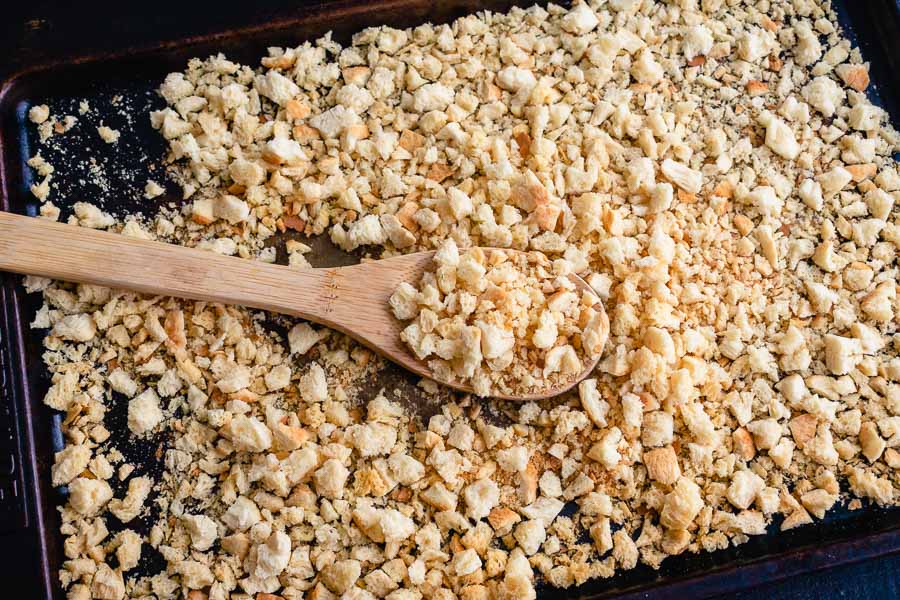
Everything else I needed to buy was available at my regular grocery store except the large bread crumbs. All they had were the finely milled bread crumbs, so I made my own using Jessica Gavin’s Homemade Bread Crumbs recipe. It was easy to do, and I made them a few days before the dinner using bread I already had.

Homemade breadcrumbs
I made homemade breadcrumbs because store-bought breadcrumbs were too fine

The Process

With my ingredients in hand, it was time to make the Bacon Wrapped Sausage Stuffing. I’m not gonna lie, I was really looking forward to this! Things didn’t go totally smoothly, though, but it all worked out in the end. Here’s how my time was spent:

  • 31 minutes to prep
  • 1 hour 15 minutes to cook
  • 1 hour 46 minutes total

That was a lot longer than the 1 hour 10 minutes listed. Let’s talk about it.

Prepping the Stuffing

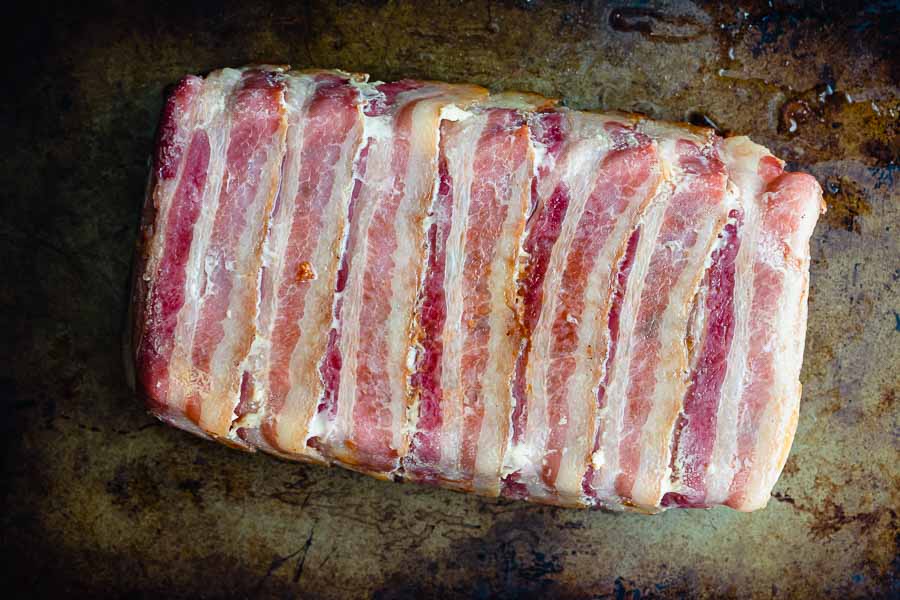
The first step was to line a loaf pan with strips of bacon, making sure there were no gaps. There isn’t a photo of this in the recipe, so I had to refer back to the blog post to see how it was done. It was actually quite easy. Tip: Although my pan was nonstick, I still sprayed the inside with canola oil. This ensured the bacon wouldn’t stick and helped it adhere to the sides.

Next up was cooking the sausages. I stripped off the casings and started cooking them in a large saute pan. The recipe doesn’t say it, but the sausage needs to be crumbled. I referred back to the post to make sure.

With the sausage cooked and set aside, it moved on to the stuffing. This part went smoothly, except the instructions don’t mention what to do with the cooked sausage. Again, I checked the blog post and saw a photo of it added to the stuffing mixture right after the bread crumbs and chicken stock.

This is where things started going off the rails. My homemade breadcrumbs seemed to disappear once they got wet. The stuffing was all sausage. I added an extra cup of bread crumbs, and things looked better. Not perfect, but better.

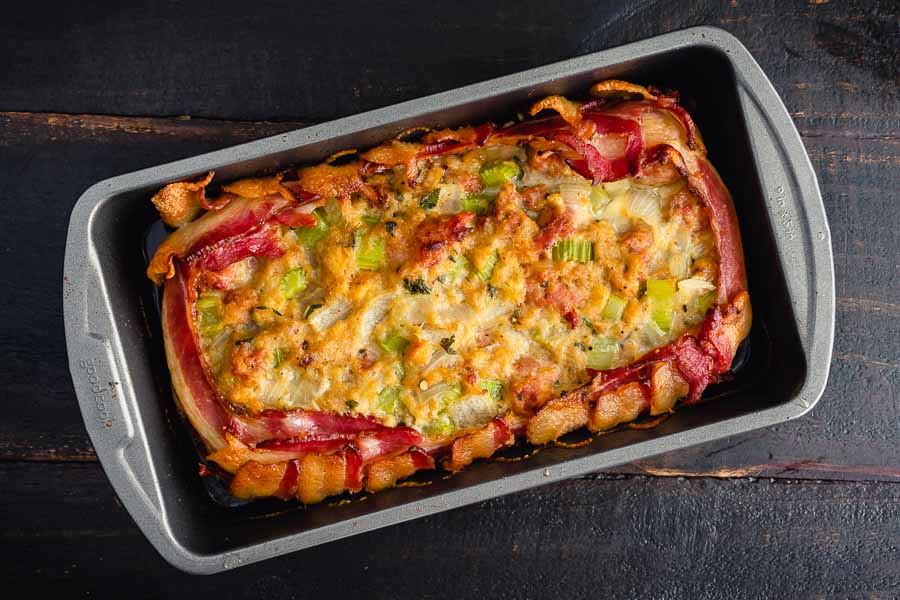
The stuffing looked like it was fully cooked after 45 minutes

Cooking the Stuffing

After letting the stuffing cool and mixing in an egg, I added it to the prepared loaf pan, turned down the edges of the bacon, and popped the stuffing into the oven for 45 minutes. It looked done when I removed it from the oven, so I cranked the temperature up to 400℉ and started roasting the turkey.

There was a lot of grease in the pan, so I gently tipped it and let that drain out. Then I turned the Bacon Wrapped Stuffing onto a sheet pan and saw that the bacon on top was still mushy. This was mild panic time, and it took a while to fix.

The bacon had not crisped after 45 minutes

First, I put the stuffing back into the loaf pan and put it into the oven with the turkey. I checked it at 5-minute intervals for 10 minutes and didn’t see much of an improvement. It was apparent that the bacon was not going to crisp this way.

My new air fryer/convection oven came to my rescue! I lined its sheet pan with foil, sprayed that with canola oil, and turned the stuffing loaf onto it. Then I put the stuffing into the air fryer for 10 minutes on the roast setting at 350℉. Things started looking better, but it took a total of 20 minutes to get the browned and somewhat crisp stuffing in the main photo.

The stuffing held together pretty well through all this. Once corner started to come apart, but I was able to tuck it back in and it wasn’t noticeable.

Roast Turkey In A Bag

Thanksgiving is almost here, and that means it’s time for a turkey post! I love this time of the year, and Thanksgiving is one of my favorite holidays. It’s so nice to cook a big dinner and get together with friends and family, especially after the past couple of years. Like last year, I have come up with a Thanksgiving menu complete with a list of groceries, equipment, and a schedule. I’m hoping it will be even better than last year’s, but that’s a tall order. Let’s find out by kicking things off with this Roast Turkey In A Bag. It promises to make the meal’s centerpiece super easy with absolutely no basting required. Sounds too good to be true, I know, but let’s find out if it works.

Roast Turkey In a Bag is a fool proof way to bake a delicious, juicy, and tender turkey. No dry meat here! Enjoy this yummy turkey this Thanksgiving and holiday season!

Recipe Author: Melanie at Garnish and Glaze
Get the recipe

The Ingredients

This recipe is simple, and the ingredients were not at all unusual. What was unusual was that I didn’t have anything by the pepper on hand. I had a little shopping to do, but it was easy.

I went with a 13.46-pound pre-brined frozen turkey from Wild Fork Foods. It was lovely and very budget-friendly at $26. The rest of the ingredients were easily found at my regular grocery store.

Roast Turkey In A Bag Ingredients
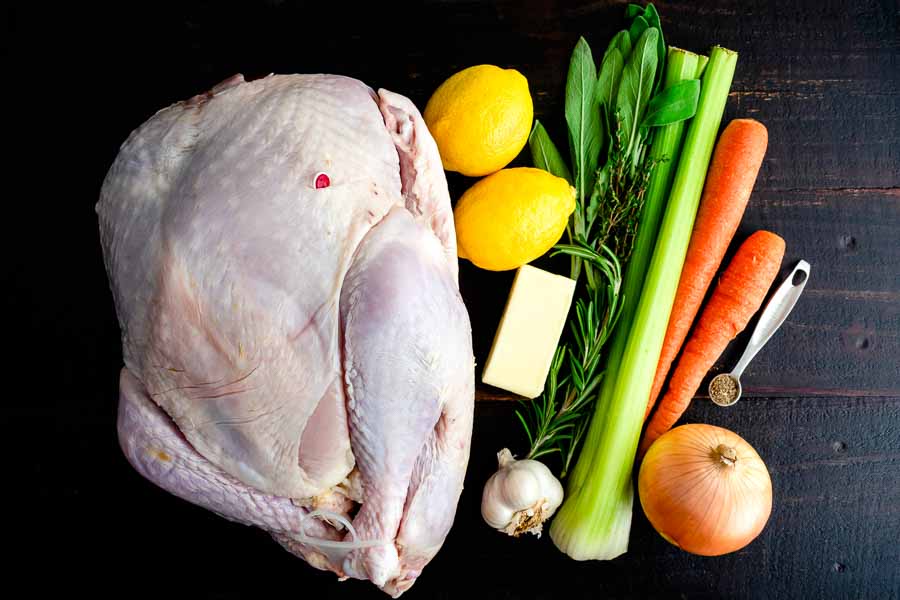
Whole turkey, lemon, butter, garlic, sage, thyme, rosemary, celery, carrots, pepper, and onion

The Process

This recipe started off with thawing the turkey. It takes about 1 day per 4-5 pounds, so I set my turkey into a pan to catch the drippings and waited.

I had a lot to do once the big day rolled around, but I’m happy to say my Roast Turkey In A Bag was the easiest part. I set a stick of butter on the counter the night before, so it was perfectly softened. That made making the herb butter so easy.

After that, I cut the celery, onions, and carrots into large pieces and stuffed all the aromatics into the turkey’s cavity (most everything fit, but I did have a couple of extra pieces that I just threw into the bag). Then it was time to use all that the freshly made herb butter.

Speaking of herb butter, this is a classic technique that I really appreciate! It’s all about flavoring the butter with herbs and spices, then rubbing it all over the turkey (or any poultry) to make the skin turn golden brown.

This recipe even had me rub some of the herb butter underneath the breast skin. It’s a little detail with a big payoff. Taking the time to do this adds extra flavor to the meat and keeps it from drying out. No one likes dry turkey breast!

Getting a greased-up turkey into a roasting bag was a little tricky, but I managed to do it by myself. Then I closed up the bag, cut a few holes to let the steam escape, added a meat thermometer to the thigh, and popped that sucker into the oven (in a pan with a roasting rack, BTW). Here’s how my time was spent for this recipe:

  • 23 minutes to prep
  • 2 hours 15 minutes to cook
  • 15 minutes to stand
  • 2 hours 53 minutes total
The aromatics that will be roasted inside the turkey
The aromatics (minus the onion, sorry about that) that will be roasted inside the turkey

Old Cuban Cocktail

2

The Cuban Style Chicken Noodle Soup I just made was so good that I had to follow it up with another Cuban recipe. Naturally, that sent me to my Pinterest boards where a quick search turned up this Old Cuban Cocktail recipe. It’s considered a modern classic that was created by a top New York bartender named Audrey Saunders in 2001. The popular opinion is it’s a mashup between a mojito and a French 75. That got my attention since I am a huge fan of both of those cocktails. I simply have to give this a try!

Even on a crisp, blustery autumn evening there’s always time for a rum cocktail or two at my house. The Old Cuban is an elegant, and dare I say sophisticated libation, created by Audrey Saunders of Pegu Club fame. Sweet and sour notes are celebrated in a way that rum fans knows and love. Some call it a contemporary classic, but I just call it cocktail perfection.

Recipe Author: Todd at Honestly Yum
Get the recipe

The Ingredients

This cocktail has a few ingredients, and I only had two: the Angostura bitters and simple syrup. A bottle of bitters seems to last forever, and simple syrup is just that. It’s so easy to make that I make it myself and always have some in my refrigerator. This is my recipe, but you can always buy a bottle too.

Simple Syrup

Simple Syrup

The Hungry Pinner
A quick and easy-to-make staple of any well-stocked bar. This recipe yields approximately 12 ounces of simple syrup.
Prep Time 5 minutes
Cook Time 5 minutes
Cool 1 hour
Total Time 1 hour 10 minutes
Course Drinks
Servings 12 1-ounce servings
Calories 63 kcal

Ingredients
  

  • 1 cup water
  • 1 cup sugar of your choice (I use organic sugar, which gives the syrup an amber tinge)

Instructions
 

  • In a small saucepan, bring the water to a boil.
  • Reduce heat to medium and add the sugar. Stir until dissolved (the mixture will become clear when the sugar is dissolved).
  • Remove from heat and allow to cool. The simple syrup can be refrigerated in a bottle or other airtight container for up to 4 weeks.
Keyword bartending, mixology, simple syrup, sugar

The limes and mint were easy to find, and I decided to buy a small bottle of prosecco to use as the sparkling wine. The rum was a little more difficult for me.

I’m not a rum expert by any means, so I didn’t know what aged rum is. I scurried over to my bar and checked what I had. for someone who isn’t that into rum, I had 3 bottles on hand—2 light (Bacardi & Largo Bay) and one dark (Myer’s).

None of them had an age on their label or the word “aged”, so I consulted the Google and found an extensive article on how rum is made and labeled (it’s a long read but worth it). Apparently, aged rum is always dark rum, but not all dark rum is aged rum. Not confusing at all…

Aged rum is just that—it’s aged in charred oak barrels (much like bourbon), and it will have the age on the label. If it’s a blended aged rum, the age on the bottle is the age of the youngest rum in the blend. I settled on a redonable prices bottle of Flor de Caña. It found it on sale for $15, but it’s regularly about $20 a bottle.

Old Cuban Cocktail Ingredients
Aged rum, Angostura bitters, lime juice, sparkling wine, mint leaves, and simple syrup

The Process

With all my ingredients and equipment gathered, the Old Cuban Cocktail took me 4 minutes to make from start to garnish.

Like a mojito, I began by muddling the mint leaves but in simple syrup instead of sugar. Mint leaves are delicate, and I have started using the smooth end of my muddler to gently bruise them. The pointed end is better for fruit and tears mint, which is not the objective of muddling.

Next, I juiced a lime, measured out the rum, and added a couple of dashes of bitters. Adding ice and giving everything a good shake almost got me to the finish line.

All that was left was to strain the rum mixture into a coupe glass, top with sparkling wine, and garnish with a mint leaf. I used a Hawthorne strainer and found it let through tiny bits of mint. I liked the extra color, but a fine strainer could be used to remove them.

Cuban Style Chicken Noodle Soup

Chicken noodle soup is a regular on our menu, but I never make it. It’s my mother-in-law’s specialty, and she always invites us over or makes extra for us to bring home. It’s the best when it’s cold outside or when one of us is sick. The stuff is magical! I guess that’s why this Cuban Style Chicken Noodle Soup recipe caught my eye. It sounds like a mixture of chicken noodle soup and tomato soup with a Cuban flair. I’m not even going to try and compare it to MIL’s chicken soup, but I have a feeling it’s going to be almost as good, and that’s saying a lot. Let’s find out if I’m right!

Chicken noodle soup flavored with tomato and fresh lemon juice. Taste just like Abuela used to make!

Recipe Author: Mindy at Coco & Dash
Get the recipe

The Ingredients

Right, so shopping for this recipe was pretty easy, but I did have some difficulties. the first thing I did was check my pantry (always!), and I had a few things on hand. Well, mostly the spices: oregano, salt, and sazon Goya. There are a fee varieties of sazon Goya, and the one I use the most is Sazon Goya Con Culantro y Achiote (Sazón with Coriander & Annatto). It’s always in my pantry!

When I was making my shopping list for the rest of the items, I realized the type of potato isn’t specified. I chose a russet or baking potato since they are pretty large. With everything else added to my list, I went grocery shopping.

I found all the ingredients I needed except one: the bone-in, skin-on chicken thighs. All the store had that day was boneless skinless chicken thighs, so I grabbed a couple of packages and crossed my fingers that they would work.

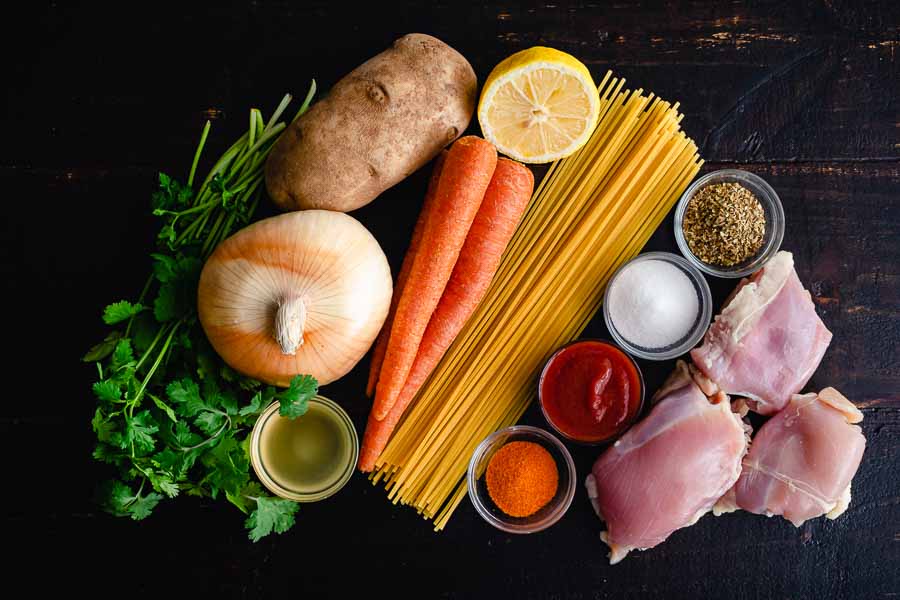
Cuban Style Chicken Noodle Soup Ingredients
Spaghetti, lemon juice, oregano, salt, chicken thighs, tomato sauce, sazon Goya, chicken broth, cilantro, onion, carrots, and potato

The Process

The total time listed for this recipe was 1 hour, with 5 minutes of prep work and 55 minutes of cooking. I went a little over that, and this is how my time was spent:

  • 10 minutes to prep
  • 7 minutes to bring the soup to a boil
  • 45 minutes to simmer
  • 5 minutes to shred the chicken
  • 10 more minutes to cook
  • 1 hour 17 minutes total

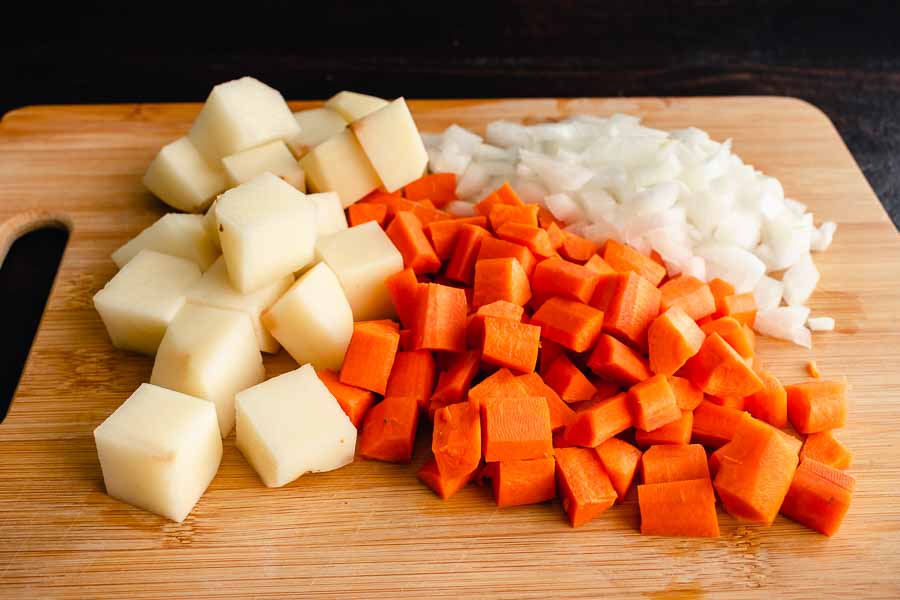
I started out my prep work by peeling and chopping the vegetables. Then I dug out my largest pot and got cooking. My 5-quart Dutch oven is my go-to pot, but it wasn’t big enough for this job. I had to use my 9.5-quart Dutch oven. It’s huge and it had plenty of room. A 6-quart might have worked too, but I don’t have one to test the theory.

Chopped potato, carrots, and onion

The bulk of the cooking is gently boiling the vegetables and chicken in a mixture of tomato sauce, chicken broth, water, and the sazon Goya. All that simmering creates a delicious broth! And while it was simmering away, I finished up the prep work.

After that, use a pair of tongs to remove the chicken from the pot. I like to let it cool before shredding, but I didn’t have to in this case. The chicken was so tender that it was falling apart as I lifted it out of the pot. Shredding was also very quick and easy without the skin and bones to deal with.

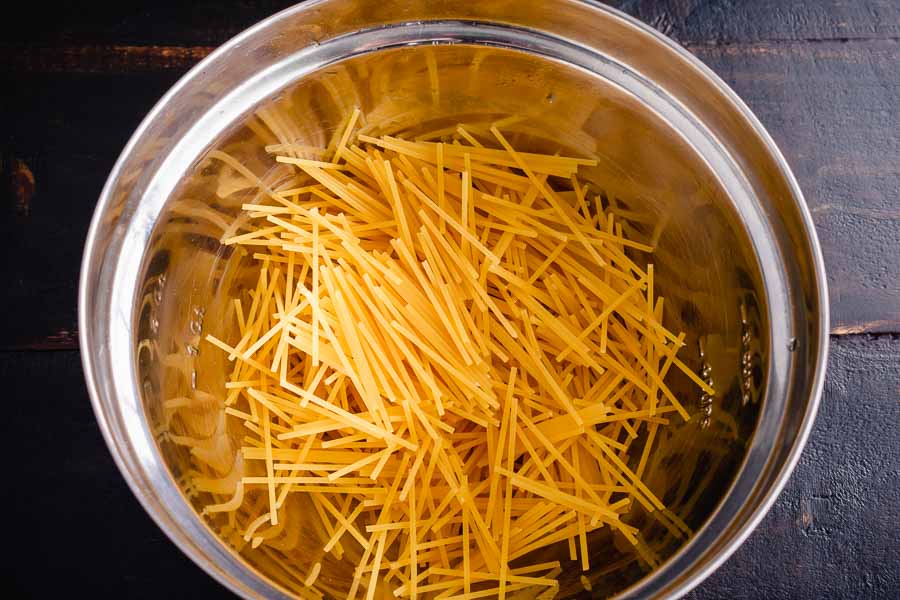
Next, I returned the chicken to the pot and added the lemon juice, oregano, and broken spaghetti noodles. Another 10 minutes, and my Cuban Style Chicken Noodle Soup was ready to serve.

Spaghetti noodles broken into smaller pieces before cooking