Home Blog Page 18

Blackberry Bacon Grilled Cheese

Although I’m trying to eat healthily, I still have cravings. I’m getting better at ignoring them or switching them into healthier foods like sweet fruit instead of sweet baked goods. But sometimes there’s just no healthy substitute for your craving, and that’s where I am now. I found this Blackberry Bacon Grilled Cheese recipe, and I fell in love! It has melty cheese in my favorite kind of bread (sourdough) plus sweet blackberry, hot and spicy peppers, and savory, salty BACON! I don’t have bacon very often, but I love the stuff!! I’ve tried it for every meal and even in cocktails. Now I need to try it in this grilled cheese sandwich.

Blackberry Bacon Grilled Cheese is the perfect combination of savory and sweet! Made with Swiss cheese, blackberry jam, fresh jalapeños, and crispy bacon, it’s a must try for ALL grilled cheese lovers!

Recipe Author: Cathy Trochelman at Lemon Tree Dwelling
Get the recipe

The Ingredients

I had a package of bacon in my freezer leftover from the Bacon Wrapped Sausage Stuffing I made last Thanksgiving. I bought two packs just in case. Now I get to use the extra.

I also had butter in the fridge, so that left me to buy everything else. None of the ingredients were difficult to find at my usual grocery store, though, and shopping was easy. I found sliced Swiss cheese in the dairy section and sugar-free seedless blackberry jam on some random aisle.

The sourdough bread came straight from the bakery. There’s nothing like a freshly baked loaf of bread, and bread is such an important part of any sandwich. So important, in fact, that I made this recipe the same day I bought the bread so it would be at its freshest.
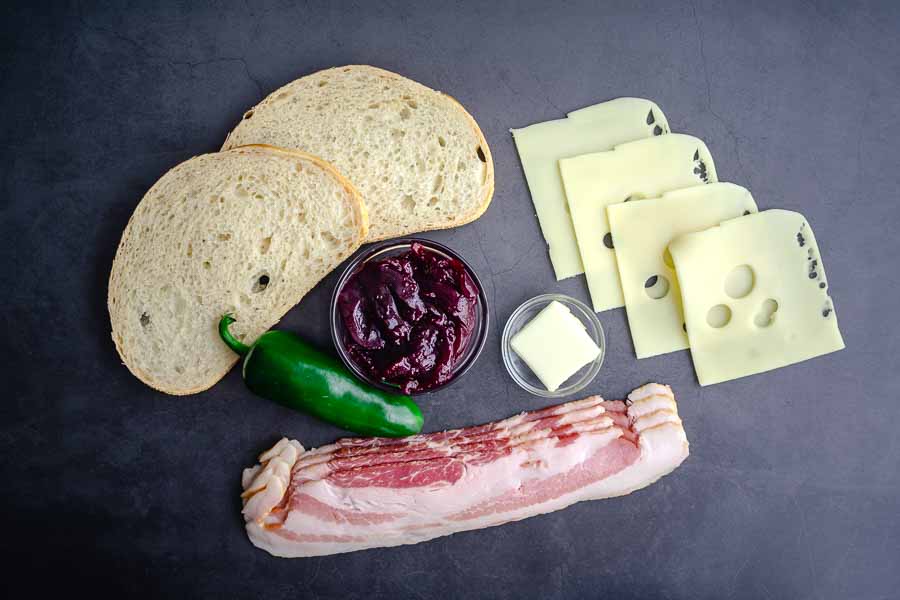
Blackberry Bacon Grilled Cheese Ingredients
Sourdough bread, Swiss cheese, bacon, jalapeno, blackberry jam, and butter

The Process

A grilled cheese sandwich is just a touch more complicated than your run-of-the-mill sandwich, but not by much. I kicked things off by frying up 4 strips of bacon. Here’s how my time was spent:

  • 12 minutes to fry the bacon
  • 8 minutes to prep and cook the sandwich
  • 20 minutes total

Just a bit longer than the 15 minutes listed,  but the recipe does call for cooked bacon. I included the time to cook it in my total because I doubt the average person would have cooked bacon lying around.

The Prep Work

But back to that Blackberry Bacon Grilled Cheese. Once the bacon was done, I poured the bacon grease out of the skillet and assembled my sandwich.

Buttering the bread can be tricky if you use cold butter. Trying to spread cold butter on soft bread just ends up shredding the bread. I anticipated this and set mine out a good 30 minutes before cooking.

Tip: If you are using cold butter, I suggest using your microwave to soften a stick of butter, then cut off the amount you need for this recipe (1 tablespoon). The rest can be returned safely to your refrigerator. You could try to soften just 1 tablespoon, but it’s more likely you will simply melt it. My microwave isn’t fancy, and it comes with a butter softening setting per stick. I’m guessing it’s a common feature.
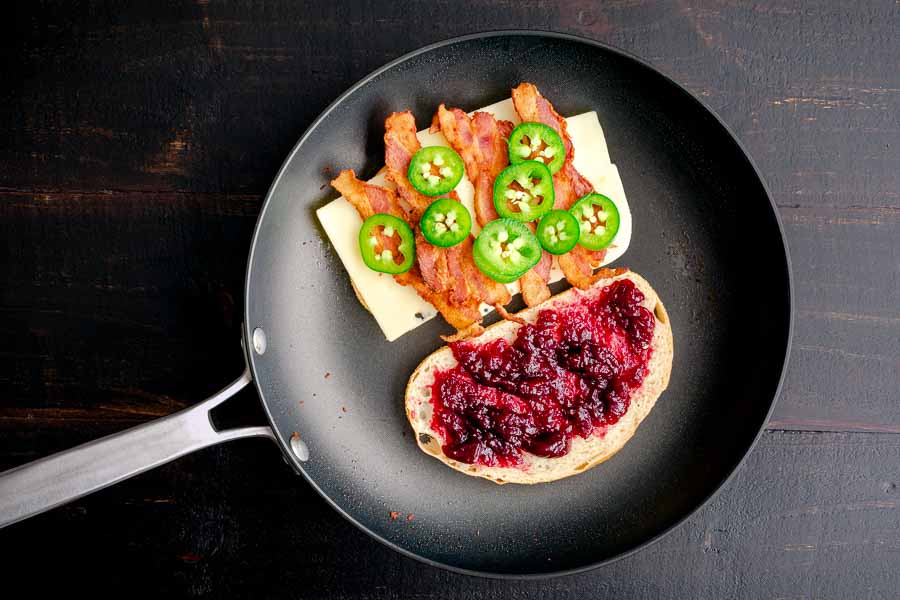
Frying my Blackberry Bacon Grilled Cheese in a nonstick skillet

Assembly & Cooking

Next, you need to assemble your grilled cheese. This part was quick and easy and ended up being very colorful (I love colorful food!). Then I added both halves to my 12-inch nonstick skillet and cooked it up.

The recipe lists 4-5 minutes per side, but mine cooked a bit faster. I’d say it was more like 3 minutes per side since my skillet was already heated from frying the bacon. In fact, I think I could have turned the heat down from 6 to closer to 4 to keep the bread from burning. (FYI, I use an electric stove.)

Spiced or Mulled Wine

I know what you’re thinking, “Mulled wine after Christmas?” Well, yes because it’s National Mulled Wine Day. It does seem like a holiday drink to me, but maybe it’s time to change my thinking. Spiced or Mulled Wine wine makes my whole house smell so good, and it’s a warm and comforting drink when it’s cold outside. Invite a friend or two over to share and conversate or curl up with a mug, a good book, and a fur baby for a peaceful afternoon.

The spices are nicely balanced with the warmth of the wine and the sweetness of the citrus and honey.

Recipe Author: Yannick and Ilse at Culinary Ambition
Get the recipe

The Ingredients

I had a little shopping to do for this Spiced or Mulled Wine recipe, but not too much. I found the lemon, orange, and red wine at my usual grocery store. It’s optional, but I decided to make a quick stop for a small bottle of cognac to add.

The honey and whole spices were all in my pantry. And yes, they need to be whole spices even though it’s not stated in the recipe (they are shown in the accompanying post, though). Ground/powdered will not work for this recipe.

Spiced or Mulled Wine Ingredients
Red wine, star anise, cinnamon sticks, whole nutmeg, cloves, cognac, orange, and lemon

The Process

This mulled wine recipe was very easy to make, but it does require a kitchen scale to measure the spices. In case you don’t have one, I converted the measurements as best I could:

  • 8 grams cinnamon = (2) 2-inch cinnamon sticks
  • 1 gram cloves =
  • 2 grams nutmeg = about 1/4 of a whole nutmeg

I happened to have a small piece of nutmeg in the bag that weighed 2 grams, so this is just an estimate. If you need to break a whole nutmeg, place it into a ziplock bag and pound it with a meat mallet. Add the pieces to your scale until they reach 2 grams.

My 2.5-quart saucepan was just the right size for this recipe. I placed the cloves and nutmeg into a tea ball and let the larger spices and citrus fruit float loose. The bigger pieces were easy to remove with a slotted spoon, but I didn’t want to have to hunt down the small ones.

It’s not specified, but I covered the pan while it simmered. Although the lid was on, the mulled wine soon filled my kitchen with its wonderfully spicy scent. I planned to simmer it for 30 minutes, but I ended it after 15 so I could try it. That’s how good it smelled!

Here’s how my time was spent on the entire recipe:

  • 6 minutes to prep
  • 15 minutes to cook
  • 21 minutes total
Mulled wine garnished with an orange slice, cinnamon stick, and a piece of star anise

Healthy Chocolate Peanut Butter Breakfast Cheesecake

If it has the word “cheesecake” in the title, chances are I’m going to give that recipe a try. that’s why I couldn’t resist this Healthy Chocolate Peanut Butter Breakfast Cheesecake. Well, that and I also wanted to change things up and try a breakfast recipe. I’ve reviewed over 500 recipes for The Hungry Pinner, and not a lot of those are breakfast recipes for a very good reason: I’m a morning zombie. Not drinking coffee much anymore doesn’t help matters, so I need very simple breakfasts when I don’t have leftovers to scavenge. This recipe sounds perfect for me, so I’m going to give it a shot.

Enjoy a smooth, creamy and easy chocolate peanut butter cheesecake for breakfast! Inspired by Reese’s Peanut Butter Cups, this no bake cheesecake is high protein and low in fat, and completely vegan, gluten free, dairy free and sugar free!

Recipe Author: Arman at The Big Man’s World
Get the recipe

The Ingredients

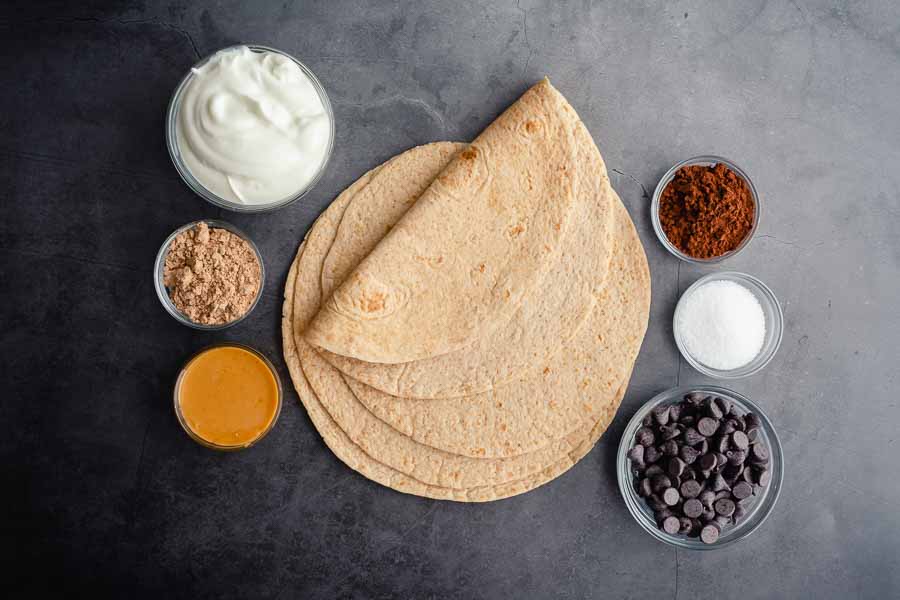
I actually made this recipe twice because my first attempt didn’t turn out (I misread the instructions, more on that later). My first attempt used Flatout Whole Grain flatbreads, but I couldn’t find them for the second attempt. I subbed Mission Carb Balance Whole Wheat Tortillas, and I liked them just as much. (Link just to show packaging—they’re $3-$4 a pack at my local grocery store).

I also bought the plain fat-free Greek yogurt and some sugar-free dark chocolate chips. The rest was in my pantry, although I only had PBfit Chocolate Peanut Butter Powder. Hey, I’m all for more chocolate!

You’ll also need some oil to spray onto the flatbread, but it’s not listed in the ingredients. I always keep some on hand, so it wasn’t an issue.

Healthy Chocolate Peanut Butter Breakfast Cheesecake Ingredients
Flatbread, cocoa powder, stevia, chocolate chips, peanut butter, peanut butter powder, and fat-free Greek yogurt

The Process

So I mentioned that I made these twice, and now I’ll explain. You may or may not know that I select my recipes in advance, and I tend to forget the blog posts I find them on. I read constantly, and things slip.

Well, that’s exactly what happened here. I read the post, loved the idea, added it to my calendar, and read a ton more posts in the meantime (and novels, news articles, and all sorts of things). When the day came to make my Healthy Chocolate Peanut Butter Breakfast Cheesecake, all I had was the recipe printout with no photo and my shoddy memory.

My First Attempt (What was I thinking?!)

No problem, I can follow instructions, right? Eh, sort of. I decided to make this recipe for lunch since the light is better for photos in the afternoon. It was after lunch, so I was completely awake. Here’s how my time was spent:

  • 10 minutes to prep
  • 10 minutes to cook
  • 5 minutes to finish
  • 25 minutes total

I followed the recipe as it was written and made the cheesecake part first. Then I cut the flatbreads into squares and toasted them up. While the chips cooked, I made the chocolate-peanut topping for them.

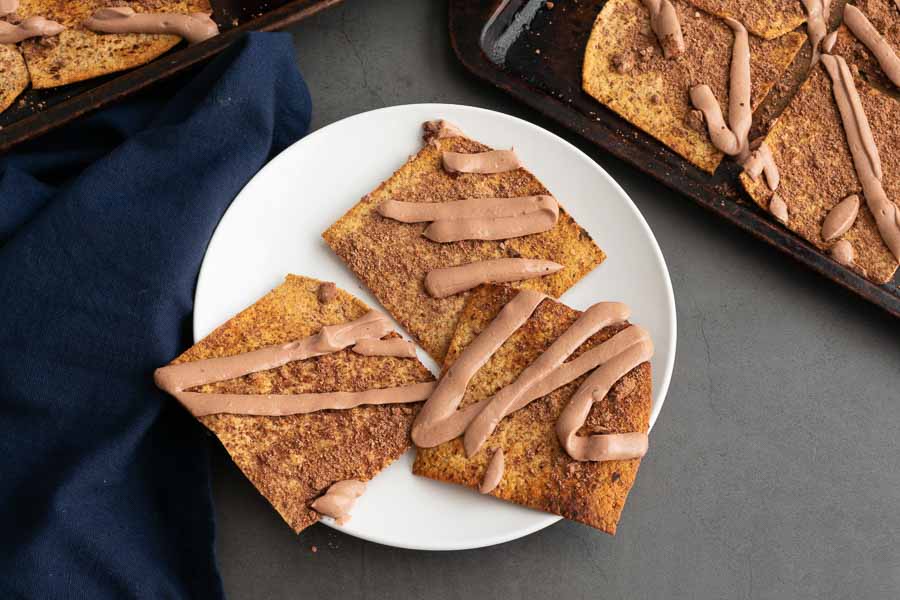
Things seemed to go well until the end. I don’t know how my brain determined this, but I swear the recipe said to drizzle the chocolate-peanut butter topping and the cheesecake mix onto the flatbread. So I added it to a ziplock bag, trimmed off a corner, and drizzled the squares of flatbread a la a piping bag.

It wasn’t until I went to write this post that I realized my mistake. The cheesecake is supposed to be served in a dish with the flatbread on the side to dip. Did I feel stupid!

My first attempt at this recipe: I drizzled the cheesecake mixture onto the flatbread

My Second Attempt (I got it right!)

I had to give this recipe another try! I wanted to do it right, and I knew I could do it faster. How? I decided to make the chips first and the cheesecake and topping while the chips baked.

This time I had round tortillas, and I noticed that Step 2 said to cut the flatbread into squares and triangles. Huh? It reads, “Cut the Flatout wrap into squares and lay it out evenly. Spray the triangles lightly…” It was a typo, but triangles were easier with round tortillas and probably easier to dip into a small serving bowl.

I have 2 sheet pans, and 4 tortillas cut into eighths filled them up. I also decided to line the trays with parchment paper to make cleanup easier.

Then I started mixing up the cheesecake and chocolate-peanut topping for the chips. I mixed up the cheesecake and set it aside. Then I mixed up the dry chip toppings, melted the chocolate chips in the microwave, and mixed everything together. Both were ready and waiting when the chips came out of the oven.

Oh, and about those chips. My oven’s heat source is on the bottom, so I used my lowest 2 racks. I placed one tray on the upper and one on the lower rack to allow the air to circulate. I let them bake for 5 minutes then switched the pans. The chips baked up nice and crisp with no turning and no burning.

When they came out of the oven, I added a few to my biggest mixing bowl, sprinkled on half the topping, and repeated with the rest. The large bowl allowed me to toss the chips in the topping and get them well coated. I used the extra topping to garnish the cheesecake.

A Note About Timing

As I mentioned, things went quicker this time. Making the chips first saved me 7 minutes. Here’s how it worked out:

  • 5 minutes to prep
  • 10 minutes to cook
  • 3 minutes to finish
  • 18 minutes total

This was a little closer to the 10-minute total time listed than my 25-minute previous attempt. However, I think that total is an error since the recipe says 5 minutes to cook at the top and 8-10 minutes in the instructions. Allowing for that, the total would be 15 minutes, and my second try’s time aligns with that.

Cinnamon Sugar Tortilla Chips

0

I know this is an odd choice to follow up the Cranberry Margaritas I just made, but it’s National Tortilla day and I had to. I’m sure this day is dedicated to the crunchy, salty treats we all love to dip into salsa or cover with toppings to make nachos. Mmmm! But I thought I’d try something a little different and actually make these Cinnamon Sugar Tortilla Chips. They sound delicious and like a great way to use up extra tortillas—something I frequently have. Let’s give these sweet and crunchy treats a try!

Cinnamon Sugar Tortilla Chips! These are a lovely sweet snack using very simple ingredients and incredibly easy to make. Perfect for parties and holidays.

Recipe Author: Carina Duclos, Shared with Mary at Lovefoodies
Get the recipe

The Ingredients

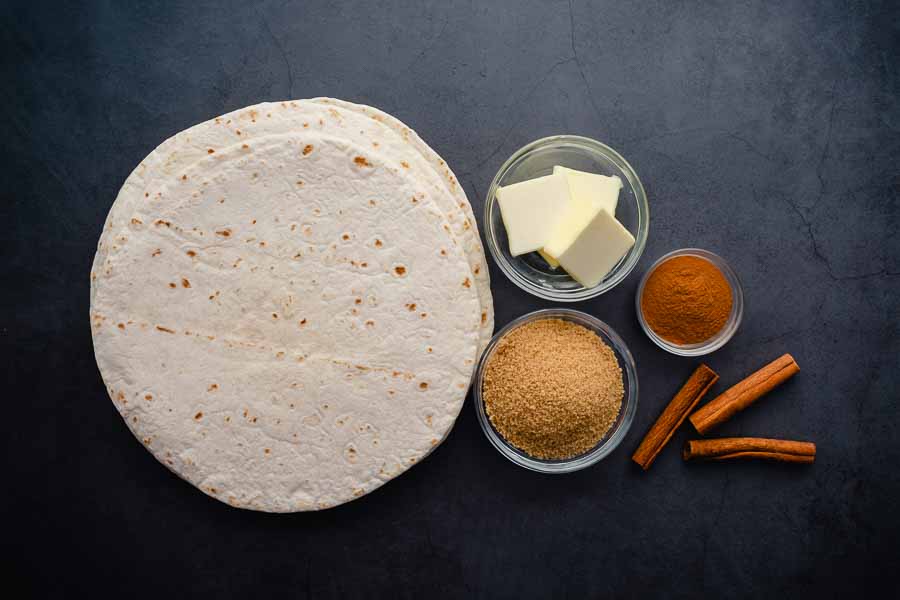
The list of ingredients was short and sweet (get it?). I had the butter, brown sugar, and cinnamon on hand, but I had to buy a package of fresh tortillas. The size isn’t given so I went with a mid-range size. I’m not sure of the diameter, but I used a 10-pack of Mission Flour Tortillas in the soft taco size.

Cinnamon Sugar Tortilla Chips Ingredients
Tortillas, butter, cinnamon, and brown sugar

The Process

This recipe didn’t take long, but it did take me a bit longer than the 20 minutes listed. The cooking time was accurate, but the prep work took me much longer than 5 minutes. In the end, this is how my time was spent:

  • 13 minutes to prep
  • 15 minutes to cook
  • 28 minutes total

I’m sure next time the prep work will go faster now that I have the technique for cutting the tortillas figured out. I also won’t take the time to lay them out in a single layer since that resulted in burnt chips. Let’s talk about it.

Prep Work

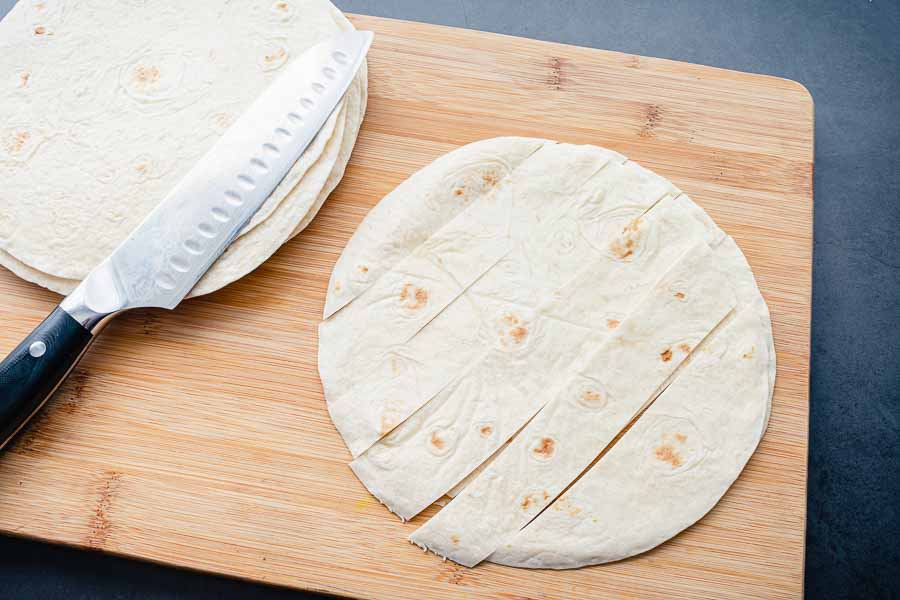
The prep work was simple and took me 13 minutes. I cut the tortillas 2 at a time so they wouldn’t slip. I began by simply cutting them into strips as shown below. The strips were quite long, so I cut them in half. Tip: You’ll need a large cutting board and a long, sharp knife to cut the strips. A dull knife will cause tearing.

Slicing the tortillas into strips

The prep work concluded with melting the butter and mixing it into the tortillas with the cinnamon and sugar. I added about 1/3 of the tortilla strips to a mixing bowl with 1/3 of the butter, cinnamon, and sugar. I mixed thoroughly and repeated with another third until all the tortillas were coated. Tip: Use a very large mixing bowl so you have room to mix without making a mess. Mine was 6 quarts or 24 cups.

My First Try: Burnt tortillas

I had a lot of tortilla strips ready to bake at this point! So I lined 2 baking sheets with parchment paper and piled on the prepped tortillas. This is where things went wrong.

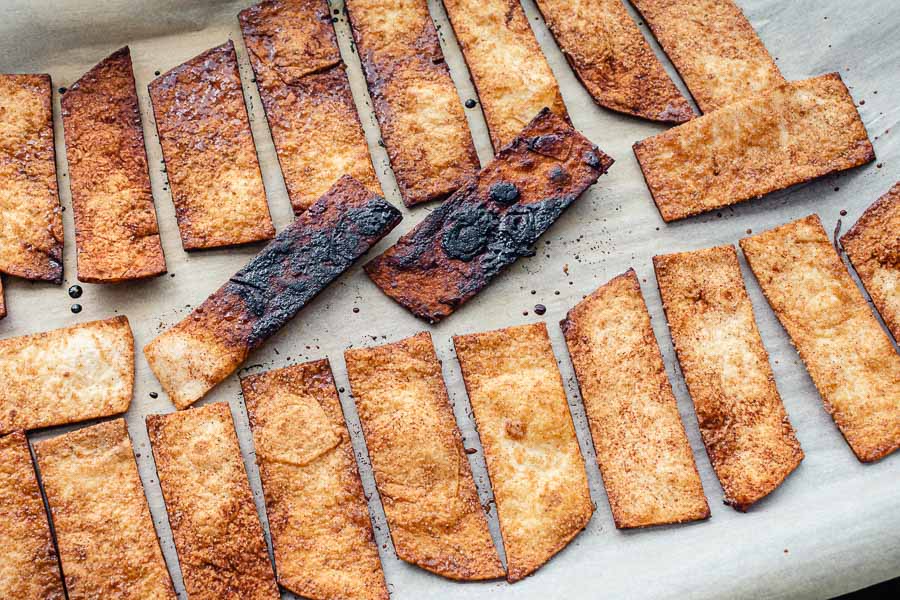
I got it into my head that the tortillas should be spread into a single layer so they could all crisp evenly. The instructions don’t specify this, but I did it anyway. I had a lot of tortilla strips, so I put 1/3 on each pan and popped both pans into the oven for 15 minutes (side by side on the middle rack, taking up the whole thing).

This was not the way to do it! I think placing the strips into a single layer in side-by-side pans caused them to burn by interfering with the air circulation inside the oven. The air under the pans was much hotter than the air above, so the strips were black on the bottom but looked okay on top. Only a few chips were edible. I was so disappointed!

Laying the strips into a single layer resulted in burnt chips

My Second Try: Success!

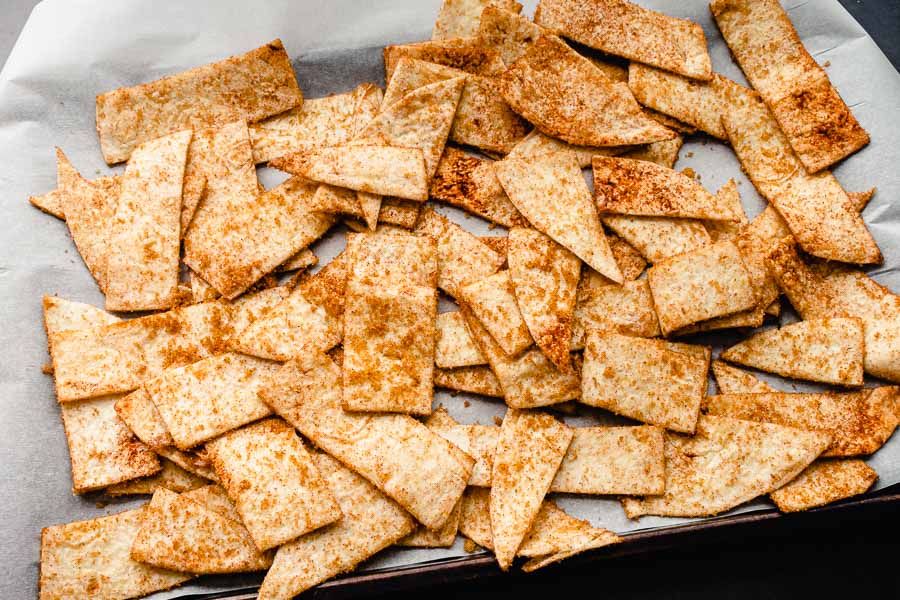
I had some tortilla strips left, so I immediately gave it another try. This time I did what I should have and scattered them onto a parchment-covered sheet pan, making sure not to pile them too deep.

I piled the strips onto a single sheet pan for my second attempt at this recipe

This method crowded the pan which created the steam needed to keep the chips from drying out too much. And the chips cooked evenly on top and bottom since there was only one sheet pan on the shelf this time.

I watched them carefully this time, and when there was no burning after 10 minutes I left them to bake for the full 15 minutes. The chips were still a little soft when I removed them from the oven. But just as the recipe said, they crisped right up as they cooled. Not as crisp as storebought, but crisp enough to crunch a bit.

In the end, I got my sweet, crunchy cinnamon treat as promised. I just wish I had the forethought to try making a cheesecake dip recipe this week too. The pairing would be so decadent!!

Cranberry Margarita

2

I know what you’re thinking: it’s February, and this Cranberry Margarita sounds like a Christmas drink. Well, it can be, and it almost was. Let me explain. My original Christmas 2021 menu had this recipe as the cocktail, but it got bumped when I found the adorable Holiday Gin & Tonic. I just couldn’t resist those cute fillable ornaments! I thought about moving this recipe to my Christmas 2022 menu, but then Margarita Day came around and it was the perfect excuse to try this recipe a little sooner. Besides, it’s still wintertime, and I think a frosty cocktail with a frosty sugared cranberry garnish still works. Let’s give it a try!

These delicious Mistletoe Cranberry Margaritas are just the thing to spice up any party or girls night!

Recipe Author: Kayti and Diane at Homemade Food Junkie
Get the recipe

The Ingredients

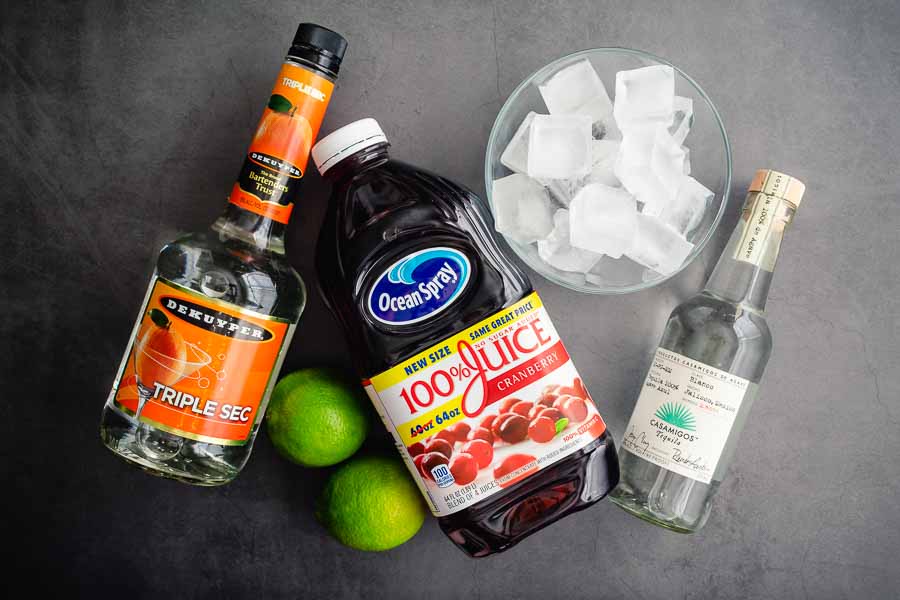
I had a bottle of triple sec and just enough Casa Migos Tequila to make a couple of these Cranberry Margarita. That left me to buy some cranberry juice and limes, but that was no big deal.

I also picked up some fresh cranberries since I noticed them in the photo. What I didn’t notice (and should have) was the mint garnish. Thank goodness the hubs was able to swing by the store and pick up a packet for me. I really wish the garnishes were listed with the other ingredients.

Cranberry Margarita Ingredients
Triple sec, lime juice, cranberry juice, ice cubes, and tequila

The Process

I’m used to making margaritas on the rocks, so this Cranberry Margarita was a little different. I read through the recipe and noticed the part about the sugared cranberries. Mainly that the instructions say to make them last because the sugar will melt.

I have made sugared fruit many times, and that has never been a problem. I think it’s due to the method. The recipe says to soak fresh cranberries in lime juice then roll them in sugar. It makes sense that the wet lime juice would dissolve the sugar. I wasn’t having that!

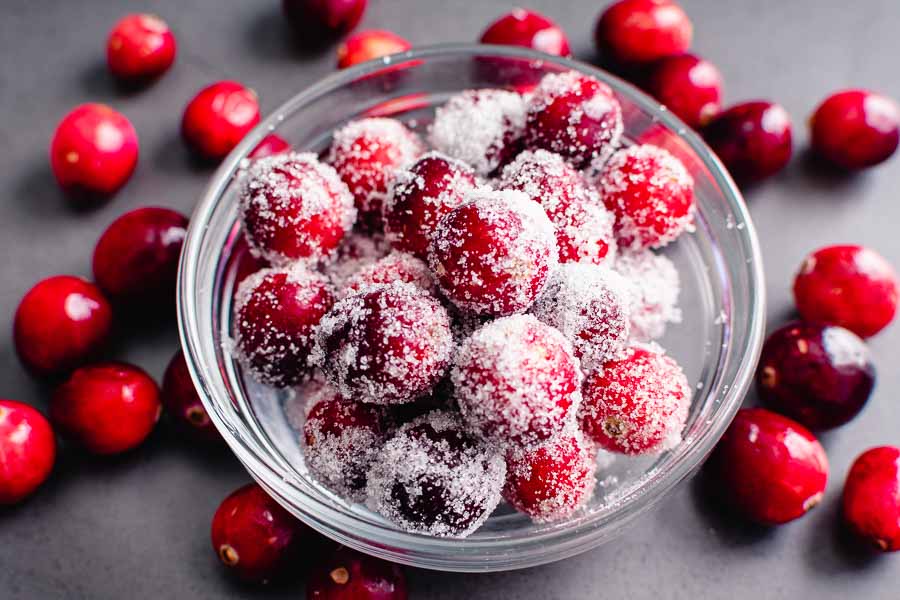
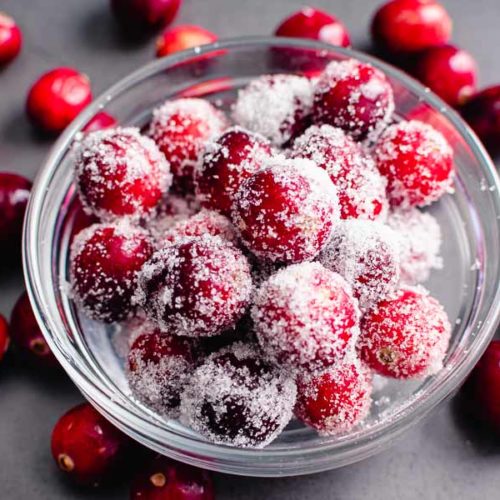
Tip: I used the recipe below to make a batch of sugared cranberries that would last. In fact, the sugared cranberries in my photos were done the day before the margaritas, and they still had plenty of sugar on them.

In short, my method is to soak the cranberries in simple syrup, then let them dry. The dried cranberries are very sticky! Rolling them in sugar gives them that frosty effect, and it lasts. The downside is it takes a good hour to complete whereas the recipe’s version only takes a minute or two.

With my sugared cranberries and other ingredients in hand, making the Cranberry Margarita was pretty simple. Tip: I filled two rocks glasses with crushed ice to chill them quickly. As they chilled, I added all the ingredients to my blender and blended. The mixture didn’t seem slushy enough, so I added more ice until I liked the consistency. I’d say I doubled the amount.

Once the margaritas were blended, I dumped out the crushed ice and rimmed the glasses as instructed. A sprig of fresh mint and a few sugared cranberries to garnish, and I was ready to snap a few photos and give them a try.

Sugared Cranberries
Sugared cranberries
Sugared Cranberries

Sugared Cranberries (No cooking required!)

The Hungry Pinner
Sugar-covered cranberries make a festive Christmas garnish for drinks, desserts, and more! This method can be used with other types of fruit too. Try it with strawberries, blueberries, grapes, etc.
Prep Time 10 minutes
Dry 1 hour
Total Time 1 hour 10 minutes
Course Garnish
Servings 1 cup

Equipment

  • mixing bowl
  • slotted spoon
  • wire cooling rack

Ingredients
  

  • 1 cup fresh cranberries
  • 1 cup sugar
  • ½ cup simple syrup * See notes

Instructions
 

  • Place cranberries into a small mixing bowl. Pour the simple syrup over them and stir to thoroughly coat each cranberry.
  • Using a slotted spoon, remove the cranberries from the bowl and place them onto a wire cooling rack. Allow to dry for at least 1 hour.
  • Pour half the sugar into a small mixing bowl that is completely dry. Add the cranberries, then pour the rest of the sugar over them. Gently stir to ensure all the berries are coated with sugar.
  • Remove the cranberries with a slotted spoon. Use immediately or store refrigerated in an airtight container for 2-3 days.

Notes

*Simple syrup can be bought ready-made or easily made at home with this Simple Syrup recipe.

Moroccan Roasted Pumpkin Soup

4

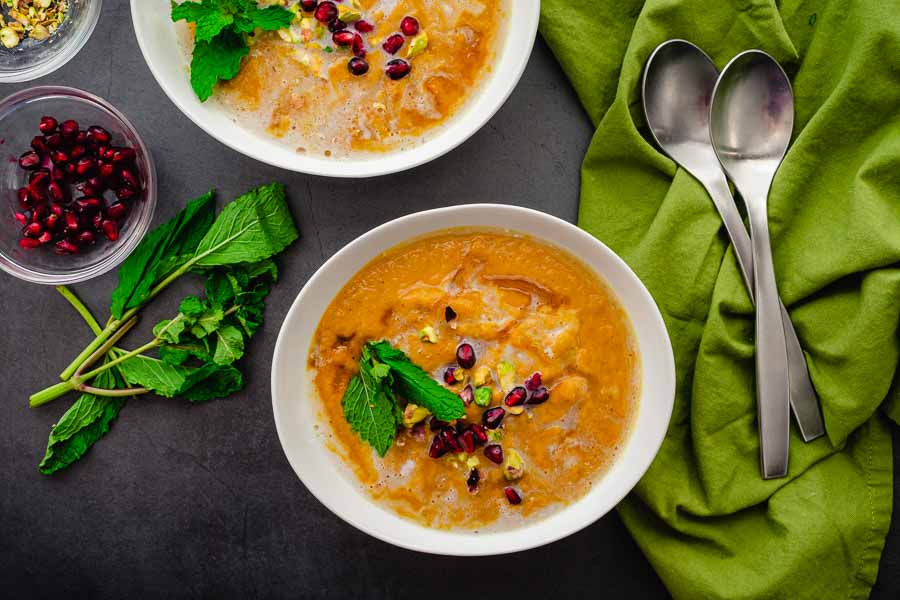
Another day, another new recipe, and this one is Moroccan too. I have come to the conclusion that I am obsessed with Moroccan food, and that’s not a bad thing at all. The Moroccan Spiced Chicken with Roasted Vegetables I just made is destined to become a favorite, but I thought I would try something a little different today. This Moroccan Roasted Pumpkin Soup sounds like the perfect food for wintertime, and it’s a vegetarian dish. Want vegan? Just use vegan honey, go with another sweet syrup like agave nectar (my favorite), or skip it altogether.

Moroccan roasted pumpkin soup is everything that you want a good soup to be. Its filling, delicious, super hearty and perfect for fall.

Recipe Author: Swayam at La Petit Chef
Get the recipe

The Ingredients

I have to be honest and tell you that I actually made this recipe back in December 2021, and it was no problem finding a pumpkin at that time of year. Pumpkin season is technically mid-September through November, but these days you can get most anything year-round.

If not, it is possible to store whole pumpkins in a cool, dry place for months. If that’s not your thing or not possible, freezing is also an option. You will need to cook the pumpkin first, though, so it requires more planning and effort.

I used a small pie pumpkin that was about 5 pounds. It seemed to be the perfect amount, though I’m guessing a slightly larger pumpkin would work too. I don’t think it’s possible to have too much pumpkin for pumpkin soup!

Almost all of the remaining ingredients were easily found at my regular grocery store. I did have to shell the pistachios myself and seed a pomegranate. The nuts were easy, and the pomegranate was a learning experience. It is possible to buy pomegranate seeds—my store sells them in the refrigerated produce section with the juices, but they were out of stock.

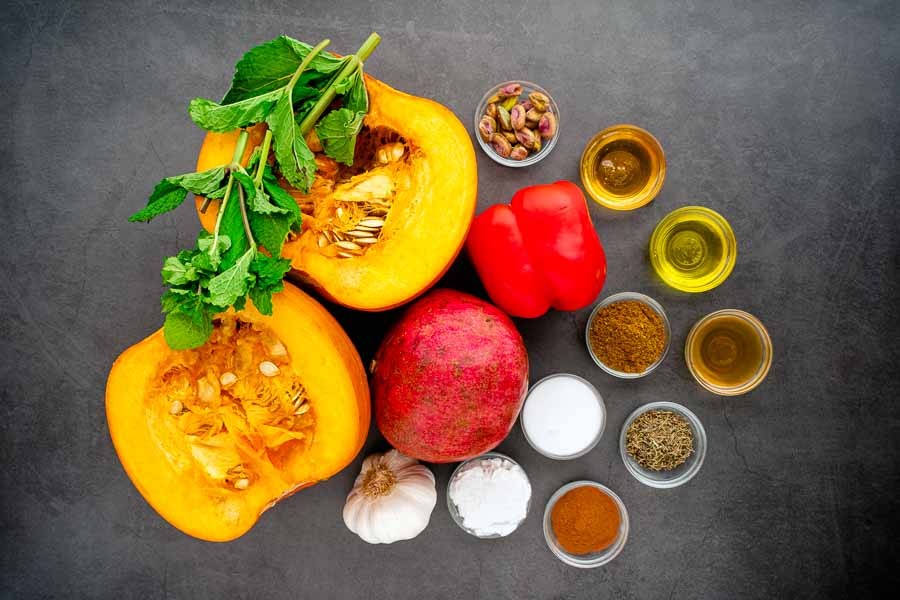
Moroccan Roasted Pumpkin Soup Ingredients
Pumpkin, mint, pistachios, honey, red bell pepper, olive oil, ras el hanout spice mix, vegetable broth dried thyme, coconut milk, pomegranate seeds, garlic, coconut cream, and cinnamon

Ras El Hanout Spice Mix

The only thing I couldn’t find was the ras el hanout. No worries, though, because I found a ras el hanout recipe on Pinterest (of course!). I had to buy a bottle of anise seeds (not the same as fennel seeds, FYI), but I had everything else in my overstuffed pantry.

This is an easy spice mix to make since there is no toasting, just zip everything into a powder using a coffee grinder. By the way, I keep one for coffee and one for spices, in different colors to tell them apart easily. You do not want to mix them up, trust me!

Tip: The cinnamon sticks were a little big for my grinder, so I had to get clever to make them fit. I did this by putting them into a small zipper bag and pounding them with the flat side of my meat mallet. It worked a treat!

I know this recipe does have a LOT of spices in it, and most people aren’t going to have them lying around. If you do, awesome! If not, you can always buy readymade ras el hanout.

I used dried herbs, spices, and flowers to make my own ras el hanout

The Process

I have to say this recipe was pretty easy to follow, and I only had one “what do I do now?” moment. Here’s how my time was spent:

  • 10 minutes to prep the garlic and pumpkin
  • 40 minutes to roast the garlic and pumpkin
  • During roasting:
    • 8 minutes to seed the pomegranate
    • 7 minutes for remaining prep work
  • 5 minutes to cool the pumpkin and garlic
  • 40 minutes to finish the soup
  • 1 hour 35 minutes total

The recipe’s total time was listed at 1 hour, so this took significantly longer. I’m not sure where the slowdown was.

Prepping the Pumpkin and Garlic

Things kicked off with cleaning and cubing the pumpkin so it could be roasted. I used two sheet pans and an olive oil sprayer to ensure they were thoroughly coated. I also sprinkled the pumpkin with cinnamon though my photo doesn’t show it.

This was my unsure moment since peeling the pumpkin isn’t mentioned. It has to be pureed later, so I opted to peel it after roasting. It’s much easier to peel the softened pumpkin cubes than a hard, uncooked pumpkin.

By the way, the oven temperature is given in Celcius, and I had to convert it. It’s 356℉, but I had to set my oven to 355℉ as it works in multiples of 5 degrees. One degree off is close enough in my book.

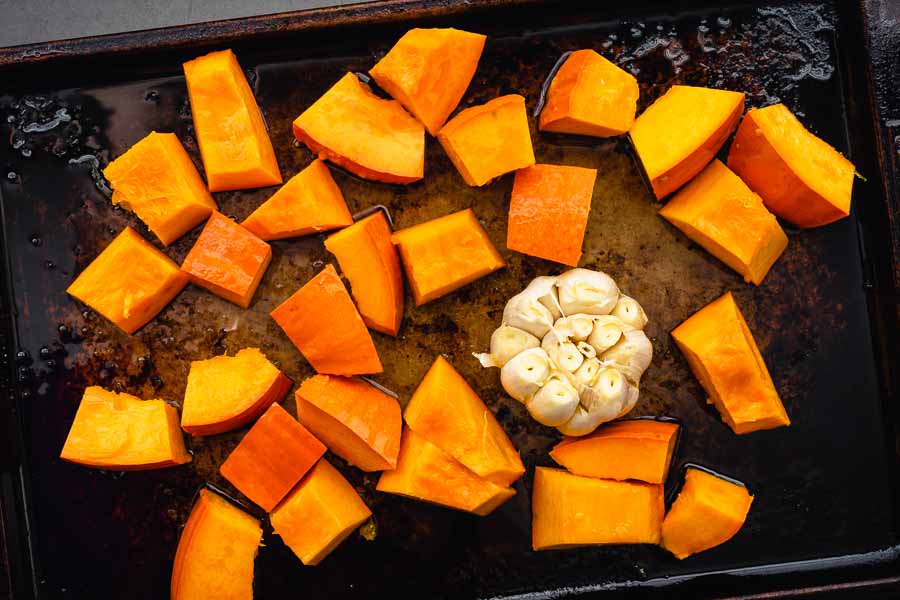
Getting ready to roast half of the pumpkin and the garlic
Getting ready to roast half of the pumpkin and the garlic. I used a second sheet pan for the rest of the pumpkin.

Seeding the Pomegranate

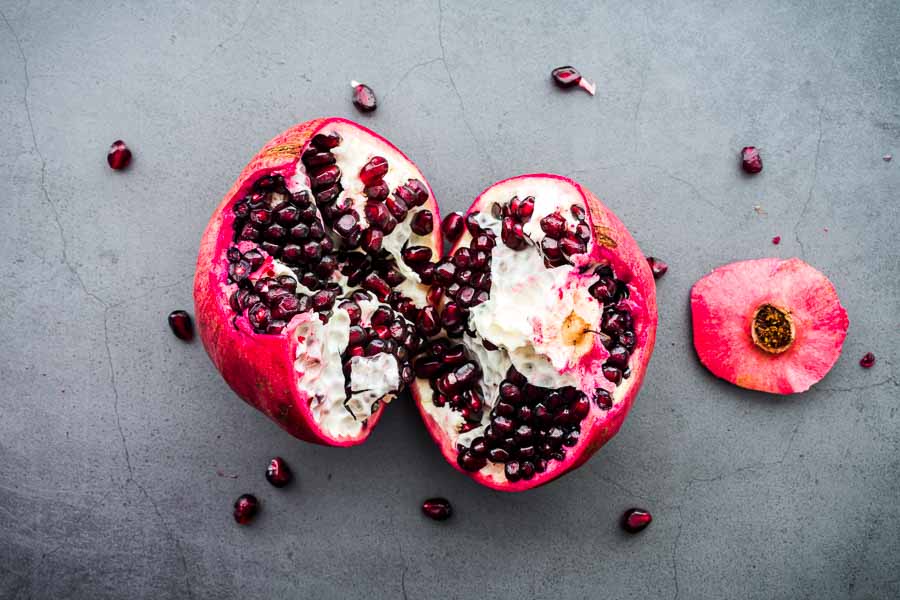
While the pumpkin and garlic roasted, I decided to seed the pomegranate next. I’ve never done this before, so I had to search for a pomegranate seeding tutorial. I found one that looked so easy, but it wasn’t IRL.

The biggest problem for me was that squeezing the pomegranate and hitting it with a wooden spoon caused it to spray bright red juice everywhere. Ev-er-y-where! And my kitchen has white counters and a white backsplash. It looked like a murder scene! Okay, it looked like someone had a very bad accident, but it wiped away from everything but my wooden cutting boards.

Tip: I moved the pomegranate and equipment into my kitchen sink to finish, and it caught most of the spray. I also ended up scooping out the seeds with a small teaspoon. I had to pick through them to remove bits of white rind. It didn’t go as smoothly as the video, but it was my first time. I definitely need to practice!

Seeding a pomegranate

Finishing the Soup

The remaining prep work only took a few more minutes and went according to the instructions. That left me plenty of time to clean up the pomegranate juice spatters.

When the pumpkin and garlic were cool enough I squeezed and mashed the garlic and peeled the pumpkin. Some of it just peeled right off with my fingers, and the rest was easily removed with a paring knife. Pie pumpkins have thin skin, but I just didn’t feel right leaving it on.

Now the soup could begin! I used my 4.5-quart saucepan, and it was just the right size. Everything in this part went so smoothly and exactly according to the instructions. I had the soup made and pureed with my immersion blender in 40 minutes.

Once it came time to garnish, I was so excited! The photos of this Moroccan Roasted Pumpkin Soup were so beautiful, and I expected mine to be nice too. They were, but I was disappointed that the coconut cream dissipated very quickly. I guess the brand I bought was too thin to hold up, and I didn’t get those beautiful white swirls.

I think the problem was that I shook the can to mix it. The cream itself was solid and never would have poured. Tip: Next time I’ll try slowly mixing the cream with the thinner liquid in the can. The goal is a thick but pourable liquid so it holds up in the soup.

The coconut cream I used wasn't very thick and dissipated too quickly to get those beautiful swirls
The coconut cream I used wasn’t very thick and dissipated too quickly to get those beautiful swirls

Moroccan Spiced Chicken with Roasted Vegetables

I’m very fond of Mediterranean cuisine. There’s such a variety of flavors even though many use the same spices and ingredients. One of my all-time favorites is Moroccan food. I realized I loved it after trying a Moroccan beef stew recipe many years ago, and that love affair is still going strong. Fortunately, my husband is just as in love with Moroccan food as I am, so we are both looking forward to trying today’s Moroccan Spiced Chicken with Roasted Vegetables recipe. We don’t need much of an excuse to try a recipe that involves harissa, a spicy paste used in North African cuisine. This recipe slathers it all over a spatchcocked chicken nestled in a mixture of vegetables and olives. It sounds so yummy!

This easy Moroccan Spiced Chicken with vegetables is bursting with flavor but quick enough to make that you can serve on a weeknight.

Recipe Author: Irvin Lin at Eat the Love
Get the recipe

The Ingredients

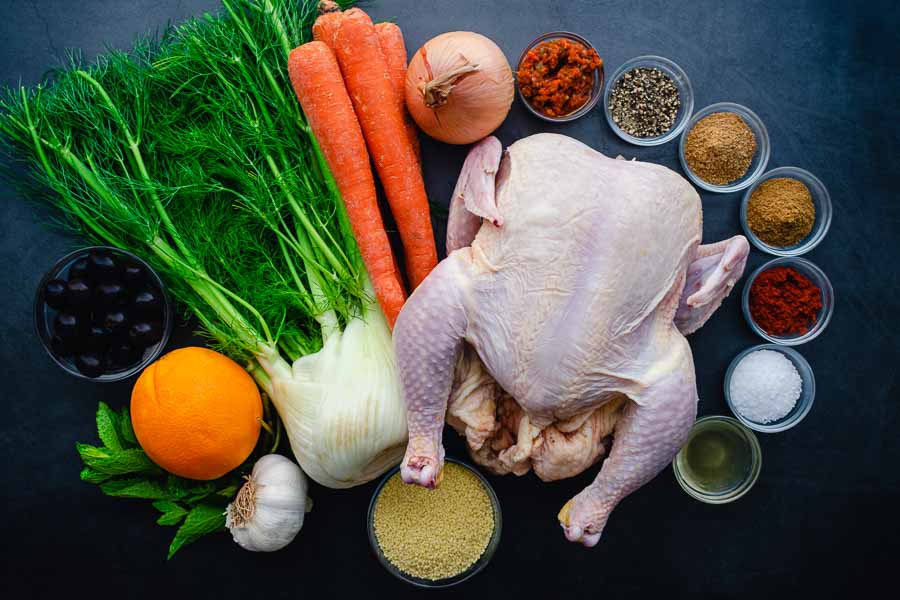
The list of ingredients for this Moroccan Spiced Chicken with Roasted Vegetables seems to be on the long side, but it wasn’t so bad after I realized what I had on hand. I had all the spices, some homemade chicken stock, and onion.

That left me to buy the chicken, produce, olives, and some couscous. I was able to find all of them at my regular grocery store.

The only item I couldn’t find was the store-bought harissa, so I decided to give making it a try. That added a few more items to my grocery list (mostly produce). Tip: I used a harissa recipe from Simply Delicious, and it walked me through the whole process. It was easier than I thought it would be, and I made it the day before I planned to make this chicken recipe.

Moroccan Spiced Chicken with Roasted Vegetables Ingredients
Whole chicken, harissa, ground pepper, ground coriander, ground cumin, smoked paprika, kosher salt, chicken stock, couscous, garlic, mint leaves, orange, black olives, fennel, carrots, and yellow onion

The Process

Does this sound complicated to you? It’s not! The author does a nice job of breaking it down into manageable chunks so it doesn’t seem like so much work.

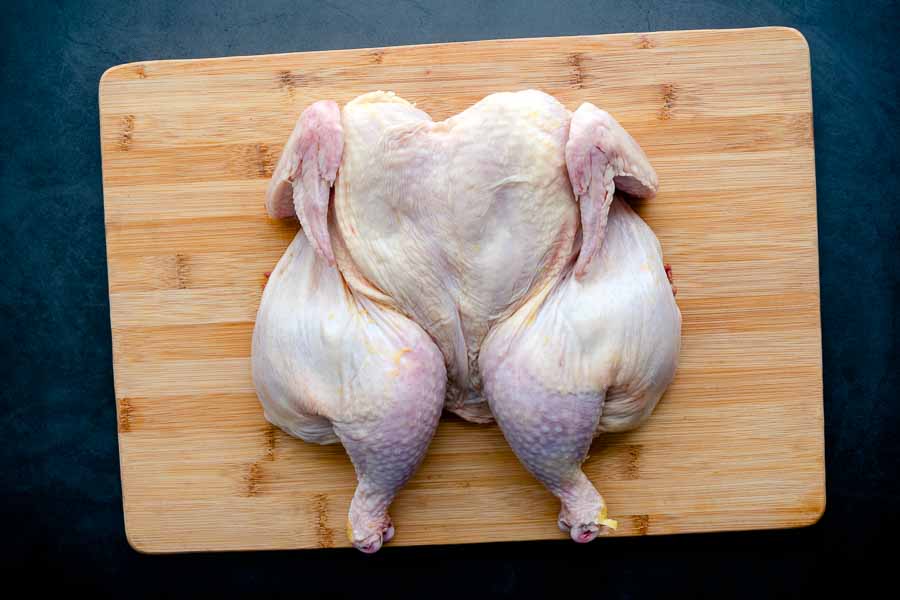
Tip: Things start off with preheating the oven and spatchcocking the chicken. I’ve done this many times before, and all you need is a sharp pair of kitchen scissors. It only takes a couple of minutes to do, and the chicken cooks so much faster than when it’s left whole.

Spatchcocked chicken

After that, I mixed up the harissa spice rub and spread half of it onto the newly butterflied chicken. This part was a little messy, and a thorough hand washing after is a must. The rest of the harissa is used to make a sauce to go over the vegetables.

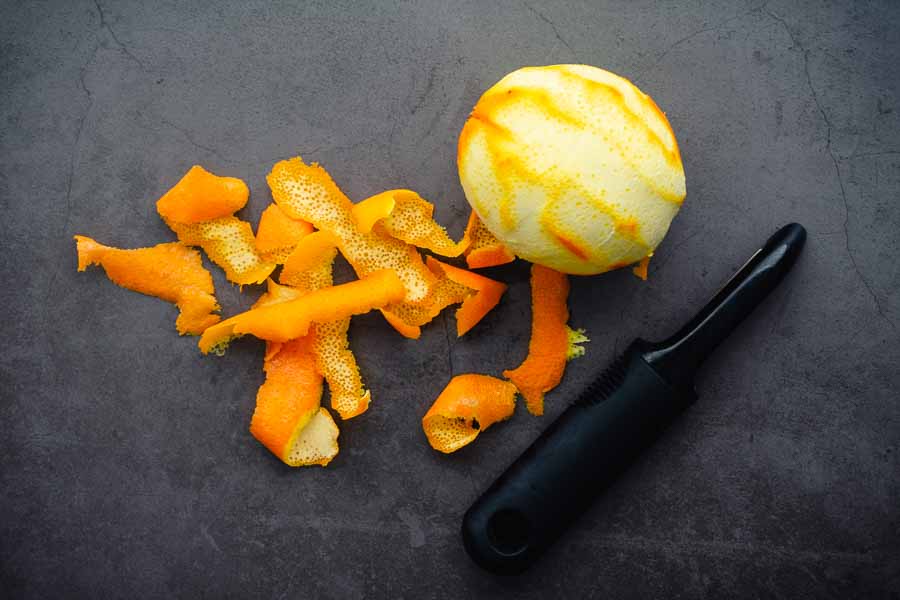
I followed the instructions for almost everything for the sauce except the orange zesting and juicing part. The instructions given are nice and clear, but I had an easier way to do it. Tip: I used my vegetable peeler to remove pith-free strips of orange zest. Once that was done I cut the orange in half and squeezed out the juice.

Zested orange
I zested the orange using a vegetable peeler

This is the home stretch! The last part of the prep work is peeling and slicing the vegetables. Tip: A good chef's knife is essential for this part, and this article with tips on how to peel garlic fast is a huge help.

Tip: By the way, this is a sheet pan dinner, but I used the bottom of my broiler pan. My sheet pans are pretty shallow, and I was concerned the harissa-chicken stock sauce would overflow. My broiler pan is bigger and deeper, and it was just right for this recipe. I didn’t spill a drop!

All that’s left is to let your beautiful dinner roast. It takes about an hour, but this is all inactive time except for stirring the vegetables once and adding a meat thermometer.

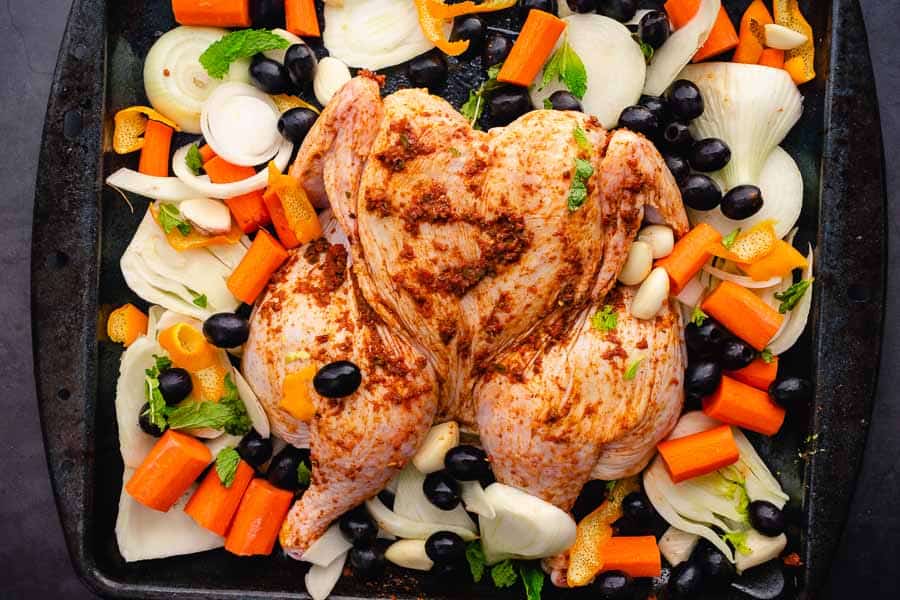
The prepped chicken and vegetables
The prepped chicken and vegetables on a deep sheet pan

Timing

So how did my Moroccan Spiced Chicken with Roasted Vegetableswork out? Wonderfully! Here’s how my time was spent from start to finish:

  • 17 minutes to prep
  • 1 hour 4 minutes to cook
  • 10 minutes to stand (I made the couscous at this time)
  • 1 hour 31 minutes total

That was 1 minute longer than the 1 hour and 30 minutes listed, but it’s so close that I’m counting it as spot-on.

Pink Grapefruit Martini

0

Being from Florida, I’m used to having citrus year-round, but I know there are places where winter citrus is a real treat. That’s why I thought I would give this Pink Grapefruit Martini a try in the middle of winter. It screams summer to me, but then again, I’m a native Floridian who has never seen snow. But regardless of where you are or what the weather is like, a bright, citrusy cocktail is always nice. So grab a couple of martini glasses and join me in giving this recipe a try!

Deliciously refreshing pink grapefruit cocktail martini.

Recipe Author: MaryJo at Cool Bean Cooking
Get the recipe

The Ingredients

Like a lot of recipes, I had some ingredients on hand and needed to shop for the rest. In this case, I had the vodka and triple sec sitting on my bar cabinet.

A quick trip to a local market, and I had a bag of six limes and three pink grapefruit. This recipe calls for a lot of citrus juice, and I didn’t want to run out. This recipe used two and a half pink grapefruit and three of the limes.

Pink Grapefruit Martini Ingredients
Pink grapefruit juice, lime juice, vodka, and triple sec

The Process

Making this cocktail wasn’t too difficult, but I did have a minor hiccup along the way. Still, I managed to have it ready in the 10 minutes listed.

There was a lot of juicing involved, so I started with that. I broke out my electric citrus juicer for this recipe. A manual reamer would have also worked, but it would have taken longer.

Once the grapefruit and lime juices were measured out, I got started on the cocktails. This is where I had the hiccup. I used my large cocktail shaker, but the citrus juices filled it to the top. There was no room for the rest of the ingredients, let alone to shake them. Oh no!

I had a small pitcher handy (about 8-cup capacity), so I grabbed it and poured the contents of the shaker into it, and continued on with the recipe. I added the vodka and triple sec then gave everything a thorough stir with a long bar spoon.

I added the lid to the pitcher to strain out the ice cubes and poured my Pink Grapefruit Martinis. A quick garnish with a sprig of mint, slice of lime, and pink grapefruit twist brightened them up, and it was time to give these beautiful cocktails a taste test.

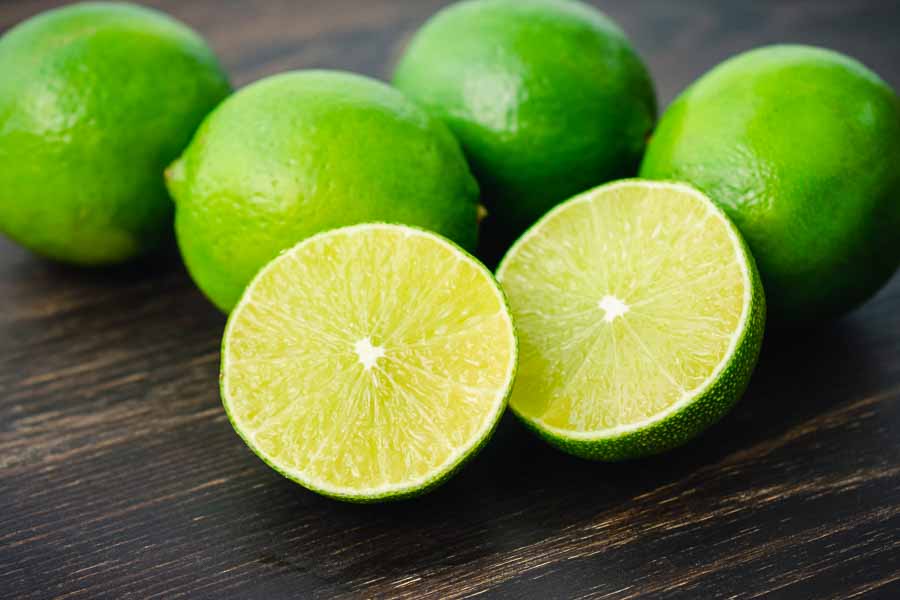
Cutting the limes
Cutting the limes

Roasted Garlic White Chicken Lasagna Soup

My love for garlic is a well-documented fact. I’ve blogged a lot of recipes with garlic, but one of my favorites is this Lemon Garlic Pasta made with roasted garlic. Of all the ways I’ve tried garlic, roasted is my favorite. It takes a little extra work to roast the garlic, but the payoff is worth it. Roasting mellows the sharp flavor so you can use more without things getting out of hand. That’s why using a whole head or more of roasted garlic in a recipe isn’t unusual at all. And that’s exactly what this Roasted Garlic White Chicken Lasagna Soup calls for—an entire half cup of creamy, delicious roasted garlic. Oh boy!

The coziest, creamiest, most comforting soup! This roasted garlic white chicken lasagna soup is sure to be a hit with the whole family! And it’s quite quick to put together too!

Recipe Author: Marzia at Little Spice Jar
Get the recipe

The Ingredients

The notes of this recipe suggest roasting 5-6 heads of garlic to make sure you have enough to measure a half cup. I had no problem with this and bought 6—I can never have too much garlic!

I had to buy a few things, but nothing was difficult to find. The recipe says “mushrooms” so I got slightly exotic and went with baby bellas. And I picked up an onion, some chicken breasts, and milk (instead of half-and-half).

I had a few things on hand like butter, flour, grated parmesan, and spices. I even had some homemade turkey stock in the freezer, so I used that instead of chicken stock.

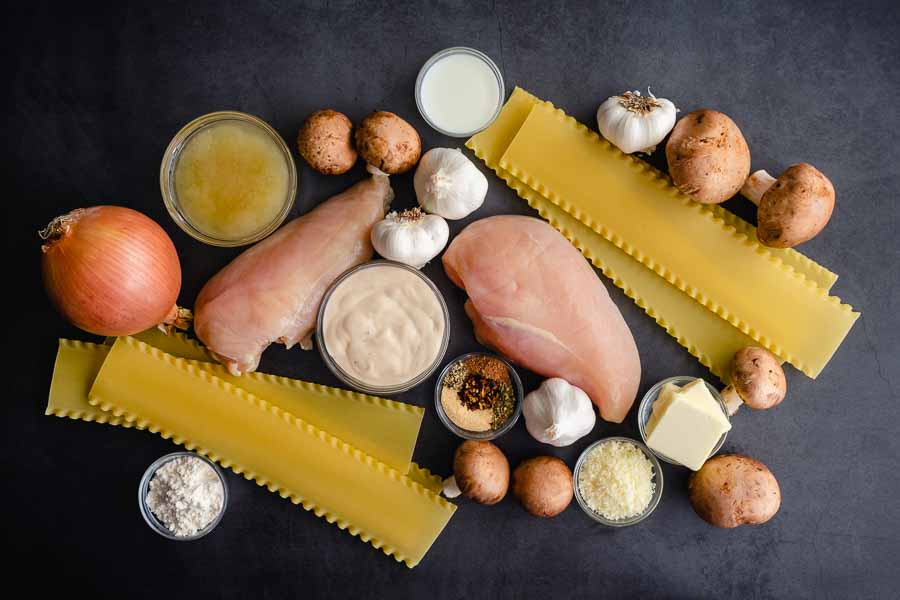
Roasted Garlic White Chicken Lasagna Soup Ingredients
Alfredo sauce, garlic, milk, mushrooms, lasagna noodles, chicken breasts, butter, grated parmesan, garlic powder, dried basil, Italian seasoning, ground nutmeg, red pepper flakes, flour, onion, and turkey stock (substituted for chicken stock)

The Process

This recipe was divided into 3 sections, and that made things easy to manage. Here’s how my time was spent:

  • 20 minutes to prep
  • 42 minutes to cook
  • 1 hour 2 minutes total

That’s a bit longer than the 45 minutes listed, but that’s because I’m including time to roast the garlic and boil the noodles. My total time would have been 52 minutes without that.

I kicked things off by roasting 6 heads of garlic in my convection oven for 20 minutes. At the same time, I boiled the lasagna noodles for 10 minutes, drained them, and sprayed them with olive oil so they wouldn’t stick together. The remaining 10 minutes was the prep work described in the recipe, and that tracks with the time listed.

Once it was time to start cooking the soup, I got out my Dutch oven and started things off with some sauteeing, namely the chicken then the mushrooms. At the same time, I used 4 heads of garlic to measure 1/2 cup then blended them with the alfredo sauce.

After setting aside the chicken and mushrooms, there was a little more sauteeing (of the onions this time), followed by mixing the flour, broth, and milk. Once the broth was mixed, I added the alfredo-garlic mixture and the spices and allowed the broth to simmer for 10 minutes.

Next, it was time to add the parmesan cheese, chicken, mushrooms, and parsley. You have the option of adjusting the seasoning with salt and pepper, but I found it was fine as it was and called it done. I got out a couple of pasta bowls, added a few noodles, and poured the soup over them.

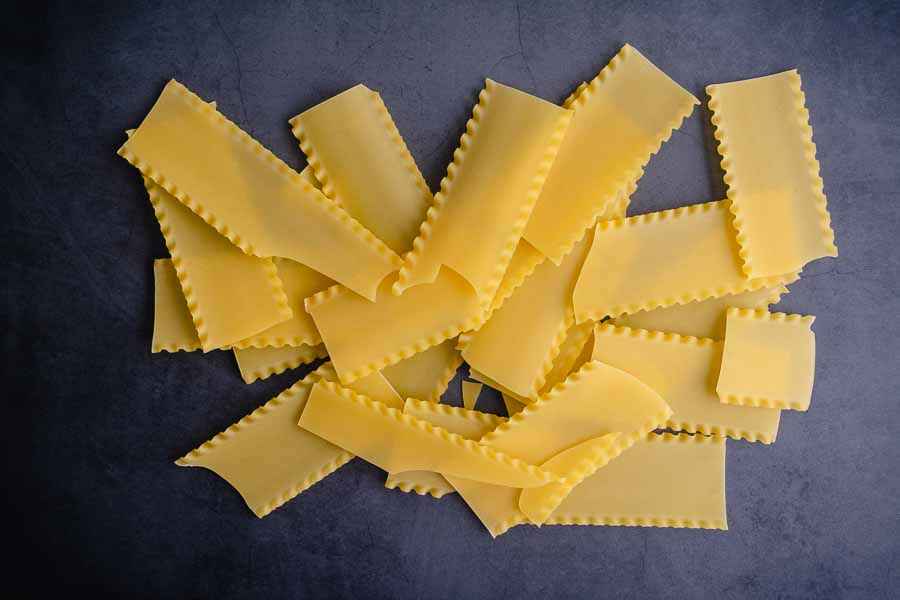
Broken lasagna noodles

Ube Cake Roll

1

My first foray into Filipino food was the Mechado I just made, and it was divine. But y’all know I had to follow it up with a Filipino dessert recipe! I did some searching through Pinterest and ube, purple sweet potatoes/yams, kept popping up. There were dozens and dozens of dessert recipes, and I had a hard time choosing one to make. I ended up deciding on this Ube Cake Roll because it looked like a challenge. I’ve never made a cake roll or had ube, so I’m going to change all that with one recipe. Let’s dive in!

Ube Cake Roll is made of a soft ube flavored chiffon cake rolled and filled with ube whipped cream.

Recipe Author: Sanna at Woman Scribbles
Get the recipe

The Ingredients

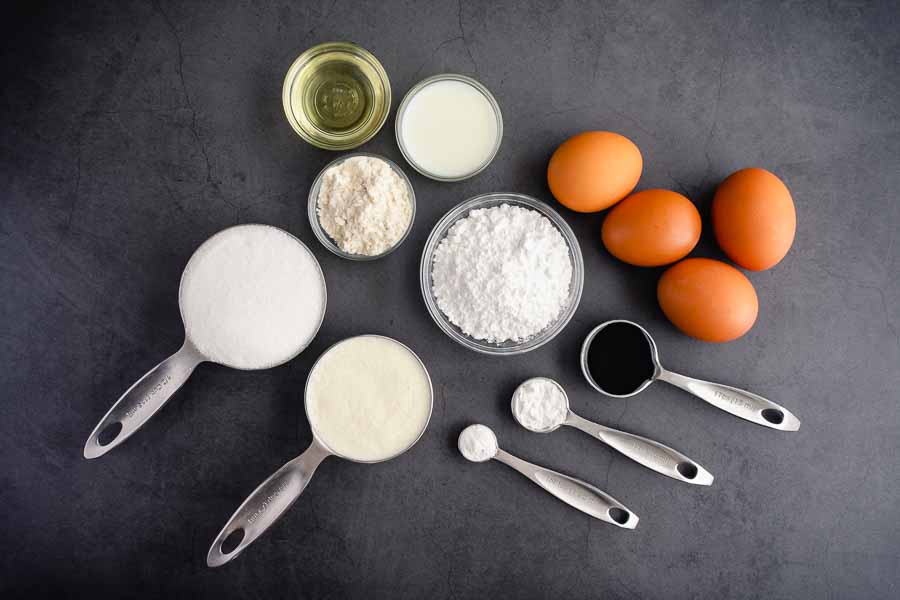
Most of the ingredients in this recipe were typical cake ingredients like flour, sugar, and baking powder. I had all those on hand plus the canola oil and cream of tartar.

All I needed to buy was the eggs, milk, whipping cream, and ube extract. I found everything but the ube extract at my regular grocery store. No worries, though, because the ube flavoring was just a click away for about $5 for a 2-ounce bottle (more than enough for this recipe).

Tip: You’ll also need some cooking spray and parchment paper to prepare the sheet pan, so make sure you have them or pick some up with your groceries.

Ube Cake Roll Ingredients
Canola oil, milk, eggs, ube extract, baking powder, cream of tartar, icing sugar, whipping cream, sugar, and flour

The Process

The total time for this recipe is 47 minutes, which I thought was quick for a cake. but I’m not the greatest baker, so… Anyway, here’s how my time was spent:

  • 21 minutes to prep
  • 12 minutes to bake
  • 1 hour to cool
  • 6 minutes to make whipped cream
  • 10 minutes to roll, ice, and decorate
  • 1 hour 49 minutes total

My time would have been 49 minutes without cooling, and that’s right in line with the total time listed on the recipe.

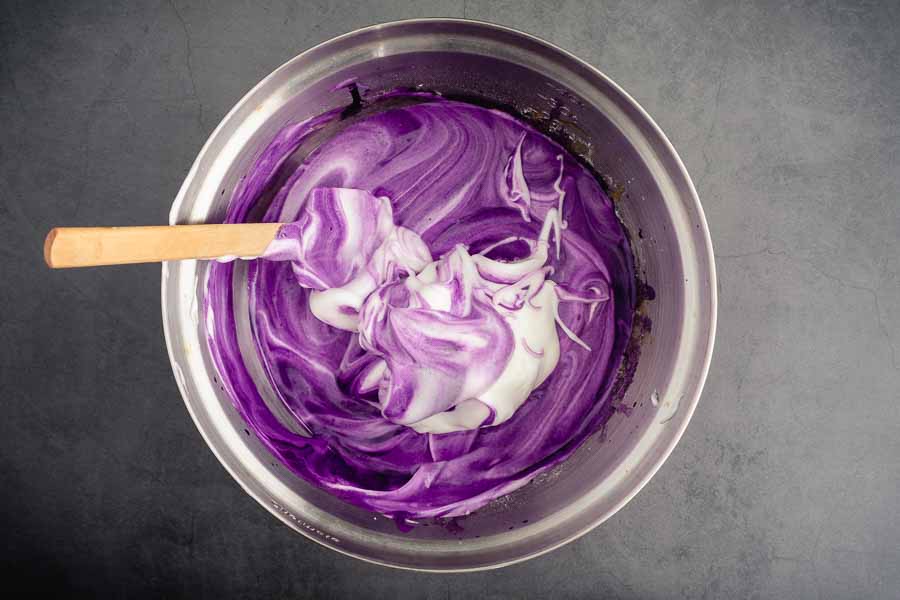
Things began with mixing up the cake batter. This part was done in 3 sections, and it was pretty easy. First, mix the wet components of the cake batter in one bowl and the dry in another then combine. Next, you make a meringue in your stand mixer and combine it with the first part. (You can use a hand mixer for the meringue, too, but I don’t recommend trying it by hand.)

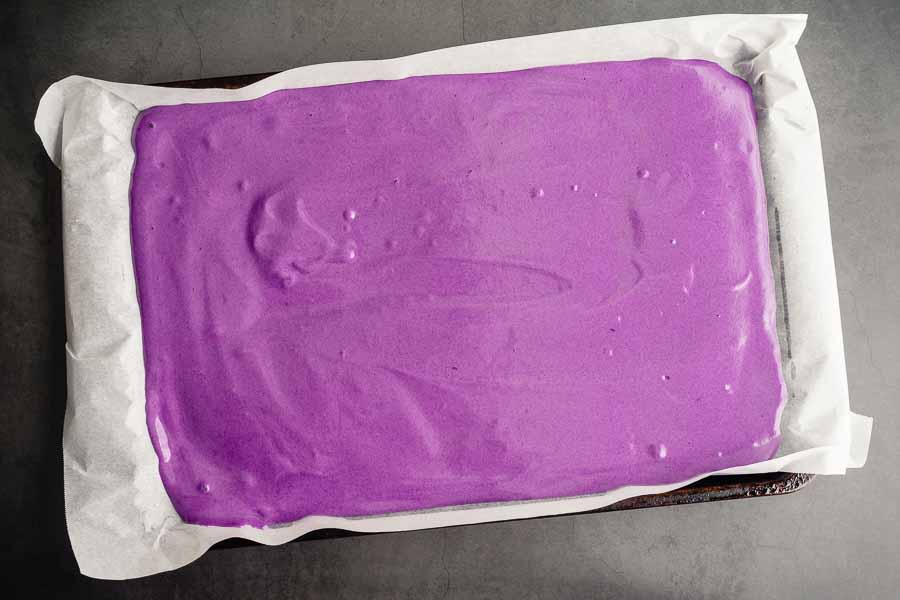
Once the batter is mixed to a uniform color it’s added to a prepared sheet pan and baked for 12 minutes. I let mine cool for an hour after it came out of the oven. It was probably okay around the 30-minutes mark, but I wanted to make very sure.

Mixing the meringue into the ube cake batter

Ube Whipped Cream Frosting

While it was cooking, I mixed up the ube whipped cream. The instructions don’t say how to do this, so I made an educated guess. I cleaned my stand mixer’s bowl and whisk attachment and mixed all the ingredients together until I had stiff whipped cream. That’s it.

Now it was time for what I expected to be the hard part: icing and rolling the cake. Removing the cake from the pan was easy thanks to the detailed instructions in Step 4. I’m sure the parchment paper and cooking spray helped too LOL. I was pleasantly surprised. Rolling the cake was easy, and so was frosting it, and I used a notched icing smoother to spruce it up.

I thought I had enough of the whipped cream left over for decorations, but I wanted to make sure. I used the extra 1/2 cup of whipping cream, 3 tablespoons of powdered sugar, and some violet food coloring I had in my pantry to make lavender whipped cream. Then I filled 2 pastry bags with piping tips and made alternating color dollops on top. So cute! Unfortunately, I forgot to time this part, but it went by quickly and is optional.

The ube cake batter poured onto a prepared sheet pan

Mechado

Beef stew is a classic wintertime comfort food, and I look forward to trying a new recipe every year. It has become a tradition, and this year I’m trying Mechado, a Filipino beef stew. It has a lot of the same ingredients as the American beef stew I grew up with plus a few Asian items that I have come to love. I’m so curious to find out what this version of beef stew will be like!

Mechado is the Philippine version of the ubiquitous comfort food with a wonderful depth of flavor that comes from browned garlic, marinated beef, and the complex flavors of patis, or fish sauce.

Recipe Author: Liren Baker at Kitchen Confidante
Get the recipe

The Ingredients

When I bought the duck breasts I made a while back, I also picked up a bag of beef stew meat. I’ve had it freezer just waiting to become Mechado.

This recipe calls for 1.5 pounds of beef, but the bag I bought was 2 pounds. I measured out the extra half-pound, and it wasn’t a lot of meat. I decided to throw it into the stew because it was such a small amount. Besides, more beef in the stew can’t be a bad thing!

I had to buy the vegetables, beef stock, and tomato sauce. The rest was sitting in my pantry, so shopping was short and sweet.

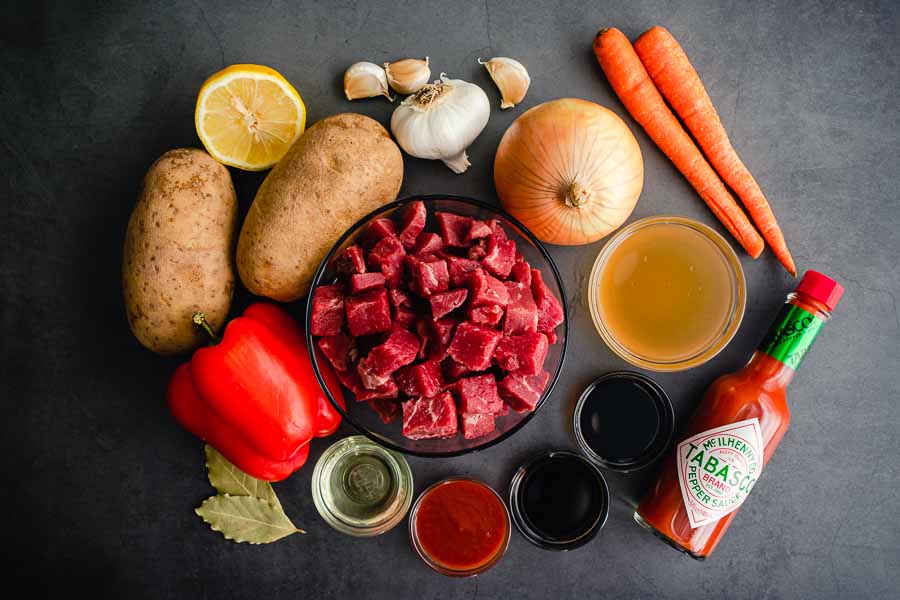
Mechado Filipino Beef Stew Ingredients
Beef stew meat, garlic, onion, carrots, beef stock, Tabasco sauce, fish sauce, soy sauce, tomato sauce, canola oil, bay leaves, red bell pepper, russet potatoes, and lemon juice

The Process

I didn’t simmer the Mechado for the maximum time because I had to squeeze in photos before the sun went down and I lost the light. Still, the whole process took me a little more than the 1 hour 50 minutes listed. I think it’s because I had to brown the meat in 3 batches, but I’d say it was worth it. Here’s how my time was spent:

  • 30 minutes to marinate the meat (includes 10 minutes to prep the veg)
  • 25 minutes to brown the garlic, beef, and onion (Steps 2-6)
  • 1 hour to simmer (Step 7)
  • 20 minutes to cook the vegetables (Step 8)
  • 2 hours 15 minutes total

Prepping the Mechado Ingredients

Things started off with marinating the beef in a mixture of soy sauce and lemon juice for 30 minutes. My largest Snapware container was the perfect size for this (the 8.5-cup shallow rectangular shape). It was just large enough to fit the meat without much leftover space. That kept it soaked in the marinade instead of allowing the liquid to pool at the bottom.

I finished prepping the vegetables while the meat was marinating. That only took 10 minutes, so I had time for a little break. Oh, this is when I also flipped the container of beef to make doubly sure the marinade soaked into all the meat.

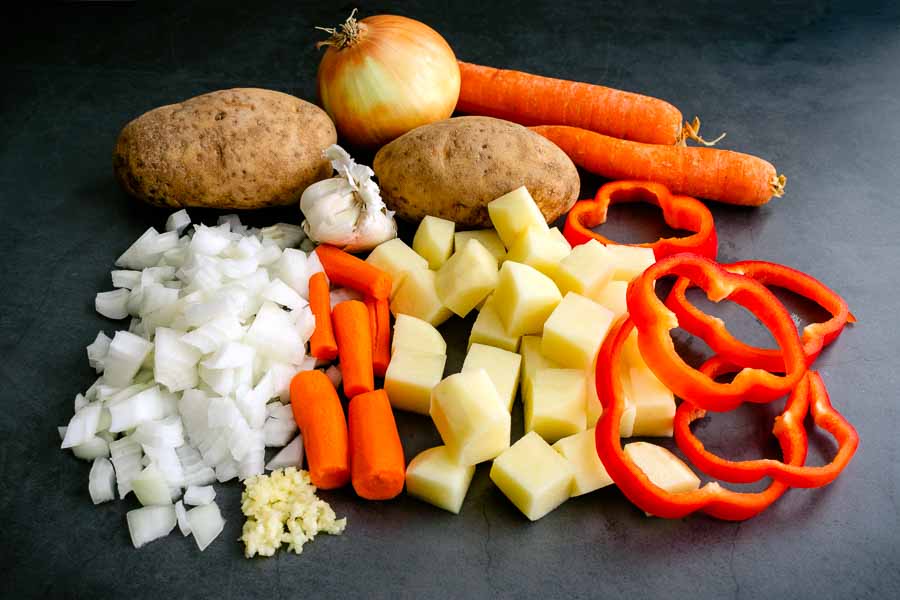
DIced onion, minced garlic, chopped carrots and potatoes, and sliced red bell pepper

Cooking the Mechado

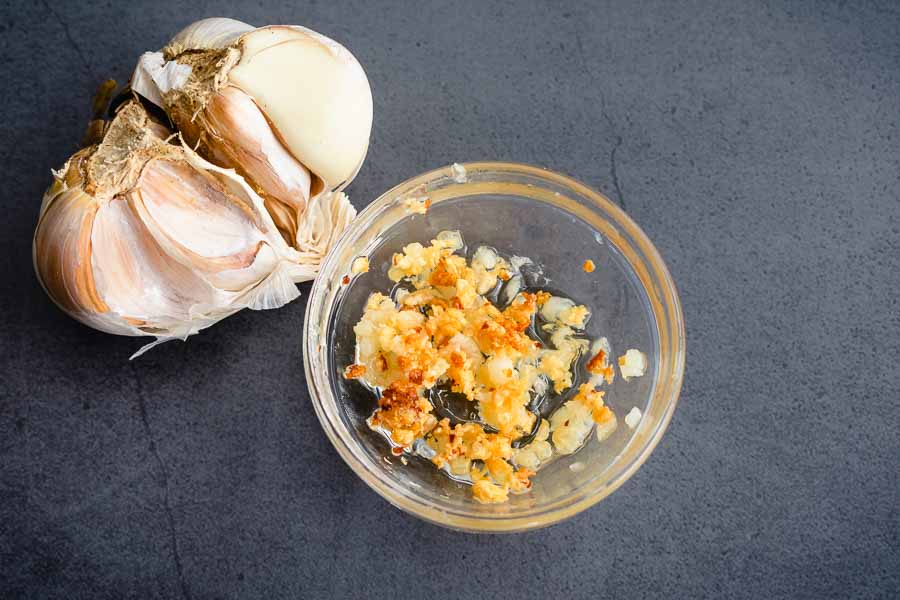
Once the timer for the marinade went off, I got back into the kitchen and started cooking. The recipe starts off with browning the garlic. Tip: Make sure to keep an eye on the pan while the garlic browns because it can go from zero to charcoal fast. Also, removing it from the pan was tricky. The tiny pieces of minced garlic fell through my slotted spoon. That meant carefully removing it with a regular spoon while trying to drain the hot oil back into the pan so I didn’t burn myself. I left a few bits in the pan, but I got most of it safely.

Next up was browning the marinated meat (be sure to reserve the marinade—you’ll need it later). I used my 5.5-quart Dutch oven, and it took me 3 batches. Tip: Browning all the meat once would have crowded the pan, keeping it from browning. Having space between the chunks of meat helps it get a nice sear.

Browned minced garlic

After that, the recipe continued with adding the rest of the ingredients (except the vegetables) over a few steps to add some depth of flavor. Once that was done, I set the timer for 45 minutes, did some dishes, and relaxed a bit.

I found the stew was ready when I checked on it, but I gave it another 15 minutes. I would have simmered it longer, but I had photos to take before it got too dark.

The final step was adding the potatoes and carrots and simmering for another 20 minutes. (BTW, this is the perfect time to cook the rice.) This cooked them just until they were tender but prevented them from getting mushy and disintegrating. I was pleased with the flavor, so I didn’t add any salt, just a dash of pepper.
Iced Irish Coffee with Coffee Ice Cubes

0

No, it isn’t St. Patrick’s Day, but it is National Irish Coffee Day. That delightful fact sent me straight to Pinterest to search for an Irish Coffee recipe. I found everything from the traditional version to the Boozy Irish Coffee Milkshake. Talk about a tough decision to make! It took some thought, but I eventually decided on this Iced Irish Coffee with Coffee Ice Cubes recipe. When I drink coffee it’s iced, so this was a natural choice. I also loved the simplicity of the recipe. Four ingredients plus four steps equal two cold, sweet, boozy, and caffeinated cocktails. I like the sound of that!

If you like iced coffee, this is the cocktail for you. Traditional Irish coffee flavor mixed with coffee ice cubes for great sipping flavor.

Recipe Author: Brandy O’Neill at She Knows
Get the recipe

The Ingredients

The list of ingredients for this recipe was short (and sweet!). I had the brown sugar on hand, but I had to buy the rest. I stopped at the liquor store for a bottle of Jameson Irish whiskey. The grocery store was my next stop, where I found light cream and cold brew coffee in the dairy section.

Iced Irish Coffee with Coffee Ice Cubes Ingredients
Jameson Irish whiskey, brown sugar, coffee, and light cream

The Process

This recipe was nice and simple, and had 3 main parts:

  • 2 minutes to make the ice
  • 2 minutes to sweeten the coffee
  • 3 minutes to assemble the Iced Irish Coffee with Coffee Ice Cubes
  • 7 minutes total (not including time to chill & freeze)
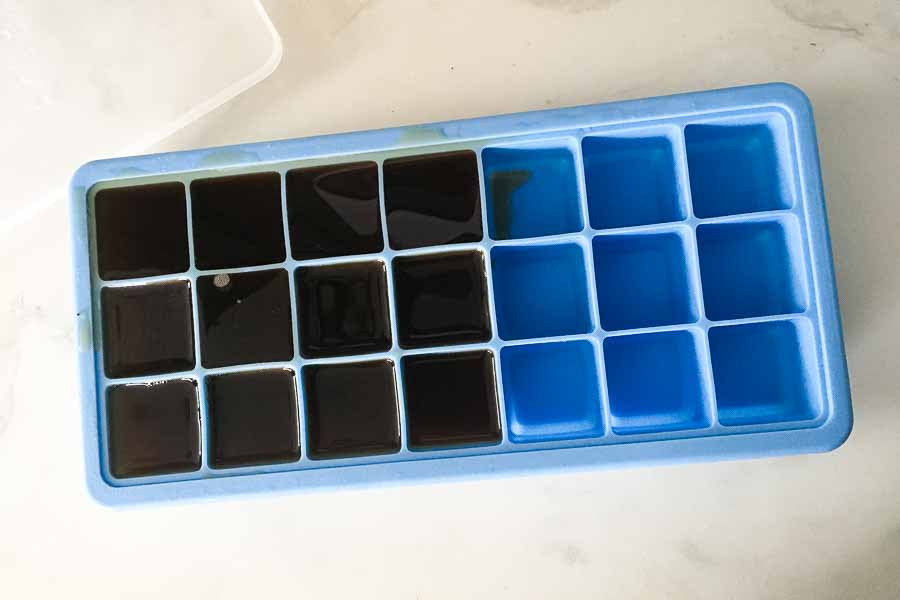
The cold brew coffee I bought was kept in the dairy section’s refrigerator, so I immediately poured 12 ounces into an ice cube tray. It filled about half of the cubes in the tray, and I let it freeze overnight.

The rest of the coffee needed to be sweetened with brown sugar. I left it on the counter to warm up, but I didn’t include the time on that. I just went about my business and came back to it later in the day. Then I added the sugar, shook the sealed container to mix, and put it into the refrigerator.

When it was time to assemble the Iced Irish Coffee with Coffee Ice Cubes, I opted for tall highball glasses. I considered Irish coffee mugs, but I was afraid there wouldn’t be enough room for the coffee ice cubes. The highball glasses were perfect!

I added 3-4 ice cubes, the Irish whiskey, light cream, and chilled coffee. A quick stir, a couple of straws, and the cocktails were complete. Cheers to that!

Cold brew coffee poured into an ice cube tray