Home Blog Page 17

Softbatch Cream Cheese Chocolate Chip Cookies

It’s been a minute since I’ve baked a dessert, and I’m in the mood for something sweet. That’s why I picked out this Softbatch Cream Cheese Chocolate Chip Cookies. It sounds like the type of chocolate chip cookie that I love—a little crispy on the outside with. a soft and chewy center. No pre-made bagged supermarket cookie can compare to homemade cookies, and chocolate chip is a classic that never gets old. Baking isn’t my strong suit, but I’m psyching myself up for this recipe. The sweet, chocolatey payoff sounds like it will be fantastic!

These soft batch cookies are made with a combination of butter and cream cheese, which makes them extra rich and delicious! I like to make mine using a combination of chocolate chips and chunks, and you can even use M&M’s in these!

Recipe Author: Averie Sunshine at Averie Cooks
Get the recipe

The Ingredients

Alright, time to gather the ingredients! I had a lot of them on hand too always a good thing). Actually, it might be easier to just tell you what I had to shop for.

My shopping list for this recipe was short at 3 items: eggs, cream cheese, and chocolate chips. I looked for a mix of chips and chunks, but all the store had was chips. They did have some giant chips, though, so I used a mix of those with regular-sized chocolate chips.

The flour, butter, brown sugar, and everything else were in my pantry and refrigerator just waiting to become cookies. How nice of them!
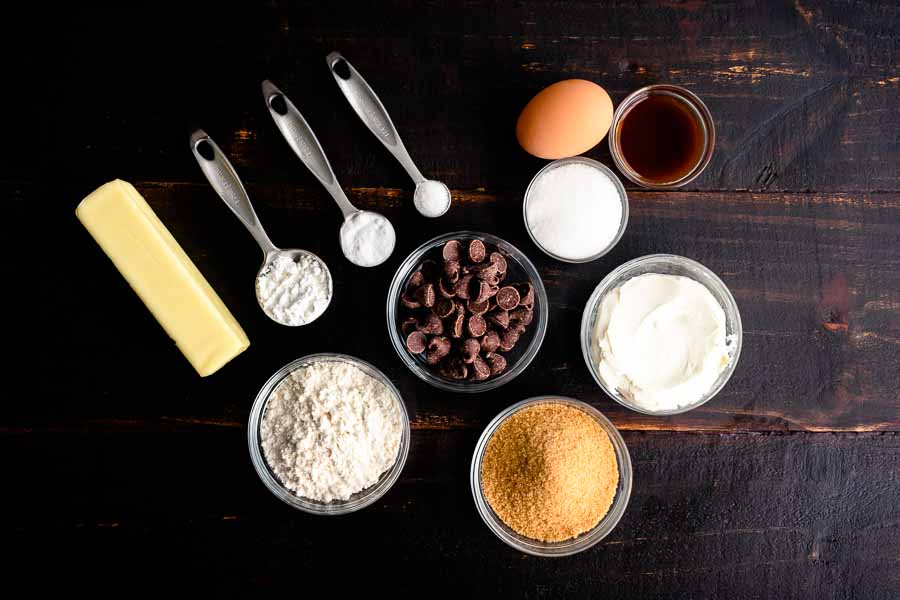
Softbatch Cream Cheese Chocolate Chip Cookies Ingredients
Semi-sweet chocolate chips, heavy cream, egg, vanilla extract, cream cheese, light brown sugar, all-purpose flour, unsalted butter, cornstarch, baking soda, and sea salt

The Process

The first order of the day is mixing up the cookie dough, of course. My stand mixer made prepping the cookie dough a breeze, but I appreciated the fact that the instructions included a note on using a hand mixer instead. That’s all I had for many years, and it get the job done.
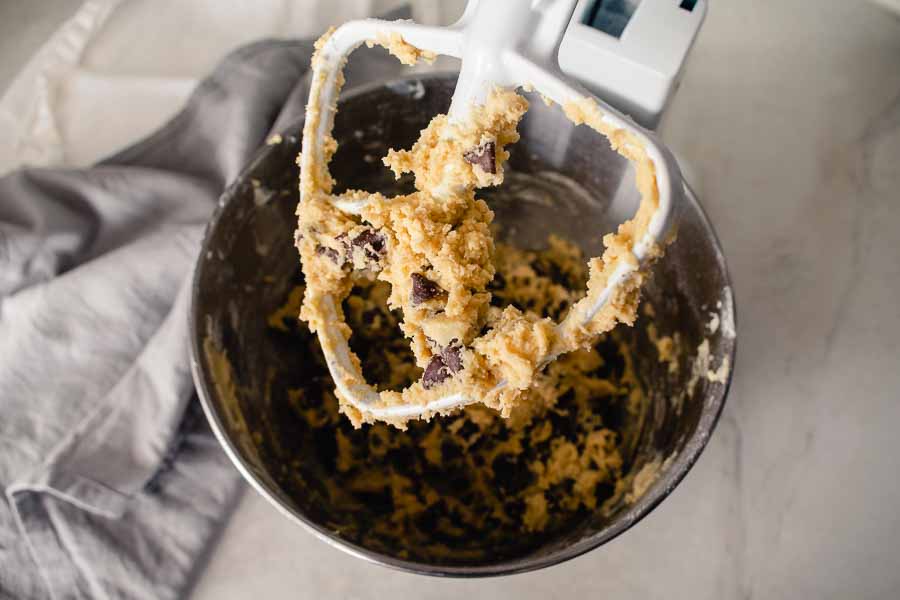
The paddle attachment on my stand mixer was perfect to mix up the cookie dough

I let the mixer cream the butter, cream cheese, sugar, egg, and vanilla for 5 minutes while I measured out the remaining ingredients. I also had time to line my sheet pans with parchment paper.

Once the chocolate chips were mixed in, I began scooping the dough onto parchment-lined plates using a 2-inch cookie scoop. Then I wrapped the plates in plastic wrap and let them chill for a couple of days. It was nice that I could wait until it was convenient to bake them.

When it was time to bake I followed the author’s advice and placed 8 cookies per sheet. I had 25 cookies, so that made 3 sheet pans. I fit the extra cookie on one of the pans and popped them all into the oven for 8 minutes.

They looked soft when I pulled them out, but none of the cookies overlapped. I allowed the cookies to cool for 5 minutes on the sheet pans, then I used a spatula to move them to a wire rack. There were some dishes to do, so I puttered around the kitchen while they finished cooling to room temperature.
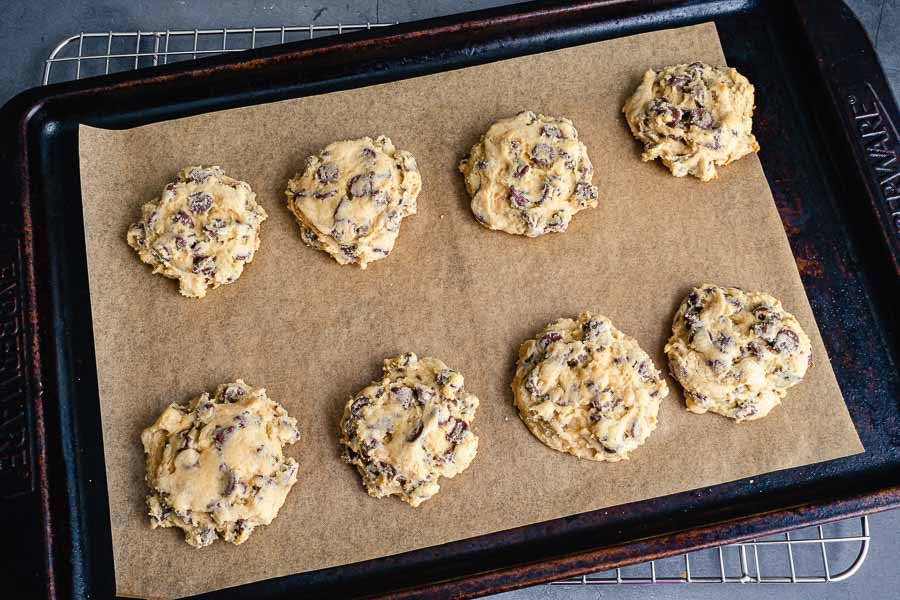
Baked Softbatch Cream Cheese Chocolate Chip Cookies on a parchment-paper lined sheet pan
I was able to fit 8 cookies per sheet pan with room for them to spread out as they baked

My Softbatch Cream Cheese Chocolate Chip Cookies baked up just as promised. The cookies were just a little crisp outside and pillowy soft on the inside. I’m guessing it was because the dough didn’t spread out too much in the oven. That and the cream cheese must have done the trick. Here’s a breakdown of the whole process:

  • 21 minutes to prep
  • 2 hours to chill dough (minimum, up to 5 days)
  • 3 minutes to transfer from plates to sheet pans
  • 8 minutes to bake
  • 5 minutes to cool
  • 2 minutes to transfer to wire racks
  • 2 hours 39 minutes total

The recipe listed a total of 2 hours 18 minutes. My time was a little more, but I can’t complain after sampling the finished cookies. They were spectacular!

Easy Potato Leek Soup

It’s been a while since I have made anything with leeks, and I had a craving. Okay, a mild craving, but a craving nonetheless. Leeks are leafy green vegetables that look like giant scallions. Like scallions, they are related to the onion. The key difference is that leeks have a very mild onion flavor. Another is the leaves are very thick and tough, so you will only want to use the white part of the stalk. Leeks are often used in soups, and that’s exactly what I’m going to do today with this Easy Potato Leek Soup. It looks a little heartier than the traditional potato leek soup thanks to the (optional) addition of Andouille sausage. I’m all for that since a little protein tends to make vegetable dishes more satisfying. Please join me!

Easy Potato Leek Soup Recipe: caramelized leeks & golden potatoes pureed together in a silky soup with pan seared andouille sausage.

Recipe Author: Florentina at Ciao Florentina
Get the recipe

The Ingredients

I had the spices for my Easy Potato Leek Soup, but that was about it. My shopping list included pretty much everything, and I was able to find almost everything without any trouble. Tip: you’ll need olive oil for this recipe. It’s not on the list of ingredients, but I always keep it around. Just thought I’d warn you in case you don’t 🙂

Leeks are available year-round in my area even though they are a spring vegetable. Their season is late winter through early summer, so finding them now shouldn’t be a problem. Just be sure to clean them well as sand tends to work its way down into the layers.

The potatoes, vegetable broth, cream, and other fresh items were easy to locate, but the chicken Andouille sausage was another story. I searched high and low in the meat department with no luck. I finally found pork Andouille in the dairy section, so I went with that.

By the way, this is one of those recipes that’s guaranteed to have extra ingredients. I had leftover leeks, carrots, thyme, chives, cream, and Andouille. In fact, I had enough to make this recipe twice, which is exactly what I did a week later! The chives didn’t quite make it, but I didn’t miss them the second time because they’re really just for garnish.
Easy Potato Leek Soup Ingredients
Leek, carrot, thyme sprigs, vegetable stock, chives, bay leaf, heavy cream, golden potatoes, salt, pepper, and Andouille sausage

The Process

I kicked off this recipe by slicing and cleaning the leeks (in that order). Sand and dirt tend to work themselves pretty far down in between the leaves, and the only way to get it out is after slicing. It sounds strange to clean your veg after slicing, I know, but leeks need it! There’s more on how I do it with a photo in my Slow-Cooker Shrimp & Crab Bisque recipe review.
I had been preheating some olive oil in my 5.5-quart Dutch oven at the same time, so I added the leeks to it. Since the heat was fairly low, I gave them the occasional stir while I finished the prep work instead of continually stirring like I would for a traditional high-heat saute. I had 15 minutes to do that, so I brought out my vegetable chopper to speed things up.

Tip: It’s not stated in the recipe, but I peeled the potatoes because this soup will eventually be pureed. I like my soup a little chunky, but potato peel chunks didn’t sound appealing (see what I did there!).

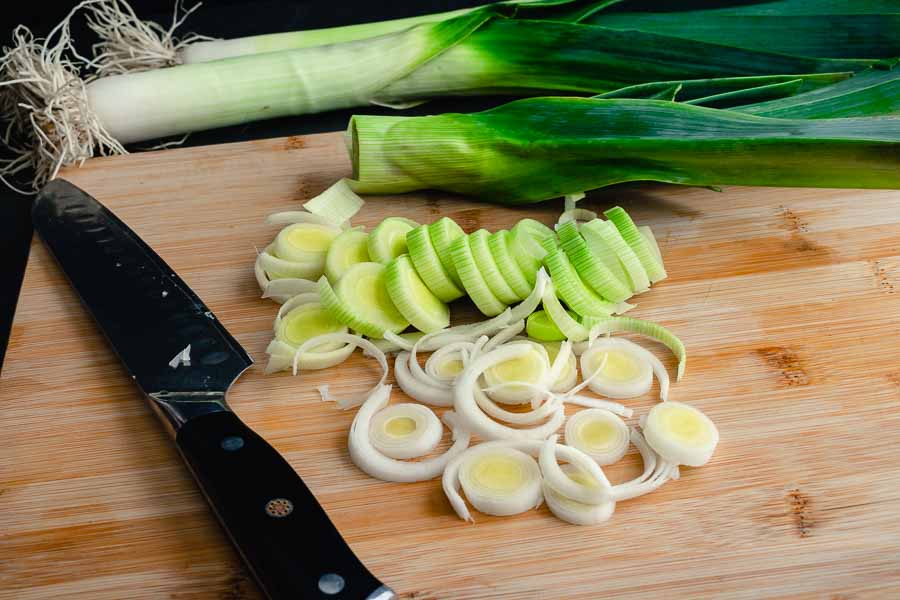
Slicing a leek
Only use the white part of the leeks and discard the tough green leaves

Finishing the soup

Everything was ready in time for the next step, and I simmered the potatoes, carrots, thyme, bay leaf, and vegetable stock with the sauteed leeks. At the same time, I grabbed my 10-inch cast-iron skillet and seared the slices of Andouille.

After removing the herbs, my stick blender allowed me to blend the soup right in the pot. Tip: Even after what I thought was a thorough blending, my soup was still a little chunky. Not a problem for me, but something to be aware of if you want a completely smooth soup. In that case, transferring a little at a time to a full-sized blender might be a better option for you.

After that, I was ready to serve my soup. I had fun with all the garnishes for the photos! Tip: Just be sure to layer them in the order listed: liquid, larger solids to smallest solids (that works best for most things with lots of garnishes). And something else to note: I didn’t reserve any leeks for garnish the first time I made this soup, but I did the second time. I highly recommend it! They add a subtly sweet oniony flavor that I loved.

This recipe lists a total time of 40 minutes, and I came close to that:

  • 12 minutes to prep
  • 35 minutes to cook
  • 47 minutes total
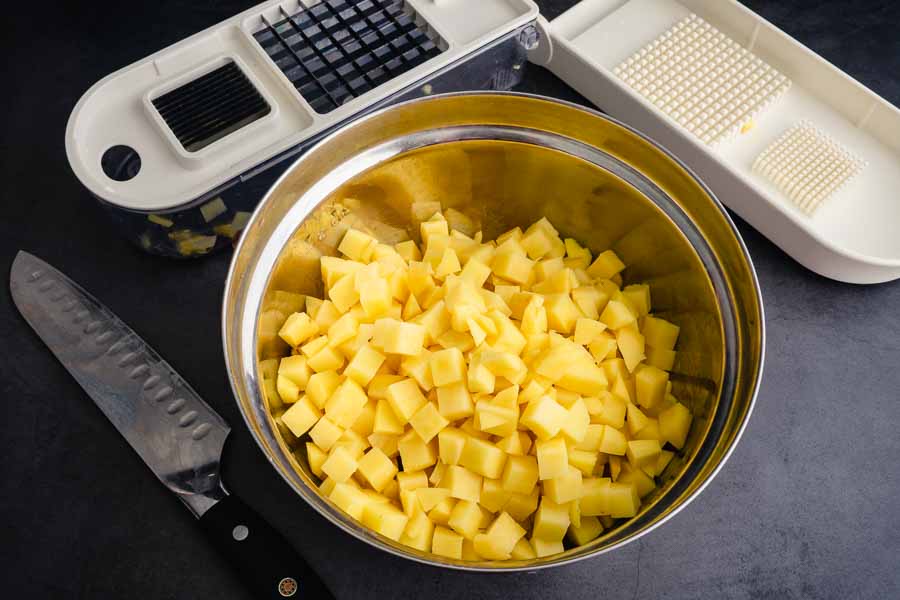
Chopped yellow potatoes
I used a vegetable chopper to speed up the prep work

Honey Baked Ham (Copycat)

With Easter fast approaching, there was one thing on my mind: what to have for dinner? It’s always nice to get together with the family and have a big meal! But it needs to be something special. I love a nice leg of lamb, and so does my father-in-law. Unfortunately, my husband and mother-in-law aren’t fans. That left me with my other favorite, a nice ham. I’m pretty fond of this Bourbon Orange Glazed Ham, but there’s only one ham that can top it. That’s right, the ham of all hams, a Honey Baked Ham. There are tons of copycat recipes to choose from, but this copycat recipe really sounded good to me. Let’s find out if it lives up to the name!

I am totally obsessed with this Copycat Honey Baked Ham Recipe! It is so simple and yet the results are absolutely insane. No wonder people pay $75 for these! Instead of glazing and roasting, we are rubbing it with dry sugar and hitting it with a kitchen torch. The crispy edges of this ham are like candy!

Recipe Author: Karen at The Food Charlatan
Get the recipe

The Ingredients

My shopping list was very short because I had everything on and except the ham. Literally all the spices, sugar, and honey were in my pantry, and the butter and dijon mustard were hanging out in the refrigerator. If you’re wondering, I used Sir Kensington’s brand of dijon. I fell in love with it when I made Dijon Tahini Green Beans last Christmas, and I have kept a jar around ever since.

The spiral sliced ham came from my usual grocery store (Winn Dixie these days). It was about $19 for 9 pounds. A little more than I remember in years past, but nowhere near the price of a Honey Baked Ham.

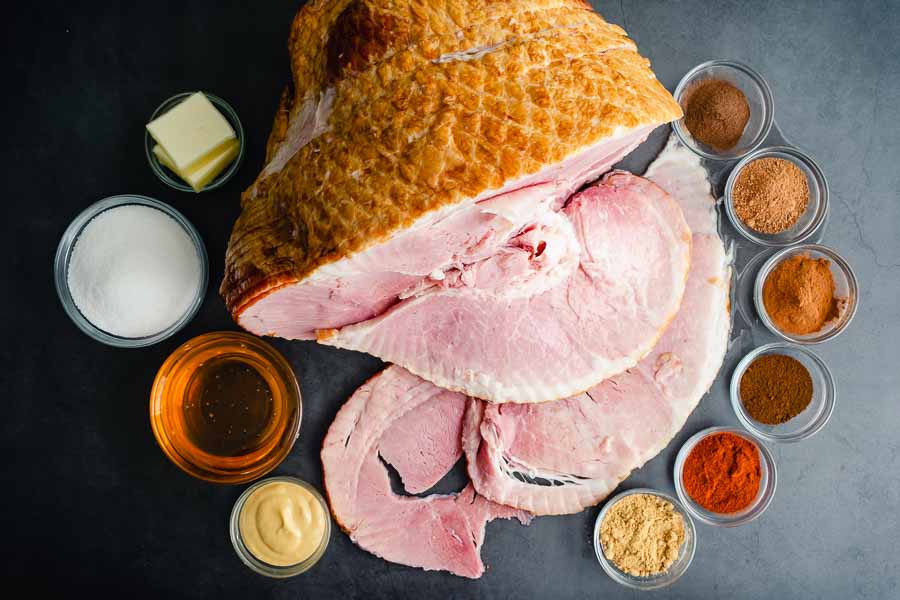
Honey Baked Ham (Copycat) Ingredients
Spiral sliced ham, cloves, nutmeg, cinnamon, allspice, paprika, ginger, dijon mustard, honey, sugar, and butter

The Process

The instructions with this recipe are pretty detailed, and they might seem intimidating because the recipe is 3 pages long. Don’t let the length fool you—this recipe is pretty easy to make as long as you have the right equipment. Here’s how my time was spent:

  • 9 minutes to prep
  • 2 hours 20 minutes to cook
  • 15 minutes to rest
  • 12 minutes to torch and make the glaze
  • 2 hours 56 minutes total

Prep & Roast

The first thing I did was put my ham into a roasting pan with a rack. The recipe says you can use a wire cooling rack on a sheet pan if you don’t have a roasting pan with a rack. I would be cautious with this method because my ham produced a lot of juices. I’m pretty sure my sheet pans would have overflowed because they are rather shallow. A baking dish might be a safer option.

After that, I mixed up the 3-ingredient honey glaze and rubbed it all over the ham. I used one hand to tilt the top of the ham so I could work the glaze in between the slices on all sides. Then I added water to the roasting pan, covered it all with foil, stuck in a meat thermometer, and started roasting.

The recipe does say to roast the ham for 20 minutes per pound. My ham was 9 pounds, so that worked out to 3 hours. However, the meat thermometer beeped after 2 hours 20 minutes.

Dry Rub & Glaze

I made the dry rub while the ham was in the oven, and it only took a few minutes to measure out and mix the spices and sugar. Once the ham was out of the oven and cooled, I poured the juices into a fat separator and applied the dry rub while it separated.

This was the fun part! I put on my grilling gloves, carefully picked up the ham, and gently rolled it in the dry rub that I had put into a sheet pan. The ham was so tender I was afraid it would fall apart, so I had to be very careful with it. Then I spooned the remaining loose sugar onto the ham and torched it until it caramelized. The instructions on how to do this were spot-on, and I didn’t have any trouble achieving that tasty candy-like coating.

All that was left was to add 1/3 cup of the pan drippings to a saucepan with the rest of the dry rub and mix. The juices were already hot, so they dissolved the sugar very quickly. I had my glaze/sauce made in no time at all. All that was left was to plate the ham, pour the glaze into a small bowl, and serve.

The pan drippings in a fat separator

Rhubarb Mint Mojito

I have never had rhubarb, and I’ve been on the hunt for it for the last few months. It just so happens that I stopped into one of my favorite grocery stores, Doris Italian Market, the other day, and there was a package of rhubarb stalks. Good thing I have recipe software on my phone because I quickly looked up everything else I would need for this Rhubarb Mint Mojito recipe. I do love a mojito, and I’m really hoping I like rhubarb. I’m not even sure how to handle or prepare it, so let’s find out!

Celebrate spring and summer weather with this recipe for a Rhubarb Mint Mojito, made with easy rhubarb simple syrup. Make it a cocktail or a mocktail!

Recipe Author: Elaine at Flavour & Savour
Get the recipe

The Ingredients

I only bought one package of rhubarb with about six stalks in it (BTW, it was just over $4). The recipe calls for four cups of chopped rhubarb, and there wasn’t enough in the package. There were about two and a half cups after I chopped it up, so I cut the simple syrup recipe in half.

I also had to pick up the fresh mint, limes, and sparkling water, but I had everything else on hand. I even had some white rum leftover from the Blood Orange and Raspberry Mojito I made a while back.

Rhubarb Mint Mojito Ingredients
White rum, mint, rhubarb, sugar, nutmeg, cinnamon, lime juice, and sparkling water

The Process

The first step in this recipe is to make the Rhubarb Simple Syrup. Simple syrup is indeed simple and adding some cinnamon, nutmeg, and chopped rhubarb really didn’t make it any more difficult. Here’s how my time was spent:

  • 15 minutes for the simple syrup (not including time to chill)
  • 4 minutes to make the cocktail
  • 19 minutes total

Rhubarb Simple Syrup

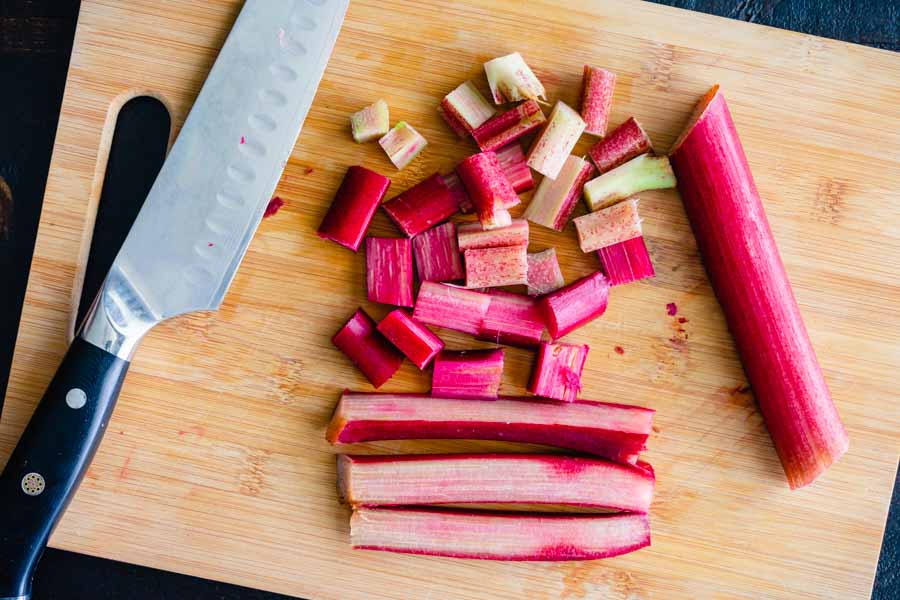
I have no clue what the “proper” way to handle rhubarb is, so I made it up as I went along. I used a chef's knife to cut each stalk into three strips, then I cut the strips into 1/2 inch pieces.

Chopping the rhubarb

Making the actual syrup was even less work than chopping the rhubarb. Just add all the ingredients to a saucepan and simmer until it thickens and the rhubarb gets soft. Tip: I used a fork to test the rhubarb, and it seemed soft after 10 minutes or so.

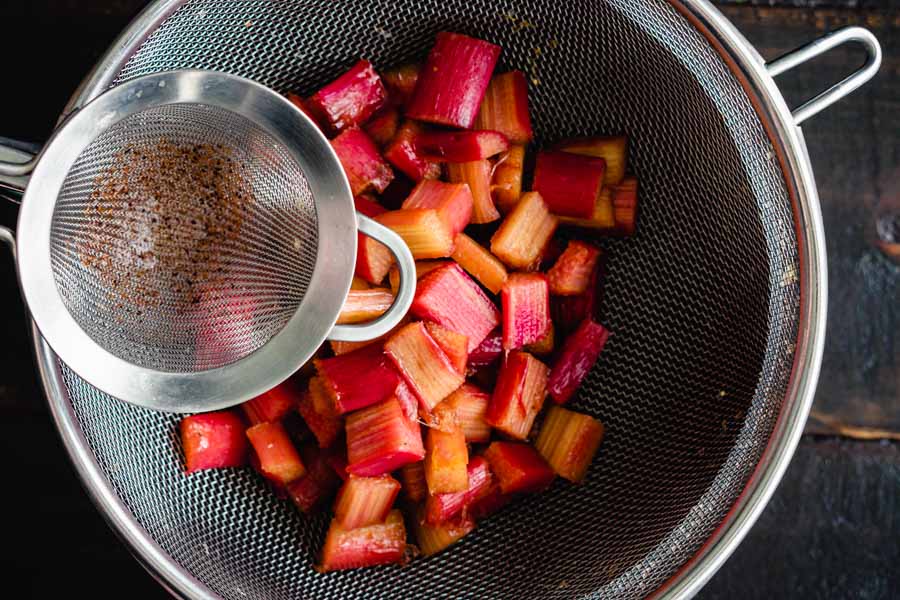
I strained the syrup with my large mesh strainer, and that removed all the big chunks of rhubarb. It also left a lot of the ground cinnamon and nutmeg, so I strained the syrup a second time with my fine mesh strainer. That gave me a much clearer simple syrup.

I drained the Rhubarb Simple Syrup twice to remove the ground spices

Then it was into a sealed container to chill while I cleaned up and got ready to make the actual cocktail. I wandered off and did some housework and came back to chilled Rhubarb Simple Syrup later that afternoon.

Rhubarb Mint Mojito

The cocktail itself was pretty easy to make, though I had a little difficulty muddling the mint. The instructions say to add the mint leaves to the cocktail shaker, add ice, then muddle with the end of a wooden spoon. I’m not sure how well that muddled the mint, but that and shaking it later seemed to take care of it. I even ended up with some tiny bits of mint leaves in my cocktail.

After that, all I had to do was measure the simple syrup and rum, and juice a lime. I poured the shaken cocktail over some ice. Tip: Slowly pouring the sparkling water over the ice didn’t disturb the syrup and created a lovely ombre effect that looked so nice in the photos, IMO. I did give everything a quick stir before I drank it, though, and it turned the whole cocktail a pretty pastel pink.

Chinese 5 Spice Chicken Wings

My husband bought me an air fryer a while back, and his first request was chicken wings. I happily obliged with a recipe I found on Pinterest (where else?). The wings were good, but they were missing one thing: sauce. We both agreed on this, so I went in search of a recipe that would include sauce and found these Chinese 5 Spice Chicken Wings With Soy, Balsamic Reduction Glaze. The recipe isn’t for the air fryer, but I’m sure it could be adapted. But I’m making this one in the oven per the recipe, and I can’t wait to try these wings!

Chinese Wings have never been so irresistible. The tantalizing marinade, the rub, the glaze. They all come together to create the most epic Chinese Chicken Wings Recipe you will ever devour.

Recipe Author: Jennifer at Carlsbad Cravings
Get the recipe

The Ingredients

My usual pre-grocery shopping pantry check yielded quite a few of the ingredients for these Chinese 5 Spice Chicken Wings. I had the sugars, spices, baking powder, and Sriracha. Not bad.

That left me to buy the reduced-sodium soy sauce, balsamic vinegar, lime, and chicken wings. I have to be honest and tell you that I know nothing about balsamic vinegar, so I just bought the most expensive small bottle I could find. It was just under $5.

As for the wings, I only found a four-pound family pack of whole wings. That meant I would have to separate them, freeze the extra two pounds, and cut apart the ones I planned to use. Mildly inconvenient, but not that much of a hassle.

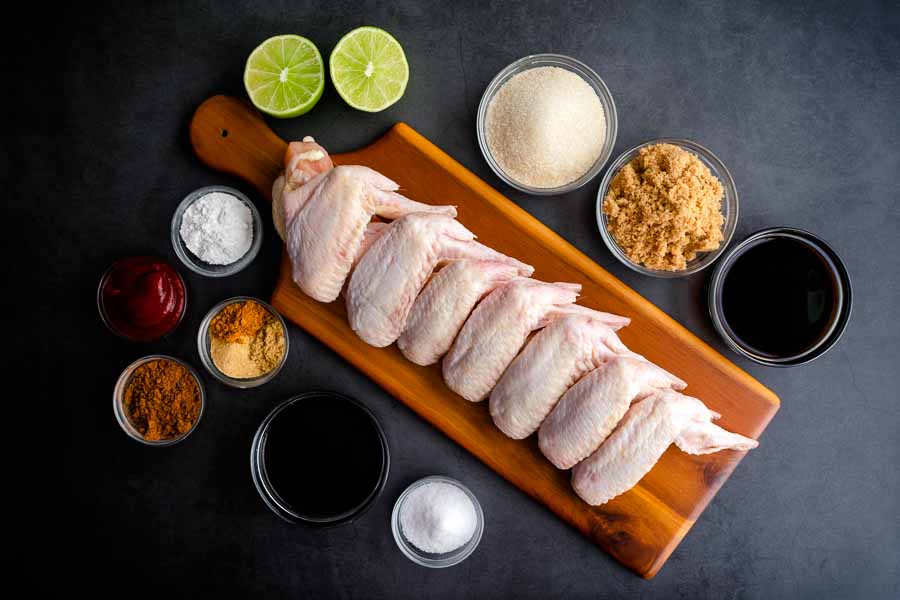
Chinese 5 Spice Chicken Wings With Soy, Balsamic Reduction Glaze Ingredients
Chicken wings, sugar, brown sugar, soy sauce, salt, balsamic vinegar, garlic powder, curry powder, ginger powder, Chinese 5 spice powder, sriracha sauce, and baking powder

The Process

These chicken Chinese 5 Spice Chicken Wings have to marinate at least 4 hours or as long as overnight. I took the second option and made this a 2-day affair. When it comes to marinade, I think longer is better.

I started things off by cutting up two pounds of chicken wings. This quick video tutorial titled How to Cut Whole Chicken Wings into Portions showed me exactly how to do it, and it only took 6 minutes. After that, all I had to do was mix up the marinade ingredients and add them to a ziplock bag with the wings.

Cutting up the chicken wings
Cutting up the chicken wings was a quick and easy process

The next day, I pulled the wings out of the refrigerator and let them warm up a little while I did some more prep work. That included lining a sheet pan with parchment paper and topping that with my wire cooling racks. I’m guessing this is to allow air to circulate while the wings cook and allow any grease to drain away.

I placed the marinated wings on a few layers of paper towels and patted them dry. Then I put them into another ziplock bag with the baking powder and tossed them to coat. The coated wigs went onto the prepared sheet pan and into the preheated oven for 40 minutes.

Meanwhile…

This recipe says to begin the sauce when there are 5 minutes left on the timer. Well, I decided to get a jump on it and started it after cleaning up my workspace a little. It was a little early, but I’m kind of glad I did it that way.

Prepping the glaze only took 2 minutes, but the glaze took a bit longer than the 10-15 minutes listed. I made it in a large skillet per the instructions (my LINK:12-inch nonstick skillet), but it took 24 minutes to reduce to a sticky consistency. I’m guessing I was too cautious with the heat setting and it could have been set a little higher.

Regardless, I ended up with a thick and sticky glaze that was ready before the wings needed to be broiled. Unfortunately, this glaze gets really thick when it cools, and making it so early gave it plenty of time to cool. I noticed this and put the pan onto my stove’s warmer eye to keep it from getting too thick.

Finishing Up

All that was left was to crisp the wings under the broiler for 5 minutes per side and glaze them. Well, I’m extra watchful when I use the broiler because it works fast! Don’t get me wrong, it does nice things but you have to be careful not to burn your food.

I set the broiler on high (mine only has low or high) and kept a close eye on my wings. Sure enough, they were getting charred around the 2-minute mark. I flipped them over early and the other side was finished when the timer went off, a full 5 minutes early.

A pair of tongs let me safely transfer the steaming hot wings to a large mixing bowl so I could pour the glaze over them. I let them cool a bit before plating them for photos and serving.

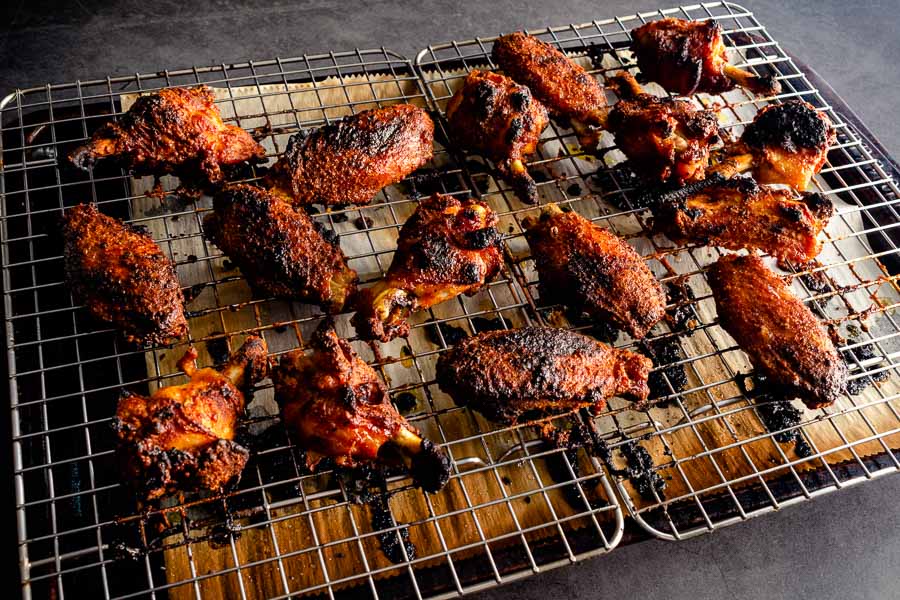
The broiled wings right out of the oven
The broiled wings right out of the oven and ready to be glazed

Timing

There was a lot going on, but I managed to capture the times for all the steps. Here’s how long everything took:

  • Day 1
    • 6 minutes to cup up the wings
    • 4 minutes to prep the marinade
  • Day 2
    • 5 minutes to prep the wings
    • 40 minutes to bake (26 minutes to make the glaze while the wings baked)
    • 5 minutes to broil
    • 5 minutes to glaze and cool
  • 1 hour 5 minutes total (not including time to marinate)

This recipe doesn’t have the total time listed, but I expected it to be done in an hour. I came within 5 minutes of that despite the glaze taking longer to reduce than expected.

T.G.I.F. Raspberry Cheesecake Martini

If you read my blog regularly, you might know that I work ahead a lot. I tend to make recipes 3-6 months in advance of posting them, and that’s exactly what happened with this one. I was getting ready to make Raspberry Baked Donuts with Raspberry Glaze when I stumbled upon this T.G.I.F. Raspberry Cheesecake Martini. Raspberries are touchy, and you have to use them almost immediately, so I decided to make the most of my delicate purchase and make two recipes with them. And it was a good excuse to have a martini, and who doesn’t like that?!

I don’t know about you but I absolutely L-O-V-E cheesecake!

Recipe Author: Lisa Cabanes at Social Couture
Get the recipe

The Ingredients

At first glance, this Raspberry Cheesecake Martini recipe appears to have only four ingredients: vodka, Chambord, heavy cream, and sour mix. I happened to have all but the sour mix on hand. A quick run to the liquor store was all I needed, or was it?

I found an easy recipe for DIY Sour Mix, and I had all the ingredients for that too. It’s sugar, water, lemon juice, and lime juice. When I have extra citrus, I juice it and freeze it in ice cube trays for situations just like this. I had just enough frozen lemon and lime juice to make this recipe.

Actually, the recipe made a large bottle of sour mix—far more than I needed for a couple of T.G.I.F. Raspberry Cheesecake Martinis. So guess what? I froze the extra in ice cube trays just like I do with extra citrus. I label small zipper bags full of the cubes and set them into my freezer door for “emergencies”.

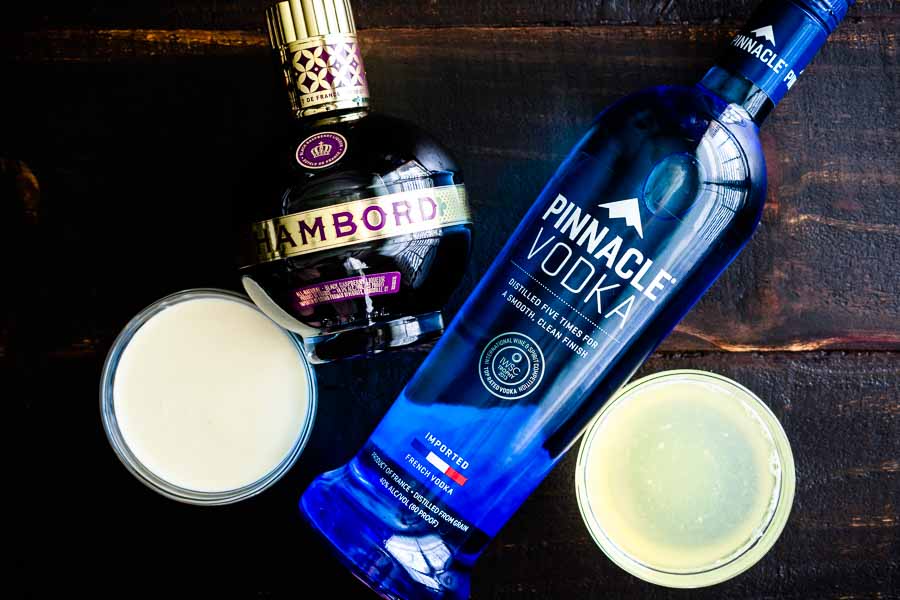
And as you can see, I didn’t have the brand of vodka, Finlandia, that’s specified in the ingredients list. I decided to go ahead and make this recipe anyway since you might not have that brand either.

Spoiler: Pinnacle has a sharp finish and may not have been the best choice for this cocktail. A sweeter vodka like Skyy or Tito’s would probably be a better choice. I’ve never tried Finlandia, so I can’t speak to its taste or sweetness.

T.G.I.F. Raspberry Cheesecake Martini Ingredients
Chambord, vodka, sour mix, and heavy cream

The Process

Making these T.G.I.F. Raspberry Cheesecake Martinis (and I did make more than one!) was pretty straightforward. Add all the ingredients to an ice-filled cocktail shaker, shake well, and pour into a martini glass.

What wasn’t included in the instructions but was shown in the recipe’s photos was rimming the edge of the glass with graham cracker crumbs. This step is a must! Without it, you just don’t get the cheesecake/desert vibe.

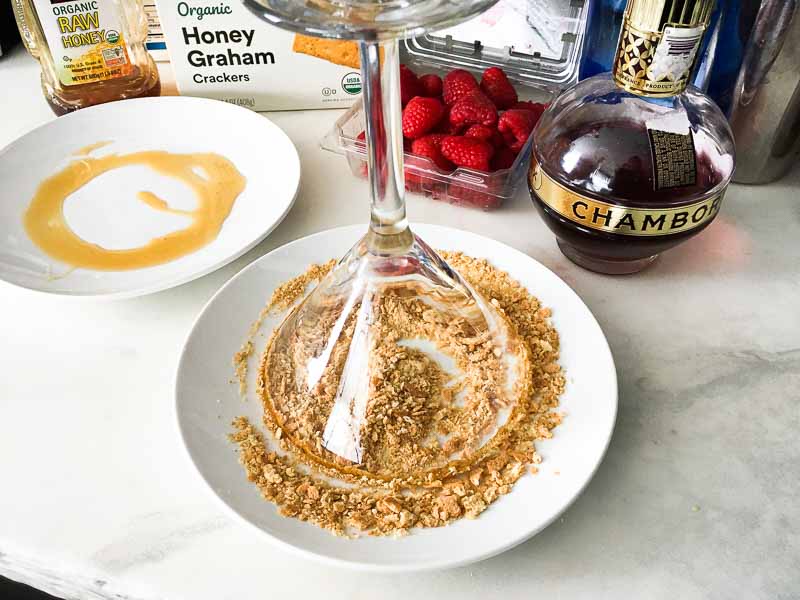
I like to use honey to rim sweet drinks. You can use water or a lemon/lime wedge, but honey’s thickness really makes the crumbs stick. Just add a bit of honey to a small plate, then add a graham cracker to a ziplock bag, smash it with your hands, and pour the crumbs onto a second plate. Dip the glass into the honey, then dip it into the crumbs.

I tend to spin the glass around to make sure the edges are thoroughly coated, then I just let it sit in the crumbs until I’m ready to fill it with the cocktail. It really makes the crumbs (or salt or sugar—whatever you’re rimming the glass with) stick.

I happened to have fresh raspberries on hand to add a cute garnish, but it’s totally optional. The recipe doesn’t call for it, and it doesn’t add to the taste of the cocktail. It does make it look pretty, though!

Rimming a martini glass with honey and graham cracker crumbs

Carbonara with Pan Seared Scallops

I try to eat healthy foods, but every once in a while I slip up. I will randomly have a craving for something that no matter how careful I am about how much of it I eat it’s just plain bad for me. Carbonara is one of those things—I feel like a mere teaspoon of it will cause me to gain at least a pound. But can it be that bad? Well… It’s pasta in a sauce made from egg yolks, parmesan cheese, butter, and cream that’s topped with bacon. It’s not just a little indulgent, it’s the very definition of indulgence. And it’s so good! I’ve never made it at home, though, and I’ve never had it topped with seafood. That’s about to change when I try this Carbonara with Pan Seared Scallops recipe.

Perfectly seared scallops served with a quick and simple carbonara pasta.

Recipe Author: Laureen King at Art and the Kitchen
Get the recipe

The Ingredients

The whole reason I decided to make this recipe was that I had a package of frozen scallops and a nice big piece of Parmigiano Reggiano I needed to use up. Add the eggs, butter, olive oil, and garlic I had, and I was halfway there.

That left me to buy the shallots, green onions, heavy cream, bacon, and linguine. Not exactly a huge shopping list, which is the kind I like.

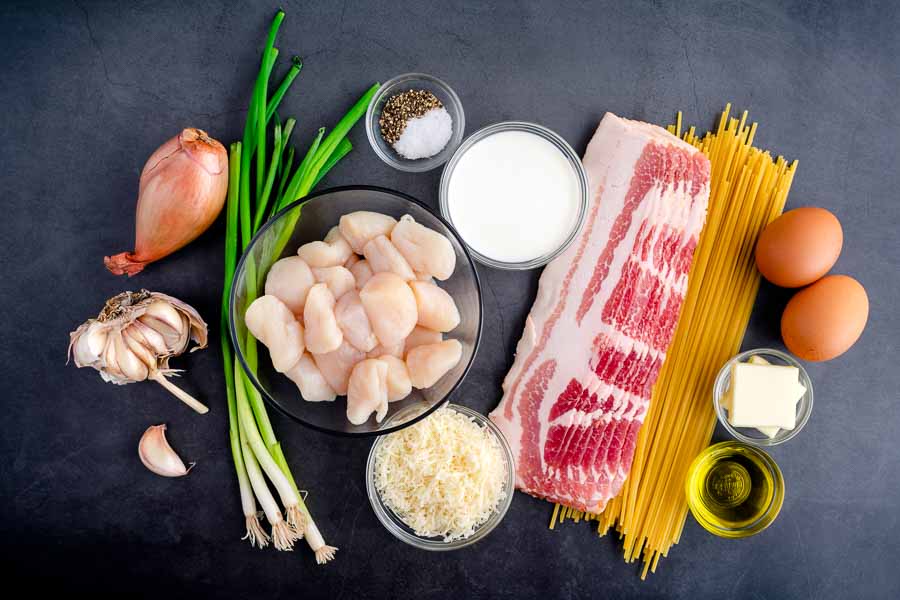
Carbonara with Pan Seared Scallops Ingredients
Scallops, salt, pepper, heavy cream, bacon, linguine, egg yolks, butter, olive oil, grated Parmigiano Reggiano, green onions, garlic, and shallot

The Process

Despite being such a decadent dish, the time listed to prepare it was 30 minutes. I always love a quick and easy meal, and this Carbonara with Pan Seared Scallops was exactly that. Here’s how my time was spent:

  • 4 minutes to grate the parmesan
  • 27 minutes to cook
  • 31 minutes total

This recipe has a lot of steps, but they are broken down nicely. Plus, half are for the pasta and the rest are for the scallops, making things even more manageable.

Having everything prepped is essential because this recipe moves fast once the bacon and pasta are done. I managed to get all the prep work done while they cooked.

Start with the Pasta

I kicked things off by grating my own parmesan. I know, you can buy it grated, but I happened to have a block in my refrigerator. It took some elbow grease and a few minutes to do.

Next, I got started on the bacon. I wasn’t impressed with the thickness of the “thick cut” bacon I bought, but it worked out. And even though I used my 12-inch nonstick skillet (the largest I have) to fry it, I  could only fit 6 of the strips in at first. I had to wait for those to shrink before adding the last 2. Tip: don’t drain that bacon fat when you’re done—it becomes part of the sauce.

One thing that puzzled me was that there were no instructions to cut up the bacon either before or after frying it. I left it whole, and it broke up when I mixed in the pasta and sauce (step 8). The bacon’s thinness actually made it easier to break up.

Finish with the Scallops

The instructions for searing the scallops were wonderful, and I have to admit they turned out very nicely. I do think the ones I used were on the small side, so used the minimum cooking time and made them in a single batch. They didn’t sear as nicely as the larger ones (they rolled around instead of sitting flat), but they had a nice texture and taste in the end.

BTW, I used the same pan I fried the bacon in (after wiping with a paper towel) to cut down on dishes to wash up. That along with a large pot to boil the pasta, a large colander to drain it, and my largest mixing bowl were essential equipment. I also love my pasta spoon for noodles, but a regular mixing spoon would also work.

Cream Cheese Brownies

1

I don’t bake a lot, but I’ve really been in a baking kind of mood lately. Maybe it’s that amazing French bread I made last week. It came out so nice that I wanted to bake something else, but what? I have pinned plenty of recipes over the years, so I grabbed some tea and started scrolling through my dessert recipe board. It took a while, but I finally found today’s recipe: Cream Cheese Brownies. How yummy do they sound? I’ve made brownies swirled with blackberry but never cream cheese swirls. Let’s find out if this recipe is as easy as the author claims.

These Cream Cheese Brownies come together so easily! Made with a one-bowl brownie batter and then marbled with a cream cheese mixture, you’re likely to be won over by these cheesecake brownies for a regular brownie!

Recipe Author: Alyona at Alyona’s Cooking
Get the recipe

The Ingredients

The nice thing about brownies from scratch is they only have a few ingredients. Did I mention they’re all kitchen staples? Well, they are, so finding anything you don’t have should be super easy.

That’s what happened to me. I usually have everything but the cream cheese on hand, but not this time. I was running out of flour, butter, and sugar, but every grocery store ever has those. Everything else was in my pantry and refrigerator.

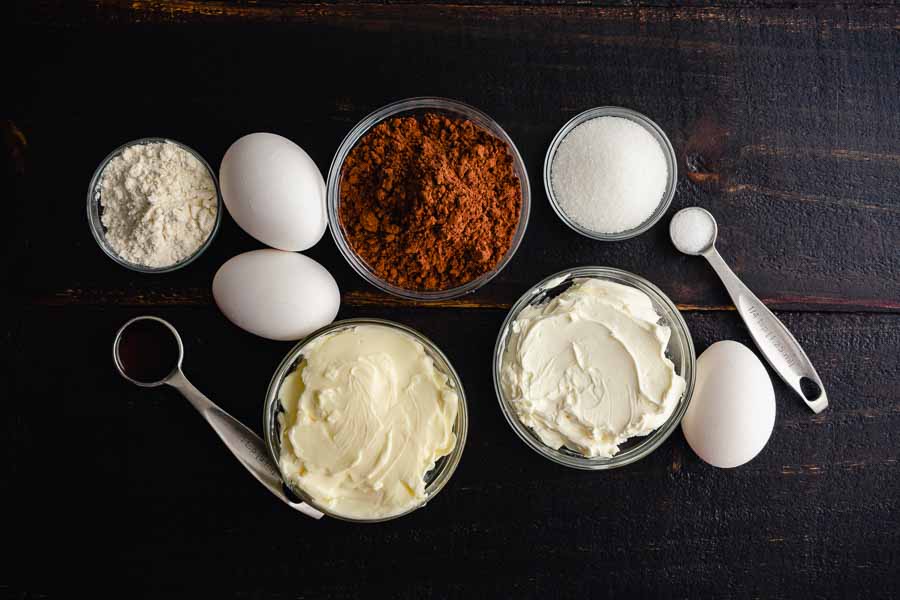
Cream Cheese Brownies Ingredients
Cocoa powder, sugar, salt, egg, cream cheese, butter. vanilla extract, and flour

The Process

I want to tell you that this recipe was a delicious Pinterest success, but that’s only half true. Delicious, yes, but not exactly a Pinterest success the first time I made them. Here’s what happened.

My First Try

I started by setting the cream cheese and butter on the counter when I made breakfast. They both need to be softened, and they were by midday when I was ready to bake.

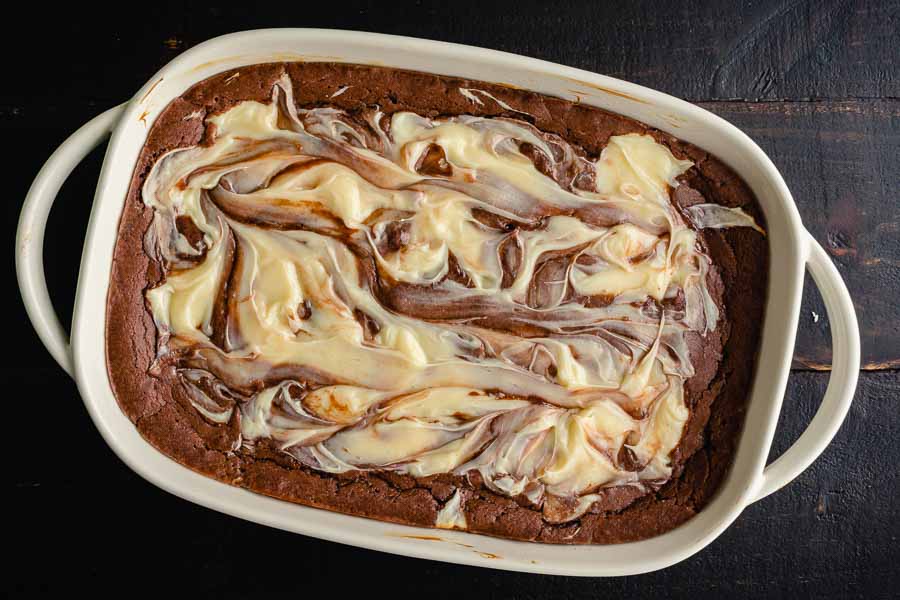
The instructions were easy to follow, and things went smoothly. I made the brownie batter, cleaned my stand mixer’s bowl, and made the cream cheese swirl. After working it into the brownie batter, it was into a preheated oven for 25 minutes.

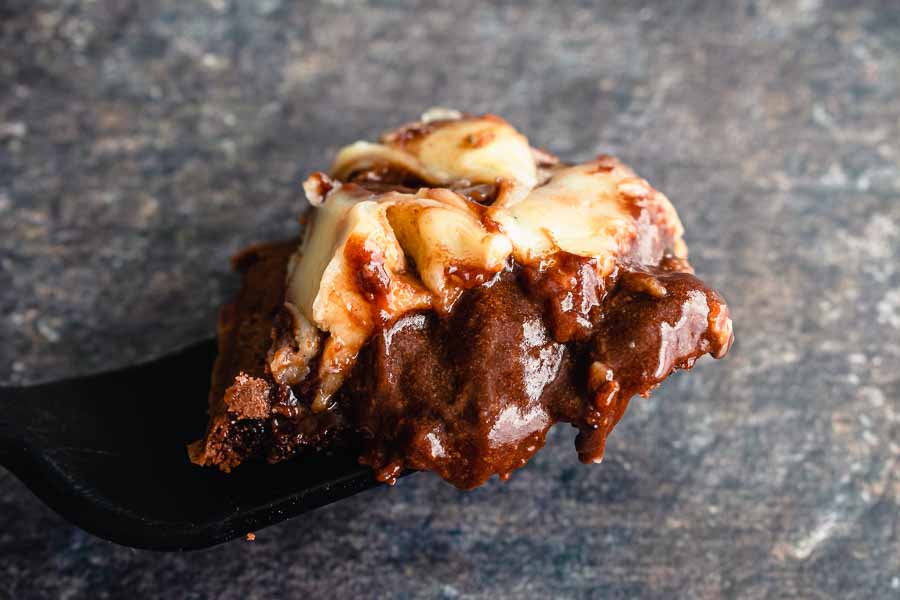
The Cream Cheese Brownies after baking for 25 minutes

The center was a little jiggly when I removed the oven, and I let the pan sit for a good hour before covering it. I wanted to make extra sure the brownies were set, so I left them on the counter overnight.

The next day, I cut them up and removed an edge piece, shown below. It wasn’t even close to set! I didn’t want to waste the tray, so I heated the oven up and baked them until the center was set. Here’s how my time was spent:

  • 17 minutes to prep
  • 25 minutes to bake
  • 35 minutes to bake (checked at 15-, 10-, and 10-minute intervals)
  • 1 hour 17 minutes total (not including cooling overnight)

I had to stop once I noticed the cream cheese was turning golden—no one likes burned cream cheese. This time, the edges were pretty done, and the center had a soft, fudgy texture.

An edge piece cut after sitting in the pan overnight

Cream Cheese Brownies: Take-Two

It always bothers me when a recipe doesn’t work out. Was it me? Was it the recipe? A little of both? These Cream Cheese Brownies mostly worked out with a little extra help, but I felt like I needed to give them another try.

This time I planned to make sure the center was set before removing them from the oven. I also decided to use a metal baking pan instead of ceramic. They were both supposed to be 9″x13″ pans, but the metal pan seemed bigger. I also increased the baking time to 35 minutes and let the cooled pan chill overnight in the refrigerator instead of on the kitchen counter.

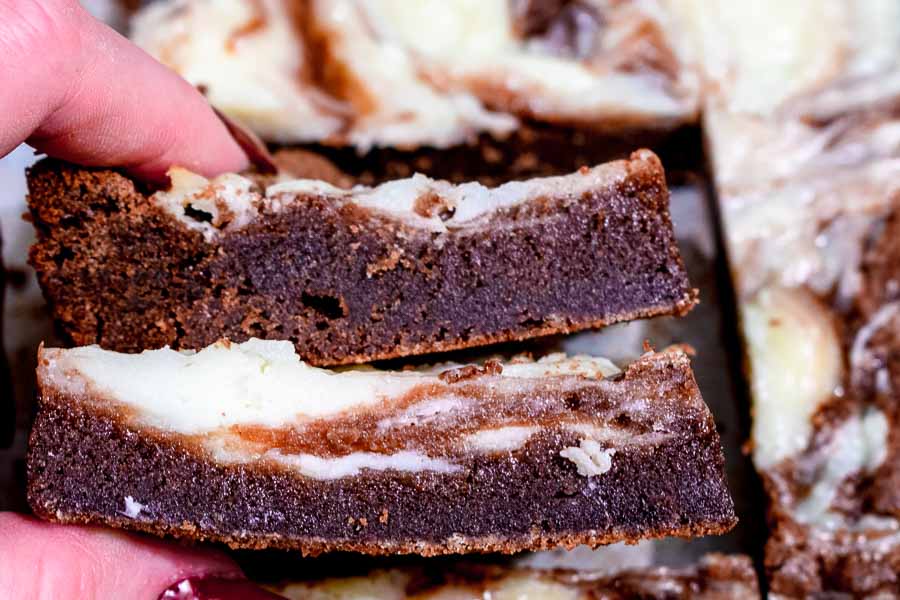
I’m pleased to say that this batch came out perfectly! The photo below shows an edge piece (top) and a middle piece (bottom). You can see the edges were a little crispy, but the brownies were chewy and fudgy in the middle. The tops also didn’t brown like the first batch, so the cream cheese was softer. I liked it both ways, and neither batch lasted very long.

My second try at this recipe yielded perfectly fudgy brownies

Healthy Chicken and Wild Rice Soup

I’m such a soup person. There, I said it. I love everything about soup. It’s a convenient meal all in one with meat and vegetables and maybe pasta or grain. No worrying about what side to make with the main, it’s all there in one recipe. Plus it’s good reheated, so I can make a batch that will last for a few days of lunches and/or dinners (and sometimes breakfast). Chicken and wild rice soup is a favorite of mine, but it comes with a price. That’s the fat and calories added with butter and cream. I really changed my diet last year and lost 50 pounds. I intend to maintain that loss, so I’m eating healthier. That’s why this Healthy Chicken and Wild Rice Soup appealed to me. No butter or heavy cream, but (perhaps) all the taste. Let’s find out if it measures up!

This Healthy Chicken and Wild Rice Soup is made without butter or heavy cream, but has all the creamy comforting goodness you crave!

Recipe Author: Cathy at Herbs and Flour
Get the recipe

The Ingredients

This Healthy Chicken and Wild Rice Soup recipe is a well-rounded meal in one. I had some chicken thighs on hand, so I used that for the meat (about 8 small thighs). I could have lightened it up even more with chicken breasts, but I have my limits. Chicken breast can dry out when it’s cooked too long, and simmering in soup for a long time is an easy way to overcook it.

I actually made this recipe a while ago, right after I made my Thanksgiving posts. That meant I had leftover carrots, celery, milk, and parsley. The thyme and bay leaves are pantry staples for me, and I also had some Bell's poultry seasoning thanks to the Bacon Wrapped Stuffing I made.

And thanks to Thanksgiving, I had just made a batch of Turkey Stock, so I was itching to use it. It’s a Thanksgiving must, and I look forward to making it every year. I had to buy the rest, but it was all easy to find at my regular grocery store.

There were a lot of options for wild rice, and I chose Lundberg Family Farms Organic Wild Rice Blend. I liked the fact that it was a blend of black, brown, and red wild rice.

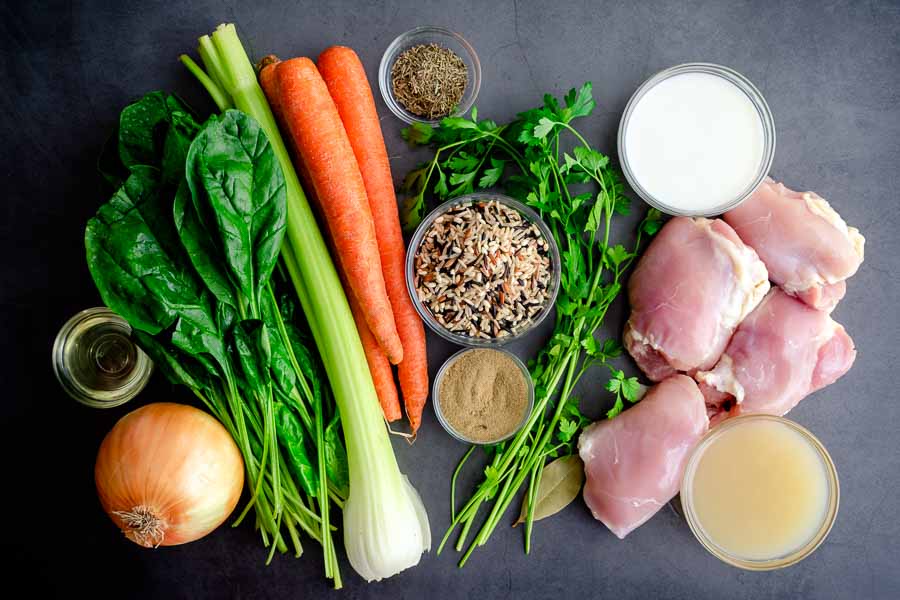
Healthy Chicken and Wild Rice Soup Ingredients
Wild rice, parsley, thyme, milk, chicken thighs, turkey stock (subbed for chicken stock), bay leaves, poultry seasoning, carrots, celery, spinach, onion, and olive oil

The Process

Since this recipe calls for cooked chicken and I didn’t have any, I didn’t include it in the total time. I did pan fry some chicken thighs while I prepped the vegetables, and they were ready at the same time. I paused to chop the chicken, but it only added a few minutes to my time. Here’s how it went:

  • 10 minutes to prep
  • 1 hour to cook
  • 2 minutes to adjust seasonings
  • 1 hour 12 minutes total

That’s right in line with the total of 1 hour 10 minutes listed on the recipe.

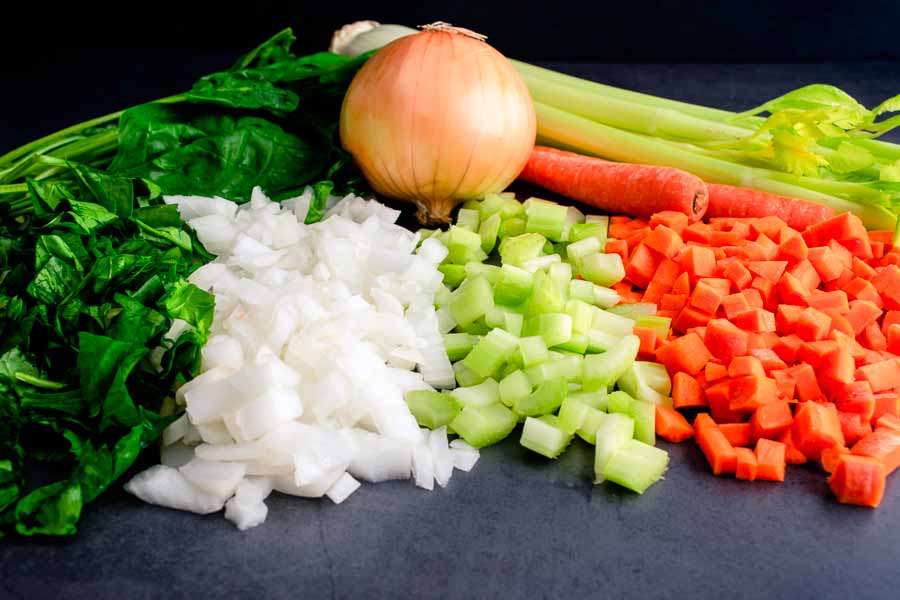
The prep work for this recipe was dicing vegetables and stemming and chopping the spinach. Nothing unusual, so a good chef's knife and cutting board are all you need for this part.

Next, the wild rice needs to be rinsed. I do this by placing it into a mesh strainer and running it under cold tap water. It’s a quick way to remove the extra starch that makes rice sticky.

Now it was time to get cooking. My 5.5-quart Dutch oven was perfect for this soup. Things started out with sauteeing the vegetables. The next step was to add the rice and herbs and saute them for a couple of minutes. This toasts the rice and releases the herbs’ essential oils, adding flavor to the dish.

After that, I added some homemade turkey stock, stirred, and let the mixture simmer for 30 minutes. The next few steps were even easier. Just add the chicken and cook for 15 minutes. Then add the spinach, parsley, and milk, simmer for another 5 minutes, and season with salt and pepper.

I’m happy to say that the whole thing went very smoothly, although I did have a minor ?? moment when I read Step 3. It says to stir in the turkey, but this is chicken soup. No worries, though—turkey would work too!

Chopped spinach with diced onion, celery, and carrots

No Knead Bread-Baguette

When I decided to make French onion soup, I knew I needed a sliced baguette to add to it. You simply cannot have it without the bread and cheese topping! Of course, I got the idea to make my own baguette. I found this simple No Knead Bread-Baguette recipe and it sounded so easy. Well, things didn’t go quite according to plan, and I ended up using a store-bought baguette for my soup. Yup, this recipe was a big ol’ Pinterest fail the first time I tried it. It happens, but I had to give it another try. I’m new to making bread, and I used that failure as a learning experience. I’m so glad I did because I now know how to make baguettes, and they really are better when they’re homemade!

Homemade baguette is a true treat! Better yet, this recipe requires only four simple ingredients and absolutely no kneading.

Recipe Author: Natalya Drozhzhin at Momsdish
Get the recipe

The Ingredients

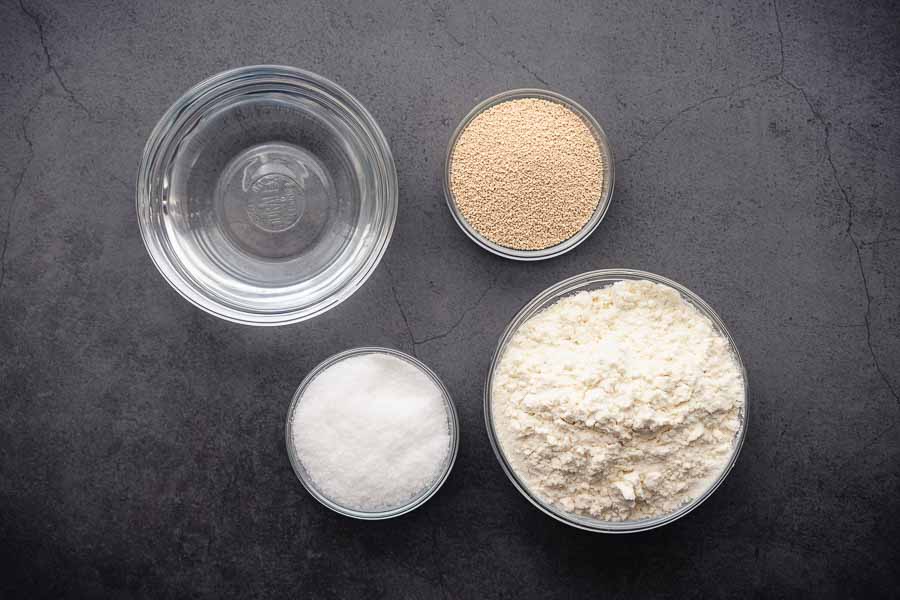
How simple is this recipe? It only has four ingredients, and one of them is water. The rest are all basics you should find at any grocery store: all-purpose flour, salt, and yeast.

I have taken to making Dutch oven bread pretty regularly, so I order instant dry yeast in bulk. It’s about the same price (sometimes less) as the 4-ounce jar I find in grocery stores, but a much 4 times as much (16 ounces). I store some in a leftover yeast jar in my pantry and keep the rest in my refrigerator. It has a 2-year shelf life, so I’m not worried about any going to waste.

No Knead Bread-Baguette Ingredients
Water, yeast, all-purpose flour, and salt

The Process

This recipe took me a couple of tries to get right. The author does warn that you might need to use a little extra flour depending on its protein content. But being new to bread-making, I really missed the mark on my first try. I read the post, printed the recipe, added it to my blog posting schedule, and got to it a few weeks later. Of course, I had forgotten most of the post’s details and photos by that time…

My First Attempt at Baguette

I mixed the ingredients as instructed, using the amounts given. My stand mixer didn’t have any trouble handling the dough, but it didn’t come together. I added a 1/4 cup extra flour and got it somewhat shaggy but still not together enough. But since I didn’t check the photos in the post as I was cooking, so I didn’t realize there was a problem.

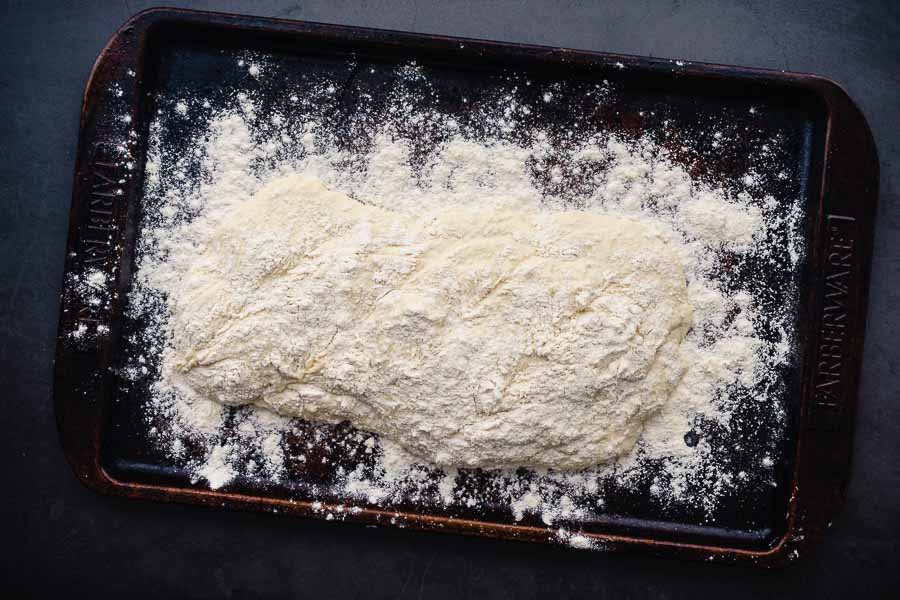
I left the dough to rise overnight and tried to shape it the next day. This is when I realized something was wrong. I managed to shape the dough, but it just melted once I had it on the sheet pan.

My first attempt at shaping the dough into a baguette didn't go so well
My first attempt at shaping the dough into a baguette didn’t go so well

I thought about trying to fix it with more flour and another overnight rise, but I knew there was no hope. I tossed this batch and almost gave up on this recipe.

My Second Attempt (Success!)

I hate to be defeated, so I gave No Knead Bread-Baguette a second try a week or so later. This time I had reviewed the photos in the post and had a better idea of what the dough should look like. And I had a plan.

I mixed the dry ingredients and slowly added the water. Instead of adding extra flour, my plan was to add just enough water to make the dough come together. Unfortunately, I added just a little too much water (2 2/3 cups) so I had to add some extra flour after all (just 3 tablespoons).

The dough came together into a ball that looked like the photos in the recipe’s post. Success! I covered it with a tea towel and let it rise overnight. Tip: I don’t have a lot of counter space, and my house is quite chilly. I put the covered bowl into my microwave to rise. The small space kept it warm enough and got the bowl out of my way.

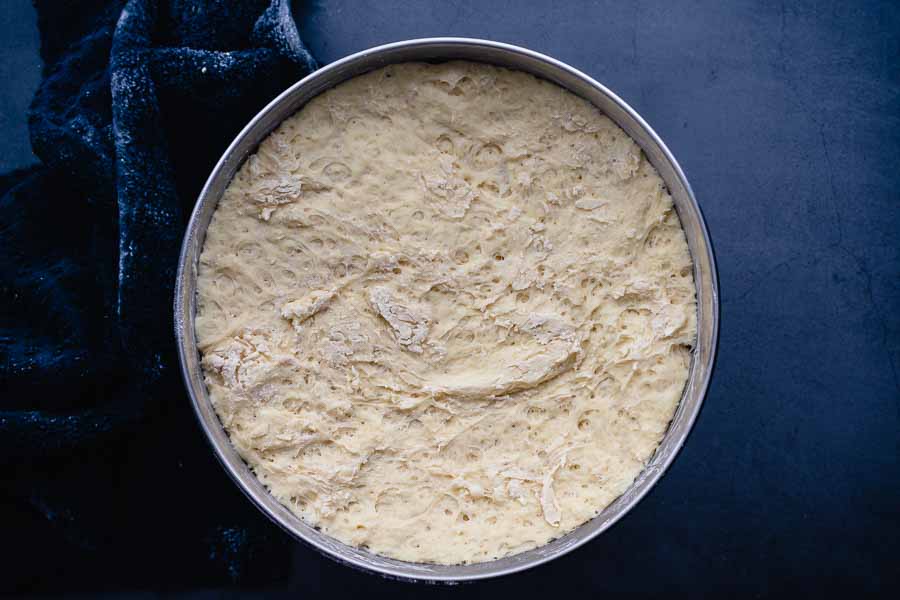
The next day I found the dough had risen almost to the top of the bowl:

Bread dough after the first rise

This time shaping the dough didn’t result in a puddle. I had legit-looking baguettes, complete with slices courtesy of a freshly cleaned spare Exacto knife refill I found in my desk.

I sprinkled them with flour and let them rise for an hour. When I checked them they hadn’t risen, and I was worried. I figured the cool temperature in my house was to blame.

Tip: I decided to pop the sheet pans into the top rack of my oven (it wasn’t on). I added a small container of boiling water on the rack below them and let them rise in a warmer space for another hour. It did the trick, and both baguettes rose significantly.

Shaped bread dough after the second rise

I removed the dough and container of water from the oven and preheated the oven.

Tip: Since both of my baking sheets were in use, I used a roasting pan to hold the boiling water for baking. The large size was similar to the area of a baking pan, and I felt it was safer due to the high sides—splashing boiling water around is not a good idea.

I removed the pan of water after 10 minutes and let the baguettes continue baking. They were a beautiful golden brown after another 20 minutes.

A freshly baked baguette

How long did it take?

I’m so glad you asked. Here’s how long I spent on my successful attempt at this baguette recipe:

  • 7 minutes to mix the dough
  • 4 minutes to shape the dough
  • 2 hours for the second rise
  • 30 minutes to bake
  • 2 hours 41 minutes total (not including overnight first rise)

The times given on the recipe are 25 minutes for prep, 40 minutes to cook, and 1 hour 5 minutes total. It looks like that doesn’t include time for either rise. If I omit that, my times would be 11 minutes to prep, 30 minutes to cook, 41 minutes total. It’s a little off, but well within the times given. I’m always okay with a recipe that takes less time than what’s stated!

Julia Child’s French Onion Soup

Not long ago my husband told me he was craving French onion soup. I told him I would love to make it for him, but I didn’t have the bowls. Two days later, a box of oven-safe ceramic French onion soup bowls arrived on my doorstep. I guess he really wanted that soup! A quick search of my Pinterest boards turned up a couple of French Onion Soup recipes. I have pinned some delicious-sounding recipes, but one stood out from the rest: Julia Child’s French Onion Soup. She famously made French cooking accessible, and I remember watching her on TV when I was young. She was so fun! So what better recipe for my first foray into making this classic dish?

Looking for a rich and hearty soup to warm you on a cold, rainy night? Julia Child’s French onion soup is everything you need and more. French onion soup is rustic comfort food at its finest.

Recipe Author: Kim at Insanely Good Recipes
Get the recipe

The Ingredients

This recipe prints out on two pages, and the list of ingredients takes up almost the whole first page. I didn’t let it phase me, and I wasn’t surprised at all.

A little digging through my pantry told me I had some of the basics like olive oil, salt, pepper, sugar, and flour. I even had butter in my refrigerator.

That left me with a good amount of things to buy, but I was able to find most of it at my regular grocery store. I was surprised that the cheeses in the recipe were parmesan and Swiss. I was expecting gruyere, and my husband thought it would be provolone 🤷🏻‍♀️

A quick stop at the liquor store for a small bottle of cognac wrapped up my shopping trip. That was also an unexpected ingredient, but I went with it. Julia Child can’t be wrong!

I chose a mix of sweet onions and standard yellow onions. I sliced the sweet onions and grated half of the yellow onion. It’s not specified in the instructions, but somewhere in my brain, I remembered sweet onions are best for French onion soup.

The recipe does say that homemade beef stock is preferable to use as the soup’s base. I stopped at a small market and they only had one type of beef-flavored stock. It was very basic, but I looked at it as a challenge. If this recipe was good with something so simple, it would be amazing with a gourmet store-bought or homemade stock.

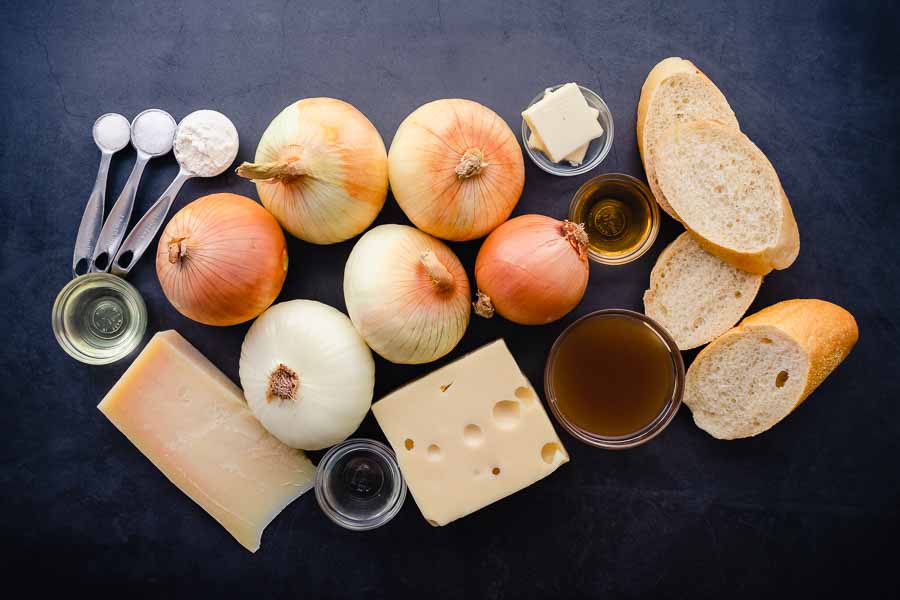
Julia Child’s French Onion Soup Ingredients
Sweet onions, butter, cognac, French bread, beef stock, yellow onion, Swiss cheese, white wine, Parmesan cheese, olive oil, flour, salt, and sugar

The Process

The recipe lists a total time of 2 hours, and I wasn’t far from that at a total of 1 hour 50 minutes. I didn’t separate my prep time from cooking because I prepped while I cooked.

Things started off with slicing the sweet onions. I used 3 good-sized onions and sliced them thin with my mandoline. Then it was into a cast-iron Dutch oven to soften for 20 minutes. This took me about 3 minutes total.

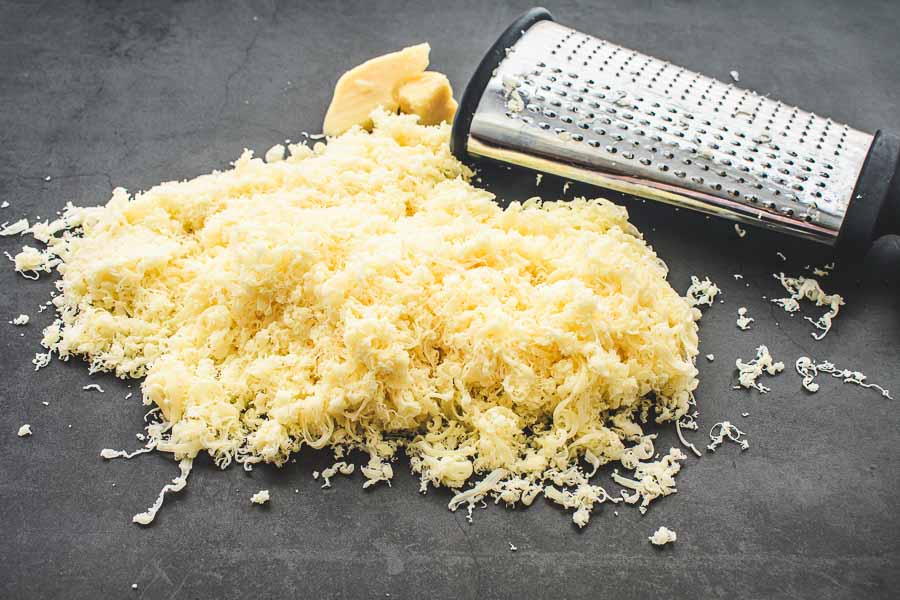
Grated Swiss cheese
Grated Swiss cheese

While the onions were cooking, I finished most of my prep work by measuring out the ingredients and grating the yellow onion. The only thing I couldn’t finish within that time was grating all the cheese. However, I was able to finish it as things progressed thanks to the grating plate in my mandoline and a lot of elbow grease. Next time, I’m going to buy the cheese already grated!

This recipe was a perfect roadmap to French onion soup! Everything went according to the instructions, and I didn’t have a single hiccup.

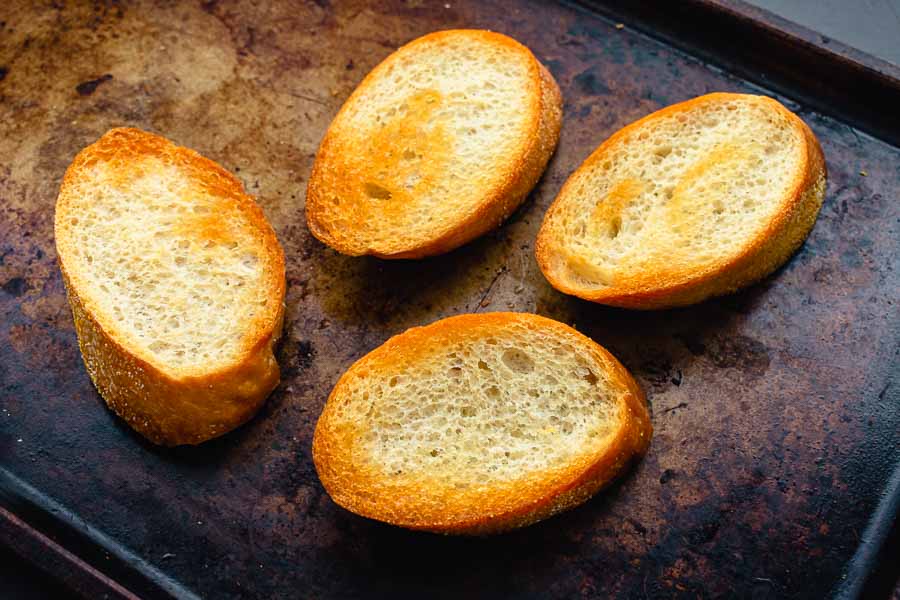
Slices of toasted French bread

I did change things up at Step 8. In my excitement finding this recipe, I didn’t notice that it calls for the soup to be finished in a casserole dish. I simply had to use the new bowls my husband so thoughtfully ordered for me!

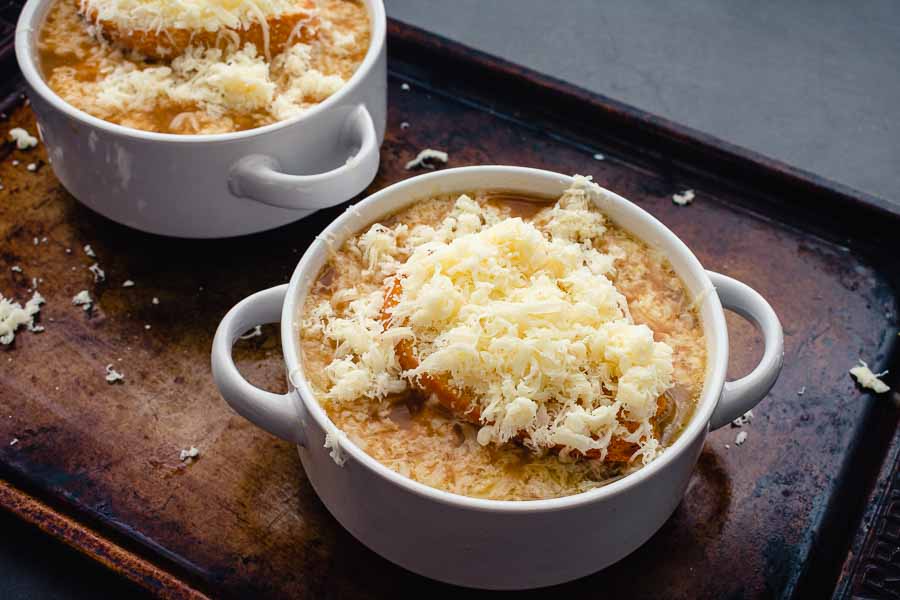
The soup was divided perfectly into four bowls along with the toasted bread and cheese. I placed the bowls onto baking sheets and popped them into the oven to finish up. But I was so excited that I forgot to turn the broiler on to brown the cheese, but I don’t think anyone noticed. I didn’t until I started writing this post LOL!

The soup just before going into the oven
The soup just before going into the oven. Look at all that cheese!

Blackberry Coulis Cocktail

Sometimes I go looking for recipes to blog, and sometimes they find me. That’s what happened with this cocktail. I was on Pinterest one night, and I came across this Blackberry Coulis Cocktail recipe. I was getting ready to reshoot one of the first cocktails I ever blogged, the Blackberry Mojito, and I thought I would kill two birds with one stone, so to speak. So I doubled up on my blackberry order, and I ended up making two cocktails instead of one. I love this job!

Blackberry Coulis Cocktail is a deliciously refreshing blend of blackberries, Chambord liqueur, and dark rum and a little fizz – slightly sweet, a little tart, and a whole lot of sexy.

Recipe Author: Jacqueline at I Sugar Coat It
Get the recipe

The Ingredients

So the blackberries were taken care of, but I had a few other ingredients to gather before I could make my Blackberry Coulis Cocktail. Water is a given, and I had the vanilla extract and demerara sugar in my pantry. It was leftover from the Baileys Pumpkin Spice Espresso Martini recipe I made a long time ago, but it was still perfectly good.

I also had some Chambord on hand from reshooting the photos for my Adult Raspberry Italian Cream Soda post. And I even had leftover Flor de Caña dark rum from the Old Cuban cocktail I made a while back.

That left me needing limes since I always have soda water in my refrigerator. How easy was that?!

Blackberry Coulis Cocktail Ingredients
Aged rum, blackberries, vanilla extract, demerara sugar, Chambord, lime juice, and soda water

The Process

Making this cocktail was a little more involved than your typical cocktail recipe since I had to use the stove and a blender. Here’s how my time was spent:

  • 10 minutes to make the blackberry coulis
  • 30 minutes to cool
  • 3 minutes to blend
  • 5 minutes to make the cocktails
  • 48 minutes total

The recipe lists times of 10 minutes for prep, 5 minutes to cook, and 15 minutes total. I’m guessing the discrepancy is due to including time to cool the blackberry coulis. If I omit that, my total time was 18 minutes. Much closer to the recipe’s time.

Fresh blackberries for the coulis

Making the Blackberry Coulis

Making the blackberry coulis seemed similar to making fruit-infused simple syrup, something I have done many times. The only difficulty I had with this part of the recipe was due to my kitchen scale. It’s actually a postal scale I repurposed, and it doesn’t go down to single grams. It starts at 5 and goes to 10, with no increments in between. I really need a new one!

Because of my scale, I had to look up how to convert grams of vanilla extract to teaspoons. Can you believe there was a converter just for converting grams of vanilla extract? I was thrilled! By the way, 3 grams of vanilla extract is .71 teaspoons or just under 3/4 of a teaspoon.

I simmered blackberries, water, and sugar in a small saucepan, then removed it from the heat and allowed it to cool for 30 minutes. Once it was cooled, I poured it into my blender and pureed it.

Finally, I strained it into a small container and refrigerated it overnight. The pureed coulis was very thick, and I found it helpful to use the back of a wooden spoon to press it through the strainer. Otherwise, it would have taken ages to drip through the mesh!

Making the Blackberry Coulis Cocktails

The blackberry coulis was the “hard” part, and the actual cocktails were pretty easy. If you’ve ever made a shaken and strained cocktail, you’ll have no problem with this one.

I filled the cocktail glasses about 3/4 of the way with ice and the cocktail then topped them off with soda water. The recipe gives the option of using ginger ale, but I didn’t have any on hand.

The entire process took me 5 minutes, and that included spearing blackberries onto cocktail picks for the garnish. Not too shabby for such beautiful cocktails!

Blackberry Coulis Cocktail