Home Blog Page 15

Easy Sushi Donuts

I have made donuts exactly once, and it was just last year. Yup, these Raspberry Baked Donuts with a Raspberry Glaze were my first time, and the silicone molds have been sitting and gathering dust ever since then. I hate wasting anything, so I was delighted to find a way to put them to use with this Easy Sushi Donuts recipe. I know sushi and donuts aren’t a good combo at first glance, but we’re talking donut shape with sushi ingredients. Trust me, no baked goods are mixed with the fish! Sound better? I thought so. Now let’s give this odd sounding recipe a try!

These Easy Sushi Donuts are way healthier than the sweet variety! They’re made with all of the traditional sushi ingredients, but packed into cute little donut shapes for an irresistible and healthy dinner that’s as fun to make as it is to eat!

Recipe Author: Lesli at Asian Caucasian
Get the recipe

The Ingredients

The ingredients list for these Easy Sushi Donuts isn’t too long, but it is incomplete. I might have missed that if I hadn’t made sushi rice before. Whew! Fortunately I had, so I knew I also needed rice vinegar, sugar, and salt.

I had all of them on hand (usually do), as well as the wasabi, pickled ginger, and soy sauce. I had to buy the rest which meant two grocery store trips plus one online order. My regular store had everything but the salmon roe so that was the extra grocery store trip.

Actually, two extra grocery store trips. I discovered the tuna had oxidized (turned brown) when I went to photograph the ingredients two days after I bought it. I asked my husband to run to the store the next day and get more, but he got it for me that night. Yup, it oxidized overnight.

I don’t recall ever having this problem with tuna steaks, but neither piece I bought was cut as a steak. Instead, they were smaller pieces labeled “special cut”. A little reading told me fresh tuna is prone to turn brown quickly unless treated with carbon monoxide. But treated and pink or untreated and oxidized, my tuna was still fresh and edible. Maybe not as pretty, but I got over it. Tip: Buy your fish the same day you plan to use it if brown tuna bothers you.
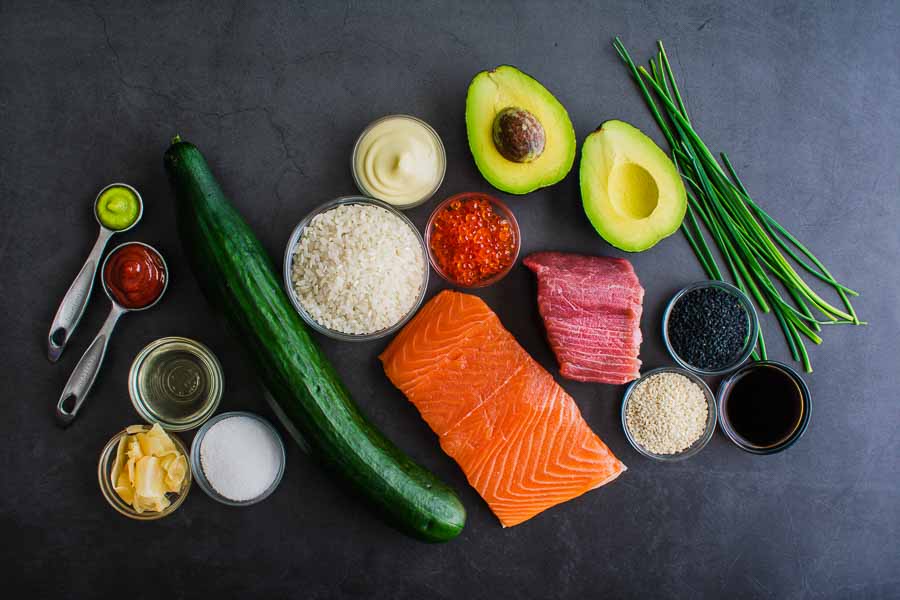
Easy Sushi Donuts Ingredients
Sushi rice, Japanese mayonnaise, salmon roe, avocado, avocado, tuna, chives, black sesame seeds, soy sauce, white sesame seeds, salmon, seedless cucumber, sugar, pickled ginger, rice vinegar, sriracha sauce, and wasabi paste

Customizing my Sushi Donuts

This recipe’s notes invite customization, and I fully embraced that! First, I replaced the radishes with avocado. My husband doesn’t like radishes, and I felt like they didn’t work with sushi.

Next, I decided to add some spicy Japanese mayo. My regular store was out of the premixed stuff, so I had to order some Kewpie Mayonnaise online and spice it up with a bit of sriracha. You can find plenty of spicy Japanese mayo recipes online, but I improvised two parts mayo to one part hot sauce.

The Process

This recipe is divided into three sections: toppings prep, sushi rice prep, and donut assembly (respectively). I like that, but I changed the order so the rice was first, giving it time to cool while I prepped the toppings. Here’s how my time was spent:

  • 38 minutes to make and cool the sushi rice
  • 19 minutes to prep the toppings
  • 8 minutes to assemble
  • 5 minutes to chill
  • 1 hour 10 minutes total

I don’t have a rice cooker, but I think that sped things up because the total time listed on the recipe is 1 hour 45 minutes. That or I time traveled LOL!

Sushi Rice

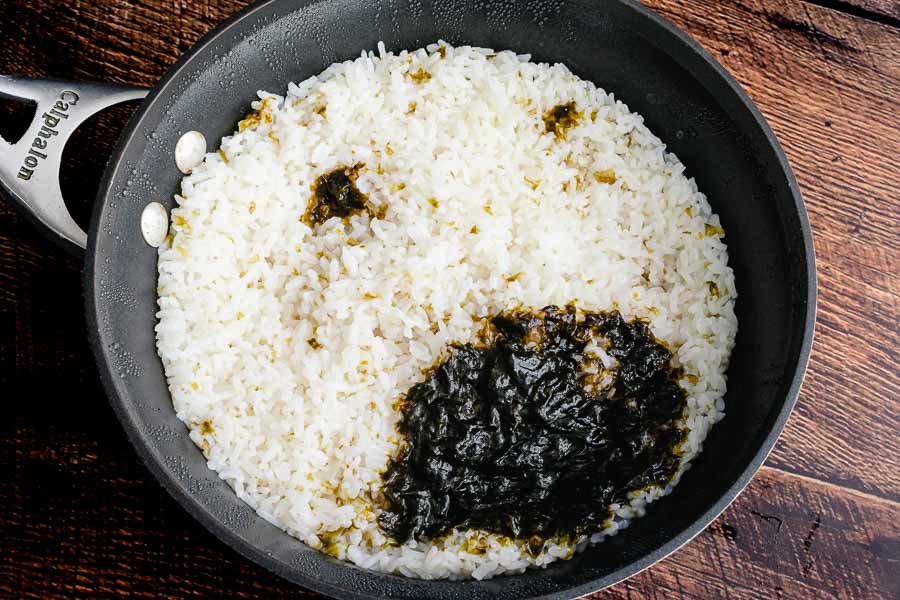
I used the stovetop recipe from the Spicy Salmon Sushi Bowls I made a few weeks ago. It’s not shown in the ingredients photo with this recipe, but I did add nori to the rice for flavor per that recipe since I had it on hand (this recipe does not call for it).

Once the rice was done, I spread it onto a sheet pan to cool. I set the sheet pan onto a cooling rack hoping it would speed things up (it did).
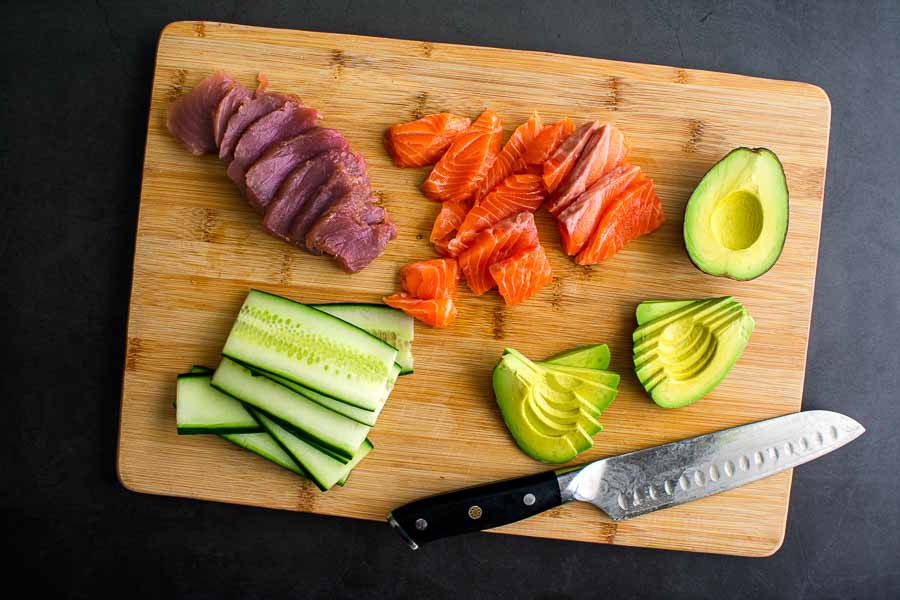
Slicing the fish and vegetables
Slicing the tuna, salmon, avocado, and cucumber

Toppings

This is the part that made me a little nervous. I have always heard cutting sushi is very specialized. Now I doubt I’m going to find work as a sushi chef, but I think I managed. I also thought getting the avocado thin enough would be a challenge, but it went very smoothly.

While the fish and avocado didn’t give me any trouble, the cucumber was a little more challenging. It needs to be pretty thin to be flexible enough to bend to the donut mold. Mine might have been a touch too thick, but I sliced it all getting the thickness setting on my mandoline right. Ugh!

Finally, I moved onto toasting the sesame seeds. I poured 12 tablespoon of each color into a small skillet and slowly toasted them over medium heat. When they began to get fragrant and brown (7 minutes), I poured them into a small ceramic bowl to cool. Prep was done!
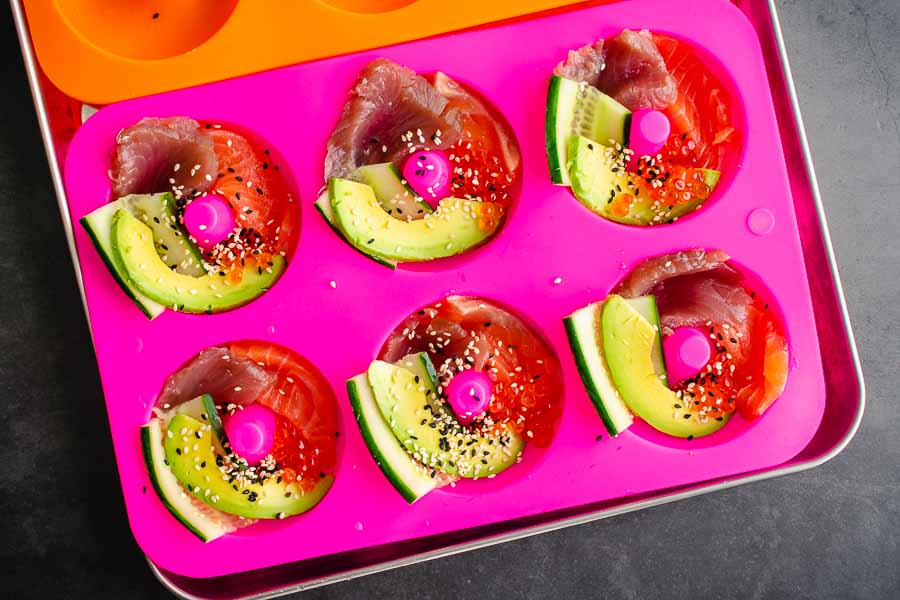
Placing the toppings into the donut mold

Assembly

I placed the silicone donut molds onto a sheet pan and got started on assembly. They are way too floppy and need firm foundation. The instructions made this part pretty easy to follow, and I didn’t have any trouble at all.

I began with the salmon, then tuna, and so on in the order listed, replacing the radishes with the avocado. I must have overbought because I was able to make eight sushi donuts.

Once they were assembled, I moved the entire sheet pan into the refrigerator so they could chill. That gave me plenty of time to mix up the spicy mayo and dispense the pickled ginger, wasabi, and soy sauce.

When the donuts were done chilling, I placed a cutting board on top of each silicone mold, turned it over, and gently removed it to find nearly perfect sushi donuts. A wide spatula mde moving them onto serving plates intact easy. All that was left was to add the garnishes and serve.

Next time I will make sure the cucumber is thinner and press the rice a little harder. Otherwise, I was pretty happy with the results!
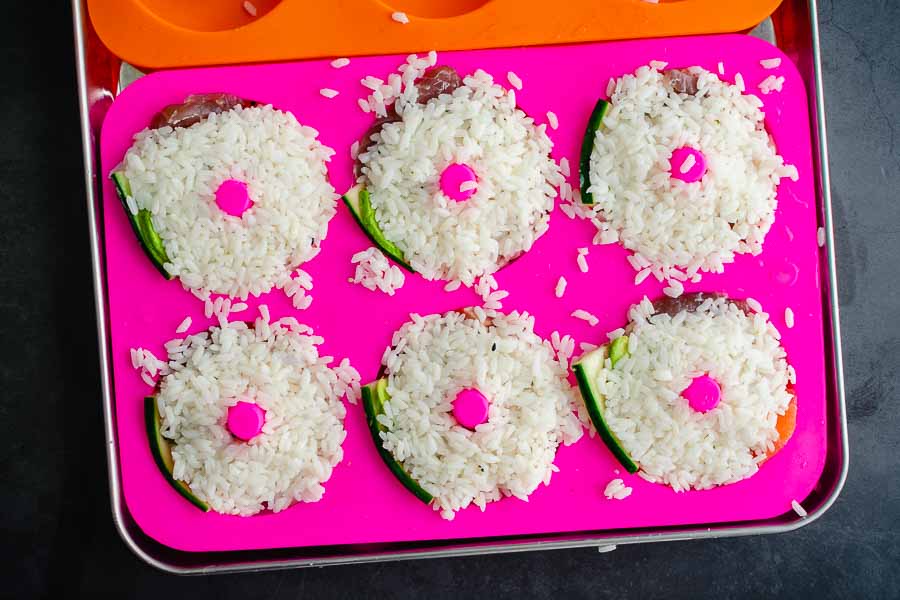
Sushi rice added to the donut mold
After adding the sushi rice to the donut mold

Caprese Roasted Asparagus

My week of easy recipes started out with a main course, so it wouldn’t be complete without a side dish. Now, I fully admit I didn’t serve these two recipes together. In fact, I don’t think they would work together, but creating menus isn’t my strong suit. That said, I’m giving this Caprese Roasted Asparagus recipe a try today. I have to admit that I couldn’t believe it was a 15-minute recipe after I saw the photos. Then again, that’s why I’m here—to test recipes and find out if they are the real deal. So let’s give this lovely side dish a try!

Caprese Roasted Asparagus is a lovely spring dish perfect for Easter Dinner! Roasted asparagus topped with mozzarella, fresh tomatoes and a balsamic glaze. This will definitely be a hit!

Recipe Author: Lauren Grier at The Curious Plate
Get the recipe

The Ingredients

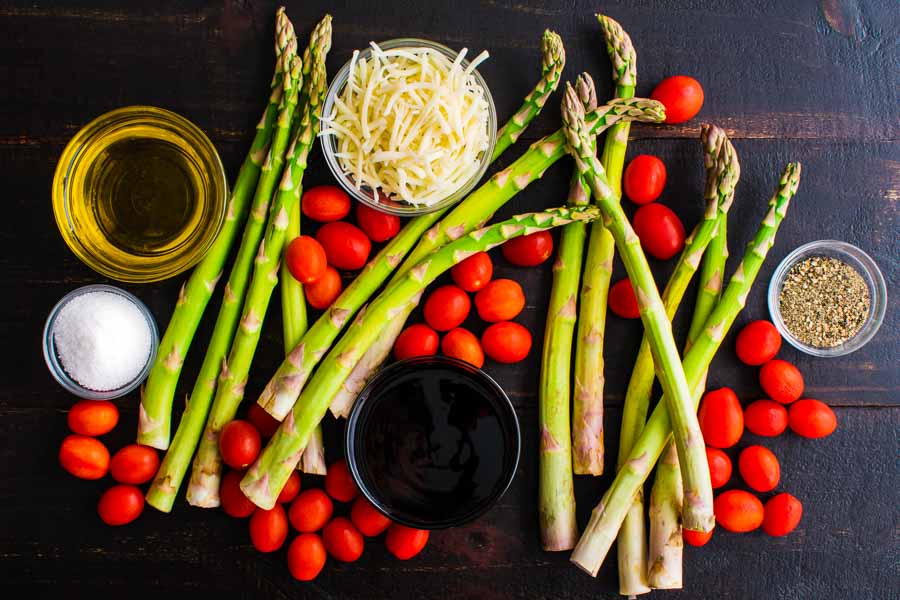
Like the Pan Roasted Pork Tenderloin I just made, this Caprese Roasted Asparagus has seven ingredients. Okay, eight if you separate the salt and pepper that’s listed on one line, but I’m counting it as one since they’re so common.

Anyhoo, I did my pantry check and found that I had the salt, pepper, and olive oil. And thanks to my 15th anniversary present from my husband, I had the fresh basil. He bought me an AeroGarden, and I’m loving it! Not only have I not killed any plants for months (a major achievement!), but for once I don’t have to buy fresh herbs and feel guilty about not using the whole package. 😊

That left me to buy a bunch of asparagus, two pints of grape tomatoes, a bag of shredded mozzarella, and a bottle of balsamic glaze. All were easy to find at my usual grocery store, but I’m glad I read the accompanying blog post and comments.

I originally thought the balsamic glaze would be made as part of the recipe. However, I realized there were no instructions/ingredients for it when I was putting together my grocery list. A search of the author’s blog post comments clarified that it’s bottled balsamic glaze.

I didn’t realize it came bottled, but it does and can be found on the salad dressing aisle. Since I had no idea if I would ever use this stuff again, I grabbed the cheapest bottle on the shelf (Bertolli, 6.76 oz. for $3.75).

Caprese Roasted Asparagus Ingredients
Asparagus, grape tomatoes, shredded mozzarella, pepper, balsamic glaze, salt, and olive oil

The Process

Wow, was this Caprese Roasted Asparagus easy to make! I really appreciated the tip on covering the sheet pan with foil as it made clean-up super easy too. The melted cheese could have been a nightmare without it.

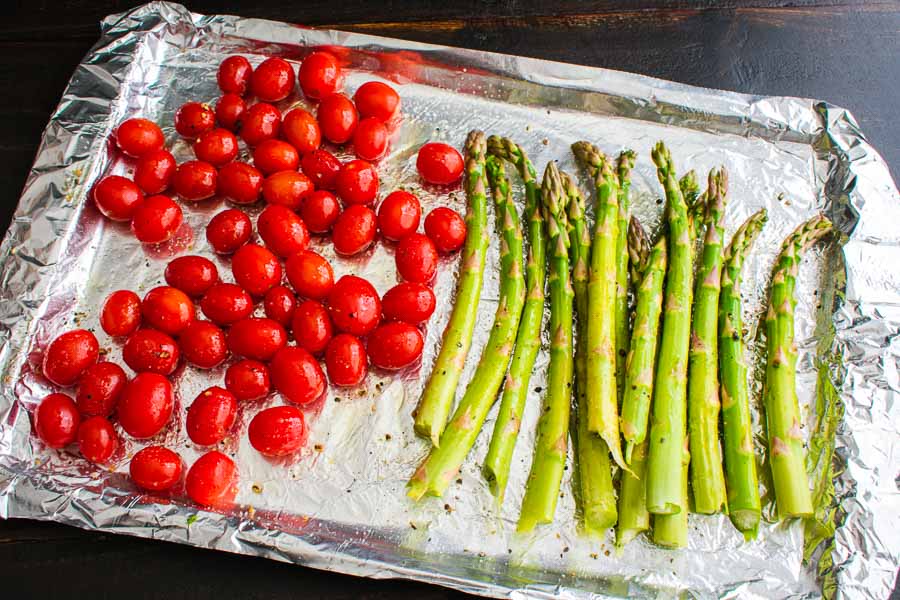
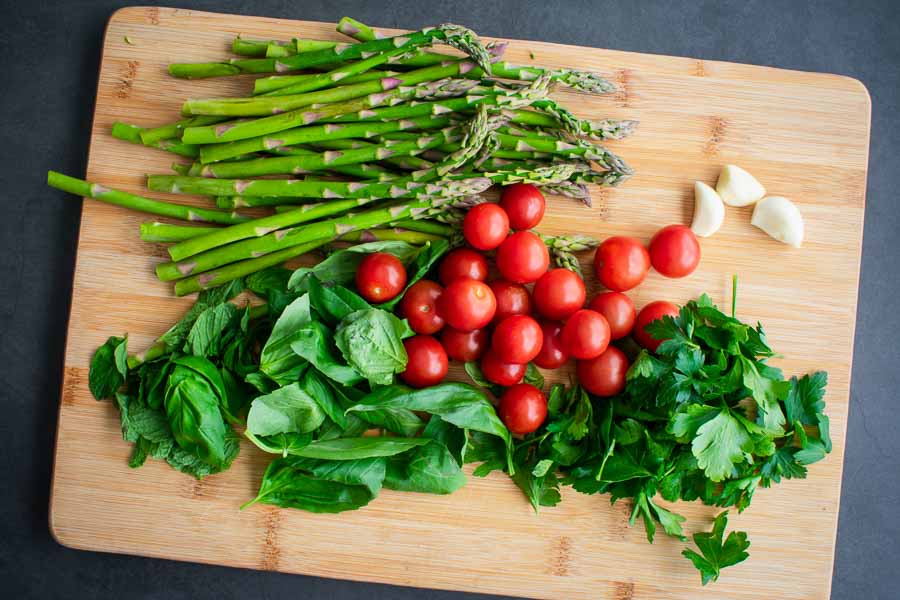
Prepping the ingredients was simple. I had previously washed and dried my produce, so I was able to get right into it. I broke off the tough ends of the asparagus spears and added them to the prepped sheet pan with the grape tomatoes, making sure to keep them separate. Then I seasoned both with olive oil, salt, and pepper and tossed them to make sure they were well-covered.

The prepped grape tomatoes and asparagus on a foil-lined sheet pan

I popped the sheet pan into the preheated oven for five minutes. While it was cooking, I measured out the shredded mozzarella and chopped up some basil. Then I sprinkled the cheese over the asparagus and let everything cook for an additional five minutes.

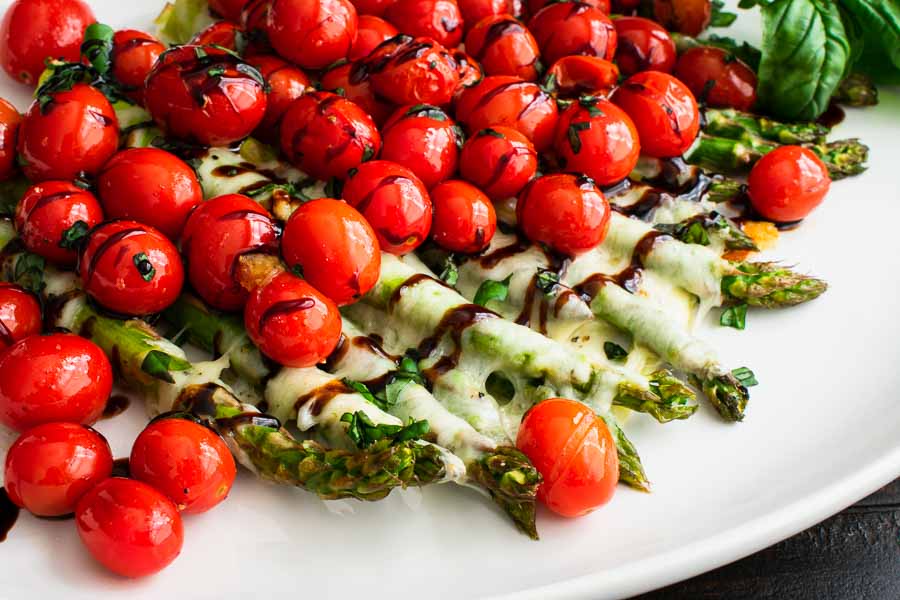
When it was done, I used a large spatula to place the cheese-covered asparagus on a serving platter. Then I covered it with the roasted tomatoes, sprinkled on the fresh basil, and drizzled it all generously with the balsamic glaze. The glaze’s squeeze bottle was made just for this, and it came out beautifully if I do say so myself. And I do!

Here’s how all my time was spent on this dish:

  • 5 minutes to prep
  • 10 minutes to cook
  • 2 minutes to finish
  • 17 minutes total

Slightly longer than the 15 minutes listed, but I’m not mad about it. This recipe was so darn fast, and the results looked like I worked way harder on it than I did.

Caprese Roasted Asparagus
Beautiful isn’t it?

Pan Roasted Herbed Pork Tenderloin

Things have been so hectic lately, and I haven’t had much time to cook. I hate to admit it, but we have been eating take-away and subs a lot. It’s okay for a day or two, but it gets old quickly. Plus it’s a guaranteed way for us both to put on a couple of pounds the longer it goes on. That’s why I sought out quick and easy recipes for this week’s posts. First up is this Pan Roasted Herbed Pork Tenderloin. It only has a few ingredients and even fewer steps plus it promises to be ready in just over 20 minutes. I’m looking forward to giving it a try and having a home-cooked meal!

This herb rubbed pork tenderloin is seared in a hot skillet then transferred to the oven to finish cooking. The result is a flavorful pan seared pork tenderloin that’s tender and juicy and impossible to resist. It can also be cooked on your grill outside.

Recipe Author: Kristin Maxwell at Yellow Bliss Road
Get the recipe

The Ingredients

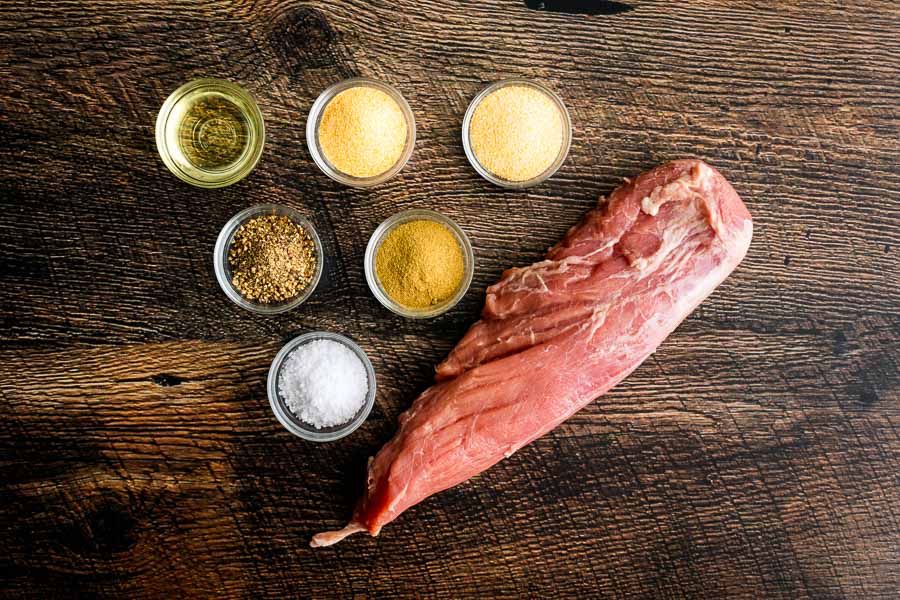
This Pan Roasted Herbed Pork Tenderloin has a grand total of seven ingredients, and I had six in my pantry! The olive oil and all the spices were there, so all I had to buy was a pork tenderloin.

The recipe calls for two pounds of pork tenderloin, but I found one that was slightly smaller. It was also a single piece, but it suited the two of us just fine.

Pan Roasted Herbed Pork Tenderloin Ingredients
Pork tenderloin, kosher salt, ground black pepper, poultry seasoning, olive oil, garlic powder, and onion powder

The Process

Making this Pan Roasted Herbed Pork Tenderloin was just as simple as I imagined it would be. I began by preheating the oven and a cast-iron pan with the olive oil. I use an electric stove, and I like to preheat my pans at setting four. It gets surprisingly hot after five minutes but it’s low enough that it doesn’t start smoking.

But back to the pork! It didn’t have much silver skin, so trimming it was very quick. In fact, I had it trimmed and seasoned in a mere four minutes (and that includes all the preheating).

Next, it was into the preheated pan to sear. I seared it for two minutes per side, but I seared mine on four sides. I have a feeling the recipe only counts two sides, which is why my total time took a little longer than listed (more on that later).

Something else to note was the color. The outside of the tenderloin went a bit past browned and was edging its way toward black. I was worried I had burned it, but I think it was the onion powder caramelizing. It ended up making a crispy outside with tons of flavor!

That was the real “work” of the recipe. The rest was putting the pan into the oven, removing it, and tenting it with foil while it rested. After that, I sliced it and served it up with a side of veg.

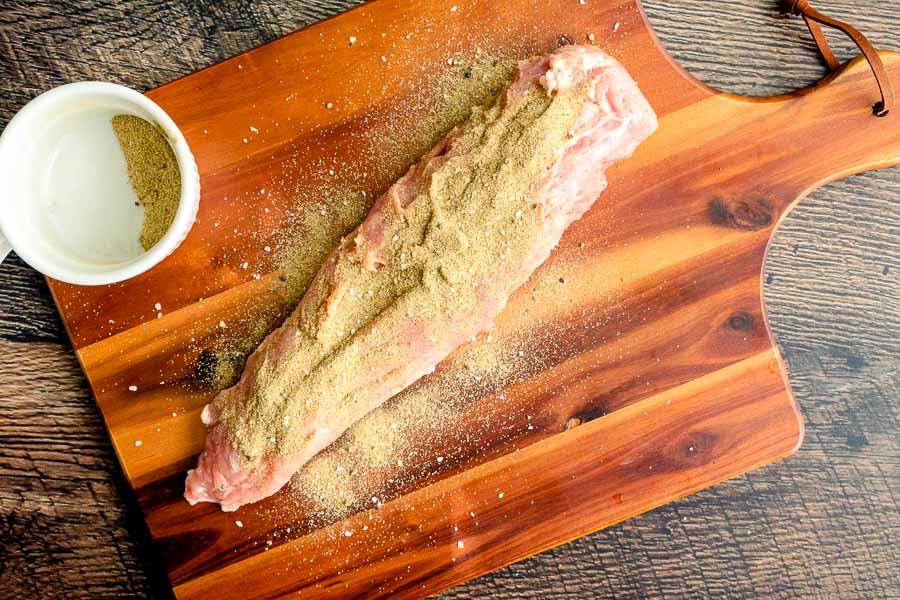
Seasoning the pork tenderloin with the spice mixture

The Timing

Here’s how my time broke down:

  • 4 minutes to prep
  • 27 minutes to cook (9 minutes to sear + 18 minutes to roast)
  • 5 minutes to stand
  • 36 minutes total

The total time listed was 23 minutes, but I went over it. Initially, I thought it was because of two reasons. First, I seared the pork tenderloin on four sides instead of two. That added four minutes. Second, I wonder if the time to rest was included in the time listed on the recipe.

However, when I did some math, I found the problem. The times listed in the recipe don’t add up to 23 minutes:

  • 4 minutes to sear (2 minutes per side, assuming 2 sides)
  • 18 minutes to roast
  • 5-10 minutes to rest
  • 27-32 minutes total

And that doesn’t include any time for prep work. It sounds like a combination of a simple math error and my theories. Hey, it happens. But once I realized the math issue, my time was much closer to the instructions.

Strawberry Cheesecake Mousse

I have some serious strawberry lovers in my house. They have been on my grocery list every week, and I often have to send my husband to pick up an extra package in the middle of the week. Why? He and my rabbit Louie can’t get enough of them. I, however, eat them in perfect moderation. Not! We all love them, and we all eat plenty of them. Louie will tell you he doesn’t get enough, but he’ll tell you that about all his food. Poor, starving creature 🙄 But I’ve had a lot of fun this summer with strawberry desserts, and the fun isn’t over. Today, I’m continuing this delicious trend with Strawberry Cheesecake Mousse.It promises to be an easy and light summer dessert. Let’s find out if it is!
This Strawberry Cheesecake Mousse is light and fluffy, sweet, and has a deliciously light cream cheese flavor. No bake and perfect for summer, this easy mousse recipe is a lovely addition to your summer entertaining menu!

Recipe Author: Glory at Glorious Treats
Get the recipe

The Ingredients

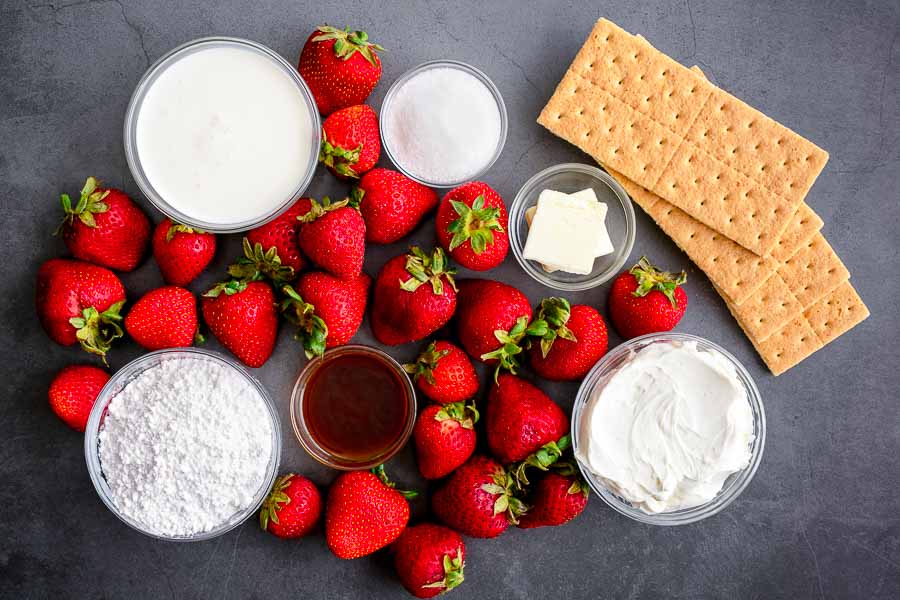
The ingredients for this Strawberry Cheesecake Mousse were certainly easy to find. I had the vanilla extract, butter, and the sugars, but I had to buy everything else. No worries, though, because they were all easy to find at my regular grocery store. Plus it was only a four items: graham crackers, whipping cream, cream cheese, and strawberries.

Strawberry Cheesecake Mousse Ingredients
Fresh strawberries, sugar, butter, graham crackers, cream cheese, vanilla extract, powdered sugar, and heavy whipping cream

The Process

My Strawberry Cheesecake Mousse started off at the bottom with the graham cracker crumble. It wasn’t a proper crust—just sprinkles—but that made it even easier. Tip: Preheat your oven to 350℉ before you start the prep work.

Crumbling the graham crackers only took a moment. I put four into a ziplock bag, closed it, and rolled over it with my rolling pin. Then I mixed the crumbs with the remaining ingredients. Finally, I spread them out in a square baking dish and baked them for 12 minutes.

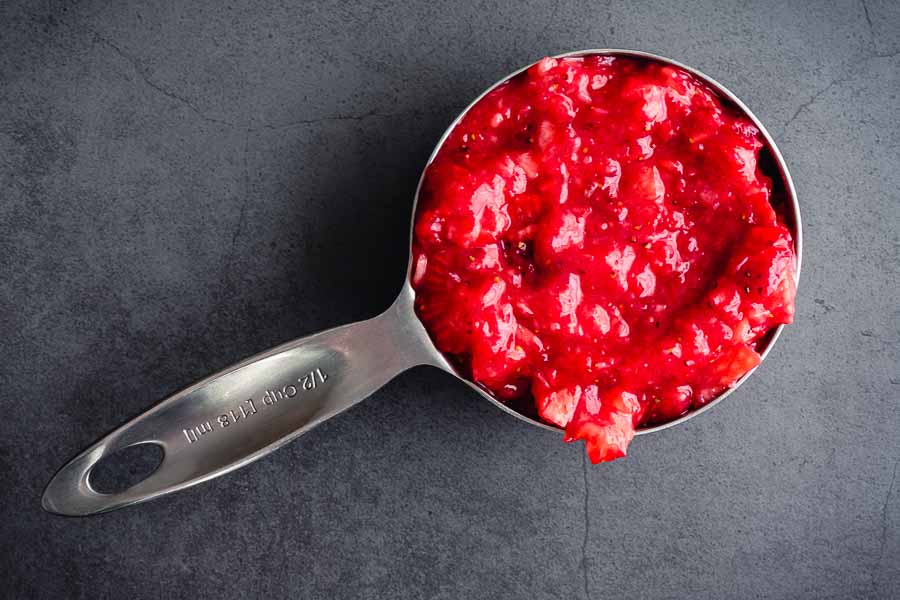
While the crust baked, I pureed the strawberries in my food processor. Spoiler: it turned out that the bowl was too large. The mixture was a little on the chunky side, but I didn’t mind. Tip: Use a smaller blender, bullet, or mini-prep if you prefer a smoother texture.

Tip: If you want to be extra sure there are no clumps or seeds, you could strain the puree through a mesh sieve. You can see an example of this in my Raspberry Baked Donuts with a Raspberry Glaze post.

strawberry puree
My strawberry puree was a bit chunky so the mousse was too

Next up was the whipped cream. I started that in my stand mixer and let it do its thing while I made the cheesecake mixture using a hand mixer. The whipped cream was ready when I finished, so I folded them together and began assembly.

Tip: This was the only area of confusion for me. The ingredients list powdered sugar twice under “Cheesecake Mousse”, but the instructions don’t mention quantities. I took a chance and added the smaller amount (2 tablespoons) for the whipped cream portion. It worked!

I had a set of five small glass dishes that were perfect for this recipe (it was six at one time, but oops!). I spooned the graham cracker crust into the bowls, then I piped in the strawberry mousse. Then I chilled the bowls for 15 minutes while I chopped up a few strawberries for the garnish.

We ate the desserts over the next few days, and I have to say that I was impressed with how they held up. I thought the graham cracker crust would get soggy, but it didn’t.

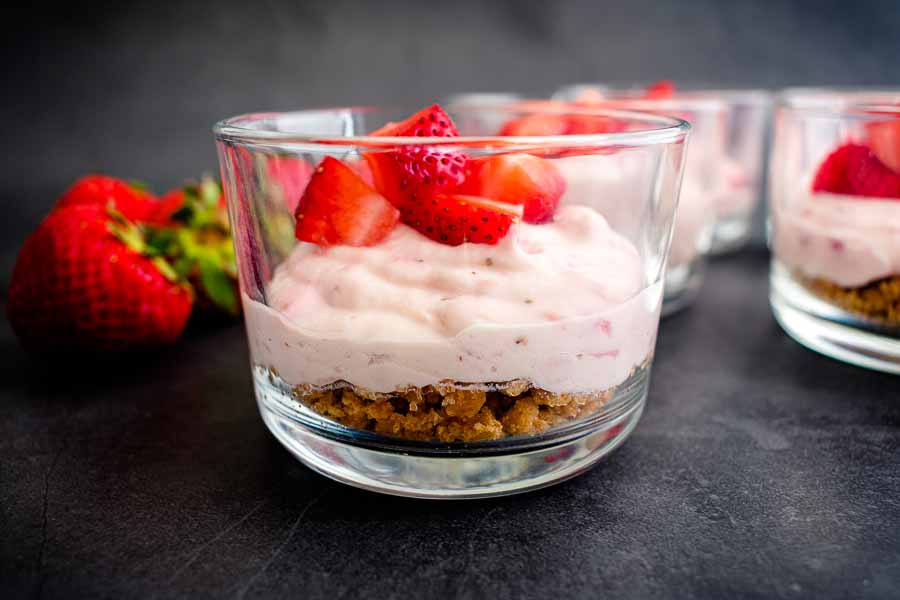
Strawberry Cheesecake Mousse
Side view of the Strawberry Cheesecake Mousse so you can see the graham cracker crumbles at the bottom

Roasted Veggie Pasta with Feta

How is your summer going? Well, I hope! We’ve been having some issues with our house lately. An upstairs window leaked, and we have people fixing the water damage in the bedroom and the kitchen below it. They’re literally ripping out wet drywall (ha ha, “dry” wall!) to fix the problems. It’s been rough! That’s why I need something that’s bright and cheery in my life right now. This Roasted Veggie Pasta with Feta looks like just what the doctor ordered. It’s cheese and pasta (total comfort food) with a variety of brightly colored roasted vegetables to healthy it up. It’s so pretty that I had to make it. Let’s see if it will cheer me up!

This creamy veggie pasta recipe is made with roasted vegetables, feta, baby arugula, and chunky pasta. Roasting the vegetables and the feta adds an incredible depth of flavor that’s hard to beat. It’s a delicious meal that’s ready in less than 30 minutes.

Recipe Author: Emily at This Healthy Table
Get the recipe

The Ingredients

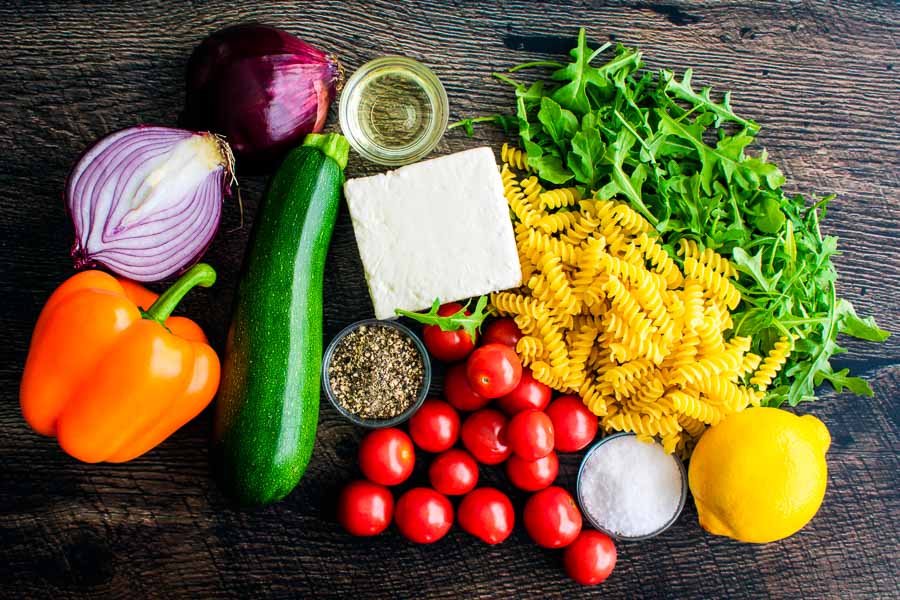
Most of the ingredients for this Roasted Veggie Pasta with Feta were fresh vegetables, so I had some shopping to do. The basics like olive oil, salt, and pepper were in my pantry. I found the rest very easily at my usual grocery store.

I have to admit I had no idea what fusilli was. It turns out in the U.S. it’s called rotini. Yup, that fancy-sounding mystery pasta was just the twists I know and love. Nice!

The only super minor problem I had was finding a six-ounce block of feta cheese. The smallest I could find was eight ounces, so I went with that. More feta is never a bad thing!

Roasted Veggie Pasta with Feta Ingredients
Feta cheese, olive oil, arugula, fusilli, lemon juice, kosher salt, cherry tomatoes, black pepper, zucchini, orange bell pepper, and red onion

The Process

No only is this Roasted Veggie Pasta with Feta, it’s also easy! I preheated the oven and put a large pot of water on to boil then began prepping the vegetables.

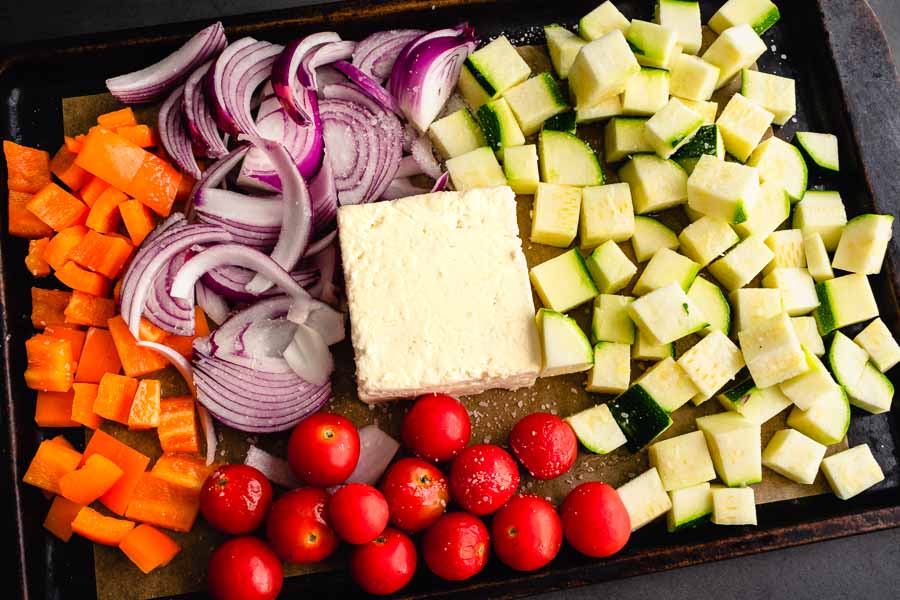
A little slicing and dicing was all it took, and I added everything to a sheet pan with the block of feta. I drizzled the tray with some olive oil, sprinkled on salt and pepper, and slid it into the oven for 15 minutes.

Meanwhile, I salted the water and put the pasta on to boil per the package instructions. it took 10 minutes, so it was done before the vegetables.

Speaking of vegetables, the tomatoes hadn’t burst when the 15 minutes was up. It took an extra five minutes for that to happen. Once it did, I scooped the softened feta into the pasta and stirred until it was mixed well. Then I added the veggies and remaining seasonings, gave it a final stir, and voila!

Serving was simple—this gorgeous dish didn’t need any garnishes. All I had to do was spoon it into a couple of pasta bowls. Generously, of course!

Seasoned vegetables and feta on a sheet pan
Feta, bell pepper, onion, zucchini, and tomatoes drizzled with olive oil, salt, and pepper

Grilled Vegetable Salad

I like vegetables, but I don’t get excited when I think about them. It’s not that I don’t like them, they just don’t do it for me like a juicy steak or a big plate of pasta (preferably with seafood!). But grilled vegetables are another story! There’s just something magical about grilling over an open flame that makes everything taste a little better, and vegetables are no exception. That’s why I decided to give this Grilled Vegetable Salad a try. Well, that and the delicious goat cheese topping. Cheese also makes everything better, so grilling plus cheese must equal nirvana, right? I have a feeling there’s a grilled cheese pun in there, but I”m gonna leave it alone. I have a theory to test!

If you love grilled vegetables and want to elevate them a notch check out this grilled vegetable salad.

Recipe Author: Courtney at Love & Good Stuff
Get the recipe

The Ingredients

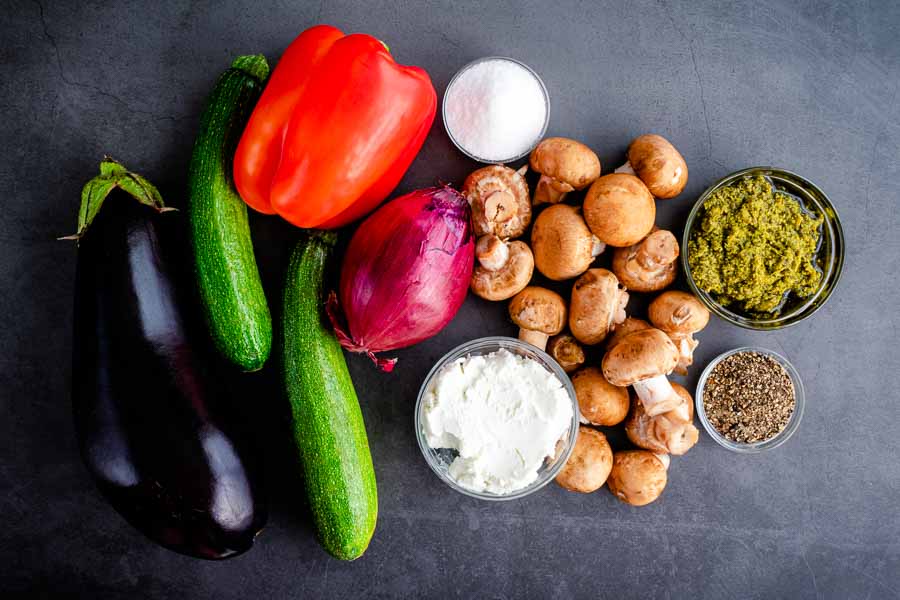
With a short list of easy-to-find ingredients, shopping for this Grilled Vegetable Salad recipe was a snap. I had salt, pepper, and olive oil on hand. I also had red onions, so I threw one in. The recipe just says onion, so I assumed I had the option to select the type I prefer.

I hit up the produce section for most of the ingredients, the canned aisle for the pesto, and the deli for the goat cheese. The only thing I didn’t find was the avocado oil. They were out, but I had extra virgin olive oil in my pantry and used that instead since the recipe does say to use the cooking oil of your choice.

Grilled Vegetable Salad Ingredients
Eggplant, zucchini, red bell pepper, red onion, soft goat cheese, salt, cremini mushrooms, pesto, and black pepper

The Process

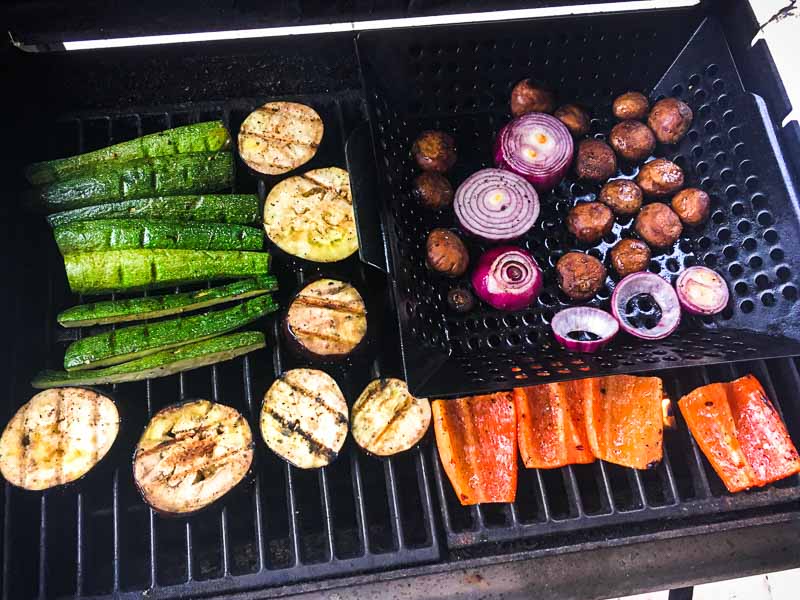
I started things off by preheating my grill. I knew the smaller mushrooms would fall through the grate, so I preheated my grill wok too. It saved the small vegetables from becoming charred crumbs in the ash pan.

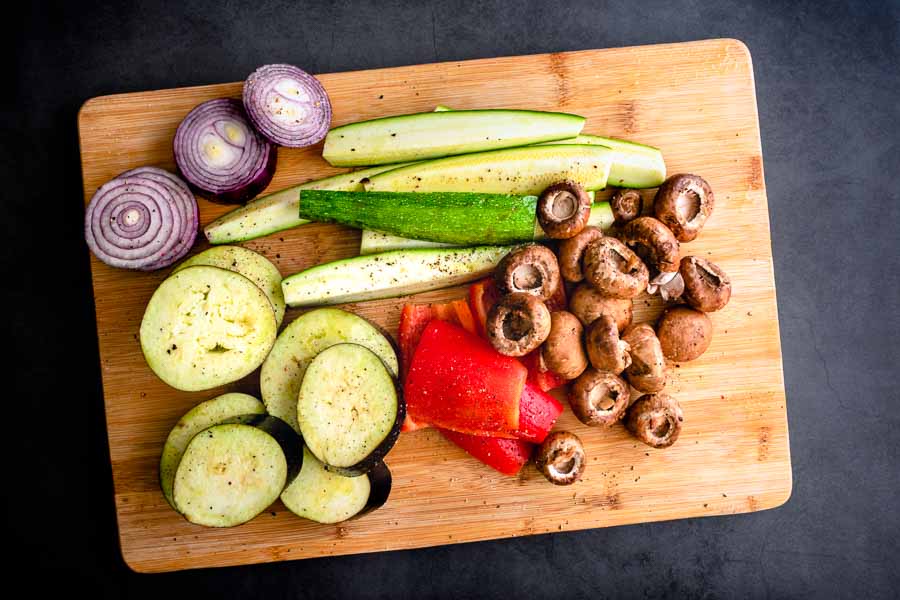
A bit of chopping and slicing was next, but it wasn’t too bad. The instructions are nice and specific about how to cut everything up. It wasn’t specified, but I decided to stem the mushrooms. It’s a nice touch if you have the time since the stems can be tough.

The directions say to brush the vegetables with olive oil, but I opted for my trusty oil sprayer because it’s easier and more thorough. Then I flipped everything and repeated oiling and seasoning.

Sliced vegetables seasoned with olive oil, sea salt, and pepper

Now it was time to grill! I’m glad I have a large grill because it had just enough room for everything to grill at the same time. I had to add the onions to the grill wok, but that worked out perfectly. Some of them fell apart after I lifted them with my tongs, and the rings would have fallen through the grate.

The instructions say to grill for 7-8 minutes, flipping about halfway through. I usually like to start with the shortest time, but I went with 8 minutes. The mushrooms and red bell peppers were done after that, but the rest needed some extra time. I flipped them a second time and added 2 more minutes to the cooking time.

Grilling the vegetables

Once I brought everything back inside, I arranged the grilled vegetables on a 15-inch serving platter. I added dollops of pesto and soft goat cheese throughout.

I had this lovely Grilled Vegetable Salad ready in less than half an hour, even with the extra time on the grill. Here’s how it went:

  • 18 minutes to prep (includes time to assemble)
  • 10 minutes to cook
  • 28 minutes total

Tuscano Burger

What’s your favorite food? My husband’s is pizza. He could (and would) eat it daily. I love a good pizza too, but my absolute favorite food is a hamburger. That’s something I could eat every day. Whether it’s a big ole burger from the Hardee’s drive-thru or a Wagyu burger at a nice restaurant, I’m always down for a good burger. I’ve even been known to crave a McDonald’s cheeseburger when I’m sick. I’m feeling particularly adventurous today, so I’m going to go to the trouble of making my very own Tuscano Burger. The Italian flair is more original than the pizza burger my favorite diner serves, and it’s loaded with all kinds of yummy things. Will it taste as good as it looks? Let’s find out!

Enjoy all the flavors of Italy in this epic Tuscano Burger – packed with fresh shallots, crisp pancetta, arugula, pesto aioli, and drizzled with balsamic vinegar!

Recipe Author: Megan at Country Cleaver
Get the recipe

The Ingredients

So there’s a little more needed for a Tuscano Burger than the typical burger, but shopping wasn’t too bad. I had panko, powdered milk, garlic, salt, pepper, mayonnaise, and pesto. I was running low on the last two, so I picked up fresh bottles to be on the safe side.

The type of ground beef isn’t specified, so I went with my favorite for burgers, 80% lean/20% fat ground chuck. More fat means more flavor and reduces the chances of the burgers drying out. I also ran by the deli counter to get some sliced pancetta. Then it was over to the bakery for some brioche hamburger buns.

Lastly, the recipe calls for a drizzle of balsamic vinegar to finish the burgers. I had balsamic vinegar and balsamic glaze on hand. I went with the glaze because the thick texture really sticks to whatever you put it on while regular balsamic is thin like water and drains away.

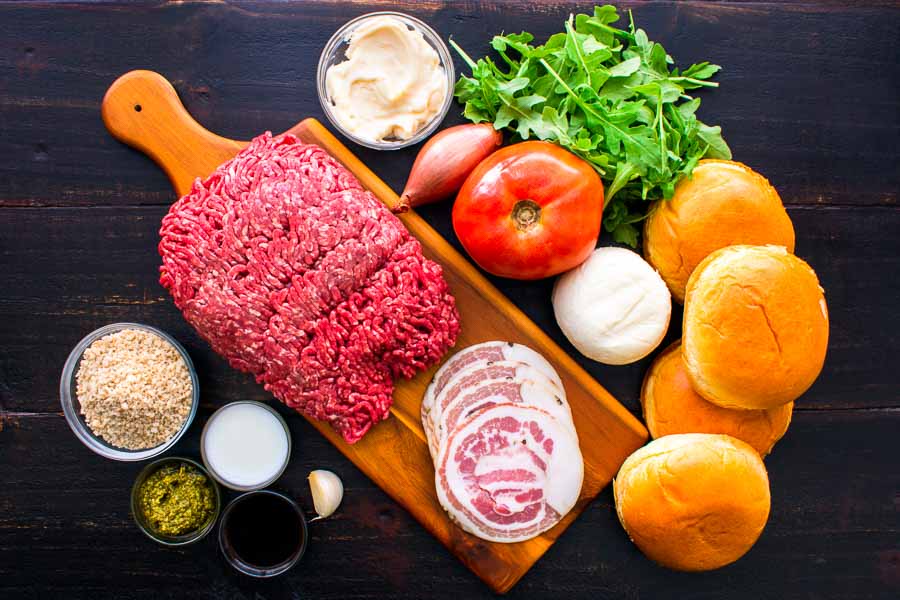
Tuscano Burger Ingredients
Ground beef, mayonnaise, arugula, shallot, tomato, mozzarella cheese, brioche hamburger buns, pancetta, garlic, balsamic glaze, pest, salt, and panko bread crumbs

The Process

It’s important to preheat your grill, and I did that first thing. Then I got started on prepping the hamburger buns. The recipe is divided into two sections, one for the burgers and one for the toppings.

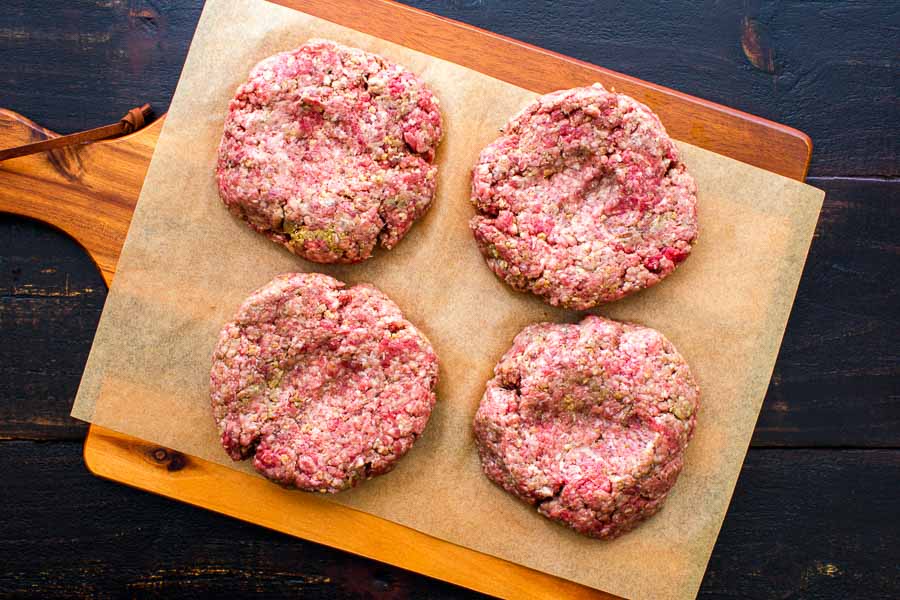
That seemed like a good idea, but there was one small mistake. I didn’t pay close enough attention, and I mixed pesto into the hamburger meat. It’s listed in that section of the instructions, but it’s actually a topping. That’s why my patties look a little greenish brown.

Freshly made hamburger patties
I added pesto to the hamburger by mistake, and it affected the color

The grill wasn’t ready yet, so I started prepping the toppings. I fried four slices of pancetta while I sliced the shallot, tomato, and cheese and mixed up the faux aioli.

Once the grill had preheated, I cooked the hamburger patties for four minutes on one side and five minutes more after flipping. I wanted them to be well done. I added the fresh mozzarella in the final 90 seconds, and it melted nicely without overflowing. (Yay, no extra grill cleaning!) BTW, the repice lists it as brie in the instructions. It was slightly confusing.

Then it was back inside to assemble these lovely Tuscano Burgers. The recipe gives the order of the toppings. I did it even though it’s not how I usually prefer to assemble my burgers. I find that putting the condiments on an untasted bottom bun makes it fall apart while eating, but it sure looked nice in the photos.

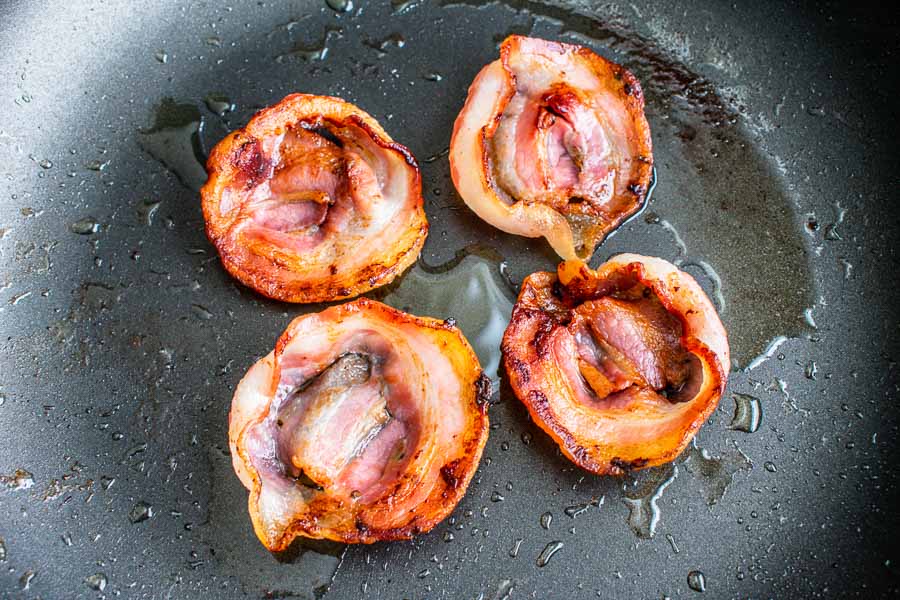
Fried pancetta
The pancetta shank when I fired it and made a cup-like shape

I also found that adding two slices of fried pancetta was tastier than one. I tried it both ways, of course, and couldn’t really taste it with one slice. Other than those small points, I wouldn’t change a thing!

Here’s how my time was spent on the entire process:

  • 8 minutes to prep the burger patties
  • 12 minutes to prep the toppings
  • 9 minutes to cook the burgers
  • 2 minutes to assemble
  • 31 minutes total

Fresh Strawberry Cake

My husband doesn’t ask for much, but one thing he frequently asks for is strawberries. He loves them, and so do I. Our rabbit Louie loves them too, and he gladly eats the tops as a treat so nothing goes to waste. That means I have no excuse not to work in more strawberry recipes, and I’m doing that with this Fresh Strawberry Cake. Strawberry cake with strawberry frosting topped with fresh strawberries should satisfy everyone in the house. Plus it’s baking, and I need all the practice I can get since it’s a weak area. Let’s give this recipe a try!

This strawberry cake gets all of its flavor from fresh strawberries! The cake itself is soft and moist with a luscious strawberry cream cheese frosting.

Recipe Author: Jenna Barnard at Butternut Bakery
Get the recipe

The Ingredients

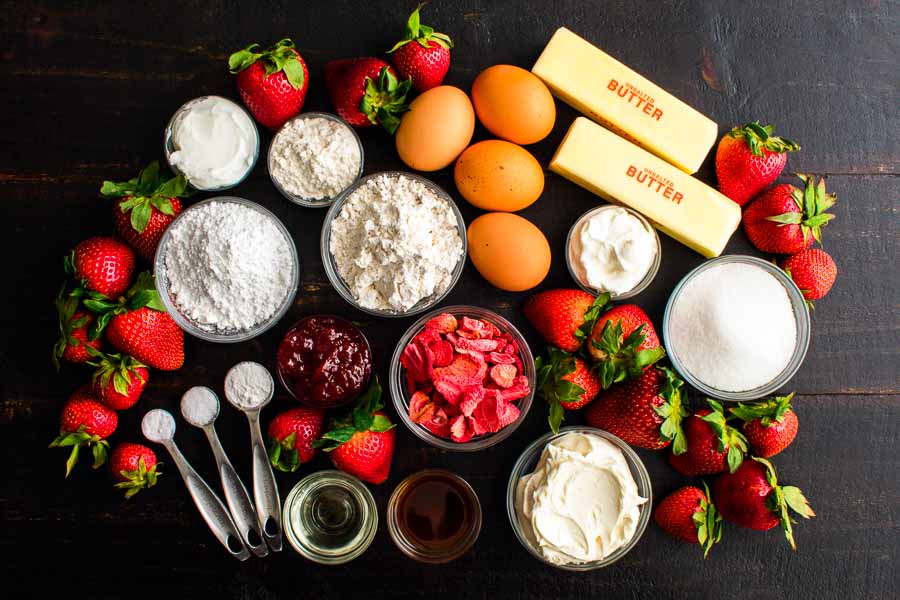
There are quite a few ingredients in this Fresh Strawberry Cake, and I was lucky enough to have quite a few of them on hand. Actually, I had most of them. That left me to buy the sour cream, cream cheese, strawberry jam, fresh strawberries, and freeze-dried strawberries.

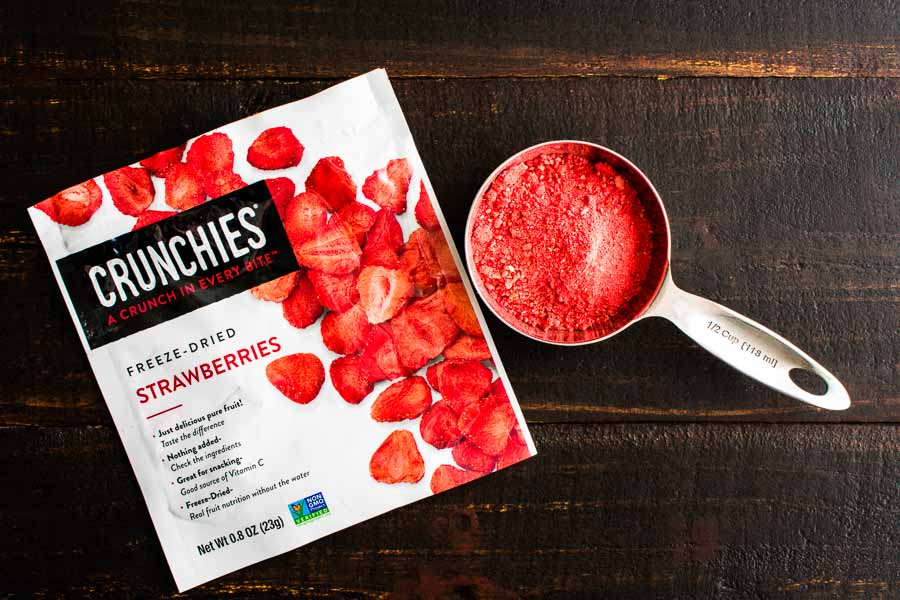
And yes, freeze-dried strawberries were easy to find. My regular grocery store had a 0.8-ounce bag for $3.87. Unfortunately, it was only about half of what I needed once I ground it in my blender. Next time, I’ll be sure to buy two bags.

Fresh Strawberry Cake Ingredients
Eggs, unsalted butter, sour cream, granulated sugar, fresh strawberries, full-fat cream cheese, freeze-dried strawberries, vanilla extract, vegetable oil, strawberry jam, baking powder, salt, baking soda, powdered sugar, shortening, cake flour, and all-purpose flour

The Process

This isn’t a simple recipe, but it is well-written. I’m not the greatest baker, and I had no problem following along. I even whipped out my kitchen scale and weighed my dry ingredients for extra accuracy.

Making the Cakes

First up was making the cakes. I have quick-release cake pans, but I greased them with vegetable shortening and took the time to cut out parchment paper rounds since that’s how the recipe was written. It only took a few moments, and it did make the cakes release with no problems.

Next, I got out my stand mixer, an extra mixing bowl, and my bullet blender. The instructions listed exactly when and how to mix the cake ingredients. I loved that the bullet had measurements on the side—it made it very easy to blend up a cup of strawberry puree. Not having to pour the puree into a measuring cup saved some time and dish-washing.

The cakes went into the oven for 28 minutes then I gave them the toothpick test. It ultimately took 36 minutes to pass the test, then it was time to cool.

Not enough freeze-dried strawberries
There weren’t enough freeze-dried strawberries once they were ground up

Making the Frosting

I had some time to wash up once the cakes were in the oven. It’s a requirement if you don’t have an extra whisk attachment, stand mixer bowl, and blender. Just be sure to dry them thoroughly as water is the enemy when it comes to making buttercream frosting.

I started off by grinding up the freeze-dried strawberries in my bullet blender and discovering I only had about half of what I needed. I was a little worried, but things worked out just fine. The frosting still mixed up beautifully, had plenty of strawberry flavor, and had a perfect consistency.

This step took me 12 minutes while the cakes were cooling. The frosting was done well before the cakes were cooled, so I left it in the stand mixer’s bowl on the counter. I gave it a quick mix right before I began frosting the cakes.

Assembly & Timing

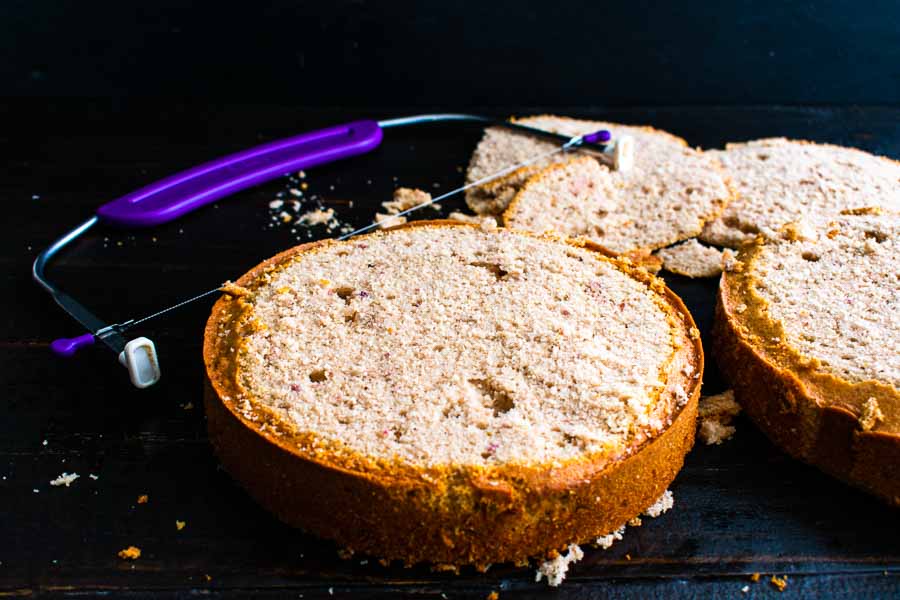
My cakes needed to be leveled, but it only took a minute or two to do that. Then I was ready to put it all together. There was nothing unusual in this process at all. Simply place a cake, add frosting, and spread with an offset spatula. Then place the next layer on top and repeat. I finished up by frosting the sides and decorating the cake with a heap of leftover strawberries for a rustic look.

Here’s how my time was spent on the entire recipe:

  • 21 minutes to prep the cakes
  • 36 minutes to bake
  • 20 minutes to cool in the pans
  • 45 minutes to cool on wire rack (12 minutes to make frosting while cooling)
  • 12 minutes to assemble
  • 2 hours 14 minutes total

That’s quite a bit longer than the 1 hour 30 minutes listed, and I’m not sure why. Things went smoothly, but it may just be that I’m a slow baker. 🤷🏻‍♀️

Leveling the cakes
Leveling the cakes with an adjustable cake leveler

Spicy Salmon Sushi Bowls

My husband and I both love sushi. In fact, we had our wedding reception at our favorite Japanese restaurant in Orlando. Sounds odd, I know, but they happened to have a banquet room with glass walls that overlooked a koi pond and their walled gardens. It was so serene and beautiful, and yes, we had sushi as a dinner option. We still have it regularly, and it’s the only way my husband really likes salmon. I’ll eat it any which way I can, but raw is it for him. These Spicy Salmon Sushi Bowls are something we can both agree on. They look delish and solve the problem of not knowing how to roll sushi. I do want to give it a go eventually, but not today. Today it’s time for sushi bowls!

All the flavors of a salmon sushi roll without rolling them in nori wrappers. It is like having a giant salmon sushi roll as a salad. Lightly marinated fresh wild salmon, sweet/tangy sushi rise, cucumbers, carrots, scallions and creamy avocado chunks. This is an easy one-bowl dinner!

Recipe Author: Pat and Dahn at Savor the Best
Get the recipe

The Ingredients

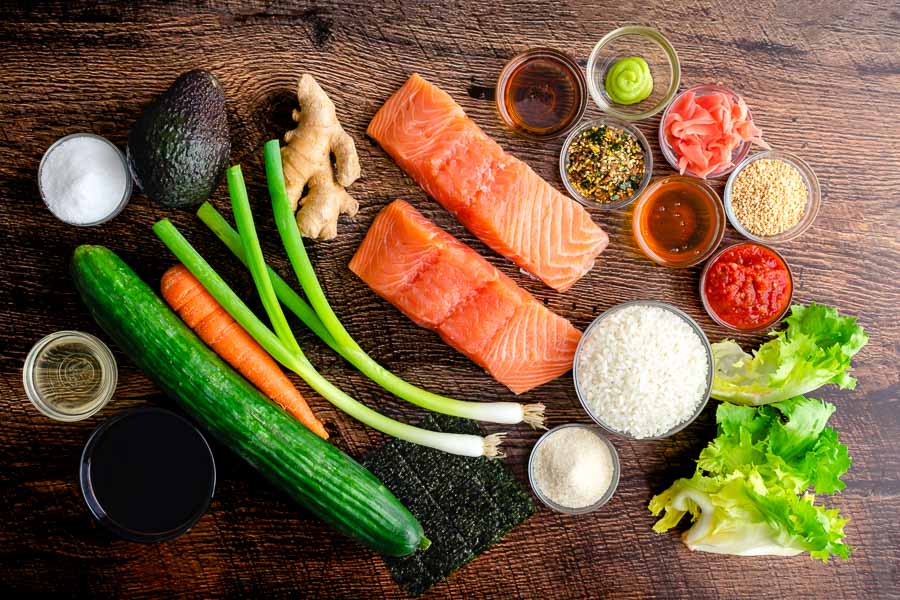
There are a lot of ingredients in these Spicy Salmon Sushi Bowls, but I was able to find most of what I needed at my usual grocery store. Toasted sesame oil, chili garlic sauce, sushi rice, ginger, scallions, avocado, lettuce, and salmon were all easy to find.

What I didn’t find locally were the nori sheets and sushi seasoning mix. I was able to order both, but it turned out that I didn’t need the sushi seasoning. It’s listed in the ingredients, but you have to read the notes for clarification.

Spicy Salmon Sushi Bowls Ingredients
Salmon fillets, toasted sesame oil, wasabi paste, sushi seasoning mix, pickled ginger, honey, sesame seeds, chili garlic sauce, salad greens, sushi rice, sugar, green onions, nori sheet, English cucumber, carrot, soy sauce, rice vinegar, sea salt, avocado, and ginger root

You can mix in sushi seasoning instead of making a solution of rice vinegar, sugar, and salt. I already had the solution ingredients in my pantry, so I didn’t need the seasoning mix. That suited me just fine since I wasn’t able to find it in a packet. What I bought came in a small jar, and I wasn’t sure how much to use.

I later researched it and found the recommended amount of sushi rice seasoning is 35 grams per 2 cups of sushi rice. I’m not sure if that’s dry or cooked, but the context sounds like cooked. Rice triples when cooked, so 2 cups dry would give you 6 cups cooked, requiring 105 grams of seasoning.

The Process

There were quite a few parts to this bowl. I started things off by preparing the sushi rice because it had to cool. A quick rinse, some boiled water, and a piece of nori were all I needed to get it started in a saucepan with a secure lid.

Sushi rice cooked with a norit sheet
The nori nearly dissolved. I used a fork to carefully remove it from the cooked rice.

As I mentioned above, I bought sushi seasoning thinking I needed it in addition to the rice vinegar, sugar, and salt. I opted not to use it and to do things the traditional way. It really wasn’t much additional work.

All I had to do was warm the vinegar enough to dissolve in the sugar and salt, then mix it into the rice. Very simple, and it took 4 minutes while the rice finished cooking. The instructions do say to use a wood or glass bowl to mix the rice. I only had a glass casserole dish, but it worked nicely for this purpose.

The Rest

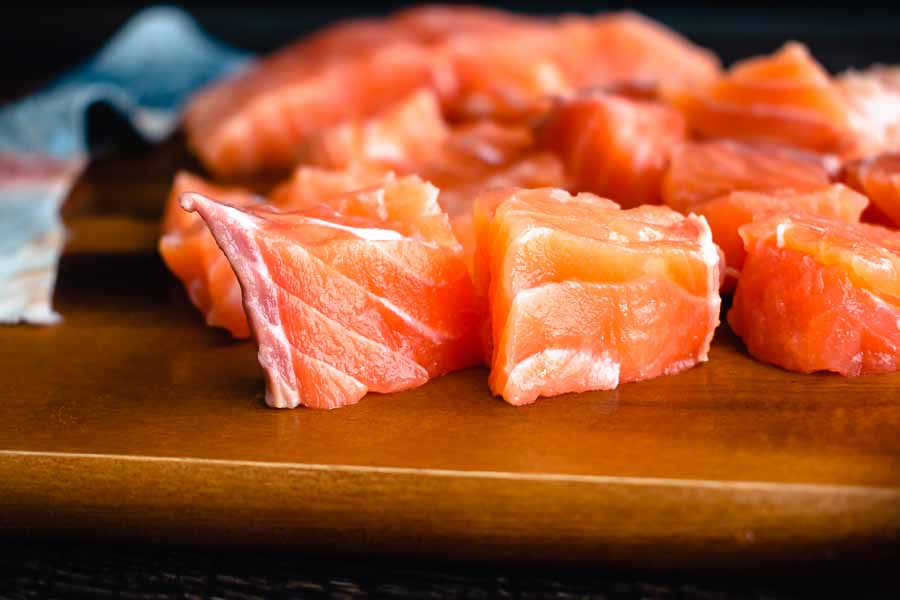
I skinned and cubed the salmon fillets while the rice cooled (4 minutes). Then I prepared the marinade (6 minutes) and set half of it aside. It was too soon to actually marinate the salmon, but I did mix the wasabi paste into the other half to make the dipping sauce (1 minute).

Cutting the salmon fillets into 1-inch cubes

Next, I spent 5 minutes prepping the cucumber, carrot, and lettuce. The cucumber was simple to slice with my trusty chef's knife, and I used my mandoline with the shredding plate for the carrots. I suppose I could have used the slicing plate for the cucumber too, but I did it the old-fashioned way. Lastly, I grabbed my knife again and sliced the lettuce into thin strips.

Once I was sure the rice had cooled, I marinated the salmon and cut up the avocado. I didn’t do it earlier so it wouldn’t turn brown. I could have sprinkled it with lemon to slow browning, but I was afraid it would affect the taste.

The Timing

Like I said, there was a lot going on. Here’s how my time was spent:

  • 8 minutes to prep the rice
  • 15 minutes to cook the rice
  • 15 minutes for the rice to stand
  • 3 minutes to finish the rice
  • 45 minutes to let the rice cool and finish the prep work
  • 3 minutes to assemble
  • 1 hour 29 minutes total

That was a lot longer than the 15-minute total time listed on the recipe. Maybe that was once the rice was made and cooled? I’m not sure. Still, while the cooking times were accurate, I have to deduct points in the time category because of the overall time.

Fried Burrata with Cherry Tomato Sauce

I thought I would finish up this week with another Italian-style recipe that features cherry tomatoes since that Tuscan Pici Pasta all’Etrusca was so good. Although it had cheese, it wasn’t my favorite Italian cheese: mozzarella. Let’s face it, even the cheaper shredded stuff from the dairy case is good, especially when melted. I’ve even been known to snack on a mozzarella cheese stick (or two). But fresh mozzarella is an undeniable step up and burrata? Fuh-get-about-it! Fresh mozzarella with a creamy center is the holy grail of mozzarella cheese. I’ve made recipes with cold and heated burrata, but today I’m trying it fried. Yes, fried—something I rarely do with any food. But how good does this Fried Burrata with Cherry Tomato Sauce sound? Did I mention it also involves fresh ciabatta bread? Yeah, the trifecta: tomatoes, melted mozzarella, and bread. Mmm!

Crispy Fried Burrata with Cherry Tomato Sauce is basically the equivalent of burrata heaven. It’s sure to be the star of your next party or happy hour!

Recipe Author: Nicole at Cooking for Keeps
Get the recipe

The Ingredients

As always seems to be the case, I had several ingredients conveniently located in my pantry. Basics like olive oil, salt, sugar, bread crumbs, garlic powder, flour, white wine, and an unopened 32-ounce bottle of canola oil. I even had some parmesan cheese in the refrigerator and some balsamic glaze leftover from a recipe I’ll be posting later.

That left me with a shortlist of ingredients to buy, and my regular grocery store had almost all of them. Cherry tomatoes, garlic, eggs, and burrata were all available, but they were out of fresh ciabatta. I had to go to another local store for that, but there are plenty of grocery stores nearby, so it wasn’t a problem.

Oh, and the burrata I got was actually two small balls instead of one medium/large ball. I would have preferred the single ball, but I had to take what was available.

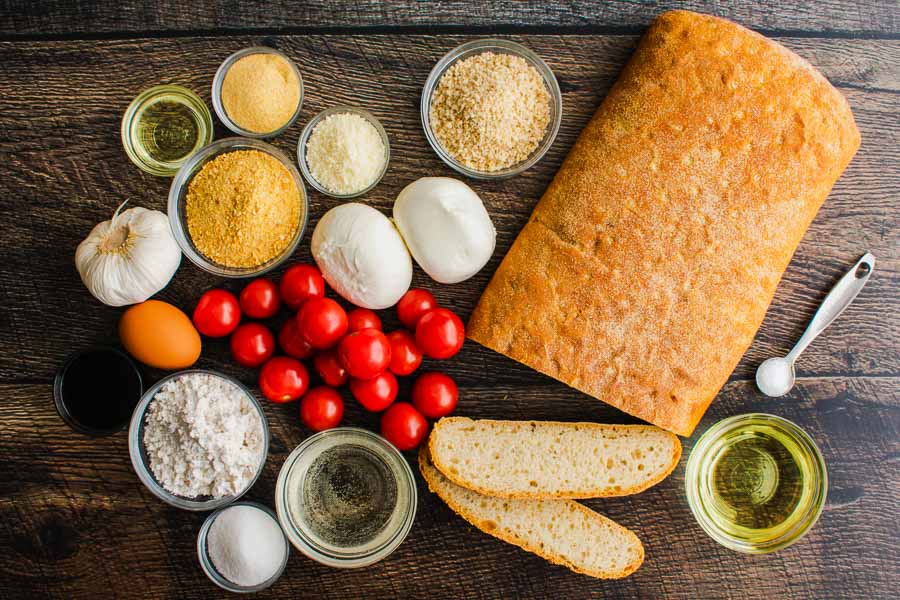
Fried Burrata with Cherry Tomato Sauce Ingredients
Cherry tomatoes, burrata, panko bread crumbs, ciabatta bread, sugar, canola oil, dry white wine, salt, all-purpose flour, balsamic glaze, egg, garlic, plain bread crumbs, olive oil, garlic powder, and grated parmesan cheese

The Process

There are three parts to this recipe: toast the bread, make the sauce, and fry the burrata. I was working on some parts simultaneously, so I wasn’t able to break the time down. Instead, I had a total of 45 minutes from start to finish.

Things moved fast because I had multiple things happening all at once, so prepping before I began was key. I made sure to have everything measured out and placed in the order I would be using it. It really helped speed things along, and I was done 15 minutes sooner than the 1-hour total time listed on the recipe.

The bread and sauce went according to the recipe, but frying the burrata was slightly quicker. I don’t have a deep fryer, so I had to heat the oil on the stove in a small saucepan. I set the heat on 4 out of 10 (electric) and dropped in my meat thermometer.

Unfortunately, the oil got much hotter than 350℉ because I wasn’t paying attention. It ended up at 432℉ by the time I was ready to fry the burrata. But everything else was ready by that time, so the breading and frying part had my full attention.

Breading the burrata was easy thanks to a large slotted spoon. It allowed me to dip the cheese into the eggs and then let the excess to drain off. It also kept things neater when I dipped into the breadcrumb mixture after. I usually use my hands or tongs for breading, but using hands would have been super messy, and tongs might have squished the burrata.

As I mentioned, I had two small balls of burrata, so I fried them both one at a time. They each took three minutes to turn a deep golden brown. The outsides were nice and crispy, and the insides melted beautifully.

I served this dish in a shallow pasta bowl so it would be easy to dip. A quick squirt of balsamic glaze, a sprig of basil from my AeroGarden, and voila! We had a beautiful and tasty appetizer for dinner.

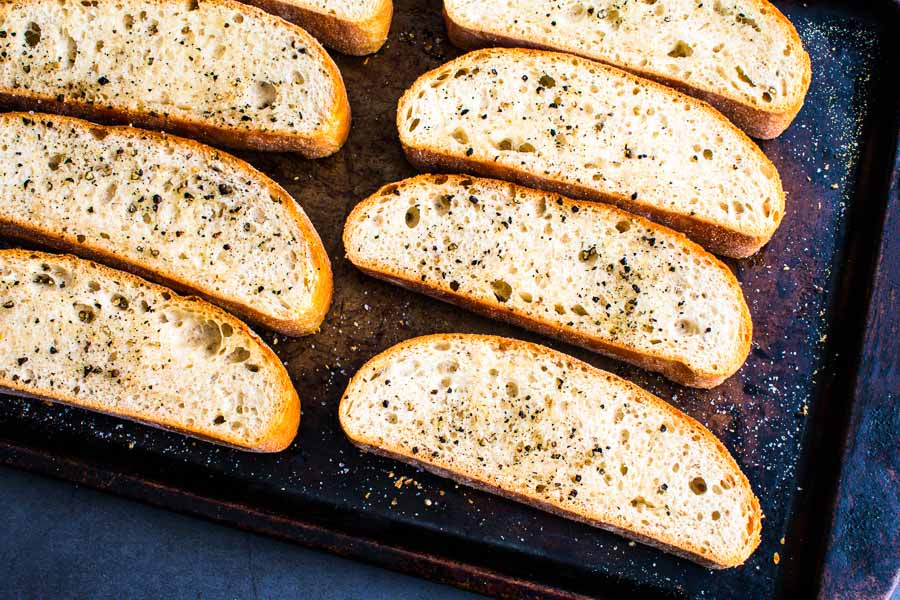
Sliced, seasoned, and toasted ciabatta bread on a sheet pan

Tuscan Pici Pasta all’Etrusca

I’ve been really into roasted vegetables lately, and I’m still not over them. Today I’m taking things up a notch by adding pasta. Although I had to make it with linguine (more on that later), I’m giving this Tuscan Pici Pasta all’Etrusca with Roasted Asparagus and Cherry Tomatoes a try. I think my recent recipes have firmly established my love of roasted vegetables, but who doesn’t like pasta? I love the stuff! I’m betting combining the aforementioned roasted veg with noodles, fresh herbs, and parmesan is incredible. Let’s find out!

A delicious pesto pasta type recipe from Tuscany with roasted fresh asparagus and cherry tomatoes.

Recipe Author: Jacqueline De Bono at The Pasta Project
Get the recipe

The Ingredients

I was all set to make this recipe, and most of the ingredients were easy to find at my regular grocery store. I was delighted when I actually found cherry tomatoes since they usually only stock grape tomatoes. Things were going well until I tried to find the pasta/

Apparently, pici (pronounced like “peachy”) pasta is hard to find in my area. No, it’s impossible. I couldn’t find it anywhere! I tried several nearby grocery store chains and even the local Italian market. There was no pici pasta to be found.

But I wasn’t about to be defeated. The recipe does mention making it, and I found a simple pici pasta recipe that looked like something I handle without any special pasta-making equipment. All I needed to find was the 00 pasta flour. Well, just like the pici, the flour was not to be found locally.

The only 00 flour I could find was for pizza dough (a.k.a. Tipo 00 flour). According to pasta manufacturer Pasta Nostra, this Tipo 00 flour isn’t suitable for making pasta without eggs due to its low protein content. Pici pasta is eggless, so pizza dough flour was a no-go.

When I can’t find it locally, I turn to Amazon. Although they did have packaged pici pasta, the cheapest I could find was $18 for a 17.5-ounce package. I also searched for the 00 pasta flour and it was pricey at $10 and up. Restaurant prices for something I have to cook? Nope! In the end, I went with the author’s notes and used packaged linguine.

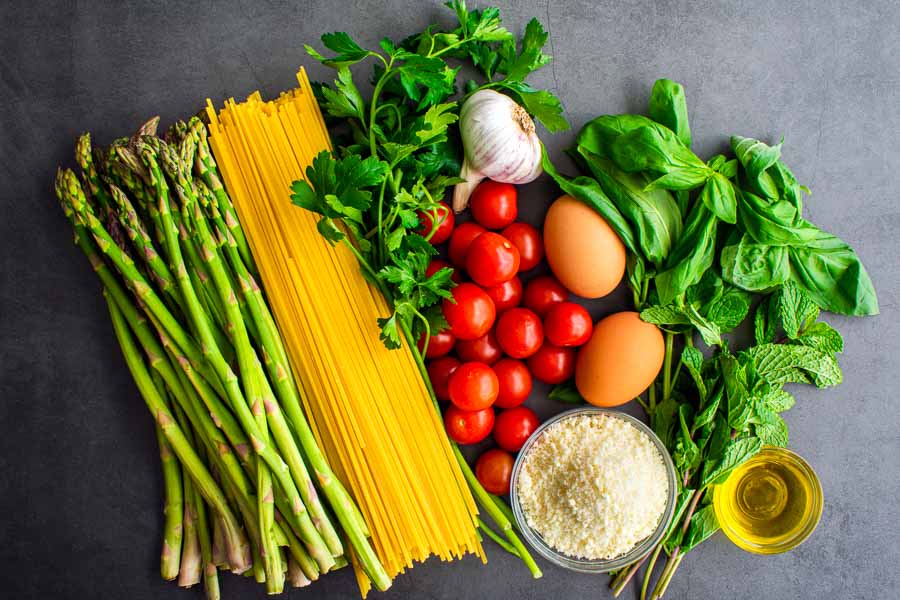
Tuscan Pici Pasta all'Etrusca with Roasted Asparagus and Cherry Tomatoes Ingredients
Asparagus, linguine, parsley, garlic, cherry tomatoes, eggs, grated parmesan, basil, mint, and extra virgin olive oil

The Process

Hard-boiling eggs is the first step of this recipe. I debated on whether or not to use previously cooked eggs and decided against it. I wanted to see how long the entire recipe took if I made it all at once.

My little egg cooker was a big help! I got the eggs started in moments and also prepared a small bowl of ice water. Once the egg cooker’s timer went off, I used my trusty tongs to safely transfer the hot eggs to the ice bath so they would cool quickly.

Meanwhile, I put a large pot of salted water on the stove to boil, preheated the oven to 355℉, and began prepping the vegetables. Stemming the asparagus and herbs was quick, but peeling the garlic took some patience in order to keep the cloves whole.

Prepping the vegetables and herbs

Once I snapped a quick photo for you, I got to making the sauce. And during all of this, I added the linguine to the boiling water and peeled and cut up the cooled eggs. This was a very active recipe!

But back to the sauce. The quantity of herbs is by the handful, which gives you some leeway. Also, the cheese needs to be weighed and the quantity of olive oil isn’t given. Not that I’m complaining (I like these types of recipes), but some people find them difficult. Here’s how much I used:

  • 4 sprigs of basil
  • 5 sprigs of parsley
  • 2 sprigs of mint
  • a generous 1/2 cup of grated parmesan
  • 4 tablespoons of olive oil (added 2 T. at a time)

A few pulses in the blender, a dash of extra olive oil, and the sauce was done. Another 4 tablespoons of pasta water helped me finish things up. The pasta was ready by this time, so I mixed it in with the sauce.

The vegetables were done just after that. I decided to serve my Tuscan Pici Pasta all’Etrusca in shallow pasta bowls topped with the roasted vegetables, egg yolk, parmesan, and fresh parsley.

Timing

I prepped and cooked this recipe all at the same time because it had so many different parts (pasta, eggs, sauce, roasted veggies). I didn’t break down the times because of that, but I had everything done in 46 minutes. It only took me 1 minute more than the time listed, and I’m calling that accurate.

Strawberry Pie with Strawberry Crust

Happy National Strawberry-Rhubarb Pie Day! Personally, I have never tried it, but I have heard good things. In fact, I tried and tried to find fresh rhubarb so I could make a strawberry-rhubarb pie just for today, but no joy. Instacart had it listed, but the shopper couldn’t find it. I ended up with a lot of butter and strawberries that I was determined to put to good use. Well, I’ve never had a plain old strawberry pie, so I thought I’d find a recipe on Pinterest. I ended up with this beautiful pink Strawberry Pie with Strawberry Crust. Pink pie crust! It was so pretty that I had to give this recipe a try, so here we go.

Food coloring was so ten years ago. That’s why this gorgeous strawberry pie with strawberry crust gets its vibrant pink hue from freeze-dried strawberries. Just whirl ’em up in the food processor with your flour and butter, and voilà: You have a pretty-in-pink dessert that’ll blow everyone away.

Recipe Author: Erin McDowel at Pure Wow
Get the recipe

The Ingredients

The good thing about baking is it requires a lot of basics that I keep stocked in my pantry. Sugar, flour, sea salt, and vanilla are always around, but I did have to stock up on cornstarch.

While I was at it, I also shopped for the remaining ingredients and had no trouble finding most of them. FYI, I bought two pounds of strawberries and used almost all of them in the filling.

I also bought two 0.8-ounce bags of freeze-dried strawberries. At $4.97 each, I felt they were a little pricey for the quantity. For comparison, a pound of fresh strawberries was less at $4.41.

The only item I couldn’t find was the sanding sugar. I ended up ordering clear sugar sprinkles as they were the closest thing I could find at a reasonable price. Then I completely forgot to sprinkle them on before I baked the pie! Oh well, they’ll keep until I need them.

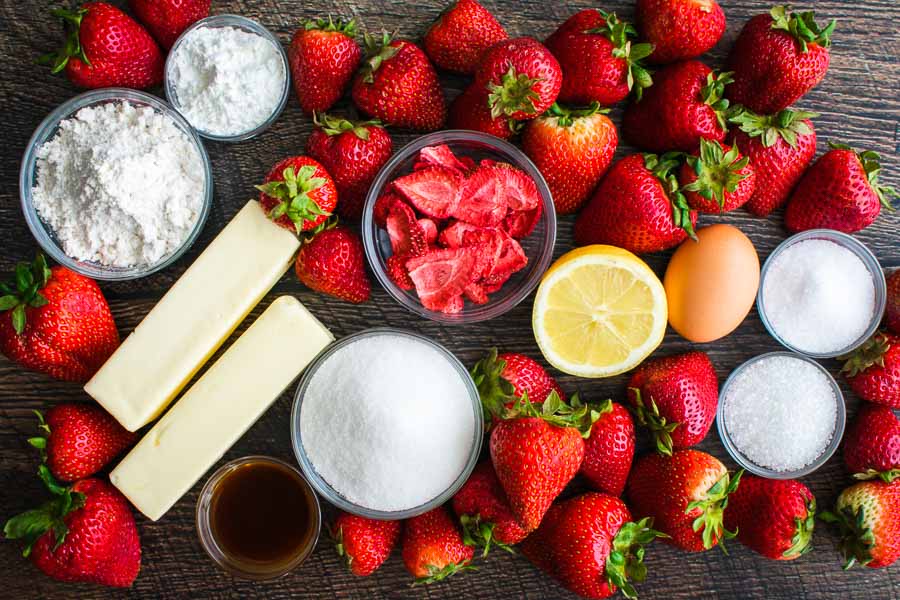
Strawberry Pie with Strawberry Crust Ingredients
Freeze-dried strawberries, fresh strawberries, lemon juice, egg white, fine sea salt, coarse sugar, granulated sugar, vanilla extract, unsalted butter, all-purpose flour, and cornstarch

The Process

Although this recipe is long, it’s broken down into manageable chunks. In fact, the crust can be made the day before since it can be chilled from 30 minutes to overnight. I almost took advantage of that, but I had to keep going once I saw how pretty it was. Here’s how my time was spent:

  • 18 minutes to make the crust
  • 30 minutes to chill the dough
    • 12 minutes to make filling and egg wash (done during chilling)
  • 43 minutes to assemble and decorate
    • 8 minutes to make and fill the bottom crust
    • 14 minutes to make the lattice
    • 6 minutes to crimp the edges (it looked awful, so I decorated it)
    • 15 minutes to decorate the edges
  • 40 minutes to bake
  • 2 hours to cool
  • 4 hours 11 minutes total (1 hour 31 minutes without cooling)

The total time listed is 2 hours 45 minutes. I’m assuming that included only one hour to cool. That might have been enough, but I gave it two before slicing to be sure the filling was set. The time would have tracked if I hadn’t been overly cautious, so I can’t take away points for that.

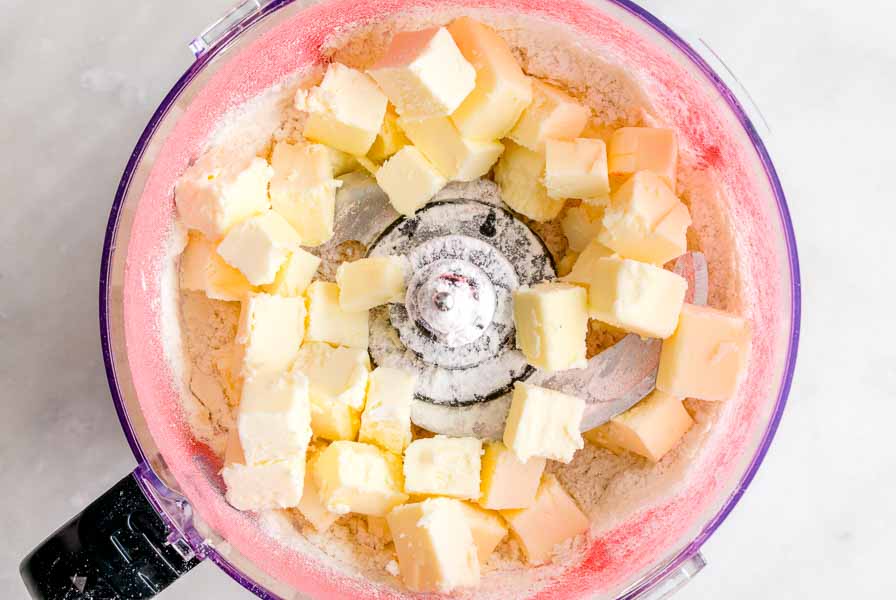
Mixing the pie crust ingredients in a food processor

Making the Strawberry Pie Crust

This was the first step to my pink Strawberry Pie with Strawberry Crust, and it got me really excited about this recipe. As I mentioned, I had to finish it once I saw the beautiful pink color!

First up was to grind up the freeze-dried strawberries in my food processor. I bought two bags of them because I didn’t know how much I would need. It turns out that one bag was enough to make the 1/2 cup the recipe called for. Sort of.

The berries I bought were sliced and then freeze-dried, so I measured 1/2 cup of them straight out of the bag. It was enough to turn the pie dough pink, but the color didn’t hold up through baking. Tip: I have a feeling I should have used 1/2 cup of ground freeze-dried strawberries for a more intense pink color. That would have used both bags, BTW. (More on this below.)

Otherwise, everything went according to the instructions except the ice water. I did have to add an extra tablespoon to get the dough to come together. A small adjustment, really, and it was mentioned as a possibility in the instructions.

Making the Strawberry Filling

The “work” in this part was slicing up the strawberries. Otherwise, it was pretty simple and went just as the instructions said. I also took the time to make the egg wash.

Both were done well before the pie crust dough had finished chilling, so I set them aside and washed the dishes while I waited. I had white a mess on my hands, so I appreciated the break to wash up. I’m a messy baker, and I always manage to coat the kitchen in flour!

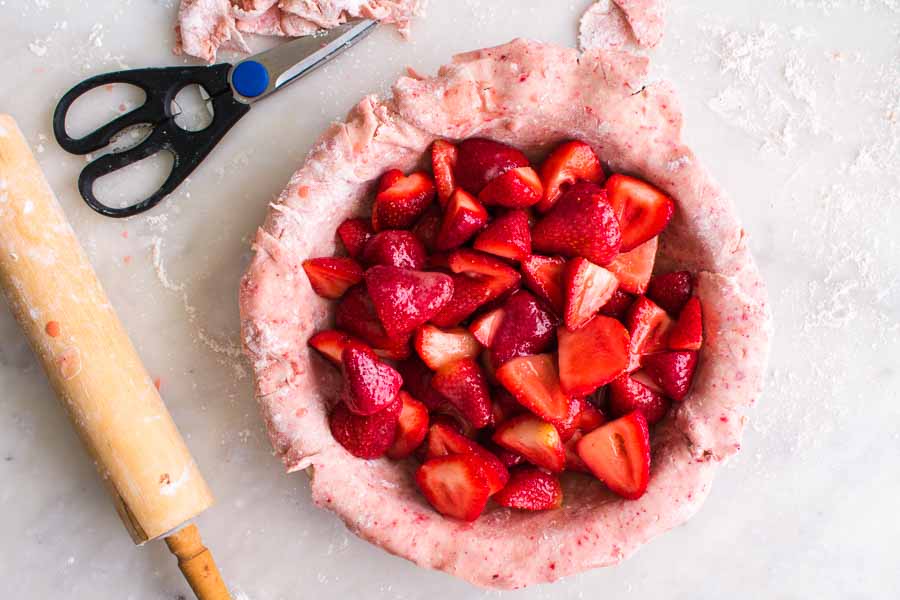
Filled strawberry pie
I used a slotted spoon to strain out the excess liquid before adding the filling to the crust

Assembly and Baking My Strawberry Pie with Strawberry Crust

This is where the real “work” happens. I’m not a fast baker by any means, so I just took my time and made sure I did it right. First up was rolling out the bottom crust. Pretty easy, but the edges of it did split the bigger and flatter the dough got.

I had to fix some of the spits before I could get the dough into the pie pan. I kept a small dish of water handy so I could wet my fingertips and moisten the dough where I needed to patch it up. Tip: Wetting the edges of the dough, overlapping them, and rolling them out sealed any large breaks.

Once the dough was safely in the pie pan, I gave the filling a good stir and added it to the newly made crust. Tip: Use a slotted spoon and allow excess liquid to drain away before adding to the crust to prevent your pie from getting soggy.

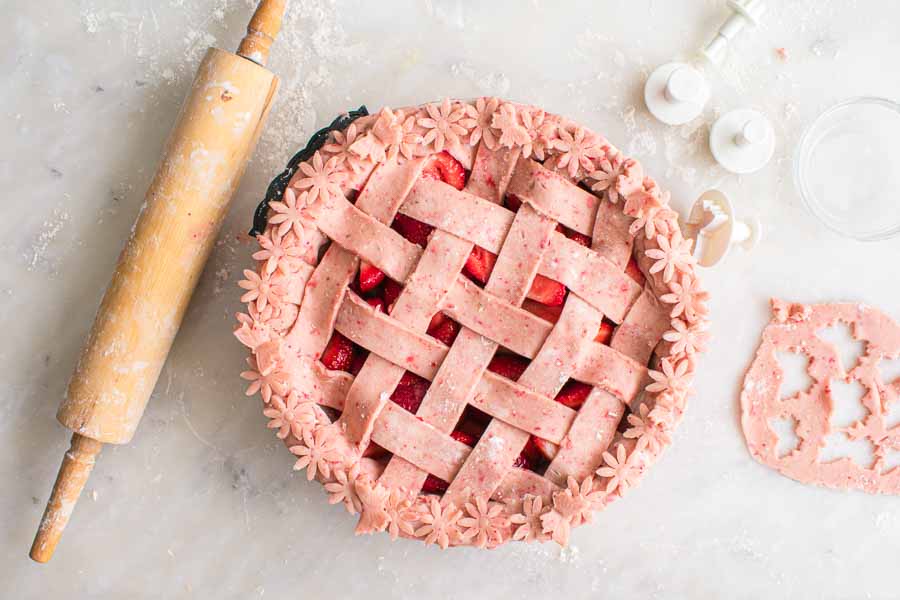
The lattice is optional, but I had to give it a try! I used a (washed) ruler to make it, re-rolling out the dough as needed. Once it was woven, I wet the edges to make sure it stuck to the crust and crimped the edges.

It looked awful! I have no idea how to make a pretty crimp, so I busted out my cookie cutters and covered up the mess. I pressed out a bunch of flowers and butterflies, then wet the edge and stuck them on. Much better 🙂

Then it was into the oven for 40 minutes, only to discover my beautiful pink masterpiece looked like a regular pie. It was pretty if I do say so myself, but I was still super disappointed about the color until I had a slice. I didn’t care too much after that!

Finished strawberry pie before baking
After adding the latticework and edge decorations

Take Two

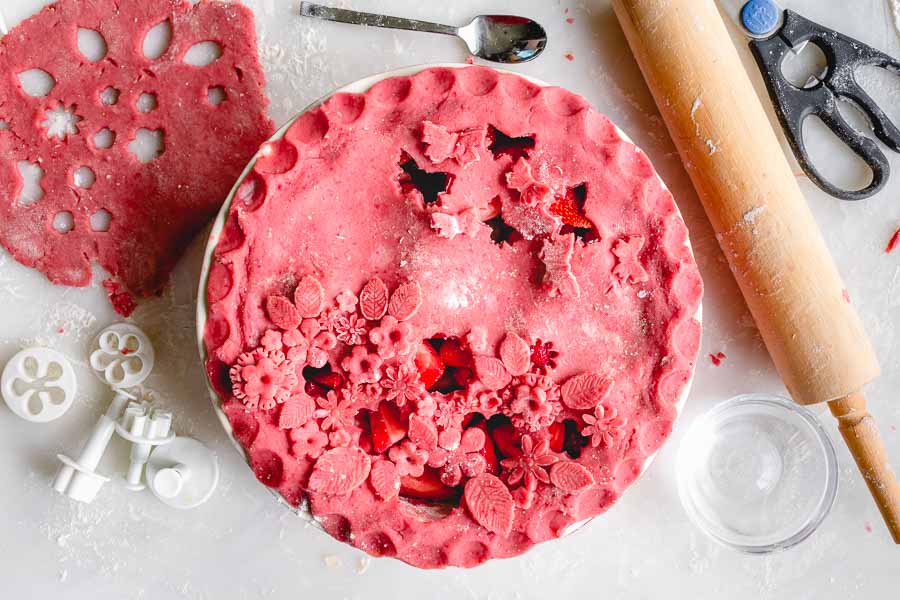
I was determined to have a pink pie crust, so I had to give this recipe a second try. This time I ground the freeze-dried strawberries before measuring out 1/2 cup. I used two 0.8-ounce bags plus what was leftover from the first pie. It gave me an almost red crust:

Using more freeze-dried strawberries made the dough a much darker pink

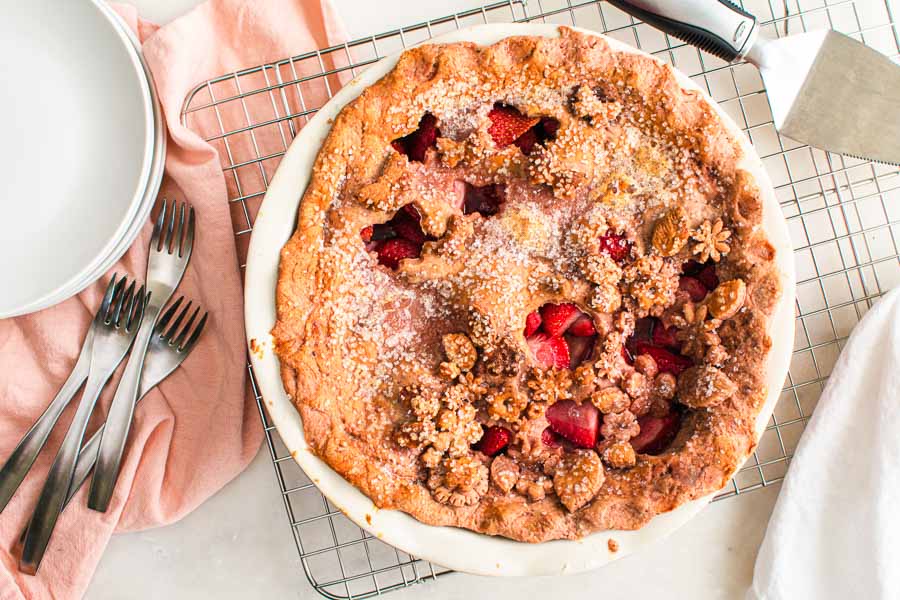
I also baked it for 35 minutes, five minutes less than the minimum time listed. In the end it was all for naught. I still ended up with a golden brown pie crust, and my lovely decorations warped into a mess. Oh well, I tried and it tasted good.

My second pie's crust still baked up to a golden brown
My second pie’s crust still baked up to a golden brown

Tip: Finally, make sure to grease your pie pan before adding the bottom layer of dough. I used canola oil spray for my first pie and had a lot of sticking. I made sure that didn’t happen with the second pie! I greased the pie pan like I do my cake pans, with a floured layer of vegetable shortening. It worked a treat.