Home Blog Page 14

Blueberry–Lemon Curd Tart

0

The Ferrero Rocher Nutella Tart recipe I made this past July was my first tart ever. Well, first time making one. It came out pretty well, so I thought I would give another tart recipe a try so I could perfect my technique. But what could possibly top a chocolate-hazelnut tart? That was a tough question, and I finally settled on this layered Blueberry–Lemon Curd Tart. I loved the look of separate lemon and blueberry layers! Plus lemon and blueberry go so well together—something I have found again and again in many recipes I have tried. Let’s add this one to that list ‘o tried recipes!

This layered, summery blueberry-lemon tart is as stunning as it is delicious. Naturally sweetened, this tart recipe features a vibrant lemon curd layer followed by a perfectly-sweetened blueberry filling.

Recipe Author: Lauren Grant at Zestful Kitchen
Get the recipe

The Ingredients

I’m happy to say that I had a few Blueberry–Lemon Curd Tart ingredients on hand, and the ones I needed to buy were easily found at my regular grocery store. A 10-ounce container of blueberries gave me exactly enough for this recipe. I also bought 4 lemons per the recipe and didn’t use them all. But better safe than sorry, and I can always use an extra lemon somehow.

It took 2 lemons for 1/4 cup of zest and 3 for for 1/2 cup of juice. I also bought eggs, unsalted butter, and heavy cream. I love those short shopping lists! The rest of the ingredients were waiting in my pantry.

Among those ingredients waiting was confectioner’s sugar. I chose to use that instead of the Sucanat. I wanted to make it, but my spice grinder has been used for spices so much that my Sucanat would have tasted like curry.
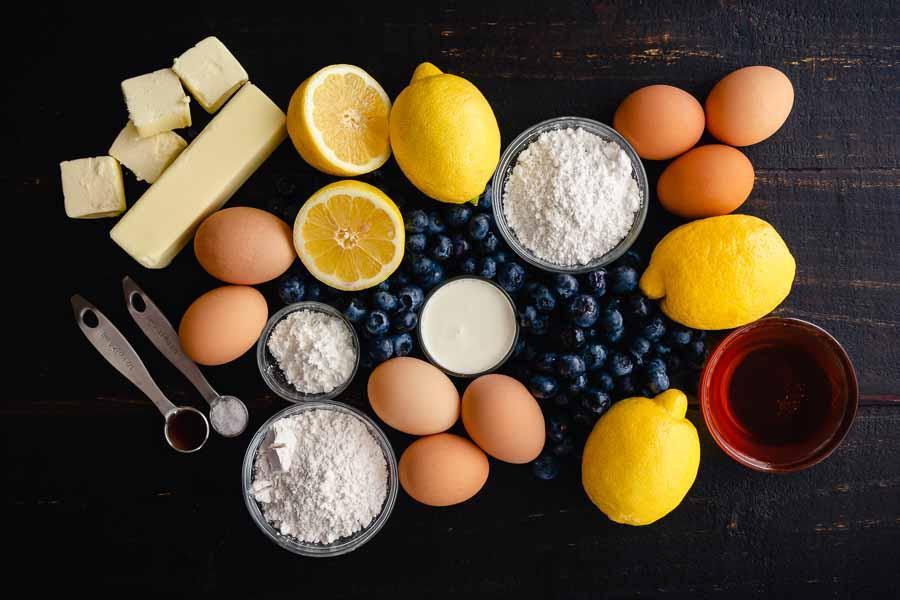
Blueberry–Lemon Curd Tart Ingredients
Lemons, powdered sugar, eggs, honey, blueberries, heavy cream, corn starch, flour, saly, vanilla extract, and unsalted butter

The Process

All right, it’s time to bake! I gathered my ingredients and equipment, put on some music, and got to it. This recipe has a lot going on, and I felt like I was making two tarts. Fortunately, this recipe has great instructions, and I made it through just fine. Here’s how my time broke down:

  • 10 minutes to prep the crust
  • 30 minutes minimum to chill the dough (I chilled mine overnight)
  • 10 minutes to warm the dough
  • 12 minutes to prep the crust
  • 30 minutes to bake the crust
    • 28 minutes to prep the lemon curd (done while crust baked)
  • 10 minutes to bake the lemon curd-filled crust
  • 16 minutes to prep the blueberry filling
  • 2 hours to chill the finished tart (I chilled mine overnight)
  • 3 hours 58 minutes total

The total time listed on the recipe is 5 hours, so I feel great about this time. I have a feeling I saved half an hour by preparing the lemon curd while the crust baked. I can’t account for the rest, but I’m not complaining!

Making the Crust

First up was the crust. Mixing up the dough was easy thanks to the instructions and my food processor, and I had it done in 10 minutes. I intended to let it chill for 1 hour but ended up chilling it overnight. The notes say it can chill up to 2 days, and I was grateful for the option.

The next day I let the dough sit on the counter for 10 minutes to warm up. Then I broke out my rolling pin and slowly rolled it out into a thin disk that was slightly bigger than my tart pan. Tip: the instructions don’t mention it, but I greased my tart pan with vegetable shortening. Butter would have also worked.

Next up was rolling out the dough and getting it into the tart pan. This recipe’s blog post has some great photos that show this process, and I was so glad I reviewed them before I began! I’m not the best baker, so it took me 12 minutes to roll out the dough, mess it up, re-roll it, and get it ready to bake.

Tip: I used the trimmed pieces to fill thin spots. Just cut the extra to the size needed, wet with cold water, and press over any gaps and/or thin spots.
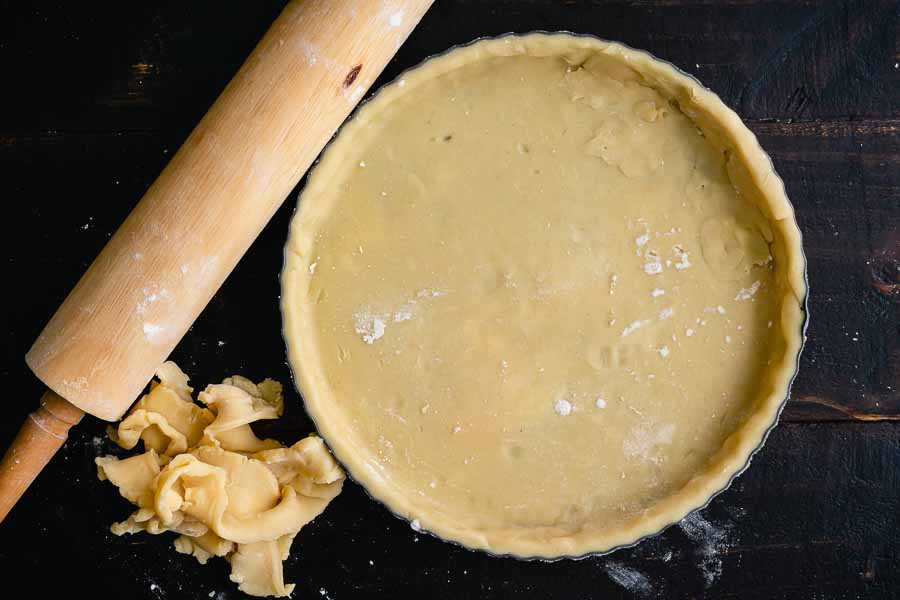
Trimmed and patched crust before baking

I was so relieved when that was done! All I had to do was place the tart pan onto a sheet pan, cover with 2 layers of foil, add pie weights, and bake for 30 minutes. Tip: I set the timer for 15 minutes so I would remember to rotate the crust halfway through baking.

Making the Filling (Or should I say fillings?)

The lemon curd goes on the bottom, so it’s the first filling that needs to be made. It’s the more complex of the two fillings, but it wasn’t terribly difficult. Once I got the ingredients into a saucepan over medium heat, I just stirred and stirred until the thermometer read 165°F. The recipe says 5 minutes, but it took 11.5 for me. Perhaps I had the heat too low, but I didn’t want to risk ruining my lemon curd. Safety first LOL!

Once the lemon curd came to temperature, I removed it from the heat, added the butter, strained it through a mesh sieve, and mixed in the cream. The crust had finished while I was making the lemon curd, so it was ready for me to pour the lemon curd right on in. Once spread evenly, I baked the filled tart for 10 minutes.

The blueberry filling was less complicated, but I did have to wash out the food processor, saucepan, and mesh strainer before I could make it. I didn’t include that time above, BTW.

Making the blueberry filling was a similar process to the lemon curd. I strained the processed blueberries into the saucepan, pressing the juice out with the back of a wooden spoon. Then I added a few other ingredients and stirred until the mixture came to 170°F.

The final steps were to remove the pan from the heat, stir in the lemon juice, and pour the blueberry mixture over the cooled lemon curd. The blueberry filling was quite thick, so I had to carefully spread it to the edges with a spatula.
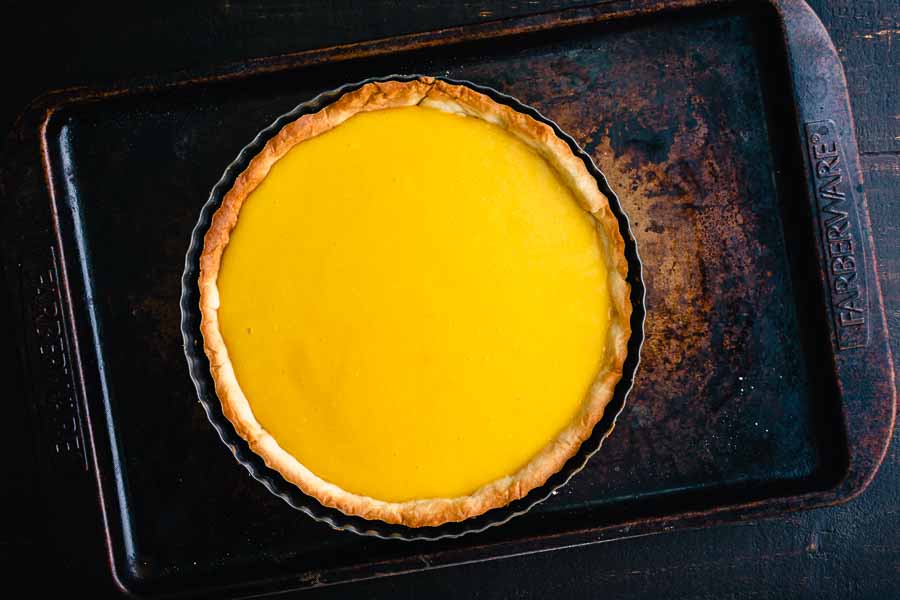
The baked lemon curd filling

Finishing Up

While the lemon curd had to be baked, the blueberry filling didn’t. All that was left to do was gently tap the tart pan on the counter to remove air bubbles and chill for at least 2 hours. I ended up chilling mine overnight.

This was a learning lesson for me: be gentle when tapping. I tapped a little too hard and broke the crust in one place. I blame the blueberry filling—it was very thick. In a way it was a relief because jiggling the pan easily dislodged the crust from the tart pan.

But on the plus side, removing the chilled Blueberry–Lemon Curd Tart from the pan was easy since the crust didn’t stick at all. And I was able to cut along the break, so you can’t tell it ever happened. Nice!

Bangers and Mash (Deconstructed)

Sausage isn’t often on the menu around here, but there are exceptions. Once in a while I crave it on my pizza, and I have blogged a few tasty recipes that include it. They have included everything from American breakfast sausage to Portuguese linguiça to spicy Italian sausage. Today I’m going to try British bangers, with mashed potatoes of course! Actually, it’s Bangers and Mash with Stout & Onion Gravy, and the bangers are deconstructed or crumbled in this version. American breakfast sausage is often served this way, but I have never seen bangers served this way. I’m not sure it I’ll miss that satisfying snap of biting into one, but I want to find out!

Bangers and mash recipe with pan-fried bite-sized sausages smothered in stout and onion gravy on creamy garlic mashed potatoes. A classic comfort food recipe with bite-sized sausages which makes it easier to enjoy!

Recipe Author: Joyce at Pups with Chopsticks
Get the recipe

The Ingredients

I added this recipe to my blog schedule a few months ago, and I was anxious to give it a try. The only problem I had was getting bangers. There’s a British grocery near a pub my husband and I like, so I assumed I’d be popping in for a visit.

All About Bangers (and Irish Sausages)

Then I happened to notice my local Fresh Market had Irish bangers, so I bought 3 in that week’s grocery order. Now I have to tell you that Irish sausages and English Bangers are very similar (and the Irish don’t call them bangers even thought they were labeled as “Irish bangers” at the grocery store).

Both usually made of pork and seasoned with herbs and garlic. The main difference is the filler. Breadcrumbs are used in bangers while rusk is used in Irish sausage. For my American audience, rusk is similar to melba toast or biscotti. And yes, I had to look all this up before buying them!

The result of all that research was finding out Irish sausages are slightly different from their British cousins but perfectly acceptable to use in bangers and mash. I had no idea if they were regularly stocked, and I couldn’t pass them up. But it was summer, and I wasn’t planning to make this recipe until the weather had (hopefully) cooled down a bit. Fortunately, sausages are great candidates for freezing, so I immediately wrapped and froze my treasures.

The Rest of the Ingredients

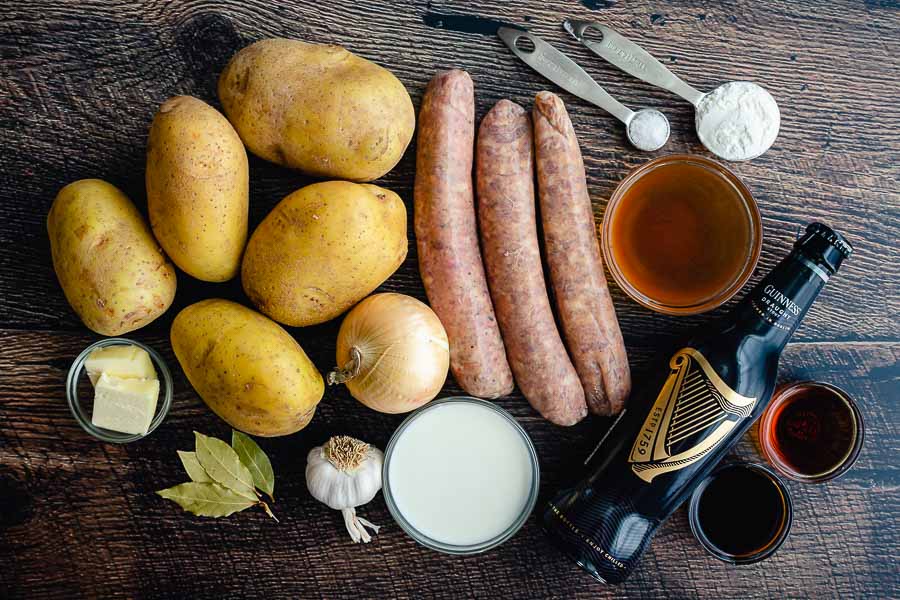
Fast forward a few months, and it was time to get cooking. Or—shopping. Gotta start with shopping, right? My shopping trip began with a look through my pantry to see what I had on hand. It turns out I had a few things: maple syrup, soy sauce, corn starch, salt, bay leaves, onion, and garlic. I even had butter and beef broth concentrate in the refrigerator.

That left a short shopping list that was easily filled at my regular grocery store. I chose yellow potatoes because of their creamy texture and Guinness stout as the dark beer for the gravy. Oh, and regular old milk for the mash. That’s it, shopping done!

By the way, I did notice later in the recipe that cooking oil is needed to roast the garlic cloves. I had some on hand and used olive oil.

Bangers and Mash (Deconstructed) Ingredients
Potatoes, bangers, salt, corn starch, beef stock, stout, maple syrup, soy sauce, milk, onion, garlic, bay leaves, and butter

The Process

There was a lot to this bangers and mash recipe, but the author broke it down into several sections to make it more manageable:

  • Roasting the garlic
  • Peeling and mashing the potatoes
  • Sausage and gravy

I was working on these simultaneously for most of the time, so I wasn’t able to break down the times for each step or even as prep and cooking. Instead, I have a total time of 1 hour 42 minutes versus the total listed of 1 hour 20 minutes.

Roasting the Garlic

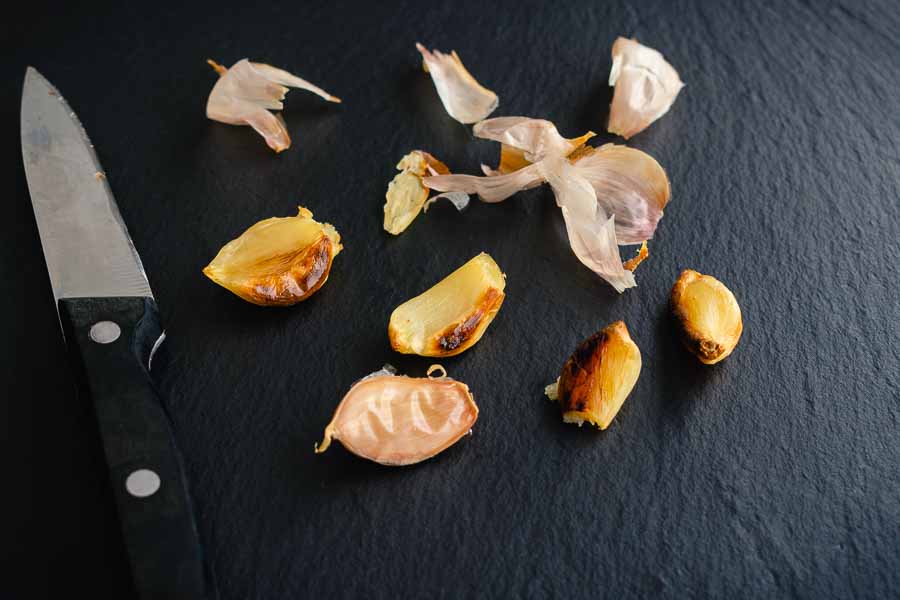
I’ve roasted a lot of garlic, but the technique here was a little different than what I’m used to. I like to roast garlic in a small ramekin filled with olive oil and covered with foil. Instead, this recipe had me coat the garlic cloves in oil and roast them on a parchment paper lined sheet pan.

I could have done this in my toaster oven, but I used my oven since that’s what the recipe specified. It took 13 minutes to roast them I let it cool while I did other prep work. I came back later and peeled it.

Peeling roasted garlic cloves

Peeling and Mashing the Potatoes

While the garlic was roasting, I put a large pot of water on the stove to boil and scrubbed the potatoes. Then I added them to the pot with the bay leaves and salt, and let them boil for 30 minutes.

The potatoes didn’t pass the doneness test after half and hour, so I added another 10 minutes. They seemed perfectly tender when I tested them with a paring knife after 40 minutes.

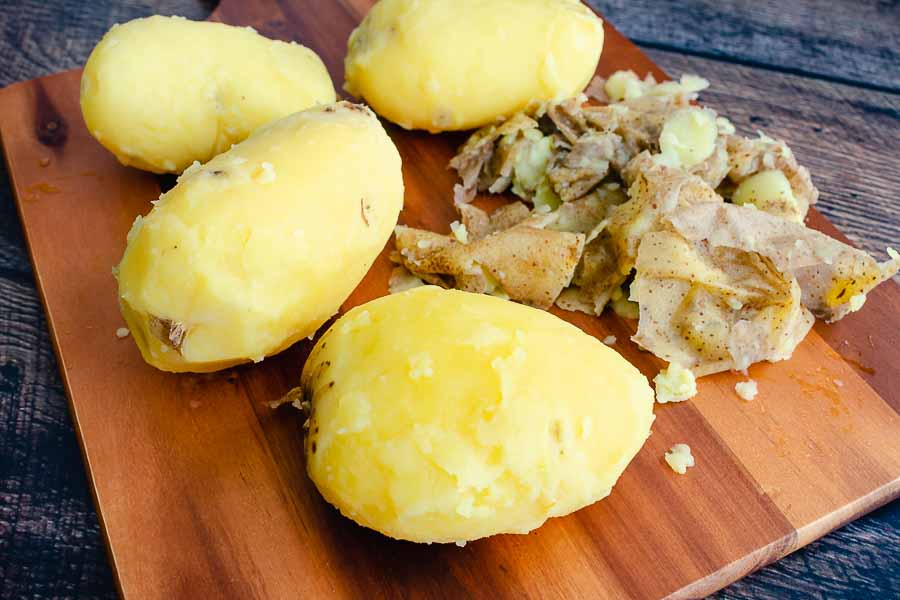
I debated on peeling the potatoes and decided to go ahead and do it to fully test the recipe. I drained the boiling water and placed the potatoes into a large bowl filled with ice water. Then I scored the skin, let the potatoes soak for 5 minutes, and the peels practically fell off.

It wasn’t perfect, and I did need to use my paring knife in a few spots. Still, I was really impressed with how easy it was to remove the peel. I have a feeling this is a technique I will use again and again.

Peeling the boiled potatoes

I also decided to mash the potatoes by hand since that’s what the recipe described. I added the chopped roasted garlic, milk, butter, and salt and went to town. Mashing with a potato masher is a little bit of an arm workout, but it’s also kind of therapeutic. I mashed and mashed until I got the creamy texture I wanted.

Sausage and Gravy

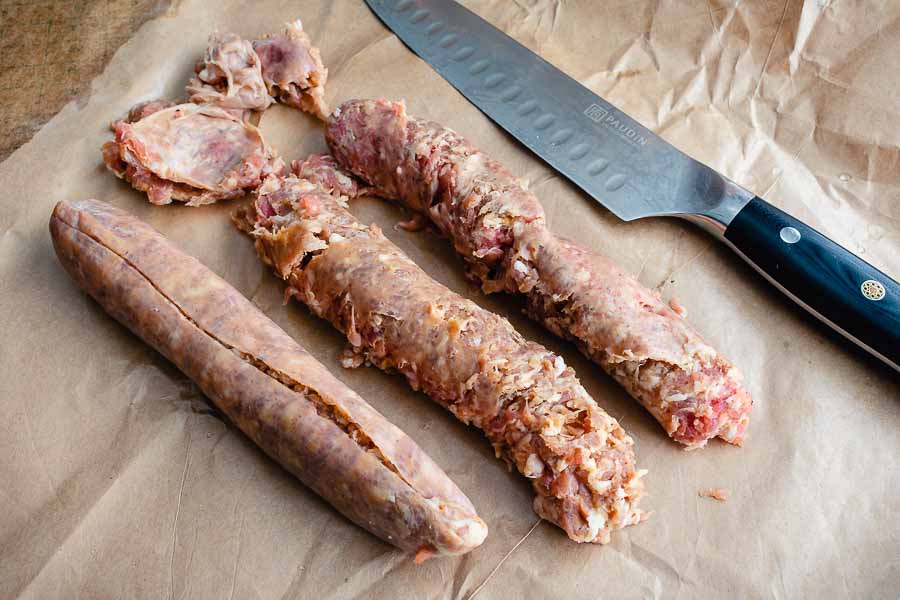
Can’t have bangers and mash without bangers, so that’s what I moved on to next. This deconstructed version required me to peel the sausages, break them into small pieces, and fry them in a skillet for about 20 minutes.

I stirred the sausage from time to time and did some prep work for the gravy while I kept an eye on them. My sausage was ready after about 15 minutes.

Peeling the sausages

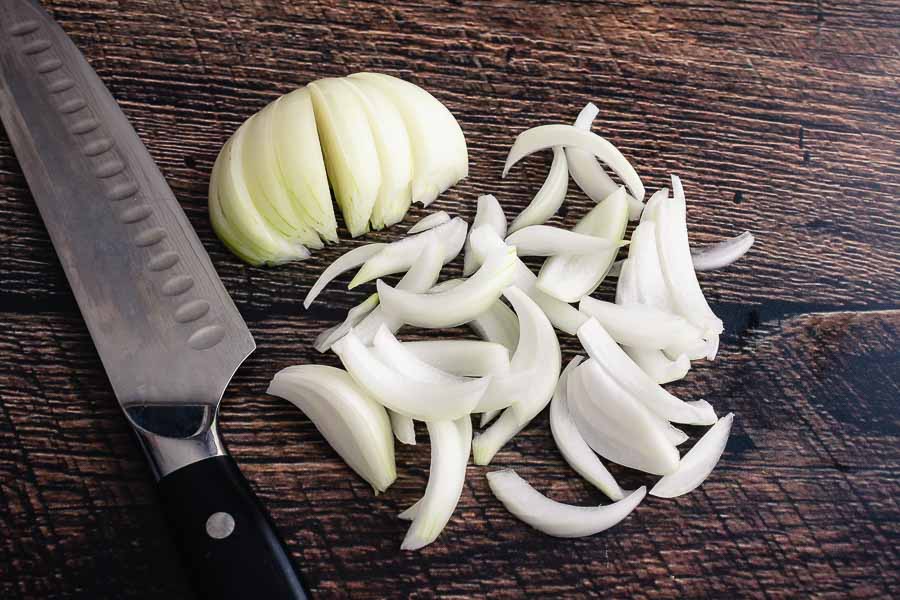
Prepping the onion was the only part of the recipe that left me wondering what to do. I went back to the recipe’s blog post and didn’t find any instructions on how to slice the onion. However, I did look very carefully at the photos, and this is what I came up with:

Thinly sliced onion
Thinly sliced onion

My sausages fried up with very little pan drippings leftover. I added a pat of butter to the skillet then the onion. I let them brown and added the remaining gravy ingredients. Tip: Make sure you scrape the bottom of the pan with a wooden spatula or spoon to deglaze it. Those browned bits you scrape up have tons of flavor!

After the gravy reduced, the house smelled ah-maz-ing!! My mouth was watering, and I couldn’t wait to get photos done so I could try my deconstructed bangers and mash. I served mine in a shallow pasta bowl smothered with plenty of that stout and onion gravy.

Bourbon Rosemary Cocktail

0

I make most of my lemonade alcohol-free but I slipped in some bourbon last year and tried Kentucky Lemonade. It was sublime. Lemonade, mint, and American whiskey go well together and that recipe made a very sweet, bubbly spiked lemonade. This summer I’m trying out a similar recipe, a Bourbon Rosemary Cocktail. It’s also a sparkling lemonade made with bourbon and fresh herbs. However, it’s made with rosemary and club soda instead of mint and ginger ale. I’m imagining a more mellow flavor that’s not as sweet and more focused on the bourbon and herbs. Let’s find out!

This bourbon rosemary cocktail is the perfect cocktail to enjoy while sitting around a fireplace with family and friends.

Recipe Author: Ali at The Littlest Crumb
Get the recipe

The Ingredients

This Bourbon Rosemary Cocktail doesn’t have tons of ingredients, and they were all easy to find. My regular grocery store had the rosemary, lemons, and sparkling water. A quick trip to my local grocery store for the bourbon, and my shopping trip was done. I had the sugar, water, ice, and maple syrup at home.

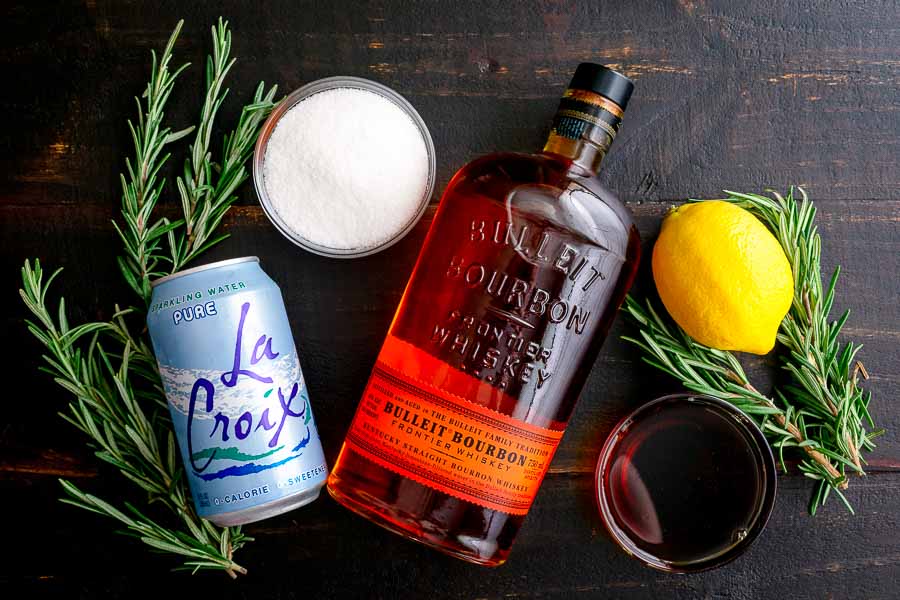
Bourbon Rosemary Cocktail Ingredients
Fresh rosemary, club soda, granulated sugar, bourbon, lemon juice, and maple syrup

The Process

This cocktail recipe has 2 parts: the simple syrup and the actual cocktail. Most of the “work” is making the Rosemary Simple Syrup, but it’s a very easy recipe that doesn’t take long. Here’s how I spent my time:

  • 16 minutes to make the simple syrup
  • 5 minutes for the simple syrup to cool
  • 6 minutes to make and garnish the cocktail
  • 27 minutes total

The recipe lists a total time of 15 minutes, and my time was almost double that. The simple syrup portion alone calls for simmering for 10 minutes plus 5 minutes to cool. It looks like the author forgot to allow additional time to prep the syrup and make the cocktail.

Rosemary Simple Syrup

I always keep plain simple syrup in my refrigerator, so I’m a pro at making it. It’s always at the ready. I also like making infused simple syrup for cocktails, but they force me to plan ahead. Most need to steep overnight to infuse the flavor, but that wasn’t the case with this recipe.

This Rosemary Simple Syrup recipe is ready to use in minutes and makes just enough for this recipe. I consider that a big plus since there’s no chance of extra going to waste. The notes to say to store extra in the refrigerator, so it’s an option if you make more.

The instructions for the simple syrup were easy enough to follow, and I really didn’t have any problems. Just heat the water and sugar in a saucepan, stir, and add the rosemary sprigs. Then let everything simmer for a few minutes, strain, cool, and use in the cocktails.

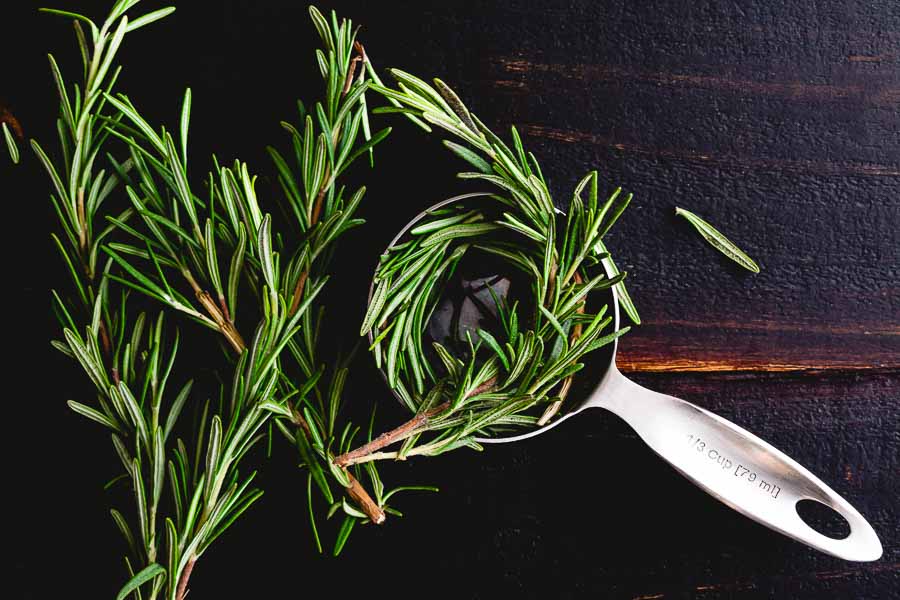
The only minor problem I had was measuring the rosemary. Getting the fresh sprigs to stay in a measuring cup was challenging, to say the least. I managed to more or less fit 4 sprigs, so that’s what I went with.

Measuring fresh rosemary
I used 4 sprigs of rosemary for the Rosemary Simple Syrup

Making the Bourbon Rosemary Cocktail

I was so pleased that the Rosemary Simple Syrup could be used immediately after I made it! It was the standard process for a shaken cocktail: add ice to a cocktail shaker, add the ingredients, shake well. Then pour over ice, top with sparkling water, and add a sprig of rosemary to garnish.

Okay, that last part was something I did to pretty up the frinks for photos, but it only took a second to do. I suppose I could have put a touch more effort in and added a slice of lemon, but it didn’t occur to me.

The recipe also doesn’t specify what type of glass to use. The photo looks like a rocks glass, so that’s what I used too. Mine are 11.5 ounces, and this recipe made 2 cocktails.

Caramelized Brussels Sprout Toast with Burrata & Bacon

0

I grew up eating frozen Brussels sprouts. Okay, it was more like tolerating them. I found them very bitter and a little mushy, so I drowned them in butter and salt or cheese to cover the taste. But recently I have noticed Brussels sprouts popping up on restaurant menus and in my Pinterest feed. A few friends have assured me fresh sprouts are delicious, so I have finally decided to give them a try. I have tons of pinned to choose from, but I settled on this Caramelized Brussels Sprout Toast with Burrata & Bacon. I might be unsure of the Brussels sprouts, but I love burrata, bacon, and nice crusty bread. A recipe with all those ingredients has to be good, right? Let’s find out!

Toasted bread with creamy burrata cheese, caramelized brussels sprouts, bacon, hazelnuts, honey, and lemon.

Recipe Author: Kayla at The Original Dish
Get the recipe

The Ingredients

As usual, I had the basics in my pantry: kosher salt, pepper, olive oil, and honey. I even had the raw hazelnuts left over from the Ferrero Rocher Nutella Tart I made last month.

My usual grocery store had everything I needed to make this Caramelized Brussels Sprout Toast with Burrata & Bacon recipe. I found a container of two burrata balls, a nice loaf of crusty Italian bread from the bakery, lemon, and bacon. Tip: I chose thick-cut bacon because it’s easier to dice.

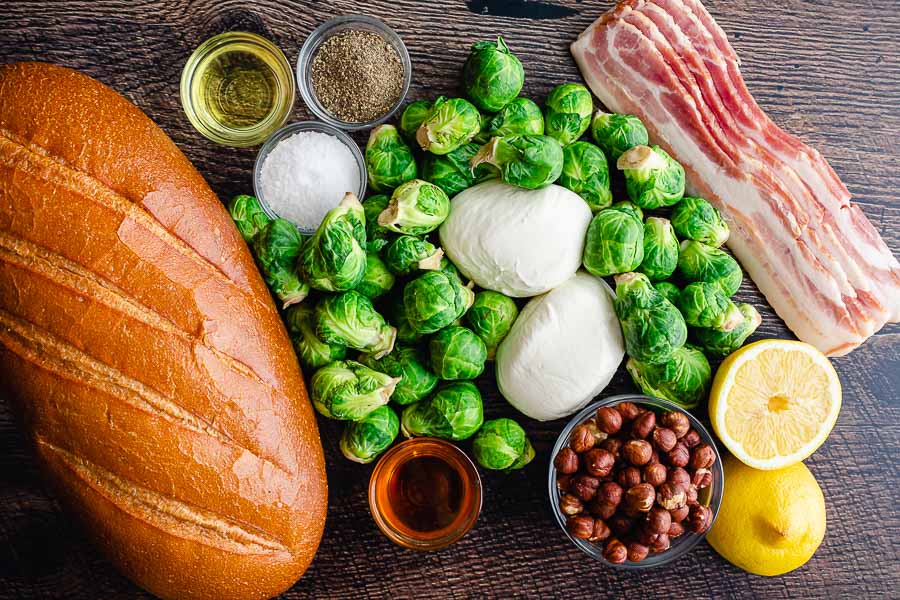
Caramelized Brussels Sprout Toast with Burrata & Bacon Ingredients
Burrata cheese, Brussels sprouts, bacon, lemon (juice and zest), raw hazelnuts, honey, Italian bread, kosher salt, olive oil, and black pepper

The Process

This recipe doesn’t list prep, cook, or total times, and I didn’t break it down. I was working the whole time, and I worked on this recipe for 51 minutes. I had the stove and oven going while I was doing the prep work—there’s a lot going on here!

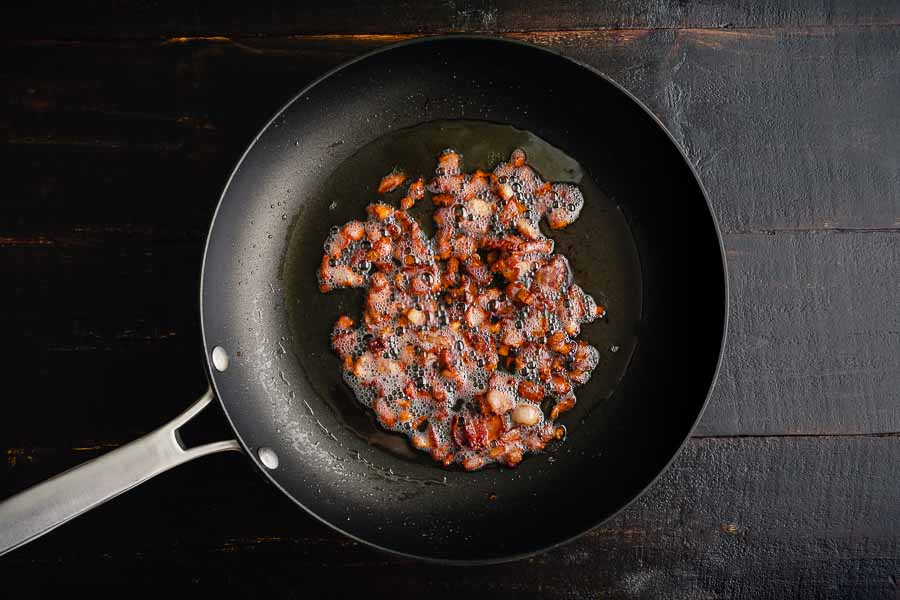
Rendered diced bacon
Step 2: Rendered diced bacon

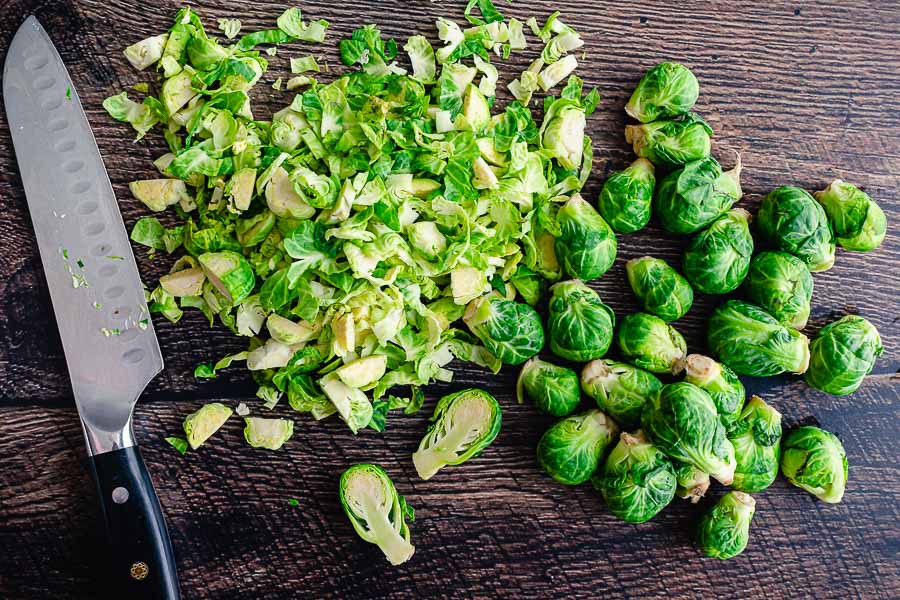
I kicked things off with toasting the hazelnuts and rendering the bacon. I finished the rest of the prep work while all that was going on. That meant measuring the other ingredients, zesting and juicing the lemon, and slicing the bread and Brussels sprouts.

Trimmed, halved, and thinly sliced Brussels sprouts

The hazelnuts and bacon finished at about the same time. I set the naselnuts aside to cool and used a slotted spoon to remove the bacon from the skillet. Then I added the olive oil and sliced Brussels sprouts and let them caramelize.

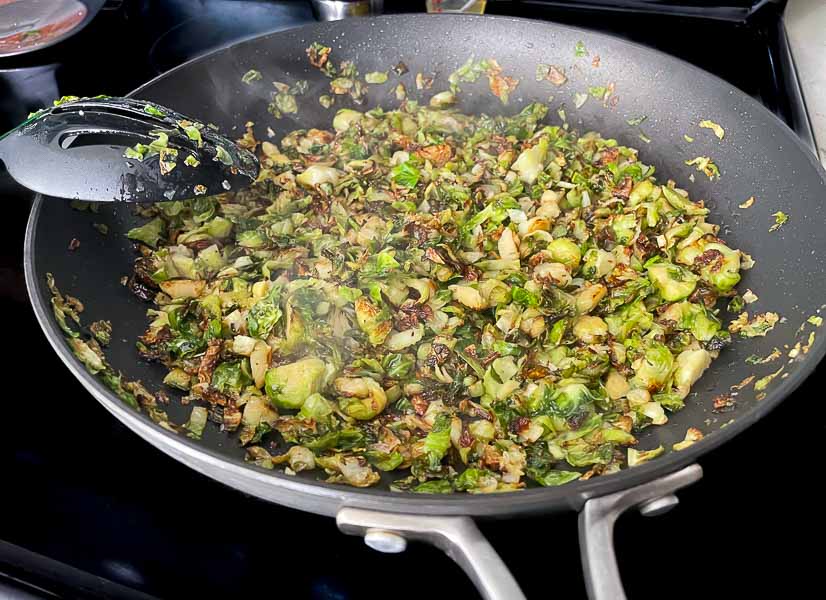
I spread them into a thin layer per the instructions and let the skillet do its thing. Meanwhile, I put the cooled hazelnuts into a tea towel and rubbed off the skins. I gave the sprouts a good stir when they began to brown and caramelize.

Cooking Brussels sprouts in a skillet
Step 3: Cooking thinly sliced brussels sprouts in bacon fat and olive oil in a 12″ nonstick skillet

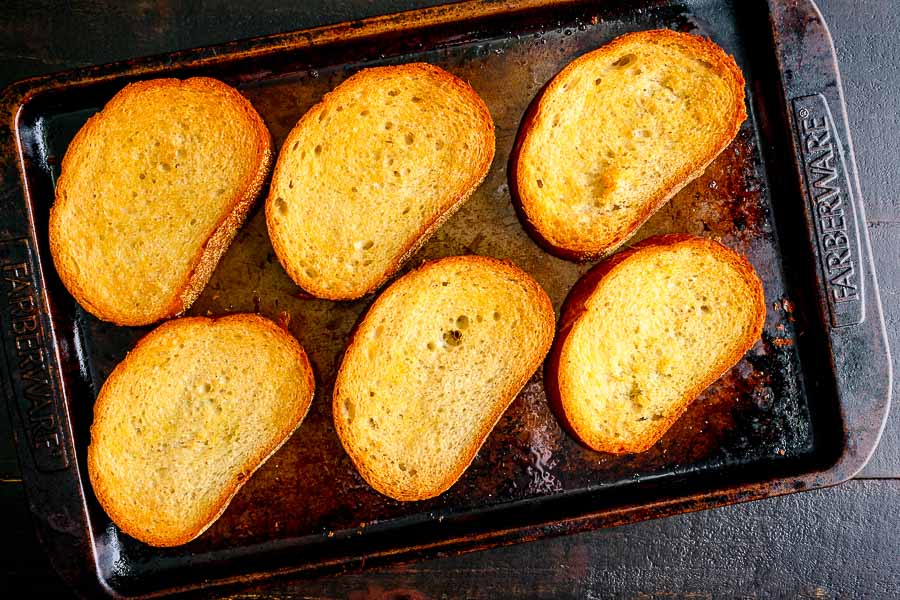
I sprayed 6 thick slices of bread with olive oil, arranged them on a sheet pan, and put them into the oven to toast while the sprouts caramelized. Twelve minutes in the oven toasted them to golden perfection.

I added the torn burrata when they were done so it could melt onto the warm bread. Then I finished up the Brussels sprouts mixture and added it to the bread with the hazelnuts, additional honey, and fresh black pepper. I didn’t have flake salt on hand, so I used a bit of kosher salt instead. It seemed to work just fine.

Thick slices of toasted Italian bread
Step 4: Thick slices of toasted Italian bread

Grapefruit Bars

I have had my eye on this recipe for Grapefruit Bars for a long time. Grapefruit Bars? I know, it’s not your average dessert bar, and that’s what intrigued me. I love that the author thought outside the box and created a dessert recipe using sweet red grapefruit. Now I love a lemon bar, but it never, ever would have occurred to me to try them with grapefruit instead. But I love it when I come across imaginative recipes, and I simply must give this one a try!

Grapefruit Bars are just like your favorite lemon bars with a shortbread crust and citrus curd, but with the sweeter flavor of pink or ruby red grapefruit.

Recipe Author: Amber at Dessert Now Dinner Later
Get the recipe

The Ingredients

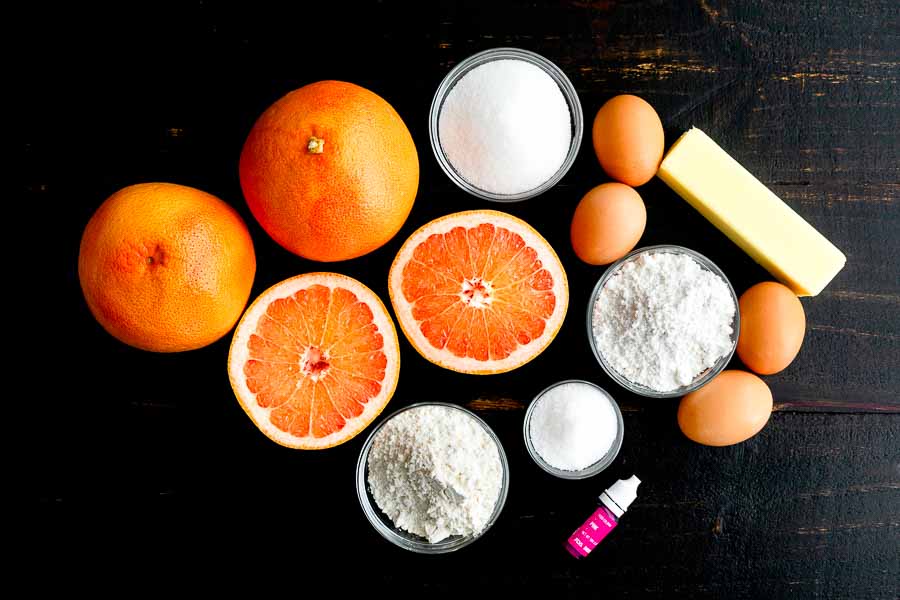
Many of the ingredients for these Grapefruit Bars are kitchen staples. I had things like butter, flour, salt, granulated sugar, and powdered sugar on hand. I even had a set of food coloring that included pink. I’m sure you could just add a drop of regular red food coloring to get a similar effect if you don’t have pink.

That left me needing only eggs and red grapefruit. I ordered my groceries from Publix using Instacart, and they had red grapefruit in stock. However, I’m not sure that’s what I received. The flesh looked more like pink grapefruit as you can see below. But no worries, the recipe notes do mention you can use pink grapefruit but it might be a little more tart.

I also picked up some more parchment paper during this shop. I was running low and wanted to make sure I didn’t run out since it’s a requirement for this recipe.

Grapefruit Bars Ingredients
Red grapefruit (juice and zest), granulated sugar, eggs, butter, powdered sugar, salt, pink food coloring, and flour

The Process

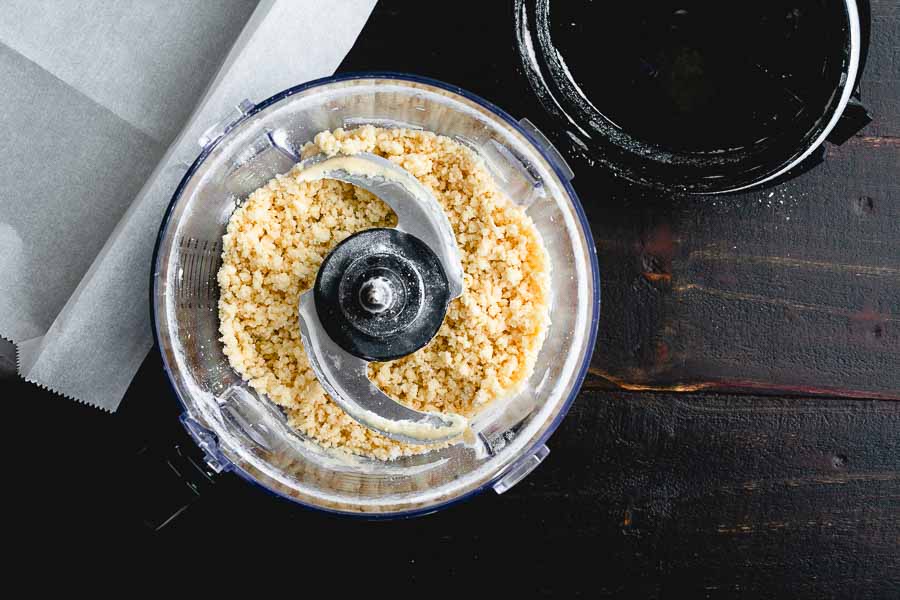
This recipe starts off with preheating the oven, pan prep, and making the crust. A food processor made that very easy. I just added the ingredients and pulsed until it formed pea-sized crumbs.

Making the crust in a food processor

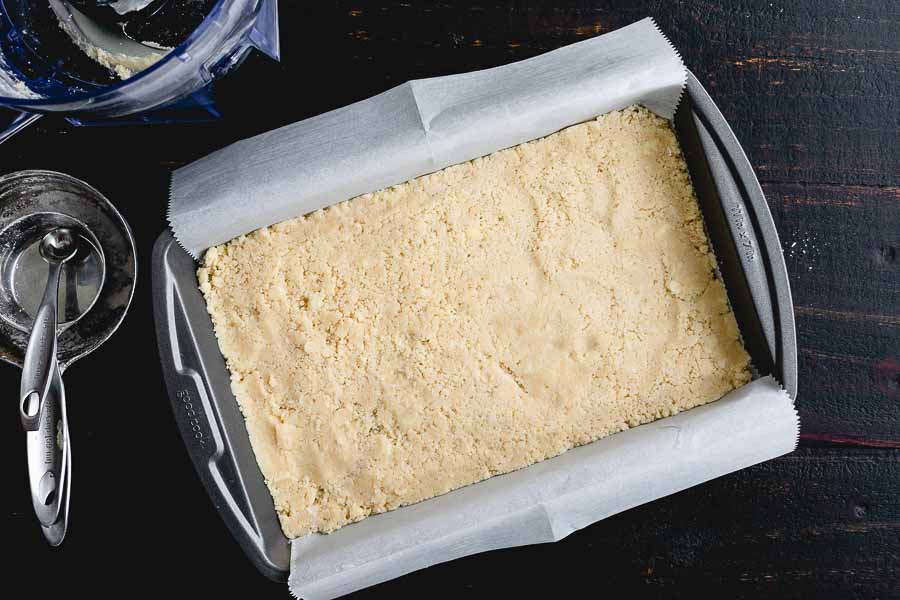
Then I poured the crust mixture into the prepared 11' x 7' baking pan and gently pressed it into an even layer. I used a combination of my fingertips and the flat bottom of a heavy measuring cup. Next, I baked the newly made crust for 18 minutes and prepared the filling.

The unbaked crust pressed into a parchment-lined baking pan

It’s not specified in the recipe, but I used my stand mixer to make the filling. In addition to the mixing, I also did a little zesting and juicing. This recipe only needed 1/2 a grapefruit for the zest, but it took 1 1/2 grapefruits to get 1 cup of juice. I bought 3 to be safe, so I had plenty.

The filling was a light pink color, but I have been obsessed with pastel desserts lately. I added 4 drops of food coloring to make sure they would be really pink once they baked. I learned my lesson with the pink strawberry pie crust that baked up brown, much to my dismay.

When the crust was ready, I poured the filling into the pan and, to my horror, noticed a lot of sugar stuck to the bottom of the stand mixer’s bowl. I had a moment of panic! Then I decided to pour the filling back into the bowl, mix it again to incorporate the errant sugar, and return it to the pan.

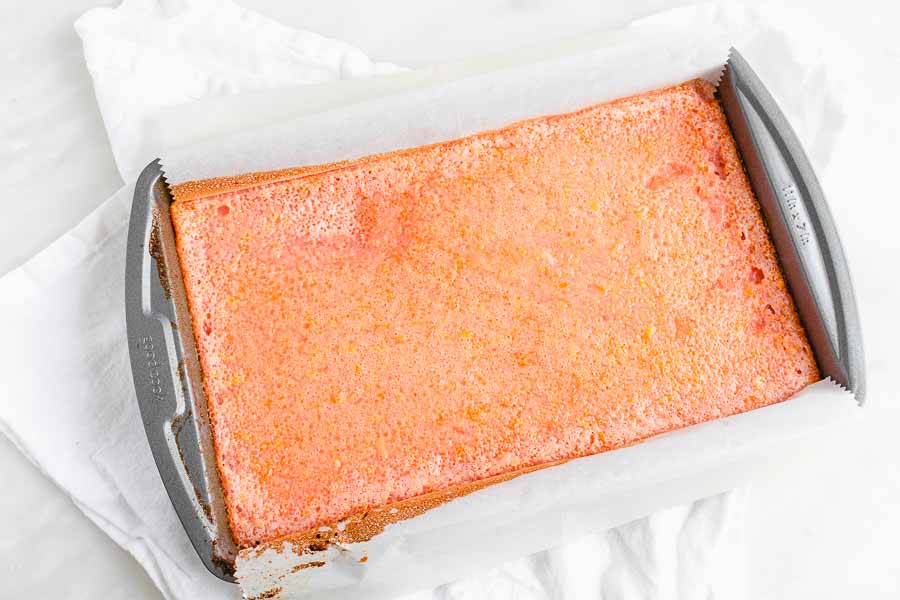
Then it was back into the oven for another 20 minutes to bake until the center was set. I usually have trouble with dessert bars not setting, so I was absolutely thrilled to discover these had set nicely in the time listed. Afterward, I let the pan cool on the counter before refrigerating it overnight.

Baked and cooled Grapefruit bars
The baked and cooled Grapefruit bars in an 11″ x 7″ brownie pan

Cutting the bars the next day was easy because the parchment paper lining allowed me to lift the whole thing out of the pan. I decided to add a sprinkle of powdered sugar to combat any potential tartness from the pink grapefruit. Well, because of that and it’s pretty. And I just feel like dessert bars should be dusted with it. It absorbed into the GRapefruit Bars pretty quickly, but I was able to snap a few photos before that happened.

Timing

  • 9 minutes to prep the crust
  • 18 minutes to bake the crust
    • 11 minutes to prep the filling (done while crust baked)
  • 20 minutes to bake with filling
  • 1 hour to cool on a wire rack
  • 3 minutes to cut and dust with powdered sugar
  • 1 hour 50 minutes total

This does not include refrigerating overnight. The recipe says to refrigerate 1-2 hours or until cold.

It looks like the recipe total time includes 1 hour of refrigeration. If I add that hour to my time I am at the exact time listed, 2 hours 50 minutes. Perfect!

Cuban Mojo Chicken

This week I’m trying out a recipe for Cuban Mojo Chicken. I love mojo pork roast, so why not try it as chicken, amirite? Roast chicken makes an impressive main course and it costs about the same as a package of 2-3 boneless, skinless breast halves. Yes, it takes longer to cook and you have to carve it but that little bit of effort sure pays off.

When I roast a chicken I like to serve the breasts for dinner one night and use the thighs and drumsticks for chicken soup for the next day or two. I even use the leftover bones to make homemade chicken stock. Then I divide the stock into two- to four-cup portions and freeze them for later use. I like to make my pennies count, and it makes stock that’s better than boxed or instant, if I do say so myself.

This Cuban Mojo Chicken is infused with a flavorful Mojo marinade made with citrus, garlic and spices, then oven roasted until golden brown, juicy and tender! This mouthwatering Mojo Chicken is perfect for dinner any day of the week and also fabulous for company!

Recipe Author: Kathy McDaniel at Lemon Blossoms
Get the recipe

The Ingredients

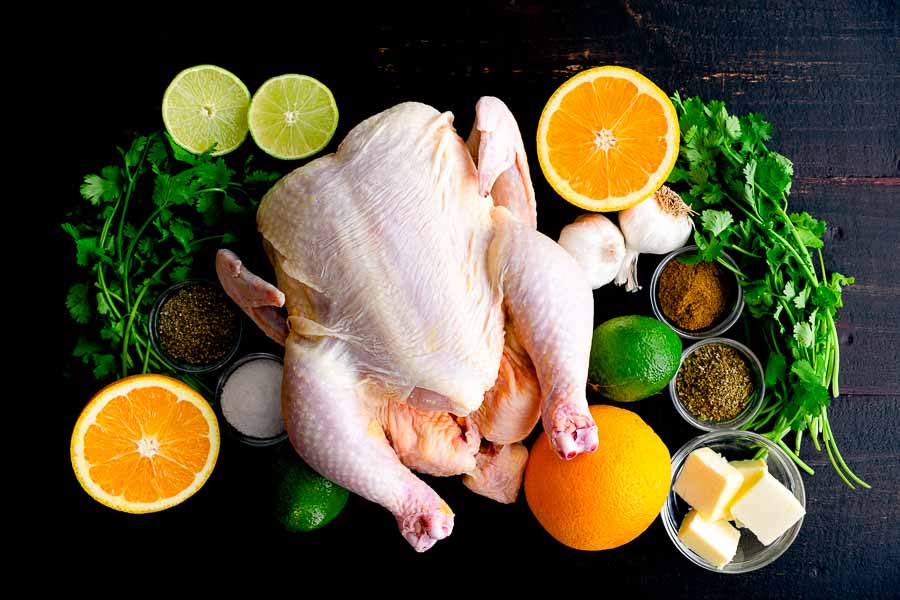
Okay, so my little rant has established the need for a whole chicken, but there is obviously more to this recipe. Cuban mojo has many variations, but it’s a mixture of citrus, garlic, herbs, and oil. This version uses regular oranges and limes to mimic the flavor of harder-to-find sour oranges. I also had to buy a bunch of fresh cilantro, and that was it.

Tip: The marinade took 2 oranges, 1.5 limes, 1 head of garlic, and about 1/2 of a bunch of cilantro.

I had everything else in my pantry and even had butter in the refrigerator. The recipe does give the option of using olive oil, but I chose butter. I was curious how it would affect the taste, and I knew it would help the chicken bake to a golden brown.

Cuban Mojo Chicken Ingredients
Whole roasting chicken, oranges, cilantro, garlic, ground cumin, dried oregano, limes, butter, salt, and ground black pepper

The Process

No, roast chicken isn’t quick, but it’s mostly hands-off time. In fact, only 23 minutes was active time. Here’s how my time was spent:

  • 20 minutes to prep the marinade
  • 3 minutes to tie the chicken
  • 1 hour 16 minutes to roast
  • 10 minutes to rest
  • 1 hour 49 minutes total (marinating overnight not included)

This recipe lists 15 minutes for prep, 1 hour 15 minutes to cook, for a total of 1 hour 30 minutes. My time was slightly over that with most of the slowdown in my prep work.

Marinating the Cuban Mojo Chicken

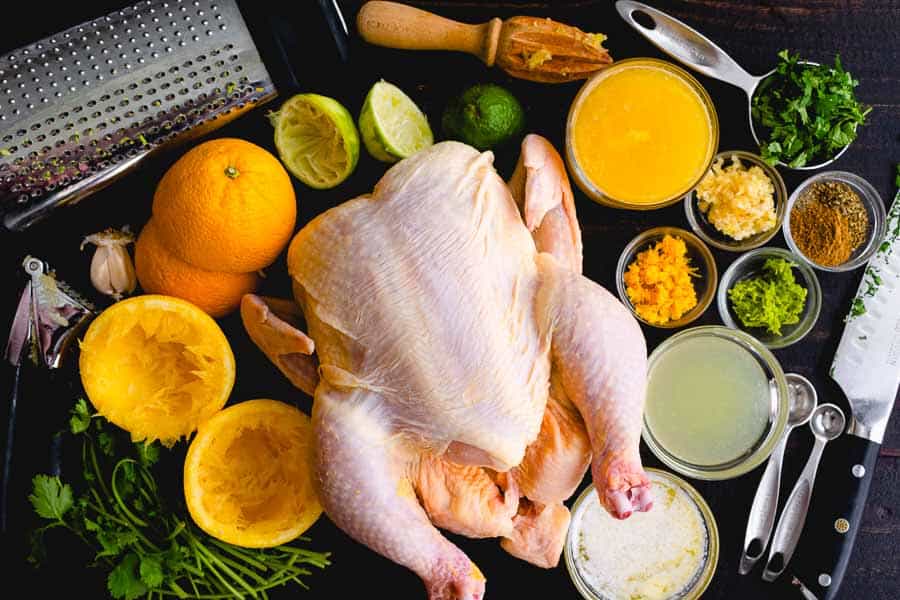
This recipe requires the chicken to be marinated for 4-24 hours, so I chose the longest option. The flavor payoff is worth the wait! So on day one I rinsed the chicken and prepped the marinade. The whole process was straightforward and took me about 20 minutes of juicing, zesting, and chopping.

The instructions say to marinate the chicken in a bowl covered with plastic wrap, but the notes mention using a large bag. I have used this method many times, and it’s great! I used a slow cooker liner I had in my pantry. I always forget to line the slow cooker when I make pot roast, but that worked in my favor.

I lined a medium mixing bowl with the bag, added the chicken, and poured in the marinade (I had mixed it separately). Tip: Place the chicken breast-side down to get the most flavor into the meat. I flipped my chicken after I took the photo, tied up the bag with a twist tie (saved from the cilantro bunch), and popped the bowl into the refrigerator.

Making the Cuban mojo marinade (or mojo criollo)

Roasting the Cuban Mojo Chicken

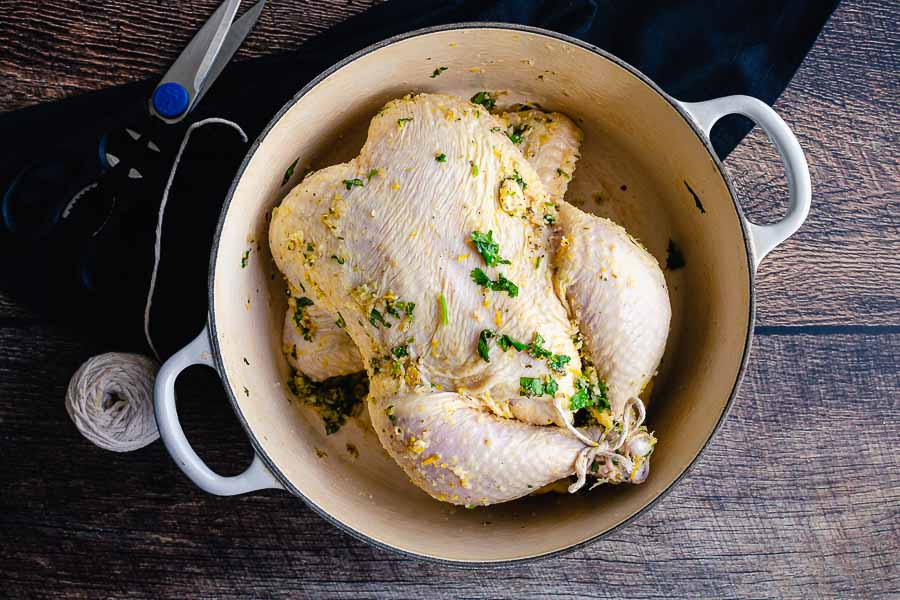
I was so ready for this chicken the next day, but I didn’t want to drag out my giant roasting pan. Instead, I went back through the blog post and noticed a comment about using a Dutch oven instead. Tip: The chicken fit nicely into my 5.5-quart cast-iron Dutch oven, no lid needed. Perfect!

After tying the legs with twine and tucking the wings, it was into the oven for 1 hour. Then I added a meat thermometer to the thigh and left it continue roasting. It took another 16 minutes to reach 165℉. After a 10-minute rest I had a beautiful roasted golden brown chicken ready to carve up and serve.

The marinated Cuban Mojo Chicken in a cast-iron Dutch oven

Smoked Salmon, Labneh & Potatoes

There were a couple reasons I was drawn to this Smoked Salmon, Labneh & Potatoes recipe. It evoked memories of special people, both old and new, involving my family. My mom and my mother-in-law to be specific, as well as my uncle. Technically uncle-in-law, but I’m not sure that “in-law” part matters outside of a family tree. Let me explain…

The topping made me think of my mom and a long ago vacation. You see, my all time favorite breakfast is a bagel with cream cheese, smoked salmon, capers, and red onions. It’s something I can’t pass up, especially when I’m on vacation. I guess because the first time I tried it was when I was on a trip with Mom. We were in the North Carolina Mountains at a Swiss chalet themed resort. It was magical!

The potato pancake base triggered the more recent memory. It made me think ff latkes which are traditional Jewish potato pancakes. I had never tried latkes until got married (my husband is Jewish). My mother-in-law made them for a holiday meal, and I loved them! Unfortunately, she burned herself badly with splashed cooking oil, and we didn’t allow her to make latkes again for a long time. But I’m happy to say she has resumed making latkes with no burns since.

And finally, a memory of this past Thanksgiving with my uncle-in-law. He is of Lebanese descent, so I decided to make him these Za’atar Spring Rolls with fresh Labneh. He loved them, and we had a good time talking while we enjoyed them—he is quite the story-teller! I gave his wife the recipes, and she later told me he likes to eat the labneh on toast for breakfast.

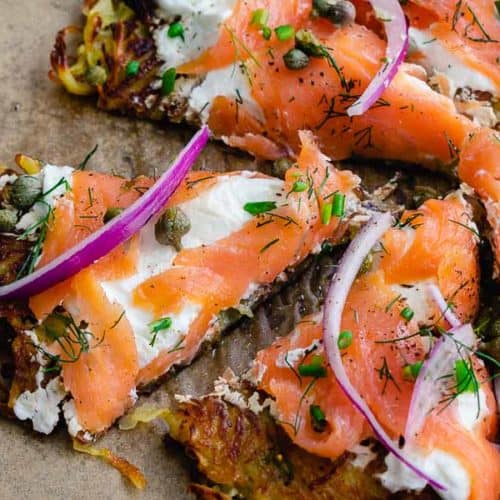
Crispy Potatoes, Smoked Salmon & Labneh…I want to call it rösti but not sure if that’s accurate 🙈. Either way, this was so good!!

Recipe Author: Nadia Aidi at Food My Muse
Get the recipe

The Ingredients

I pretty much had to buy everything for this Smoked Salmon, Labneh & Potatoes recipe. I had olive oil, butter, and pepper. That left half a dozen or so items to buy, but my regular grocery store had them all in stock. I even managed to save a few dollars by using the dill I grew in my AeroGarden.

The ingredients list smoked salmon as a topping but didn’t specify what kind. Most people call smoked salmon lox, but I prefer nova. Why? Nova is smokier and isn’t as salty. Lox are salt-cured or brined but not smoked. Read more about Nova vs. Lox.

The ingredients list also gives the option of using labneh or creme fraiche as a topping. I chose to make the labneh since it’s a simple 3-ingredient recipe: Greek yogurt, lemon, and salt. I made it 2 days before this so it was ready to go.

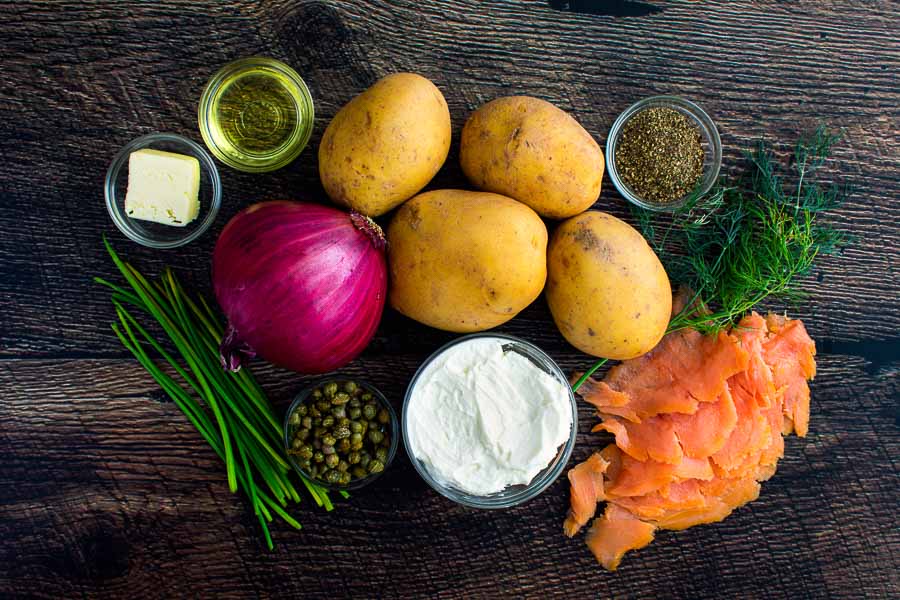
Smoked Salmon, Labneh & Potatoes Ingredients
Yukon Gold potatoes, black pepper, dill, smoked salmon labneh, capers, chives, red onion, butter, and olive oil

The Process

This recipe was posted as a Pinterest video pin. It had some text with it, but there was no printable version (I looked on the author’s site and couldn’t find it). This was a first for me—I have never reviewed a recipe in this format. I’m used to recipes having a blog post with helpful hints plus a printable recipe.

I like to have a printable version when I cook, so I had to watch the video over and over again and write the steps in my recipe software. I pasted in the list of ingredients and steps that accompanied the video pin, but the instructions were incomplete when compared to the video.

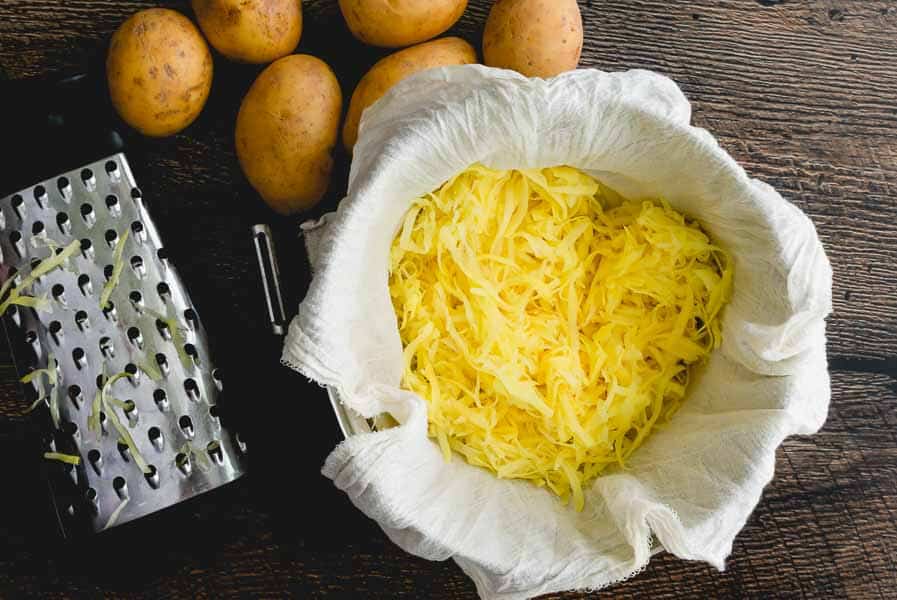
Shredded potatoes in a cheese cloth-lined mixing bowl

Missing Steps

Prepping the potatoes was the first missing step I noticed. The video shows the peeled potatoes being shredded, then the shreds being placed into a piece of cheesecloth, and that squeezed to remove excess moisture. Then the squeezed shreds are placed into a mixing bowl and mixed with melted butter, olive oil, salt, and pepper. None of this was in the text.

Tip: The video shows the potatoes being shredded in a food processor, but mine doesn’t shred. Instead, I used my mandoline with the shredding plate to manually shred the potatoes. It took me almost 10 minutes, but I was able to do it!

Step 1 picks up after the potatoes are prepped with preheating a cast-iron skillet with more olive oil. Then you add the potatoes, shape them into a pancake, and (Step 2) gently press down with a spatula. I’m assuming that last part helps the potatoes hold together.

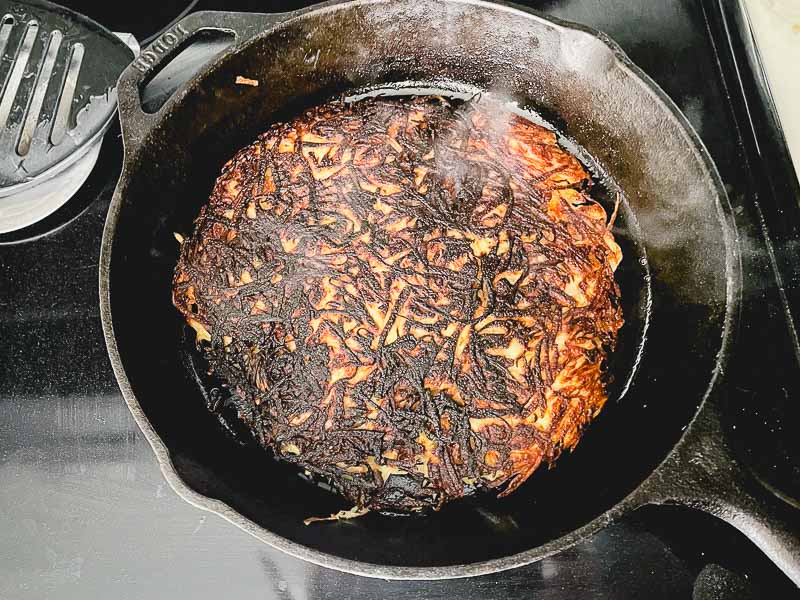
Step 3 says to cook for 12-15 minutes per side on medium-high. I had a bad feeling about that one and decided to set my electric stove on #3 (out of 10). Even with the low setting, the potatoes seemed burnt after I flipped them at the 12-minute mark. I lowered the time to 9 minutes and the heat to #1 for the second side, and it came out much better—well browned but not burnt.

The first side of the potato pancake was a little over done
The first side of the potato pancake was a little over done. I reduced the heat and cooking time for the other side.

Timing

I had plenty of time to prep the topping while the potatoes cooked. Everything was chopped and sliced before the first side of the potatoes were done, so I was able to add them as soon as the potatoes finished cooking. Here’s how my time broke down:

  • 19 minutes to prep
  • 21 minutes to cook
  • 40 minutes total

The recipe pin listed a total time of 45 minutes and was spot-on.

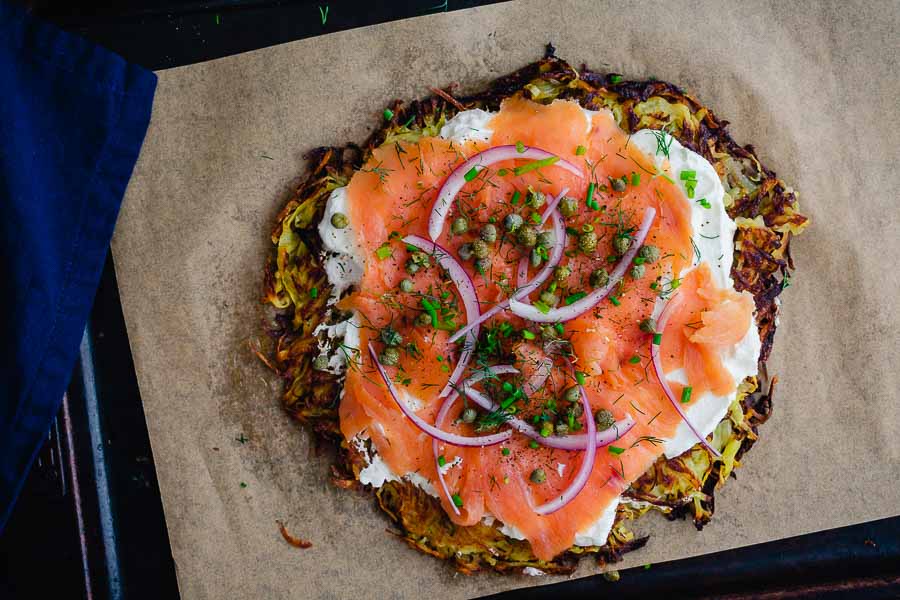
Before slicing into wedges
The finished recipe before slicing into wedges

The Smoked Salmon, Labneh & Potatoes Recipe

Smoked Salmon, Labneh & Potatoes

Smoked Salmon, Labneh & Potatoes

Food My Muse
This recipe was originally posted as a video pin by Food My Muse. The instructions were slightly incomplete, so I watched the video several times so I could complete them and add this recipe to my collection. It was so good that it must be made again!
Prep Time 20 minutes
Cook Time 24 minutes
Total Time 44 minutes
Course Appetizer, Breakfast, Snack
Servings 1

Ingredients
  

  • 2-3 large Yukon gold potatoes peeled and shredded
  • 1 Tbsp butter melted
  • 2 Tbsp olive oil divided
  • 1 Tbsp butter
  • salt and pepper to taste

Toppings (all to taste):

  • labneh or creme fraiche *see notes
  • smoked salmon
  • capers
  • red onion thinly sliced
  • fresh chives minced
  • fresh dill minced
  • black pepper

Instructions
 

  • Place shredded potatoes into a piece of cheesecloth. Draw up the corners and squeeze to remove excess moisture.
  • Place shredded potatoes in a mixing bowl. Add melted butter, 1 tablespoon olive oil, salt, and pepper and mix well.
  • Add remaining tablespoon of olive oil and butter to a preheated cast iron skillet.
  • Add the potatoes to the skillet and shape into a thin pancake. Gently press it with the spatula but don't over press.
  • Cook for about 10-15 minutes per side on low to medium low.
  • Place finished potato pancake on to a plate to serve. Top it with the labneh, smoked salmon, capers, red onion, chives, dill, more olive oil, & pepper. Slice into wedges and enjoy.

Notes

*I used a wonderfully simple 3-ingredient labneh recipe from Caroline's Cooking.
You can view the recipe video here.

Lavender Cold Brew Latte

0

When I worked in the corporate world I drank coffee all day every day. We had a K-cup machine and a single-serving espresso machine in the break room and a barista in the cafe downstairs who would make anything you liked for free. I was in coffee heaven! Now I work at home and found I didn’t need all that caffeine, so coffee became a rare treat. But one day, completely out of the blue, I had a craving and started making iced coffee with my breakfast. It’s become a morning ritual. I have been experimenting with different flavors, but I inevitably got bored with the same old same old and went searching Pinterest for new recipes. This Lavender Cold Brew Latte fits right in with the Honey Lavender Cheesecake I planned to make, and I simply had to give it a try!

Honey Lavender Cold Brew Latte is a sweet summer treat that never gets old!

Recipe Author: Erin at The Wooden Skillet
Get the recipe

The Ingredients

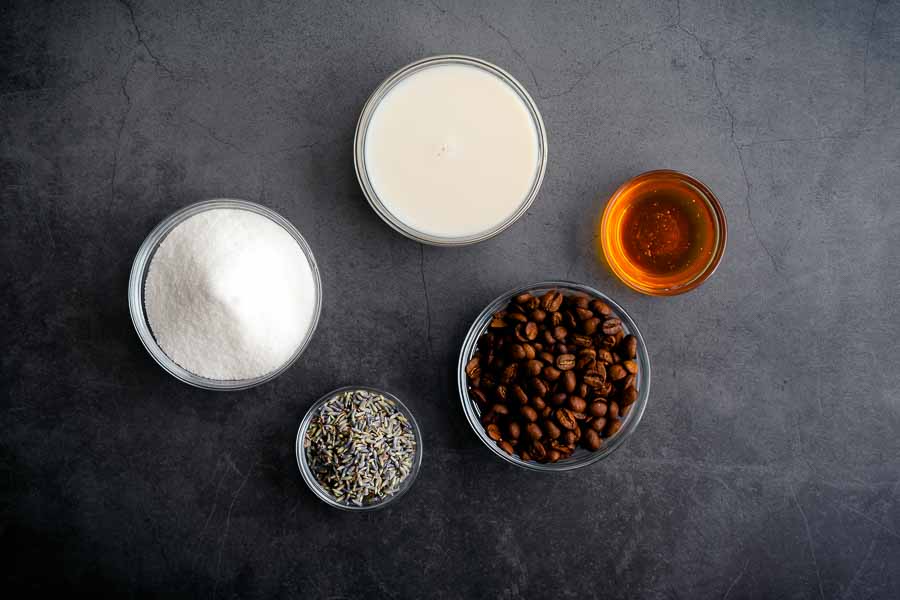
This Lavender Cold Brew Latte recipe recipe does give the option of buying lavender simple syrup and cold brew, but I decided to make both. My food blogger pantry came in handy for this recipe, and all I had to buy was the almond milk. I had whole coffee beans, honey, sugar, and culinary lavender on hand.

Lavender Cold Brew Latte Ingredients
Coffee, lavender flowers, sugar, almond milk, and honey

The Process

I had to make this recipe (or recipes—there were really three) since I decided to make my own cold brew coffee and lavender simple syrup. The latte recipe conveniently links to both recipes (there is even a link to an almond milk recipe, but I bought mine since it’s a household staple for me).

Making the Cold Brew & Lavender Syrup

I started with the lavender simple syrup since it was the more complex of the two recipes. At least compared to the cold brew—both are really easy. I put the water on to boil, added sugar and lavender, and stirred until the sugar dissolved. Then I took the saucepan off the heat and let mixture steep and cool for an hour.

I moved onto the cold brew while I waited on the syrup. All I had to do was coarsely grind the coffee beans and add them to a pitcher filled with filtered water. Then I covered it and set it into the refrigerator to brew for 24 hours. Super easy!

Once an hour had passed, I strained the lavender flowers out of the simple syrup with a cocktail strainer and funneled it into an airtight bottle. I popped it into the refrigerator to full chill while the coffee steeped and planned to make a Lavender Cold Brew Latte the next day.

Making the Lavender Cold Brew Latte

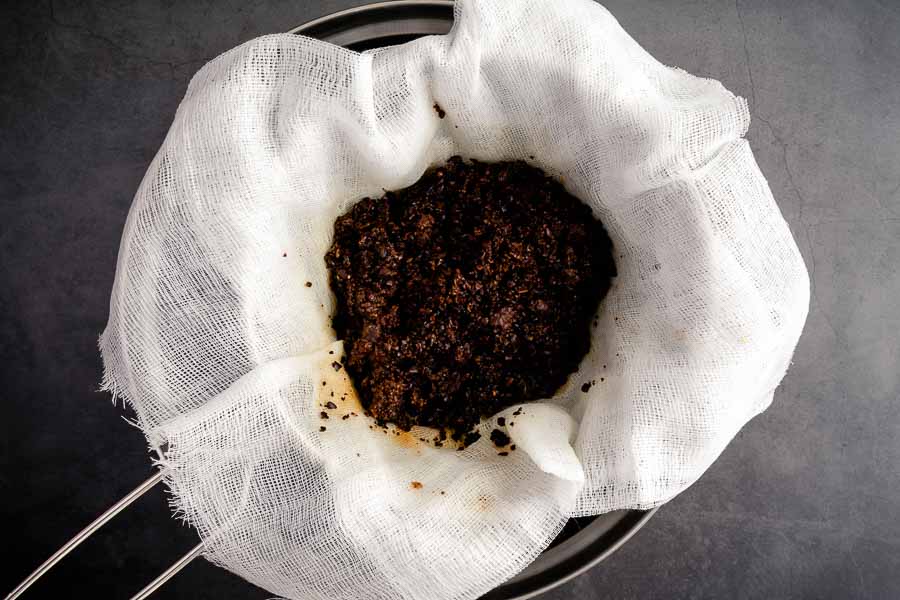
The next day I strained the coffee grounds out of the cold brew. Once using a cheesecloth-lined mesh sieve over a mixing bowl. Next, I used a fine mesh cocktail strainer placed over the mouth of a large pitcher. That gave me perfectly clear cold brew.

Unfortunately, life happened and I wasn’t able to make and photograph my iced latte until a few days later. But no worries! The cold brew and lavender syrup were ready and waiting when I finally found the time for photos.

The actual latte recipe is very simple! Mixed the cold brew, syrup, and some honey in a measuring cup. Tip: Honey has to be stirred very well to get it to dissolve into cold liquid. Then I poured it over ice cubes and added the almond milk.

My first glass is in the background of the main photo. I found that pouring the almond milk slowly made it float on top of the coffee and ice cubes. The latte in the foreground had the almond milk poured from several inches above the rim of the glass. That gave me the pretty swirls I was looking for. Food photographers 🤷🏻‍♀️

straining out the coffee grounds
Straining the cold brew through a sieve lined with cheesecloth

Timing

I came close to the stated times for all three recipes I made. Here’s how it went with the times listed in parentheses for comparison:

Cold Brew Coffee

  • 4 minutes to make cold brew
  • 24 hours to steep
  • 3 minutes to strain
  • 24 hours 7 minutes total (24 hours 5 minutes listed)

Lavender Simple Syrup

  • 21 minutes to cook
  • 1 hour to steep
  • 3 minutes to strain
  • 1 hour 24 minutes* (1 hour 20 minutes listed)

*Plus 24 hours to chill

Lavender Cold Brew Latte

  •  4 minutes to make (10 minutes listed)

Honey Lavender Cheesecake

0

I made a strawberry pie a while back that promised a pink crust. Unfortunately, I didn’t get pink even though I tried the recipe twice. The pie was delicious, but I didn’t get the pretty pastel dessert I wanted. Well, I’m getting it today with this Honey Lavender Cheesecake. Unlike that strawberry pie this recipe uses food coloring. That means it guaranteed to be the pretty pastel dessert I’ve been wanting, right? You would think, but the only way to make sure is to give this recipe a try. It’s been a while since I have attempted a cheesecake, so I’m raring to go!

Something about the combination of honey + lavender really gives this cheesecake an amazing taste without being too overpowering. I hate when things taste super floraly. This guy is nice and light and absolutely to die for! You will definitely be going back for a second piece!
Recipe Author: Lindsay Nathanson at Sprinkles for Breakfast
Get the recipe
(You can get a printable version here.)

The Ingredients

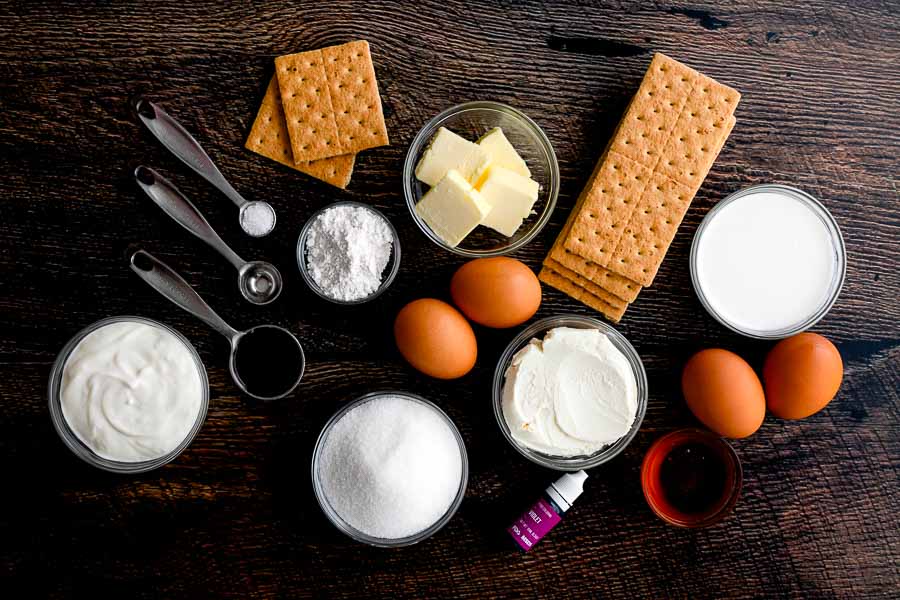
I normally keep several of this recipe’s ingredients on hand, but I still had a lot of shopping to do. My pantry had sugar (granulated and powdered), honey, salt, and even the violet food coloring. I know, who has that? Me!
The violet food coloring was in a 12-pack I had ordered to color the icing in these Tequila Sunrise Cupcakes. Of course you can always mix red and blue food coloring from the typical McCormick food coloring most every grocery store stocks. You know the one with the tiny red, yellow, green, and blue bottles.

I had to shop for the rest, but most everything was easy to find at my regular grocery store. This Honey Lavender Cheesecake is full of basics like cream cheese, butter, sour cream, eggs, etc.

The only item I couldn’t find locally was the lavender extract. I had to order it too. I found it a bit pricey, but the package I ordered included a dropper and sprayer. I’ll be adding a spritzes and drops of calming lavender to my laundry detergent and sleeping areas. It won’t go to waste!
Honey Lavender Cheesecake Ingredients
Graham crackers, butter, heavy whipping cream, eggs, honey, violet food coloring, cream cheese, granulated sugar, sour cream, vanilla extract, lavender extract, salt, and powdered sugar

The Process

I love it when longrecipes are divided into chunks because it makes them so much easier to handle. This one has three main parts: making the crust, then the filling, then the topping. Here’s how my time was spent:

  • 30 minutes to prep
  • 2.5 hours to bake
  • 4 hours to chill
  • 7 minutes to top
  • 7 hours 7 minutes total

This recipe only listed cooking and chilling times (not prep time). These times were spot-on for me.

The Crust

A good cheesecake starts with the crust. This one was a simple two-ingredient graham cracker crust. That’s right, just crushed graham crackers and butter pressed into the bottom of a 9-inch springform pan.

I placed about nine graham crackers into a gallon-size ziplock bag and crushed them with my hands a bit. Then I placed the bag onto the countertop and finished crushing them with a rolling pin (just like I did for these Mini Eggnog Cheesecakes).

A quick measure verified the amount was just what was needed. Next, I mixed the crumbs with the melted butter and poured the mixture into my prepared springform pan. Tip: The recipe calls for cooking spray to grease the pan, but it’s not in the ingredients list.

I pressed the mixture into the bottom of the pan using the side of my index finger to force the edges about 1/2 inch up the sides. Then it was into the preheated oven for 12 minutes while I prepared the filling.

The Filling

The filling was the most work of all the steps, but it wasn’t difficult at all. I put the cream cheese into my stand mixer and let it do its thing while I measured the rest of the ingredients.

From there it was just a matter of adding the ingredients per the recipe with stops to scrape down the sides with a spatula and add the violet food coloring. Tip: I wanted a pale lavender cake, so I added about 25 drops of Violet (a.k.a. Incense Purple) food coloring.

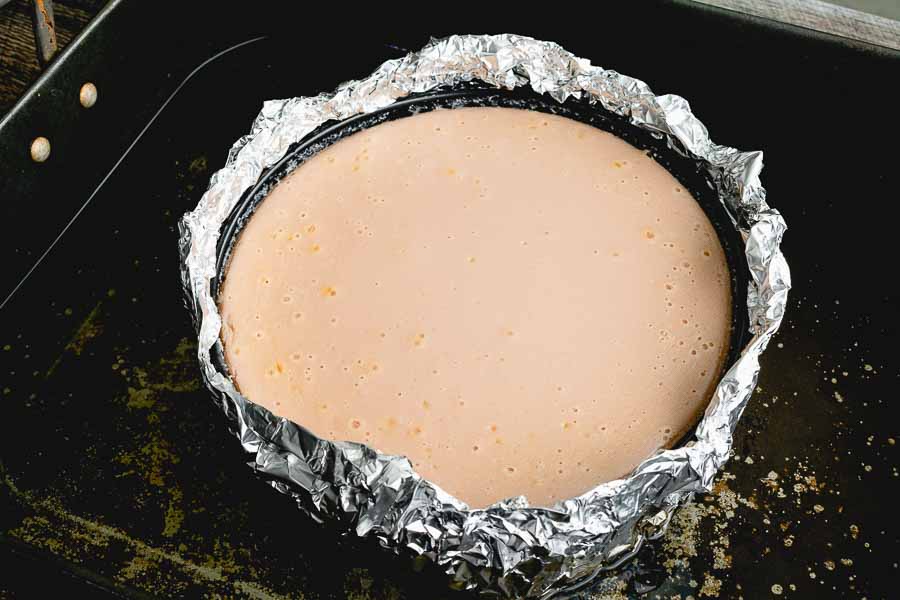
The crust finished during the filling prep, and I left it to cool on a wire rack as I finished up. Then I wrapped the pan in foil, poured in the filling, and placed the springform pan into a deep roasting pan.

The baked cheesecake in a water bath

The oven had cooled down to 325℉ by this time, so I placed the roasting pan inside and added enough water to come about halfway up the sides of the springform pan.

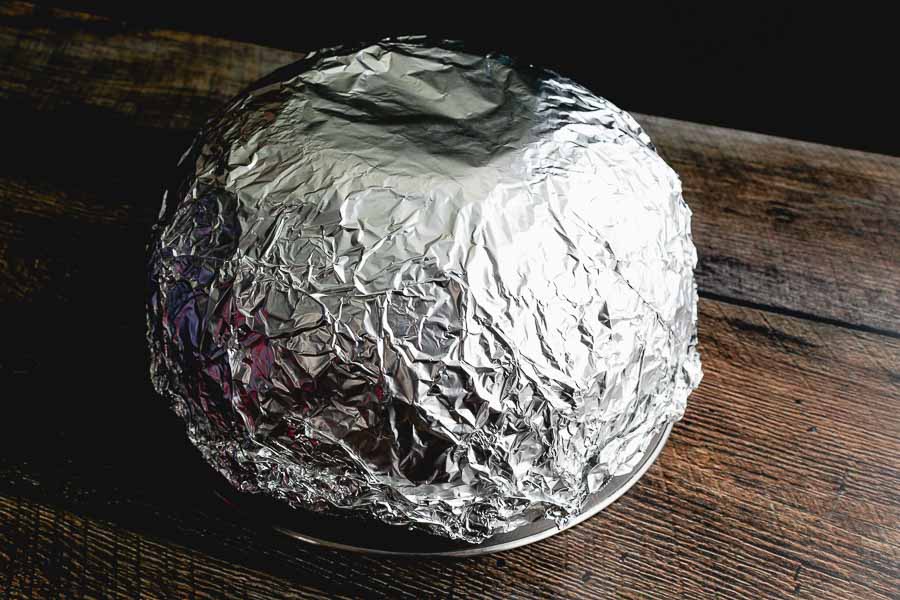
Two and a half hours later and my Honey Lavender Cheesecake was ready to be chilled. Tip: I used foil shaped over an upside down mixing bowl to create a dome so the foil wouldn’t touch the cheesecake. It was a 4-quart bowl with a 10-inch diameter. It wasn’t airtight, but it did the job. I suppose I could have also just used the bowl itself.

Making a foil dome to cover the cheesecake
I used a large mixing bowl to form a foil dome to cover the cheesecake

The Topping

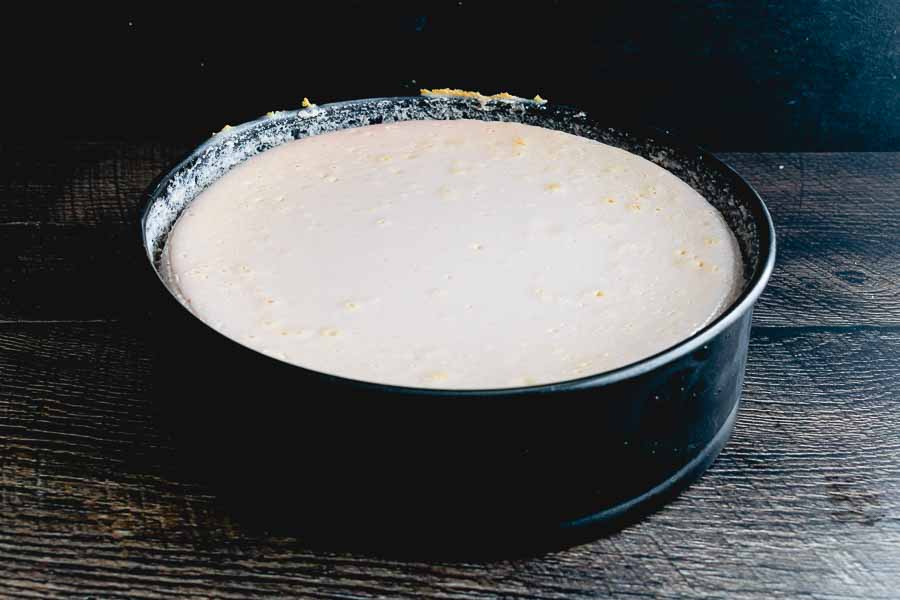
I left the cheesecake to chill overnight and was pleased that it didn’t sink in the middle (see my Rum Caramel Drizzled Eggnog Cheesecake review for an example of sinking and tips to prevent it). Mixing up the topping was super easy but I must confess that I took my time spreading it onto the cheesecake. It had gone so well that I didn’t want to ruin it at the end (and I didn’t)!

Chilled cheesecake
The chilled cheesecake didn’t sink in the middle

Sheet Pan Roast Pork Tenderloin with Potatoes

My husband isn’t a picky eater, but there are a few things he dislikes. Pork chops are one of those things, much to my dismay. He loves ham and pork tenderloin, though, and I can work with that. We don’t have ham very often, but pork tenderloin has become a staple around here. I love to grill, air fry, and roast it for an easy weeknight dinner. That’s why this Sheet Pan Roast Pork Tenderloin with Potatoes was a must-try. It combines one of our favorite cuts of meat with vegetables on the side for a complete all-in-one meal. Let’s give it a try!

This Sheet Pan Roast Pork Tenderloin with Potatoes is extremely tender, succulent, and healthy. This pork tenderloin recipe is easy enough for a weeknight meal and delicious enough for serving to guests. Little effort with big results.

Recipe Author: Amy Dong at Chew Out Loud
Get the recipe

The Ingredients

I planned on making this recipe a few weeks ahead of time, so I was able to buy a package of pork tenderloins when it was on special (there were two in the package). I froze it and moved the package to the refrigerator to thaw two days before I planned to make it.

Tip: I love that pork tenderloin is almost always sold vacuum packed. They last for along time in the refrigerator and can also be frozen without risking freezer burn. It makes it easy to buy several when I find them on special. Sometimes I even buy them pre-seasoned for even easier dinners.

As usual, I had the basics on hand, so no need to buy the olive oil, balsamic vinegar, honey, kosher salt, or pepper. That left a few things to pick up at the store, but not too many.

I found everything I needed at my usual grocery store. I was especially happy that they had bags of the baby carrots and potatoes in the exact amounts needed.

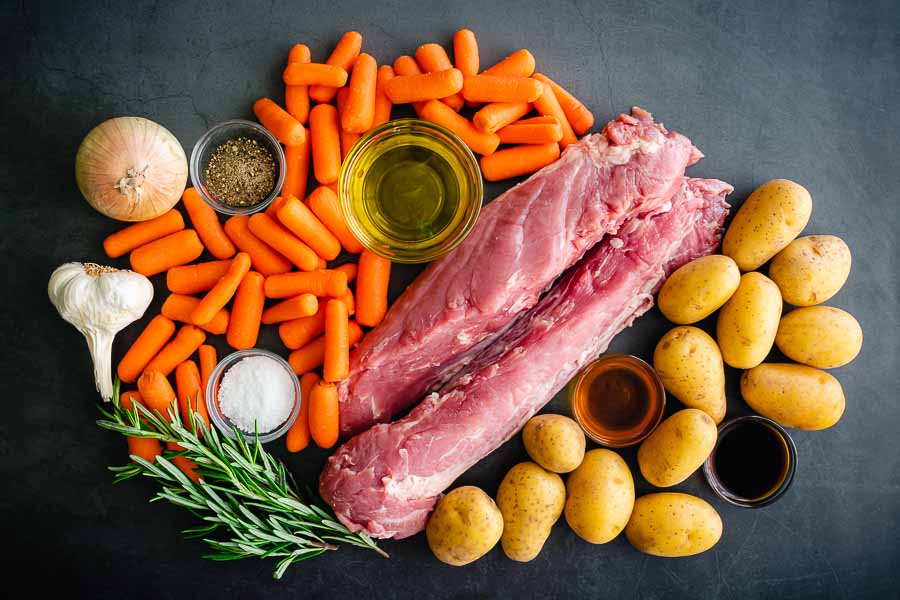
Sheet Pan Roast Pork Tenderloin with Potatoes Ingredients
Pork tenderloins, baby potatoes, balsamic vinegar, fresh rosemary, kosher salt, baby carrots, garlic, onion, black pepper, and extra virgin olive oil

The Process

I really appreciated how the steps for this Sheet Pan Roast Pork Tenderloin with Potatoes recipe were written. Each part was broken down into simple steps that were easy to follow. The recipe walked me through the whole process, but things didn’t quite go as planned.

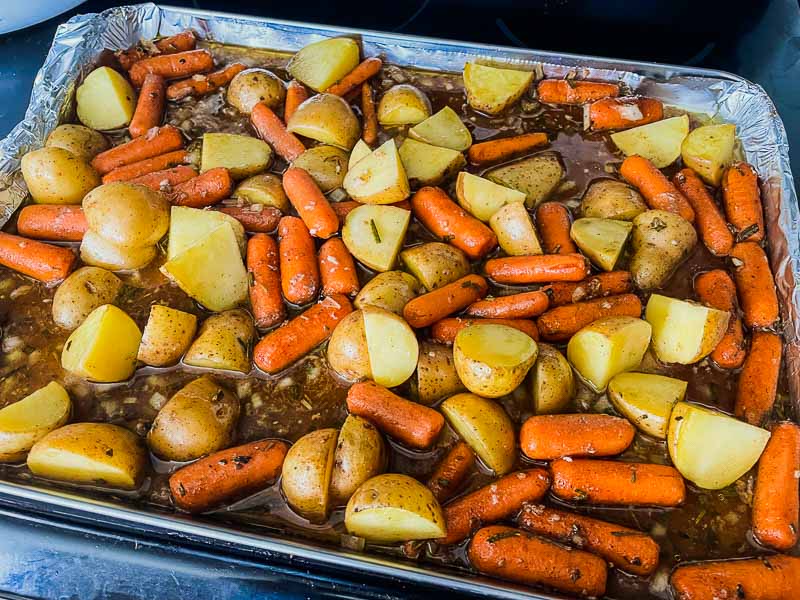
The notes did say the carrots and potatoes would need to be cut into smaller pieces than normal, but I used the photo to judge the size of the potatoes and carrots when cutting them up. Or not cutting them up in the case of the carrots. They were baby carrots and looked small enough. I did cut up the baby potatoes, but I only quartered them. Big mistake!

I popped the sheet pan into the oven with my meat thermometer set to beep when the pork reached 145℉, or so I thought. Unfortunately, I didn’t look at the display carefully, and the alert wasn’t set. The pork ended up roasting for the full 45 minutes and reached 156℉. It was well done but fortunately it was still very juicy.

However, the potatoes and carrots were not done. I removed both tenderloins to a plate, covered them with foil, and turned up the oven to finish the vegetables. I gave them another 15 minutes until they looked and felt done with the fork test.

Perhaps I tested a smaller potato because I realized most of them were pretty underdone when we ate. The carrots were still a little tender-crisp, but my husband likes them that way (I hate cooked carrots so only tried a small bite).

Roasted vegetables with pan juices
There were a lot of pan juices, and I’m glad my sheet pan had deep sides

Timing

Even with the extra time roasting the potatoes, I still came very close to the total time listed of 1 hour 20 minutes. Here’s how my time was spent on this recipe:

  • 22 minutes to prep
  • 45 minutes to roast the pork
  • 3 minutes to remove the pork from the sheet pan & cover with foil
  • 15 minutes to roast the vegetables
  • 1 hour 25 minutes total

Sumac and Spice Roasted Chickpeas

When I menu plan, I tend to focus on the main course and make simple side dishes. We’re talking rice, couscous, frozen and roasted vegetables. I have noticed that my favorite sides have one thing in common: I don’t need a recipe for them. Well, that just omits tons of recipes I have pinned, and I can’t have that! I need make more side dish recipes, and I’m going to do that today with this Sumac and Spice Roasted Chickpeas recipe. It’s simple, full of spices I like, and promises to be packed with flavor. I can’t wait to try it!

Citrus-scented Sumac and warm Middle Eastern spices add bold flavor to these roasted chickpeas!

Recipe Author: Linda at The Wanderlust Kitchen
Get the recipe

The Ingredients

This recipe was so easy to shop for! I had all the spices and olive oil in my pantry. All I had to get at the grocery store was a couple of cans of chickpeas (a.k.a. garbanzo beans).

Actually, nearly all the ingredients are usually easy to find at my regular store. The only exception is the sumac. I order that online.

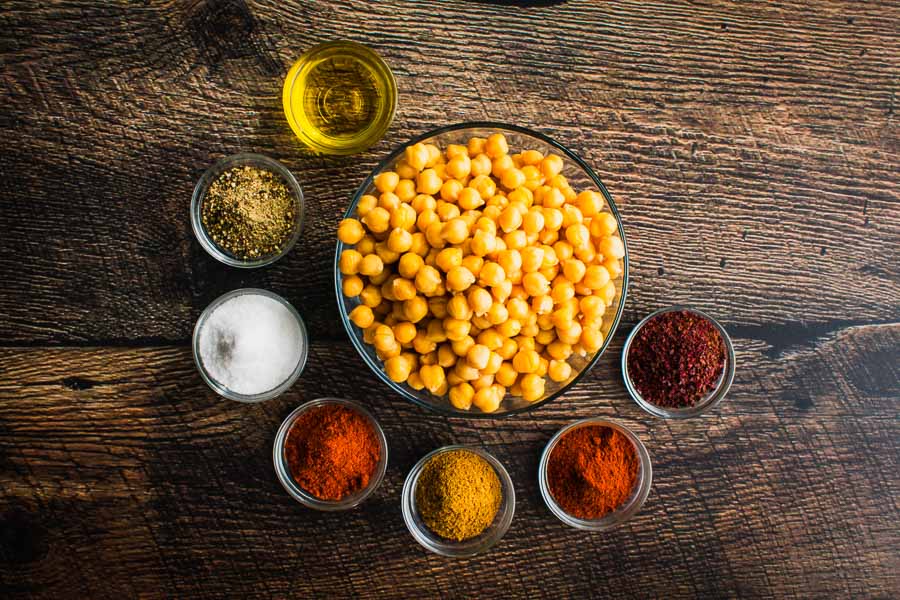
Sumac and Spice Roasted Chickpeas Ingredients
Chickpeas, sumac, cayenne pepper, ground cumin, paprika, sea salt, ground black pepper, and extra virgin olive oil

The Process

I love to be able to share tips and tricks that make these recipes easier, but this one went so smoothly that I don’t have many. The instructions were simple and well written, so I didn’t have any trouble following along. Mine did take a bit longer than the 30 minutes listed, though. Here’s how my time was spent:

  • 9 minutes to prep
  • 30 minutes to cook
  • 39 minutes total

I began by draining and rinsing the chickpeas, then I used a couple of tea towels to dry them off. I left them sitting on a towel to dry a bit more while I whisked up the oil and spices.

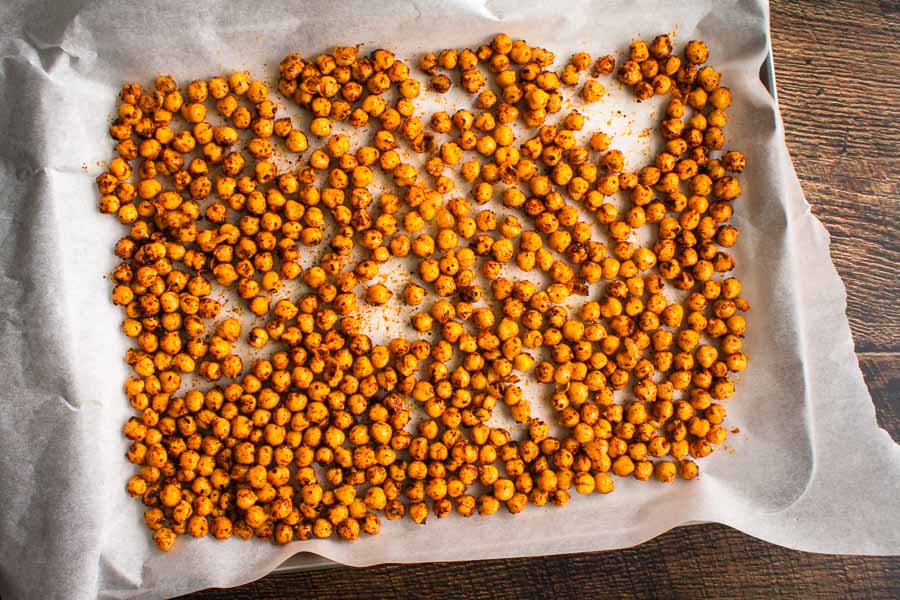
The spice mixture was quite thick, so I had to make sure to thoroughly stir the chickpeas to coat them. Then I spread them on a parchment-lined sheet pan and roasted them. I started out with 20 minutes, tossing them at the 10 minute mark.

My Sumac and Spice Roasted Chickpeas weren’t crispy after roasting for 20 minutes, so I tossed them a second time and put them back into the oven for another 10 minutes. Once I tried them, I realized they weren’t truly crispy, but they were dryer than what I’m used to. I was left wondering if another 5-10 minutes was needed. I’ll have to try this one again and report back.

Ferrero Rocher Nutella Tart

What’s your favorite candy? Mine is hands down Ferrero Rocher chocolates. They are a beautiful mix of chocolate and hazelnut flavors and crispy and creamy textures in each piece. I like chocolate and hazelnut individually, so naturally, I love Nutella. But add all those things into a buttery pastry crust? I about fell off my chair when I found this Ferrero Rocher Nutella Tart recipe. My husband just said, “Oh yeah!” So here we go, I’m going to make my first tart ever, and it might just be the best dessert I have ever made. Let’s find out!

A sweet shortcrust pastry base, with a layer of Nutella, a chocolate ganache filling with Ferrero Rocher – a Delicious Ferrero Rocher & Nutella Tart!

Recipe Author: Jane at Jane’s Patisserie
Get the recipe

The Ingredients

I had some shopping to do for this recipe. I had flour, eggs, and icing sugar. That left me to buy everything else. Fortunately, Ferrero Rocher chocolates are available year-round. And things like Nutella, butter, heavy cream, and baking chocolate are no problem either.

My only mild “complaint” was that I had to buy two bars each of dark and milk chocolate. Apparently, they come in 100-gram packages, and this recipe calls for 125 grams each. I chose Lindt brand, and I am happy to say both extra bars were easy to break into 25-gram pieces.

The only problem child for this recipe was the hazelnuts. I can usually find them at Publix, but they happened to be out. Fresh Market had them, though, and the price was reasonable.

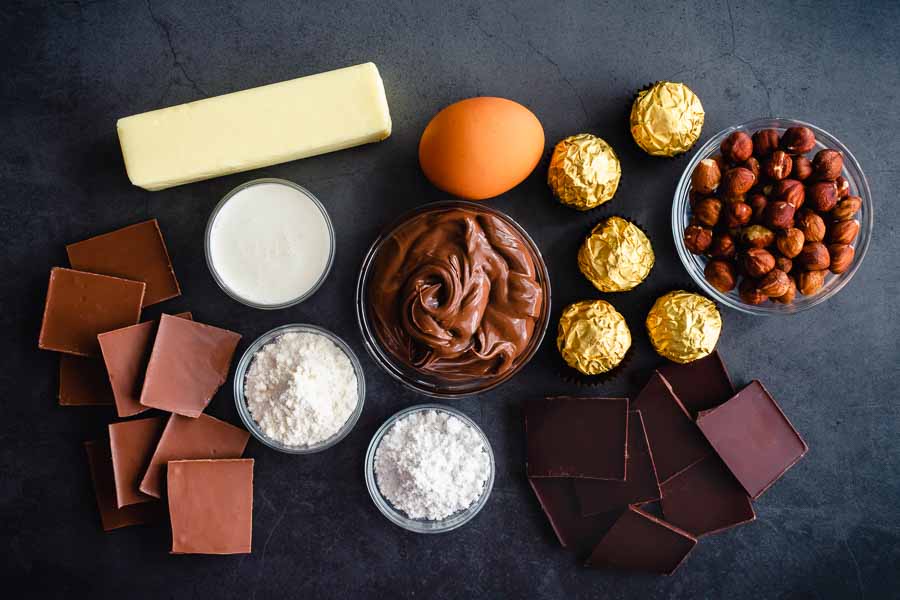
Ferrero Rocher Nutella Tart Ingredients
Nutella, egg yolk, Ferrero Rocher chocolates, hazelnuts, dark chocolate, icing sugar, flour, milk chocolate, double cream, and unsalted butter

The Process

There are two main sections to this recipe: making the crust and making the filling. I suppose chilling it a third, but it’s completely inactive time.

Naturally, things have to start at the bottom, and that means making the crust first. Tip: Well, I would have changed it slightly to start out by cutting out a parchment paper circle small enough to fit inside the crust (you’ll need it later). Then grease the tart pan (I used vegetable shortening), and then make the crust.

Making the Tart’s Crust

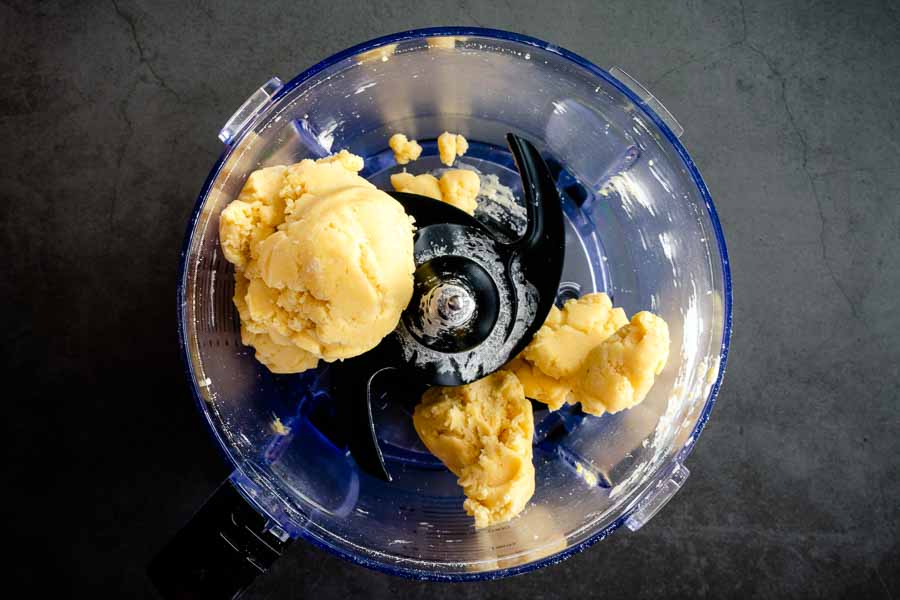
The actual tart crust started with weighing the ingredients with my kitchen scale (thank goodness it has grams). Then I sifted the flour and sugar into the bowl of my food processor (fitted with the dough blades), added the rest of the ingredients, and mixed until they came together. I wasn’t sure how I would know, but I stopped when this happened:

Tart dough
The dough once it came together in the food processor

It was legit dough at that point, and I was able to mix all the pieces with my hands very easily

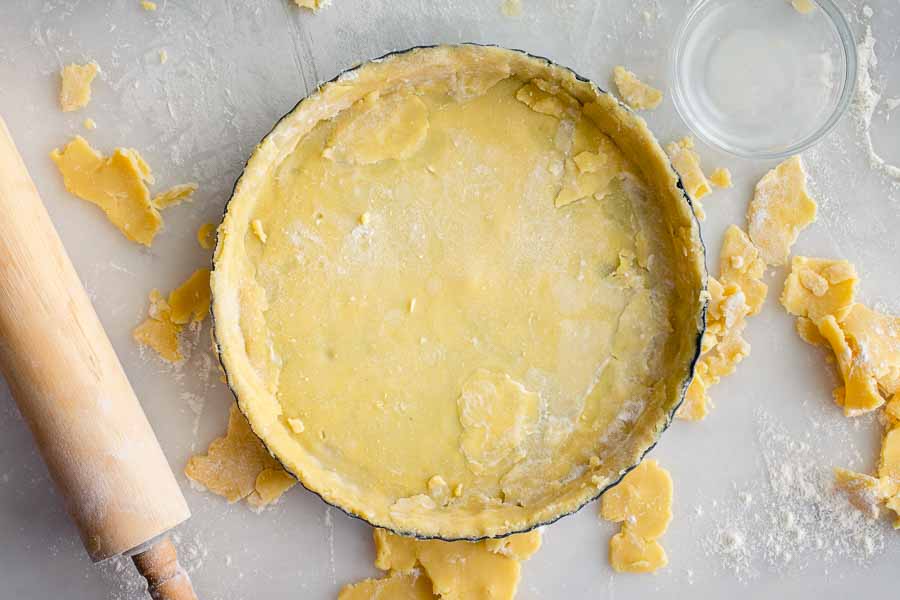
After that, I turned the dough onto a floured surface, rolled it out, and added it to the tart pan. The pastry dough was super sticky and delicate, so I had to patch it several times as you can see below. It wasn’t pretty, but it was going to be filled, so NBD.

Uncooked tart crust
The rolled-out and patched tart crust

Tip: I worked with the tart pan on top of a dinner plate because the dough needed to be refrigerated before baking. The recipe says to put it onto a sheet pan to bake, and I did do that (the removable bottom of the tart pan makes it necessary). However, I couldn’t fit the sheet pan into my very full refrigerator, so a dinner plate worked well for that part.

I added the parchment paper circle I mentioned at the start, pie weights, topped it with pie weights, and put the crust into the oven. The temperature is listed in Celsius, and it is converted to 390℉.

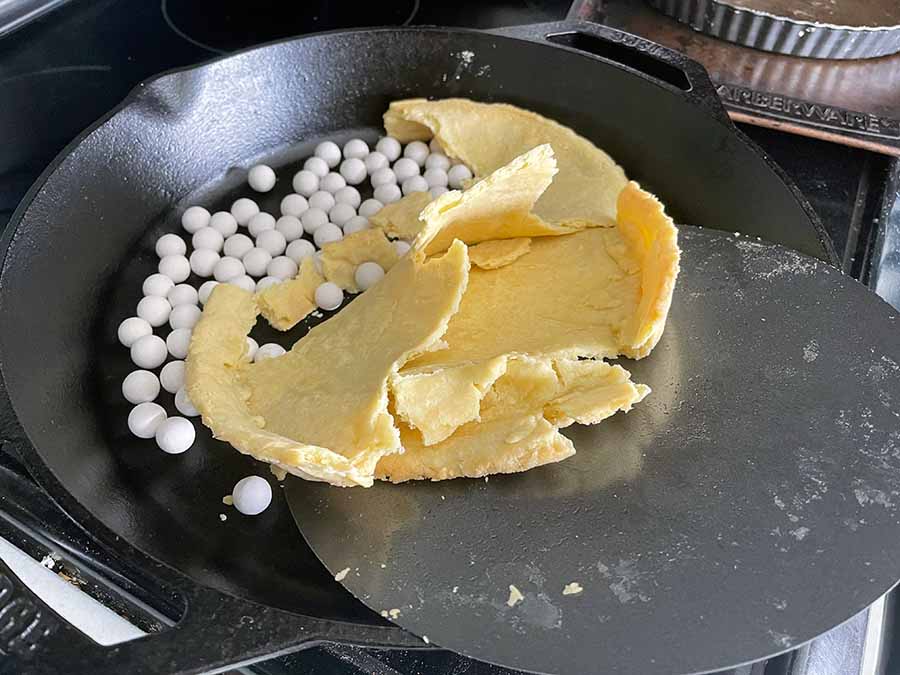
The pie weights had to be removed after baking for 15 minutes, and this is where things went very wrong. Totally my fault because I have never blind-baked with weights before!

The weights were hot, so I thought it would be safe to dump them into a cast iron skillet. Nope! I ended up dumping the hot pie weights AND the crust AND the bottom of the tart pan into the skillet. Not cool (no pun intended). Thankfully I had enough ingredients left over to immediately make another crust. Tip: The second time I carefully removed the hot weights with a big spoon.

Ruined tart crust
I tried to dump the pie weights into my cast iron pan and ended up dumping the pastry too

Making the Chocolate-Nutella Filling

Once the crust had cooled, I put it back onto a dinner plate so moving it in and out of the refrigerator would be easy. Then the crust went into the refrigerator to chill for the final time.

The first step for the filling is to spread the Nutella layer into the cooled pastry. It sounds easy, but the baked crust was delicate! Tip: I had to be very gentle and not quite spread it to the sides or they would break.

The Nutella layer needs to be covered in a layer of chocolate ganache, so making that was the next step. Ganache is melted chocolate mixed with heavy cream,  and it’s easy to make.

There were two options for melting the chocolate: microwave or stovetop. I have a double boiler, so that’s what I melted the chocolate in. I’m more comfortable with it than the microwave because I can watch the chocolate the whole time. Plus over-microwaved chocolate can seize, and I didn’t have extra. Seized chocolate can be fixed, but I already had one disaster that day!

The chocolate-cream mixture melted quickly, and I poured it into the prepped crust. Unfortunately, I was not very careful and it overflowed and covered the crust’s edges. Tip: Pour the filling slowly and carefully to prevent overflowing and create defined edges.

Almost done! The final step was adding the Ferrero Rocher garnish and a few chopped hazelnuts. Chopping nuts can get messy, so I placed a few into a ziplock bag and crushed them with a meat mallet. Then I sprinkled them over the chocolates and put the tart into the refrigerator to set. The recipe says 3-4 hours, but I chilled mine overnight.

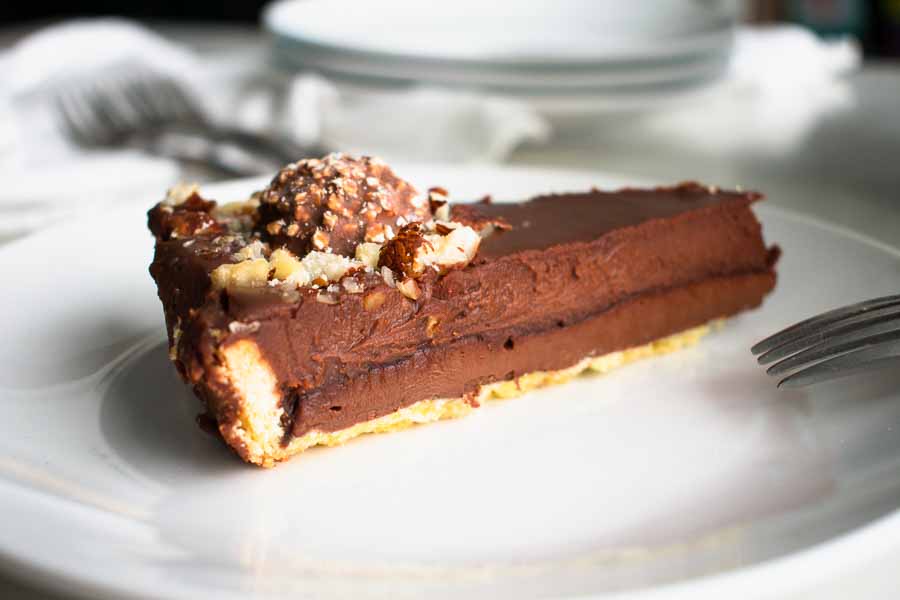
Sliced Ferrero Rocher Nutella Tart
You could see the separation of the Nutella and chocolate layers

Timing

This recipe lists 30 minutes to prep, 15 minutes to cook, 4 hours to chill, and 4 hours 45 minutes total. I went 5 minutes over the total time listed, and I’m well pleased that I came that close on my first-ever tart. Here’s how my time was spent:

  • 18 minutes to prep the pastry crust
  • 30 minutes to chill the crust
  • 20 minutes to bake the crust
  • 20 minutes to cool the crust
  • 13 minutes to fill
  • 14 minutes to decorate
  • 3 hours to chill*
  • 4 hours 55 minutes total

*I chilled my Ferrero Rocher Nutella Tart overnight, but I’m using the minimum time listed in the recipe for a comparison of the overall time.