Home Blog Page 12

Cranberry Glazed Turkey Breast

Making a turkey breast for Thanksgiving dinner this year was so easy and delicious that I decided to do it again for Christmas dinner. It’s just the two of us, so the smaller portion worked nicely. We love cranberry sauce, so this Cranberry Glazed Turkey Breast worked on several levels. Easy turkey breast plus built-in cranberry sauce, plus it promises to be incredibly juicy. What’s not to like?

You can find my 2022 Christmas Dinner Menu as a free downloadable Google Doc. It includes a schedule, a shopping list, and an equipment list. The checkboxes on the lists are interactive and cross off each item when you click them. You may also print it or save it and make any changes you like.

This cranberry glazed turkey breast recipe is so good that I make it several times a year … I’ve perfected this recipe to the point where a turkey breast comes out of the oven so juicy, so moist that it’s hard to believe that super lean turkey breast meat can be like that.

Recipe Author: Victor at Craving Tasty
Get the recipe

The Ingredients

There are only nine ingredients in this Cranberry Glazed Turkey Breast recipe, and two of those are salt and pepper. The rest are almost as easy to find. I had the chicken broth, dried thyme, honey, and apple cider vinegar on hand.

That left me to shop for turkey breast, butter, and cranberries. They were all easy to find at my regular grocery store. I found fresh cranberries, but I loved that frozen were an option. I can find those year-round.
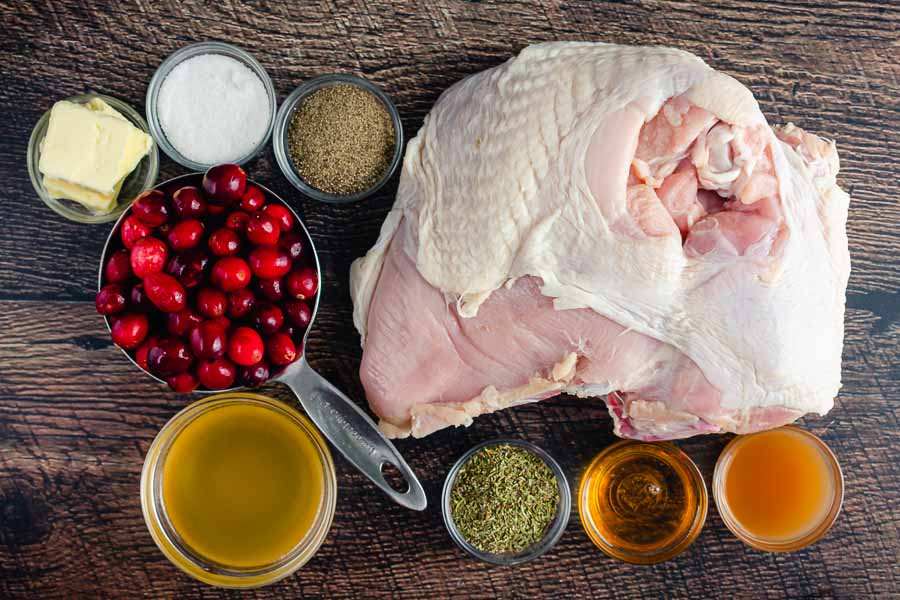
Cranberry Glazed Turkey Breast Ingredients
Turkey breast, apple cider vinegar, honey, dried thyme, chicken broth, fresh cranberries, butter, salt, and black pepper

The Process

The first part of this Cranberry Glazed Turkey Breast recipe is making the cranberry glaze. It was quick and easy to do. I just added the ingredients to a saucepan, brought them to a boil, and let them simmer for about 5 minutes.

I prepped the turkey breast while the glaze simmered. The one I found had the rib bones, but they weren’t too difficult to remove thanks to my boning knife. I saved the ribs to make Turkey Stock, but you can discard them.

Once the ribs were removed I mixed up the salt, pepper, and thyme to season the meat. I rubbed it on both sides, lifting the skin to get it underneath. Then I tucked the loose bits of meat underneath and moved the extra skin to cover a bare spot and prevent it from drying out.
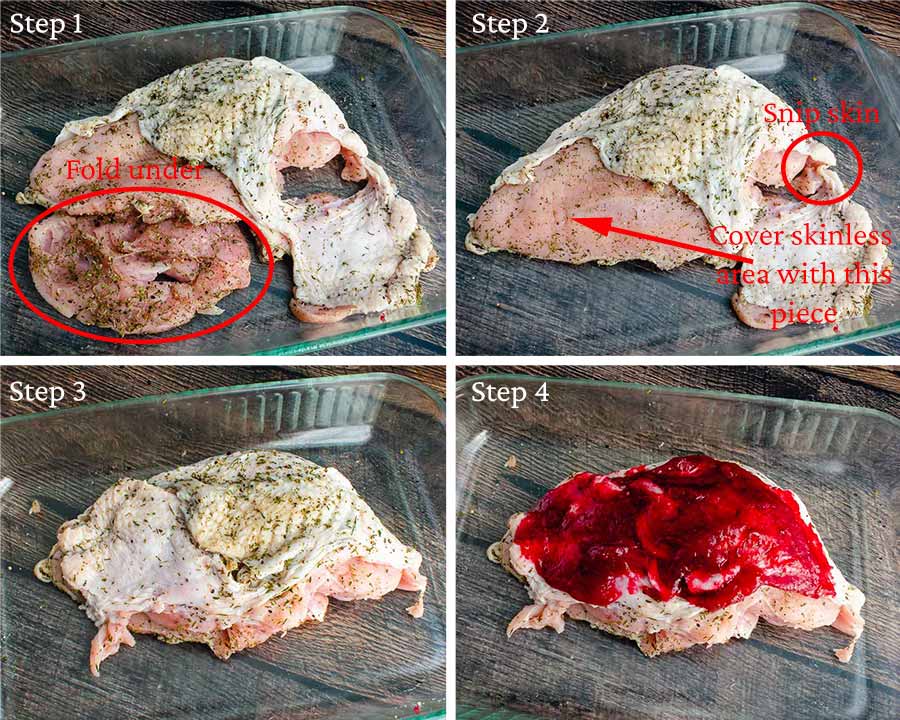
Seasoning, folding, and glazing the turkey breast in a baking dish

The cranberry glaze was ready while I was prepping the turkey, so I set it aside until I was ready for it. Then I used a wooden spoon to press it through a mesh strainer placed over a small mixing bowl. The glaze was very thick and stuck to the sieve, so I had to scrape a lot off the underside.

I spooned the newly made cranberry glaze over the turkey breast, put in the meat thermometer, and added the chicken broth and butter to the baking dish. The recipe says about 45 minutes, but mine took longer—closer to an hour.

I let it rest for about 5 minutes, then I sliced it for a few photos and it was dinner time. I have to say I wish I had let it rest for longer because a lot of the juices ended up on the platter. Unfortunately, the sun was setting and I was running out of light for the photos. Otherwise, I was well pleased with this recipe.

By the way, the juices ended up burning to the bottom of the pan, so I wouldn’t count on being able to make gravy with them as the recipe mentions.

Timing

This recipe lists times of 20 minutes to prep, 45 minutes to cook, and 1 hour and 5 minutes total. Mine went a little over that, but it was thanks to my meat thermometer. I’m counting that as a good thing—no one wants rare turkey! Here’s how it went:

  • 18 minutes to prep
  • 58 minutes to cook
  • 5 minutes to rest
  • 1 hour 12 minutes total

Spiced Mascarpone Cranberry Cake

0

I decided to try an easier Thanksgiving menu this year, and I’m continuing that theme with my 2022 Christmas dinner menu. Things have been extra hectic around here lately, and I could use a break. I had originally planned to make a cheesecake topped with cranberries, but it just seemed a little too complicated right now. Instead, I decided to go with this Spiced Mascarpone Cranberry Cake. A spiced cake is perfect for the Christmas season, and this one is also topped with cranberries. However, it’s a single-layer cake with no frosting, and it sounds much simpler than a cheesecake. Let’s find out if it is!

A simple spiced cake with mascarpone cheese, tart cranberries, cinnamon, nutmeg, and orange.

Recipe Author: Kayla at The Original Dish
Get the recipe

The Ingredients

This Spiced Mascarpone Cranberry Cake recipe has a lot of the typical cake ingredients: sugar, flour, baking powder, etc. I had all of those on hand as well as a few other ingredients like spices, vanilla, and powdered sugar. A quick check of the fridge and I found butter and eggs too.

I had to shop for everything else and didn’t anticipate it being a problem at my regular grocery store. I had found everything I needed before and expected them to have it all this time. Unfortunately, that was not the case.

The one thing I couldn’t find was a tub of mascarpone cheese. I couldn’t believe it! I guess everyone is making cheesecake this time of the year, and the store had sold out. A quick search on my phone told me creme fraiche was a good substitute for mascarpone.

My usual grocery store never has creme fraiche. I almost didn’t bother to look, but I decided to take a lap past the dairy case, and there it was. Maybe they decided to stock it after they remodeled the store. I grabbed a container, did a happy dance, and calmly made my way to the checkout like nothing happened LOL!

Spiced Mascarpone Cranberry Cake Ingredientts
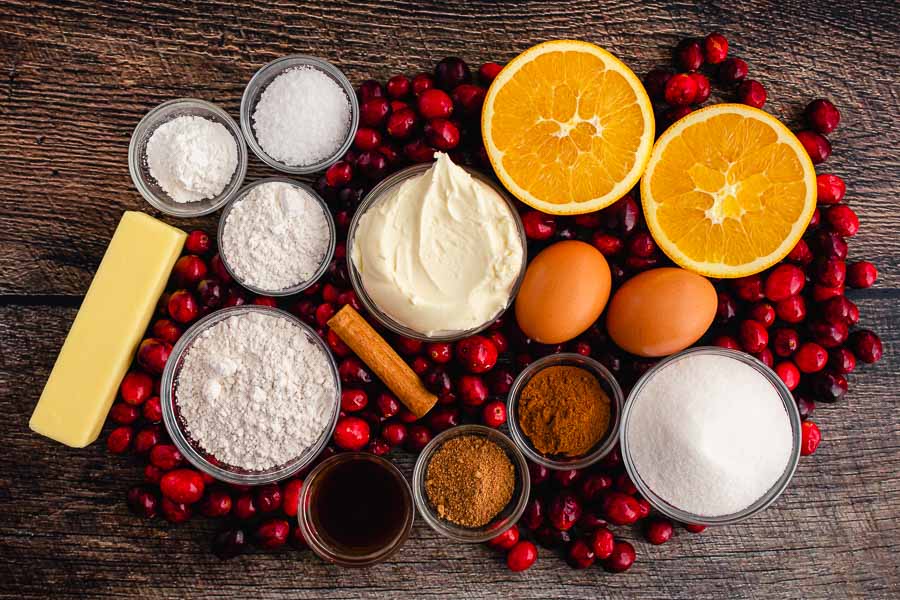
Fresh cranberries, creme fraiche (substituted for mascarpone cheese), orange juice and zest, eggs, granulated sugar, ground cinnamon, nutmeg, vanilla extract, all-purpose flour, cinnamon stick, butter, powdered sugar, baking powder, and kosher salt

The Process

Making this Spiced Mascarpone Cranberry Cake went pretty smoothly, but I did switch the order of the first 2 steps. Tip: Start things off by moving the oven rack to the bottom and preheating before you begin the cranberry topping. Otherwise, the oven might not be ready when the cake is ready to bake.

The actual cooking started off with making the cranberry topping. It was just like making cranberry sauce but with less liquid. I added the ingredients to a saucepan and stirred while it heated to a boil. Then I let the cranberry mixture simmer while I prepared the batter.

The Cake Batter

My stand mixer did most of the work for the batter. I followed the instructions and it mixed together in a few minutes with no problems at all.

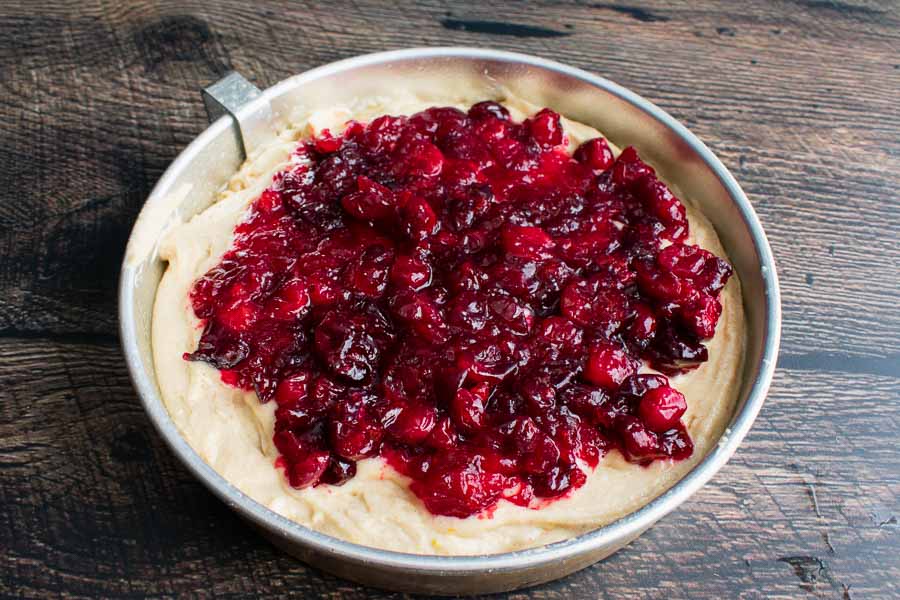
While I spooned it into a greased 8-inch cake pan I noticed the batter was rather thick, but I didn’t think much of it. Then I realized it was a good thing when I spooned on the cranberry mixture. The thick batter kept the cranberry sauce-like mixture in place.

The thick cake batter kept the cranberry topping from sinking in

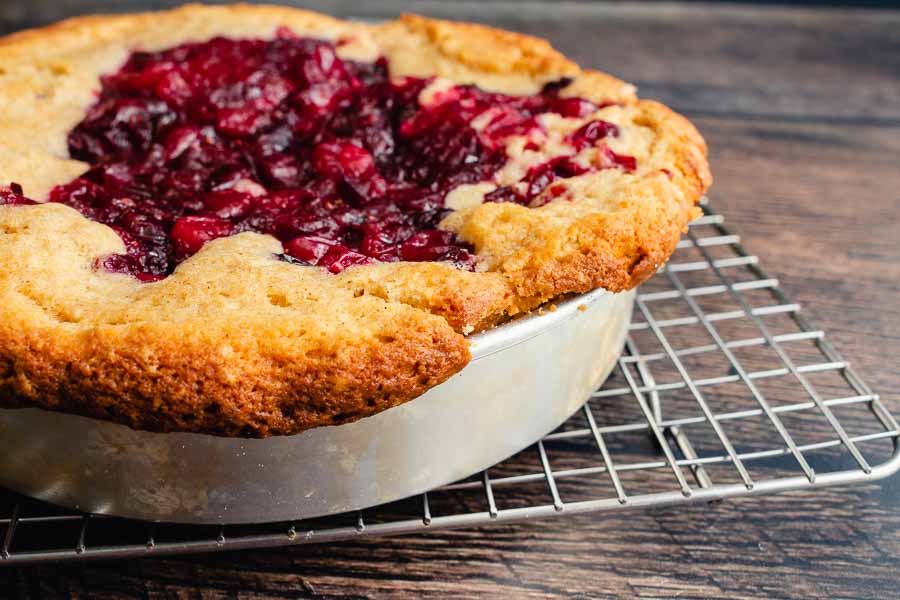
Next, I popped the pan into the oven and let it bake on the bottom rack for 35 minutes. But when I opened the door to cover the cake with foil I noticed the cake had overflowed the pan. It had a muffin top! Tip: A 9-inch cake pan or a deeper springform pan would have been a better choice for this cake.

There was nothing I could do, so I covered the cake with foil and let it bake for another 20 minutes. I hoped it would fall, but it didn’t. All I could do was continue, though, so I let the cake cool in the pan for 15 minutes.

The batter puffing up distorted the cranberry topping and made it a little difficult to get out of the pan. I managed, though, and placed it onto my cake stand and topped it with some powdered sugar. I was a little disappointed, but it looked fine once I sliced the cake into pieces.

My Spiced Mascarpone Cranberry Cake overflowed the pan and had a muffin top

The Timing

This recipe doesn’t list times, so I wasn’t sure how long it would take. I’m happy to say it didn’t feel like it took long at all since most of the time was inactive. Here’s how my time was spent:

  • 25 minutes to prep*
  • 55 minutes to bake
  • 15 minutes to cool in the pan
  • 30 minutes to cool completely
  • 2 hours 5 minutes total
*The prep time includes making the cranberry topping and batter, assembly, covering with foil, removal from the pan, and topping with powdered sugar.

Apple Pomegranate Salad

I always crave something light and healthy after all the indulging during Thanksgiving. Sometimes it’s a smoothie full of fruit, a vegan dish full of vegetables, or a salad full of both. Salads are so versatile, and I love the challenge of mixing flavors and textures to create a good one. That’s why I decided to give this Apple Pomegranate Salad a try. It’s full of fruit, vegetables, and nuts with a balsamic dressing. Plus there’s feta, one of my favorite cheeses. It looks colorful in the photo, and I’m hoping I can recreate this lovely dish. Let’s find out!

The whole family will love this amazing pomegranate salad! Made with crisp apple slices, crunchy + sweet pomegranate seeds, and lots of greens paired with a simple balsamic dressing.

Recipe Author: Bethany Kramer at A Simple Palate
Get the recipe

The Ingredients

I had all the ingredients for the balsamic dressing, but I had to shop for the salad ingredients. That was not a problem—my usual grocery store had everything.

This recipe’s ingredients list is full of options (and I do love a flexible recipe). I went with feta and pecans for the toppings. Tip: Pecan pieces usually cost less than pecan halves, and no chopping is necessary.

My husband doesn’t like raw kale, so I chose spring greens with a couple of handfuls of leftover baby spinach leaves. I made Italian Skillet Chicken and had some extra spinach. This was a great way to use up the extra.

Apple Pomegranate Salad Ingredients
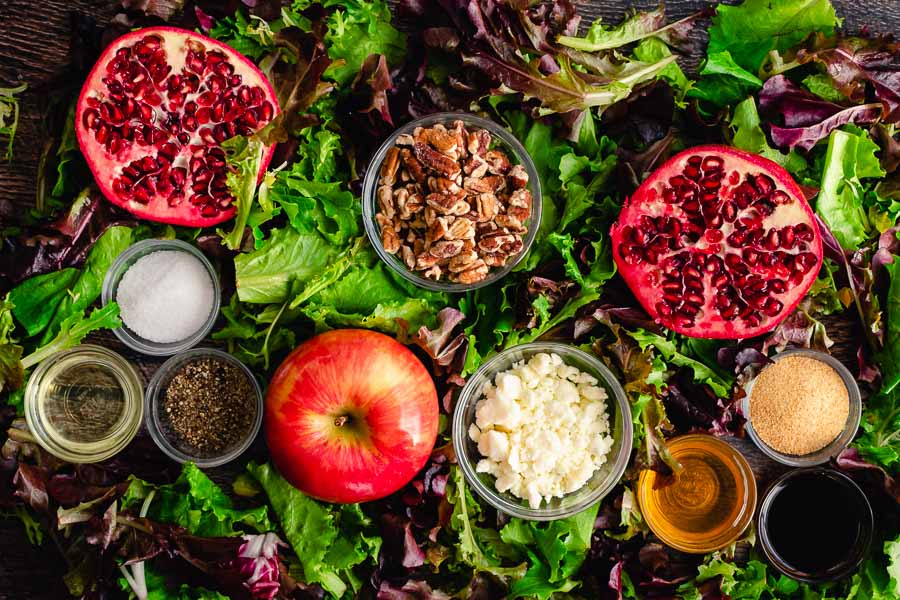
Chopped pecans, pomegranate seeds, garlic powder, balsamic vinegar, honey, crumbled feta cheese, Honeycrisp apple, black pepper, salt, and olive oil

The Process

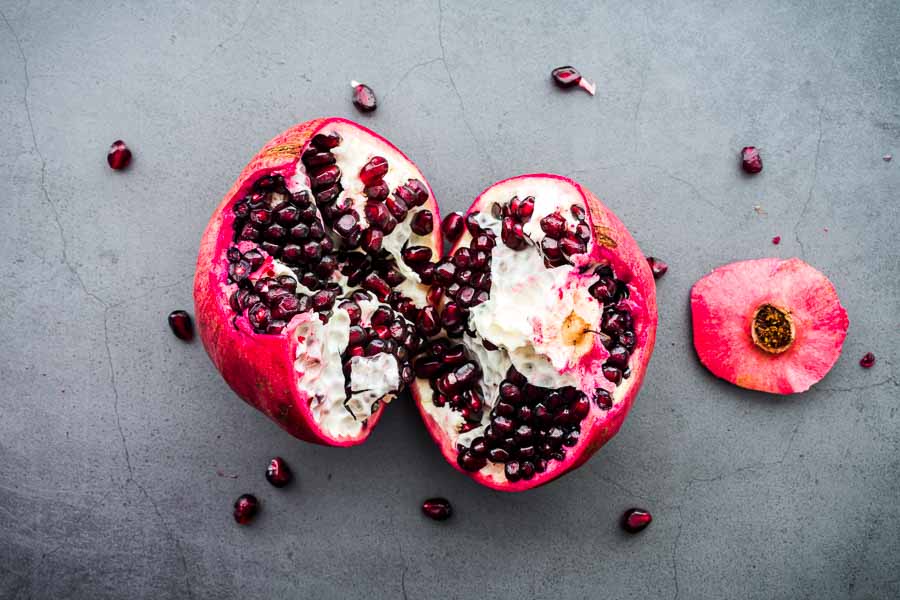
Once in a while, I can find pomegranate seeds, but all I could find on this shopping trip was a whole pomegranate. That meant I had to seed it before I could make my Apple Pomegranate Salad.

I seeded the pomegranate a couple of days before I made my salad. It took me 6 minutes, and 1 pomegranate gave me all the seeds I need with a little extra. Seeding a pomegranate isn’t difficult, but it is messy. I highly recommend doing it in your kitchen sink.

Seeding a pomegranate

When I was ready to make my salad, I was delighted to find it was very easy. Buying pre-washed greens, crumbled feta, and pecan pieces took out a lot of work. I did have to thinly slice the apples, but my apple corer/slicer tool helped a lot. I managed to get 3-4 slices from each wedge.

To get the look in the photo I did not mix the ingredients. I added the greens and then placed the sliced apples around the bowl. Then I sprinkled on the toppings and about half the pomegranate seeds.

One cup of pomegranate seeds is a lot! They would have covered everything else, so I kept them on the side for photos. I added them in when I mixed the salad right before we ate.

The final step was to add the dressing ingredients to a bottle, shake, and pour over the salad. I poured some of it over the salad and mixed it. The bottle was placed on the table when I served it so more could be added if desired. Everyone did because it was so good!

The salad potion took me 8 minutes. That’s over the 5-minutes total listed, but I have to admit I took my time slicing the apples so they looked good for photos. I’m sure it will go faster next time I make it.
Pecan Pie Baked Oatmeal

0

‘Tis the season for pecan pie! If you didn’t get enough (or, perish the thought, any) at Thanksgiving dinner fear not for I have the next best thing: Pecan Pie Baked Oatmeal. It promises to be a quick and easy recipe for a healthy breakfast reminiscent of that Autumn dessert favorite. I know, I know, pecan pie and healthy are a bit of a contradiction. I’m calling this one an ironic fusion recipe and giving it a go since I didn’t get any pecan pie at Thanksgiving (don’t worry—there was plenty of pumpkin pie!).

This delicious pecan pie baked oatmeal recipe can be made ahead and enjoyed all week for an easy, healthy fall breakfast that tastes like dessert!

Recipe Author: Kaleigh at Lively Table
Get the recipe

The Ingredients

I must admit I’m an instant oatmeal person. For me, making oatmeal means emptying a packet into a bowl, adding water, and microwaving for a minute. This Pecan Pie Baked Oatmeal was a little more involved.

First, this recipe uses the real deal oats and not the instant freeze-dried (or whatever they do with them) stuff. There were several more items that I happened to mostly have. My pantry was stocked with brown sugar, cinnamon, and sea salt. I even hand some golden flaxseed stored in my refrigerator (it’s great in smoothies).

I had to buy the rest of the items, but they were all easily found at my regular grocery store. The recipe gives the option of coconut oil or butter. I opted for butter since it seemed more pecan-pie-like.

Pecan Pie Baked Oatmeal Ingredients
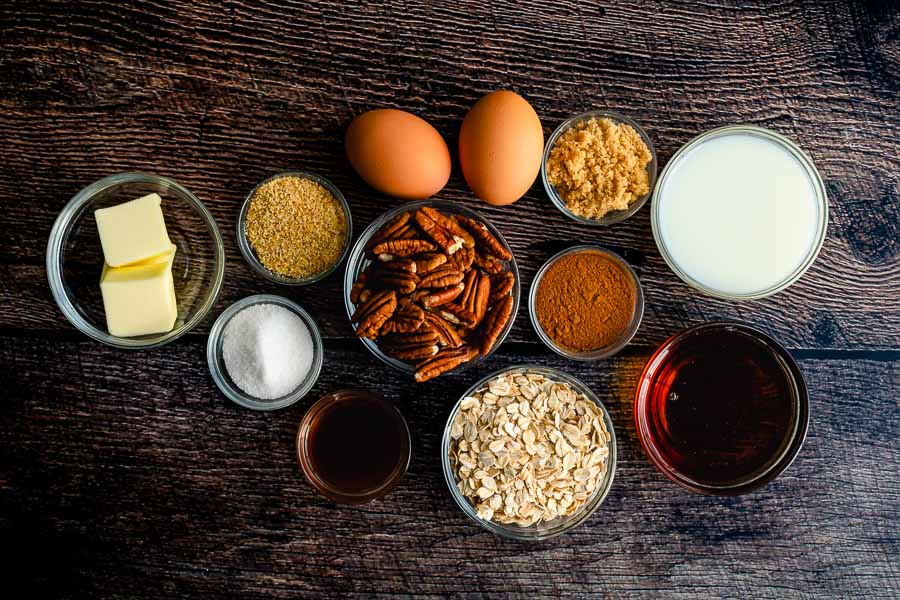
Pecan halved, eggs, brown sugar, milk, maple syrup, cinnamon, rolled oats, vanilla extract, sea salt, butter, and ground flaxseed

The Process

Baking oatmeal is new for me, so I wasn’t sure what to expect. This recipe says it can be done in 30 minutes, which I consider quick.

I started off by preheating the oven and greasing a 1.5-quart oval baking dish. Then I combined the dry ingredients in one bowl and the wet ingredients in another. Once I mixed them together I poured them into the prepared baking dish and baked the oatmeal for 10 minutes.

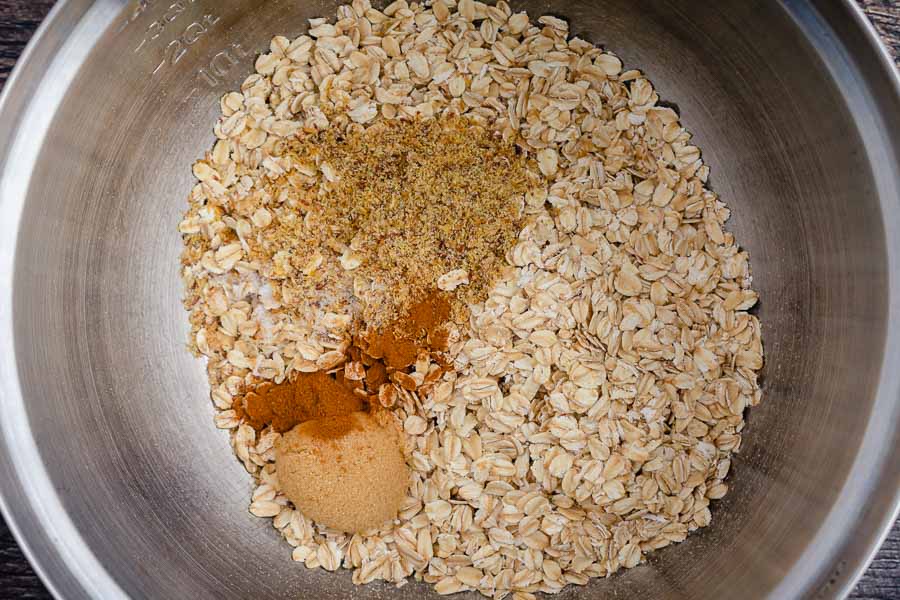
Dry ingredients in a mixing bowl
Rolled oats, brown sugar, cinnamon, ground flaxseed, and sea salt

Meanwhile, I prepared the topping in a saucepan on the stove. It’s basically candied pecans. All I had to do was mix and boil everything but the pecans, then add them and stir well to coat.

The oatmeal was done at almost the same time as the pecans. The next step was to pour the pecan topping over the halfway-baked oatmeal and then let it finish baking. The smell was to die for, but I gave the Pecan Pie Baked Oatmeal a few minutes to cool before serving it warm.

  • 6 minutes to prep
  • 10 minutes to bake
    • 8 minutes to make the topping (done during baking)
  • 15 additional minutes to bake
  • 31 minutes total

Only 1 minute more than the time listed. Wonderful!

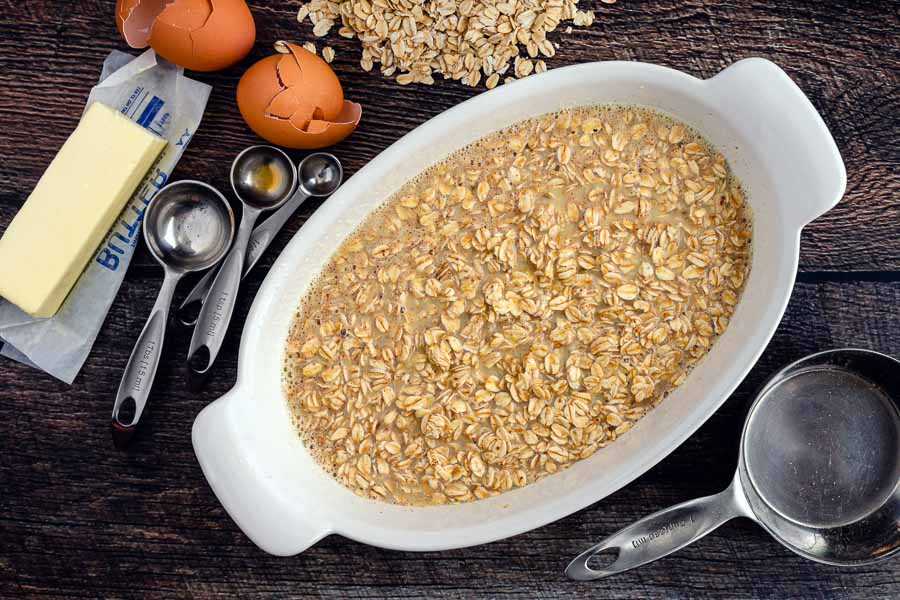
The oatmeal ready to be baked

Thanksgiving Leftovers Galette

Happy Thanksgiving everyone!! Today is just a quick post with a recipe for some of those delicious Thanksgiving leftovers we all love. I normally just use the leftovers for sandwiches and dinner for a few days after the big dinner. And let’s face it, Thanksgiving dinner is a lot for one person to cook even when you keep it simple and spread it over a few days as I did. But this year the dinner doesn’t stop with dessert. No, I have one more recipe to make after Thanksgiving: Thanksgiving Leftovers Galette. It’s all the Thanksgiving dinner goodness surrounded by a flaky pastry crust, and it looks divine.

If you plan ahead and are making pies for Thanksgiving, then just make extra pie dough for the galette! Just refrigerate the dough and use it later for the galette.

Recipe Author: Todd & Diane at White on Rice Couple
Get the recipe

The Ingredients

I love recipes that use leftovers! Using what you have and reinventing it to make another meal is convenient and efficient. And tasty. Mostly that last part!

When I was putting away my Thanksgiving dinner leftovers I set aside the filling for this recipe. The ingredients for the crust were all things I had on hand like flour, butter, and kosher salt. That made this a zero shopping necessary recipe.

Tip: The recipes for the galette fillings can be found in my post for Thanksgiving Stuffed Porchetta-Style Turkey Breast. There is also a downloadable menu that includes a shopping list, equipment list, and schedule.

Assembling the Thanksgiving Leftovers Galette

The Process

Making this Thanksgiving Leftovers Galette was so quick and easy! I made the dough for the crust during my Thanksgiving dinner prep, and I loved the new method.

Most pie crusts are blended with a food processor or with a pastry cutter. I have even read that you can use 2 forks, but I have never tried that method. This galette’s instructions said to blend the butter into the dry ingredients using your fingers.

It sounded counterintuitive because the butter for pastry crusts needs to be cold, but it worked. Not only that, but I had the crust made in a mere 6 minutes. That’s about half the time it takes me with a pastry cutter or the same as a food processor. The bonus here is I didn’t have to wash the food processor blade and bowl after.

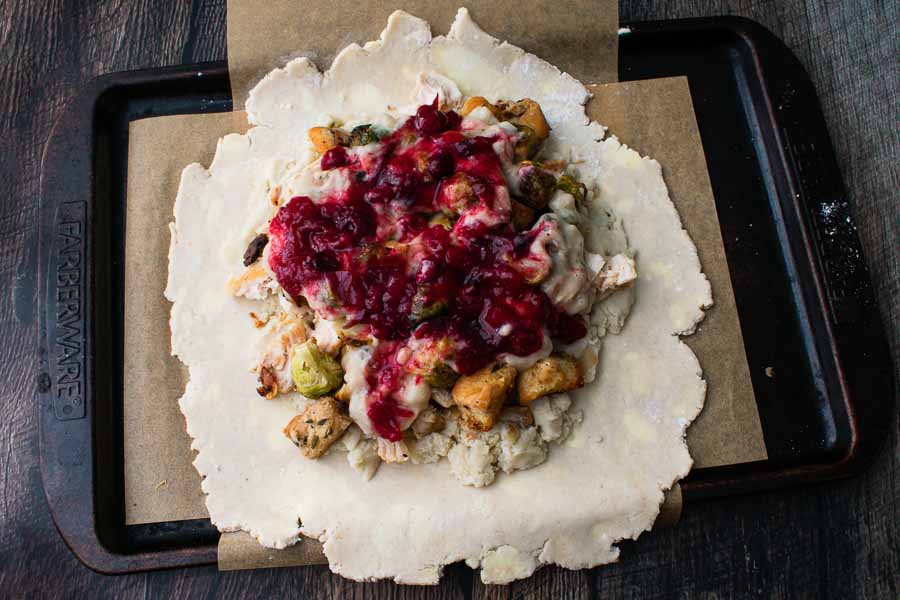
I made the galette a couple of days after Thanksgiving dinner. I have to admit I wanted a night off of cooking after all that work! But putting this together was crazy easy. I just rolled out the dough and layered in the leftovers. I think the order from bottom to top was:

  1. mashed potatoes
  2. shredded turkey
  3. stuffing
  4. Brussels sprouts
  5. gravy
  6. cranberry sauce

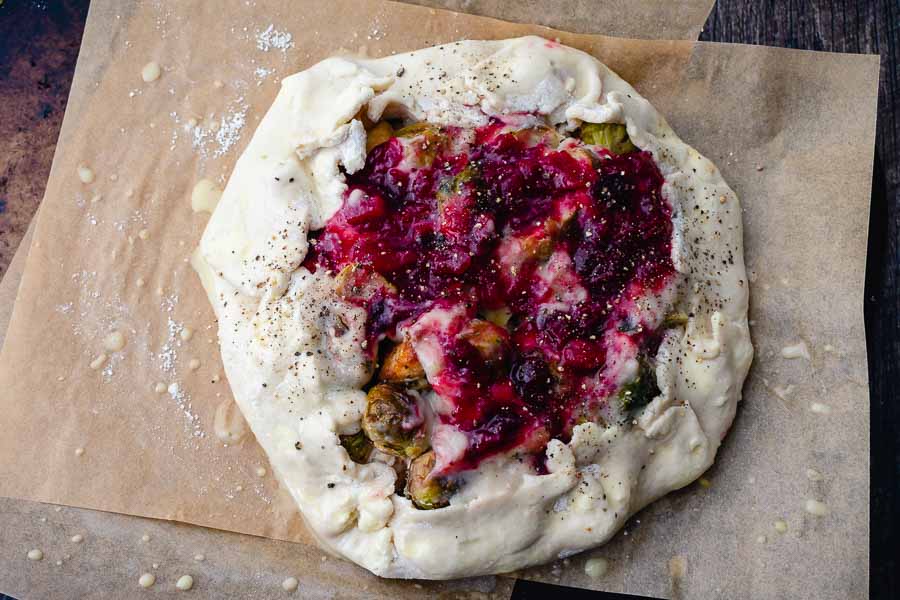
The instructions don’t say this but I halved the sprouts because the filling was piling up. It helped keep it thin and spread the Brussels sprouts out better. Once that was done I pinched the edges closed, brushed them with egg wash, and baked the galette for 50 minutes. The results were spectacular!

The assembled galette brushed with egg wash and sprinkled with pepper

Fall Sangria

0

Every Thanksgiving dinner needs a cocktail, and my 2022 Thanksgiving menu has Fall Sangria. It’s loaded with fruit with cinnamon, maple syrup, and bourbon. But what struck me was this sangria is white wine based. I cook with it all the time, but I’m not a big white wine drinker. That made me a little hesitant, but I decided to take a risk because it sounded so perfect for my menu. It promises to be quick and easy and makes up a whole batch of drinks at once. This sounds like it’s made for parties and get together, so let’s find out if it lives up to its name!

You can find my 2022 Thanksgiving Menu as a free downloadable Google Doc. It includes a schedule, a shopping list, and an equipment list. The checkboxes on the lists are interactive and cross off each item when you click them. You may also print it or save it and make any changes you like.

This Fall Sangria with apple cider, bourbon, and wine is loaded with fresh apples, pears, and plums for a gorgeous fall beverage!

Recipe Author: Courtney at NeighborFood
Get the recipe

The Ingredients

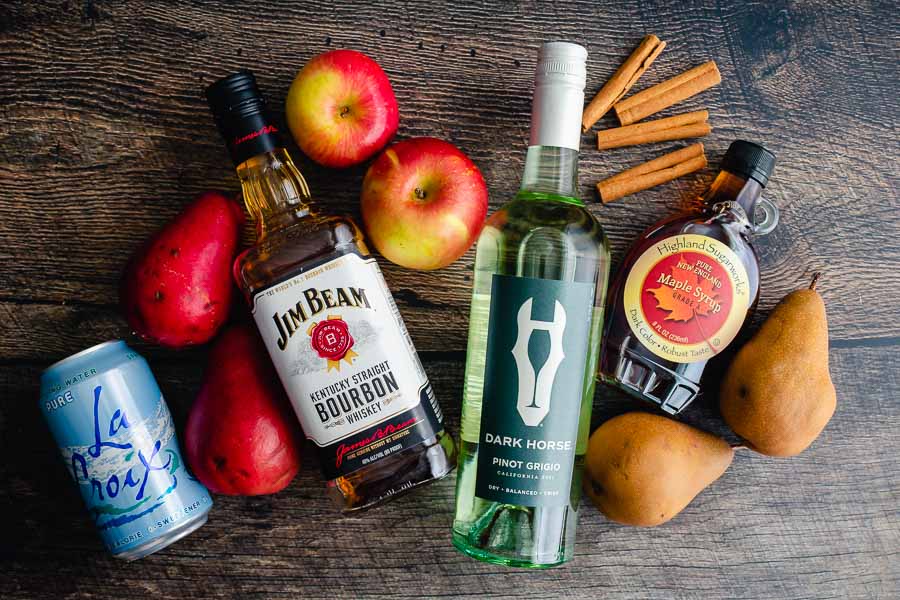
I tend to keep bourbon and club soda stocked, and usually maple syrup. The real thing–it’s worth the extra expense, trust me. The rest I had to shop for.

Most of the ingredients were easy to find at my usual grocery store except the plums. I searched at least three stores and never found them. Fortunately, this recipe does invite customization, so I used red pears instead.

Fall Sangria Ingredients
Fuji apples, pinot Grigio, cinnamon sticks, maple syrup, Bosc pears, bourbon, Anjou pears, and club soda

The Process

Sangria is easy to make, and this recipe was no exception. Just chop the fruit, add it to a pitcher with a few other flavorings plus the liquor, and stir well. But things didn’t go exactly as planned.

I used my largest ‘pretty’ pitcher, and the chopped fruit alone filled it almost to the top. It had just enough room to add the wine, bourbon, maple syrup, and cinnamon sticks, but not enough for the apple cider and club soda.

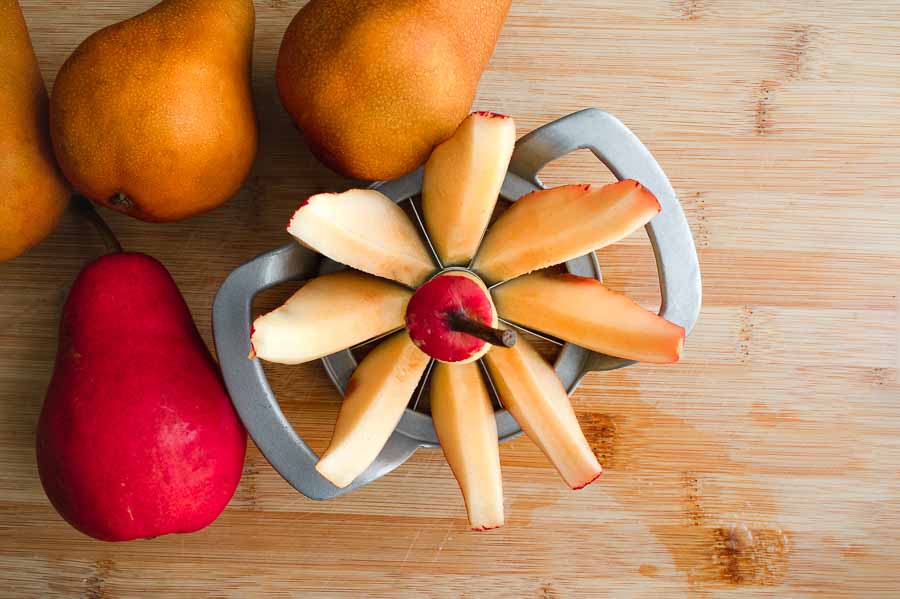
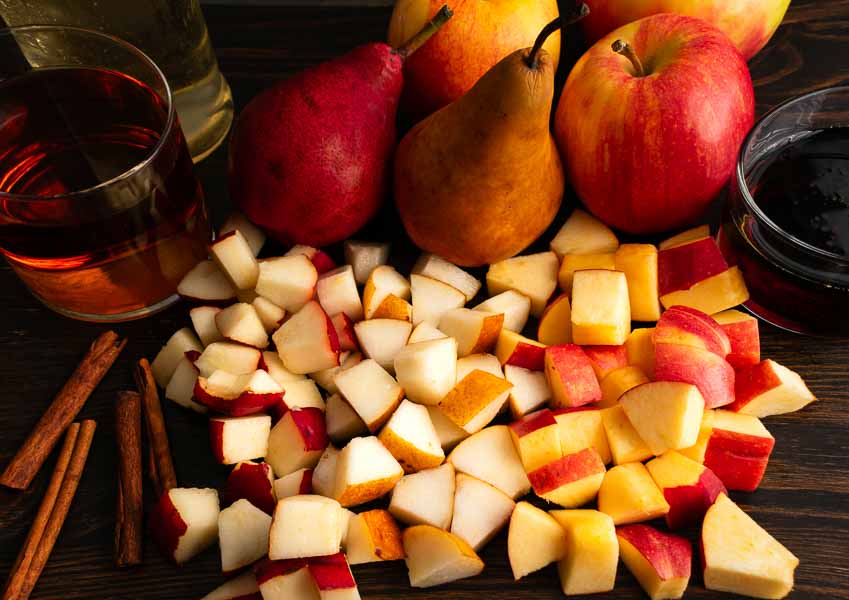
Coring and slicing a pear
My apple corer/slices also worked for the pears

I had a mild panic moment until I remembered I wasn’t using my iced tea maker’s pitcher. It’s 3+ quarts, and it held everything with room to stir. Tip: The fruit and liquids filled the pitcher to the 2-quart mark (64 ounces). It wasn’t as pretty as the pitcher I originally chose, but it did the job. All I had to do was cover it with plastic wrap and let it infuse overnight in the refrigerator.

The next day I stirred in the club soda and transferred the sangria to a prettier pitcher to serve. I was able to fit about half the fruit into that pitcher with the sangria, so I held the rest to garnish each glass of sangria. And yes, the sangria-infused fruit was delicious too!

Chopped pears and apples

Salted Caramel Apple Galette

0

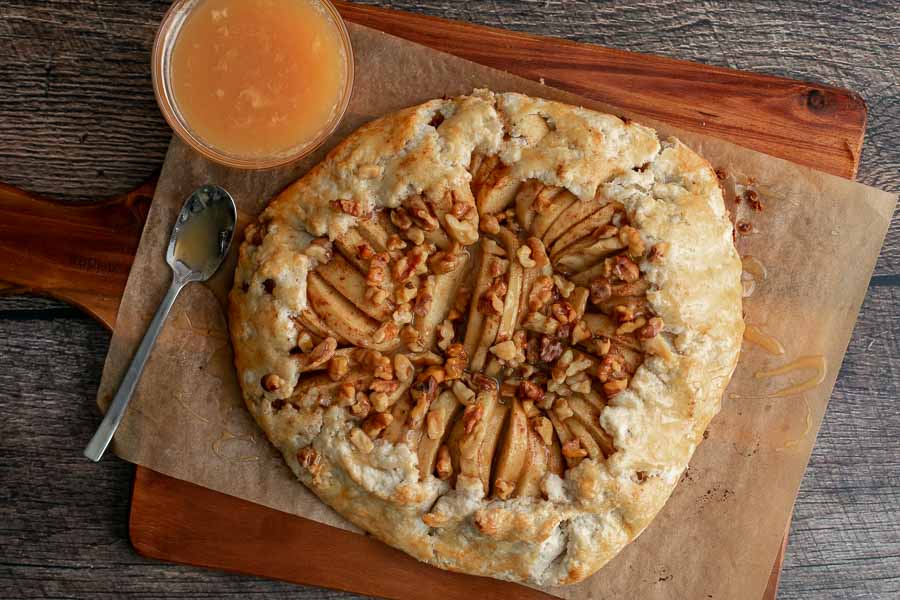
I wanted my Thanksgiving dessert to be easy to make and store this year. I know cheesecake is very popular this time of the year, but it was a little more work than I wanted to put in. My next choice was pie, but it had to be a single crust. I wasn’t in the mood to attempt latticework. Then I came across this Salted Caramel Apple Galette, and I knew my search was over. This rustic deconstructed pie was the answer! Apples and cinnamon are perfect for this holiday, and it doesn’t even need a pie pan. My Thanksgiving dinners are pretty informal, so this galette recipe fits right in. Let’s give it a try!

You can find my 2022 Thanksgiving Menu as a free downloadable Google Doc. It includes a schedule, a shopping list, and an equipment list. The checkboxes on the lists are interactive and cross off each item when you click them. You may also print it or save it and make any changes you like.

From scratch salted caramel apple galette is as delicious and impressive as pie, but half the work! This easy fall dessert is complete with homemade pie crust and a drizzle of salted caramel. Serve with a scoop of ice cream for the ultimate indulgence!

Recipe Author: Sally McKenney at Sally’s Baking Addiction
Get the recipe

The Ingredients

The ingredients for this Salted Caramel Apple Galette were the same as your typical apple pie with a few extras for the sauce. There is a link included for homemade salted caramel sauce. I know I could have bought it, but I made the caramel sauce because it’s so easy.

The only question I had while making my shopping list was shat type of apples to use. Thankfully the recipe lists a few suggestions. I chose to use a mix of Granny Smith and Fuji apples.

The Granny Smith apples are tart and crisp while the Fuju apples are sweet and have a softer texture. My favorite apple pie recipe uses both, so I did that here too. Using both gives a nice mix of flavor and texture.

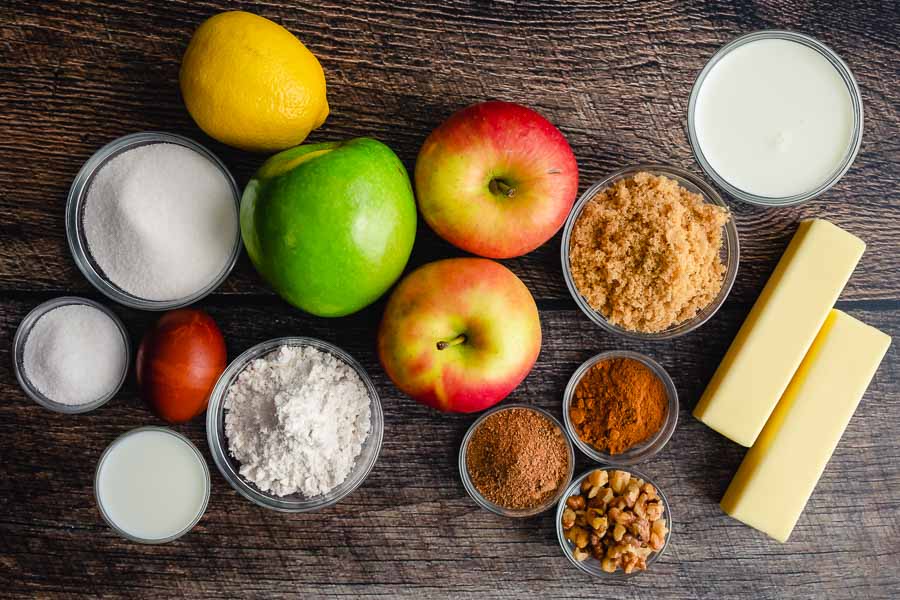
Salted Caramel Apple Galette Ingredients
Granny Smith and Fuji apples, light brown sugar, heavy cream, salted butter, walnuts, cinnamon, nutmeg, flour, milk, egg, salt, sugar, and lemon juice

The Process

There were a few parts to making this Salted Caramel Apple Galette: salted caramel sauce, crust, filling, and baking. I started on it the day before I planned to make the galette. I’m not the greatest baker, but it was pretty easy to make.

Homemade Salted Caramel

I made the salted caramel sauce the day before making the galette. It only has 4 ingredients, so prep work was a quick 3 minutes of gathering and measuring them out.

Things started off with melting the sugar in a saucepan. The recipe says to avoid nonstick but not why. I’m guessing it’s so you can see the color of the sugar as it melts. I do the same thing when making browned butter. Perhaps it’s because a dark nonstick pan makes it hard to see the color and easier to burn.

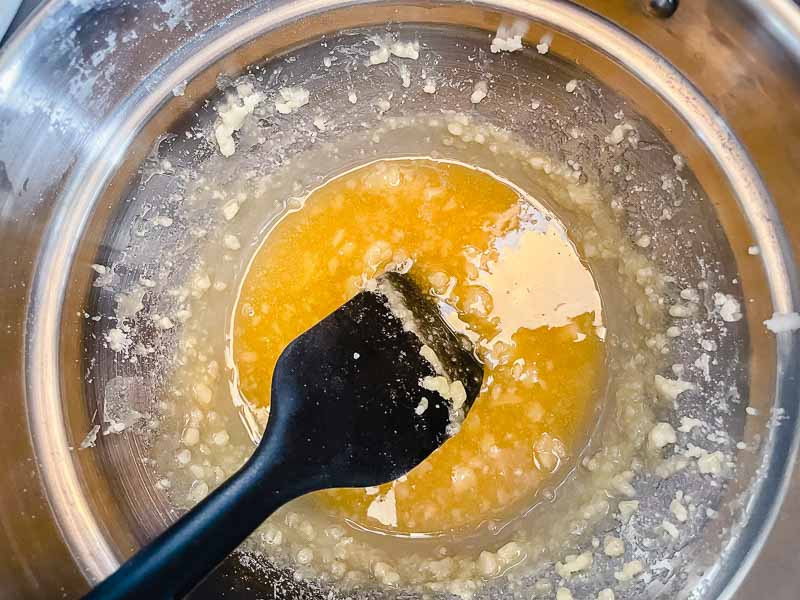
I stirred the sugar for 5-6 minutes before it began clumping and melting. It felt like forever, but things moved fast once the sugar melted. Once the sugar completely melted and turned an amber color I added the salted butter. I noticed some clumps and followed the instructions to remove them, but no joy.

I kept going, though, and slowly poured in the heavy cream. The mixture bubbled a little more than it did when I added the butter, but it wasn’t bad. There was no popping or spattering.

After letting the mixture boil for another minute I removed the pan from the heat and added the salt. It still had clumps in it, so I used a mesh strainer to remove them while transferring the sauce to a storage container. I left the sauce on the counter to cool before putting the lid on and refrigerating.

Making homemade salted caramel sauce
The Homemade Salted Caramel had lumps in it that had to be strained out

Making the Crust

The next step in this recipe was making the dough. I did this the next day. Galette crust is the same as pie crust—mostly flour and cold butter. Some call for a food processor, but this one was mixed by hand.

The recipe says to use a pastry cutter or 2 forks to work the butter into the dry ingredients. I have a pastry cutter so that’s what I used. The dough was a bit dry and I did add the extra 1 tablespoon of cold water mentioned in the instructions. Otherwise, the crust came together perfectly. I had it made into a disk and wrapped in plastic in just a few minutes.

Making the Apple Filling

The filling took about the same amount of time to make as the crust. I started out by peeling the apples with a vegetable peeler. Then I cored them with an apple corer/slicer. If you happen to have a hand-cranked apple peeler/corer/slicer you can do everything at once. I do but I kind of forgot about it LOL!

The wedges needed to be cut into thinner pieces, so I used a chef’s knife to cut each wedge lengthways into 3-4 thin pieces. Once that was done all I had to do was mix the slices with the rest of the filling ingredients and chill for an hour.

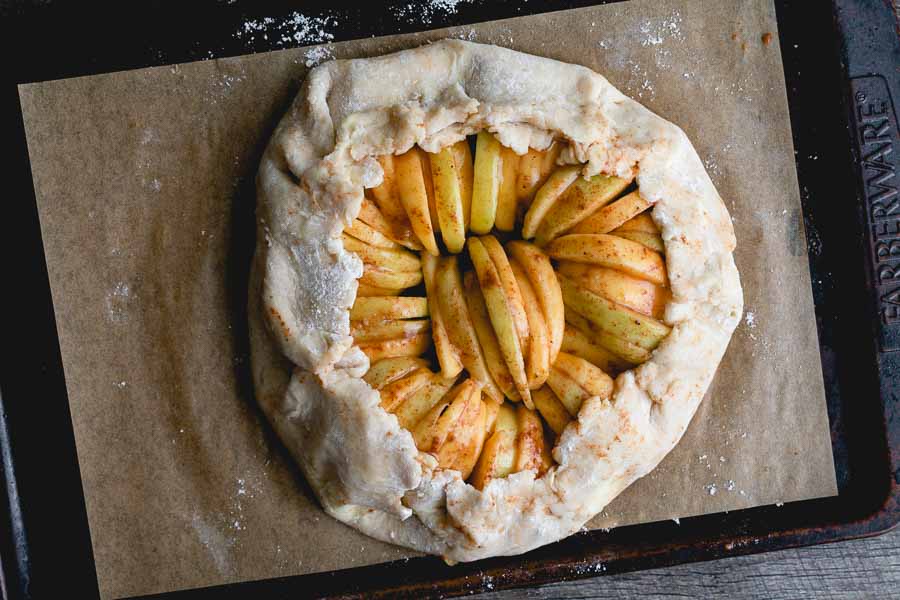
Assembled Salted Caramel Apple Galette before baking

Assembling & Baking the Salted Caramel Apple Galette

The dough finished chilling a few minutes before the filling giving me time to roll it out and place it onto a parchment paper-lined sheet pan. Tip: The dough needs to be rolled into a 12-inch circle. I use a floured 17'x12' cutting board as a work surface so I don’t have to measure.

Once I moved the flattened dough onto the sheet pan I drained the chilled filling using a large colander. Then I placed the pieces of apple onto the galette dough and pinched the sides up to contain them.

A short bake for 35 minutes and my Salted Caramel Apple Galette. I let it cool then wrapped it tightly and stored it in the refrigerator until dinner the next day. Removing it and the salted caramel sauce from the oven about 2 hours before dinner brought them up to room temperature for serving. Of course, you can always reheat it if you wish to serve it warm (the microwave is perfect for this if the oven is tied up).

Timing

The recipe for the galette and sauce both list prep, cook, and total times. My times came very close. I’m listing them below with the recipe times in parentheses.

Homemade Salted Caramel

  • 3 minutes to prep (5 minutes)
  • 22 minutes to cook (15 minutes)
  • 25 minutes total (20 minutes)
Salted Caramel Apple Galette

  • 1 hour 23 minutes to prep (1 hour 20 minutes)
    • 11 minutes to prep the crust
    • 1 hour to chill
      • 10 minutes to prep the filling (done while the dough chilled)
    • 12 miutes to assemble
  • 35 minutes to bake
  • 2 hours 8 minutes total (2 hours 10 minutes)
My time was slightly over on the sauce and slightly under on the galette itself. Overall, the total time was very close to what the recipes listed.

Salted Caramel Apple Galette with Homemade Salted Caramel

Thanksgiving Stuffed Porchetta-Style Turkey Breast

Thanksgiving is here, and I’m so excited! I have gotten a later start on it than normal because life has been hectic, but I’m ready to get cooking. It’s the most challenging meal for me physically because of my disabilities, but I’m not going to let them keep me from my favorite meal of the year. I designed this menu to spread the work over a few days and even included a recipe for the next day with Leftover Thanksgiving Galette. I’m also not going to post a review for each and every side. Instead, I’m going to blog about the most important parts of the menu starting with the main course: Thanksgiving Stuffed Porchetta-Style Turkey Breast.

I have made many styles of turkey over the years, and this is a new one. I even tried stuffed turkey tenderloins but never stuffed turkey breast. This one is a lot like the matambre and porchetta I blogged about a few years ago, just with all the Thanksgiving fixings. Well, most of them. The photo shows a slice served over mashed potatoes and green beans and topped with gravy and cranberry sauce, but they are not part of the recipe.

Never fear, I have those covered! I am also making Crockpot Mashed Potatoes, Classic Southern Gravy, and Apple Cranberry Sauce with Cider & Cinnamon. That recipe for leftovers I mentioned calls for leftover Brussels sprouts, so I switched the green beans for Roasted Brussels Sprouts with Garlic Butter. I make green beans every year, so I’m kind of glad to be switching things up. I always love to try new things!

You can find my 2022 Thanksgiving Menu as a free downloadable Google Doc. It includes a schedule, a shopping list, and an equipment list. The checkboxes on the lists are interactive and cross off each item when you click them. You may also print it or save it and make any changes you like.

Instead of basic roast turkey, break with tradition and make bacon-wrapped turkey ‘porchetta.’

Recipe Author: Tastemade
Get the recipe

The Ingredients

I did my shopping for this recipe in early November, so finding most of the ingredients wasn’t a problem. The only item I couldn’t find at my regular grocery store was fresh rosemary, but it was available at another nearby store.

I also couldn’t find a boneless, skinless half turkey breast. I did find one with bones and skin, though, and deboned it myself. It only added a few minutes of extra work to the recipe but was not difficult to do at all.

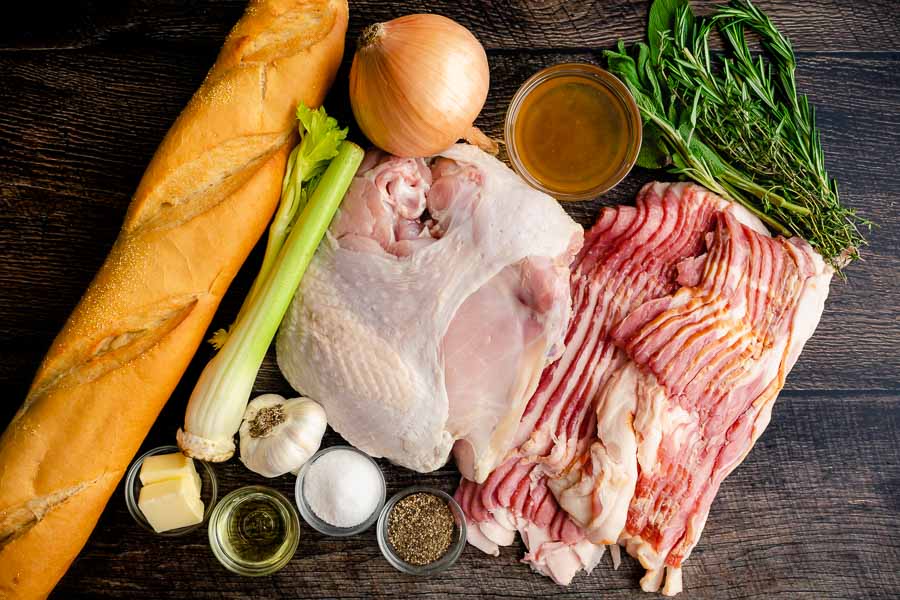
Thanksgiving Stuffed Porchetta-Style Turkey Breast Ingredients
Turkey breast half, onion, chicken stock, sage, rosemary, thyme, bacon, thick cut bacon, pepper, salt, olive oil, garlic, butter, celery, and sourdough bread

The Process

This recipe had a lot of prep work! I started off by skinning and deboning the turkey breast. It went quickly and only took me 8 minutes. I also removed some smaller pieces of meat from the ribcage and kept them in case I needed to patch any holes. They came in handy later during assembly.

Next, I shopped the 3/4 pounds of bacon and started cooking it in a large 12-inch skillet. It took a while to crisp up, and I used that time to finish most of the other prep work. The only thing I didn’t get to was butterflying and pounding the turkey breast.

Once the bacon had crisped I added the butter with the diced onion and celery to the pan. There was a lot of bacon grease, and I was tempted to drain it. The recipe didn’t say to do that, so I resisted the urge.

I was able to butterfly and pound the turkey breast while the vegetables were cooking. Tip: Place the turkey breast between two pieces of plastic wrap before pounding them. It keeps gross turkey juice from contaminating your kitchen. Tip: Use the flat side of your meat mallet. The spiked side may tear and/or weaken the meat and cause holes.

Assembly

After that, I finished up the stuffing and got ready to assemble my turkey roll. This part didn’t go as smoothly as the video, but I got it done. A big part of the problem was my bread cubes were too big. I think much smaller cubes or even crumb-style would have worked better. When it was all done I only got about half of the stuffing into the roll. I placed the rest into a small bowl and cooked it during the first half of the turkey’s cooking process.

Another issue was the stuffing was very hot. I should have waited for it to cool some. Also, a hole tore in the turkey as I was rolling it up. Remember those smaller pieces of turkey I mentioned at the beginning? I just placed the largest one over the hole (under the stuffing) and it patched the hole.

Once the turkey was rolled I cut a long piece of kitchen string and wrapped that sucker up. I did it as shown in the video with a minor change. Tip: When I got to the end I brought the remaining string under the roll longways and tied it to the string at the start. It helped hold in the filling that kept falling out of the ends of the roll.

Cooking

My turkey roll was ready to cook! I popped it onto a sheet pan, added a little seasoning, and a drizzle of olive oil, and placed it in the preheated oven. I let it cook for 40. minutes then removed it so I could wrap it in more bacon.

And I forgot to remove the string. I was so worried about the bacon wrap that I completely missed that step. I just wrapped the turkey in bacon, tucked the ends underneath, added a meat thermometer, and put it back into the oven. But I did remember to increase the oven temperature LOL. And the twine wasn’t hard to remove when I sliced the turkey, so no biggie.

My meat thermometer beeps when the desired temperature is reached, so I washed up and began some other prep work. It took another 37 minutes for the turkey to reach 160℉. Then I removed the turkey from the oven and let it rest while I made the Brussels sprouts.

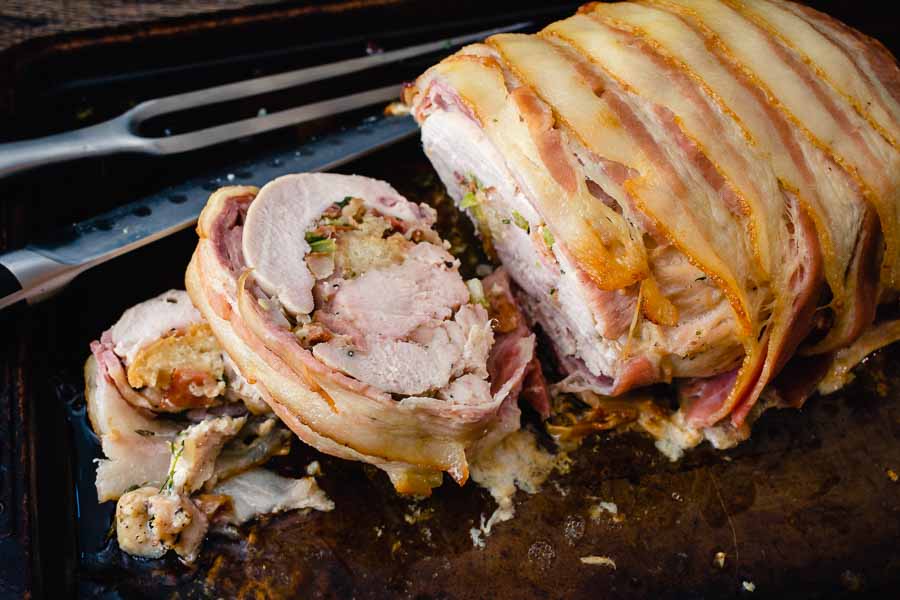
Sliced Thanksgiving Stuffed Porchetta-Style Turkey Breast

Timing

  • 5 minutes to cube bread for stuffing (I did this 2 days before cooking)
  • 37 minutes to prep
  • 40 minutes to cook
  • 3 minutes to wrap in bacon
  • 37 minutes of additional cooking
  • 15 minutes to rest
  • 2 hours 24 minutes total
The recipe lists a total time of 1 hour 35 minutes, but it took me significantly longer. Removing the extra time for cubing the bread and skinning and deboning the turkey breast only removes 12 minutes. I’m guessing the slowdown was in several things.

First, there were no cooking times listed for the bacon and stuffing, so I had to use my best judgment. Also, I’m sure assembling the roll took me longer because I had to struggle with it a little. Finally, the last stage of cooking was to temperature instead of a set time. Mine took seven minutes longer (not including resting time).

Vanilla Maple Whiskey Cupcakes

0

Today is another food holiday that I had no idea existed: National Vanilla Cupcake Day. I have blogged a few recipes with vanilla-ish cupcakes, but they all had some other flavoring in them too. I realized I have never blogged any truly vanilla cupcakes, so I had to rectify that with these Vanilla Maple Whiskey Cupcakes. Plain vanilla is good, but adding maple and whiskey has to be even better, right?! Well, I’m betting it does, so let’s find out.

These Vanilla Maple Whiskey Cupcakes are a boozy delight, with a buttery maple center and a vanilla whiskey buttercream. A perfect grown-up birthday treat!

Recipe Author: Brandy at Savory Simple
Get the recipe

The Ingredients

The ingredients for this recipe were typical for cupcakes. I had a few things on hand like baking powder, salt, vanilla extract, maple syrup, and whiskey. I love bourbon, so that’s what I used.

There was some sugar and flour in my pantry, but not quite enough. I also needed butter and eggs. If you’re wondering, this recipe uses 9 sticks of unsalted butter. I know!

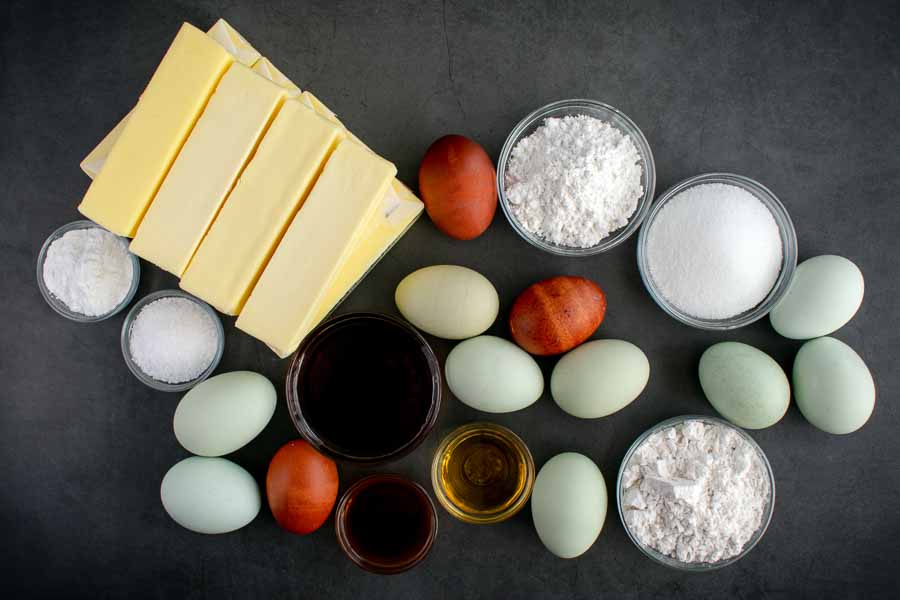
I decided to order my groceries from Instacart that week, and that’s what led to the blue and brown eggs. The shopper swapped my order of regular brown eggs for heritage eggs. They were double the cost, but I have to admit they were very pretty.

Vanilla Maple Whiskey Cupcakes Ingredients
Unsalted butter, eggs, confectioner’s sugar, granulated sugar, flour, bourbon whiskey, maple syrup, vanilla extract, salt, and baking powder

The Process

This Vanilla Maple Whiskey Cupcakes recipe has four parts: batter, filling, frosting, and assembly. The total time listed was 1 hour and 10 minutes. I’m not the greatest baker so I expected to go over that and I did. My total time was 1 hour and 40 minutes. Here’s how my time was spent:

  • 17 minutes to prep the batter
  • 20 minutes to bake the cupcakes
    • 11 minutes to make the filling (during baking)
  • 49 minutes to make the buttercream
  • 7 minutes to core and fill the cupcakes
  • 7 minutes to pipe the buttercream
  • 1 hour 40 minutes total
Making the Cupcakes

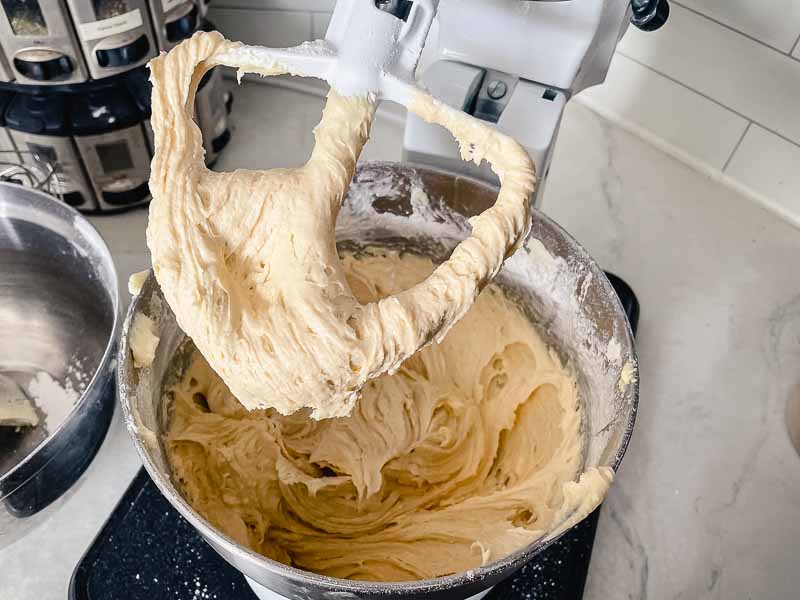
This was the easiest part of the entire recipe. Everything went according to the recipe, and I’m glad I had a powerful stand mixer. I’m not sure if you can tell, but the batter was extremely thick. So thick that it couldn’t be poured into the cupcake pans. It was more of spooning it in, and it was hard to tell if I did that evenly because the batter didn’t settle evenly in the cups.

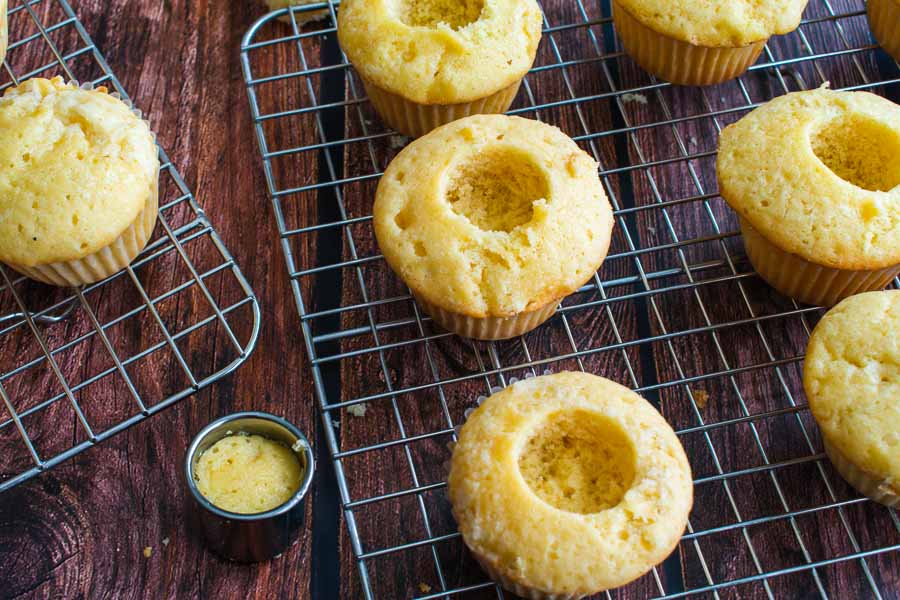
The baking time was spot on for me, and both pans passed the toothpick test after 20 minutes. When they were done I set them aside on wire racks to cool while I worked on other parts of the recipe.

Mixing the cupcake batter in a stand mixer
The batter for the cupcakes was very thick. It had to be spooned into the pan because it was too thick to pour.

Making the Filling

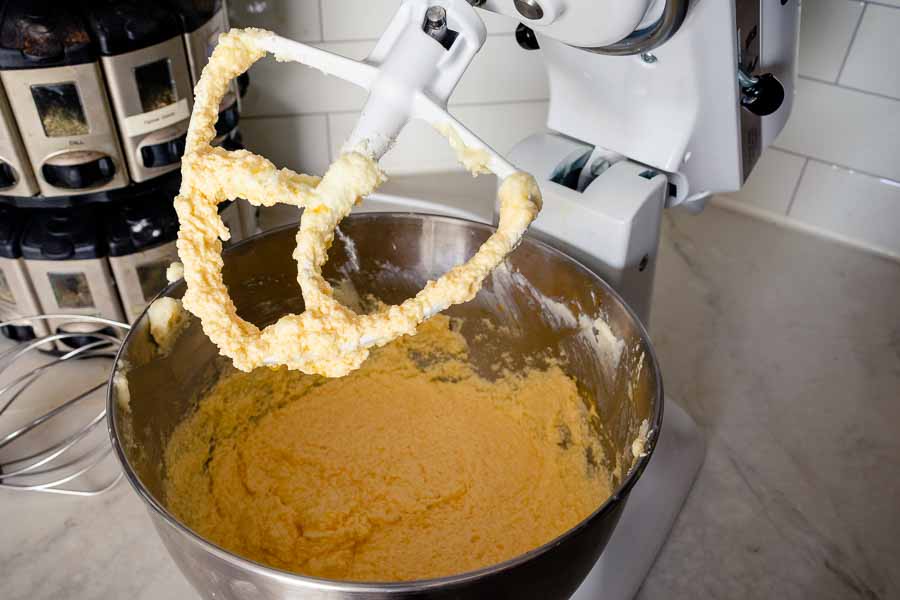
I washed my stand mixer’s bowl and paddle attachment while the cupcakes baked, then I began the maple whiskey filling. It didn’t go as smoothly as the batter. The recipe does warn that the filling will break if the ingredients aren’t at room temperature, but I’m sure mine were.

I had set all my butter and maple syrup out on the counter the night before since the recipe said they had to be at room temperature. The house is kept pretty cool, but the butter warmed up too much. I added the filling ingredients to the stand mixer and mixed and mixed. But no matter how much I mixed it, the filling just wouldn’t come together. You can see it in the photo below.

I grabbed a couple of gel ice packs from the freezer to fix the filling. I held them on the sides of the bowl to cool the filling slightly. The butter thickened enough for the filling to come together, and it ended up with a texture like a buttercream frosting.

Mixin the maple filling
The filling wouldn’t come together until I used gel ice packs to cook the stand mixer bowl

I put the filling into a piping bag and set it aside while I cored the cupcakes. The second smallest size of my biscuit cutters worked perfectly for this job. Most of the cores came out when I pulled out the cutter. A few didn’t, but I was able to dig them out with a small spoon.

Coring the cupcakes with a round biscuit/cookie cutter

Making the Buttercream

I have made plenty of American buttercreams but this was my first time making Italian meringue buttercream. It got off to a rough start. I put the sugar and water on the stove and began separating the eggs.

Since I bought a dozen eggs, I only had just enough left over for the frosting. I had left them out on the counter after making the cupcake batter, and they warmed up to room temperature. Apparently, that’s bad and makes the yolks fragile.

I tried separating two and broke both yolks. Spooning out the broken yolks was hopeless. I had to send my husband to the store for another dozen eggs. I wanted extra in case I broke more yolks, but I’m happy to say I didn’t. The cold egg yolks held up, but I did separate them one at a time to be safe.

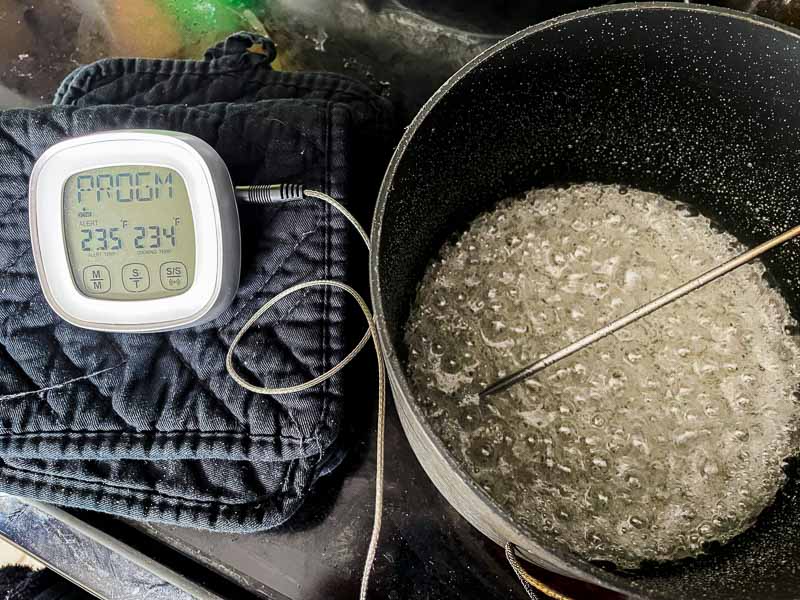
When he got back I started the syrup and then the meringue. I don’t have a candy thermometer, but my meat thermometer worked just fine. I used a custom setting and set it to beep when it reached the temperature. Below is a quick shot of how it looked by the end.

Boiling sugar and water to make syrup
The syrup just as it was reaching the temperature

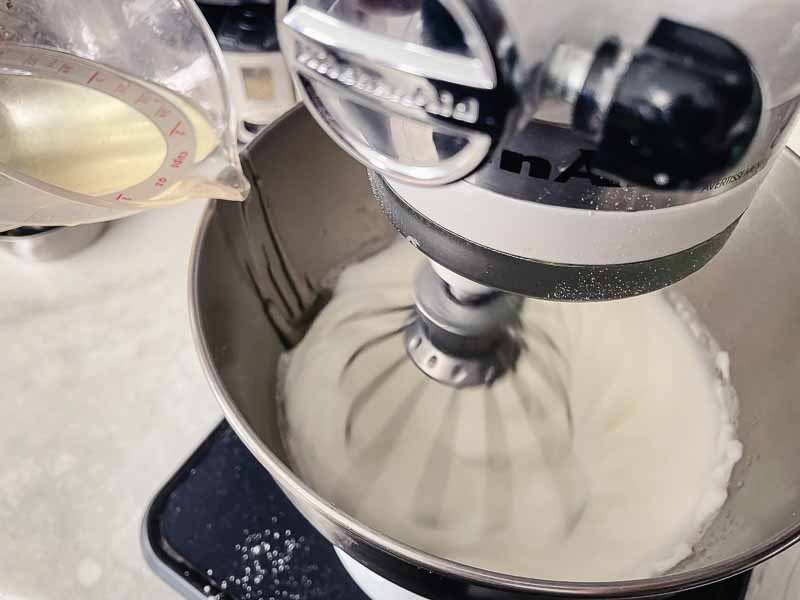
I transferred the syrup to a measuring cup with a handle and a pour spout to make it easier and safer to add to the meringue. Then I slowly poured it down the side of the bowl while the mixer worked. Very, very slowly.

Mixing syrup with beaten egg whites
Slowly drizzling the syrup down the side of the stand mixer bowl

I was afraid I would end up with an egg-white omelet, but things went just as described. After it mixed for 20 minutes I slowly added the butter cubes then whiskey and vanilla. And I ended up with a similar situation as the filling.

The buttercream just wouldn’t quite come together. Close, but not quite. The blog post links to a detailed article about various types of buttercream and troubleshooting tips if they break (I’m assuming I added the butter too fast). I would have tried the method described if I hadn’t successfully fixed the broken filling with ice packs. I tried it again, and it fixed the buttercream too. Whew!

It took me filling another piping bag three times to finish up my Vanilla Maple Whiskey Cupcakes. This is where I have to admit I’m not great at piping frosting and I tend to overdo it. I topped the cupcakes a little too generously and ran out after 22. I had to take some extra frosting from two other cupcakes to completely finish them all. It wasn’t pretty, but they tasted good!

Easy Split Pea Soup with Ham

One of the things I enjoy most about this blog is trying new food, and that’s exactly what I’m doing today with this Easy Split Pea Soup with Ham recipe. My dad loved split pea soup and my father-in-law does too but I have never tried it let alone made it. Until now, that is. Why the sudden interest?, you might ask. Because today is the start of National Split Pea Soup Week. Yes, week. Apparently, a day isn’t enough to appreciate this dish. Between that and my dads’ endorsements, I figured it was finally time to find out if I also like peas made into soup. Let’s find out!

Smoky, hearty, and full of protein, this Easy Split Pea Soup with Ham is a meal worth savoring!

Recipe Author: Katerina at Diethood
Get the recipe

The Ingredients

I had a few basics like butter, olive oil, and spices on hand as well as some chicken broth base. That left me to buy the fresh produce and split peas, which was easy to do at my usual grocery store.

The only item I had questions about was the ham hocks. The recipe doesn’t say whether they should be fresh or smoked, and I wasn’t sure which to use. It does mention using a meaty ham bone as an alternative, and that made me think fresh was the way to go. However, it also describes the soup as “smoky” and says not to use too much salt because the ham hocks are salty, which says smoked to me.

Well, the store made the decision for me because they only had smoked ham hocks in stock. I have to tell you I was very glad about this as soon as I took my first bite. Sure fresh would have had more meat, but that smoked flavor is so good!

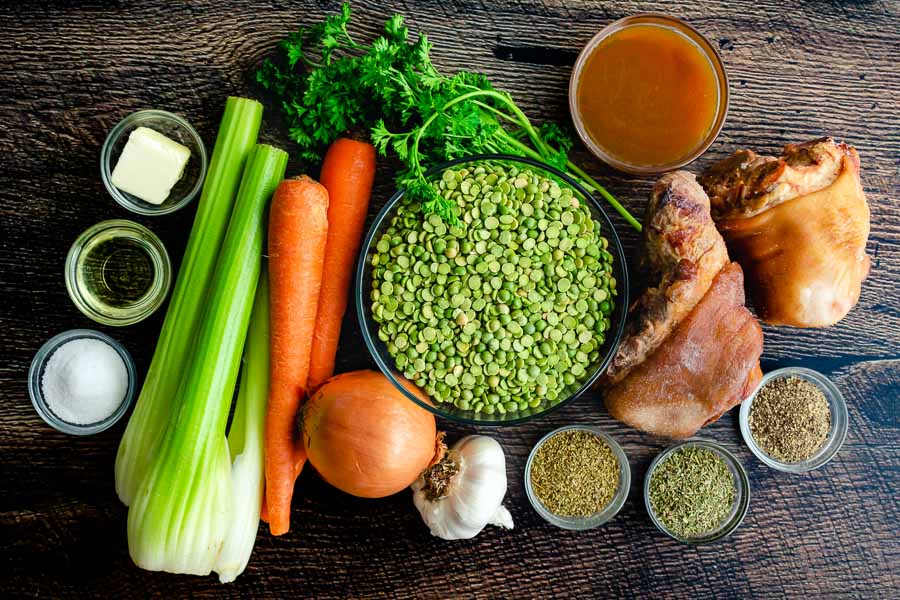
Easy Split Pea Soup with Ham Ingredients
Split peas, parsley, chicken broth, smoked ham hocks, black pepper, thyme, oregano, garlic, onion, carrots, celery, salt, olive oil, and butter

The Process

I truly enjoy making well-written recipes, and I’m happy to say this is one of them. The instructions were clear and easy to follow once I had the ham hock issue sorted.

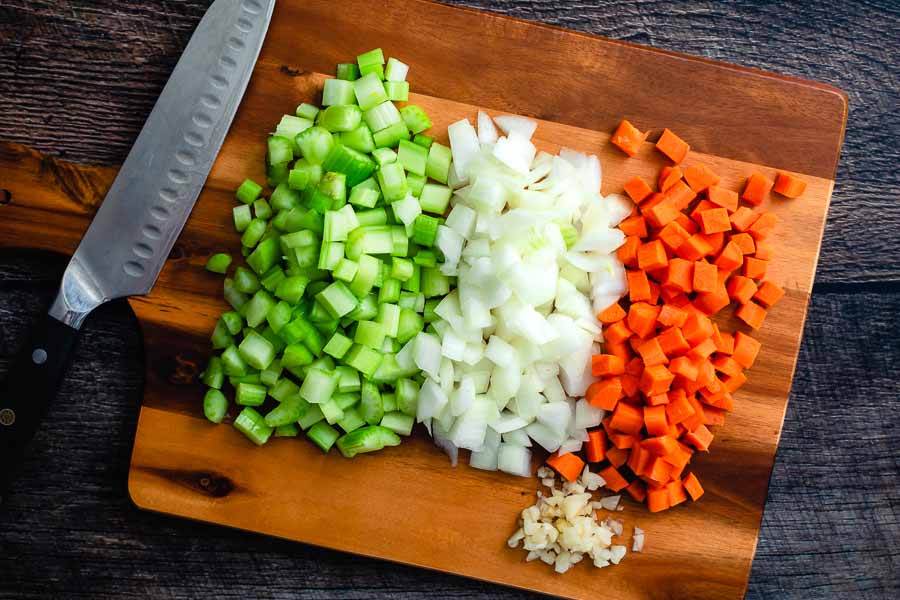
I spent a few minutes prepping the ingredients before I began cooking. This recipe moves fast and doesn’t allow my usual prep-while-cooking method. Eight minutes and a little chopping, and I was ready to cook.

Prepped vegetables on a wood cutting board
Diced celery, onion, and carrots with minced garlic

My 5.5-quart cast-iron Dutch oven came in handy (again!). I love that pot! I sautéed the vegetables and garlic for a few minutes, then added everything else for a long simmer.

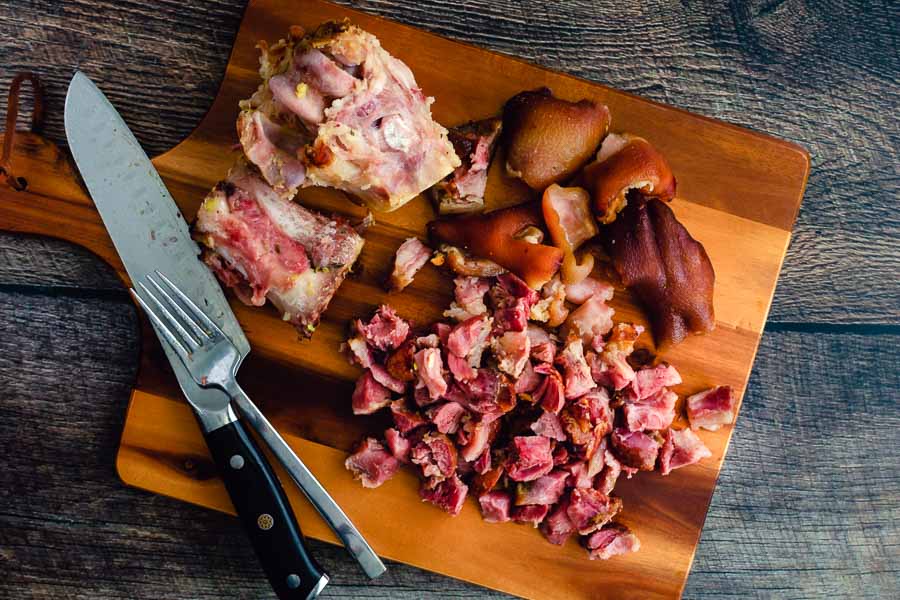
A quick check after 55 minutes told me the soup was ready because the peas had almost disintegrated, creating a creamy texture. At this point, I used a pair of tongs to remove the ham hocks and stripped off the meat.

I was nervous after I did the first hock because it had almost no meat. Panic time! But the second one had a surprising amount of meat on it, so everything worked out. I returned the chopped meat to the pot, heated it for another minute, and I was done.

Stripping the meat from the ham hocks

Timing

The total time listed on this recipe was 1 hour 30 minutes, but I made mine in a little less time. That was thanks to the prep work going a little faster and the advice to check for doneness at 55 minutes. Mine was done at that point, so I’m very glad that advice was included! Here’s how my time was spent:

  • 8 minutes to prep
  • 1 hour 6 minutes to cook
  • 6 minutes to strip the pan bones
  • 1 minute to ladle and garnish
  • 1 hour 21 minutes total
Earl Grey Hot Chocolate

0

Although it’s still warm in my area, I always feel the need to start making Fall and Winter recipes this time of year. It’s just ingrained in me. When I came across this Earl Grey Hot Chocolate I knew I had to give it a try. I love Earl Grey tea, and we always have some in the house. But mixing it into hot chocolate? Now that sounded interesting!

Thick, rich, and decadent, you’ll love each delicious sip of this Earl Grey hot chocolate.

Recipe Author: Jee Choe at Oh How Civilized
Get the recipe

The Ingredients

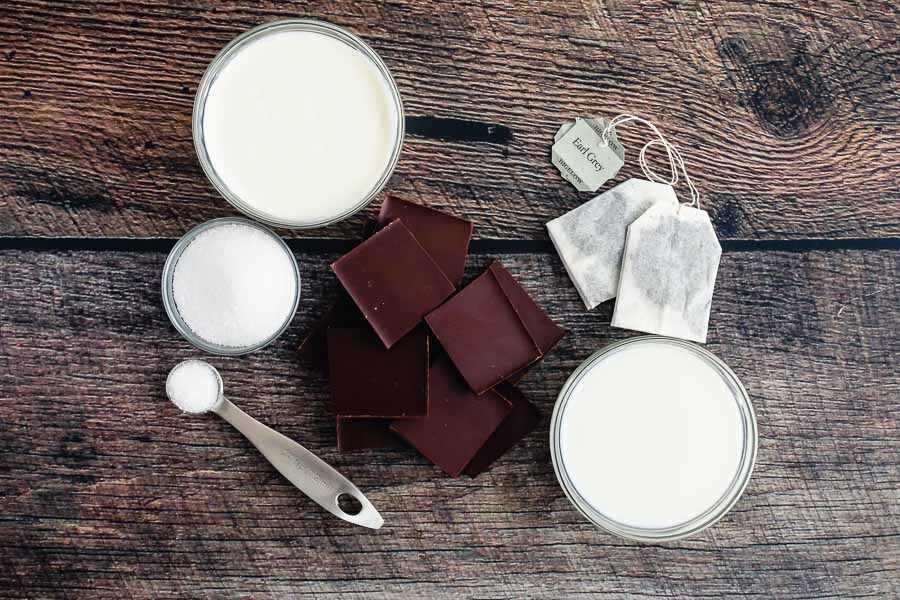
As I mentioned, I had the Earl Grey teabags or sachets as this recipe calls them. I also had sugar and salt and some leftover heavy cream. That meant all I had to buy was some milk and dark chocolate. Easy!

Unfortunately, I didn’t pay attention to the chocolate’s packaging. It was only 3.5 ounces, and this recipe calls for 5 ounces. I didn’t realize this until I was standing at the counter with a saucepan of milk and cream warming on the stove. Doh!

Earl Grey Hot Chocolate Ingredients
Dark chocolate, Earl Grey tea sachets, milk, salt, sugar, and cream

The Process

Making this Earl Grey Hot Chocolate recipe was simple, but I managed to mess it up. And it was not the recipe’s fault. Lack of sleep and lots of stress might have had something to do with it. I considered re-making it, but I decided not to. I didn’t have time, and I hoped someone could learn from my mistakes.

Mistake 1: Not Enough Dark Chocolate

So I have the milk and heavy cream warming over relatively low heat on the stove. It’s only then that I realize I need more dark chocolate, and I panic a little. Then I do what I always do in these situations and search for a dark chocolate substitute.

I didn’t have time to properly research this (tick tock), so I took the first suggestion of using 3 tablespoons of cocoa powder per ounce of chocolate. I missed the part about adding extra sugar and butter. Not that I would have added butter, but the sugar would have been a good idea.

Still, I soldiered on, steeping the tea bags in the warmed milk, grating a little chocolate for the garnish, and finishing up the rest of the prep work. The tea was still steeping, so I moved on to the cream topping. And my second mistake.

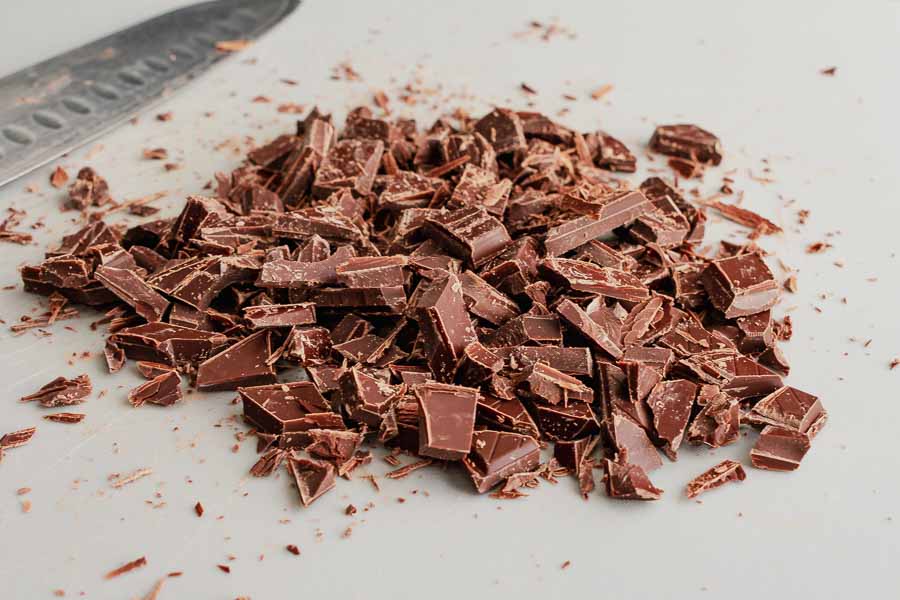
Chopped dark chocolate

Mistake 2: Over-Whipping the Cream

I don’t have a milk frother, but the recipe notes said an immersion blender could be used instead. Great–I have one!

All I had to do was mix the remaining cream with some sugar for a few seconds, and I would have the topping. Sounds easy enough, but I overdid it. Maybe the immersion blender was too powerful? I honestly don’t know since I have never used a milk frother. It’s impossible for me to compare the two.

I ended up with something more like whipped cream than a foam topping. I hoped it would lose some cohesion while I finished the hot chocolate, but it didn’t. It still worked when I spooned it onto the finished hot chocolate, though.

Finishing Up

The tea finished steeping a few minutes later, and I removed the bags and put the pan back on the heat. Then I added the chocolate, sugar, and salt along with about 3 tablespoons of cocoa powder.

The chocolate melted in nicely, but the cocoa powder created tiny little clumps. I decided to remove the bits of powder by straining it through a fine mesh strainer as I poured it into the mugs. It worked pretty well.

Then I spooned in the whipped cream topping and sprinkled on some of the grated chocolate. The whole process took me 24 minutes versus the 18 listed.

Spicy Thai Curry Pumpkin Noodle Soup

I’m breaking out the pumpkin in an effort to feel more like the Autumn season. Seasonless-ness is kind of good, but there are things about it I miss. Falling leaves, cool breezes, and the smell of fireplaces being used for the first time since the previous year. I don’t miss the mess our sycamore tree made of the lawn, though! Okay, maybe a little… But I’m continuing with pumpkin recipes since that’s what I associate with this season. Today I’m trying this Spicy Thai Curry Pumpkin Noodle Soup recipe. It’s all about the pumpkin with a few other tasty bits thrown in. Let’s find out if it is as good as it sounds!

Creamy, comforting Spicy Thai Curry Pumpkin Noodle Soup gets ready in 20 minutes and the recipe takes you back to Thailand!

Recipe Author: Richa at My Food Story
Get the recipe

The Ingredients

My usual pre-shopping ingredient check revealed I had several of the ingredients on hand. Namely the vegetable oil, Thai red curry paste, fish sauce, vegetable broth concentrate, brown sugar, and salt. I even had a nice batch of Thai basil growing in my AeroGarden.

Shopping for Spicy Thai Curry Pumpkin Noodle Soup ingredients I didn’t have was pretty easy, but I did have to make some substitutions. First, I could only find fresh shiitake mushrooms, not dried ones. It was an 8-ounce package of sliced shiitake mushrooms, and I used the whole thing. I’m sure the flavor if dried mushrooms would have been stronger, but used what was available.

The other substitute was canned pumpkin puree. Now the notes do tell you how to make it by boiling a fresh pumpkin. I have roasted it, but I have never tried boiling it. I didn’t even know it was an option! But alas, I still haven’t tried that method because there were no fresh pumpkins to be found when I shopped for this recipe (in September). Must have been too early in the season. But thankfully canned pumpkin is always on the shelf. I ended up buying two 15-ounce cans to make sure I had the 2 cups needed for this recipe.

Finally, I wasn’t sure what type of noodles to buy. The ingredient list literally says “150 grams Noodles.” I was hoping this recipe’s blog post would list a specific type, and I found it in the comments: flat pad Thai rice noodles. I found an 8-ounce package and weighed out what I needed (about 1/2 the package). If you can’t find rice noodles try using a wide noodle like linguine instead.

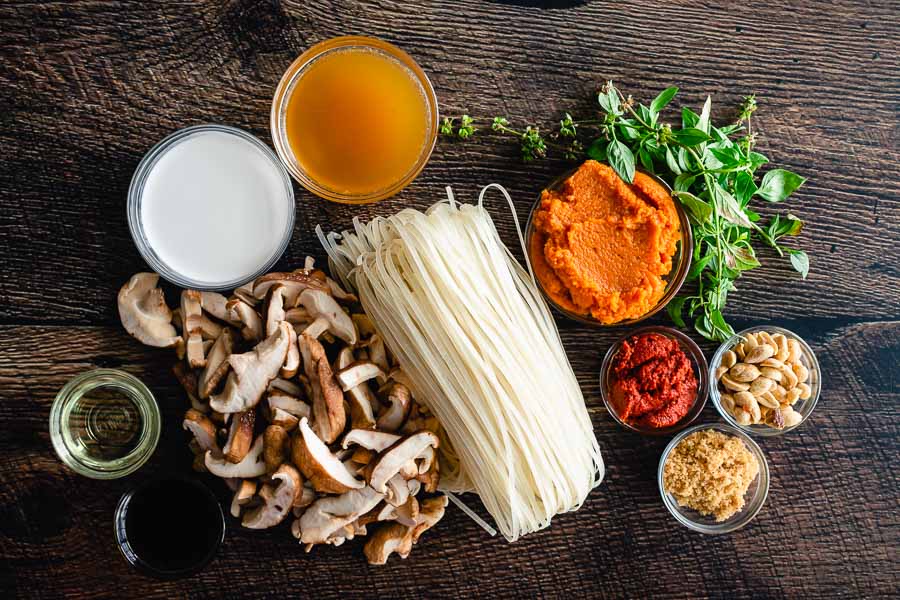
Spicy Thai Curry Pumpkin Noodle Soup Ingredients
Rice noodles, pumpkin puree, Thai basil, roasted peanuts, brown sugar, red curry paste, shiitake mushrooms, fish sauce, vegetable oil, coconut milk, and vegetable broth

The Process

Making this recipe was a pleasure. I saved myself some time by skipping the soaking since I used fresh mushrooms. Instead, I prepped the ingredients and went straight to cooking. Tip: Boil the water for the noodles while you prep the other ingredients to save time and place a colander in the sink so it’s ready to use.

My 5.5-quart Dutch oven was perfect for this curry. The instructions were well-written and so easy to follow with no ‘huh?’ moments. I love that!

The noodles were ready before they were needed, but this recipe even included a tip for that. I followed it and didn’t have sticky noodles (a huge plus!). And it’s so easy, just rinse the drained noodles in cold water to stop the cooking process.

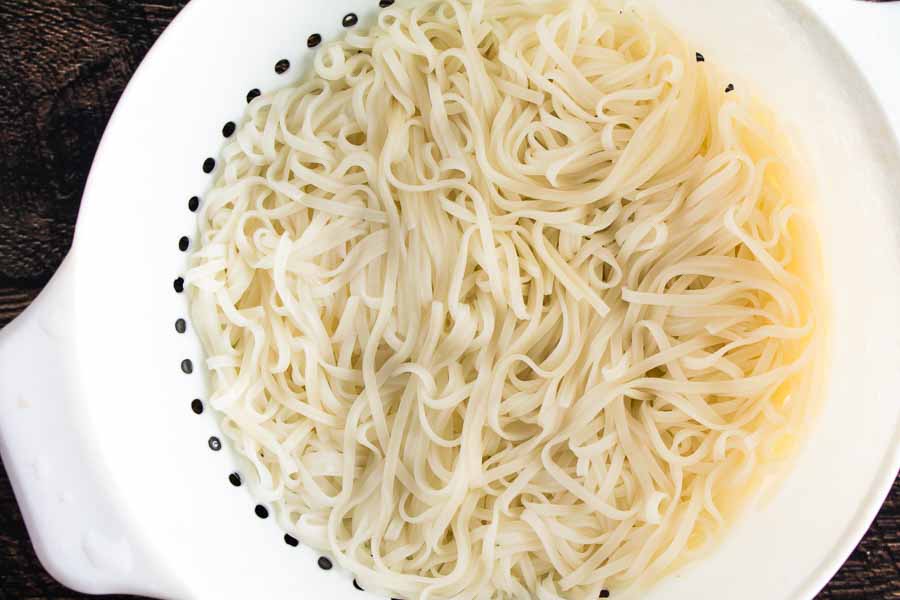
Cooked and strained rice noodles in a colander

As the curry finished up I put a few roasted peanuts into a small plastic bag and pounded it with a meat mallet. It’s neater and quicker than chopping, and you won’t have peanut bits flying around your kitchen.

My beautiful Spicy Thai Curry Pumpkin Noodle Soup was ready in 28 minutes, making it quick and easy. The recipe lists a total time of 40 minutes. I’m not sure if that includes soaking the mushrooms and making your own pumpkin puree, neither of which I did.