Home Blog Page 11

Sweet Potato Chowder

0

Have you ever had the urge for comfort food but you don’t want it to be too heavy? I know, it sounds silly, but here I am. It’s been cooler (for South Florida) but not cool enough to turn off the air conditioner—just use it a lot less. But it’s still technically wintertime, and I can’t help that comfort food craving this time of year. I guess I’m just wired that way. But then I happened upon this colorful Sweet Potato Chowder that might just be the solution to my little “problem”. It’s not vegetarian, but it is a mostly vegetable chowder that’s packed with healthy things like sweet potato and kale with a creamy broth. I’m game to give it a try, how about you?

This sweet potato chowder is a hug in a bowl! Made with lots of greens and crunchy pancetta and pepitas for topping, it’s a perfect weeknight meal.

Recipe Author: Jessica at How Sweet Eats
Get the recipe

The Ingredients

My pre-shopping pantry check only yielded a few ingredients. I had the spices dried spices (salt, pepper, and ground sage) and the whole spices (nutmeg and garlic). I checked my refrigerator and also found butter, but I must have missed the chicken broth concentrate. Turns out I didn’t have enough but thank goodness for bouillon powder! It wasn’t low-sodium, but it saved the day.

I found almost everything else I needed at my regular grocery store. My favorite was a 4-ounce package of diced pancetta. Actually, it was the only option for pancetta, but I’m not complaining.

I wasn’t sure how many sweet potatoes so I went with 3 and only used 2 (they were on the large side). The only item I couldn’t find was Tuscan kale (a.k.a. dinosaur kale or lacinato kale). Curly kale seems to be the most common type of kale in my area so that’s what I went with.
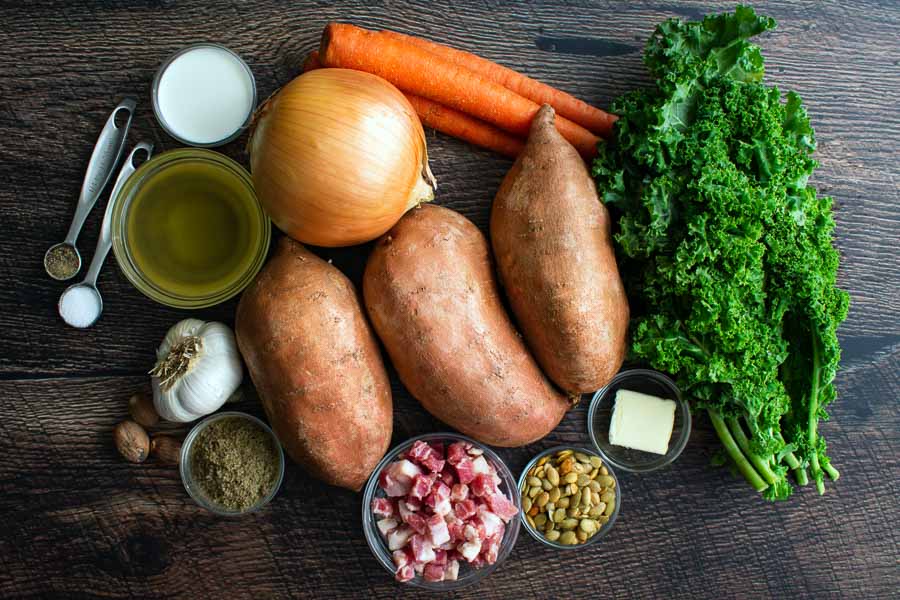
Sweet Potato Chowder Ingredients
Sweet potatoes, sweet onion, carrots, kale, butter, roasted salted pepitas, ground sage, whole nutmeg, garlic, chicken stock, salt, pepper, and half-and-half

The Process

Instead of prepping everything, I began cooking while I prepped since the first step is rendering the pancetta and I bought it already diced. I allowed 5 minutes for my 5.5-quart Dutch oven to preheat first.
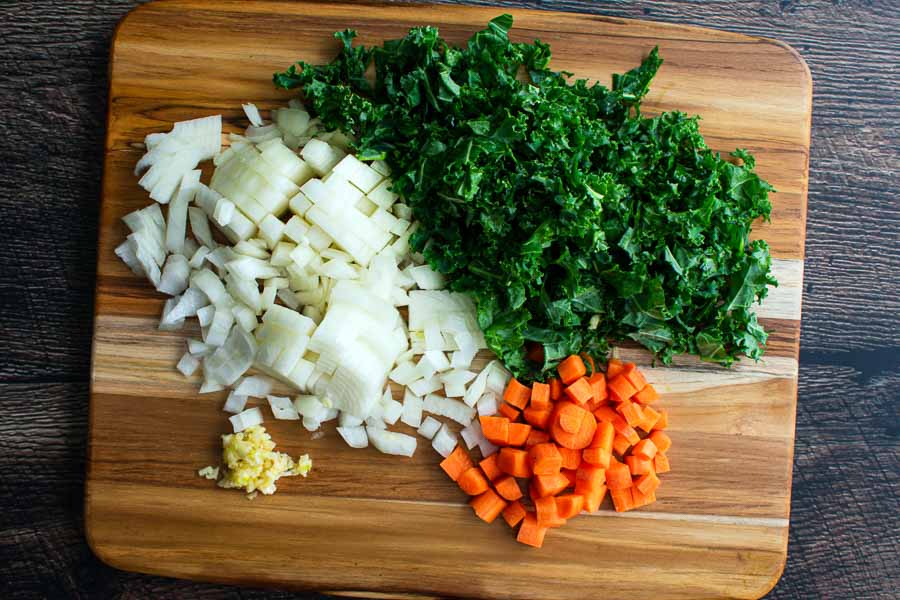
Chopped onion, kale, carrots, and garlic

I was able to do the peeling and chopping while the pot was preheated and the pancetta cooked. Also, I mixed up the chicken bullion at the same time since I forgot to buy more stock concentrate.

The instructions were easy to follow, and I didn’t have any questions as I worked. My Sweet Potato Chowder slowly came together as I added more ingredients and allowed them to simmer.

Step 4 gives the option of serving the chowder right after the kale is added or simmering it for an additional 10 minutes. I decided on the extra simmering since my husband isn’t a big fan of raw kale. It softened but still gave the chowder some extra texture, and the roasted pepitas and pancetta added even more crunch.
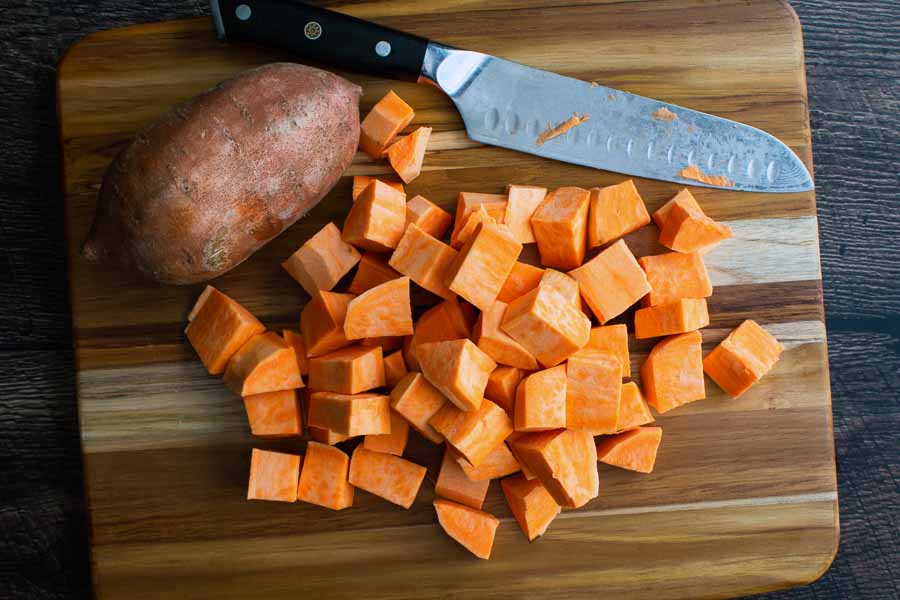
Peeled and chopped sweet potatoes
Peeled and chopped sweet potatoes (I used 2)

Timing

  • 5 minutes to prep (really just preheating the Dutch oven)
  • 45 minutes to cook
  • 2 minutes to add kale and adjust seasonings
  • 10 minutes to cook
  • 1 hour 2 minutes total

The recipe lists 10 minutes to prep, 45 minutes to cook, and 55 minutes total. I went a little over that, but my time does include an optional 10 minutes to soften the kale. Not counting that I am actually a little under the time listed at 52 minutes.

Storage & Leftovers

When it came time to box up the leftovers, I decided to add the extra pancetta and pepitas to the container. I find that if I don’t, the toppings are forgotten and end up going bad.

I got a nice surprise when I served the chowder the next day. The pancetta (at least I think it was the pancetta) added a lovely hint of smokiness. The other flavors also melded and developed, and, as is typical for soups, it was even better the next day.

Roasted Chocolate Cherry Brownies

0

My cooler weather cravings for rich foods continue today with these Roasted Chocolate Cherry Brownies. I do have Golden Girl-level cheesecake cravings, but I have to admit to a pretty indiscriminate sweet tooth. For me, chocolate is right up there with cheesecake, so trying a brownie recipe was an easy decision. Not only are they brownies, but they are chocolate chip brownies with roasted cherries inside and on top. Yup, I need to try this recipe!

These cherry brownies are super fudgy chocolate brownies. They are filled and topped with roasted cherries.

Recipe Author: Stephanie Rutherford at Stephanie’s Sweets
Get the recipe

The Ingredients

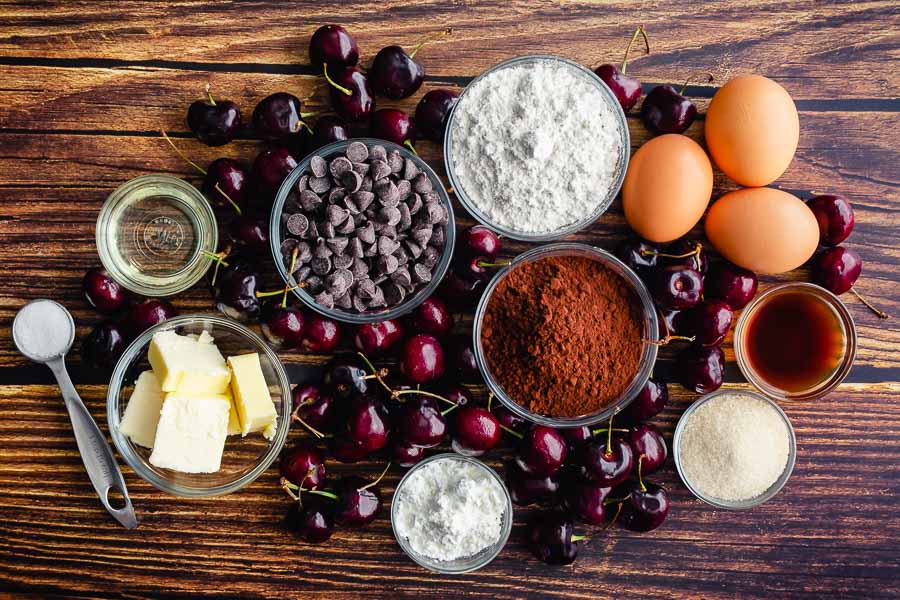
Brownies. Generally have a short list of ingredients, and this Roasted Chocolate Cherry Brownies recipe was no different. My pre-shopping check showed me I had 7 of the 11 ingredients in my pantry.

Most of the ingredients were pretty basic, but I did have some leftover Dutch process cocoa powder from Droste. It was something I had to order for another recipe, and it’s so much better than what I find at my local grocery store.

And speaking of the grocery store, I had a short shopping list. Just eggs, butter, semi-sweet chocolate chips, and cherries. The cherries were sold in 1-ounce bags, and I used nearly all of them.

Roasted Chocolate Cherry Brownies Ingredients
Cherries, Dutch process cocoa powder, semi-sweet chocolate chips, all-purpose flour, eggs, vanilla extract, granulated sugar, cornstarch, unsalted butter, sale, and canola oil

The Process

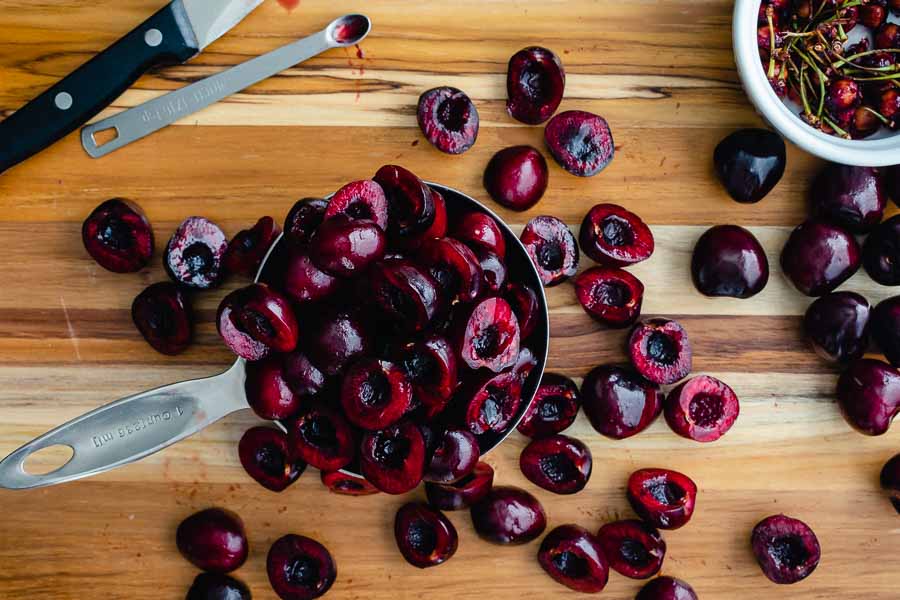
Things kicked off with asking and pitting the cherries. I usually use a straw to pit cherries, but this time I used a paring knife and a small measuring spoon to scoop out the pits. The reason was the. Cherries had to be cut in half anyway, so why pit them and then have to slice them?

Halving and pitting the cherries
Halving and pitting the cherries with a paring knife and measuring spoon

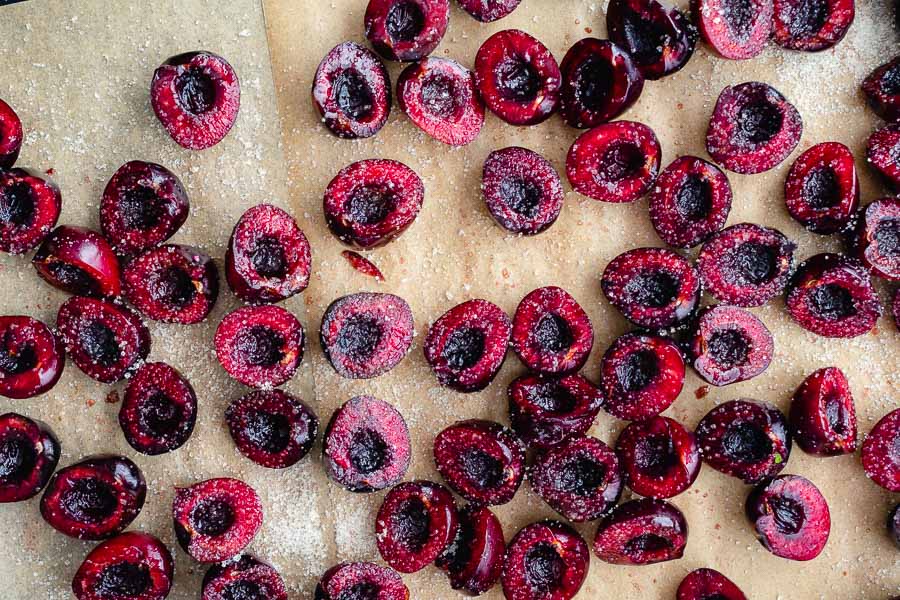
Next was roasting the cherries on a parchment-lined sheet pan. I generously sprinkled them with sugar first, and they caramelized beautifully. The roasted cherries basically made their own thick sweet syrup as they cooked.

I made the batter while waiting for the cherries to roast and cool. My stand mixer came in handy for mixing the liquids. I used a silicone spatula when was time to fold in the dry ingredients and half of the cherries.

I smoothed the thick batter into a square baking dish I had prepared with parchment paper sprayed with canola oil. The instructions say to bake until the edges are set, and that’s exactly what I did. The center was pretty jiggly straight out of the oven, but it set up as it cooled.

I ended up letting the pan cool overnight on the countertop. The next day I put the pan into the freezer for 15 minutes before slicing and topping it with the remaining roasted cherries.

Halved and pitted cherries sprinkled with granulated sugar

Timing

  • 17 minutes to prep the cherries
  • 10 minutes to roast the cherries
  • 19 minutes to prep the batter
  • 50 minutes to bake the brownies
  • 2 hours for the pan to cool completely
  • 15 minutes to freeze
  • 2 minutes to slice and garnish
  • 3 hours 3 minutes total

The recipe lists 20 minutes to prep, 45 minutes to cook, and 1 hour and 5 minutes total. If I don’t count the time to cool, my total time would be just under that at 1 hour and 3 minutes.

Creamy Roasted Butternut Squash Pasta with Sausage and Spinach

We finally had a cold snap here, and I was instantly put into the mood to make some comfort food. I really do treasure the all-too-brief cold weather down here since the rest of the time it’s full-on hot and humid summer weather. But back to the food because that’s why we’re here, right? A quick skim of my Pinterest boards turned up this Creamy Roasted Butternut Squash Pasta with Sausage and Spinach, and I was hooked. Creamy, roasted squash, pasta, and sausage are all in the name, and all sound like comfort food to me. Let’s find out if they are as good together as the sound!

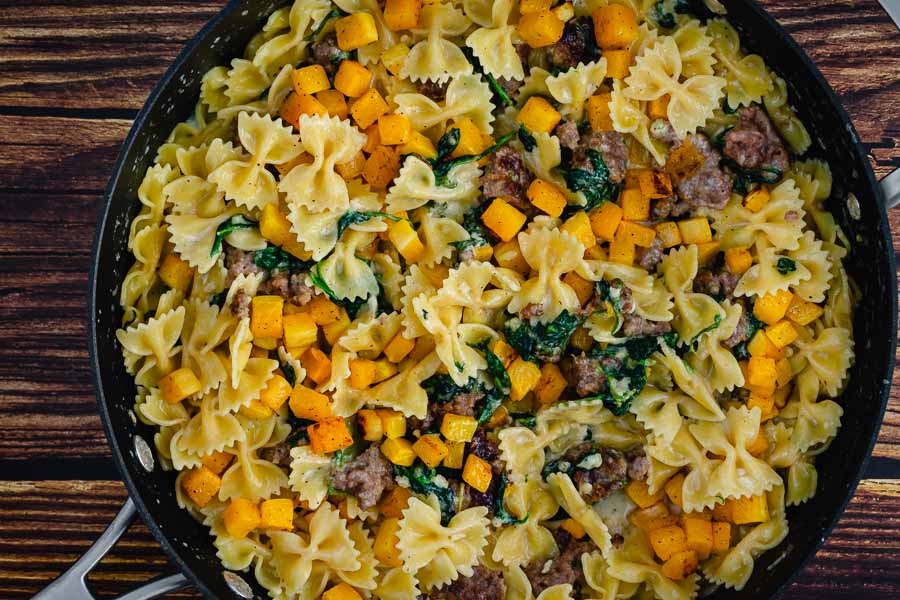
Creamy Roasted Butternut Squash Pasta with Sausage and Spinach is a perfect Autumn comfort food. This easy and flavorful recipe is packed with veggies and will become your favorite Fall and Winter family weeknight dinner!

Recipe Author: Julia at Julia’s Album
Get the recipe

The Ingredients

I had a few things on hand for this roasted butternut squash pasta recipe. Salt, pepper, and olive oil are a given around here. I even had some leftover heavy cream though I forget exactly what from.

That left me to buy several items, but they were all found at my regular grocery store. The type of sausage wasn’t specified, so I chose a tube of mild pork sausage. I think it was breakfast sausage, but it was only a few dollars for a pound. I halved it for this recipe and froze the rest.

This recipe does call for 6 ounces of spinach, but the largest package I could find was only 5 ounces. I could have bought 2 packages and used the extra for something else, but I decided 5 ounces would have to be enough. I must have been having a lazy day LOL.

Lastly, I bought grated parmesan instead of shredding it. My husband is convinced he hates the real deal but he likes this stuff. Bless his heart!

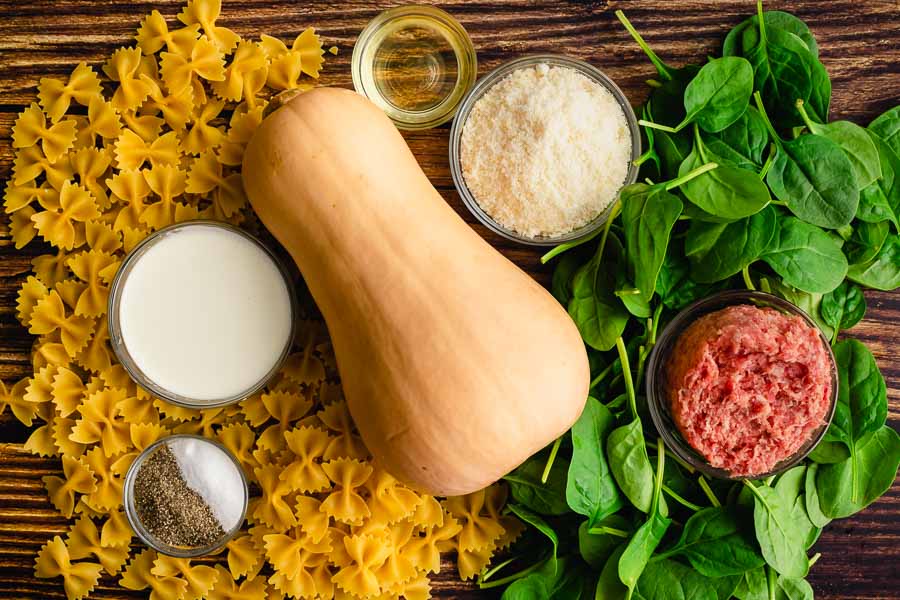
Creamy Roasted Butternut Squash Pasta with Sausage and Spinach Ingredients
Butternut squash, olive oil, grated parmesan cheese, spinach, sausage, black pepper, salt, and heavy cream (garlic not shown)

The Process

There was a lot going on with this roasted butternut squash pasta recipe. At one point I had 3 stove eyes and the oven going at the same time. It gave me Thanksgiving flashbacks!

Butternut Squash

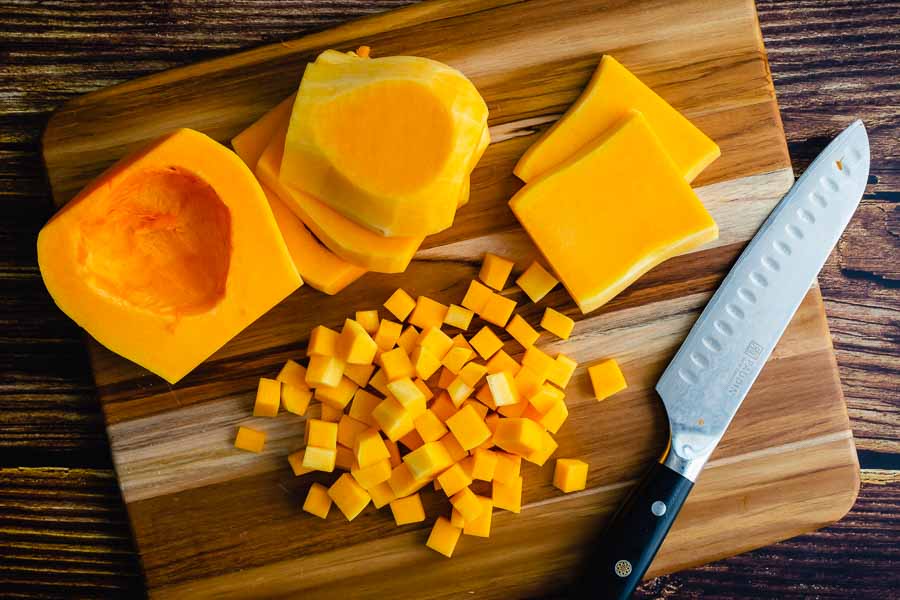
First up was peeling and cubing the butternut squash. The recipe didn’t specify a size so I guessed based on the photos and went with fairly small cubes. I used about 3/4 of the butternut squash. Once it was cubed I tossed it in olive oil, salt, and pepper, and put it into the oven to roast on a parchment-lined sheet pan.

Slicing the peeled butternut squash into small cubes

Sausage

Cooking the sausage was next. I heated a 10-inch skillet, broke up the sausage with my fingers, and let it fry while I worked on the pasta and cream sauce. I put on a pot of salted water as part of the prep work, so it was ready to go when I was done with the sausage.

Cream Sauce

Last up was the cream sauce. I expected this to be difficult for some reason. It must be something in my head because it was not at all difficult. Tip: My 5-quart saute pan was the perfect pan for this. The recipe does say to use a large skillet, but I like the high sides of my saute pan for recipes like this that need to be stirred thoroughly.

All I had to do was let the spinach wilt with the garlic, add the cream, then the cheese. The key was to keep stirring once the cream went in to ensure a smooth sauce. I did add a touch of salt and pepper, then it was time to assemble.

My 5-quart saute pan was the perfect size
My 5-quart saute pan was the perfect size for the assembled dish

Finishing Up & Assembly

The only problem was the squash still had 15 minutes to go before it was finished roasting. Still, I added all the other ingredients to the saute pan and mixed them up. My stove has a warmer eye, so I covered the pan and placed it onto that to keep it warm. I stirred in the roasted butternut squash as soon as it was done with no problems at all. I was worried the sauce would break or coagulate but it didn’t.

Timing

This roasted butternut squash pasta recipe lists 30 minutes to prep, 40 minutes to cook, and 1 hour and 10 minutes total. I don’t know how I managed it, but I came in way under that with the following times:

  • 11 minutes to prep the butternut squash
  • 31 minutes to finish prep and cook
  • 42 minutes total

Kimchi Fried Rice

Rice has always been a huge part of my menu, and I love that it is such a versatile food! The innumerable ways it can be prepared are what keeps it interesting, and I’m always down to learn a new one. I’m doing that today with this Kimchi Fried Rice. If you’re thinking it’s too similar to the Chines takeaway you’re used to, think again. There is no egg, pork, or any other animal product to be found in this recipe, although the author does mention topping it with a fried egg if you are so inclined. Honestly, I planned to do that for the photos, but I just plain forgot. Anyhoo, let me tell you all about making it and how delicious this version of fried rice is!

Fresh, bold, and flavorful Kimchi Fried Rice is an easy Korean rice recipe that takes just a few minutes to make. Serve as is or top it with a fried egg or chicken.

Recipe Author: Lauren Allen at Tastes Better From Scratch
Get the recipe

The Ingredients

My pre-shopping pantry/refrigerator check yielded a few ingredients for this Kimchi Fried Rice. Salt and pepper, of course, plus yellow onion, Sriracha, gochujang paste, and toasted sesame oil.

That only left me with a few things to buy. I was low on white rice (surprisingly) and soy sauce (also surprisingly) plus the garlic, spring onions, and kimchi. All were easily found at my regular grocery store.

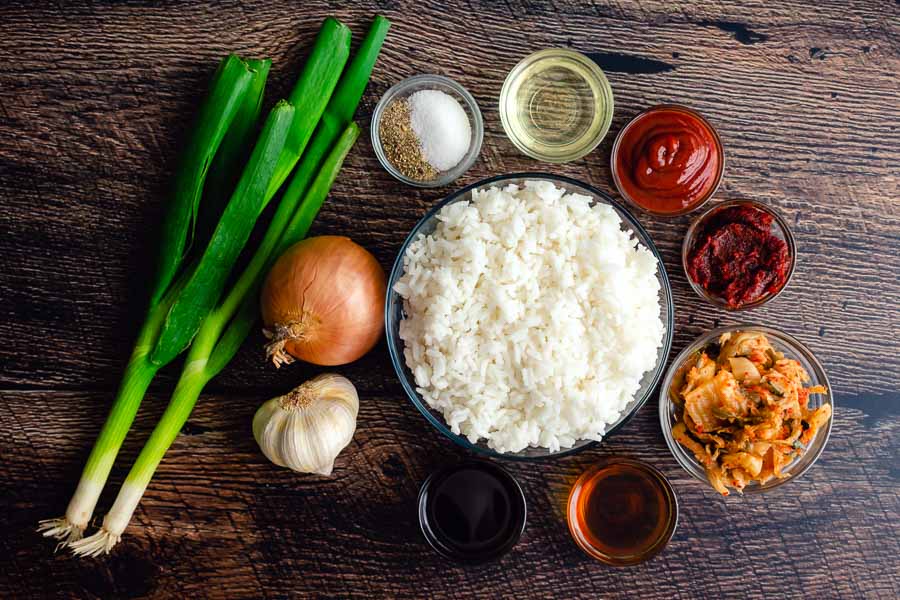
Kimchi Fried Rice Ingredients
Day-old cooked white rice, black pepper, salt, vegetable oil, Sriracha, gochujang, kimchi, toasted sesame oil, garlic, and yellow onion

The Process

I made a batch of white rice the day before I planned to make my Kimchi Fried Rice. It only took 20 minutes, and I just popped it into the refrigerator when it was ready. It made about 3 cups, so I ate the leftovers as a snack.

The fried rice itself moves fast, so I had to prep everything in advance. That meant measuring, chopping, and pressing the garlic. I even had the cute little ingredient bowls lined up and ready to go.

The only minor question I had was how much of the spring onions to use. Some recipes specify the white part only or the whole thing. As you can see, I went with whole onions.

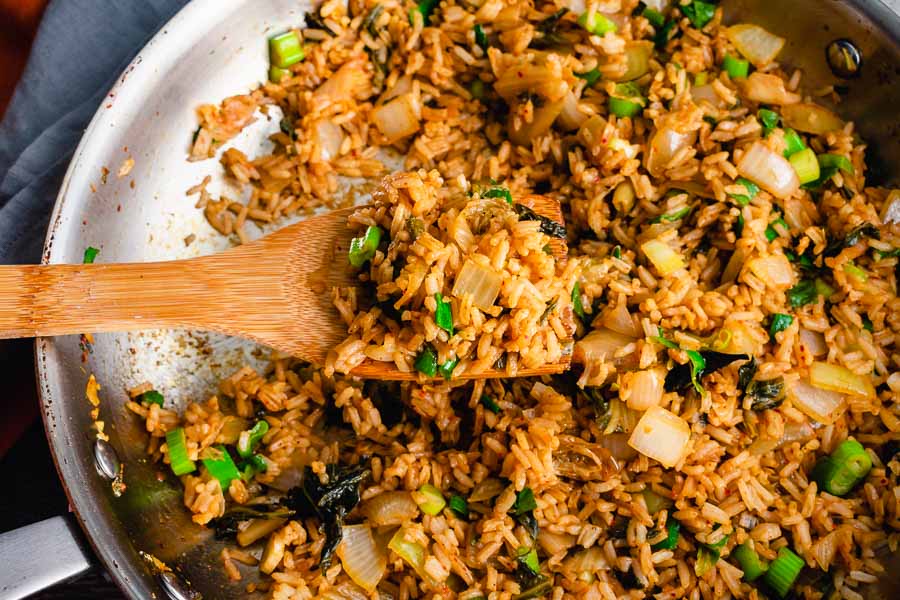
Once the ingredients were ready I heated up a large skillet and got to cooking. It did go quickly, but the instructions guided me right through it. I used my wooden spatula to stir and stir and stir (and fry!) until I had this lovely Kimchi Fried Rice just begging to be eaten.

Kimchi Fried Rice in a 12-inch skillet
I made my Kimchi Fried Rice in a 12-inch skillet

Timing

This recipe listed a prep time of 10 minutes, a cook time of 5 minutes, and a total time of 15 minutes. My times were a little longer, but I think it was because I didn’t preheat the pan as part of the prep work. I forgot and included it in my cooking time. Here’s how it all broke down:

  • 9 minutes to prep
  • 10 minutes to cook
  • 19 minutes total

Korean Steak Sandwich with Jalapenos and Garlic Mayo

I love a good sandwich whether it’s cold or hot, but there’s something about a hot sandwich that makes it just a little better. My personal favorite is melted cheese, though toasted bread and sauteed veggies are up there. Good thing this Korean Steak Sandwich with Jalapenos and Garlic Mayo recipe has all that and more. More as in strips of marinated steak and chili garlic mayo. Yum! Let’s find out if it’s as good as it sounds.

This Korean Steak Sandwich with Jalapenos and Garlic Mayo is roll-your-eyes-in-your-head amazing! Marinated rib eye steak and a kick of chilli heat!

Recipe Author: Nicky Corbishley at Kitchen Sanctuary
Get the recipe

The Ingredients

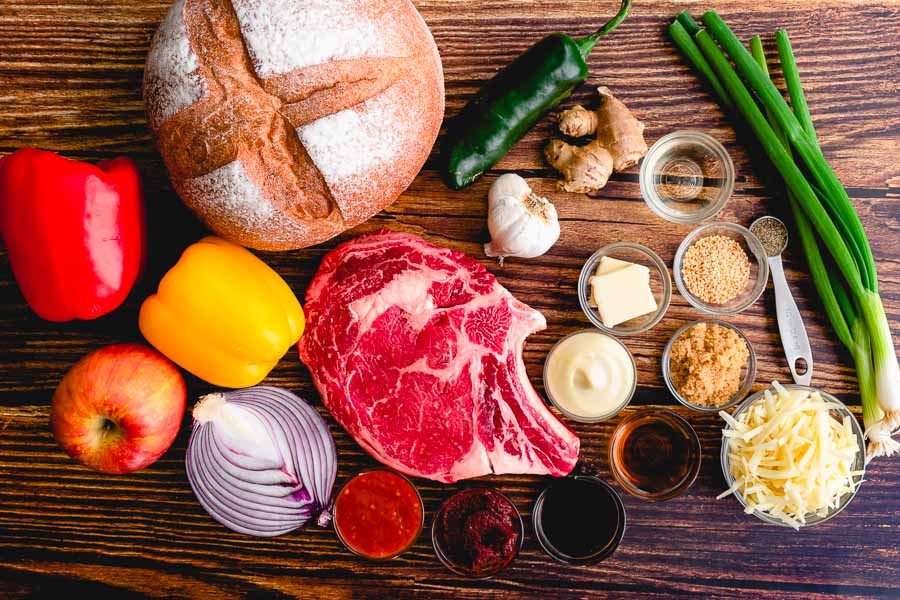
This recipe promises to be filling and very caloric. So much so that half of each Korean Steak Sandwich with Jalapenos and Garlic Mayo is one serving. I decided to half the meat because it’s just the two of us. Plus ribeye steaks are pricey. Boneless ribeyes were priced around $25, but I was able to find one bone-in for $17 (deboning it only took a few seconds).

The recipe also calls for a sweet apple, but it doesn’t specify what kind. I did a quick search and settled on a Fuji apple since it was very high on the apple sweetness scale. My usual grocery store also had the rest of the produce, the cheese, and a loaf of fresh bread at the bakery. I opted for unsliced so I could slice it extra thick.

Korean Steak Sandwich with Jalapenos and Garlic Mayo Ingredients
Ribeye steak, jalapeño pepper, garlic, ginger, rice wine (sake), spring onions, black pepper, sesame seeds, butter, mayonnaise, light brown sugar, shredded aged cheddar cheese, sesame oil (toasted), soy sauce, gochujang paste, sweet chili sauce, red onion, Fuji apple, yellow bell pepper, red bell pepper, and bread

Everything else was waiting in my pantry and refrigerator. oh, and I had some Kewpie Mayonnaise, so I went with that. It’s Japanese mayonnaise made with egg yolks and it’s not as tangy as regular mayo.

The only thing I forgot was the sweet chili sauce. I assumed I had some on hand despite my pre-shopping check. I clearly didn’t check very well because the jar I thought was sweet chili sauce was garlic chili sauce. There is a link to a sweet chili sauce recipe in the ingredients list, but I didn’t have the ingredients on hand.

Instead, I used this recipe for Easy Sweet Chili Sauce since I had all its ingredients. It was great, but it needs to cool thoroughly to thicken up.

The Process

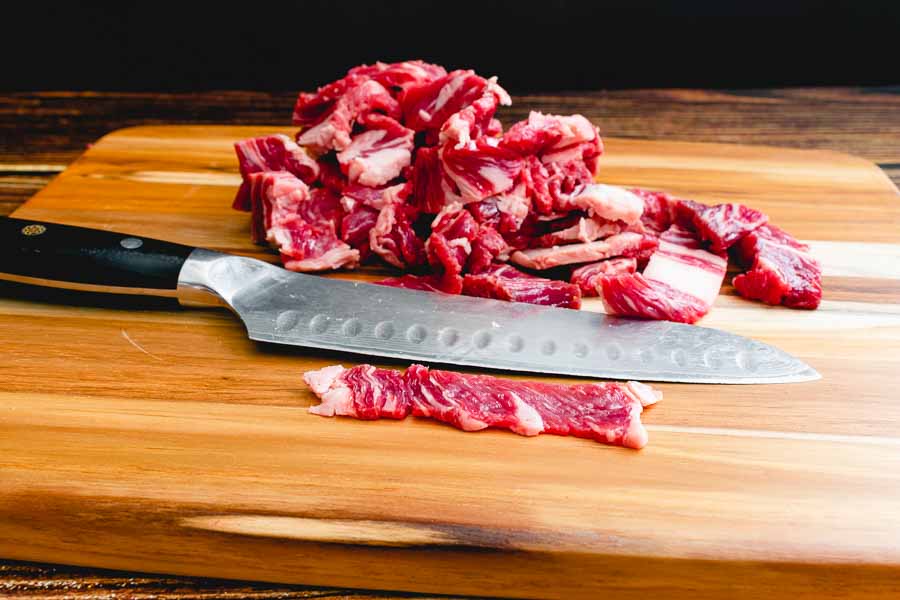
There is a lot to this Korean Steak Sandwich with Jalapenos and Garlic Mayo, and it all starts off with freezing the steak for 30 minutes. That firms it up so it’s much easier to slice it thinly. Once that was done, I mixed up the marinade. Tip: Instead of stirring, add the marinade ingredients to a sealed container, shake well to blend, then add the meat and stir to thoroughly coat.

The meat needed 30 minutes to marinate, so I had plenty of time to prep the remaining ingredients. I had everything sliced, measured, and ready to go by the time the steak was done. I also misread the recipe and mixed the chili sauce with the mayo and garlic. It actually worked out nicely since it blended all the flavors into one sauce.

Thinly sliced ribeye steak

I also preheated a large cast iron pan, so I was able to start cooking the steak immediately. I kept a large spoon and a heat-proof bowl next to the stove since the recipe said a lot of liquid would be released and need to be drained. It turned out that the liquid cooked away and I didn’t need either. I added a touch more oil and sauteed the peppers in the same pan.

Assembly and Toasting

My sliced bread was waiting for me to brush on the melted butter and top it will all that tasty goodness I had been prepping and cooking, and I happily did just that. It turns out that one steak was plenty of meat. I used all of it along with all the peppers and cheddar cheese. The sandwiches were pretty stuffed at this point, so I went a little lighter on the remaining onions and jalapeno slices.

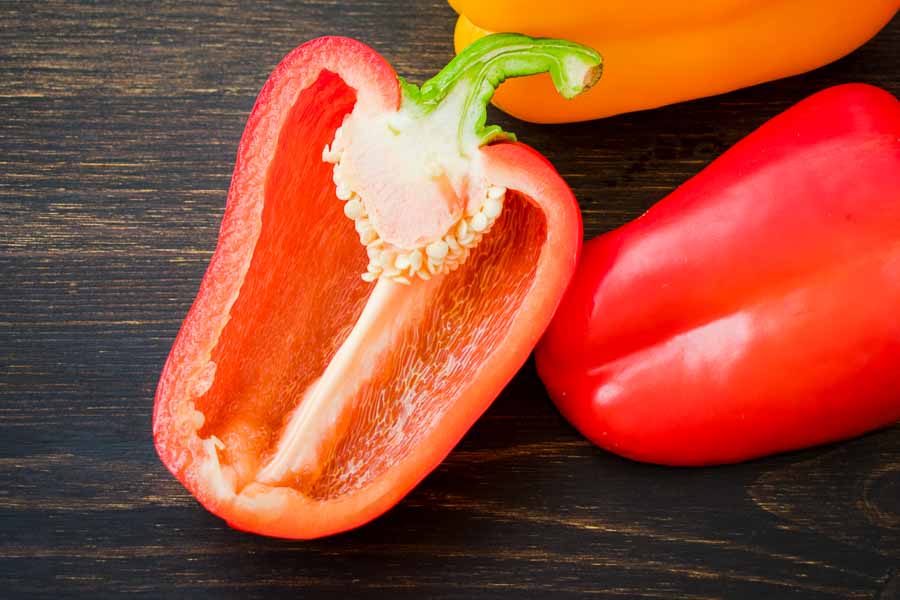
Slicing the red and yellow bell peppers

I don’t have a sandwich press, so I did some research while planning this recipe. I used method #2 from 5 Ways to Make a Hot, Crispy Sandwich Without a Panini Press. By preheating a second cast iron skillet while I cooked the peppers, I had an improvised sandwich press for free.

It wasn’t perfect, but my sandwiches were nice and toasted. The bottom bread did look burned, but it tasted great. The top pieces were not as well done, and both were nice and buttery. All that was left was to add the chili-garlic mayo, slice, and enjoy.

Timing

  • 1 hour 5 minutes to prep
    • 30 minutes to freeze the steak
    • 5 minutes to prep steak and marinade
    • 30 minutes to marinate and finish prep work
  • 17 minutes to cook
  • 1 hour 22 minutes total

The recipe listed 1 hour 15 minutes to prep, 5 minutes to cook, and 1 hour 20 minutes total. My prep and cook times worked out differently, but my total time was extremely close.

Mixed Berry Galette with the Best Pie Crust

Ever since I tried the Bourbon Cherry Chocolate Galette, I have been obsessed with galettes. They are an easier version of a pie, and their free-form style takes off the pressure I feel to make my pies look perfect. There’s no latticework or double crust, and you don’t even need a pie pan, yet it gives you all the pie deliciousness. Since then I have made a few more galette recipes, both sweet and savory, and I’m still in love with the whole process (and so is my husband!). Today I’m trying another galette version of a pie I have always wanted to make. This Mixed Berry Galette with the Best Pie Crust might be the ultimate dessert for me. I’m such a berry lover, and adding a flaky, buttery crust to berries is never a bad thing!

Now that I know how to make a galette, it’s my new favorite thing. Why, you might ask? Well, it’s because I love how simple this amazing pie crust recipe is. I also love the rustic feel of the galette.

Recipe Author: Stacey at Posh in Progress
Get the recipe

The Ingredients

There aren’t a ton of ingredients in this Mixed Berry Galette recipe, and I had a few things on hand. Kosher salt, sugar, cider vinegar, and cornstarch were all in my pantry. And I had eggs and water and ice, of course.

As usual, I had all-purpose flour on hand, but I was not sure if it was unbleached. I decided to buy a bag that specifically said unbleached to be on the safe side. It was a little more than the generic stuff I normally use but not by all that much.

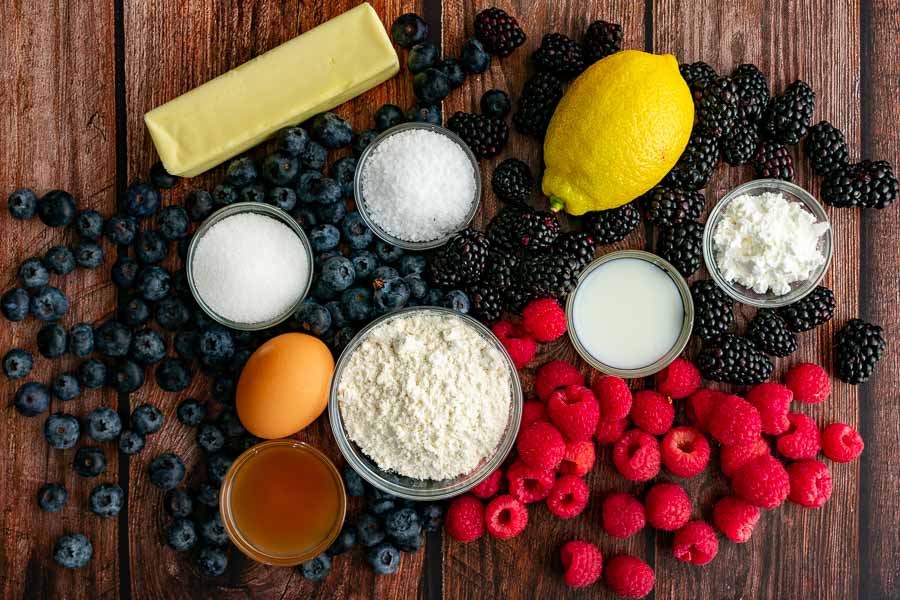
That left me needing butter, a lemon, and 4 cups of fresh berries. The author gave her ideal mix, and that’s what I went with since this was my first time making this recipe. It was 2 cups of blueberries with 1 cup each of raspberries and blackberries, and it was just perfect!

Mixed Berry Galette with the Best Pie Crust Ingredients
Blackberries, lemon juice, cornstarch, milk, raspberries, unbleached all-purpose flour, cider vinegar, egg, sugar, blueberries, unsalted butter, and kosher salt

My only minor difficulty with this recipe was choosing the correct package sizes of berries. Well, I lucked out because 1 package of each type of berry was exactly what the above recipe needed. Here’s what each package weighed and yielded:

  • 1 dry pint (155ml) of blueberries to make 2 cups
  • 6 ounces (170 grams) of raspberries to make 1 cup
  • 6 ounces (170 grams) of blackberries to make 1 cup

I admit I bought 2 packages of blueberries to be safe, so I ended up with an extra pint.

List of recipe ingredients pictured

The Process

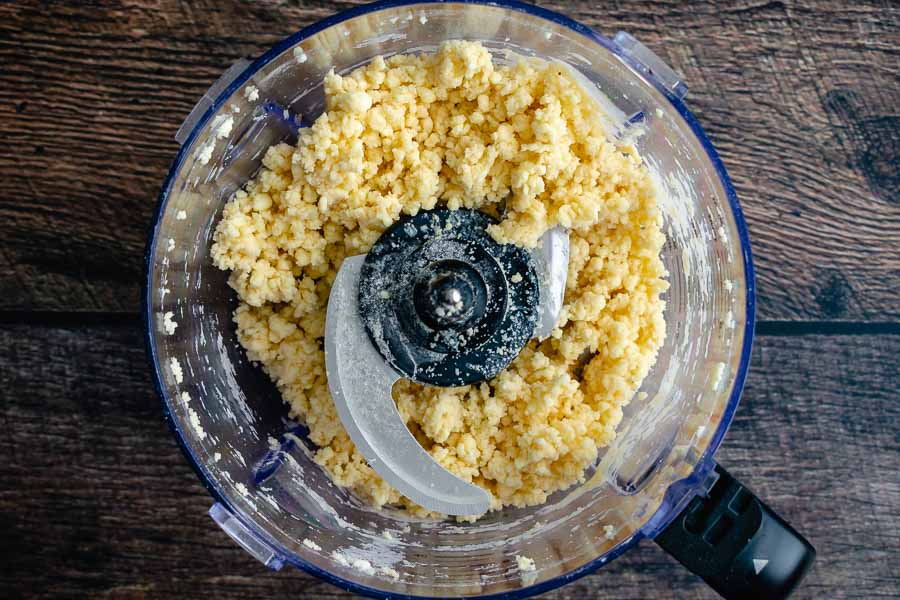
Just like pie, this Mixed Berry Galette recipe began with making the crust. It calls for using a food processor, and it really did zip the crust together in no time at all. In fact, I didn’t even have to add extra water to the dough after I turned it out and pinched it together.

Mixing the crust in a food processor

The recipe says the dough needs to be chilled for at least an hour or overnight. I’m used to 30 minutes to an hour for chilling pastry dough and expected this step. However, overnight sounded like the preferred method, so that’s what I did.

The instructions also said to mix the filling ingredients and let them chill with the dough. I mixed them up in a large bowl and poured them into a smaller sealed container to chill. I didn’t have room in my refrigerator for a big mixing bowl.

Assembly and Baking

The next day was time for baking! I started out by lining a sheet pan with parchment paper and putting a big colander into my sink and draining the berry mixture. I find it gets rid of the extra juice so my pies and galettes aren’t soggy.

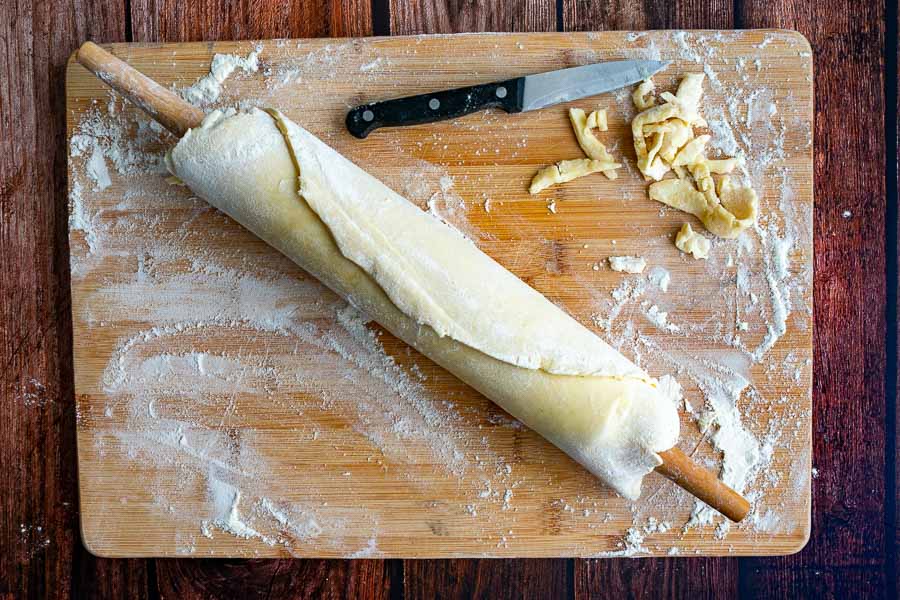
Rolled out, trimmed dough rolled onto a rolling pin

While the berries drained, I rolled out the galette crust. The recipe calls for a 12-inch diameter, so I used a large Dutch oven lid to create a neatly trimmed circle of dough. Then I rolled the dough onto my rolling pin and transferred it to a parchment-lined sheet pan.

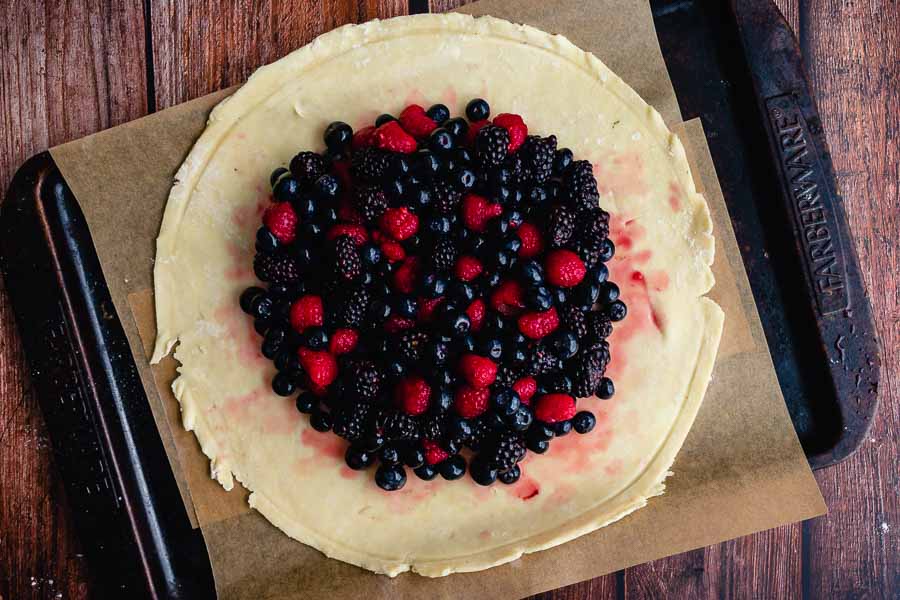
Next was adding the filling to the dough and pinching the edges closed. I always used to think this part would be difficult, but trust me when I say it’s so easy. Just pinch, move an inch or two along the edge and repeat until the filling is encircled. All that was left was brushing on the egg wash and baking.

Chilled filling added to rolled out and trimmed dough
Chilled filling added to rolled-out and trimmed dough

Like most recipes, this one listed a range for the baking time of 25-30 minutes. I always try the shorter time on my first try, but it just wasn’t quite enough. The filling wasn’t bubbling so I ended up baking my Mixed Berry Galette for the full 30 minutes.

Timing

There were no prep, cooking, or total times listed with this recipe. The only times were for chilling and baking, and that’s what I’m using in my rating. But here is a list of how my time was spent from start to finish:

  • 8 minutes to prep the crust
  • 3 minutes to prep the filling
  • 1 hour to chill crust (minimum, I chilled it overnight)
  • 11 minutes to assemble
  • 30 minutes to bake
  • 1 hour 52 minutes total

A more concise way to break it down is:

  • 22 minutes to prep
  • 1 hour to chill
  • 30 minutes to bake

Creamy Shrimp Risotto with Bacon

Have you ever made risotto? I have eaten plenty, but I have never made it from scratch. The closest I have come is a pre-packaged just-add-water risotto mix. My favorite is Alessi Porcini Mushroom Risotto—it’s an excellent side dish with a steak and spinach salad. It is an easy weeknight dinner with a touch of luxury. But today I’m actually going to make my risotto from scratch with this Creamy Shrimp Risotto with Bacon recipe. It sounds truly luxurious, and I’m super excited to give it a try!

Creamy Shrimp Risotto with Bacon is THE dish to make for Date Night In. This combines a slow-cooked risotto with sautéed bacon and shrimp, all topped with some freshly grated parmesan cheese. So fancy, so delicious!

Recipe Author: Sue Ringsdorf at Sue Bee Homemaker
Get the recipe

The Ingredients

The star of this risotto recipe is the shrimp, and I just happened to have a pound in the freezer. The recipe calls for them to be peeled, deveined, and their tails removed. Mine were deveined, but I had to remove the shells and tails. It was surprisingly fast to do since the shells had been sliced open for deveining. The shrimp were also large and there were only 20 to peel.

My pre-shopping pantry/refrigerator check yielded a few more ingredients. I had the basics like salt, pepper, butter, and olive oil on hand. I also had some chicken broth concentrate, a yellow onion, and a mini bottle of chardonnay.

And as luck would have it, I had enough leftover grated parmesan cheese from the Nourishing White Bean Soup I made recently. Oh, and I always keep arborio rice on hand to make Avgolemono Soup (it’s a regular on my menu).
That really shortened my shopping list for this recipe. All I needed to buy was garlic and bacon. And the bacon was on BOGO, so I was quite pleased.

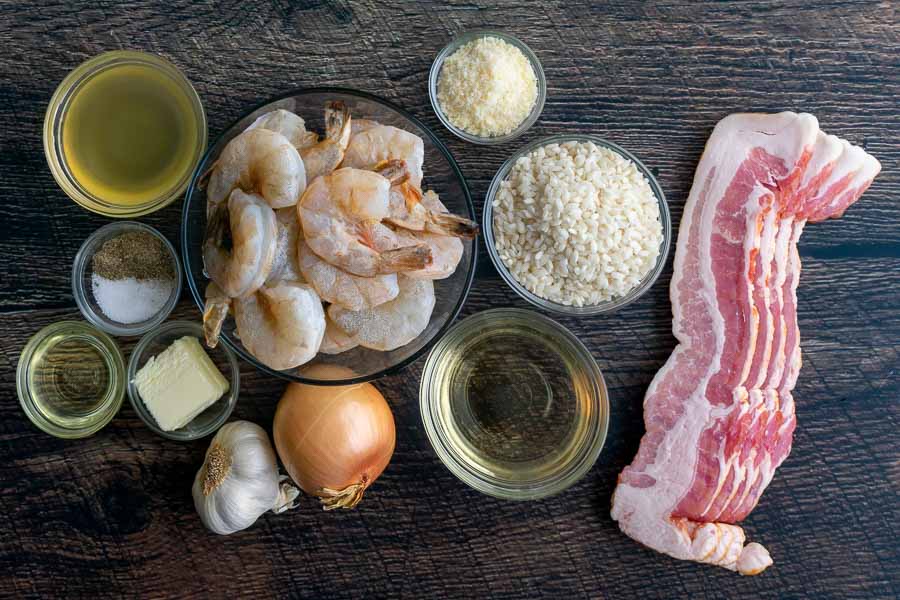
Creamy Shrimp Risotto with Bacon Ingredients
Large shrimp, grated parmesan cheese, arborio rice, bacon, white wine, onion, garlic, butter, olive oil, salt, pepper, and chicken broth

The Process

There is a lot of stirring to make risotto. A lot! That meant a lot of hands-on active time with no inactive time when I usually tidy up. I had dishes to do when dinner was over, but hubby stepped up 🙂

First off was the prep work. I had everything chopped, minced, and measured before I began cooking. I included the time to peel and remove the shrimp tails. The recipe list 10 minutes for prep and mine took 9 minutes.

Next, I heated the oil and butter in my smaller saucepan and sauteed the onions, garlic, and rice per step 1. My only mild hesitation was that seasoning with salt and pepper had to be done at the start. I went light on the salt (about 1/2 teaspoon) because I would be adding bacon and parmesan cheese, and it worked very well.

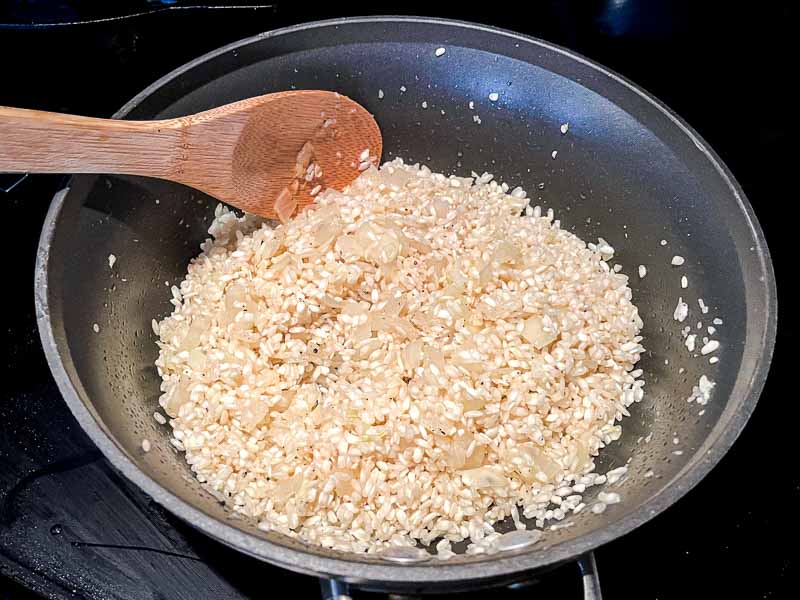
Arborio rice mixed with the softened onions

Adding the wine and broth a little at a time was the next step, stirring between until the liquid was absorbed by the rice. At the start, it took maybe 2 minutes to absorb, but that time increased as more and more liquid was added.

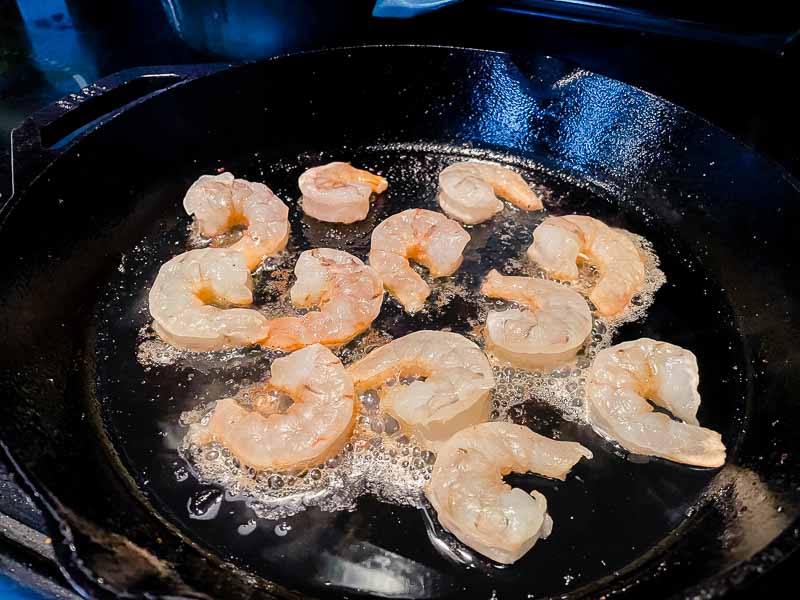
I managed to get the bacon into my cast-iron pan and fry it up as I stirred the risotto. Then I removed it to a paper-towel-covered plate to drain and fried the shrimp in the same pan. Luckily the bacon left just the right amount of fat, so I didn’t have to drain it. The shrimp took 1 minute per side, and my tongs were the perfect tool for the job.

The risotto finished after the shrimp and bacon. I stirred it almost constantly with small breaks so I could work on other steps. I removed the pan from the stove once I felt the risotto was at the right consistency and stirred in the parmesan.

My risotto from scratch was ready! I served it in pasta bowls topped with juicy shrimp and crispy bacon. Spoiler: it was absolutely amazing!

Frying the shrimp
Frying the shrimp

Timing

  • 9 minutes to prep
  • 39 minutes to cook*
  • 48 minutes total

*The cooking time includes about 10 minutes to fry the bacon and 4 minutes to fry 2 batches of shrimp.

The recipe lists a total of 45 minutes, so I came very close to that.

Chai Frappuccino

0

Can you tell I planned my blog menu waaay too far in advance? I had no idea this winter would be so cold when I decided to make this Chai Frappuccino, but I decided to forge ahead anyway. Mainly because I had most everything on hand, and I just plain need to save a few bucks this year. Never mind that it is going to get in the 40s for the next few nights here in “sub-tropical” South Florida. I don’t know how those in colder climates are handling it! But here is a delicious drink in case you can’t quite get that heat setting quite right and it’s just a touch too warm inside right now. Or if you are just dreaming of a warm summer day like I am 🙂

A copycat recipe of a Starbucks chai Frappuccino made with just a few simple ingredients! So easy and delicious!

Recipe Author: Madi at Snacks and Sips
Get the recipe

The Ingredients

As I mentioned, I had all of the ingredients for this Chai Frappuccino on hand, and that doesn’t happen very often. Ice and water are a given, but I happened to have extra whipped cream from the Pumpkin French Toast Casserole I posted last week. I also keep cinnamon on hand at all times as well as a selection of teas including chai.

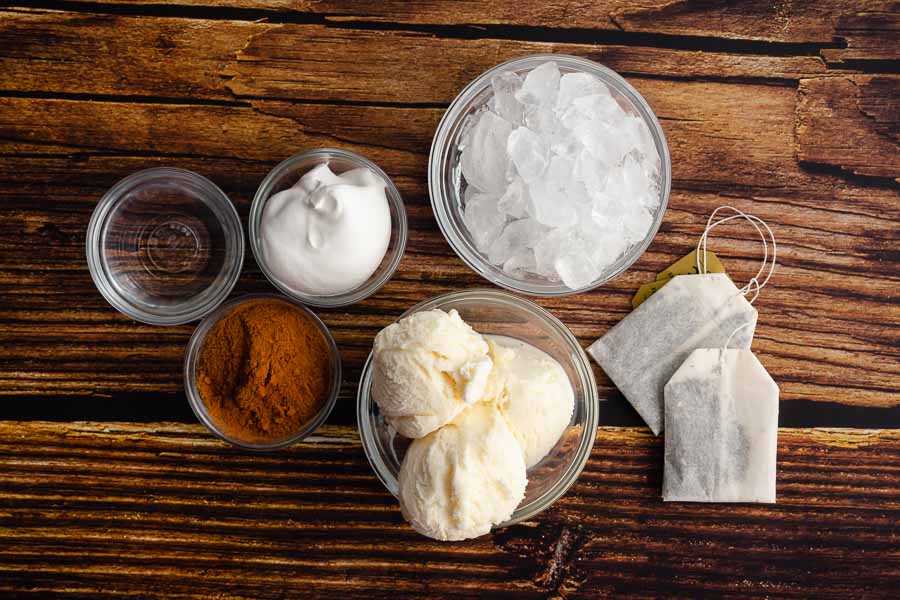
Chai Frappuccino {Starbucks Copycat} Ingredients
Chai tea bags, vanilla ice cream, ice, whipped cream, cinnamon, and water

The Process

This frappuccino was so simple to make, and the recipe breaks down into two main parts: brewing the tea and blending the drink. Mine took just a bit more than the 25 minutes listed. Here’s how my time was spent:

  • 12 minutes to heat make the tea
  • 15 minutes to cool the tea
  • 4 minutes to make the frappuccino
  • 31 minutes total

I kicked things off by brewing the tea and decided to skip the stove and boiled the water in my microwave. I was sure to watch, and 90 seconds had it at a rolling boil. Then I poured the water over the tea bags and let them brew for 10 minutes. Afterward, I removed the tea bags and placed the chai tea into my refrigerator. Tip: I put the tea container on top of a frozen gel ice pack to cool it faster.

Next, I added the chai tea, ice, and three generous scoops of vanilla ice cream to my blender and blended until smooth. Then I poured it into a mug and topped it with a spoonful of whipped cream and a sprinkle of cinnamon. I even threw in a long cinnamon stick to make it a little extra.

The recipe does say this makes two servings, but I used very large mugs. They hold 16 ounces, and I was only able to fill one. You’ll need to use much smaller mugs to get two 8-ounce servings.

Nourishing White Bean and Lemon Soup

0

Okay, the holidays are almost over, and now I’m craving something light and healthy after all that food. I love finding soup and salad recipes around this time of year. Especially soups because they are so comforting and filling. Bonus if they are vegan or vegetarian, and that’s why I am in love with this Nourishing White Bean and Lemon Soup. It’s full of things I love and it’s vegetarian but can easily become vegan by changing or omitting the cheese. I say change it to vegan cheese because it’s more than a garnish—it’s melted into the broth. How good does that sound? I need to find out if it states as good as it sounds!

Nourishing White Bean and Lemon Soup is a vegetarian, fiber-filled meal ready in just 40 minutes. A one-pot meal perfect for make-ahead lunches or easy weeknight dinner.

Recipe Author: Jamie Vespa MS, RD at Dishing Out Health
Get the recipe

The Ingredients

I was out of everything since I cleaned out my refrigerator for Christmas dinner and leftovers. My pre-shopping pantry check showed me I needed to buy everything but the kosher salt, pepper, and olive oil.

A trip to my usual grocery store was all it took to find the ingredients for this Nourishing White Bean and Lemon Soup. I know some people don’t like canned beans, but I find them so convenient because they eliminate the hours-long soaking and cooking process.

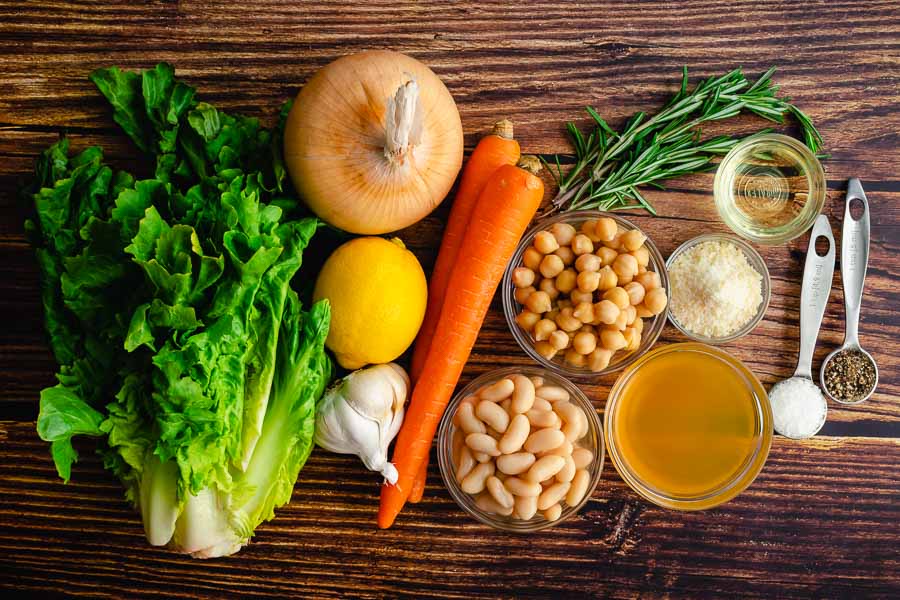
Nourishing White Bean and Lemon Soup Ingredients
Escarole, onion, lemon (zest & juice), garlic, carrots, rosemary, cannellini beans, chickpeas, olive oil, grated parmesan cheese, vegetable broth, salt, and pepper

The Process

This recipe lists 5 minutes to prep, 35 minutes to cook, and a total time of 40 minutes. My prep work took a bit longer. Here’s how it broke down:

  • 18 minutes to prep
  • 36 minutes to cook
  • 54 minutes total
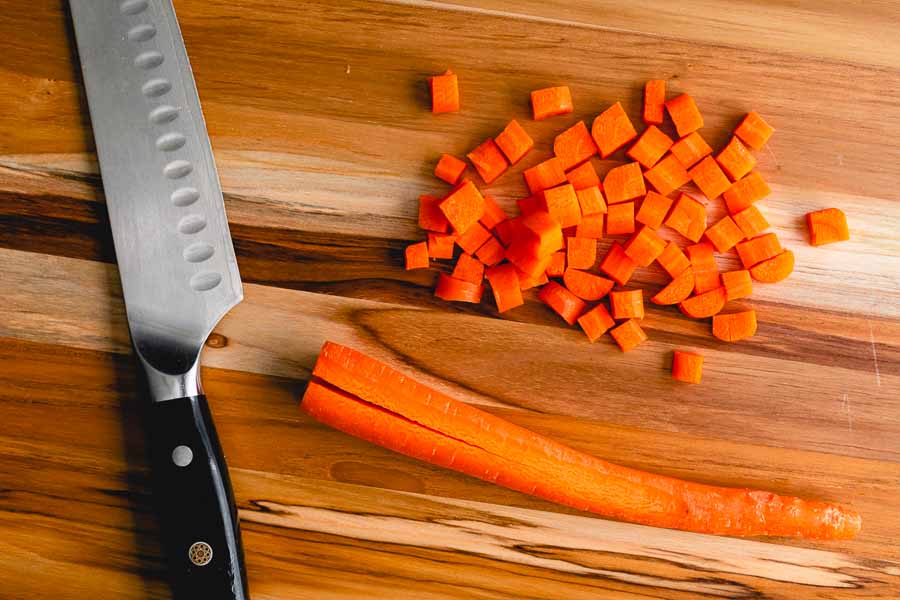
Peeled and diced carrots

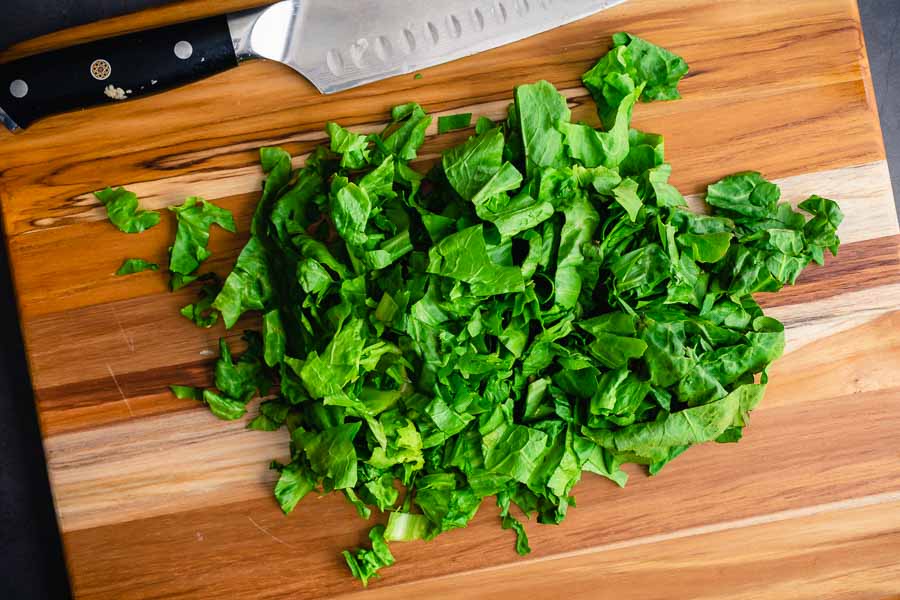
The prep work involved chopping onion, carrots, and escarole, mincing garlic and rosemary, plus draining and rinsing two cans of beans. I also had to zest and juice a lemon. There’s no way I could do that in five minutes. Maybe if I bought pre-chopped vegetables and used minced garlic in a jar. Maybe.

Despite the prep work taking longer than the time listed, everything else went smoothly. I started off by pureeing some of the cannellini beans with vegetable broth. Then I moved to the stove and began cooking the soup. The instructions were easy to follow along, and my cast-iron Dutch oven was perfect for this recipe, but I think a slightly smaller pot would work too.

Roughly chopped bunch of escarole

The cooking time was on point, and I had a delicious soup ready to ladle into bowls about half an hour later. I garnished it with a touch more of grated parmesan and a sprig of rosemary. So pretty and so tasty!

Pumpkin French Toast Casserole

0

Normally I’m looking for something light and healthy after the Holiday season, but I decided to change things up this year. It’s the first day of winter, and I’m in the mood for a hearty breakfast. That Pecan Pie Baked Oatmeal I made a while back has really gotten me into breakfast, so I’m going to continue the trend with this Pumpkin French Toast Casserole. I know, it’s a little late in the season for pumpkin, but I just had to!

Pumpkin French Toast Casserole can easily be prepped the night before and baked the next morning. It feeds a crowd, has a delicious pumpkin flavor, and a cinnamon streusel topping for a little crunch.

Recipe Author: Fiona Dowling at Just So Tasty
Get the recipe

The Ingredients

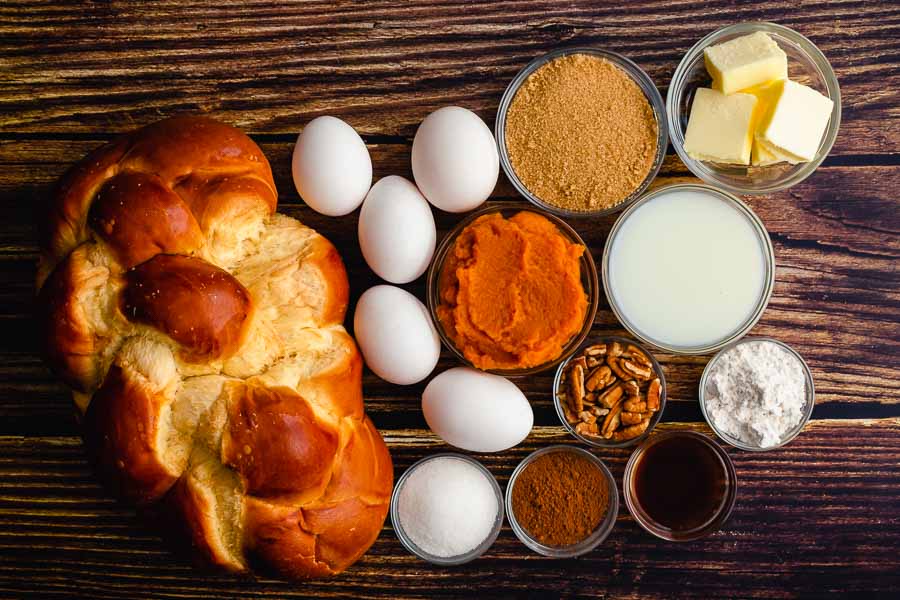
I normally have most of the Pumpkin French Toast Casserole ingredients on hand, but I had to top up after all that Christmas cooking and baking. That meant shopping for milk, butter, eggs, pumpkin puree, chopped pecans, and bread.

I chose a loaf of challah from the grocery store’s bakery. Buttery brioche would have been good too, but I went with the first option listed. I had everything else needed in my pantry.

Pumpkin French Toast Casserole Ingredients
Challah bread, eggs, brown sugar, butter, milk, pumpkin puree, pecans, flour, vanilla extract, pumpkin spice, and granulated sugar

The Process

The challah needs to be stale for this Pumpkin French Toast Casserole recipe, so I left the loaf on the counter (out of the bag) for about 24 hours. The outside was pretty hard, but the inside was still a little soft. I was worried it would get too mushy, but everything worked out fine.

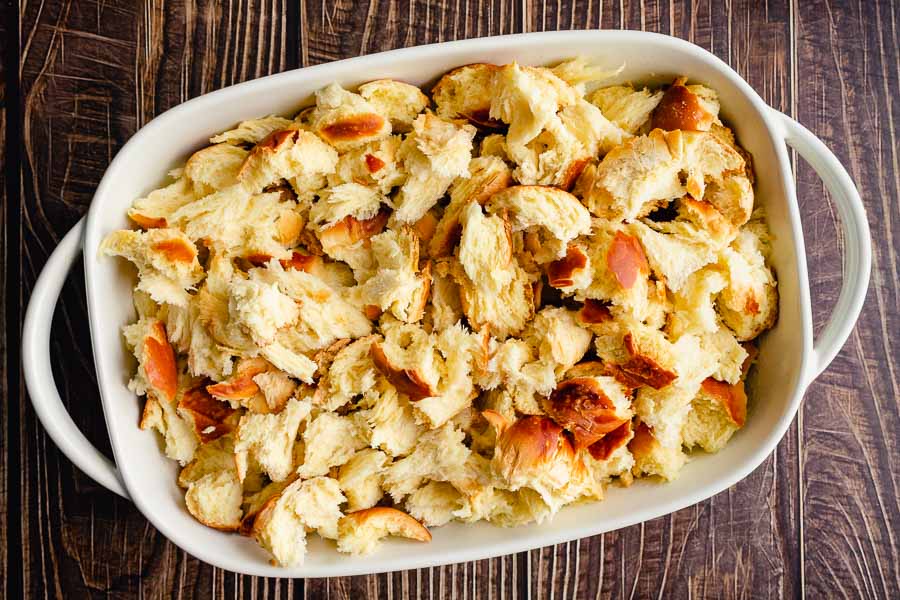
Torn pieces of challah bread in a baking dish

When I was ready to get cooking, I started things off by preheating the oven. (I love that there is an option to make this recipe a day ahead!) Then I sprayed a baking dish with oil and tore the bread into small pieces.

Next, I wanted to make sure the casserole ingredients blended thoroughly, so I changed up the steps. I broke the eggs into a mixing bowl and beat them lightly before adding everything else. Once blended I poured the pumpkin mixture over the torn bread and gave it a stir. I almost skipped this step, but I’m glad I didn’t because there were lots of dry spots in the bread (I was very surprised at that).

The streusel topping mixed up just as the instructions said. I used my fingers to crumble it over the casserole. Then I covered the pan with foil and popped it into the oven for 40 minutes. I removed the foil when the time was up and baked the casserole for another 15 minutes. It passed the toothpick test, so all that was left was to top it with some whipped cream and cinnamon and give it a try.

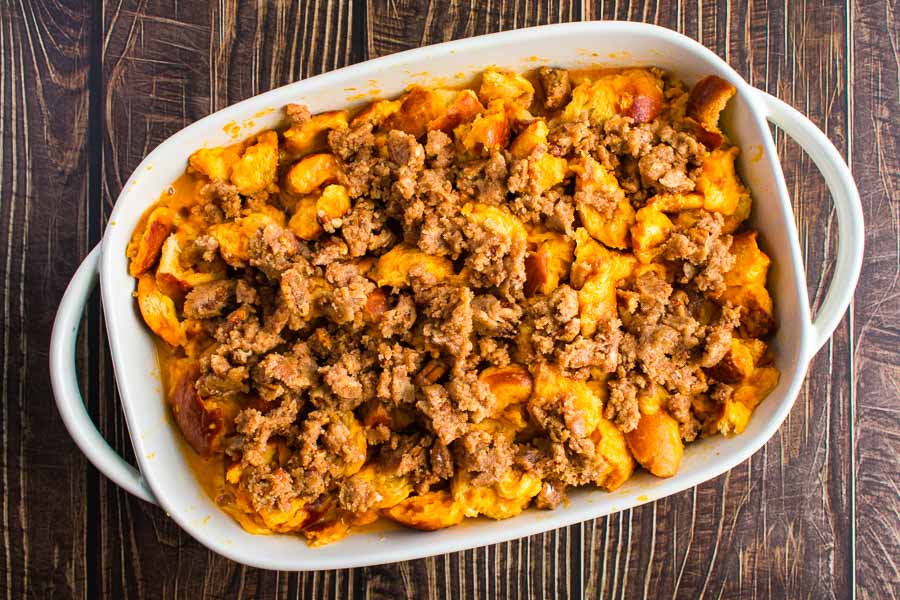
The unbaked casserole with streusel topping

Christmas Morning Mimosas

0

I have had a bottle of my favorite sparkling wine chilling in my refrigerator for ages, and I finally found the perfect way to use it with these Christmas Morning Mimosas. Not only will they allow me to finally indulge in that bottle, but they also fit the holiday and dinner theme. And the most important theme of the whole menu: simplicity. Score!

You can find my 2022 Christmas Dinner Menu as a free downloadable Google Doc. It includes a schedule, a shopping list, and an equipment list. The checkboxes on the lists are interactive and cross off each item when you click them. You may also print it or save it and make any changes you like.

Determined to get you in the holiday spirit, I’m serving you a cocktail so full of festive sparkle that you can’t resist.

Recipe Author: Jessica at How Sweet Eats
Get the recipe

The Ingredients

Not only did I have the champagne on hand, but I also had the cranberries thanks to Cranberry Glazed Turkey Breast. I also had sugar leftover from the Spiced Mascarpone Cranberry Cake, so that left me with a very short shopping list. I do love those!

All I needed to buy to make my mimosas was a package of rosemary sprigs and some cranberry juice. I did look for the others just to see if I could find the alternatives. Pomegranate juice was in stock but not blood orange juice.

Christmas Morning Mimosas Ingredients
Champagne, sugar, cranberry juice, cranberries, and rosemary

The Process

I was skeptical of the 15-minute total time when I read over this recipe, but I came close at 17 minutes.

Making the Sugared Cranberries

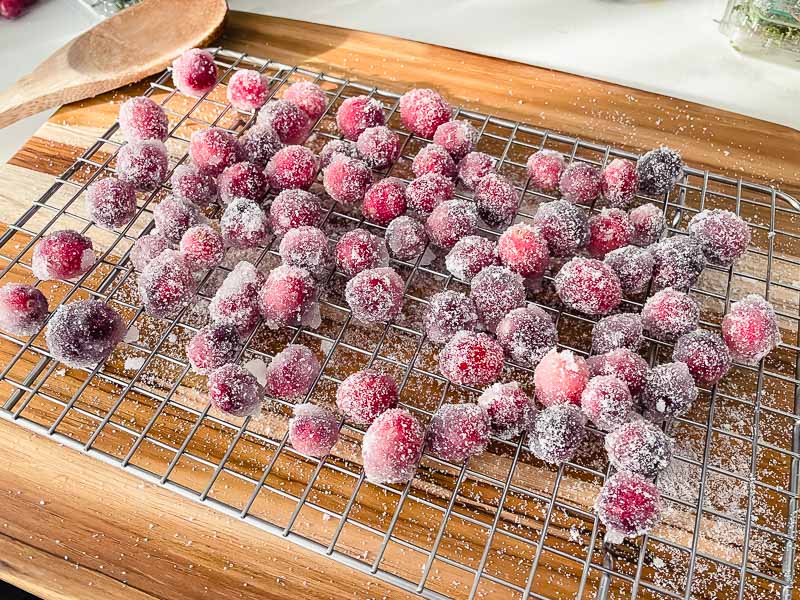
The first step was to make simple syrup by boiling sugar and water in a saucepan. It only took me a few minutes, but the sugar never quite dissolved. I ended up with a thick granulated syrup but that was perfectly fine for sugared cranberries.

The syrup needed to be cool to the touch before I could use it for the sugared cranberries. That’s what made me skeptical of the time, but I worked around it. First, I poured the syrup into a plastic container and placed it onto a gel ice pack. Then I put a smaller gel ice pack into the container and stirred until it was cool to the touch.

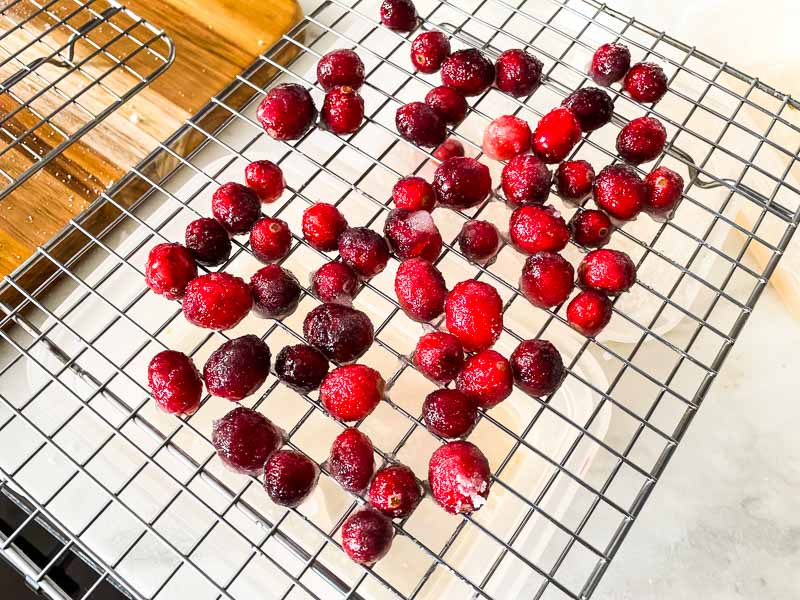
I tried picking out a few with my fingers and rolling them in sugar, but things got clumpy. I decided to put the cranberries into the syrup and then drain them on a wire cooling rack with a container underneath to catch the drips.

That allowed the excess sugar to drain off and kept away most of the clumps. I used a second rack for the sugared cranberries with a cutting board underneath to catch the stray sugar. It worked a treat!

Making the Christmas Morning Mimosas

All that was left was to make the Christmas Morning Mimosas. I followed the instructions by adding cranberry juice to the champagne flutes. Then I poured in most of the champagne, added the rosemary, topped off the champagne, then tossed in 3 sugared cranberries. There was a short pause after each step once the champagne went in because it foamed after each pour/garnish.

By the way, I tried them with 1 ounce of cranberry juice and didn’t think they were red enough. Doubling that was better but still not quite as red as the photos.

Brussels Sprouts Gratin

0

Since I decided to make a turkey breast again, I thought why not make Brussels sprouts again too? In fact, this year’s Christmas menu is just an alternate version of my Thanksgiving menu including some of the same recipes. That might sound boring, but the challenge was to make them different enough. I think I succeeded, especially with this Brussels Sprouts Gratin recipe. Adding tons of cream, cheese, and bacon makes everything better, and I’m pretty sure that’s the case with Brussels sprouts. Still, the only way to prove my theory is to try it, so let’s give it a whirl!

Brussels Sprouts Gratin with bacon…roasted brussels sprouts are paired with a rich cheesy cream sauce, perfect for any holiday occasion!

Recipe Author: Michelle Nahom at A Dish of Daily Life
Get the recipe

The Ingredients

A quick pantry check showed I had extra virgin olive oil, salt, pepper, flour, and cayenne on hand. I had to shop for everything else, but I found it all at my regular grocery store.

Brussels sprouts were sold in 1-pound bags, so I used them all. I figured they would come closer to 1.5 pounds after they were peeled and trimmed. Everything else was easy to find including shredded gruyere and sharp cheddar cheese. The slightly extra cost was worth the convenience when cooking such a big meal.

The only item I was unsure of was the light cream. A quick search on my phone as I shopped made me think half-and-half didn’t have enough fat. I ended up going with regular whipping cream since there was nothing labeled “light cream” in the dairy case. It worked a treat!

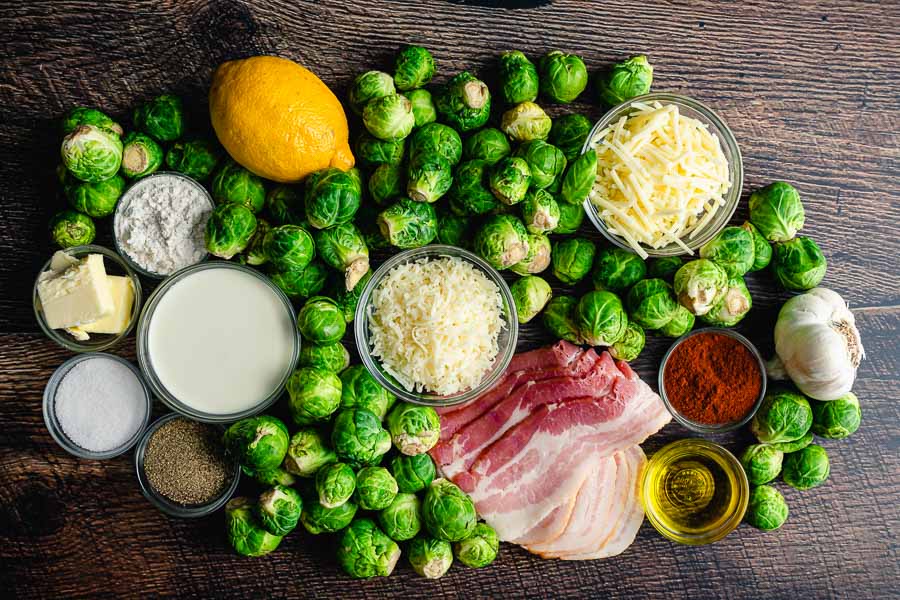
Brussels Sprouts Gratin (With Bacon) Ingredients
Brussels sprouts, sharp cheddar cheese, garlic, cayenne pepper, extra virgin olive oil, bacon, gruyere cheese, black pepper, salt, light cream, butter, flour, and lemon zest (shallot not shown)

The Process

This recipe has a few phases that make it more manageable:

  1. Initial prep
  2. First bake (sprouts only)
  3. Additional prep (sauce)
  4. Second bake

Most of the work is done during the initial prep phase since that’s when the Brussels sprouts are peeled, trimmed, and halved. That part alone took me 28 minutes (I blame the multitude of tiny sprouts), so you might want to pull up a barstool or do this sitting at a table.

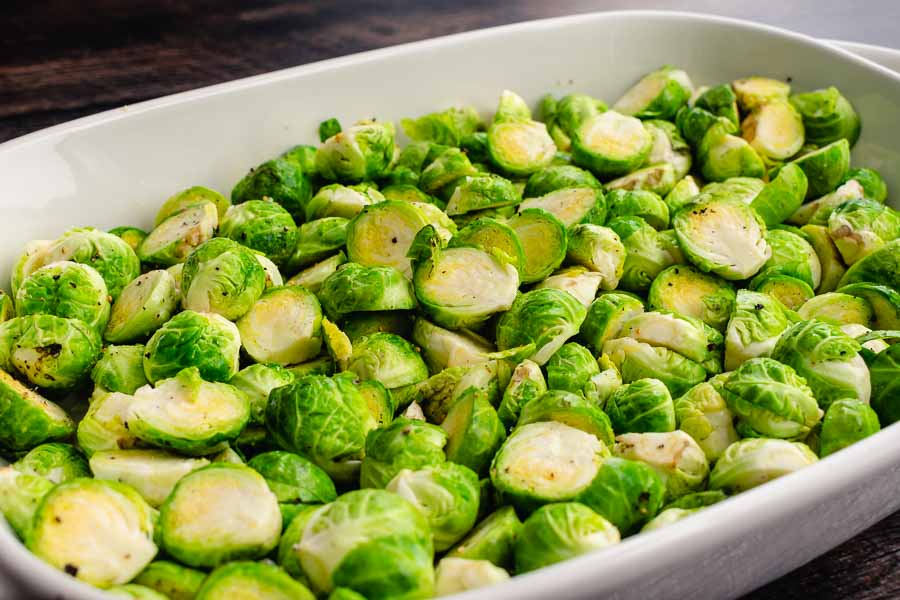
Halved Brussels sprouts tossed with olive oil, salt, and pepper

I fried and drained the bacon while I worked on the spouts, and it was cooled and ready to be crumbled by the time I was ready to use it. Once I had the Brussels sprouts prepped all that needed to be done was to toss them with olive oil, salt, and pepper. From there it was into a rectangular baking dish and into the oven to roast for 20 minutes.

I finished the prep work and made the cheese sauce while the Brussels sprouts were roasting. Tip: Both kinds of cheese needed to be reserved for topping. I mixed them together and scooped out 1/2 cup as part of the prep work.

The instructions were very clear and it seemed easier than I imagined it would be. It was mostly stirring and whisking the ingredients in a saucepan. I had a creamy, cheese sauce when I was done.

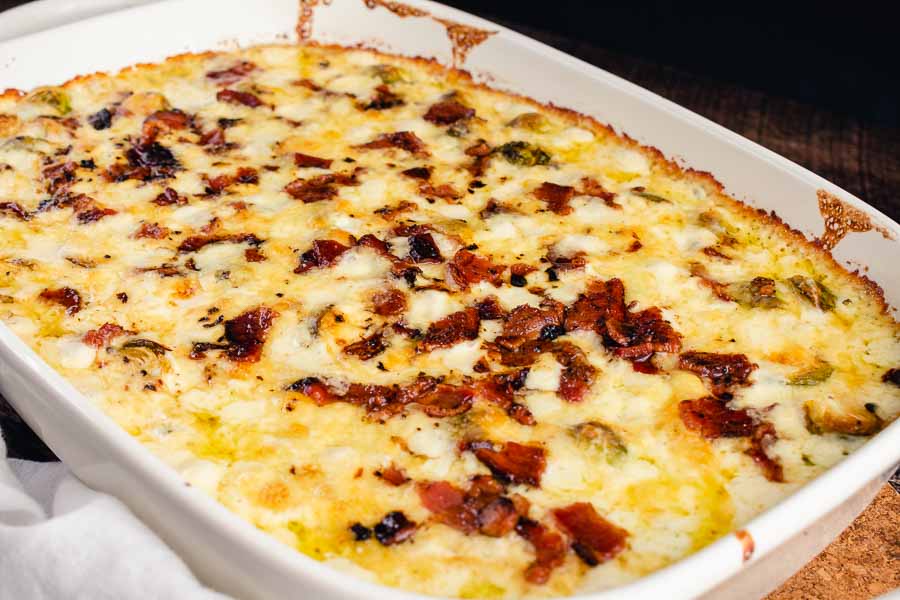
All that was left to do was spoon the sauce over the roasted sprouts, top with reserved bacon and cheese, and let everything finish baking. The result smelled great, but it wasn’t too impressive looking in the pan If I’m being honest. But don’t let that fool you—this recipe tasted incredibly good!

The finished Brussels Sprouts Gratin (With Bacon) Process

Timing

Here’s how my time was spent from start to finish:

  • 30 minutes to prep the Brussels Sprouts & fry the bacon
  • 20 minutes to bake
  • 19 minutes to finish prep, make the sauce, and assemble
  • 20 minutes to bake
  • 1 hour 29 minutes total

This recipe lists a total time of 1 hour, but mine took quite a bit longer. I’m sure a big part of the slowdown was the Brussels sprouts prep work. The ones I bought were all very small, so there were lots and lots of them to peel, trim, and halve. Tip: Look for larger Brussels sprouts to cut down on prep time.