Home Blog Page 10

Honey Rosemary Grapefruit Sodas

I came across some Florida Red Grapefruit in the grocery store the other day, and I just had to buy a bag. They’re sweeter and milder than regular grapefruit, and the red color is just beautiful. A quick Pinterest search showed me exactly what I needed to make with these beauties: Honey Rosemary Grapefruit Sodas. They looked gorgeous and sounded so refreshing, how could I pass them up? I couldn’t! So let’s give this soda recipe a try and see if it tastes as good as it looks.

Tart and fizzy honey rosemary grapefruit sodas combine a sweet and herbaceous rosemary simple syrup with fresh grapefruit juice and pure honey for a flavorful, naturally-sweetened homemade soda you’ll want to sip on all Summer long.

Recipe Author: Laura at Fork Knife Swoon
Get the recipe

The Ingredients

I had a few things to buy for this recipe besides the red grapefruit. And I need to point out that the recipe doesn’t say “red grapefruit”, just “grapefruit”. I only figured it out because I noticed the photo and read through the accompanying blog post.

But besides the red grapefruit, I needed some sparkling water, honey, and fresh rosemary. The only ingredients for these Honey Rosemary Grapefruit Sodas I had on hand were organic cane sugar and plain non-sparkling water.
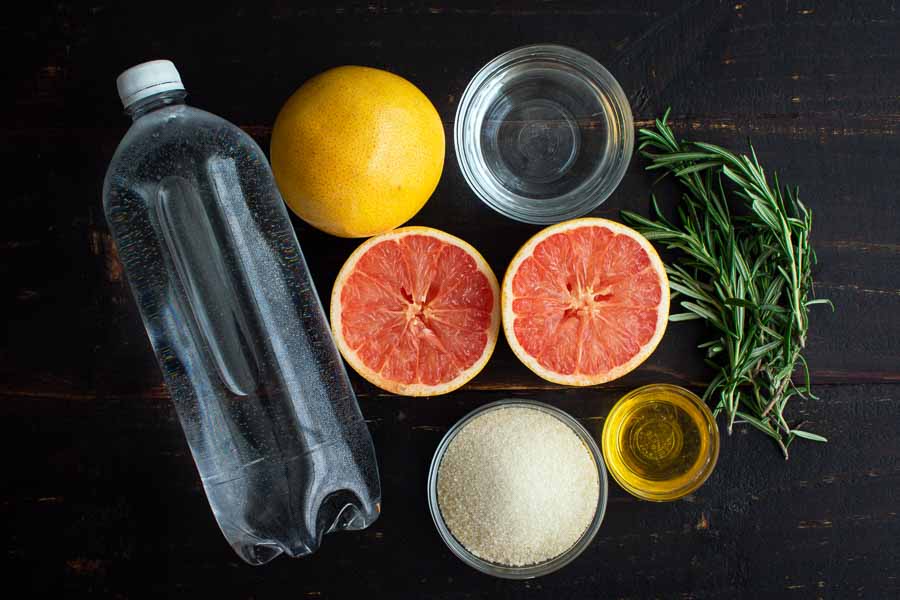
Honey Rosemary Grapefruit Sodas Ingredients
Red grapefruit, water, fresh rosemary, honey, organic cane sugar, and sparkling water

The Process

These Honey Rosemary Grapefruit Sodas are made in 2 parts: rosemary-grapefruit simple syrup and the sodas themselves. I divided this over 2 days, but everything could be done in a single day as long as you have enough time to chill the simple syrup.

Rosemary-Grapefruit Simple Syrup

This simple syrup is a little more complicated than the plain kind, but not by much. I started off by adding the water, sugar, and honey to a medium-sized pan. While they began to heat I used a vegetable peeler to peel off 2 strips of zest. Next, I juiced a red grapefruit. That gave me more than the 1/4 cup of juice needed.

I immediately added the freshly squeezed grapefruit juice to the pan and let it simmer. Then I added the grapefruit zest and rosemary sprigs and let the mixture simmer for another 5 minutes.

The simple syrup needed to steep for up to an hour after removing it from the heat. I let it infuse for a full hour before straining it and storing it in a sealed container in the refrigerator.
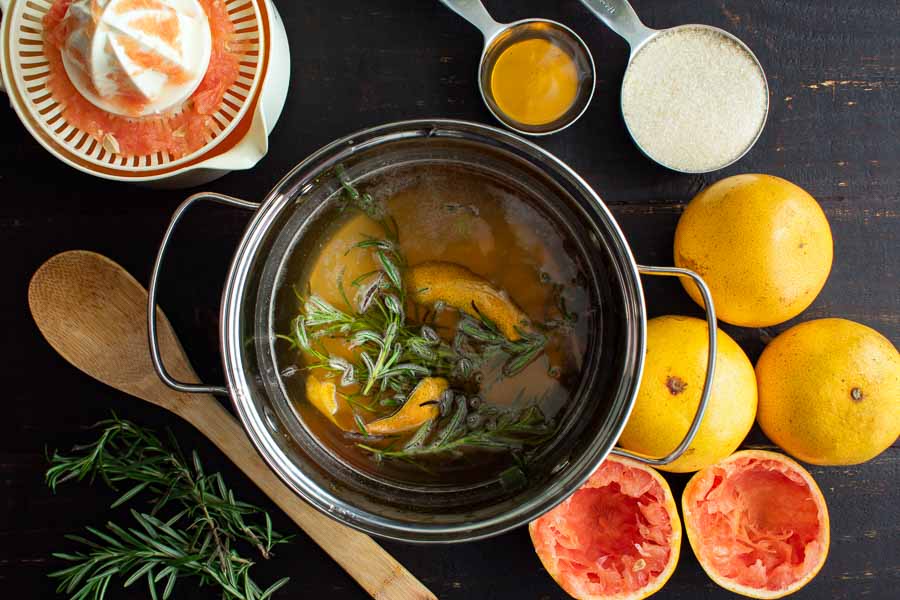
Making the rosemary-grapefruit simple syrup

Honey Rosemary Grapefruit Sodas

The next day it was time to put it all together and try these yummy-looking sodas! the “work” of this part was squeezing the red grapefruit juice. I used an electric juicer to make it quick, then I strained out the teeny tiny seeds it missed with a fine mesh strainer. I’m picky like that LOL!

Juicing 2 red grapefruits gave me 1 cup of juice. The soda portion of this recipe doesn’t give exact measurements. Instead, it gives portions of each ingredient so you can scale it very easily. I mixed my sodas with the following portions:

  • 1/2 cup red grapefruit juice (1 part)
  • 1/2 cup rosemary simple syrup (1 part)
  • 2 cups sparkling water (4 parts)

That gave me enough Honey Rosemary Grapefruit Soda to fill 2 16-ounce tumblers filled with ice cubes. A quick garnish of grapefruit wedges and rosemary sprigs, and I was ready to do some sippin’.

Timing

This recipe lists 60 minutes (1 hour) of prep time, and 15 minutes of cook time, for 1 hour and 15 minutes total. Here’s how my time broke down:

  • 1 minute to prep the simple syrup
  • 10 minutes to cook the simple syrup
  • 1 hour to steep the simple syrup
  • 1 minute to strain the simple syrup
  • 6 minutes to make and garnish the sodas
  • 1 hour 18 minutes total

I don’t think the recipe’s total time includes chilling the simple syrup. I didn’t include it because I just stuck it into the refrigerator and let it chill overnight. Either way, the time comparison seems fair, and I went just over the time listed.

Blood Orange Cardamom Cake

I like blood oranges, cardamon, and cake. And if it’s a colorful cake, well I’m in! Plus I’m always looking to practice my baking skills. I’m super-confident in my baking skills, and practice is the only way to improve. So when I scrolled across this beautiful Blood Orange Cardamom Cake recipe, I just had to try it. Actually, I wanted to try it a few months ago, but I couldn’t find blood oranges. Well, I happened to notice them the last time I went grocery shopping, so I grabbed a few of those beauties. Then I checked the recipe software on my phone (thanks Paprika!) to ensure I had all the other ingredients and practically ran to my kitchen to make this cake.

This cake is citrus cake dreams are made of. The cake itself is soooo fluffy and moist – like it’s kind of ridiculous how fluffy and moist it is. The flavour of the blood orange combined with that hint of cardamom is such a fantastic pairing I pretty much think it’s now necessary for me to make orange cardamom EVERYTHING.

Recipe Author: Kristie at The Sweet and Simple Kitchen
Get the recipe

The Ingredients

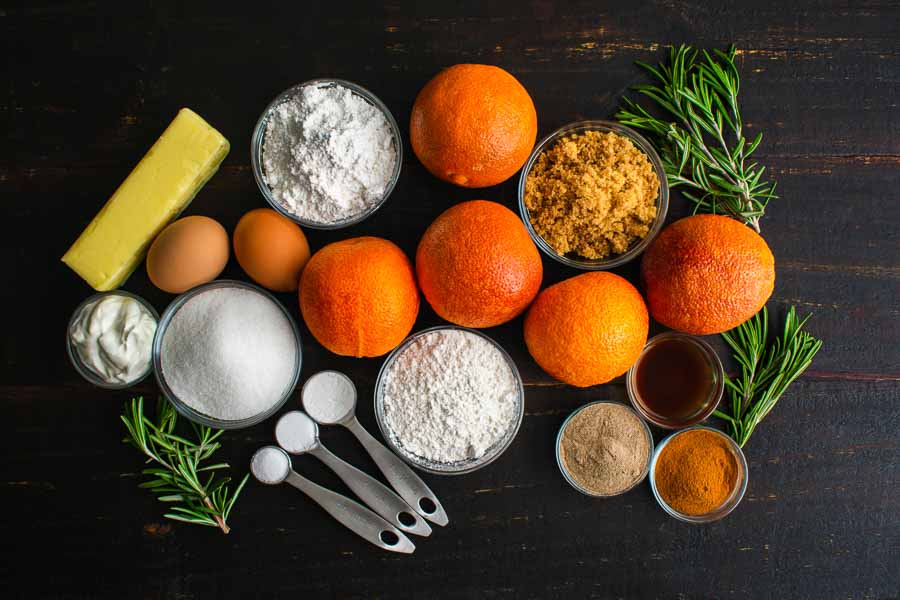
This Blood Orange Cardamom Cake recipe has quite a few ingredients, but I had very little shopping to do for it. Besides the blood oranges, I had to pick up some sour cream and rosemary sprigs.

Can you believe that was it?! I was thrilled! Everything else in this recipe was basics like flour, sugar, and spices I tend to keep on hand. I even had plenty of eggs in my refrigerator.

Blood Orange Cardamom Cake Ingredients
Blood oranges, brown sugar, rosemary sprigs, vanilla extract, cinnamon, cardamom, all-purpose flour, salt, baking soda, baking powder, granulated sugar, sour cream, eggs, butter, and icing (powdered) sugar

The Process

Before I could make this cake I had to make the garnishes: dried blood orange slices and sugared rosemary. The dried blood oranges took the longest to make so I started with them.

Making the Dried Blood Oranges

I considered using the dehydrate setting on my air fryer, but I decided to follow the recipe to truly test it out. That meant drying them in my oven for a couple of hours. I wasn’t sure how many oranges I would need for the cake and glaze so I only sliced up 1. That gave me 5 slices.

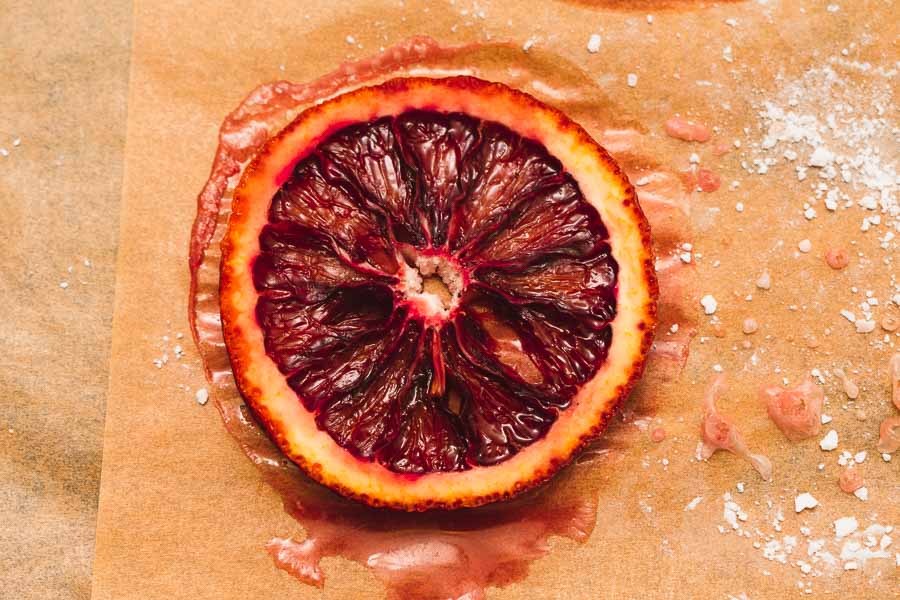
After slicing, I placed them on a parchment-lined sheet pan, sprinkled both sides with icing sugar, and popped them into the oven. The photo below shows what they looked like after 2 1/2 hours at 220℉.

The blood orange slices weren’t totally dried out, but they were noticeably drier. I stored the dried slices in a sealed container overnight with paper towels layered underneath to absorb any excess moisture.

A slice of blood orange after drying in the oven for 2 1/2 hours

Making the Sugared Rosemary

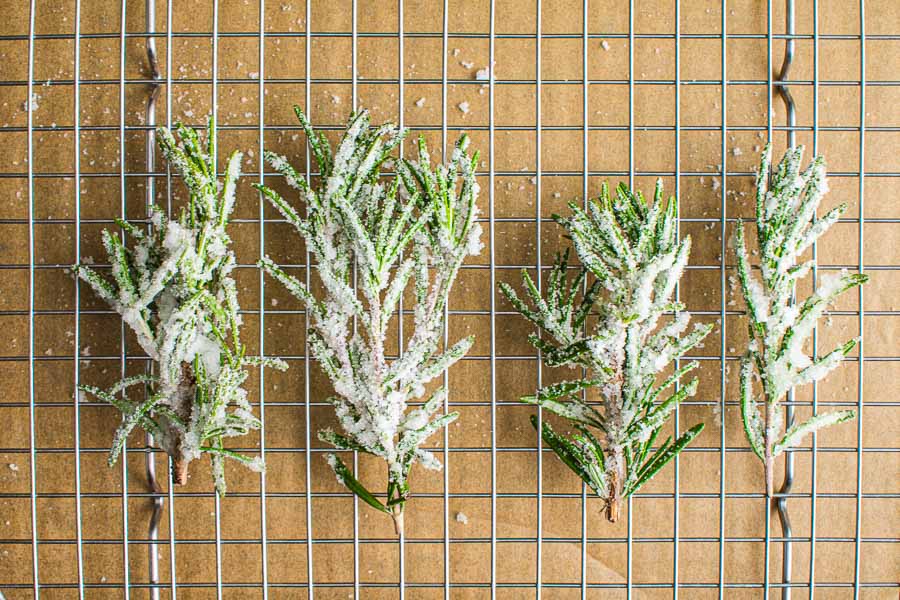
I made the sugared rosemary garnishes the next morning, right before I began baking. They were very simple too! I selected 4 sprigs, dipped them in water, then dredged them in a plate filled with sugar.

I let them dry for an hour or so on a wire cooling rack placed over a parchment-lined sheet pan. The sugar easily flaked off the rosemary, but the sheet pan and parchment paper made clean-up a breeze.

In the end, I think they were too big. If I could do it again I would snip off the tips of the sprigs so they could be spread amongst the blood orange slices.

Drying the sugared rosemary sprigs on a wire rack

Making the Blood Orange Cardamom Cake & Glaze

Once again my stand mixer came to the rescue! This cake could be made with a hand mixer, but I’m really appreciating my stand mixer more and more for allowing my hands to be free while I work.

The recipe walked me through mixing the wet and dry ingredients the combining them to make the cake batter. Tip: Prepping the cake pan so the cake releases in one piece is key to a pretty cake. I greased it with vegetable shortening (butter also works) and followed that with a thorough dusting of flour.

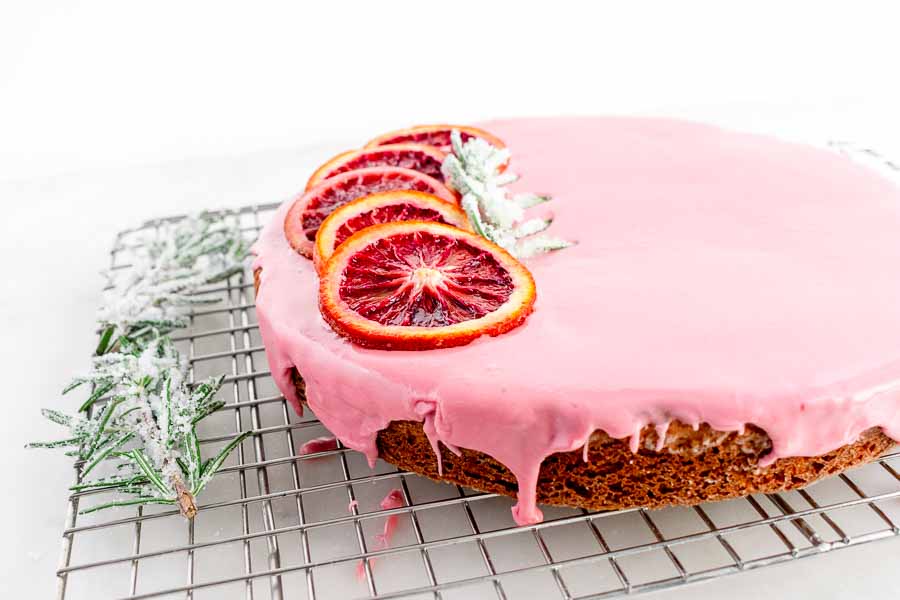
The recipe says to make the glaze while the cake bakes, but I decided not to do that because the glaze is designed to harden. Instead, I waited until the cake was completely cooled.

That gave me plenty of time to clean and dry my stand mixer’s bowl and switch the paddle for the whisk attachment. Then I made the glaze and immediately poured it over the cake. Tip: I used an offset spatula to smooth and spread the glaze before it hardened. All I had to do was spread it just to the edges so it would form drips.

I used an offset spatula to spread the glaze and make it drip over the sides before it hardened

Timing

There were no prep, cook, or total times listed on this recipe. All the times were listed as part of the instructions, though, and they seemed pretty accurate. Here’s how it went:

  • Blood Orange Slices:
    • 5 minutes to prep
    • 2 hours 30 minutes to dry
  • Sugared Rosemary:
    • 5 minutes to prep
    • 1 hour to dry
  • Cake:
    • 18 minutes to prep the cake
    • 35 minutes to bake
    • 20 minutes to cool in the pan
    • 30 minutes to cool on a wire rack
  • Glaze & Garnishes:
    • 10 minutes to make and apply the glaze
    • 2 minutes to decorate
  • 5 hours 35 minutes total

I spread this over 2 days so it was manageable for me, but it is possible to do it all in a single day if you start early. My only complaint is the blood orange slices didn’t dry out enough. I would let them spend a little more time in the oven if I could redo this recipe.

Spicy Shrimp With Cauliflower Mash and Garlic Kale

I have never felt super confident in my menu planning skills. I normally pair a meat recipe with a vegetable for our dinners and have leftovers for lunches. Soup and stew are easy because they’re the whole meal in one recipe, but soup can get old. That’s why recipes like this Spicy Shrimp With Cauliflower Mash and Garlic Kale appeal to me. They have an entire meal in one recipe. All the decisions are already made, and the instructions lay out the whole process. There’s no guessing whether the items will go together or how to time making them. So let’s find out if this combo is a keeper!

Tender-sweet shrimp and smoky garlic kale over creamy cauliflower mash. The most DELICIOUS fake-fancy weeknight dinner!

Recipe Author: Lindsay at Pinch of Yum
Get the recipe

The Ingredients

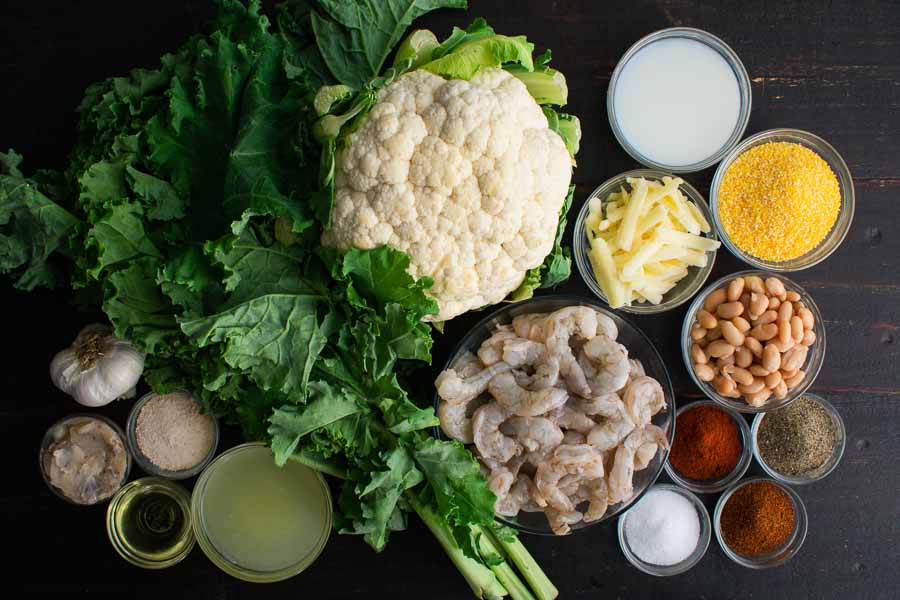
The ingredient for this spicy shrimp with cauliflower and kale recipe really wasn’t too long for a meal with 2 side dishes. I always keep things like olive oil, salt, garlic, spices, and bacon fat around. And I try to keep some chicken broth concentrate in my refrigerator at all times. I even had half a bag of coarse cornmeal left over from a polenta recipe.

I had to shop for fresh items like shrimp, cauliflower, and kale. It’s unusual for me to have a can of cannellini beans in my pantry, but I was out this time. I also had to pick up some milk and shredded cheddar cheese. I wanted to use havarti, but I could only find shredded white cheddar.

Spicy Shrimp With Cauliflower Mash and Garlic Kale Ingredients
Shrimp, cauliflower, milk, cornmeal, shredded cheddar , cheese, cannellini beans. black pepper, cayenne pepper, paprika, salt, kale, chicken broth, olive oil, bacon grease, garlic salt, and garlic

The Process

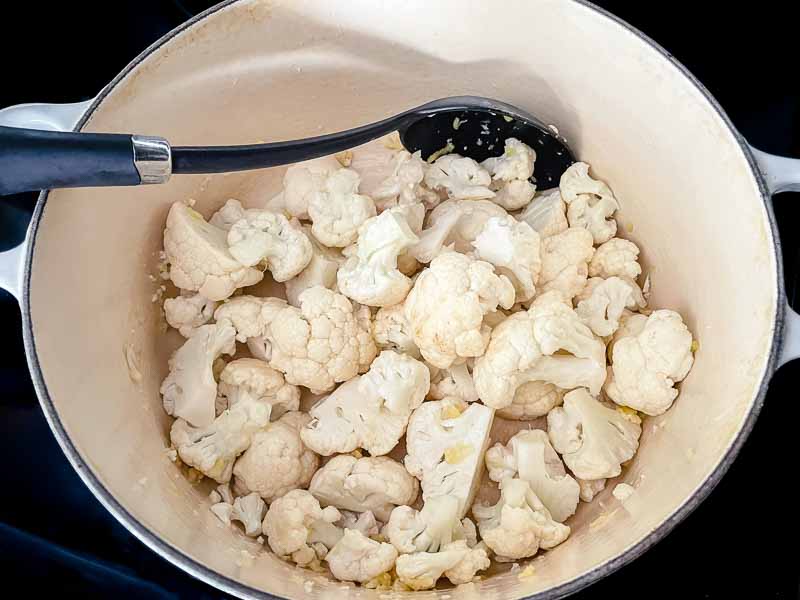
This recipe’s instructions have the entire process laid out in order. I began by sauteeing and then simmering the cauliflower and garlic in milk. My 5.5-quart Dutch oven was a good size for this.

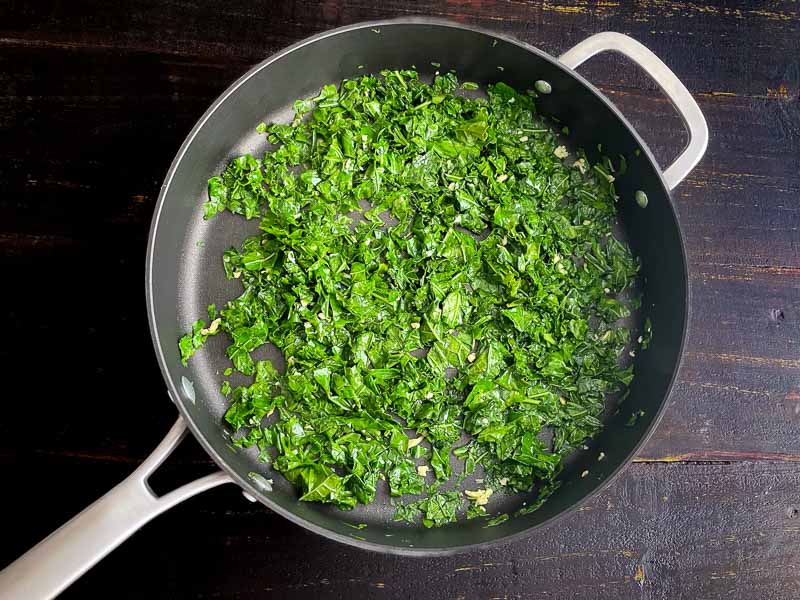
I prepped and cooked the garlic kale in a non-stick saute pan while the cauliflower was simmering. It was done just as the cauliflower finished up. When it was done I move the kale to a covered dish and set the pan aside to cool.

Sauteeing the cauliflower florets and garlic in my Dutch oven

I moved back to the cauliflower mash and added the cannellini beans. Mashing the mixture with the back of a wooden spoon as the recipe instructs wasn’t easy. Instead, I reached for my potato masher, and it worked a treat. I had a rough mash in no time.

The instructions warn the cauliflower mash will be soupy at this point, but adding the cornmeal and cheese did thicken it up. Still, I didn’t think it was thick enough, but it must have thickened as it sat while I made the shrimp.

Kale and garlic sauteed in bacon grease

First, the pan needed to be wiped clean with a paper towel. Next, I preheated it with the remaining olive oil while I mixed up a little of each spice mentioned. I was lucky that I found peeled and deveined shrimp because it cut down the prep work.

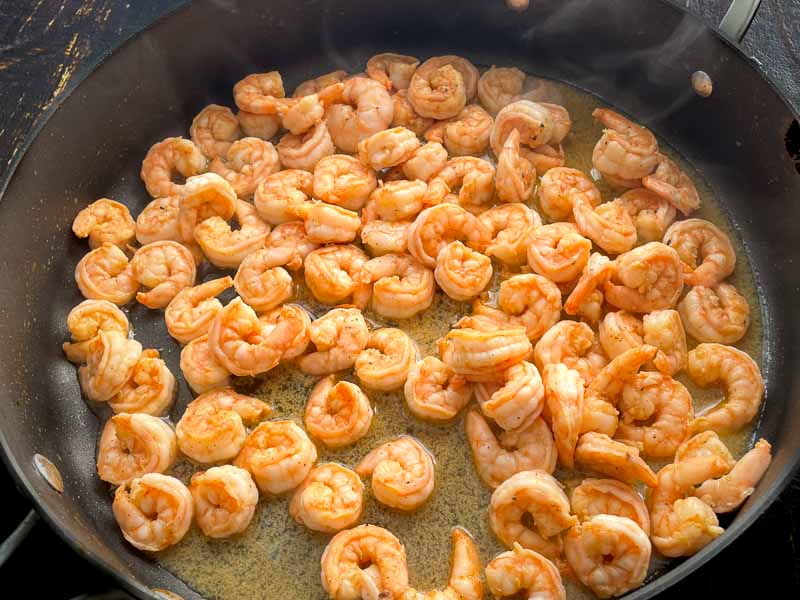
The spicy shrimp cooked quickly, so I kept a close eye on it. Tip: There was a short but intense blast of cayenne when the shrimp first went into the pan, but it dispersed quickly. You might want to stand back at the start so you don’t inhale it like I did.

Tip: Remove the shrimp from the hot pan as soon as they are done. The heat will continue cooking them and they will turn rubbery if left too long.

Shrimp sauteed in spices

Timing

This spicy shrimp with cauliflower and kale recipe doesn’t list preparation or cooking times. Instead, it lists a total time of 45 minutes. I came in under that at 34 minutes. Here’s how my time broke down:

  • 9 minutes to prep the cauliflower
  • 21 minutes to cook and mash the cauliflower
    • 8 minutes to prep and cook the kale (done while the cauliflower cooked)
  • 4 minutes to prep and cook the shrimp
  • 34 minutes total

I was extremely pleased to have such a nice dinner ready in just over half an hour!

Healthy Chicken Piccata

I have been making more of an effort to eat healthy lately, and that means cooking healthy. And no more takeaway for dinner. That means I need simple recipes that don’t contain tons of fat and calories. That’s why this Healthy Chicken Piccata recipe stood out. I love chicken piccata, but it normally has tons of butter in the sauce (which is probably why I love it!). This recipe omits the butter entirely and switches to a non-stick pan to reduce the amount of olive oil needed. But like all healthier recipes, my first question was ‘Will it taste as good?’ Only one way to find out, so let’s try it out!

Healthy chicken piccata recipe with lemon, capers, white wine and parsley. A delicious and healthy version of classic Italian lemon chicken.

Recipe Author: Katie Webster at Healthy Seasonal Recipes
Get the recipe

The Ingredients

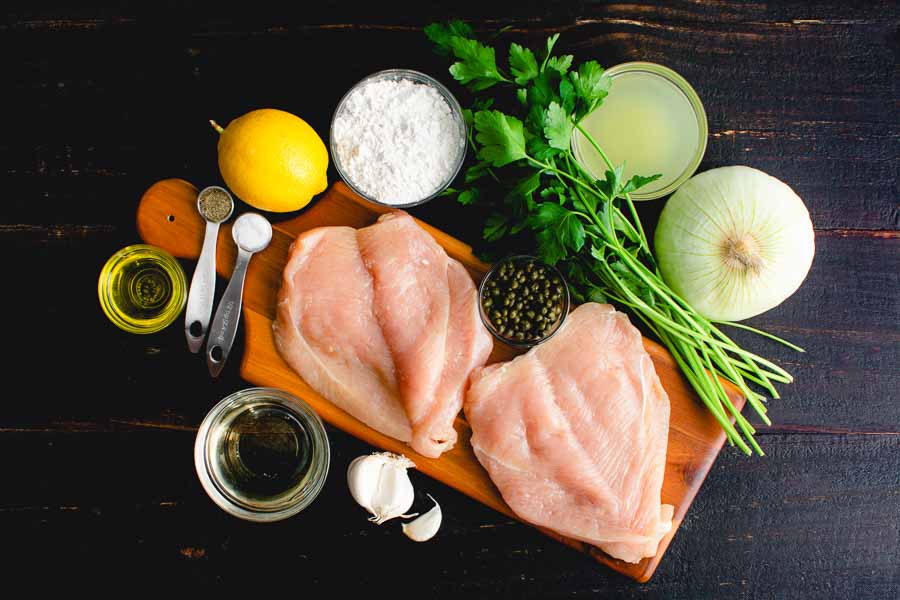
My pre-shopping pantry and refrigerator check showed me I had several ingredients for this recipe: all-purpose flour, salt, ground pepper, extra-virgin olive oil, garlic, chicken broth, and capers.

That left me with a few things to buy, but they were all basics that were easily found at my regular grocery store. I even took advice from the notes section to make things a little quicker and easier. I bought thin-sliced chicken cutlets so I didn’t have to cut them myself.

Healthy Chicken Piccata Ingredients
Chicken cutlets, all-purpose flour, parsley, chicken broth, sweet onion, garlic, dry white wine, salt, ground pepper, extra virgin olive oil, and lemon

The Process

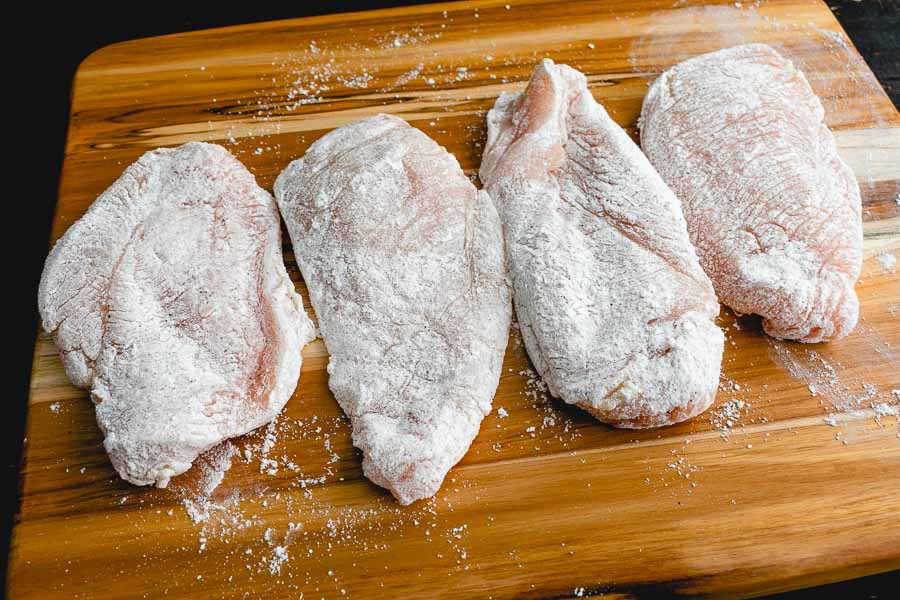
This recipe’s instructions broke down the steps into simple steps that were easy to handle. It begins with slicing the chicken into cutlets and dredging it in seasoned flour. I bought 1.3 pounds of chicken cutlets and cut them in half for 4 cutlets. The recipe says 1 pound of chicken will make 8 cutlets, so perhaps mine were very large.

Chicken cutlets dredged in seasoned flour

Next, I browned the chicken with a little olive oil in a large non-stick saute pan for 4 minutes per side. (I chose a saute pan instead of a skillet for the higher sides, but a skillet would work too.) The pan had to be wiped clean when the chicken was done. Tip: A balled-up paper towel held in kitchen tongs is an easy way to clean the pan while avoiding burns.

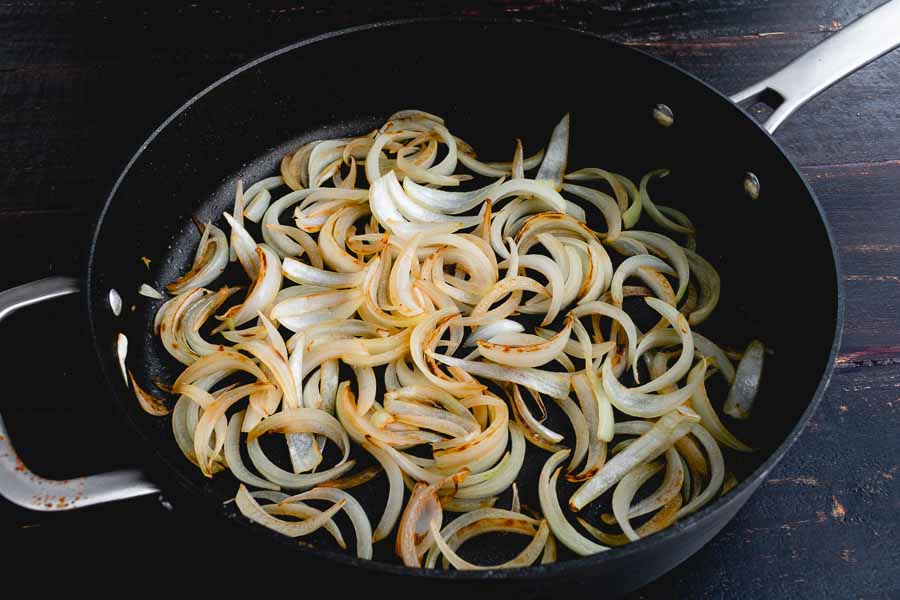
With the addition of a little more oil and I was onto the next step of browning the onions and making the sauce. From there the garlic is added, then the remaining seasoned flour. Next, the wine, broth, capers, and lemons are added and stirred constantly. Finally, the chicken was returned to the pan and coated in the sauce, and cooked for a few more minutes.

Browning the onions in a non-stick pan

Timing

This recipe lists a total time of 30 minutes but no prep or cooking times. I came pretty close to the total time:

  • 7 minutes to prep
  • minutes to cook
  • 35 minutes total

Stuffed Flank Steak with Prosciutto and Mushrooms

I love a good steak but there’s only so much you can do with a traditional steak. That’s when I hit up Pinterest and started looking for something new. I did that not long ago, and this Stuffed Flank Steak with Prosciutto and Mushrooms sounded too good to pass up. I have made stuffed flank steak (a.k.a roulade) before, but this version didn’t require butterflying which can be tricky. Nope, just found it thin, fill, roll, and cook. Sounds pretty simple and looks delicious. Let’s give it a try!

Nothing says ‘Be Mine’ like Stuffed Flank Steak with Prosciutto and Wild Mushrooms.

Recipe Author: Sommer Collier at A Spicy Perspective
Get the recipe

The Ingredients

I only had a few ingredients for this recipe on hand: salt, pepper, flour, and olive oil. I had to shop for the rest, but I didn’t expect any problems finding what I needed in one stop.

Flank steak can be a bit pricey. I found it for $16.99 per pound making a 1.935 piece $32.88. As I said, pricey but worth it for an occasional splurge.

I found pre-packaged provolone and prosciutto in the deli section. A 5-ounce package of provolone cheese was $9.99. It had 7 slices, and I used them all even though the recipe only calls for 6. The prosciutto was $10.49 for 3 ounces and had exactly 6 slices.

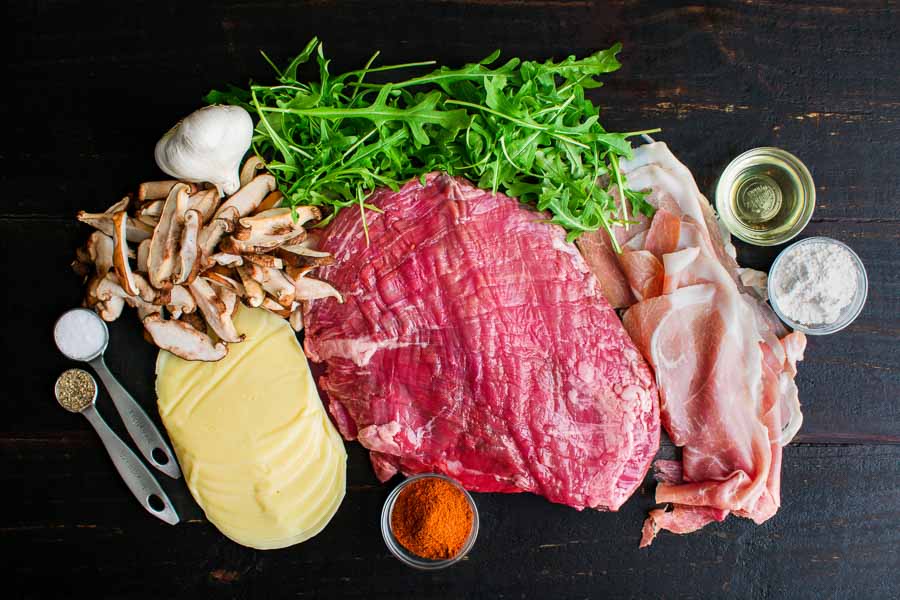
Everything else was easy to find except the mushrooms. They didn’t have anything labeled “wild mushrooms” so I had to choose one. I opted for sliced shiitake mushrooms.

Stuffed Flank Steak with Prosciutto and Mushrooms Ingredients
Flank steak, arugula, prosciutto ham, olive oil, flour, paprika, provolone cheese, shiitake mushrooms, and garlic

The Process

This recipe starts out with a little sauteeing. I heated a large cast-iron pan and fried up the mushrooms and garlic. Then I seasoned them with salt and pepper and set them aside.

This is only the second time I have made a stuffed flank steak. The first time was when I made Matambre a few years ago. That recipe called for butterflying the flank steak, but this stuffed flank steak did not. Instead, I placed the flank steak on a large cutting board, covered it with plastic wrap, and used the smooth side of a meat mallet to pound it thin. I don’t think I managed to get it to 1/4-inch, but I really gave it my all.

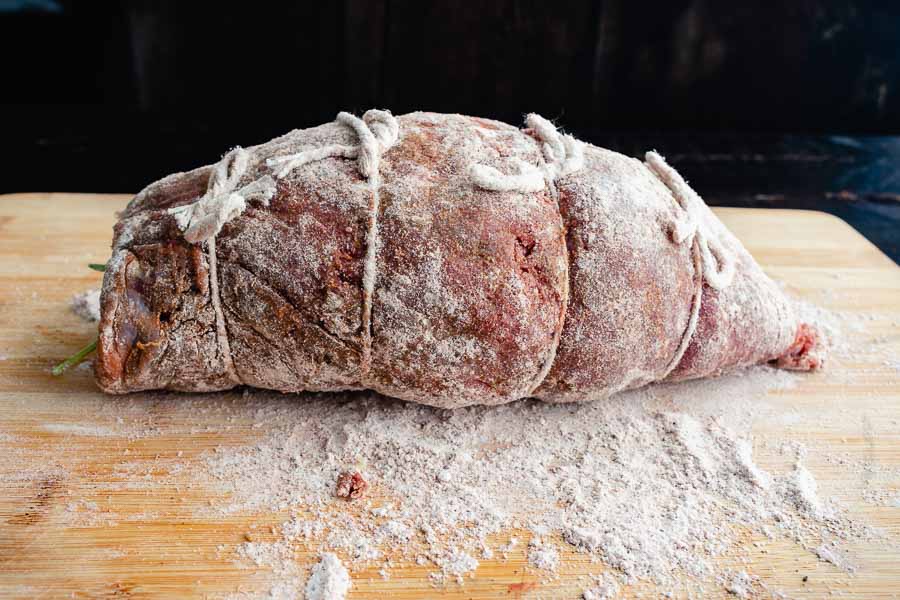
Now the roulade was ready to assemble. I layered the cheese, mushrooms, prosciutto, and arugula onto the flattened steak. Then I carefully rolled it up and tied it in 4 places with kitchen string. A few bits did fall out of the ends, but I was able to stuff them back into the ends.

The assembled roulade after dusting in flour

Next, I rolled the roulade in the flour mixture, heated some more oil, and browned it in the same pan I used for the mushrooms. I let it sear for 2 minutes per side for a total of 8 minutes. Then I put the pan into a preheated oven for 30 minutes.

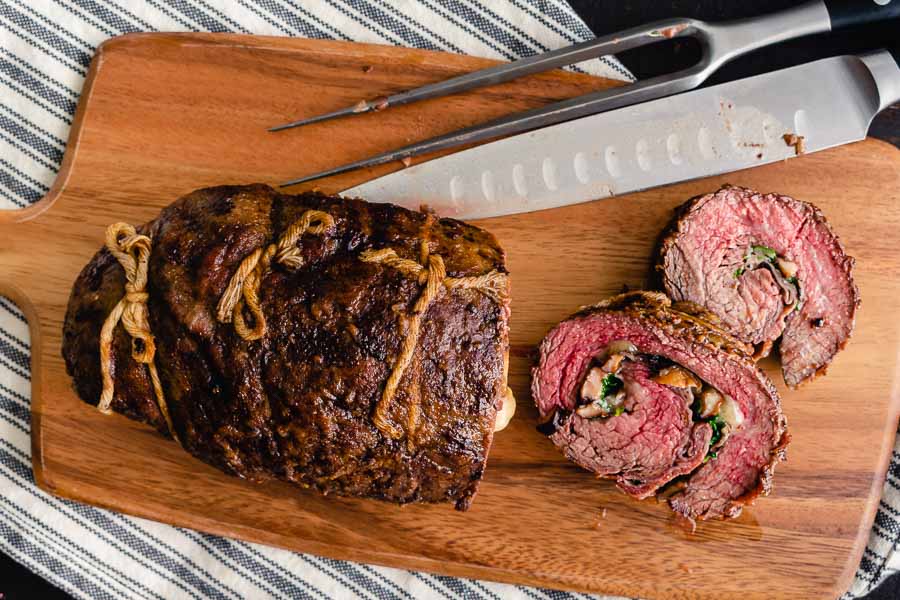
The roulade smelled incredible! I tented it for 10 minutes to let the juices redistribute. While the flank steak was cooking I made some Roasted Brussels Sprouts with Garlic Butter in my air fryer on the bake setting. They were a great side dish for this recipe!

Slicing the Stuffed Flank Steak with Prosciutto and Mushrooms

Timing

  • 31 minutes to prep
  • 30 minutes to cook
  • 10 minutes to stand
  • 1 hour 11 minutes total

The recipe lists 30 minutes to prep, 45 minutes to cook, and 1 hour and 15 minutes total. I saved a few minutes because the mushrooms browned up quickly. I added the garlic and seasonings and had them done in 10 minutes instead of 12.

Chicken Liver Curry

Chicken livers have been one of my favorite foods ever since I was a little girl. Beef liver is good too, but when it comes to liver, I’m team chicken. While mom’s fried chicken livers will always be my favorite way to eat them, I do enjoy trying new chicken liver recipes. I especially love trying international versions, and that’s what I’m doing today with this Chicken Liver Curry. It uses Indian spices and, like mom’s version, is served with rice. Basmati rice in this case (one of my favorites!). Let’s get started!

Chicken liver fry is an easy and spicy side dish that goes well with the rice varieties. The onions and spices together make a flavorful liver curry recipe.

Recipe Author: The Team at Hungry Forever
Get the recipe

The Ingredients

One nice thing about chicken livers is their price. They must not be terribly popular because I found a pound of them for $2.43. The recipe calls for 500 grams, and that converts to 1.1 pounds. Close enough.

I had all the dry spices in my pantry, but I did have to buy a few other things. I needed milk, coriander leaves (fresh cilantro), onion, lemon, coconut powder, and ginger-garlic paste. The last 2 items worried me.

The milk and produce were easily found at my regular grocery store. They even had coconut powder in the Caribbean food section. It’s just powdered coconut milk. I never knew that existed, but I’m keeping it in my pantry now along with powdered milk and buttermilk.

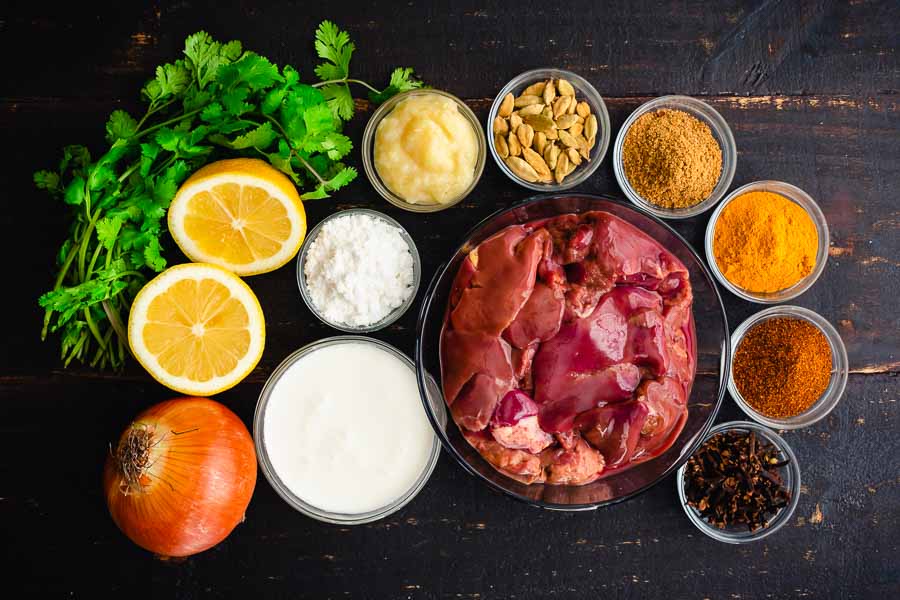
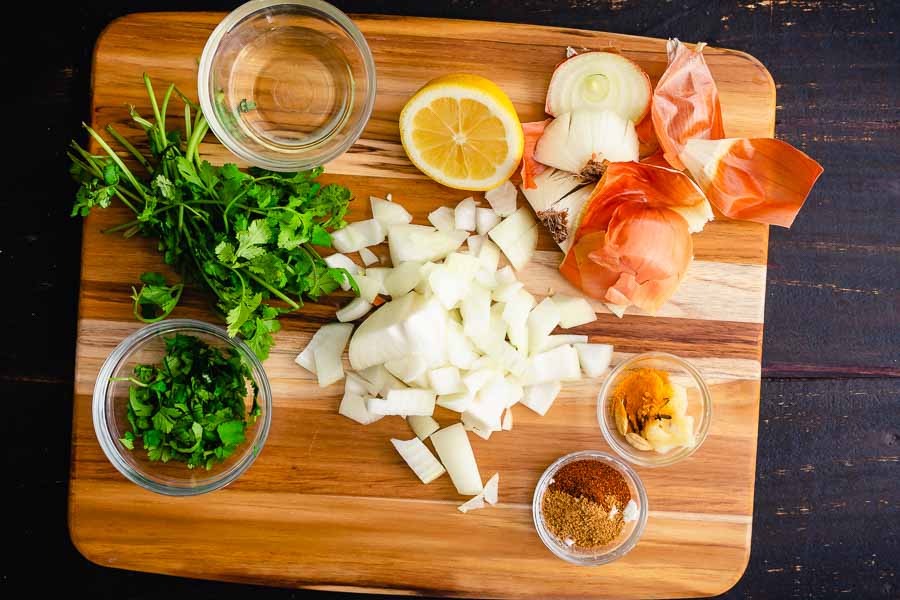
Chicken Liver Curry Ingredients
Chicken livers, milk, onion, cilantro, lemon, coconut milk powder, ginger-garlic paste, coriander powder, green cardamom pods, turmeric, red chili powder, and whole cloves (garam masala not shown)

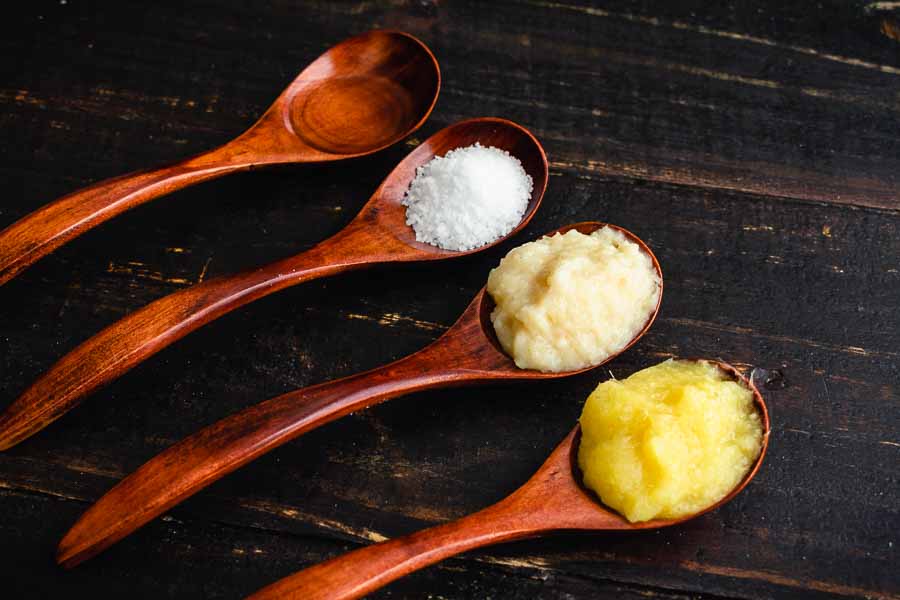
They didn’t have the ginger-garlic paste, but I was prepared for that. I could have ordered it, but I didn’t want to wait. Instead, I combined some ginger paste, garlic paste, kosher salt, and cooking oil to make my own. The recipe I used was:

  • 2 3/4 Teaspoons of ginger paste
  • 2 1/2 Tablespoons of garlic paste
  • 1/4 teaspoon kosher salt
  • 3/8 Tablespoon vegetable oil

It made a little more than this recipe requires, but not too much.

Tip: The final step of this recipe mentioned sprinkling on some garam masala. However, it’s not listed in the ingredients. I had some on hand, but it’s easy to miss in case you need it.

Ginger-garlic paste ingredients
Ginger-garlic paste ingredients: ginger paste, garlic paste, kosher salt, and vegetable oil

The Process

This Chicken Liver Curry recipe started off like a lot of chicken liver recipes with a 30-minute milk soak to tenderize the meat. I prepped the rest of the recipe while the chicken livers were soaking and started cooking some basmati rice to serve with it.

After rising the soaked chicken livers, I mixed in some spices and fried them up in a non-stick saute pan with the oil. Then I removed them to a plate, added some additional spices, and cooked up the onions.

The recipe calls for adding water during this step, and I assume that’s to make a sauce. I estimate I used 1/2 to 3/4 cups of water (just enough to make a thick sauce). Then I returned the chicken livers to the pan to finish cooking in the sauce.

The rice finished up while the livers were cooking, and I just set it aside. When the chicken livers were done I spread the rice over a 15-inch platter and topped it with the chicken livers, a sprinkle of garam masala, and some chopped cilantro. Lemon juice is optional, so I served lemon wedges on the side.

Prepping the onions, cilantro, lemon and spices

Timing

Here’s how my time was spent on this Chicken Liver Curry recipe:

  • 2 minutes to prep the milk soak
  • 30 minutes to soak the chicken livers
  • 5 minutes to rinse the chicken livers and heat the oil
  • 20 minutes to cook
  • 57 minutes total

The recipe lists 5 minutes to prep and 20 minutes to cook, for 25 minutes total. I went way over that, but I realized those times do not include the 30-minute milk soak. When I add that in I get a total time of 55 minutes, which is right in line with my experience.

Cozy Almond Rooibos Tea Latte

0

When I was planning today’s post I noticed it would also be National Almond Day. It was a while ago, but I planned to make a recipe that used almonds prominently. Most of the recipes I found were desserts, but I did find something a little different. This Cozy Almond Rooibos Tea Latte uses almond milk. I think that qualifies for National Almond Day, but it didn’t quite work out as almond-y as I had planned…

You know how you love chai lattes because they’re cozy and cinnamon-y and make you want to wear all of the sweaters? Well, rooibos lattes are just as magical. And this Almond Rooibos Tea Latte is like Harry Potter World at Christmas with matching Weasley sweaters magical.

Recipe Author: Sara Behrendt at Beginning With Bergamot
Get the recipe

The Ingredients

The recipe recommends a particular brand of loose rooibos tea, but it’s no longer available. Things like this happen all the time, so I substituted. I had a few bags of Twinings rooibos tea in my pantry.

I also had vanilla extract, maple syrup, water, and milk. It wasn’t almond milk, though, just plain old milk. I debated buying almond milk but ended up deciding against it. The recipe says either can be used, and money is tight right now. So much for National Almond Day 🤷🏻‍♀️

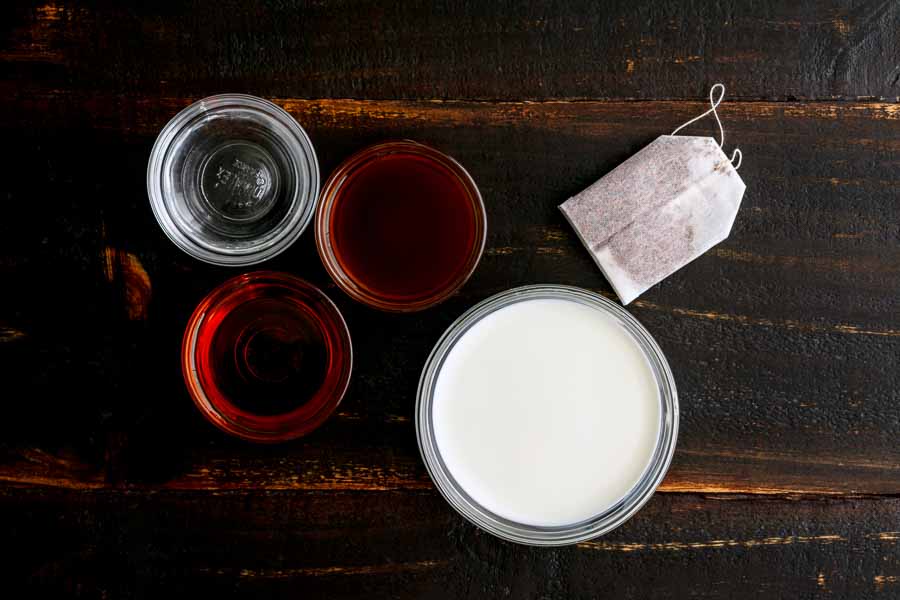
Cozy Almond Rooibos Tea Latte Ingredients
Rooibos tea, milk, vanilla, maple syrup, and water

The Process

The instructions for this recipe were straightforward and looked like they would be easy to follow. The only thing I was unsure of was how much of the bagged tea to use since I substituted it for loose tea leaves.

Substituting Bagged Tea for Loose Leaves

This recipe makes (1) 8-ounce serving and calls for 1 tablespoon of loose rooibos tea. However, I normally use 1 teabag for an 8-ounce serving, and there is 1 teaspoon of tea leaves in the bag (at the most). I wasn’t sure if simply cutting open a few bags of tea to get the same amount of tea leaves was the right thing to do.

I did a lot of searching and I think I found some bad information. I used 1 tea bag on my first try, but some additional searching makes me think I should have used 3. Here’s why…

The general rule for rooibos is:

1 teaspoon loose tea + 8 ounces water = 1 serving OR

1 tea bag + 8 ounces of water = 1 serving

This recipe calls for 1 tablespoon of loose tea with 8 ounces of water. There are 3 teaspoons in a tablespoon, so that would be 3X the normal amount of tea leaves. If I followed that scale I would have needed 3 tea bags.

Making My Cozy Almond Rooibos Tea Latte

With the amount of tea settled, I was able to get started by warming the milk and water in a saucepan. This latte has more milk than water, so it’s creamy from the start—something I really like. I used a nonstick pan and low heat so the milk wouldn’t burn. Then I added the vanilla and maple syrup once it finally came to a simmer.

I cut open the tea bag while waiting for the milk mixture to finish simmering. Once it did, I removed it from the heat and added the loose tea. The recipe doesn’t specify, but I covered the pan to help keep it warm.

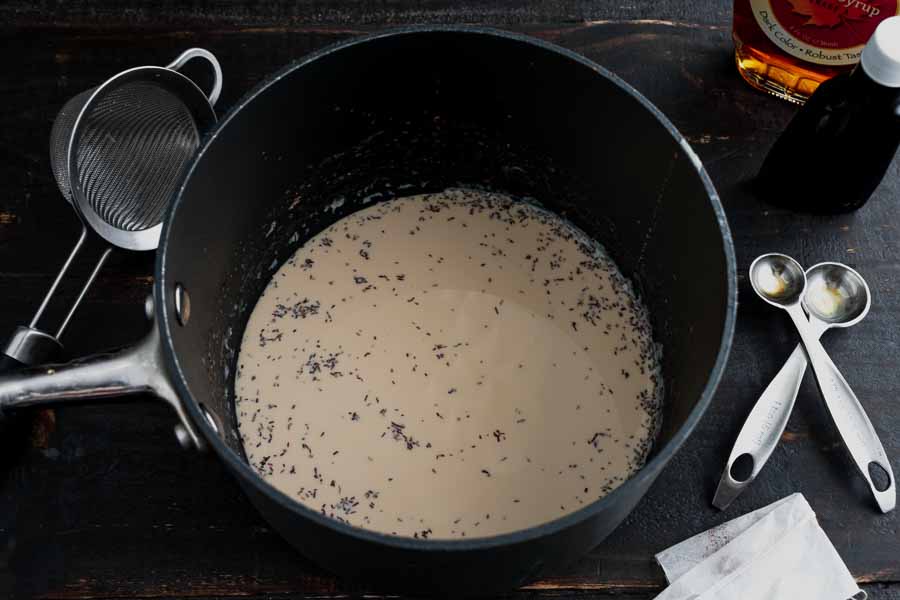
Loose tea steeping in warmed milk

After steeping for 7 minutes the milk had turned a pale beige color. I used a fine mesh strainer to filter out the leaves. An Irish coffee mug was just the right size for this latte. A dash of cinnamon on top, and I had a lovely Cozy Almond Rooibos Tea Latte that I couldn’t wait to try.

Timing

This recipe doesn’t list prep, cooking, or total times. The only times shown are part of the instructions, and they were accurate. Here’s how it went for me:

  • 10 minutes to simmer the milk mixture
  • 7 minutes to steep the tea
  • 1 minute to strain and garnish
  • 18 minutes total

Raspberry and Chocolate Valentine Cocktail

0

It’s Valentine’s Day, a day that’s all about pink and red hearts. I’m not so into those, but I can’t turn down an excuse for a pretty cocktail, and this Raspberry and Chocolate Valentine Cocktail looks gorgeous! My love for raspberries and chocolate is well-documented, and I can’t say no to combining them into a pretty pink cocktail with sprinkles. I’m imagining sweet, fruity, and creamy goodness in a martini glass. With sprinkles 💖 How good does that sound? I can’t wait to start on this one, so let’s get into it!

Raspberries are combined with chocolate liqueur, half and half, and vodka for a beautiful, romantic Valentine’s cocktail.

Recipe Author: Barb at Creative Culinary
Get the recipe

The Ingredients

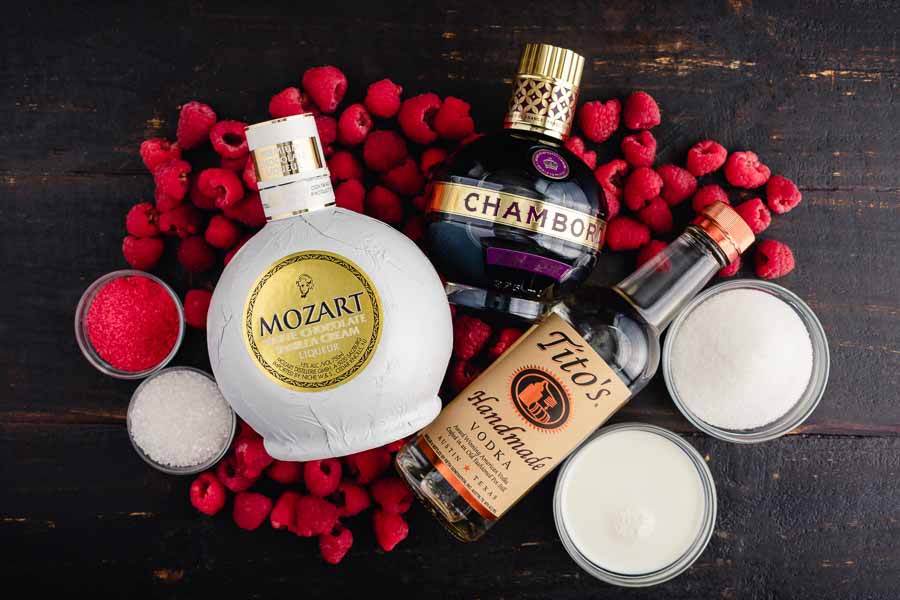
This recipe doesn’t have many ingredients, but I only had a few. I had a bottle of Mozart white chocolate liqueur leftover from making a White Chocolate Gimlet recipe a while back. And sugar, of course, plus some white sprinkles from a Full Moon Martini for last Halloween. I even had red sugar sprinkles, but I can’t remember what from.

That left me to buy the vodka, half and half, and raspberries. The latter two were easily found at my regular grocery store. The vodka was just a matter of a quick trip to the liquor store.

Raspberry and Chocolate Valentine Cocktail Ingredients

The Process

This Raspberry and Chocolate Valentine Cocktail is made in 2 steps: raspberry syrup then the cocktail itself. Here’s how my time was spent:

  • 10 minutes to prepare the raspberry syrup
  • 5 minutes to chill the glasses
  • 2 minutes to rim the glasses
  • 3 minutes to make the cocktails
  • 20 minutes total

My total time was 5 minutes longer than the total listed on the recipe. However, I used large 8.3-ounce martini glasses and had to make 1.5 times the recipe to fill both.

Making the Raspberry Syrup

First up is the raspberry syrup. I expected it to be similar to making simple syrup, but there was an important difference: no water.

That’s right, there is no water in the raspberry syrup. Instead, heating the raspberries caused them to break down and release their juice and dissolve the sugar. The result was a more concentrated raspberry flavor. And if that wasn’t enough, I added some raspberry liqueur after removing the raspberry mixture from the heat.

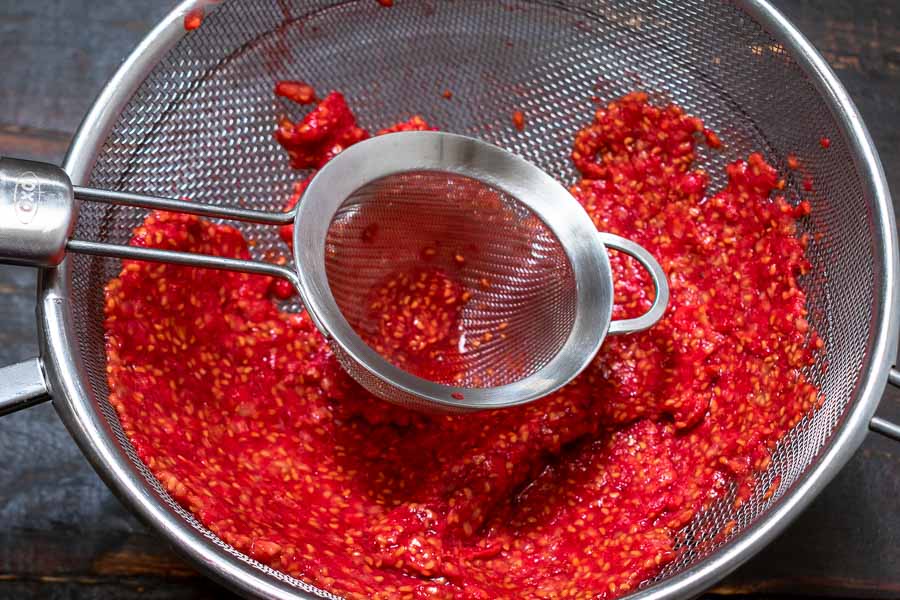
There were tons of seeds in the syrup, so the final step is straining it. I used my large mesh strainer and pressed the raspberries with the back of a wooden spoon. A few seeds escaped the strainer, so I did a second strain using a fine mesh strainer specifically designed for cocktails.

I refrigerated the syrup for a few days before I actually made the cocktail. It was pretty cool after being strained, but life happened, and I just couldn’t get to it right away.

I double-strained the raspberry syrup to get out all the seeds

Making the Raspberry and Chocolate Valentine Cocktail

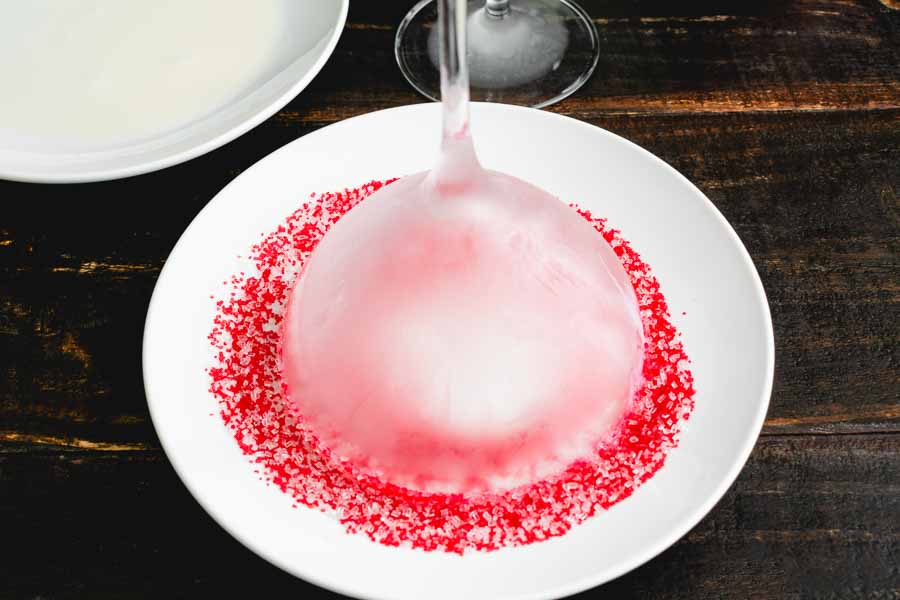
I mixed the red and white sugar sprinkles while the glasses chilled. I simply poured a little white chocolate liqueur into a saucer and the sprinkles into another. Then I dipped the rim of each chilled glass into the liquid followed by the sprinkles. The results were perfect!
Lastly, I added all the drink ingredients to a cocktail shaker filled with ice, shook, and strained the pink mixture into the prepared glasses. I happened to find some heart-shaped marshmallows and used them as a garnish with long bamboo cocktail picks.

Rimming a chilled martini glass with white chocolate liqueur and sprinkles

Make Your Own Lox

0

It’s National Bagels and Lox Day, and I just had to celebrate. And not only celebrate but actually try making my own lox. Just reading the recipe prompted me to do some research, and I realized I have been incorrectly calling it smoked salmon for years. There is no smoke involved at all. Instead, lox is salmon cured in a mixture of salt and herbs. If you really need that smoked flavor (and I don’t blame you!), you want nova—salt-cured salmon that is then smoked. Both are delicious, but since I don’t have a smoker and it’s Lox and Bagel Day, I’m going to try making my own lox.
The only thing left to do once you’re done curing your own lox is to make sure you have plenty of a chilled sparkling wine on hand. Believe me: You will never again buy lox in the grocery store once you learn to make your own.

Recipe Author: Tim Vidra at Tasting Room
Get the recipe

The Ingredients

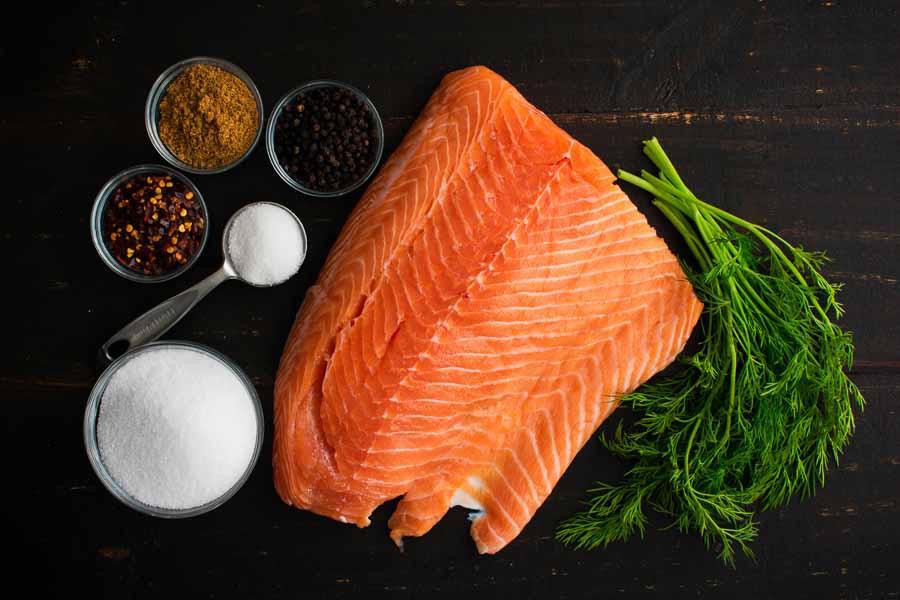
This lox recipe is pretty simple and has only 7 ingredients. Most of them are spices, sugar, and salt. It isn’t specified, but I used non-iodized sea salt because iodized salt has an aftertaste I notice. I have to recommend non-iodized sea salt so the salmon doesn’t end up with the same aftertaste.

The only other items needed are a 1 1/4-pound salmon fillet and a bunch of fresh dill. I found both at my regular grocery store. A 1.79-pound skin-on fillet was $23.25, and a bunch of organic dill was $2.35, bringing my total cost to $25.60.

Make Your Own Lox Ingredients
Salmon fillet, fresh dill, sea salt, sugar, red chili flakes, ground coriander, and black peppercorns

The Process

This recipe sounded very easy, and only had a few steps. Sometimes I wonder if I’m underestimating these types of recipes—they sound almost too good to be true. I’m happy to say that wasn’t the case with this one!

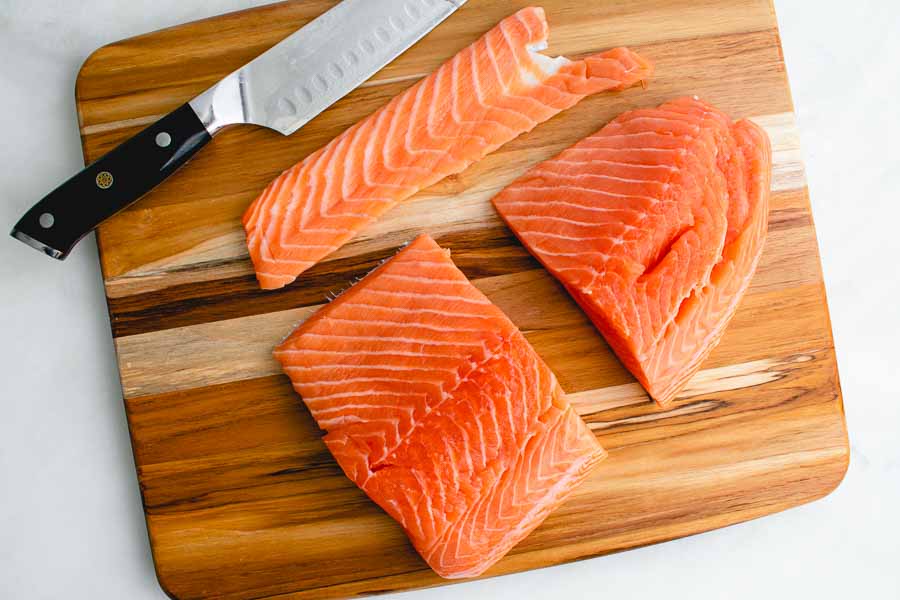
I did add a little to Step 1. The filet I bought had a very thin edge that I trimmed away. There was almost no meat on it (it was only about 1/8″ thick), so I got rid of it.

I trimmed away the thin edge of the salmon fillet
I trimmed away the thin edge since there was barely any meat on it

Next was mixing the salt and spices. Talk about easy! The black peppercorns didn’t even need to be ground or crushed. I will admit I considered crushing them to release more of their flavor. I decided not to since it wasn’t mentioned in the recipe.

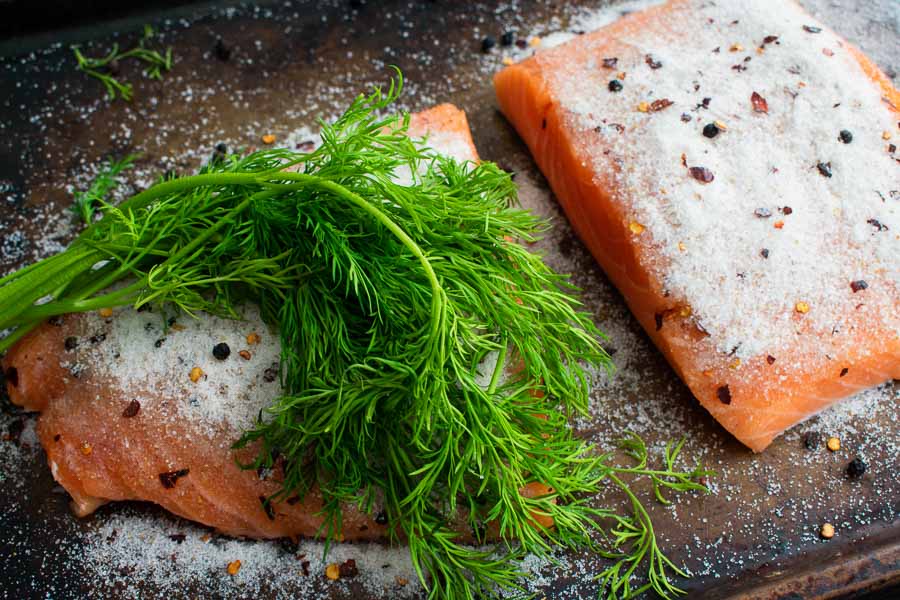
The dill came next. All I had to do was trim off the excess stems and drop to onto half of the fillet. That’s it. No slicing, dicing, or anything else though I would mention that I washed it the day before to make sure it was completely dry.

Two halves of the salmon fillet topped with salt, spices, and dill

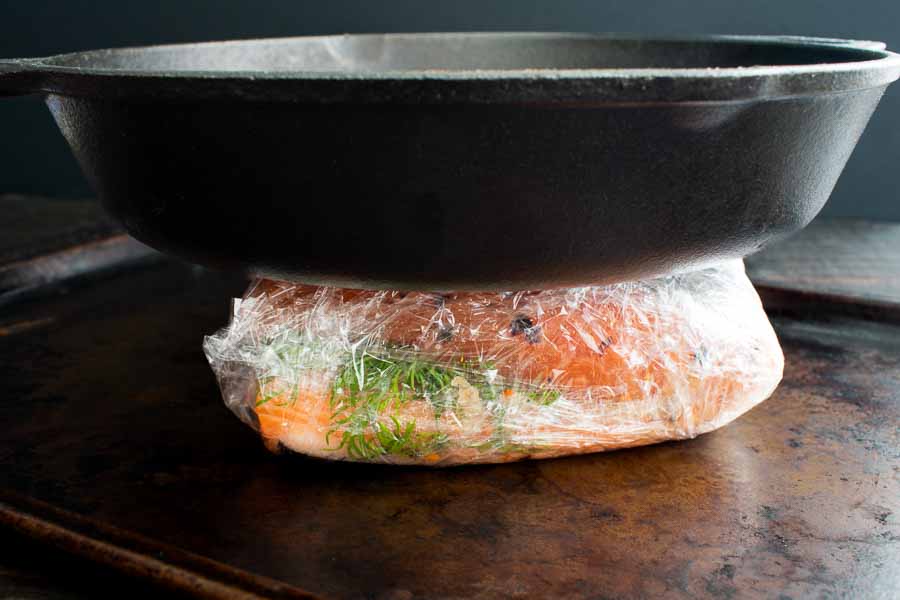
Finally, I double-wrapped the sandwiched salmon fillets in cling wrap, making sure to keep it tight. I didn’t want to expose the salmon to the air in case it affected the texture. Then I put it onto a plate, put the plate into the refrigerator, and weighted it with a small cast-iron skillet.

The seasoned salmon fillets stacked, wrapped, and weighted
The seasoned salmon fillets stacked, wrapped in cling wrap, and weighted with a cast iron pan

After 36 hours there was a lot of liquid built up in the cling wrap, and some did leak out like the recipe mentioned. I forgot to take a photo, but the liquid came halfway up the stack so it covered the bottom fillet. I flipped the wrapped packet, put the skillet back on, and waited until the 3-day curing process was done.

There was quite a bit of liquid in the wrap and on the plate by the time the salmon was cured. I poured it off, cut a sample piece, and decided it was a bit too salty for me. I decided to rinse my lox and pat it dry before continuing.

Timing

This recipe only lists the “cooking” time, but I made sure to time the prep work. It only took me 7 minutes to trim, season, wrap, and weight the salmon. I think it took me longer to prepare the items I served it with!

To Serve

Lox can be served in many ways, but I went for a bagel with cream cheese, red onion, and capers. You know, because of National Bagels and Lox Day (the whole reason I made this recipe). I did take a cue from the recipe and added some prosecco and orange juice for mimosas. Mwa! Chef’s kiss!!

Cheesecake Stuffed Baked Apples

0

I thought a dessert would be the perfect way to wrap up this week. Since I made that Apple Butter Roasted Chicken, I was in the mood for apples. That made trying these Cheesecake Stuffed Baked Apples an easy choice. How good do they sound? I’m imagining a mix of apple pie and cheesecake and wondering why I didn’t think of the combo. Let’s find out if it’s as good as it looks and sounds!

The only thing better than a juicy harvest apple is a baked apple filled with rich cheesecake! Top it off with caramel sauce, graham cracker crumbs, and pecans for the ultimate no-fuss Autumn dessert!

Recipe Author: Tiffany at Creme de la Crumb
Get the recipe

The Ingredients

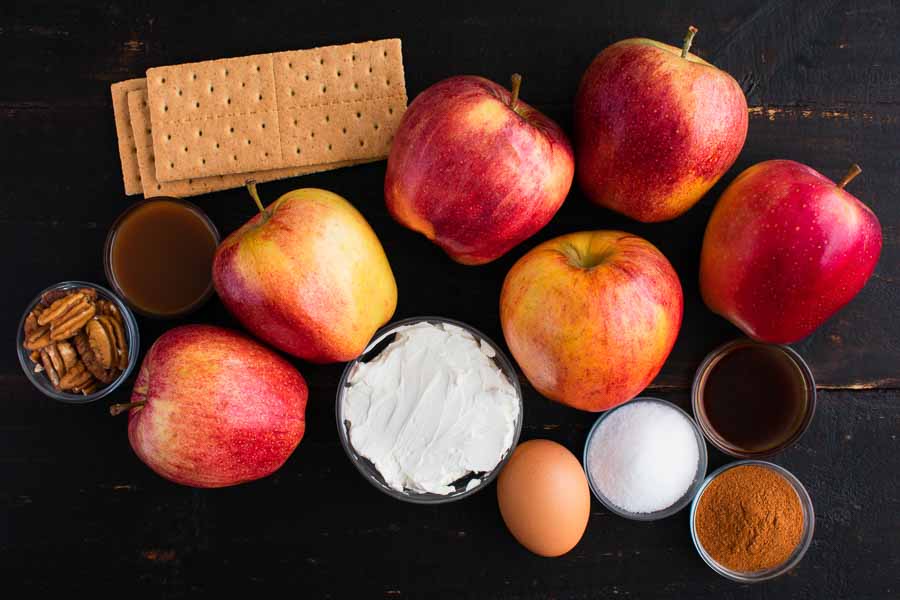
As usual, I had a few ingredients in my pantry and refrigerator. That’s almost always the case with basics like sugar, vanilla, and spices. I even had an extra egg.

The recipe suggested Gala apples, and I found them at my usual grocery store. I also picked up a few toppings: caramel sauce, pecans, and graham crackers. I almost missed them since they aren’t on the ingredients list. Instead, they are mentioned in the last step.

Cheesecake Stuffed Baked Apples Ingredients
Gala apples, vanilla extract, cinnamon, sugar, egg, cream cheese, pecans, caramel sauce, and graham crackers

The Process

I had a few false starts with this Cheesecake Stuffed Baked Apples recipe because I kept forgetting to set the cream cheese out to soften. Once I did, it was easy!

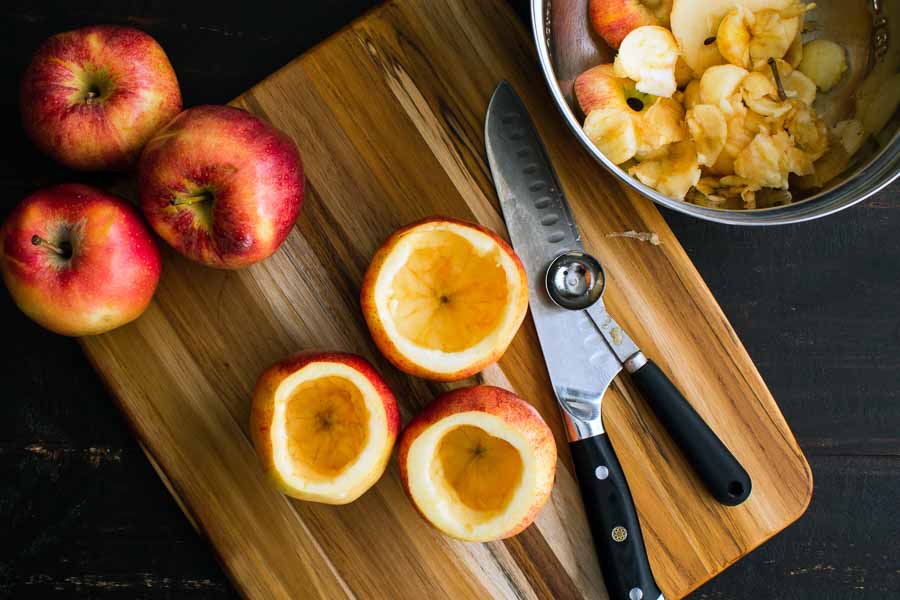
I began by using a melon baller to core the apples. I tried not to remove too much of the fruit for a couple of reasons. First, it tastes good. And second, I wanted the apples to keep their shape once baked.

Coring the apples
Coring the apples

It only took me about 5 minutes to core the apples and set them out on a parchment-lined sheet pan. I have to admit I expected it to be difficult (I don’t know why), but it was really easy to do.

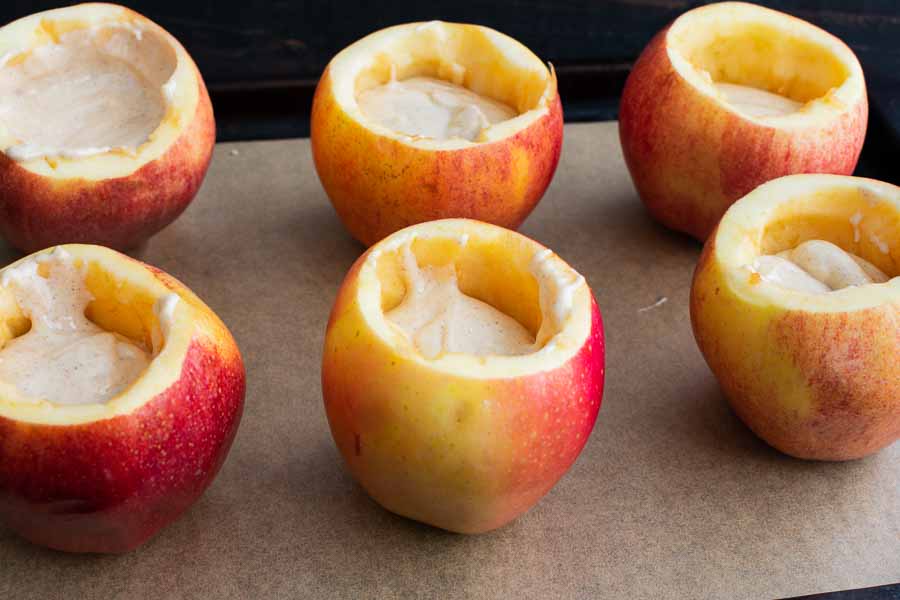
I prepared the cheesecake filling next using my stand mixer. It came together even faster than the apples, and I had it poured into the apples about 6 minutes later. Then it was into the oven to bake for 25 minutes.

I let the apples cook for an hour before topping them with crushed graham crackers, caramel sauce, and a pecan. There was still enough room in the apples for a generous amount of toppings, and I’m happy to say the apples held their shape.

Apples filled 2/3 full and ready to bake

Timing

The times listed on the recipe are in parentheses:

  • 11 minutes to prep (5 minutes)
  • 25 minutes to bake (25 minutes)
  • 1 hour to cool
  • 2 minutes to top
  • 1 hour 38 minutes total (30 minutes)

The recipe notes do say the times listed do not include cooling. Not counting that, my time is 38 minutes. Still a bit longer than the 30 minutes listed, but not by too much.

Apple Butter Roasted Chicken

I love a good roast chicken! They are so easy to make and there are usually leftovers for lunch or dinner the next day. I’ll even use the carcass to make chicken stock when I feel up to it. For some reason, I haven’t made a roast chicken in a while so it’s time. I found this Apple Butter Roasted Chicken recipe, and I just happened to have a jar of apple butter in my refrigerator. What a coincidence! It’s fate, and I have to give this recipe a try.

This apple butter roasted chicken is a killer combination of sweet and savory flavors. With a crispy outside and a juicy, tender inside, it’s the perfect Sunday dinner!

Recipe Author: Gina Matsoukas at Running to the Kitchen
Get the recipe

The Ingredients

Like I said, I had a jar of apple butter in my refrigerator, so I didn’t have to buy it. I will tell you that it’s not usually at my regular grocery store. I don’t know if it’s a regional thing, but it might be hard to find.

I had all the spices and garlic, so my Apple Butter Roasted Chicken shopping list was short. All I had to buy was the chicken and fresh thyme. I found both for $12.10.

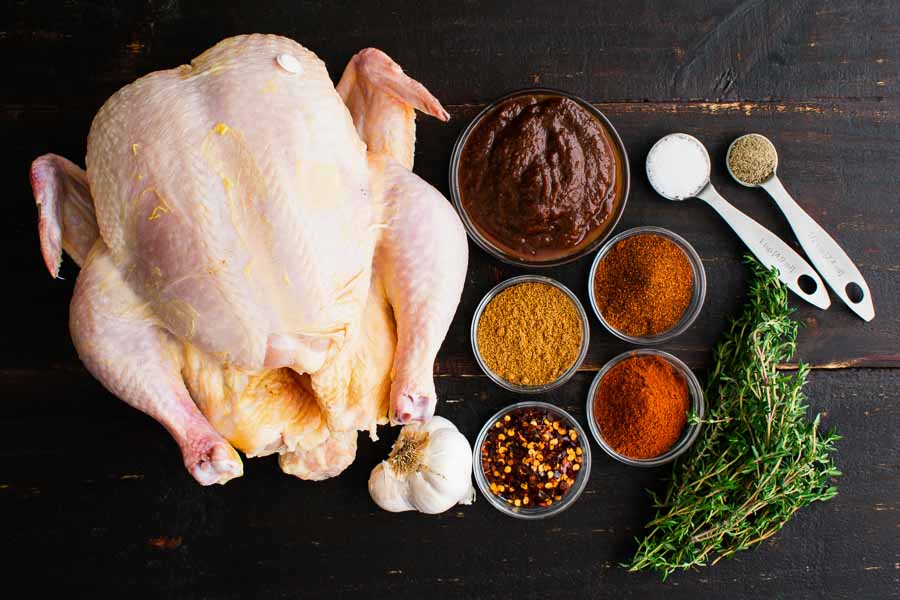
Apple Butter Roasted Chicken Ingredients
Whole chicken, apple butter, kosher salt, black pepper, fresh thyme, chili powder, cumin, paprika, crushed red pepper flakes, and garlic

The Process

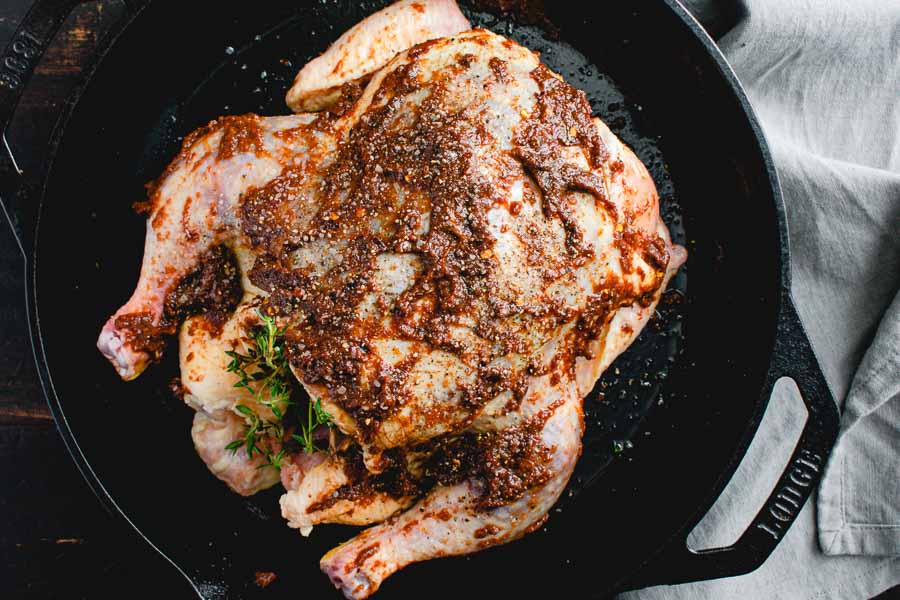
I have to say this recipe was easy to prepare, but I did get my hands dirty. The dried spices are mixed with the apple butter to create a glaze. Then I used my fingers to loosen the chicken skin to spoon the mixture underneath the skin of the breast and thighs. I even managed to get it into the tops of the legs.

It wasn’t difficult, but it took some patience. My chicken also came with a plastic pop-up timer that I had to remove. Otherwise, I couldn’t get the glaze underneath the skin on one side. After that, I stuffed the chicken with thyme and garlic and brushed on the remaining glaze.

Chicken rubbed with apple butter and spice mixture
Chicken rubbed with apple butter and spice mixture and ready to go into the oven

My 12-inch cast iron pan was perfect for this recipe. I did add a little bit of vegetable oil to the bottom before the chicken so it wouldn’t stick (and it didn’t). I also tucked the wings underneath, but I didn’t tie the legs. It is supposed to make the chicken cook more evenly, but you can tie them for a prettier presentation.

I checked on the chicken every 20 minutes, and there were enough drippings to begin basting it after 40 minutes. My meat thermometer beeped right as I checked the chicken at 1 hour 20 minutes.

Timing

  • 8 minutes to prep
  • 1 hour 20 minutes to cook
  • 10 minutes to rest
  • 1 hour 38 minutes total

The recipe listed 10 minutes to prep, 1 hour to cook, and 10 minutes to rest for a total of 1 hour and 20 minutes for a 4- to 5-pound chicken at 20 minutes per pound. My chicken took a little longer, but the recipe did say cooking time depends on the weight of the bird. I’d say my times were as expected for a 5.87-pound chicken.

Spiced Old Fashioned

0

I like whiskey, but I have to say bourbon is my favorite variety. Its unique, subtly sweet flavor is like nothing else. I’m prone to enjoying a Manhattan cocktail now and then, but I do like an old-fashioned sometimes. I haven’t had one in ages, so I think that’s why this Spiced Old Fashioned practically called my name. The homemade spiced simple syrup sounds perfect for this cooler weather, so I’m giving it a go. Fingers crossed!

An Old Fashioned with a Holiday twist!

Recipe Author: Katrin Björk at Modern Wife Style
Get the recipe

The Ingredients

I do a pantry check before shopping every week, and this time I had almost all the ingredients I needed. All but one, the ginger, but it was easily found at my regular grocery store. I love those short shopping lists!

By the way, I didn’t have maraschino cherries, I had bing cherries. Bada Bing Cherries to be exact. They’re just amazing and sounded perfect for this recipe.

Spiced Old Fashioned Ingredients
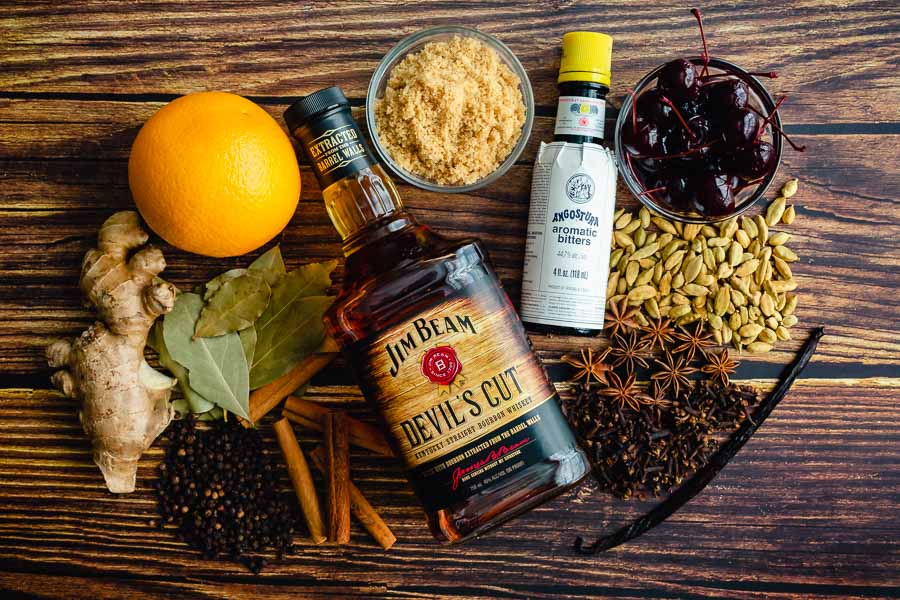
Bourbon, brown sugar, Angostura bitters, maraschino cherries, cardamom, star anise, cloves, vanilla bean. cinnamon sticks, black peppercorns, bay leaves, ginger, and orange peel

The Process

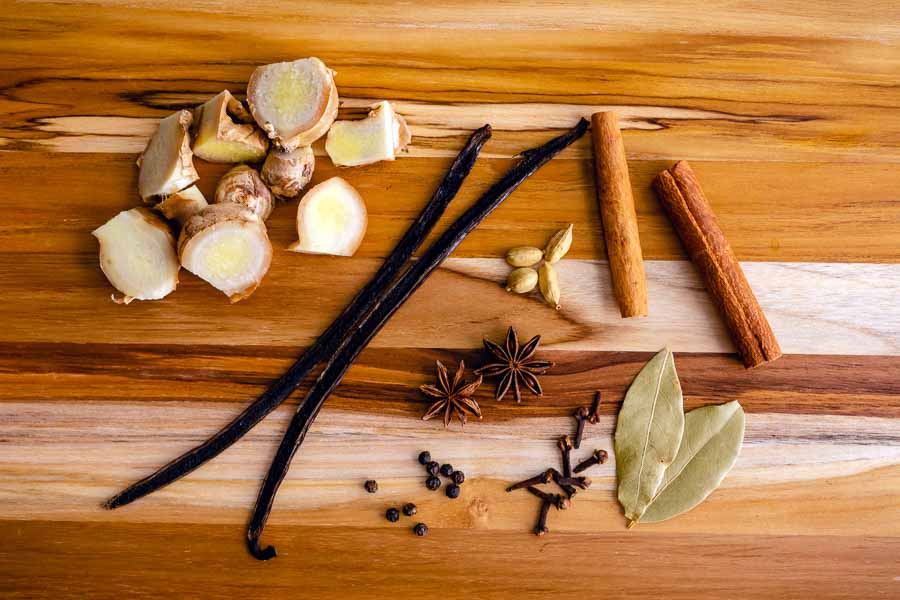
The “work” for this recipe was making the spiced simple syrup, and it was pretty easy to do Just boil water, stir in sugar, and add spices. All the spices were whole except the vanilla bean and ginger. The vanilla beans had to be split, and the ginger chopped (but not peeled). Easy peasy!

The spiced simple syrup had to simmer for 7 minutes. Then I removed the saucepan from the heat to cool. finally, I transferred the liquid and spices to a sealed container and refrigerated them overnight. I used a cocktail strainer to remove the pieces the next day, and then I was ready to make my cocktail.

I always keep a couple of ice spheres in my freezer so there was no prep work involved there. All I had to do was pop them into glasses and make my stirred cocktail. A quick garnish with a cherry and a bit of orange peel, and I had two lovely Spiced Old fashioned cocktails.

Chopped ginger, split vanilla bean, and other whole spices

Timing

This recipe doesn’t list prep, or total times, only times to simmer and steep the spiced simple syrup. Those times seemed to work perfectly, though. Here’s how the entire process broke down:

  • 12 minutes to make the spiced simple syrup
  • 3 minutes to make and garnish 2 cocktails
  • 15 minutes total

This does not include time to cool and steep overnight.