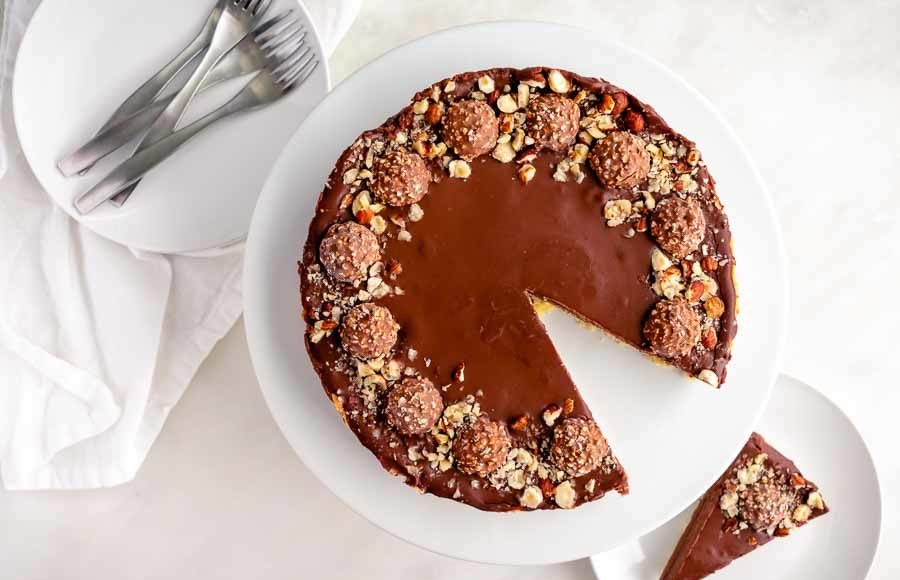
What’s your favorite candy? Mine is hands down Ferrero Rocher chocolates. They are a beautiful mix of chocolate and hazelnut flavors and crispy and creamy textures in each piece. I like chocolate and hazelnut individually, so naturally, I love Nutella. But add all those things into a buttery pastry crust? I about fell off my chair when I found this Ferrero Rocher Nutella Tart recipe. My husband just said, “Oh yeah!” So here we go, I’m going to make my first tart ever, and it might just be the best dessert I have ever made. Let’s find out!
A sweet shortcrust pastry base, with a layer of Nutella, a chocolate ganache filling with Ferrero Rocher – a Delicious Ferrero Rocher & Nutella Tart!
The Ingredients
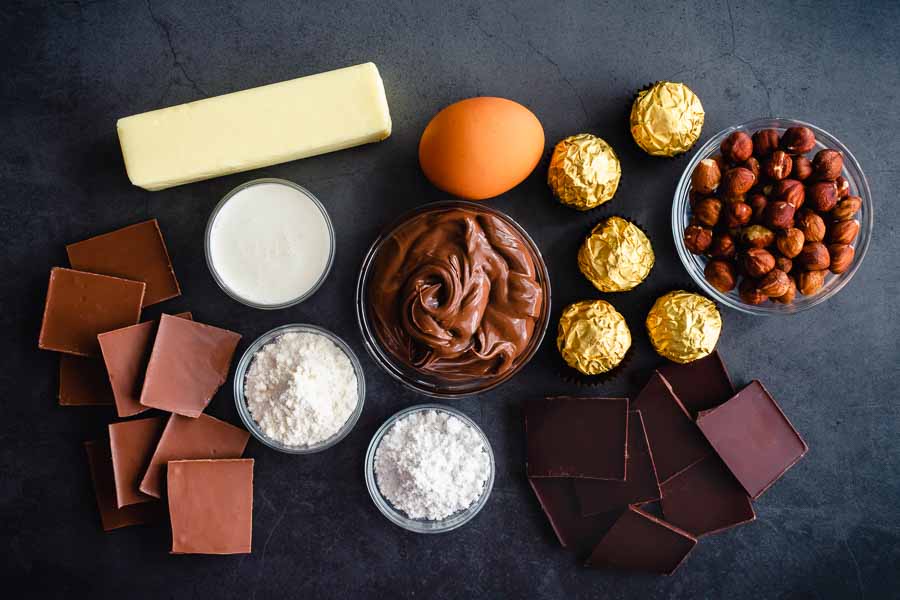
I had some shopping to do for this recipe. I had flour, eggs, and icing sugar. That left me to buy everything else. Fortunately, Ferrero Rocher chocolates are available year-round. And things like Nutella, butter, heavy cream, and baking chocolate are no problem either.
My only mild “complaint” was that I had to buy two bars each of dark and milk chocolate. Apparently, they come in 100-gram packages, and this recipe calls for 125 grams each. I chose Lindt brand, and I am happy to say both extra bars were easy to break into 25-gram pieces.
The only problem child for this recipe was the hazelnuts. I can usually find them at Publix, but they happened to be out. Fresh Market had them, though, and the price was reasonable.
The Process
There are two main sections to this recipe: making the crust and making the filling. I suppose chilling it a third, but it’s completely inactive time.
Naturally, things have to start at the bottom, and that means making the crust first. Tip: Well, I would have changed it slightly to start out by cutting out a parchment paper circle small enough to fit inside the crust (you’ll need it later). Then grease the tart pan (I used vegetable shortening), and then make the crust.
Making the Tart’s Crust
The actual tart crust started with weighing the ingredients with my kitchen scale (thank goodness it has grams). Then I sifted the flour and sugar into the bowl of my food processor (fitted with the dough blades), added the rest of the ingredients, and mixed until they came together. I wasn’t sure how I would know, but I stopped when this happened:
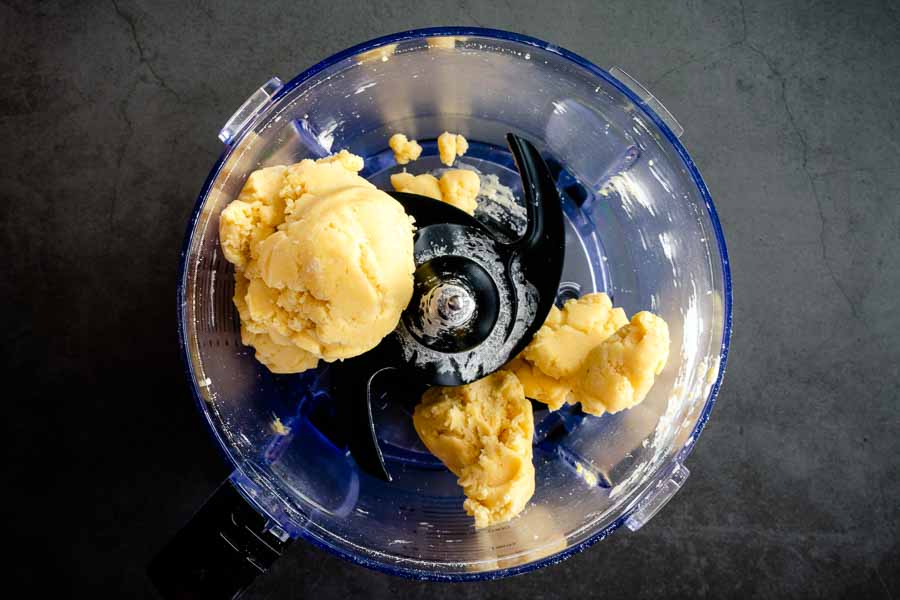
It was legit dough at that point, and I was able to mix all the pieces with my hands very easily
After that, I turned the dough onto a floured surface, rolled it out, and added it to the tart pan. The pastry dough was super sticky and delicate, so I had to patch it several times as you can see below. It wasn’t pretty, but it was going to be filled, so NBD.
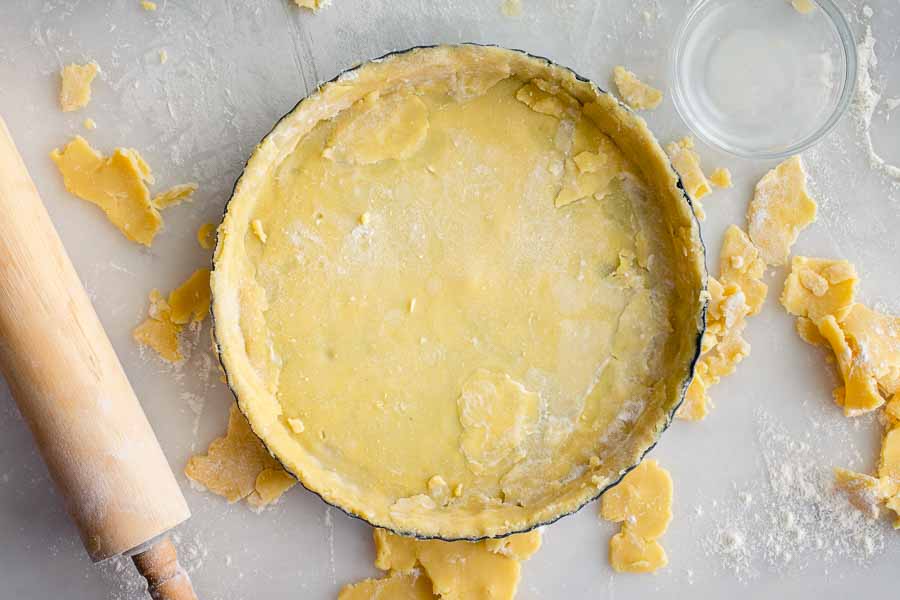
Tip: I worked with the tart pan on top of a dinner plate because the dough needed to be refrigerated before baking. The recipe says to put it onto a sheet pan to bake, and I did do that (the removable bottom of the tart pan makes it necessary). However, I couldn’t fit the sheet pan into my very full refrigerator, so a dinner plate worked well for that part.
I added the parchment paper circle I mentioned at the start, pie weights, topped it with pie weights, and put the crust into the oven. The temperature is listed in Celsius, and it is converted to 390℉.
The pie weights had to be removed after baking for 15 minutes, and this is where things went very wrong. Totally my fault because I have never blind-baked with weights before!
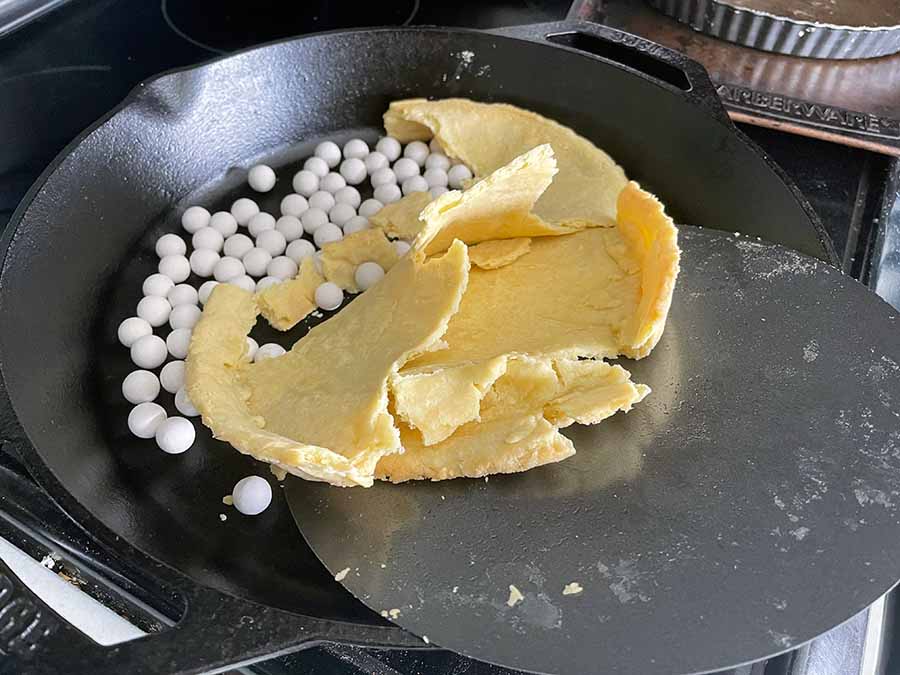
The weights were hot, so I thought it would be safe to dump them into a cast iron skillet. Nope! I ended up dumping the hot pie weights AND the crust AND the bottom of the tart pan into the skillet. Not cool (no pun intended). Thankfully I had enough ingredients left over to immediately make another crust. Tip: The second time I carefully removed the hot weights with a big spoon.
Making the Chocolate-Nutella Filling
Once the crust had cooled, I put it back onto a dinner plate so moving it in and out of the refrigerator would be easy. Then the crust went into the refrigerator to chill for the final time.
The first step for the filling is to spread the Nutella layer into the cooled pastry. It sounds easy, but the baked crust was delicate! Tip: I had to be very gentle and not quite spread it to the sides or they would break.
The Nutella layer needs to be covered in a layer of chocolate ganache, so making that was the next step. Ganache is melted chocolate mixed with heavy cream, and it’s easy to make.
There were two options for melting the chocolate: microwave or stovetop. I have a double boiler, so that’s what I melted the chocolate in. I’m more comfortable with it than the microwave because I can watch the chocolate the whole time. Plus over-microwaved chocolate can seize, and I didn’t have extra. Seized chocolate can be fixed, but I already had one disaster that day!
The chocolate-cream mixture melted quickly, and I poured it into the prepped crust. Unfortunately, I was not very careful and it overflowed and covered the crust’s edges. Tip: Pour the filling slowly and carefully to prevent overflowing and create defined edges.
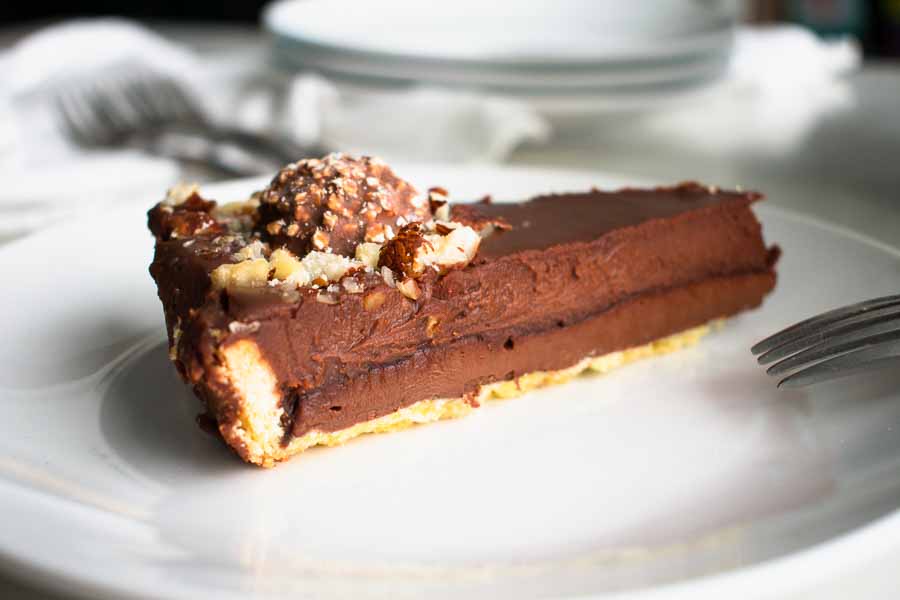
Almost done! The final step was adding the Ferrero Rocher garnish and a few chopped hazelnuts. Chopping nuts can get messy, so I placed a few into a ziplock bag and crushed them with a meat mallet. Then I sprinkled them over the chocolates and put the tart into the refrigerator to set. The recipe says 3-4 hours, but I chilled mine overnight.
Timing
This recipe lists 30 minutes to prep, 15 minutes to cook, 4 hours to chill, and 4 hours 45 minutes total. I went 5 minutes over the total time listed, and I’m well pleased that I came that close on my first-ever tart. Here’s how my time was spent:
- 18 minutes to prep the pastry crust
- 30 minutes to chill the crust
- 20 minutes to bake the crust
- 20 minutes to cool the crust
- 13 minutes to fill
- 14 minutes to decorate
- 3 hours to chill*
- 4 hours 55 minutes total
*I chilled my Ferrero Rocher Nutella Tart overnight, but I’m using the minimum time listed in the recipe for a comparison of the overall time.
