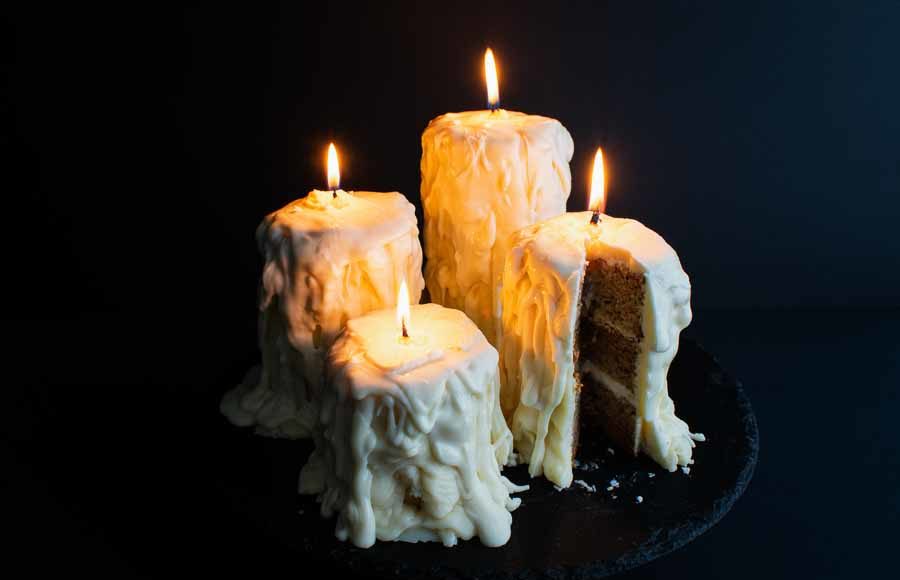
I wanted to do a Halloween post this year, and I found lots of ideas on my Pinterest boards. Most of them were either cocktails or baked goods. Cocktails I can handle; my baking skills ar so-so at best. What the heck, let’s do both! I went back and forth between this Beeswax-Infused Parsnip Candle Cakes recipe and something a little easier looking for this post. As you can see, I decided to challenge myself. And I have to say I’m quite pleased with the results. It wasn’t all easy, though, so let me tell you about it…
I infused the sumptuous flavor of beeswax into these gorgeous candle cakes! They’re baked with sweet winter parsnips and filled with the glorious richness of cream and honey.
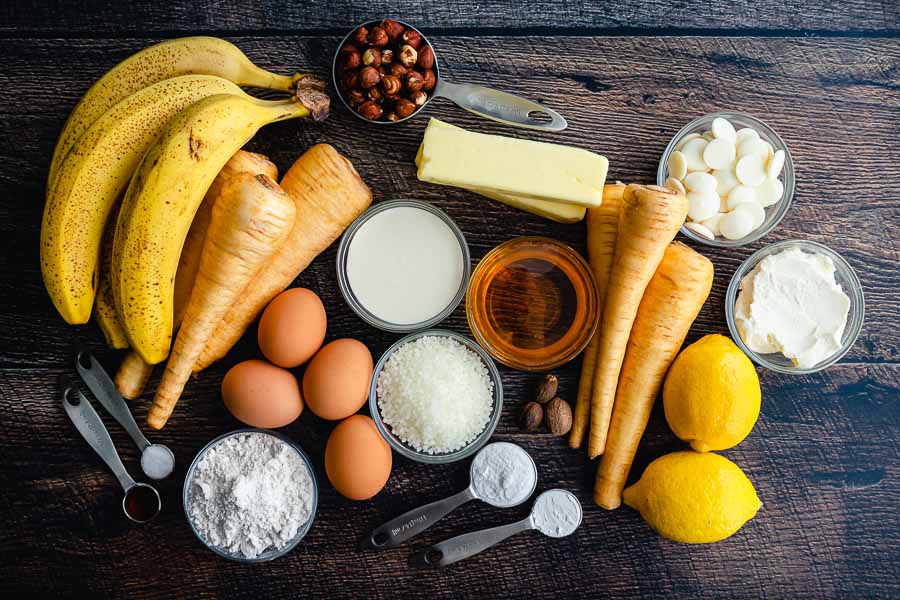
The Ingredients
First things first. This recipe doesn’t have a printable version, so I created one by adding it to my recipe software (I use Paprika). I like having the printed recipe taped above my workspace when I try new recipes. It’s old-fashioned, but it works for me.
Once I had the recipe added to Paprika, I created a Beeswax-Infused Parsnip Candle Cakes grocery list and started shopping. And I’ll admit this right now: I had no clue what a parsnip was. In short, they’re root vegetables that look like ivory-colored carrots and they have a similar sweet taste.
They’re also stocked at my usual grocery store, so I bought 2 bags. I had no idea how many I would need, so I bought 2 bags (about 8 parsnips). I only ended up using 3, so I need a good parsnip recipe if anyone has one!
Everything else was either in my pantry or easily found at my local grocery store except the beeswax. There were lots of options: bars, blocks, sheets, and pellets; yellow or white; and every size you can imagine. It was daunting! I ended up choosing a 4-ounce bag of white beeswax pellets for $9.95. It was enough for this recipe with a bit left over.
The Process
Timing
This recipe didn’t have any total times listed, just cooking and freezing throughout the steps. I knew I was in for a lot of baking, though, and over multiple days because of the Beeswax-Infused Cream. Here’s how my time broke down:
- Beeswax-Infused Cream:
- 12 minutes to heat
- 1.5 hours to simmer
- 30 minutes to cool
- 10 minutes to strain
- Parsnip Cake:
- 38 minutes to prep the ingredients
- 13 minutes to make the batter
- 55 minutes to bake
- 10 minutes to cool in pan
- 1 hour to cool on wire rack
- Honey Cream Cheese Filling & Assembly:
- 7 minutes to mix
- 10 minutes to assemble cakes
- 30 minutes to freeze
- 27 minutes to frost
- 1 hour to freeze
- 20 minutes to glaze
- 20 minutes to refrigerate
- 15 minutes to add wax drips and candles
- 8 hours 27 minutes total (not including overnight infusion of cream)
Although the total time wasn’t listed, the individual times throughout the recipe proved to be accurate.
Beeswax-Infused Cream
I have to tell y’all that I straight-up did this part wrong. It did work out in the end, though. Let me explain. I used my double boiler instead of a saucepan to ensure the heavy cream wouldn’t burn on the bottom of the pan (milk is notorious for this). But instead of melting the beeswax in the microwave first, I just threw the pellets into the cream as it warmed. I was clearly not paying attention!
It took a while for the milk to heat up enough to melt the beeswax, but it did eventually. Once it did, I stirred it in, covered the pan, and let it sit for 1.5 hours. Then I removed the pan from the heat, allowed the mixture to cool for 30 minutes, and put it into a sealed container to refrigerate overnight.
The next day I strained it into a small mixing bowl. The larger pieces of beeswax were easily filtered out, but there were some very fine sand-like grains still in the cream. I had to strain them through my extra fine cocktail strainer to remove them.
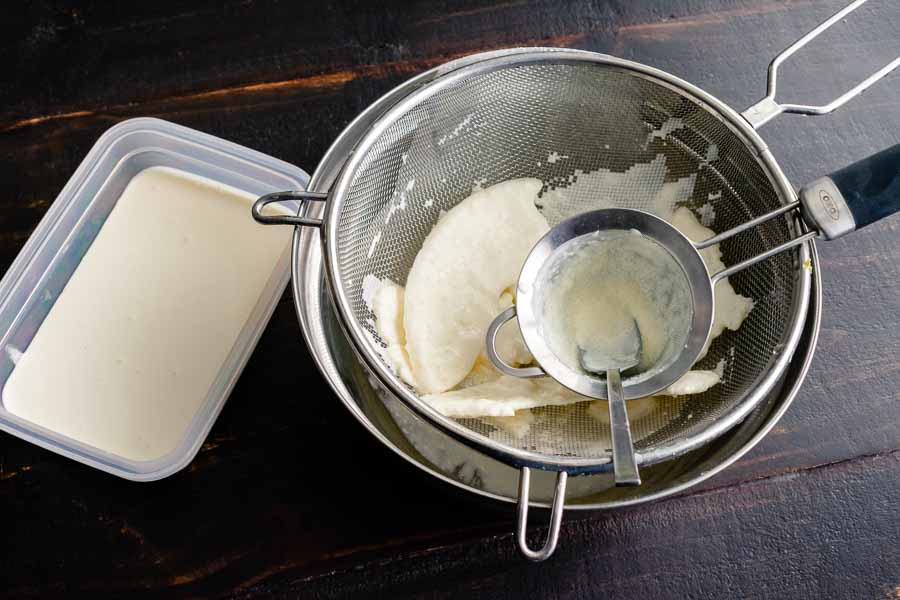
And I’ll tell you this now: there was only 1 cup of Beeswax-Infused Cream. I didn’t find this out until I started baking the cakes, and I mildly panicked! But I was able to make another batch while they baked since I bought a large container of cream and had leftover beeswax. I did halve the recipe, though, because I only needed 1/3 cup more cream for the Beeswax White Chocolate Glaze. You might want to make a larger batch from the start to be sure you have enough.
Oh, one more sort of oops: I threw away the filtered beeswax. The recipe does say to reserve it, but there is no mention of it any later in the recipe. I thought maybe it would be used in the candle drips, but they are all white chocolate and Beeswax-Infused Cream.
Prep Work
Many times when I’m making dinner I prep as I cook. There are often pauses in the recipes that give me the time to do this. For example, I’ll cut up the meat and put it on to brown while I chop vegetables. It’s an easy flow I’m used to.
But after my mistake with the Beeswax-Infused Cream, I decided to use mise en place or prep the ingredients before the cooking began. It took a while, but it helped things go smoothly and correctly, especially for the Parsnip Cake and Honey Cream Cheese Filling.
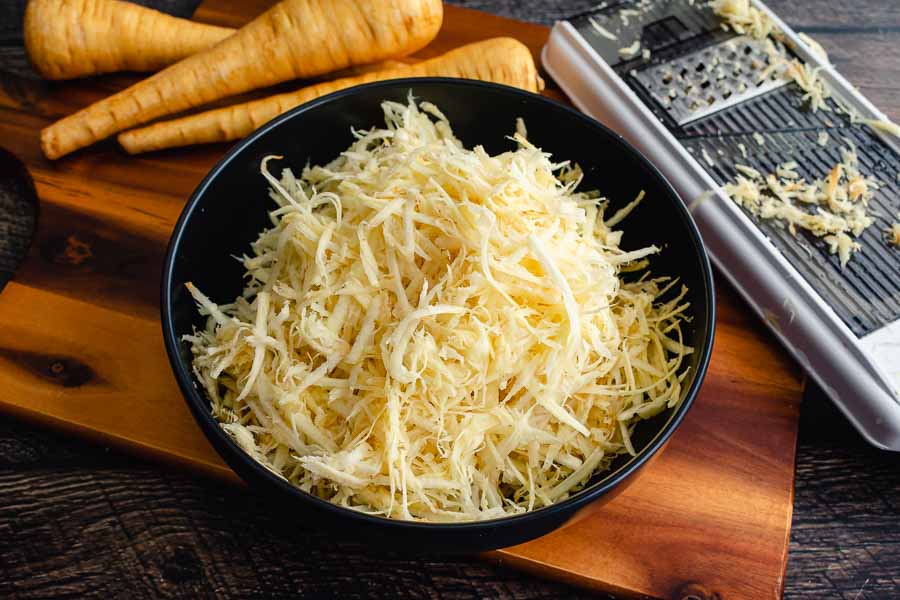
That meant I shredded the parsnips, juiced and zested the lemons, grated the nutmeg, measured the ingredients, etc. in advance. It took a while, especially shredding the parsnips. My mandoline was very helpful for that, though a box grater would have also worked. (I chose the mandoline because the handpiece saves my fingers from nasty scrapes.)
I also had to toast the hazelnuts. My air fryer was a huge help with this! I put the whole hazelnuts into the basket for 5 minutes at 400°F on the air fry setting. Then I put them into a sealed Snapware container and shook it until the skins fell off. I was left with nicely toasted hazelnuts that were easy to pick out from their skins.
From there, I put the nuts into a quart-sized ziplock bag and smashed them with a meat mallet. I love this method for “chopping” nuts because it’s cleaner and quicker than using a knife.
Parsnip Cake
With the prep work done it was finally time to start making my Beeswax-Infused Parsnip Candle Cakes! Making the actual cake was very similar to making banana bread. A potato masher made short work of the bananas. Then I mixed in the shredded parsnips and lemon, then sifted in the dry ingredients.
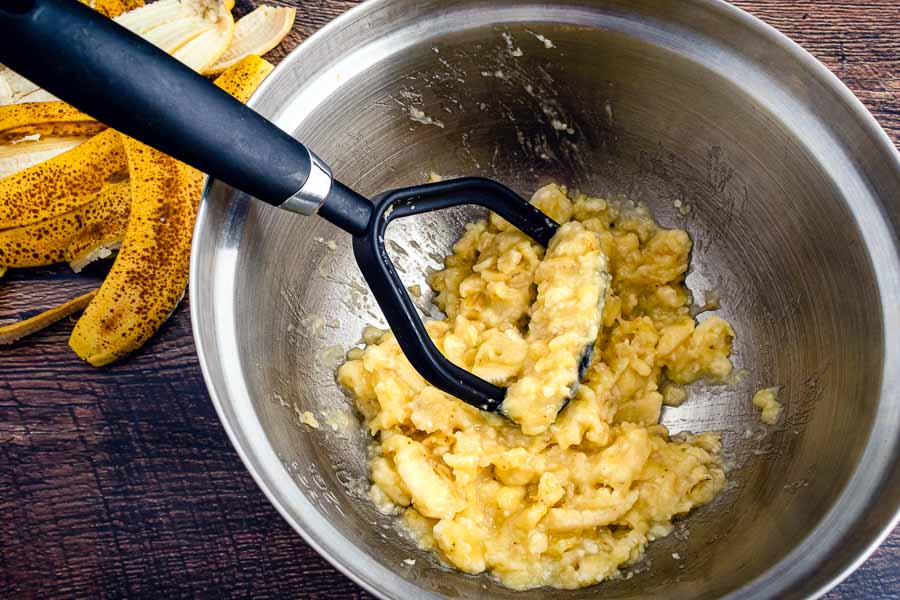
Once that was mixed, I added the eggs and mixed again. The batter was very thick, and the eggs helped thin it out a bit. I prepared the rest of the liquid ingredients in another small bowl and added them to the batter. Then I used my trusty wooden spoon to fold everything together and mix in the hazelnuts.
I preheated the oven and lined 2 loaf pans before I made the batter, so everything was ready to go. I also decided to place the loaf pans onto a sheet pan lined with a Silpat mat to keep them from slipping. It’s a trick I picked up somewhere that makes transferring in and out of the oven just a bit easier.
I gave the cakes the toothpick test after 55 minutes, and they were both done. My loaf pans I have aren’t the same size—one is 8″x4″ and the other is 9″x5″. I was expecting the larger loaf to need a little more time, but it didn’t.
After cooling in the pans for 10 minutes I used the parchment to lift both out of their pans and placed them on wire racks to cool for another hour. It was late in the day by this time, so I wrapped them well in plastic wrap and refrigerated them overnight.
Honey Cream Cheese Filling & Assembly
The filling (or frosting) was super simple thanks to my stand mixer. All I had to do was add the ingredients, turn it on, and let them mix. While it worked I took a few seconds to clear a shelf in my freezer for the next steps.
First, I sliced the cakes into 1-inch slabs with my cake leveler and got 2 from each loaf. Then I used a 2.5-inch diameter biscuit cutter to create the layers for my parsnip candle cakes. I was able to get 3 from each slab by staggering the cuts for a total of 12 layers.
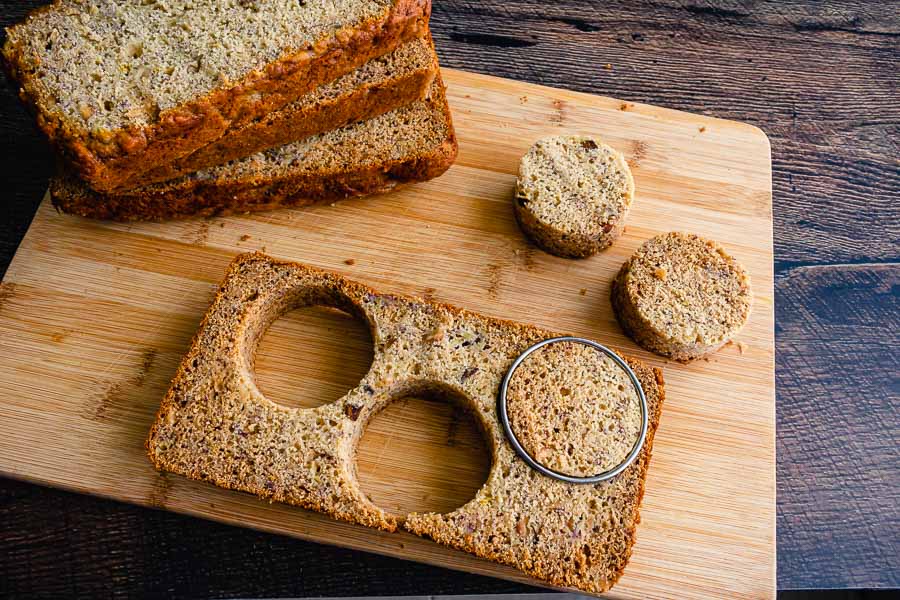
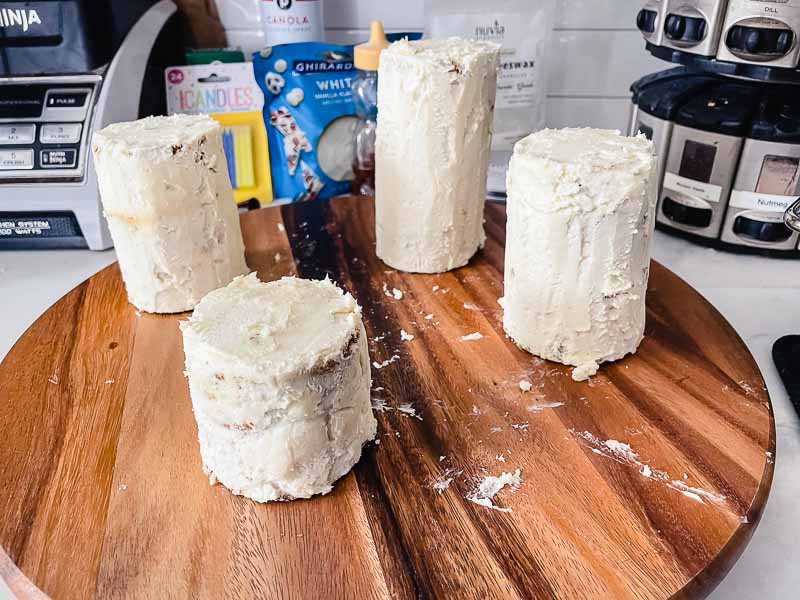
I decided to create the candles as follows: (1) 4-layer, (2) 3-layer, and (1) 2-layer. Then I added a generous layer of the honey-cream cheese mixture between the layers and placed them into the freezer for 30 minutes.
Next, I attempted to smoothly frost the outside of my parsnip candle cakes with a bench scraper. It looks so easy when I see videos of this, but mine didn’t turn out so great. I eventually gave up and popped them back into the freezer while telling myself the finished candles were supposed to be lumpy from the wax. Hopefully, it would cover my poor technique!
Beeswax White Chocolate Glaze & Wax Drips
First up was glazing the candles. This was done by melting white chocolate with some Beeswax-Infused Cream in a double boiler. Once it was nice and creamy with no chunks of chocolate, I spooned it over the parsnip candle cakes. They were starting to look like dripping candles!
All I had left to do was melt my second bag of white chocolate wafers and pipe on the drips. Well, it didn’t work out so well. I turned up the heat too high and managed to seize the chocolate even in a double boiler. I didn’t even know that was possible.
In a desperate try to save the chocolate, I added a little bit of cream to thin it out. All that did was keep it from hardening and forming the drips properly. I ended up scraping it off, patching any damage I had done using a pastry brush, and sending hubby to the store for more white chocolate.
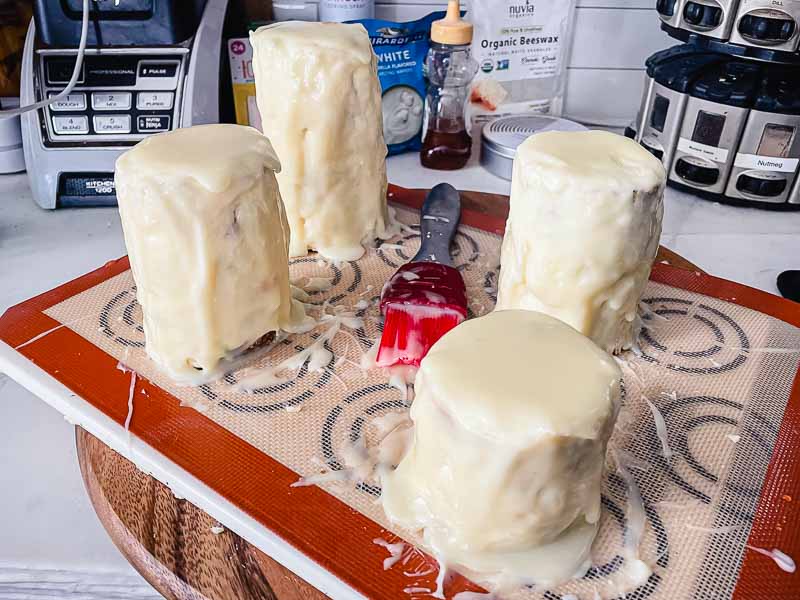
He managed to get there and back with enough daylight left for photos. I was working against a deadline, but I made myself heat the chocolate slowly this time. It made all the difference!
I want to tell you I had some great techniques for the wax drips, but I didn’t. Once I added the chocolate to a piping bag, gravity did most of the work for me. I did make sure I coated the tops of the candles evenly, but that was the extent of my technique.
I almost waited to add the candles, but I’m glad I didn’t. The white chocolate began hardening quickly, and it was crunchy by the time I put in the last two. I felt fortunate it didn’t crack. Whew!
Equipment
These Beeswax-Infused Parsnip Candle Cakes have a lot going on, from the ingredients to the equipment. In addition to the standard stuff like measuring spoons and cups, you’ll need:
Beeswax-Infused Cream:
- small saucepan (I used a double boiler)
- ceramic bowl (to melt beeswax, microwave in 30-second bursts)
- silicone spatula
- sealed container
- fine mesh strainer
Parsnip Cake:
- (2) mixing bowls
- parchment paper
- box grater
- zester
- fork or potato masher
- (2) loaf pans
- toothpicks
- wire cooling rack
Honey-Cream Cheese Filling:
- stand mixer (I used a whisk attachment)
Assembly:
- cake leveler
- biscuit cutters
- offset spatula
- bench scraper
Beeswax-White Chocolate Glaze:
- double boiler
- piping bag
- medium piping tip
- birthday candles
- plate or serving tray
